|
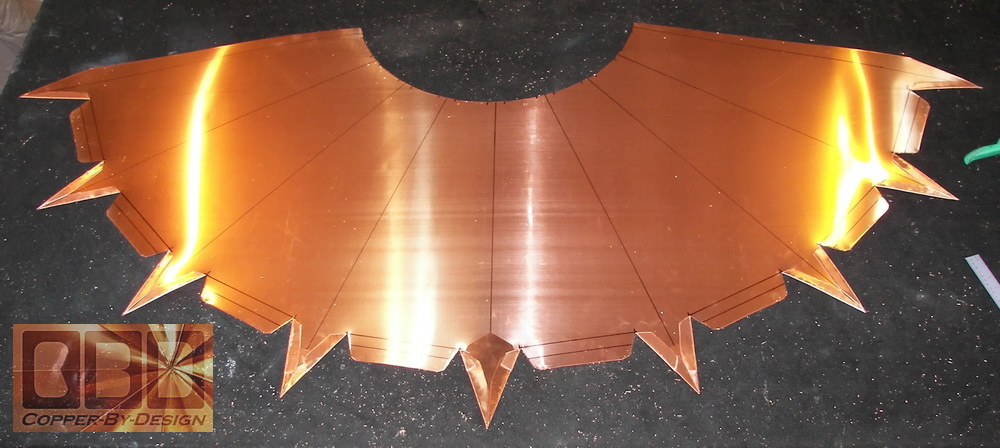
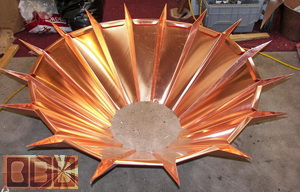
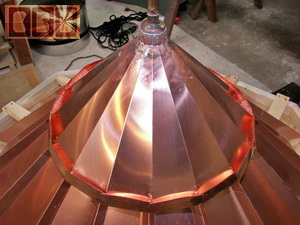
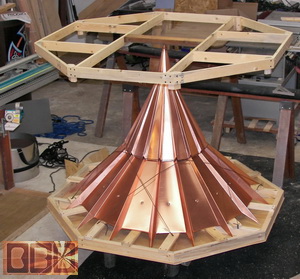
This is another first for
me in 2 ways: it was the first 16 sided roof cap with raised corners
and the largest roof cap to date. It was built for Andrea and Bob Steele
in Meridan Kansas for their 17' wide 12/12 pitch circular turret on
the front of their house. This shows the aluminum template I made to
draw out the base section. I was able to form 8 sides in one piece and
the other overlapping 8 sided back section in the other piece.
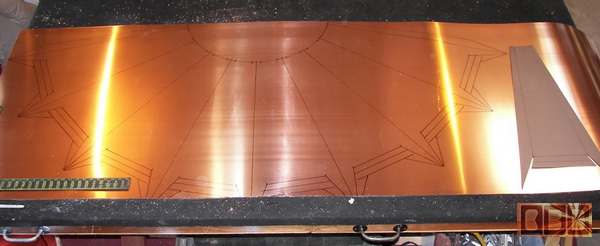
To fit this many sides on
a single piece of copper sheet metal to make it as seamless as possible
I hade to draft it out with 3 of the spiked corners cut off, then later
splice them on with small scrap pieces.
|
|
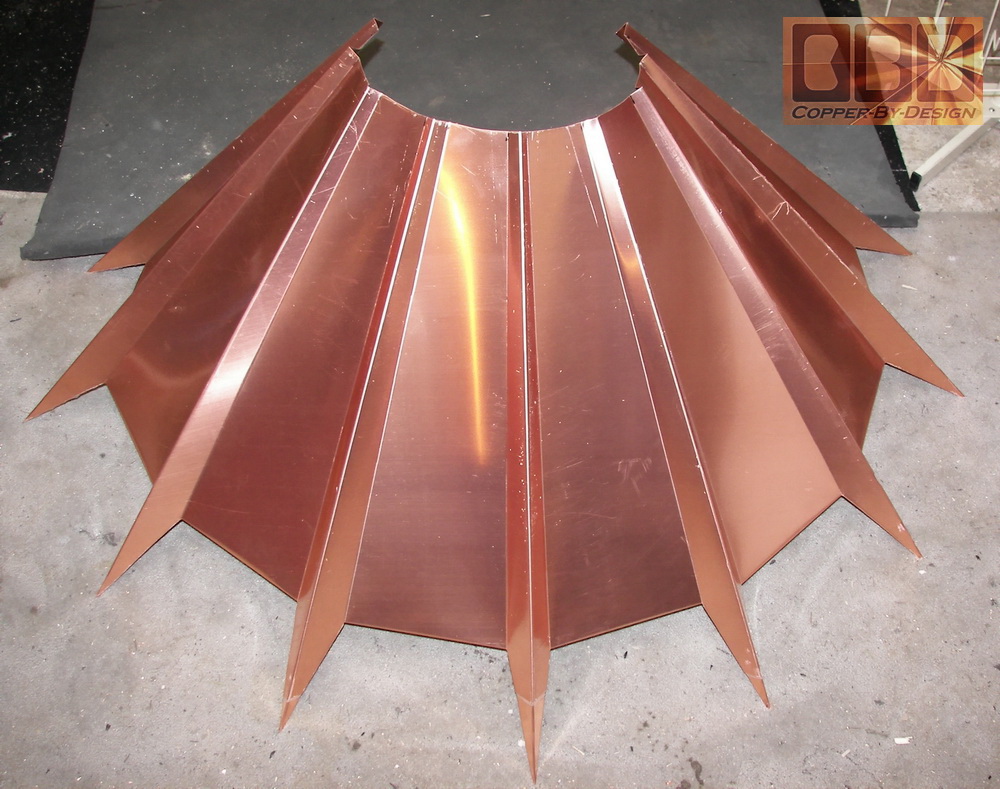
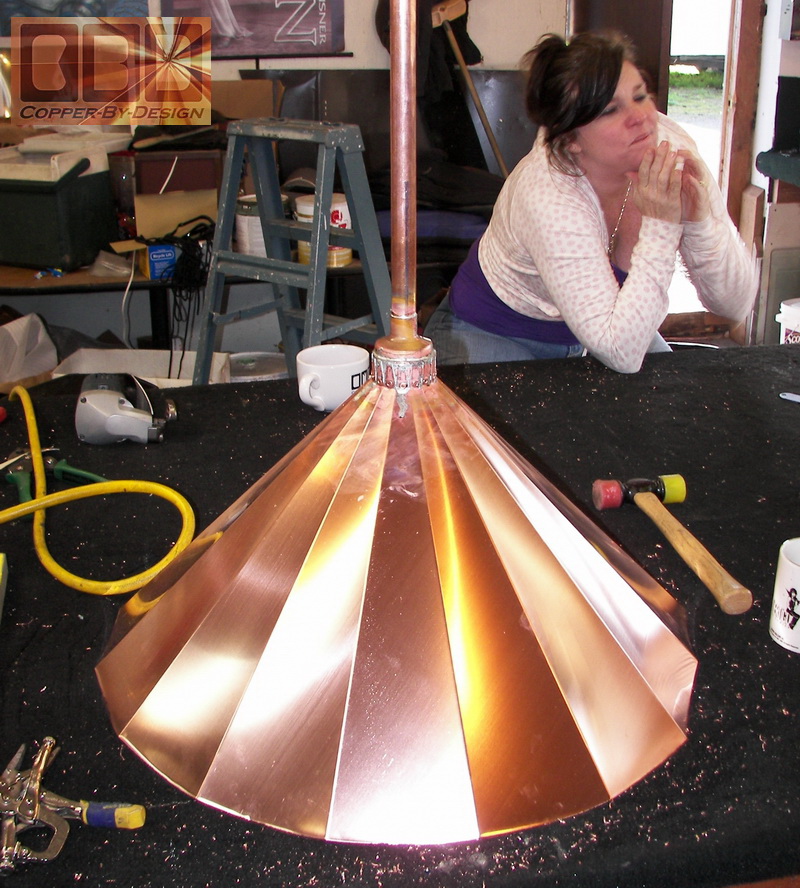
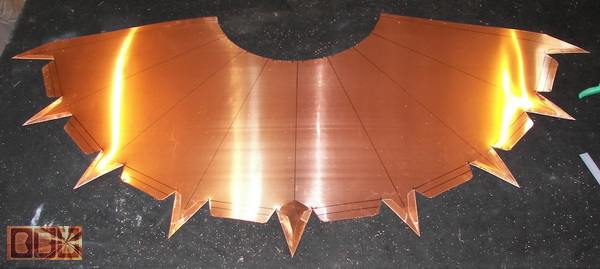
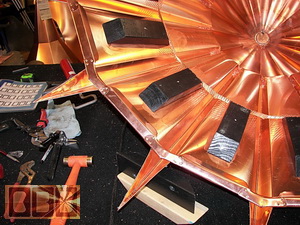
This
shows the base section bent into shape with the raised corners for a
more dynamic look and adds to the increased strength incase of an impact
from falling branches flying through the air in a wind storm. I had
attached it to the back 4 side piece.
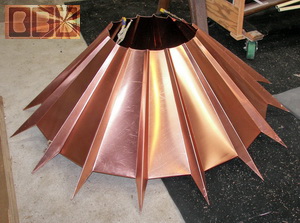
Then I added braces at the bottom of the raised corners to make sure
they will not spread open wider and change the 12/12 pitch angle of
the roof cap. It took 16 small scrap pieces with 6 rivets each = 96
rivets. There are already about 170 rivets in this.
|
|
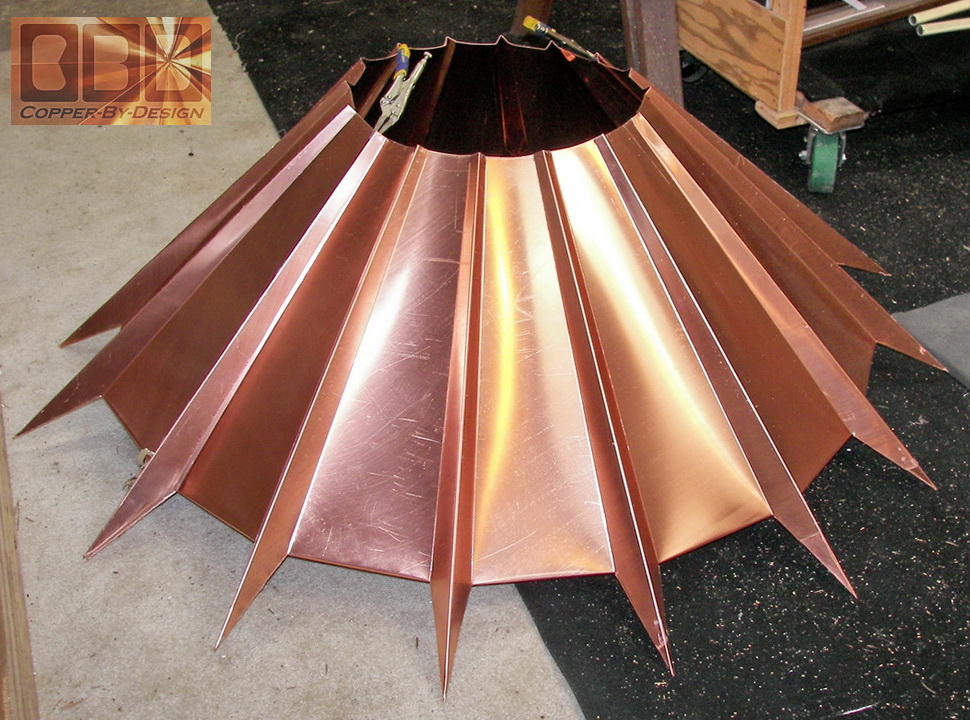
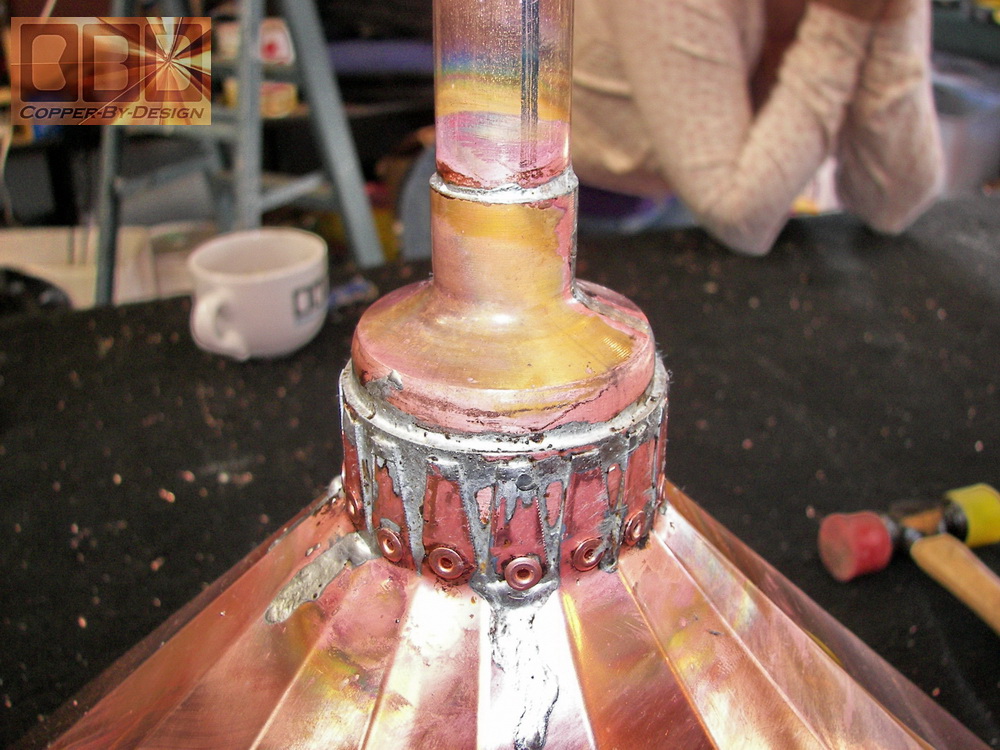
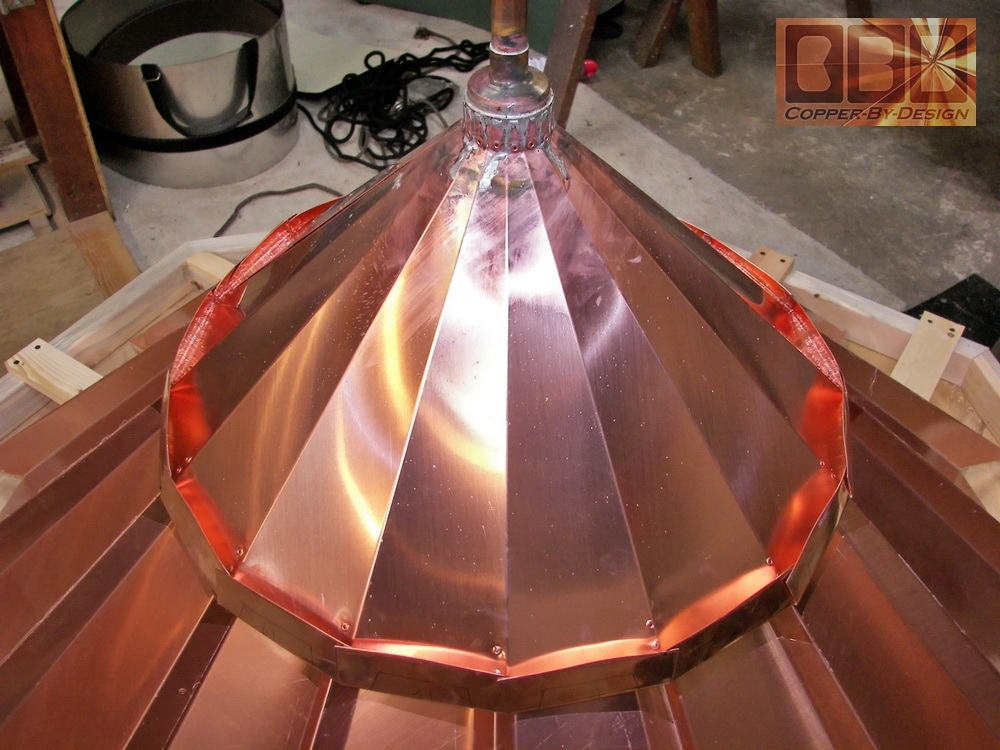
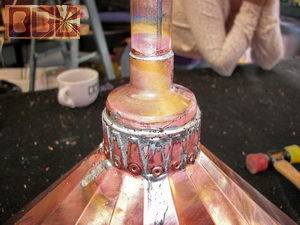
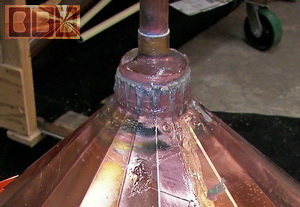
I had left the center section
out of the base since it would be too hard to make all these bends on
such a large piece up to the center point. It is better to make a more
simple 16 sided center cap that is riveted over the top of the base.
It will not be seen when complete and offers a good flange to attach
the steeple cone onto, which maintains the best possible weather seal
and also offers some added roof venting up higher inside the roof cap.
As you can see this center cone supports the bottom of the finial support
pipe attached with the solder and 16 extra long rivets through the 3
to 4 layers of copper.
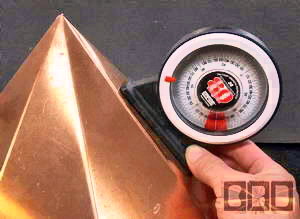
I am always careful to have this cap on a level surface and make sure
the pipe is set perfectly vertical before soldering and riveting it
in place.
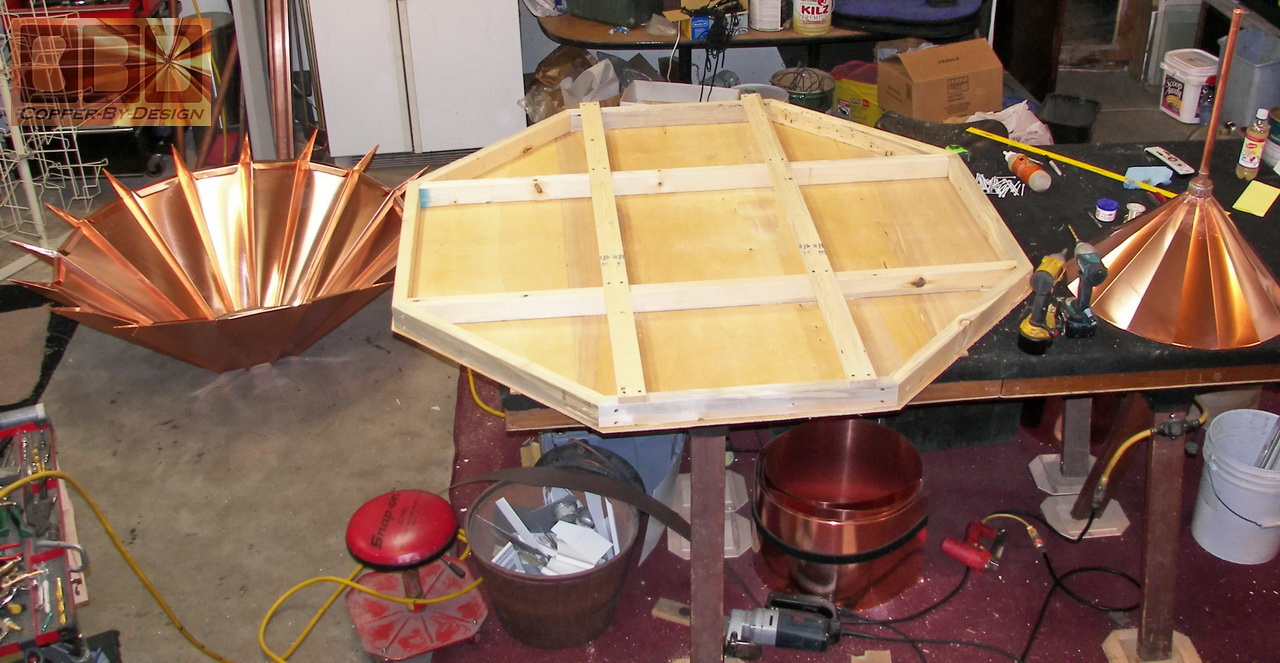
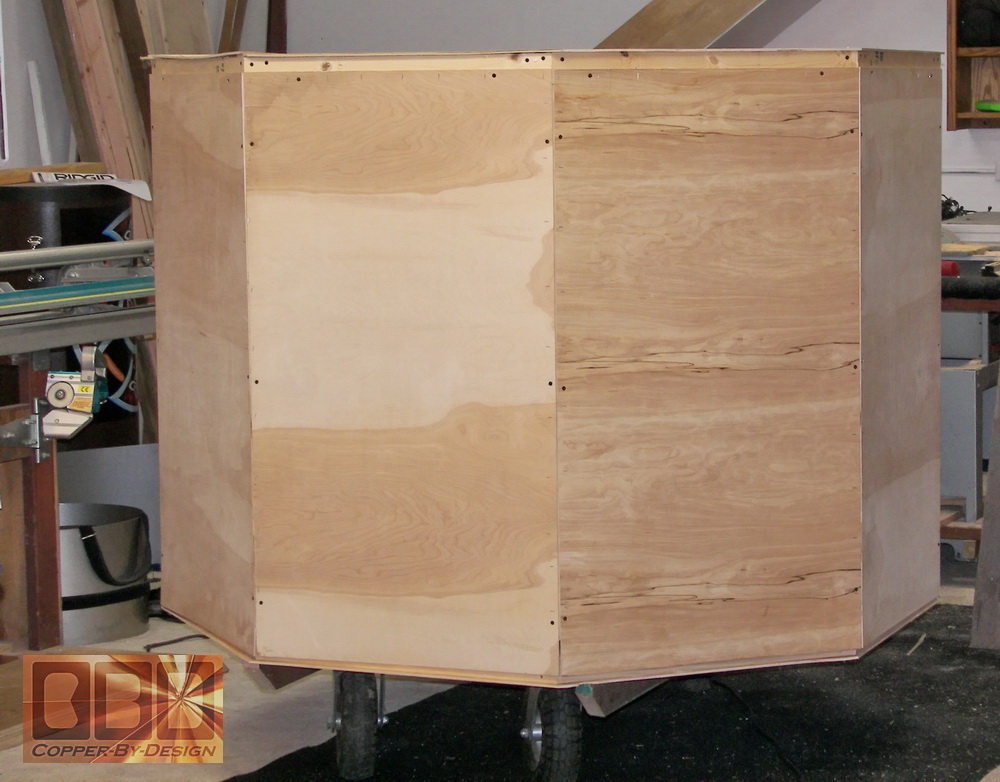
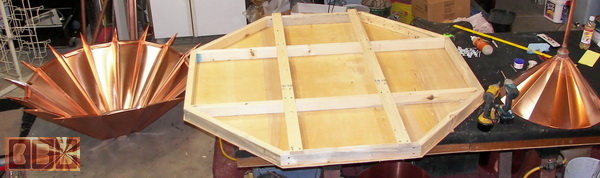
At this point I needed to
make the bottom part of the shipping crate to rest the roof cap on for
more work before it got too heavy. This was a trickier fabrication than
most, since I had to make sure the roof cap would not be sitting on
the spikes during it's travel to Kansas. I decided to make it an 8 sides
crate to help minimize the weight as much as possible, even though it
make the construction a bit more complicated. I guess you could say
I was cutting corners. (LOL)
|
|
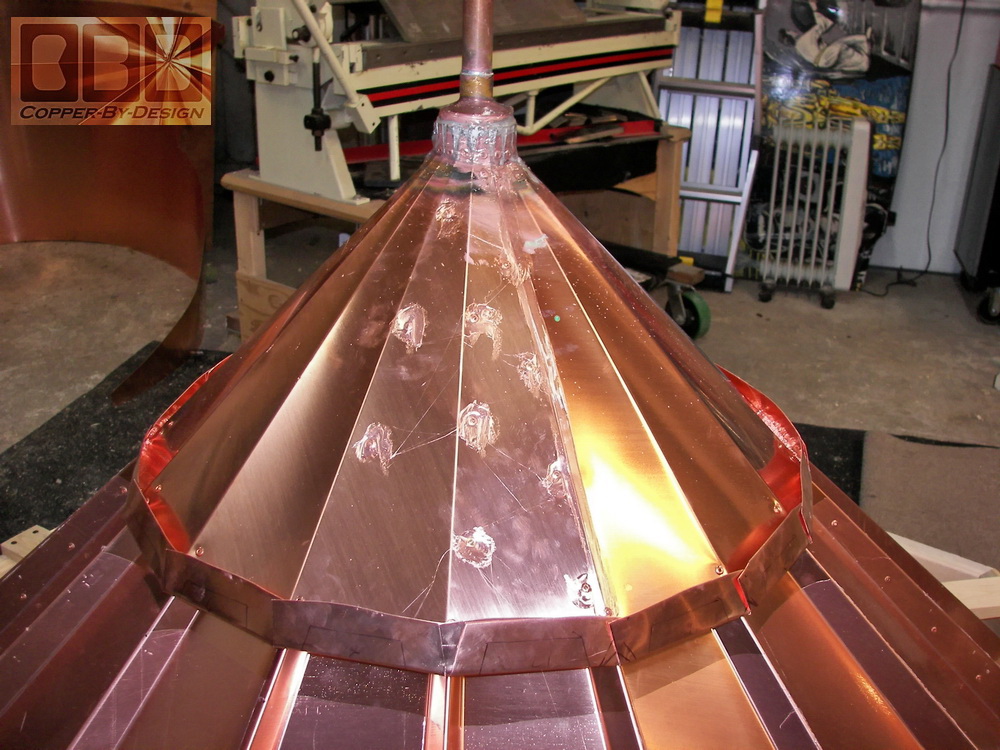
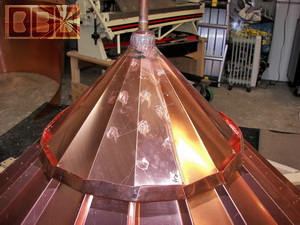
The first photo below shows the center cone partially
formed just resting over the base section. I then riveted it in place
once I was sure the finial support pipe was straight. From there I was
able to bend the flanges up for attaching the steeple cone to.
|
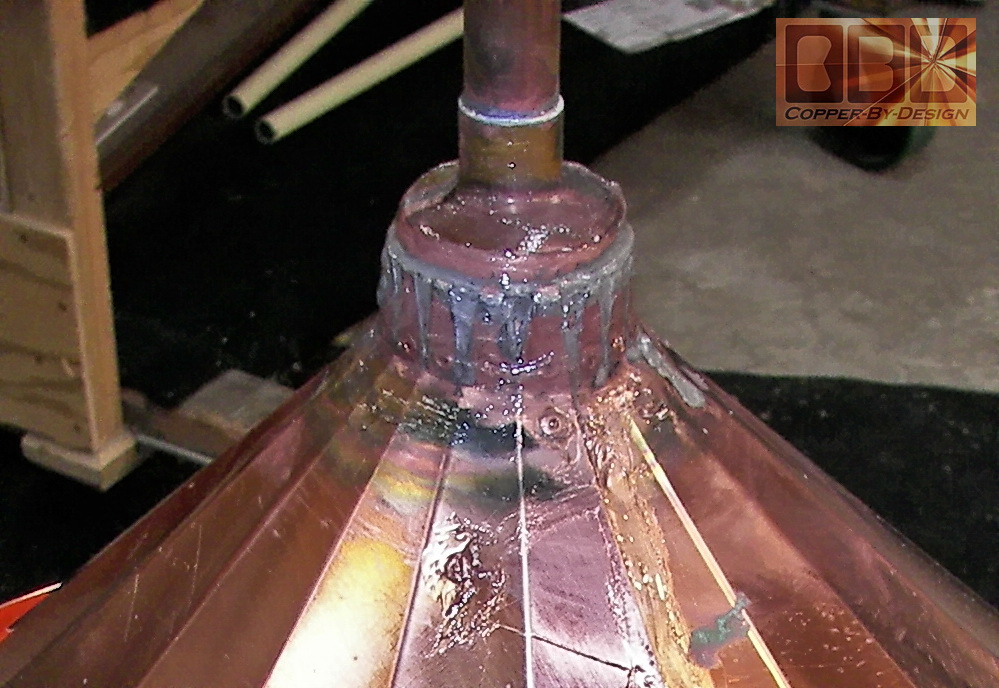
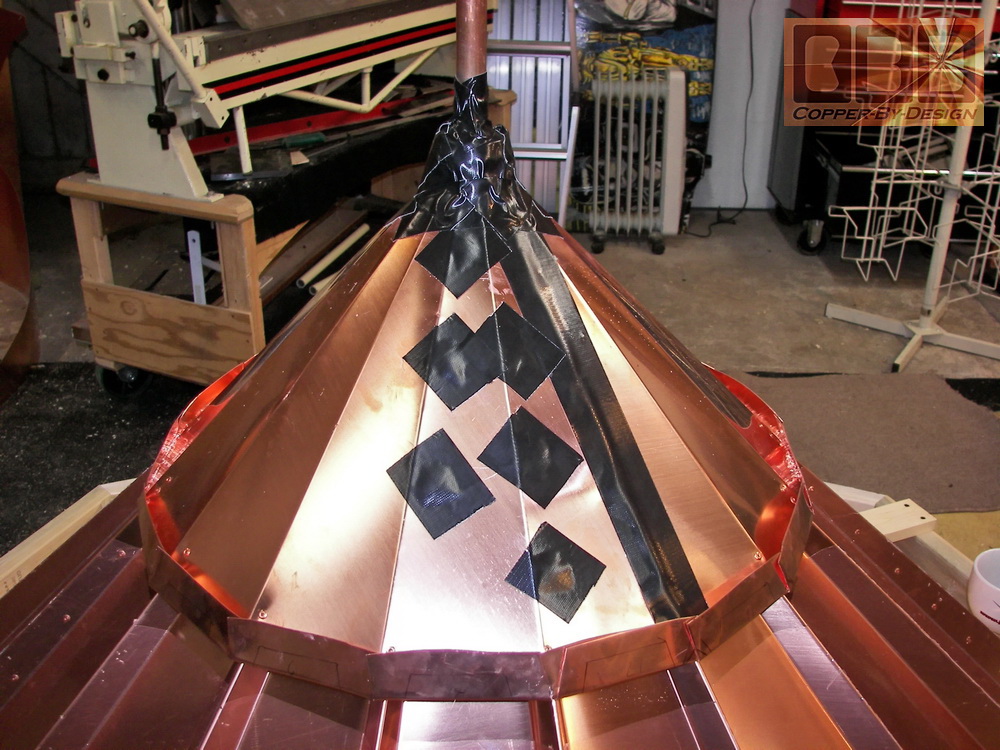
|
This has been caulked over the solder and rivets
to make certain they will never leak. I then covered the caulk with
a special tape to shield it from oxygen to increase it's life span.
|
|
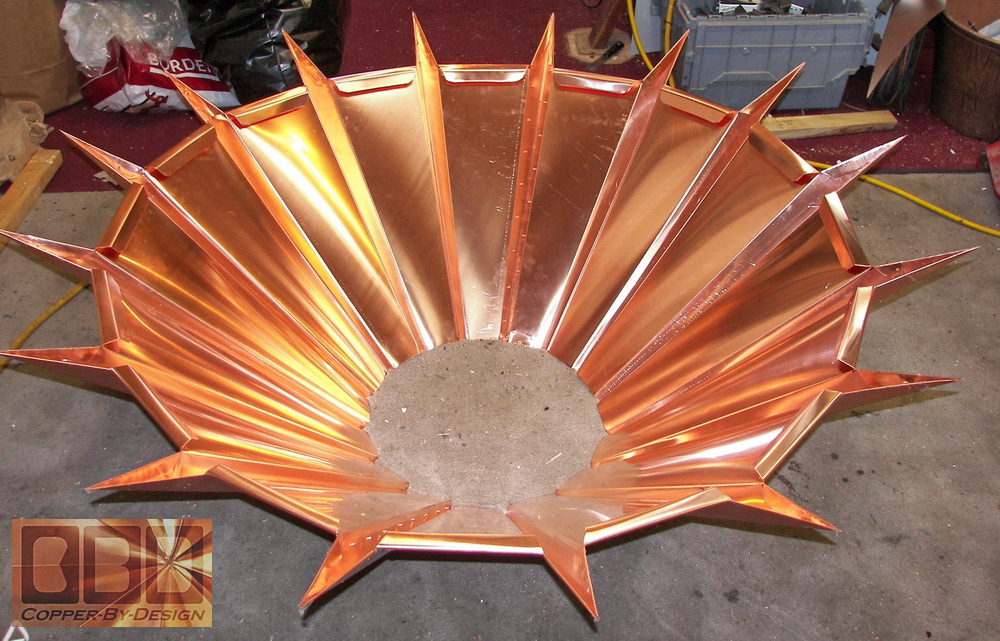
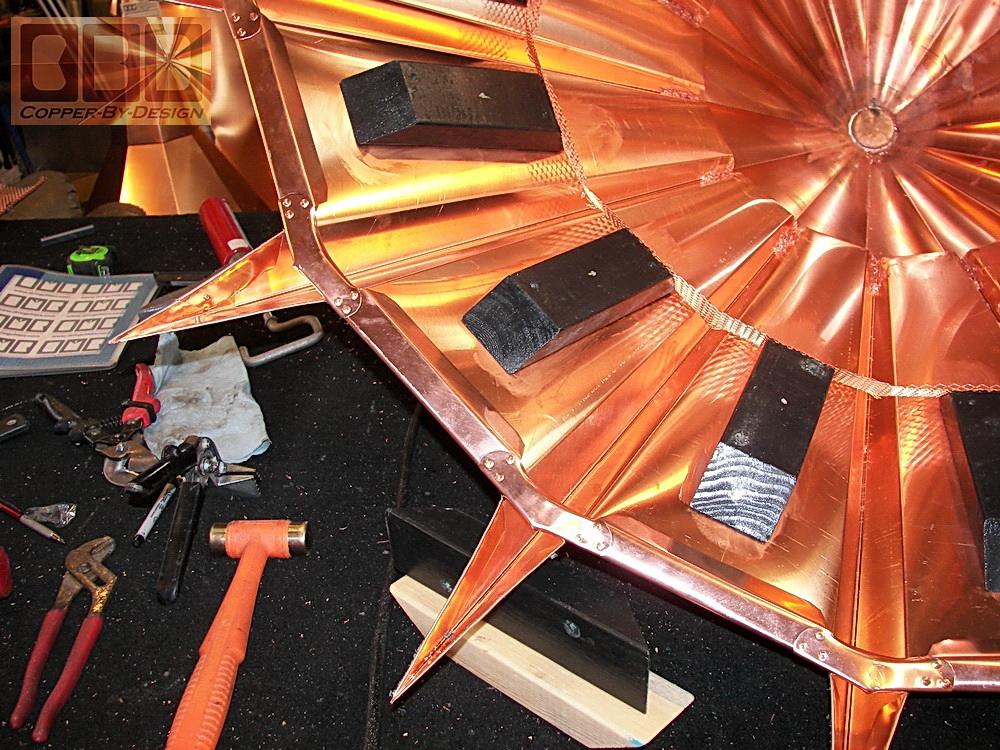
These underside shots shows the wood blocks in
place with the copper screen attached with stainless steel staples.
I
mounted the spacer blocks inside the cap base to suspend it 1.5" out
over the roofing shingles and attached the screen to sealed out pests
that may want to nest inside these caps. The blocks were primed
and painted with a high quality black paint, so they would not be visible
from the ground.
Each block has a pair of holes drilled and counter sunk for the 3" deck
screws to lock them to the roof.
 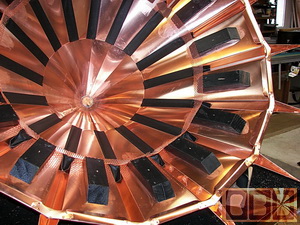
The underside has been recaulked over the seams
and rivets. All the screw holes in the blocks were pre-drilled, so they
will not crack and split. I added this gaffer's tape to the underside
of the raised corners to close the gaps the screen did not close off.
|
|
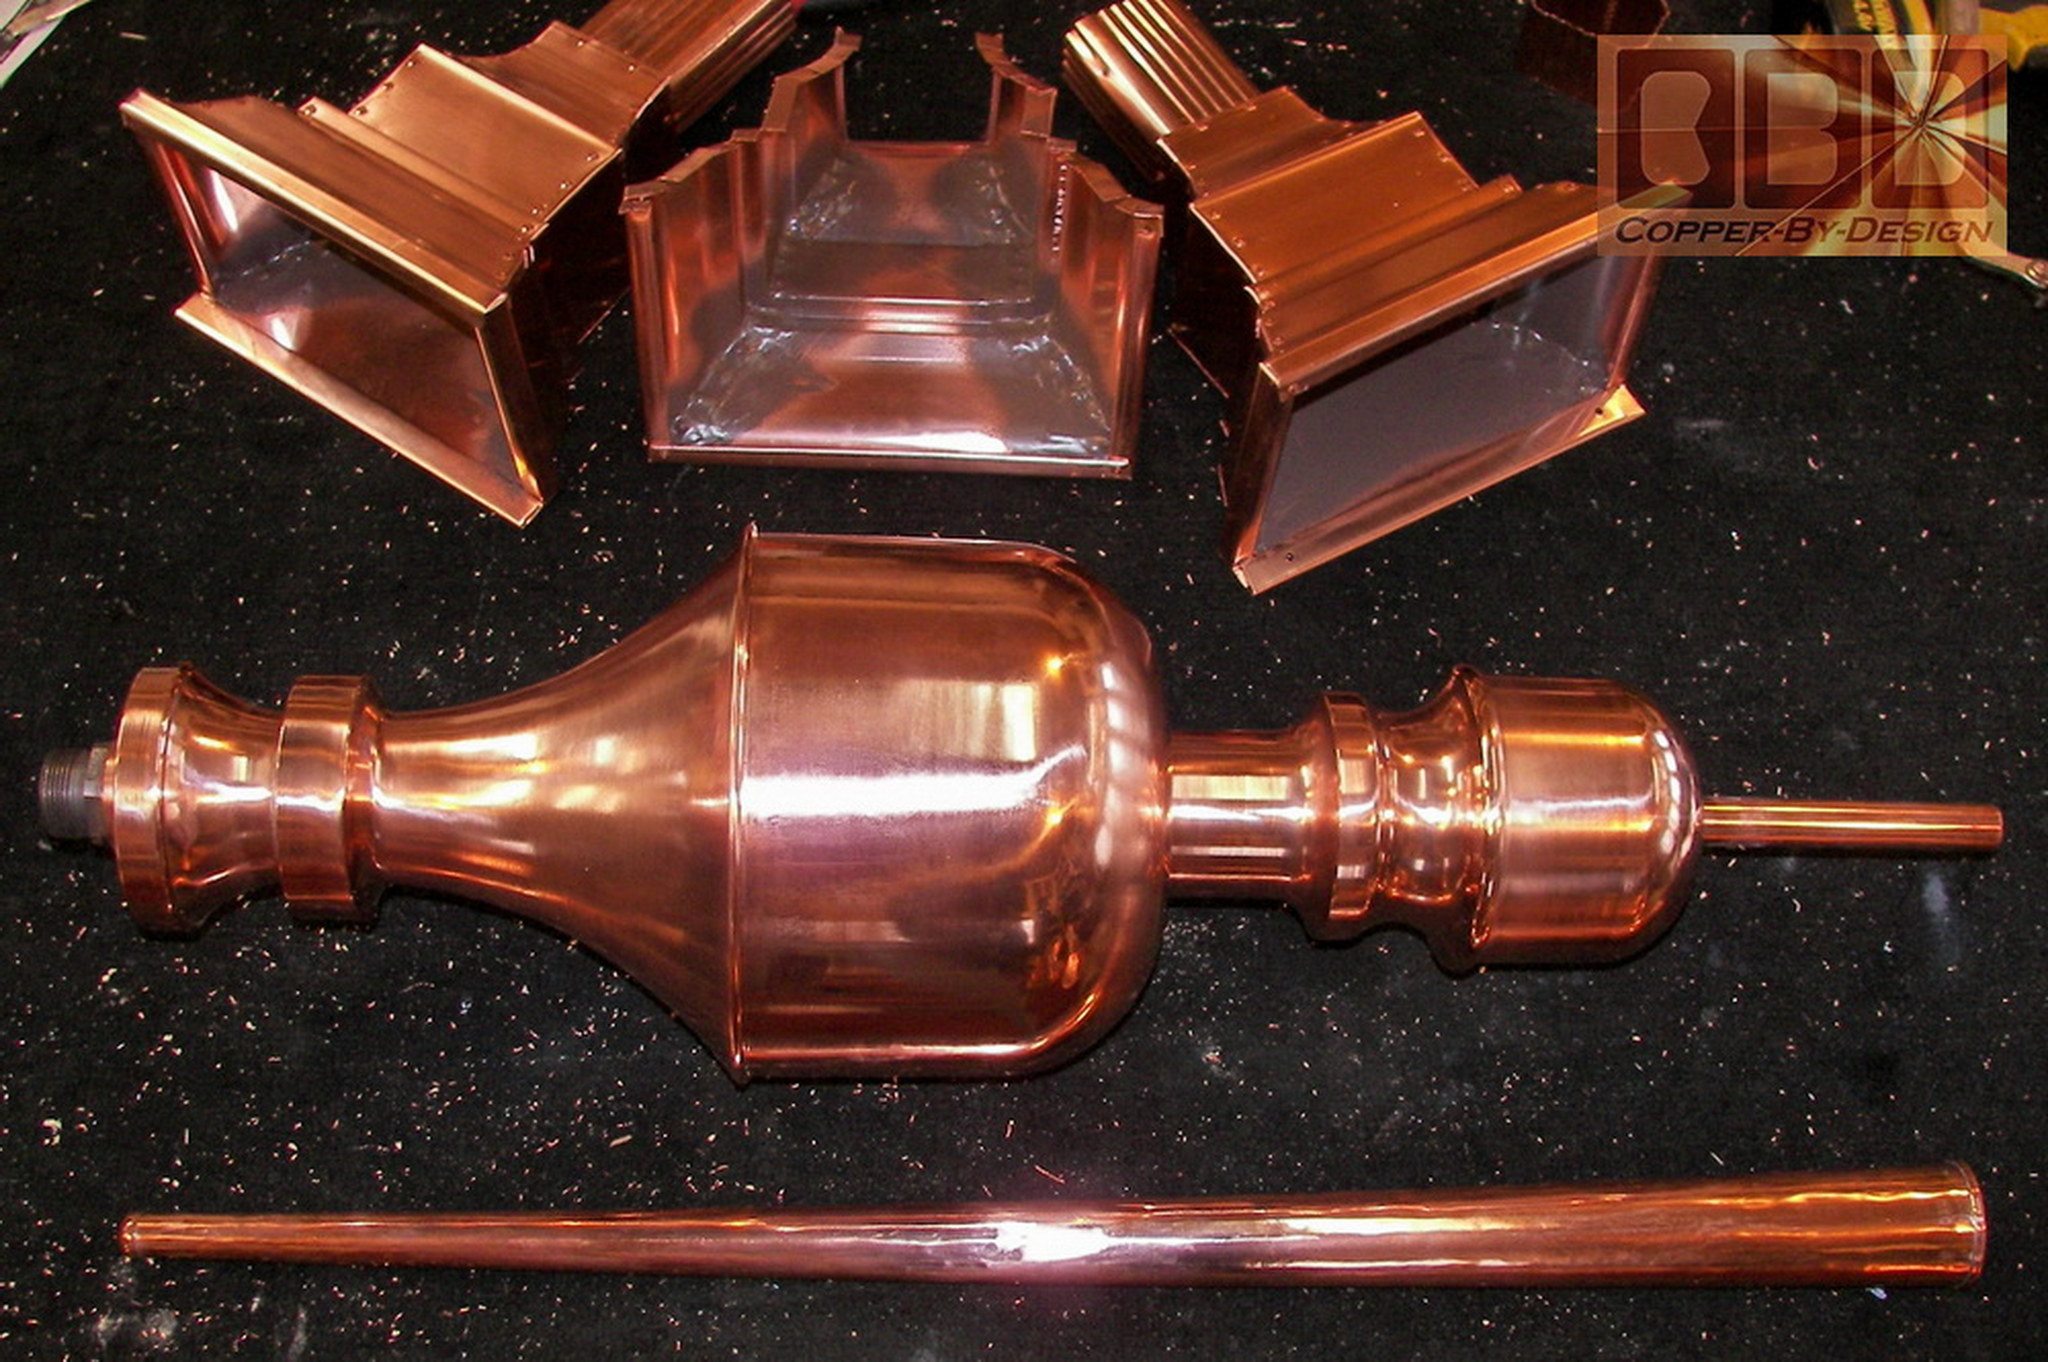
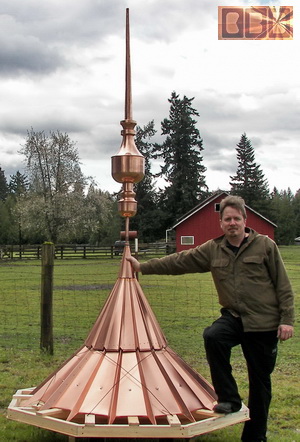
I know it is very expensive to ship long items
like this. The large 69" finial arrived and I was still surprised to
find that it was built in 2 separate pieces with a steel screw on post.
I sent some pipe thread compound with this to use on the threads just
before attaching the top piece. Hopefully that will help those steel
threads from rusting badly over the next decades to come. The compound
has some Teflon in it as well to help keep the threads from seizing
together.
|
|
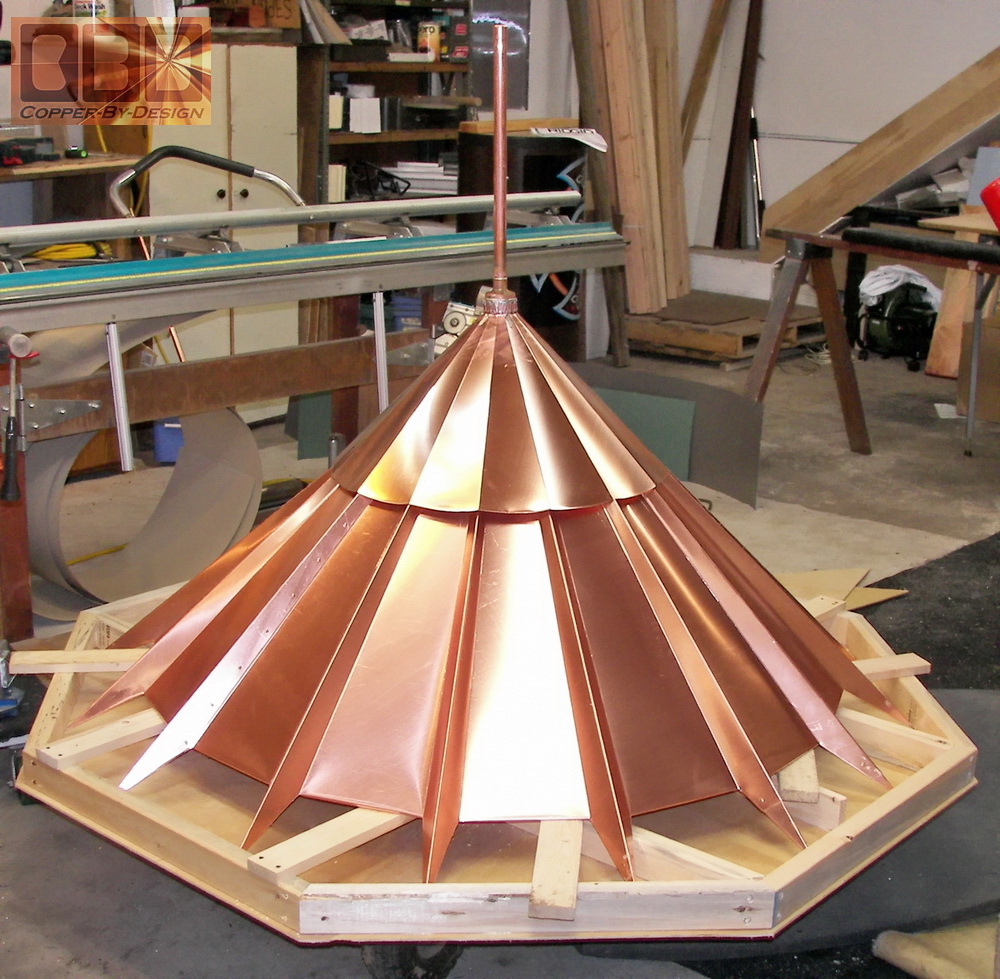
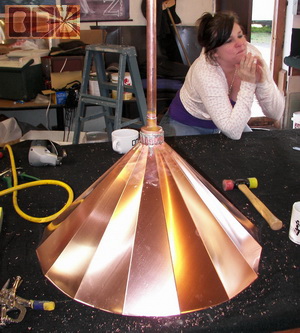
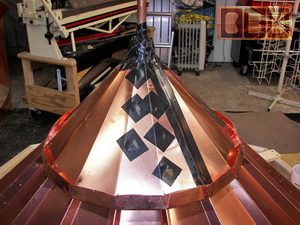
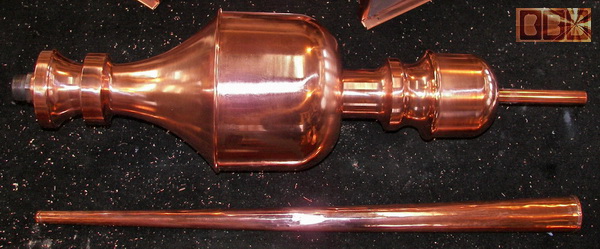
Then there is the forming
of the steeple cone to cover this and hold the top of this pipe. It
was 24" wide at the bottom. This is the first photo of me with my hair
cut off for donating to cancer patients.
Here is the base attached together and sealed
with the finial support pipe sealed to the tip. The steeple cone is
attached and sealed at the top with a 2" copper plumbing pipe reducer
to cover the top of the steeple cone and soldered in place to hold the
top of the finial support pipe in place to have a strong hold for the
next century of stormy weather.
That pipe reducer was so large I felt the need
for a cover cone over it, that you see my hand on. There is another
48 rivets holding the steeple cone on, so we are at about 325 rivets
in this roof cap, even though very few rivets are seen from the
outside.
This project took 13.82 square feet of copper
sheet metal more than predicted in the quote. This is a good example of how
I will not short cut quality on any project because of an error I may
have made in not bidding enough on it. At least it makes a nice addition
to my web site showing what I can do on a larger scale.
|
|
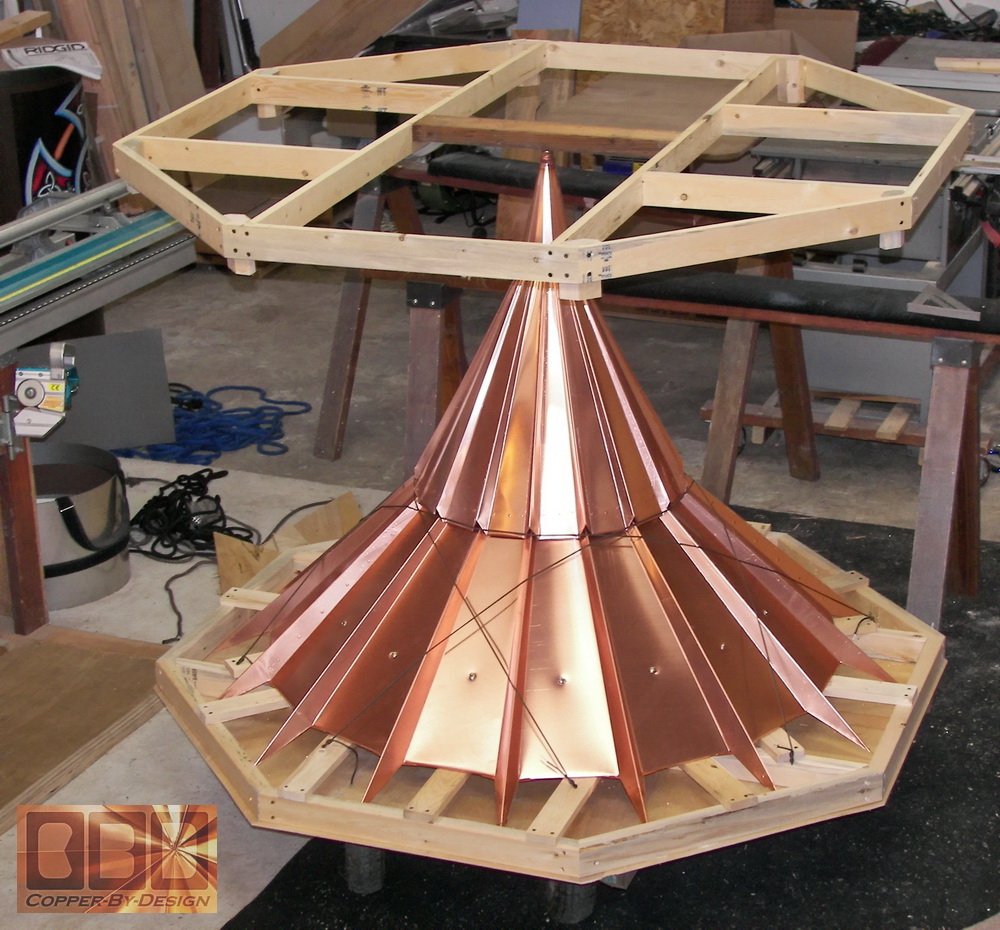
This shows the top frame of the crate built
and just resting on the tip of the new finished roof cap. I made 8 vertical
boards special cut length wise to have a 45 degree angle on one side,
in stead of the normal 90 degree cut, so I would have a nice flat surface
to attach the plywood onto for the 8 sides of this crate.
The shipping cost was very high, since this crate
had to be over 62" wide and takes up the space of at least 2 pallets
in their truck. I have to make these crates very strong, since I know
they may be stacking other boxes and crates on top of this one during
transit.
|
|
The final cost with the 69" Victoria
finial was $2,412.50 with the wood crate and truck shipping to a residential
address with lift-gate service.
They actually saved
$850.10 in
all from this for the added copper I used over the quoted price. The
shipping cost alone was $510, so I did not make a much on this project.
It was like they got a free finial and crate.
|
|
From: Andrea Steele <tcctmickey@yahoo.c*m>
Date: Fri, 17 Oct 2008
Subject: Re: Turret Cap
David,
I would be happy to send you some pictures. I
will send them in the next few days. We love the turret cap!
Thank You,
Andrea Steele
|