|
|
The Simon Turret Roof Cap Photos & Details Page Updated 4-20-2008 |

|
|
Company Profile |
|
Roof Caps |
|
Chimney Caps |
|
Scuppers |
|
Gutters |
|
Shipping |
|
Contact Info |
|
|
The Simon Turret Roof Cap Photos & Details Page Updated 4-20-2008 |
|
|
Company Profile |
|
Roof Caps |
|
Chimney Caps |
|
Scuppers |
|
Gutters |
|
Shipping |
|
Contact Info |
.
.
|
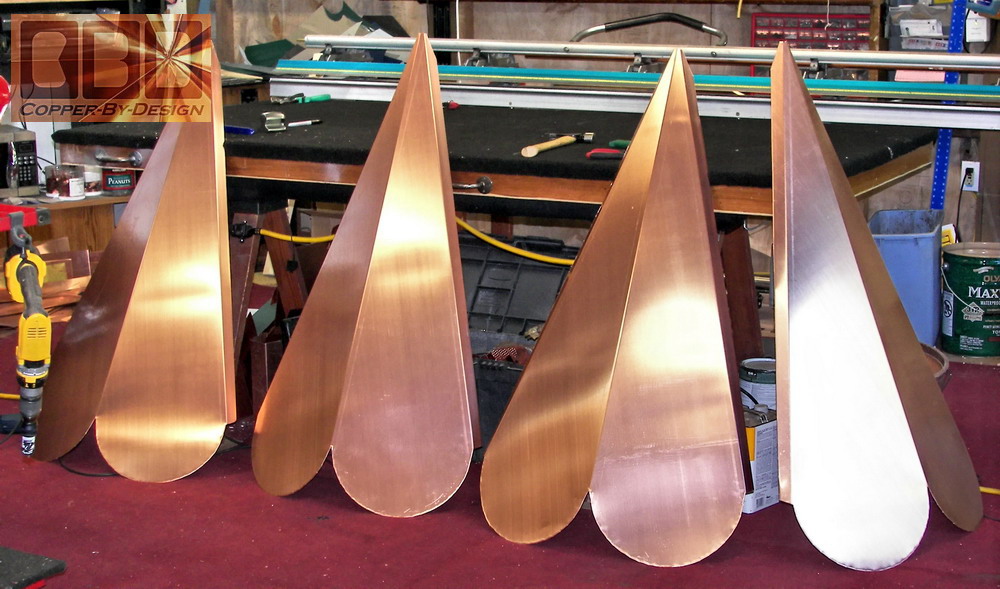
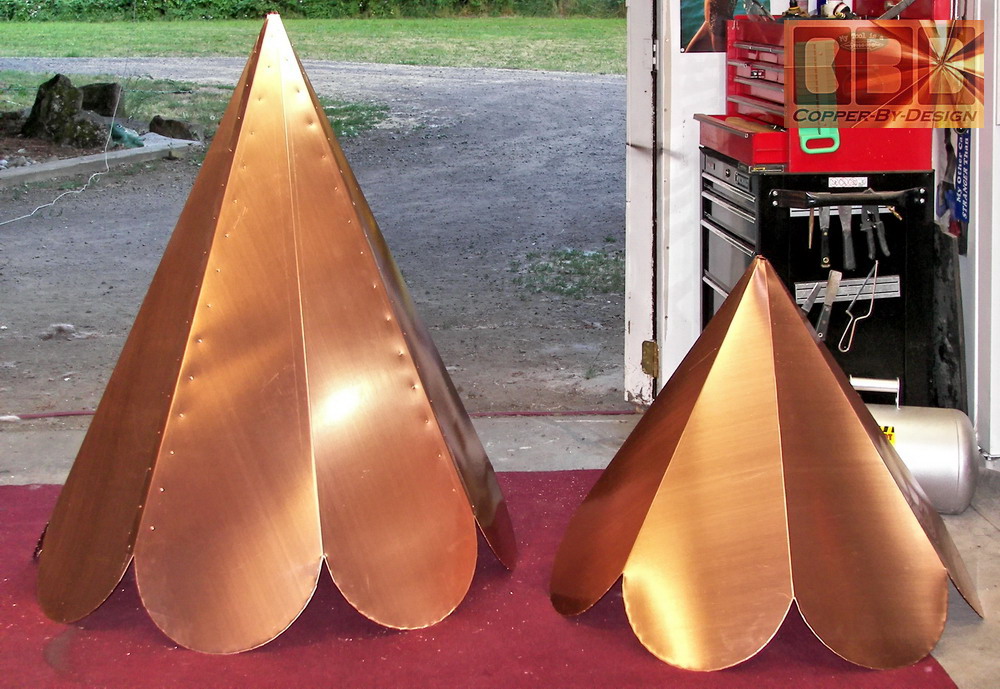
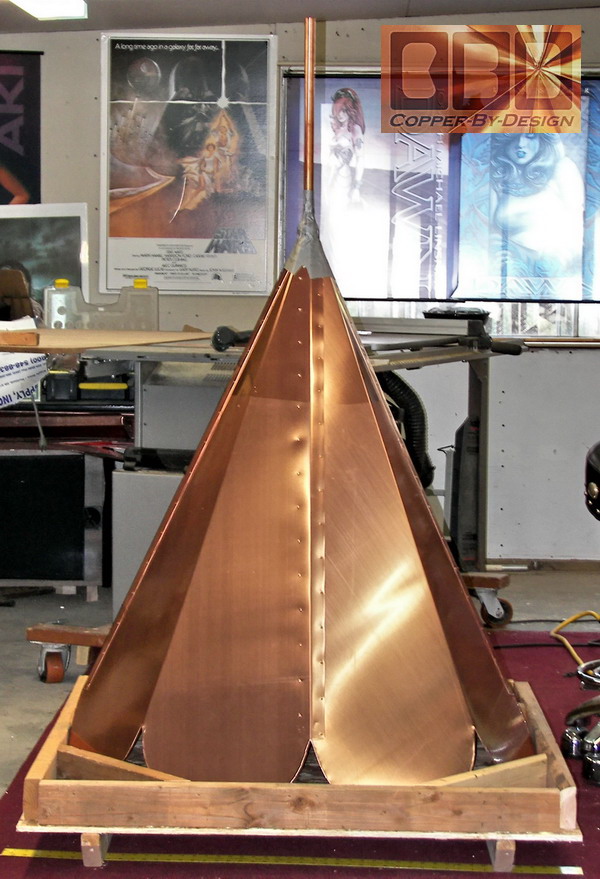
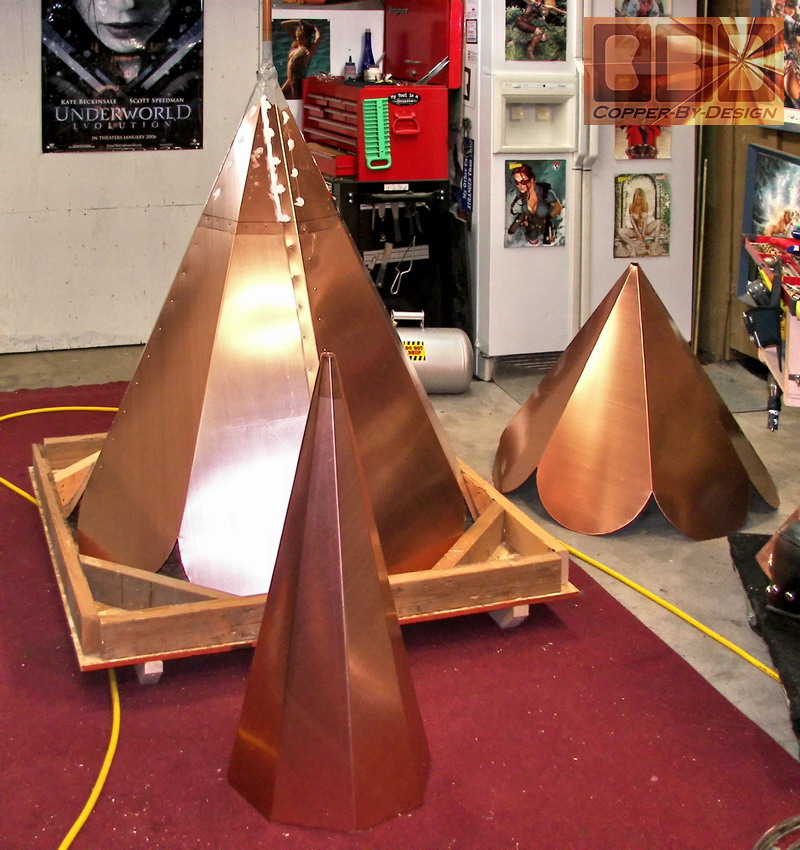
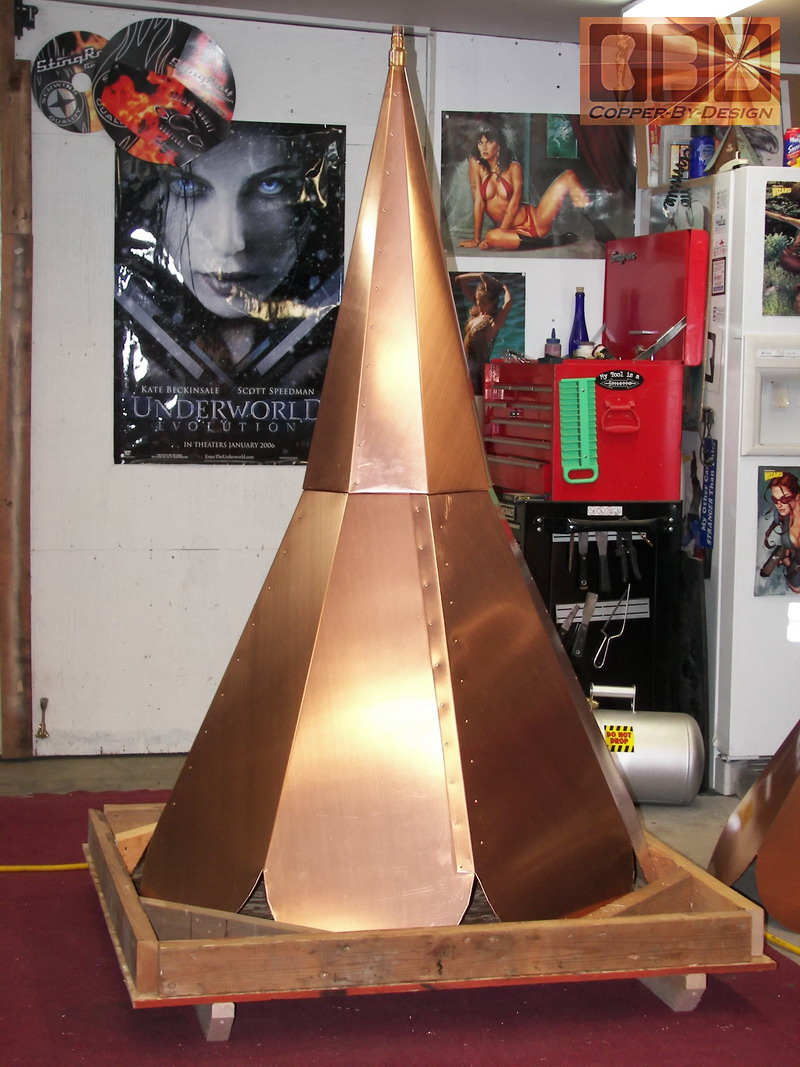
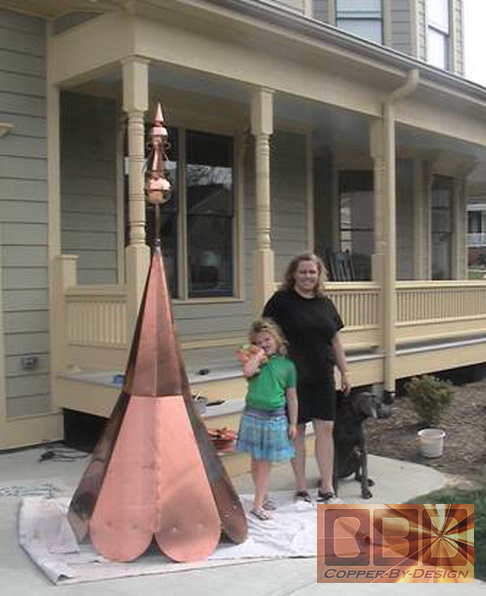
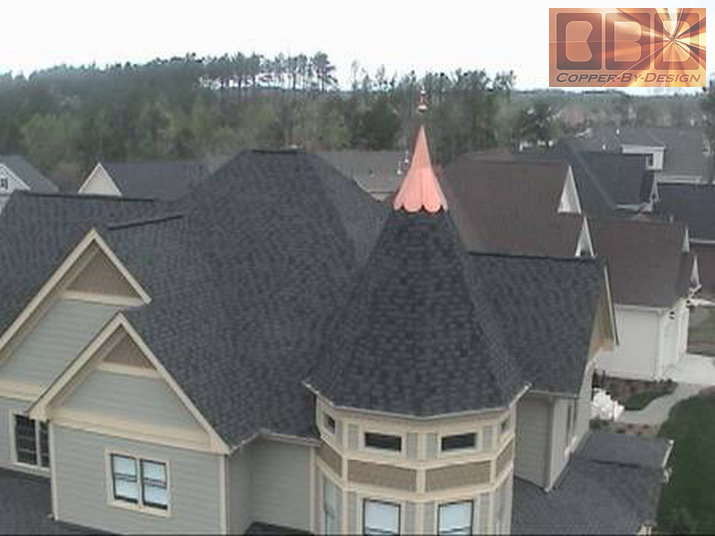
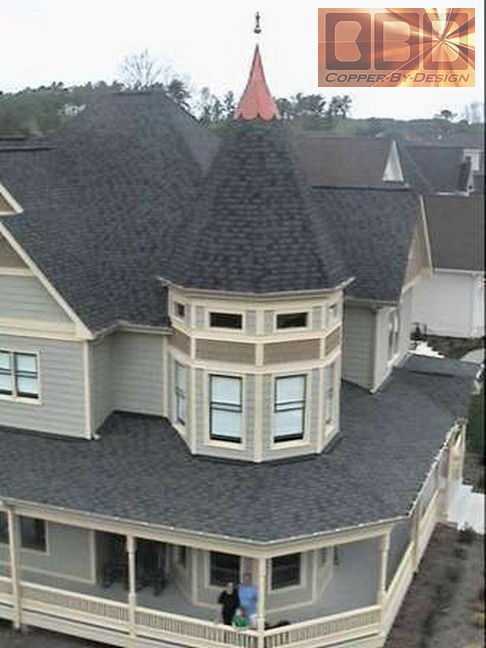
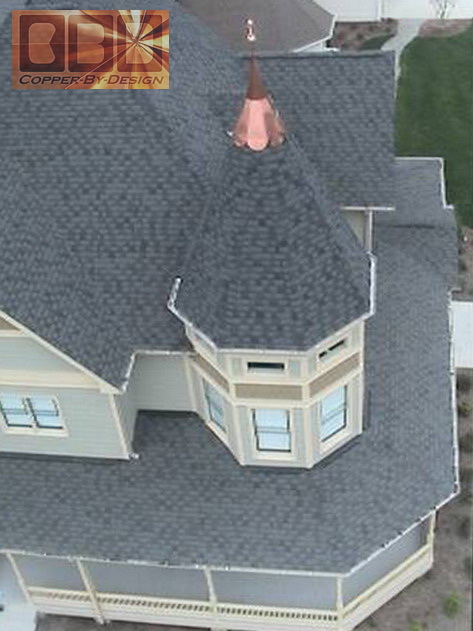
This solid 20oz copper turret roof cap was custom made for our clients named Tom & Kathy Simon in Cary, North Carolina for their 28/12 pitch 8 sided turret roof. This roof cap was made 42.25" wide across the base with a safety hem bent under the bottom edge for strength and better handling during installation. 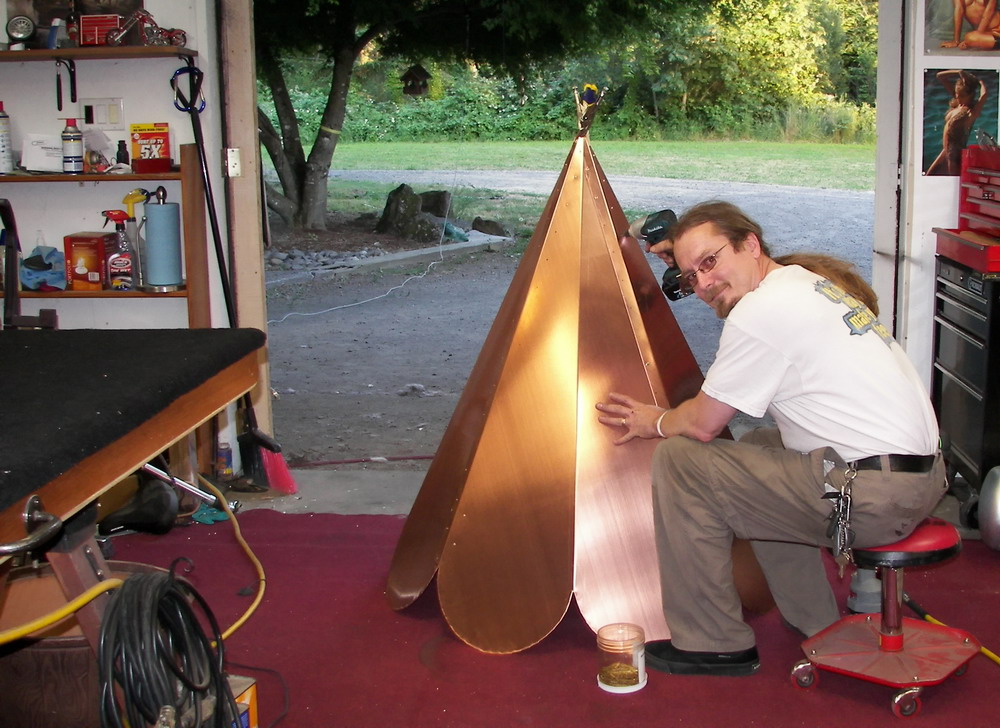 In his first e-mail he had not only provided all the info I needed to provide the quote, but had also sent me a $200 deposit through Paypal to expedite this order. They then saved another $175.50 from the additional amount of copper that went into this cap over what was quoted, along with the 10% discount for being prepared before contacting me. I had calculated this to require 34.5 square feet of copper, but it weighed in at 48#, which calculates down to 38.4 square feet of copper sheet metal. |
|
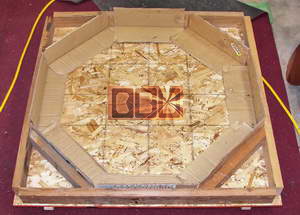
These photos show this roof cap in the different stages of fabrication with the 4 sets of 2 sides cut out and bent for the main base of this roof cap. Because of the large size of this roof cap this was the most seamless I could make it, so I had to connect and seal each 4 overlapping seams together with 120 rivets and the clear caulk I use.
This shows the comparison size of another turret
roof cap I was making at the same time for
Robert Fischer in Elk, Washington
|
|
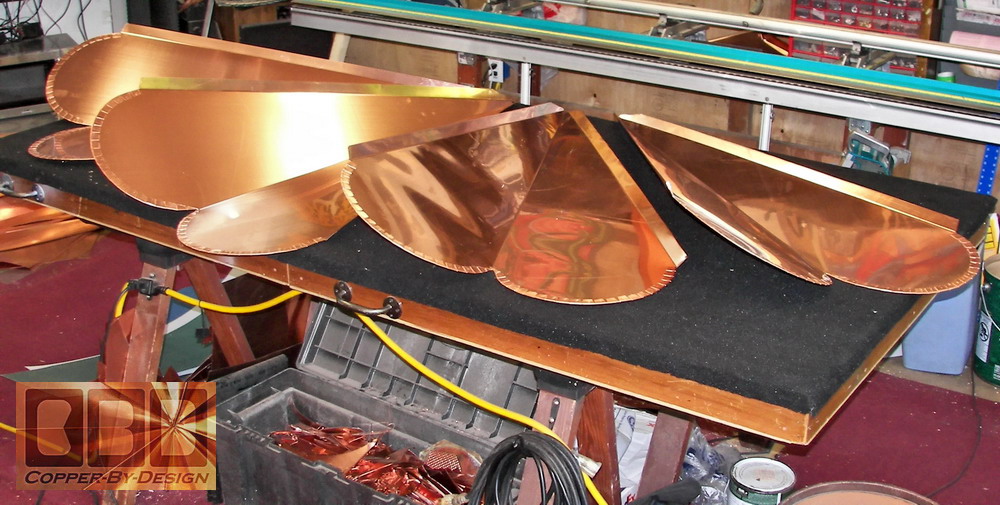
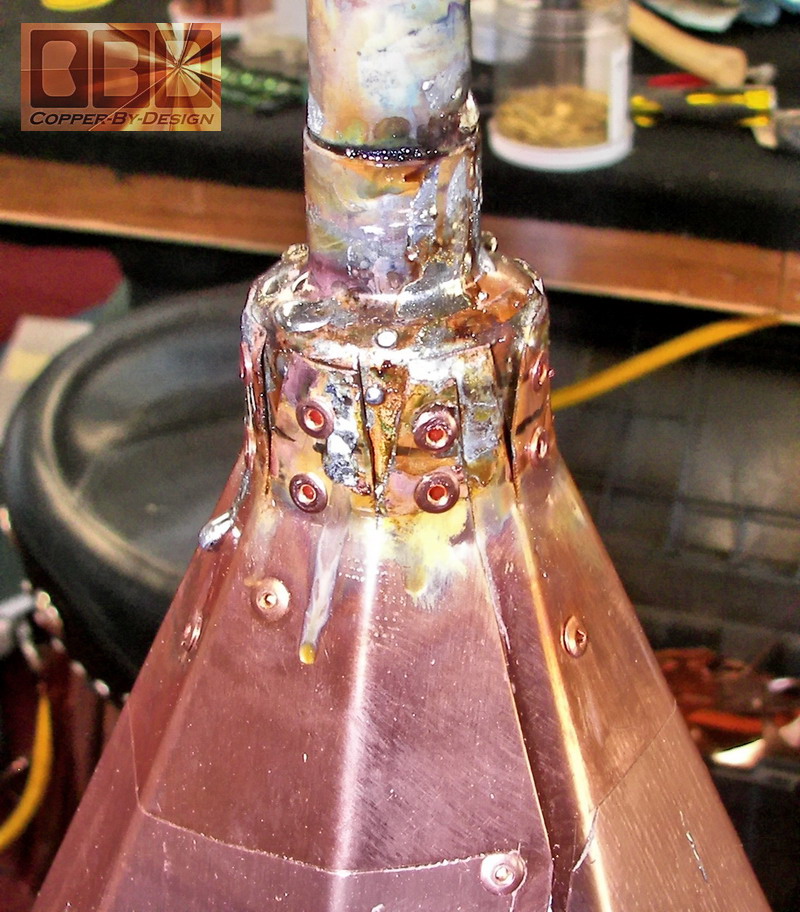
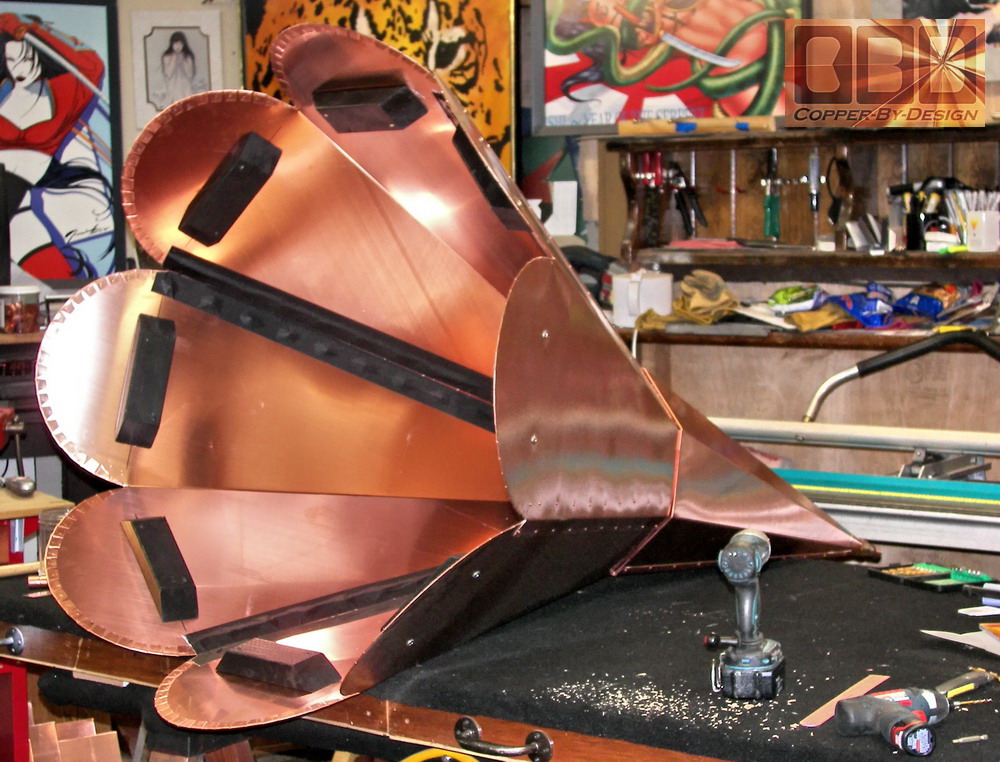
These show the finial support pipe connected and sealed to be independent of the roof. Then the steeple cone is riveted and soldered over the base cap for upper support of the finial support pipe. I do all I can for double redundancy to make sure it will not possible leak over the next century.
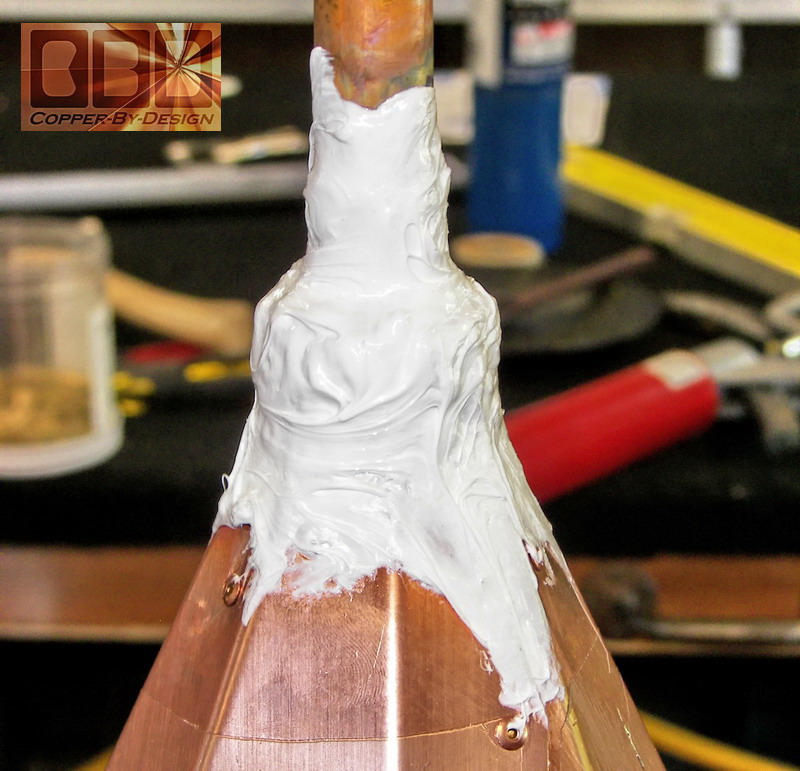
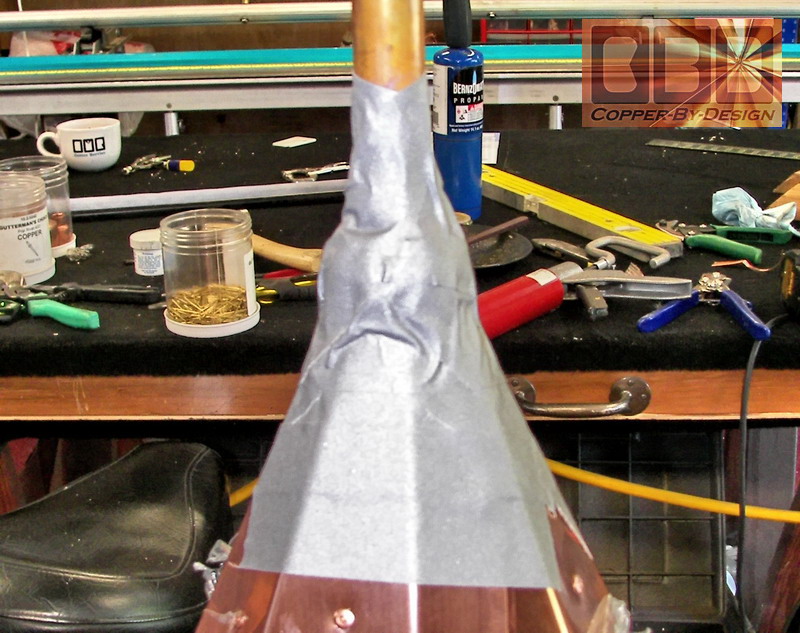
This is a 1.5" copper pipe reducer fitting that is capped off underneath and riveted to the top of the base cap with 16 extra long copper rivets. It is then soldered for added strength and seal. Then the caulk is spread over that to make sure I did not miss any small holes and the rivets cannot leak through. Over that is the silver cloth gaffer's tape over the caulk.
I then caulked the rivets holding the base cap together just below this just before covering all this ugly mess with the steeple cone. The steeple cone has a flange bent under along the bottom edge to rivet through from inside the base cap, so all those 24 rivets are hidden. You can see the rivet holes predrilled in the base cap with the clear plastic film pealed off. |
|
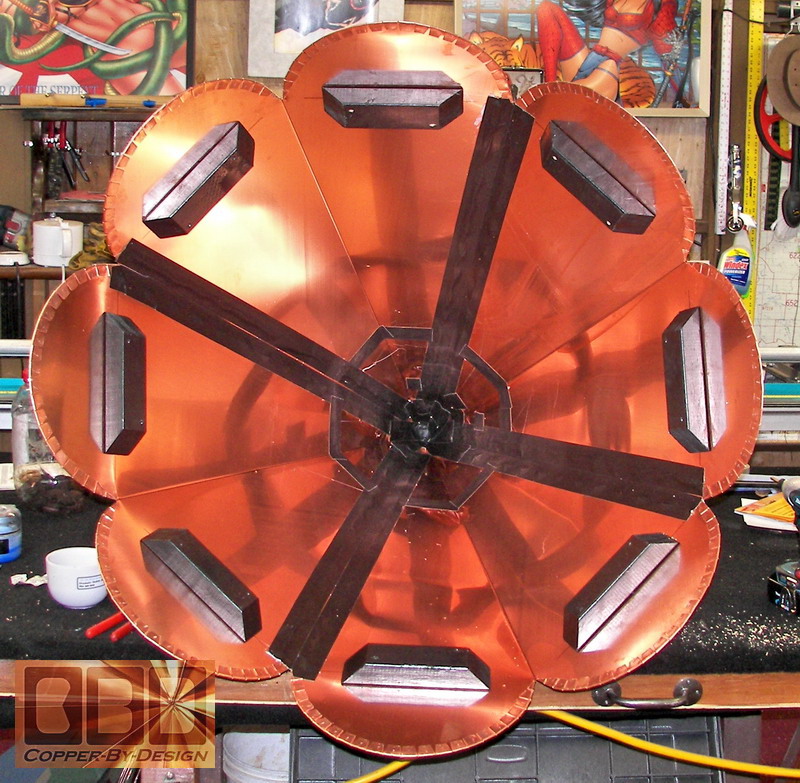
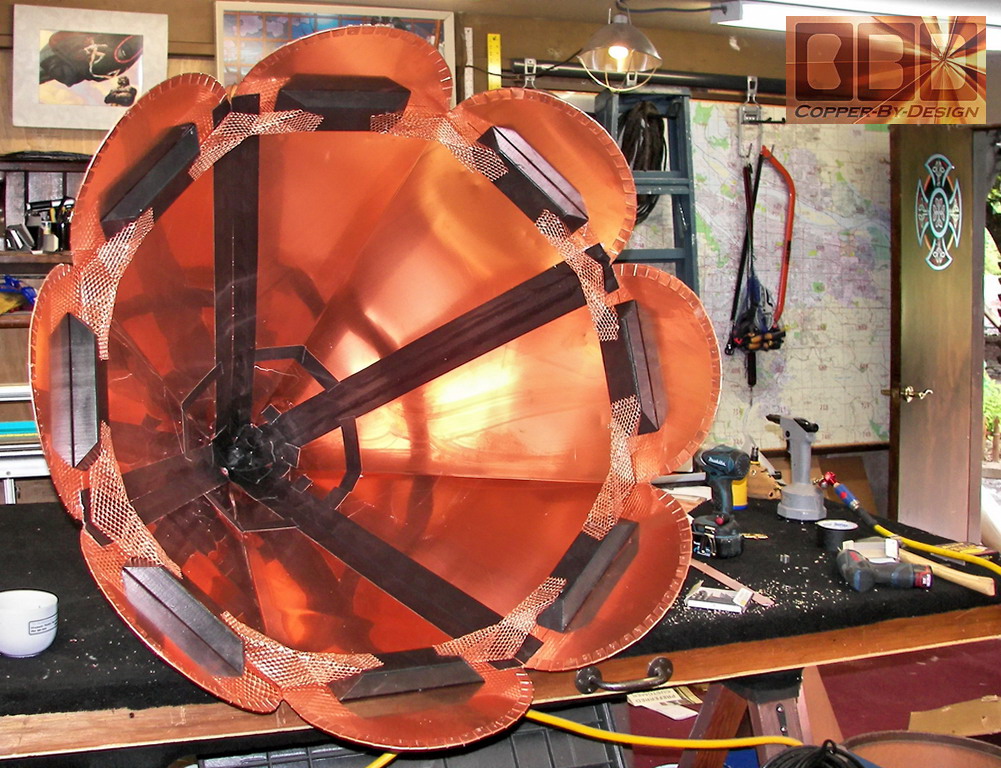
Below shows the set of special primed and painted spacer blocks for a hidden roof vent w/copper vent screening installed.
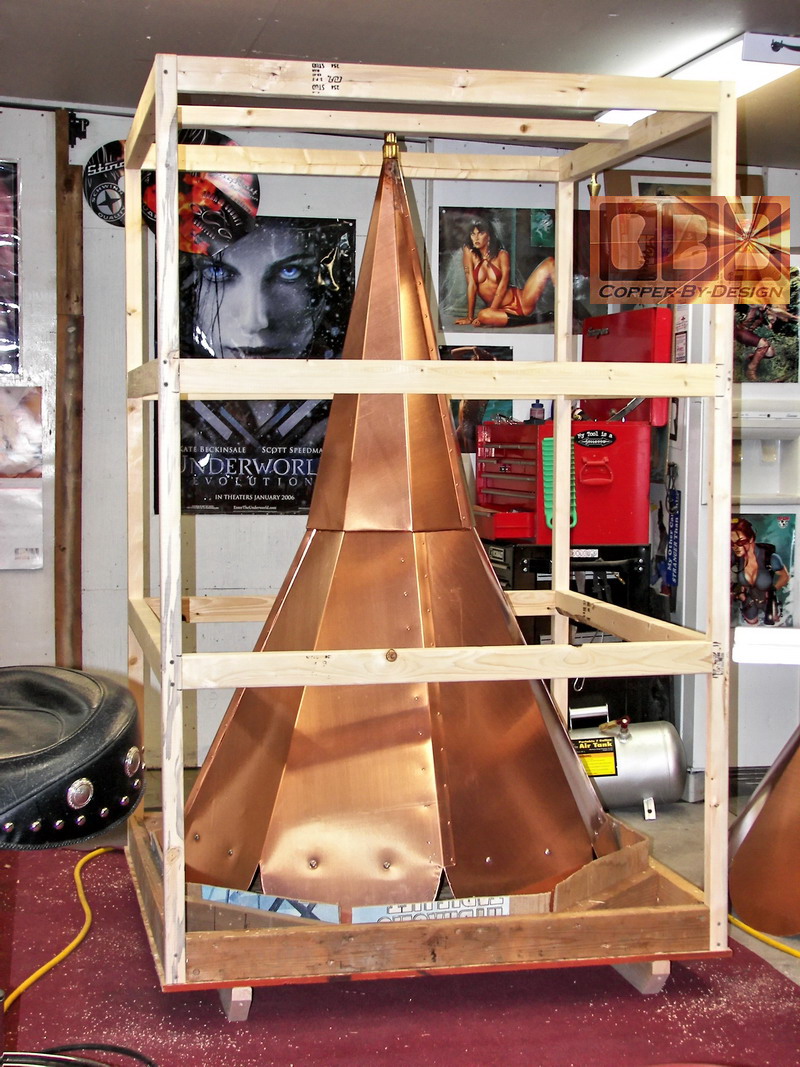
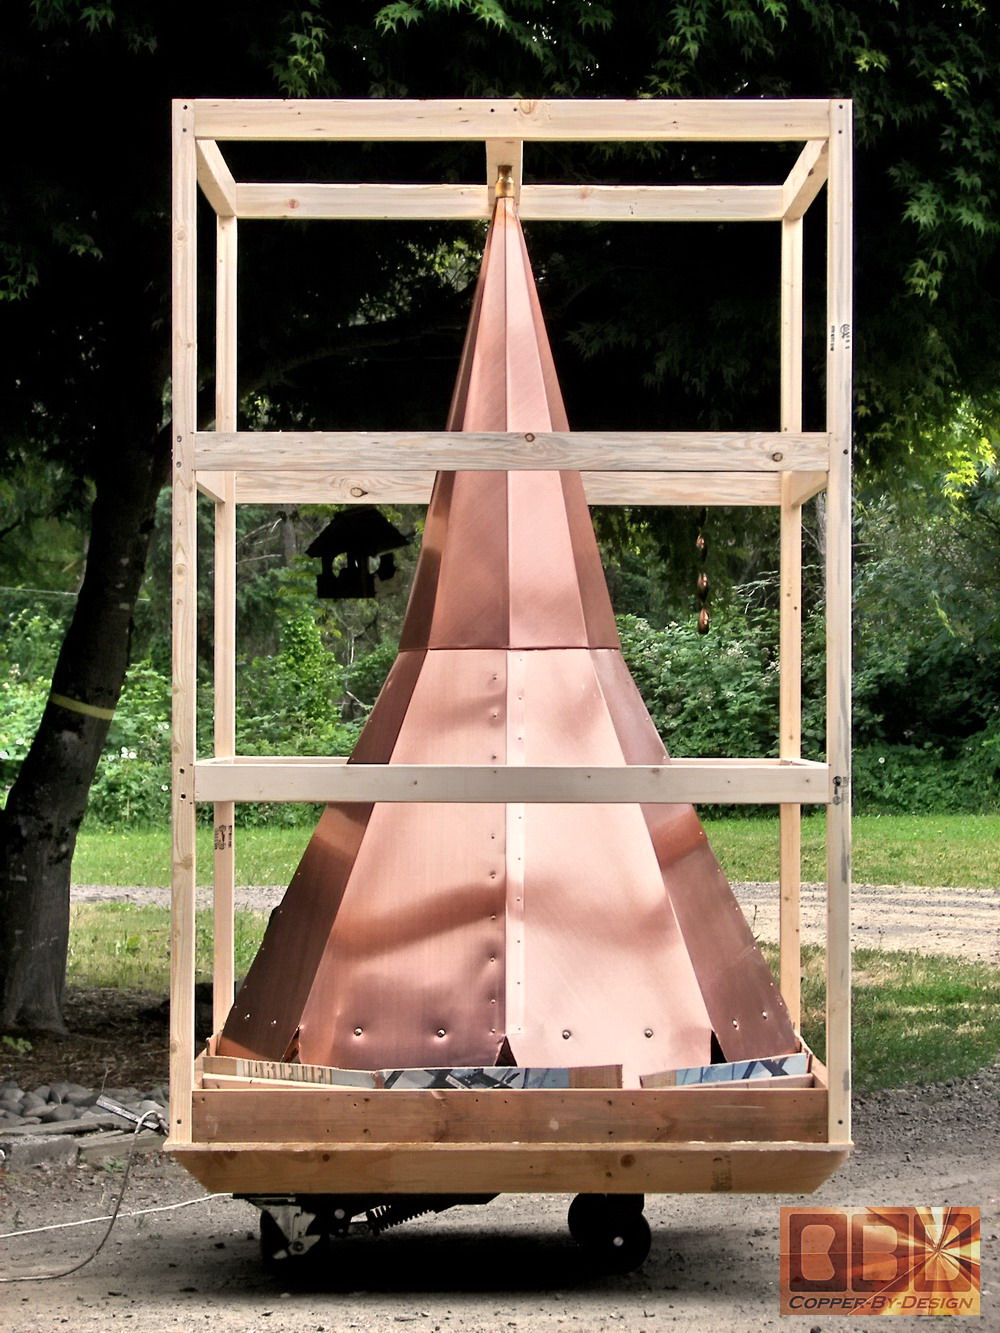
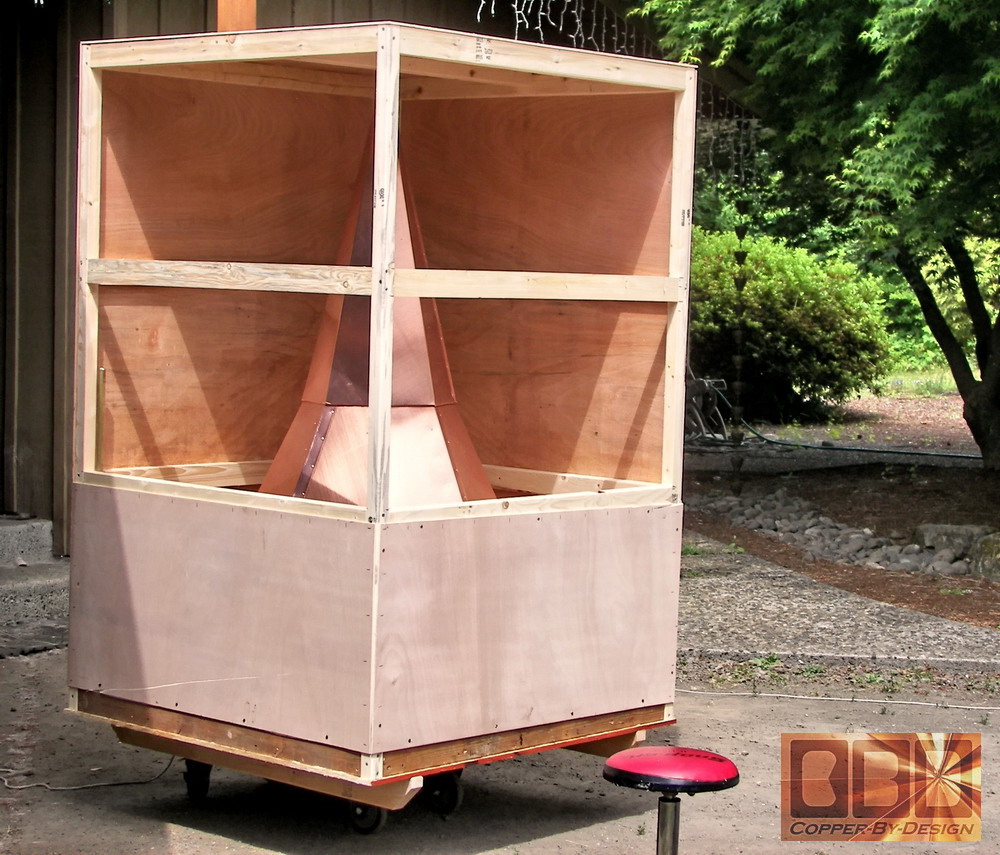
Here is the custom crate base the weight of the roof cap will be resting on during it's long journey to North Carolina. |
|
Now it is ready for the wood crate we build for each order with a hardwood plywood shell that is glued, stapled, nailed, and screwed on the wood frame.
Cost: $1,806.75 w/Merlin finial, crate, and shipping as quoted $180.68 off - 10% discount for having all
the right info in the first e-mail |
.
|
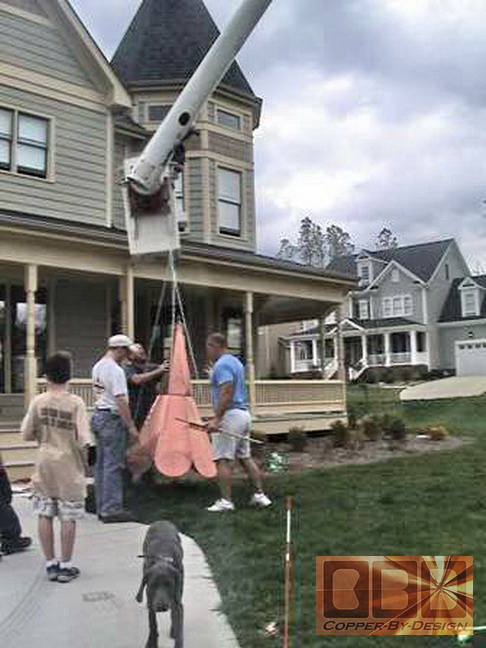
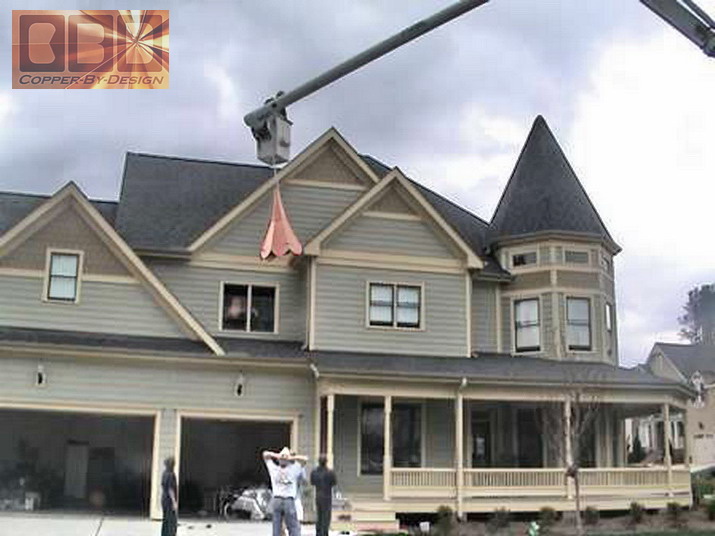
Client photos of the installation |
|
|
|
|
|
|
|
|
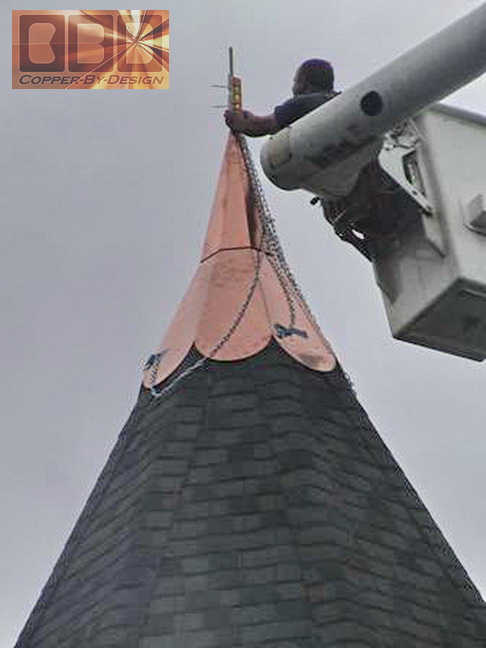
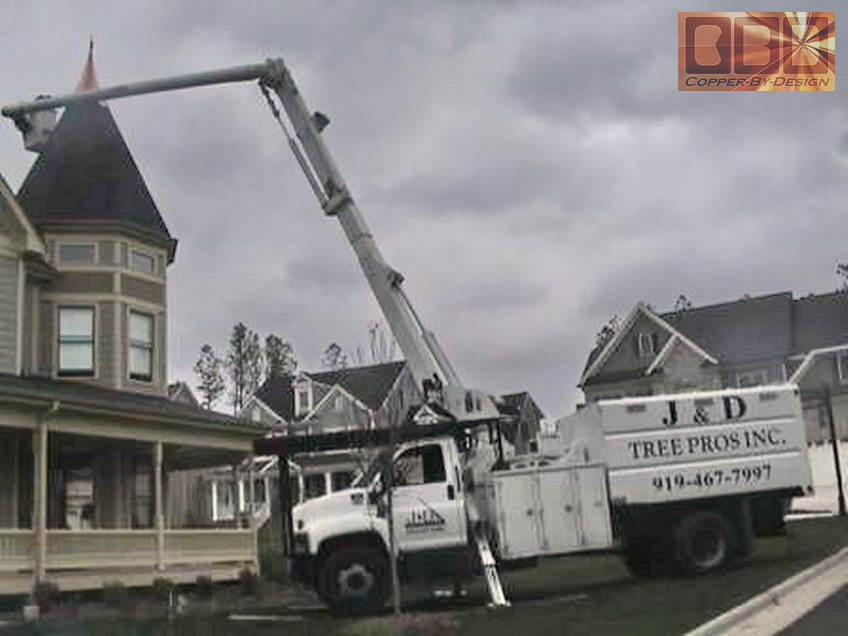
From: "Tom Simon" <tcsimon@nc.rr.c*m>
David,
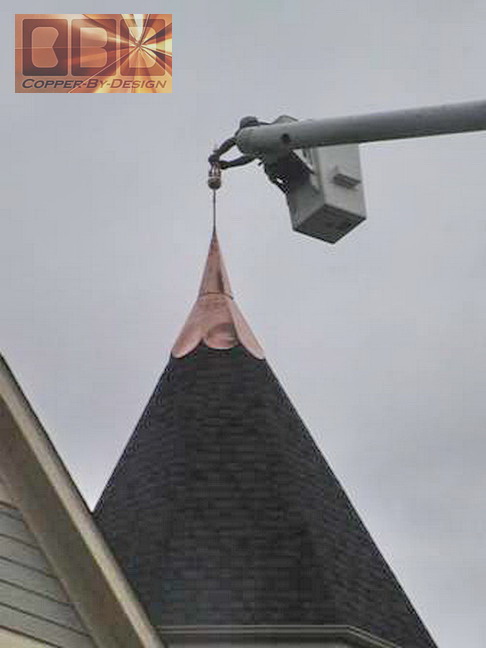
We finally got the cap installed. We decided against venting it. We had the installer set the cap in place with the venting blocks installed and everyone agreed it looked hideous, and should sit flat on the roof. Given the steep pitch of the roof, when you looked up at it all you could see was the big gap under the cap. Here’s a picture of it:
As you can see from the picture, we didn’t wear gloves when
we handled it. We had the installer wipe it with denatured
alcohol (it was all we had on hand) but it didn’t help.
Would tarn-x have worked? It’s too late now. It
will even out eventually. You can also see that
we used masking tape to hold the hooks in place once the cap
was set down and the chains went slack, they were also zip tied
to the rod at the top. We also zip tied two small levels
to the rod to make the installers work easier. The masking
tape was even used to label the front so there was no question
as to if it was positioned as we wanted it. Thanks again, Tom Simon
|
|
|
|
|
.
| Click this
photo to go back to the Custom Copper Roof Cap main page.
|
.
.
|
Below is a
photo of our |
|
|
|
We were also a 1997 finalist for this same award. See our referral web page to see how we managed to be honored with this special award |
 Homepage |
|
|
Company Profile |
|
Roof Caps |
|
Chimney Caps |
|
Scuppers |
|
Gutters |
|
Shipping |
|
Contact Info |
.
.
.
.
.
.
.
.
.
.
.
.
.
.
.
.
.
.
.
.