|
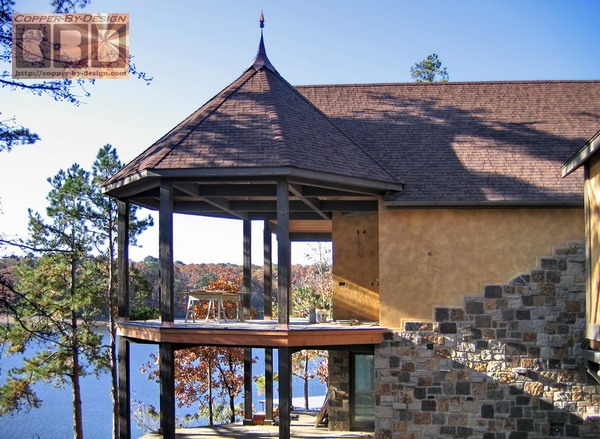
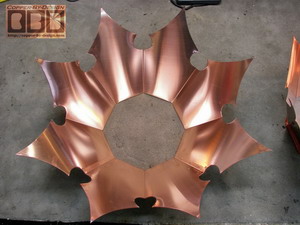
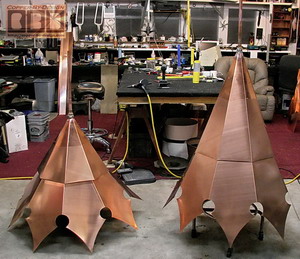
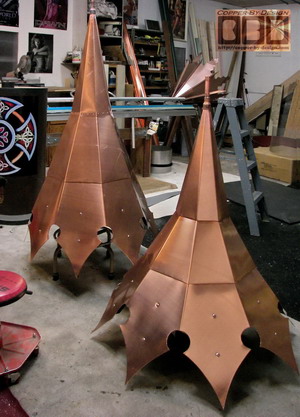
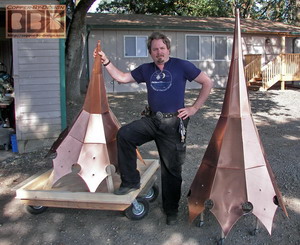
Here is a set of 2 different angled roof caps
made for our client Marinick through Larry Wagner of
Top-Notch Construction, Inc. in Hot Springs, Arkansas. Phone #
501-627-3164. They were designed to go on the house they are
building to cover the top of the turret and gazebo built off the
back lake side of the house.
They made these very detailed plywood models to
get the right size and angle. I was blown away by how much detail
they put into these sample caps. I had never seen a client do nearly
this much before. These certainly were examples of this contractors
unusual ability to be creative.
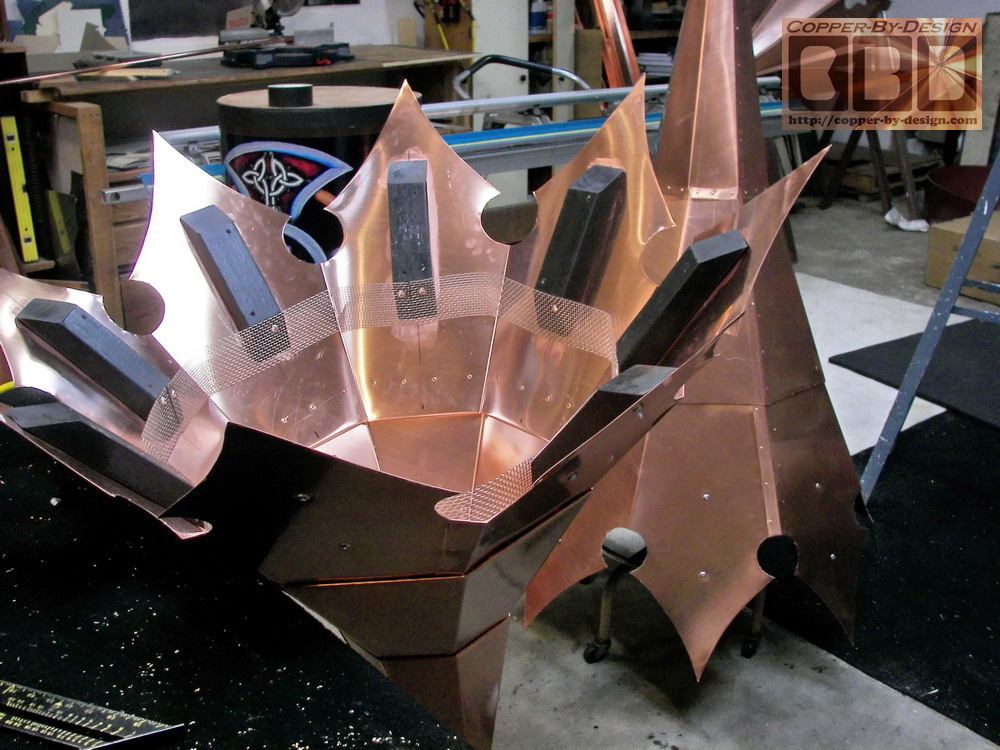
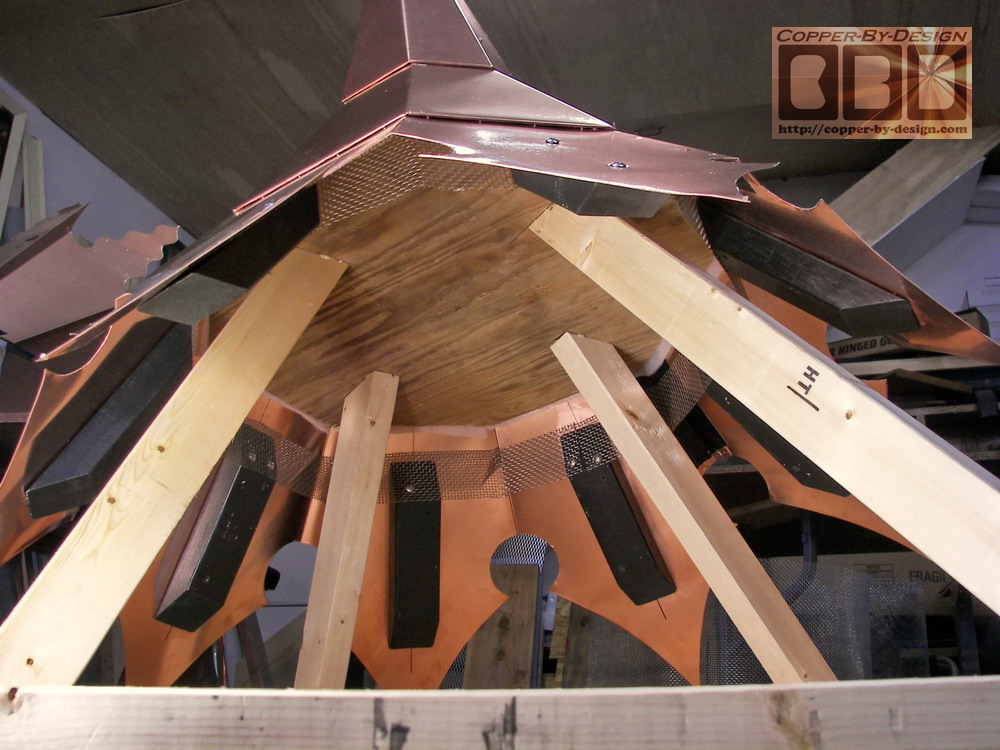
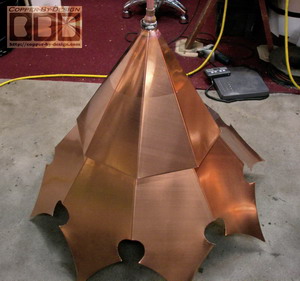
It has the 8 wood support blocks under each
roof cap with stainless steel screening for a hidden roof vent. They
also they help give the fancy points style tails a more noticeable
look after they had tarnished.
|
|
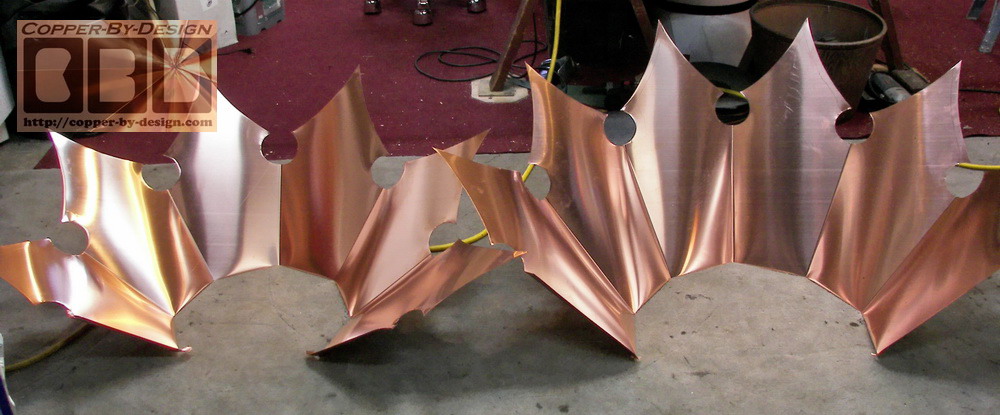
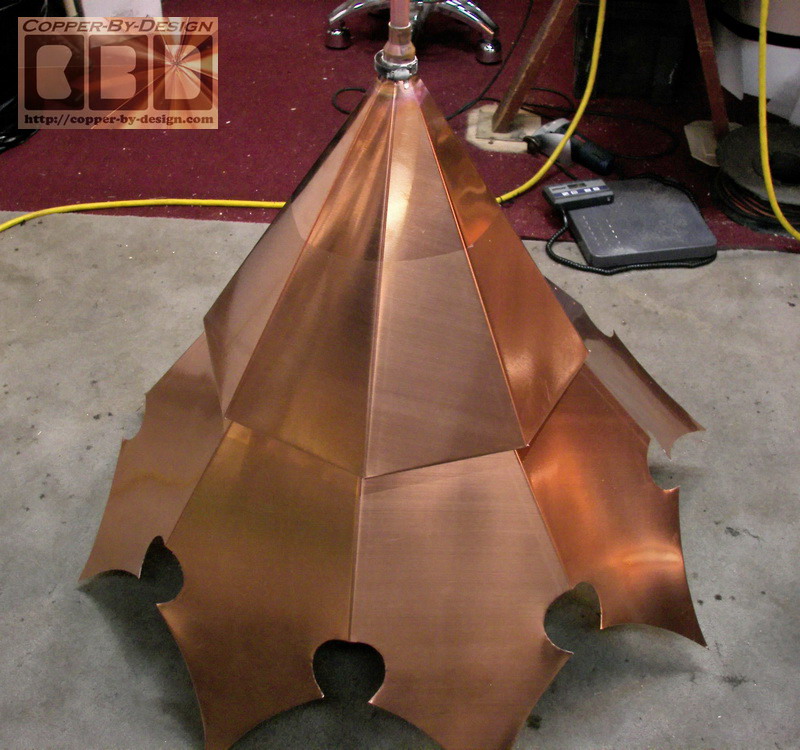
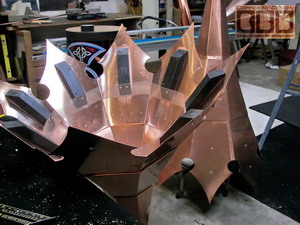
Here is the 6 sides of this large roof cap base section drawn
out on the copper sheet and cut out with the Points style tails.
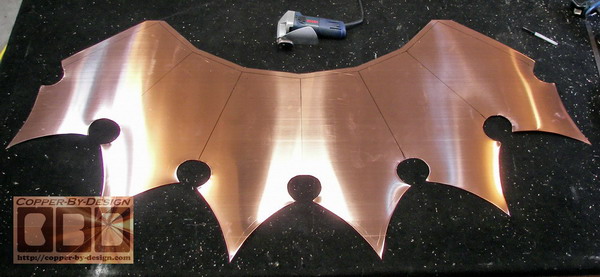
Their gazebo roof has a
lower roof pitch of 16/12, where the front turret has a 27/12 pitch
roof. I had to make several templates for these different
stages of these roof caps. I did my best to make the tails
in the right proportions given the different sizes.
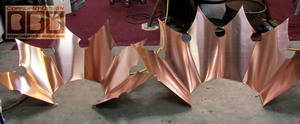 
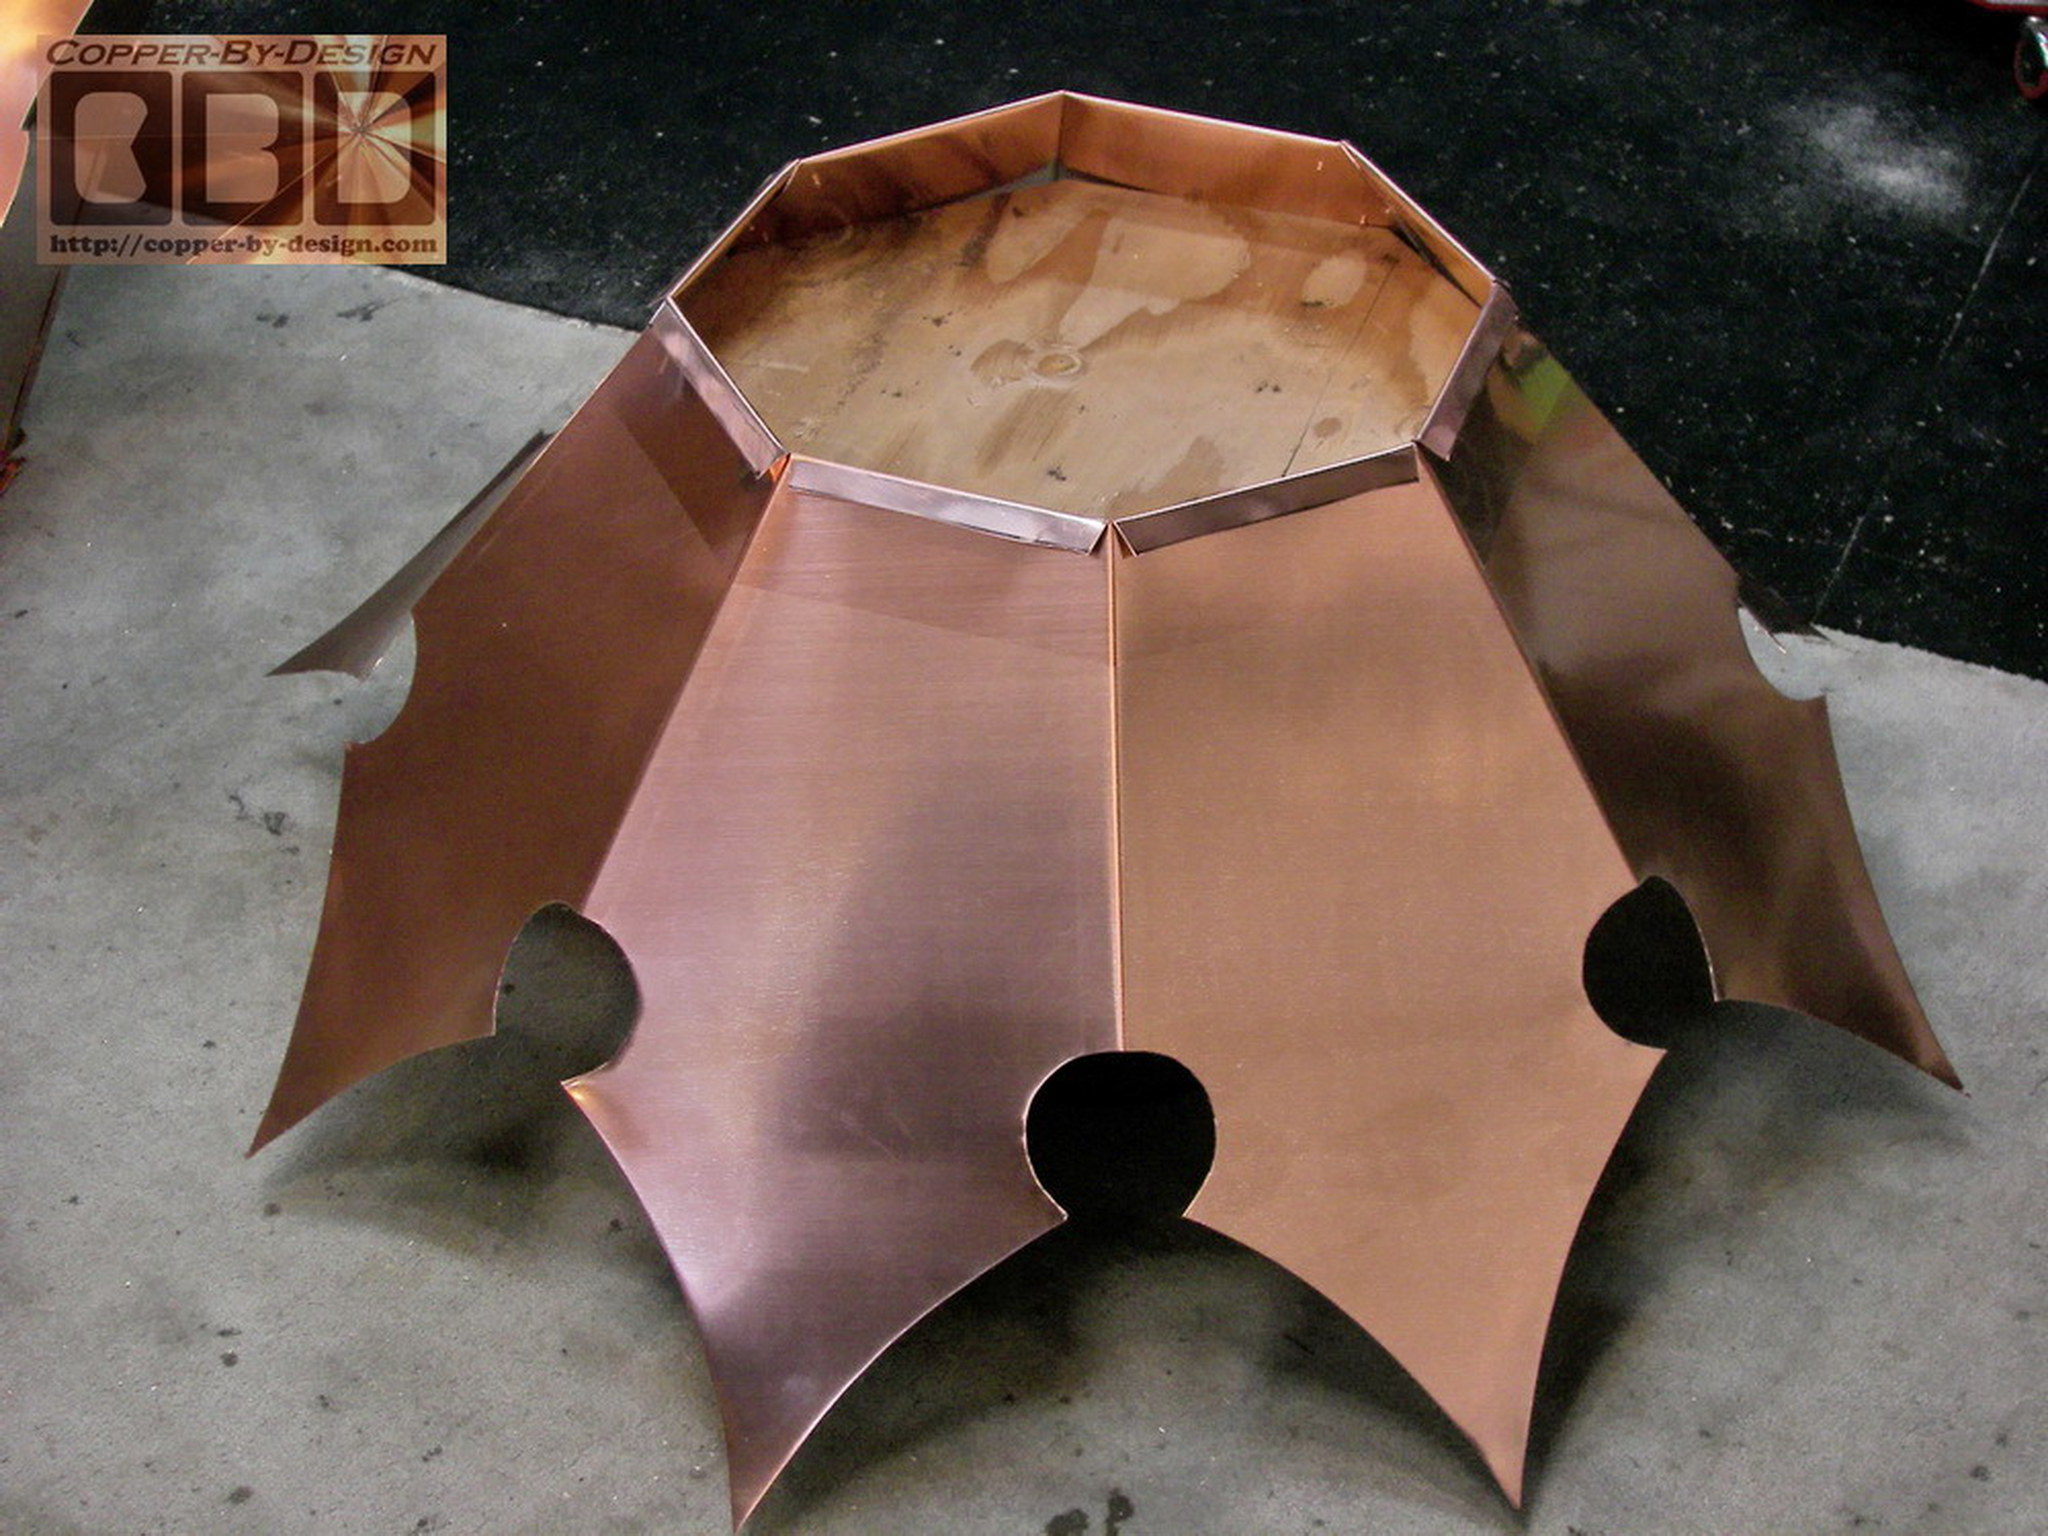
Here are
the bottom section of these roof caps cut out and ready for assembly.
I had to make some octagonal pieces out of plywood to rest these on,
since the pointed tails would be far too fragile.
|
|
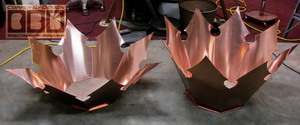
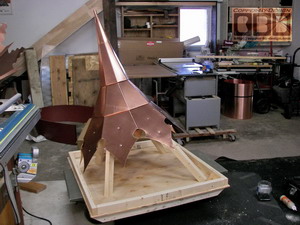
Here is the next sections made and attached to
the base section and holding the bottom of the finial support pipe.
I see how I should have made this section a lot steeper to make a
more noticeable transition of the angle to help simulate a curved
roof cap, but I was afraid it would make this cap too tall when I
was finished. The steeper on on the right is a good 6' tall already.
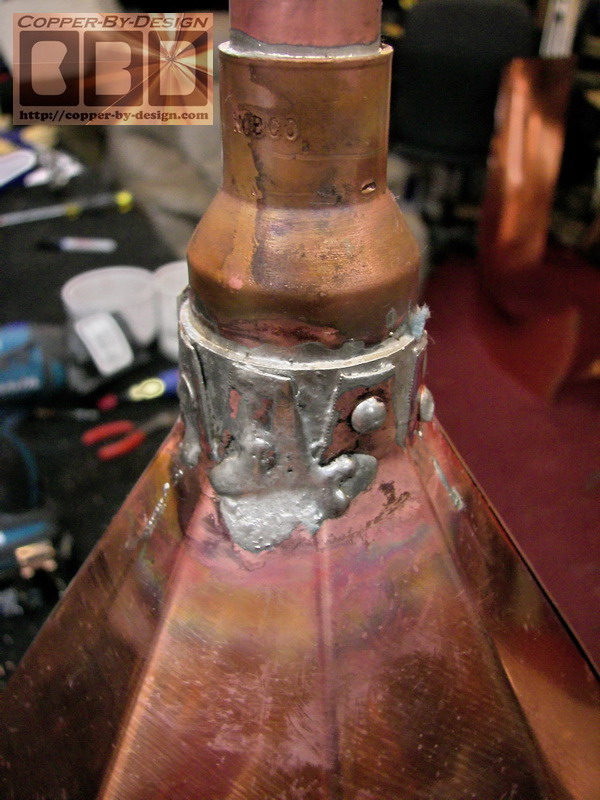
Here is some close up shots of the bonding and
sealing of the tip of these sections to the base of the finial
support pipe. I covered the clear caulk with this tape to help seal
it from the oxygen to prolong it's life span. this area should
actually never get wet, but I figure what is the harm of overkill in
every aspect of what I do?
 
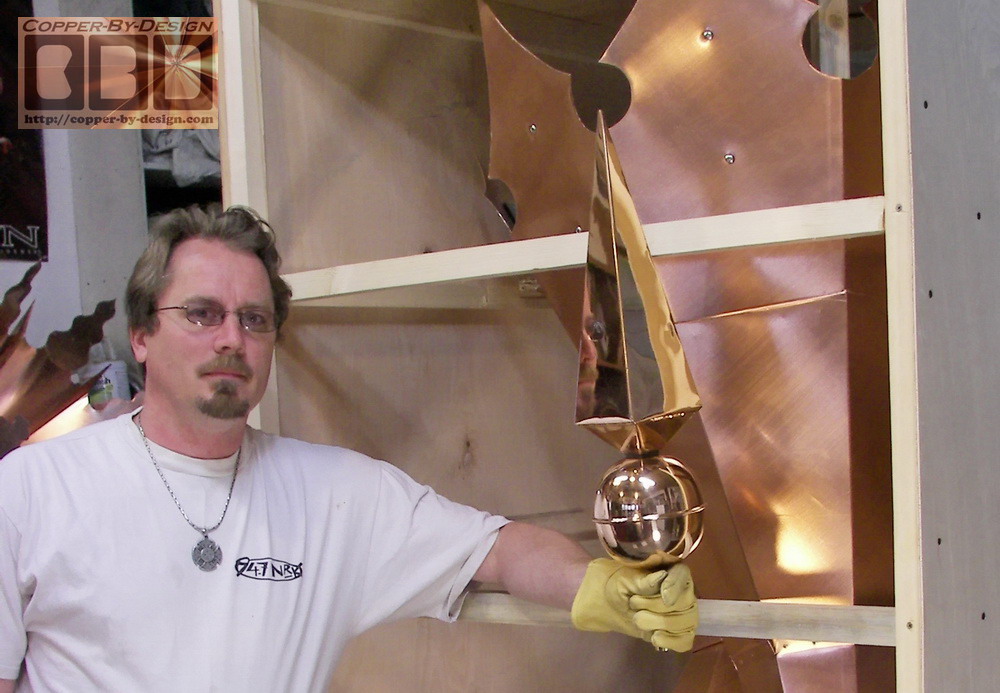
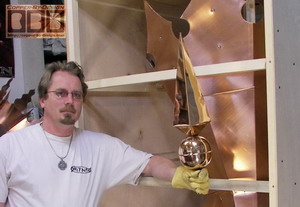
Then I cover this with the
matching steeple cone that is riveted to the base cap through the tab
bent under the bottom edge of the steeple cone. This steeple cone also
is to hold the top of this finial support pipe in place through the
harshest wind storms.
|
|
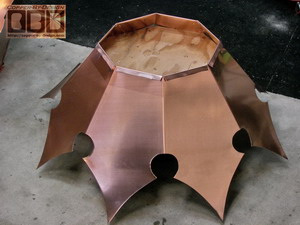
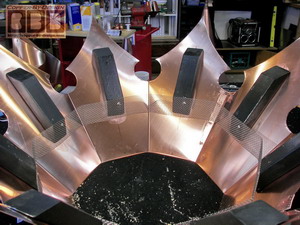
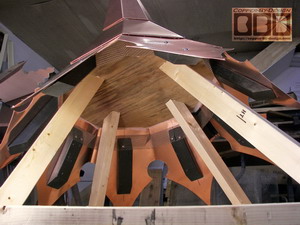
I then added the wood support blocks and
stainless steel screen that will allow for the roof venting.
|
|
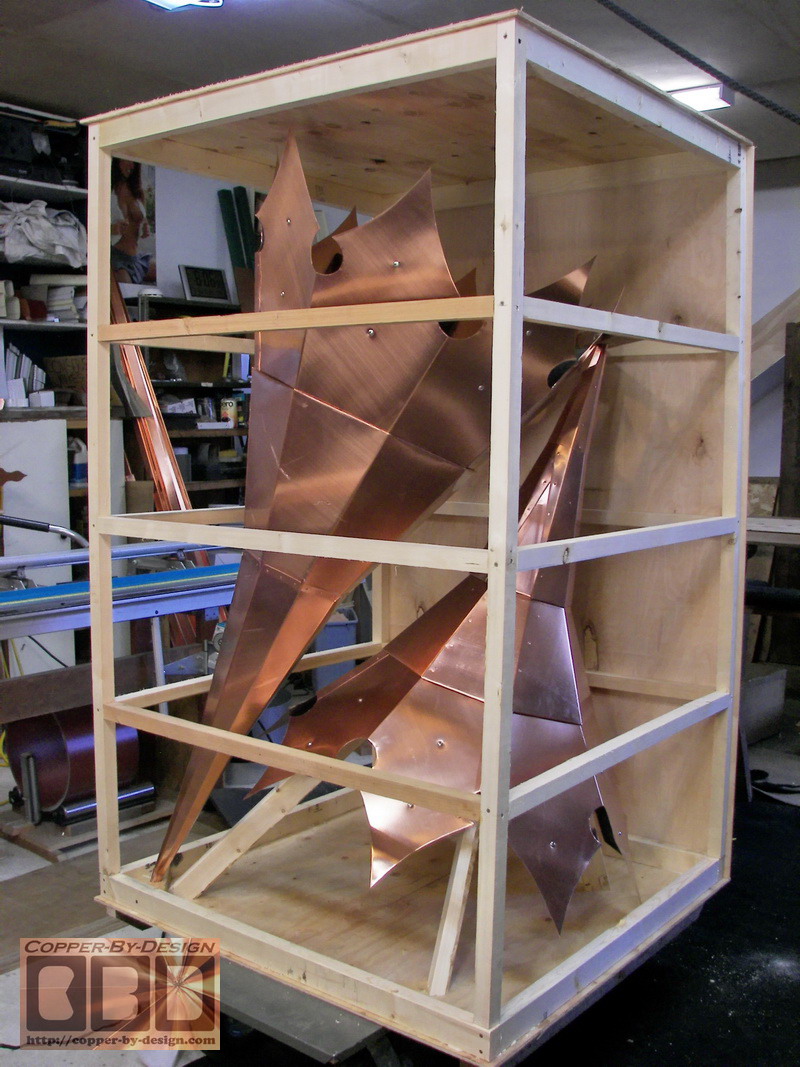
This shows the third
section in place and sealed to the top of the finial support pipe. I
had to carefully build this saddle for the first roof cap to rest on
inside the crate. It was very trick to make it angled like this so I
could try to fit both roof caps in this crate with the least amount
of space and weight of the crate for a lower shipping cost. There
boards are glued and screwed to the plywood for a sturdy ride down
to Arkansas from Oregon.
|
|
|
 |
|
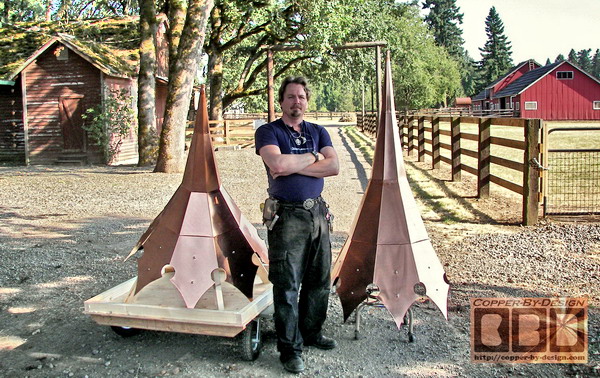
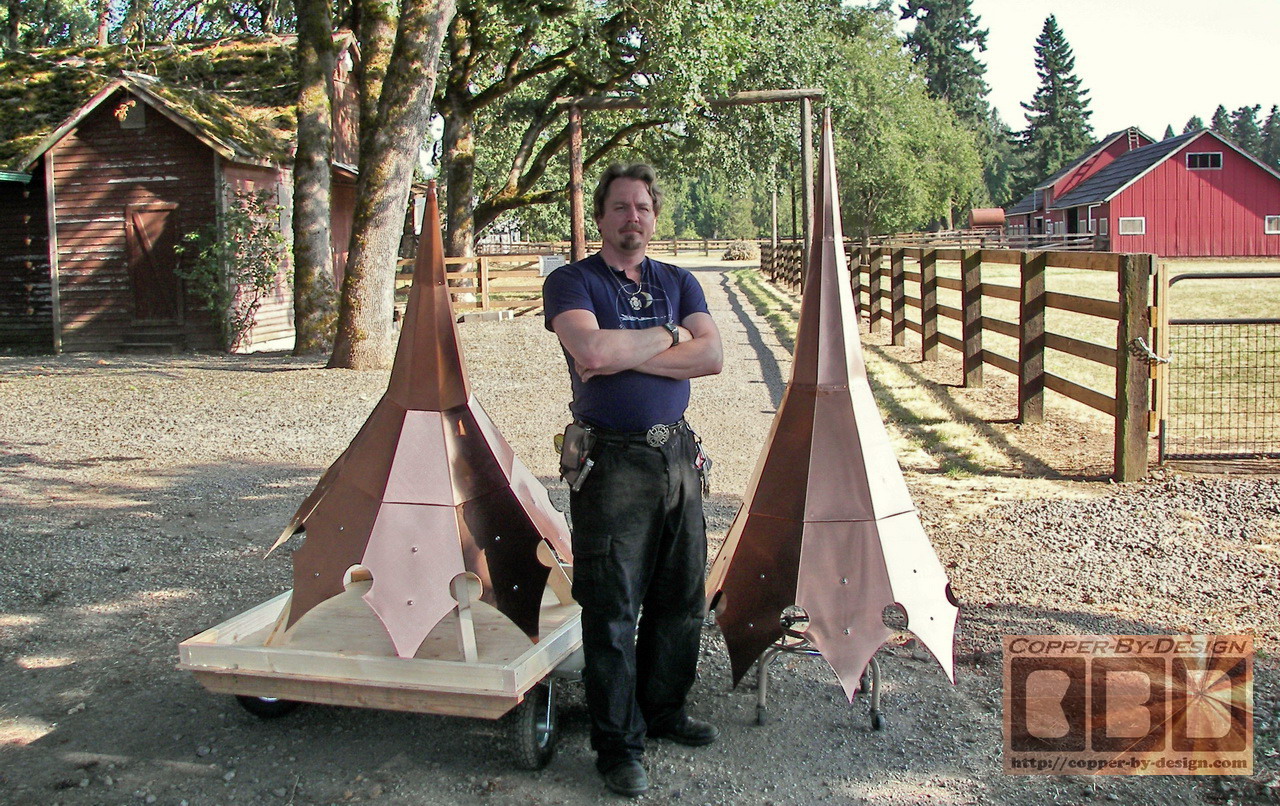
They are resting on a padded
stool I made, since I cannot rest it on these pointed tails. I moved
them outside to get some better shots out in the daylight. Here is
the copper Lancelot finial they wanted in hand. This is a lot of
roof cap for such a small finial, but they can still change it out
if they decide they would like to have a larger finial or
weathervane.
|
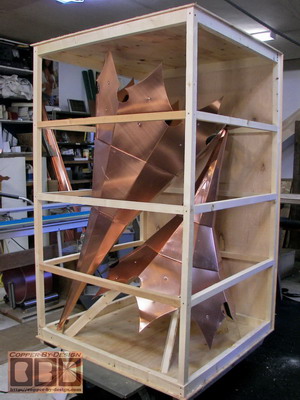 
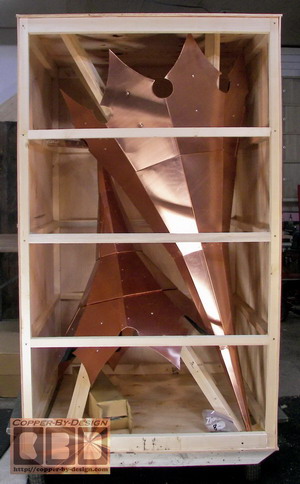 Here
is the copper roof caps both in place inside the custom crate I made
for them. the boards are glued and screwed together and then the
1/4" thick hardwood plywood sheets are attached to this frame with
the same Gorilla Glue and sheetrock screws. Here
is the copper roof caps both in place inside the custom crate I made
for them. the boards are glued and screwed together and then the
1/4" thick hardwood plywood sheets are attached to this frame with
the same Gorilla Glue and sheetrock screws.
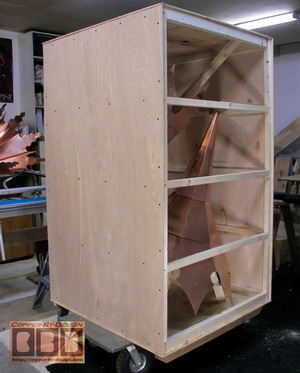
The taller cap was set upside down in the
crate resting on the tip of the finial support pipe inside a wood
block with a 1" hole cut in it. This shows how strong I build these
support pipes that the full weight of this cap is held securely
bumping down 2,000 miles of road they need to travel. I built a
padded saddle for this upside down cap as well secured to the roof
of the crate, so this cap will not move sideways in the crate and
bend up the points tails. I understand it did reach it's destination
without harm.
|
|
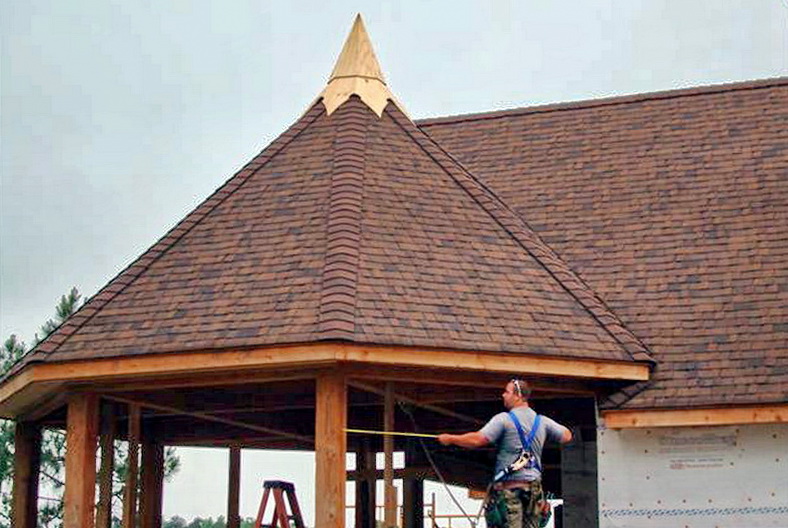
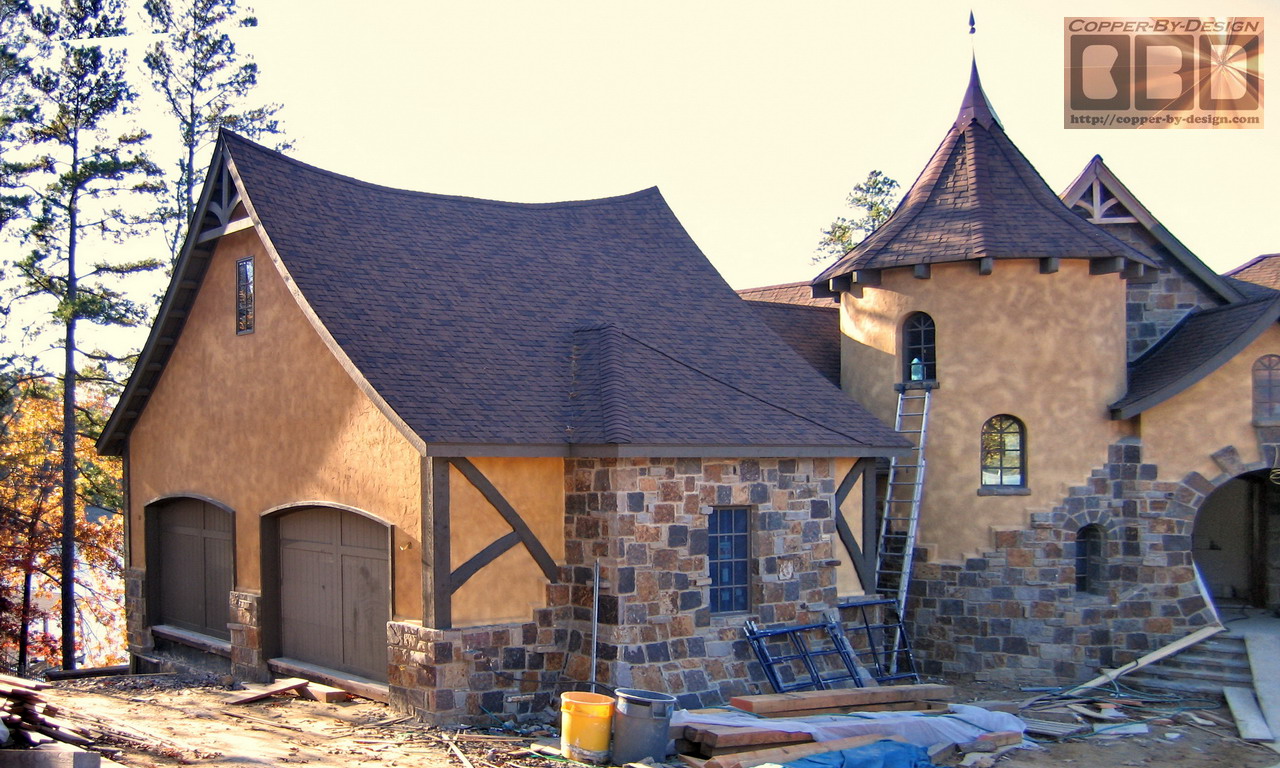
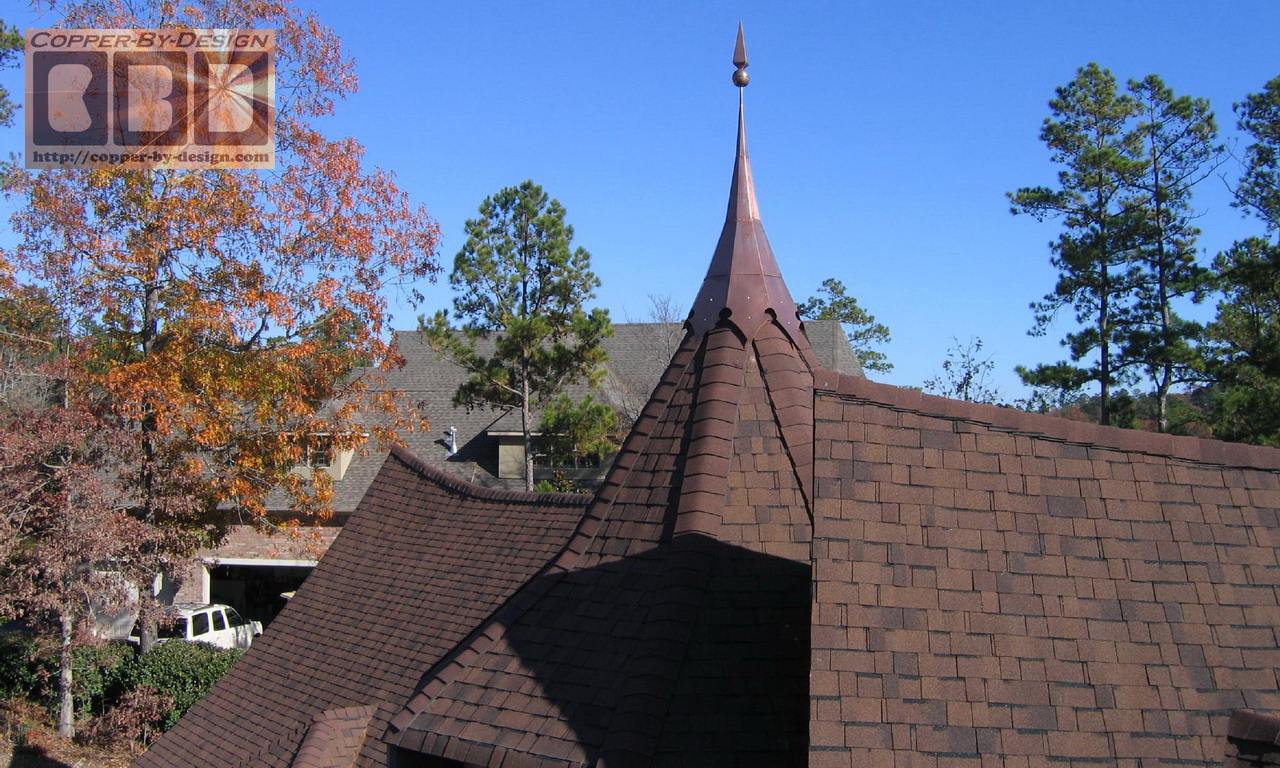
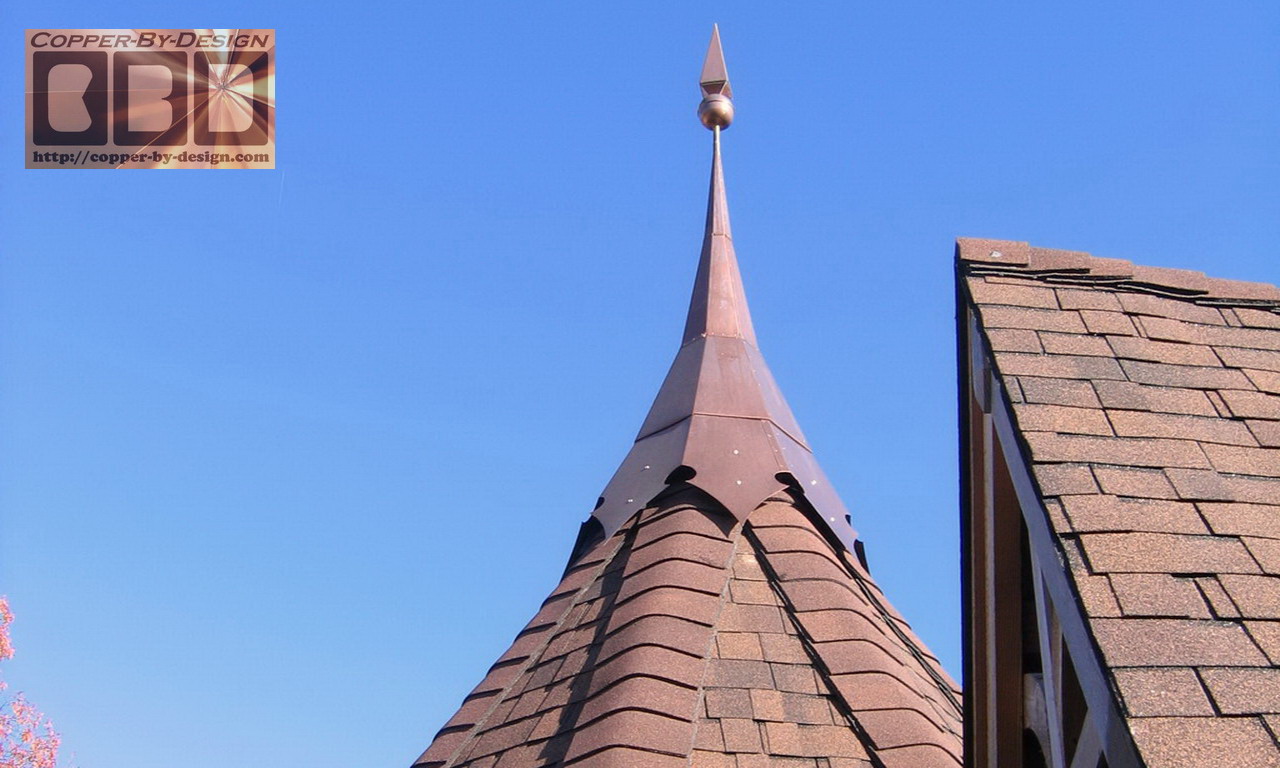
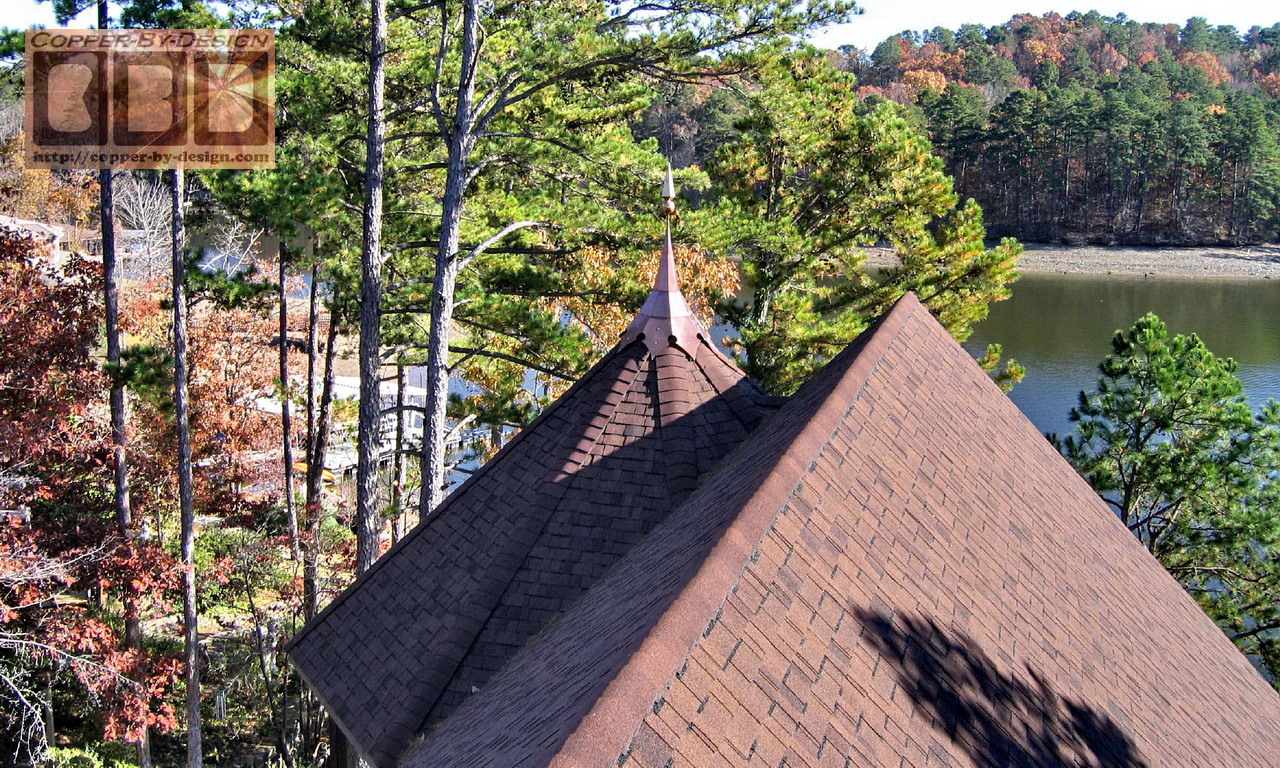
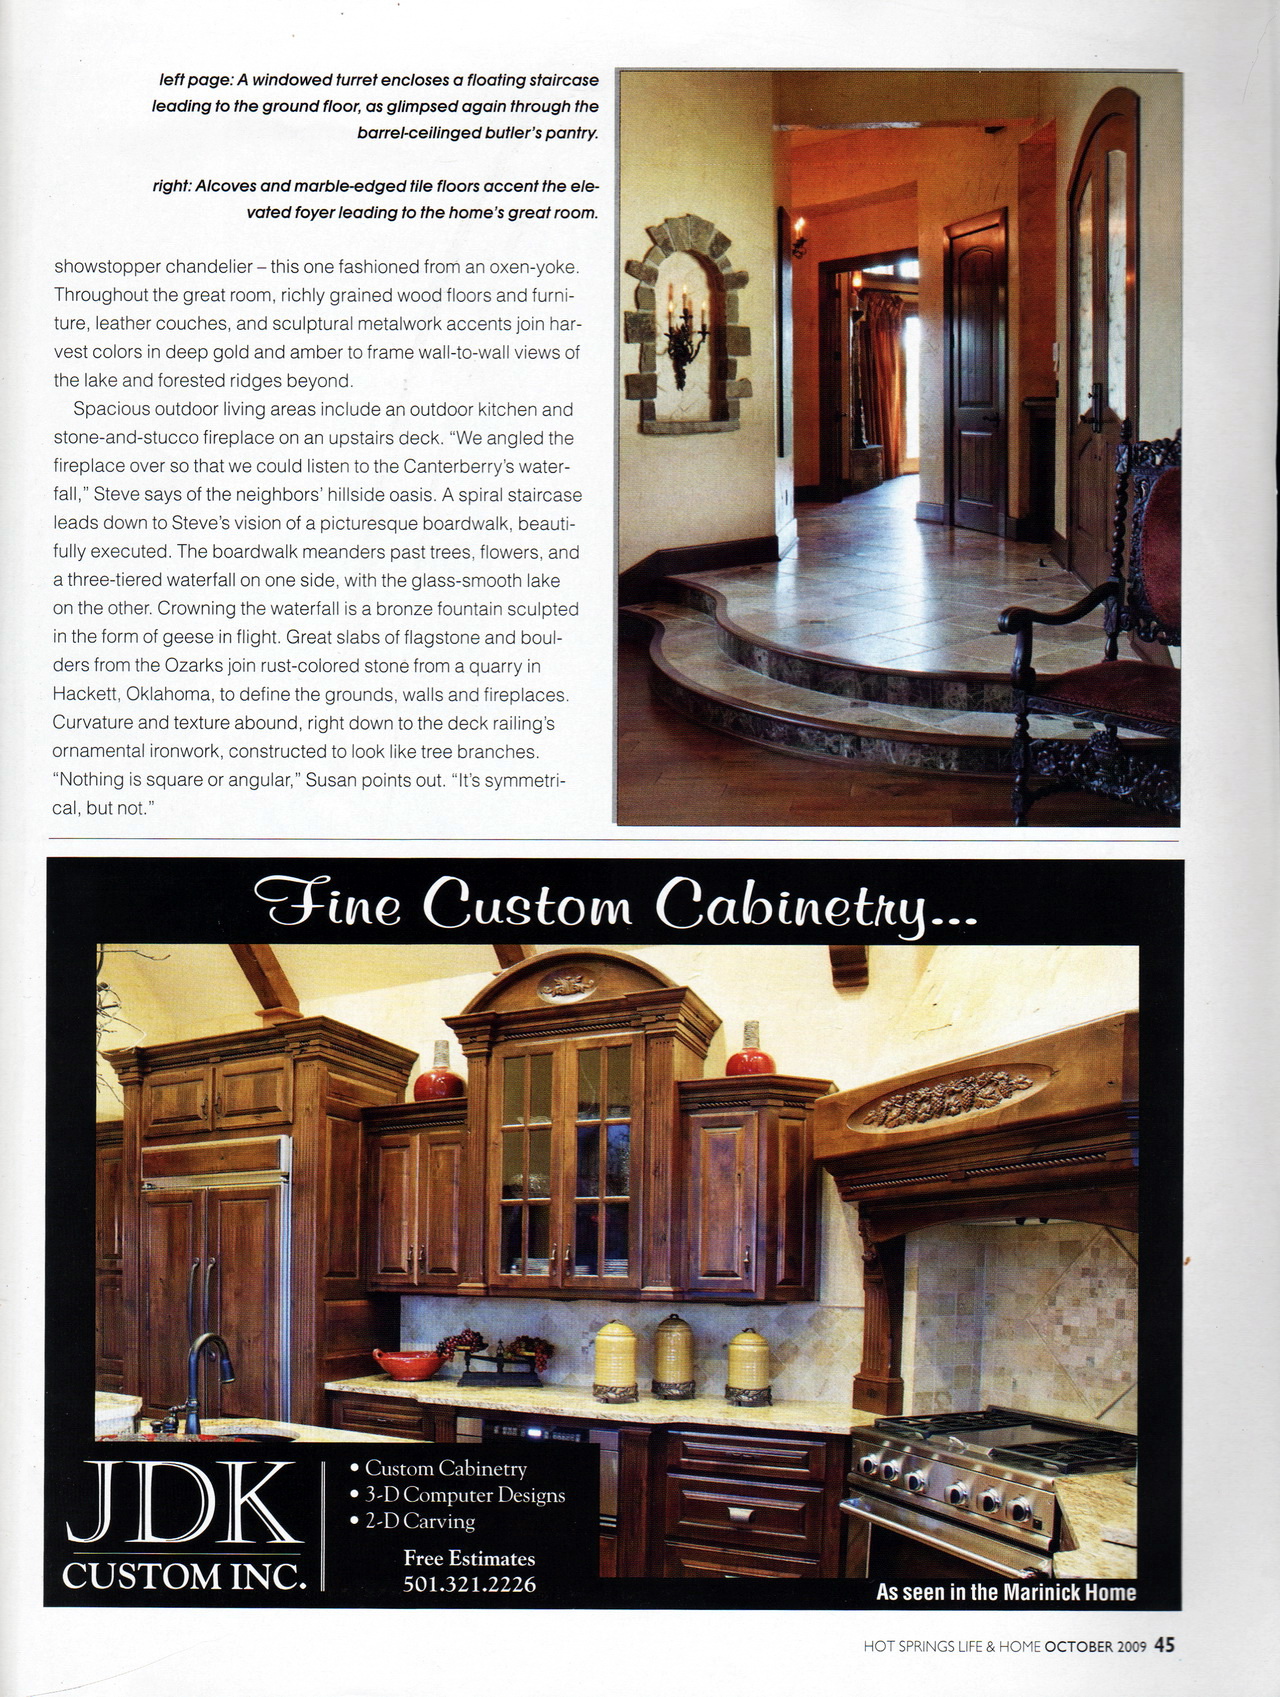
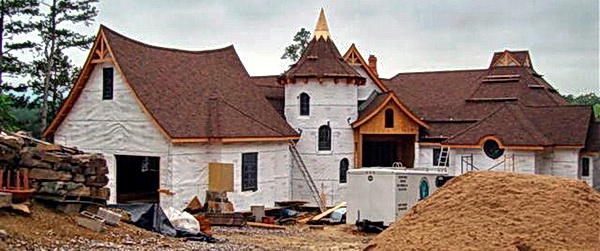
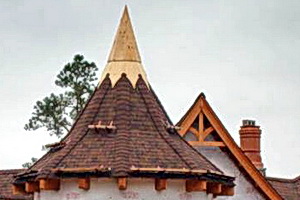
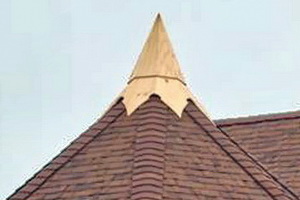
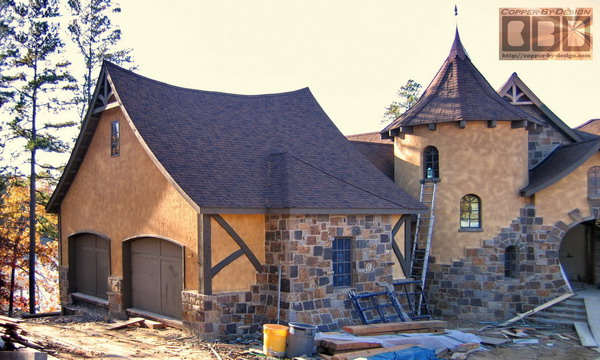
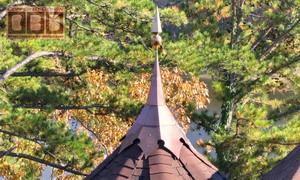
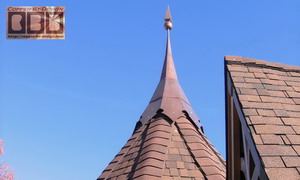
Here is these turret
roofs mounted in all their glory in these photos sent in 12/08.
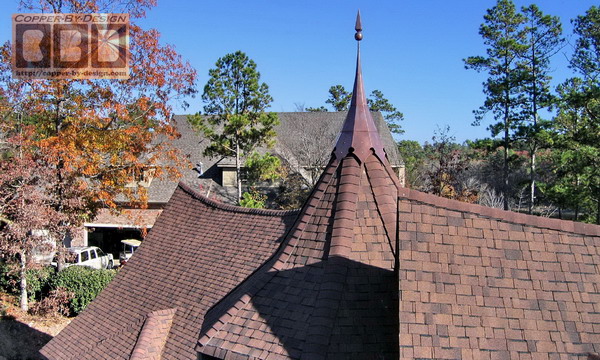
 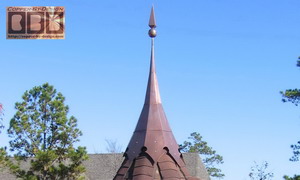
This is a really neat house being built
on the shore of a lake in Hot
Springs Arkansas designed with these complex curved roof lines.
The final
weights for the taller cap is 43.4# and the shorter one is 34.2# =
77.6#
77.6# - 10.8# for the wood blocks, screening and screws =
66.8# copper weight
66.8 X .8 = 53.44 sq' X $50 = $2,672
It is
not a lot less than the original quote, but it did shave off about
$40.
$2,672 for the copper
+ $250 for the finial support
pipes built into the roof cap
+ $340 for the pair of Lancelot
finials w/15% discount for buying w/roof caps
+ $140 for wood
support blocks w/SS screening for a hidden roof venting
$3,402 total cost of this set delivered less the $2,000 deposit =
$1,402 balance

|
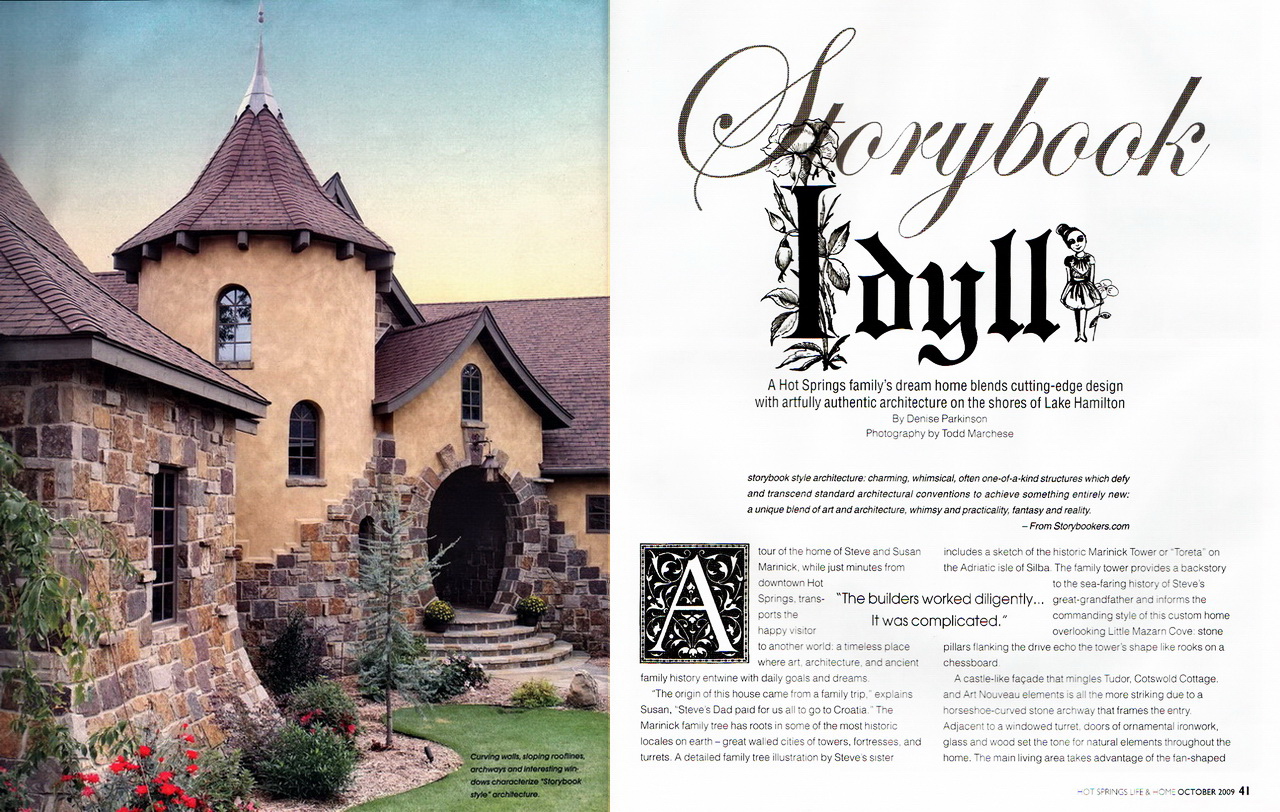
Cover page:
First & Second page:
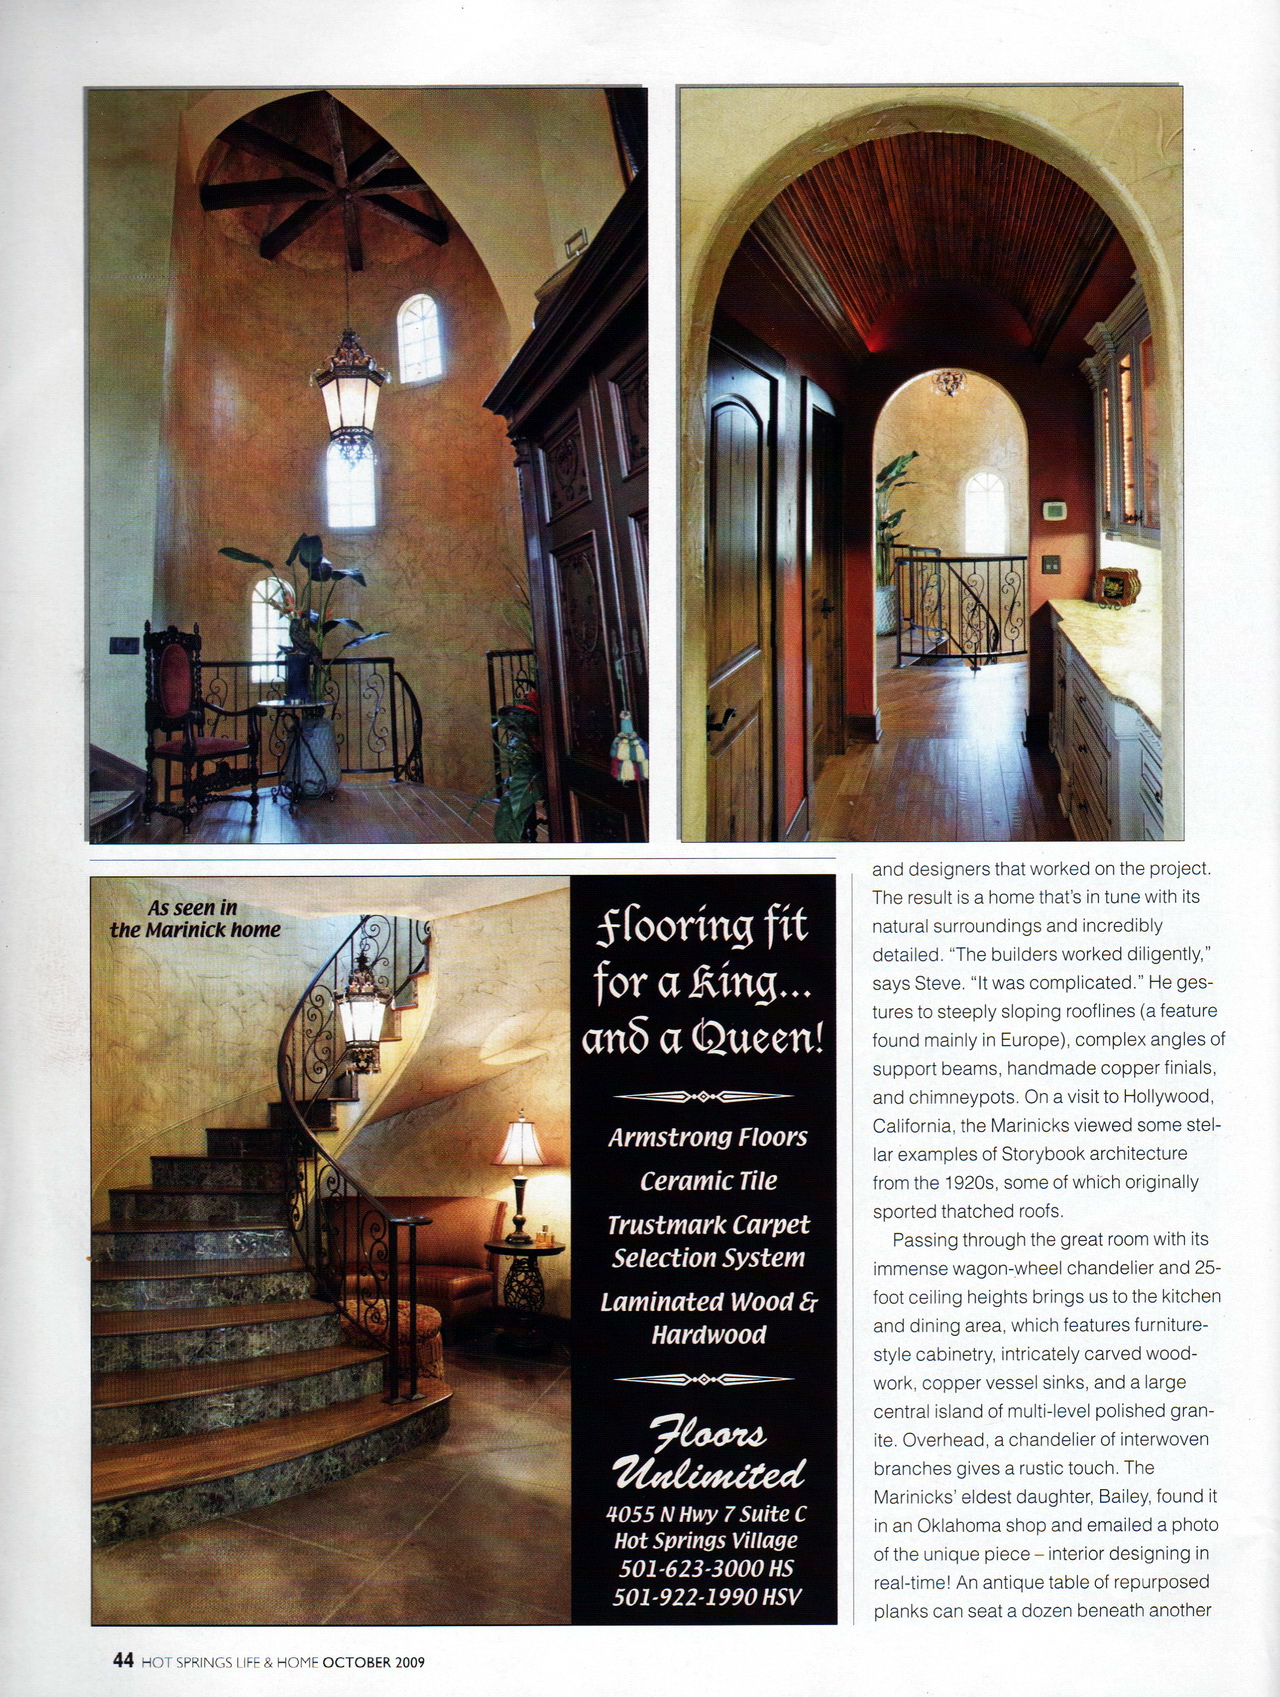
Third &
Fourth page:
 |
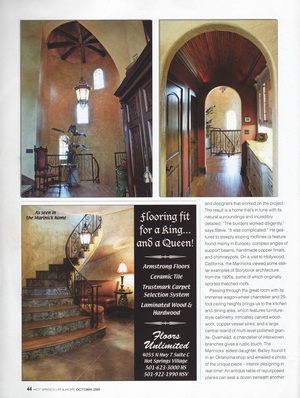
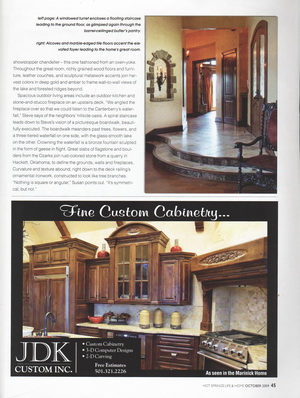
Here is some
shots out of the magazine article that featured the amazing work on
this house.
They were kind enough to mail me a copy.
Fifth page:
Sixth page:
 |