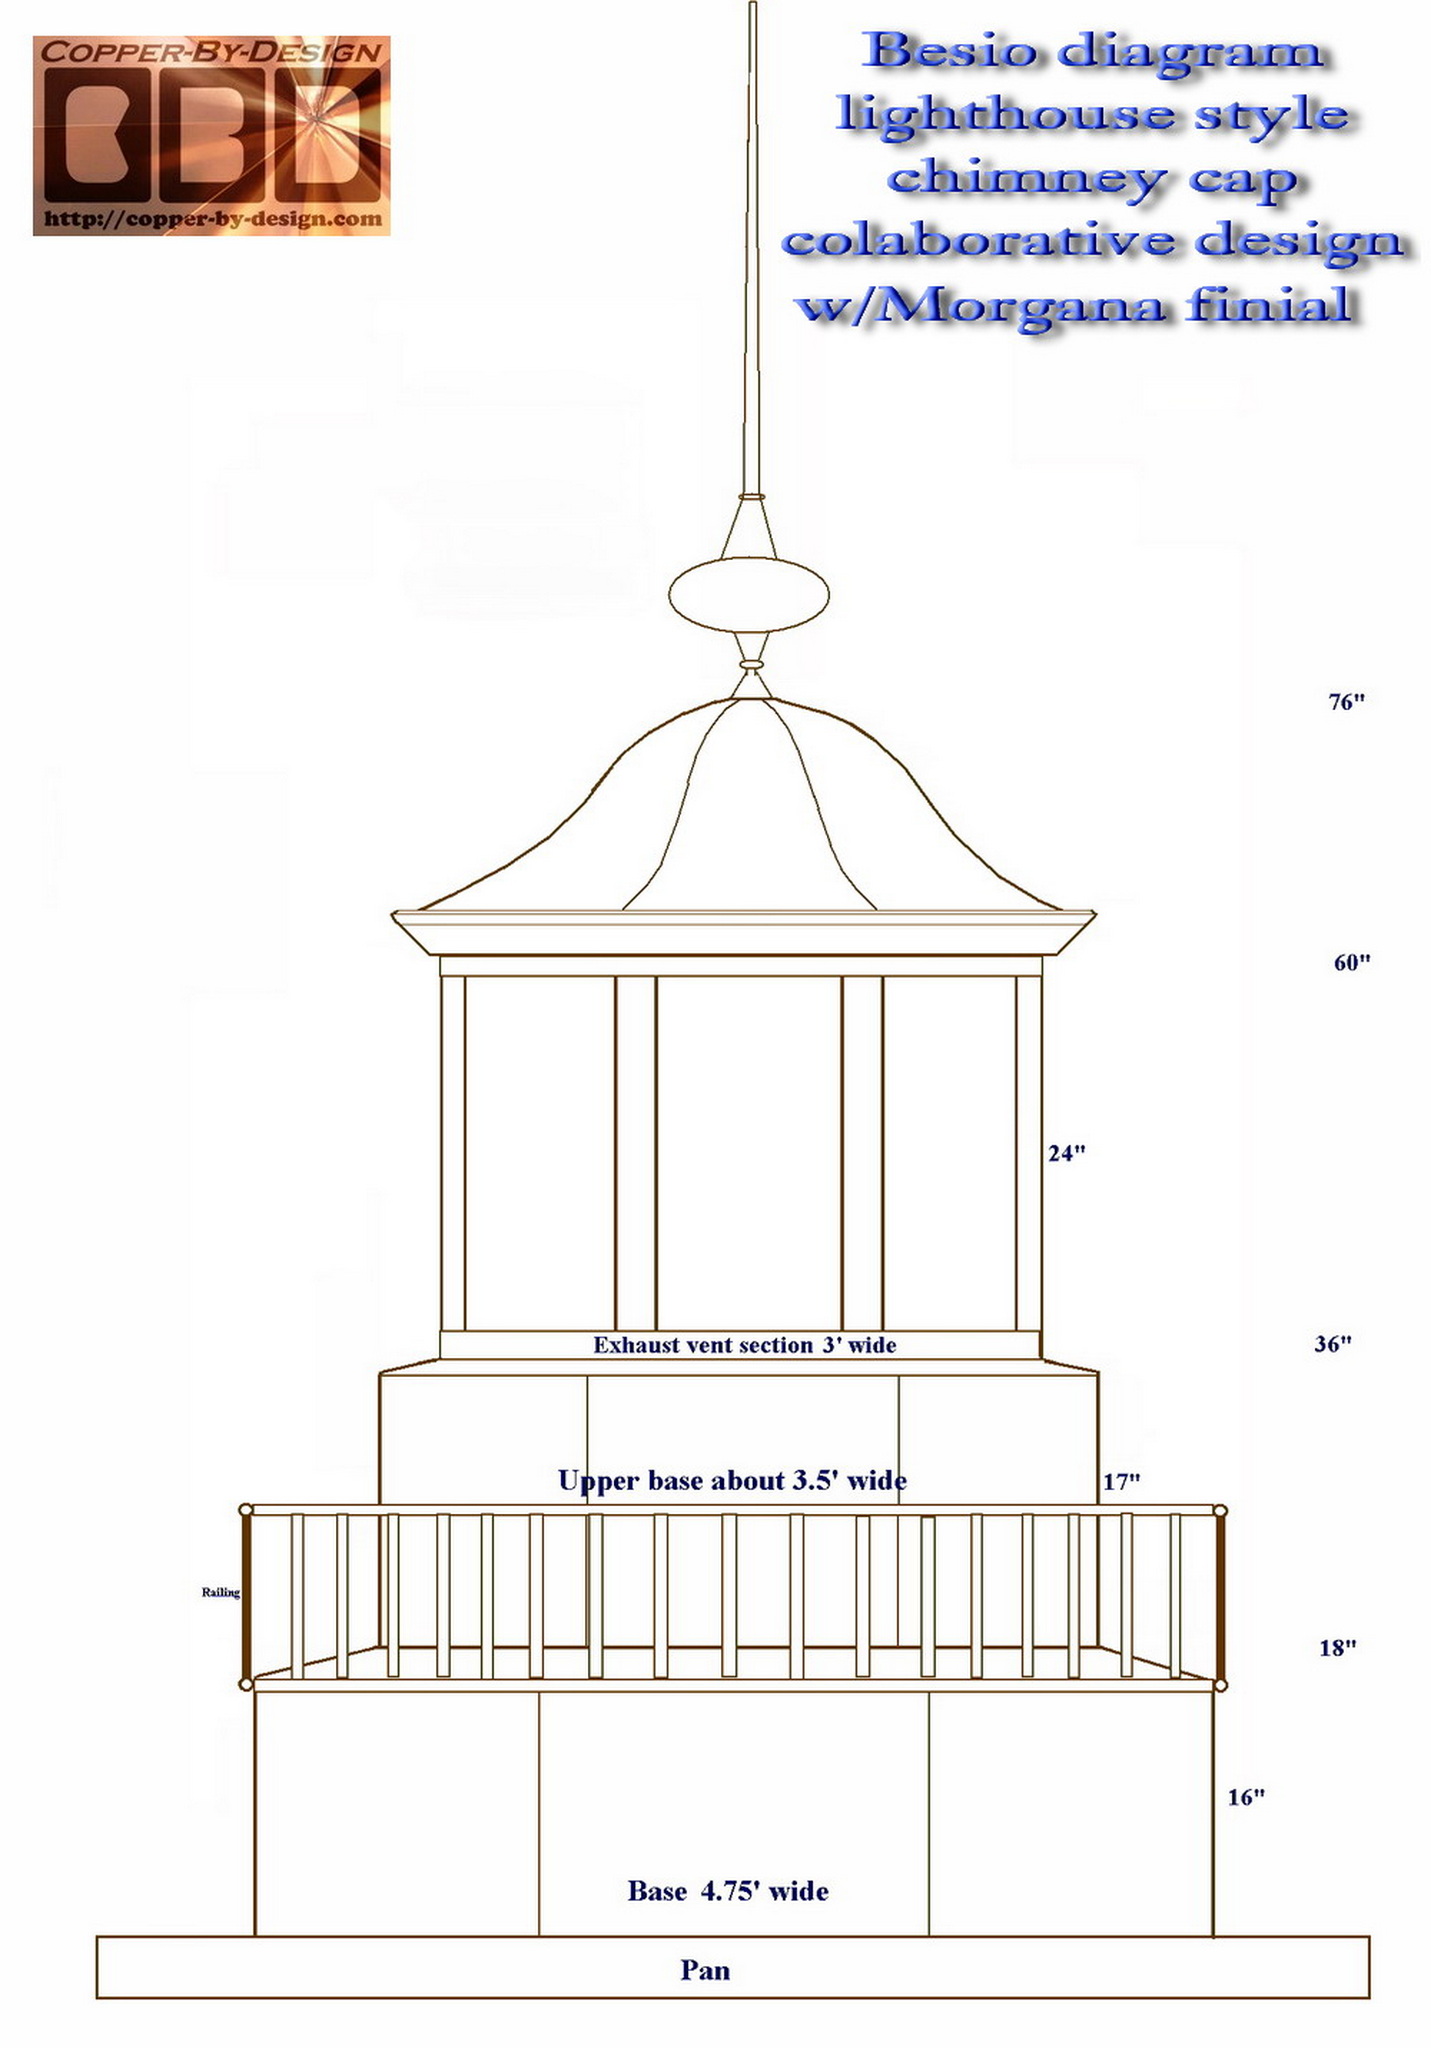
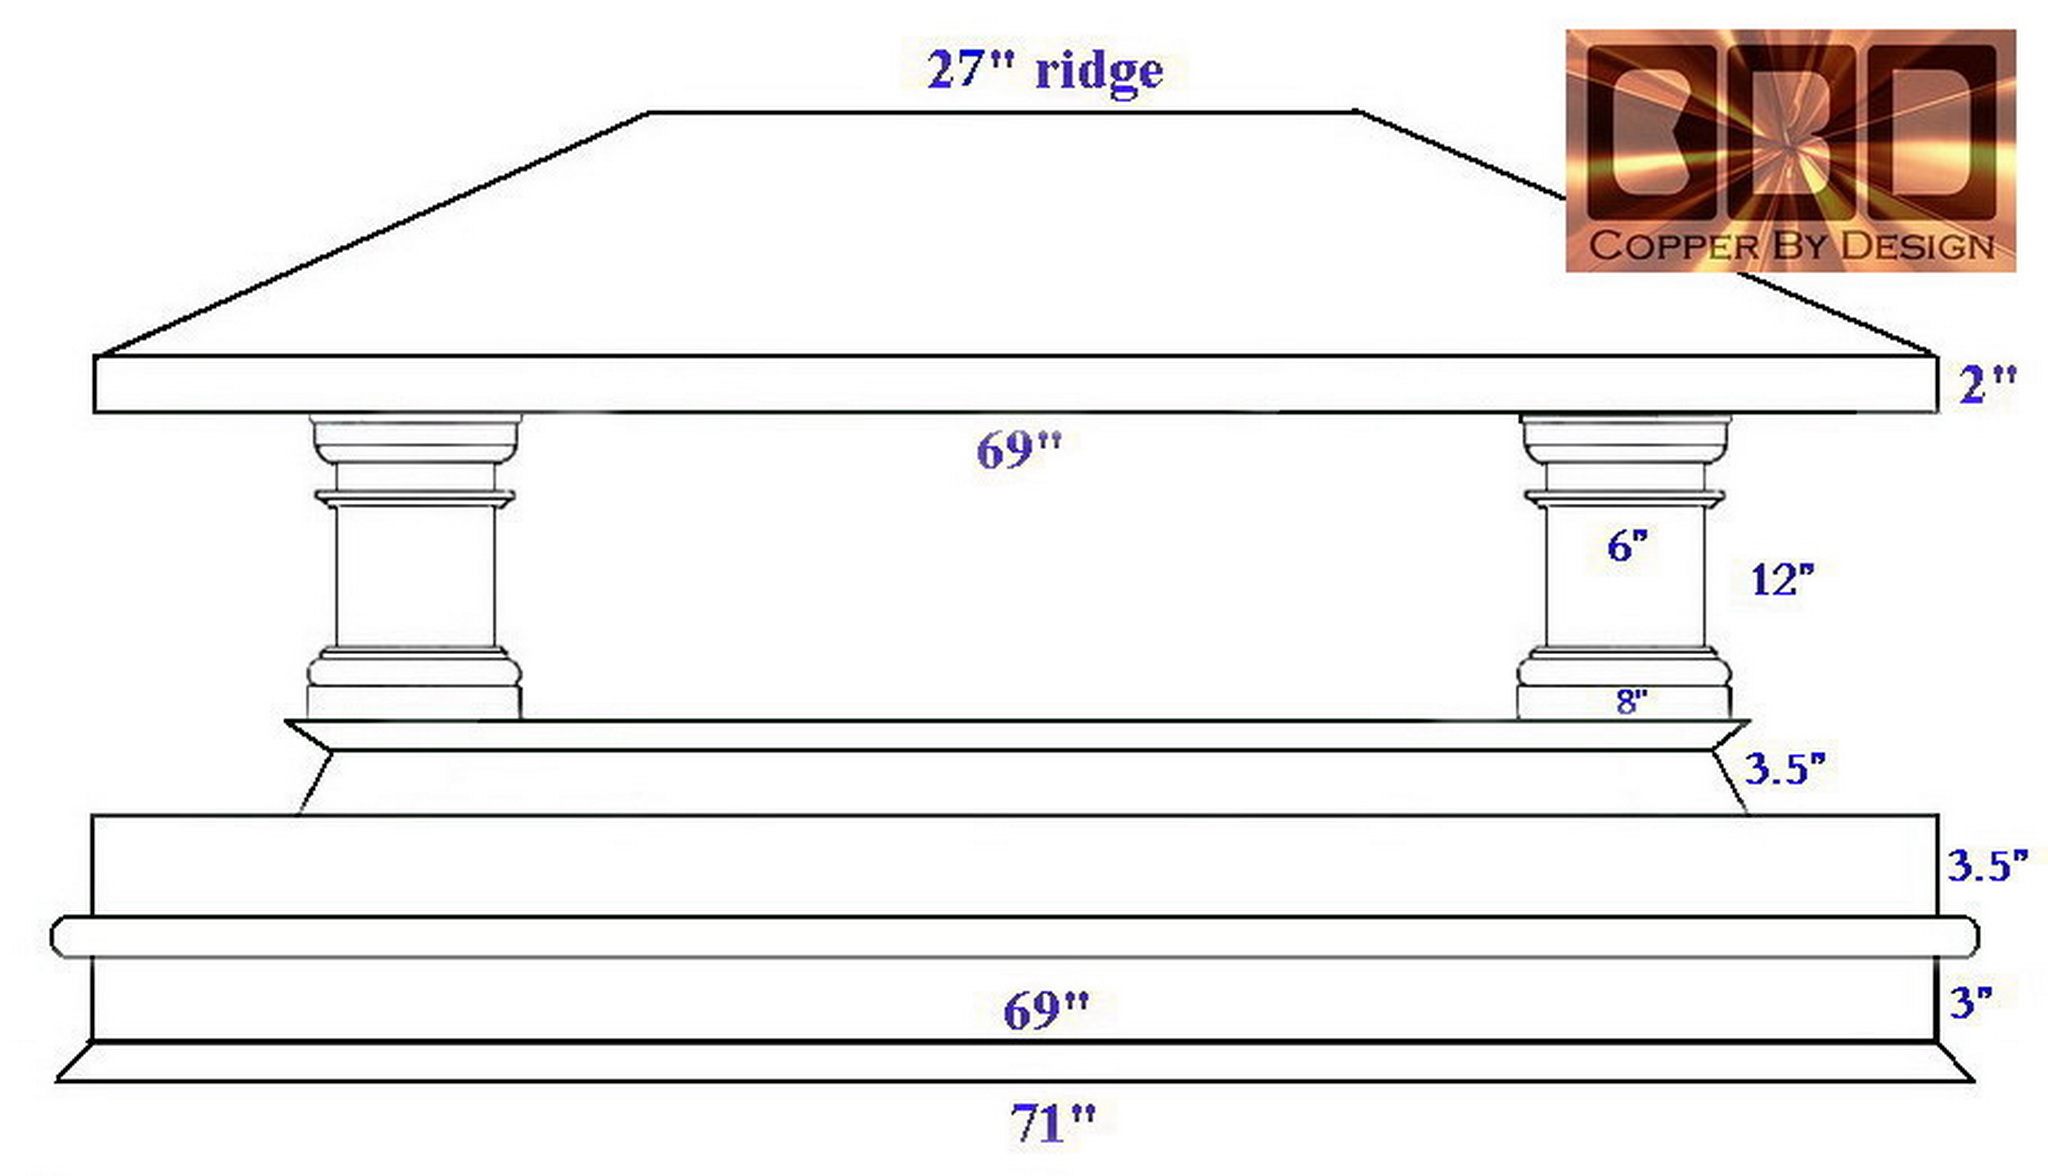
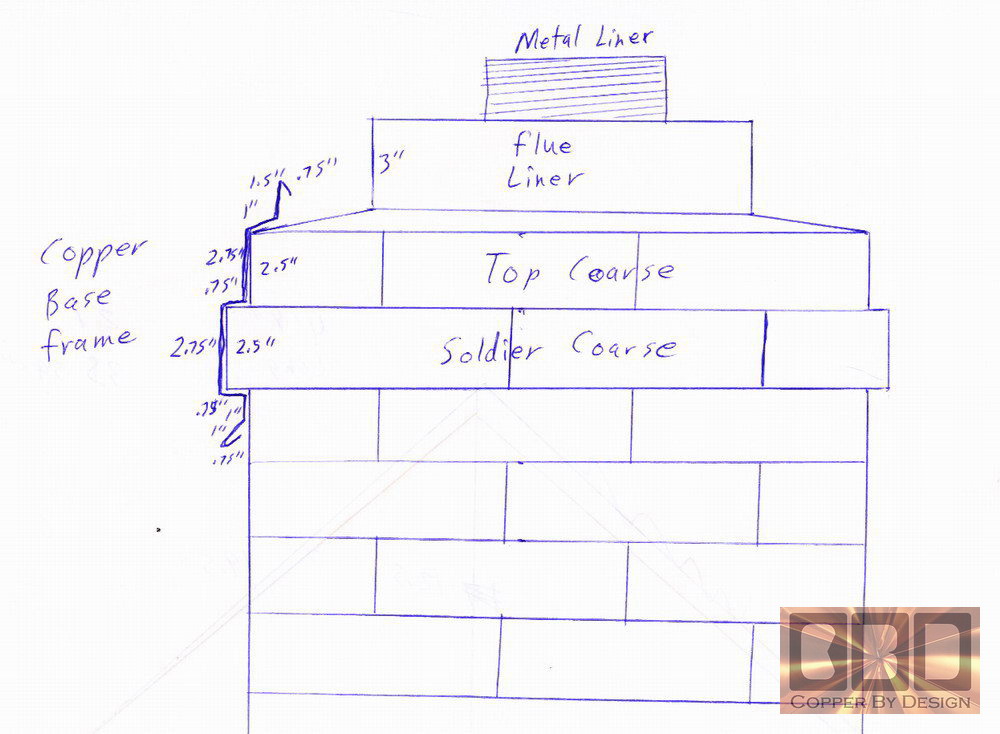
|
CBD's
Lead
Time
|
|
You can see what our work schedule is by going
to our
Latest News page to find out our most
current lead time. We strive to check our e-mail at least a couple
times each day even on the weekends to respond within 24 hours. Give
us a ring if you have not received a personal response within a business day
to see if we got your message.
This process should go swiftly,
depending on how fast you are able to answer our questions. We
do have a toll free phone# listed on our
Contact
web page, but I may be busy in the shop or up on a ladder
when people seem to call. Not just sitting at my computer. That process
can take several hours to do the careful calculations
(as long as I have the info I need).
I also do not like to quote costs for work over the phone because then
neither of us would have a written record of what was said.
With this comprehensive internet exposure
we've become pretty busy. After we have locked down all the details and received
your deposit we are still booked out several months with projects before
we could begin the actual fabrication of your project, so be prepare
to hear we will not be able to deliver your custom project in short
order. We currently have no teams of workers to speed up production. We demand
excellent craftsmanship and have not found others to equal our meticulous
expectations and creativity. So it is simply on a first come-first
serve basis hinging on the receipt of the deposit.
If you are confident we will be able to workout a
reasonable contract you could send an approximate 1/3 deposit to lock your project
in our cue as soon as possible while we work out the details, taking
some of the pressure off to make hasty decisions. That deposit would be
90% refundable if we
were not able to work out an agreement to your liking. We want serious inquiries only, since that would push our schedule
out that much further, causing us to loose other prospective
clients, so that 10% reservation fee is not refundable.
|
|
General Cost & Prices
|
The cost can vary
widely to fit
your needs for a custom fabricated item due to the size, complexity, and
features. Our
chimney cap projects over the last 2 decades have run between $200
to $600 ln' of the chimney top measurements. Our most popular
Tuscany arch style now averages $400 ln'. This gap largely depends
on the thickness of copper used, height, style, ornamentation, an
internal pan (if needed), and the need for a custom sturdy shipping
crate with truck freight. Since most of our clients do not happen to
be local to the Porland Oregon area where we reside. CBD is not a
francise with multiple locations. Without the singular passion of
David Rich at the helm CBD would not exist.
Another way to
calculate the cost is around $30# base rate to $60# for more ornate
work calculated from the actual weight of
the finished project plus the cost of a crate and truck freight if needed. Our pricing is not calculated
along with the the
scrap cut-off included. This way our Client are able to double check our
cost with the actual weight once it had arrived; to see how honest CBD was, so there is no deception
possible. This has been part of my ethical business practice for
the last 3 decades, yet unheard of with any other metal shop across
the country. If your project does come in under weight your final cost will be
discounted accordingly. Although, many projects have come in over the estimated weight
due to the extras CBD tend to put into each project. Although, a
written quote places a ceiling
on the cost on that project. Unless there are substantial authorized changes made after the quote
was accepted it would not cost more than quoted amount, but shipping
cost could fluctuate a bit. You are also welcome to arrange your own
freight, since we do not mark up any freight cost. Often it winds up being a better bargain in the end,
given the free copper you may get.
Besides our very
unusual business practice of discounting work like this, we have been
told our quotes are quite reasonable and even cheaper than many other
shops. CBD also gives discounts to clients who aid in the quote
process by carefully reading over these web pages and clearly convey
their needs in their first e-mail with good clear photos; in order
to minimize the number of e-mails needed to iron out those details.
If you have read this far, you are off to a very good start. Feel
free to mention this discount in your e-mail.
Our base rate for a more basic custom project
(not including crate & freight)
is $35#.
Base Rates per square foot charges come to:
$43.75 sq' - 20oz copper for 1.5X strength compared to
standard 16oz
copper (is most commonly used)
$52.50 sq' - 24oz copper
for 2X strength (CBD's minimum standard)
$70 sq' - 32oz copper
for 4X strength
$105 sq' - 48oz
copper for 12X strength, or hammer dent resistant
$15 sq' - 1 X 6 ipe
hardwood used in the base/skirt angle cut on all 4 edges
$18 sq' - 5/4 X 6 ipe hardwood used in the base/skirt
$22 sq' - 16 gauge stainless steel spark arrest screen
$25 sq' - 13 gauge stainless steel spark arrest screen
Of course, tricky ornamentation and curves add substantially
to the complexity and cost of a project.
If you are not local CBD will need to add
the cost of a sturdy custom wood crate with packing along with the cost of truck
freight w/hydraulic lift-gate
residential service in most cases.
We have no control of the shipping time,
other than to charge you a huge cost for 2 day, or overnight shipping,
which can cost more than the custom copper fabrication. Most of
the ground shipments have not been taking more than a week for delivery
from the West Coast to the East Coast,
so it hardly seems worth the cost of moving such large projects just
a few days sooner. We have rarely had had a client who was willing to
pay that much for Express Shipping.
Payments
To get your project set within my workload, here is the
payment schedule:
$600 and under a
full payment up front is required for those small projects.
Over $600 only a 1/2 down deposit
is required for these medium size projects, with final payment before
it ships.
$2.5k projects and above just a 1/3 down deposit is required for
those larger
projects. The second third when we show you we have begun work
on your project through digital photos. Then final adjusted payment before it
ships.
$20k and above we only
require a 1/4 down payment at the time of scheduling, 1/4 when
begun, 1/4 due at half completion, and the final adjusted payment
once complete, before it ships.
By then you will have seen
numerous photos of your project and have much more confidence that
you will be receiving just what you ordered, and I would have a chance to weigh it in order to recalculate the final
cost down to what copper actually stayed in your project. A detail
that you could double check to see how honest I was.
Trust
We all know what a scary ugly world it
is; full of liars and cheats. I believe that our referrals web page,
thousands of step-by-step photos,
and
Business Integrity Award
from the Better Business Bureau should help give even the worst skeptic confidence
in my ethical responsibility and devotion to my clients. Because
of this we have only had less than 5% of our potential clients express
discomfort with our payment policy. This has not been much of
an issue, but if you do not trust CBD, you should simply not do business
with CBD under any terms.
|
|
What Sort of
Information Will We Need?
|
| I understand how hard it is to decide on a
style of chimney cap that would look best for your house and getting
the measurements we'll be needing. Here is an example of what
a client sent to us that they had done to help them decide what style
to go with, but this not not required. We post as many photos of the
installed chimney caps we can, but often time we never hear back for
our clients after shipping out their order.

To fabricate a copper chimney cap for you,
we'll need to know a few details:
Your Contact Info:
Your complete contact info to send the
copper chimney cap out to you: name,
address, & ph# where you can be
reached in case they have trouble delivering it. Shippers prefer a business address
to deliver it to, so there is a better chance to have a person there
to receive it, but that is not a requirement in most cases. We will
need to know if you will need a lift-gate service at the job site to unload
the crate.
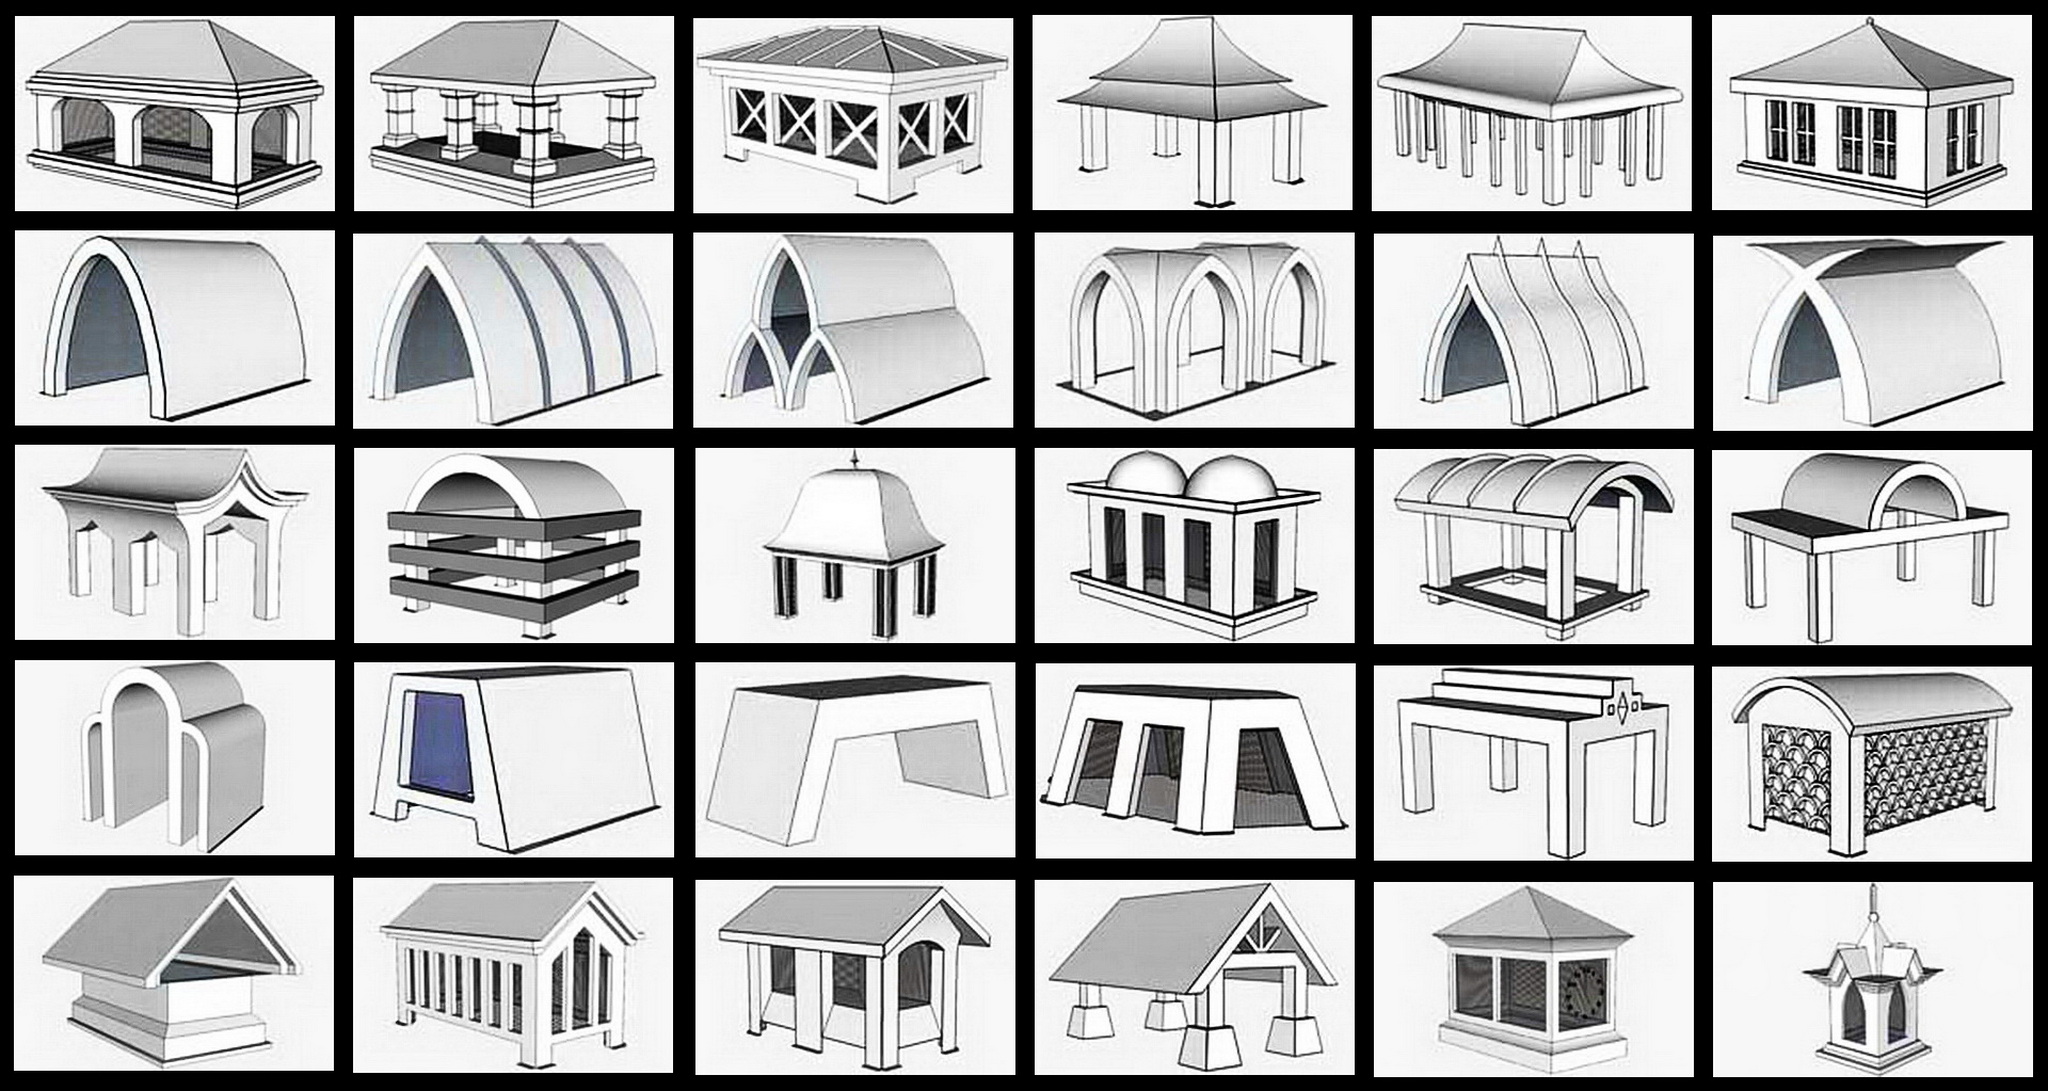
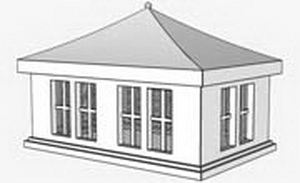
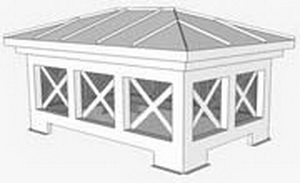
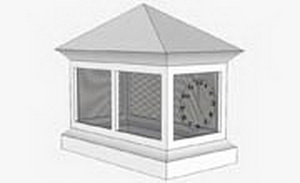
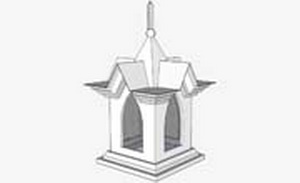
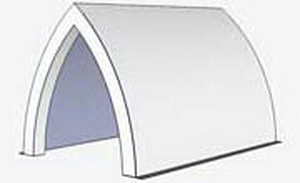
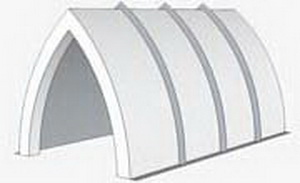
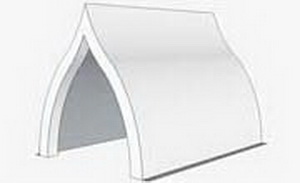
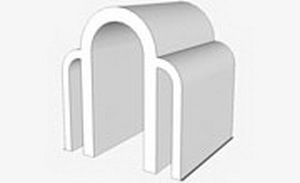
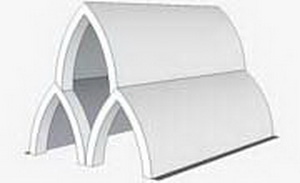
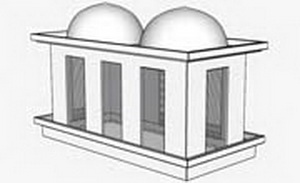
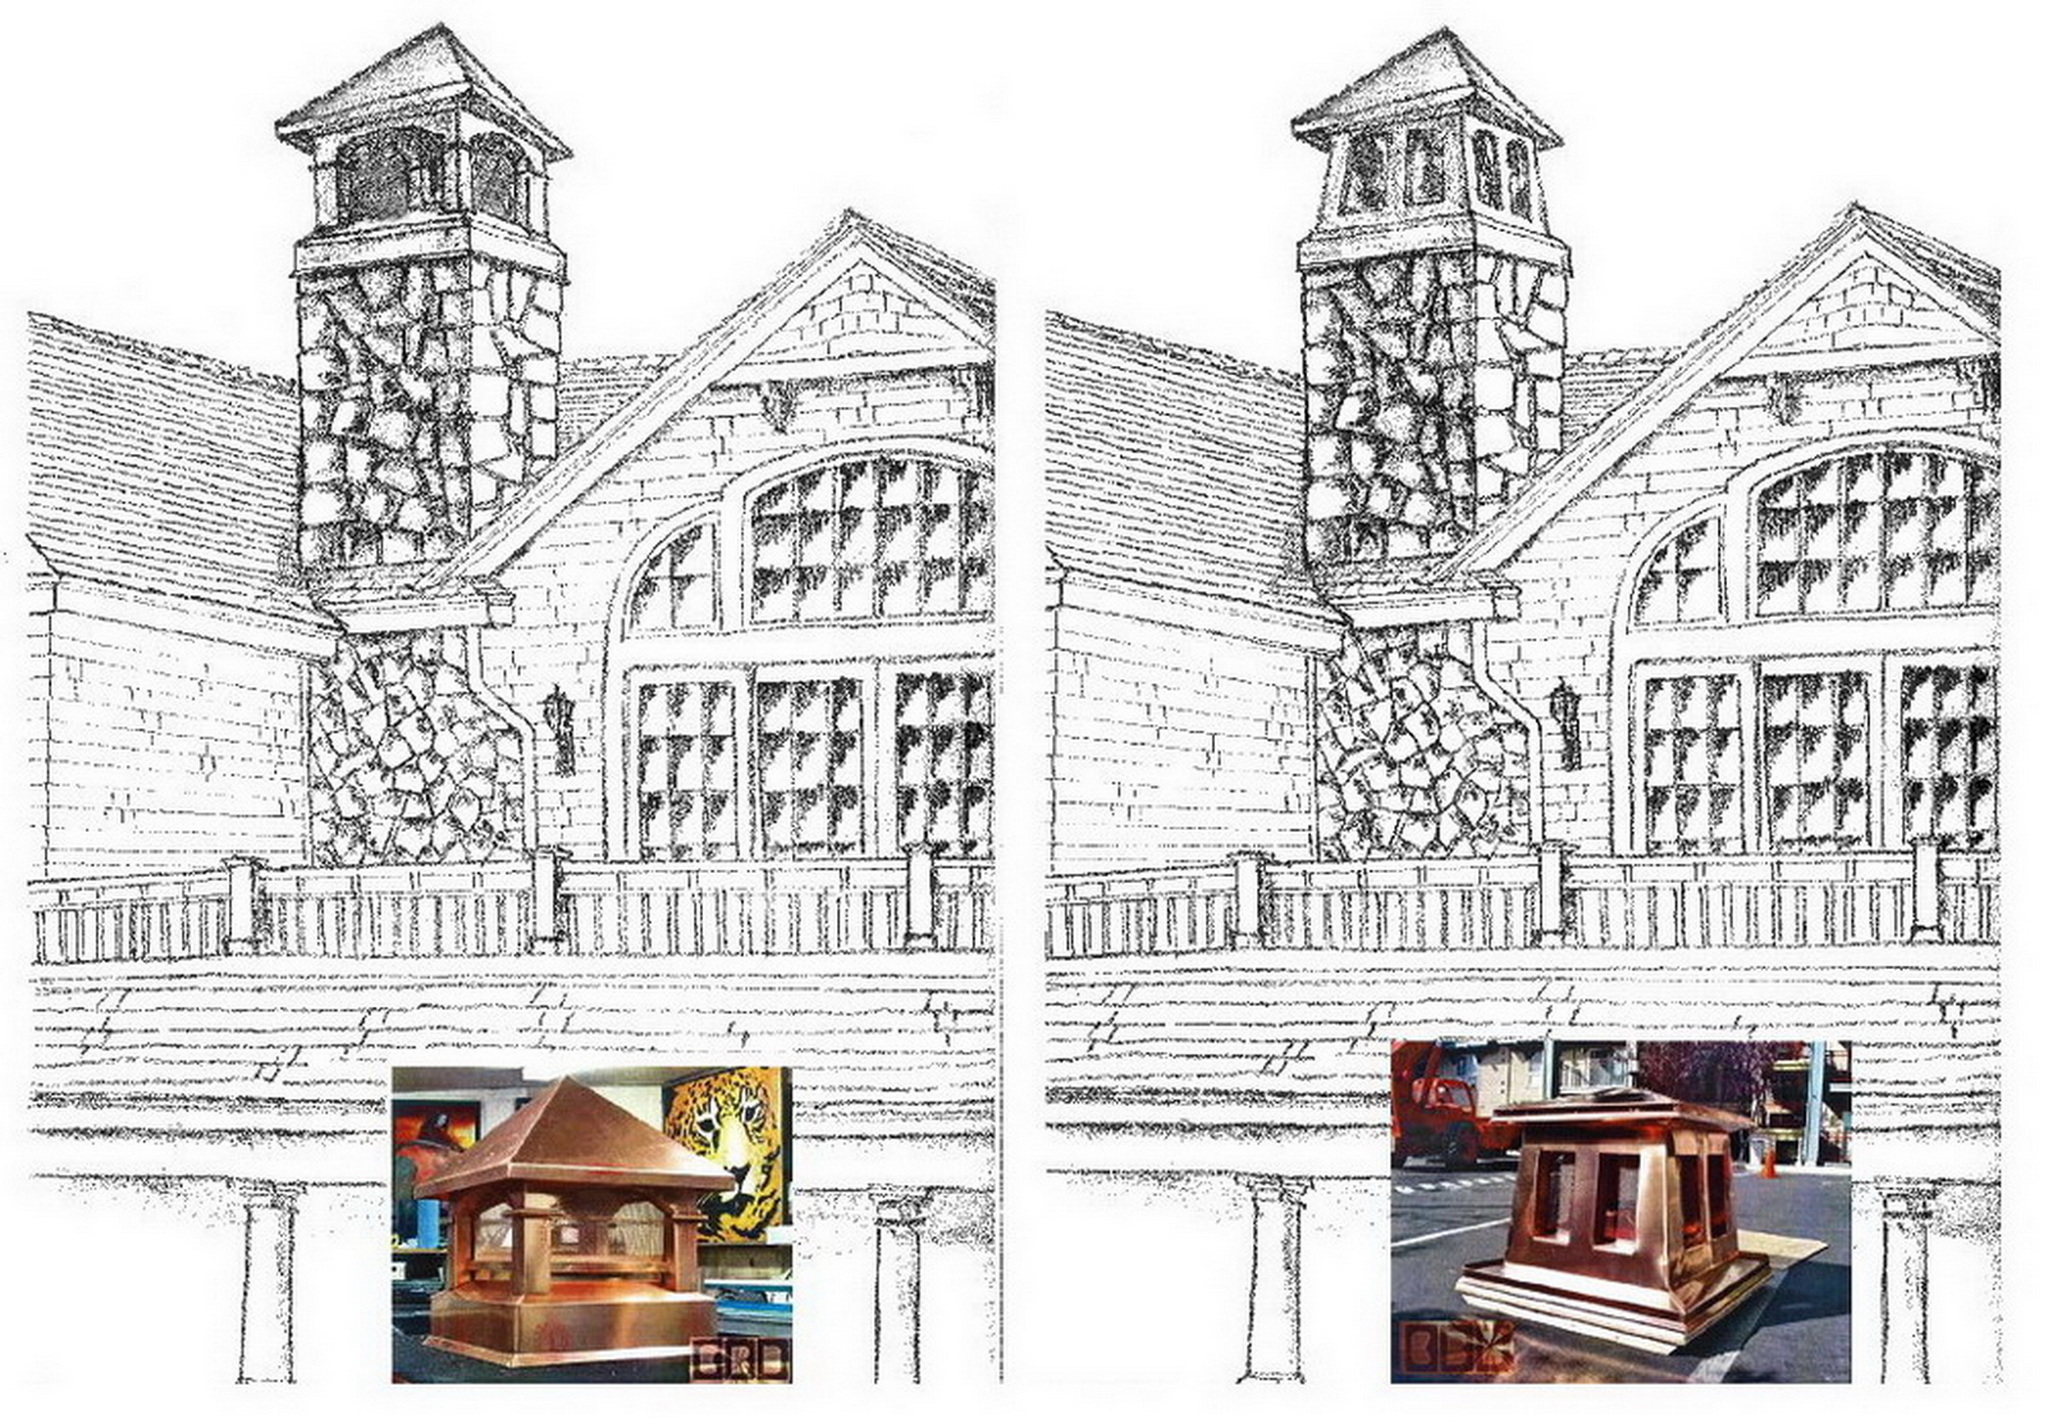
Style:
What style cap you are looking to have us build. If you do not find
what you are looking for in the examples shown on our
Chimney Cap page you can have your
ideas diagramed, then scan it or take a photo of it to send us as a image file,
or send up any other images you find that could show me what you
have envisioned. We
have a cable modem, so large file sizes are not a problem. Everything
you can do to help convey your wishes will aid in getting just what
you want from us, and we will better be able to quote you a firm price. Our
primary goal is to provide you with your dream cap at a price you can
live with.
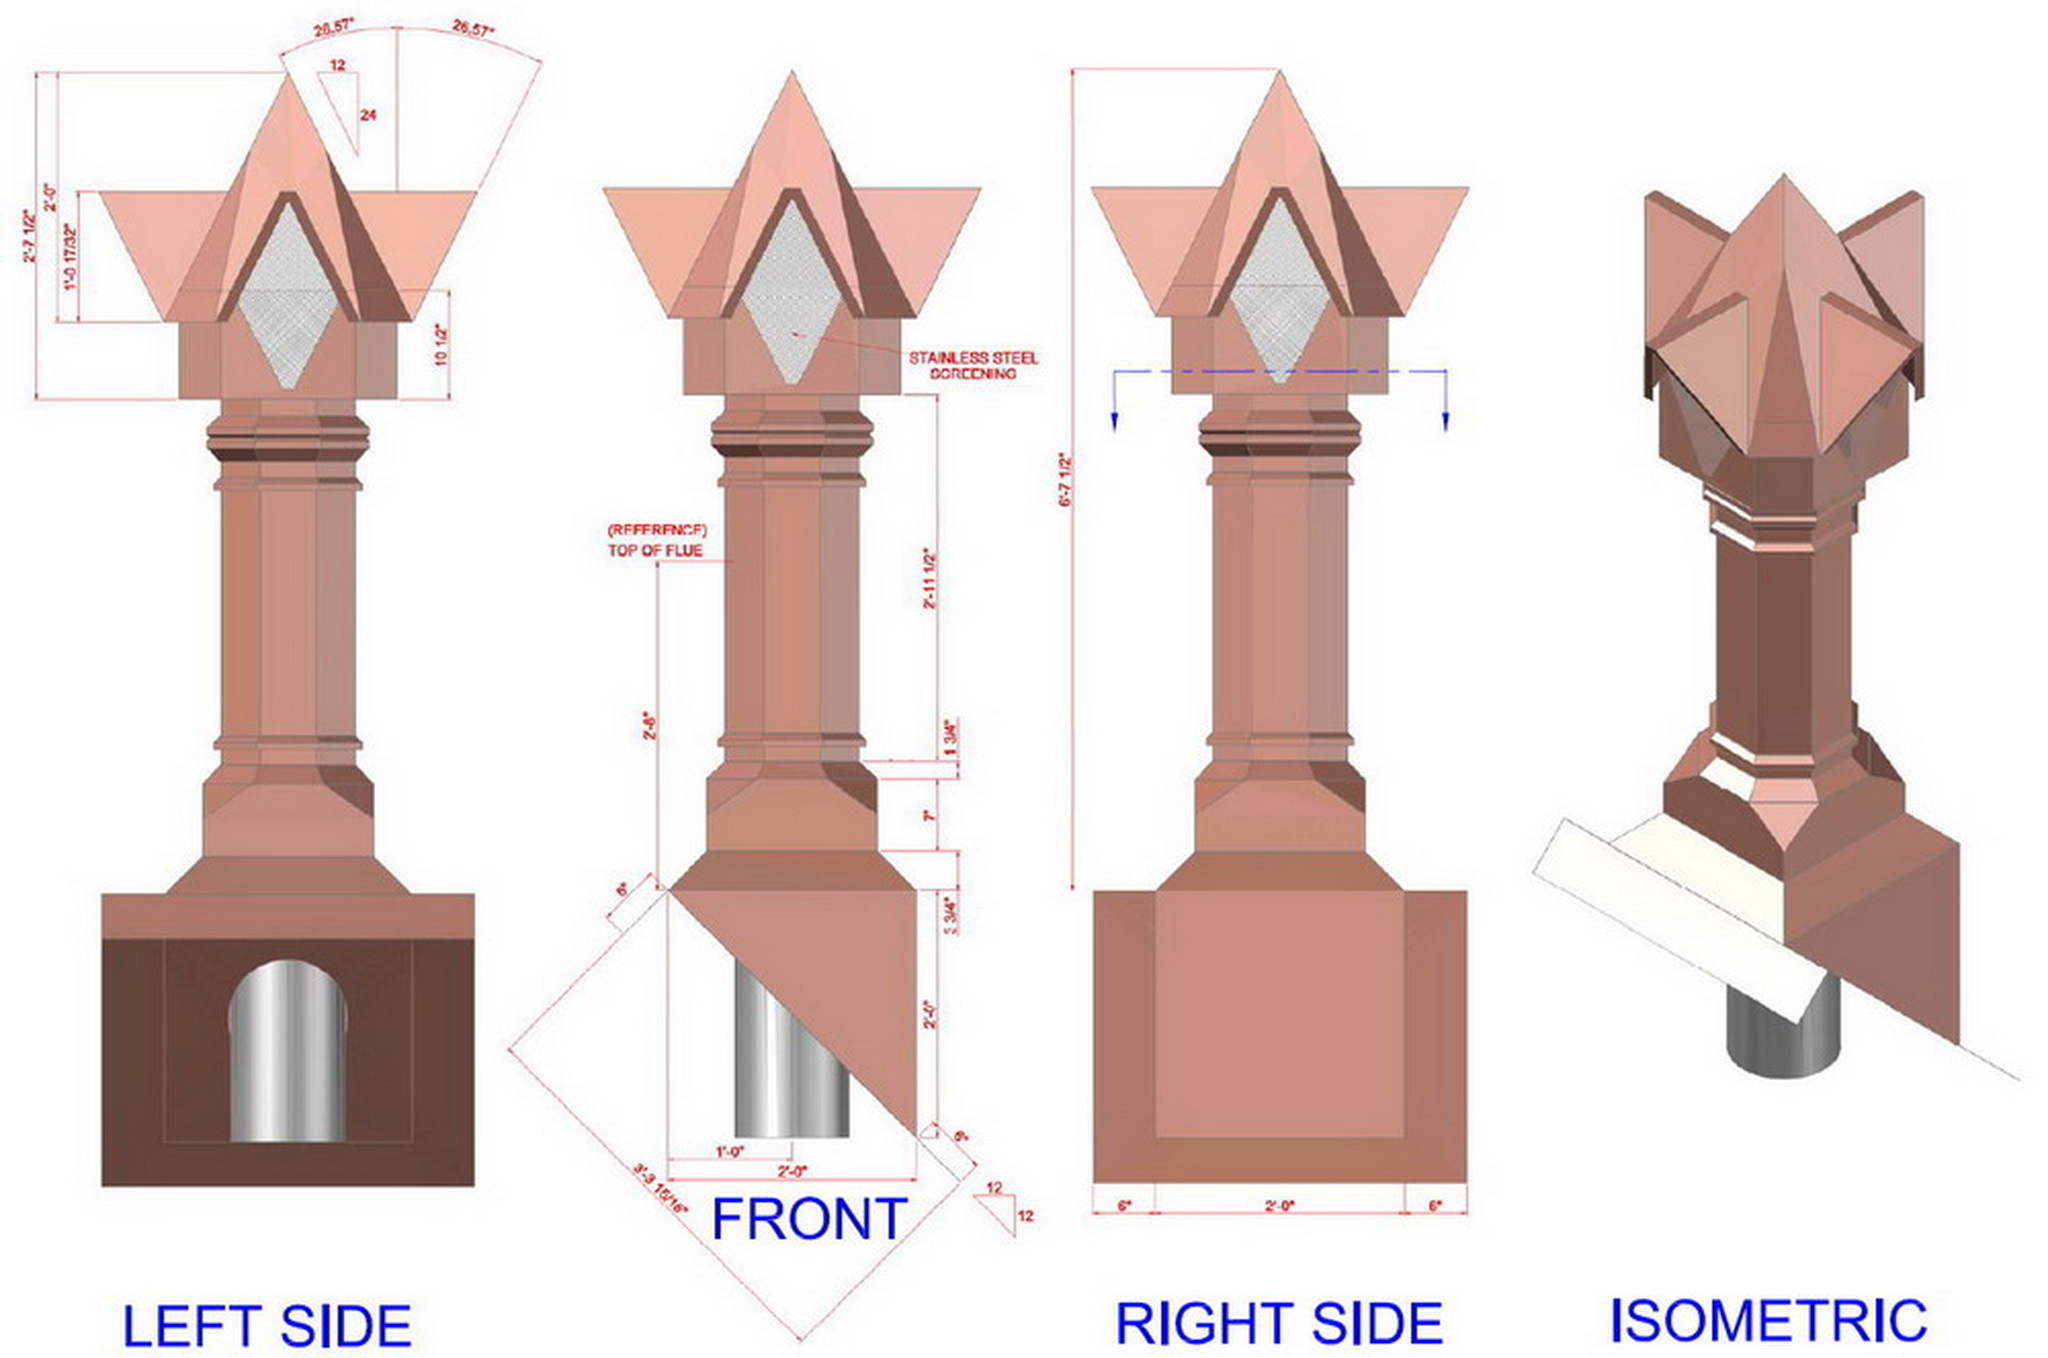
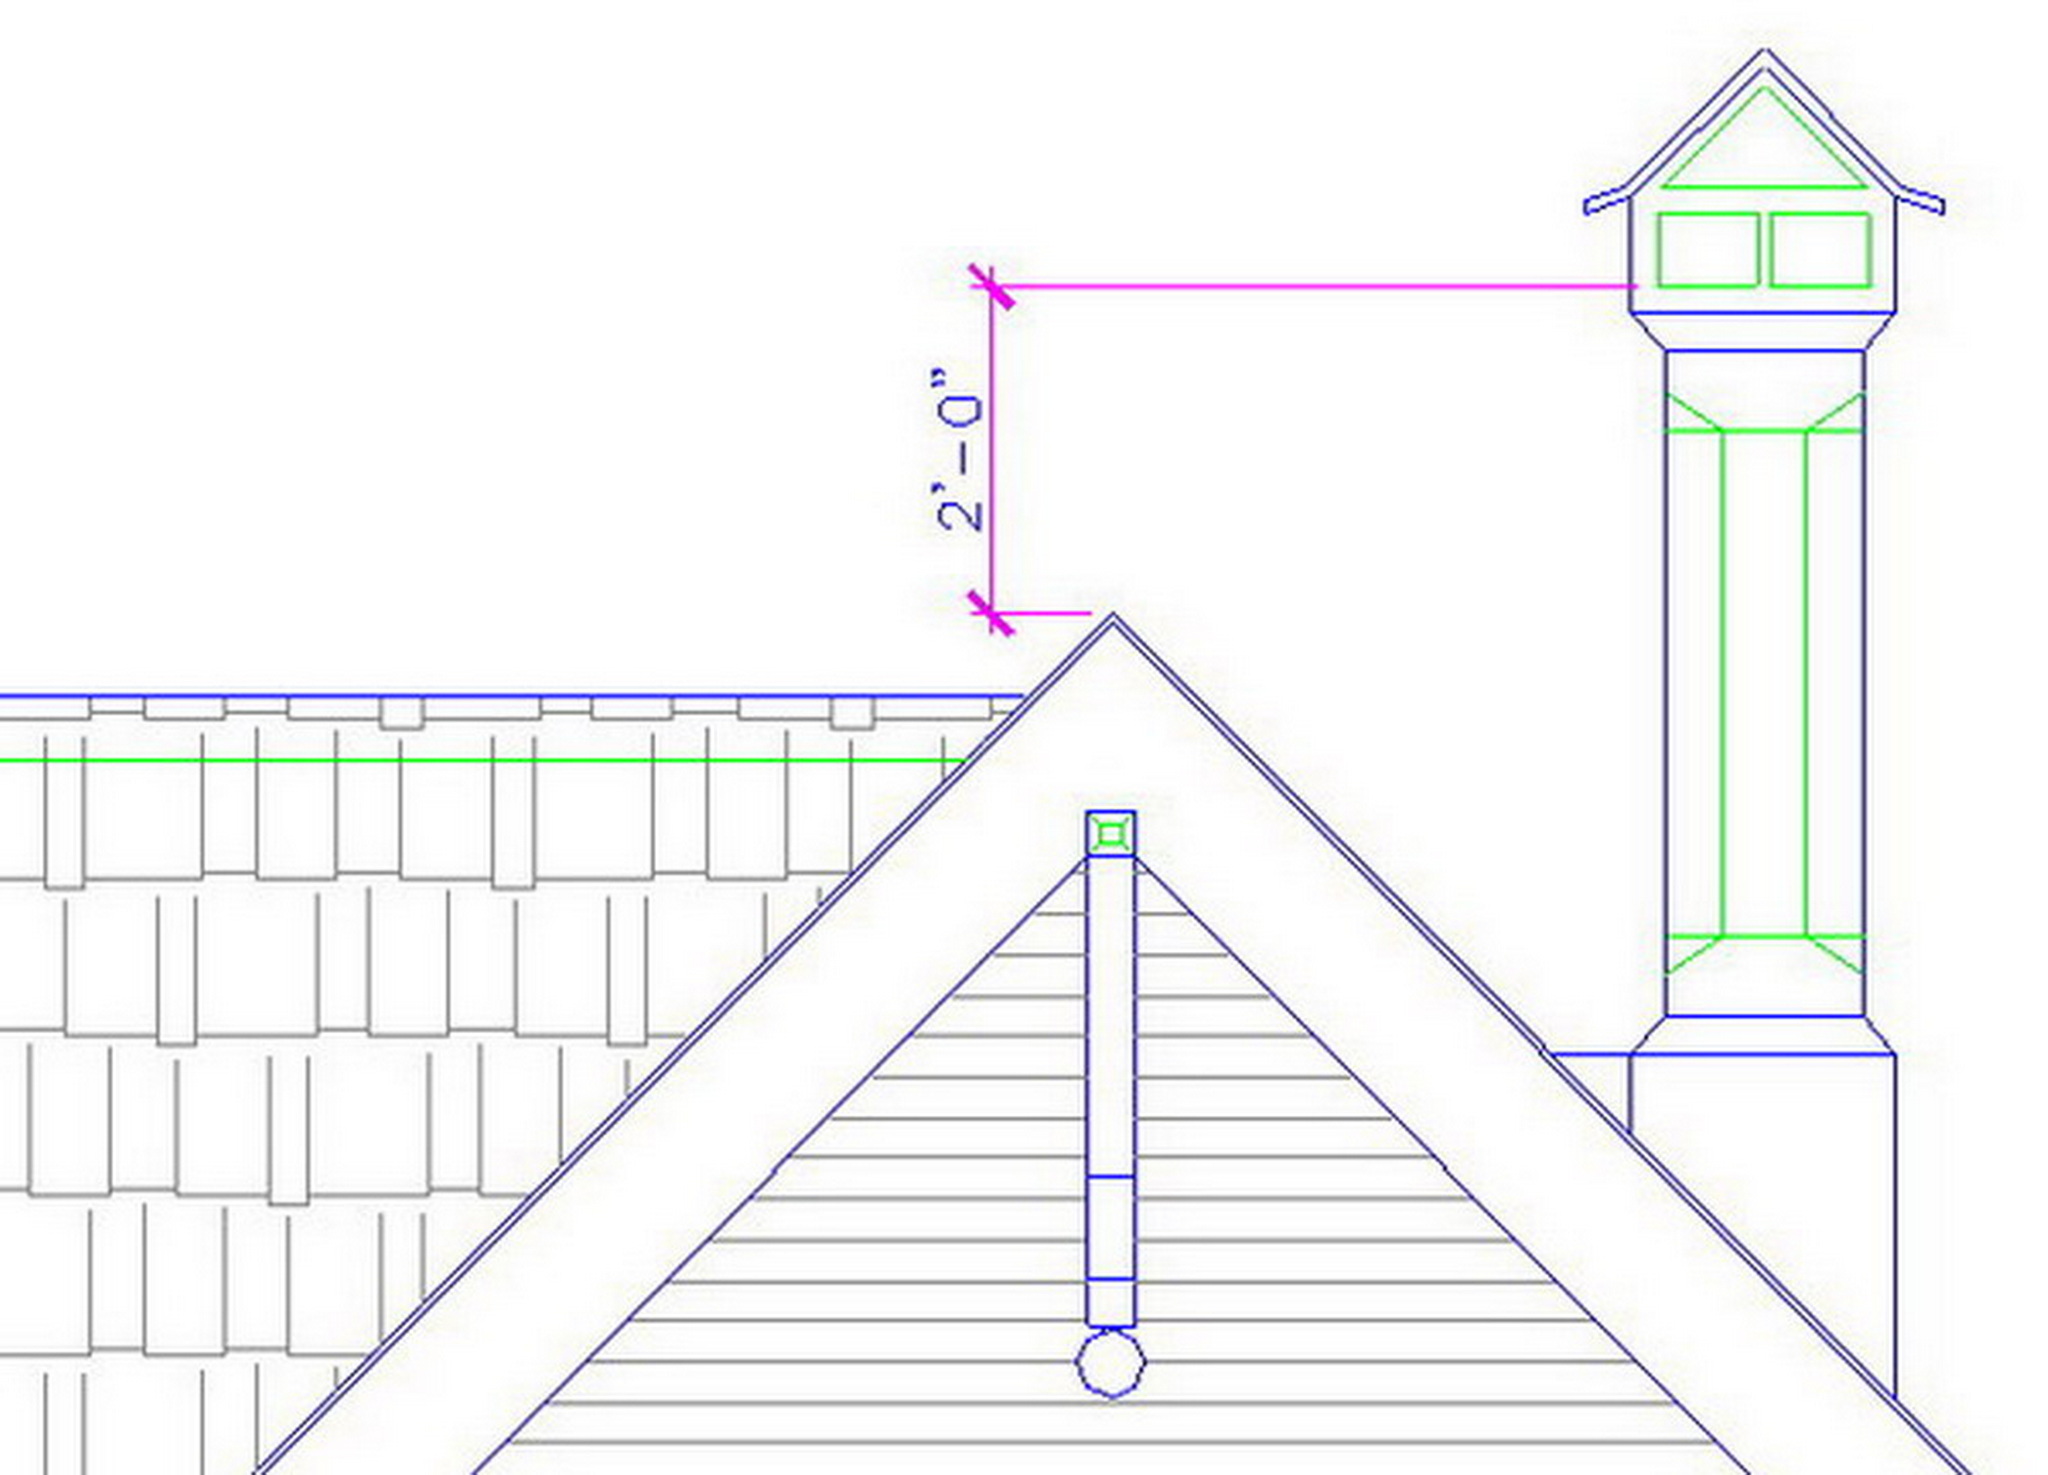
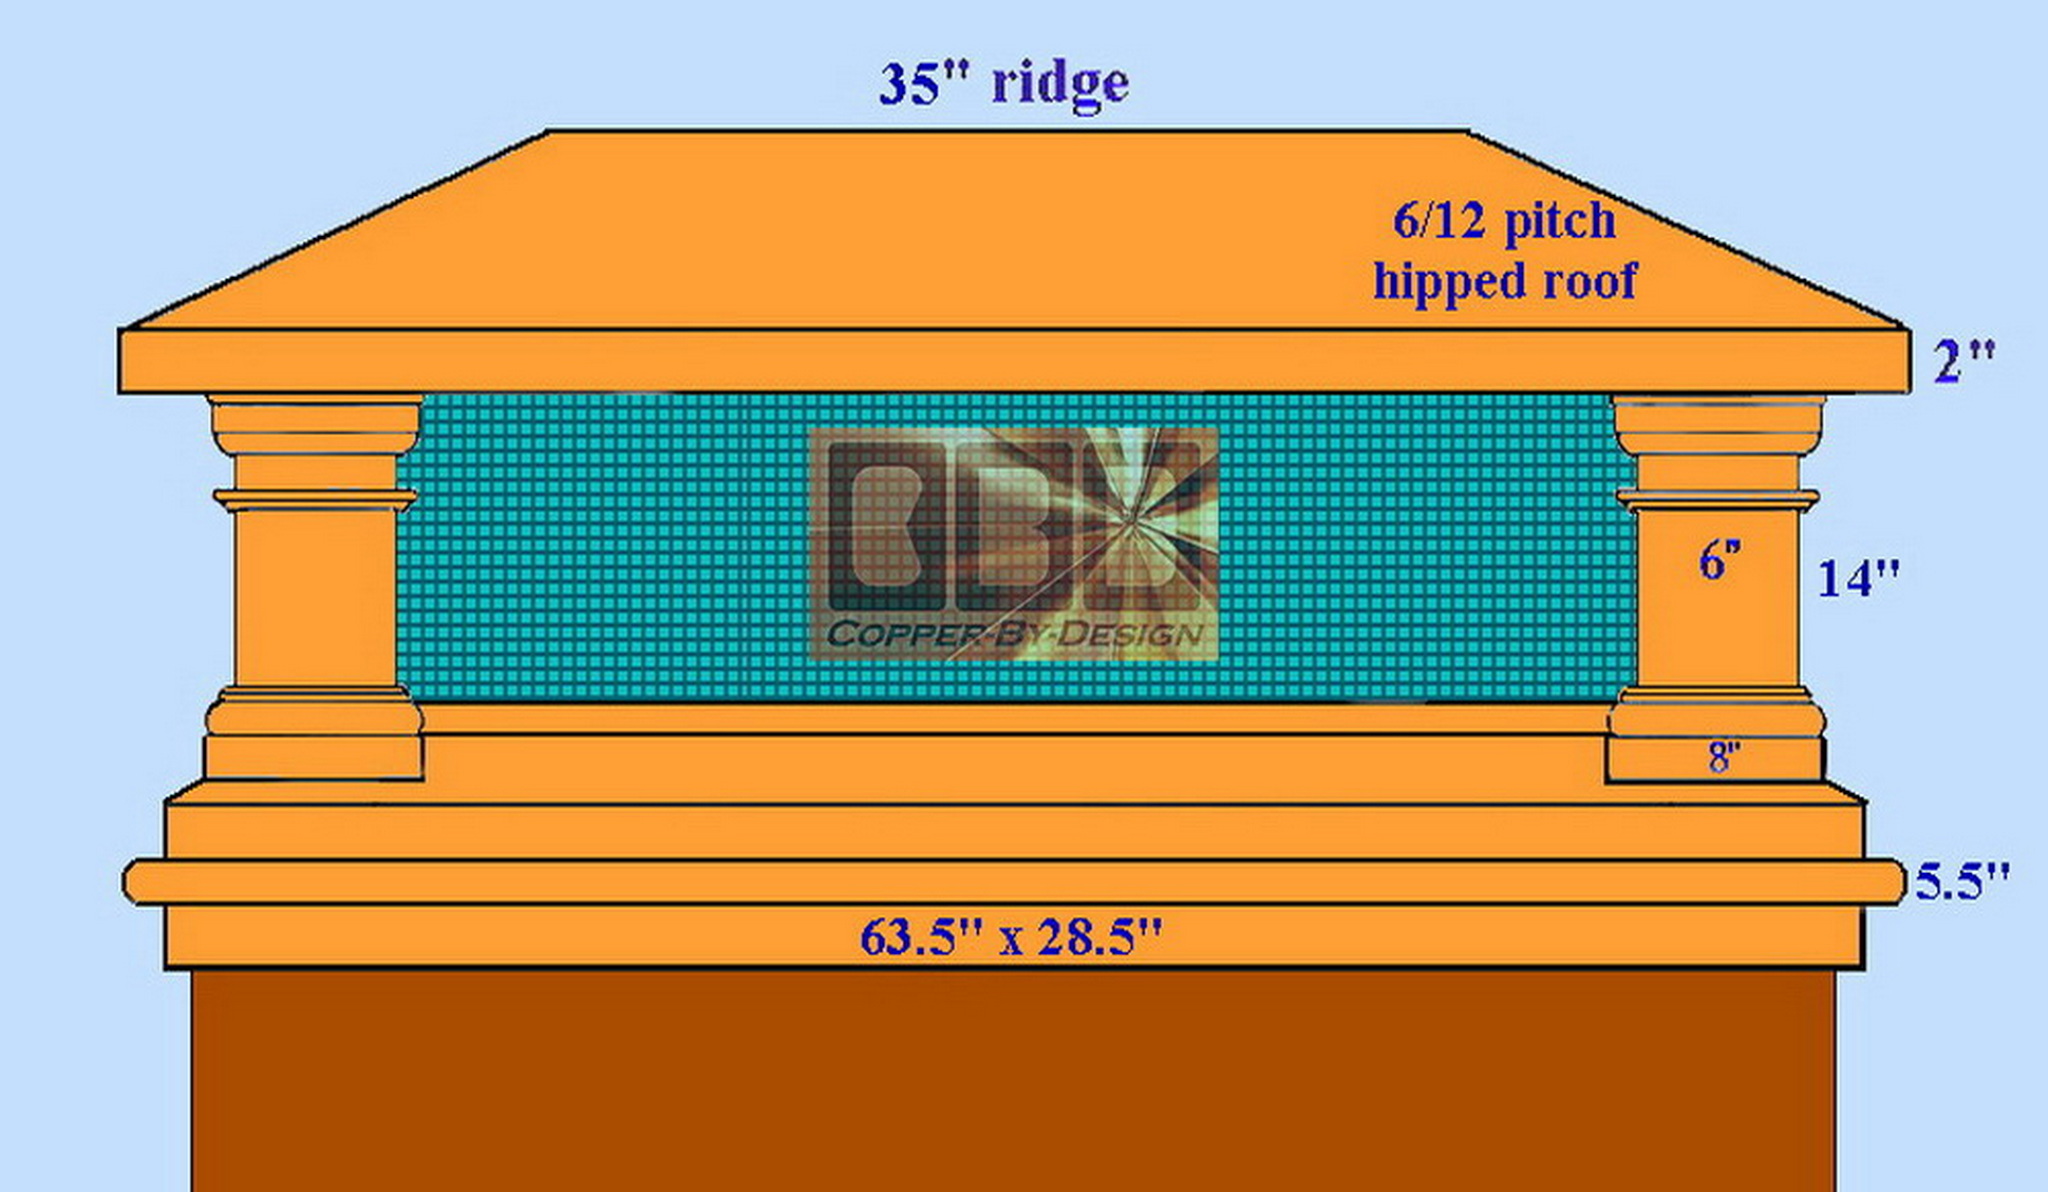
Roof Top Angle:
The angle of the roof that would
be best. I do not make flat top chimney caps. It is best
to match the roof pitch of the house roof to help make it look like
it fits with the style of the house. Normally this is calculated in the inch rise per
12 inches straight out level. Example: a 6/12 pitch is half
of a 45 degree angle. The second number is always 12.
Sizing:
Before I begin fabrication I will
need to know how long and wide the base needs
it be to fit over your chimney to secure properly in high wind situations,
which can also be removed for cleaning. We also need to know how wide
you want the roof in relation to the base. If I make this exactly to your measurements, but it does not fit right for some reason you would be very unhappy with your order, so my goal is that it will install without a hitch. If you following these instructions this should prove to give us this result. Have them use a pair of straight 2X6 boards that are
longer than the longest sides to lay horizontally against the sides of your chimneys
near the top where the base will be positioned to measure the span on each end
between those boards. Then repeat this for the opposing sides of the
chimney, so you'll have 4 different measurement charted looking down
over the chimney with the front side of your house listed. This will
give us the best possible measurements taking account to any irregularities there may be. I will
then add 1/4" to those measurements you provide to allow for a little slack, so it is not too tight. What I will need from you is just those tight measurements of the sides it will go over.
Obstructions:
What size and type of flues are protruding out
of the chimney top. What is the inside displacement, so we can match
the exhaust flow with the side vent spark arrest screening area on each of the 4
sides, so there is no flow restrictions. Digital photos may be needed
looking down over the top, so
we can better see what the chimney cap will be mounted over to be sure
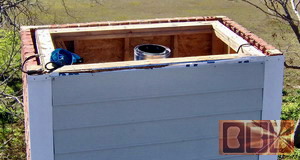
it will fit properly and not give your installers any grief.
|
|
Why do we primarily
use copper?
|
| We prefer
to work in copper for the client's advantages, not ours. Here is a few
of the reasons why: (a)
Copper can
handle heat much better than aluminum (as
long as it is not soldered together).
(b)
Copper costs
the same as stainless steel, but has several advantages, as listed below:
(c)
Copper
sheet metal is thicker than standard
stainless steel sheet metal for the same
strength, so it is heavier for better stability in high winds.
(d)
Copper does
not need to be painted, resolving any future repainting issue.
It is a metal that is meant to be seen with it's attractive patina effect
that darkens the metal within a few months exposure to the elements.
It remains a classy look, and less conspicuous than stainless steel,
which remains a bright shiny eyesore, and is prone to mildew on the
Northern side.
(e) Copper
will not mildew and has been known to aid in reducing mildew and moss
growth below the area it is installed.
We feel that since the cost labor is by
far the largest part of the cost for any custom work like this, why
use cheaper materials? If it is built well, it is common knowledge that
copper has proven to last out in harsh elements for well over a century.
But this is the key we place most of our focus on "If built well". Even
if it were to be made with a steel that is 3 times as thick, it would
still only last 1/3 as long as copper. That is a 9 to one ratio or better
over the most common metal used for chimney caps, but when you calculate
the lost labor of fabrication and the replacement installation cost,
the spread is far greater.
Even if you got a fantastic deal on a smaller
chimney cap made of steel for only $600, in the long run that is actually
more expensive than paying over $4,000 for a larger more decorative
copper unit that would last well over a century. If you want to avoid
the rust stains it will cause if left up there too long, you would have
to change out the steel unit every 10 years or so, and pay to cover
up those ugly rust stains.
Then there is the resale value of the house to consider, which is likely
greater than the cost difference of using a cheaper metal. That issue
alone would be profitable to go with a better unit.
|
|
How
thick is the copper we use?
|
 For some reason they do not use the
same scale for the different types of sheet metal. Copper is gauged
by weight per square foot, so if they use a different gauge it is likely
that they are not using solid copper. Some shops actually use a
micro thin copper coated stainless steel or just cheap steel sheet
metal painted to look like copper, which will rust and fall apart in short order. Most fabrication shops
that
are willing to with copper tend to only use a very thin 12oz or 16oz copper sheet
metal to help bring down the high cost of production,
since it is easier to cut, drill, and bend. Although, keep in mind
how most of what you are paying for is labor and freight. That thin
16oz copper has been the standard in
the industry for many decades. It may look swell, but is quite
fragile. CBD uses a minimum of 24oz copper these days, which is at
least twice as strudy. For some reason they do not use the
same scale for the different types of sheet metal. Copper is gauged
by weight per square foot, so if they use a different gauge it is likely
that they are not using solid copper. Some shops actually use a
micro thin copper coated stainless steel or just cheap steel sheet
metal painted to look like copper, which will rust and fall apart in short order. Most fabrication shops
that
are willing to with copper tend to only use a very thin 12oz or 16oz copper sheet
metal to help bring down the high cost of production,
since it is easier to cut, drill, and bend. Although, keep in mind
how most of what you are paying for is labor and freight. That thin
16oz copper has been the standard in
the industry for many decades. It may look swell, but is quite
fragile. CBD uses a minimum of 24oz copper these days, which is at
least twice as strudy.
They also will not have bracing inside these thin roof covers.
This detail would add about twice the metal needed, but makes a huge
difference in the strength of the unit to resist the elements they will
be exposed to. Like heavy snow loads, high winds, and being hit by a
falling branch.All of our custom
work in the last 18 years has been fabricated with a thicker
20oz solid copper sheet metal or even thicker
where needed. All the way up to 48oz copper. Then in 2017 CBD
had
upgraded our standards to 24oz copper for most chimney cap work. To give you an example
of this statement; 20oz copper is so rarely requested by contractors
and other shops that I did not even know our metal supplier could order
20oz copper sheets until 2003. A full decade after specializing in sheet
metal work. So, from 2003 to 2017 all I order is 20oz copper in large sheet form for
these custom fabrication. Now CBD uses more 24oz
copper than 20oz copper.
We have an old copper scupper on display
here that I had replaced it back in 2002, which is a classic design
you will not see made in these modern days. It had a few holes worn
through the left side because they used such a thin copper in it's construction.
Also the soldered seams were cracking apart even though there was no
sign of an impact. The client had already bought a new scupper from
a different shop for me to replace this with. It was not nearly as ornate.
I could see how the new scupper was no better built, so I made a funneling
copper liner for it to be hidden inside, so this same failure would
not happen again. At least it would last twice as long this way.
|
|
Patinas and Other Finishes?
|
We have rarely been contracted to pre-tarnish the new copper surface
to make it look aged before you receive the products we build, since
the copper will naturally turn brown within a few months of exposure
and the heat from your fires will also turn the copper different
colors.
There are
numerous different mild acid wash soaks that can be applied and then
a lacquer applied over it to retain that look, but the lacquer
finish will not handle the normal heat generated, so that would be a
waste. Here is a link to a company that specializes in these sort of
copper patinas. I have their sample physical pack of the different
colors and striations:
http://www.colorcopper.com/
Here's a
link to a web
site that shows some of the different chemical compositions to get
different colors out of the copper surface:
http://www.sciencecompany.com/-W160.aspx
What about Retaining that New Penny
Copper Look?
Personally I agree they look nice with that new penny copper look,
but most clients seem to like the tarnished look better, and it's
near impossible to do this with chimney caps because of the heat. You could lacquer
it, but even if it were a high temp coating a decade later it will start to peal off and look
terrible; tarnishing between the cracks and require some expensive
restoration. The raw copper will also help retard growth of moss and
mildew on the chimney surface below. If you were to polish and wax
it there would be no unpleasant side effects, but it would not last
very long.
The only good way to get a lasting new look would
be to have it layered with rose gold leaf, or PVD coated like the
better door knobs, which is just a colored chrome plating to look
like copper, but it would probably cost more than the amount you pay to have this made and delivered,
so it would be impractical. |
|
Fasteners
|
At CBD we provide the #14 shaft stainless steel mechanical fasteners
with each project to make sure it will be secured well and still be
removable decades later without damaging the unit. We do our best to
design chimney caps that will be attached strong enough to withstand
the highest wind gusts you are likely encounter in your area, yet still
be removable for flue cleaning, or some other servicing that may be
required over the next century or so.
We have had some
clients ask about a hinged chimney cap. It could be done, but the
strength would be compromised. If the Chimney Sweep did not latch it
just right when they're finished it could blow open and cause some
damage. You also run the risk of them denting or damaging the
chimney cap in the course of their work. So it has proven best to
just remove the whole chimney cap as a one piece unit, set it aside
where it is safe, and reinstall when their done. The way we build
the bases they are much less likely to fly off even if they forget
to tighten the screws again
Nails:
We do not recommend using nails for mounting any of our products
other than copper roof shingles. There is a very good chance it will need to be removed
again for servicing and the flues may need swept out. On the left is
a solid copper 1.5" nail we supply for chimney flashing kits.
We also have 2" copper nails and hardened masonry nails if
requested. These would be the most inconspicuous looking fasteners,
but these are not much good for chimney cap attachment.
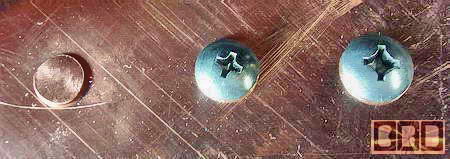
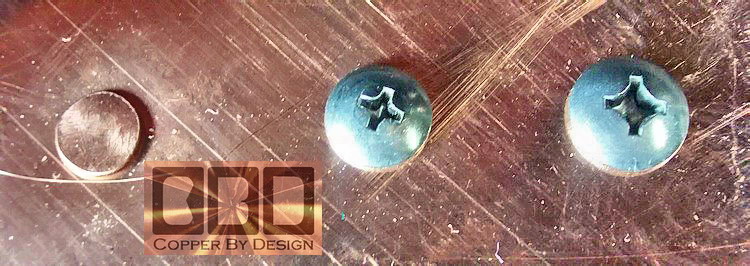
Standard SS (stainless steel) Screws:
in the middle is a common #2 Phillips head w/#10 shaft SS screw just 1" long with a low profile
truss head. I feel this screw is too small and fragile.
We stopped using the #2 slotted screws over 15 years ago, even for aluminum
downspout attachment with our gutter systems replacements.
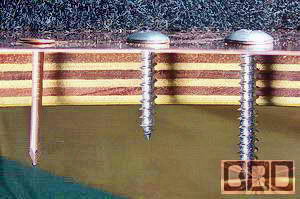
Larger SS Screws:
on the right is a #12 shaft SS screw we use for gutter installation.
Although, we provide #14 shaft stainless steel screw with our custom
chimney cap fabrications, which is 1/4" OSD. We do this so we know the installers will use good
sturdy fasteners. We have these in a 1.5", and 2.5".
These takes a larger #3 Phillips screwdriver
tip, which is a lot less likely to strip out during installation.
Besides installation this means it is a lot more likely to be
reusable when your chimney cap needs any sort of servicing latter on.
We have hex head SS lag screws as well, but they would have a much
larger noticeable head showing. I highly recommend using an impact
driver to reduce the wear to the head slot of these screws. Or any
work with screws you happen to be doing.
SS Bolts w/Locking Nuts:
we also supply the client with stainless steel bolts and locking nuts
where needed, or use them for assembly where rivets will not be enough
to hold the structure together.
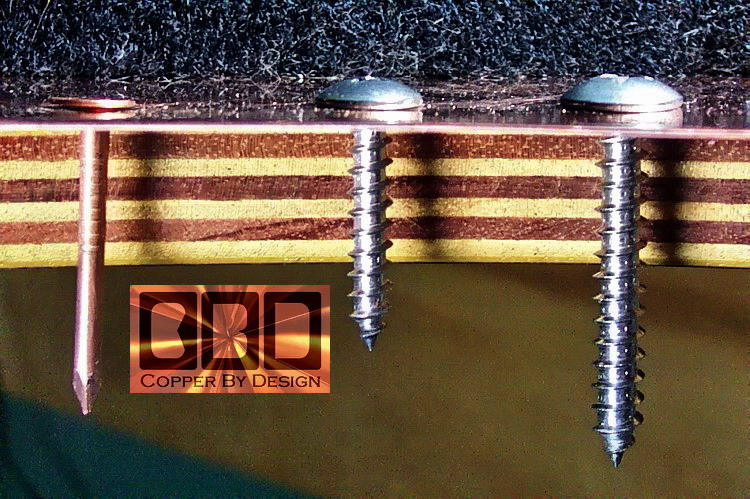
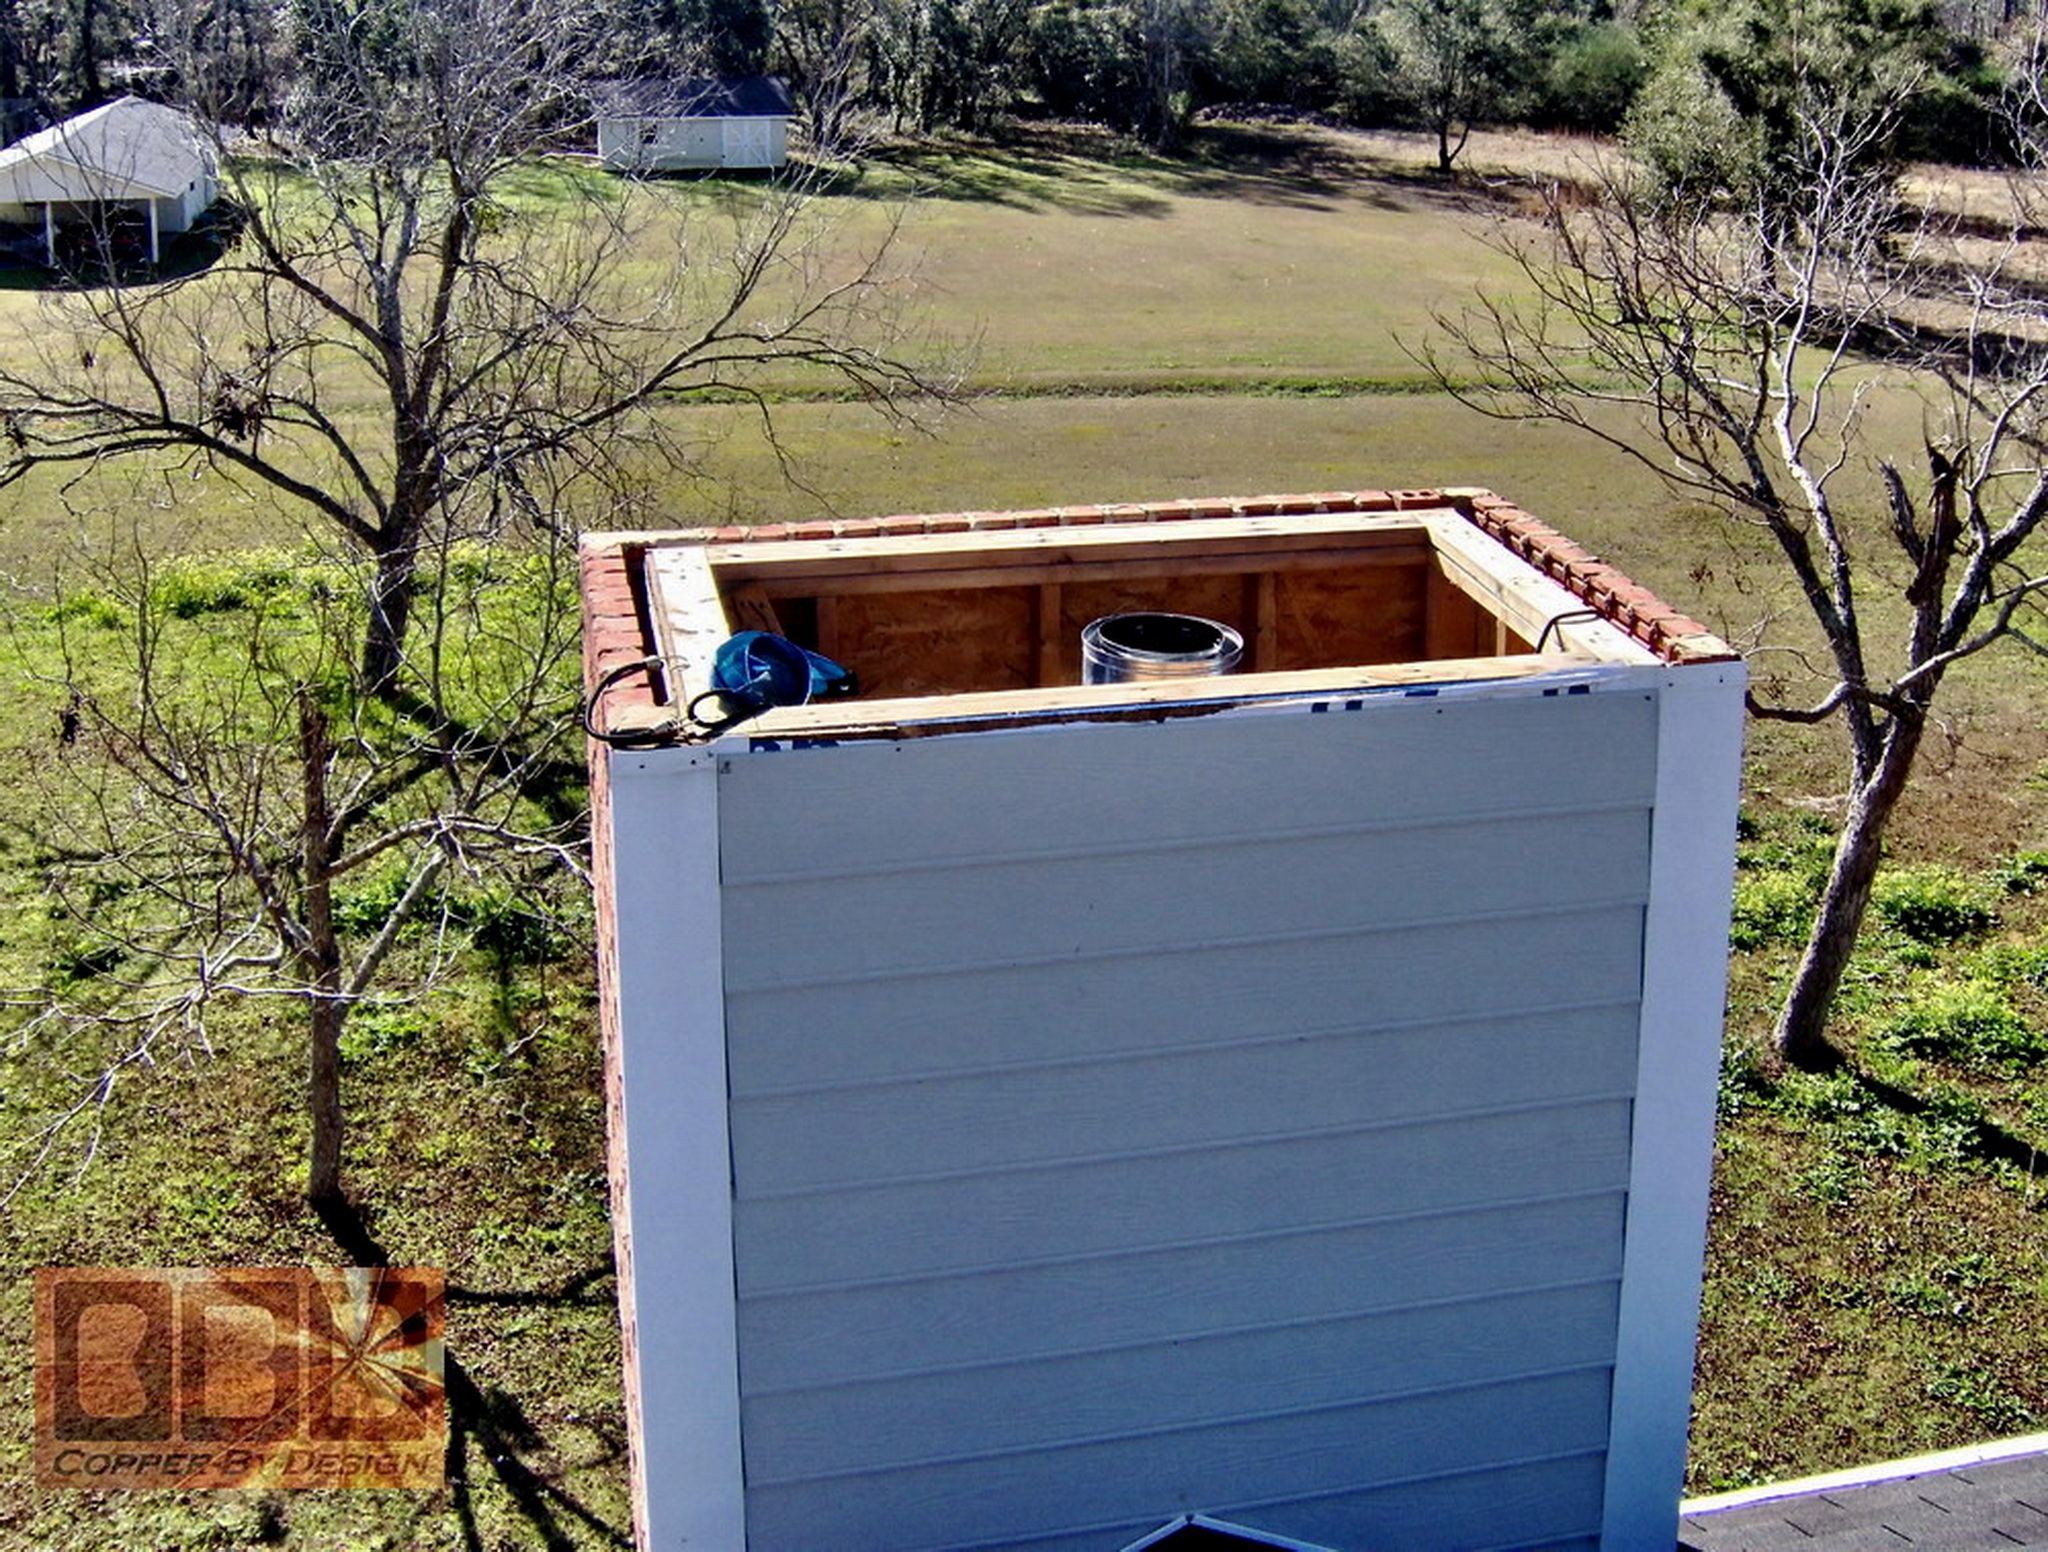
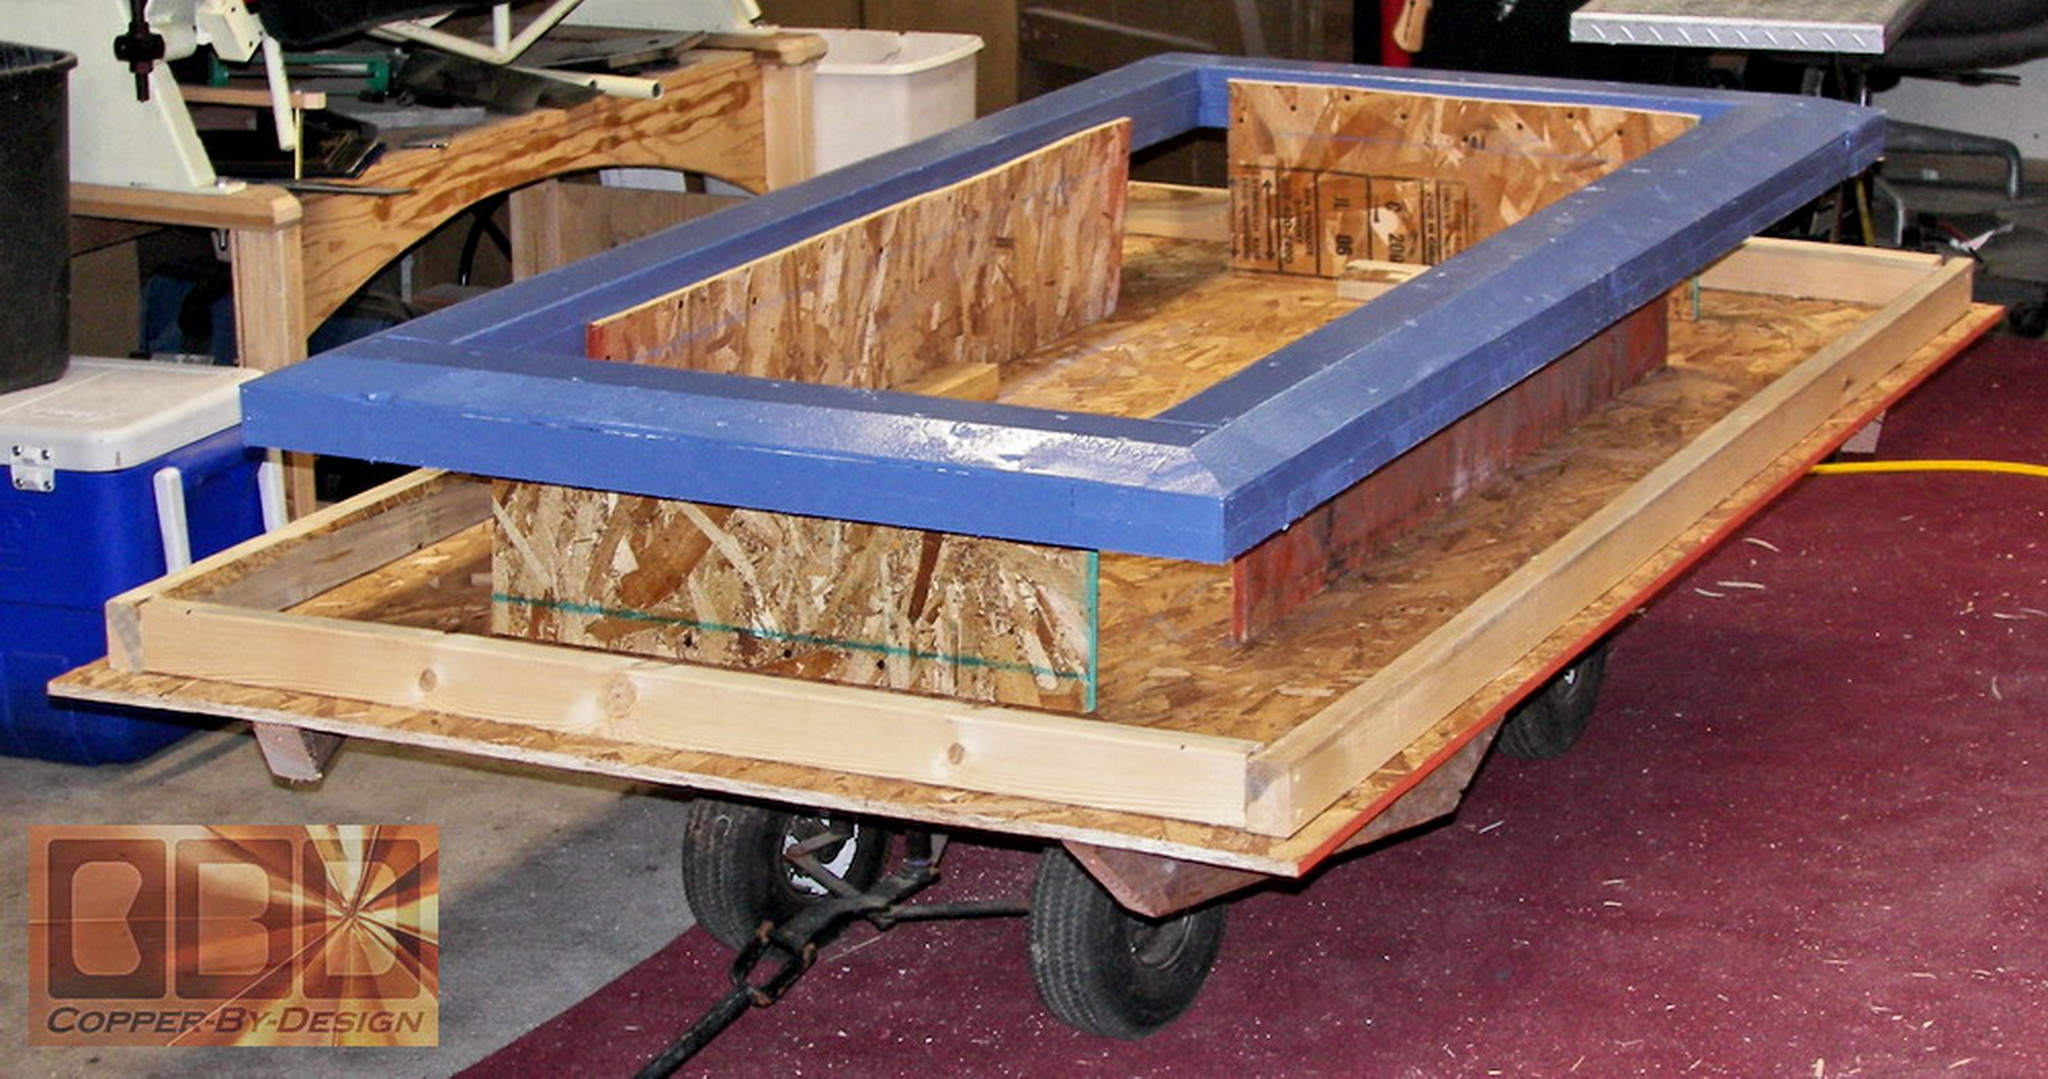
Instead of just a brick chimney lots of
modern houses are built with fireplaces that use an insolated flue pipe
that is covered up by a wood chase built w/stud and plywood. The outside is
sided and painted.
Fancier houses will have a stucco or rock facing mortared over the wood.
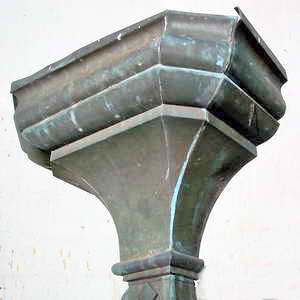
For these types of chimney caps we usually build a custom angle cut
wood base for the chimney cap to rest on
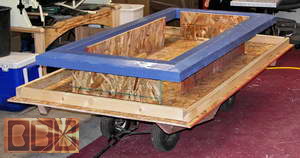
(shown above painted blue mounted over the crate
base w/screws) This frame bolts down to
the studs and overhangs the exterior cover. If the chimney box has a
double top stud plate (as shown here),
they are just be nailed down, which could be pulled off in high
winds, so for these wood frames we provide several 8" long lag
screws with washers to fasten this base deep into the studs below to secure it properly.
|
|
Minimum orders
|
| Our minimum order charge
for any custom work is $300, but since most copper chimney caps we make
cost well above that, this has not been much of an issue. |
|
What about Volume
Discounts
|
|
Yes, we
will discount large orders of the same design. We also give discounts to clients
who aid us in the quote process by carefully reading over these web
pages and clearly convey their needs to us in their first letter with
good clear photos, in order to minimize the number of e-mails needed
to iron out these details. If you have read this far, you are
off to a very good start. Feel free to mention this discount in
your e-mail.
|
|
As for Propper
Instalation:
|
I suppose theoretically a few guys could
try to muscle one of our chimney cap creation up a ladder and
traverse your steep roof, but there are several critical flaws with
that plan. Especially with a large chimney cap. Namely; the fact
that they do not make a ladder rated to handle that much weight for
a chimney cap along with even one man. This alone should be a
deal-breaker for anyone to ponder this type of installation. They
also greatly risk damaging your roof and the chimney cap if
something goes sideways, and they would not be able to afford to
replair your roof or replace that chimney cap they thrashed.
In my vast
experience I would highly advize using a crane over the use of my 2'
wide 20' long aluminum platform that is rated for 500#. We have used
it to slide up a smaller chimney cap that this sitting on a custom
wood sled we had made. We had to pull it up with a rope to a one
story flat roof, which was very difficult, and even harder to raise
it up over the chimney while on that flat roof. There is also a very
small chance an installer happen to have a nice wide platform like
this, since most platforms are only 14" wide. Here is a link to see
an example of this:
https://www.facebook.com/1DavidRich/photos/a.1373373982684768/1394629167225916/?type=3&theater
I had also used a 32' long ladder for this
sort of un-manned slide, but it was very steep, wabbly, and quite
difficult. Here is a few photos of that as well:
https://www.facebook.com/1DavidRich/photos/a.2016431418379018/2023279054360921/?type=3&theater
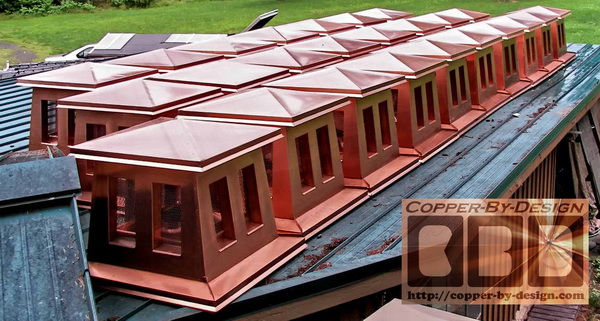
Here is a good example of how to do this
propperly, which took less time to install all 3 chimney caps than
it took the driver to set up his rig:
https://www.facebook.com/1DavidRich/photos/a.1333178243371009/1348596531829180/?type=3&theater
In my
experience NO other option should be considered. I would not even
recommend using any sort of man-lift for several reasons. Most
impotantly is their lack of experience opperating it, compared to a
seasoned crane operator. Huge difference! People have died from
these falling over. I would not even trust myself at the controls.
That's why I hire the professtional crane operators.
To open the crate
and safely remove your new chimney cap you will need a #25 Torx tip
in a drill/driver handy for the wood crate. It would be best to have
someone there to quickly open on side of the crate to inspect before
the driver leaves to make sure it is in good order. Especially if
you see any damage to the outside of the crate. You only need to
remove the #Torx screws on the upper sides to remove the top and
lift off the top once it is free. Then any one of the sides can be
removed at the sides and bottom screws. It would be best to leave
the chimney cap on the crate base until you are ready to do the
lift.
You'll also need the #3 Phillips tip
(included) for the stainless screws to fasten it to the chimney. It
is recommended to wear clean gloves when handling the copper. It
will help from getting finger print oils on the copper, which will
tarnish sooner than the rest of it's surface leaving it spotty. It
will also help you from the possibility of getting cut from the
edges of the copper, even though we went to great lengths to hide
all the sharp edges. We wiped it down before it left us, but it may
have still darkened a bit in transit, so you may want to give it one
final polish before installing it, so it is sure to tarnish evenly,
but it will also develop irregular heat marks the first time you use
it, and change a bit with each use. The SS screen will darken as
creosote coats it after numerous uses.
Condense and
dispose of the crate as you see fit, or use it to make a cute play
house for children by cutting a door and windows, sanding off the
edges, and painting it. The sides can be reversed to make it more
attractive on the outside.
There are screws in the corners and on the
cross boards. It's glued together, but it should crack apart without
too much trouble.
We strongly advise
that you use a cordless impact driver to set these SS screws, which
is far better than a standard drill to help avoid damaging the
Phillips slot. Trust me on this one. If you have not yet bought an
impact driver, do so. It will be one of your best investments for
setting any screws. Makita makes a nice light weight 18V cordless
driver with the good Lithium batteries and a brushless motor model
LXDT01.
As to the installation; with the right
equipment this should be fairly easy and quick to do. Using the
provided lift kit you will want to lift up on the upper eaves so
there is nothing underneath to be in the way of setting it down over
the chimney, like your fingers. Once it is settled down in place the
SS screws just need to be run in enough to apply a little pressure
against the stone work under the edge of the slab, but be careful
not to over tighten and crack the stones. If they are not long
enough we also provided you with longer screws to swap out if
needed.
At the time of installation feel free to
call me with any questions to reach me a lot faster than through
e-mail. Please let me know how it turns out, and we would love to
see any photos you are willing to share. A written report also help
me learn how best to advise clients in the future, so don't be shy
to say it like it is. |
|
Are CBD Fabrications UL
Listing Certified or Compliant?
|
The short answer is
'yes' and 'no'. You should be able to clearly see how these are designed and built far better than UL Listed products. Without even being an
Engineer; you should be able to understand how our unique designs far exceed
UL Listing requirements. It would be far too time consuming and
expensive for CBD unique designs to have each chimney cap creation tested and
certified through Underwriters Laboratories. Beside the cost to
build you a second chimney cap once it has past inspection, I would
have to make one before that for them to beat up and pay a $10k fee
for this. So, they will not
certified UL Listed products.
If CBD were to down-grade our build
standards to
just the bare minimum UL Listed requirements it would go against my
ethical standards. It would only be feasible if I were going to make thousands of a
single design in that one size. Then this would be more practical and something I would
have done, but I have rarely been able to use a template twice, as
these designs are each so different from one another. It would be
completely impractical to go through that process of making 2
identical chimney caps each time and
pay for the testing process. It woul greatly hinder my progress with long delays. UL listed products may be a good
idea, but are not the law that we have to use only UL listed products.
That would still not guarantee you will have no problems with it, any
more than I could make such a promise.
The key factors to
consider in a chimney cap design:
(a) Is this design providing enough screened surface
area to not cause an exhaust restriction given how this will be
used? ie: type of fuel being burned and flue size. The design should
allow for at least 1.5X that of the inside measure of the flue(s)
for each of the 4 sides; as the direction of the wind will change.
That is
a total of 6X the flue size in all.
(b) Is this
going to handle keeping most of the wind-driven rain out effectively. Even form splattering?
(c) Is this design constructed well to be
sturdy and attached sufficiently well?
(d) Can this be removed
reasonably well for serviced as
needed?
(e) Can it handle the heat it may be
subjected to? Keep in mind solder melts at just 450 degrees, or just oven
temperature. At a 1,200 degree melting point aluminum is not suitable
for a wood burning chimney cap. Copper is rated to handle up
to 2,000 degrees. Even higher than steel. |


 We
have only seen one other manufacturer on the web who makes similar copper
sheet metal chimney pots, which are sold by several different retailers.
They are named after chess pieces, but I think they look more like light
houses. I have not heard or seen where they take orders to build custom
work like we do for specific sizing or style. They are also more expensive
than our work; considering the fact it is a thinner copper and are rather
plain looking.
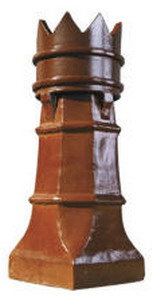
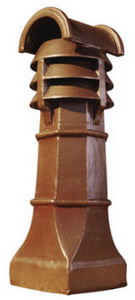
We
have only seen one other manufacturer on the web who makes similar copper
sheet metal chimney pots, which are sold by several different retailers.
They are named after chess pieces, but I think they look more like light
houses. I have not heard or seen where they take orders to build custom
work like we do for specific sizing or style. They are also more expensive
than our work; considering the fact it is a thinner copper and are rather
plain looking.