|
|
Skip's Crossing Photos & Details Page Updated 4-3-2010 |
|---|

|
|
Company Profile |
|
Roof Caps |
|
Chimney Caps |
|
Scuppers |
|
Gutters |
|
Shipping |
|
Contact Info |
|
|
Skip's Crossing Photos & Details Page Updated 4-3-2010 |
|---|
|
|
Company Profile |
|
Roof Caps |
|
Chimney Caps |
|
Scuppers |
|
Gutters |
|
Shipping |
|
Contact Info |

.
The client said the contractors and workers named his home "Skip's Crossing"
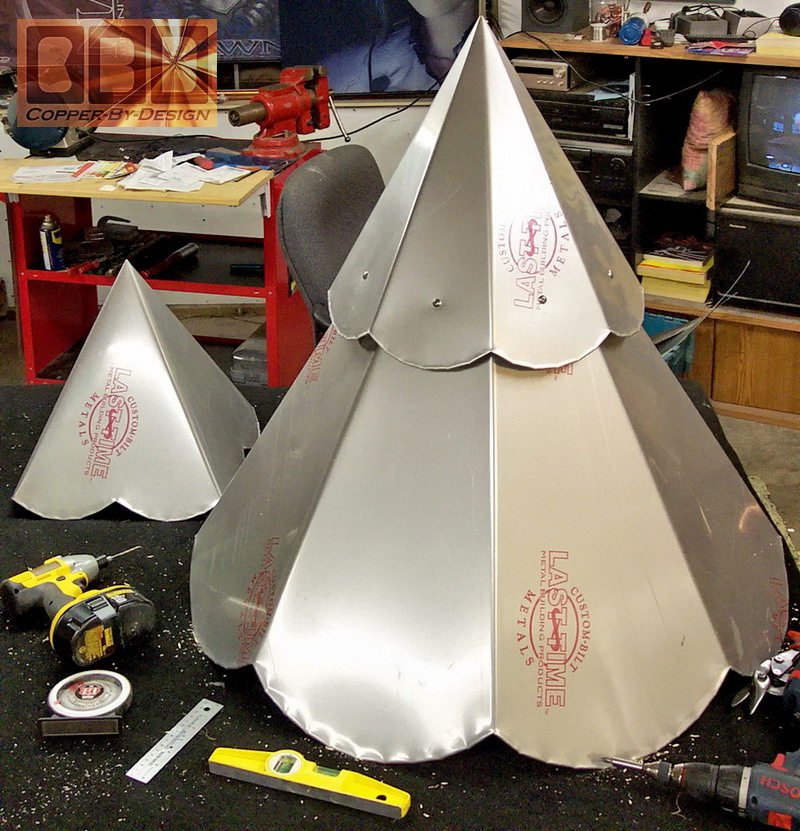
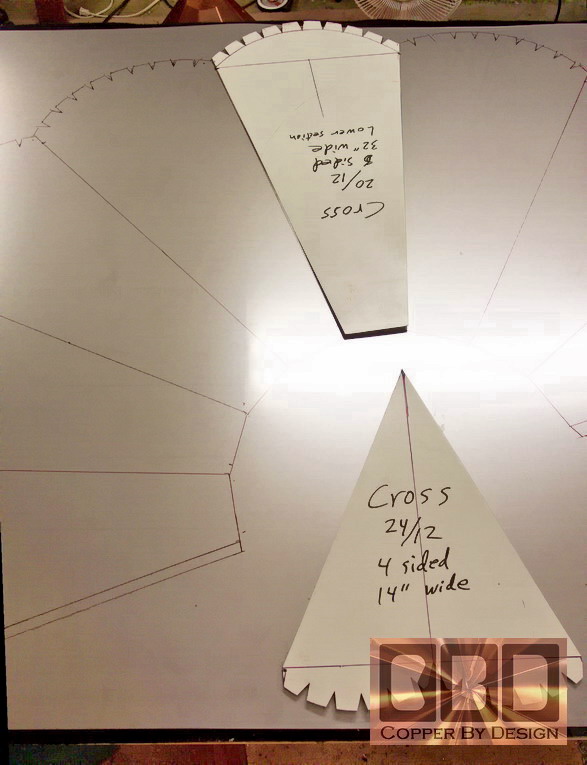
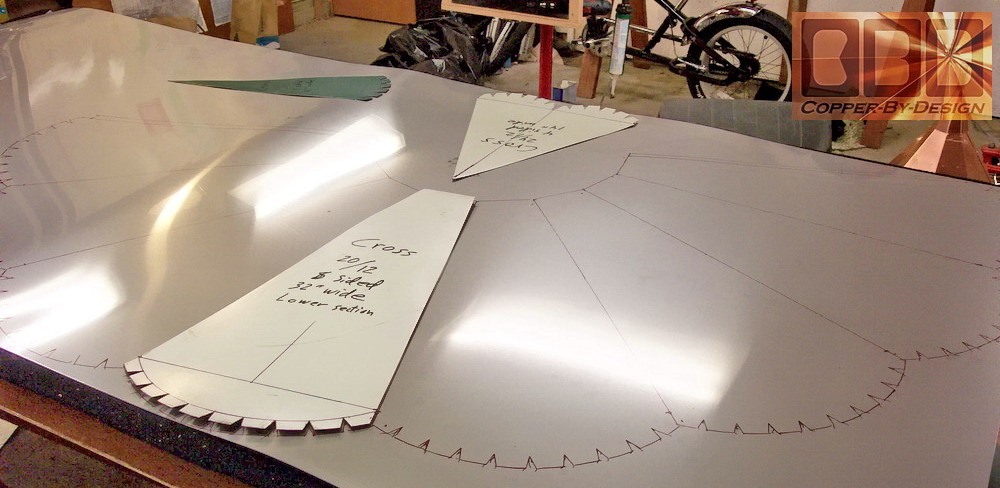
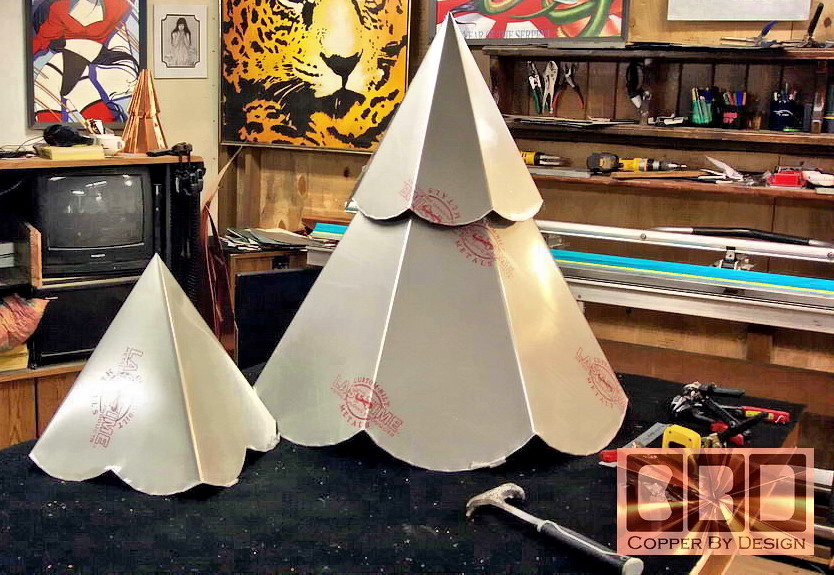
I mentioned how the roof caps he was asking for seemed rather small, so after getting up on the roof with a cardboard sample cap, Mr. Cross agreed and decided he wanted much larger caps. We made some suggestions and he liked our ideas after passing several diagrams to look over through e-mails. Even if it was hard to fully visualize these suggestions. He agreed that this double tier design is what he wanted, and the double scallop on the smaller 4 sided cap for the copula was a good idea. He and his builder use a roof kit that was to build the roof at an 18/12 pitch, but we asked if they can double check this. They discovered in fact that it ended up being a 20/12 on the turret, and a 24/12 pitch on the cupola over the garage.
The cupola is 14" wide and has only 4 sides to the roof. We made that one with a double soft scallop to match the size of the small upper section of the turret roof cap's scallops. The small cap was only $100. The cost was $807.50 for both caps php. |
|
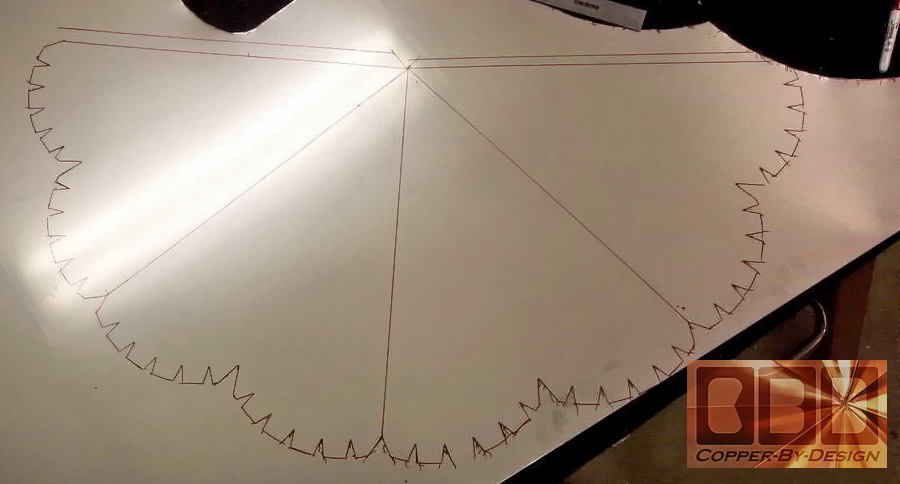
We got this large 10' x 4' sheet of 24 gage sheet metal for these caps to make them with only single seams. It is a high grade non-iron stainless steel that will not stick to a magnet, and has the clear plastic film over one side that will be used for the outside of this copper roof cap to protect it. 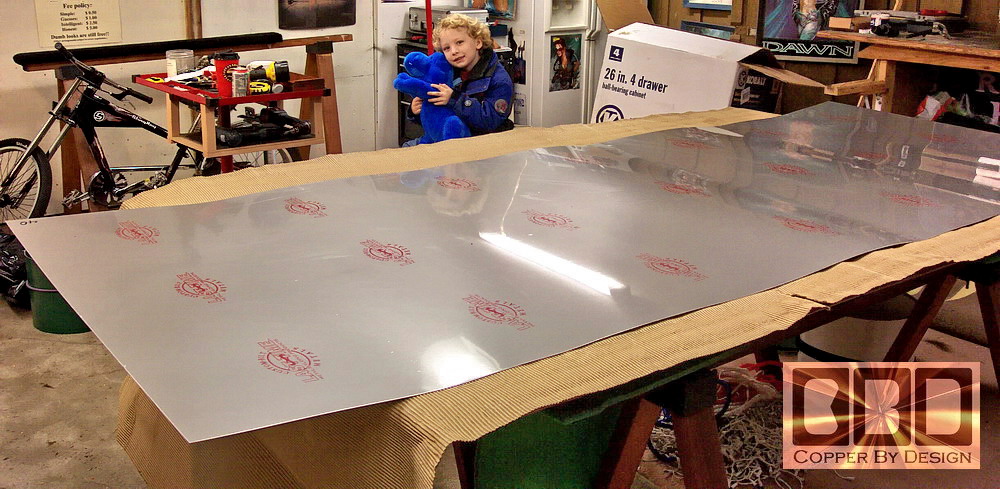 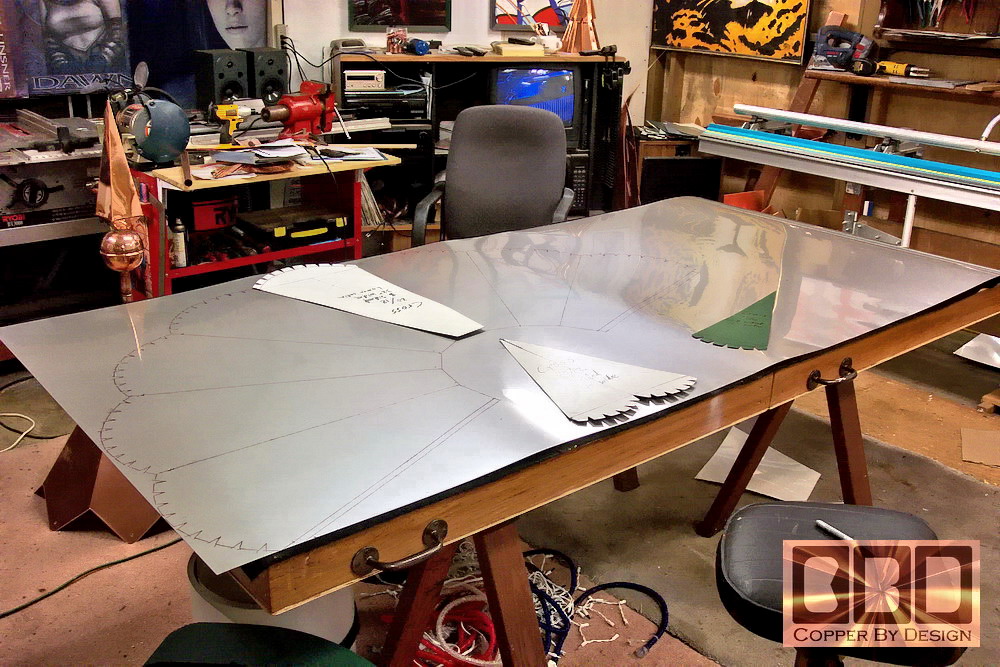 The first step is to do the careful math and design the templates, so we can draw the pattern out on the sheet-metal. We draw this out on sheets of aluminum and cut these templates out and work on positioning this template on the large sheet of stainless steel sheet to figure out the best use of the sheet. |
|
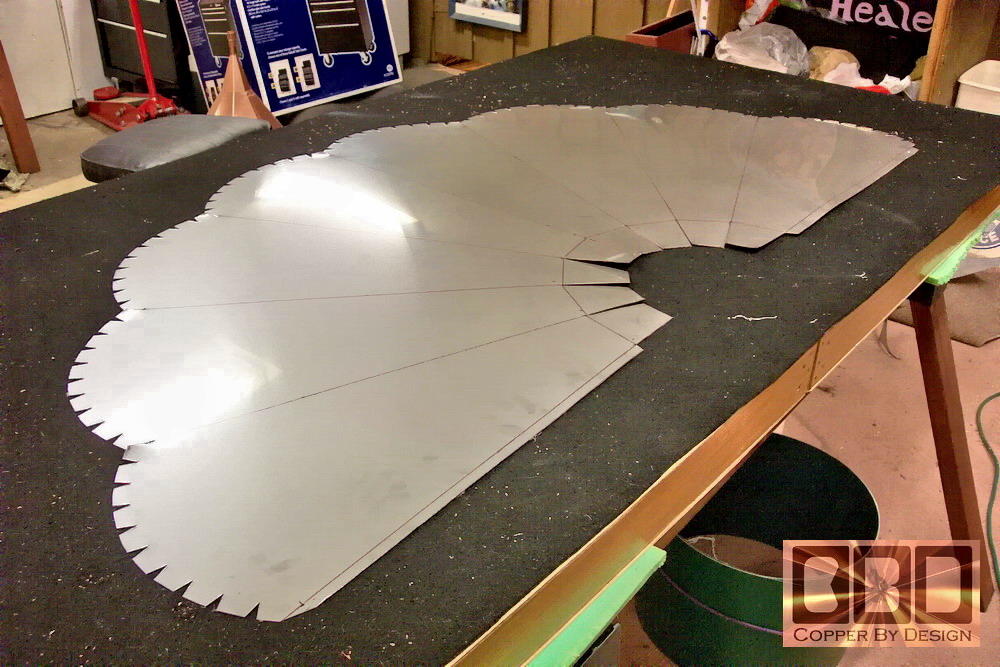
The cuts in the bottom curved edge of the template is for the cuts we need to make for the safety hem to be bent over. We have the cut and fold lines for this cap drawn out on the sheet here. We try to make these caps in one piece, so they are as seamless and strong as possible. This may not the most practical use of sheet metal, but this way it is much less likely to develop a leak, let alone fall apart. |
|
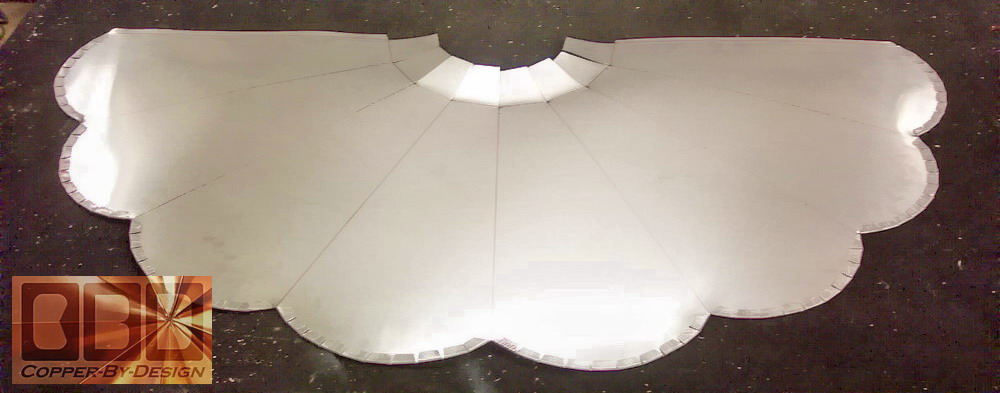
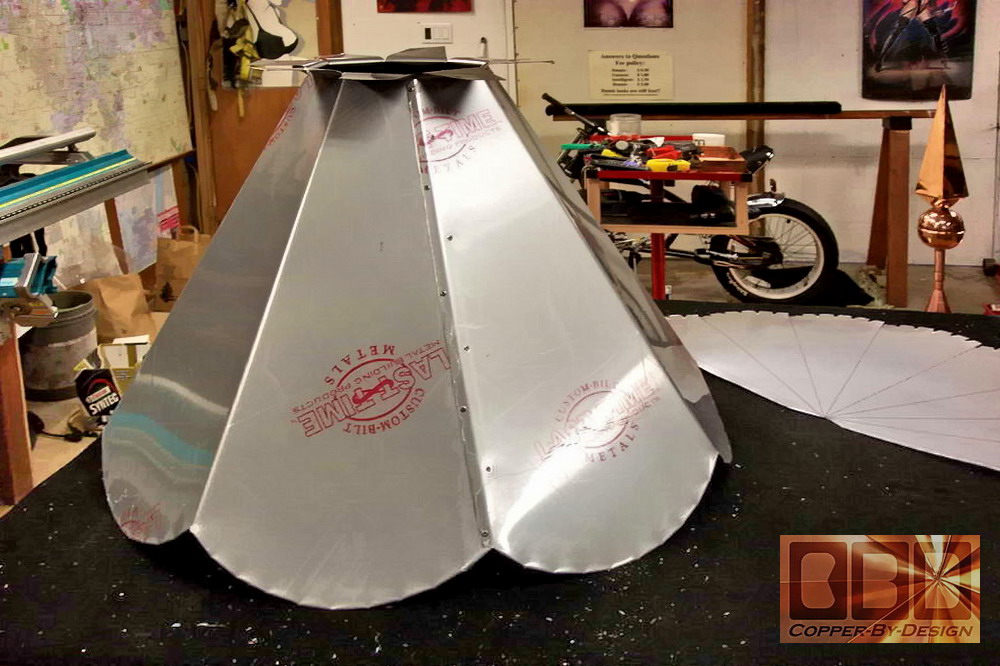
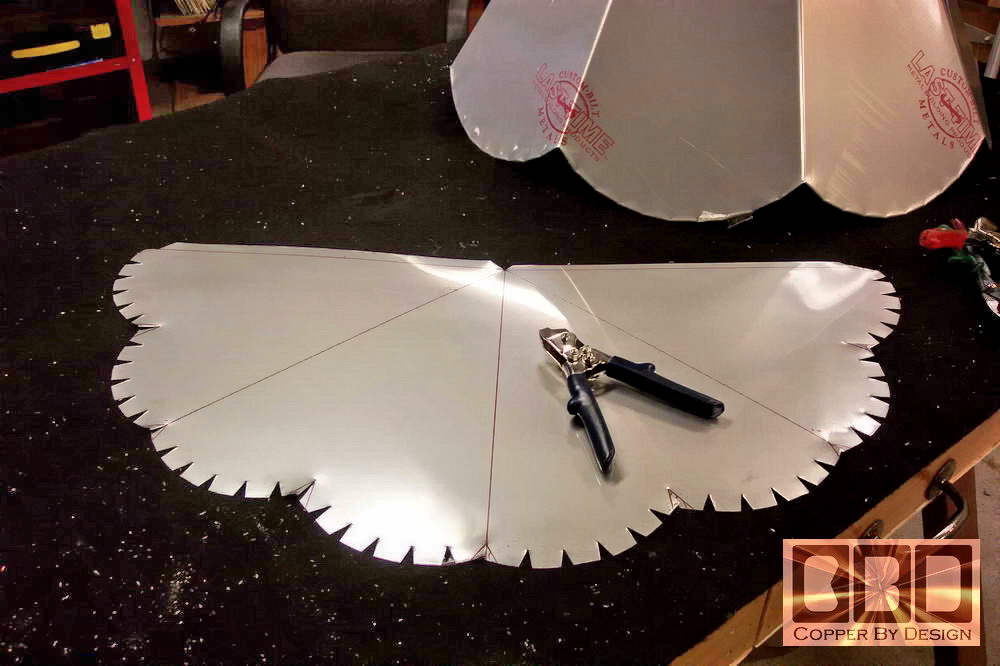
The pattern all cut out with the tabs cut along the bottom edge of the scallop design they asked for, and folded over in the second picture to help strengthen it and make it easier to handle. It also resist any possibility that a strong wind could rip at the metal and dislocate the cap.
It was a very hard sheet metal and quite difficult to cut. The electric shears we have would not cut it. It took two hands on the tin snips to cut the shapes out inch by grueling inch. I clearly did not charge enough. The cost of the sheet metal is about the same as copper, but due to how hard it is to work with, we will need to charge more per square feet needed on future orders. |
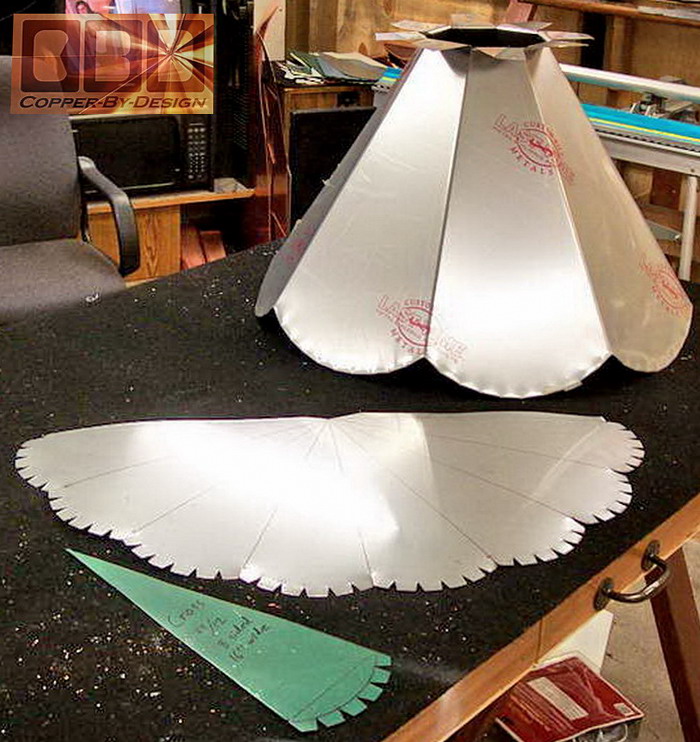
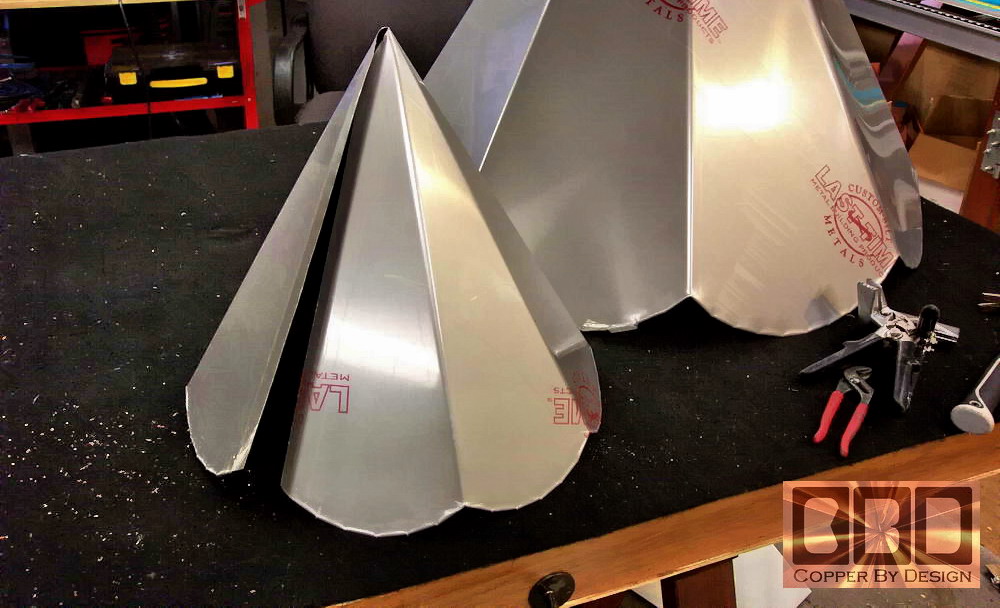
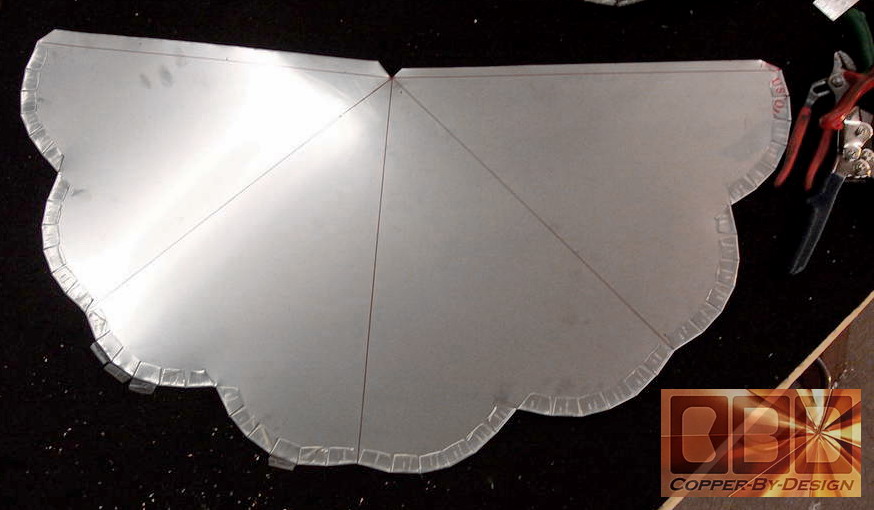
 These
pictures show the main cap bent into shape. The second picture shows
the smaller top cap pattern cut out and ready to bend the safety hem
and bend the cap into shape. These pictures show the front side
of the cap that will be seen most. These
pictures show the main cap bent into shape. The second picture shows
the smaller top cap pattern cut out and ready to bend the safety hem
and bend the cap into shape. These pictures show the front side
of the cap that will be seen most.
|
|
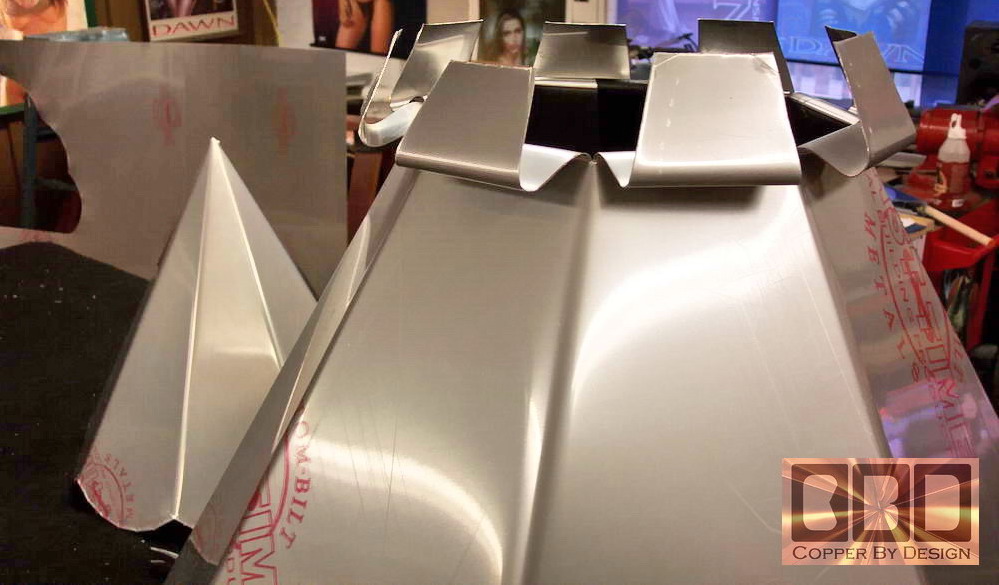
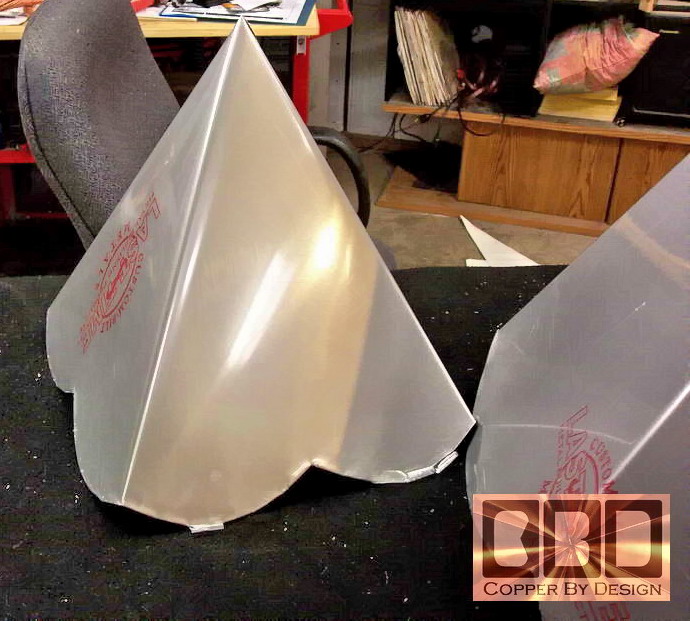
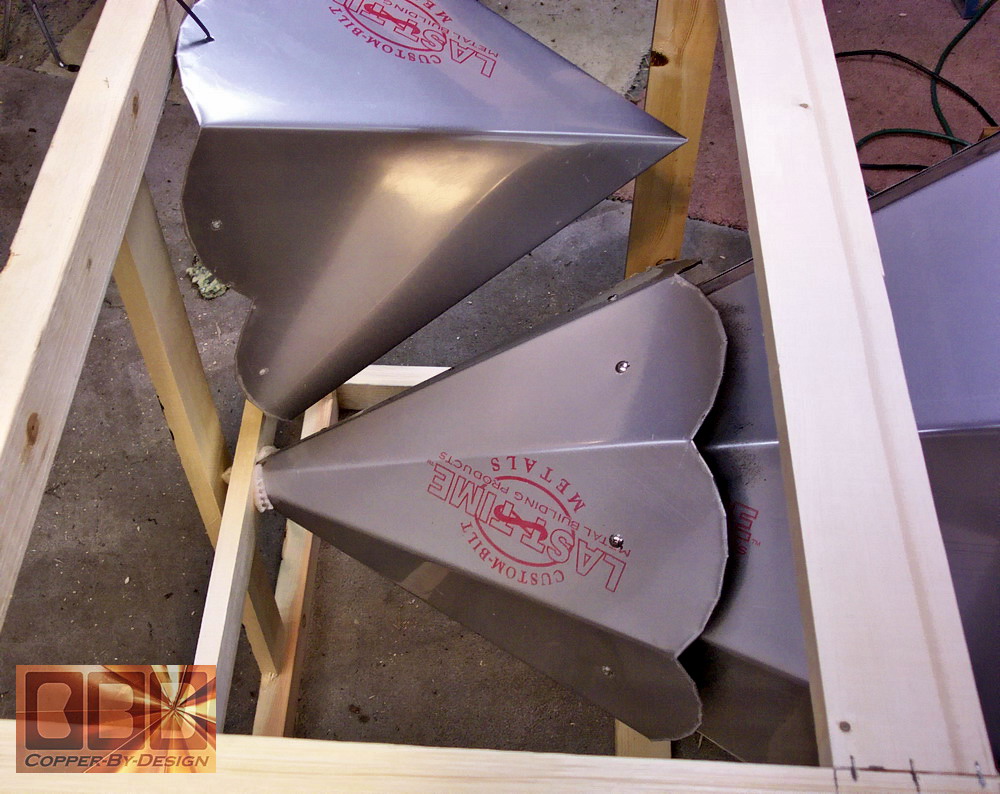
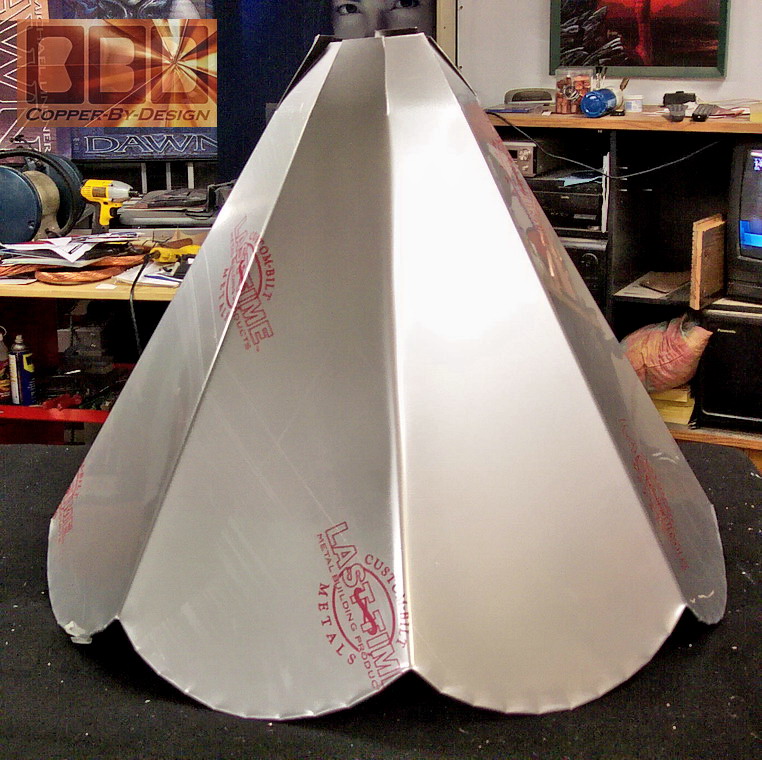
This shows the caps top flanges bent outward. You can click on the pictures to get a better look at the single over-lapped, caulked, and riveted seam. The picture on the right shows the seam on the small top cap that will be riveted together and placed on the back side of the turret as well for the cleanest and seamless look.
Again, it still has a clear plastic film over the bare stainless steel. The red printing is on that film and will come off after the roof cap is installed. |
|
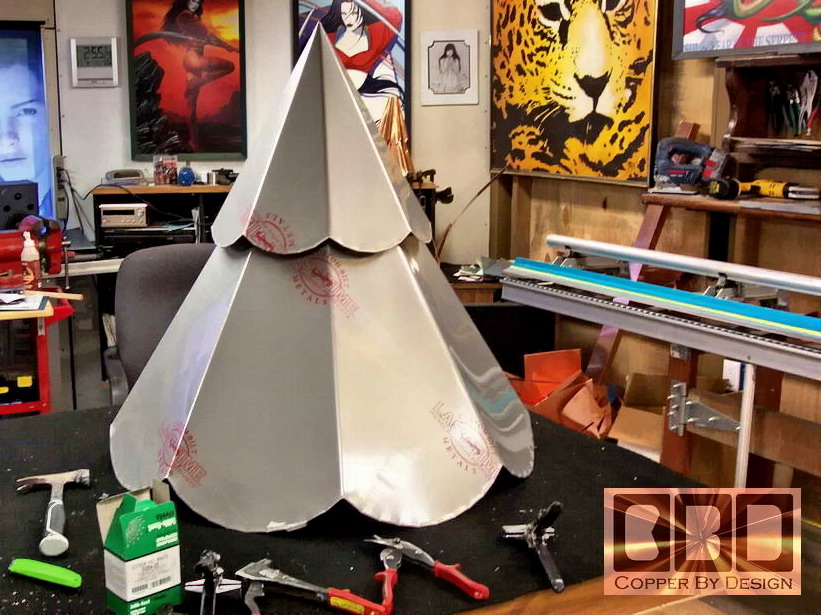
These pictures show the flanges bent to help support the smaller top cap and step it off the main cap to give it some visual dimension, so the upper scallops will clearly be seen. We set the smaller cap in place, but did not feel it would have been stable enough and the rivet that would fasten it in place would be too close to the hole and look odd showing on the little cap. so we went a different route, as seen below. |
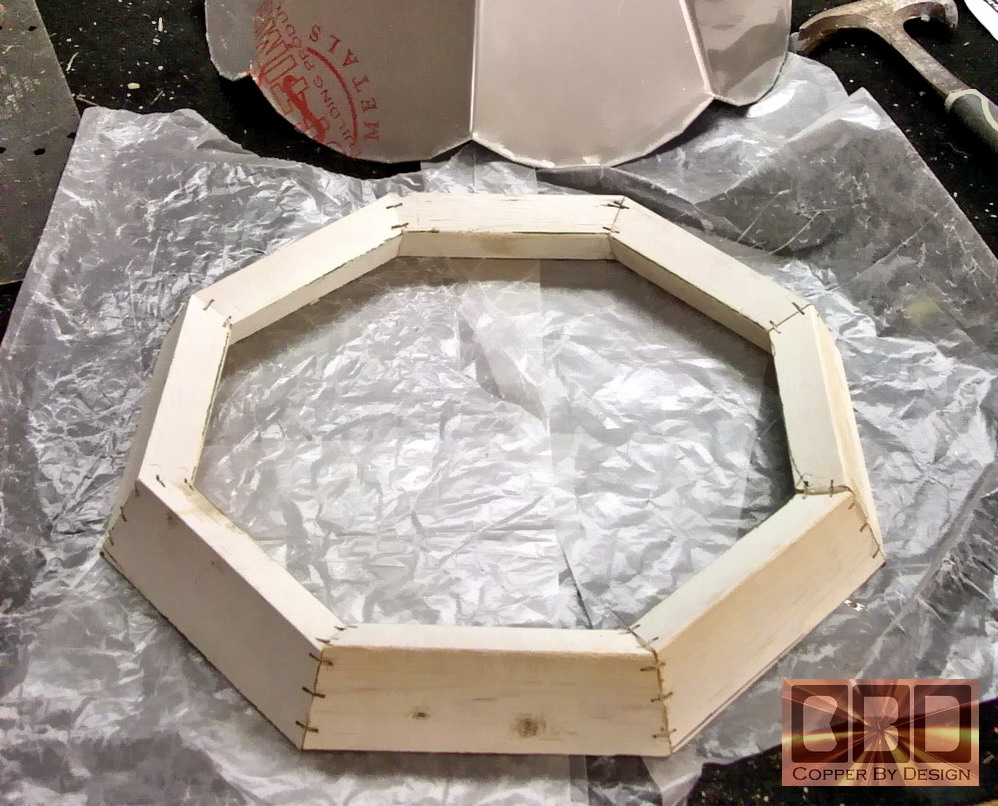
| This is showing the smaller wood frame support ring
we custom made to step out the smaller cap on top. The flanges on the
bigger base cap were only helpful to align the small cap in place, since
they will not be getting attached.
|
|
|
|
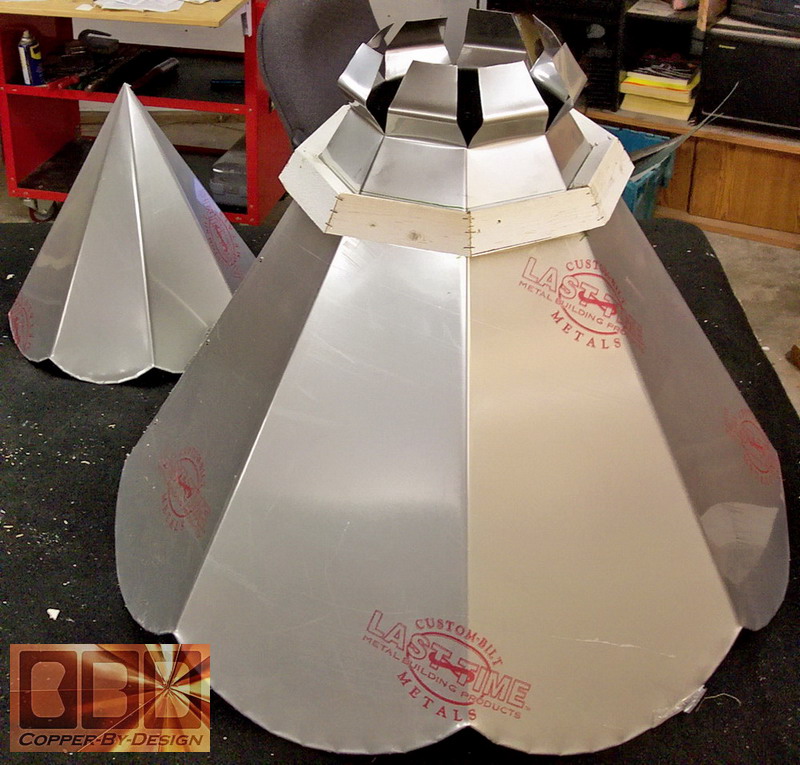
Here is the fabrication of the other small 4 sided 24/12 pitch roof cap to go on the cupola over the garage.
|
|
It is only 14" tall and 14" wide.
|
|
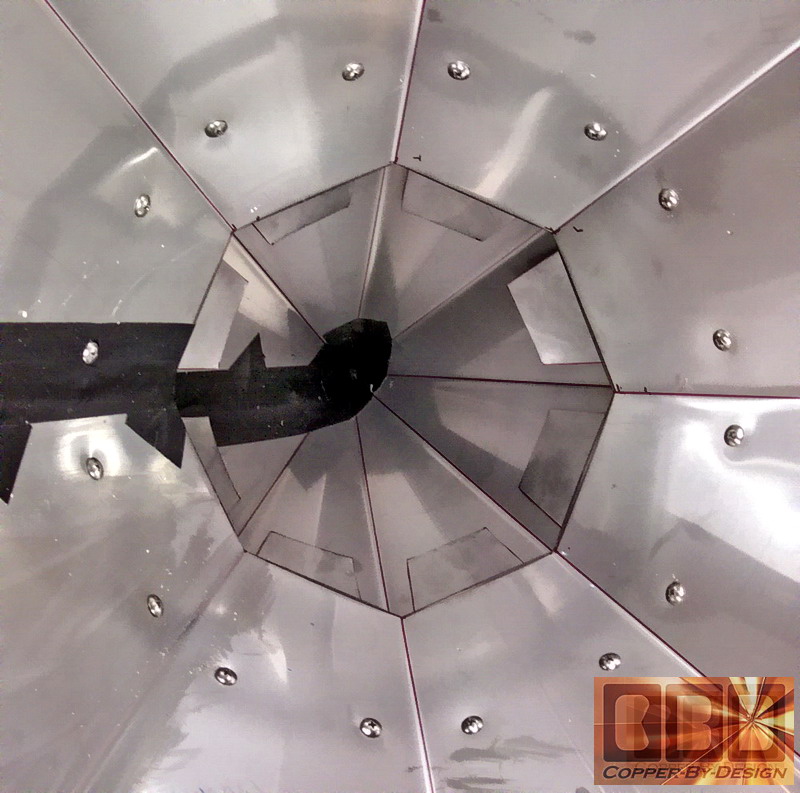
The second picture shows the small top cap screwed into place with 8 stainless steel screws, that will now match the 8 larger stainless steel screws that will secure the base to the roof over the larger wood support ring shown below. |
|
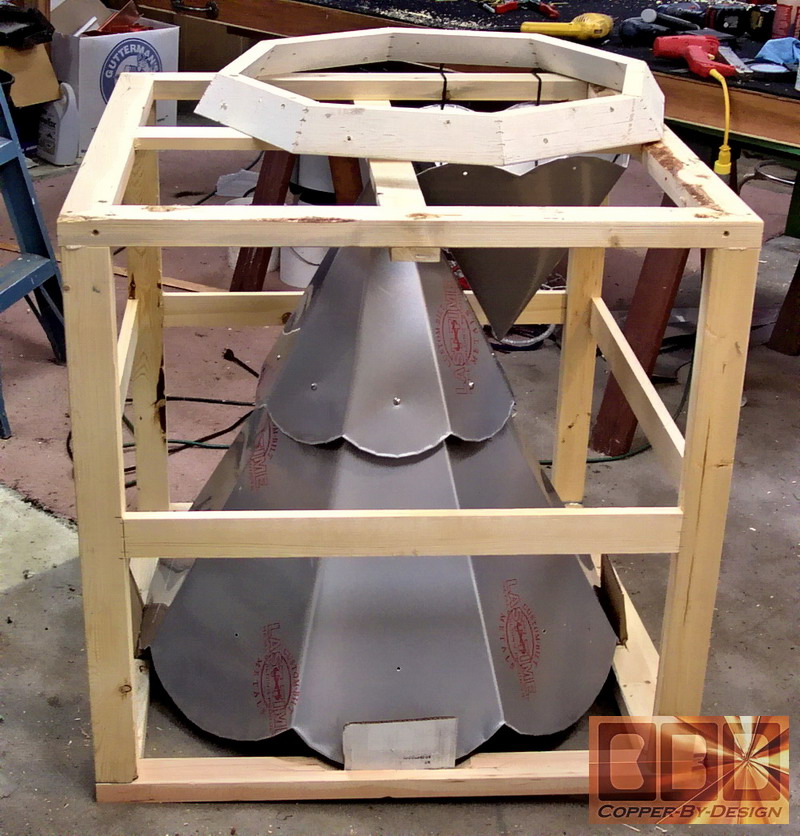
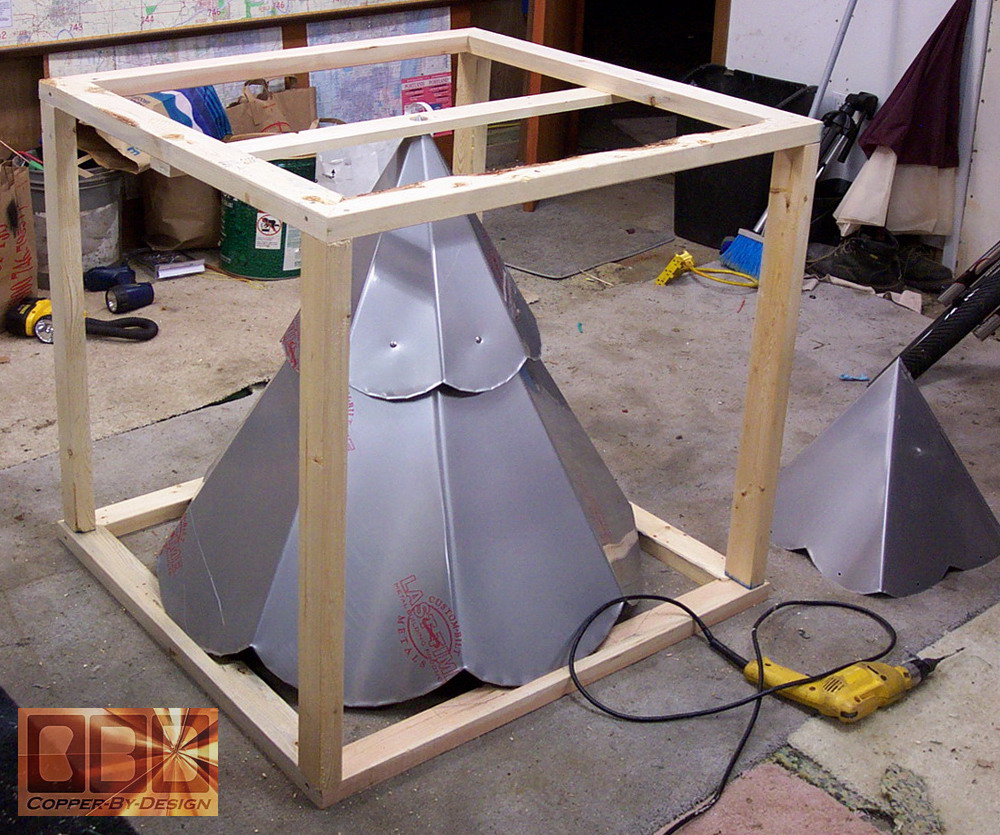
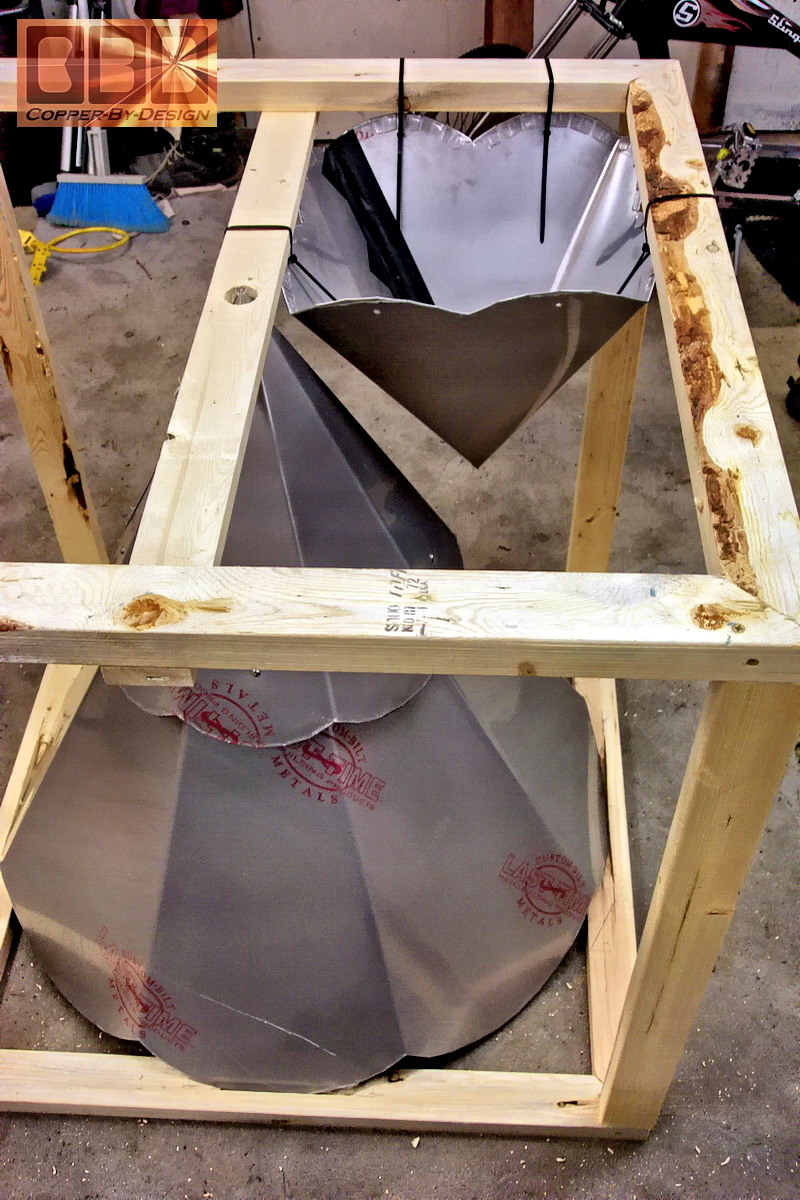
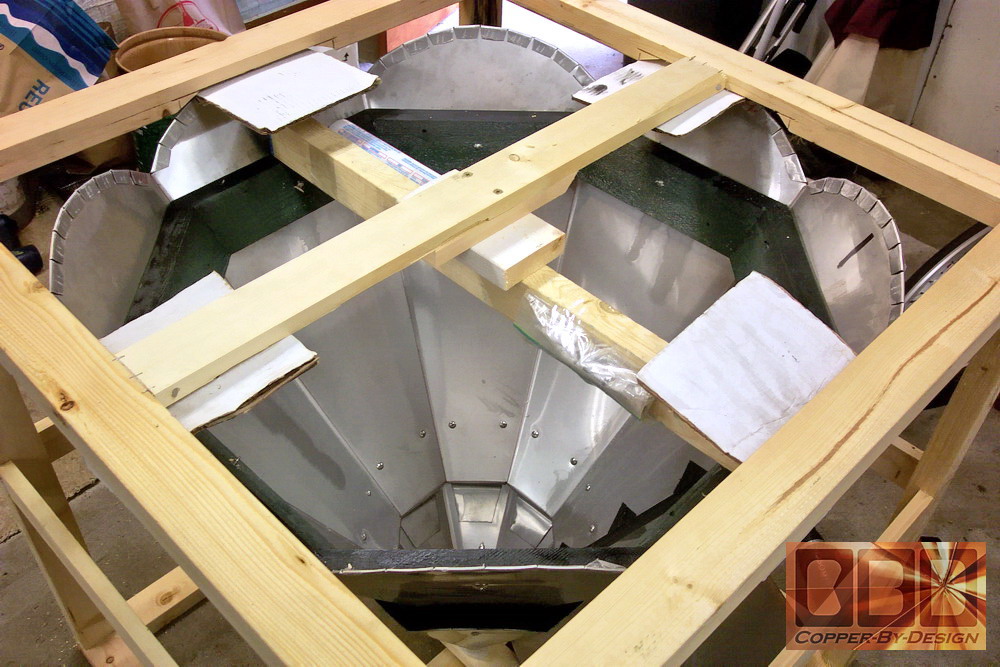
The second picture shows more cross boards added across the middle for strength and to help resist punctures through the cardboard cover we will staple over this wood frame. You can see the large wood support ring on top of the crate with a white primer on it. That ring will checked for level and be screwed down on the roofing first with 3" coated deck screws we supplied. We were able to secure the smaller cap to the crate frame with nylon ties through the 8 holes we drilled for the screws that will hold this cap to the roof.
|
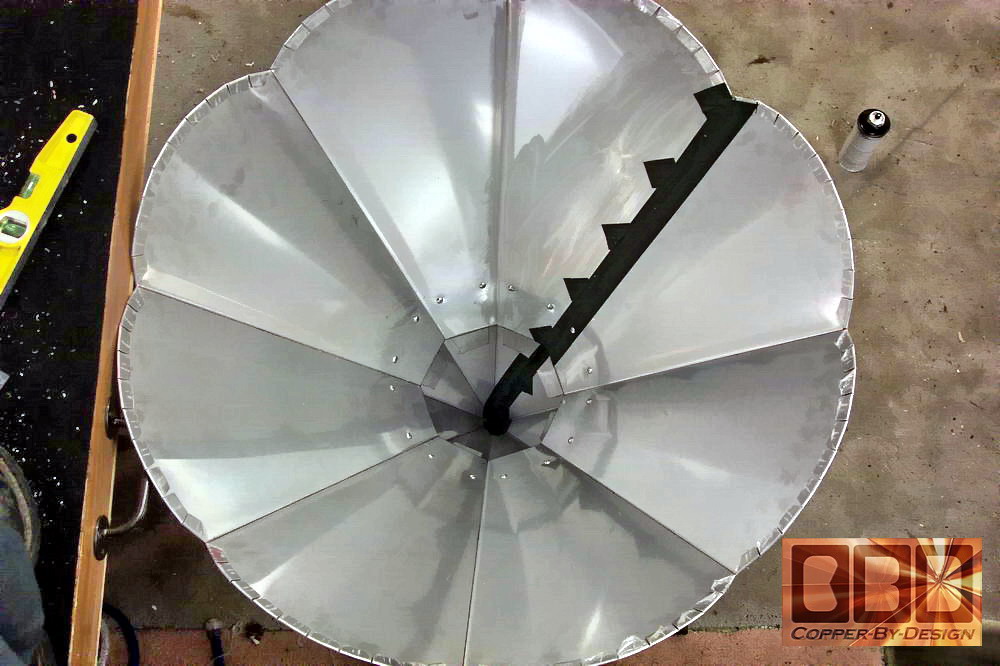
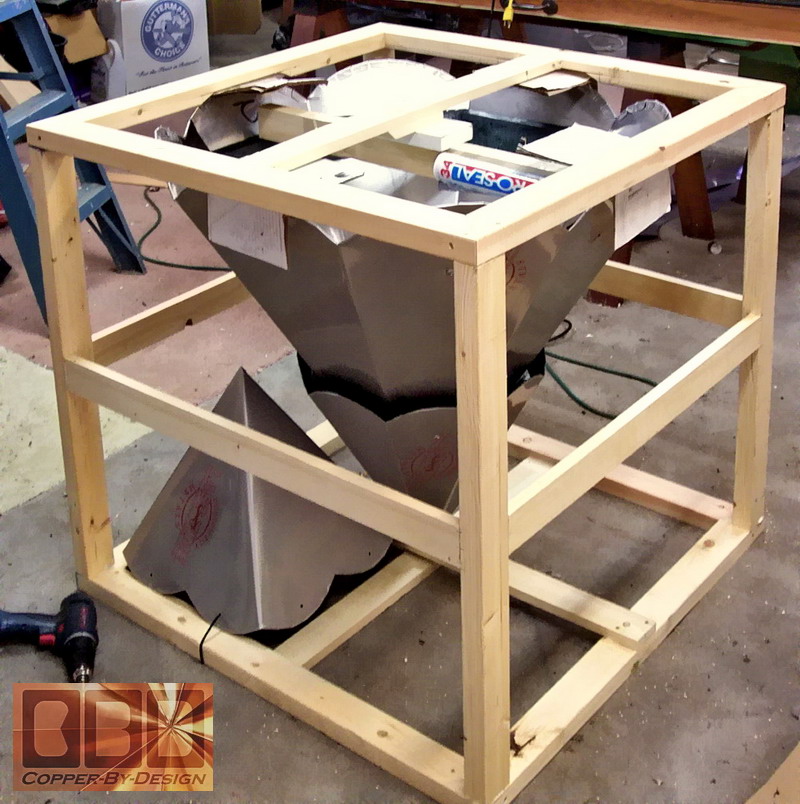 These pictures show the cap set inside the crate turned upside down. Here is a close-up of the crate under the cap, showing the tube of caulk supplied, and some cross braces to hold the black painted wood support rind, now inside the cap where it will be when it is installed. That is what the large cap is actually resting on.
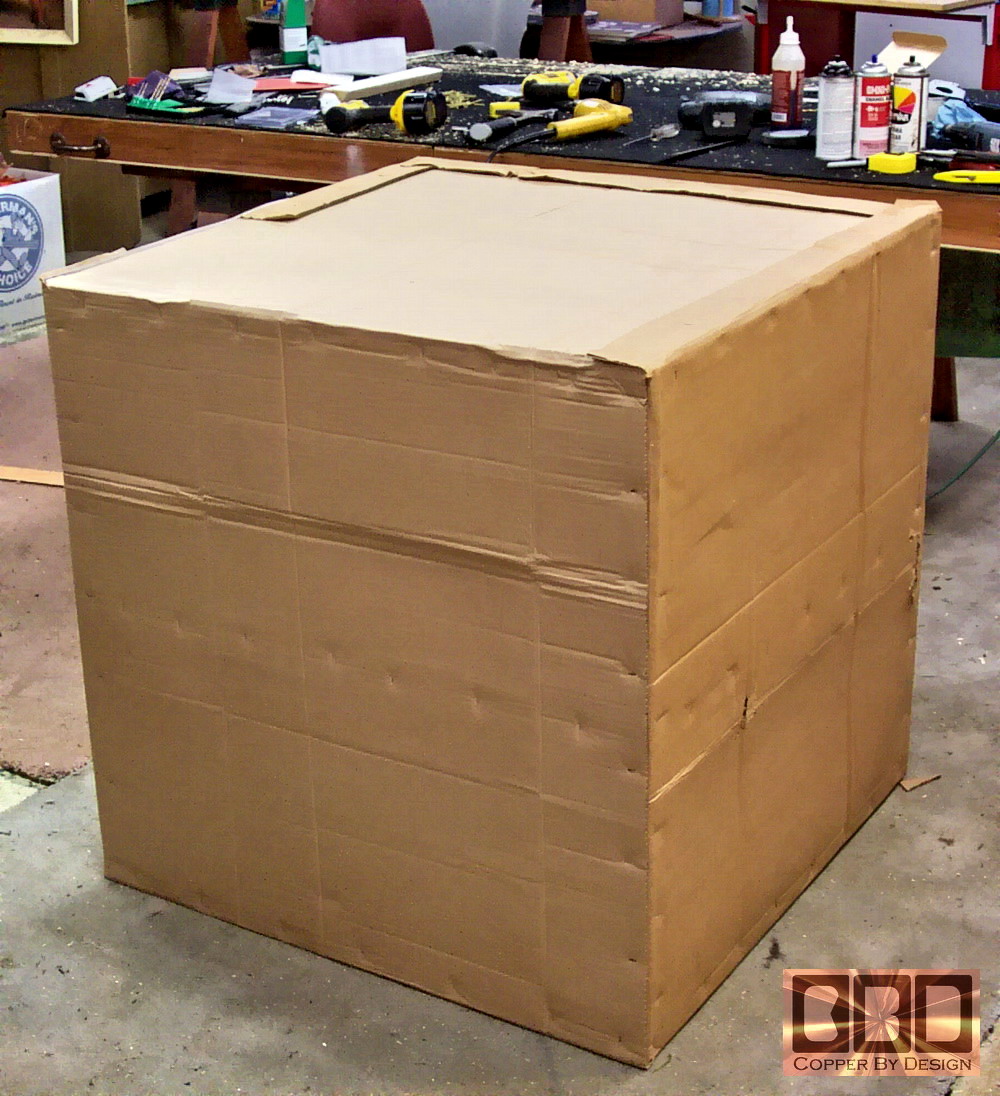
We cover this wood frame with cardboard using a staple gun, leaving an inspection hatch, so the shipper can inspect to see that we are not smuggling contraband. We then use a hand stapler to seal the crate with the last cardboard side. We later marked the cardboard with a 'Top' side, so the shipper knows which side would be best during transit. We sent the client these digital photos of the progress to get their feedback of what they thought of this, and if they have any ideas or concerns. In this case it took several full work days to get it done and getting it off to the shipper. |
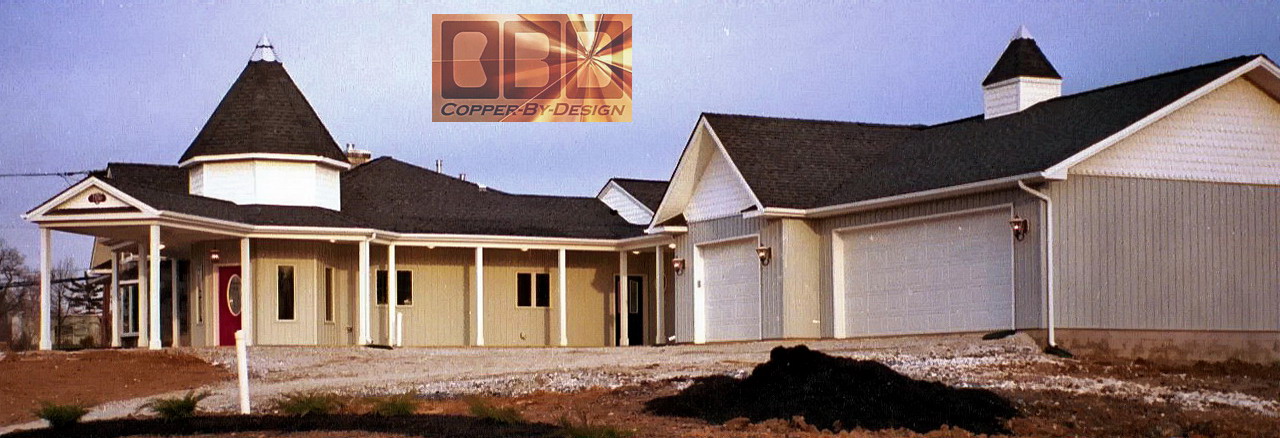
These are
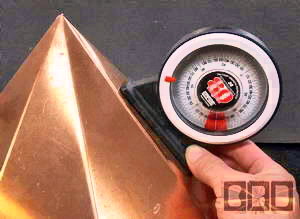
some new photos sent in by the client 4 years later when requesting
a quote for a chimney cap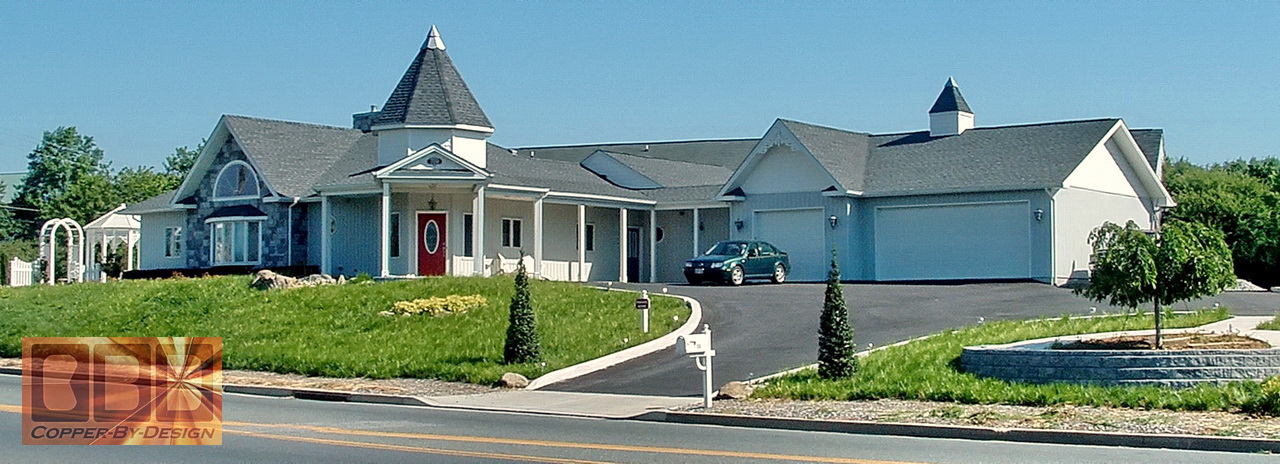 . 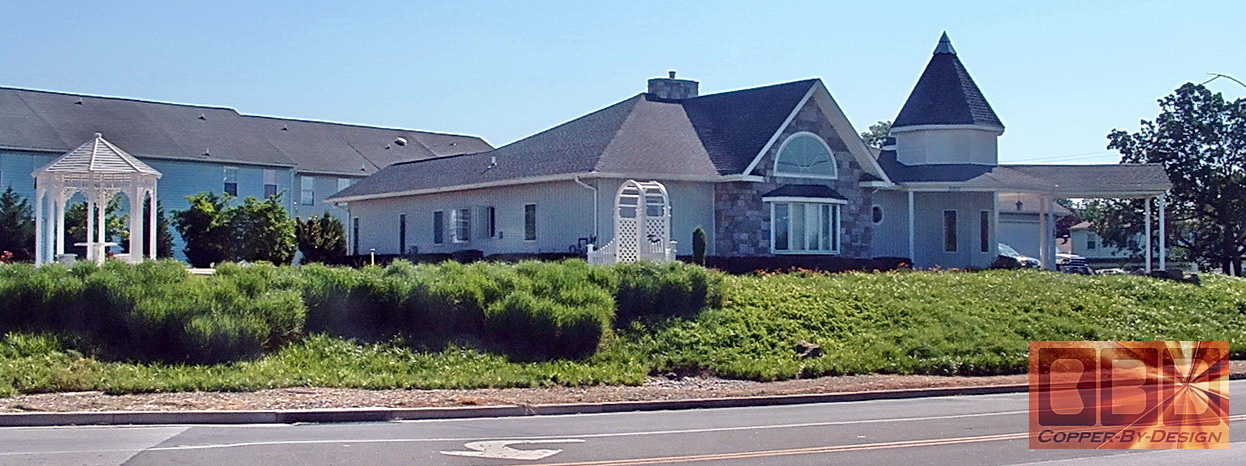 . And here are some more recent photos sent in by the client 6 years after they were installed (3/10). 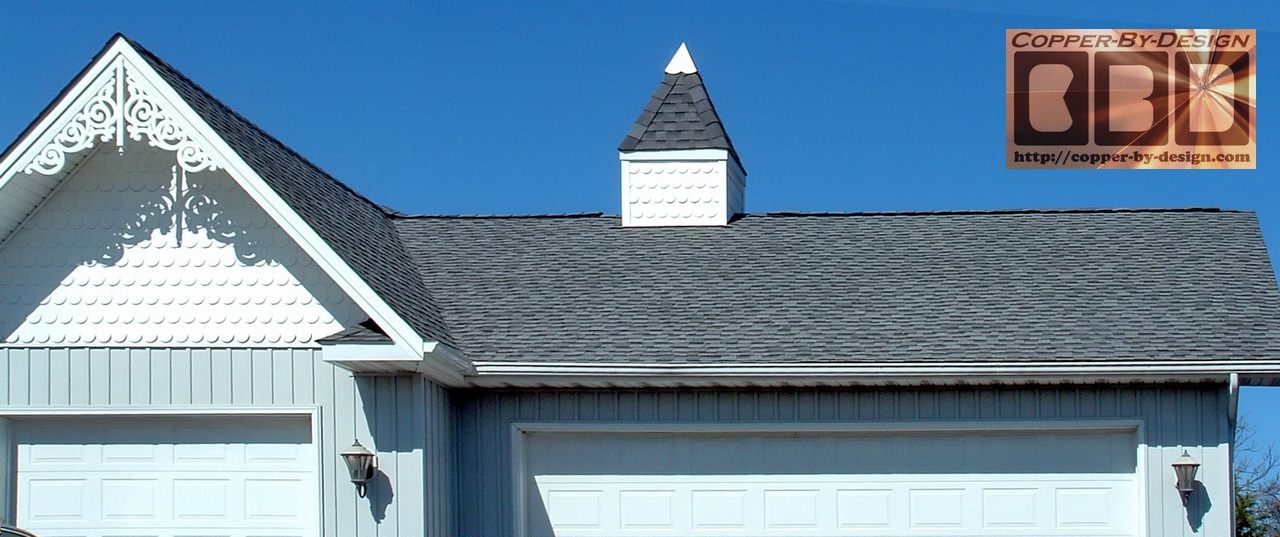 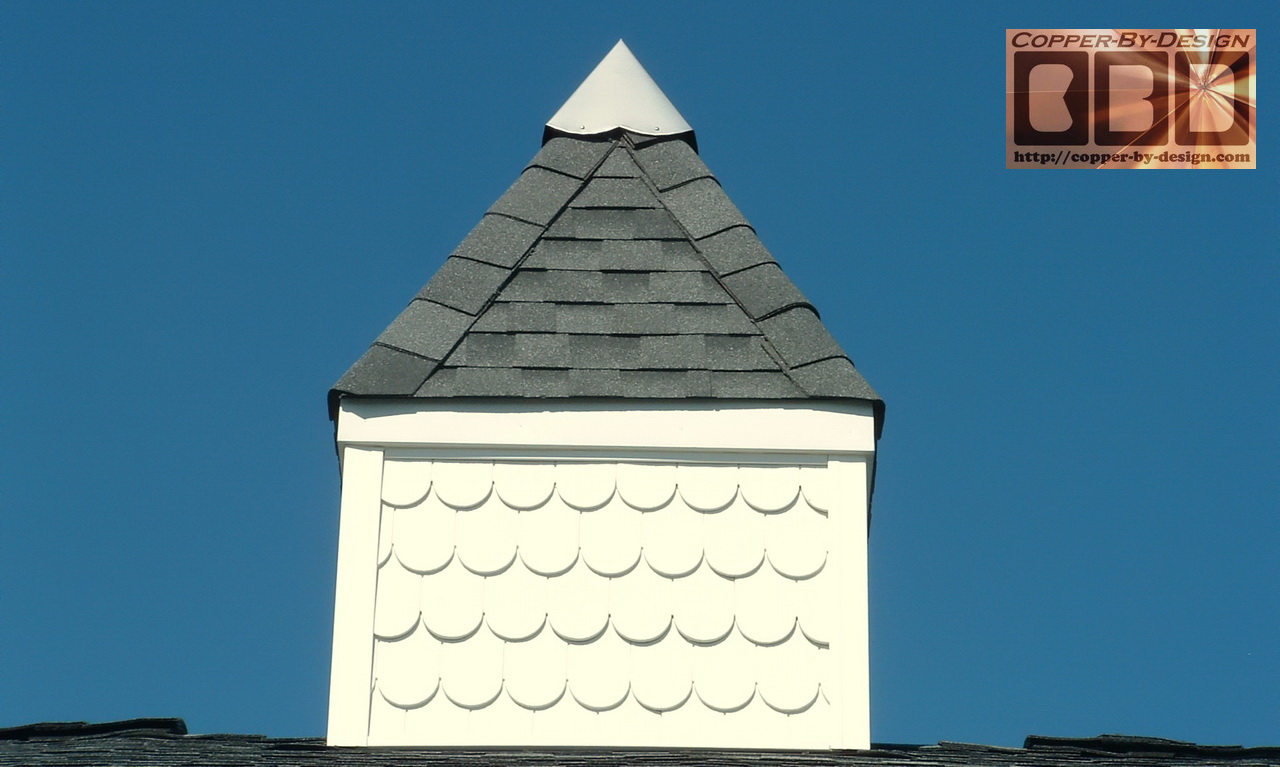 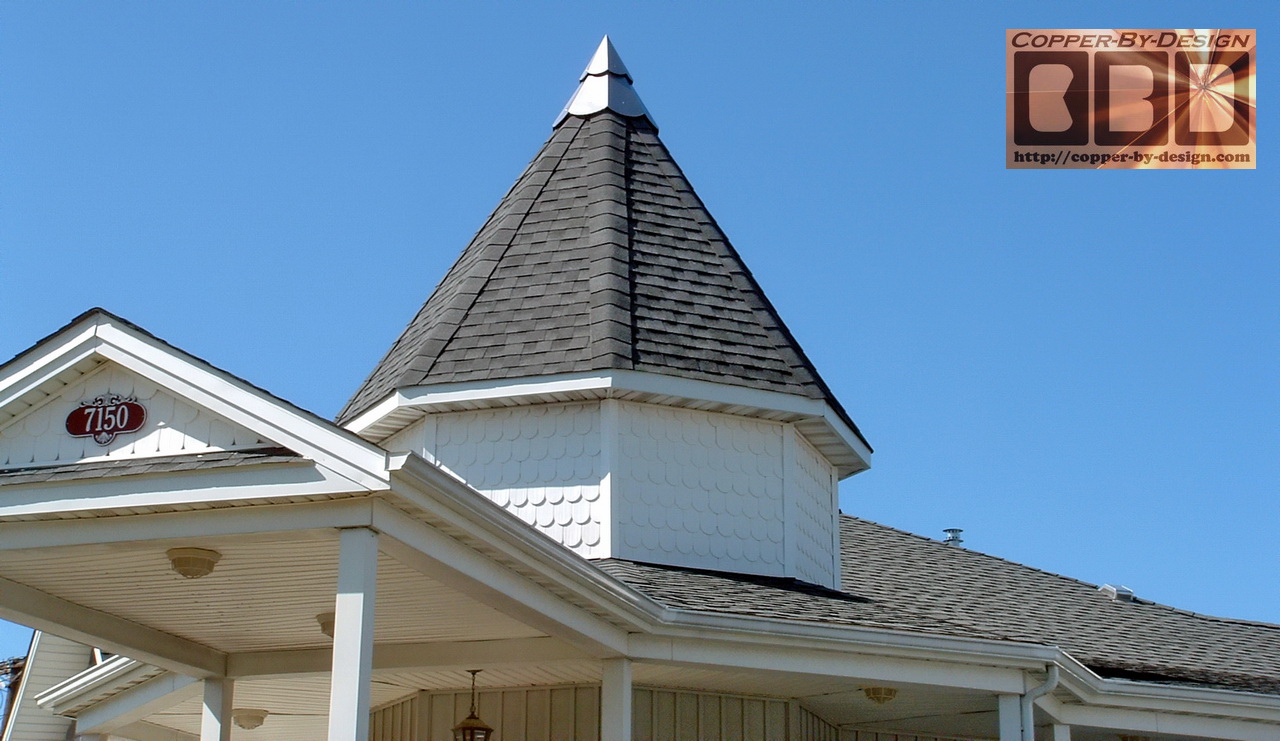 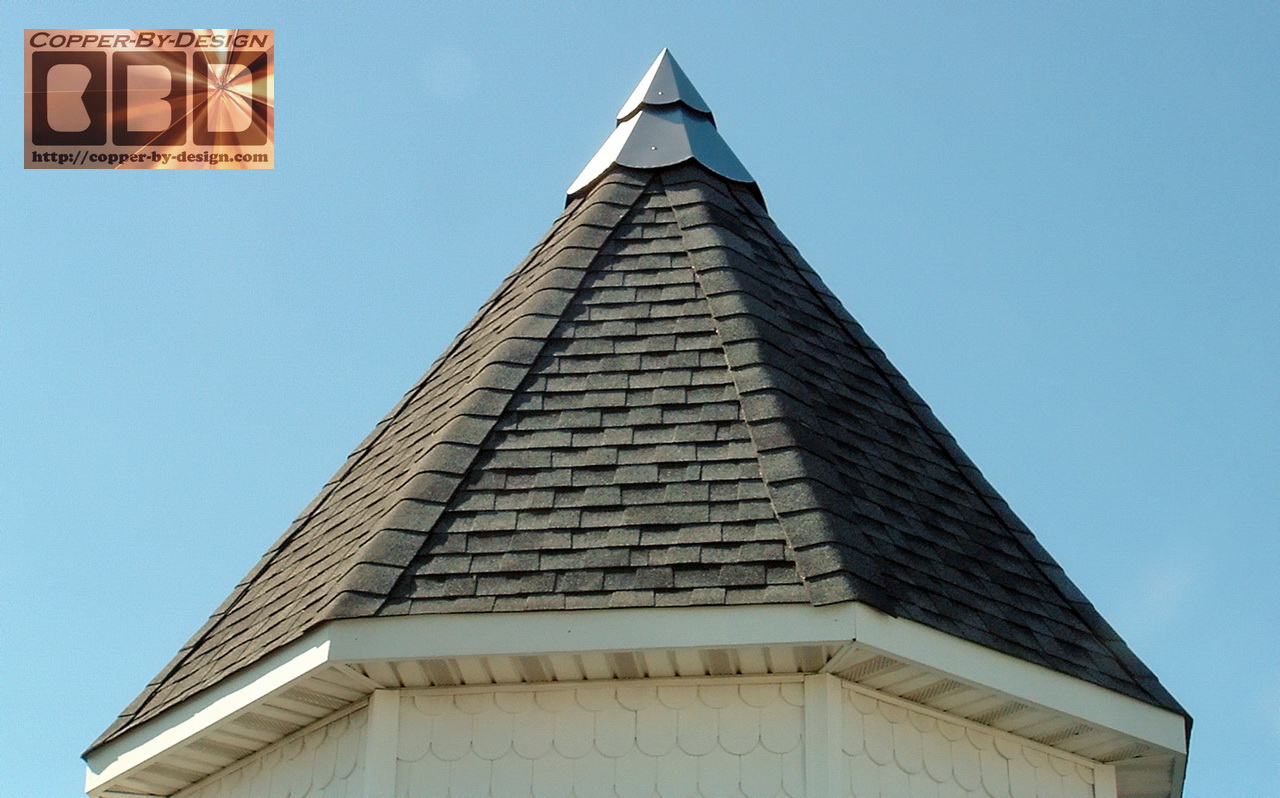 |
.
| Click this
photo to go back to the Custom Copper Roof Cap main page.
|
.
|
Below is a
photo of our |
|
|
|
We were also a 1997 finalist for this same award. See our referral web page to see how we managed to be honored with this special award |
 Homepage |
|
|
Company Profile |
|
Roof Caps |
|
Chimney Caps |
|
Scuppers |
|
Gutters |
|
Shipping |
|
Contact Info |
.
.
.
.
.
.
.
.
.
.
.