.
|
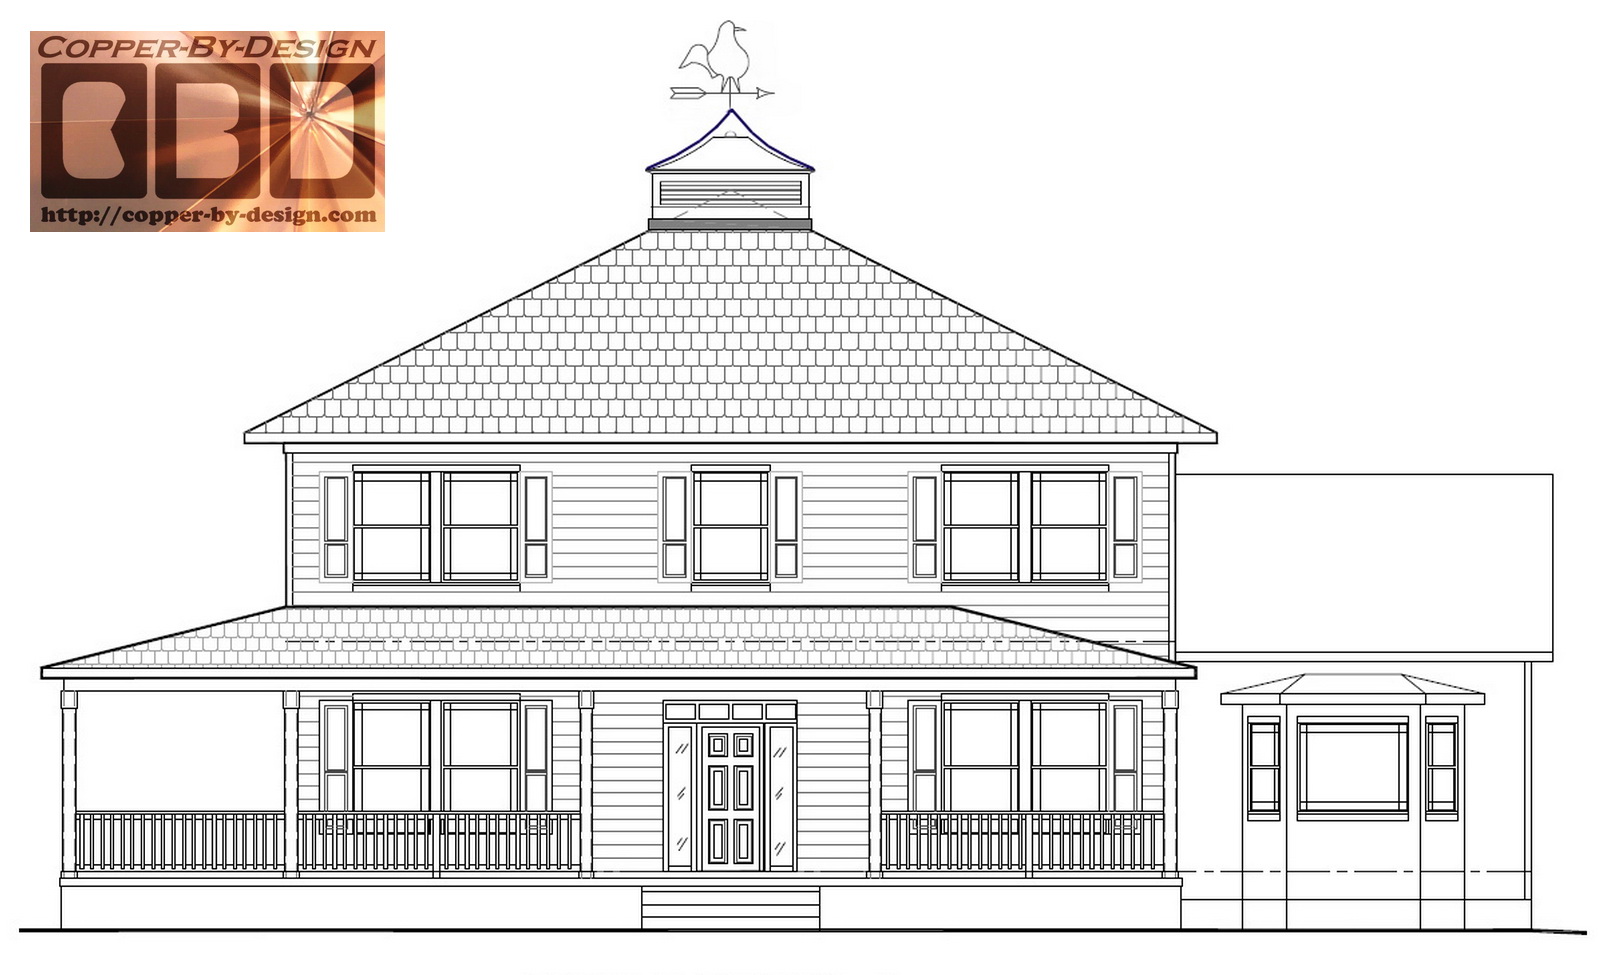
Steve and Loree Edwards found my web site on
6/1/11 and we worked out the details over the next 7 weeks before
they contracted with me to build them a custom cupola for the new
house they were having built in Silverton, Oregon. At first they
wanted it to be 4' wide at the base, but on 9/13 they let me know
there architect redesigned the cupola to be over 7' wide at the
base. The architect is
Gary
McKeon
of Drafting by Design LLC 503-873-6595

I saw how the roof-line of the cupola shown in his
diagram started at a 4/12 pitch in this new diagram, but the house
roof was a 6/12 pitch, so I suggested this slight alteration to the
curvature to the cupola roof. This much larger cupola design drove up
the cost from $5.4k to $8.2k, since the roof had nearly tripled in
size.
Remember you can click on each of these photos to
see them much larger.
Here is a video to watch that I shot during the lift with the
crane. It starts off a bit shaky as I am climbing a 2 story ladder
and my adrenalin is pumping.
https://youtu.be/jqHrLcgeweo
|
|
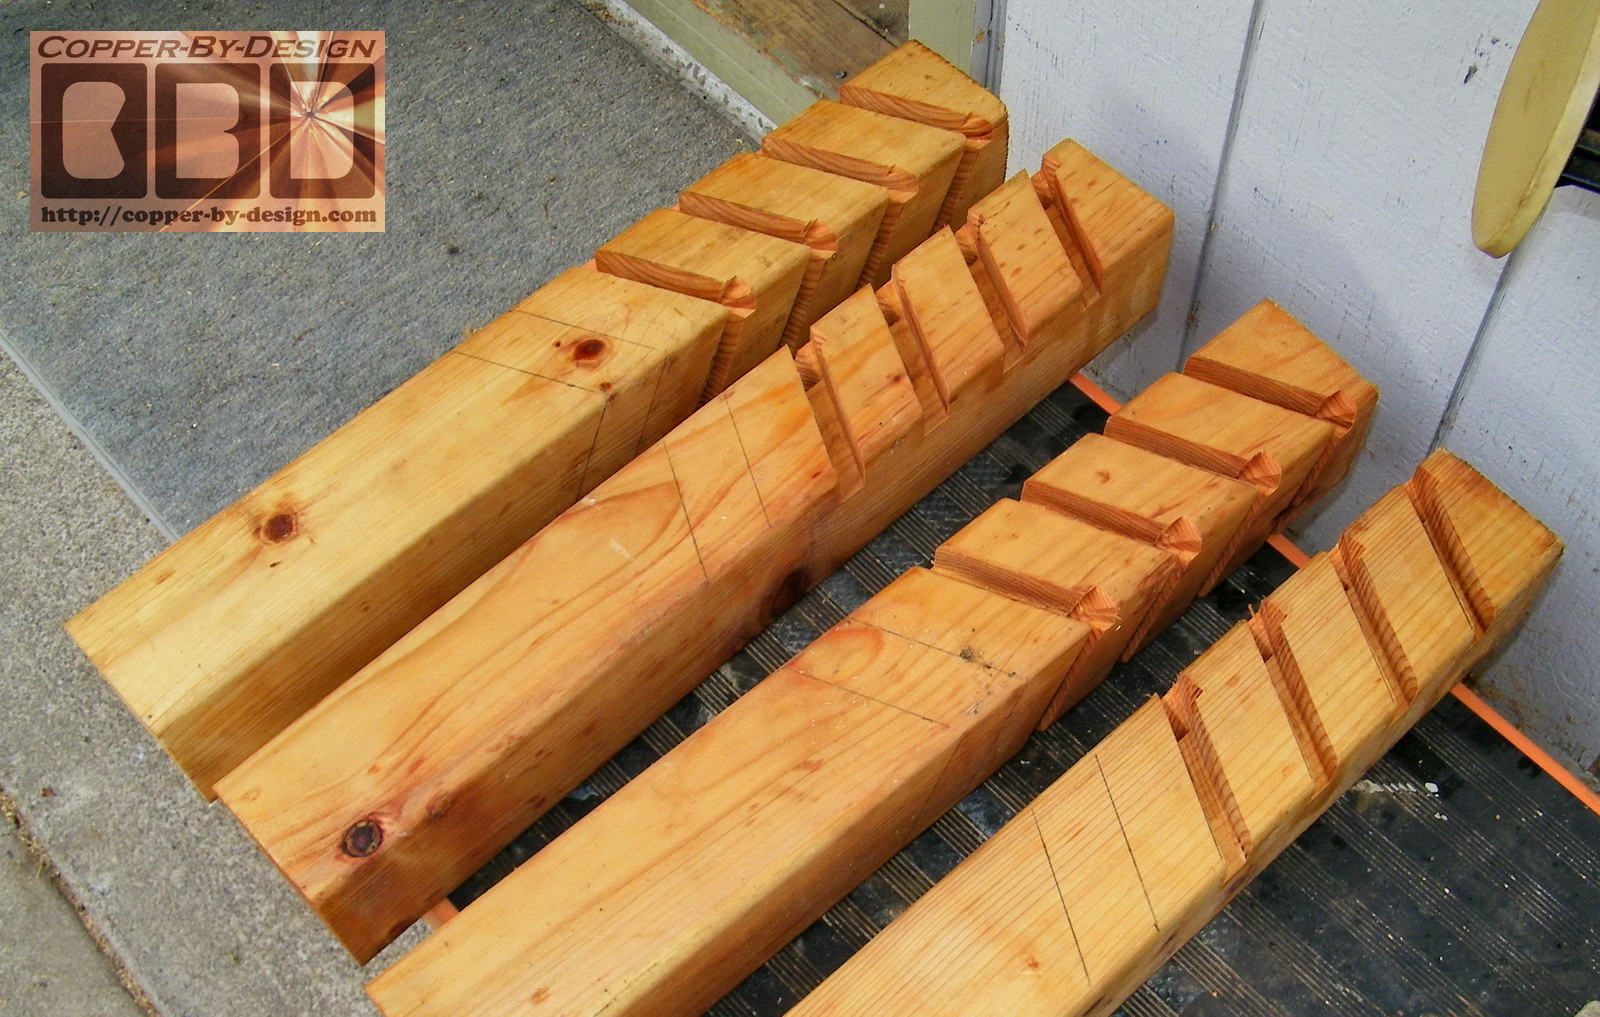
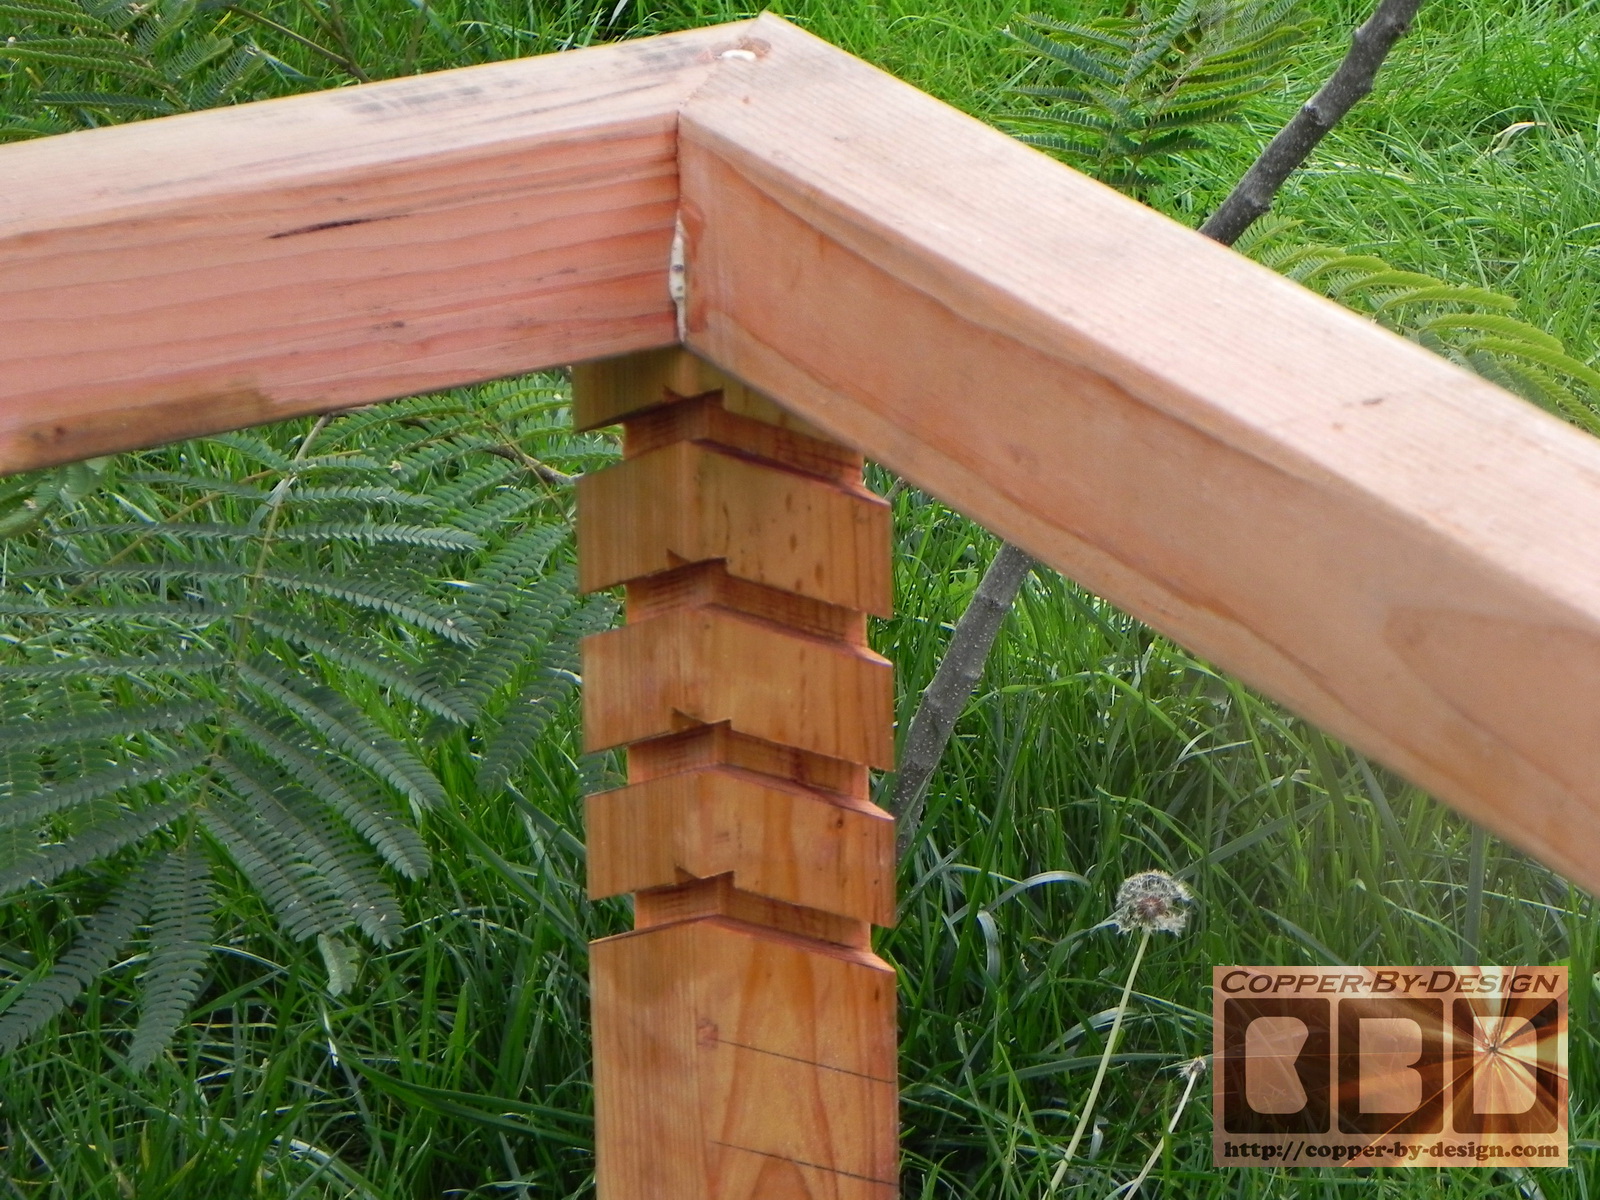
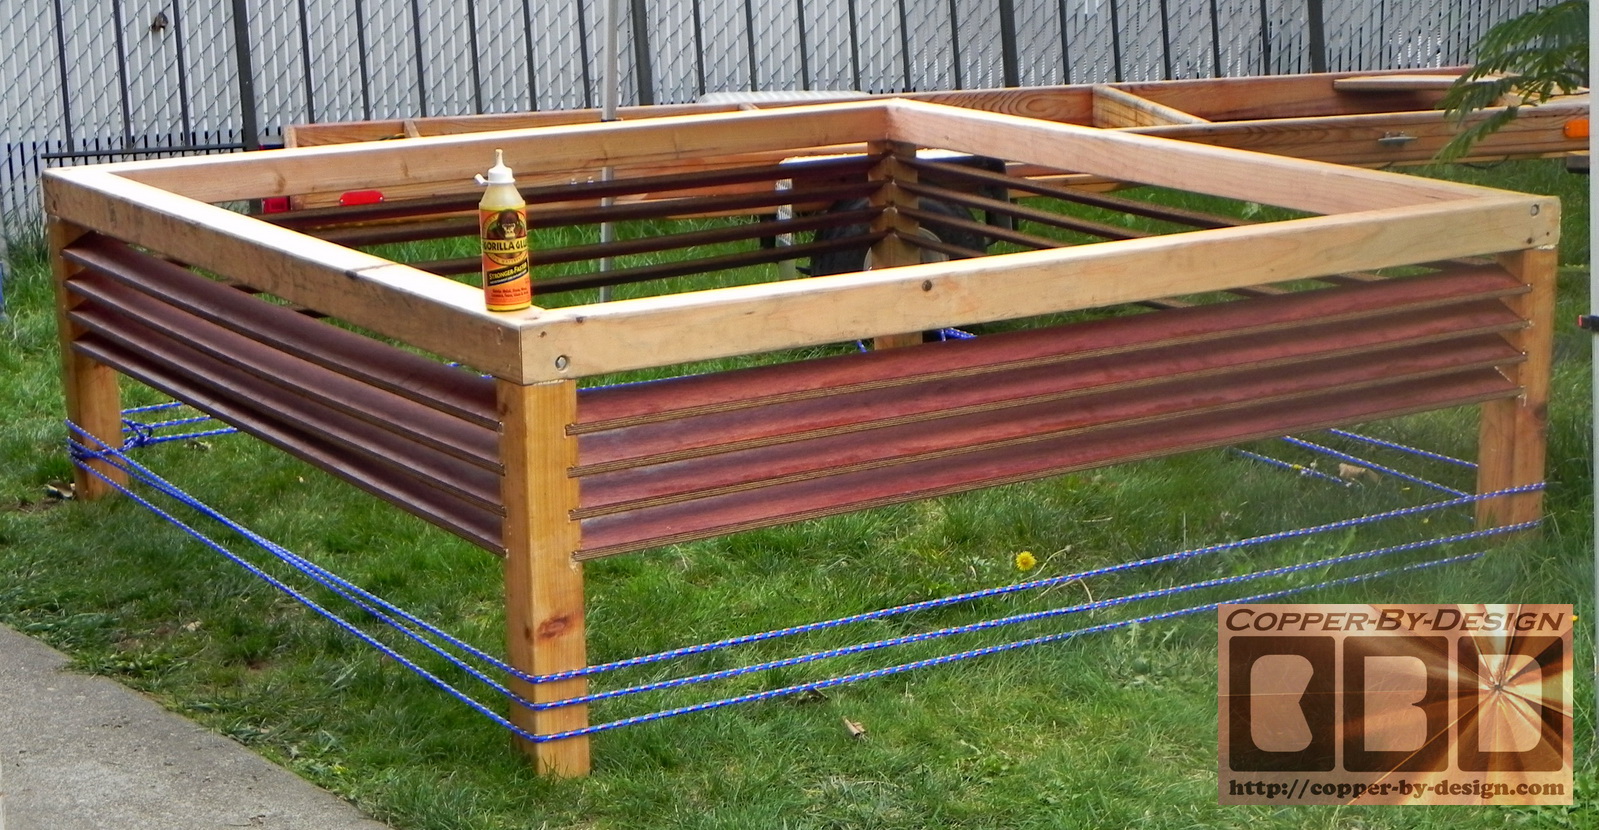
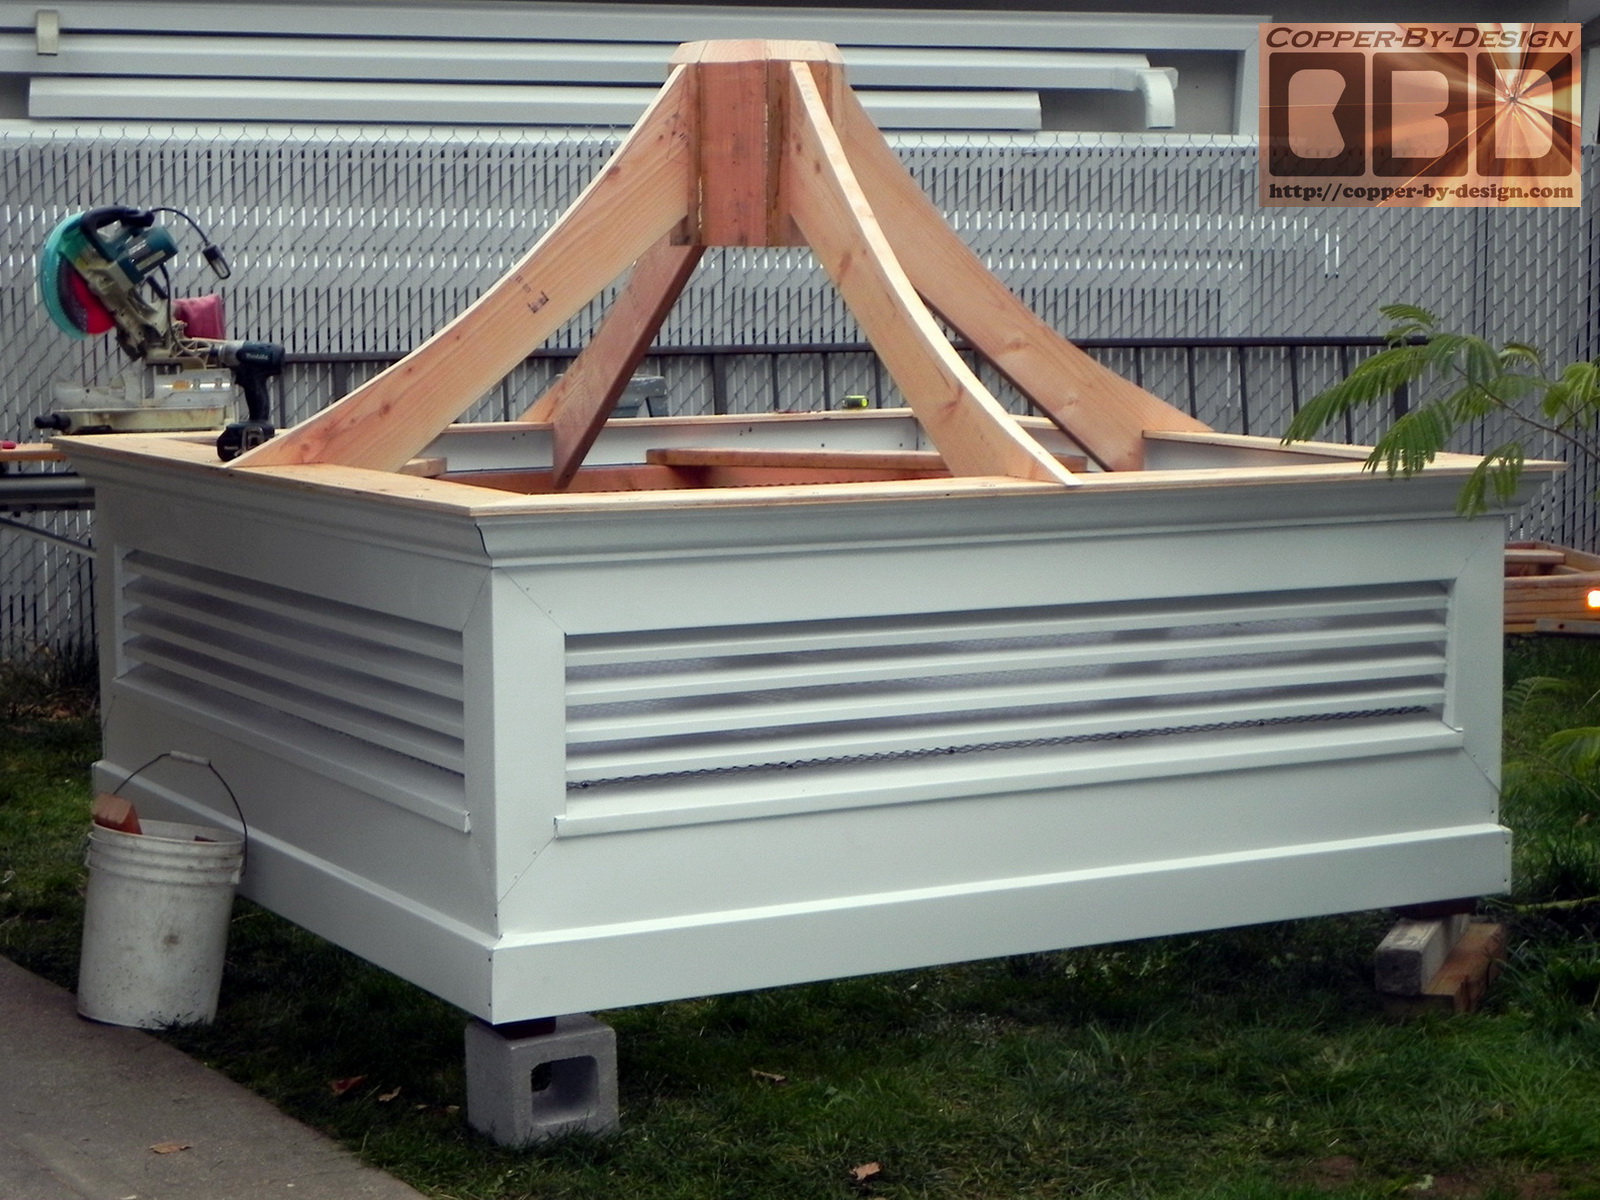
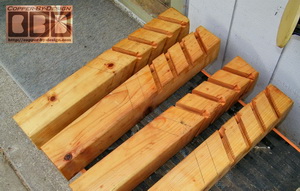
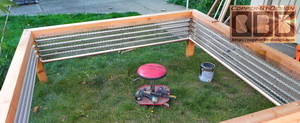
Fabrication starts; building the 7' wide frame 10/21/11:
This portion was made with 4x4 beams and is
already strong enough for me to stand on at any point of this
structure. I carefully notched out the groves for the louvers before
assembling this frame. The cross beams are Douglas fir and the
corner beams are cedar.
 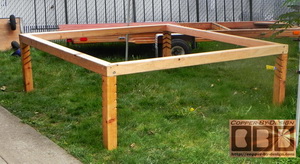
The corners are held together with 8 deck screws
and 12 lag screws. the louvers are make with 5/8" marine grade
hardwood plywood angle cut at 27 degrees and treated with tung oil.
 
|
|
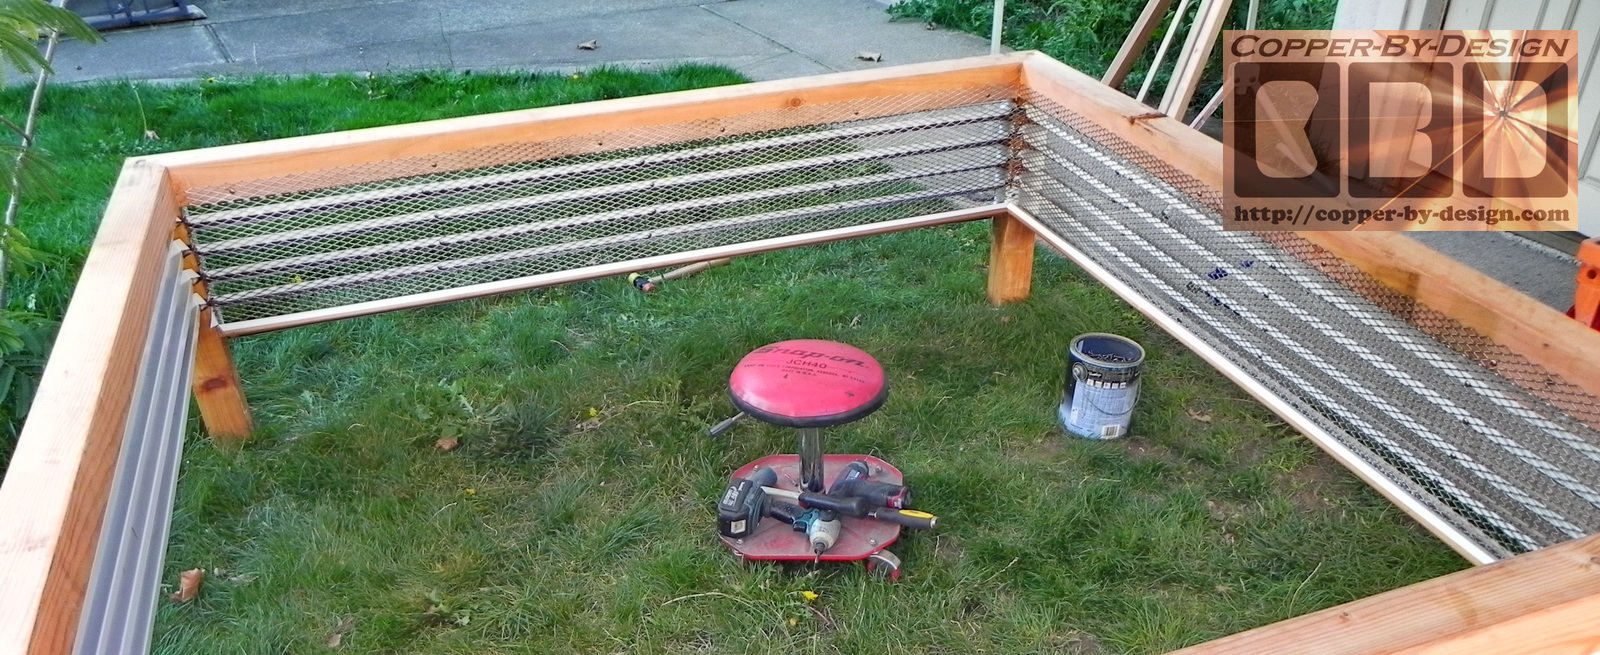
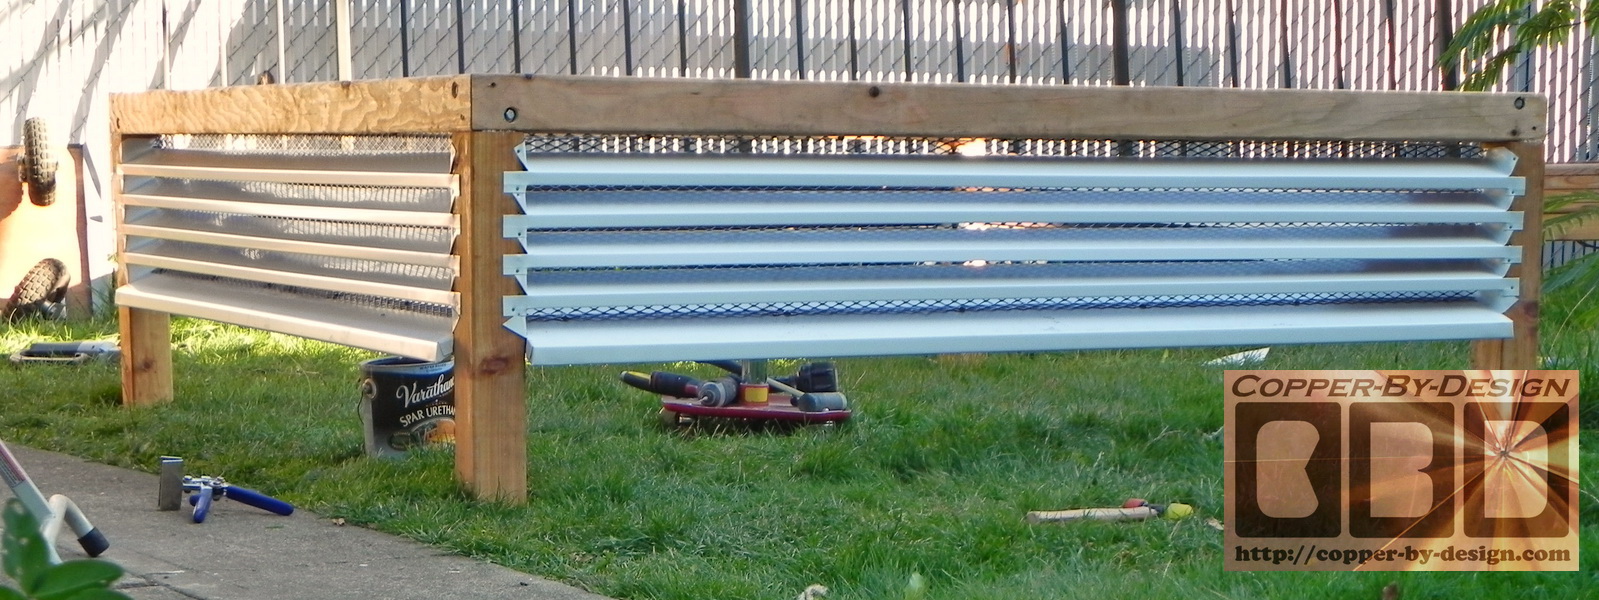
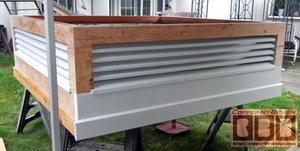
Covering the wood w/pre-painted aluminum sheet
metal 10/25 - 11/10:
I had to form each of these 20 louver covers and
attach them one at a time. Then attach a custom formed stainless
steel screen behind them w/140 stainless steel screws, which added a
lot of strength and stability to these louvers.
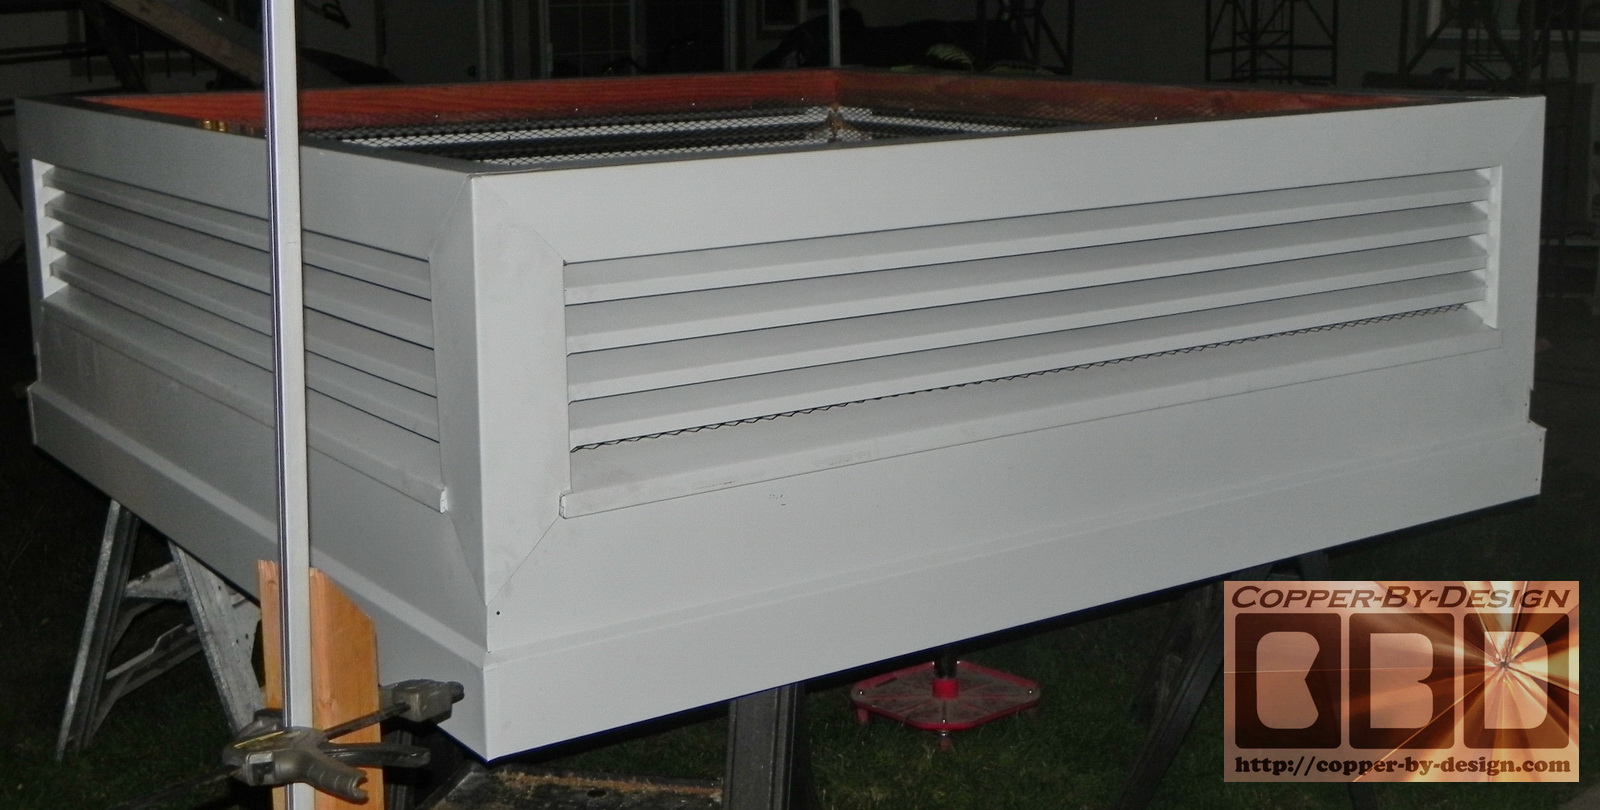
I then got the sides covered with 5/8" plywood
and 2x6 cedar boards along the bottom that are all angle cut at 27
degrees, which matches their 6/12 pitch roof. I treated the outside
of that wood with tung oil to protect the wood if condensation
develops behind the aluminum covers. I also added another set of 2x4
inside between the 2x6 cedar and the plywood for added support. I
could hardly wait to get to working on the roof, but I need to be
patient and get this lower part finished first before I was able to
add the crown molding.
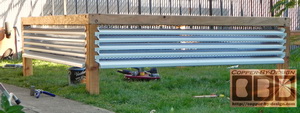 
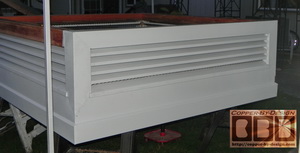
I had to form and attach the rest of the 12
pieces of aluminum sheet metal to cover the rest of the sides.
I angle cut the last 8 pieces at 45 degrees, so
it would look like a picture frame around the louvers.
|
|
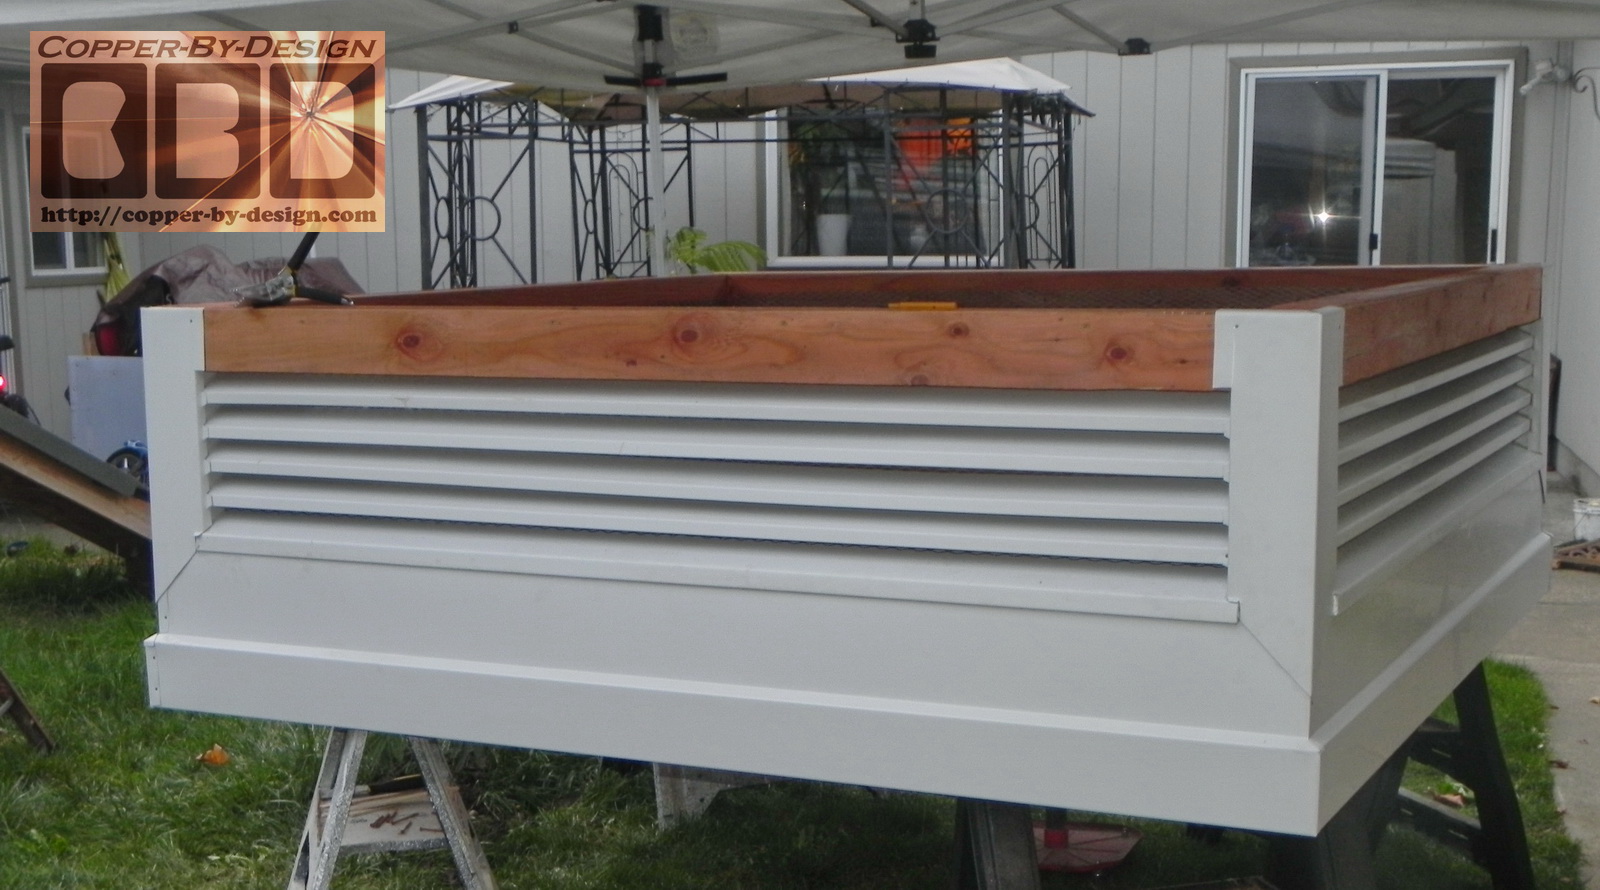
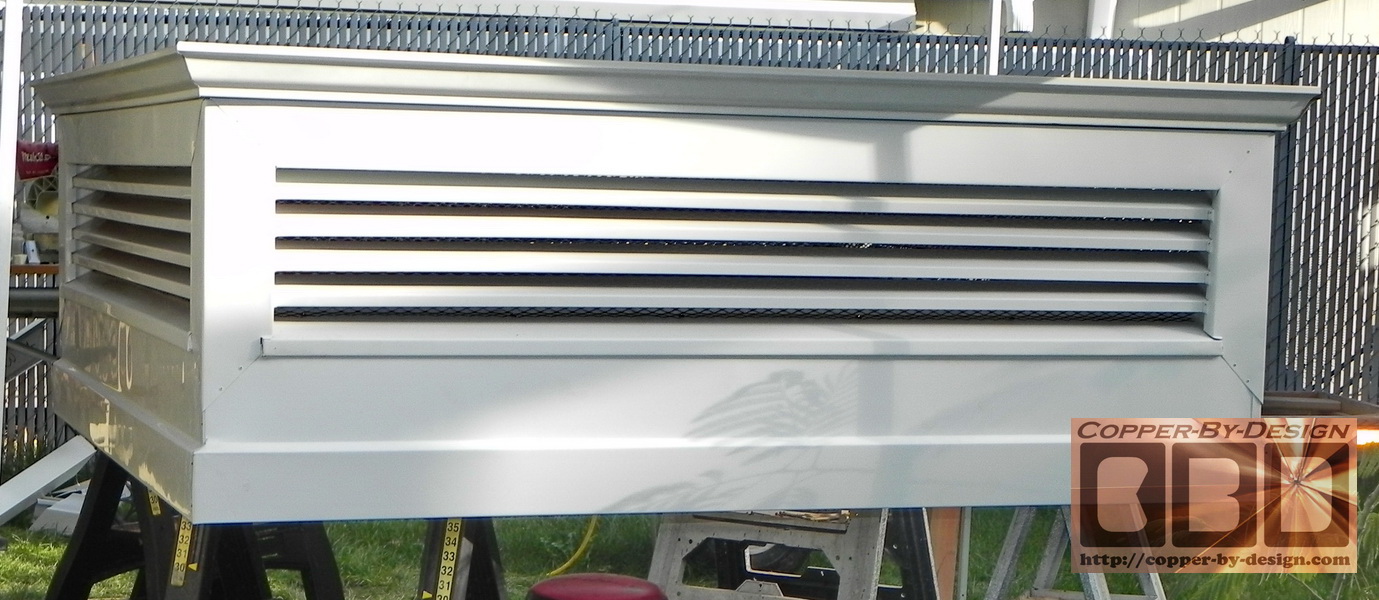
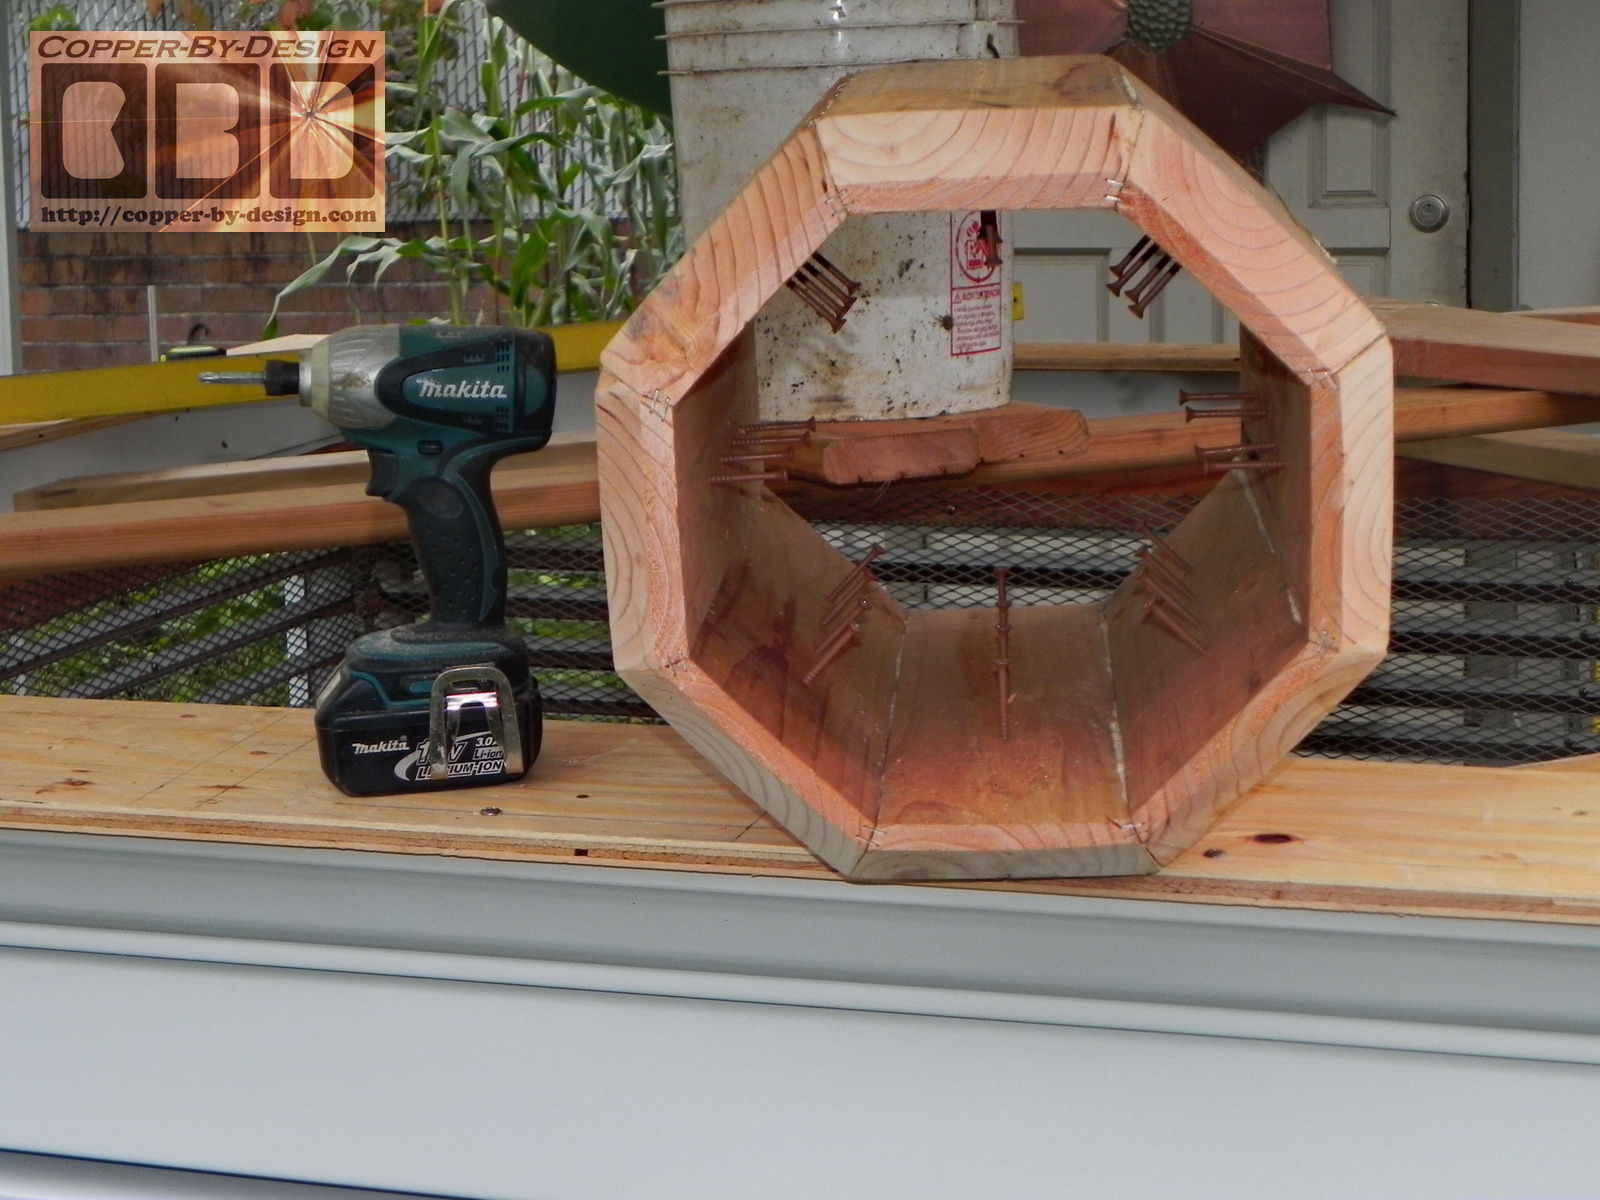
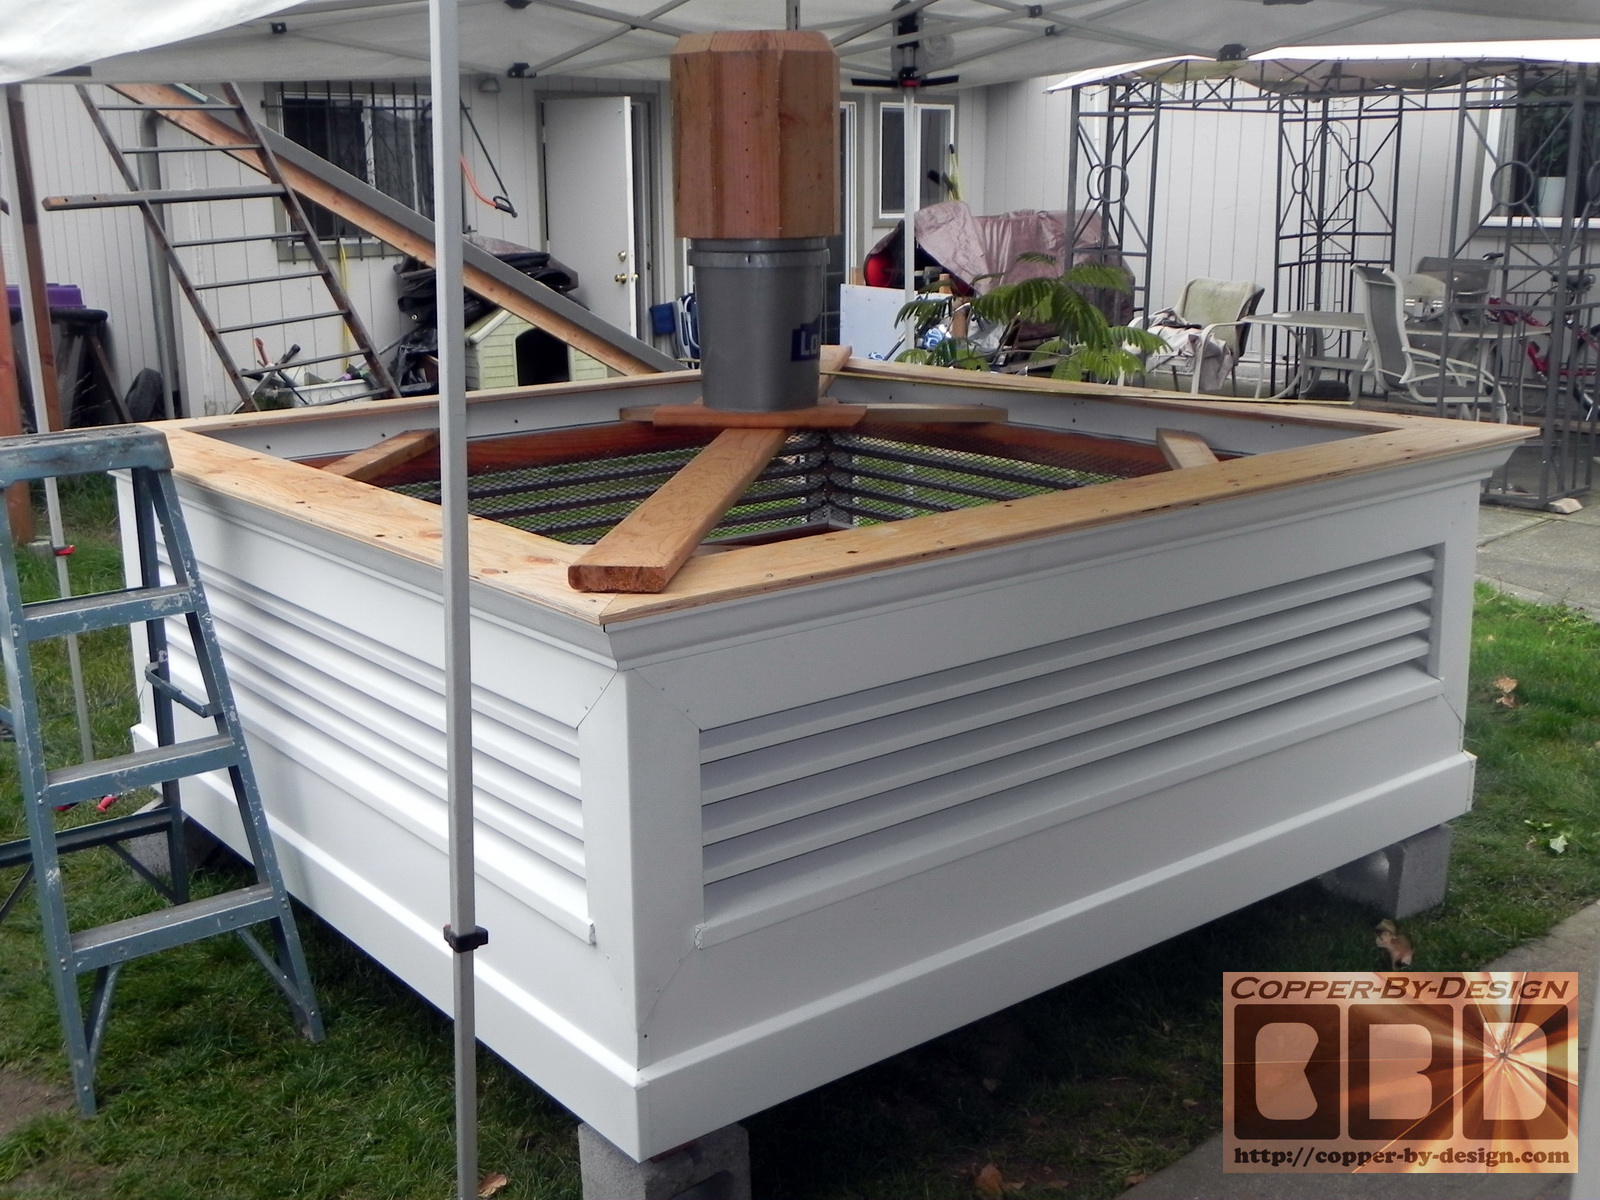
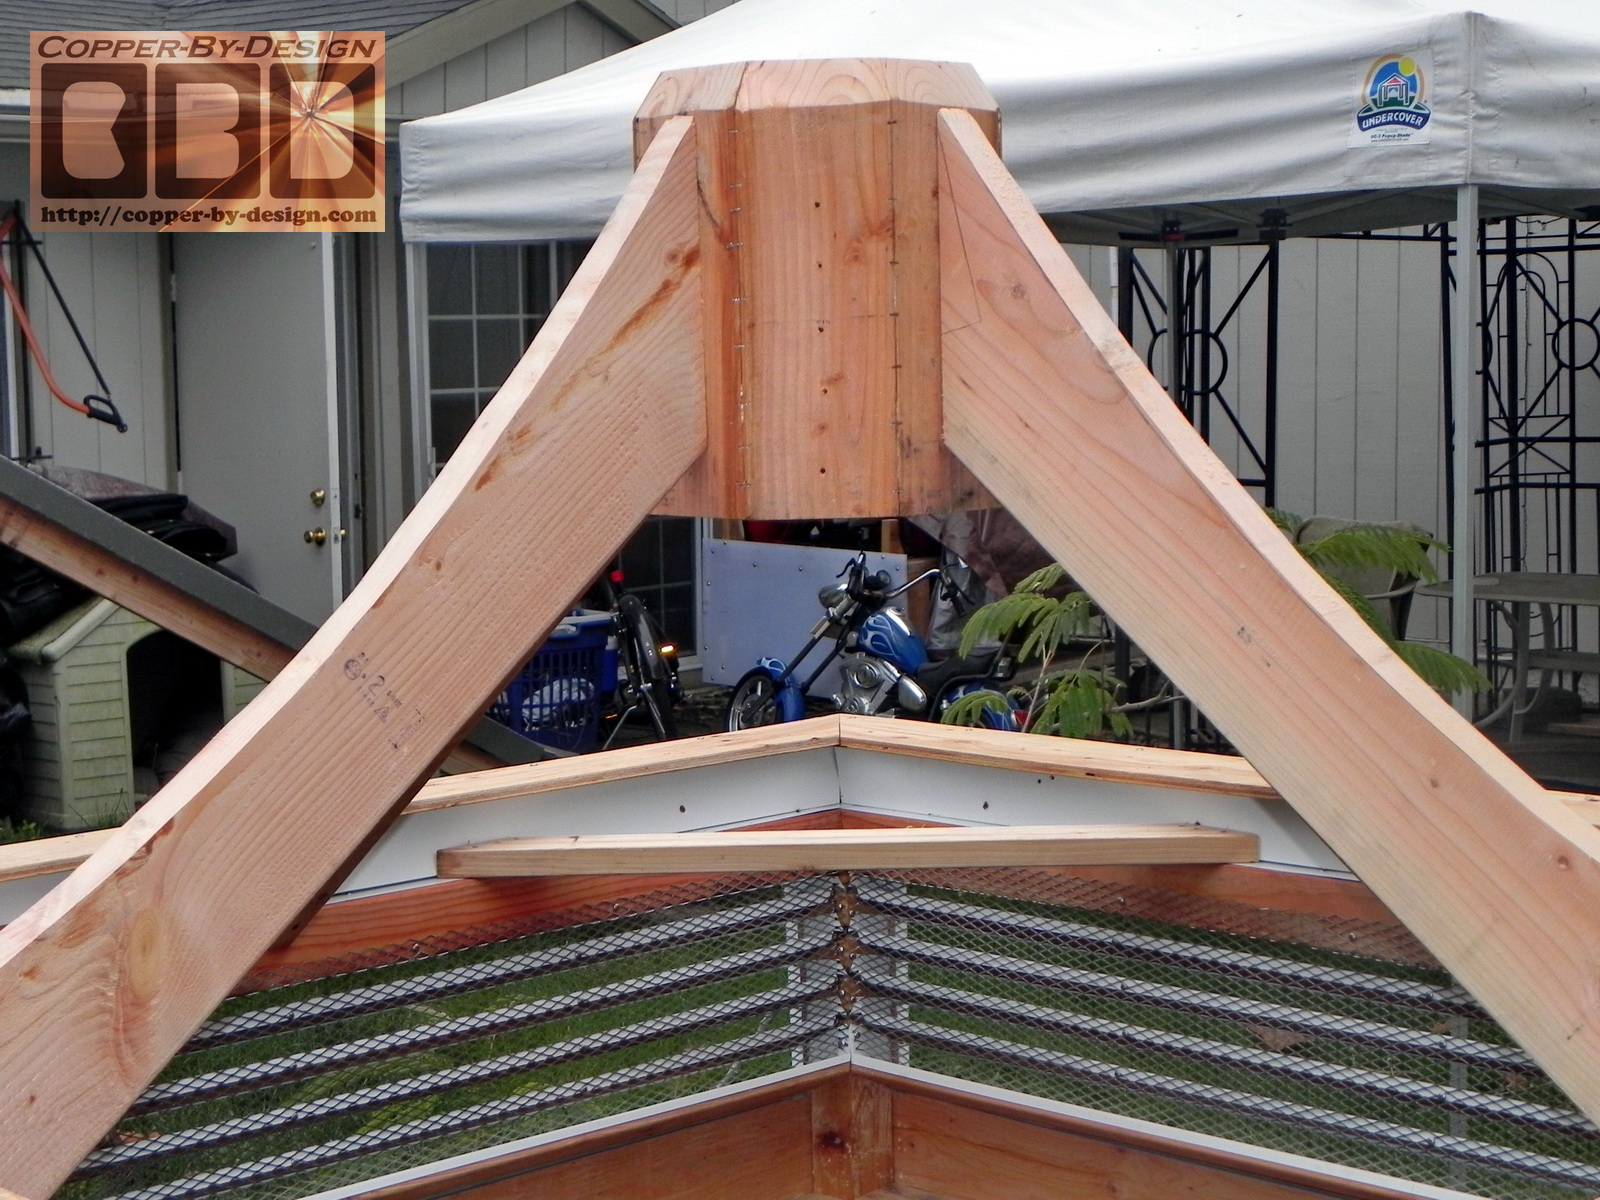
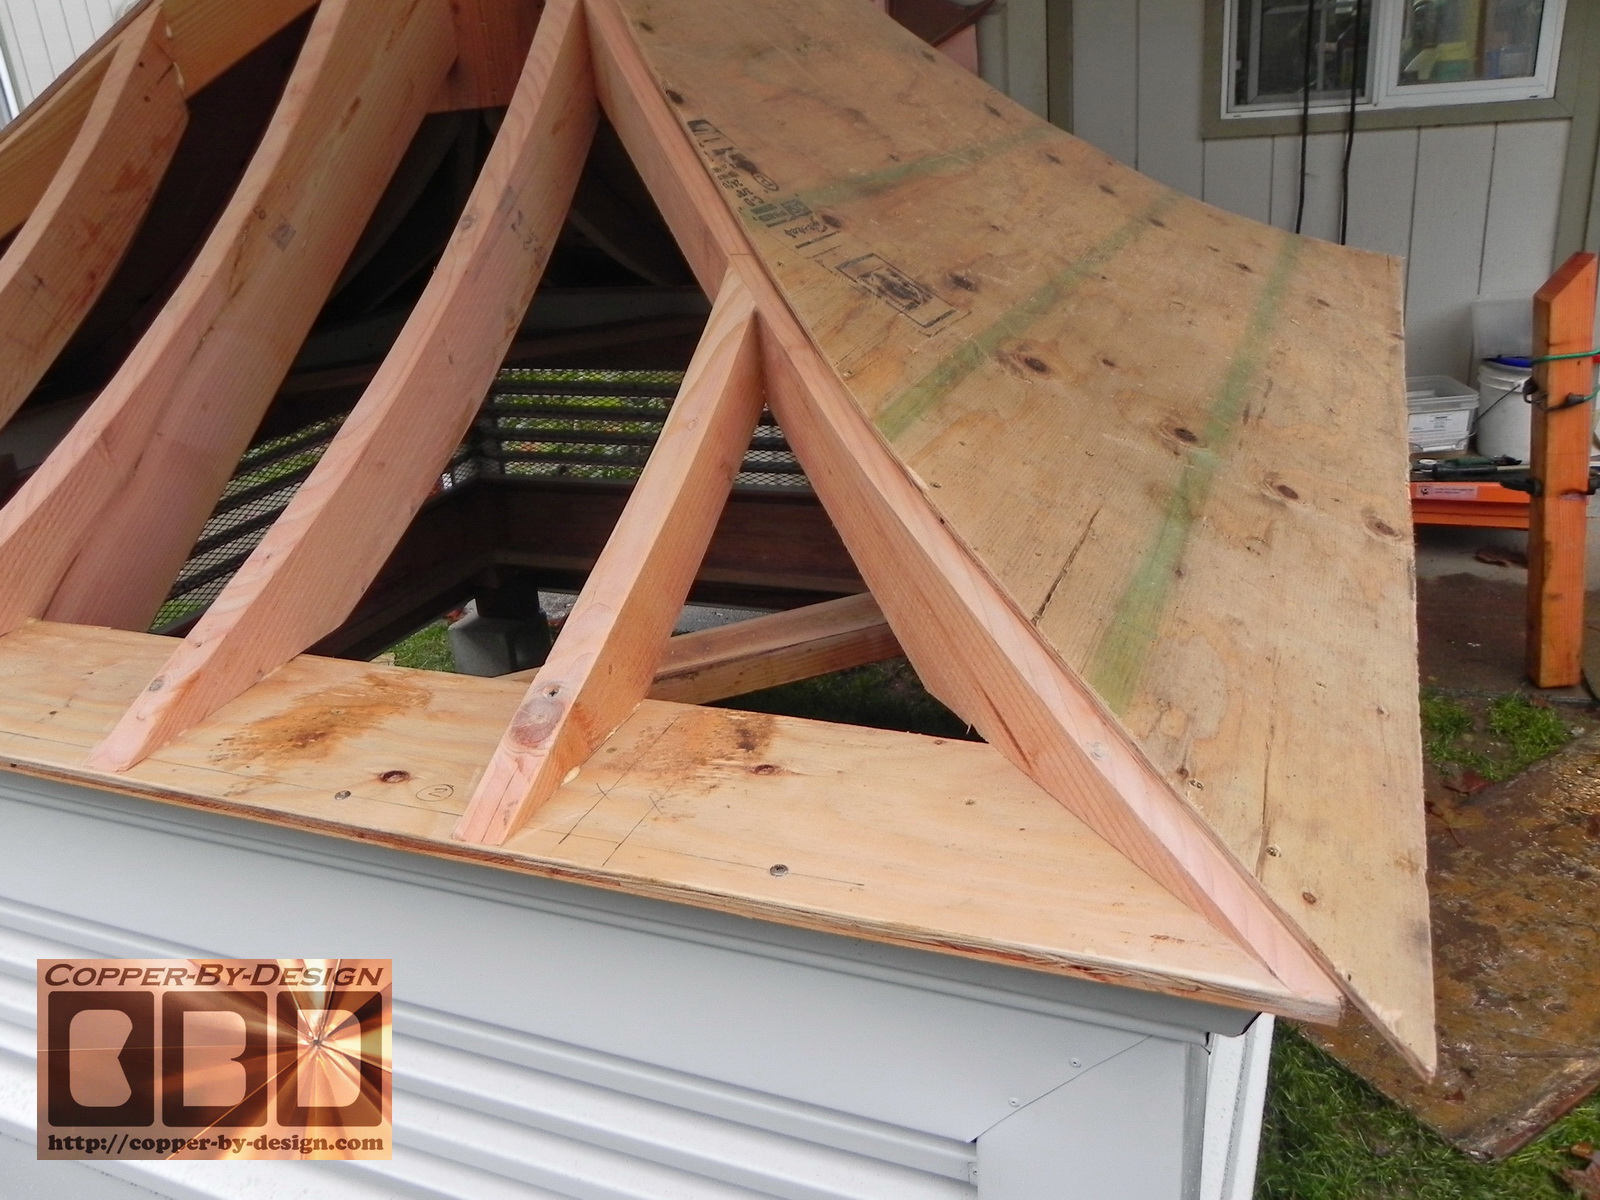
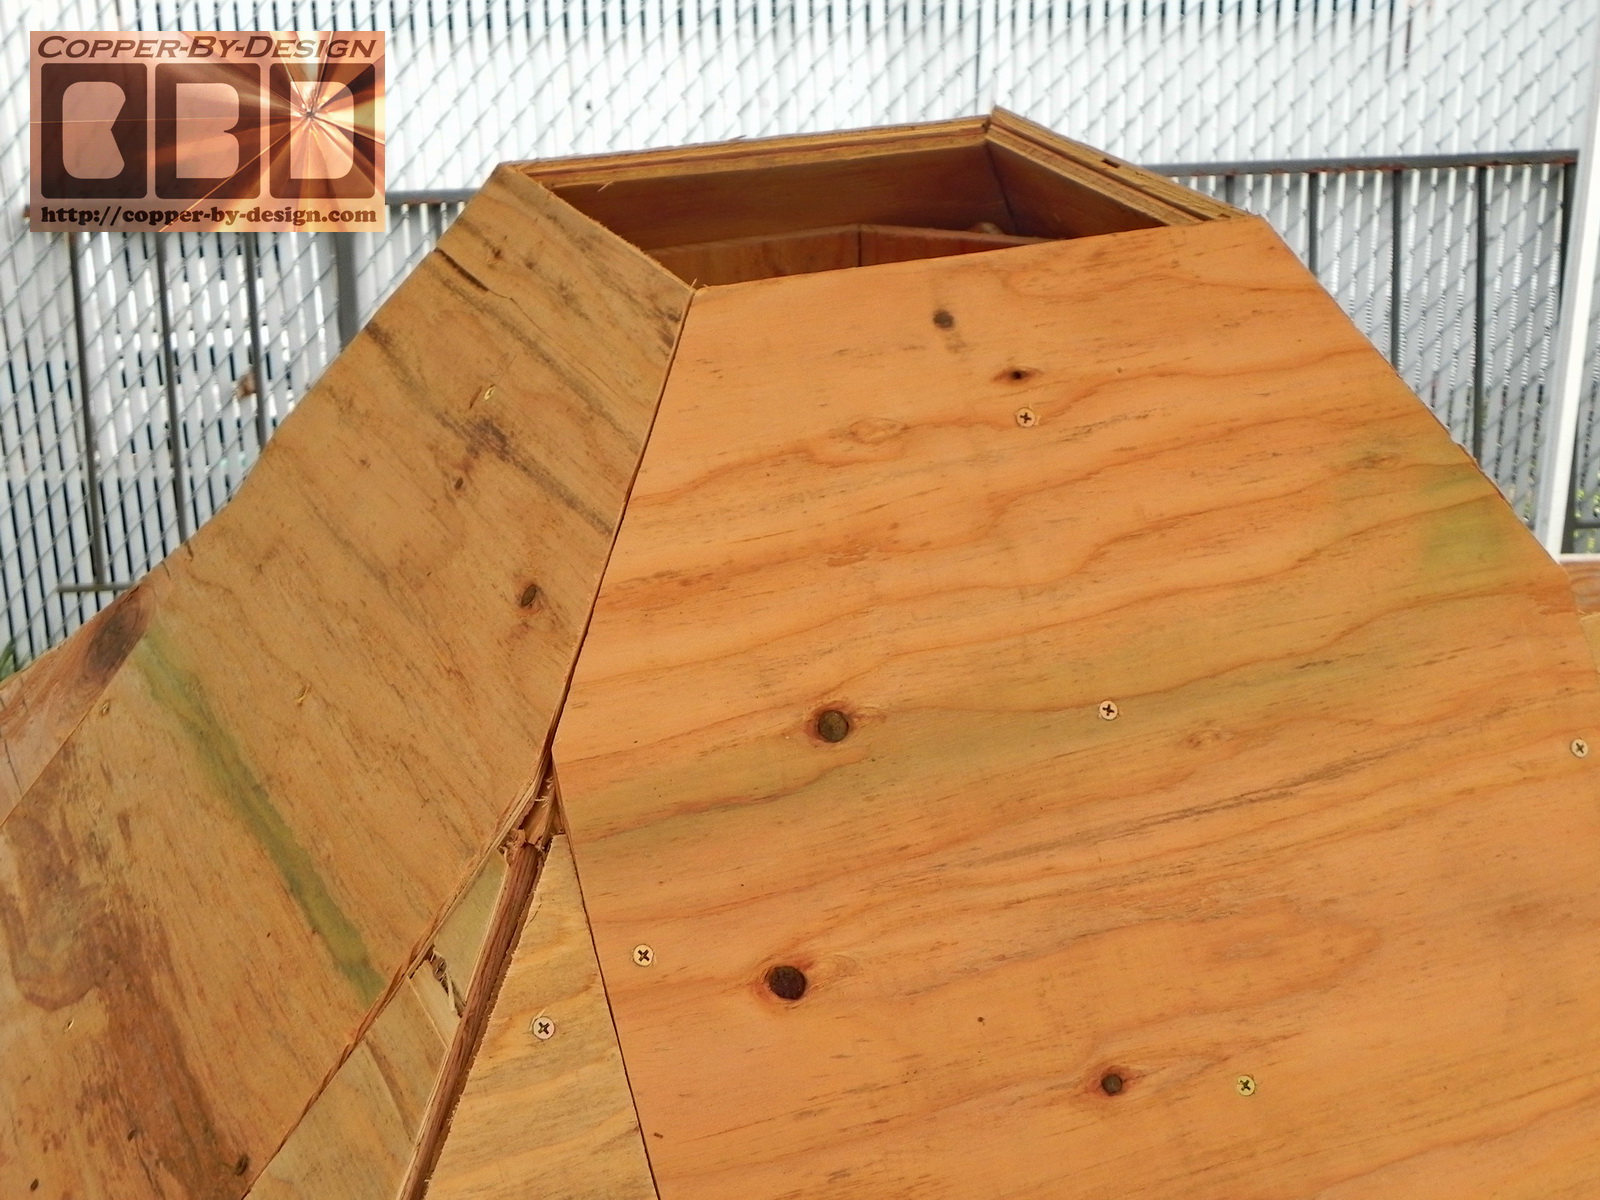
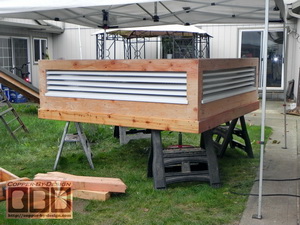
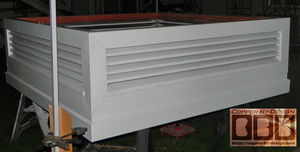
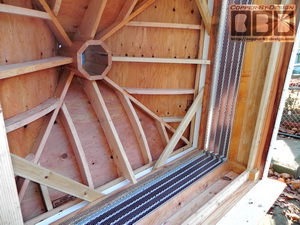
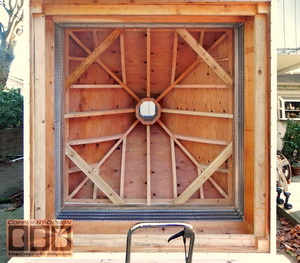
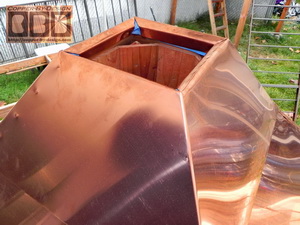
Building the concave roof trusses
11/10 - 16:
The crown molding was added over this to make it 7'
6" wide. It required 174.34 sq' of aluminum to cover the sides
like this. I then covered the crown molding with plywood to help strengthen it before the roof trusses go over them. It is now 7' 7.5" wide extending out another 3/4" past the crown molding on each side.
 
It was tricky, but I managed to get 4 of the concave curved roof trusses
drawn out, cut, and installed into this center column I made. It is already strong enough to stand on this center column and jump up and down on it, and
it will get stronger as I add more wood to it; like the corner
trusses that will go in next. This is 5' 9" tall at this point.
 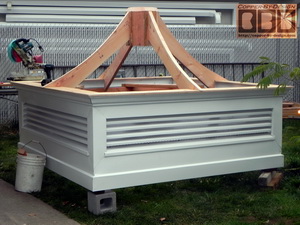
 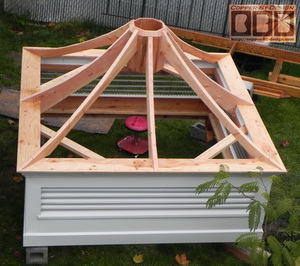
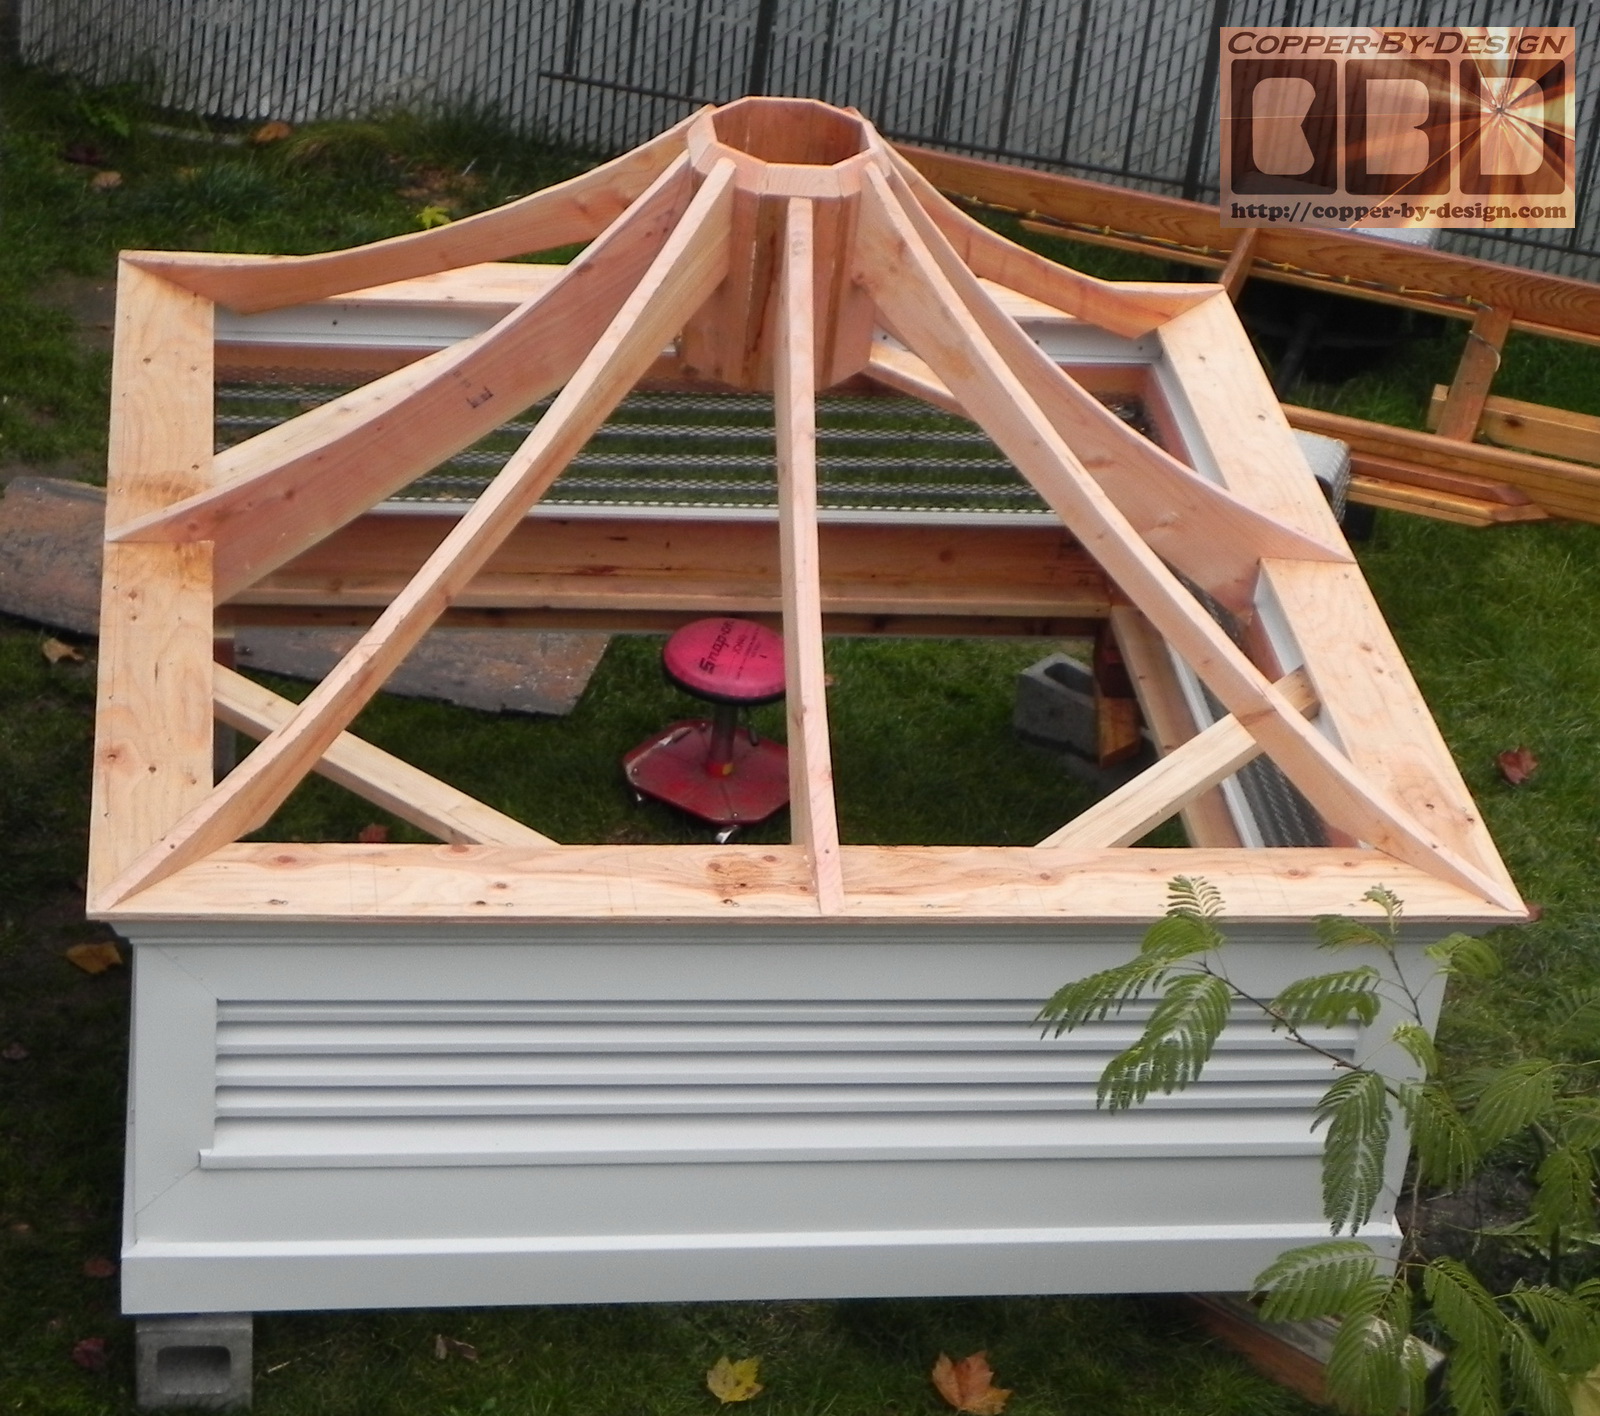
I managed to get all 24 of the concave
curved roof trusses drawn out, cut, and installed over 3 days
working on it. If it is not made just right any flaws will show in
the copper I will cover the plywood with. Once all the roof trusses
were in they had a 13" center span. Floors and walls have 16"
centers, but most roofs are made with a 24" wide span between
trusses, so this is almost twice as strong.
There is 36' of 4X4 beams, 130' of louvers, 92.33'
- 2X4, 53' - 2X6, 44' - 2X8, 16' - 2X10, and 209.75 sq' - plywood.
|
|
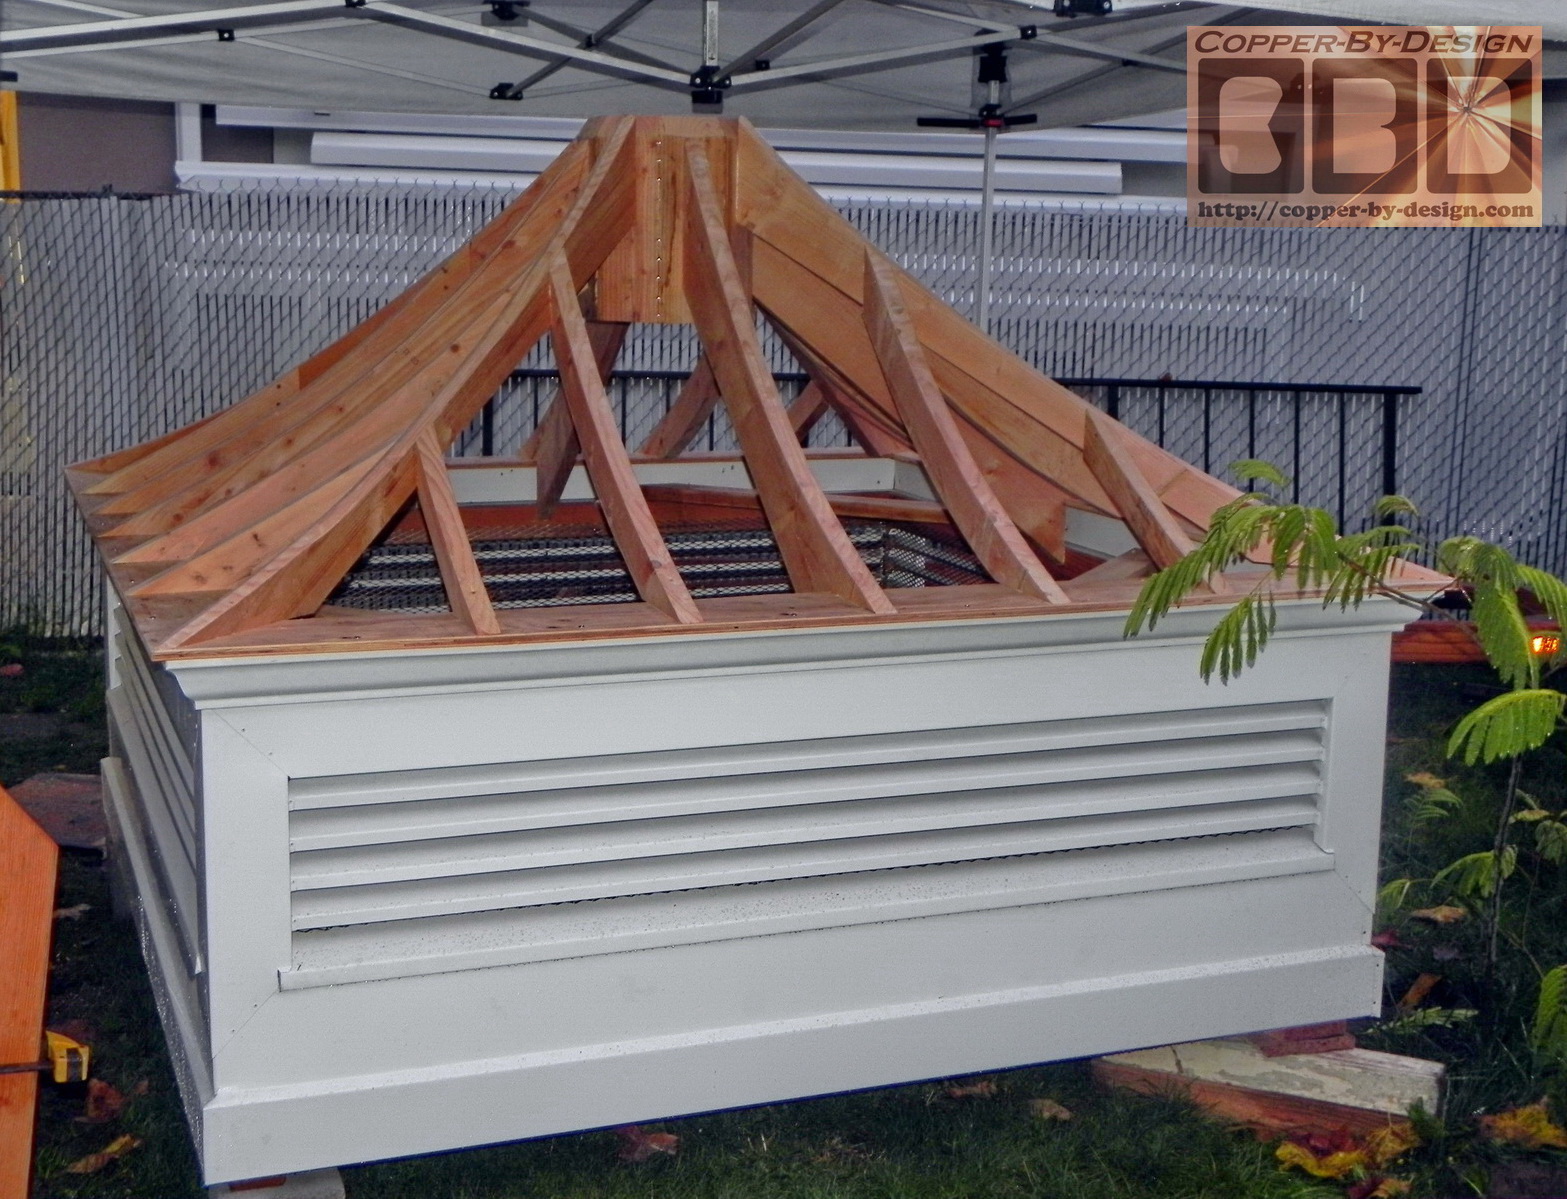
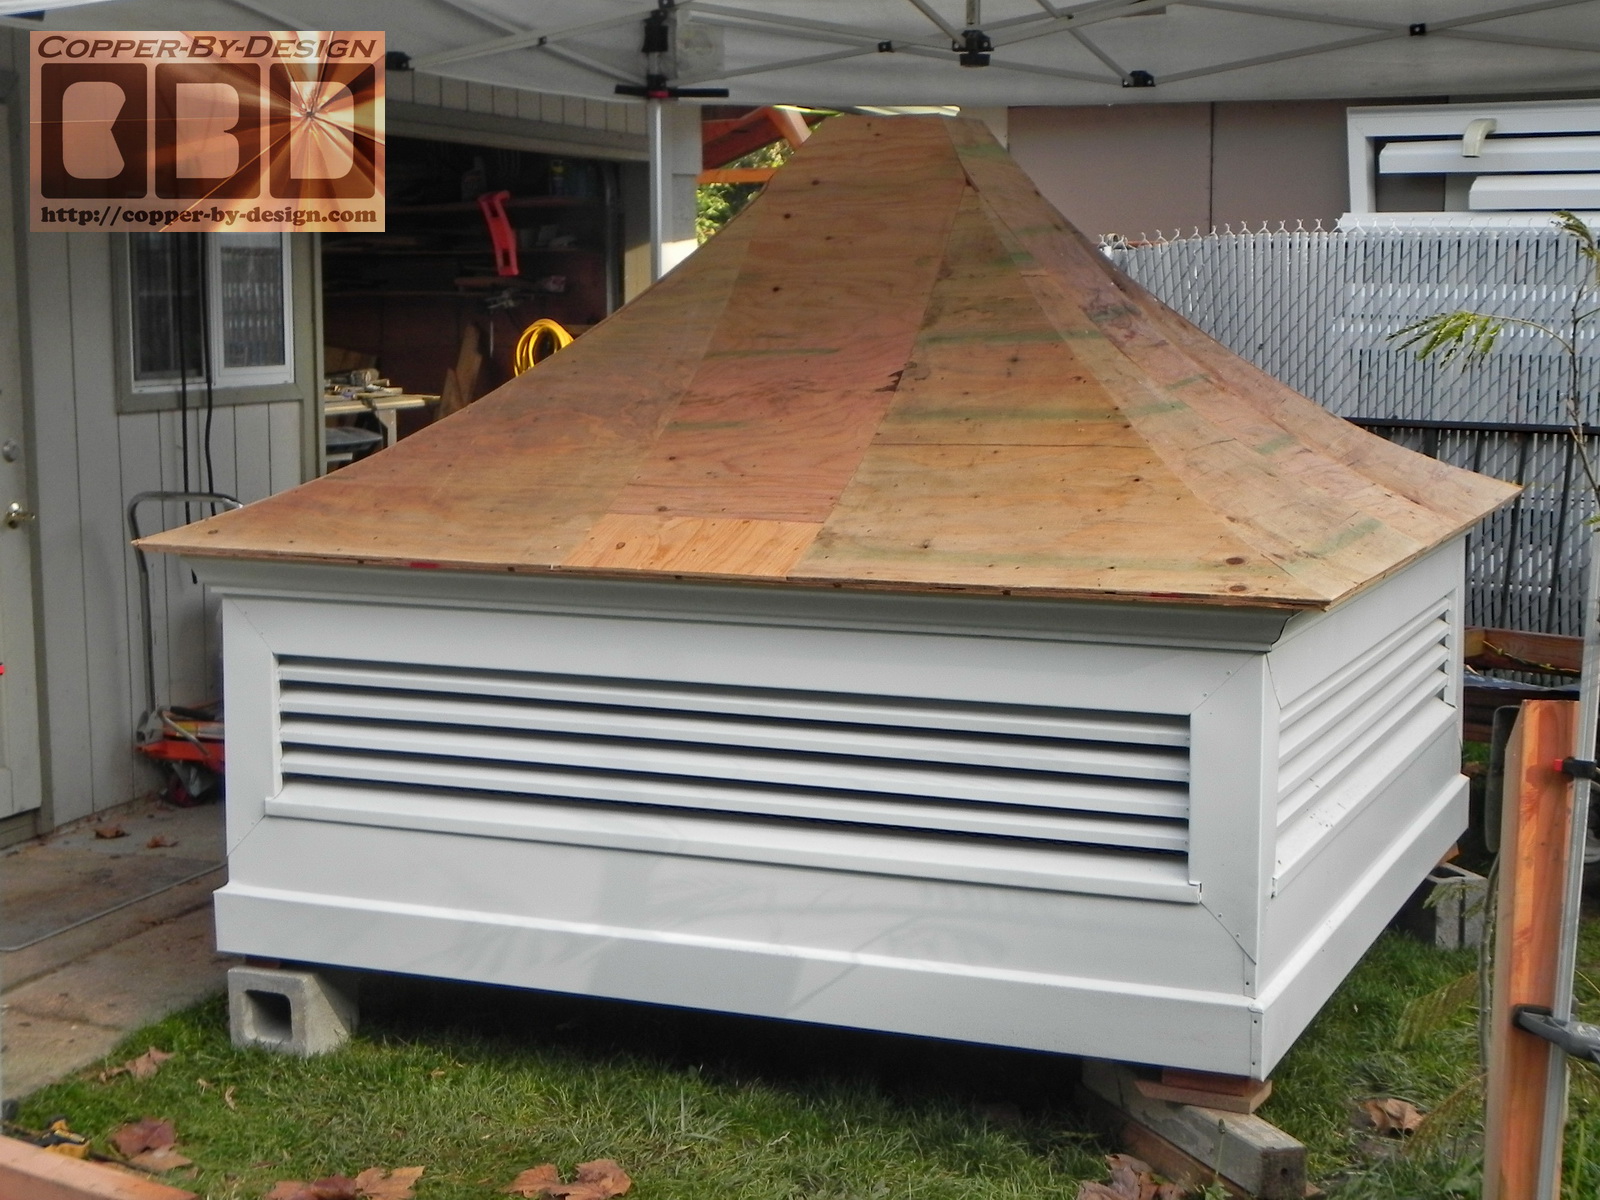
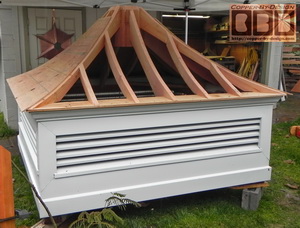
Covering roof trusses w/2 layers of plywood
11/17 - 25:
I got the first layer of 3/8" plywood on. At 4'
wide the sheets of plywood did not reach all the way up to the top, so
I had to add another 8.5" above that. The next layer of 3/8" plywood
overlapped the seam, so no strength was lost.
These layers of plywood were screwed down with
hundreds of screws every 6". With both layers I have a combined
total of 3/4" thick roof surface, where most roofs are made with
just a single layer of 1/2" OSB chip board, so again this detail is
about twice as strong as standard building construction. The roof is
now 7' 10" wide.
|
|
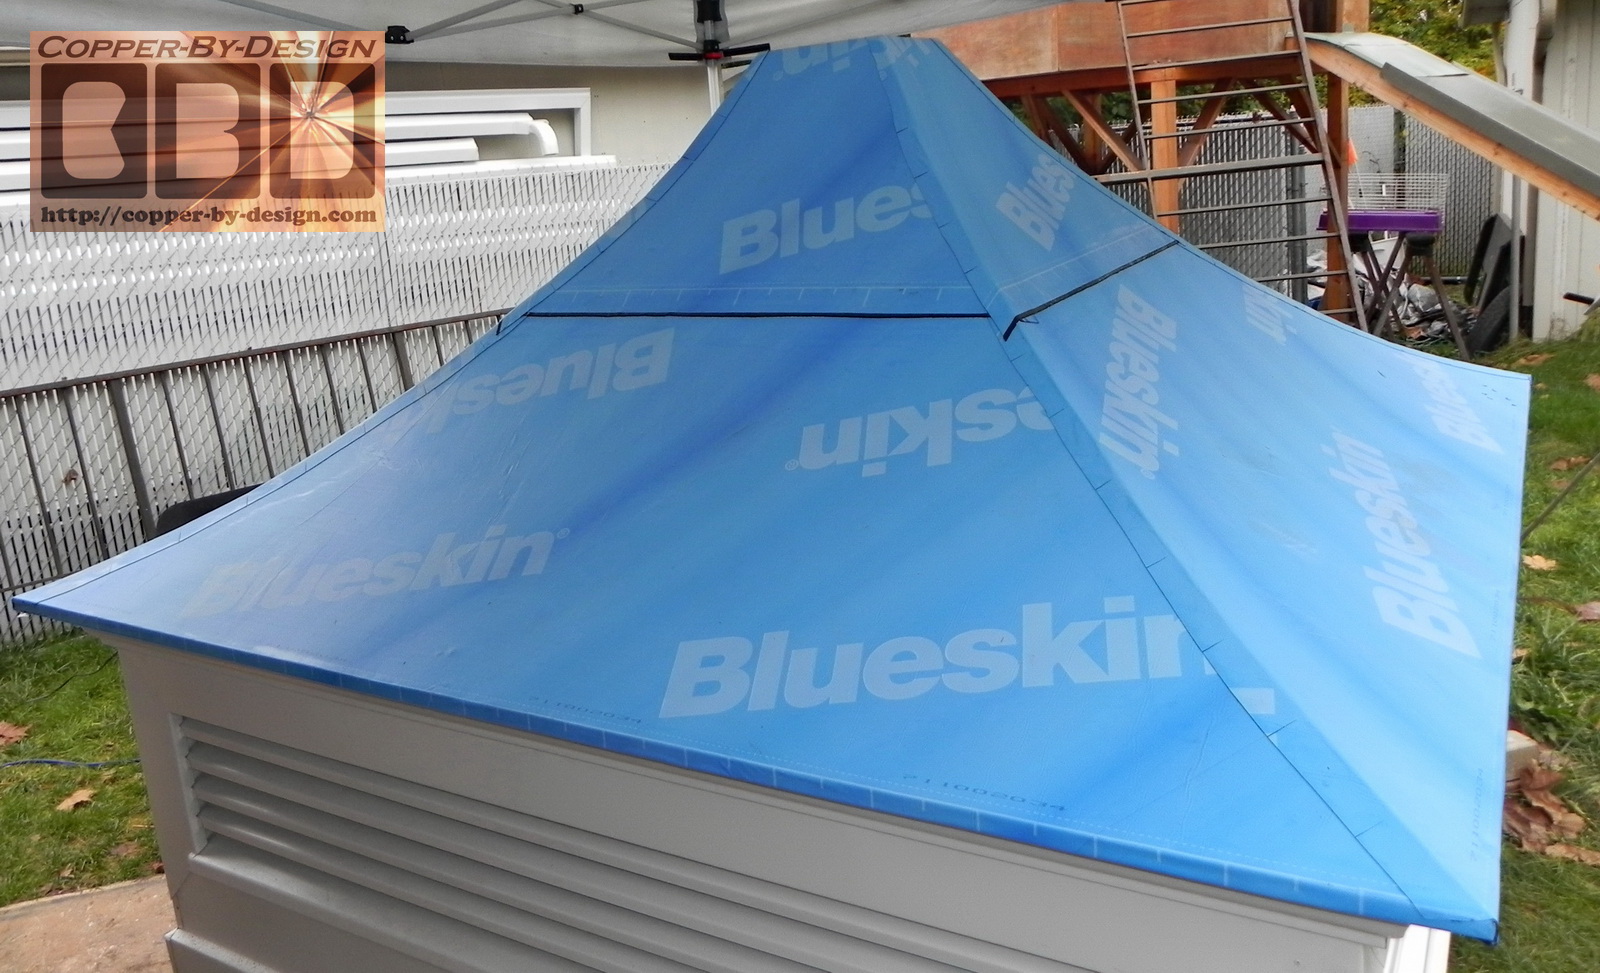
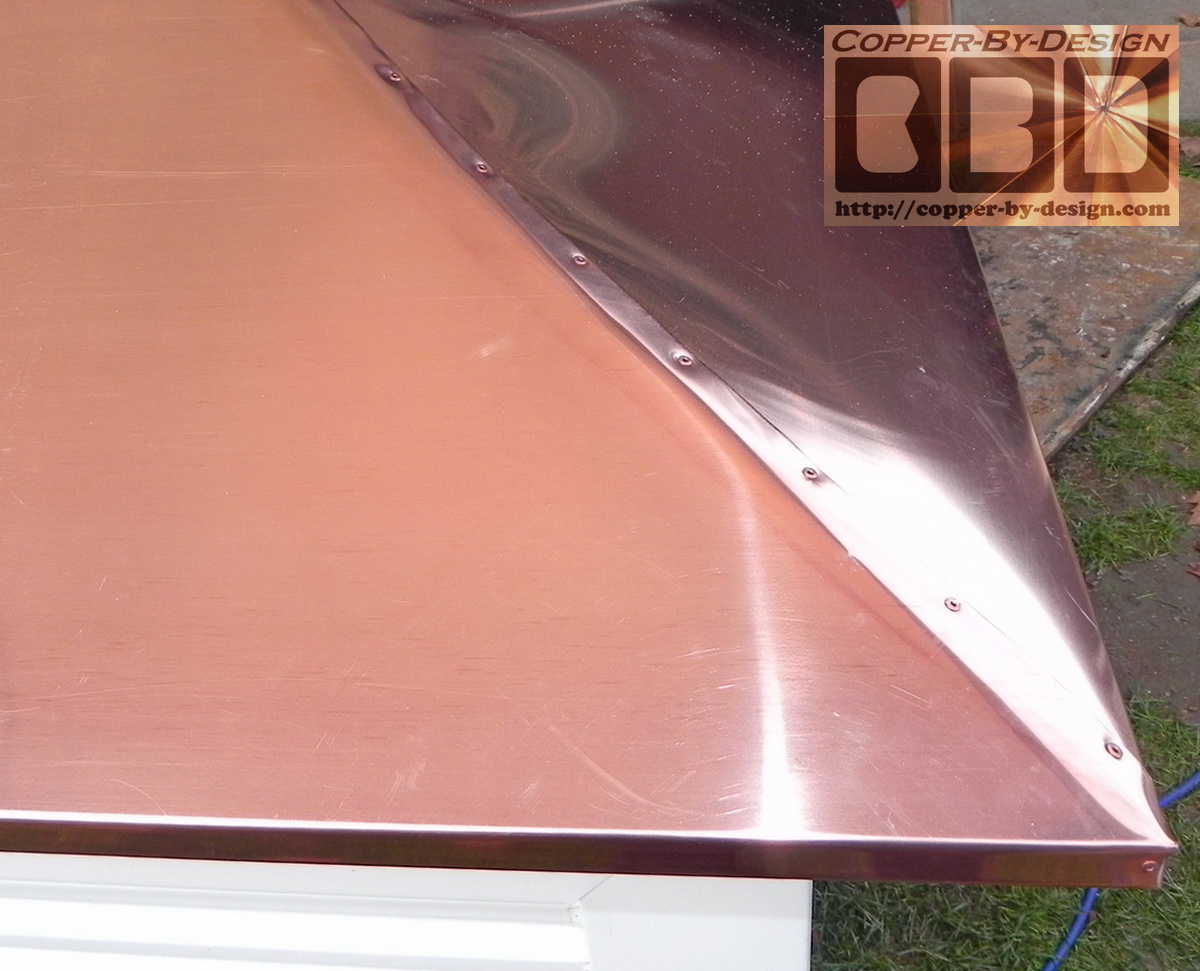
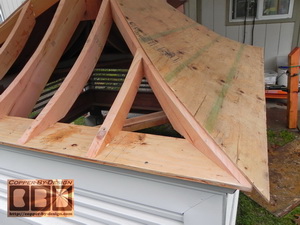
Covering sloped roof w/Water & Ice Shield, and 20oz
copper 11/25 - 30:
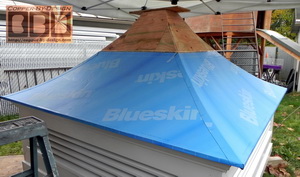 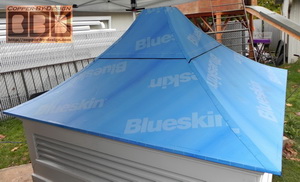
I just found out the developed a high temp Water &
Ice Shield underlayment for metal roofs that is suppose to withstand
300 degrees, so that's what I used here. It is even more expensive
than a good 40 year roofing shingle at $65 a square. It also took
about 10 times as long to apply, since the temperature had dropped to
around 40 degrees outside. I had to use a blow dryer and clothing iron
to heat it us to get it to stick to the plywood like it is suppose to
do.
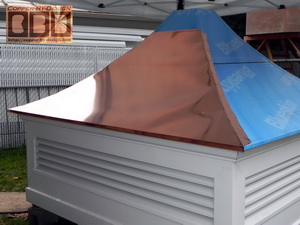 
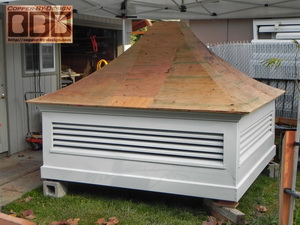
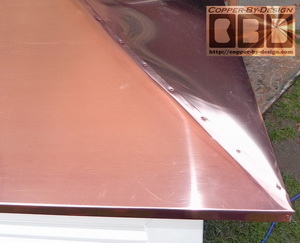
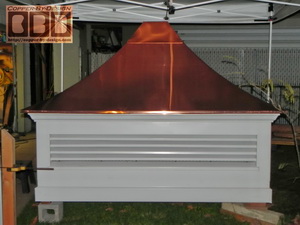
I could finally begin to attach the copper sheets to this.
The sheets I had used to cut these pieces from were 4' X 10' long, so this is all
I could cover in a single piece for each side. It took 96.3 sq' of the
20oz copper to cover this.
|
|
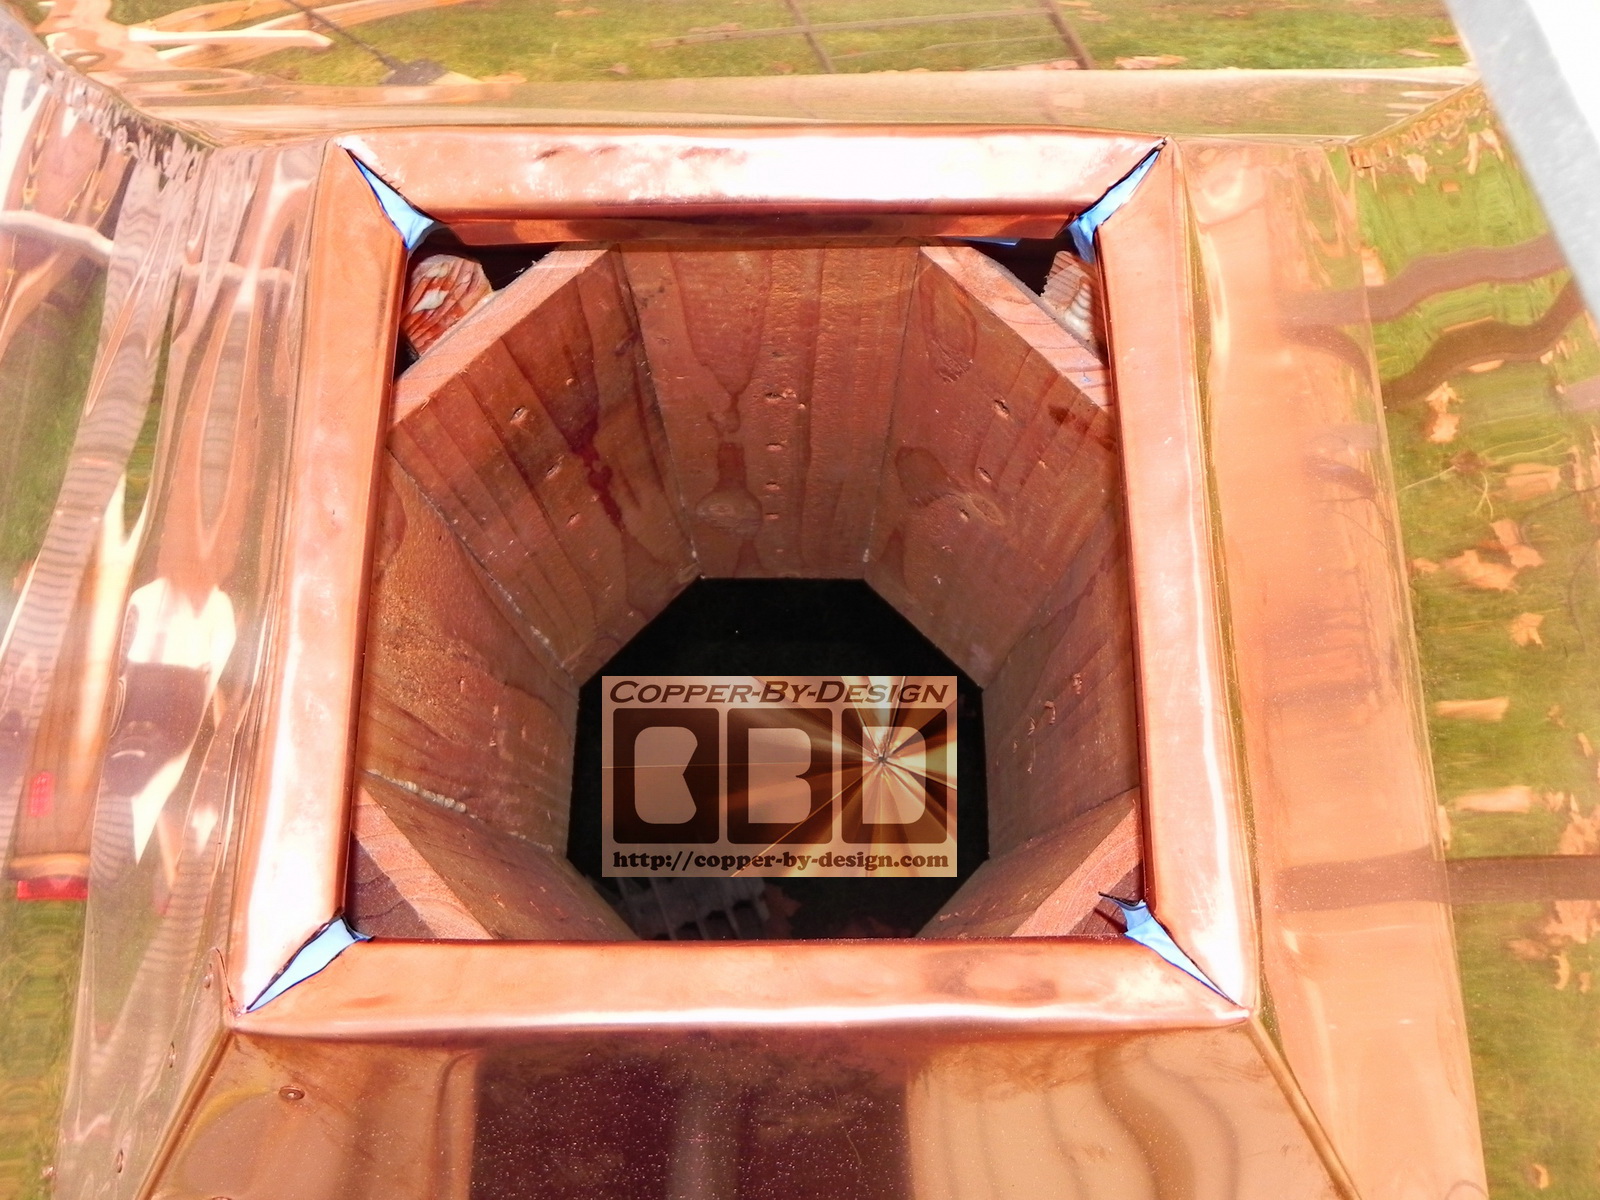
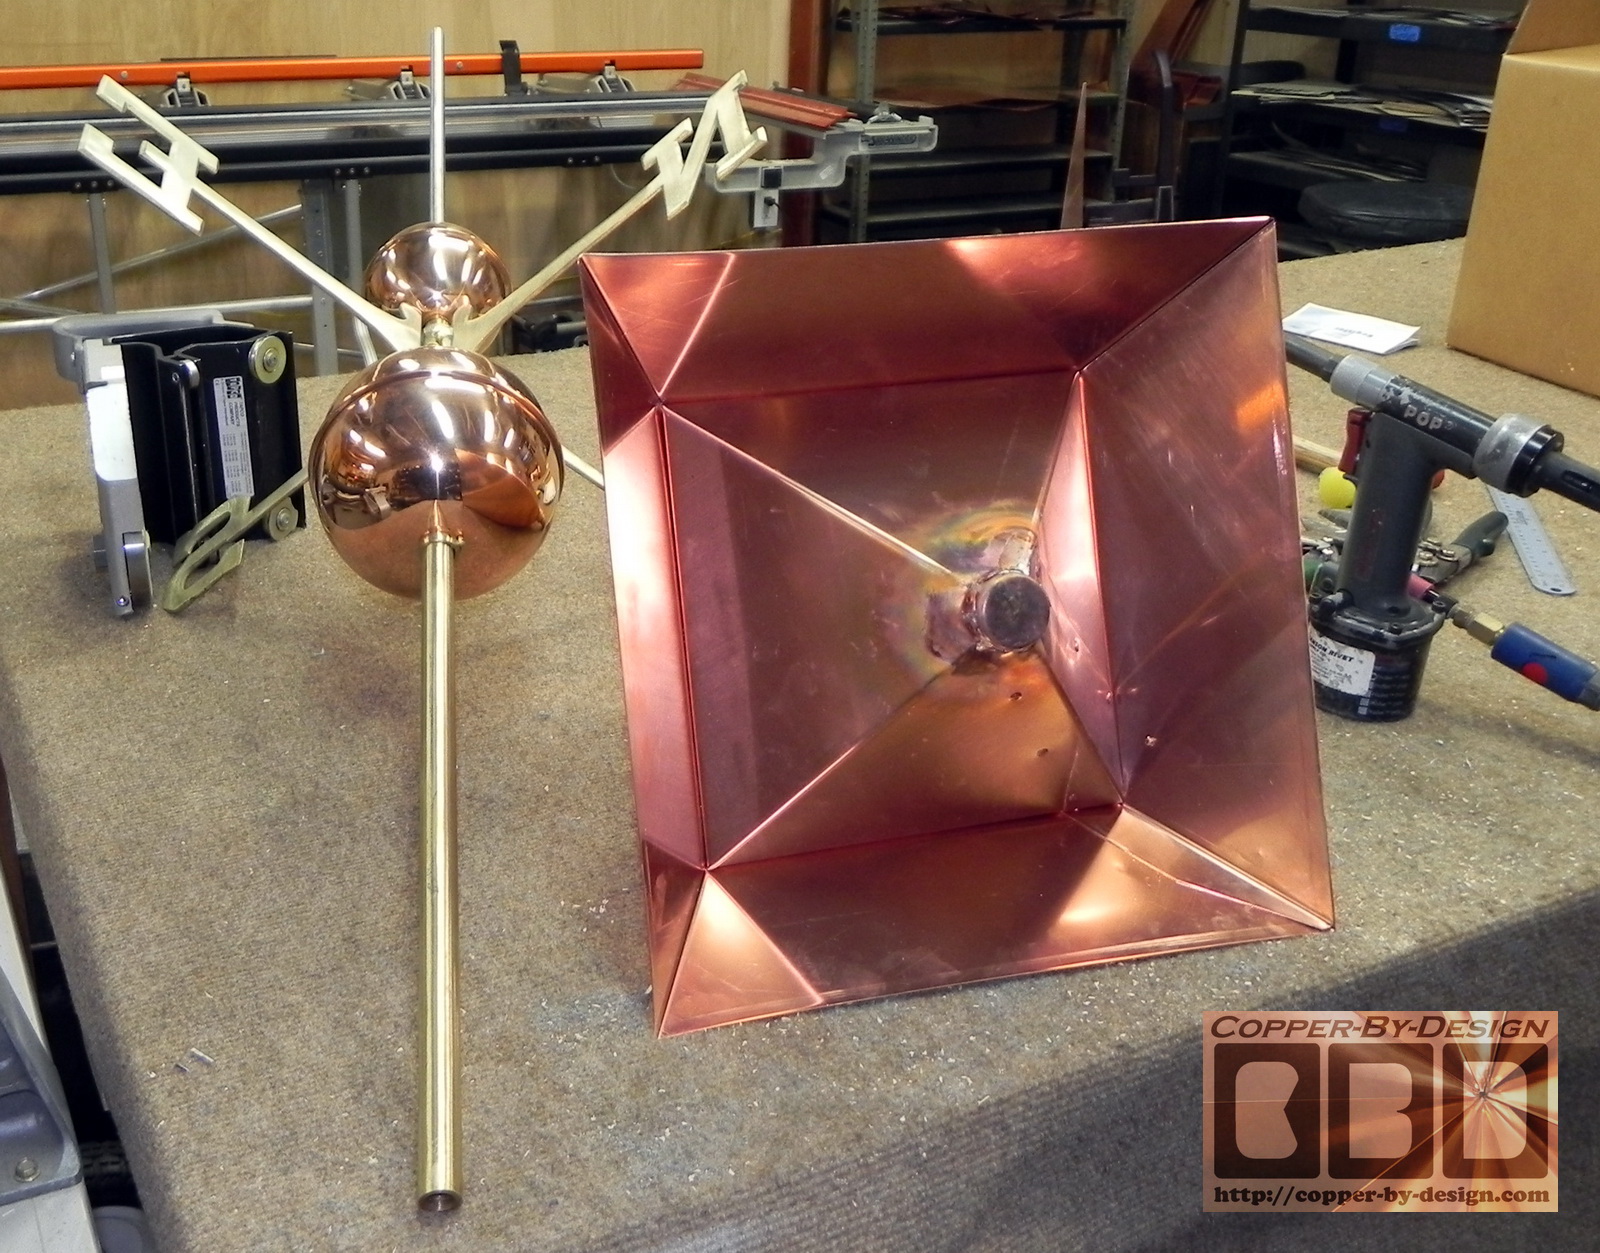
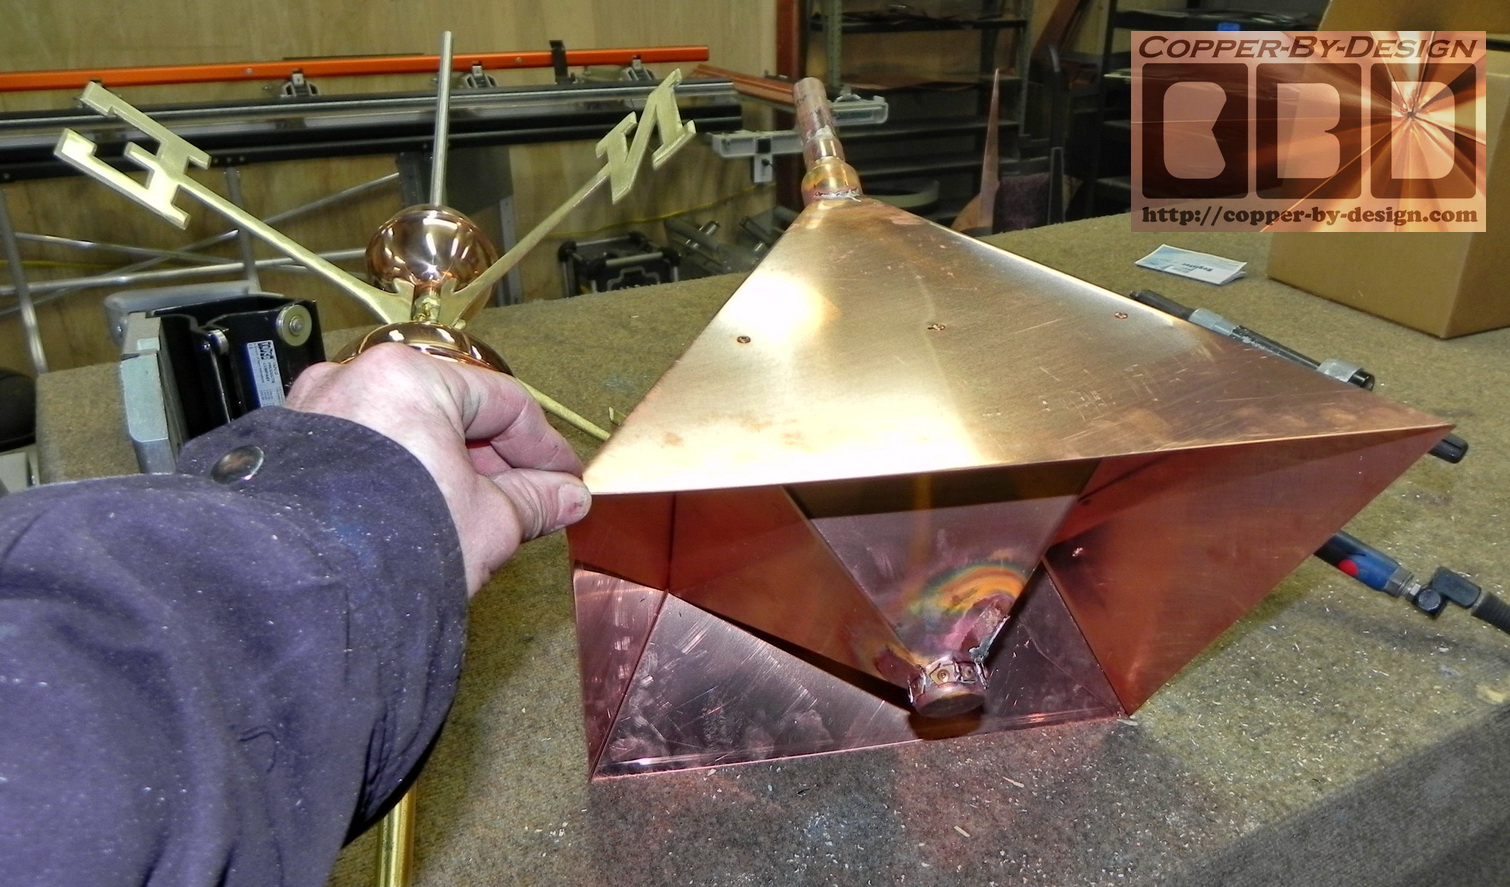
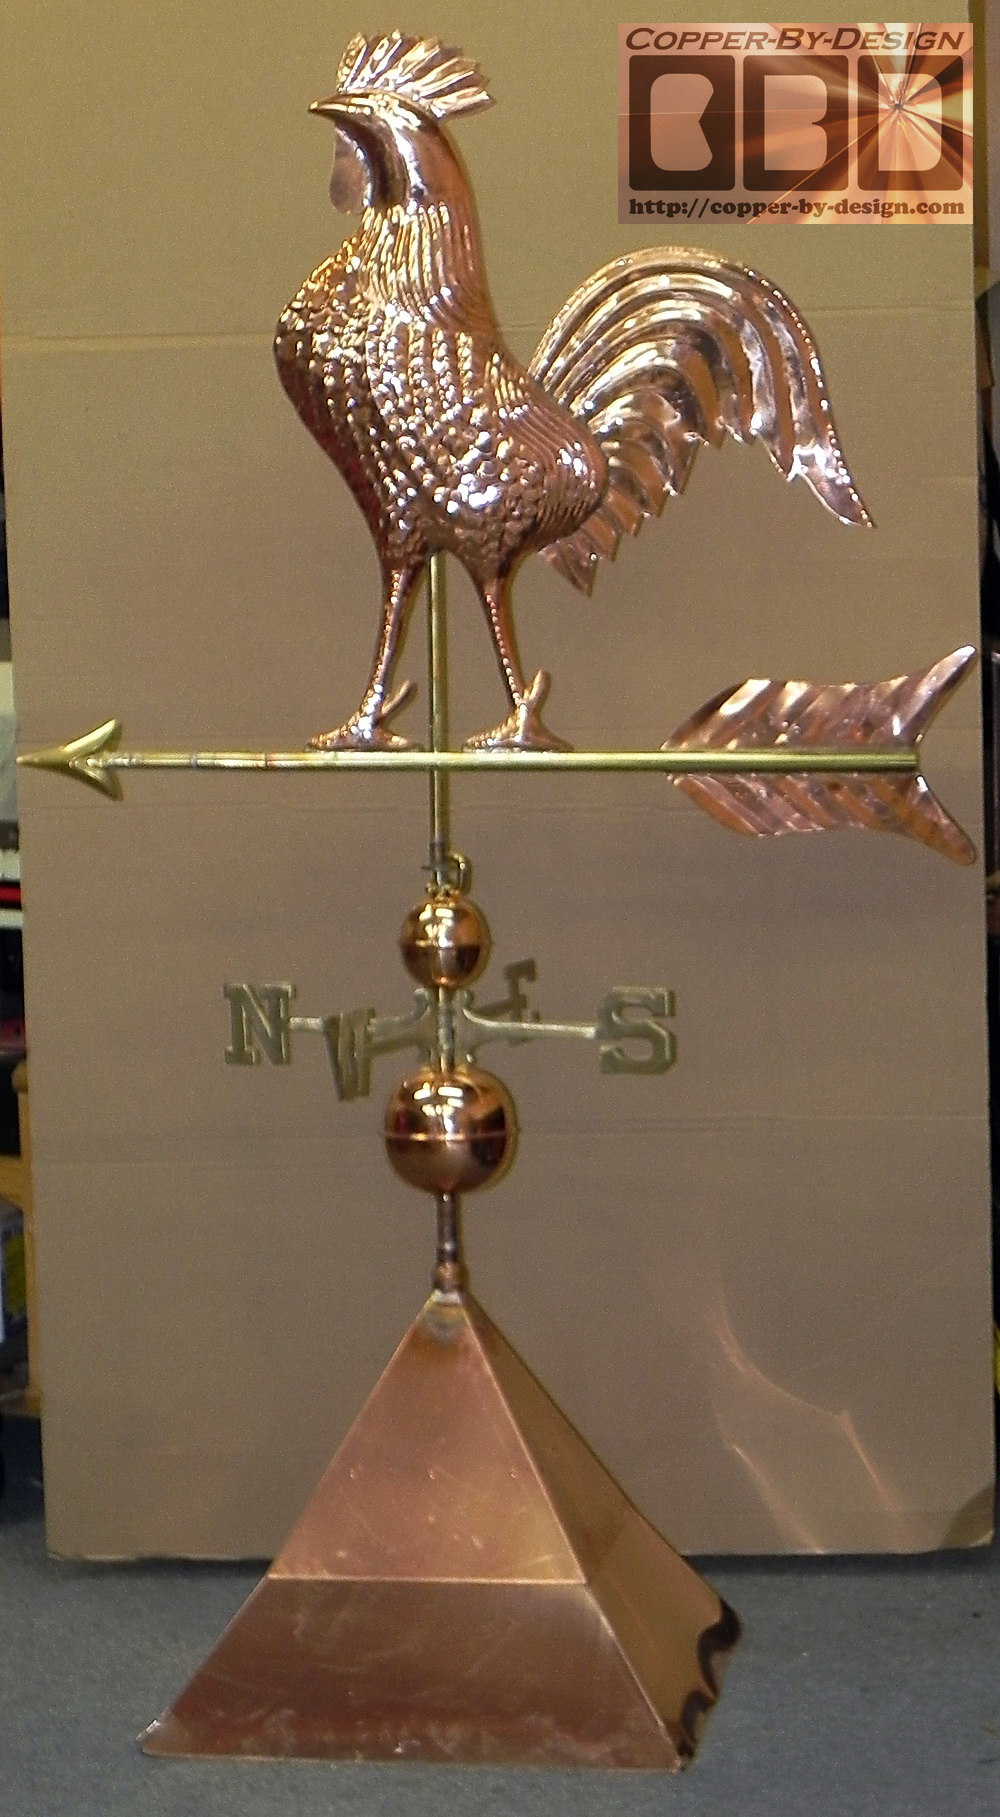
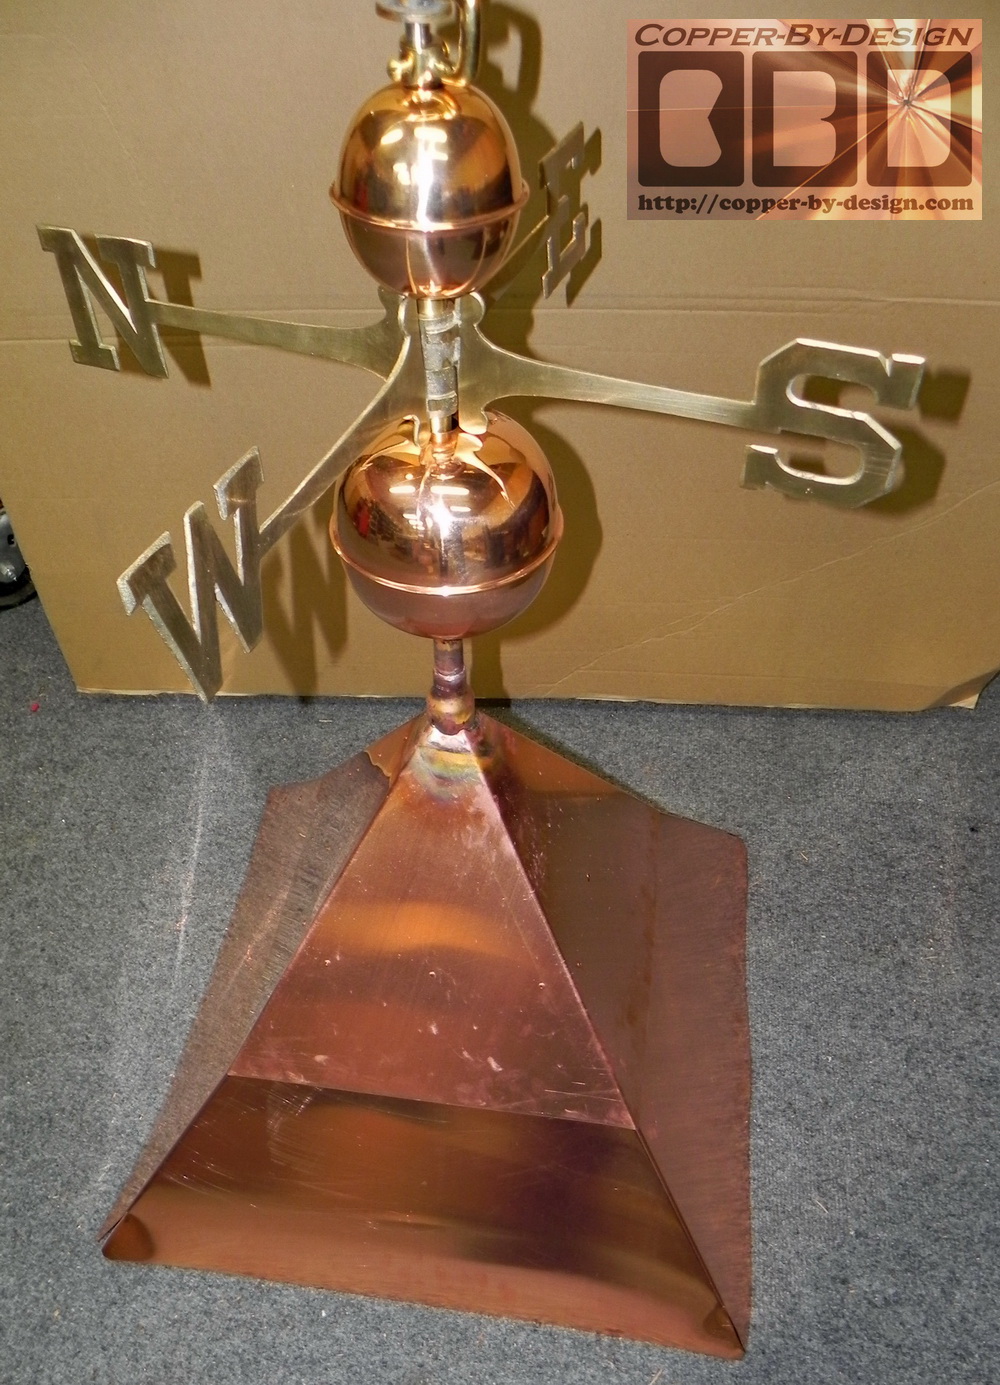
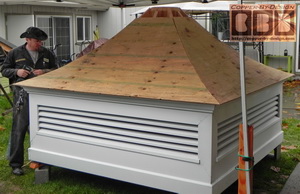
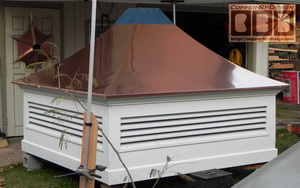
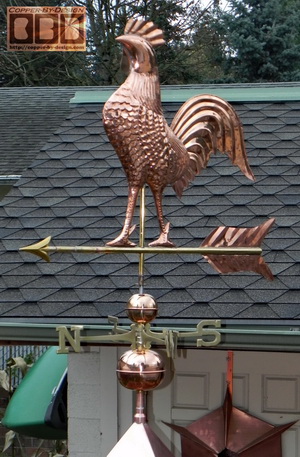
Building the roof peak cap/WV support
11/30 - 12/2:
 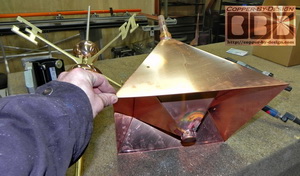
I worked on the center roof
cap that will hold this large Rooster style weathervane they wanted. I
made a reverse pyramid shape inside to secure the bottom of the
support pipe. I thought this was particularly clever. This will be
adjustable after the cupola is installed on their roof to make sure
the weathervane shaft is perfectly straight, so it will rotate
smoothly.
 
This Rooster style weathervane was damaged in
transit to my shop through UPS. The thin hollow brass tubing of the
arrow and base got bent. I had to spend several hours fixing the
damage of this fragile thin metal I am not accustom to working with. I
noticed the weathervane was tail heavy. Not balanced, so in adding a
solid brass rod inside the forward half of the arrow helped bring the
proper balance it needed, so maybe it was a blessing in disguise it
got damaged?
|
|
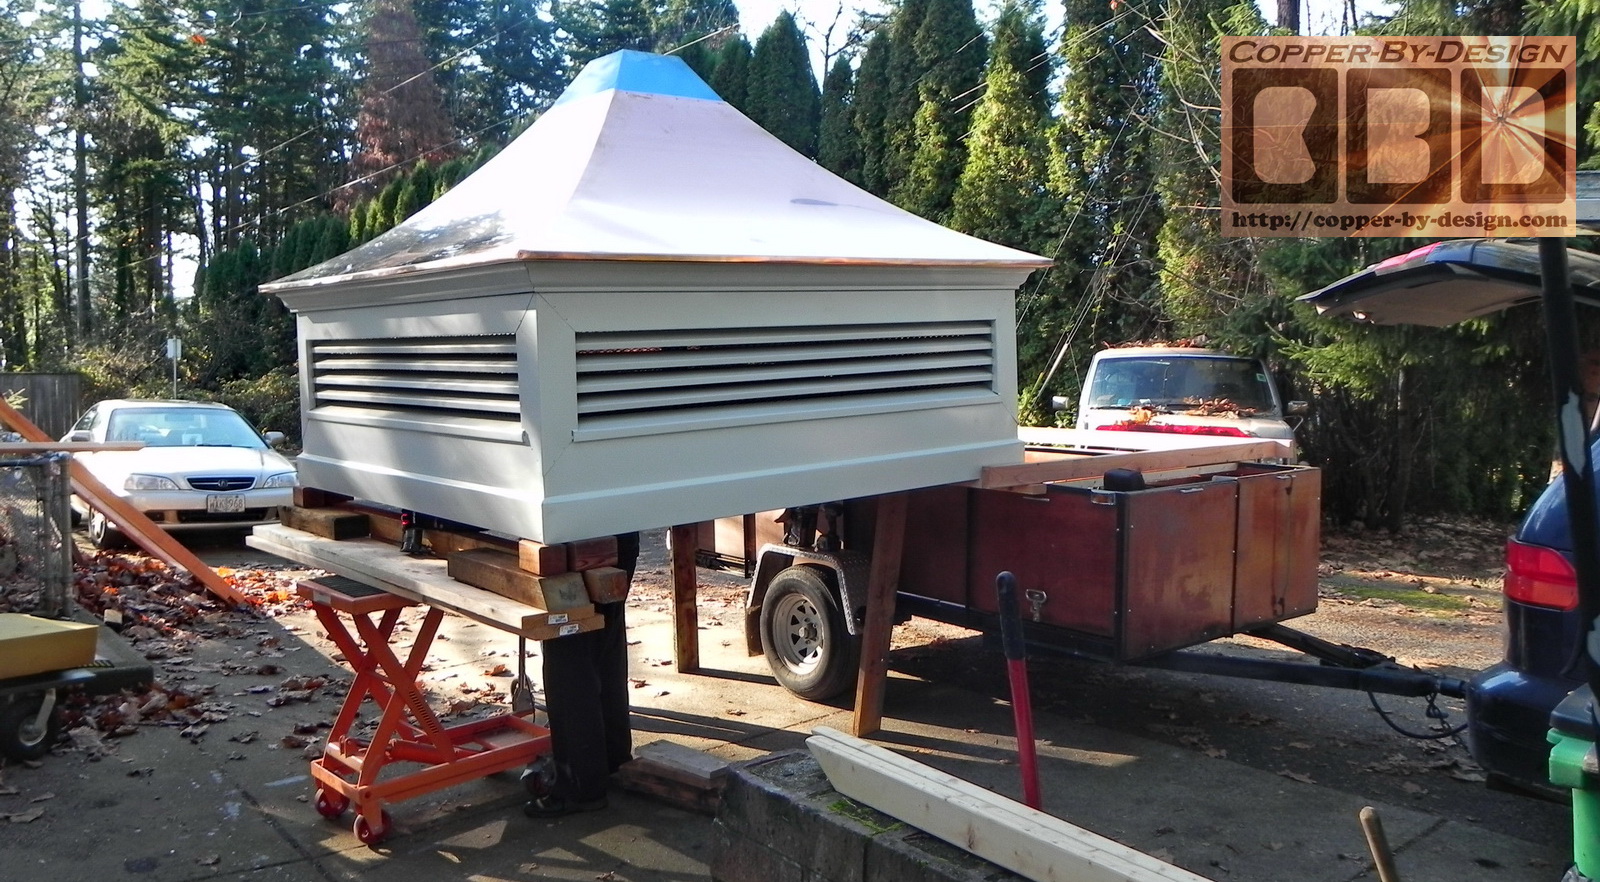
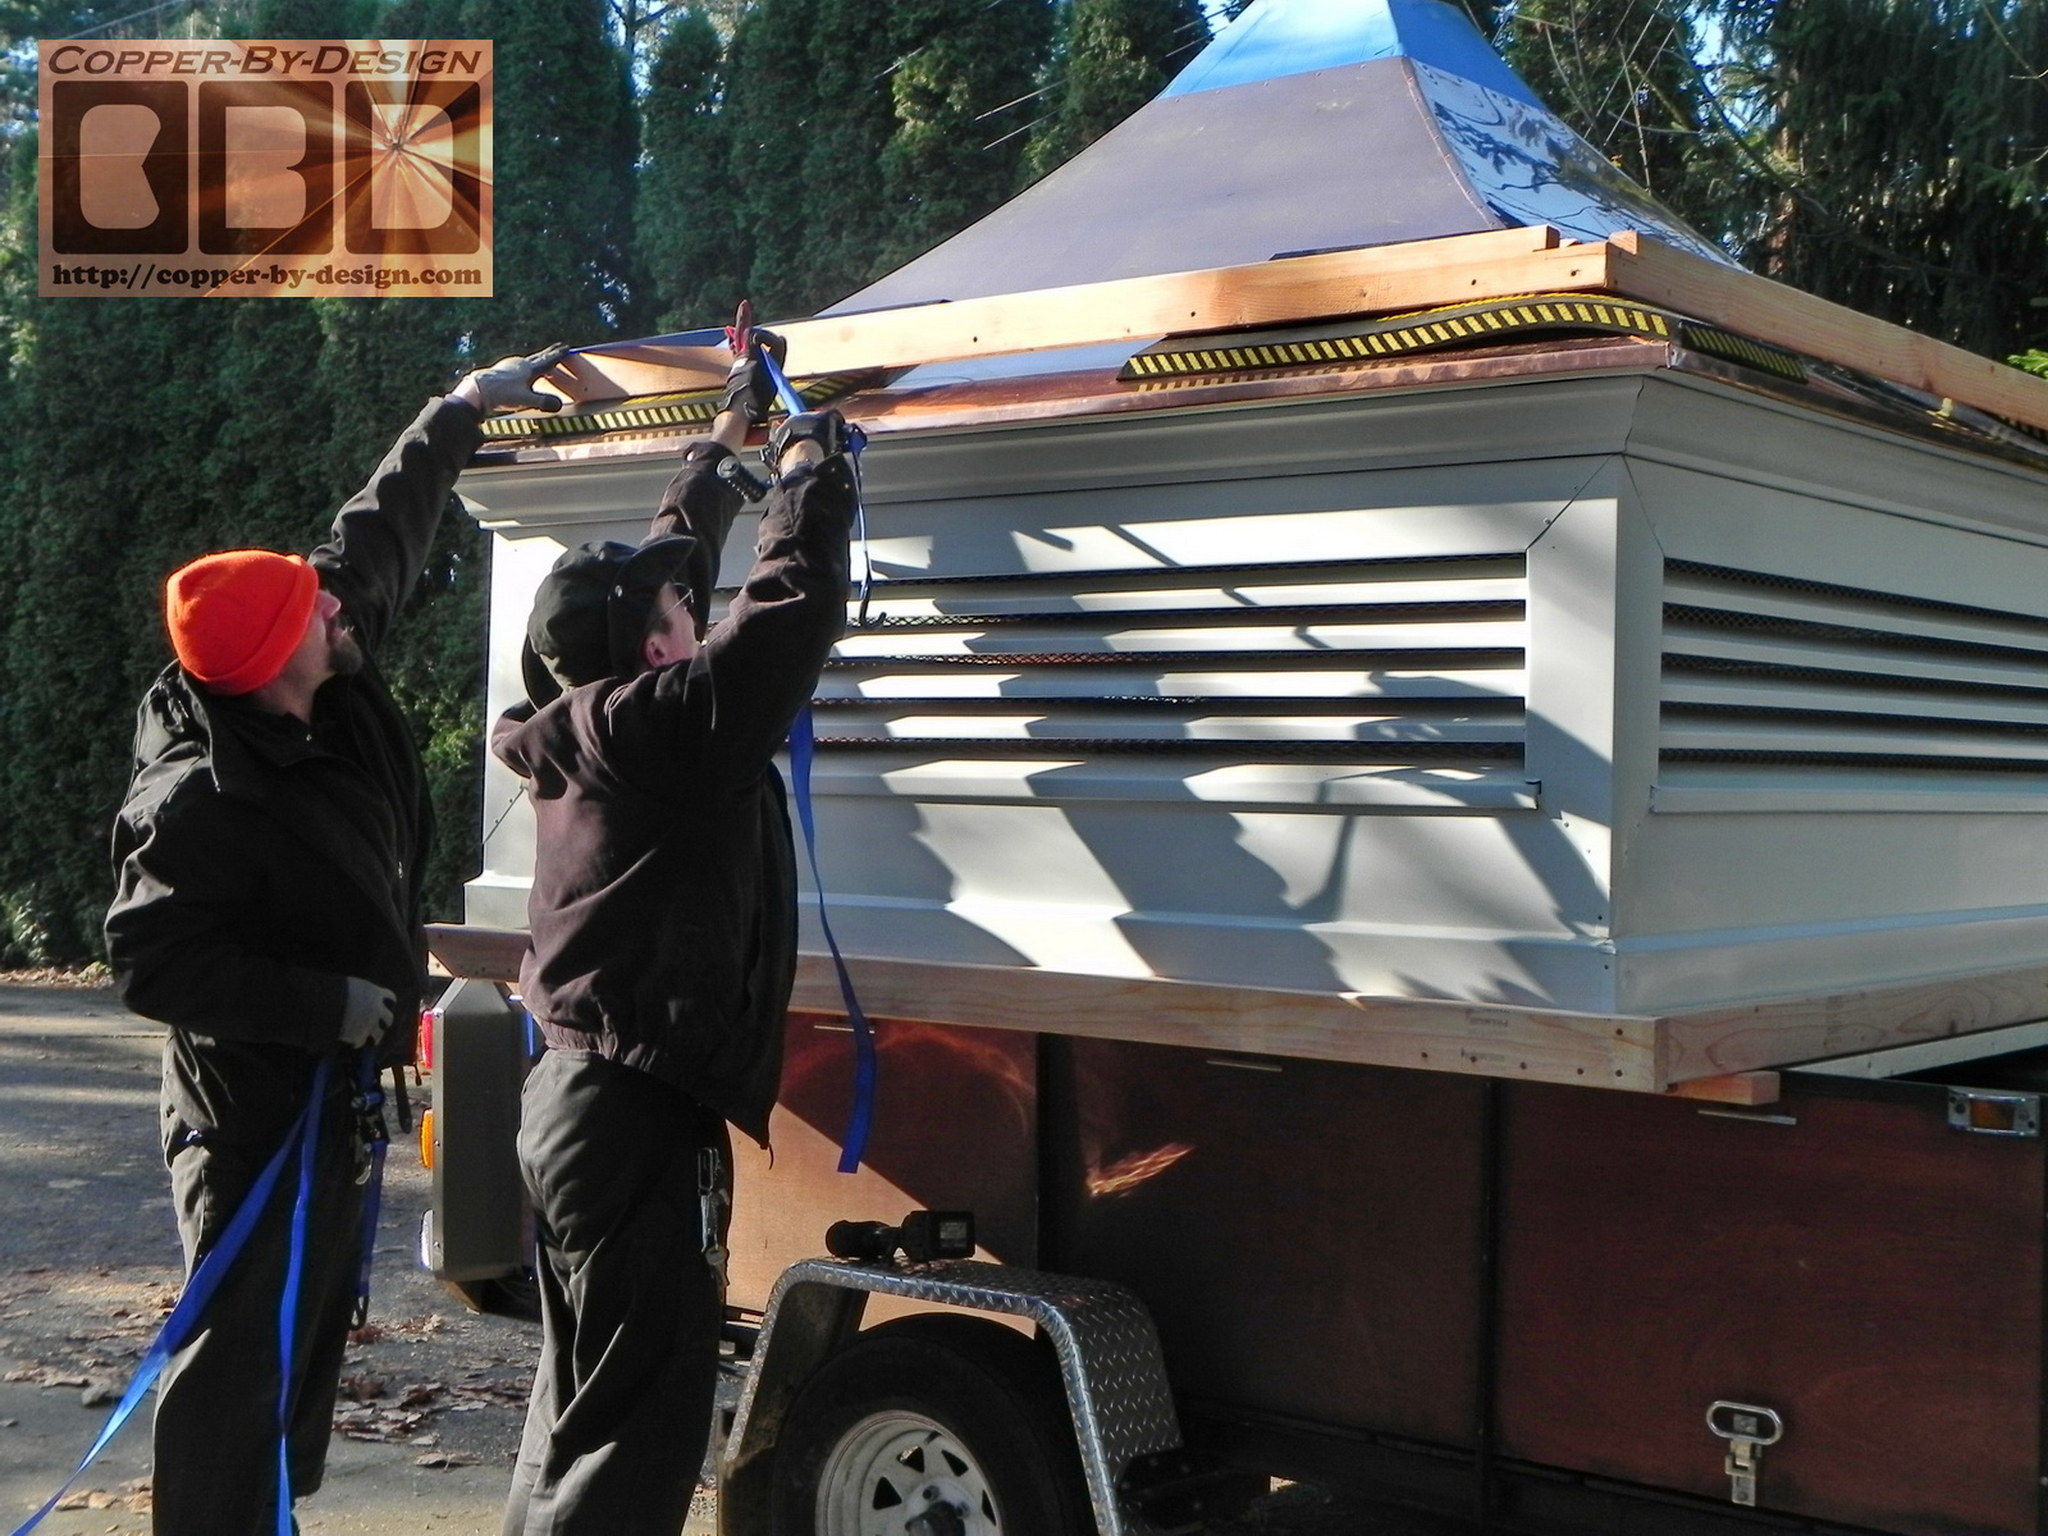
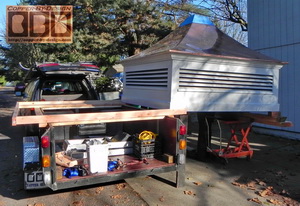
Delivery Preparation
12/3 - 5:
We had to deliver it to Silverton, Oregon on my
trailer and get it installed that Monday, so I worked through the
weekend to make sure we would be ready to get this loaded on my
trailer that morning. This now weigh about 500# or more.
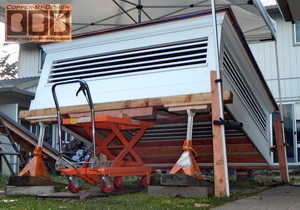 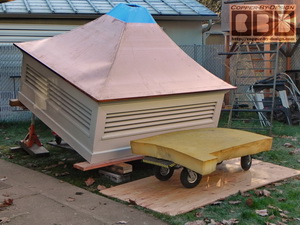
Since it was so wide we had to tilt it on
it's side to get it from the back out to the street. I devised some
stilts and this rolling cart to help get it up to slide it on a wood
frame I built for this over my trailer.
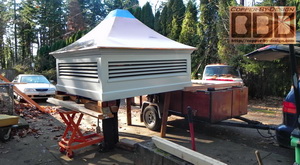 
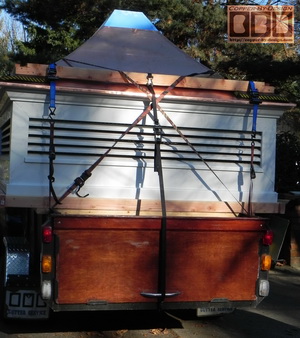
We strapped it down to withstand freeway
travel on my trailer and spent an hour on the road getting it to the
job site some 50 miles Southeast of Portland.
|
|
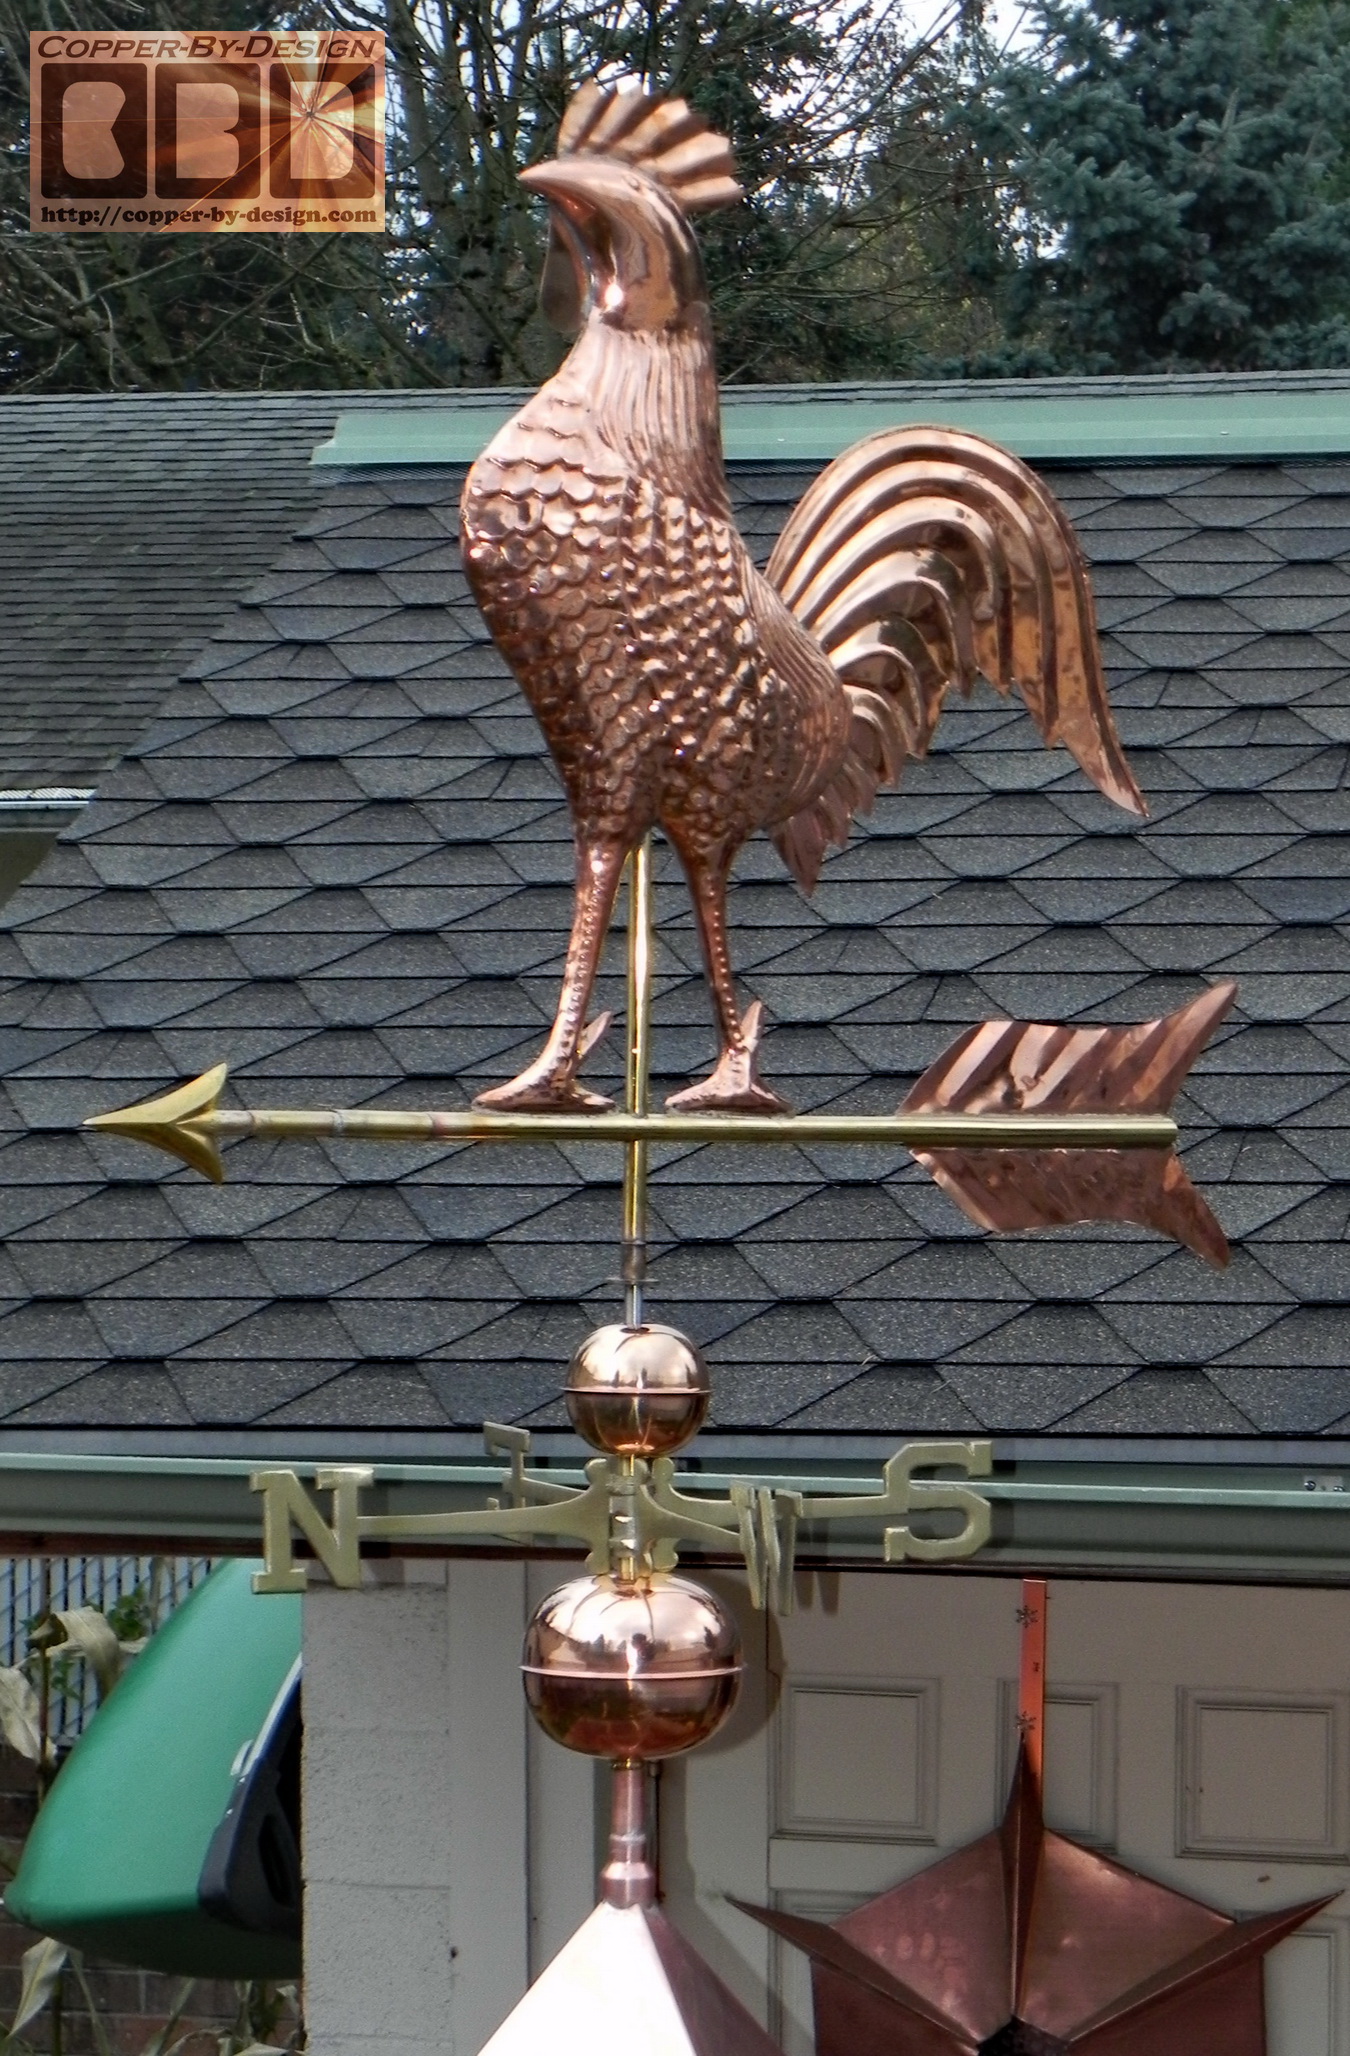
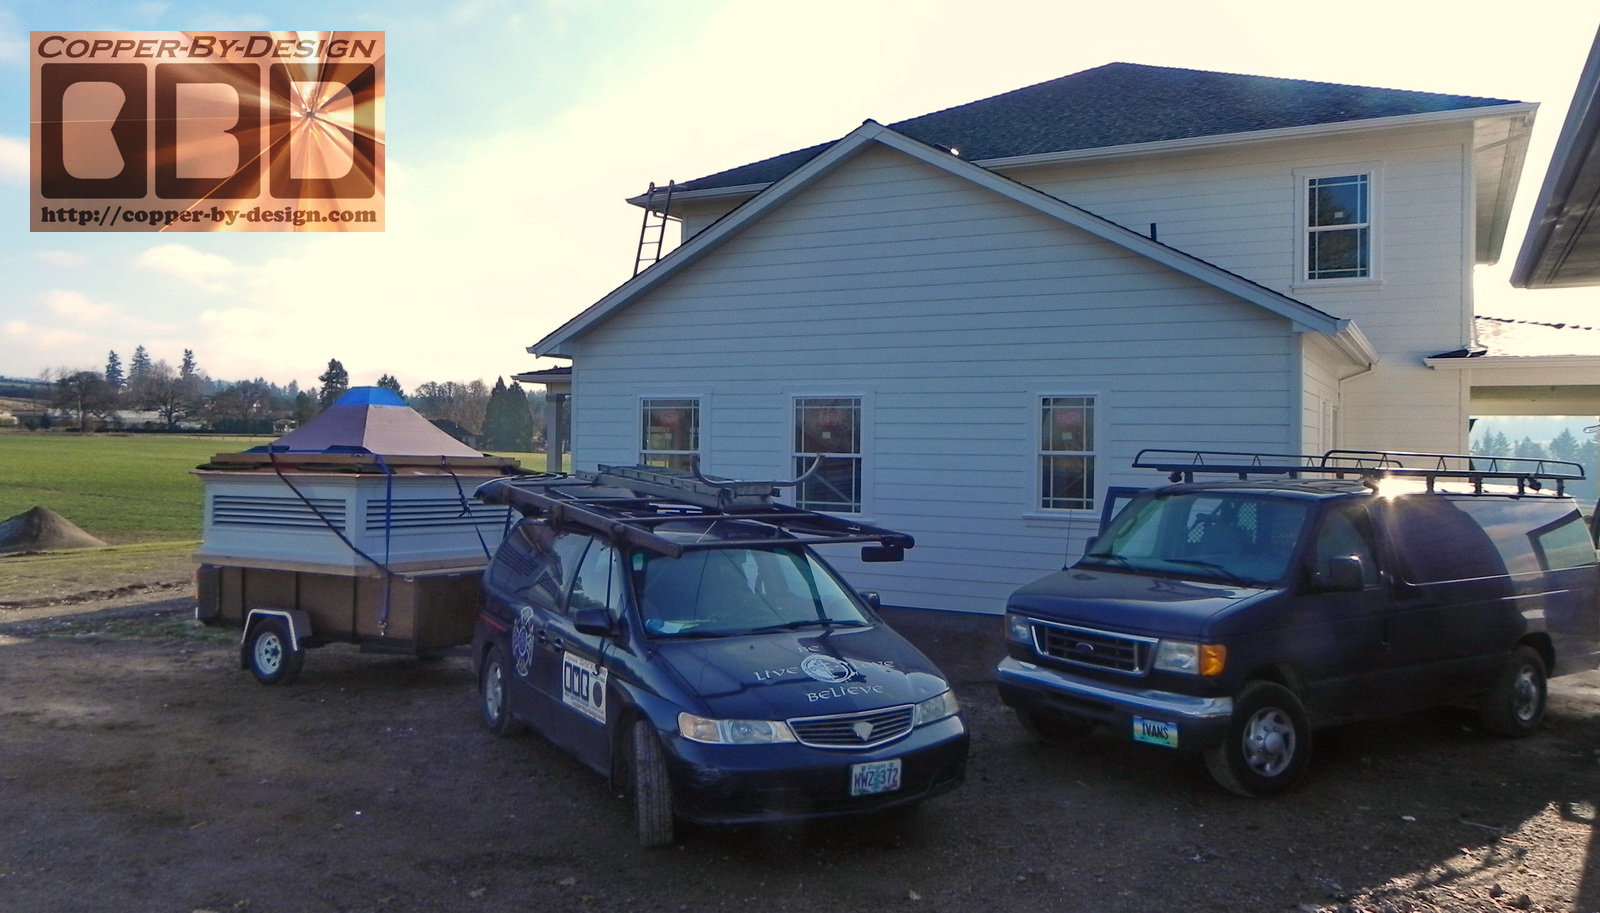
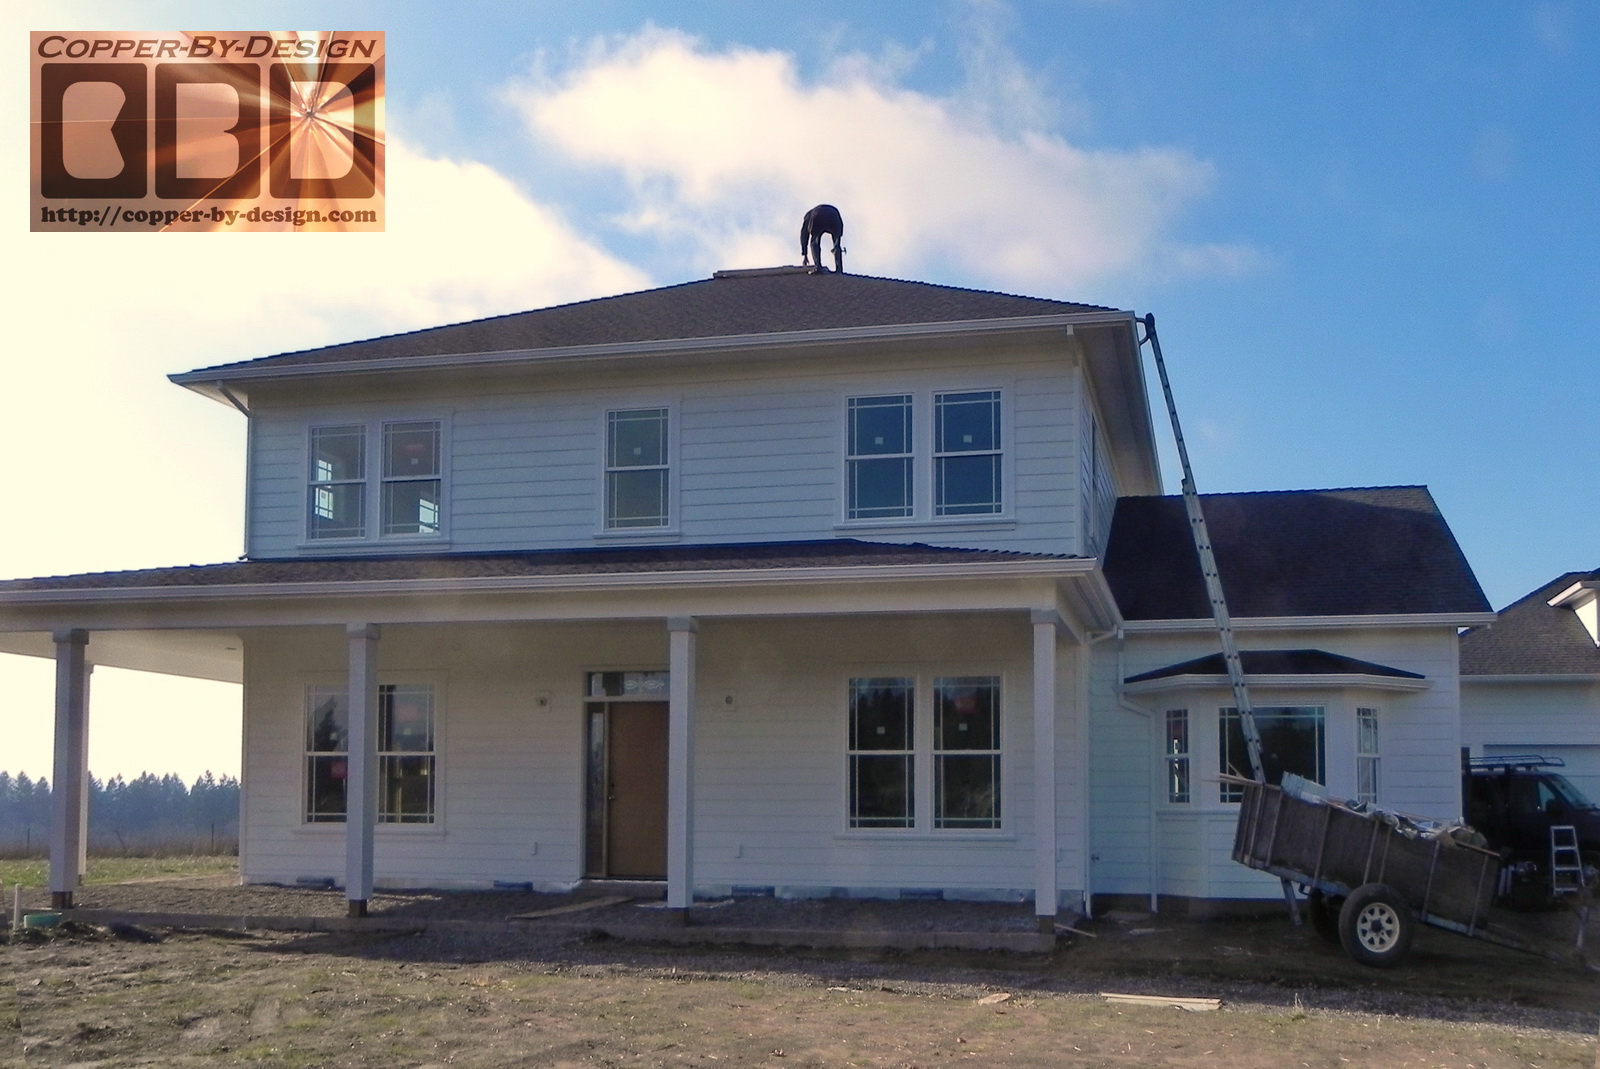
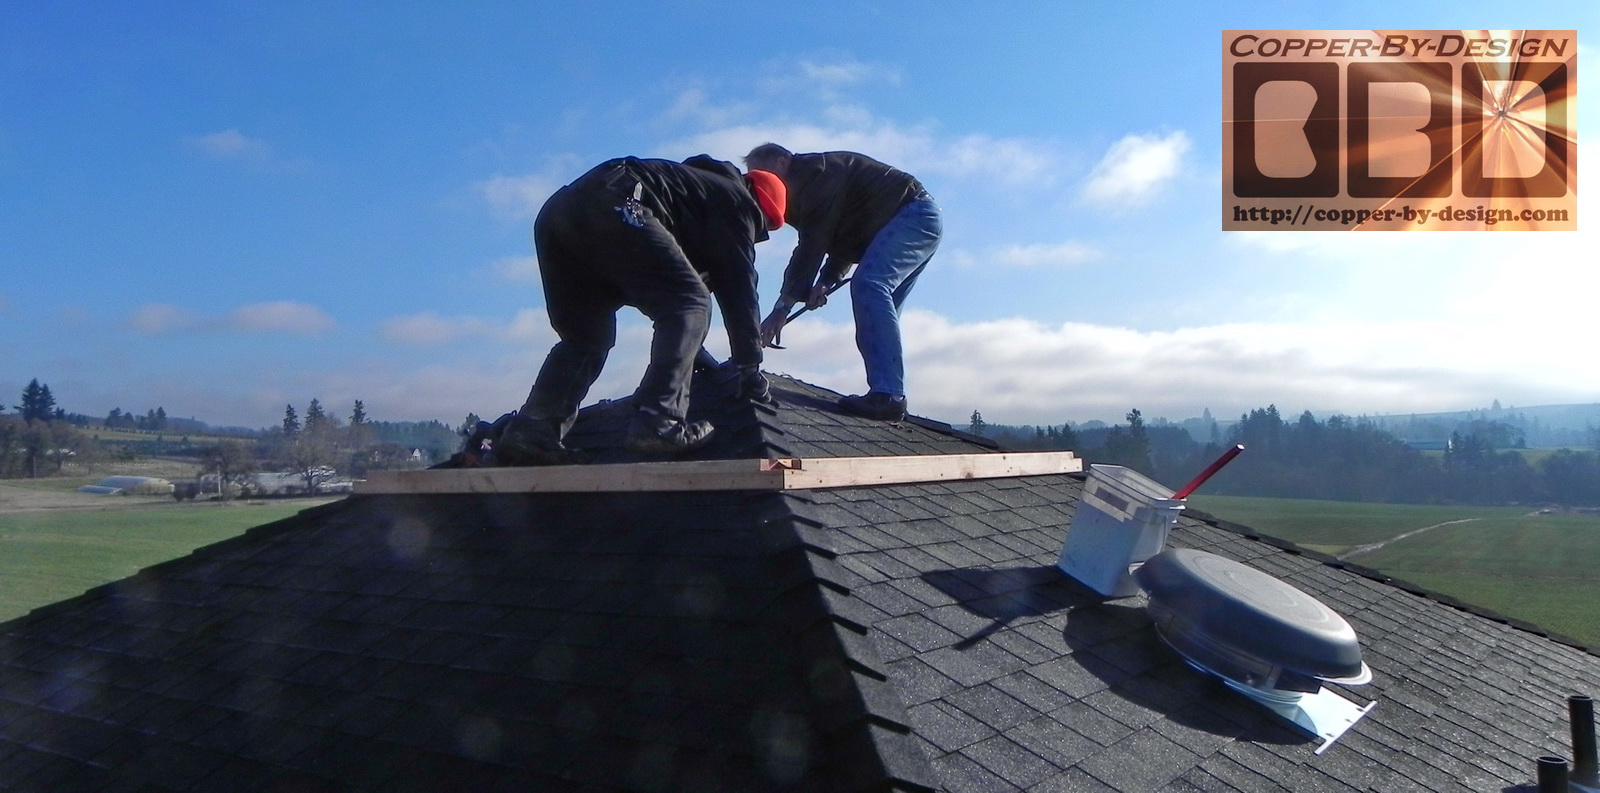
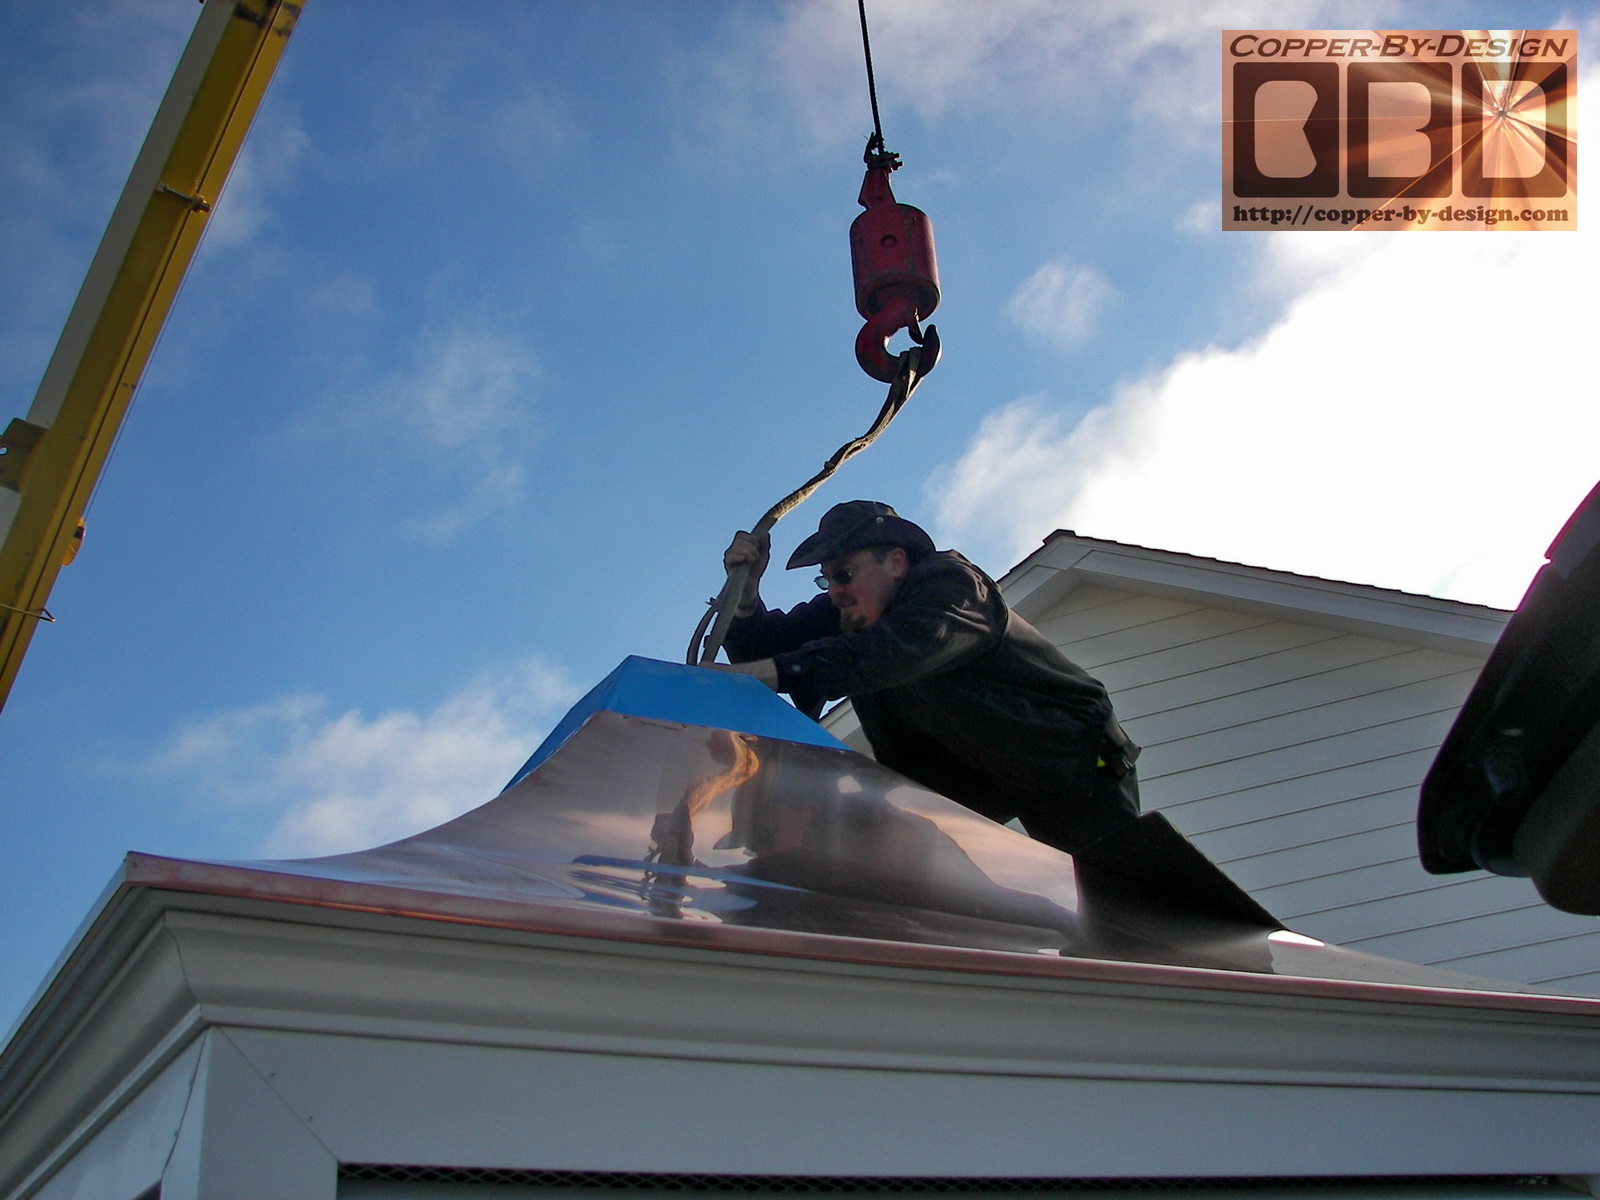
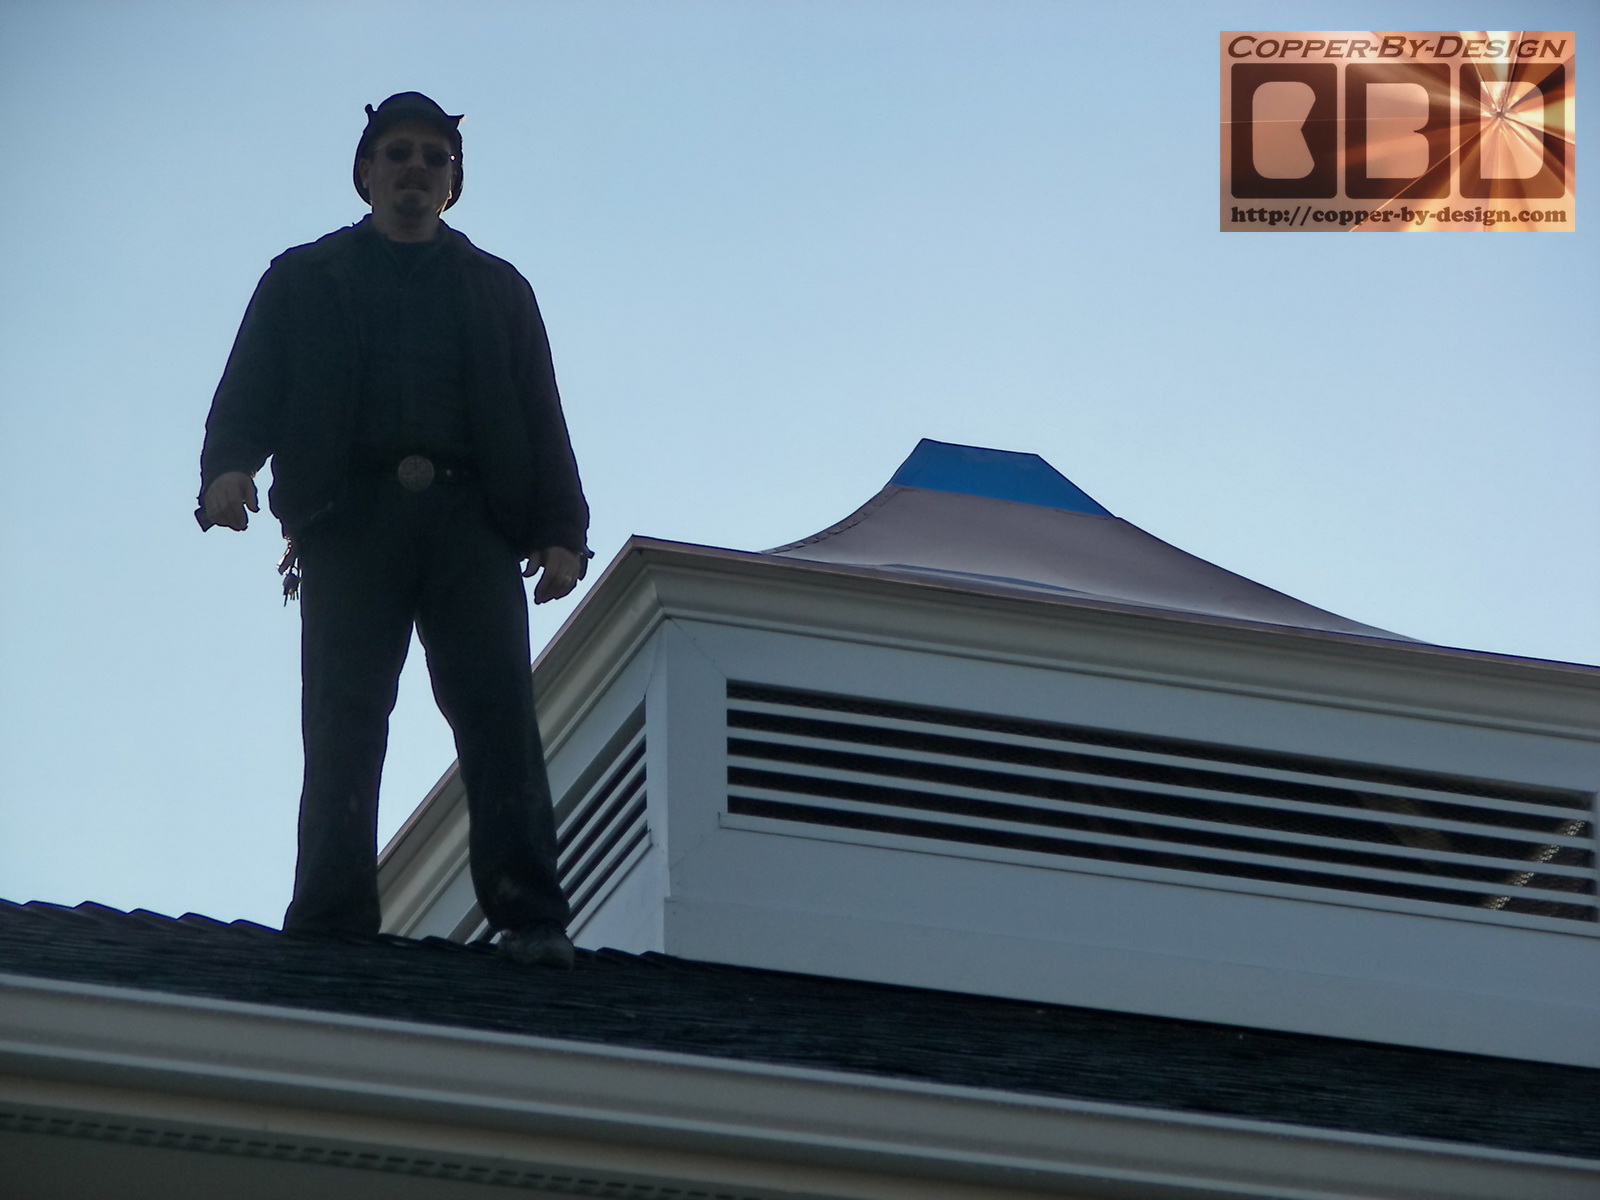
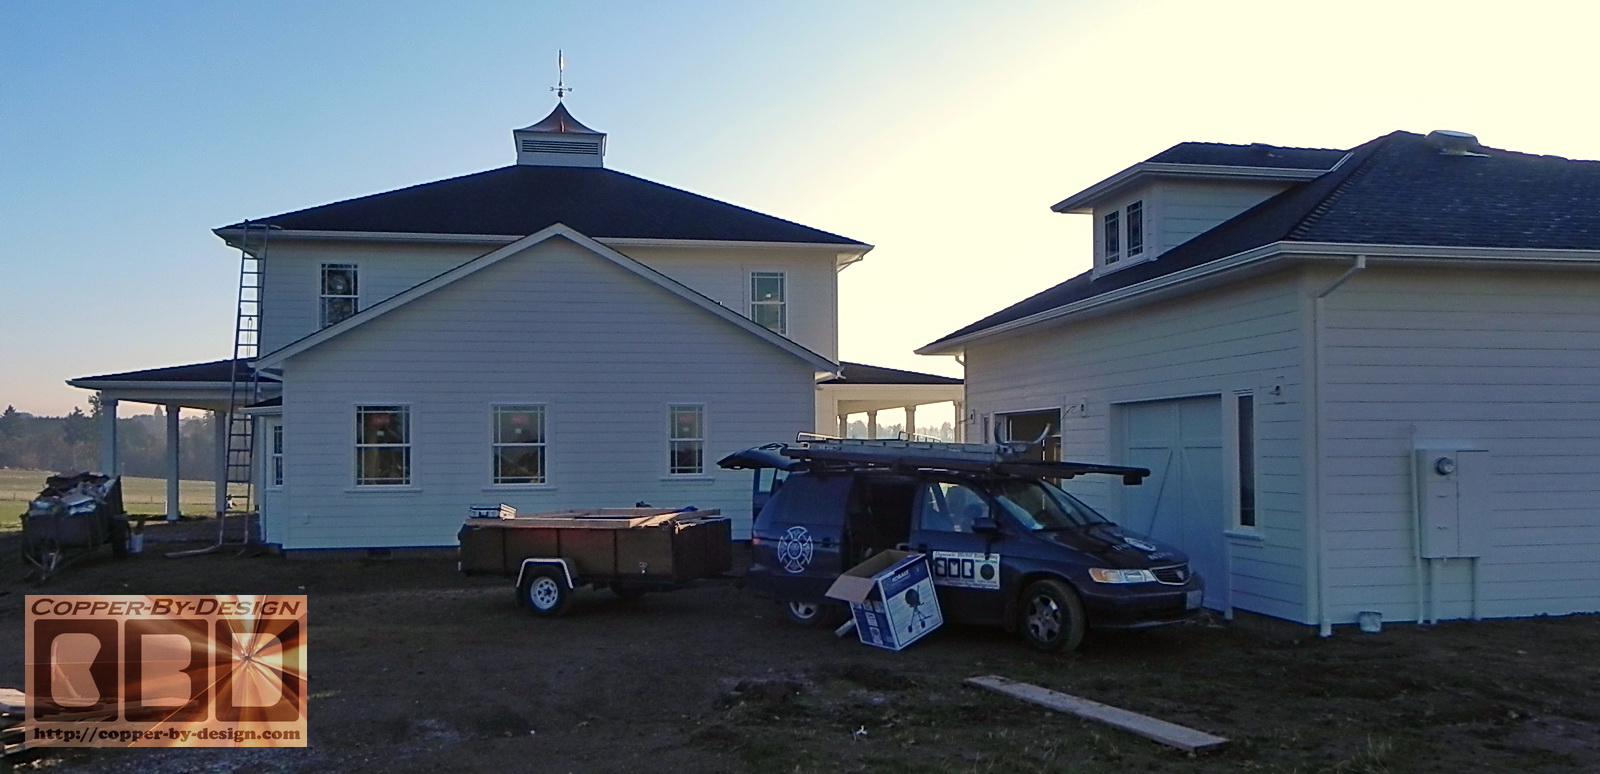
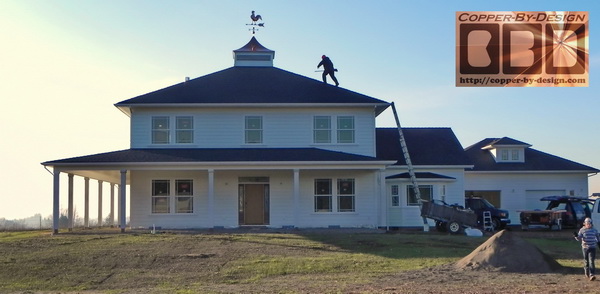
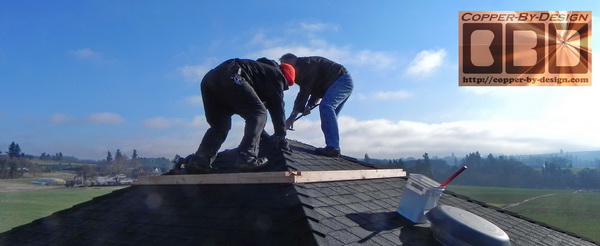
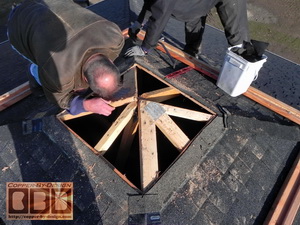
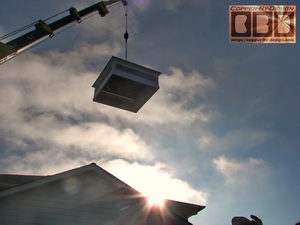
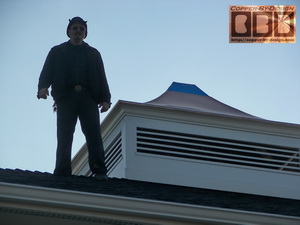
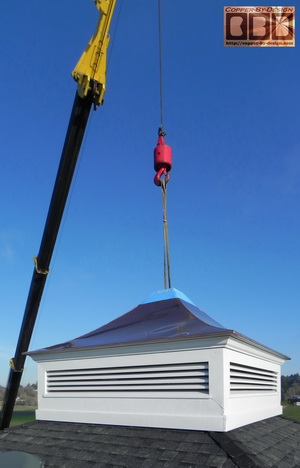
Installation
12/5:
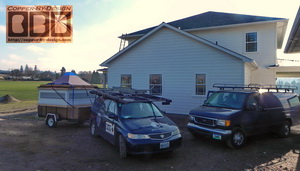 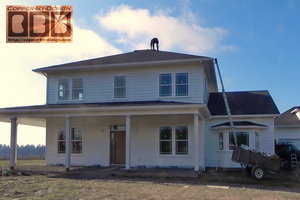
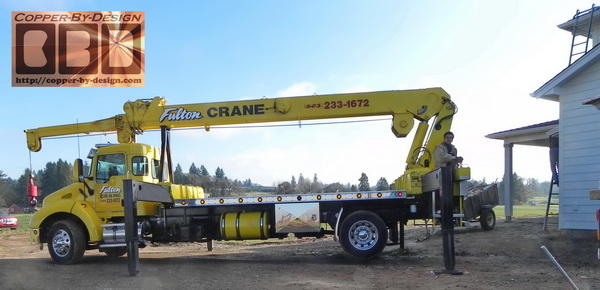
Shortly after we had arrived the crane
showed up a little early, so we were a bit rushed to get the roof
frame mounted and the hole in the top of the roof cut open for
proper ventilation into the new cupola. The owner Steve joined up on
the roof and dug in to help get it prepped.
 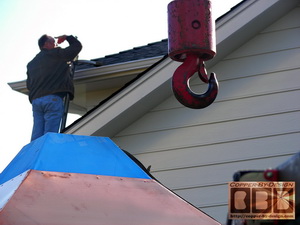
I rigged up a special custom wood device
to slide down inside the center hole and hook to gently lift the
whole cupola up, so there would be no need to have straps wrapping
under it, which would need pulled out after it's set in place.
Rather cleaver if I do say so myself.
|
 |
 |
|
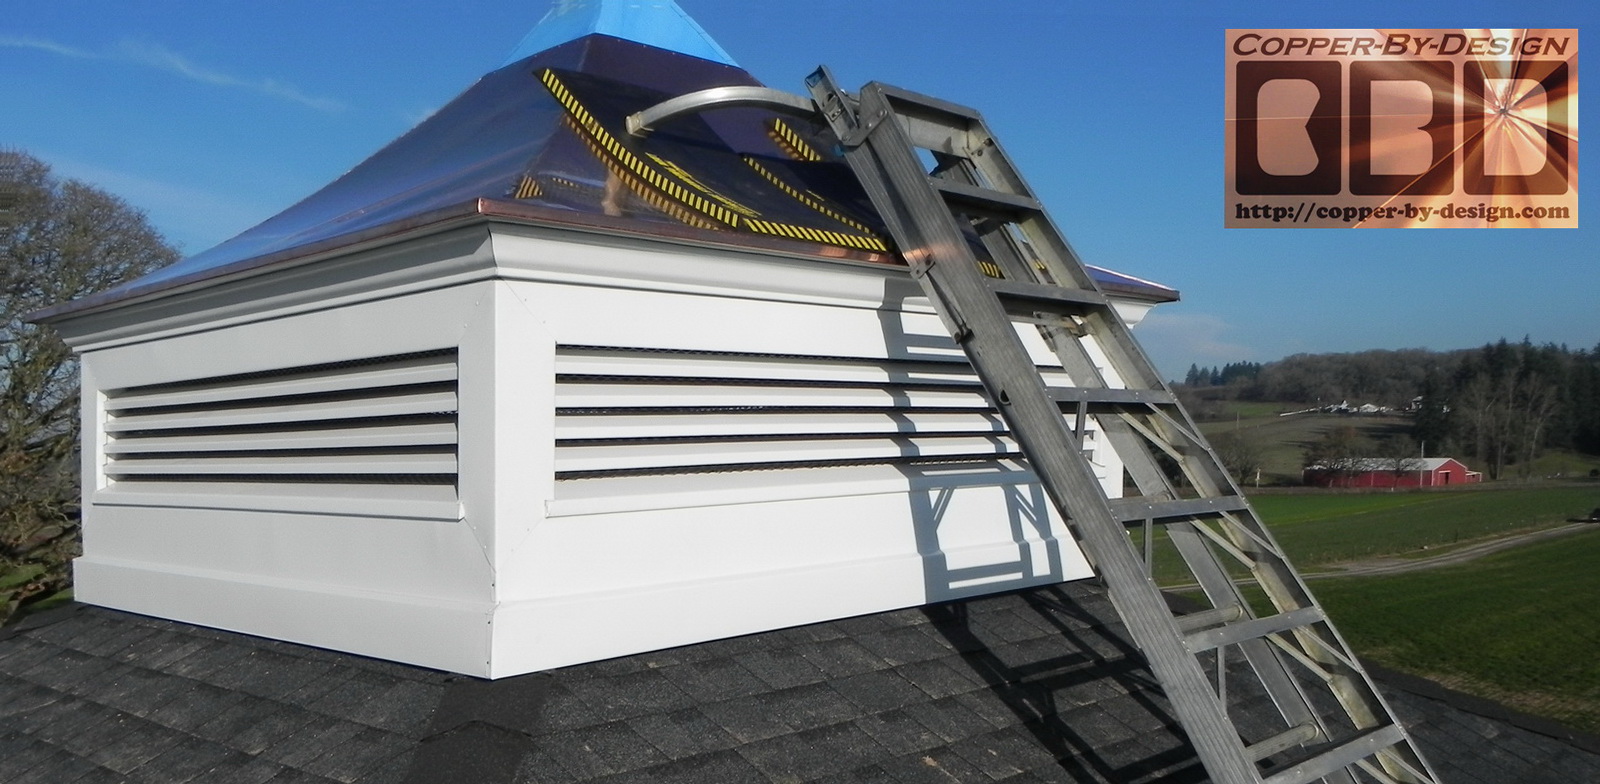
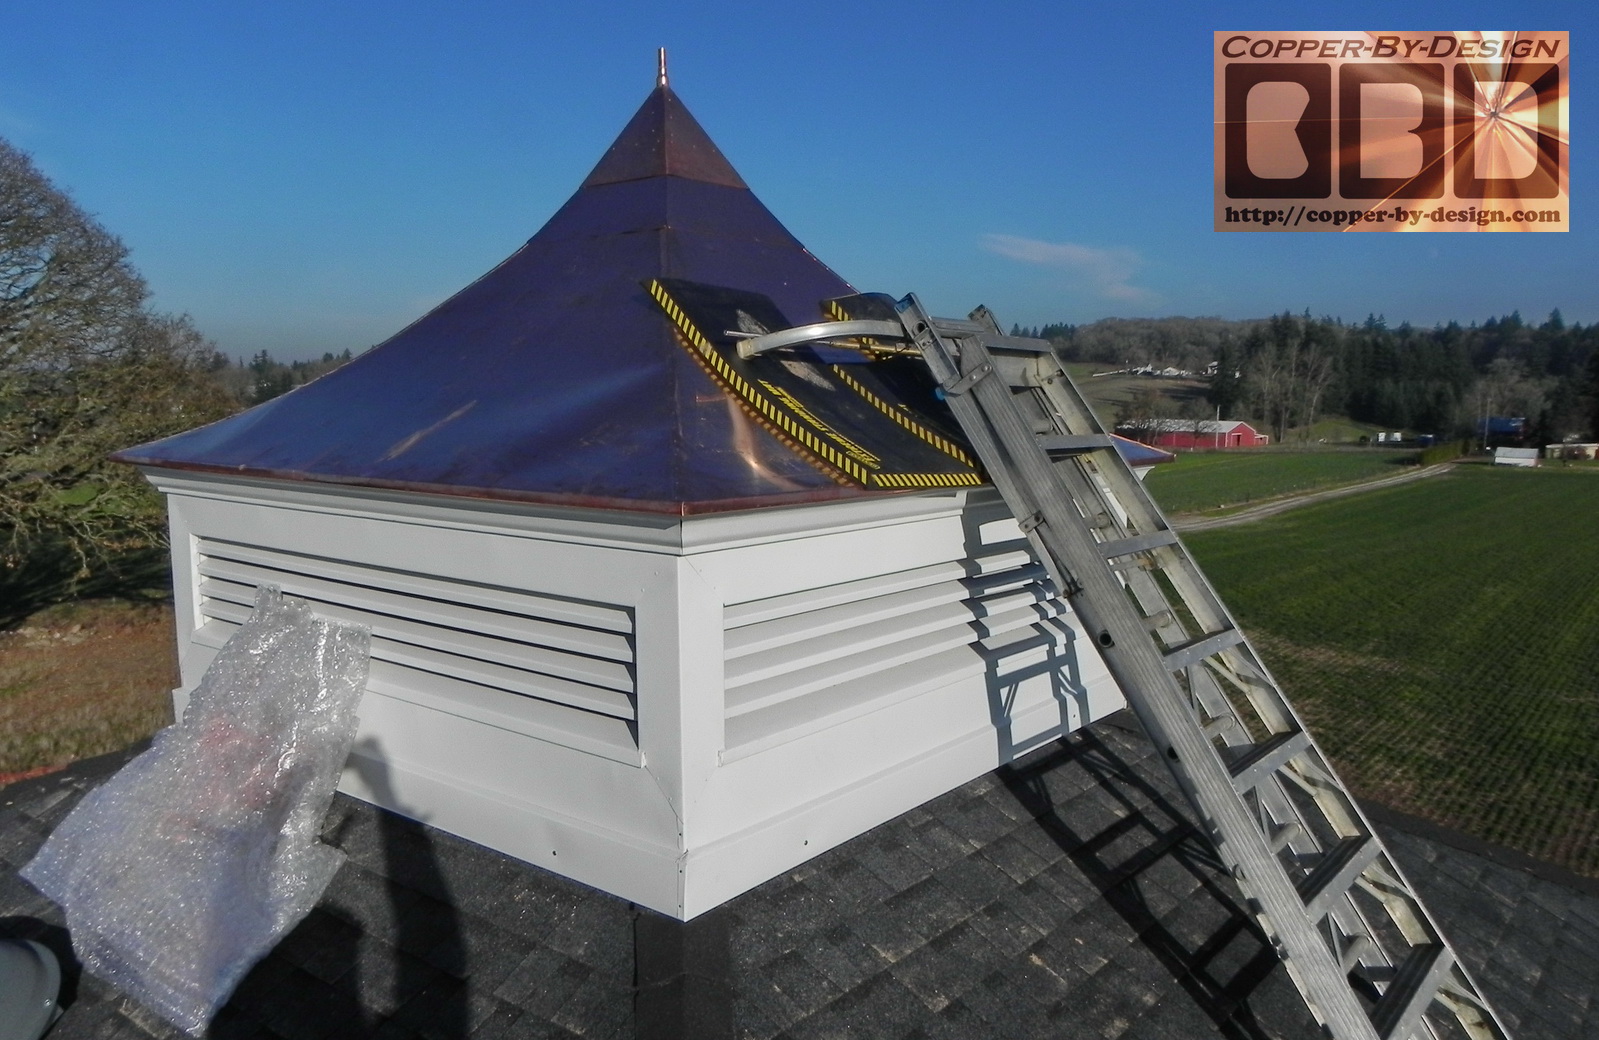
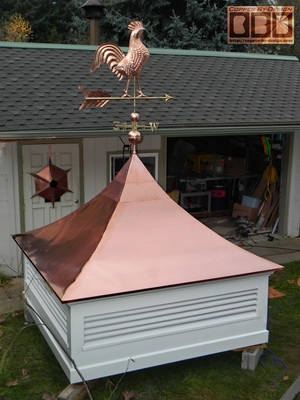
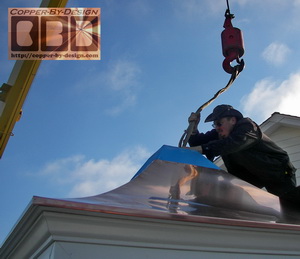
Then it was time to attach the upper
copper cover and the center peak cap, so I could place the
weathervane.
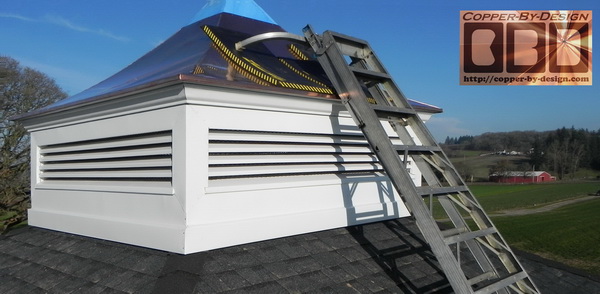
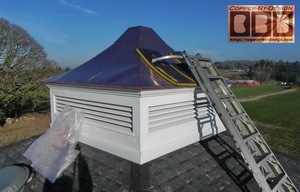 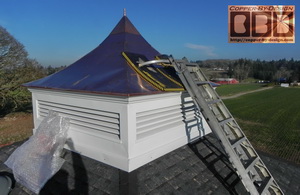
Chris got up there one last time to wipe
the cupola down and touch up any scratches on the white paint of the
aluminum sheet metal as I got these last shots. the clients raved
about how nice it looked once it was complete.
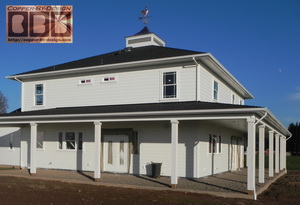

Cupola Cost: $8,160
w/enhanced Rooster style weathervane,
delivery, & installation
Clients saved over $1k form my under
quoting this project
|
.
..
.
.