|
|
Brown Custom Rear Balcony w/New Stairs Work Page Updated 5 / 2012 |

|
|
Company Profile |
|
Roof Caps |
|
Chimney Caps |
|
Scuppers |
|
Gutters |
|
Shipping |
|
Contact Info |
|
|
Brown Custom Rear Balcony w/New Stairs Work Page Updated 5 / 2012 |
|
|
Company Profile |
|
Roof Caps |
|
Chimney Caps |
|
Scuppers |
|
Gutters |
|
Shipping |
|
Contact Info |

| Here's another projects I've done that show the unique diversity and innovative ideas of what I can do to solve your needs and desires. Even if your needs are different than what is shown here, this shows how I'm good at brainstorming solutions, design, and fabricate nearly anything you may need, but this is also good advice to have a local Contractor do if you are not within our area of the Great Northwest. |
.
|
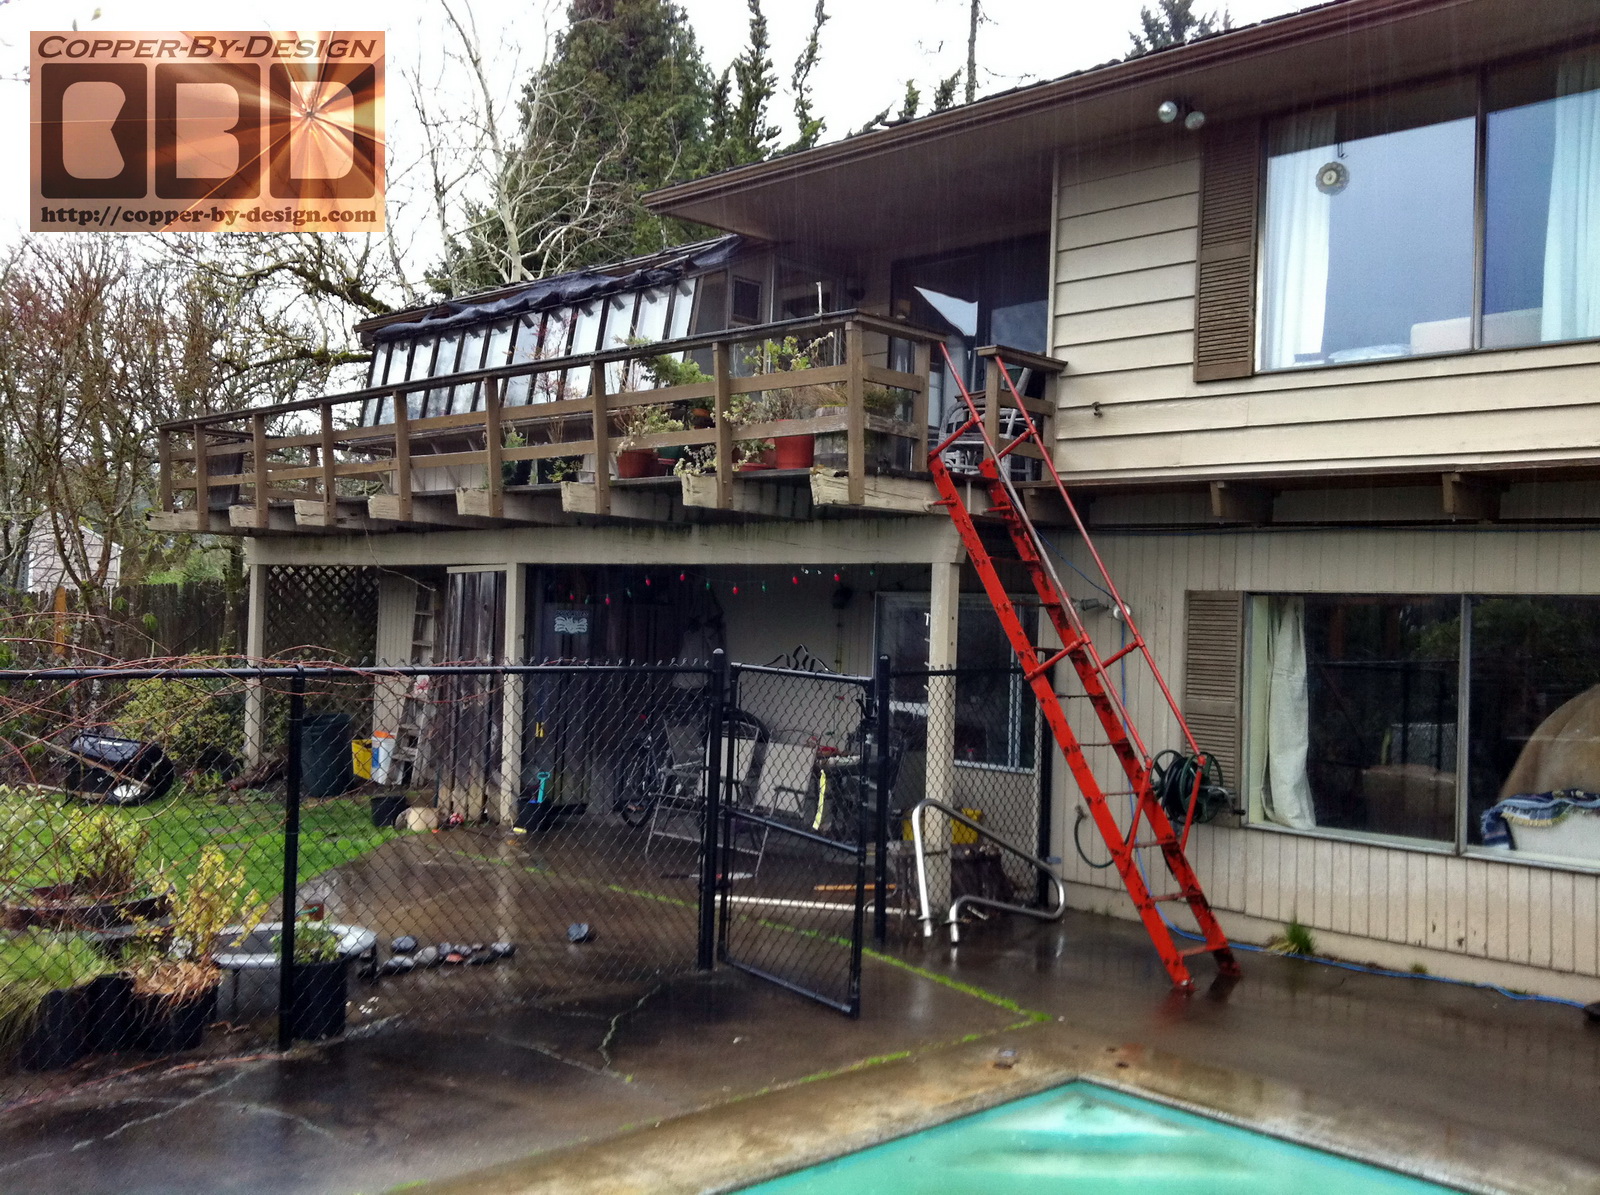
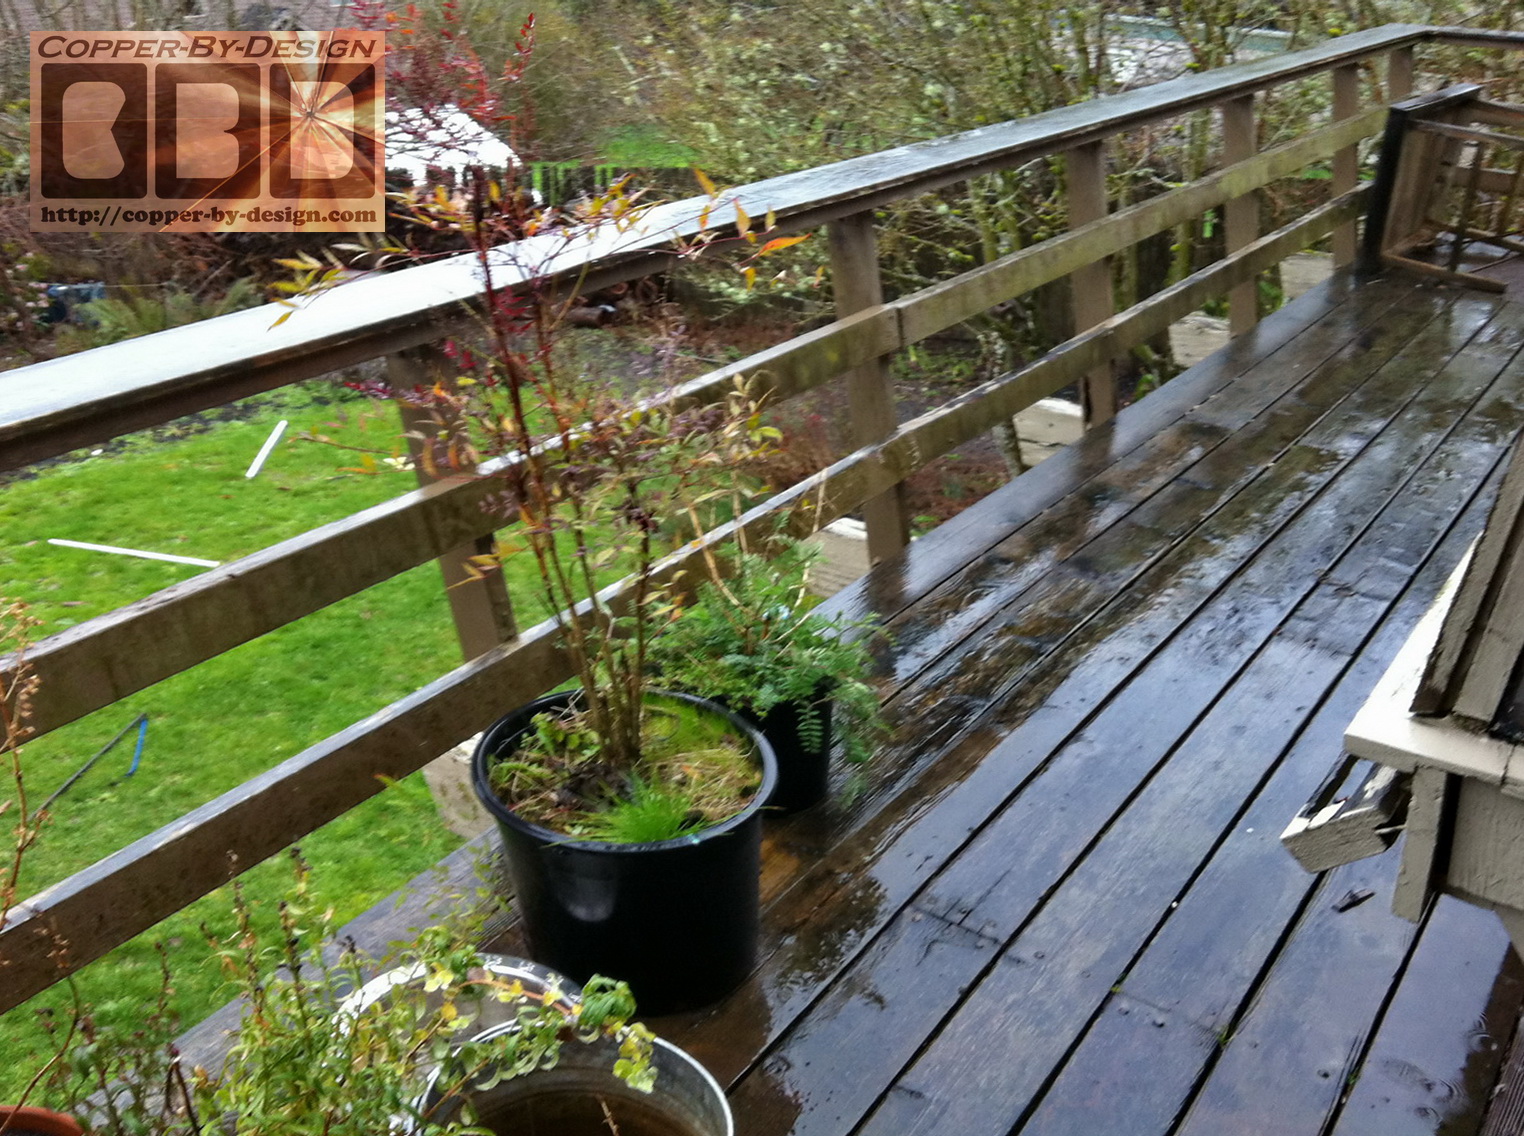
10' X 32' rotten wood balcony rebuild, new 4' wide stair case, and 117 ln' of hardwood railing w/SS cable |
|
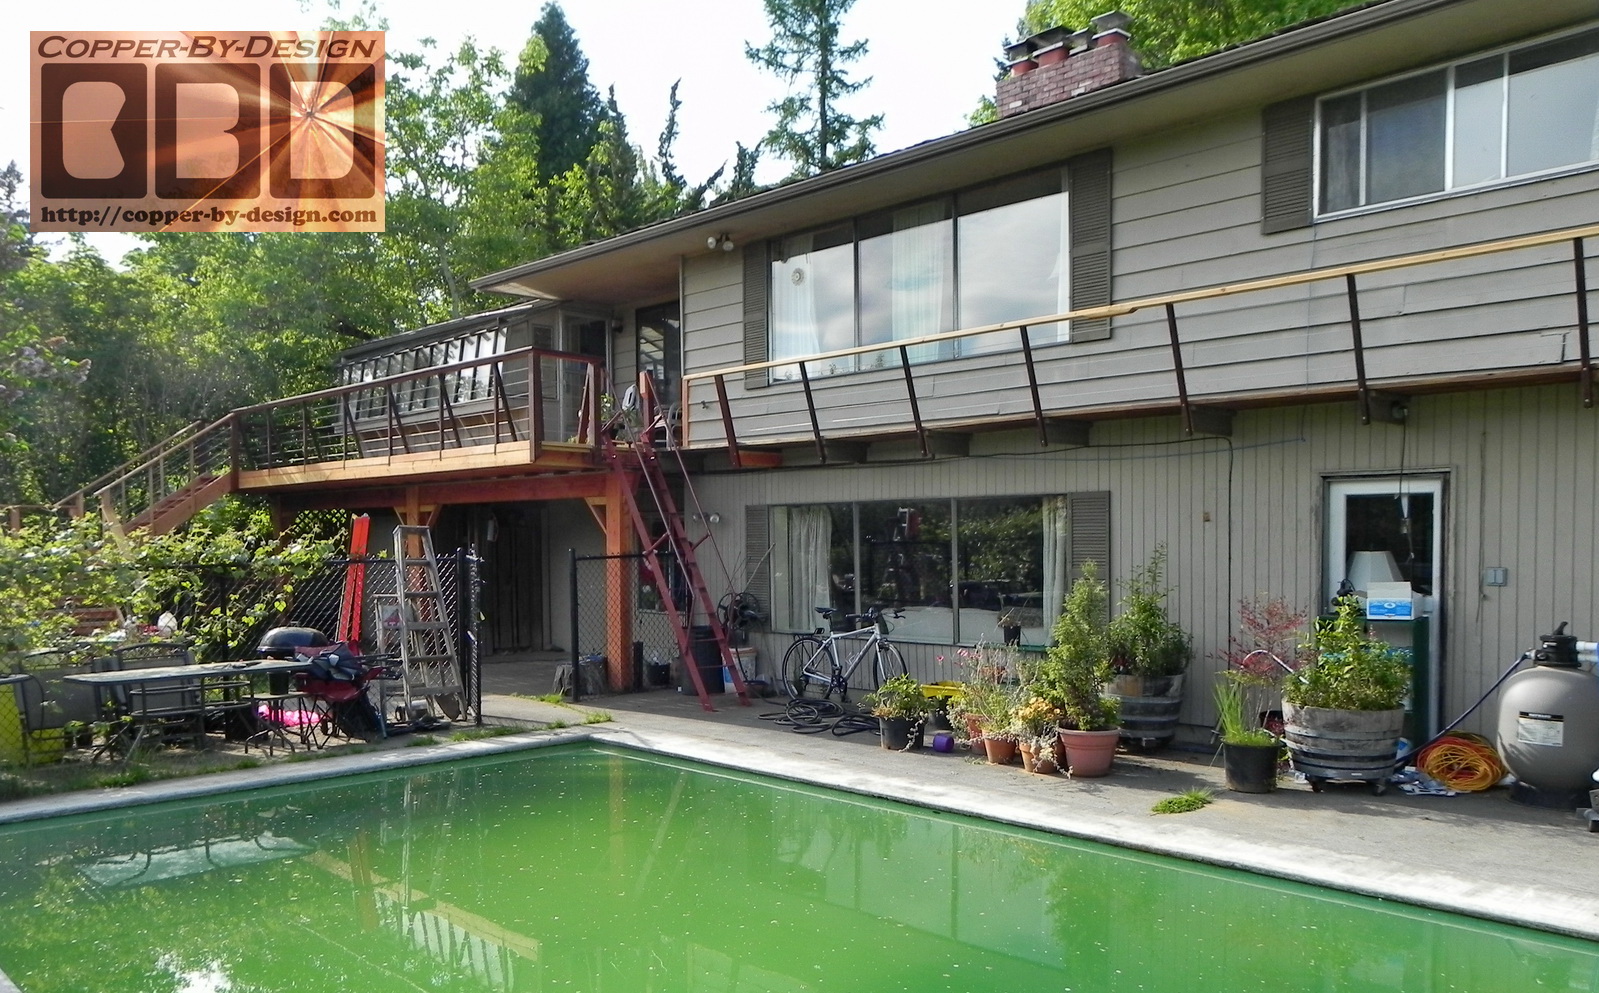
We've known Paul and his Wife for a few years after being part of a raw milk Co-op through them. I was asked to replace a plastic downspout in back with aluminum, since it had fallen apart. While back there I noticed his balcony was in serious need of repair, so I offered him some friendly advice, knowing he was a handy guy with a decent workshop in his garage. I was not trying to sell him on my services, but he was not wanting to take on such a substantial project.
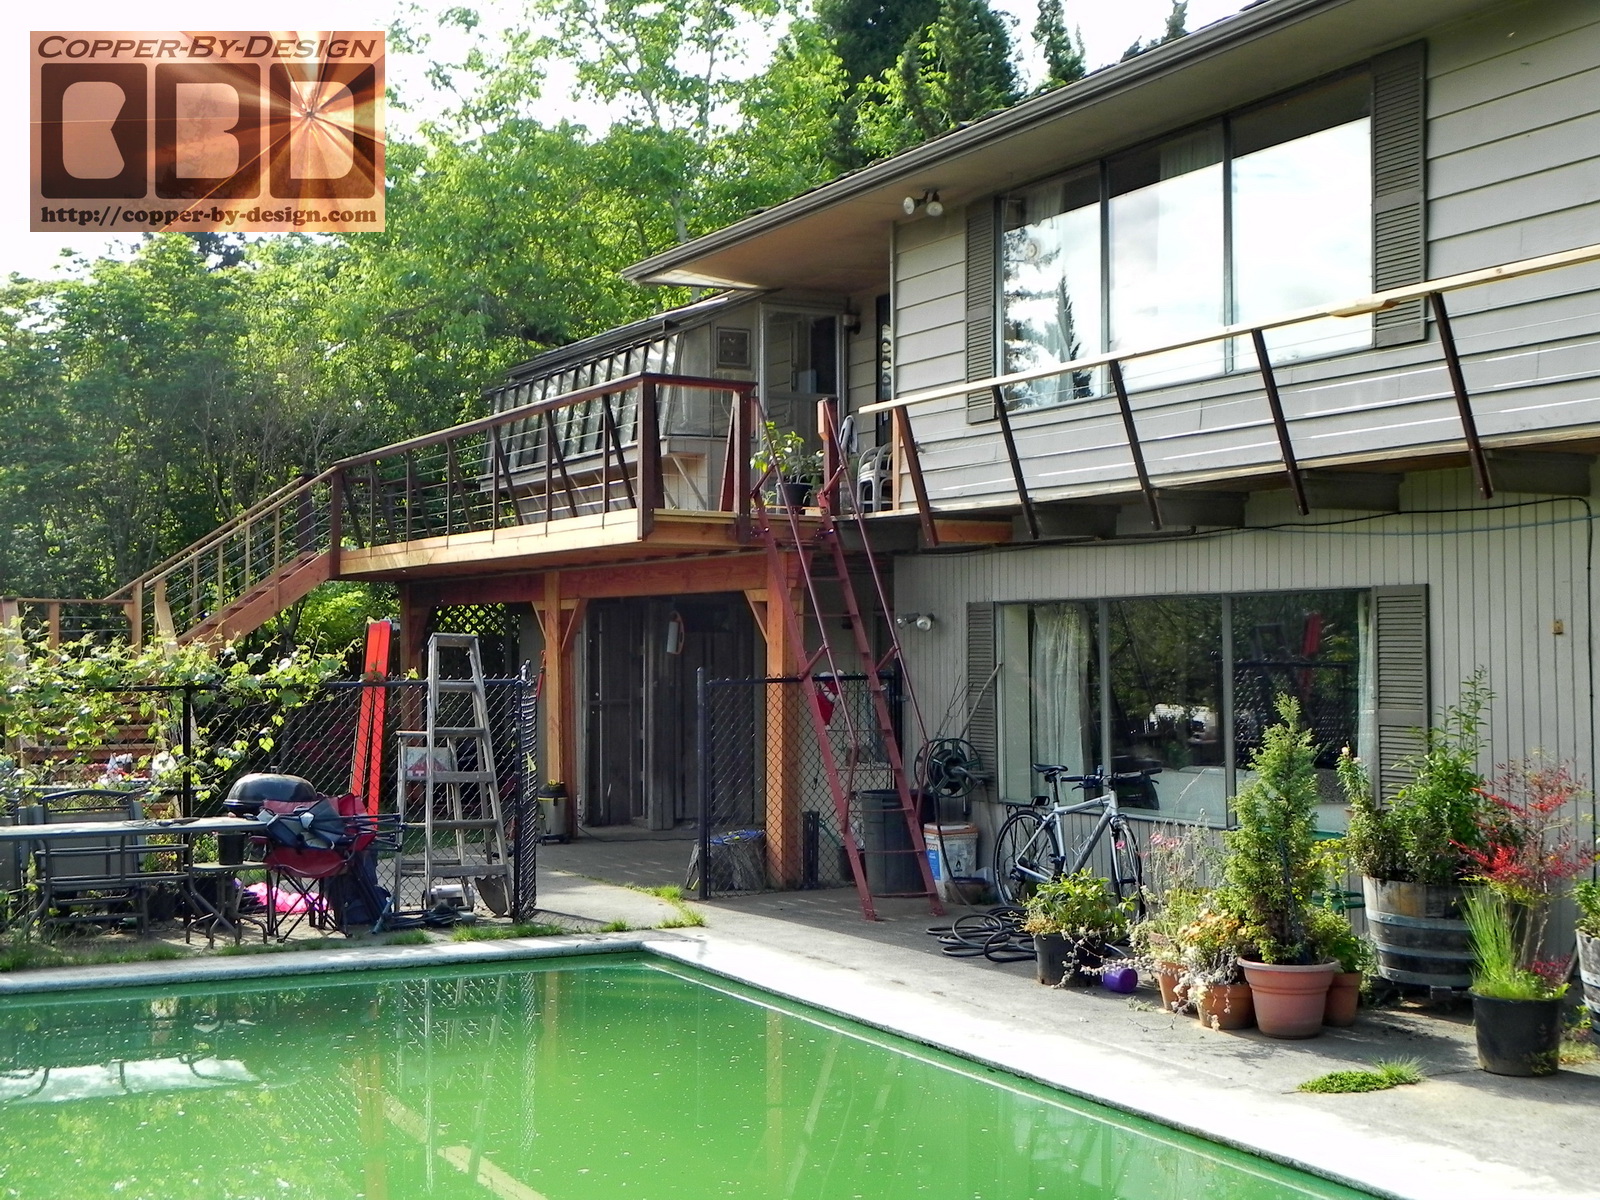
We then discussed options to rebuilding their back balcony and add a star case on the other end. They also wanted the railing formed with metal cables for a clean less obstructed view. You can click on each of these photos to see them much larger to get a better look at the before and after photos. I had personally designed each detail with the client's input:
$12,105 for
parts and 6 weeks labor
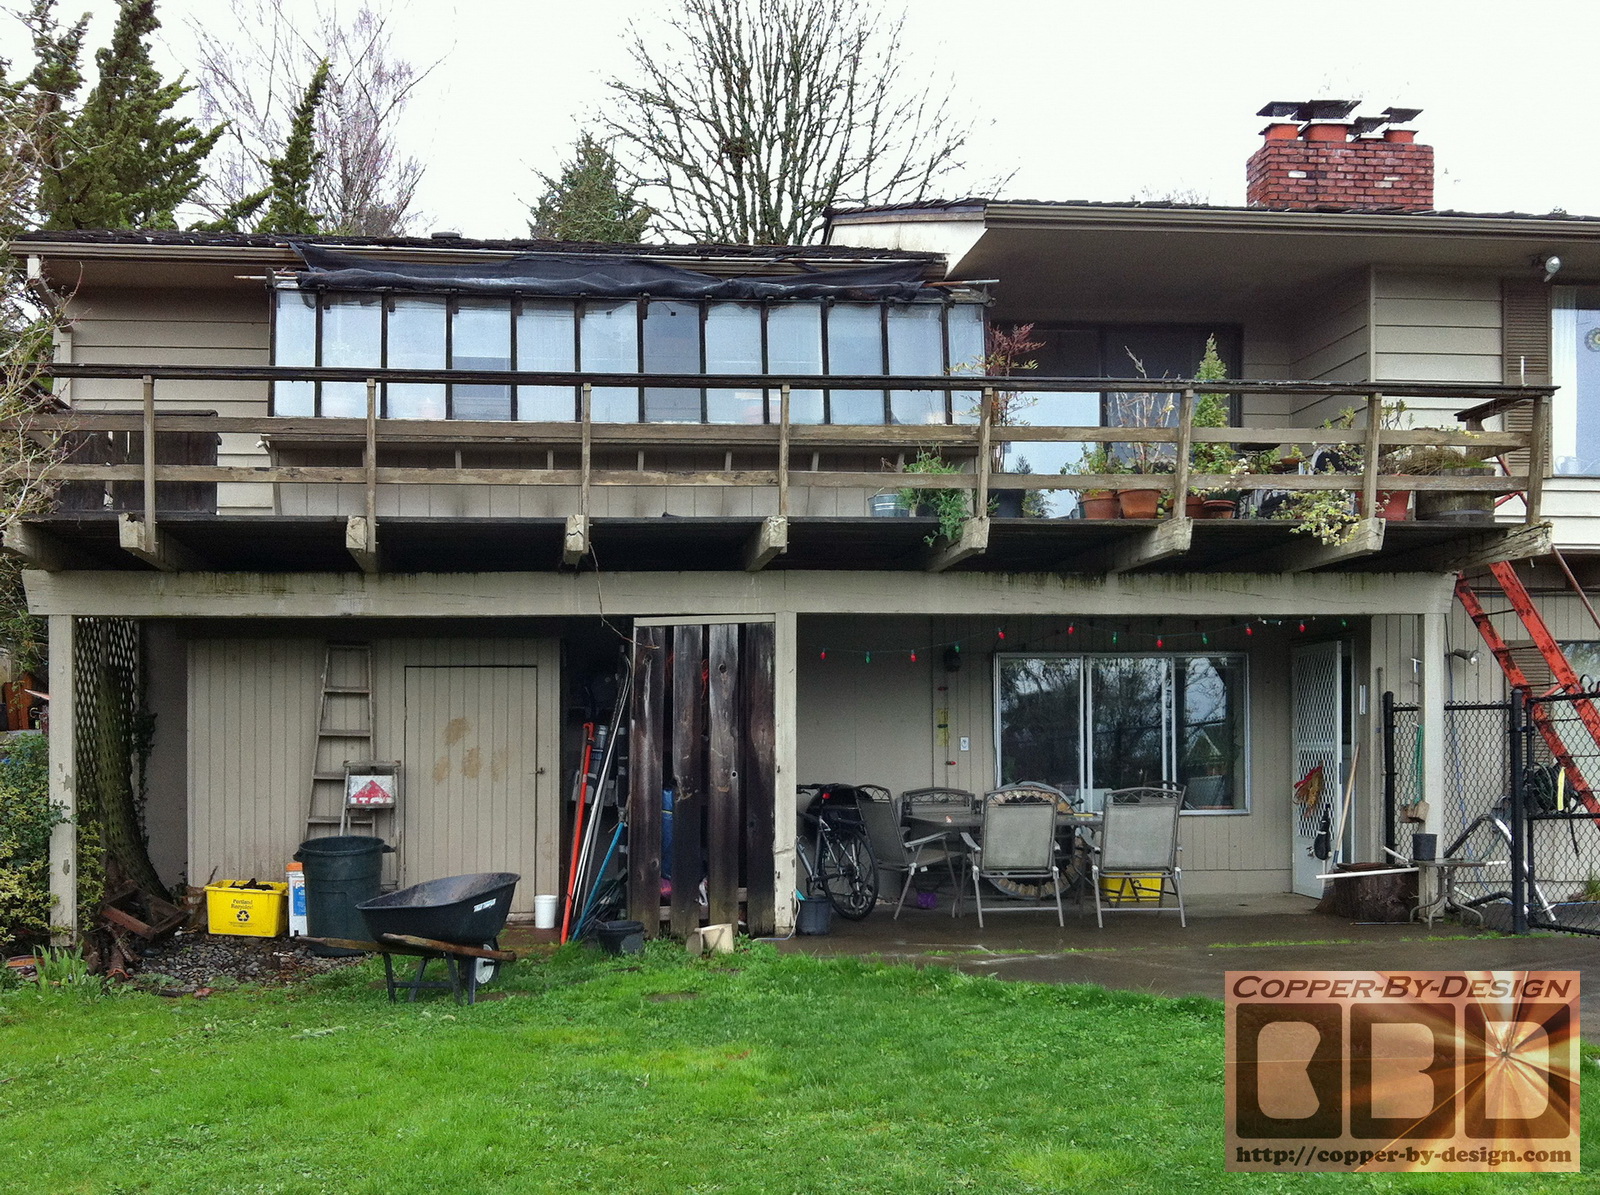
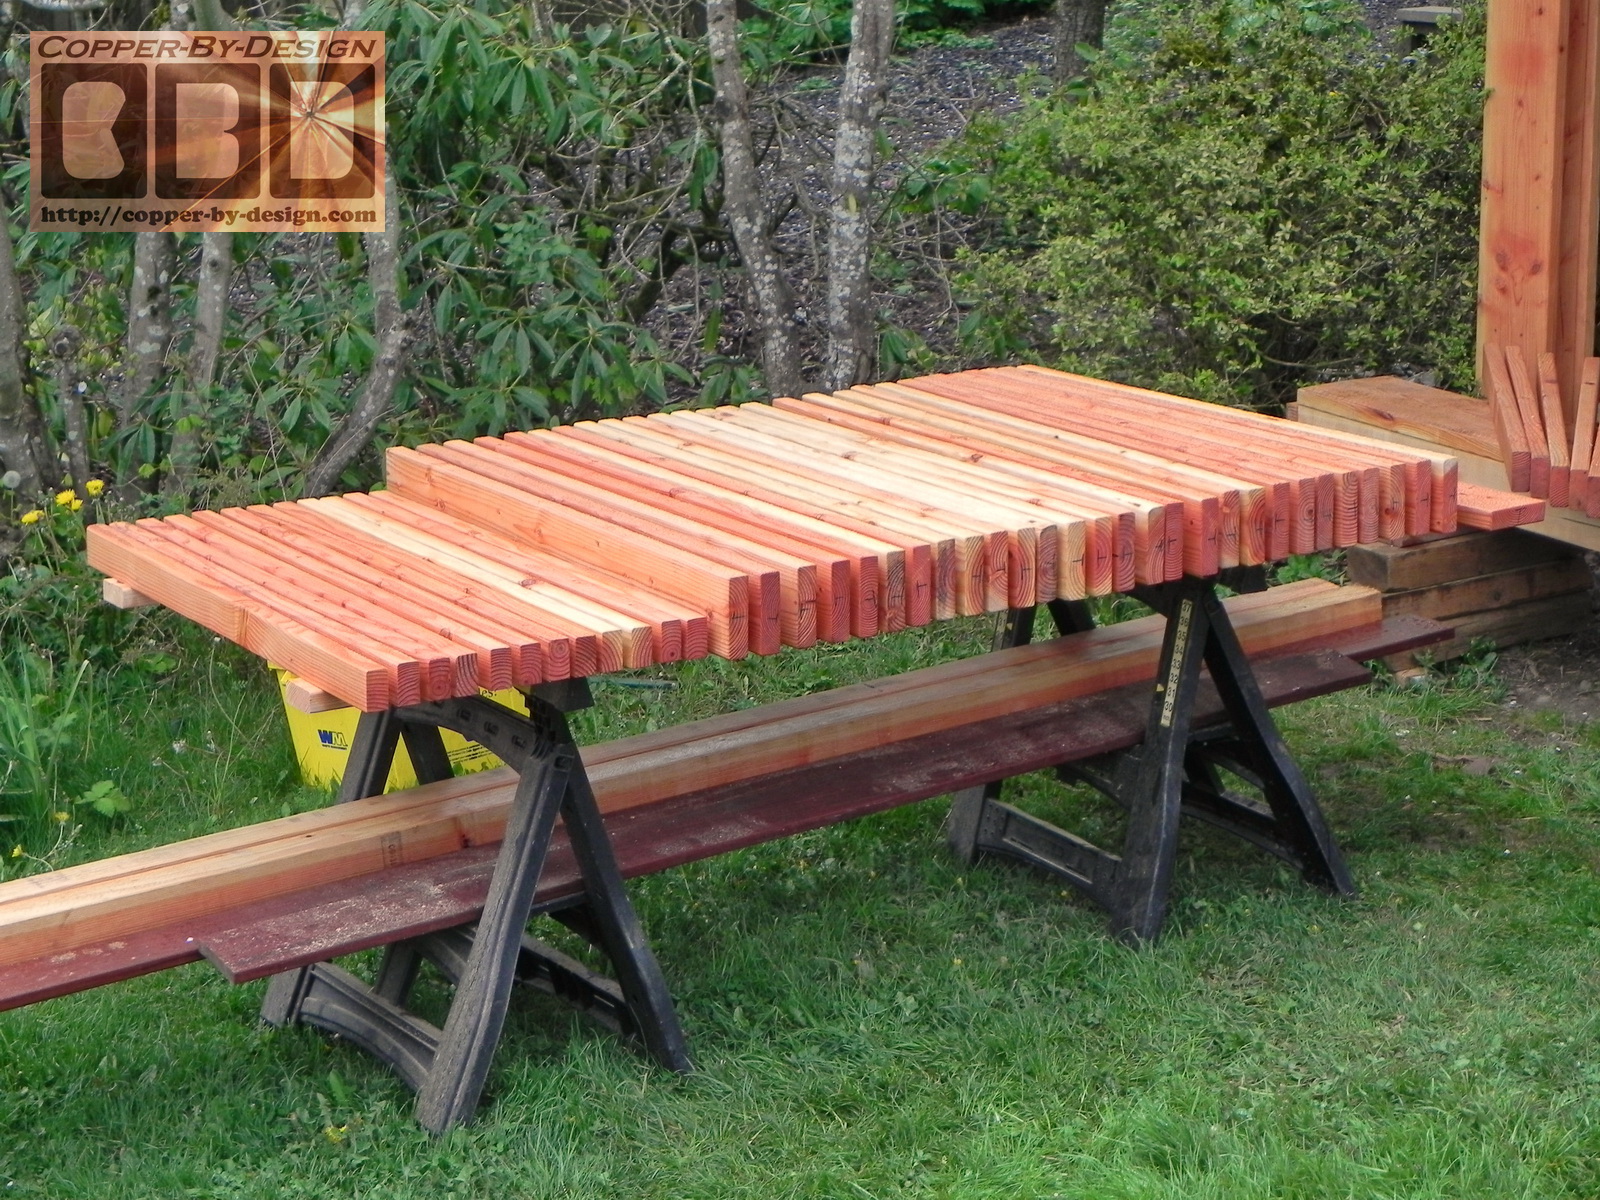
I could see how many of the floor boards were warped in such a way they trothed the rain water, in stead of shedding it, which shortened their life span by holding water long after the rain had stopped, as well as dirt, which breeds mold and mildew that eats away at the wood.
As you look at the end grain they should realize how the lines are going to try to straighten out, so it is important to install them convex side up to shed the water and debris better, even if it is not the nicer side of a board. Most Decking Contractors do not know this, or just don't care, so it does not translate to their workers doing the actual labor. |
|
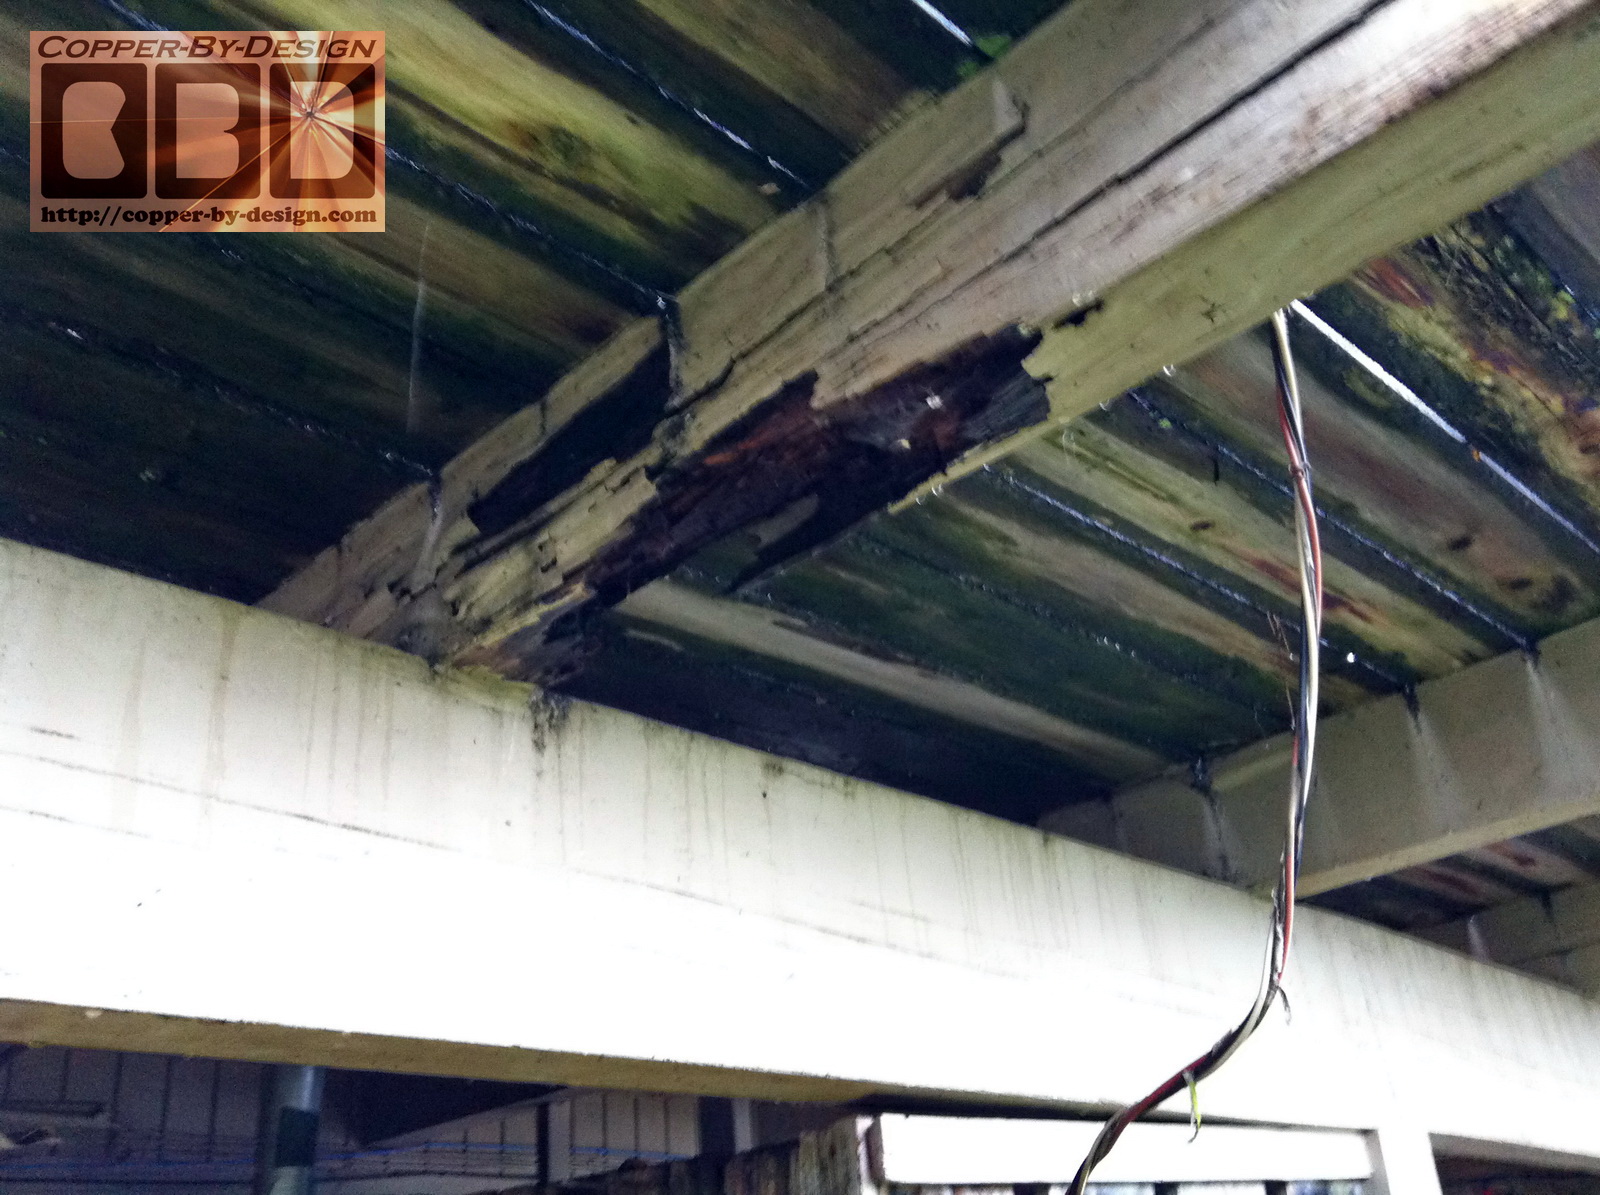
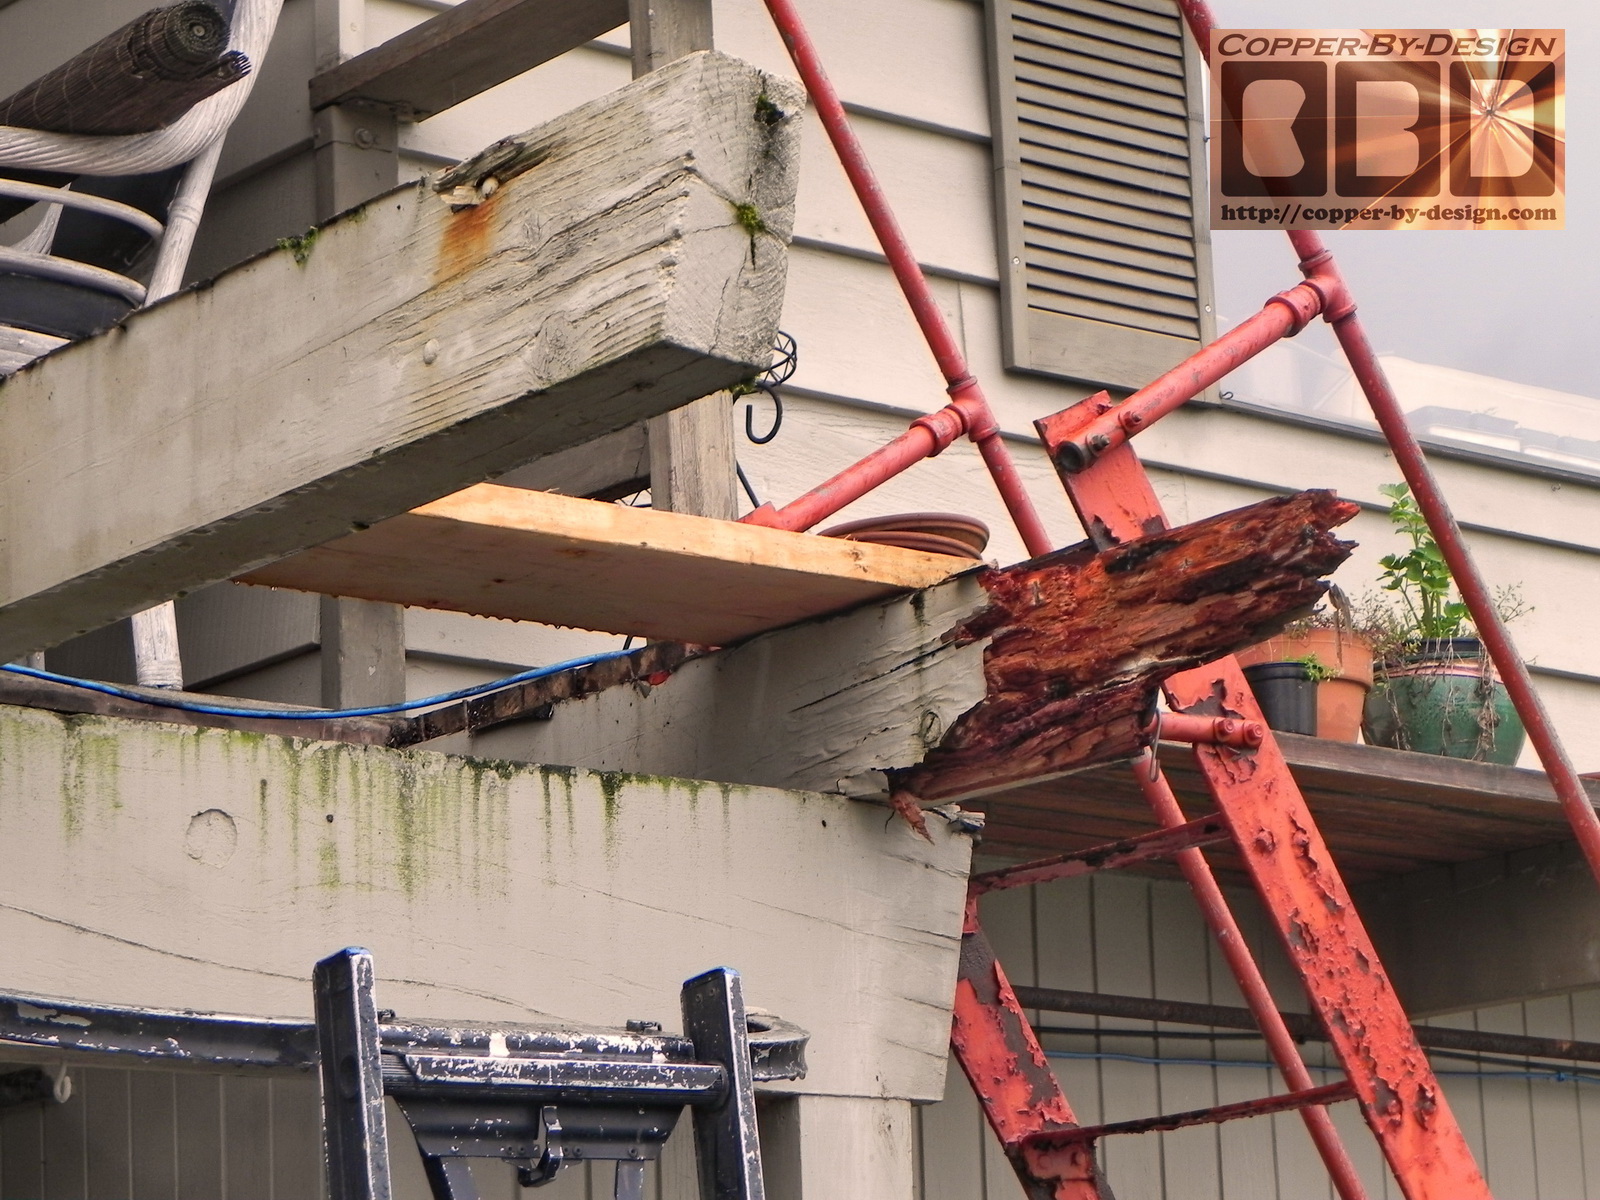
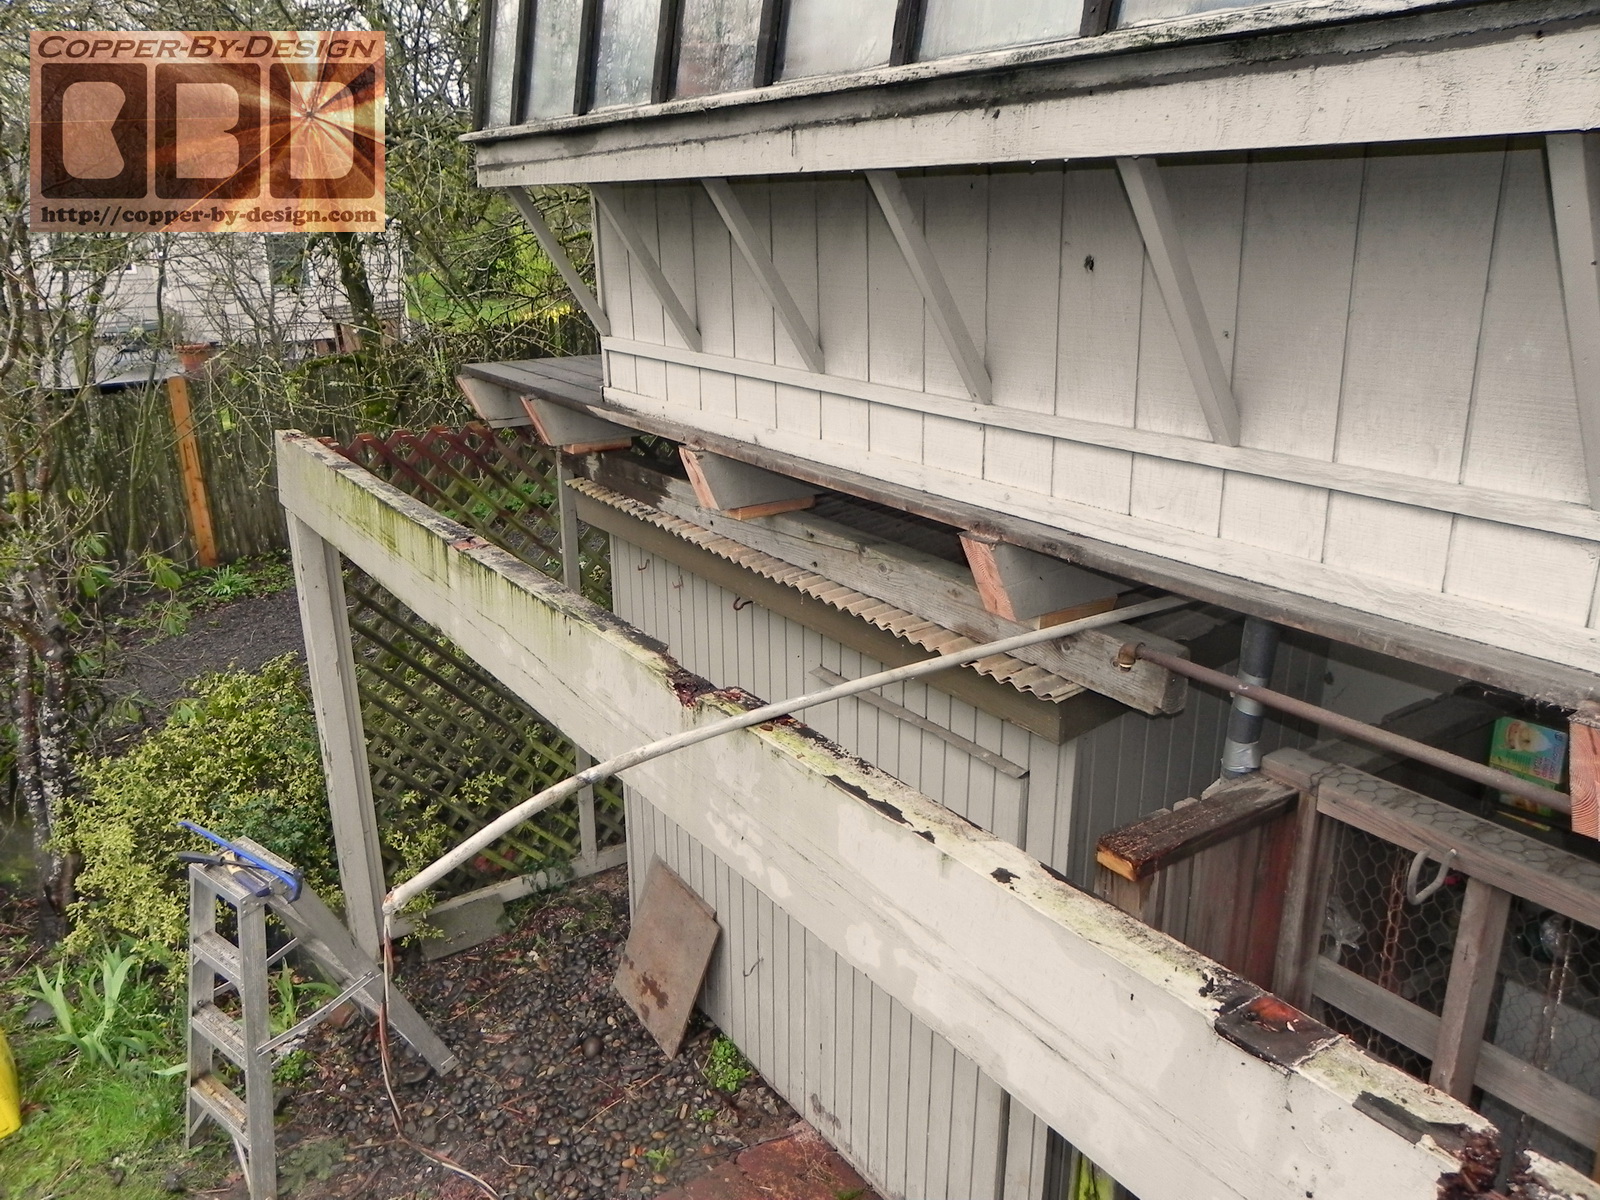
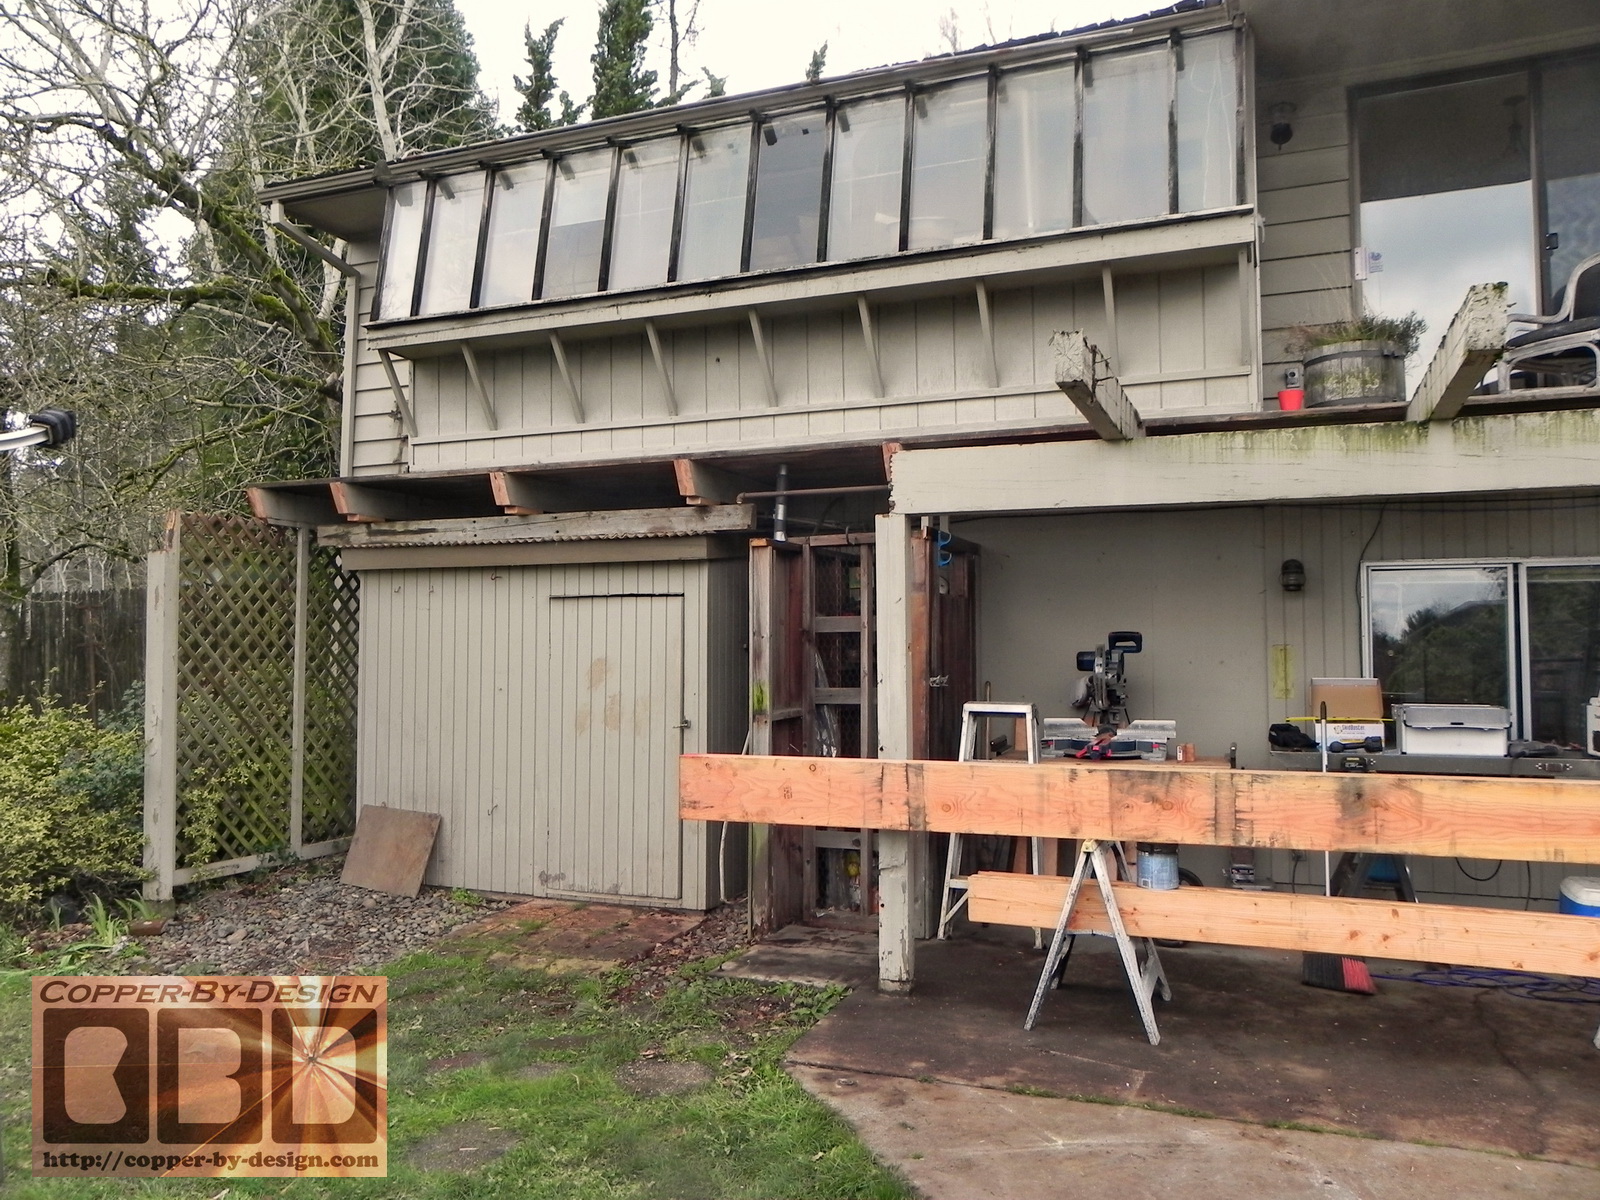
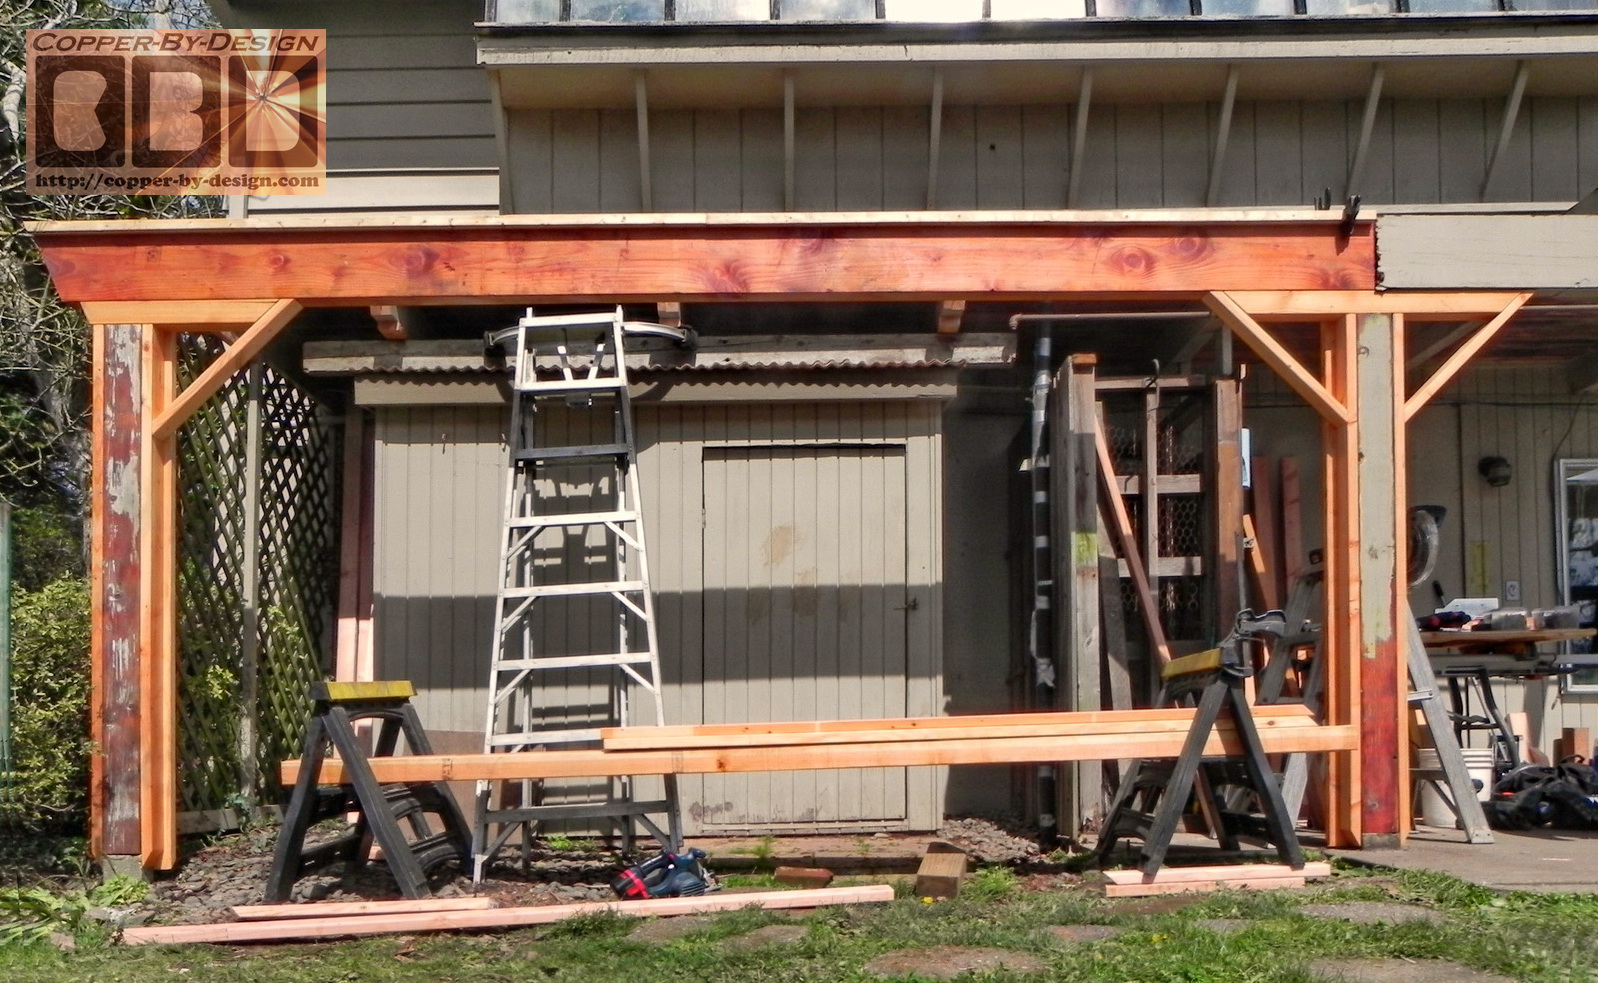
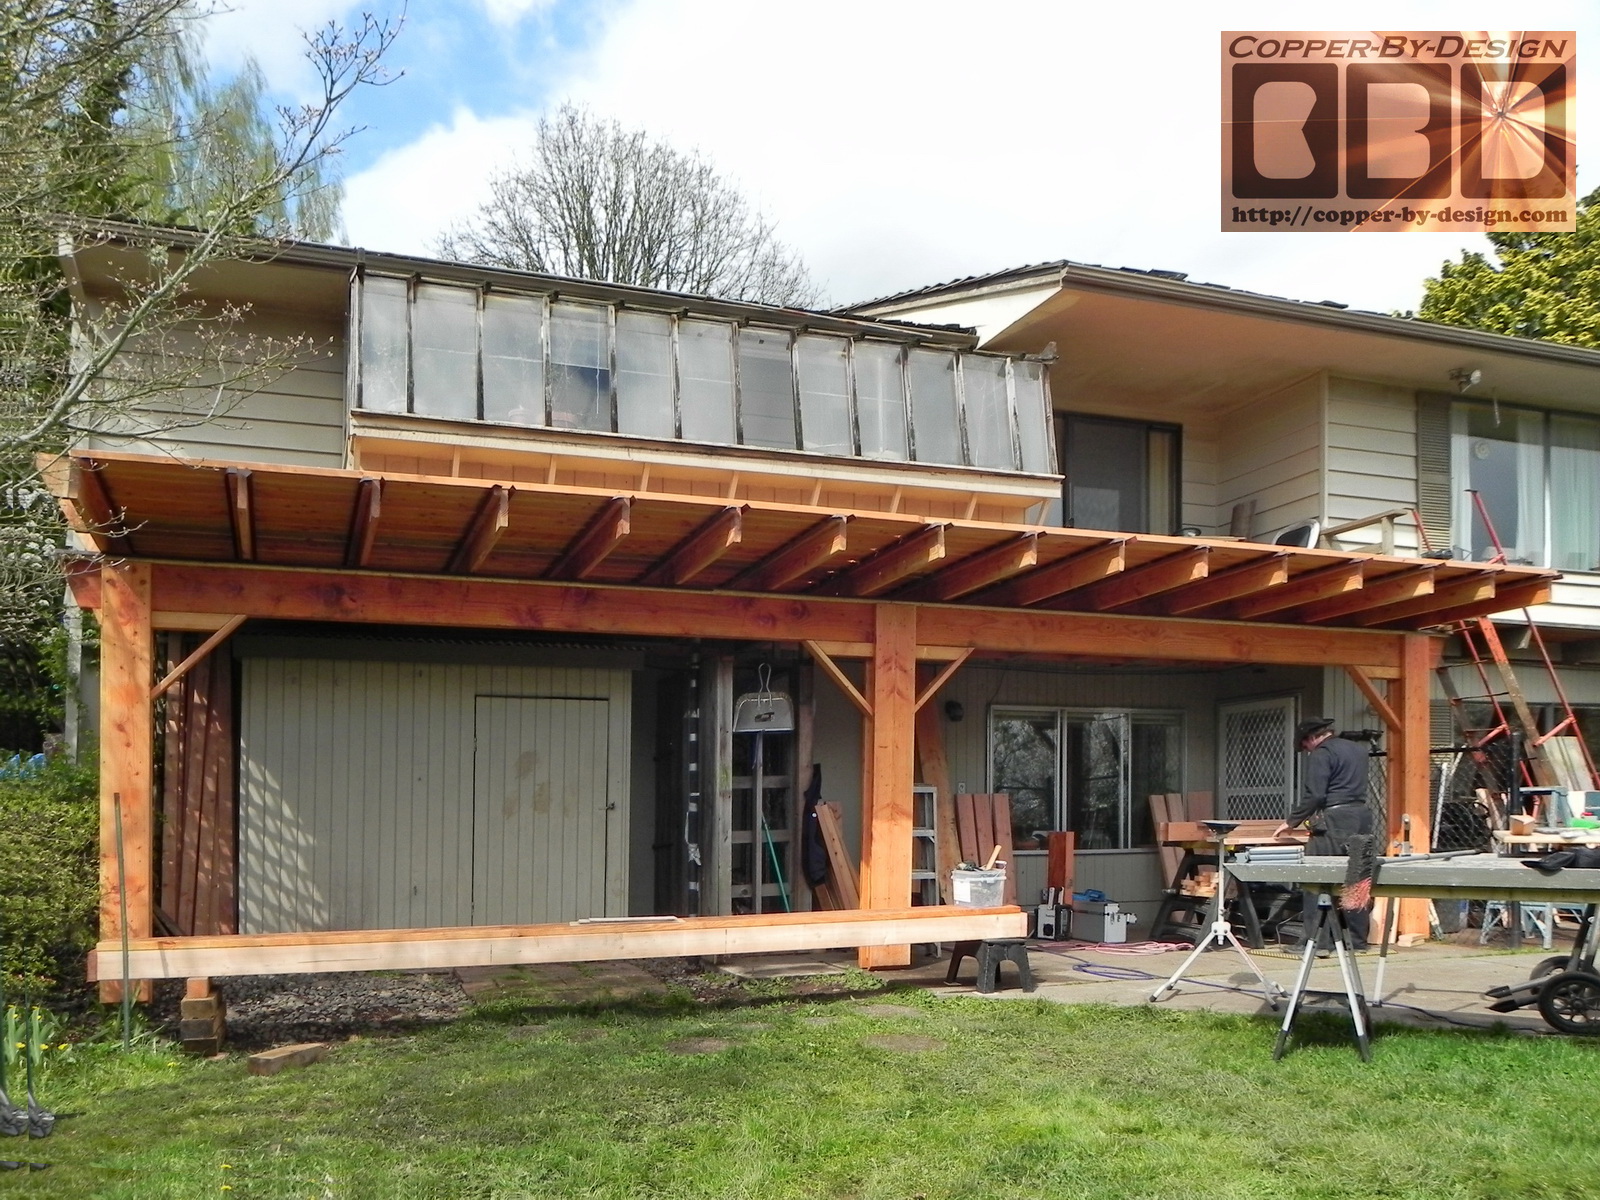
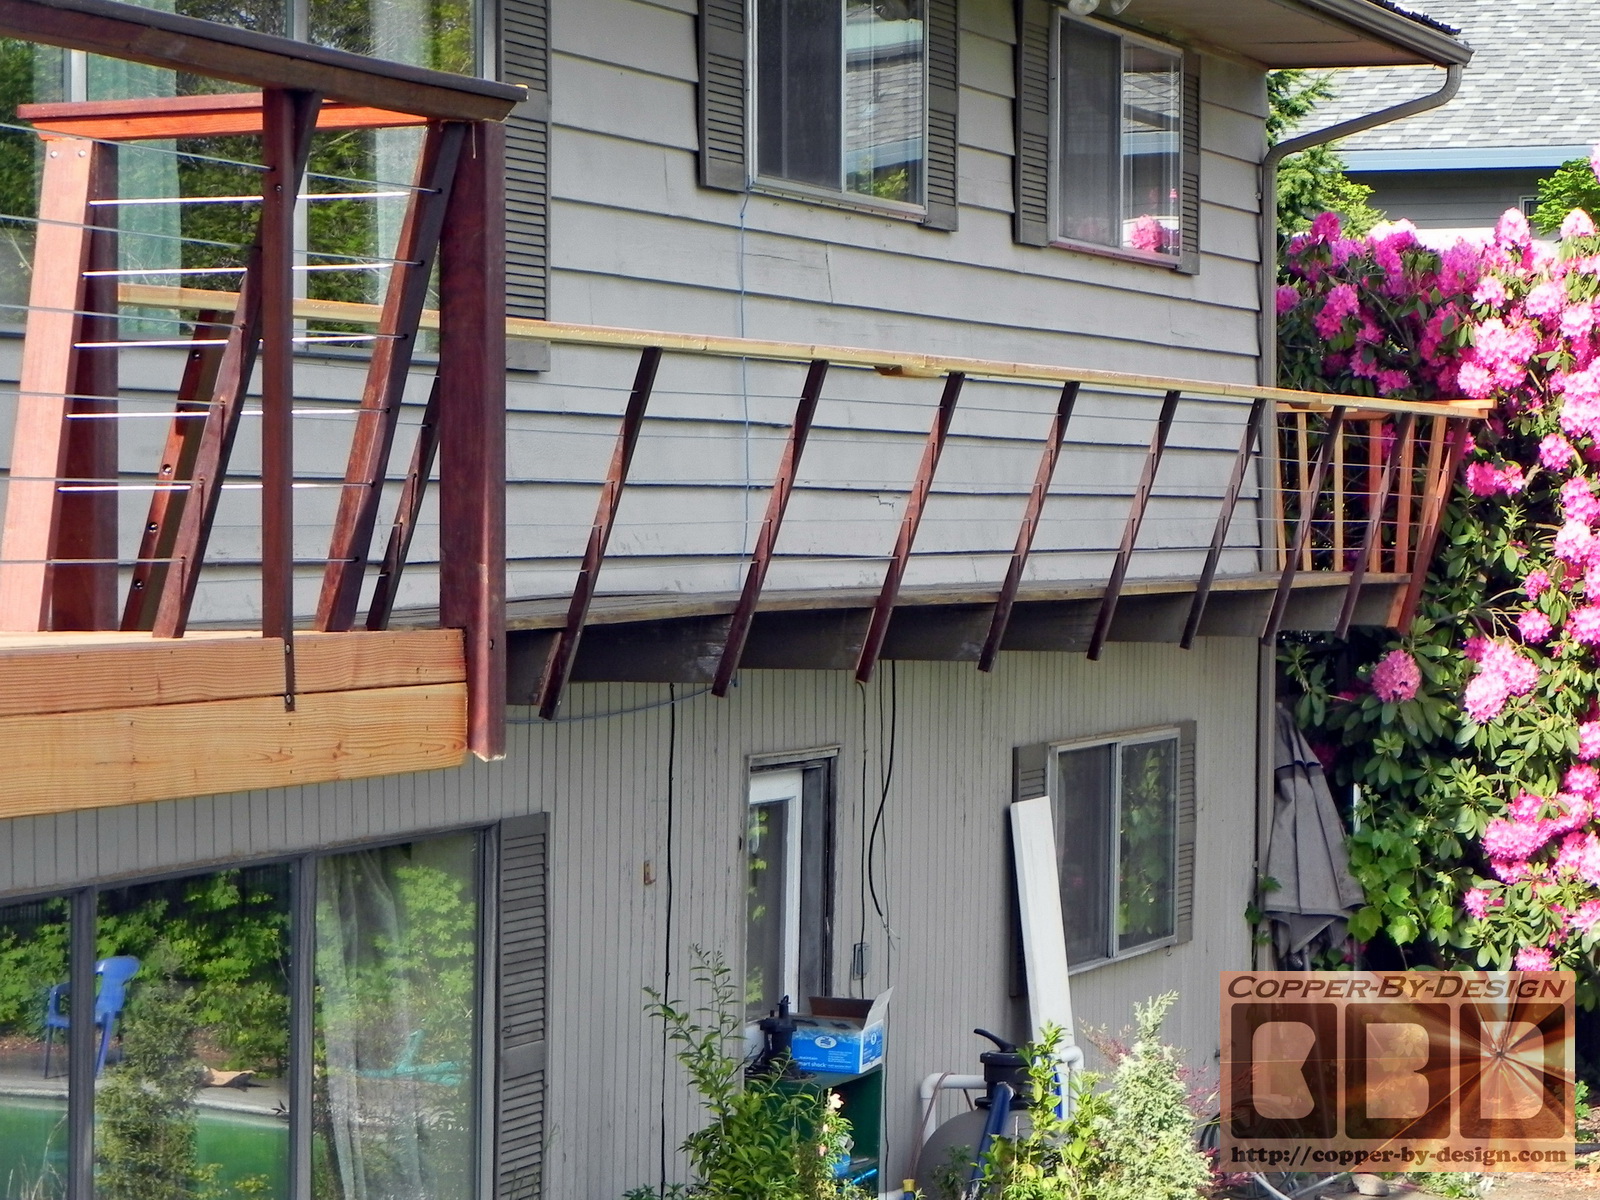
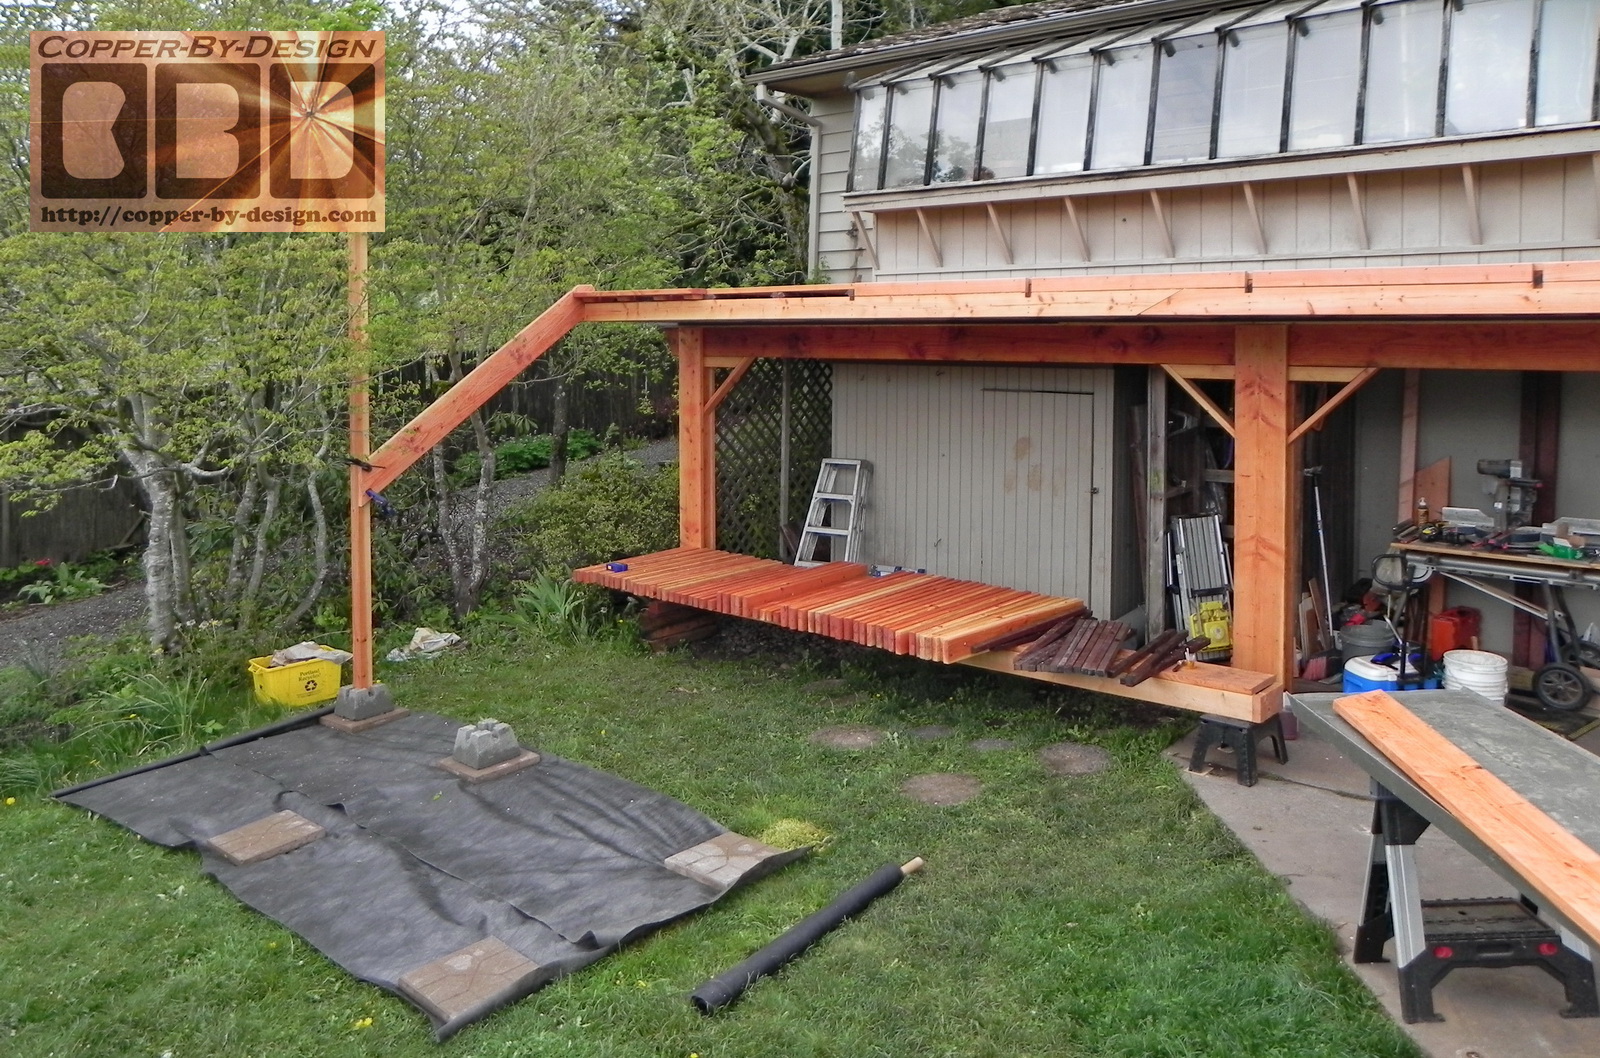
First step: removing their old rotten boards
We removed their old back balcony floor boards. Then before we could cut out the rotten parts of the floor joists we had to build a support under the floor joists that are still holding up their green house up on the balcony, which they did not want removed even though it is sorely in need of repair as well.
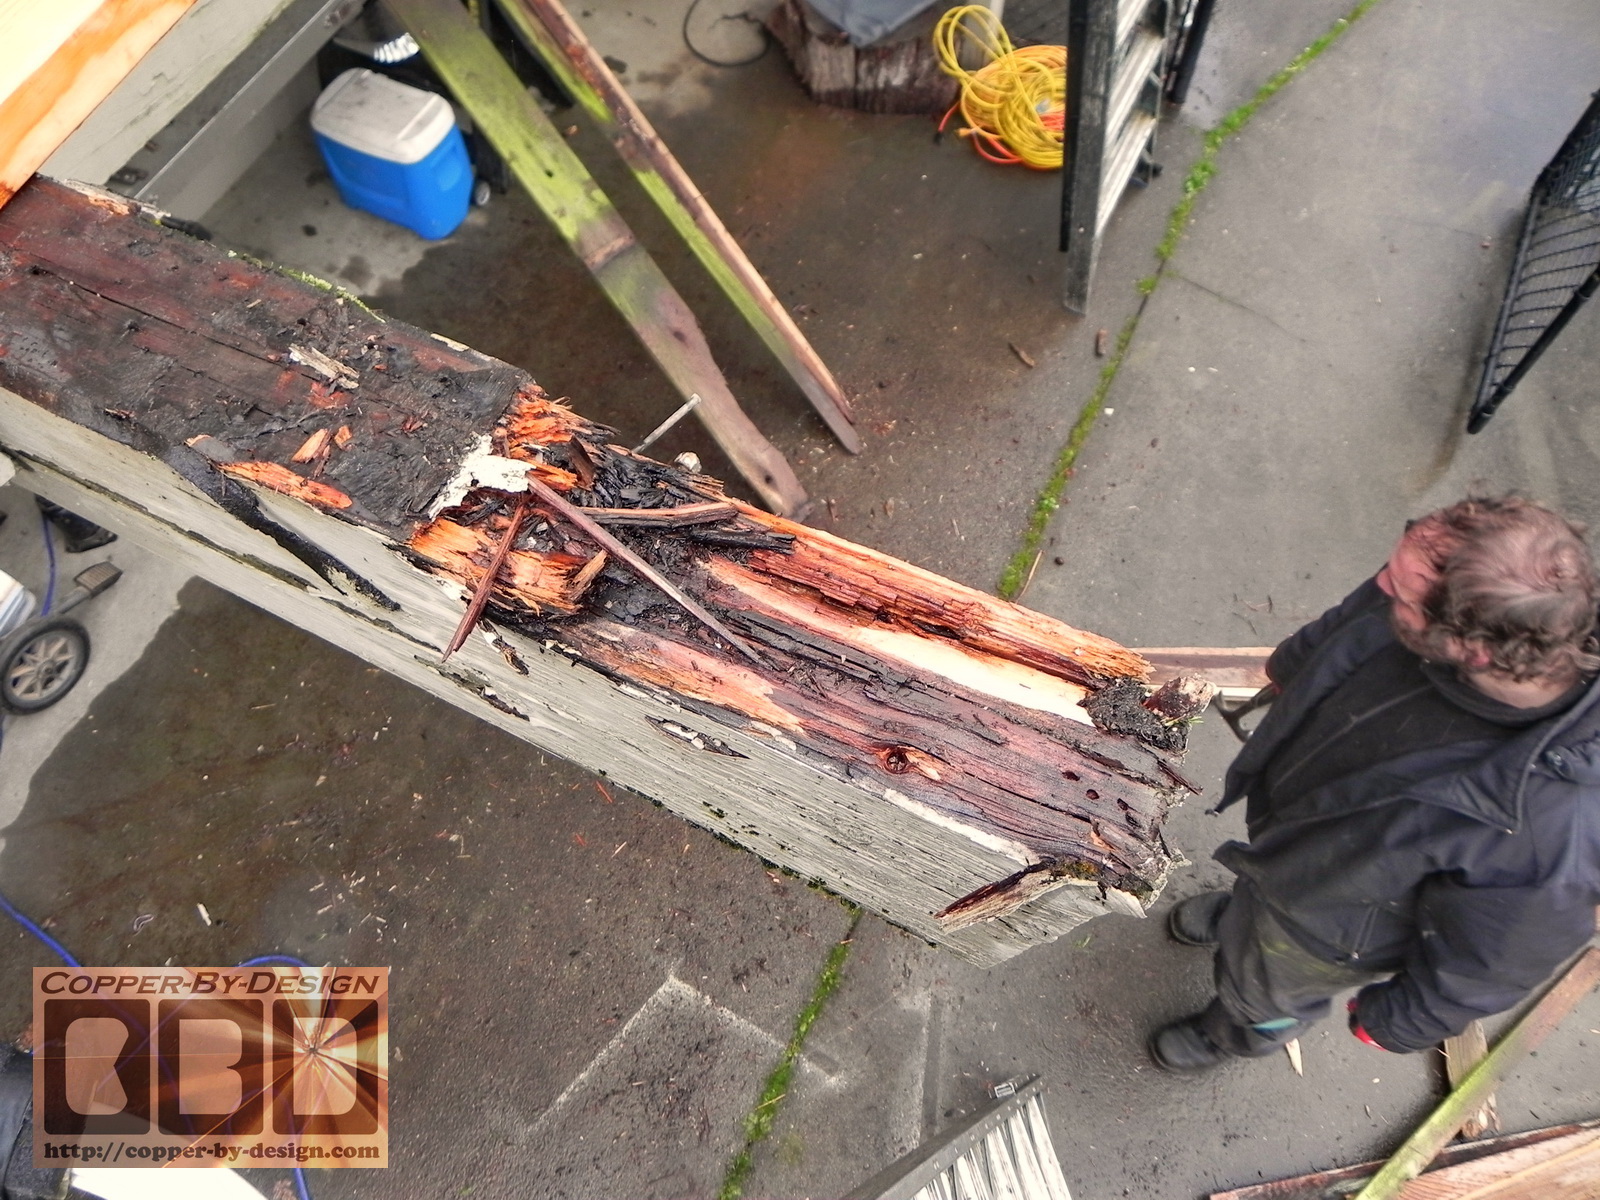
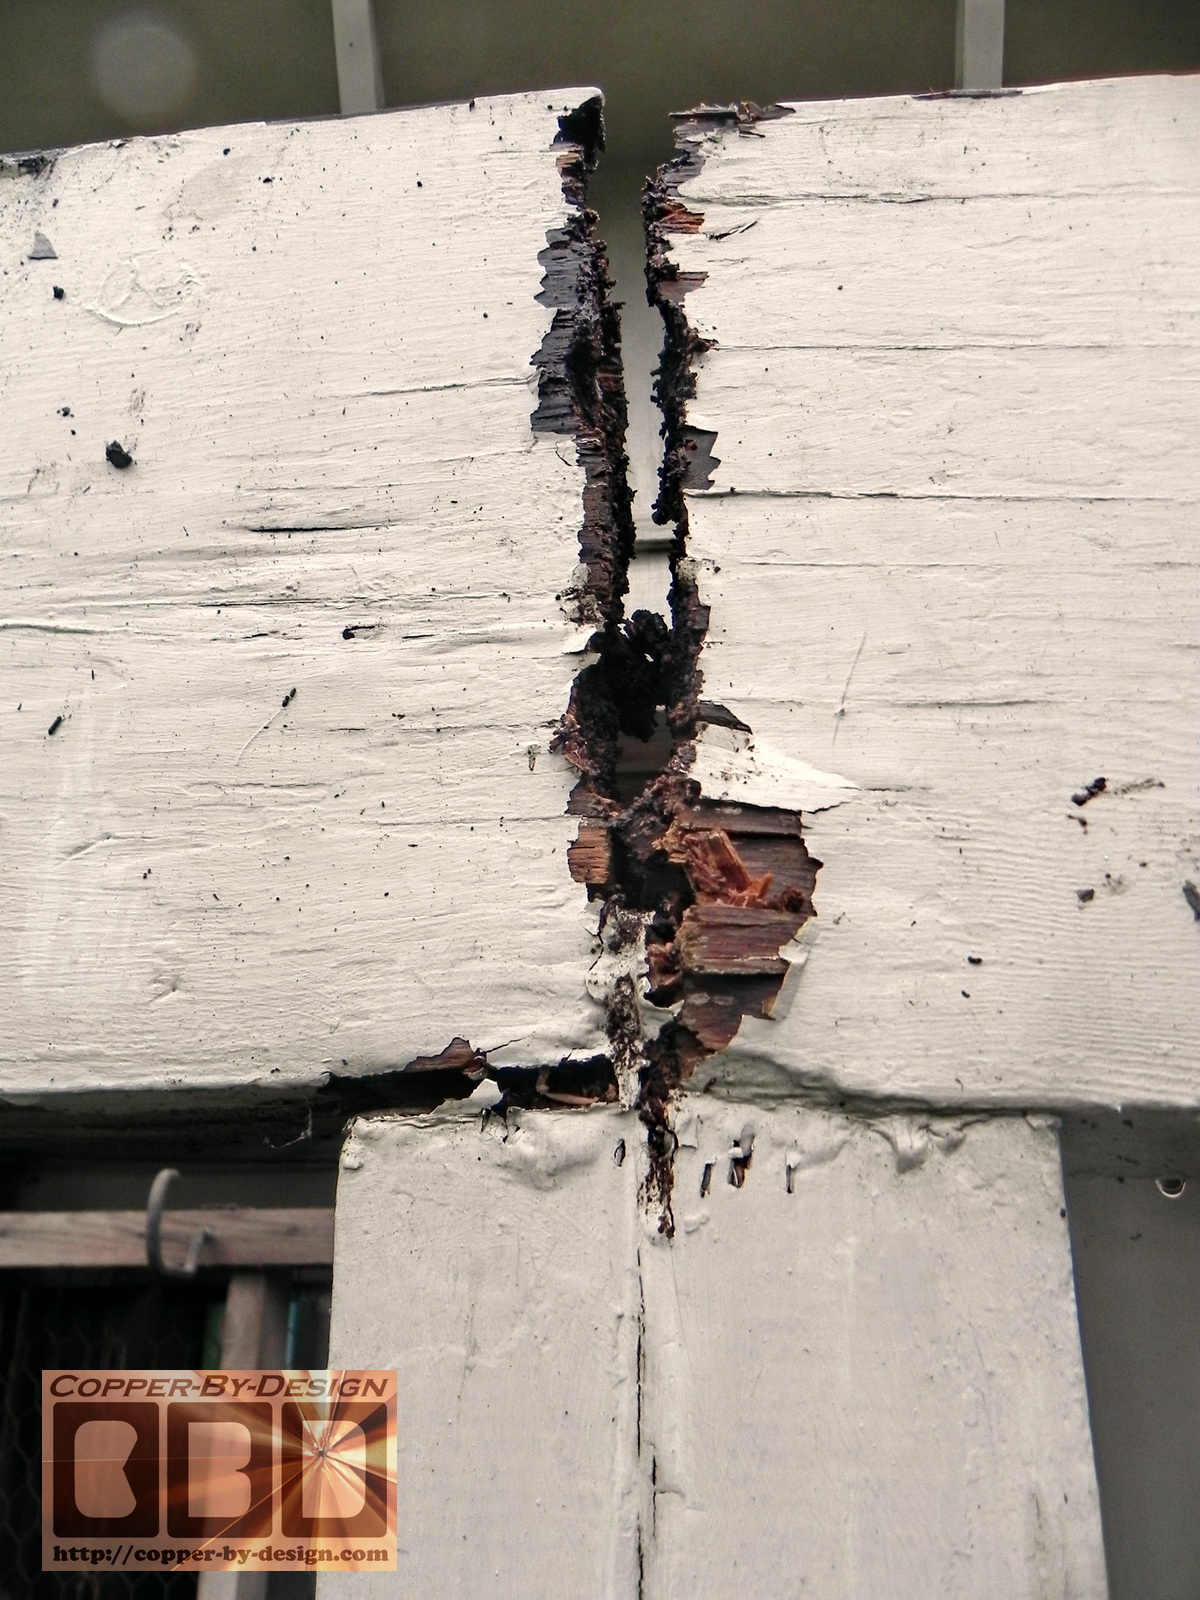
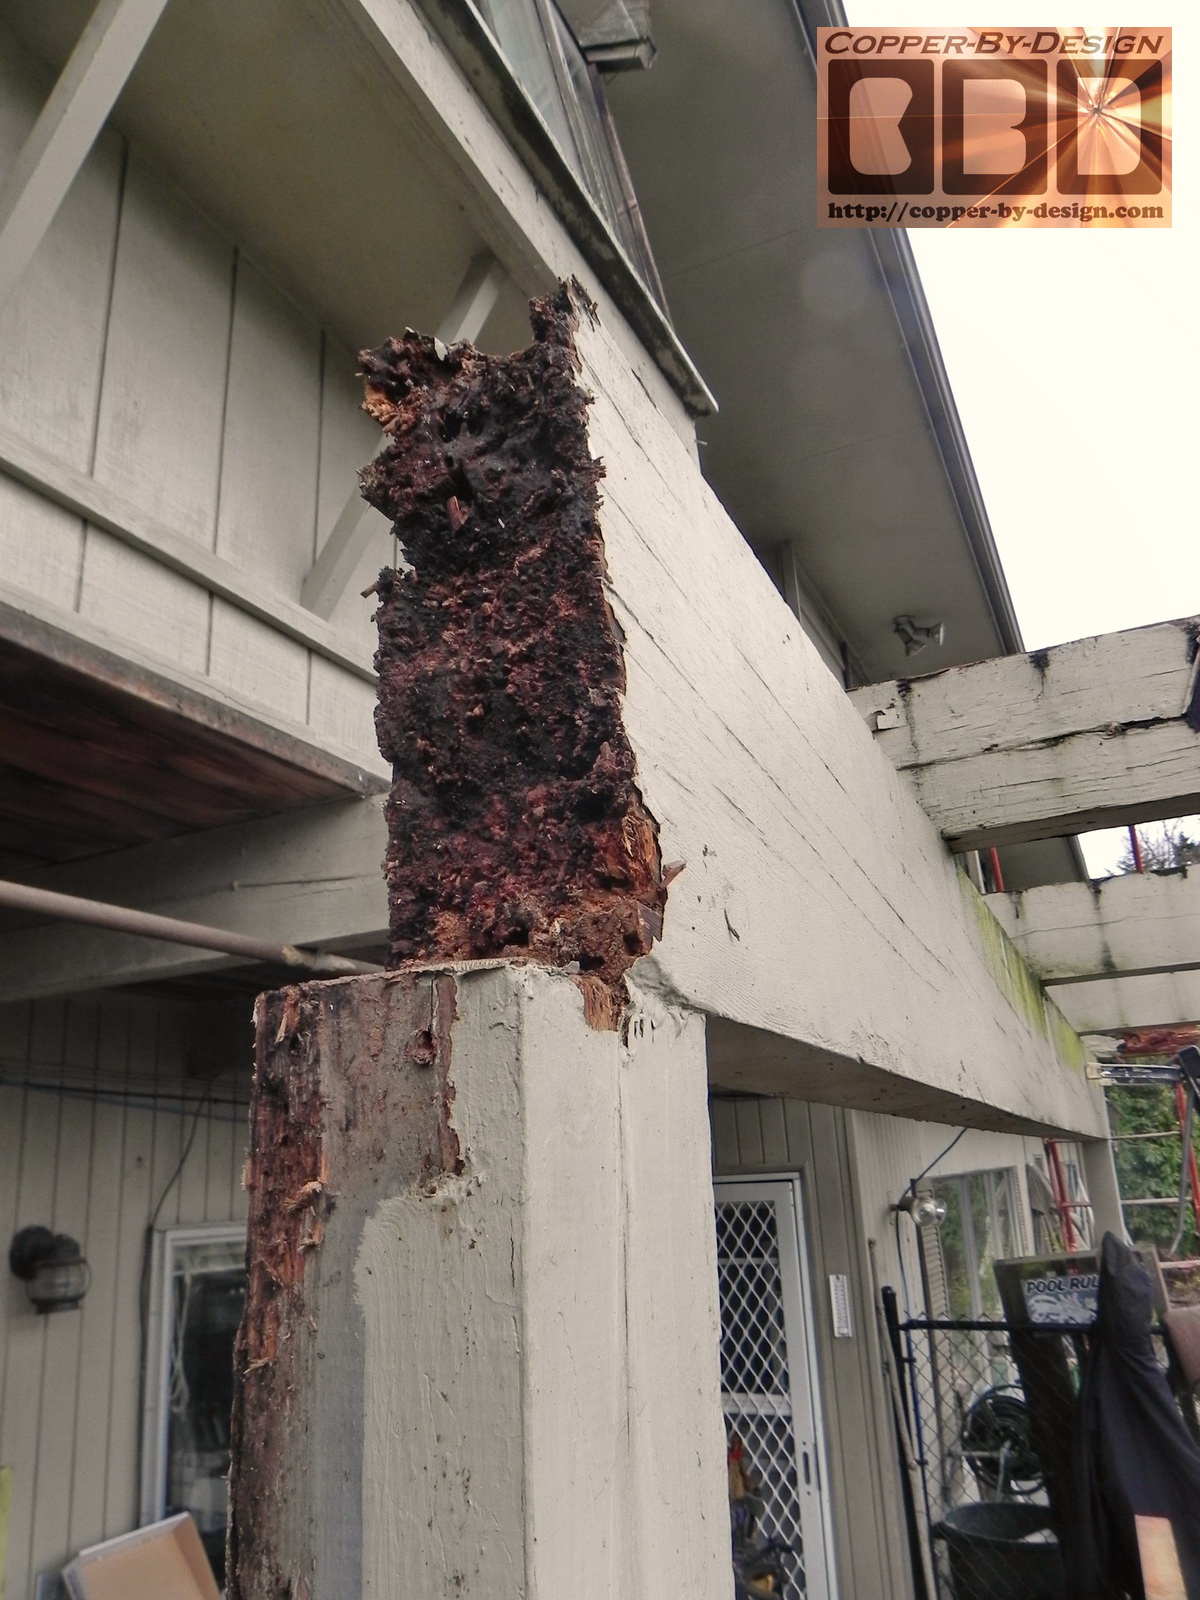
I did not realize the 4X12 beam sub structure beams were so bad off until we had the rest removed. Besides dry-rot the left beam was quite warped before it was originally installed. I could tell because they had angle cut the 4X6 vertical beam under it to compensate for it's curvature. At the junction where these 2 beams met had been caulked, so I could not see the cancerous dry-rot at the ends until I got digging around. I pulled out a couple large slugs living inside the wood feeding on it's decomposition. It was a small miracle this balcony had not collapsed before we got to rebuilding it
At first I thought we could salvage the right beam, but after careful consideration I felt it was not safe to reuse that one as well and it would be more trouble to sand the paint off to make it match the other new beam than the $40 it would cost. It was tough to find a pair of decent 16' 4X12 beams. I had to go to several different lumber yards to find them. |
|
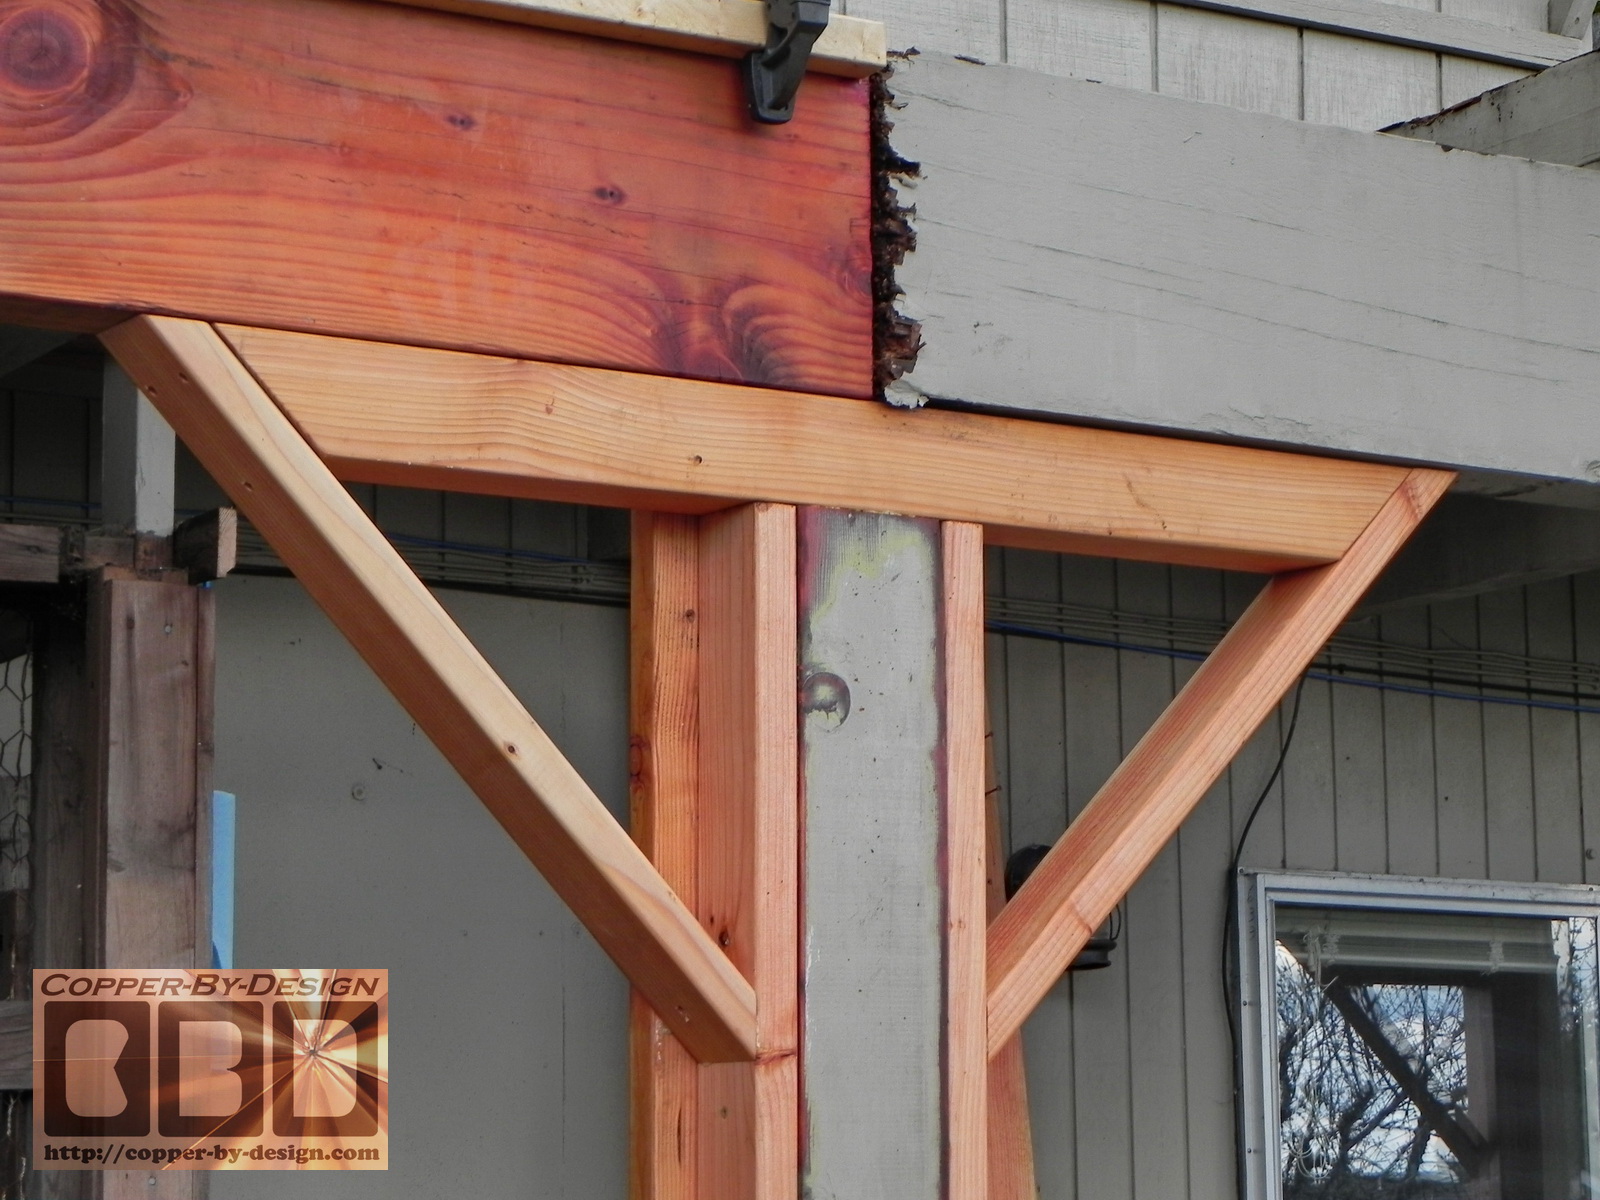
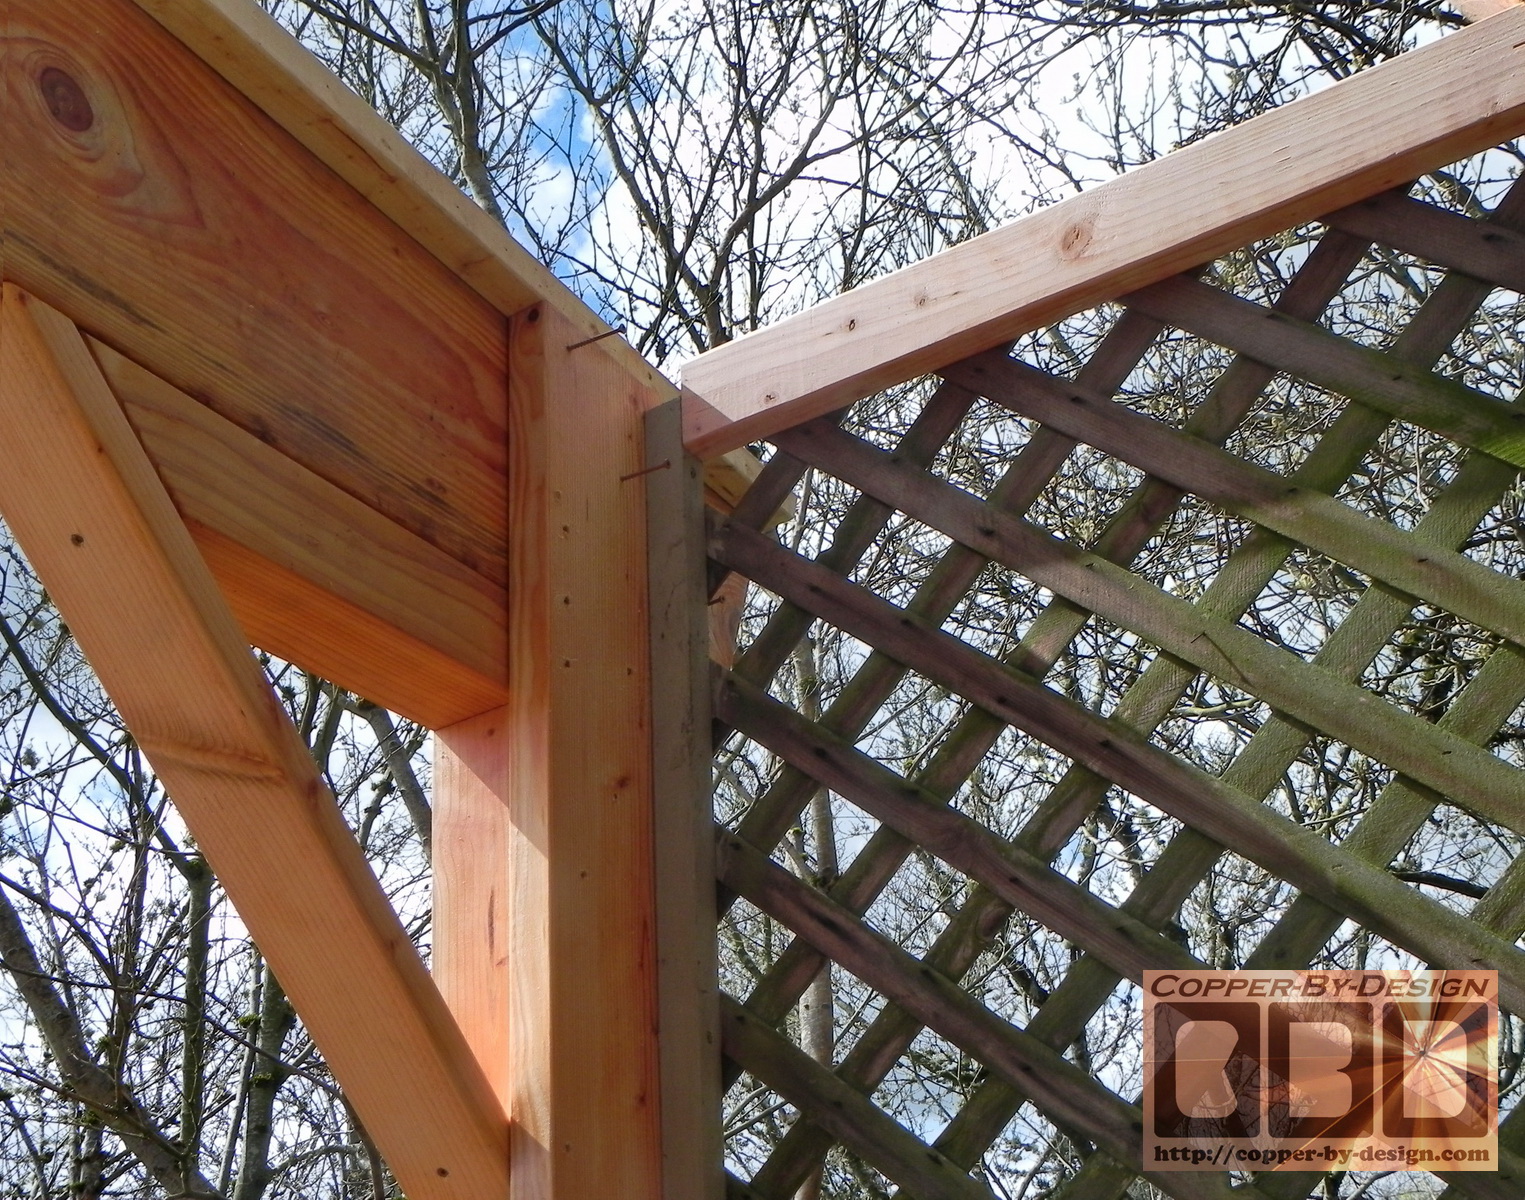
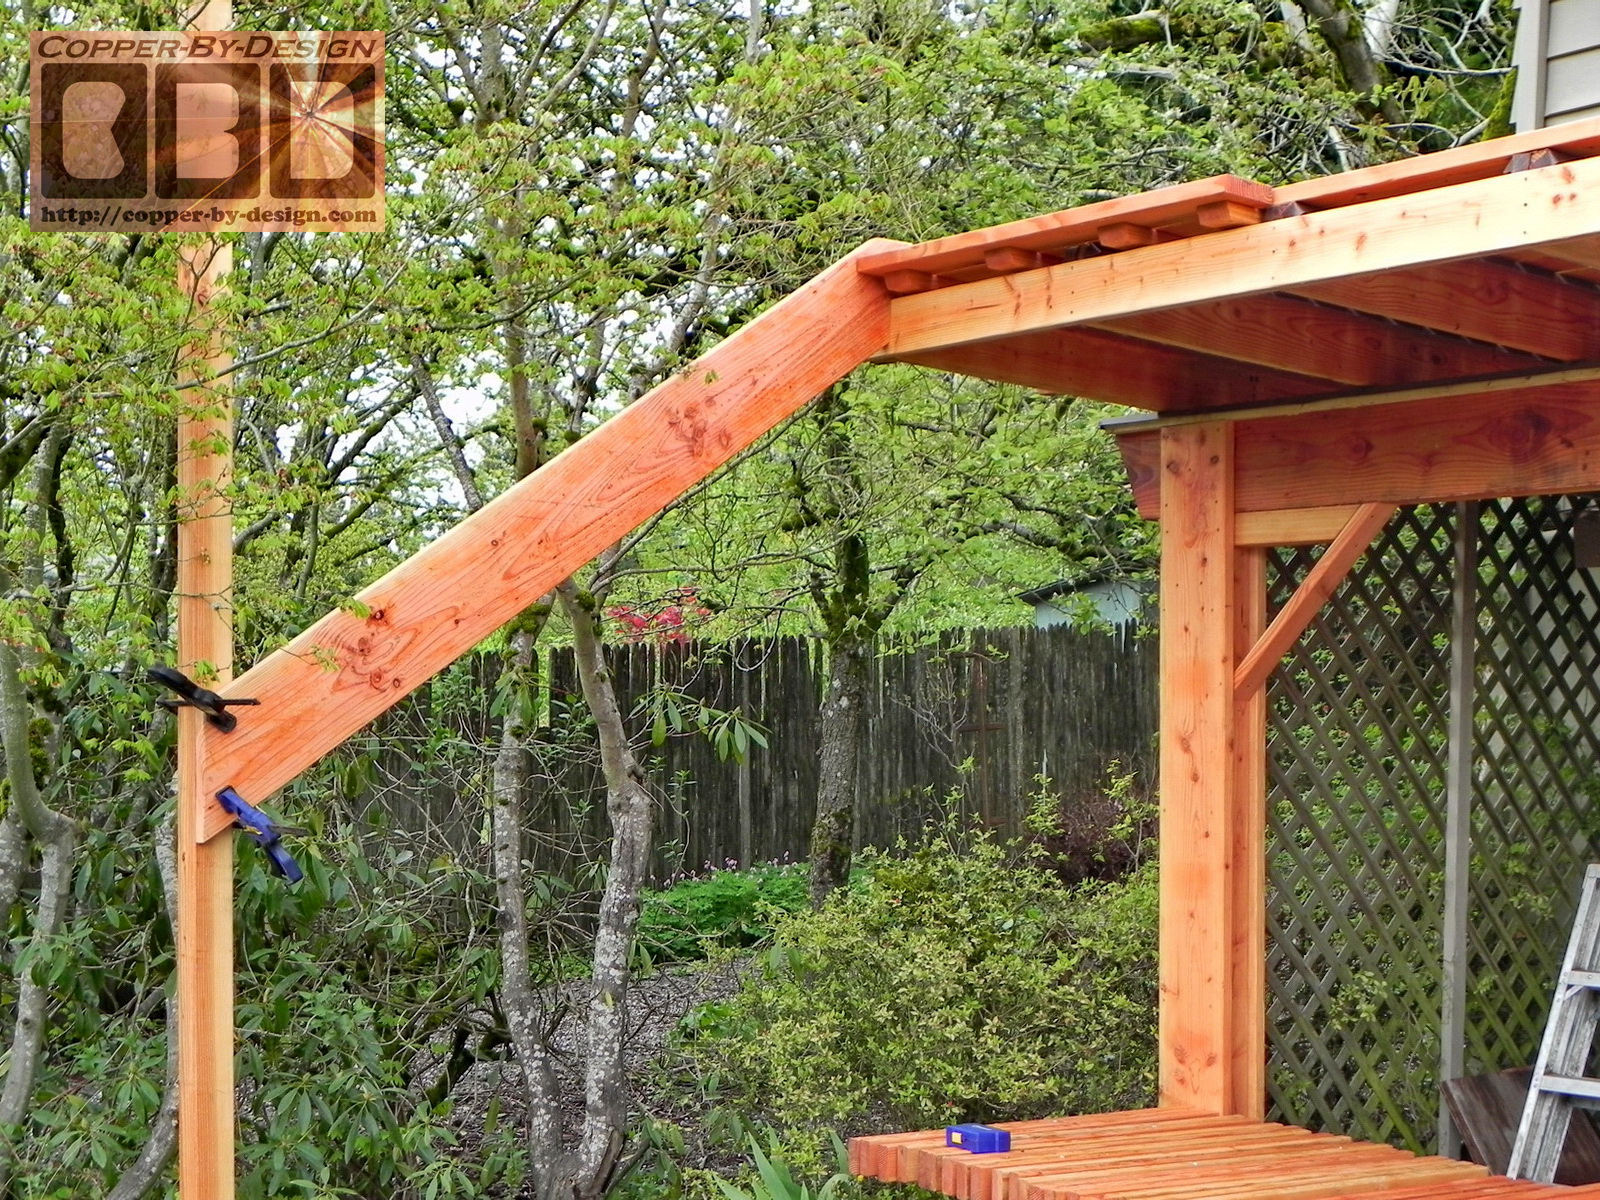
Rebuilding the vertical supports stronger:
I wanted to make sure that even in an earthquake these would hold up well and have some resistance of any sideways movement by adding these 4 cross braces. I added a pair of 2X12 boards to this 4X6 beam to lock the horizontal 4X12 beams together with dozens of screws and glue. A far cry better than just the 4 nails they used before to keep them in place. I used an expanding glue called Gorilla Glue to give it even more strength. How much sturdier do you think this will be than the original design?
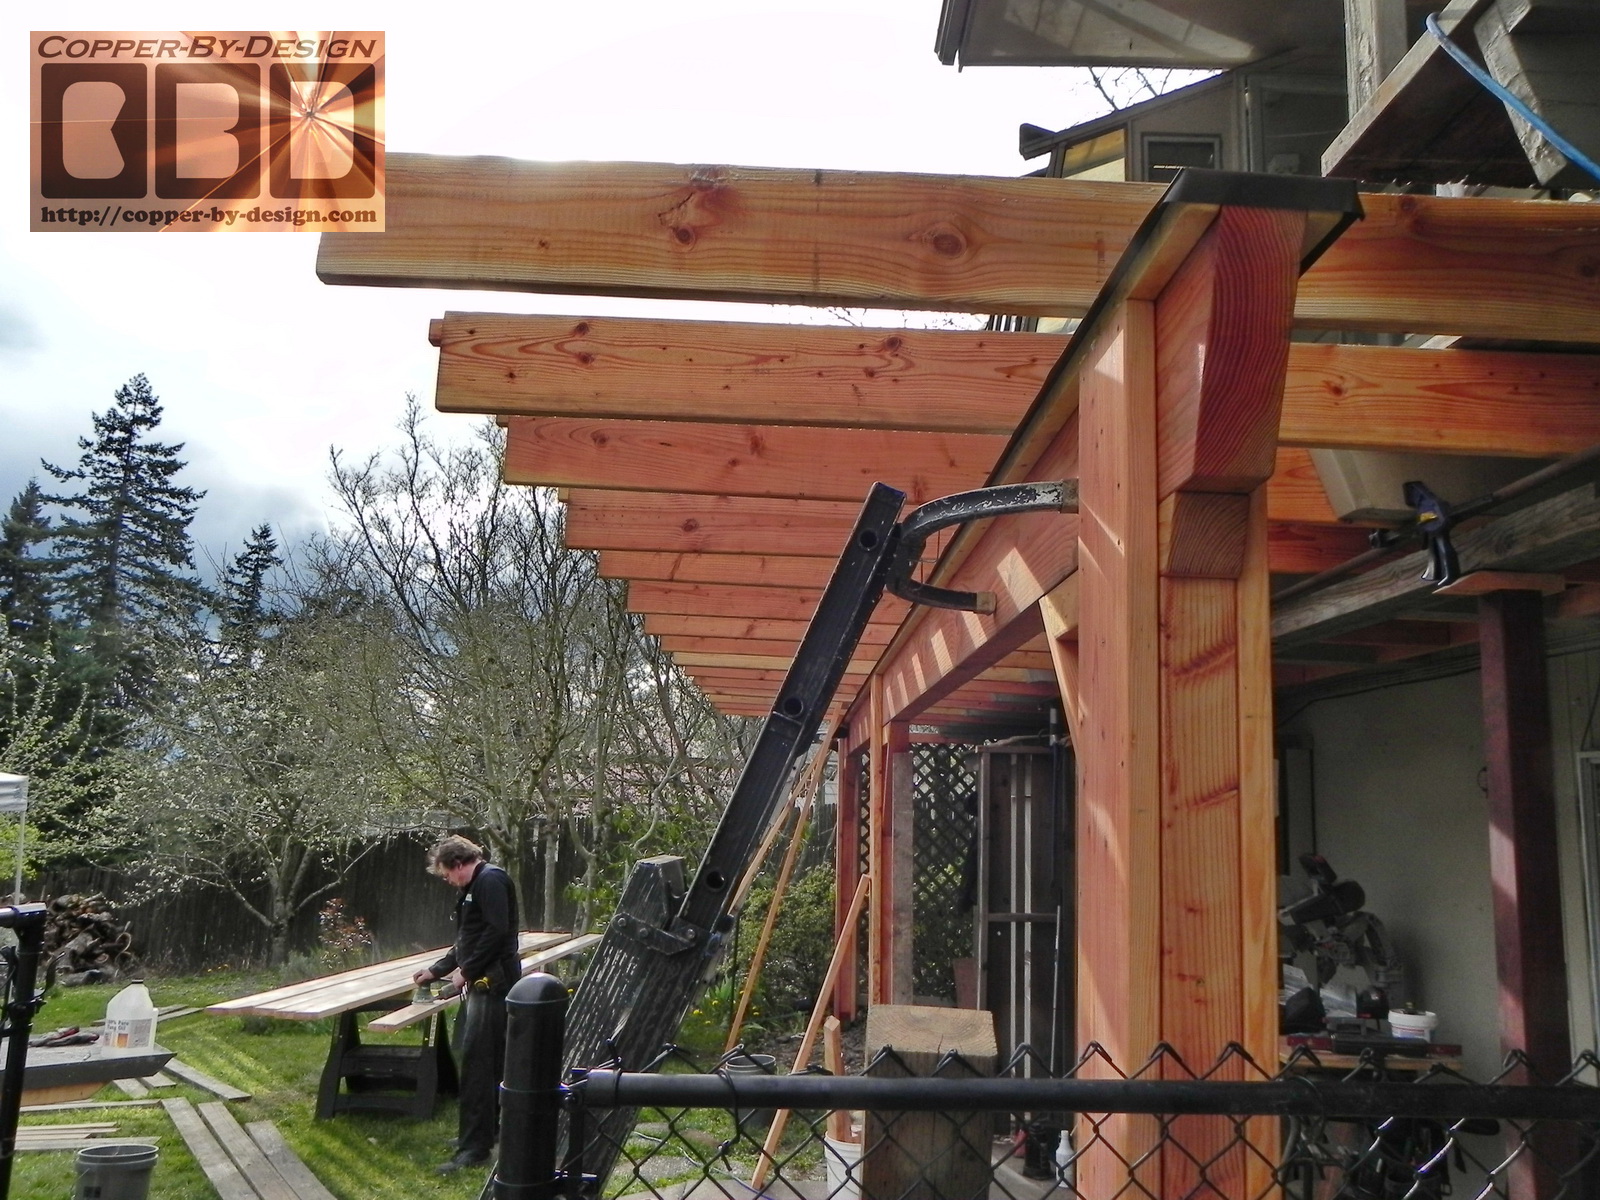
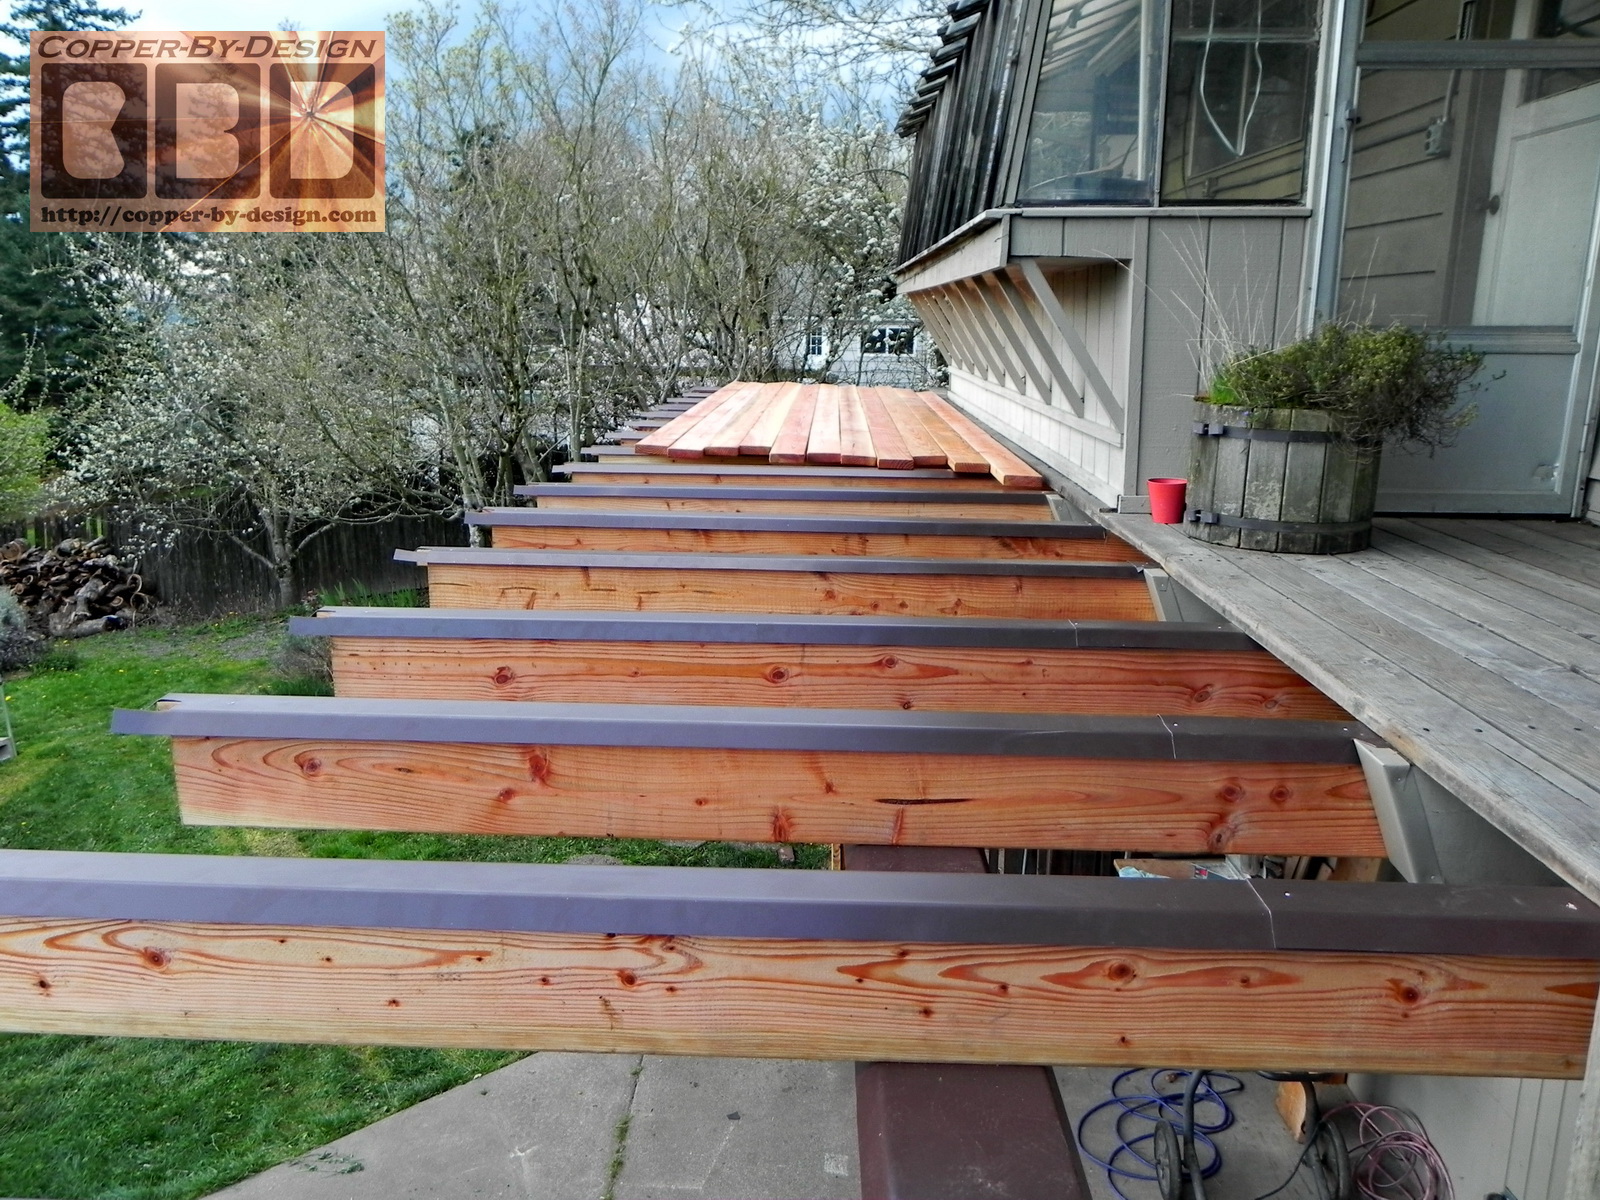
We added a pair of 2X2 boards to the front and back upper edge of the 4X12 horizontal beam, so we had a good firm way to attach the new floor joists with deck screws from underneath, in stead of just angling nails through the edge of that beam. It just seems like a more civilized way to do it.
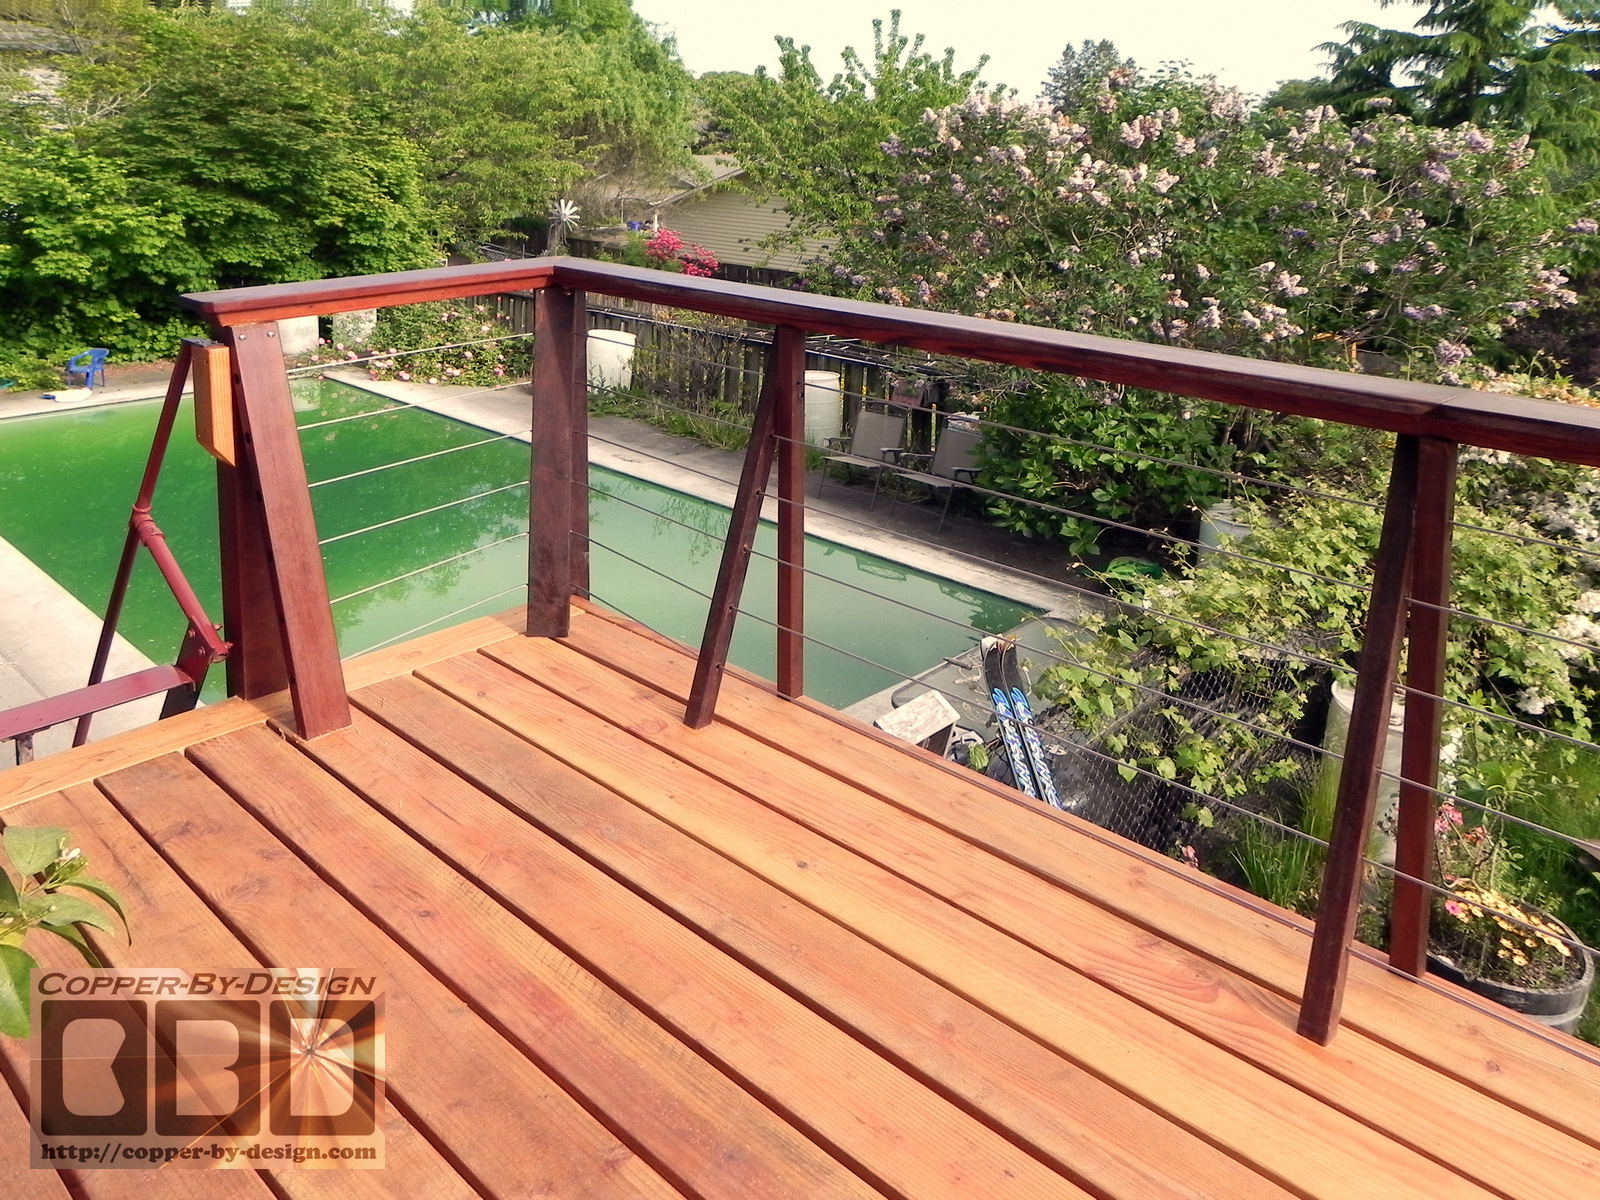
We treated every board on all 6 sides before assembly with a 50/50 mix of tung oil and Thompson's Premium Weather Seal, in stead of just thinning it with mineral spirits. This should give these boards better UV protection, so it will not gray so fast and retain this nice warm wood look. We also spent over a hundred hours carefully sanding these boards before assembly. Details you would not get from any other Contractor at any price, which made this project take over 3X longer.
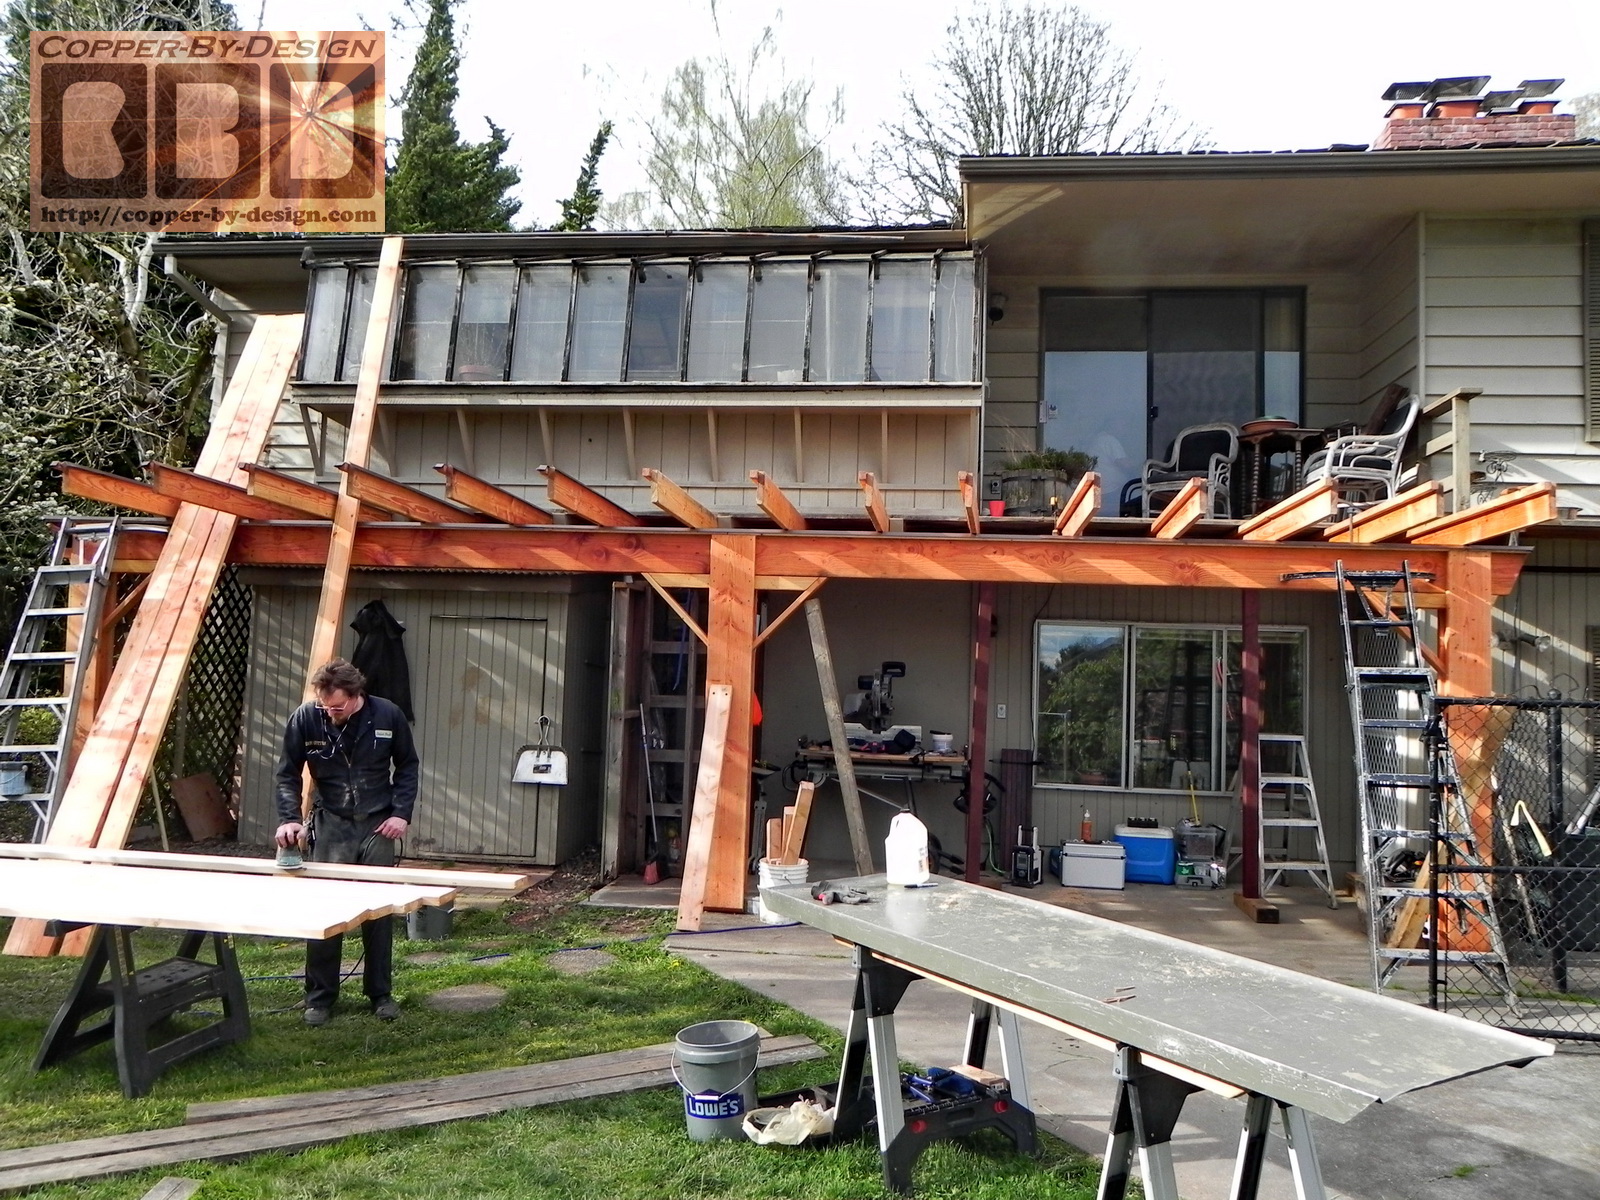
We decided it would be best to use the same amount of wood to use twice as many 2X8 floor joists spaced 2' apart, in stead of the 4X8s they had used originally, making the floor feel much more solid.
|
|
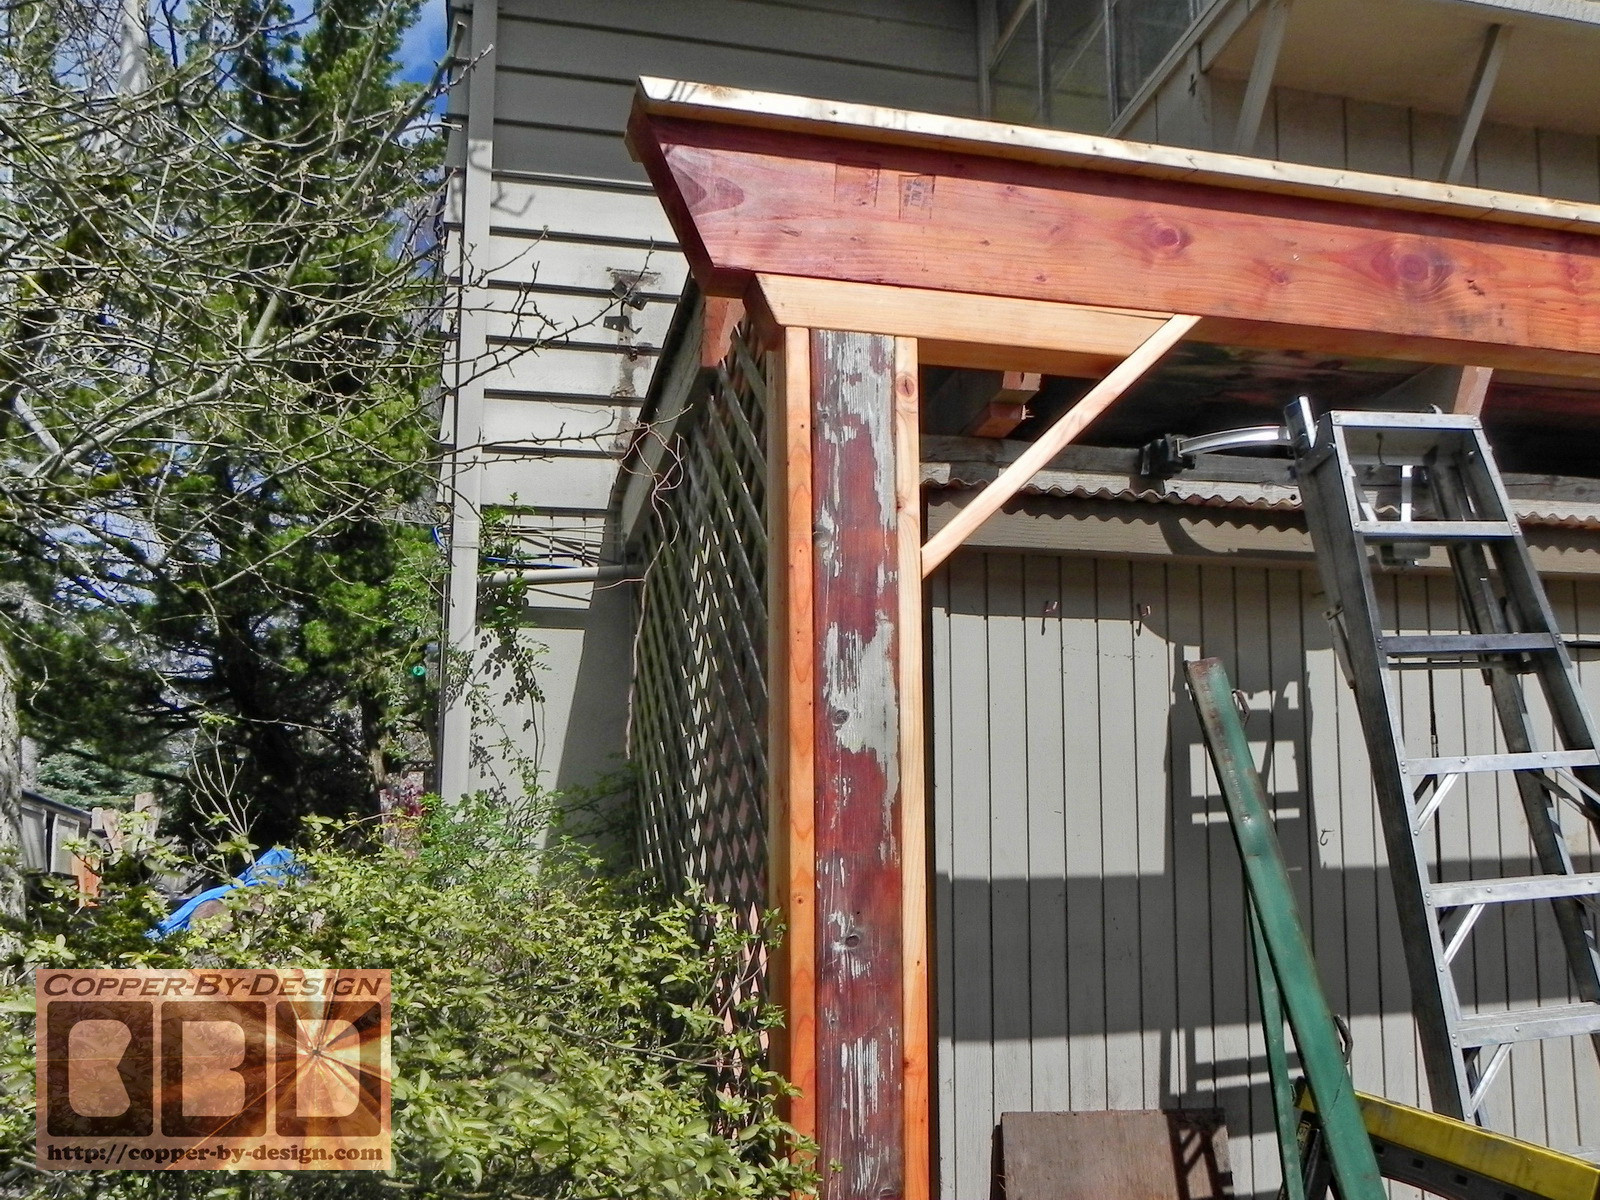
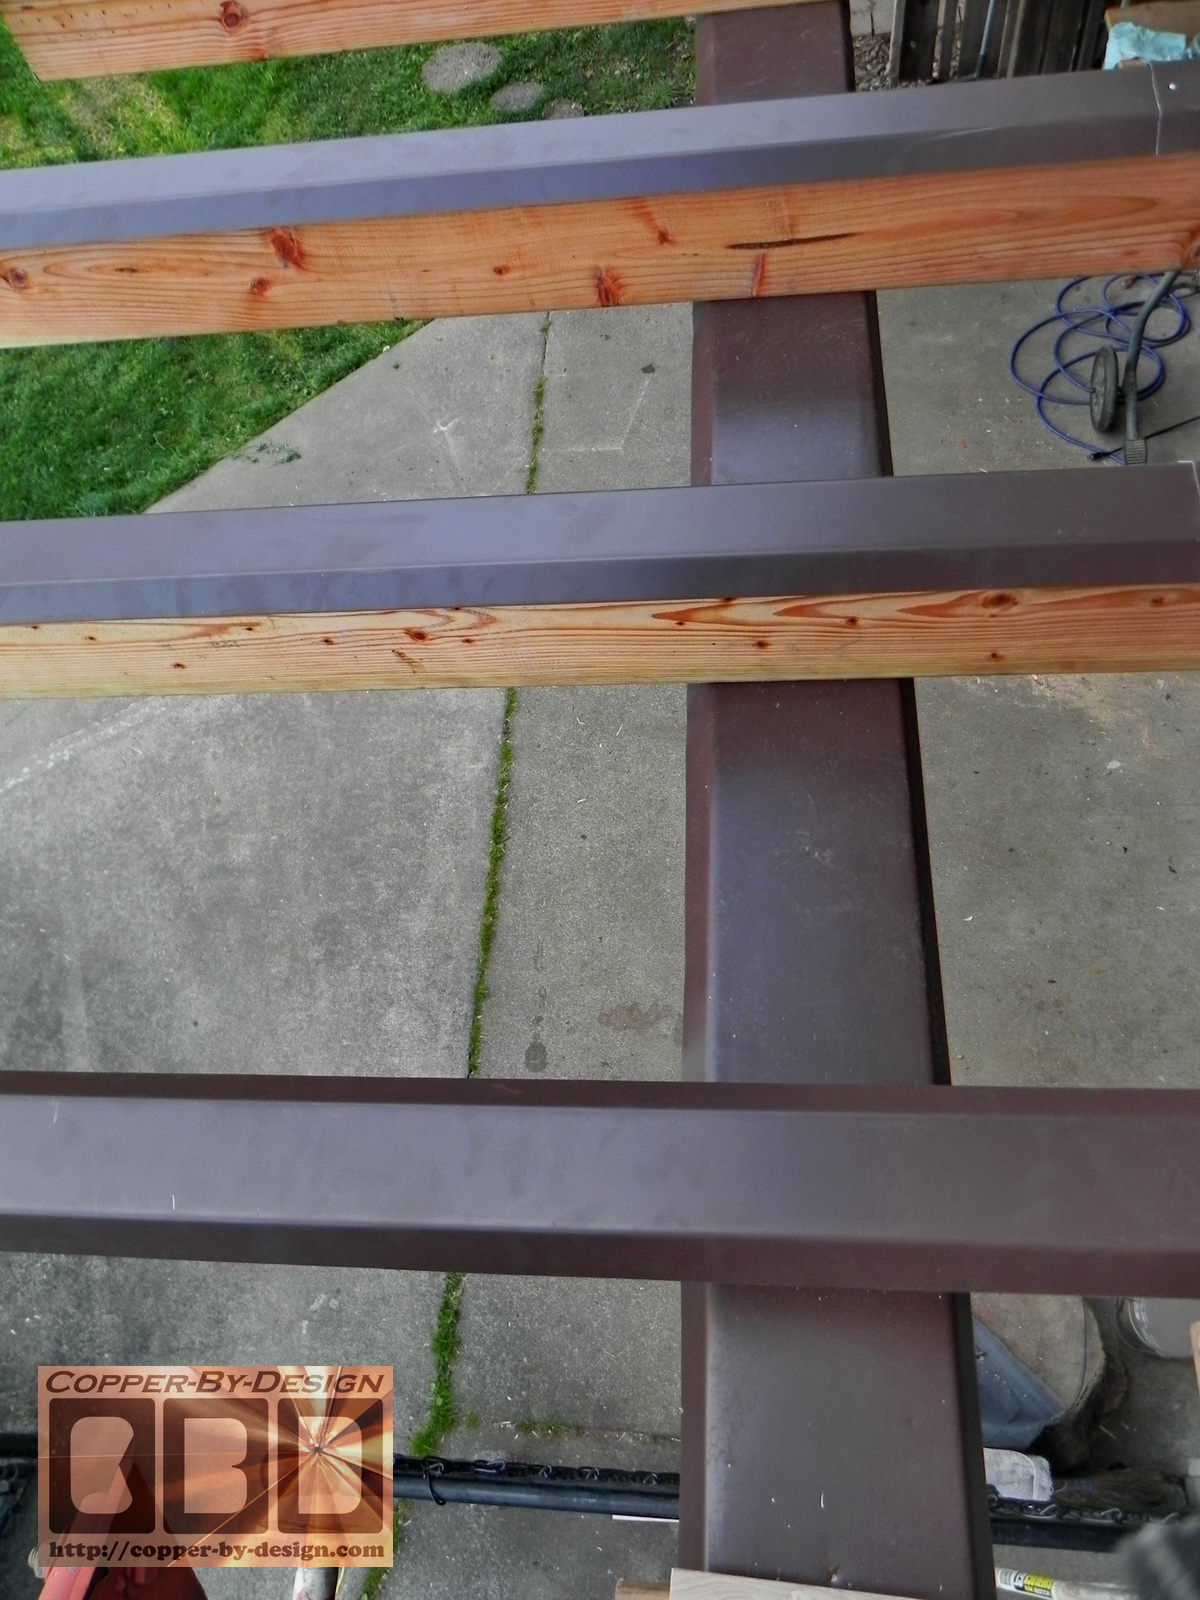
Covering these boards with brown painted aluminum cap metal:
We also do something you will not find elsewhere; with the custom cap metal made with a thick aluminum gutter coil. This is to keep the floor joists dry and free of the mildew stains they suffered before. It's simple enough thing to do and does not cost much, but Decking Contractors are not sheet metal guys, so this detail is never done by them. I have even implored dozens of other Contractors to add this detail, but have yet to meet one who cared enough about lasting quality. I would even tell them that they would not need to do this on every job like I do, but at least offer it as an option that would of course cost a bit more. They were still not interested.
Even though this is a good stiff metal the aluminum is soft enough that we can easily drive the deck screws through it into the floor boards, so there are no exposed fasteners holding the floor boards in place. We pre-drilled each screw hole, so we did not risk cracking the 2X2 boards. Another detail not found with most, if not all other Decking Contractors. This would not even be considered cabinetry quality, but a lot closer don't you think?
Even though they did not have it before I decided to add a fascia board across the ends of the floor joists to make it look clean and more solid.
|
|
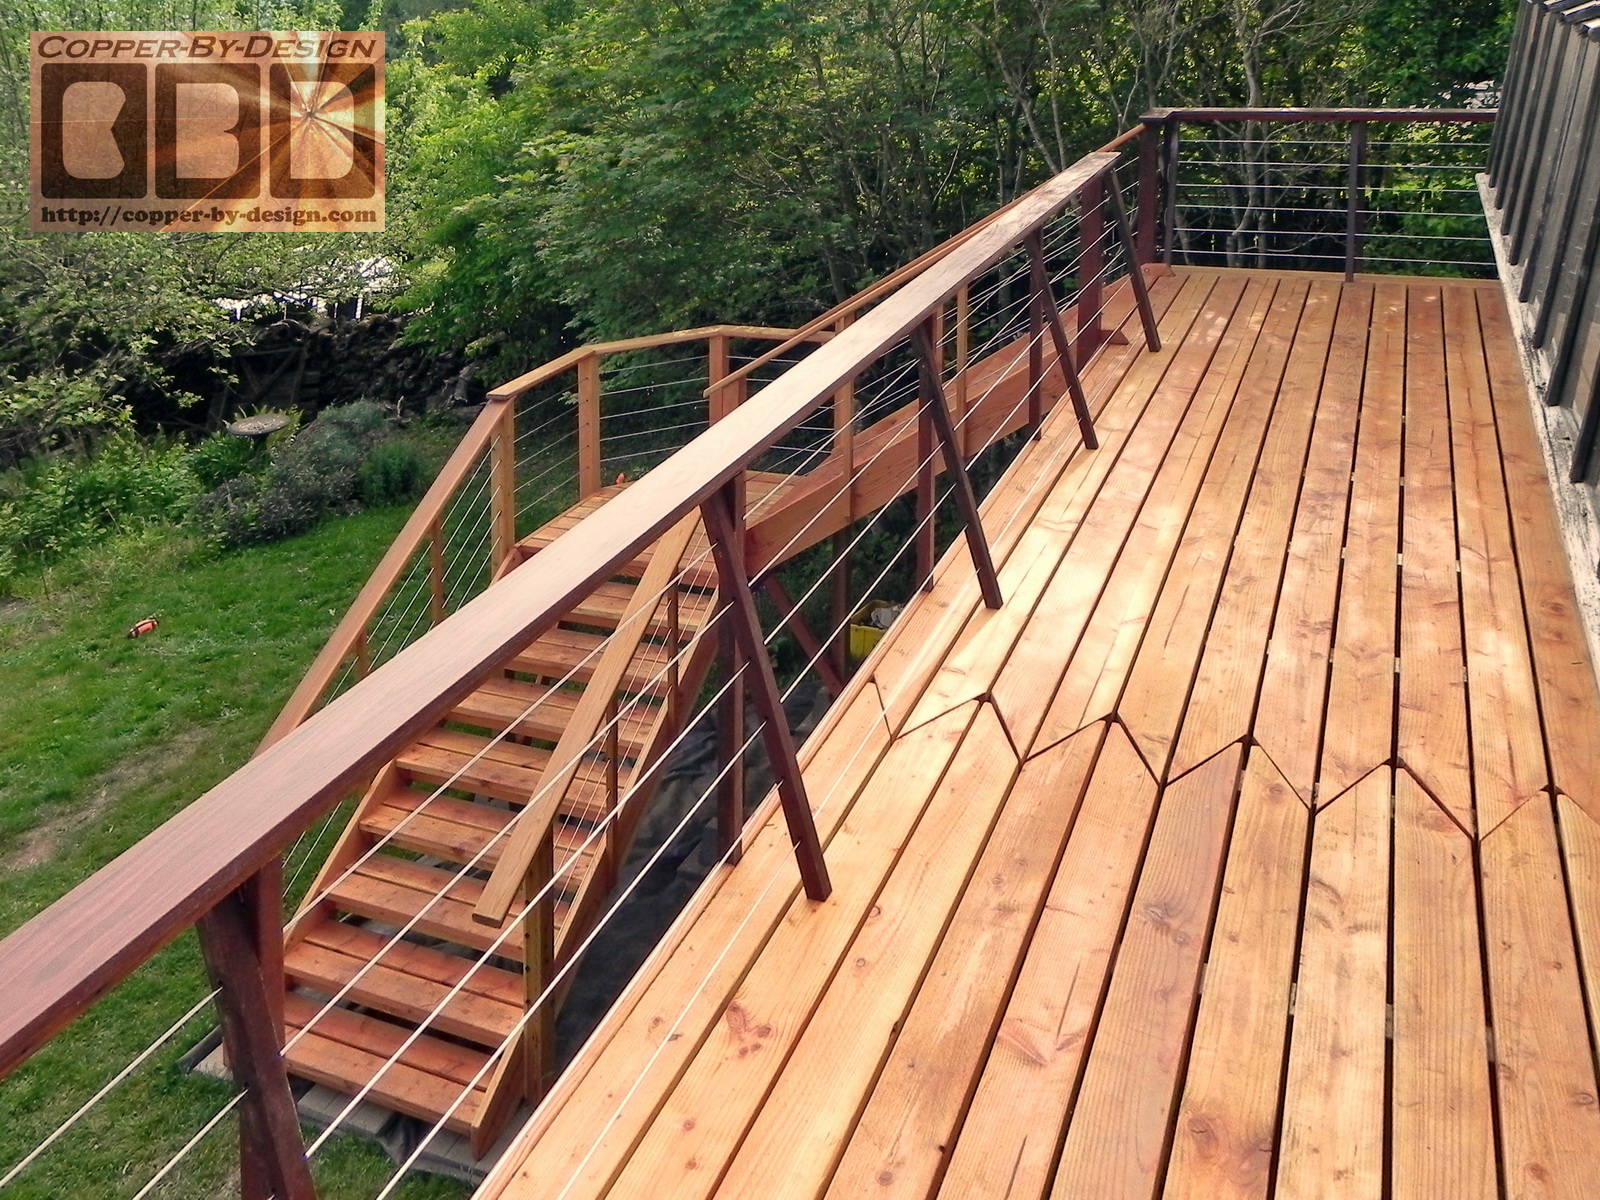
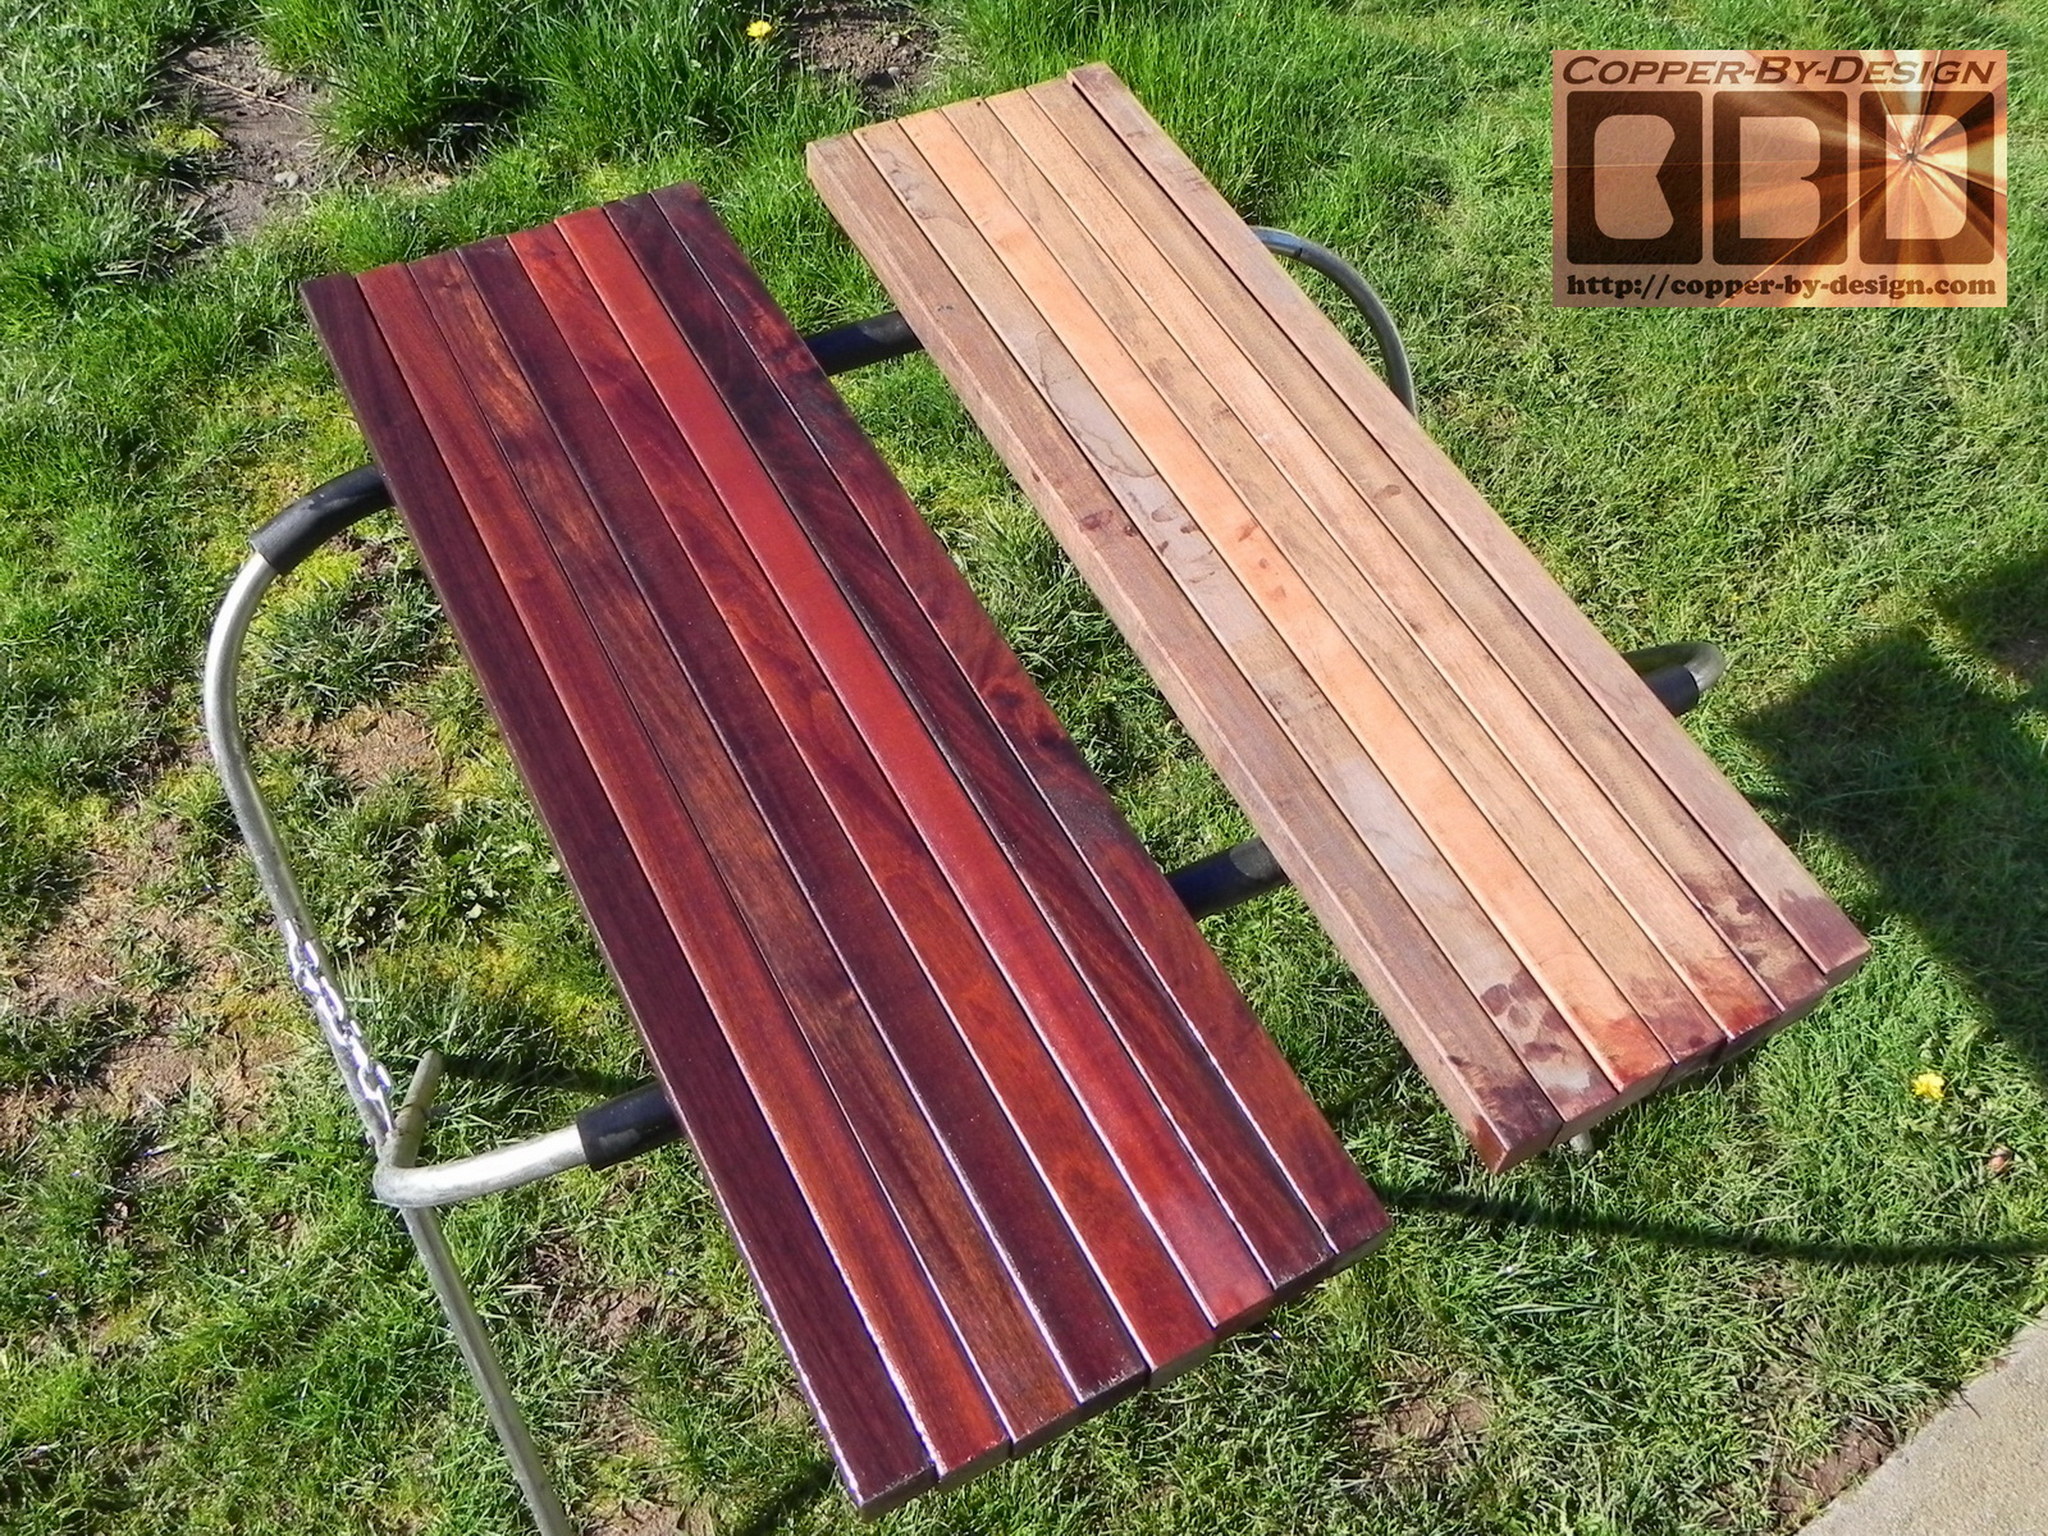
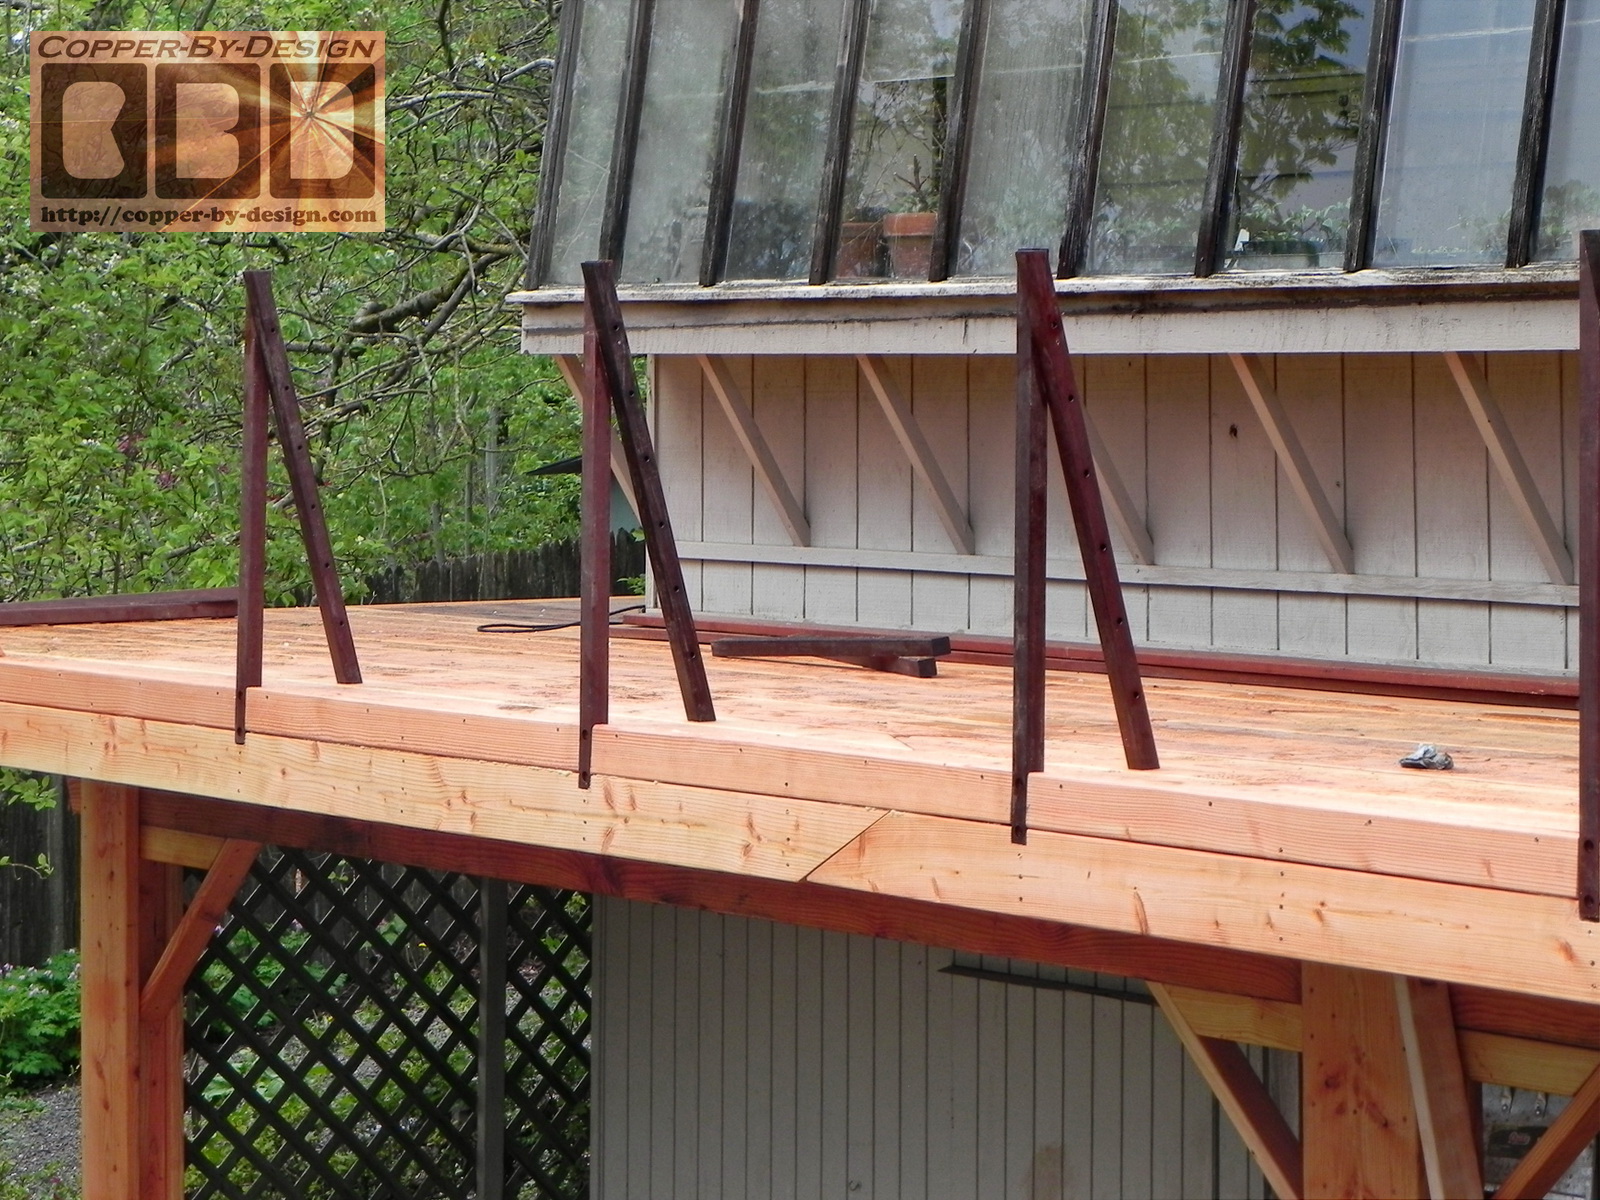
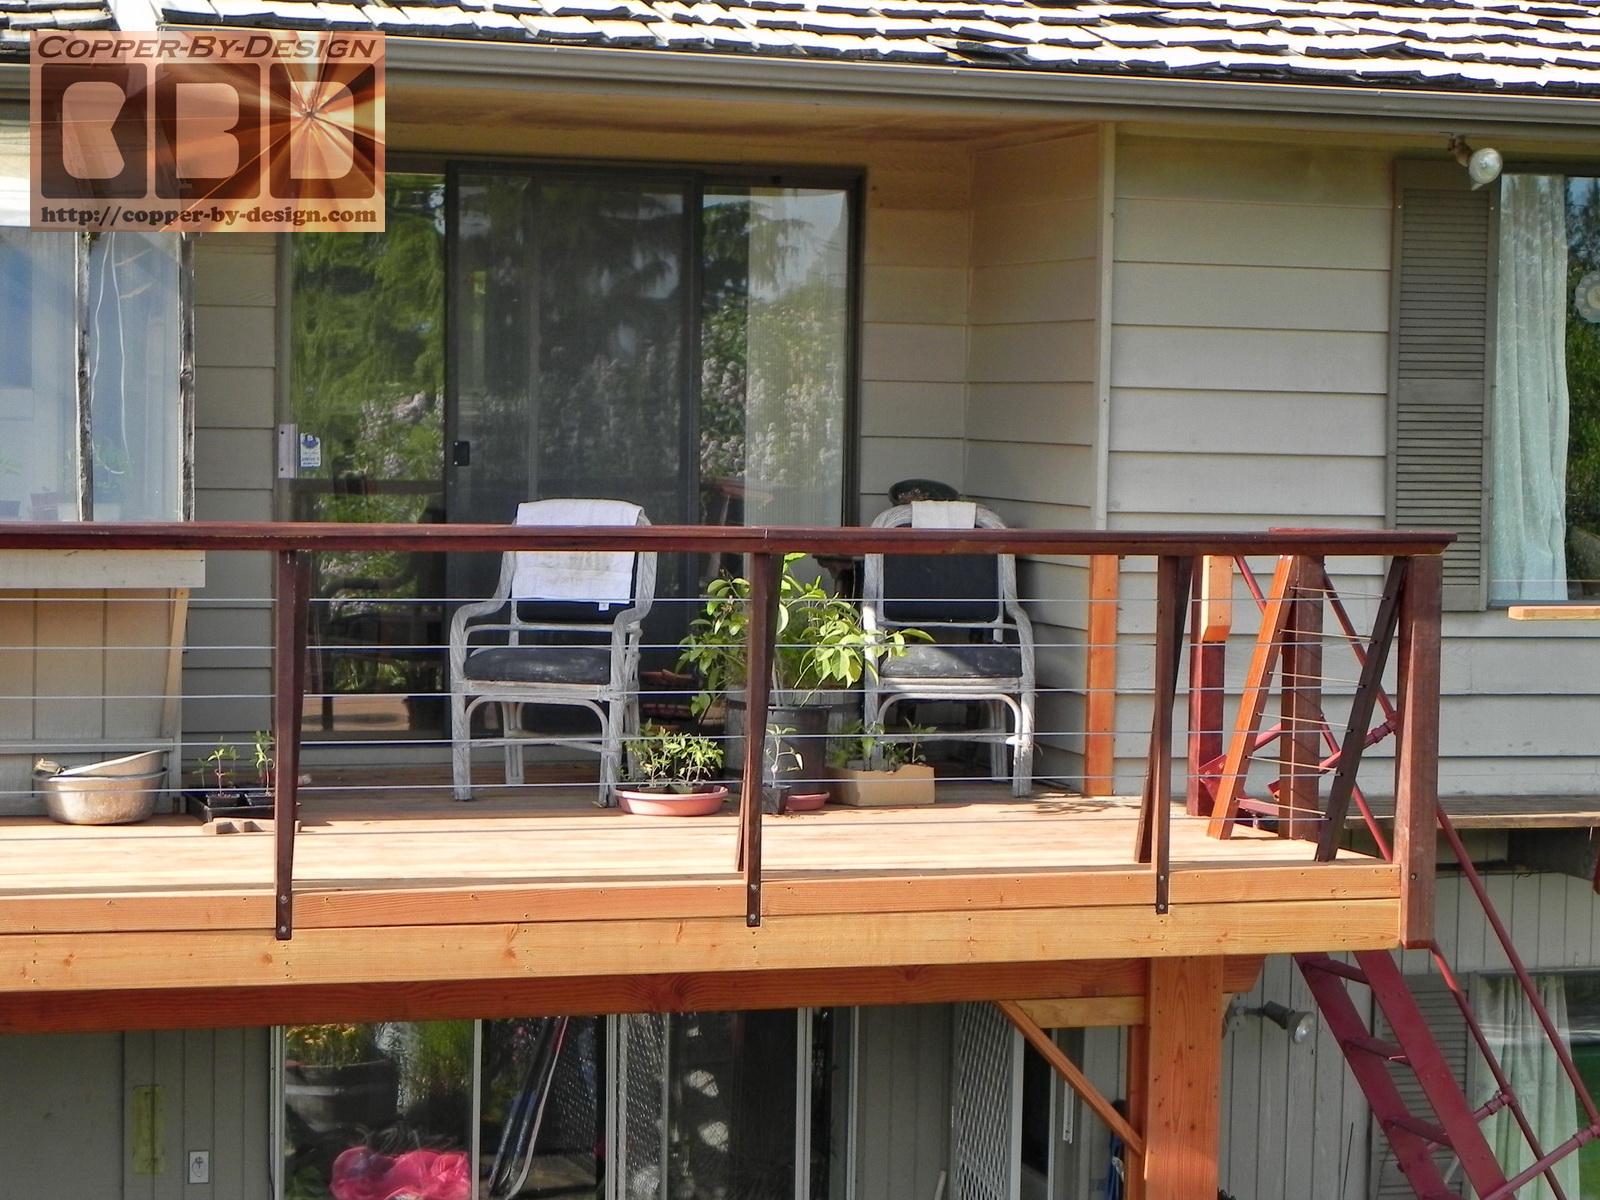
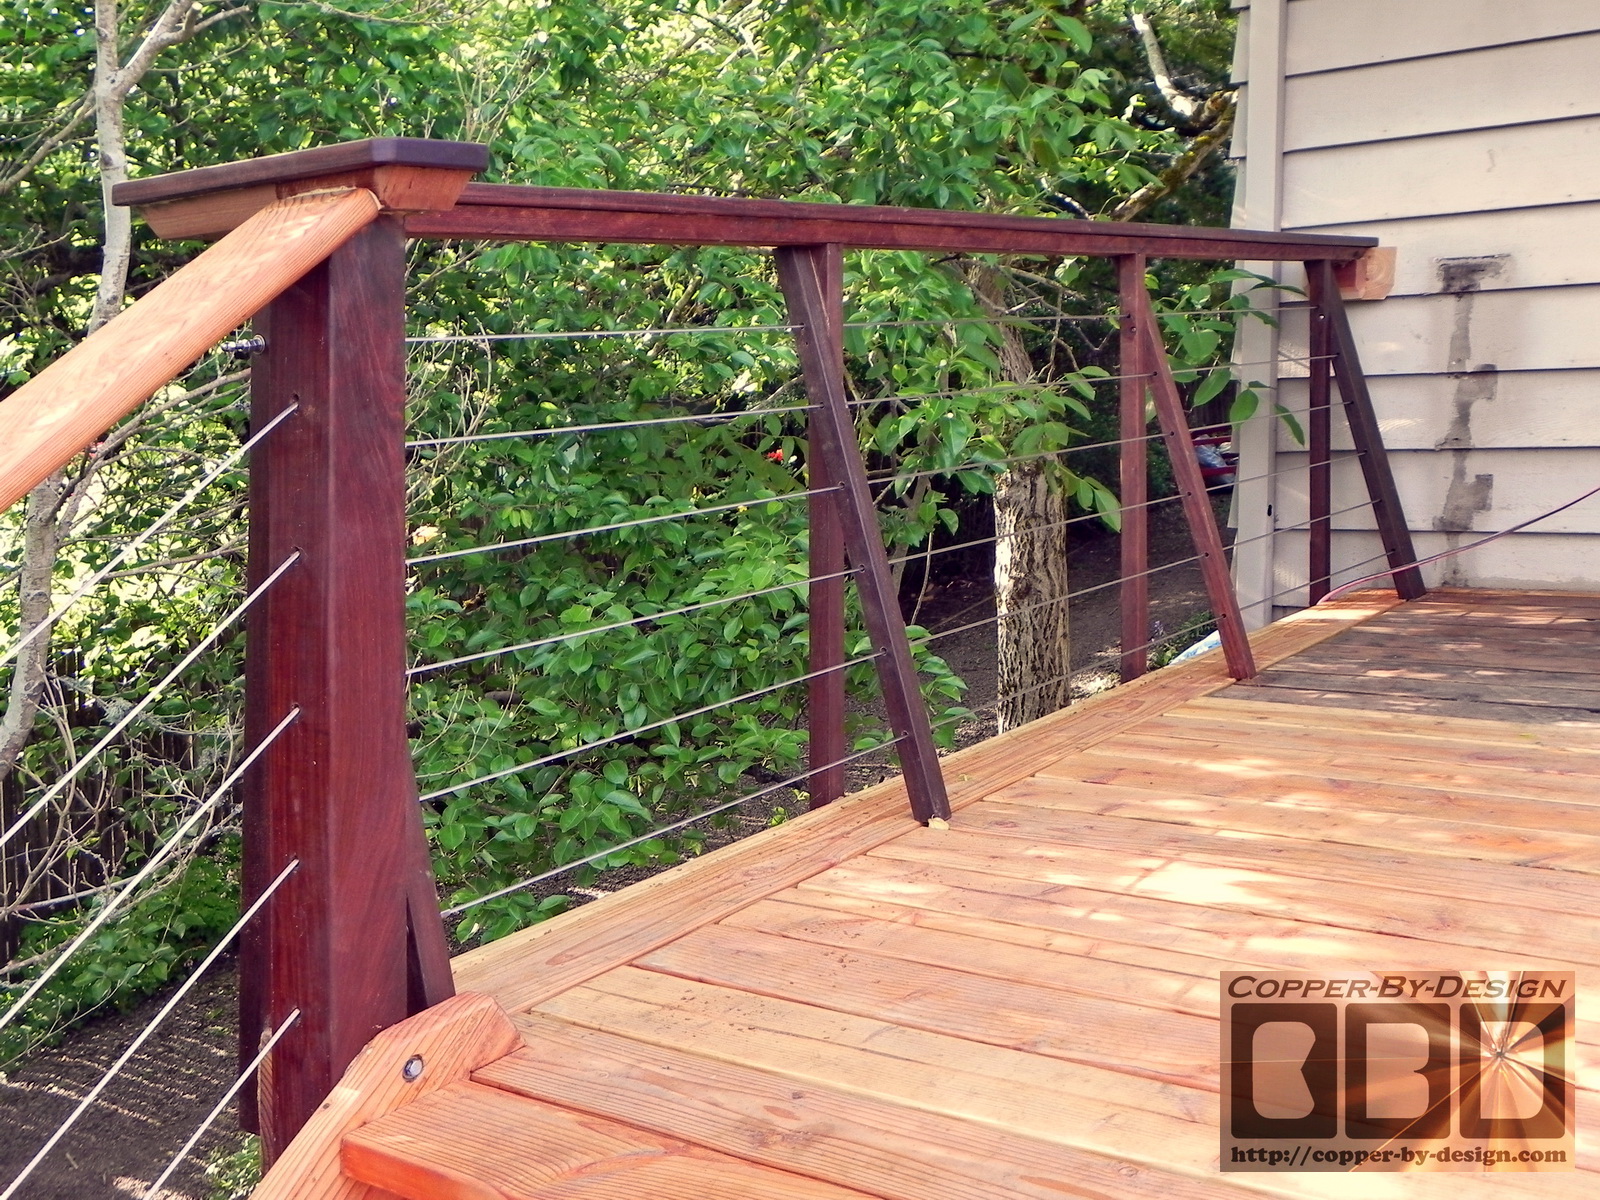
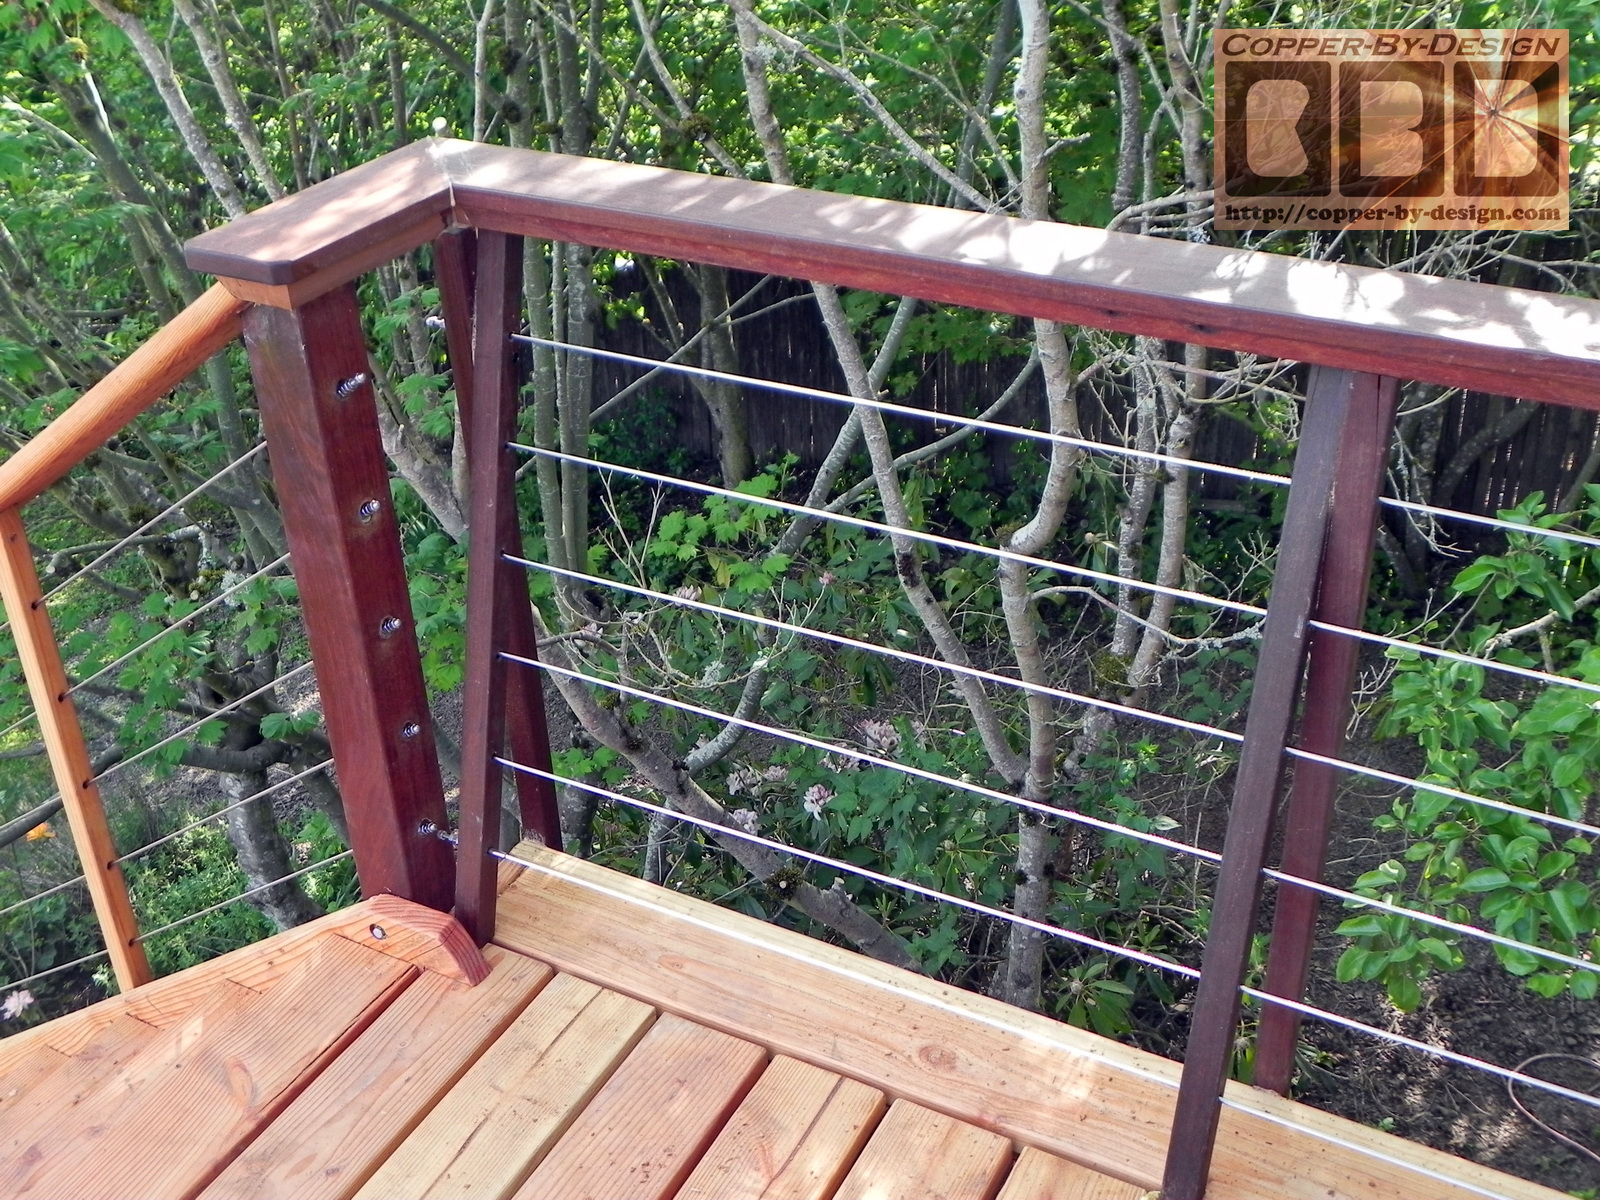
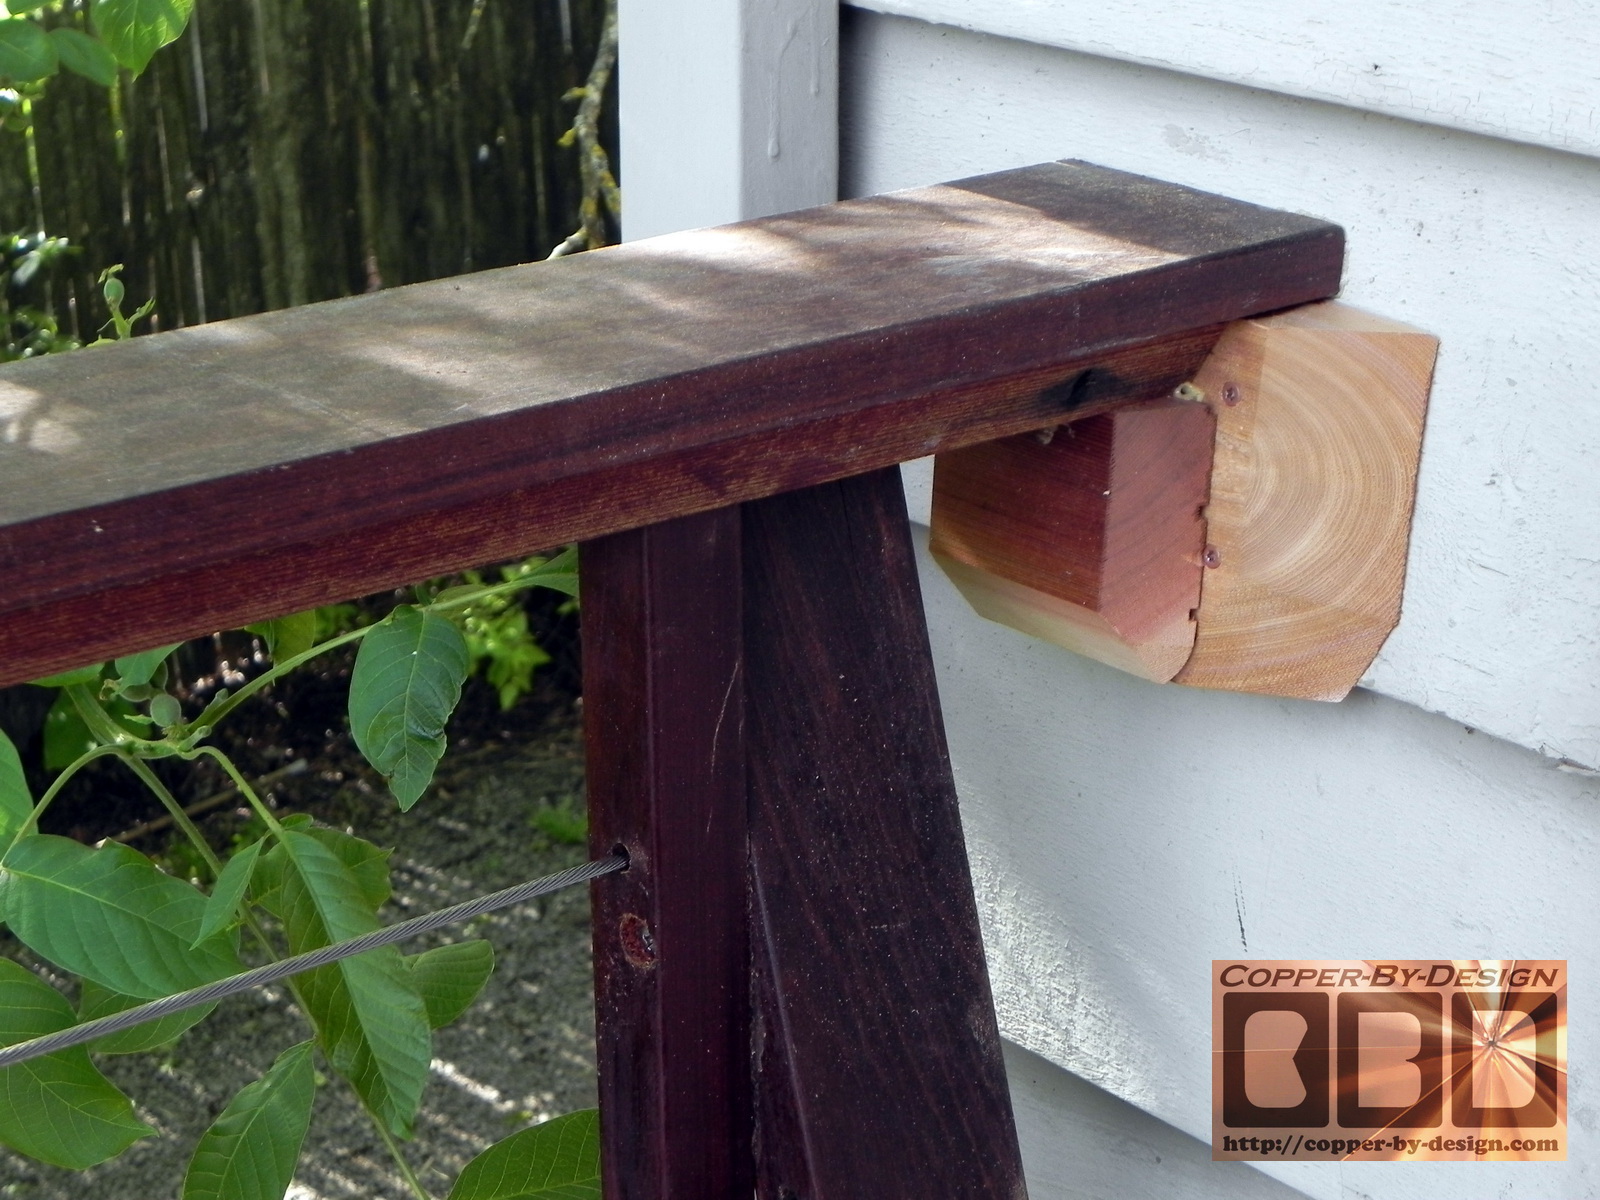
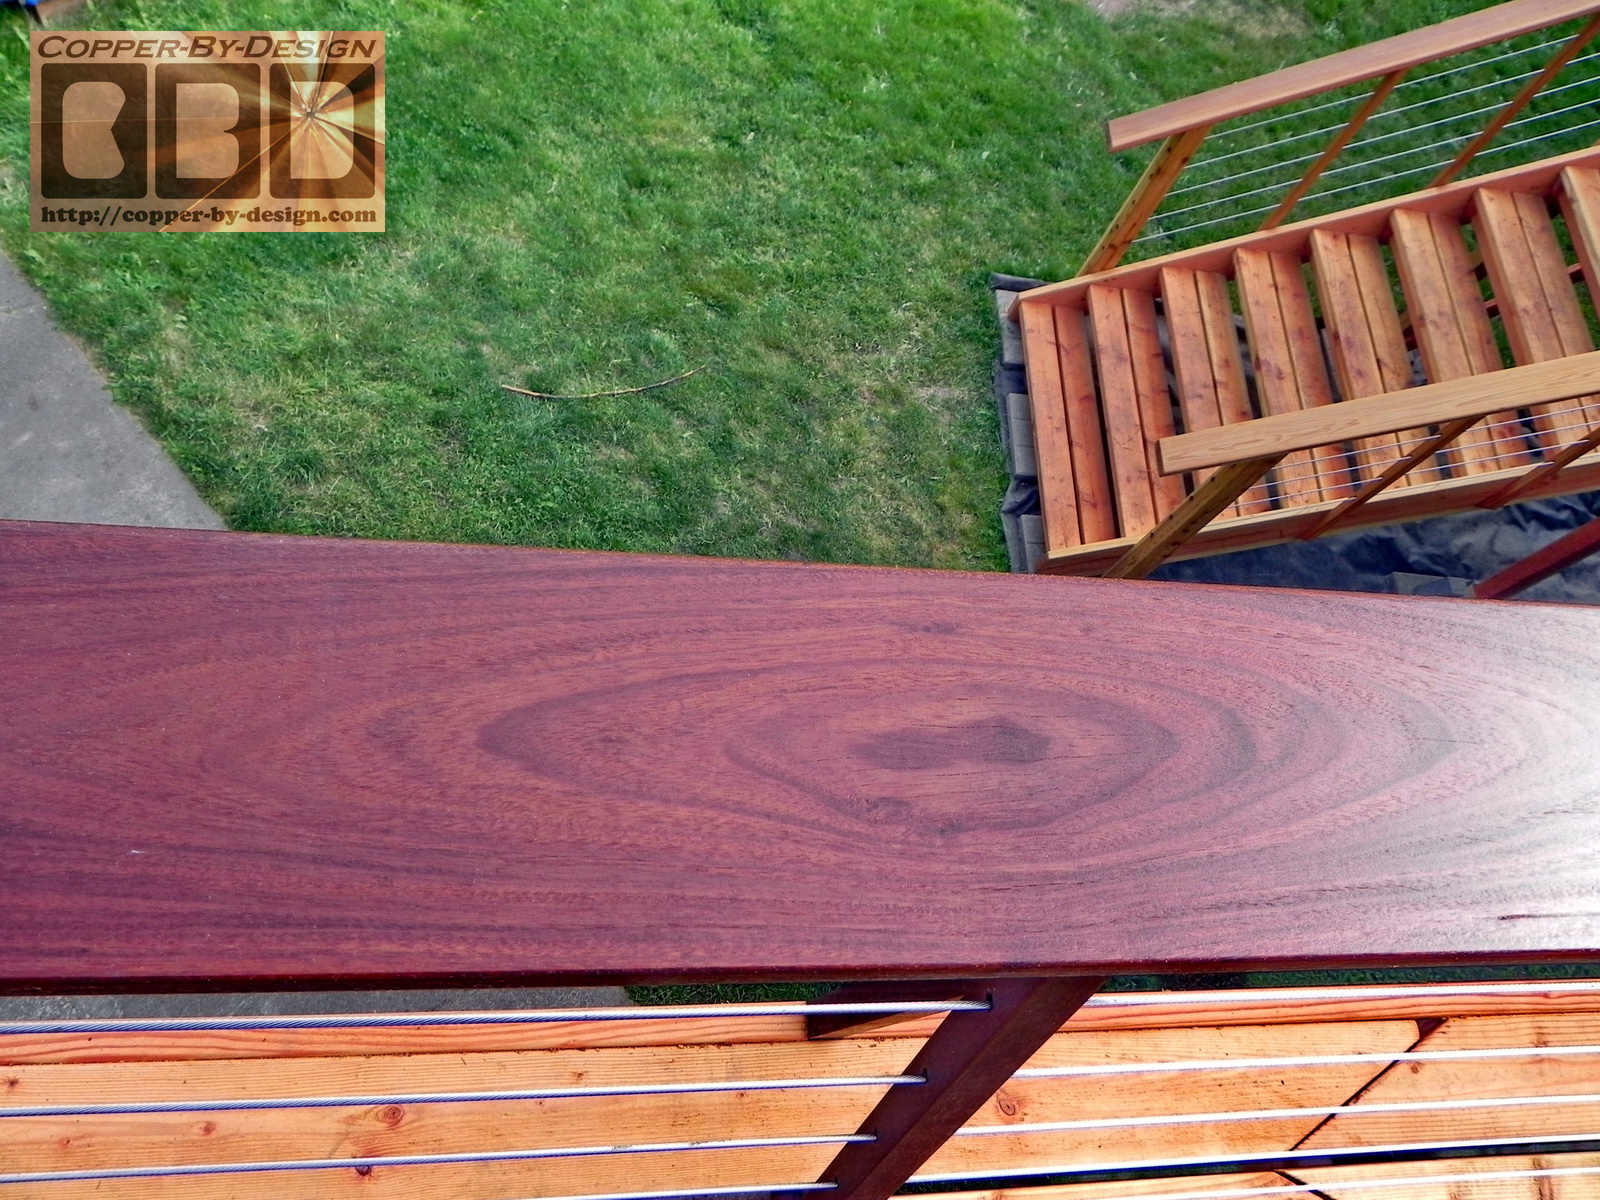
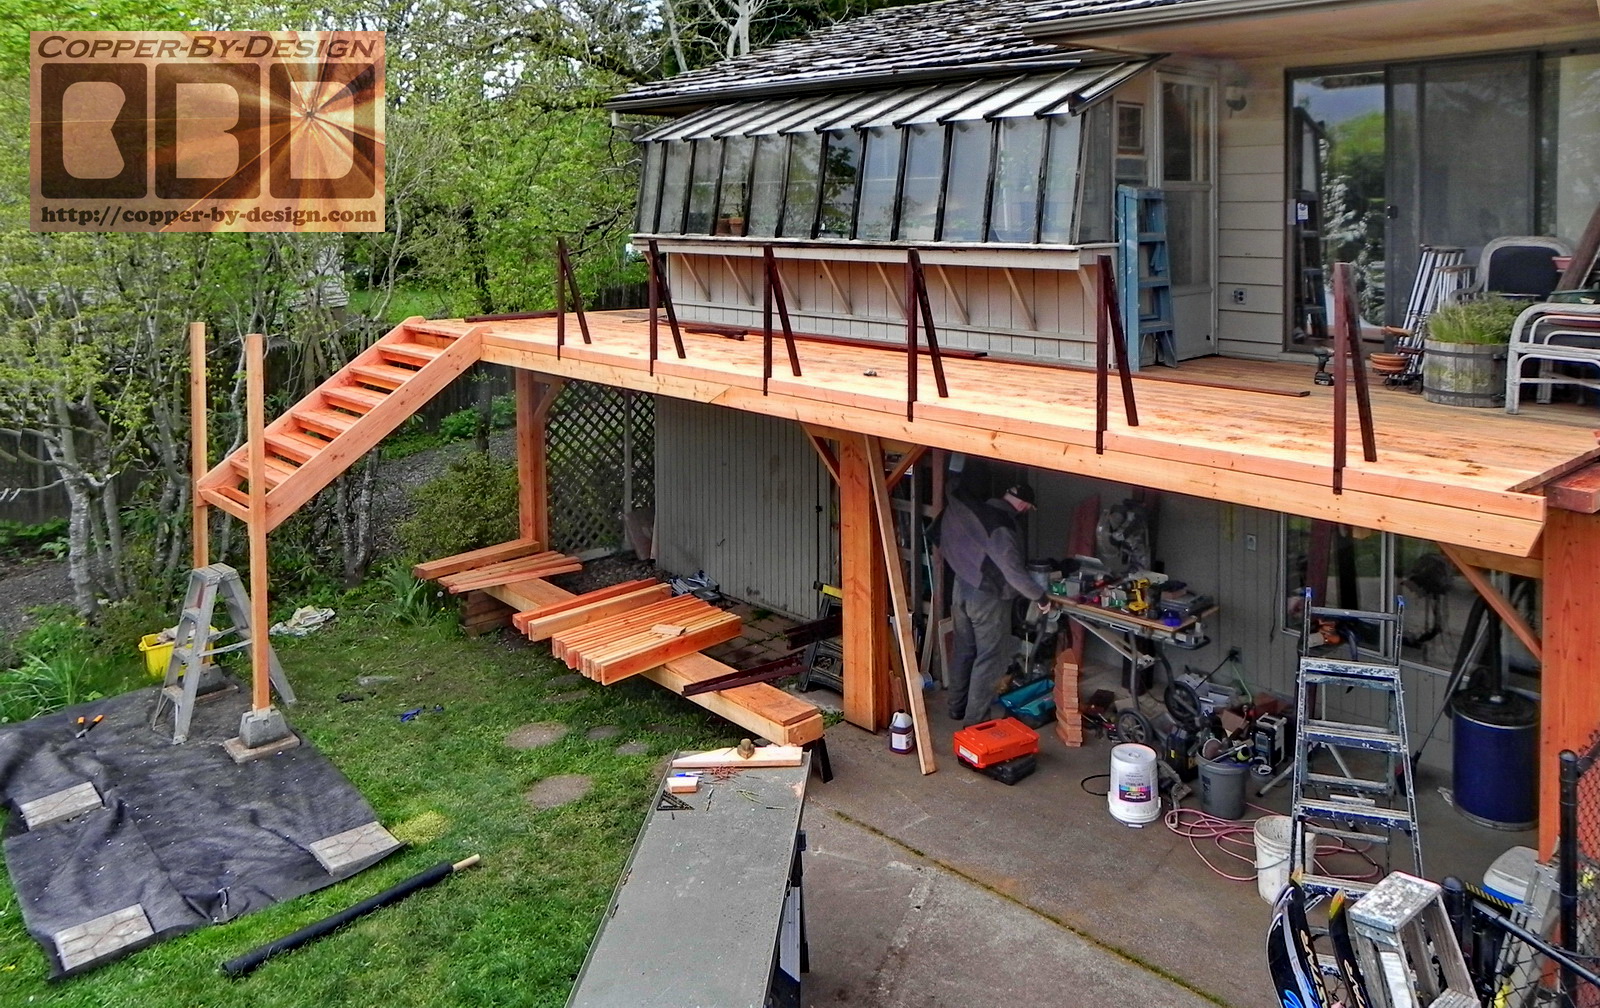
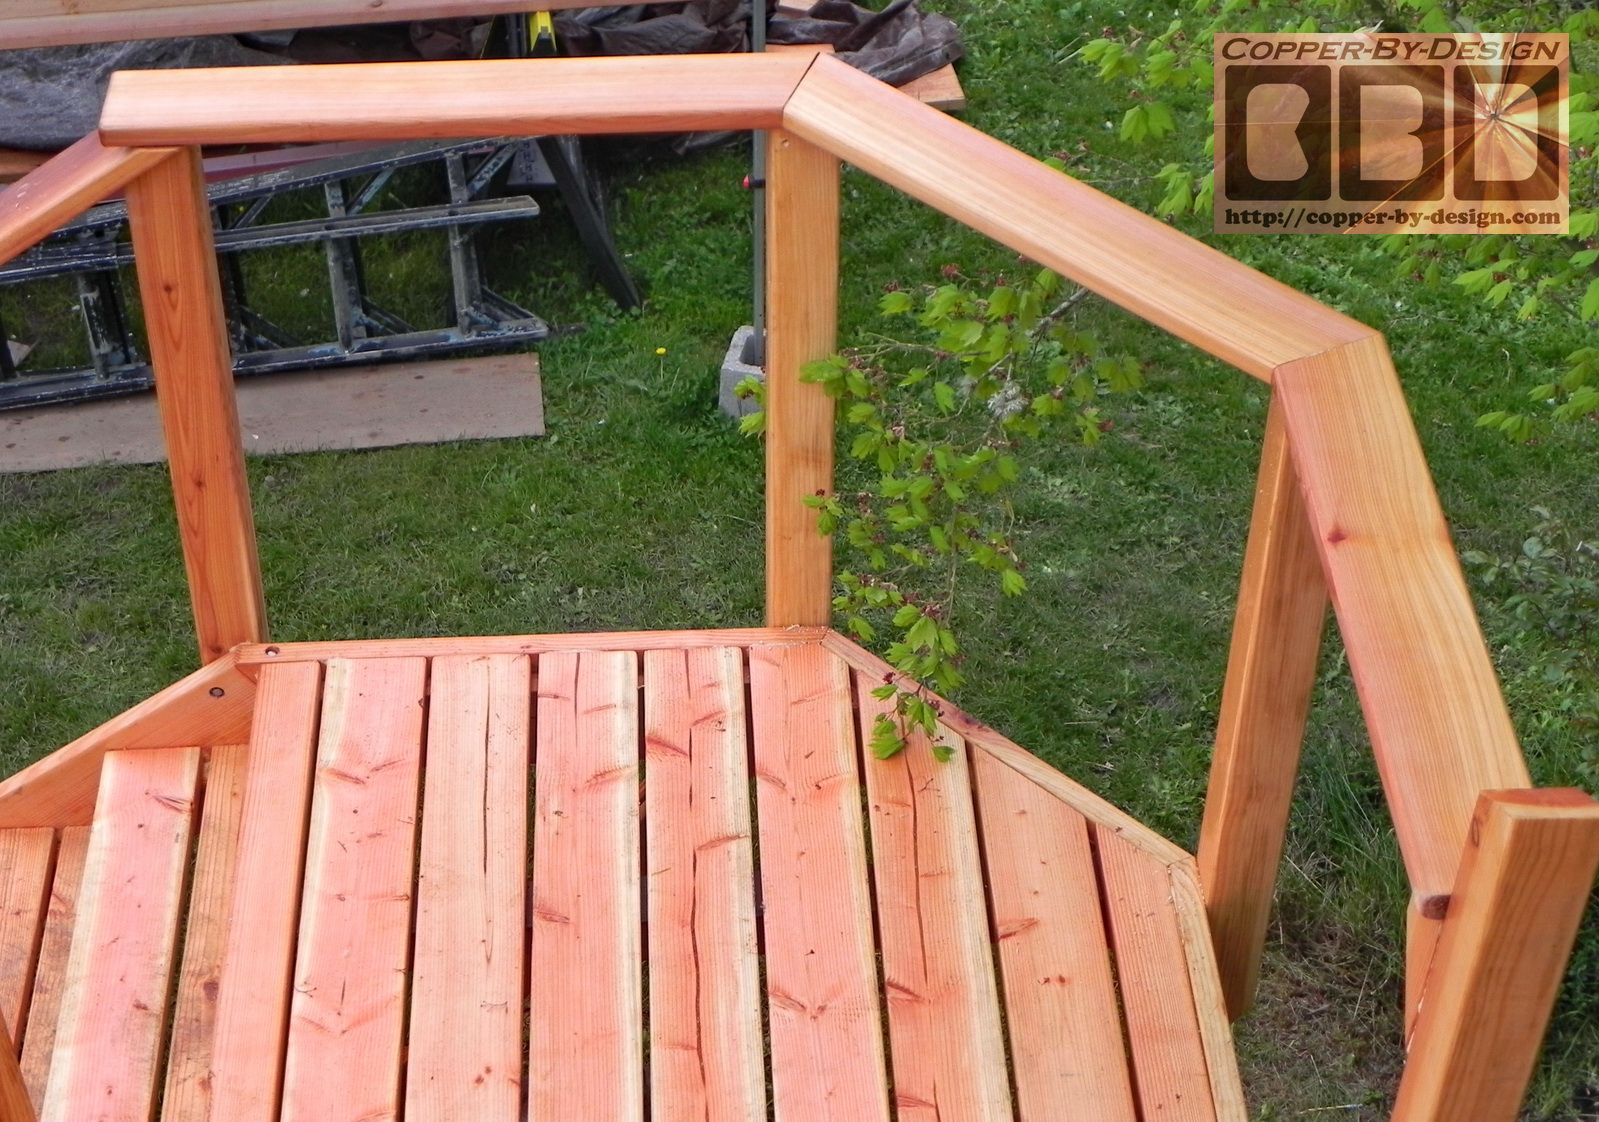
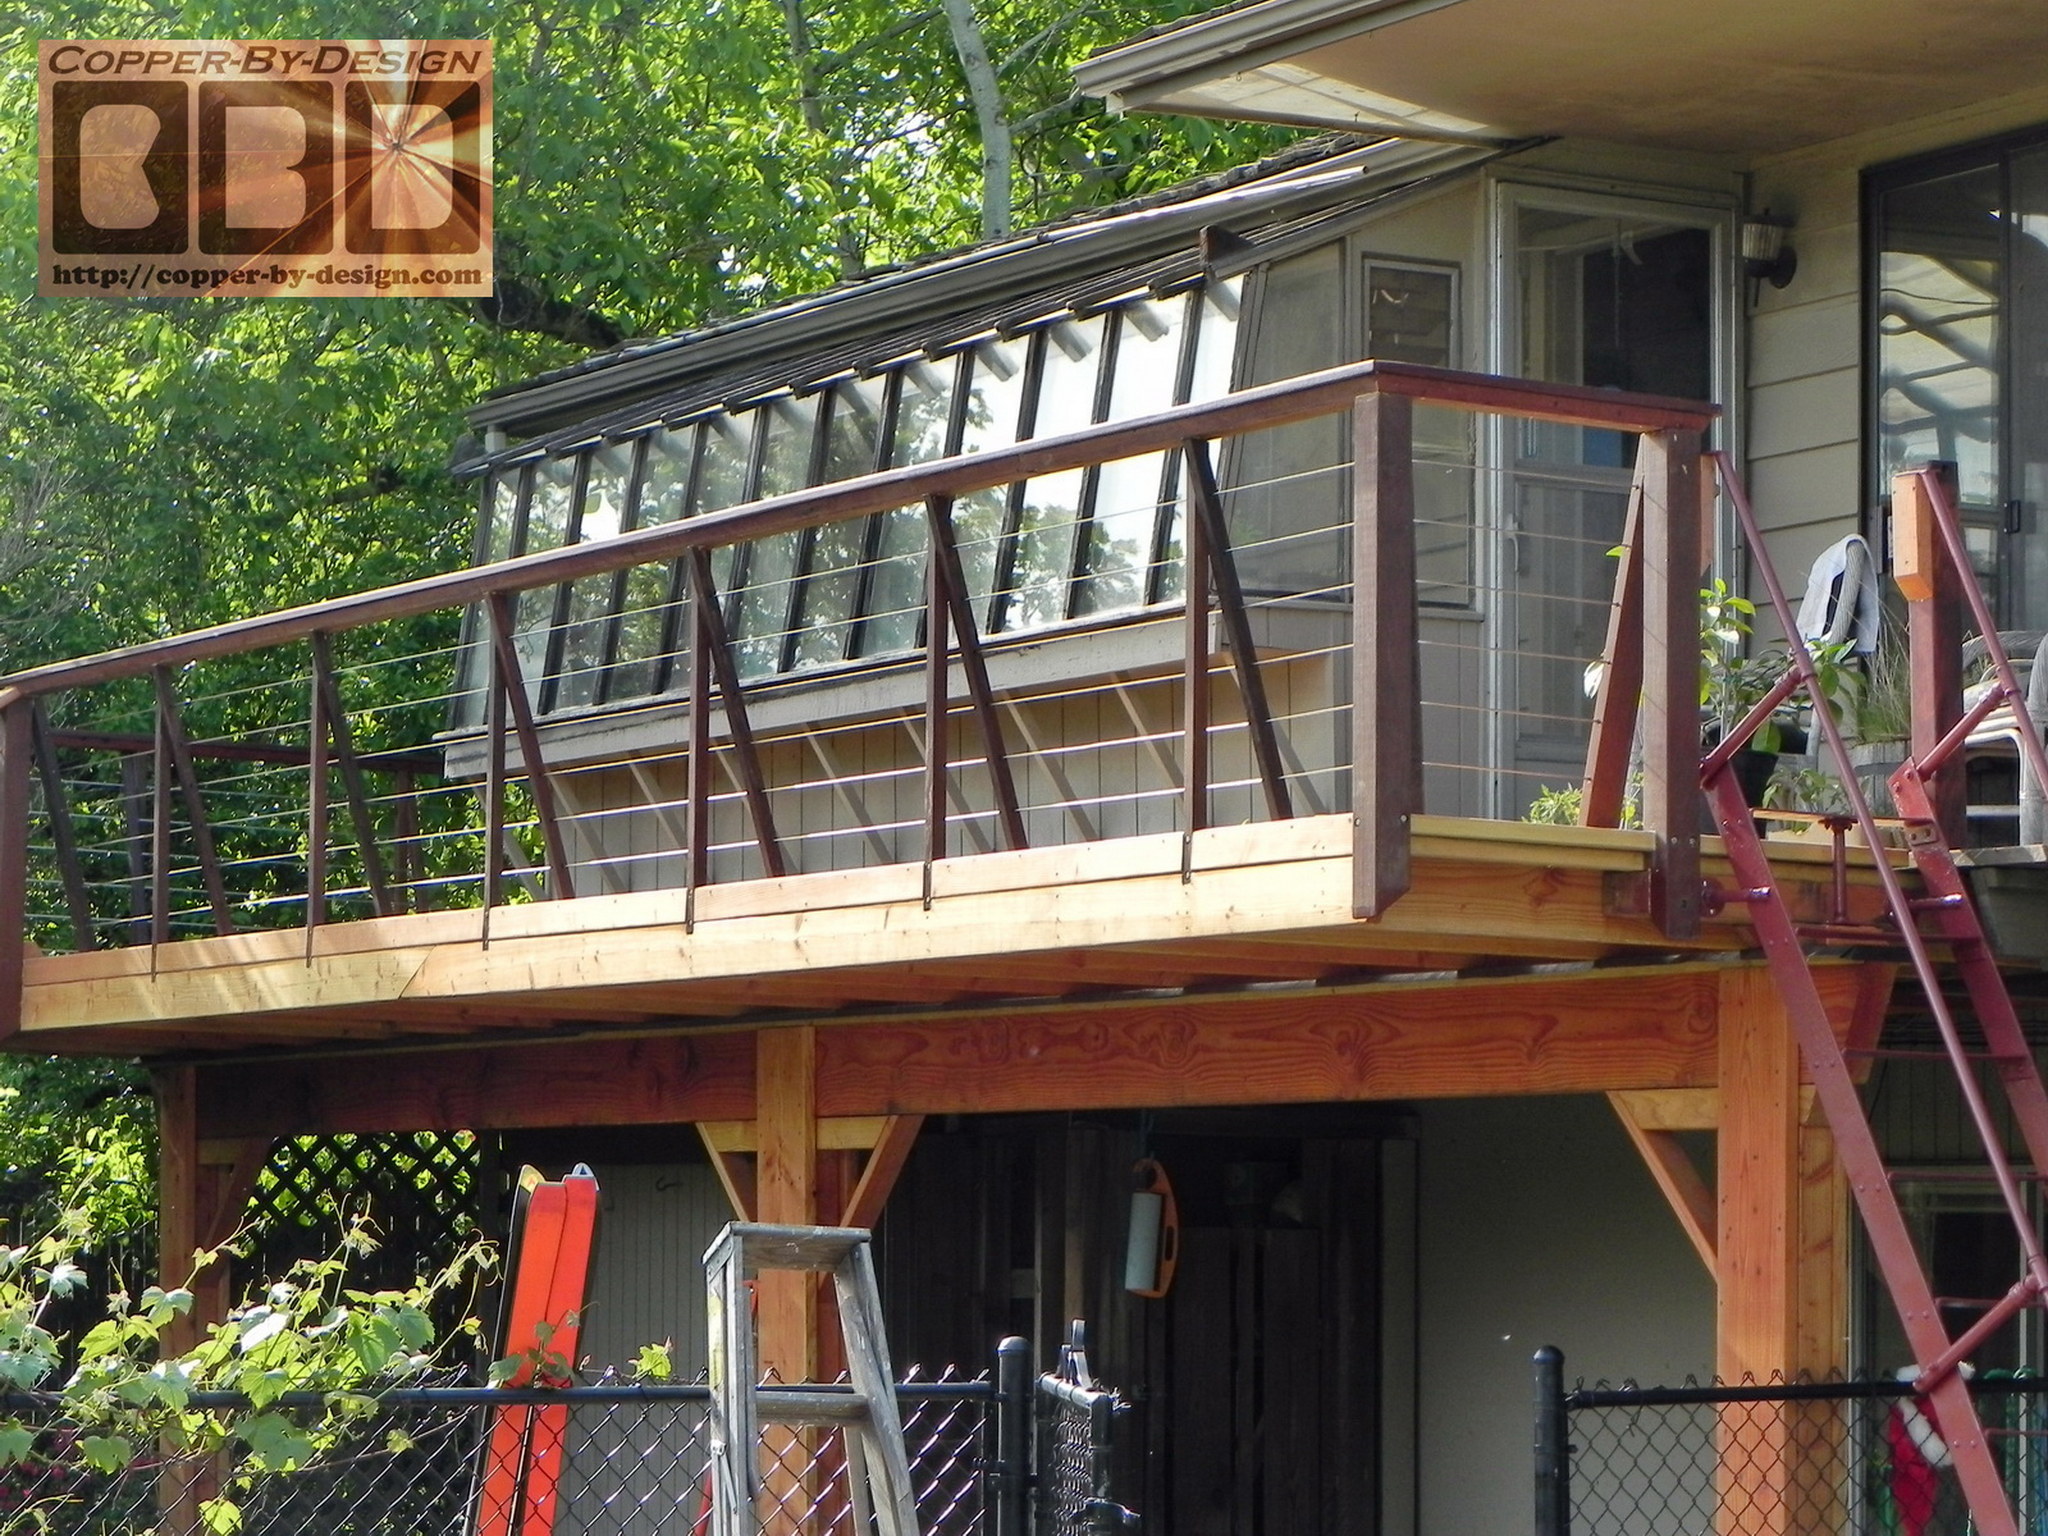
Now for the Ipe hardwood railing: I decided it was necessary to use an expensive hardwood for the railing to have enough strength I wanted with minimal lumber and yet strong enough for the tension of the stainless steel cables they want for their horizontal safety rails for minimal visual obstruction. I could have used metal pipes in stead, but that seems so cold. I love the feel and look of real wood.
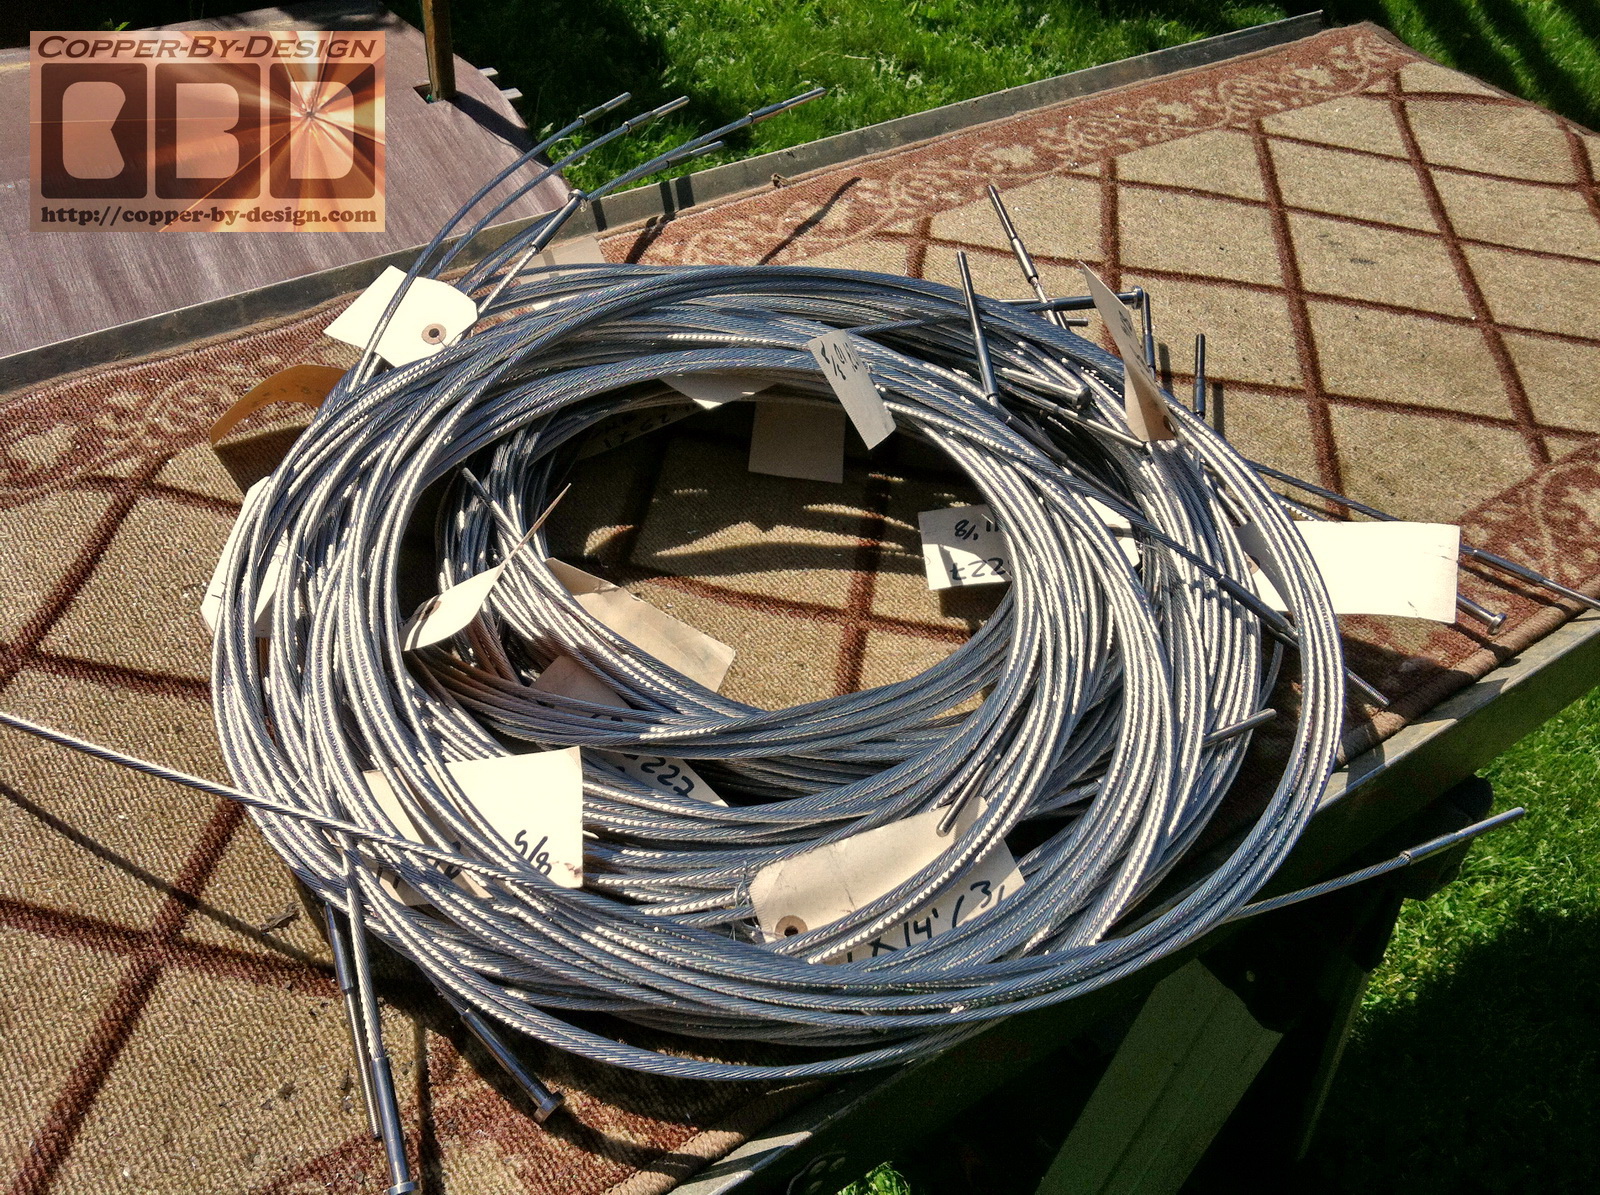
This left photo above shows how dramatically the color changes with the application of the clear tung oil. I drilled 238 holes for the 3/16" SS cables to go through. These are attached to the balcony with stainless steel lag screws. This pile of SS cables were about 618 ln' and with the 44 bonded ends cost about $700. Before I could order these cables we had to thread a metal cable through each set of holes to get just the right measurements. Twine or rope would be far too flexible and not give us a true reading.
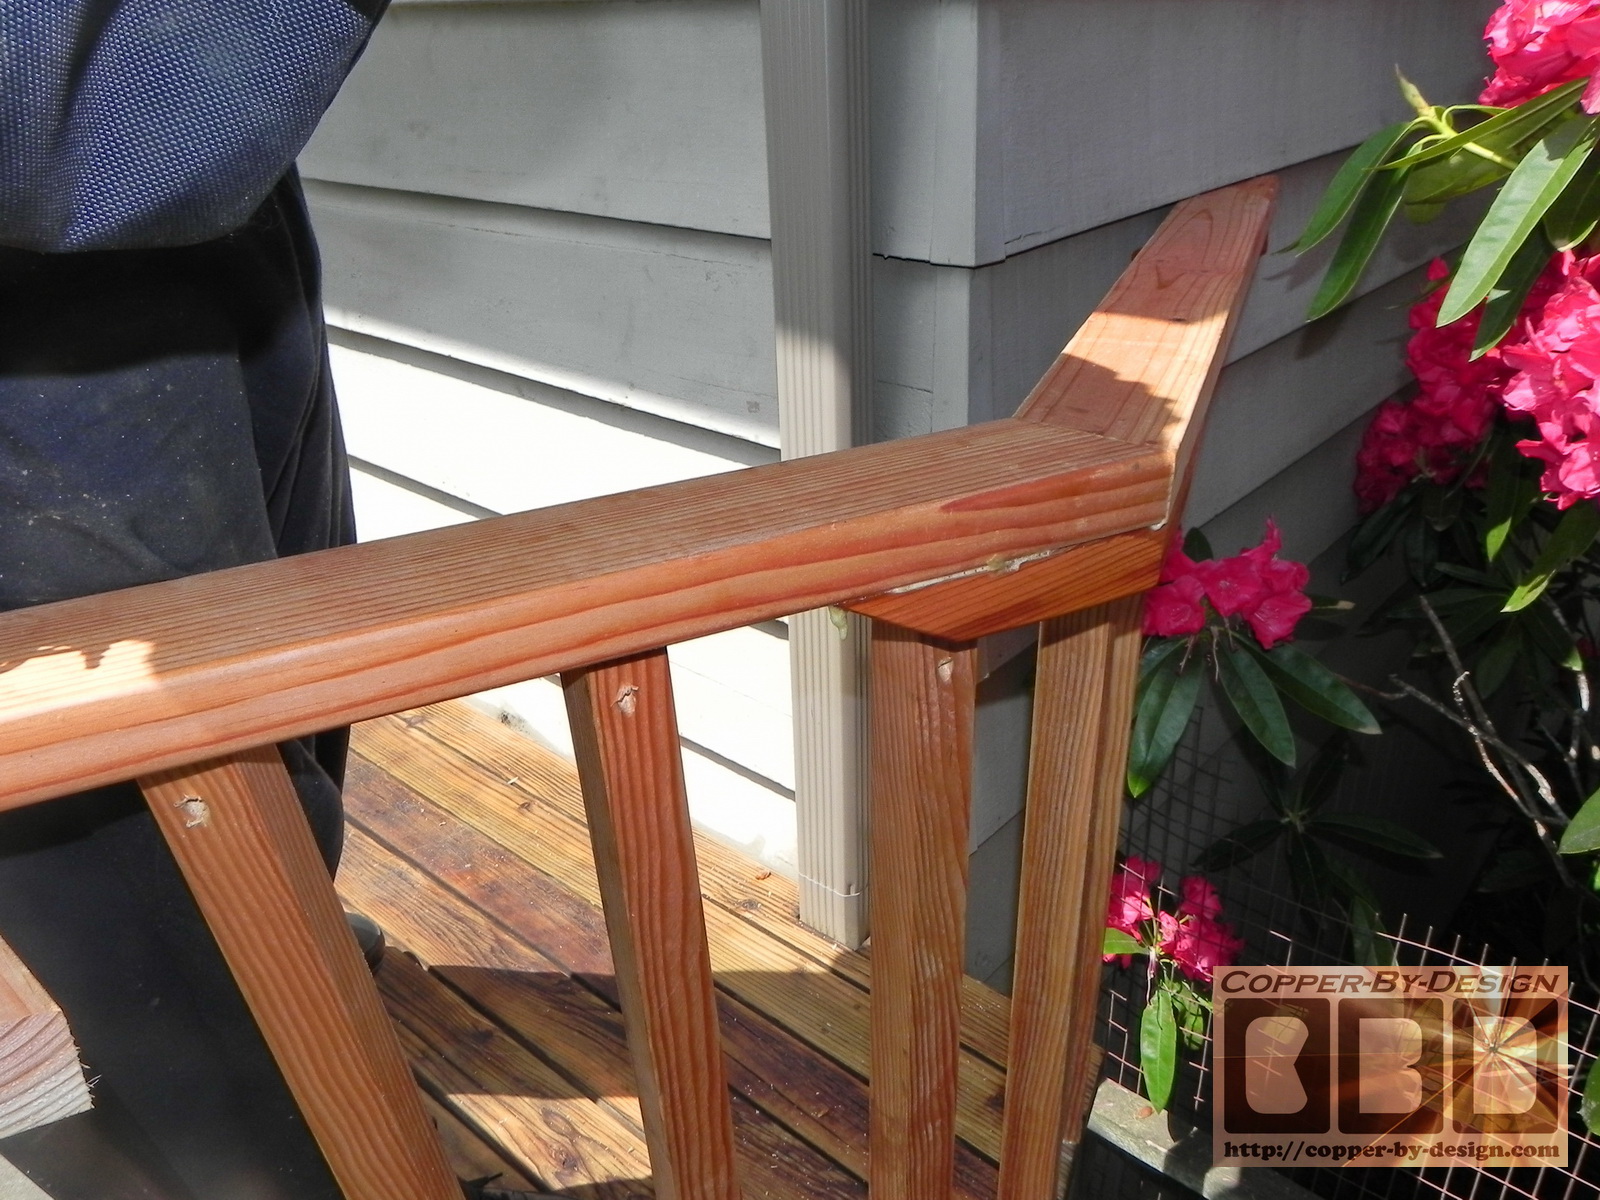
They wanted us to keep the slanted look of the previous railing, so I devised a way to use a pair of 2X2 boards to cross each other in this way to give the railing a lot more strength than a single 2X4. The top cable is going through the middle of both boards. I drilled most of these holes on my drill press in my wood shop so the holes would each be nice and straight.
To make the railing with this hardwood and cable system is about twice as expensive, but certainly makes for nice railing. We just used 3 sanded 16' 2X4s for the catwalk hand rail to save on cost, since I was already so far over budget, but the vertical railings for the cables were made from the better ipe hardwood.
|
|
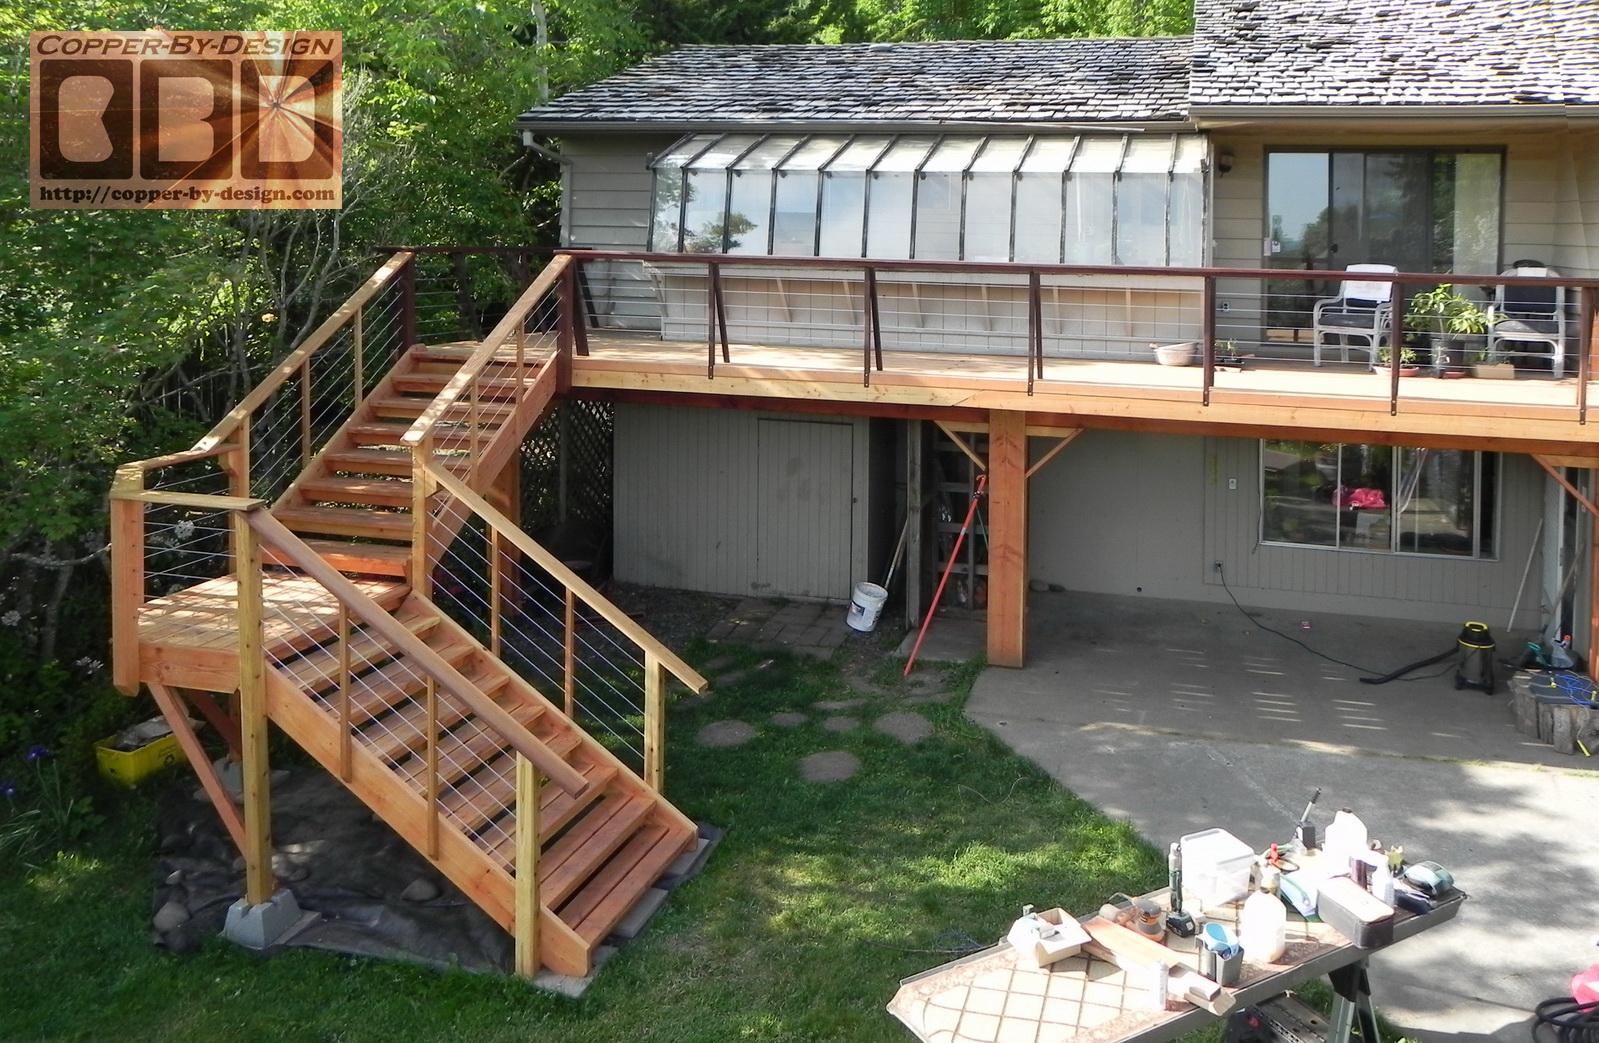
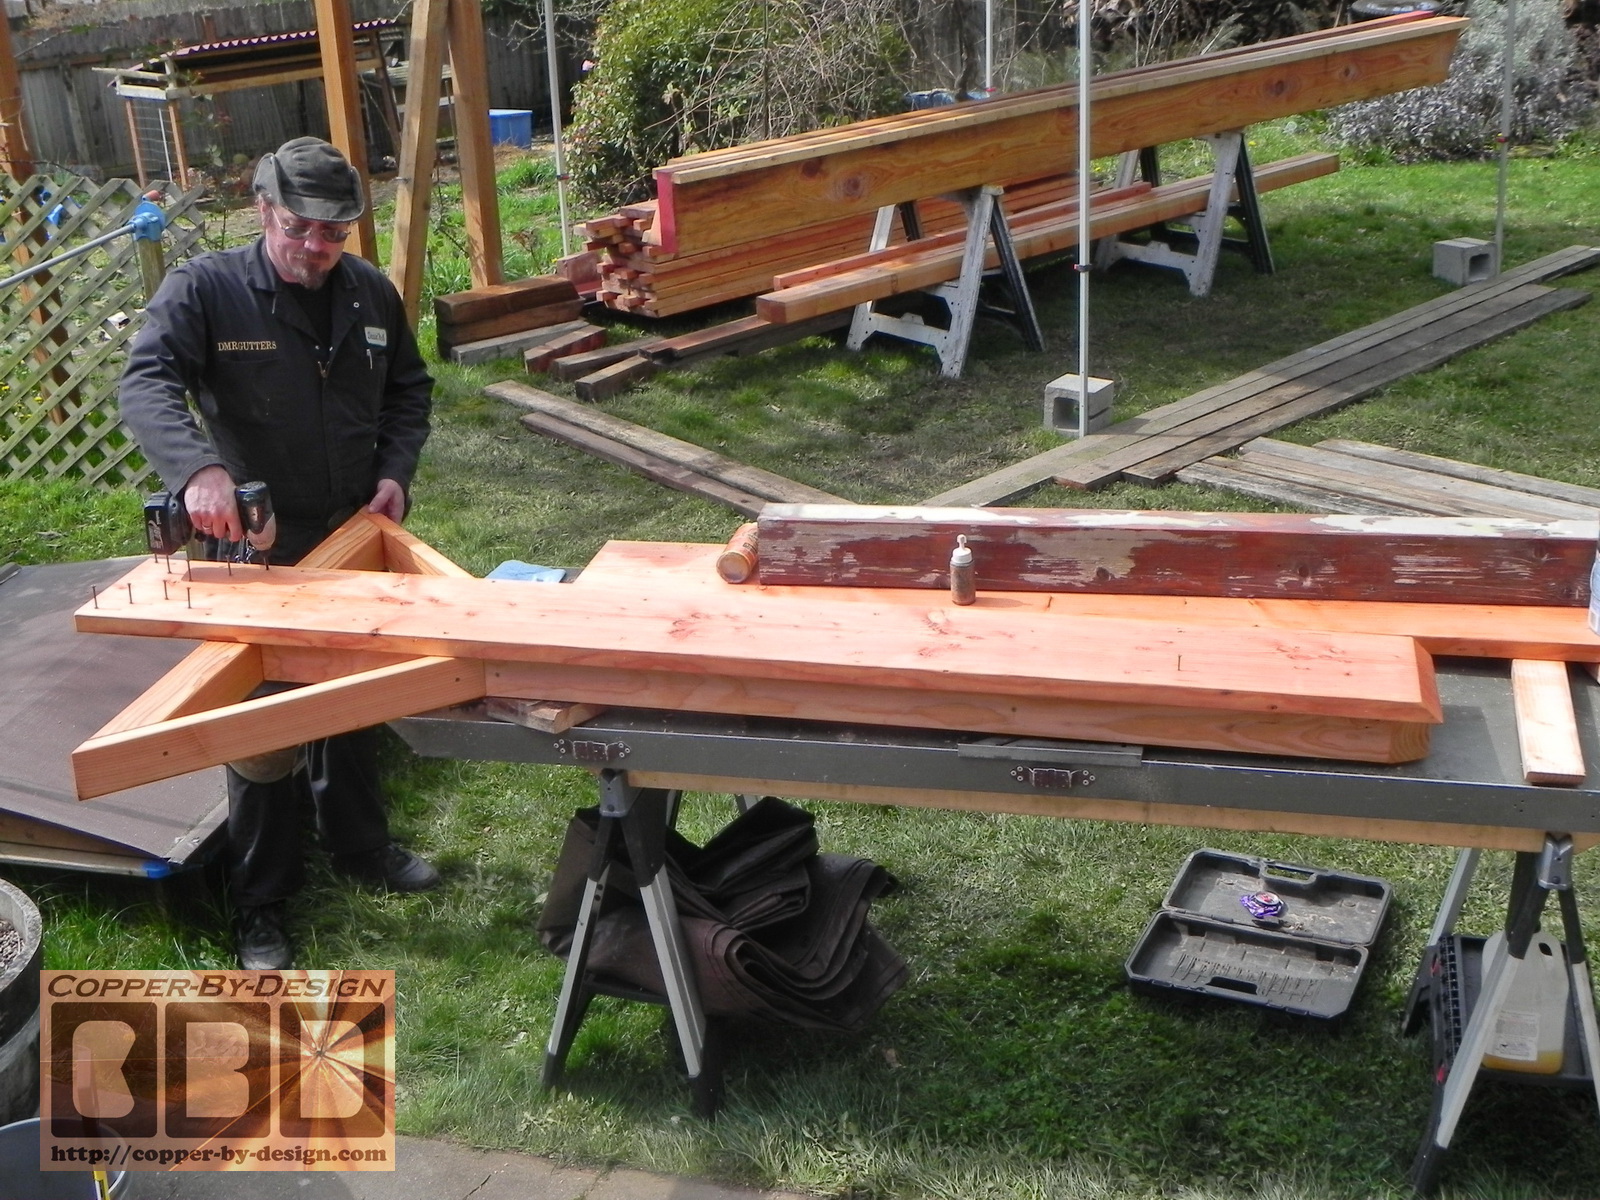
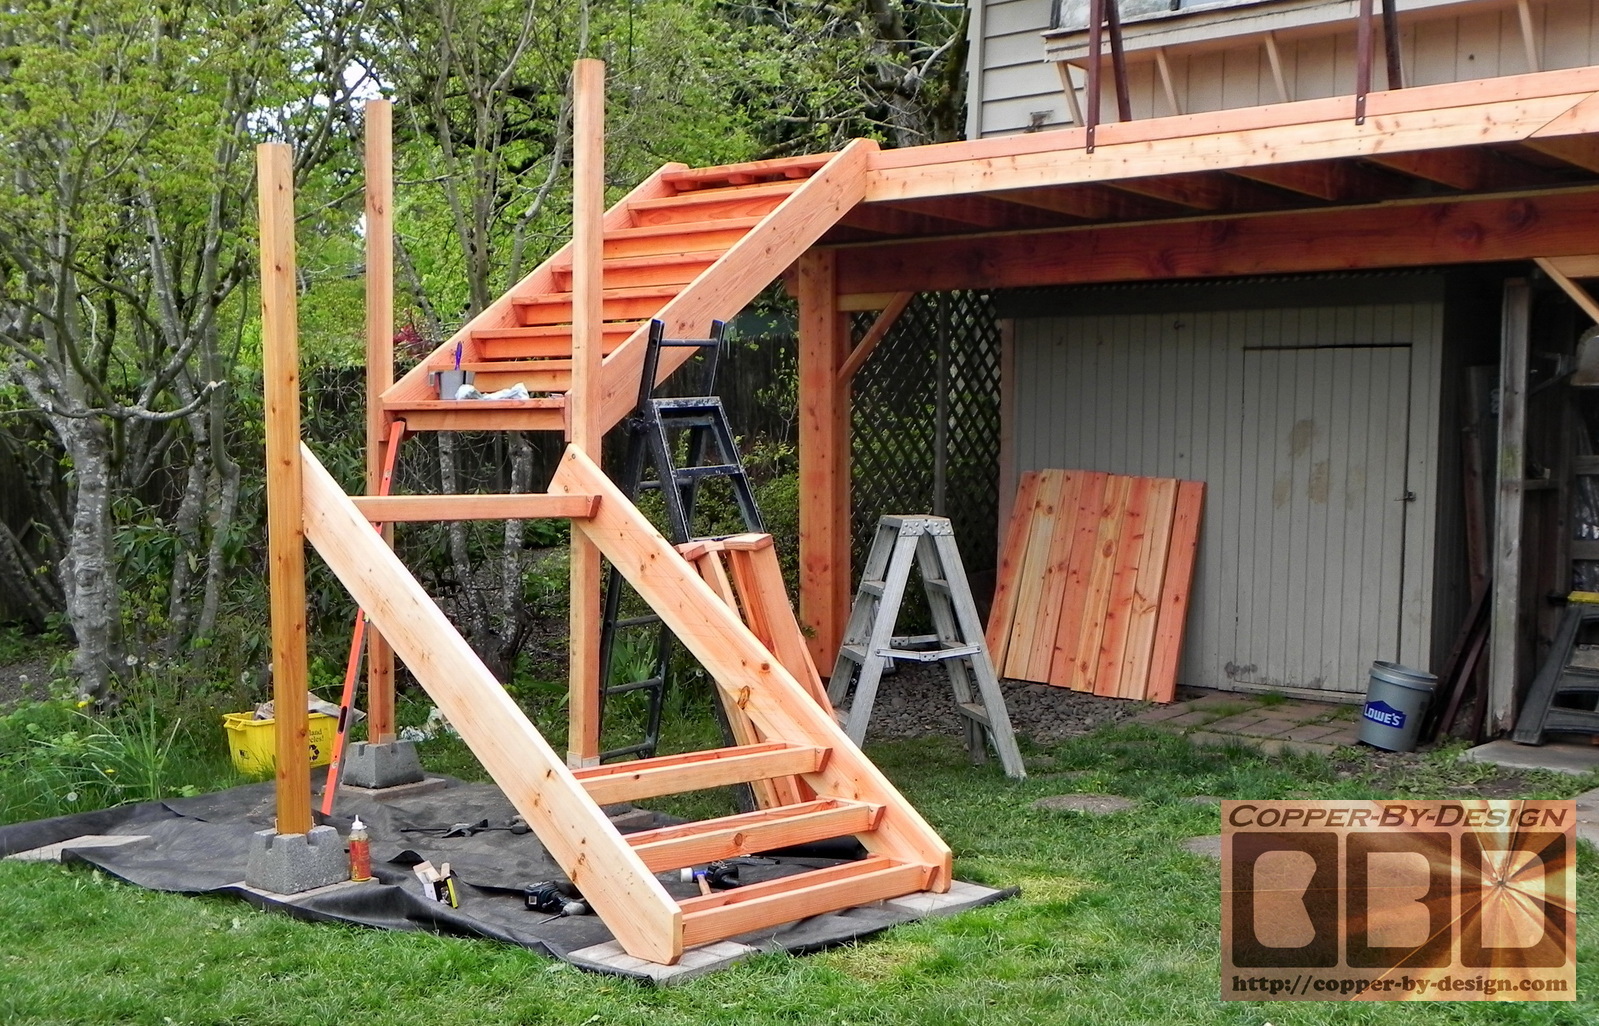
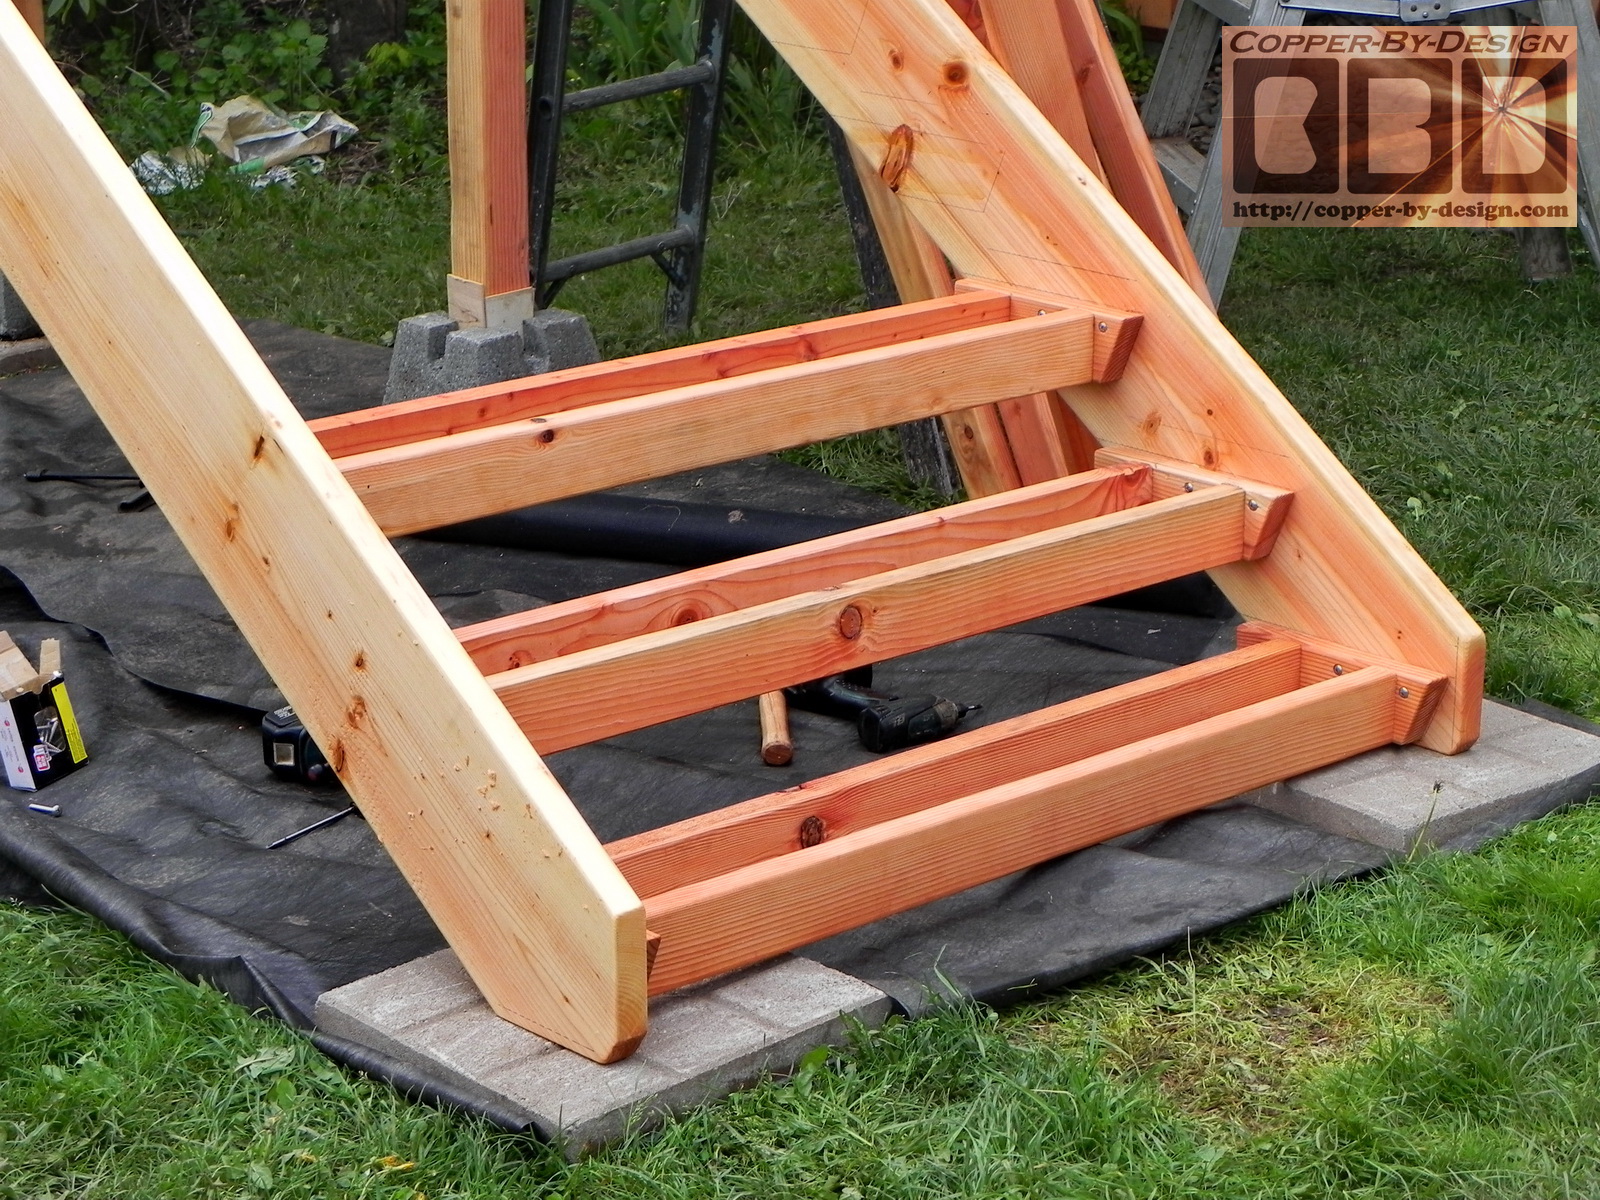
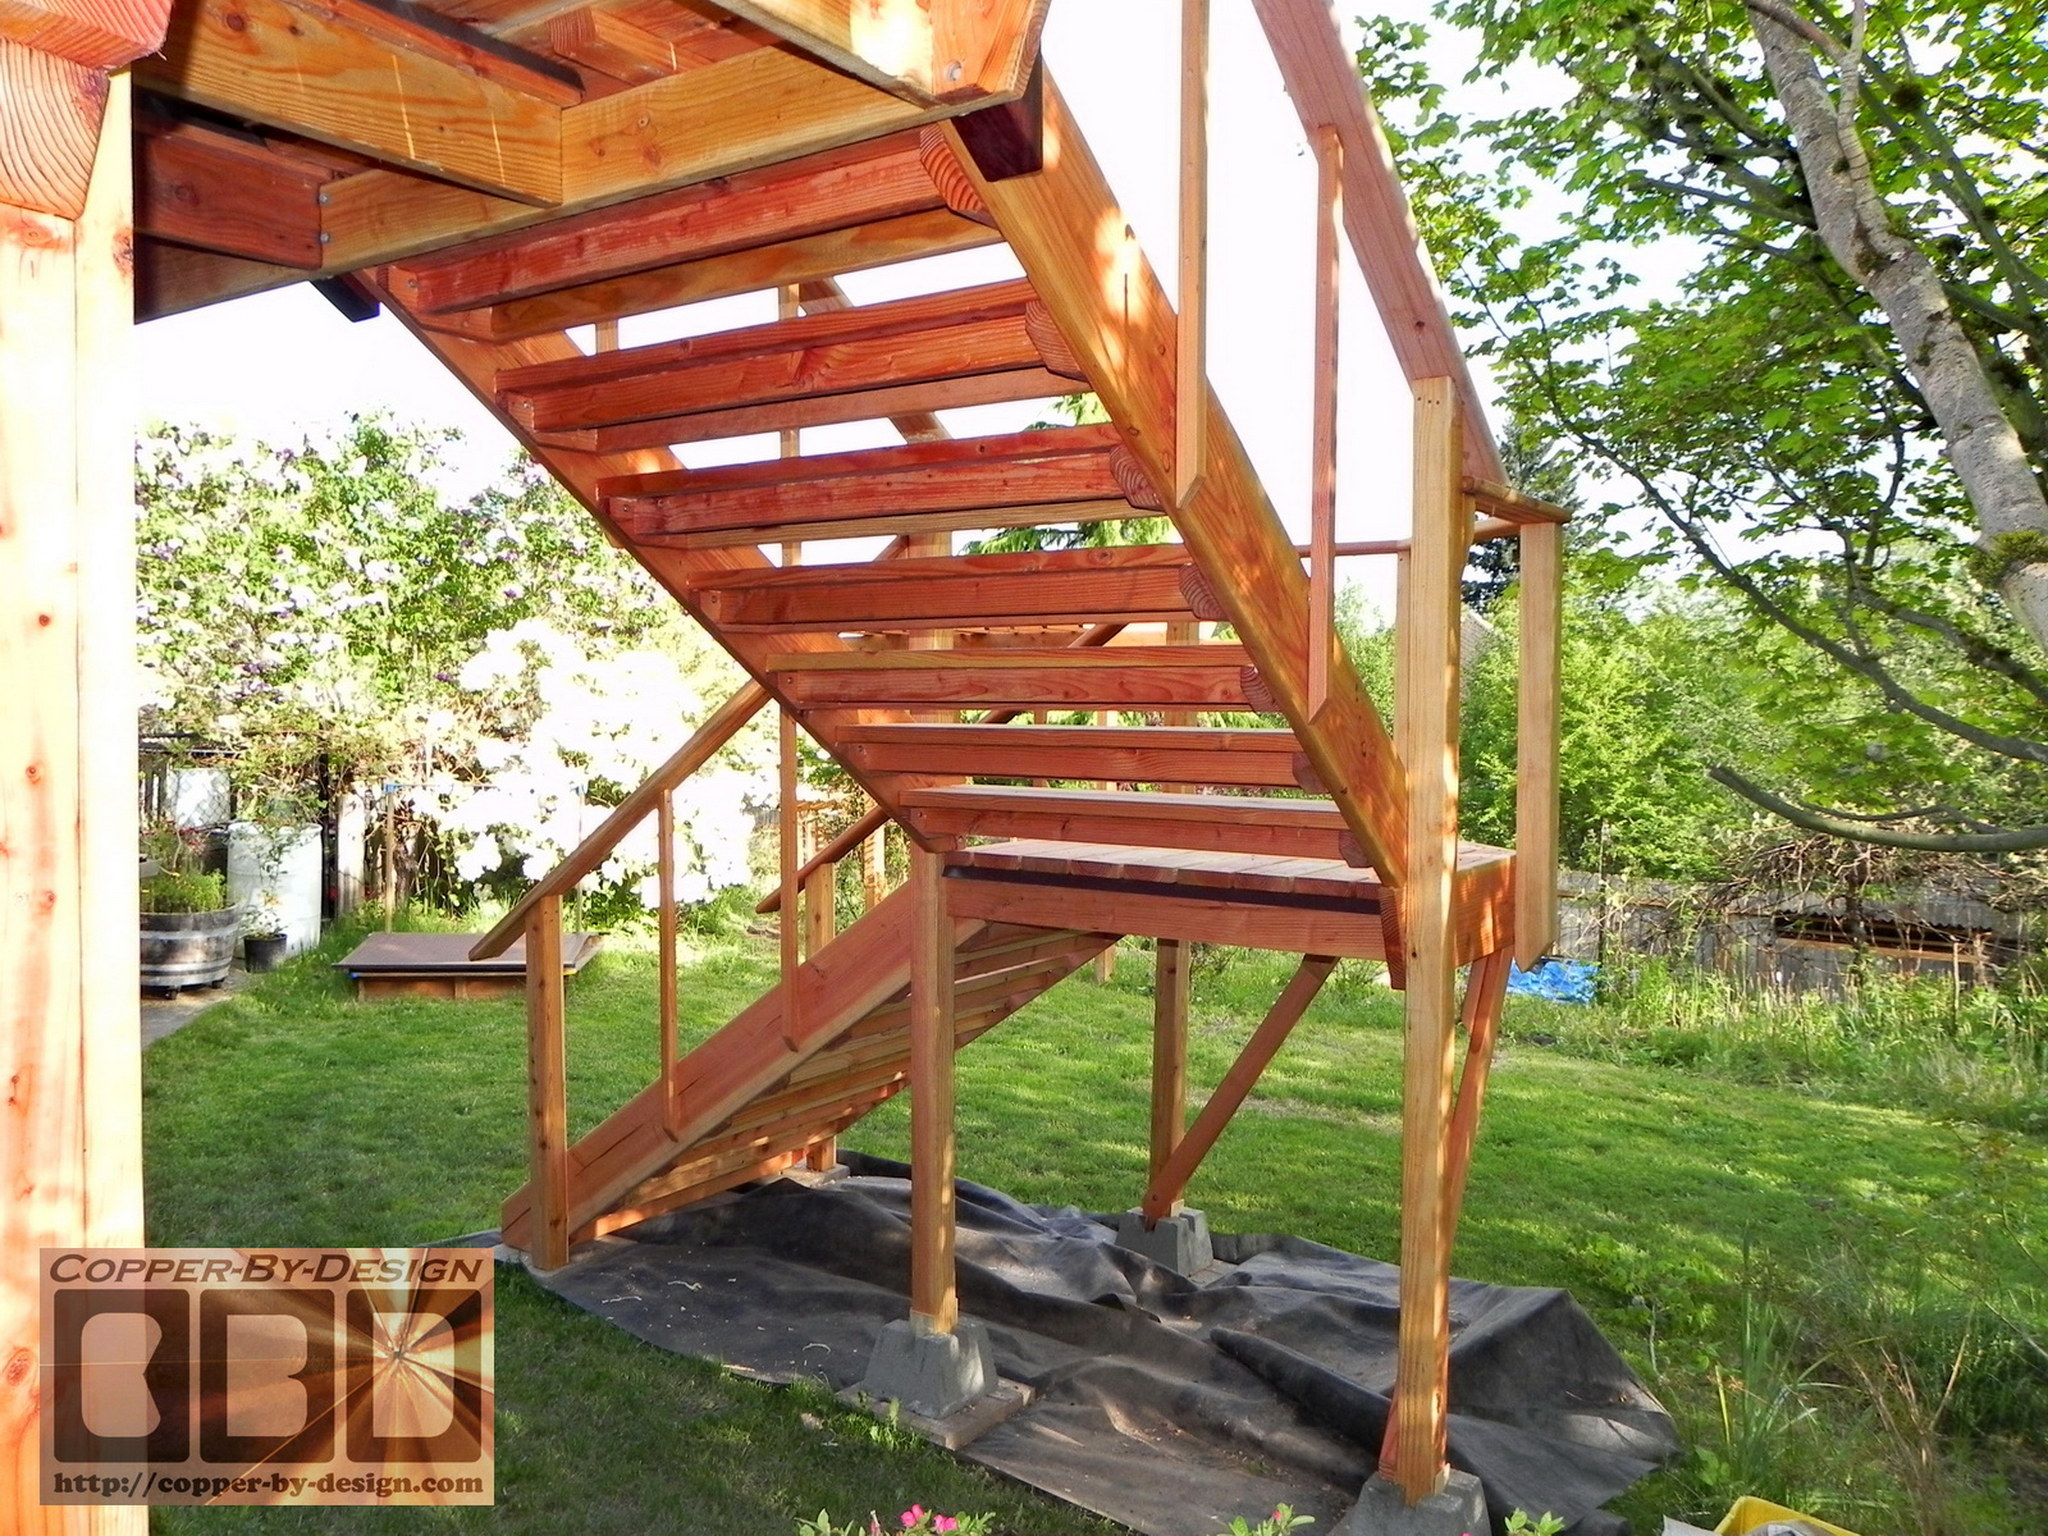
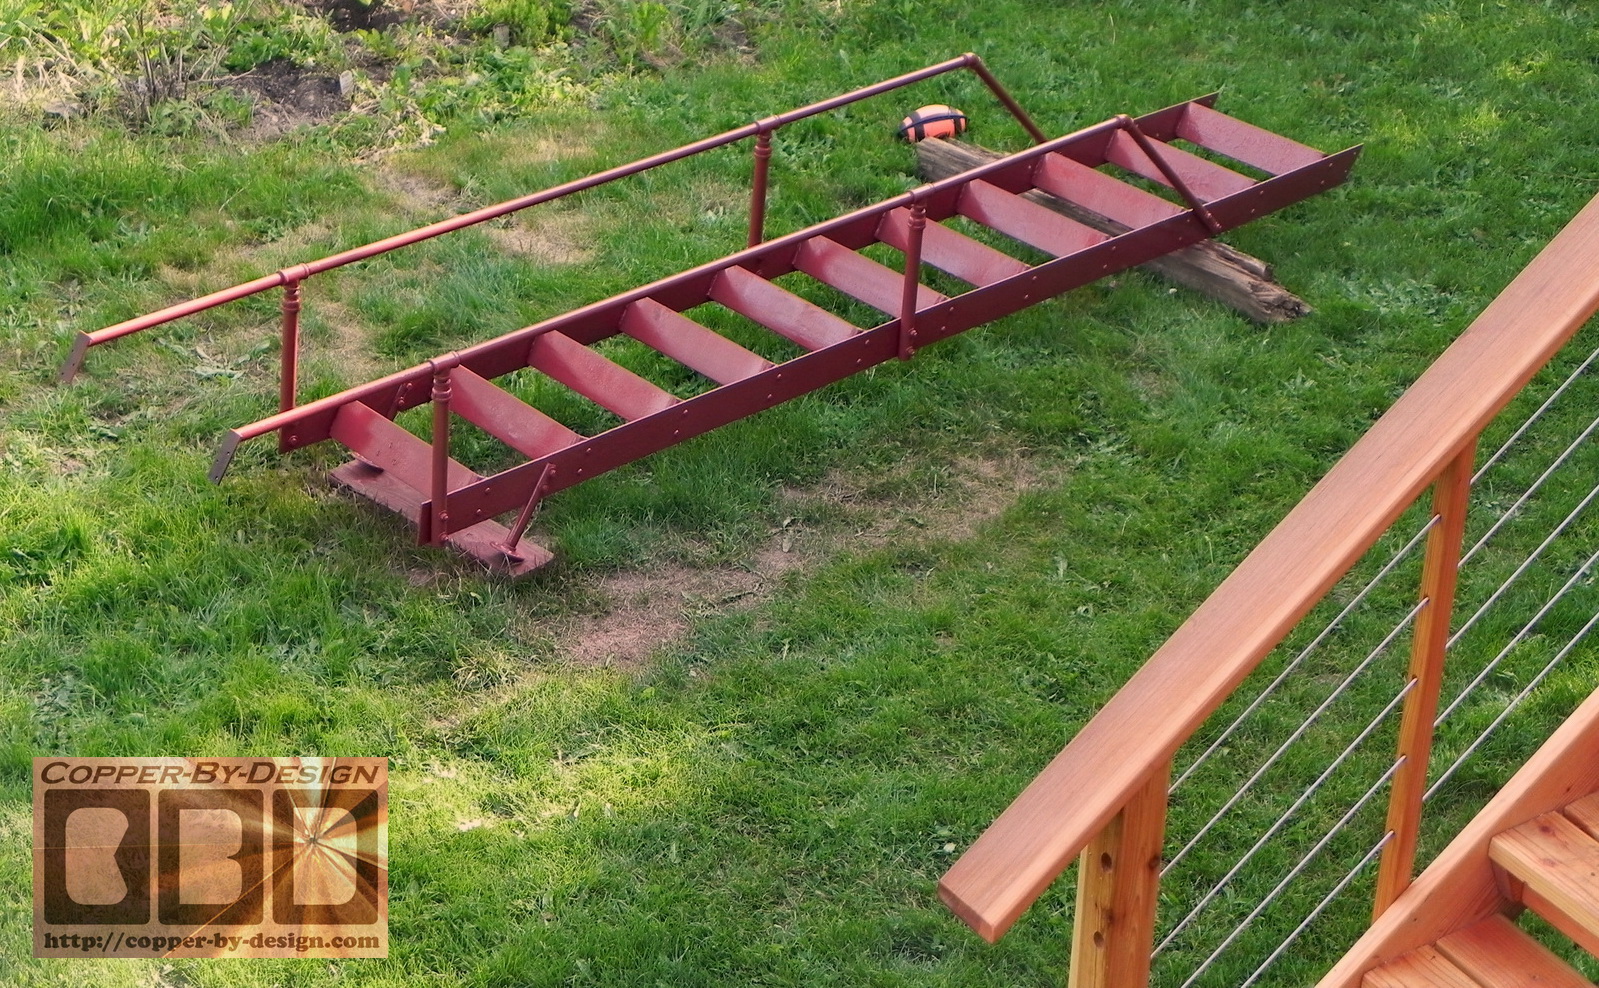
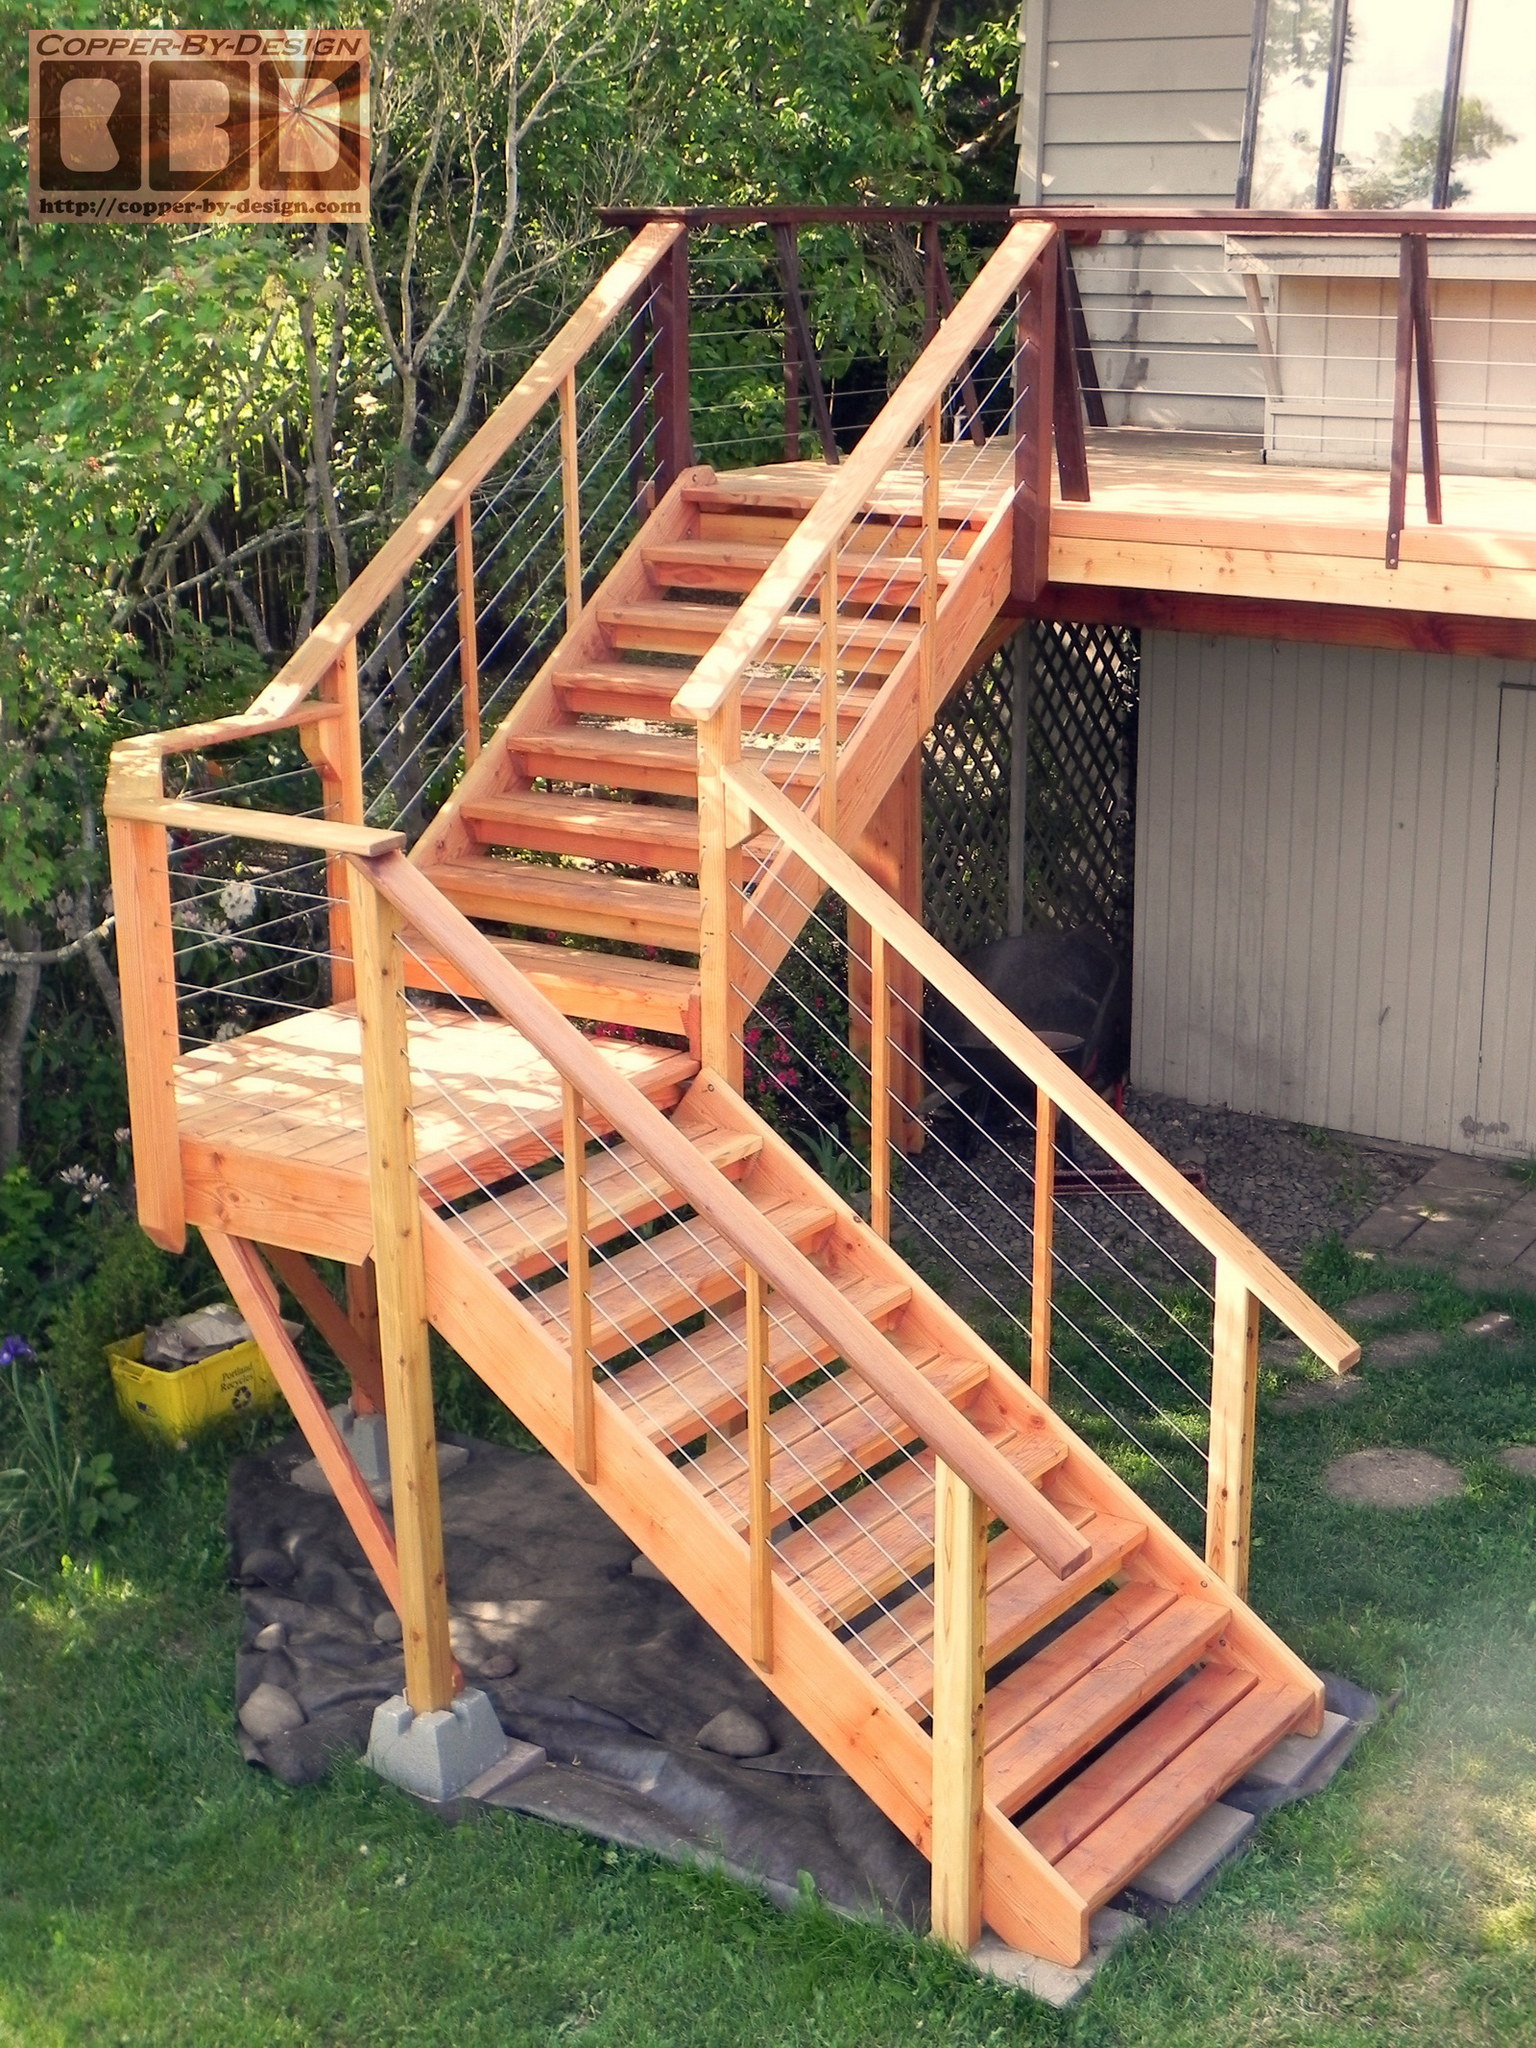
Preparation and assembly of the new stair case: My design requires 6 pieces of wood for each step, so there is few fasteners visible. Each of the 144 boards had to be cut, sanded, drilled, and treated with tung oil one at a time before assembly. These were just a few of them set out for the tung oil to soak in and cure for a couple days. During most of this time we were battling the unusually wet Spring weather we were having, so it was very frustrating.
It's tricky to get all the angles right and make sure the vertical posts are straight.
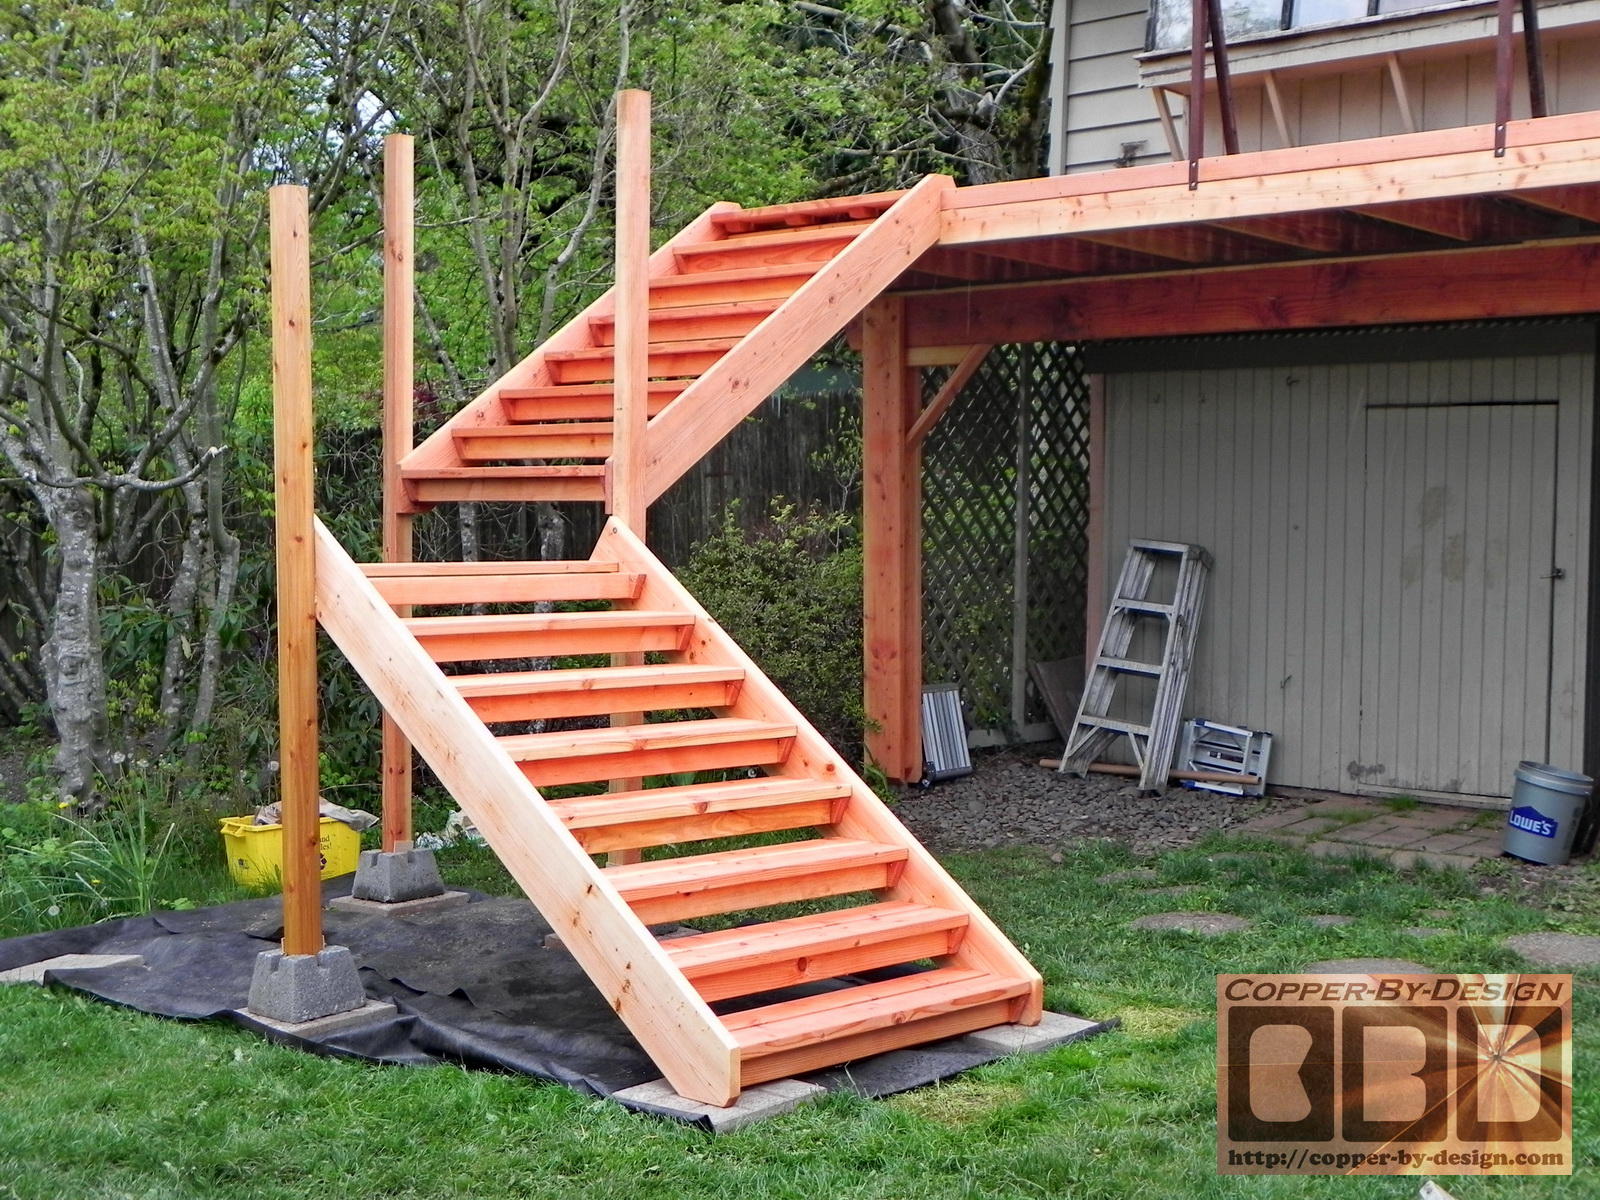
Believe it or not at this point shown above the new upper steps were sturdy enough to hold both of us and felt solid. The side of the steps are 2X10 boards that were not compromised by cutting the notches for each step, like you usually see. I think it looks a lot better this way as well as sturdier.
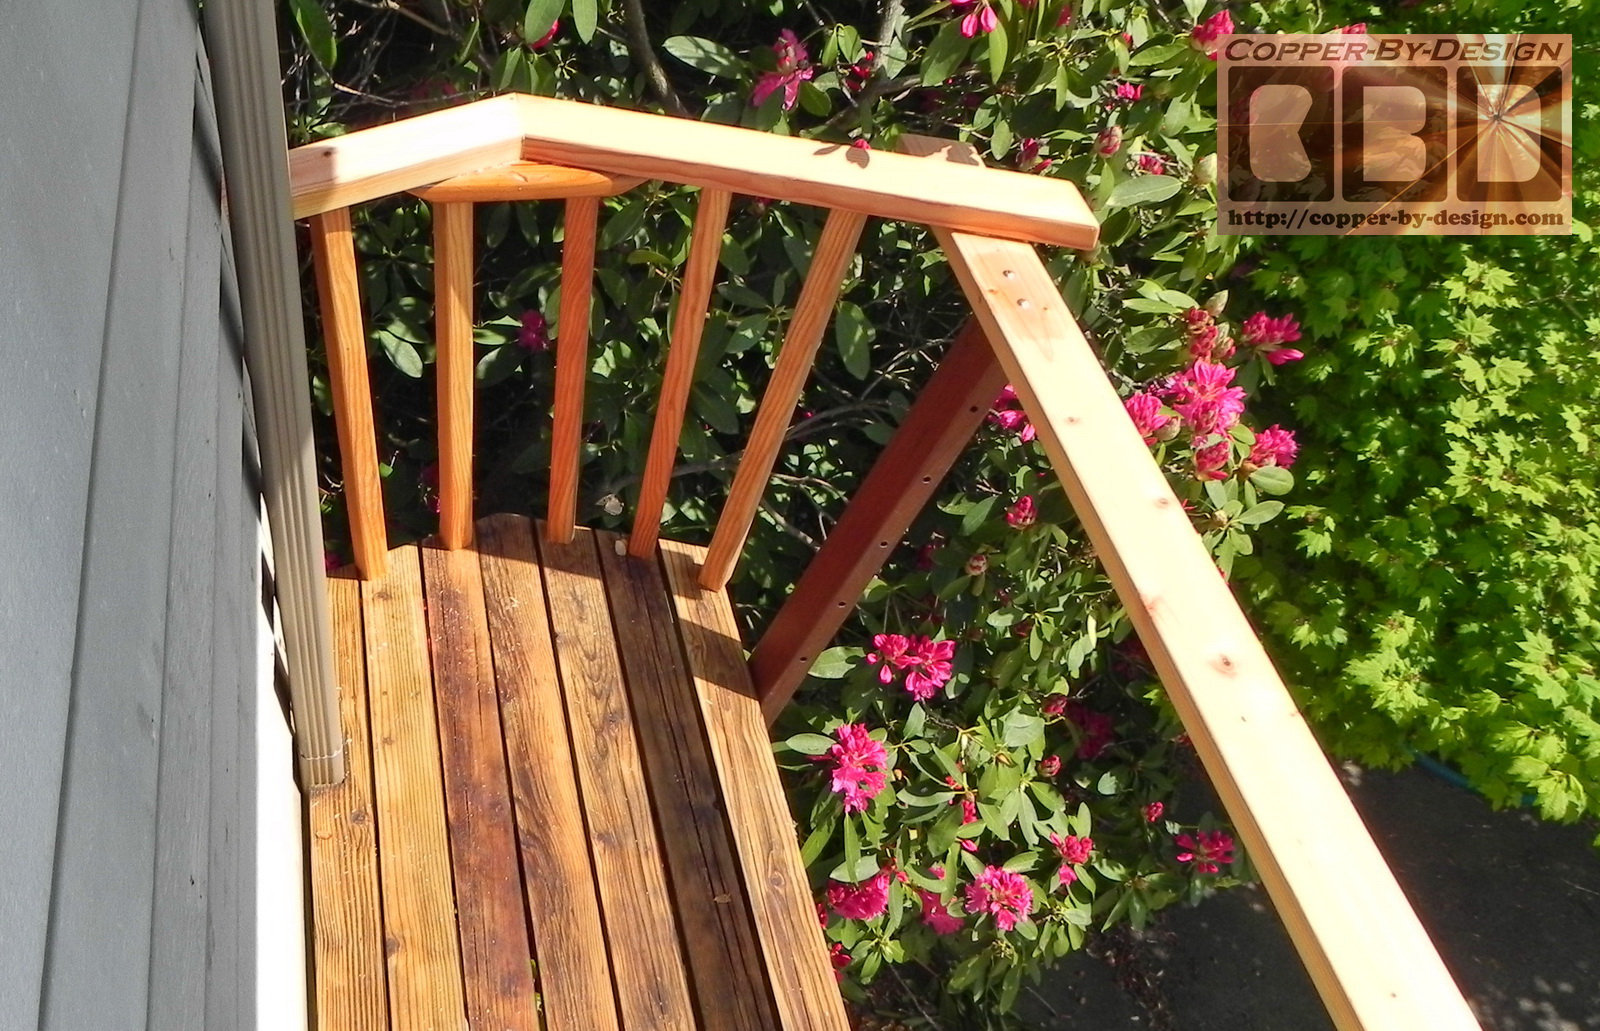
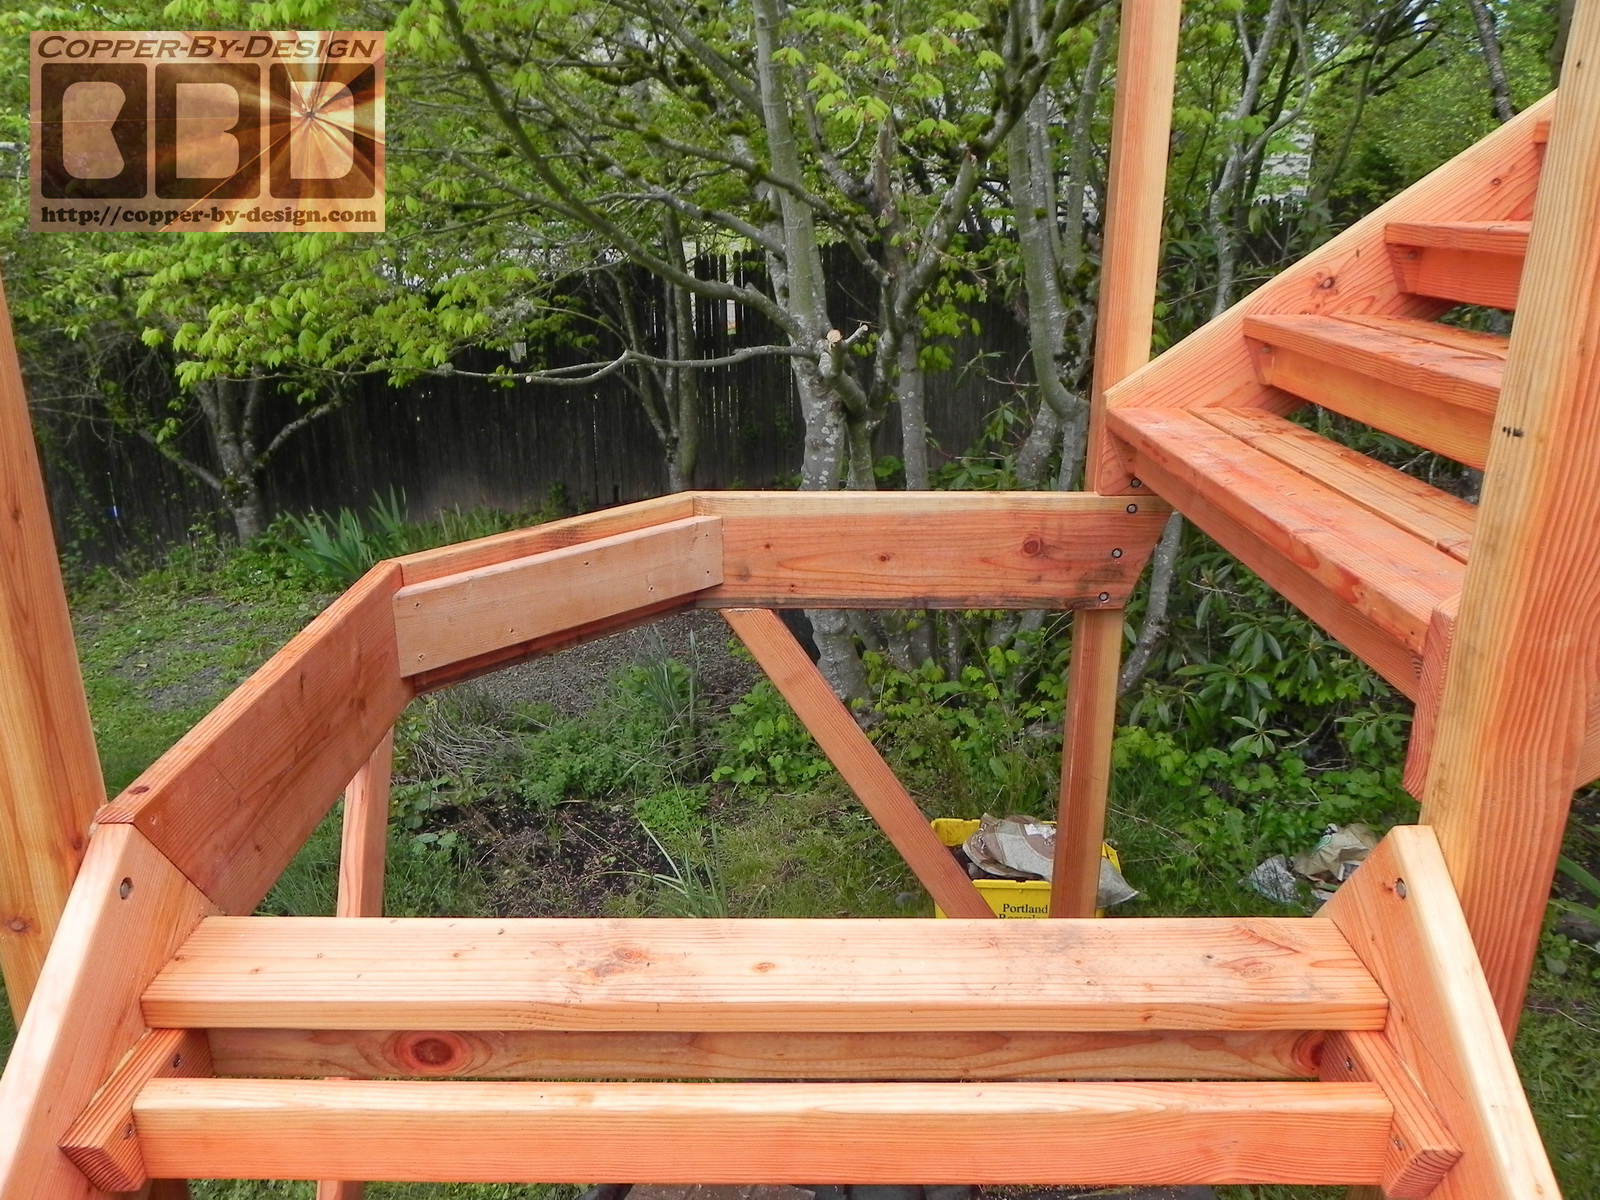
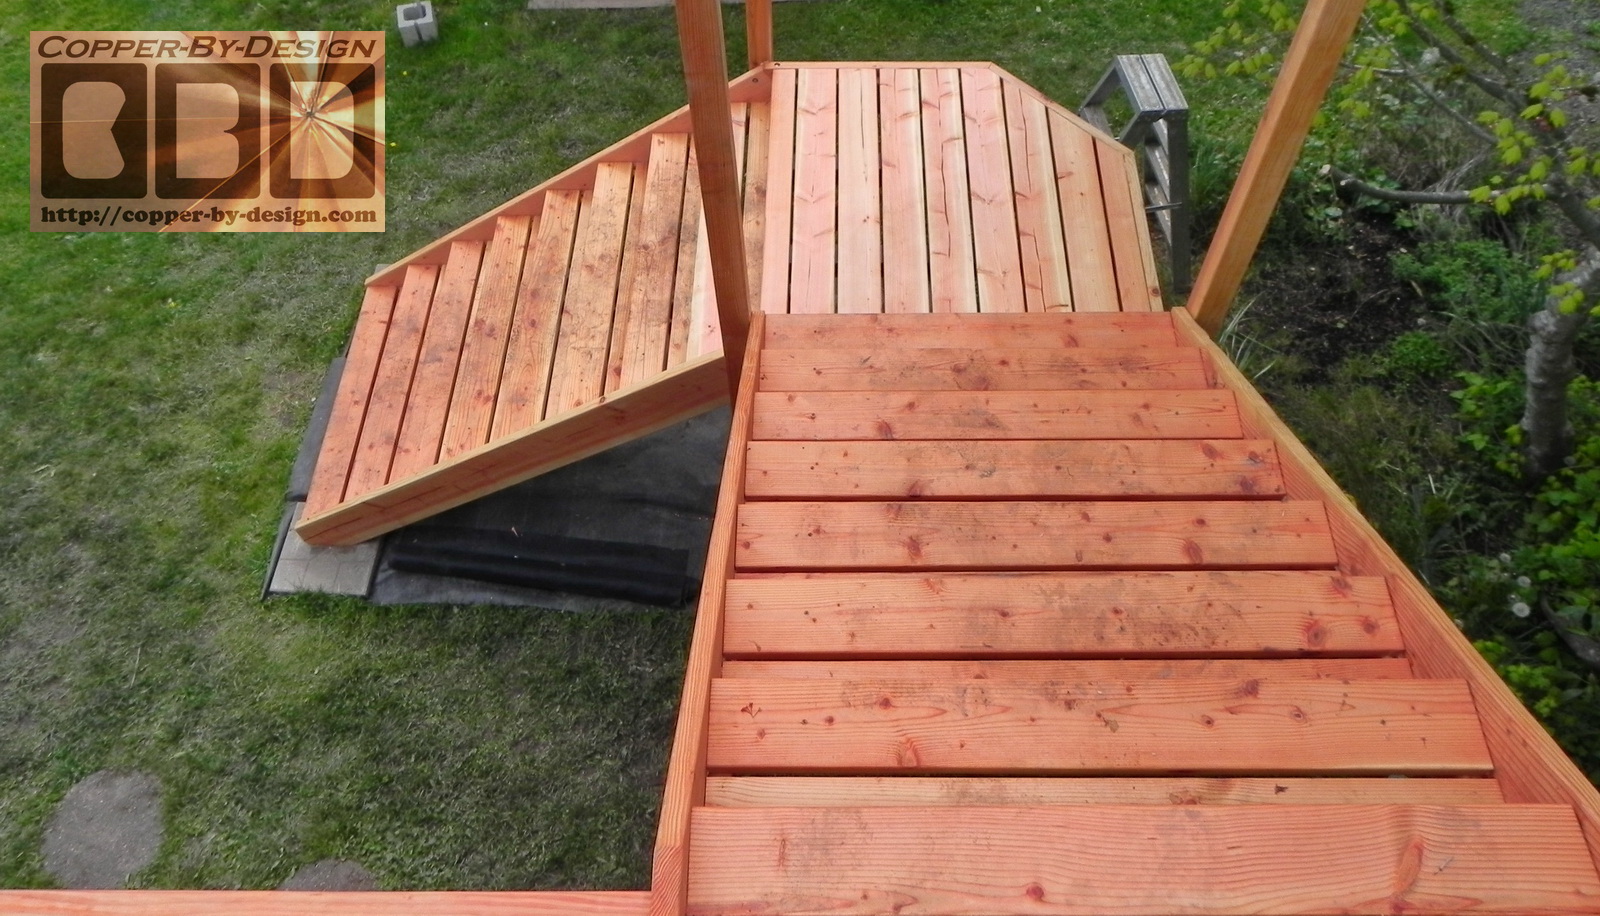
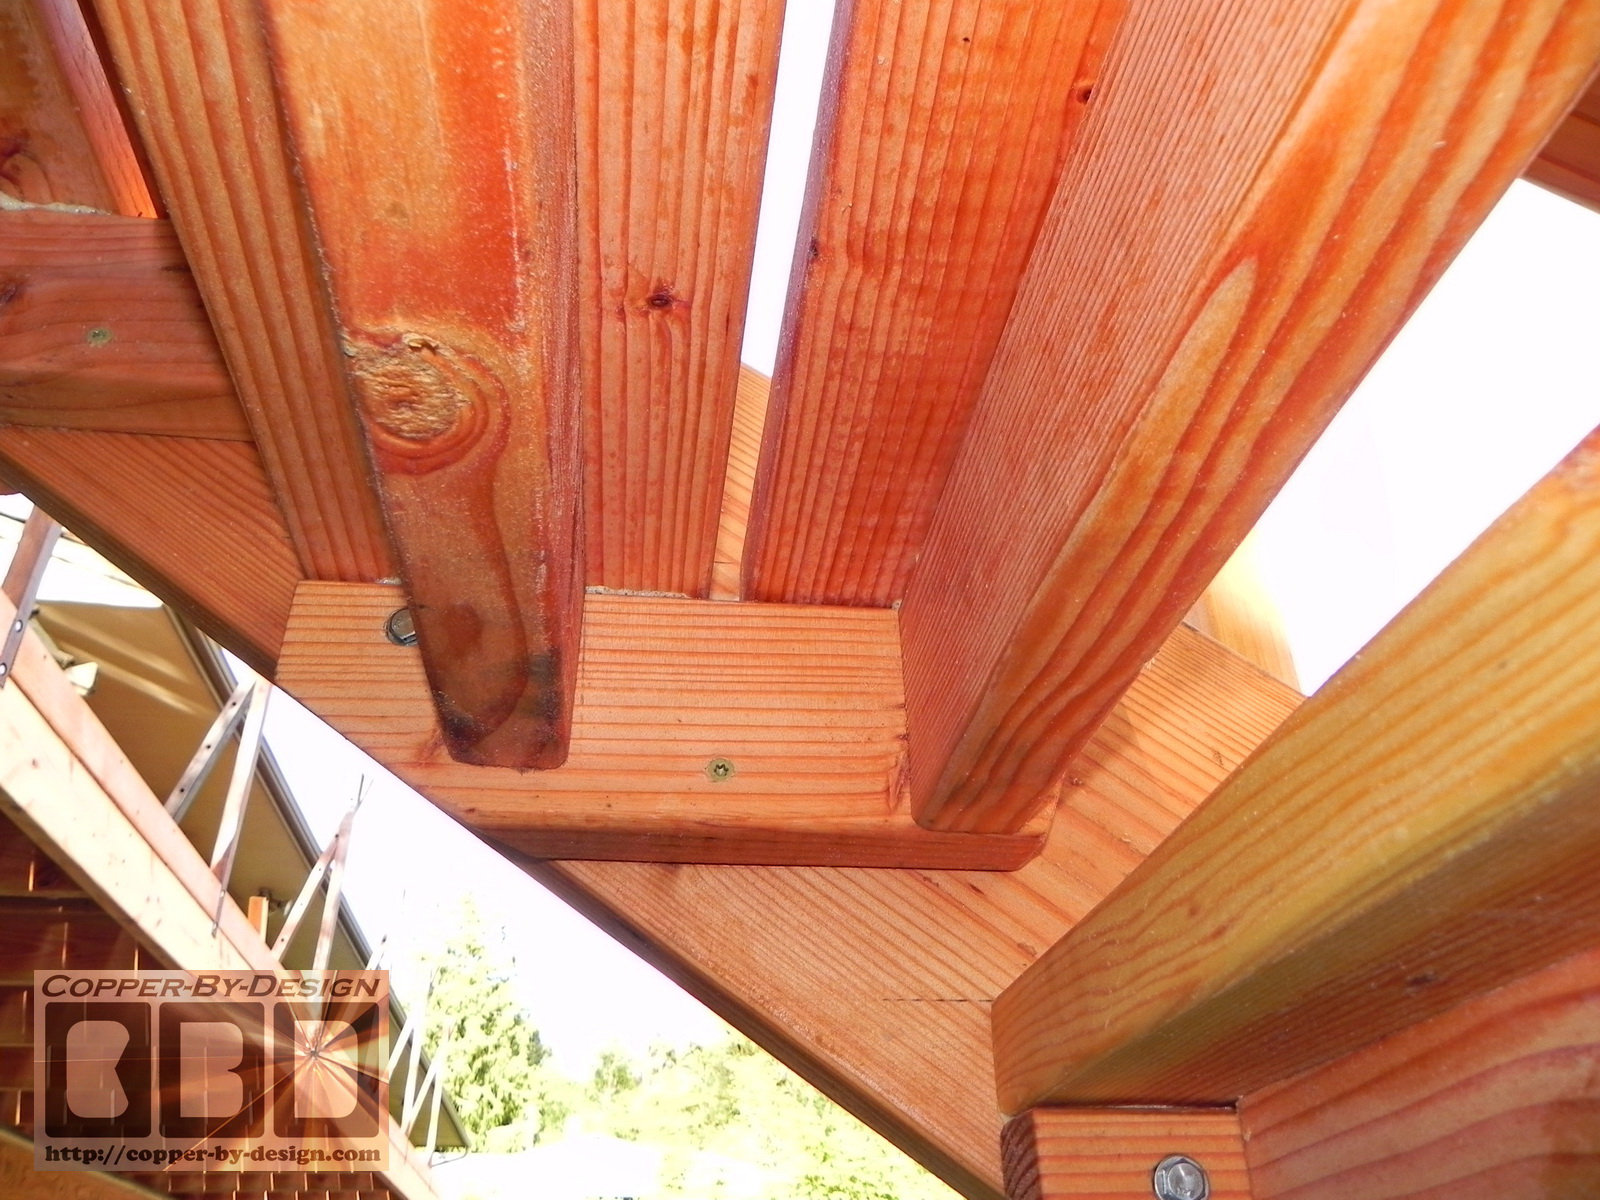
I designed this to have the 45 degree angle to the corner of the platform for a little added style. even though there was no support right under this corner the cross braces gave this ample strength and could hold a couple thousand pounds I used clear lumber for those supports, so I would know they are not likely to crack. Engineering has always been my strong suit.
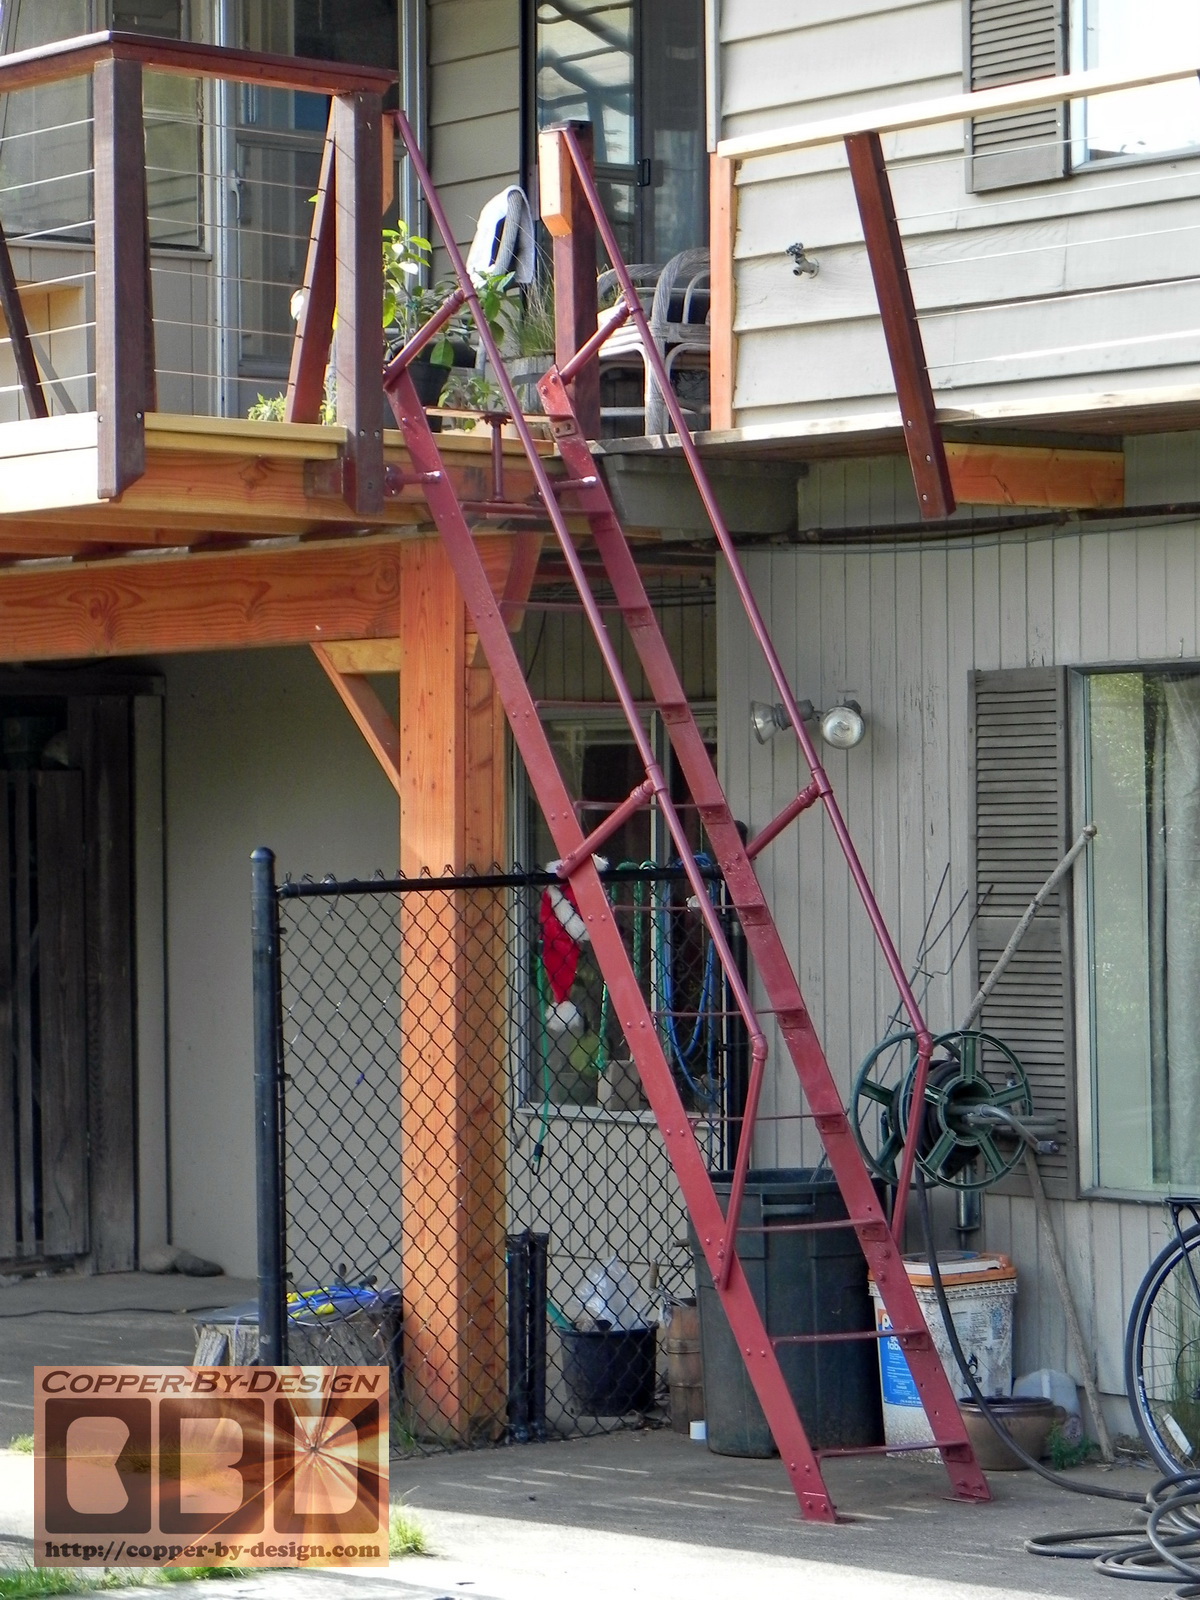
There's hidden 1/4" lag screws holding each step from behind with glue. They had an old rusty metal ladder they had used to get down to the pool area. They wanted to keep it, so we spent a couple days sanding it and treating it with a rust reversing chemical. The hitting it with 4 cans of high quality spray paint that cost me $12 each. Then reattached it with stainless steel screws and bolts.
|
..
|
Helpful Roofing Information For some valuable advice with regards to roofing and rain management issues check out our:
(a)
Gutter Installation web pages for answers and solutions that could save you thousands of $ and a great deal of anguish. If you do find this information very helpful, feel free to send us a $ tip for the assistance we so freely have published on the web here for your benefit, like you might tip a waitress. Heck, send us a gift certificate for a candle lit dinner for two. |
.
|
Below is a
photo of our |
|
|
|
We were also a 1997 finalist for this same award. See our referral web page to see how we managed to be honored with this special award |
.
 Homepage |
custom sheet metal fabrication
|
|
Company Profile |
|
Roof Caps |
|
Chimney Caps |
|
Scuppers |
|
Gutters |
|
Shipping |
|
Contact Info |
custom sheet metal fabrication
custom sheet metal fabrication
custom sheet metal fabrication
custom sheet metal fabrication
custom sheet metal fabrication
custom sheet metal fabrication
custom sheet metal fabrication
custom sheet metal fabrication
custom sheet metal fabrication
custom sheet metal fabrication
custom sheet metal fabrication
custom sheet metal fabrication