|
Getting it All Worked Out |
|
After making these clients a pair of copper chimney caps for
their house a year prior, this project was to strengthen and
reroof their old gazebo with 20oz copper. This was for Emil and Norma Bardana
in Lake Oswego, Oregon.
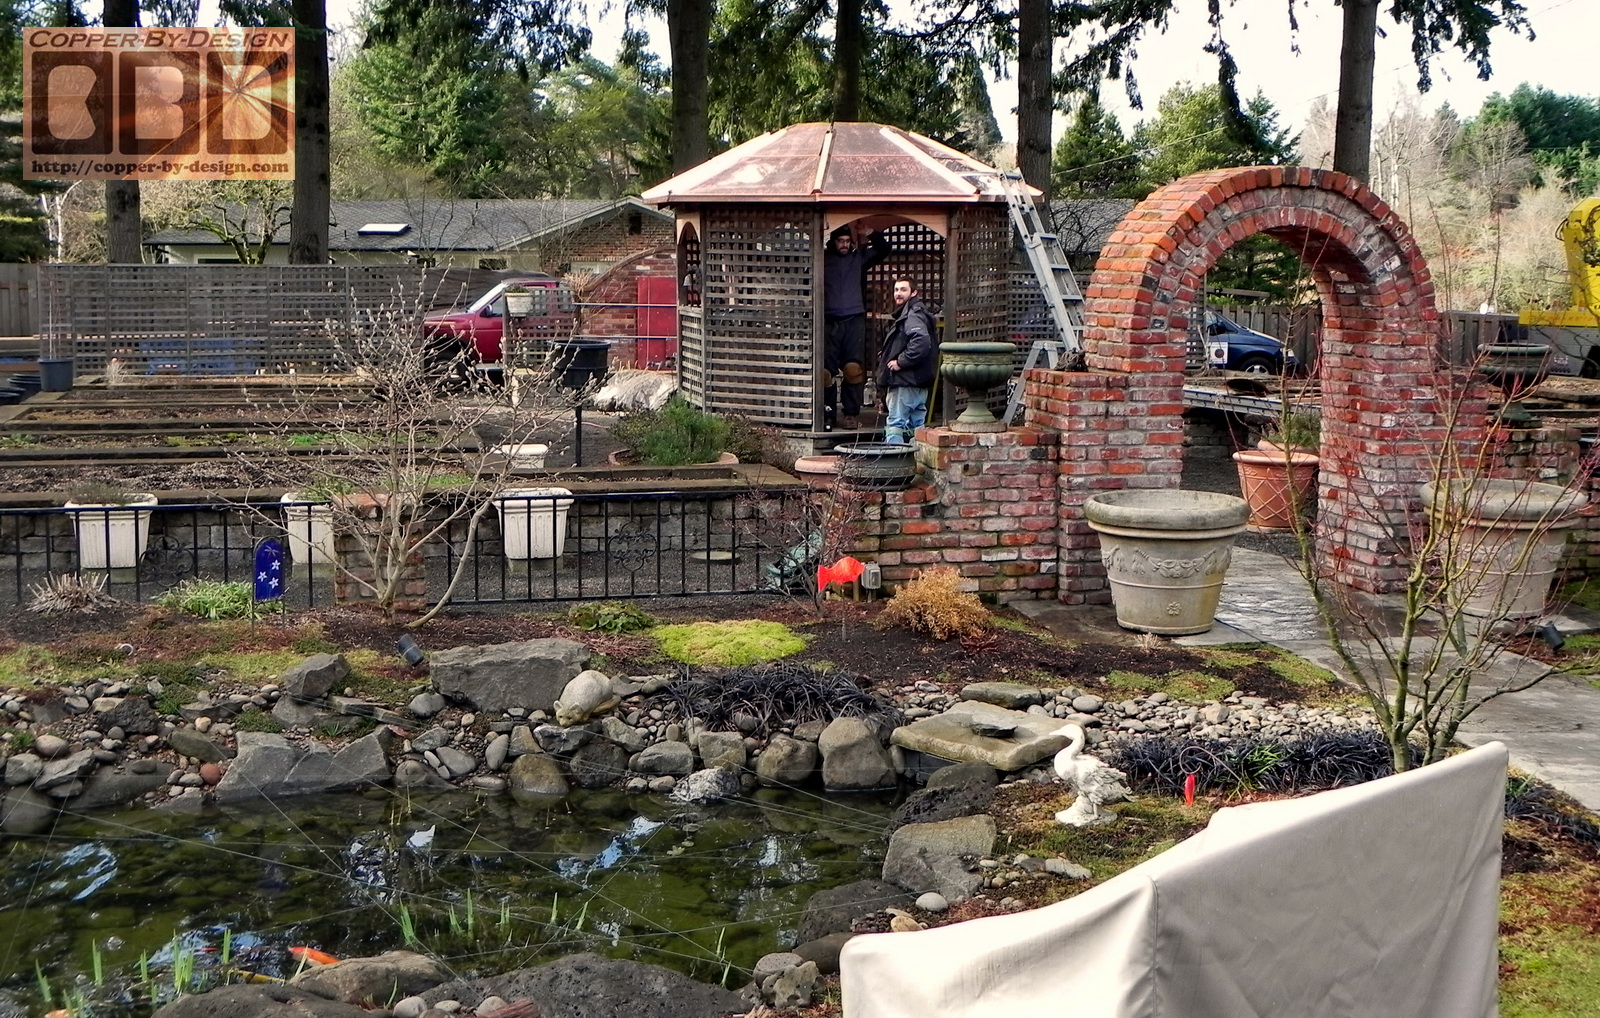
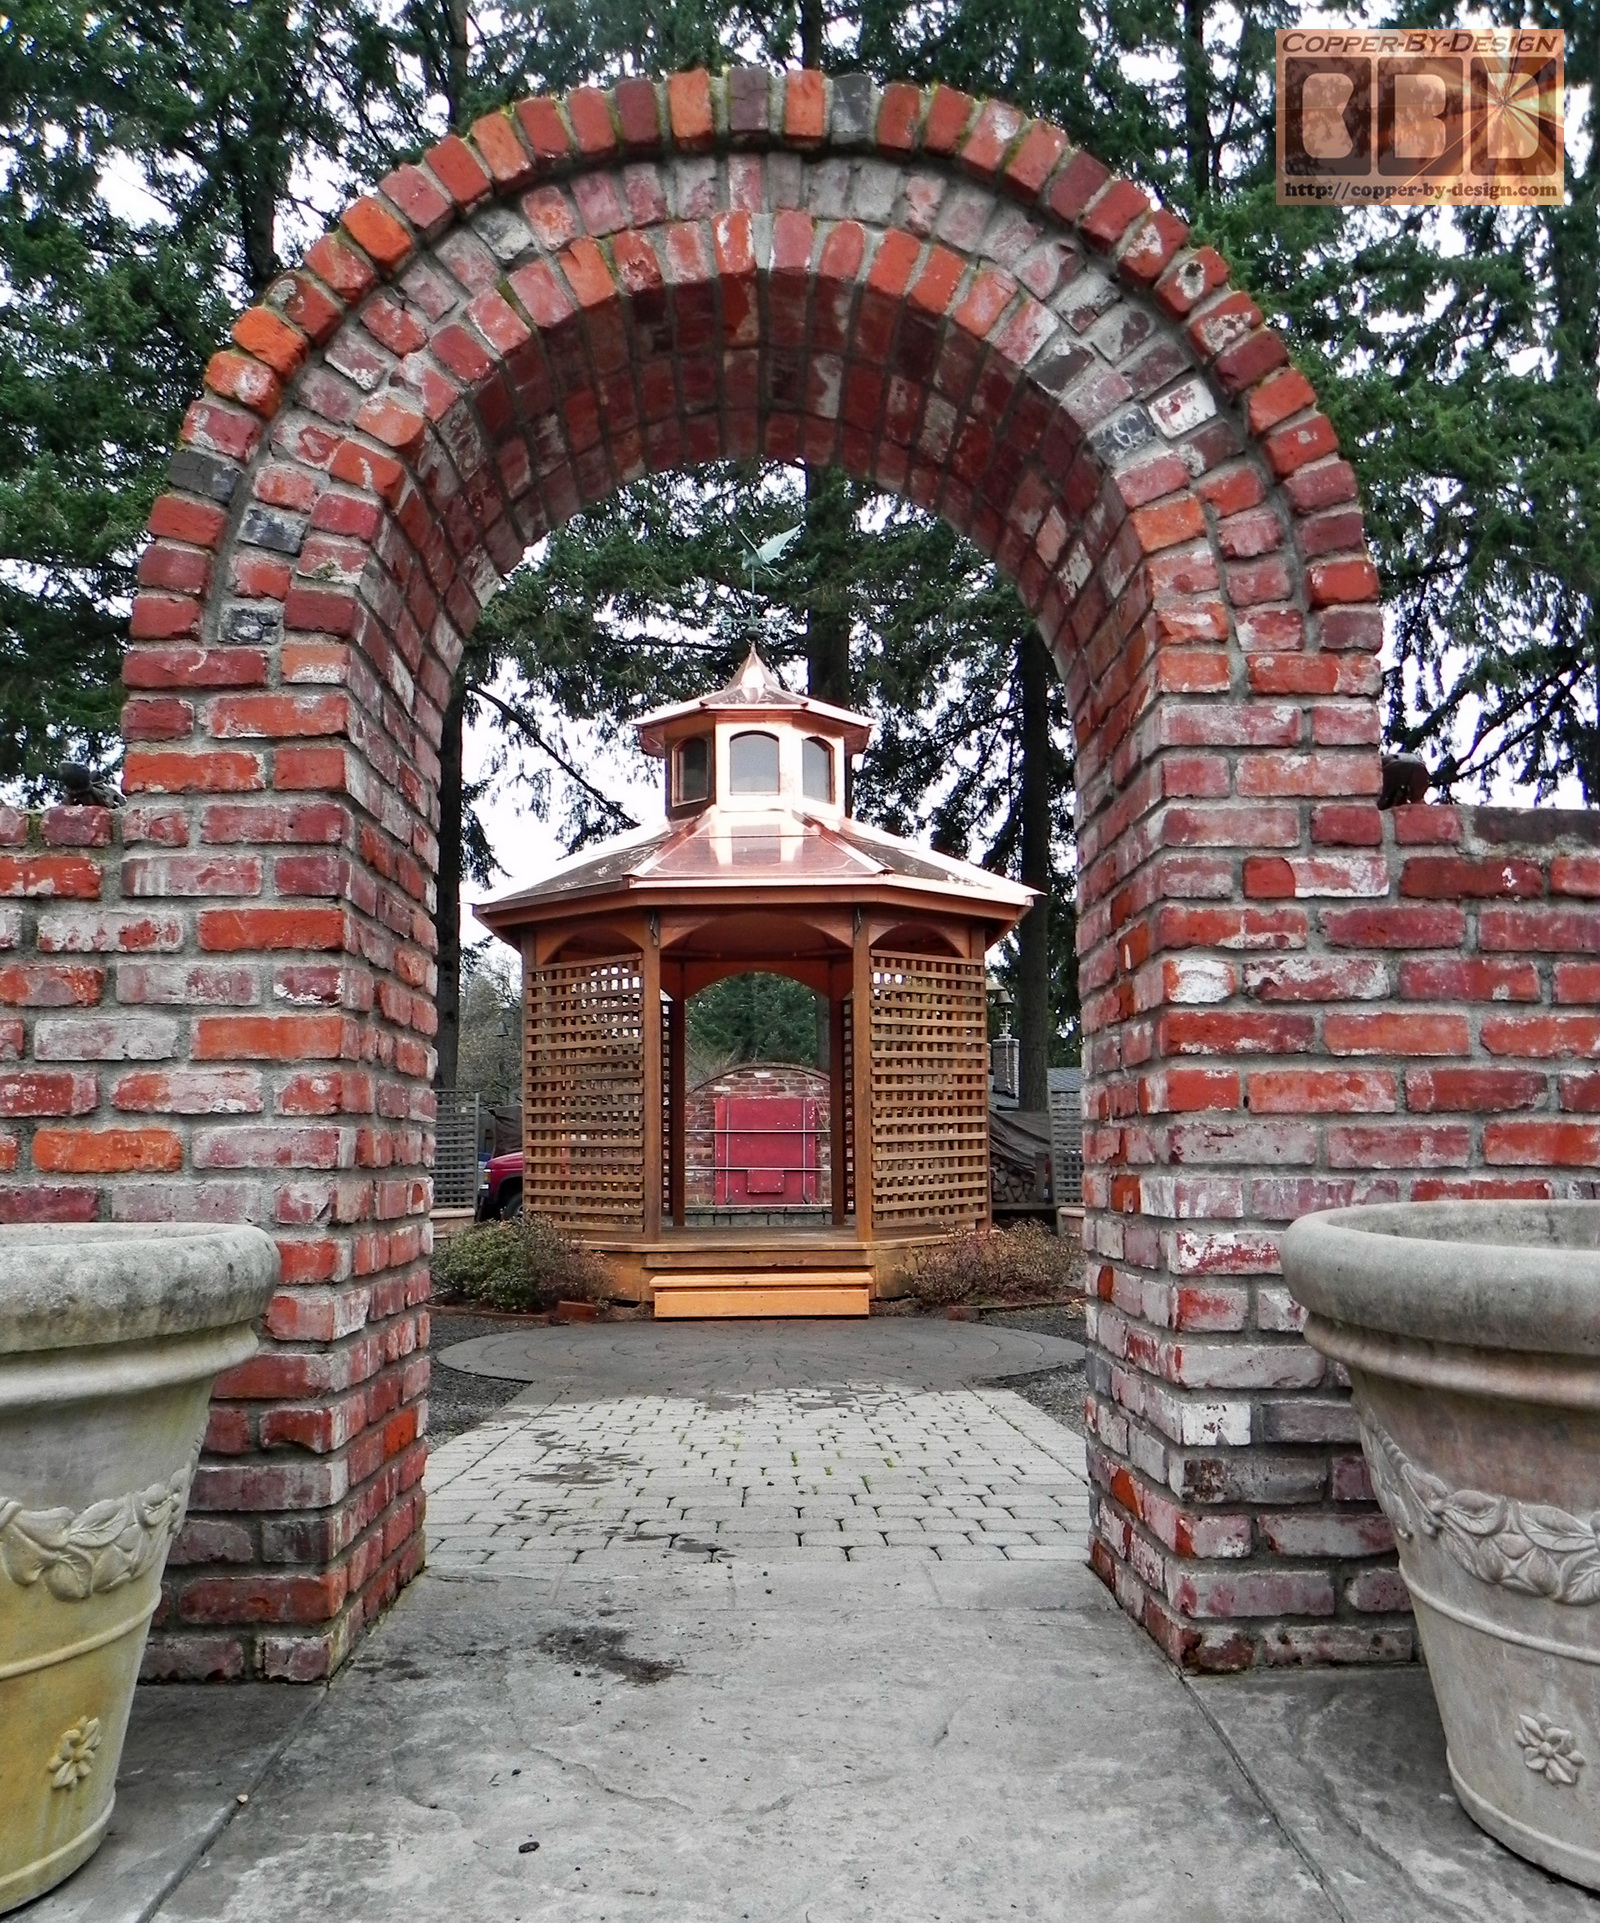
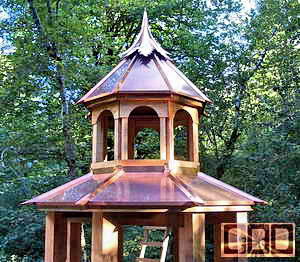
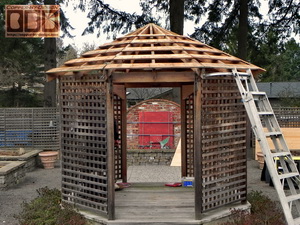
They wanted it rebuilt in
my Tuscany arch style with a fancy lighted cupola. Sort of like I
had done for our clients Cait and Charley Jabusch:
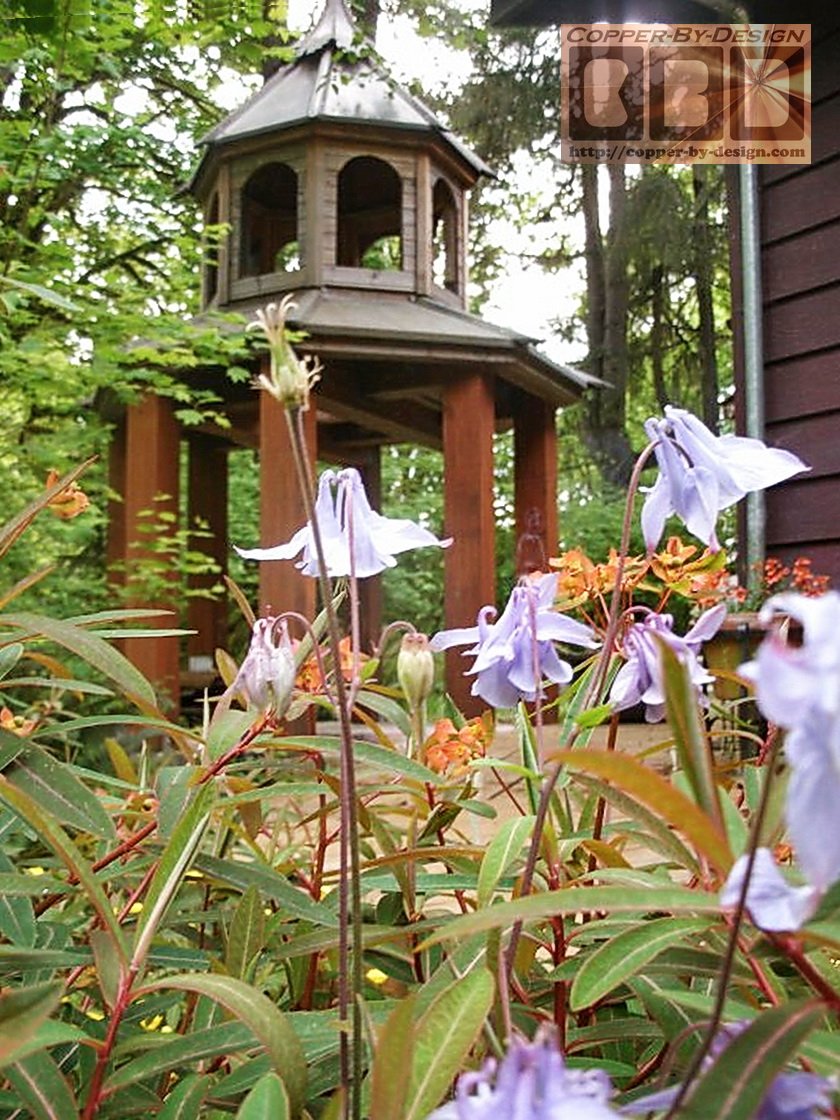
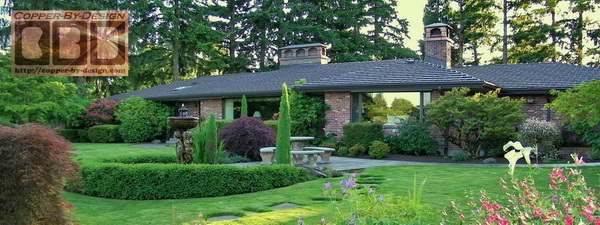
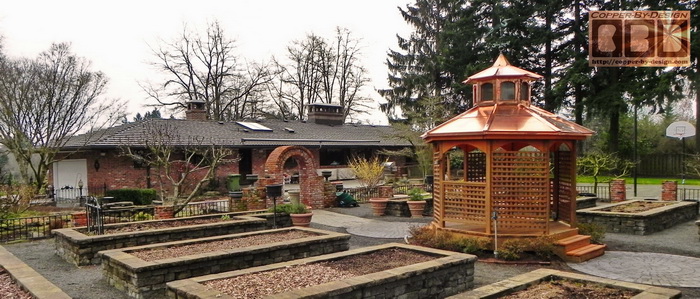
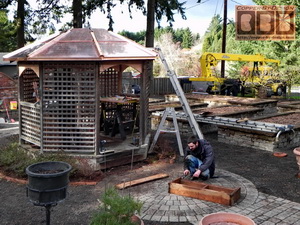
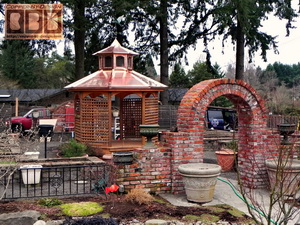
I had taken this photo of their beautiful garden area back when
I bid the chimney caps. I just suggested they could have
me make them a small copper roof cap for their gazebo to hold
their weathervane better, but it seems they wanted a whole lot
more.

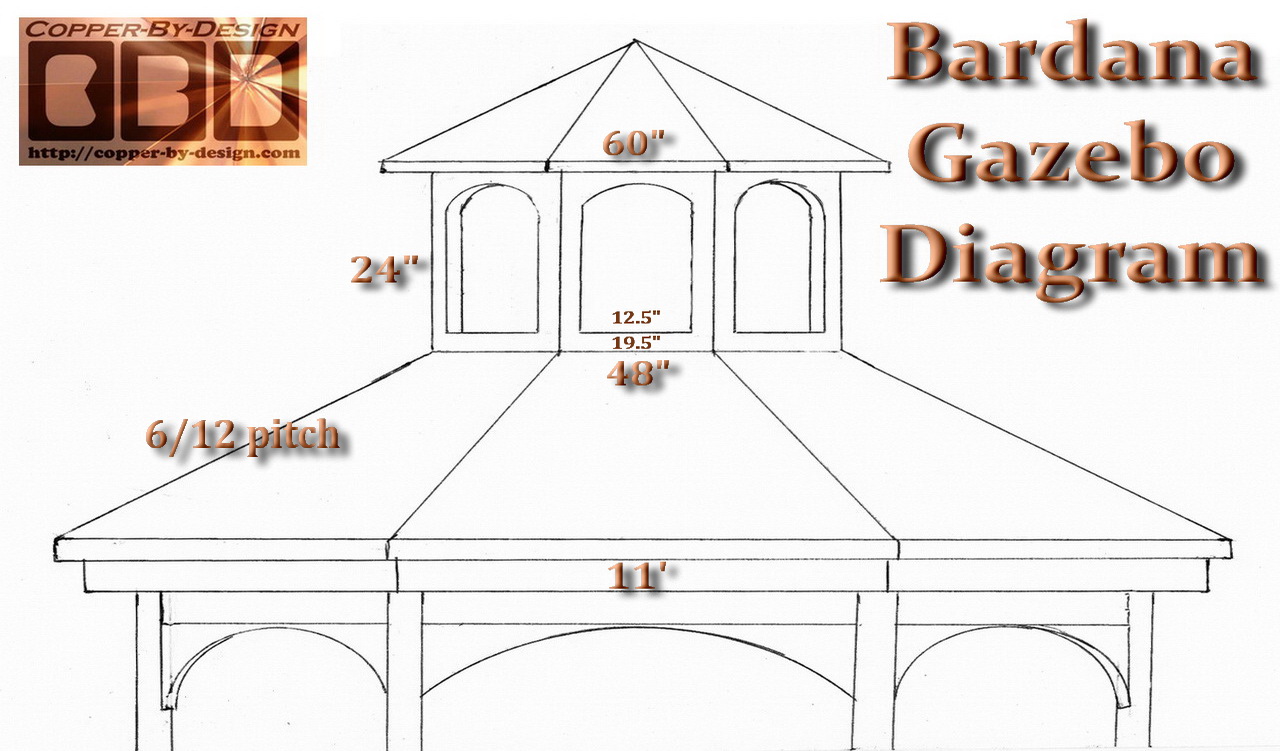
I was surprised to hear from them a year later, asking to have the whole
gazebo roof covered with copper and make them a copper clad cupola as well. We
discussed different sizes and I made them a scaled diagram to
show what is would look like. They again placed a lot of trust
in me to meet or exceed their expectations with this project.

This was the coolest Tuscany arch style copper project I've
worked on to date. They had first contacted me 6/12/09 and then
again on 6/20/10 to discuss this second major project they were
now ready for, so we swiftly worked out the details of this
project on site with a personal visit to their lovely garden
space again to get measurements, so I could
provide them with a firm quote to do this work.

Given the
width of over 11' I came up with the recommendation of a 4' wide
and 2' high cupola with a 5' wide roof over that for a 6" eave
out past the arches. Knowing they were not looking for a cupola
so big a person can sit up inside it, like the Jabusch gazebo,
this was substantial enough, but should not seem too large.
I ended up adding 3" to the width of the
cupola roof, and about 6" to the width of the lower roof
plus the new copper gutter. The
cupola roof line is designed to match the roof line of the main
gazebo roof: 6/12 pitch, so this will look
more like what the architect might have designed for this
gazebo, had he designed a cupola for it.
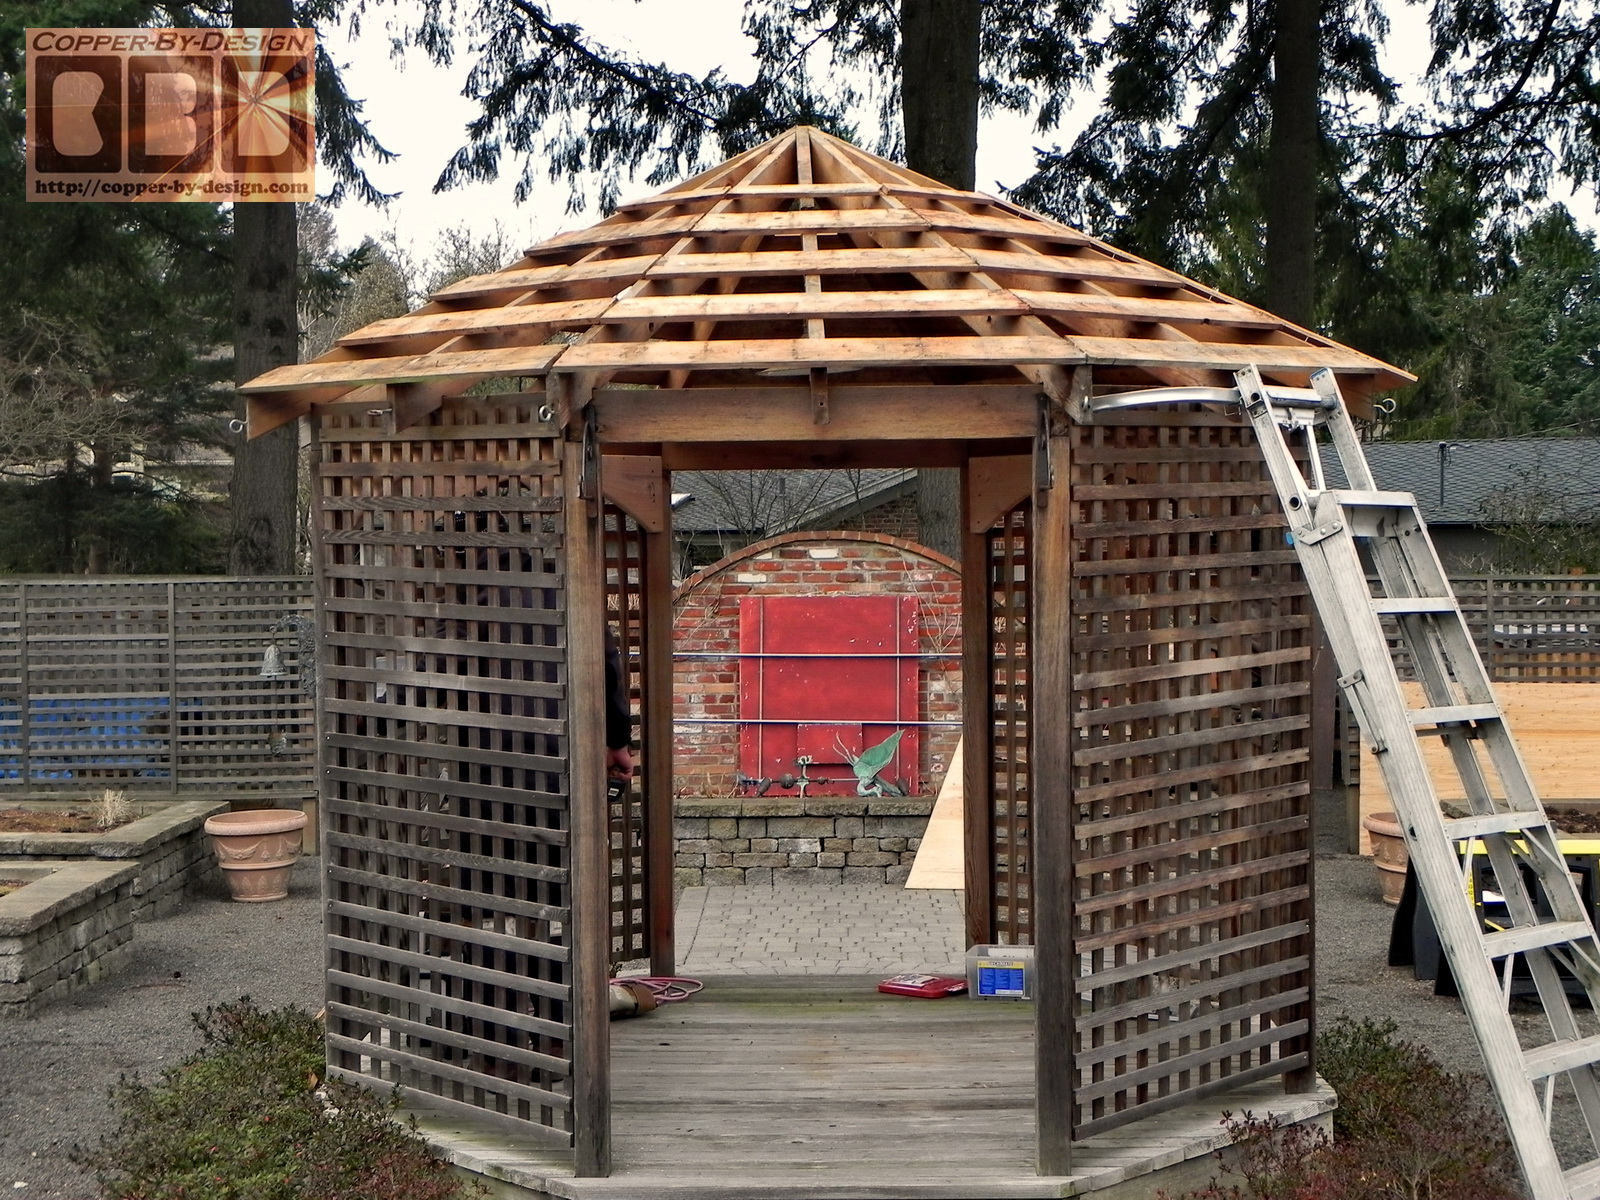
The client approved this design and were very pleased with the
results. We
discussed aesthetic options, like adding the arched detail to the
gazebo below the roof, which also added a good deal of stability
to the gazebo structure, so it was less wobbly up there.
|
|
Stripping it Down |
|
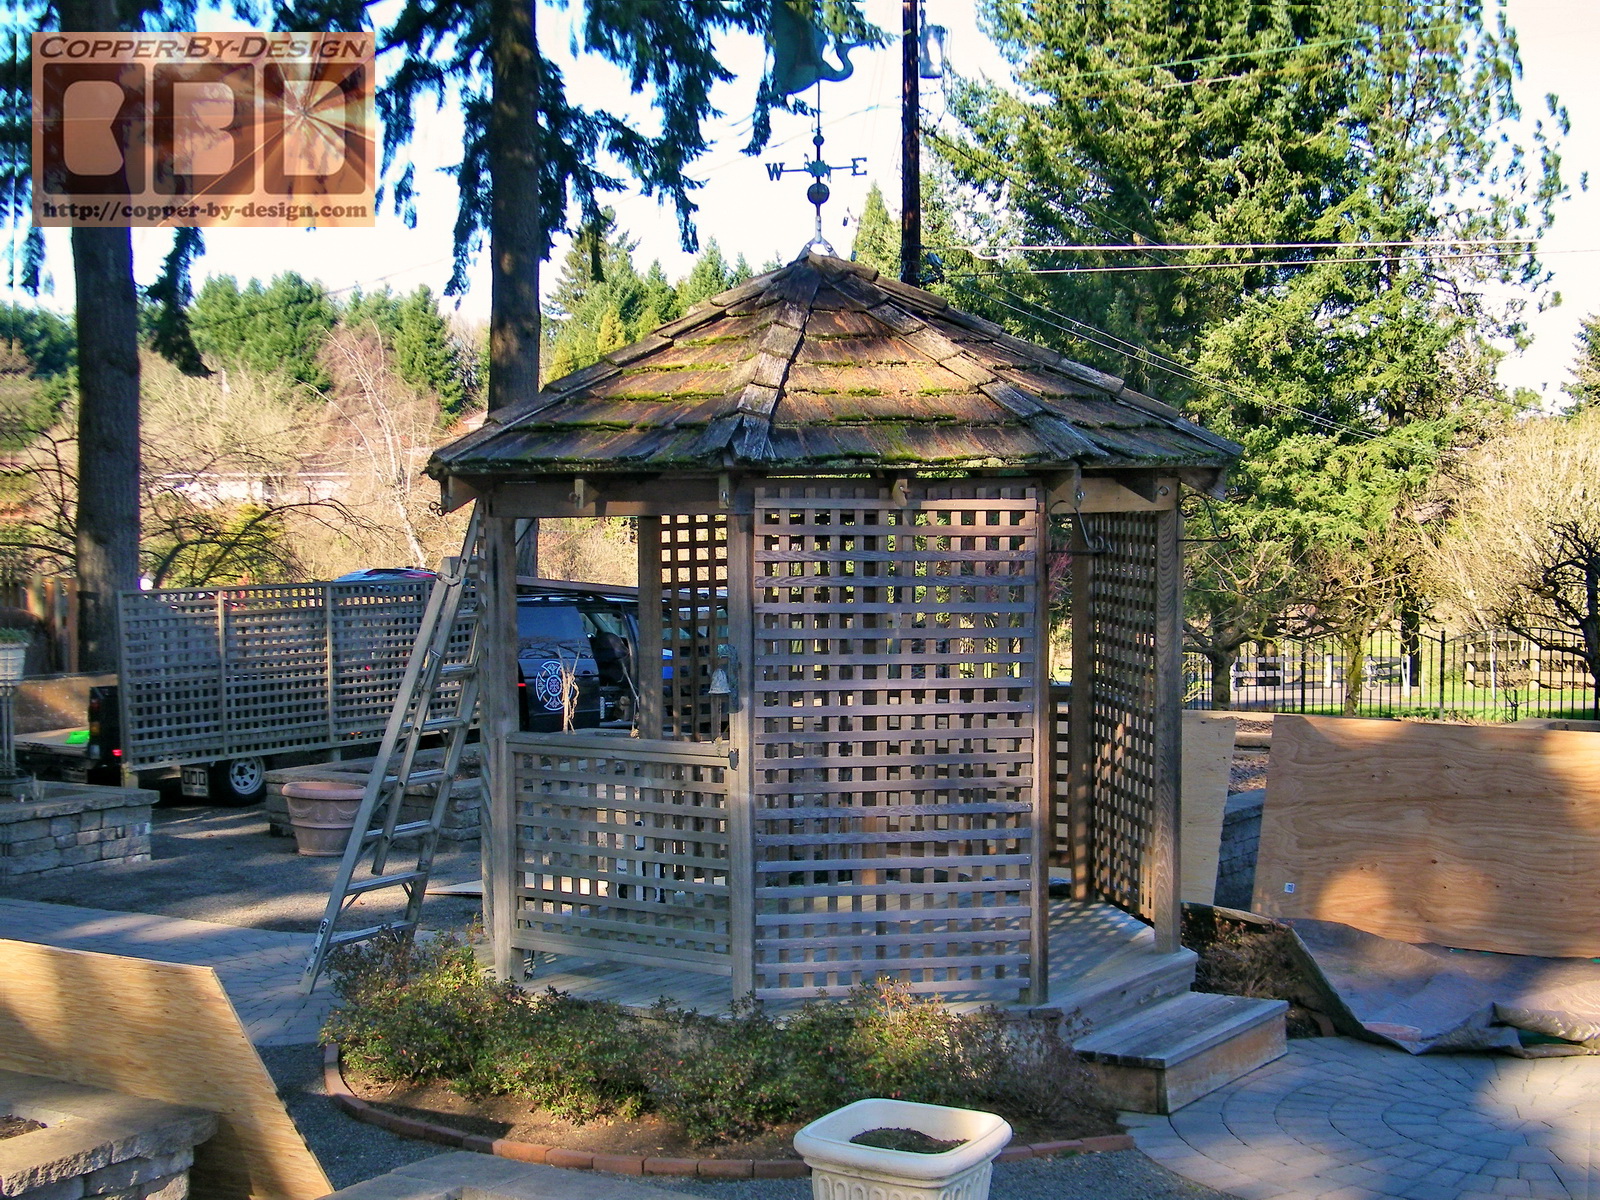
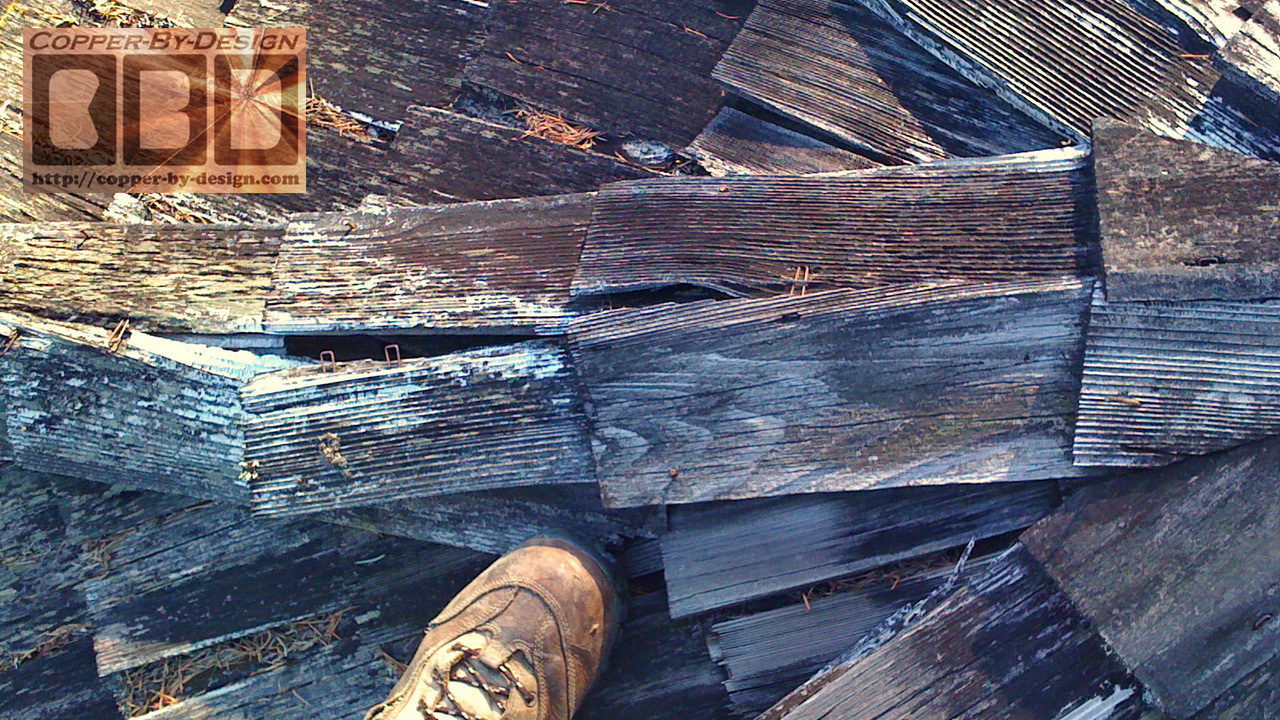
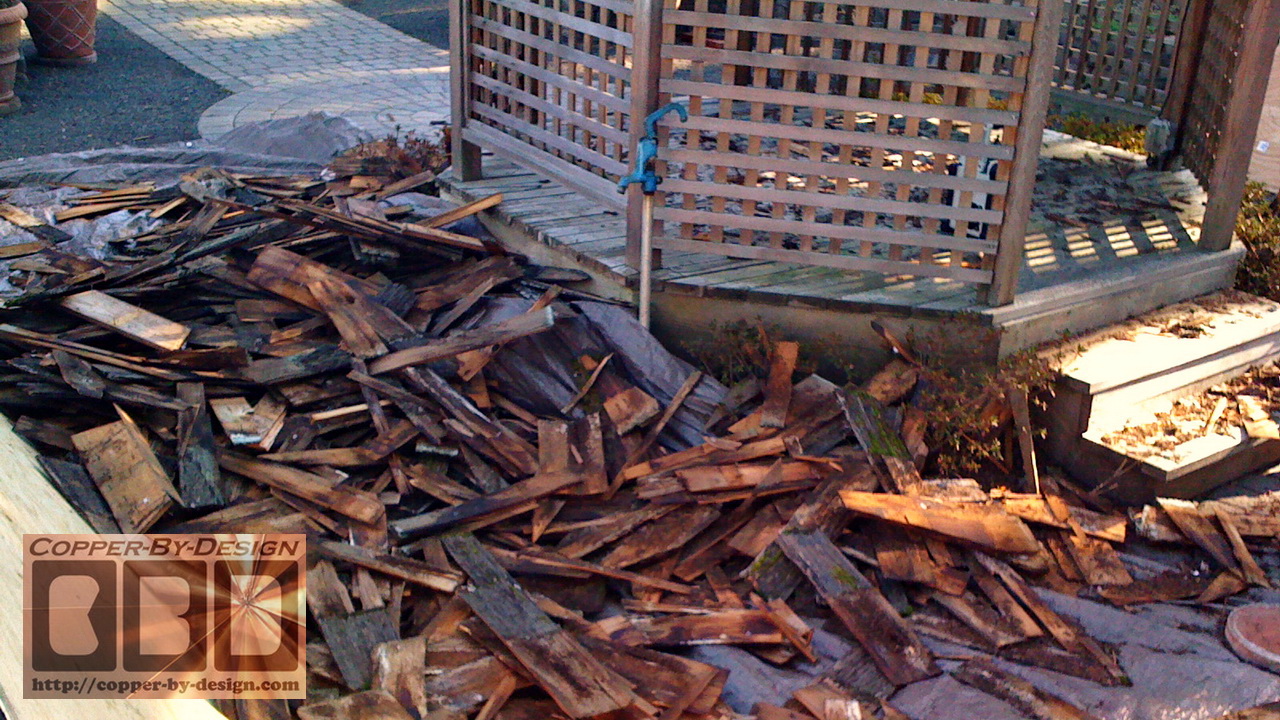
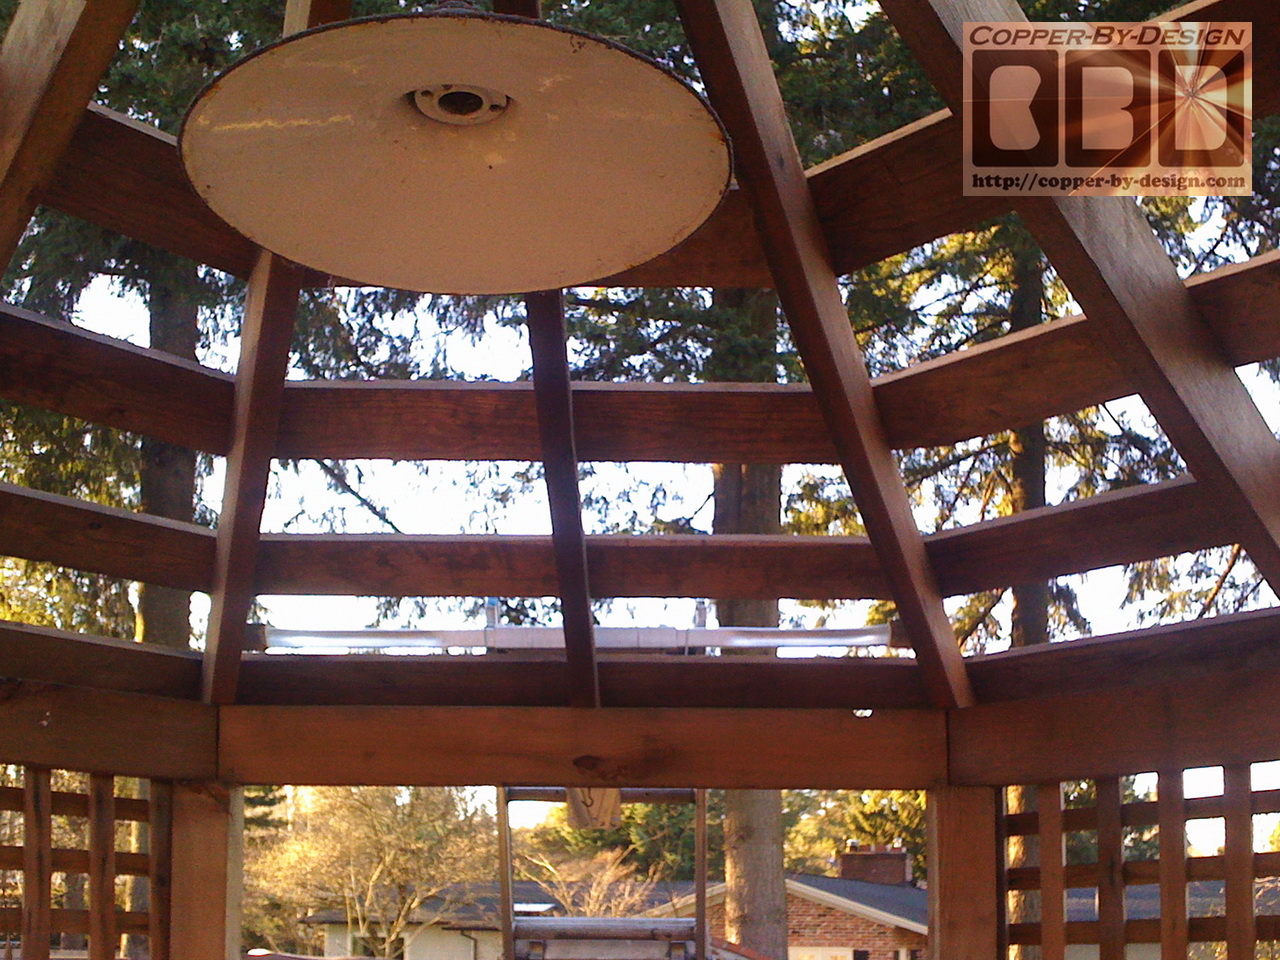
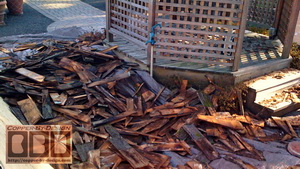
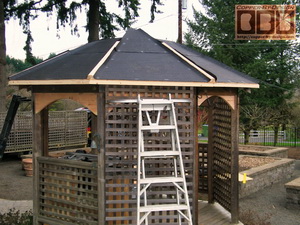
Here's the before photos showing the
roofing removal.
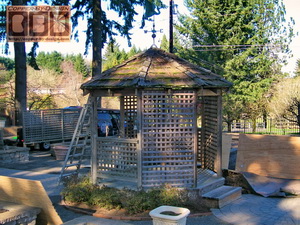 
These close-up shots show how rotten these
cedar shakes were and no longer sealing the roof.
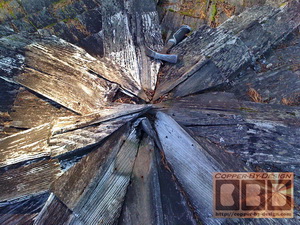 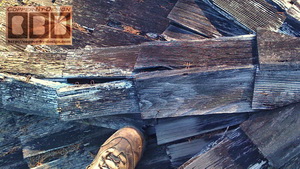
There were lots of water stains on the
roof trusses indicating how badly that roof had been leaking.
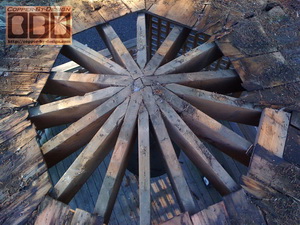 
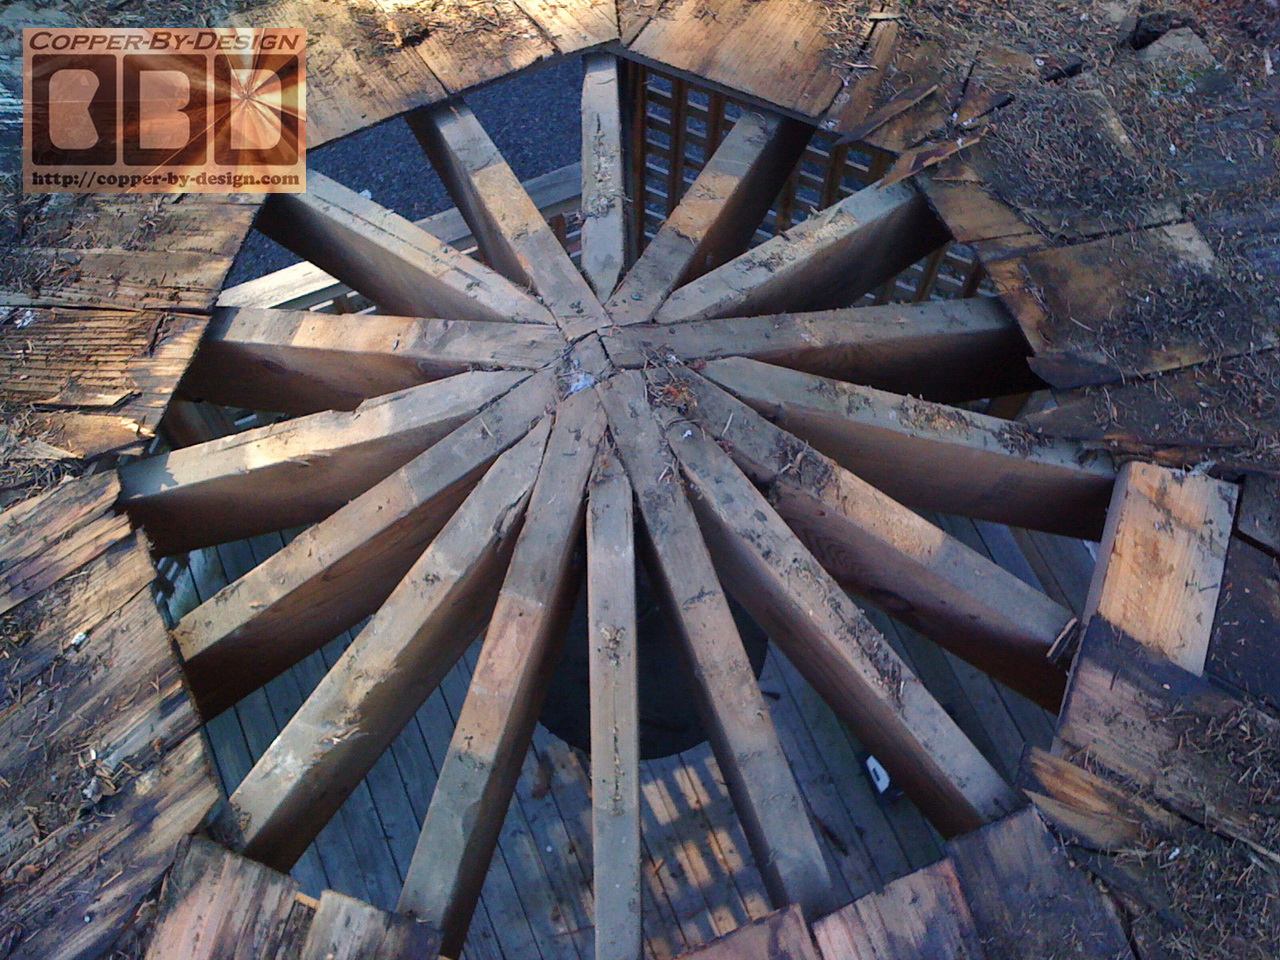
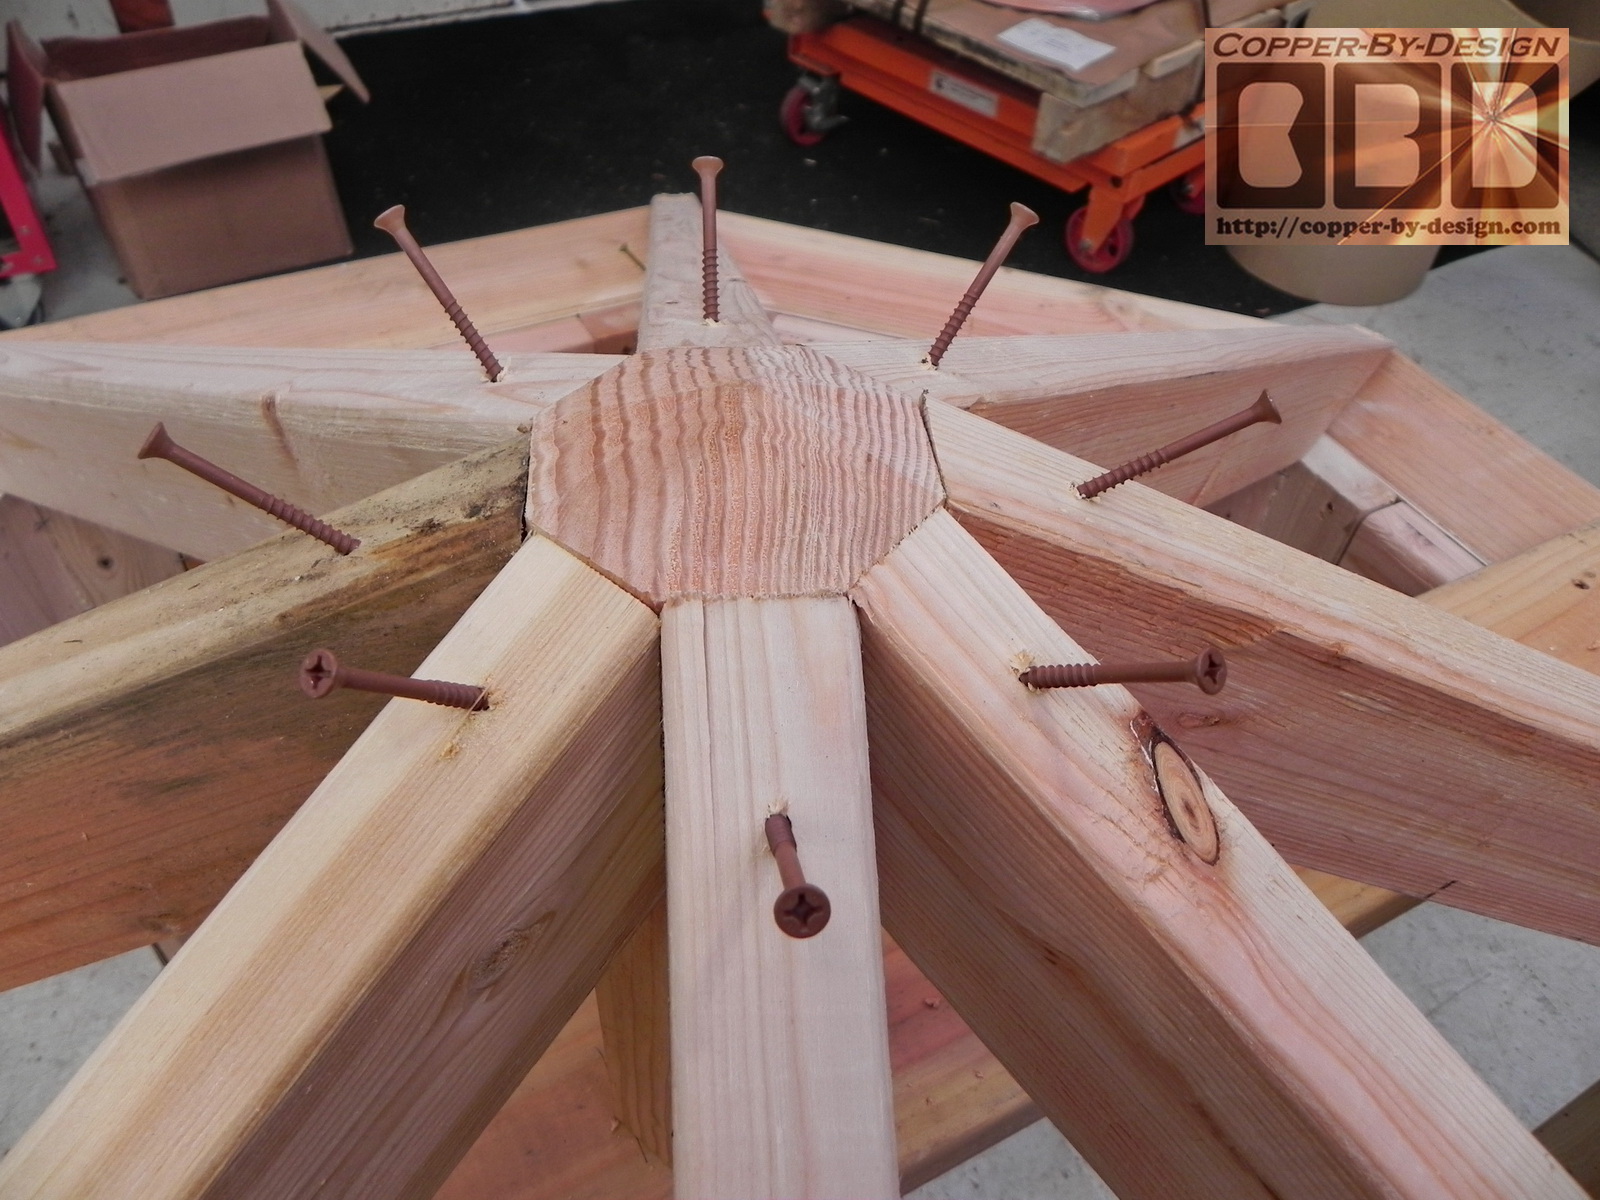
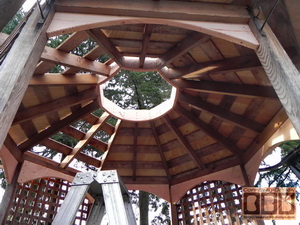
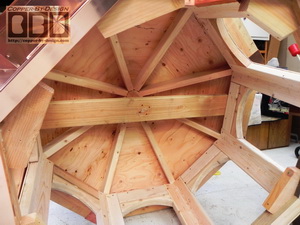
I find it very funny how most carpenters
will struggle with how to join all these trusses together in the
center like this, instead of just making a simple hollow core
like I recommend on this web site. It does not have to be nearly
this large. Just big enough to get a drill inside to attach
those stringers with deck screws.
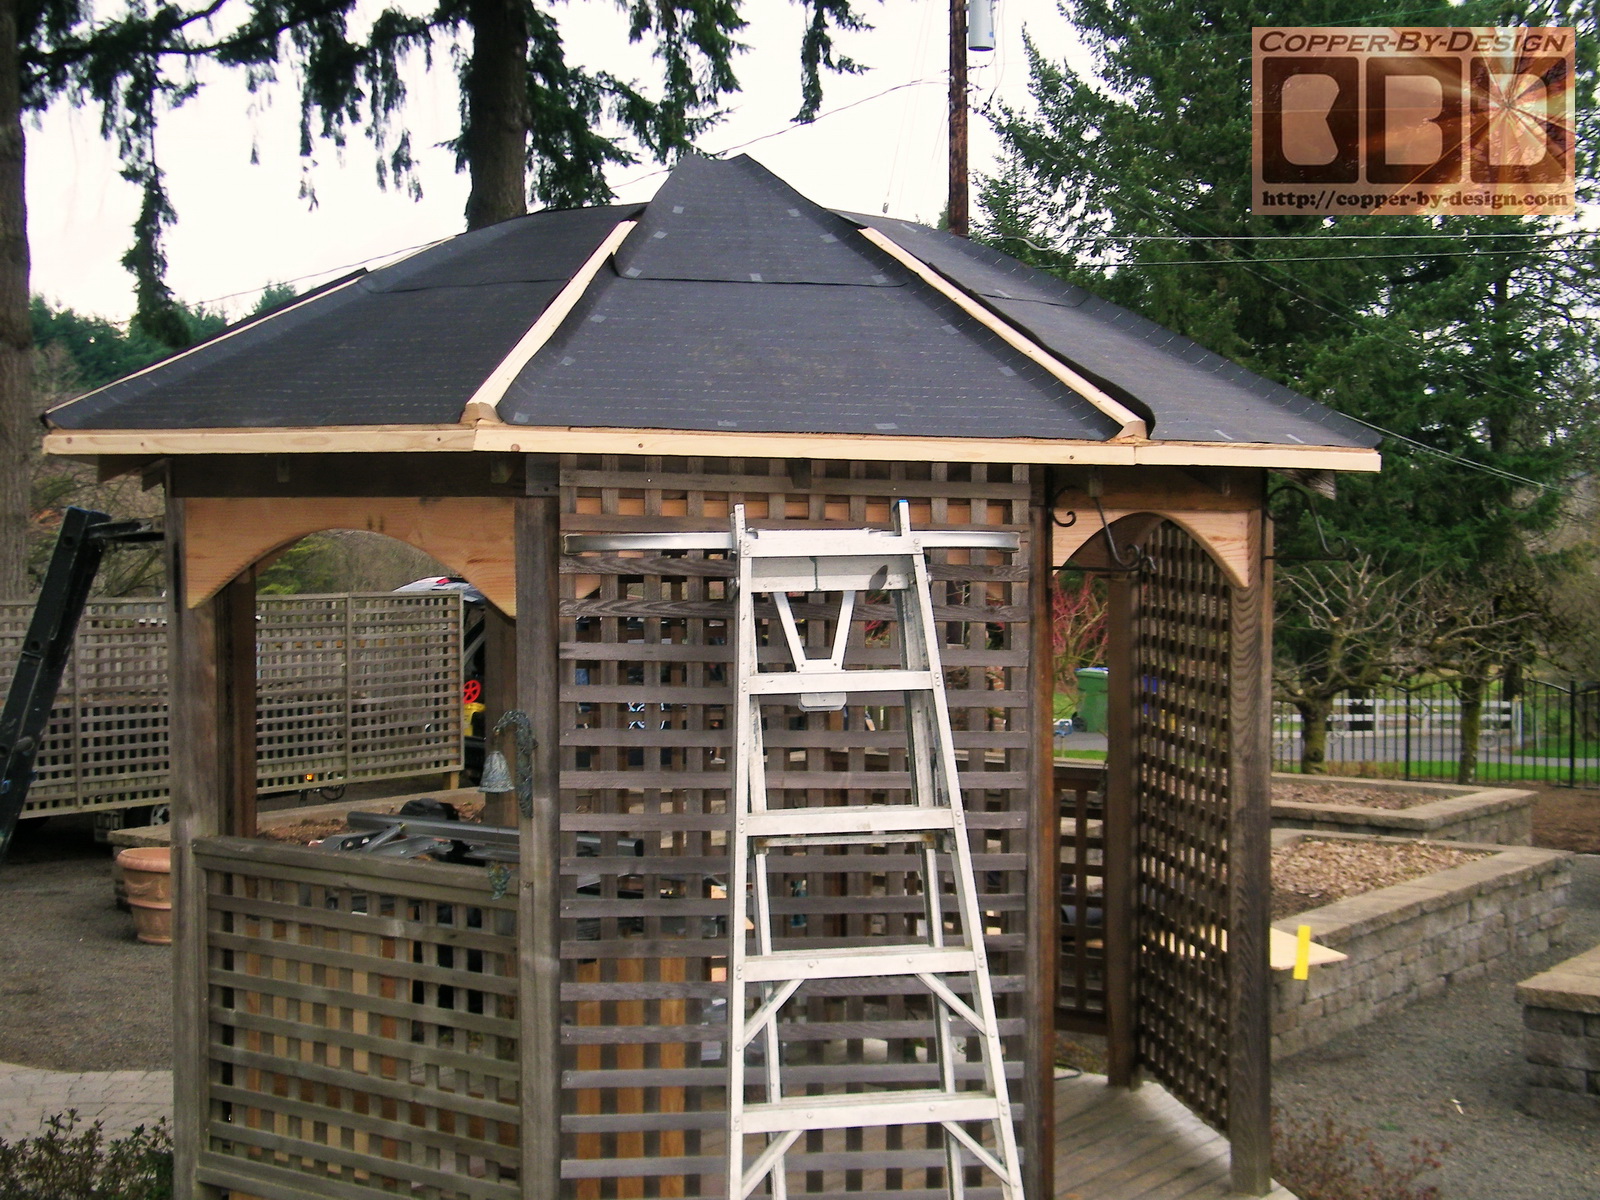
I stripped all the rotten cedar shakes off
the roof leaving only this step-sheeting.
|
|
Preparation for the Copper Sheeting |
|
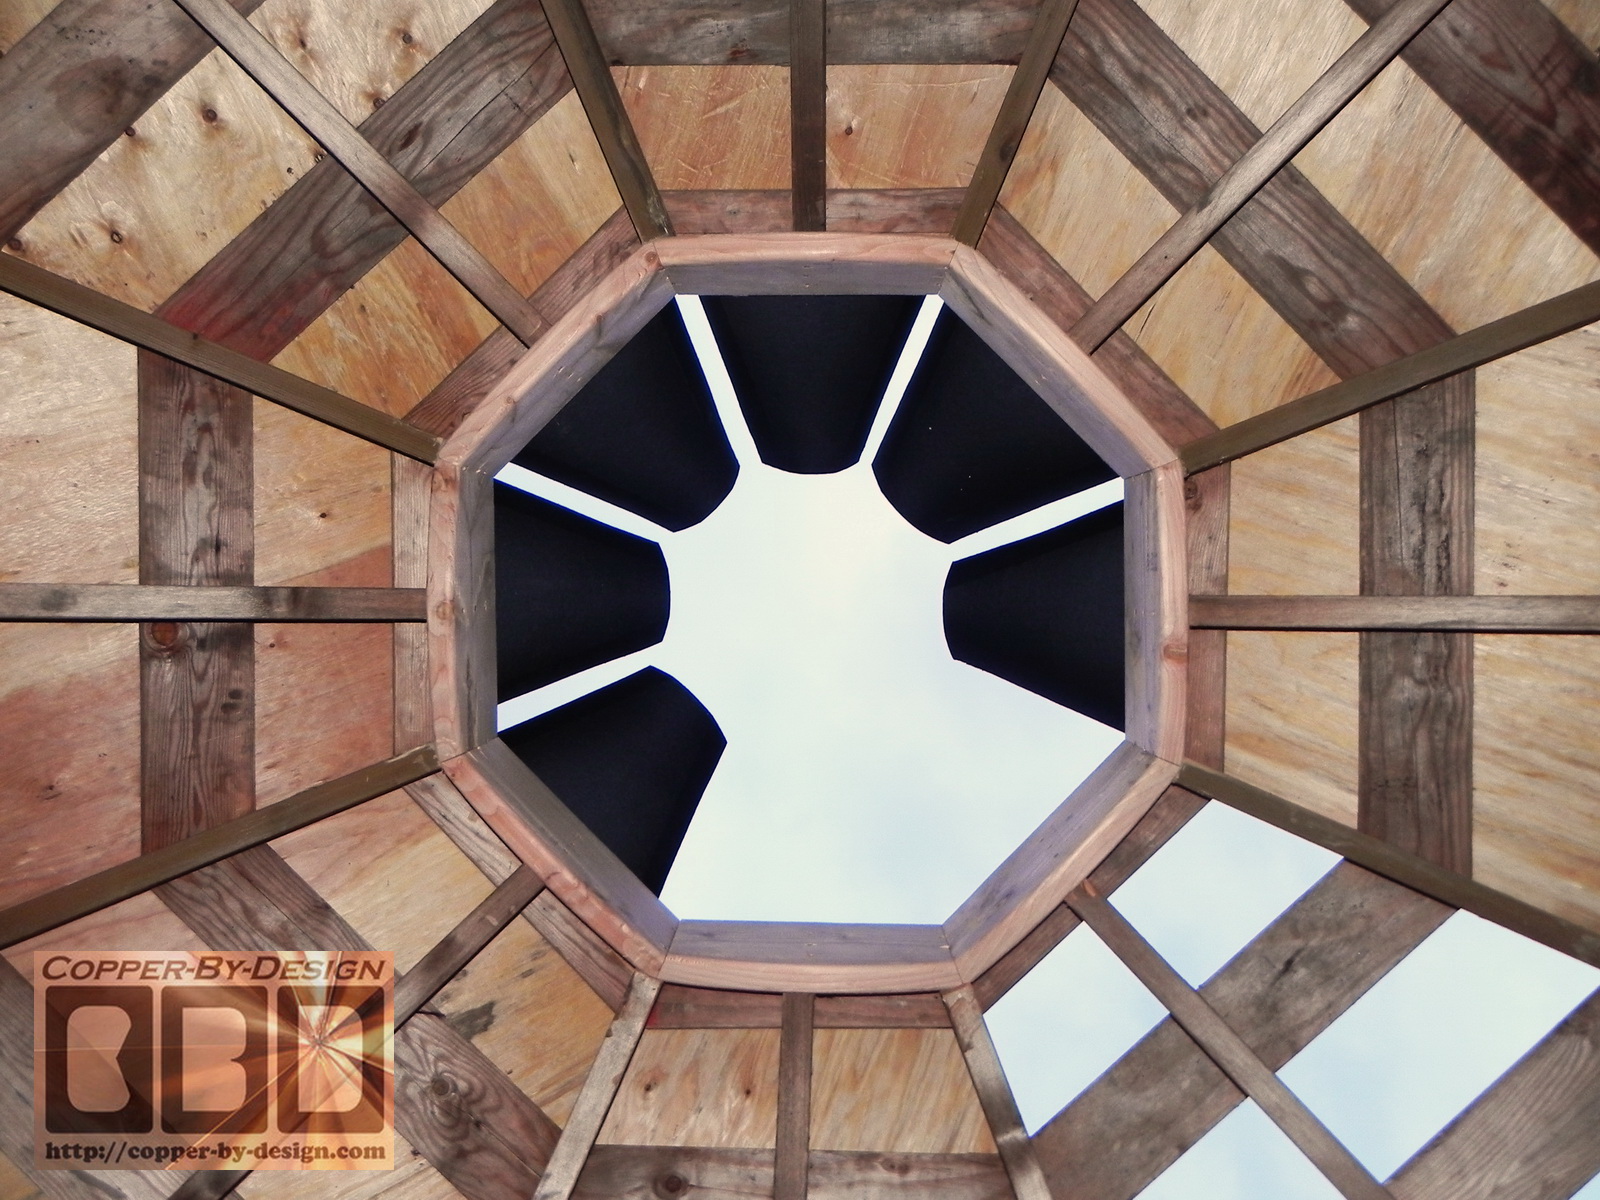
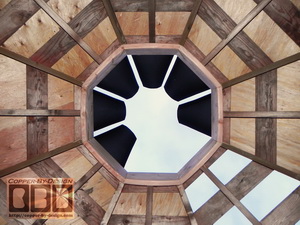
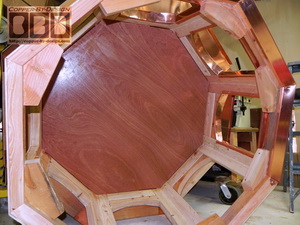
Here's the plywood getting attached with 2.5" deck screws after I
had cut out the center of the roof joists to install this support
ring for a 36" open gap in the middle. Each piece of plywood had to
be carefully measured and cut to fit, since this gazebo was so
irregular on each side.
This does not change the roof angle at all. To make this
support ring I was able to just use the parts I had cut out of
the 2x12 boards for the lower arch supports with the grain going
horizontally for the best possible strength. I used 48 - 3" deck
screws to attach this support ring into the ends of the 16 roof
joists.
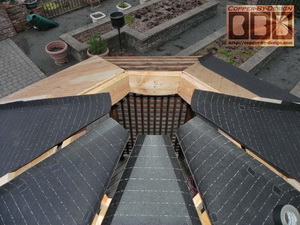
Then there is the hip boards that were angle
cut on my table saw at a 40 degree angle for the outside and a
10 degree angle where they were glued together. Then I was able
to cover most of this with 30# roof felt for the vapor barrier
between the wood and copper sheet metal that will cover this to
minimize the mildew than could form on the plywood from trapped
condensation.
|
|
20oz Copper Sheeting Applied |
|
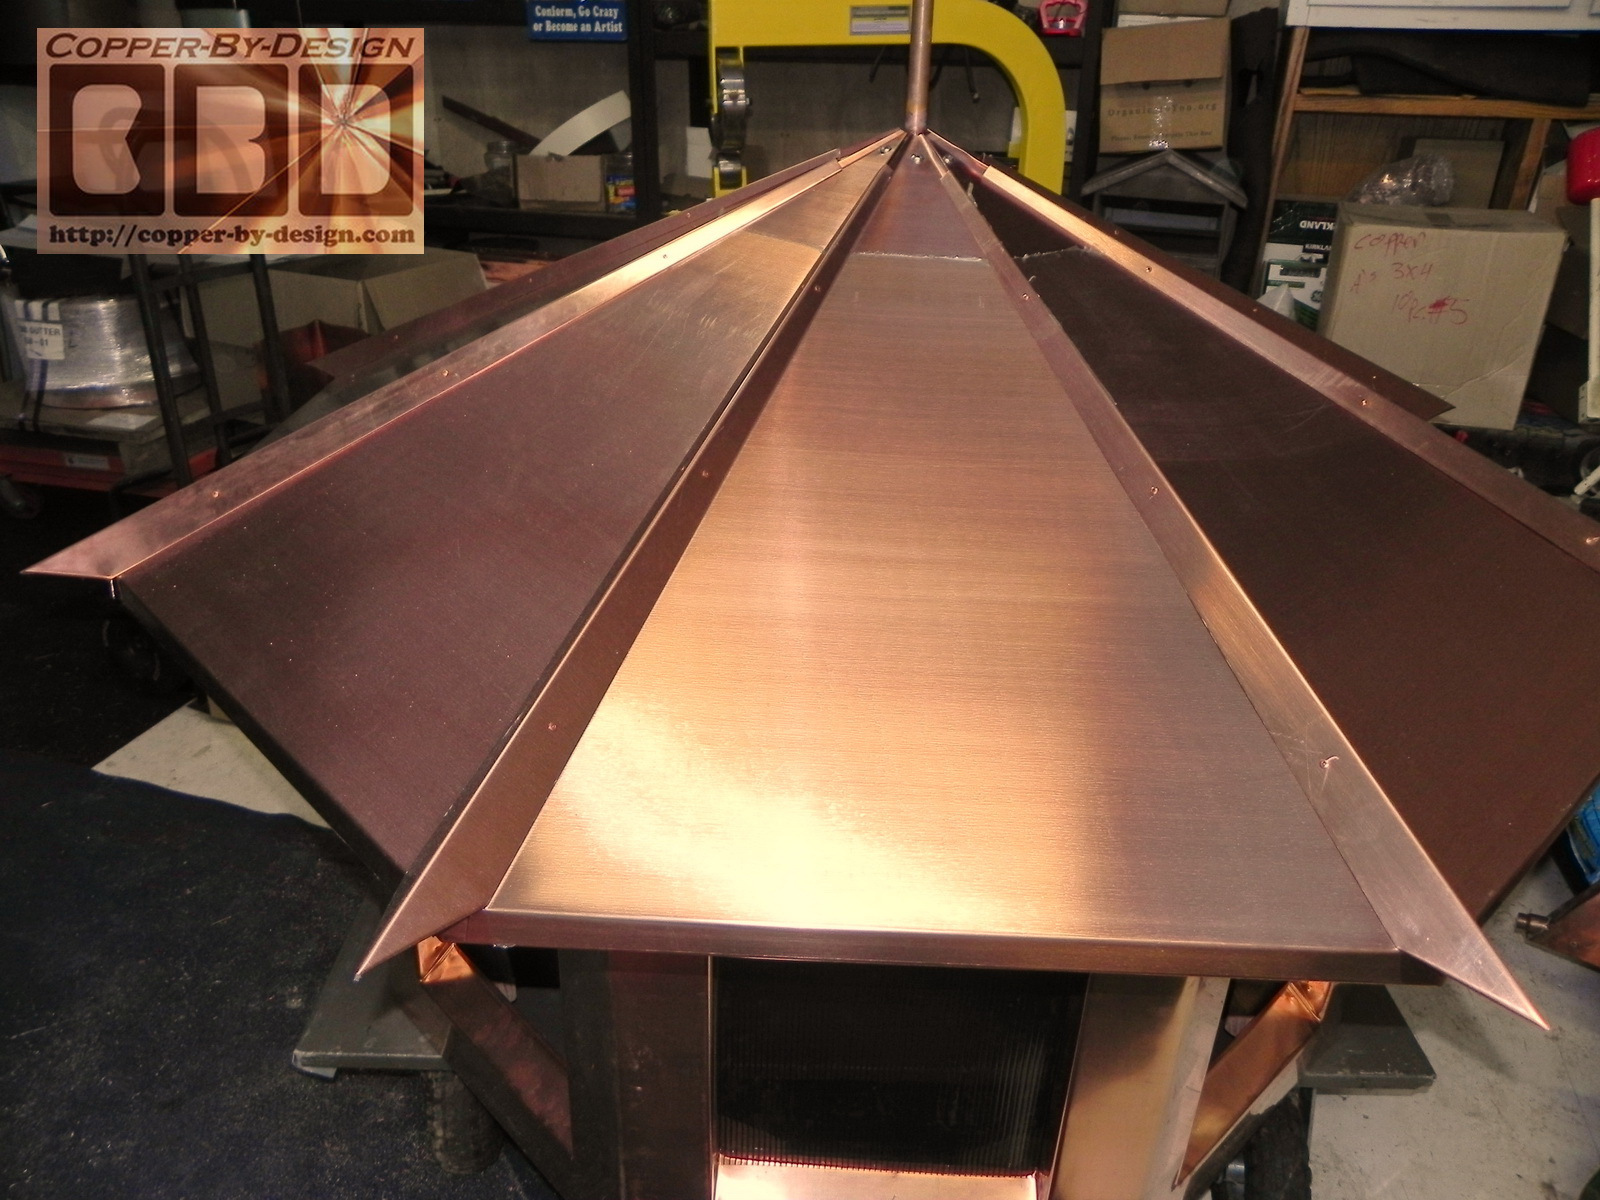
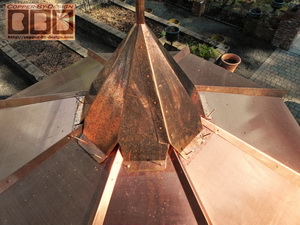
Again, each of the 24 pieces of copper had to
be custom measured for each placement to fit just right one at a
time. It took 4 sheets 3' x 10' to just to make the larger 8
pieces with very little left over. Then 2 more sheets to form
the 8 upper pieces. Then the cap metal for each hip.
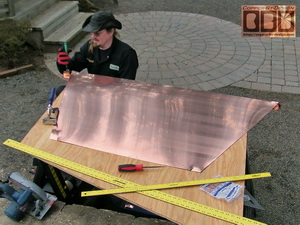 
This first 16 part copper sheet set took a
couple days to get ready for the cupola to be lifted on with a
crane. I was still working on the last piece when the crane
operator showed up.
|
|
Cupola Creation |
|
I had been working on the cupola for their gazebo
throughout the previous month off and on between doing gutter
jobs.
Here are some photos to see how it looked at the different
stages.
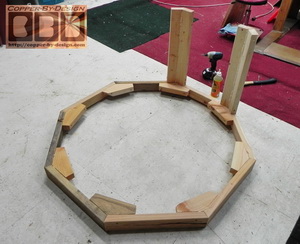 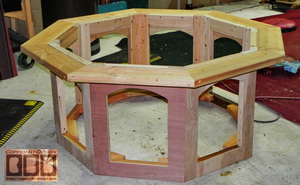
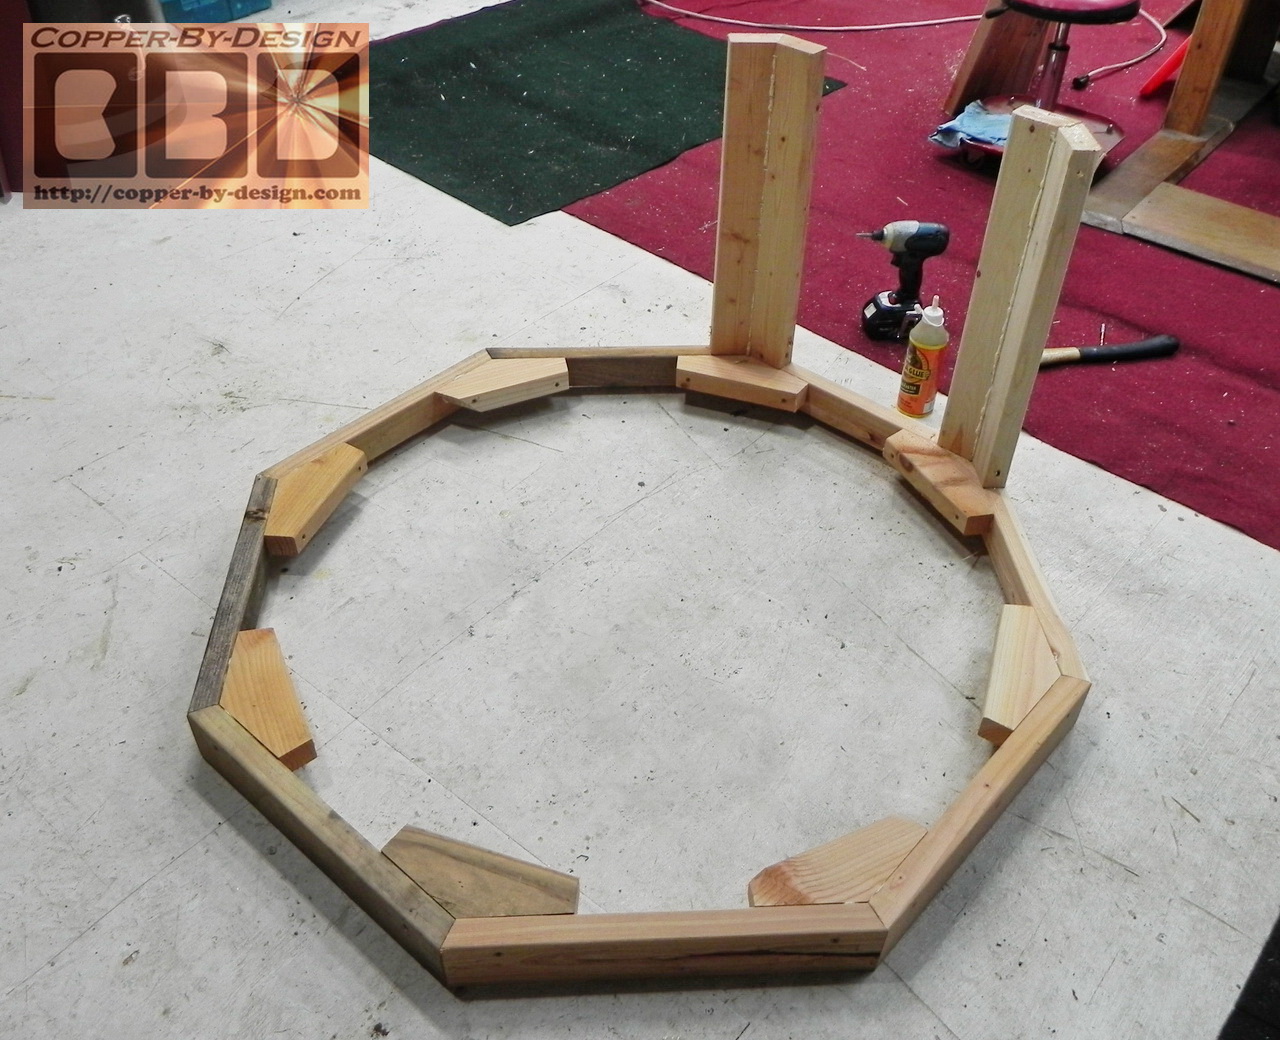
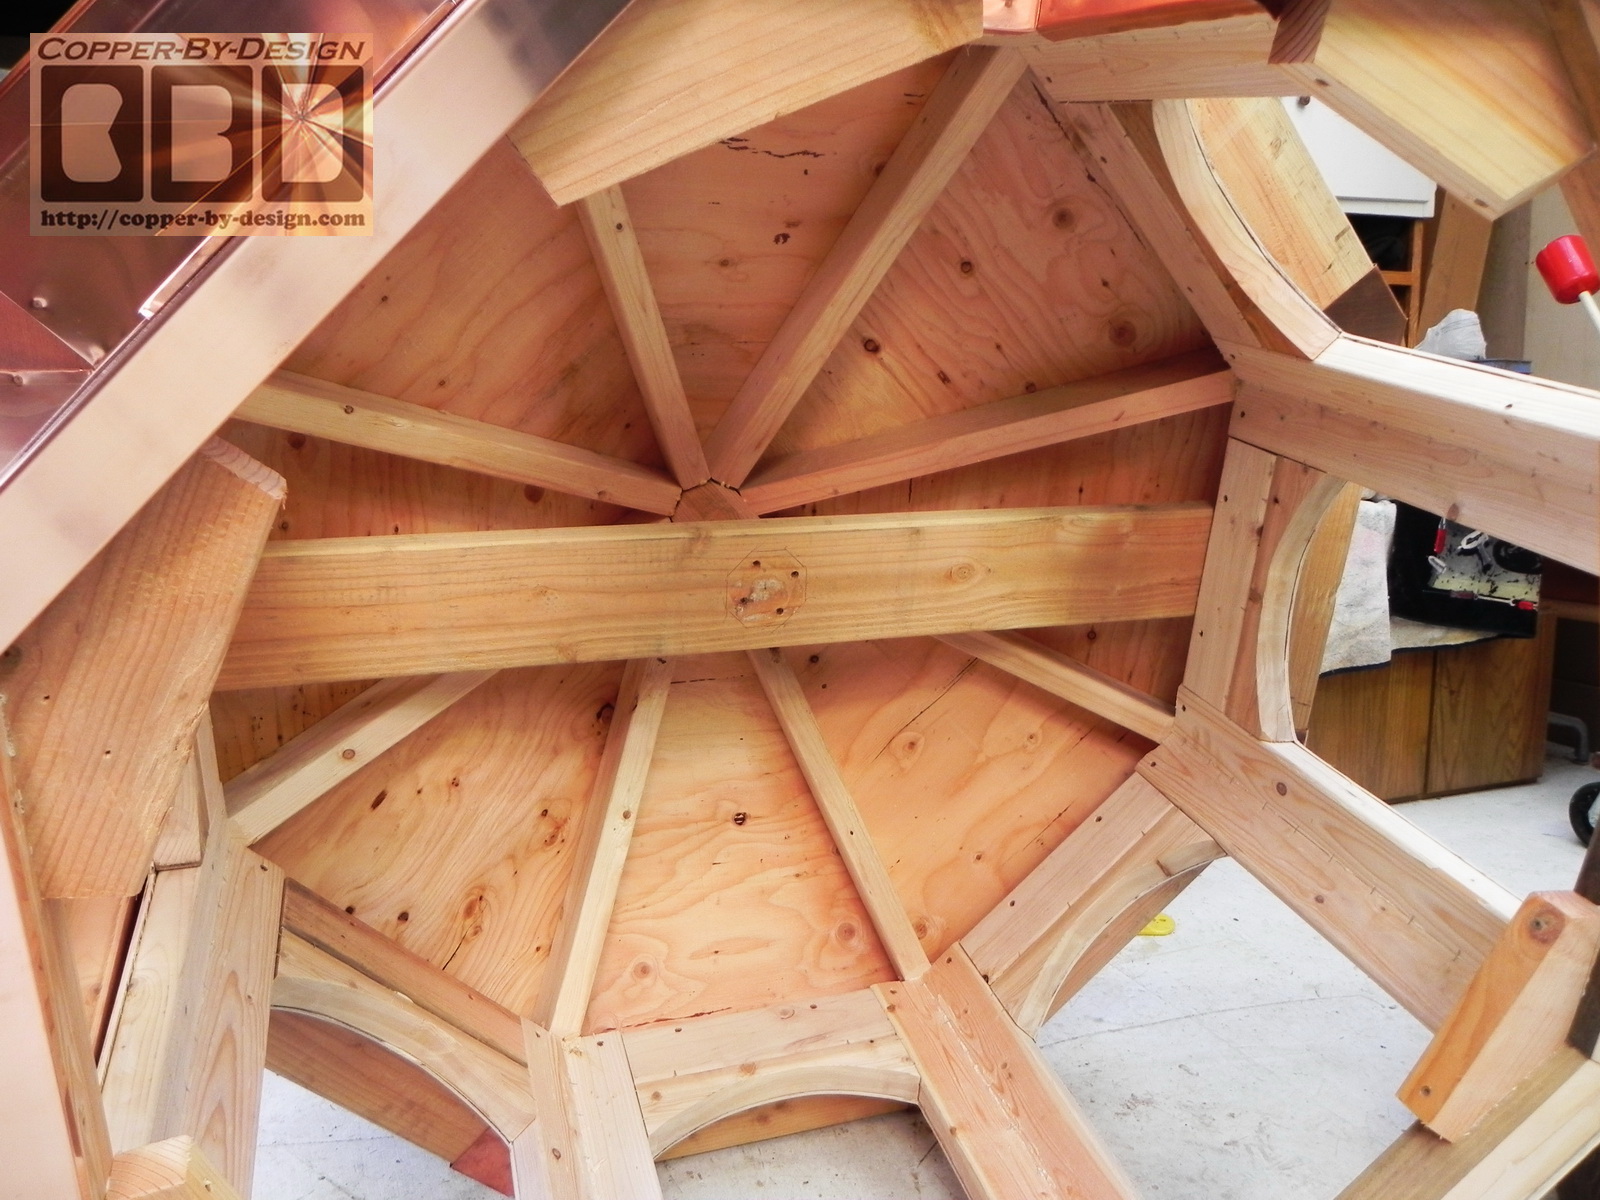
I first got the wood framework for the sides
built.
There are 56 special angle cut wood pieces in this frame below
the roof. Then the eaves are made and attached from inside, which
adds a lot more strength to this.
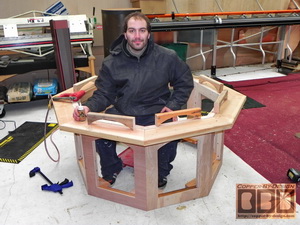 
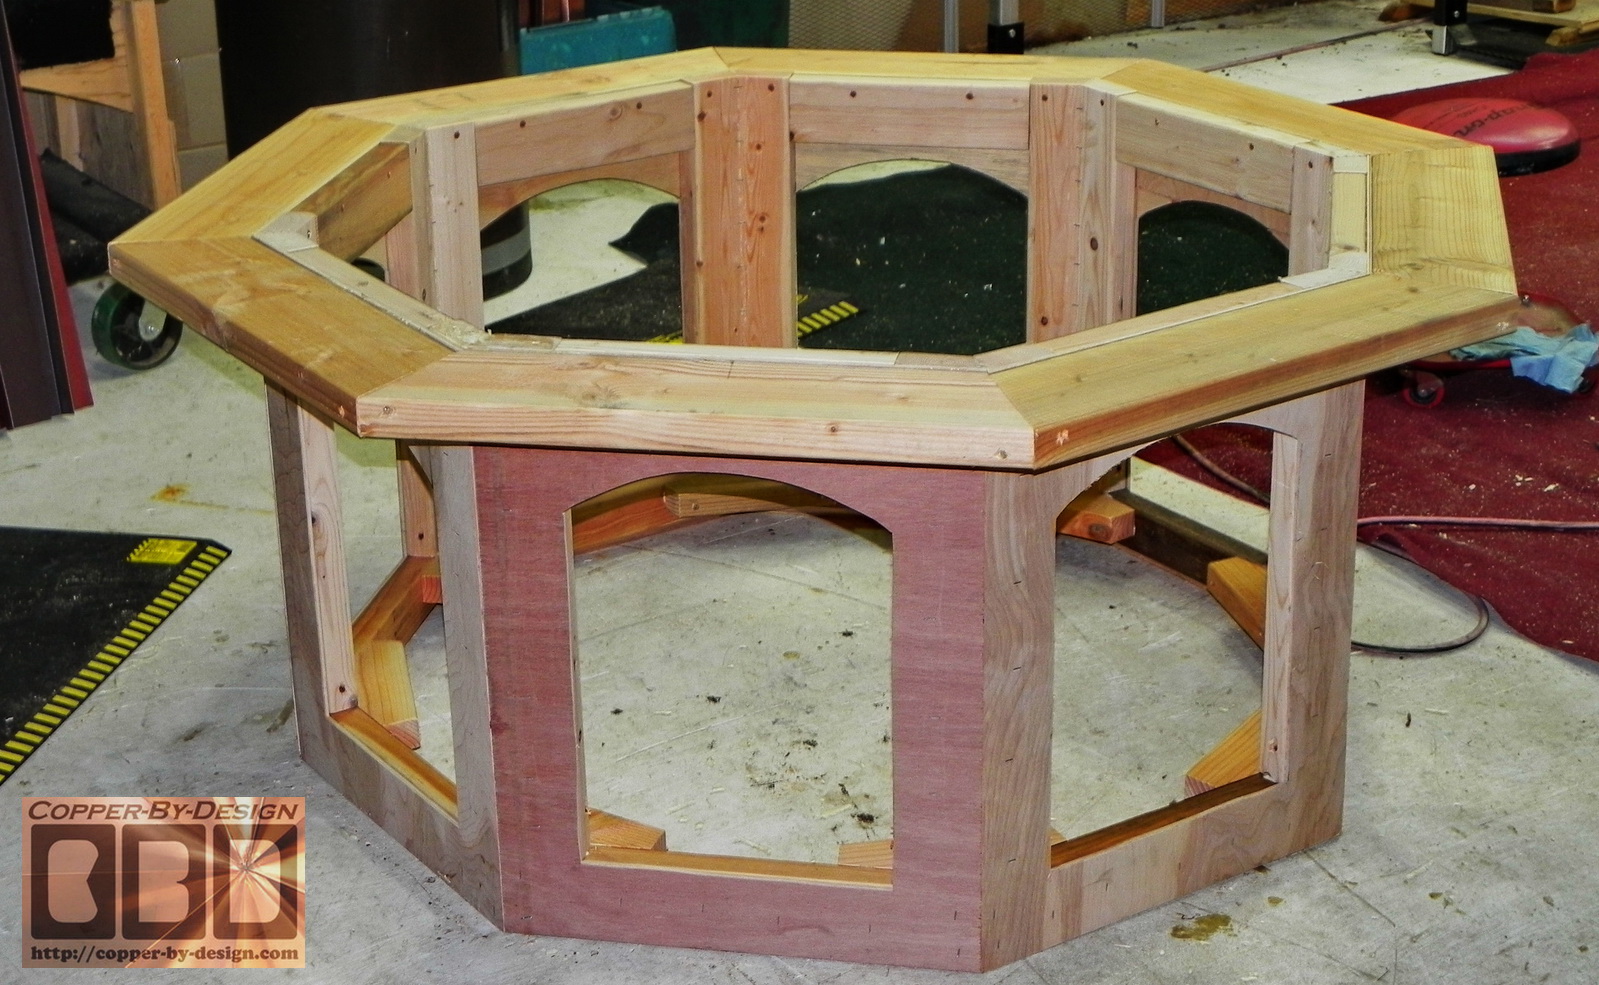
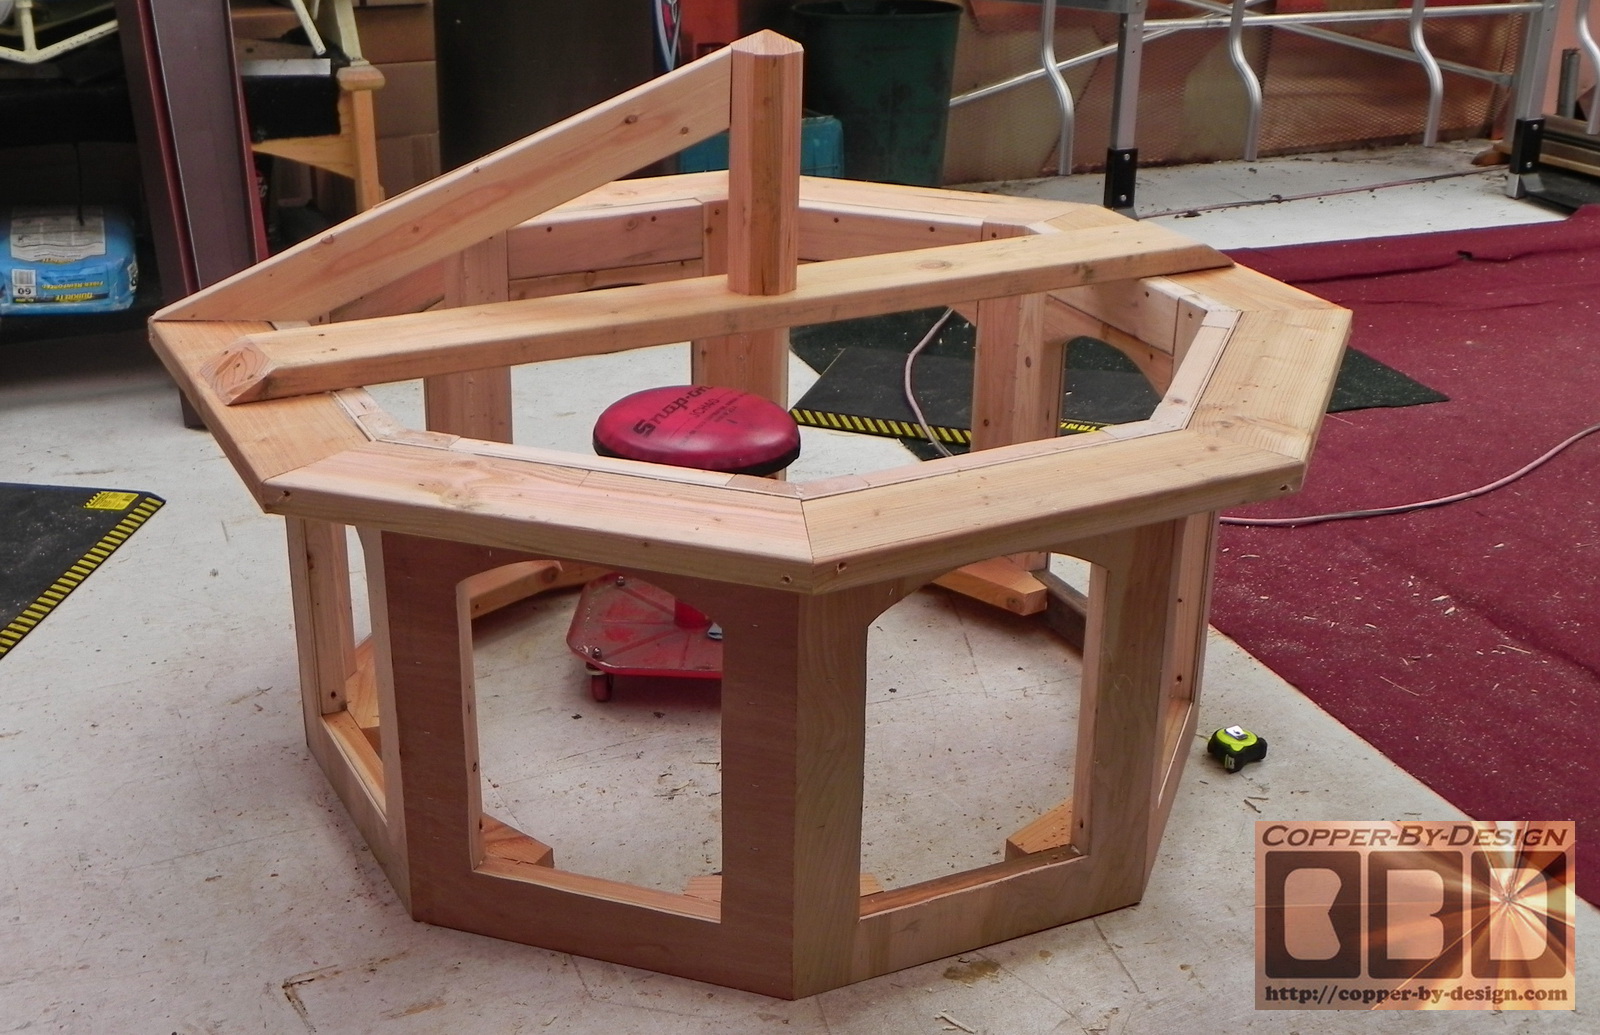
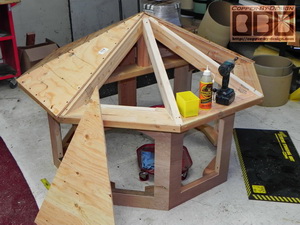
I had Chris make the arch pieces and put them
in. Then I got the roof joist on the cupola made. This is all assembled with screws after the expanding Gorilla Glue was applied, so it is very sturdy.
 
With the roof that makes 74 pieces in all.
Now that this wood work is done we just need to cover this
in copper and make a weather vane support in the center.
|
|
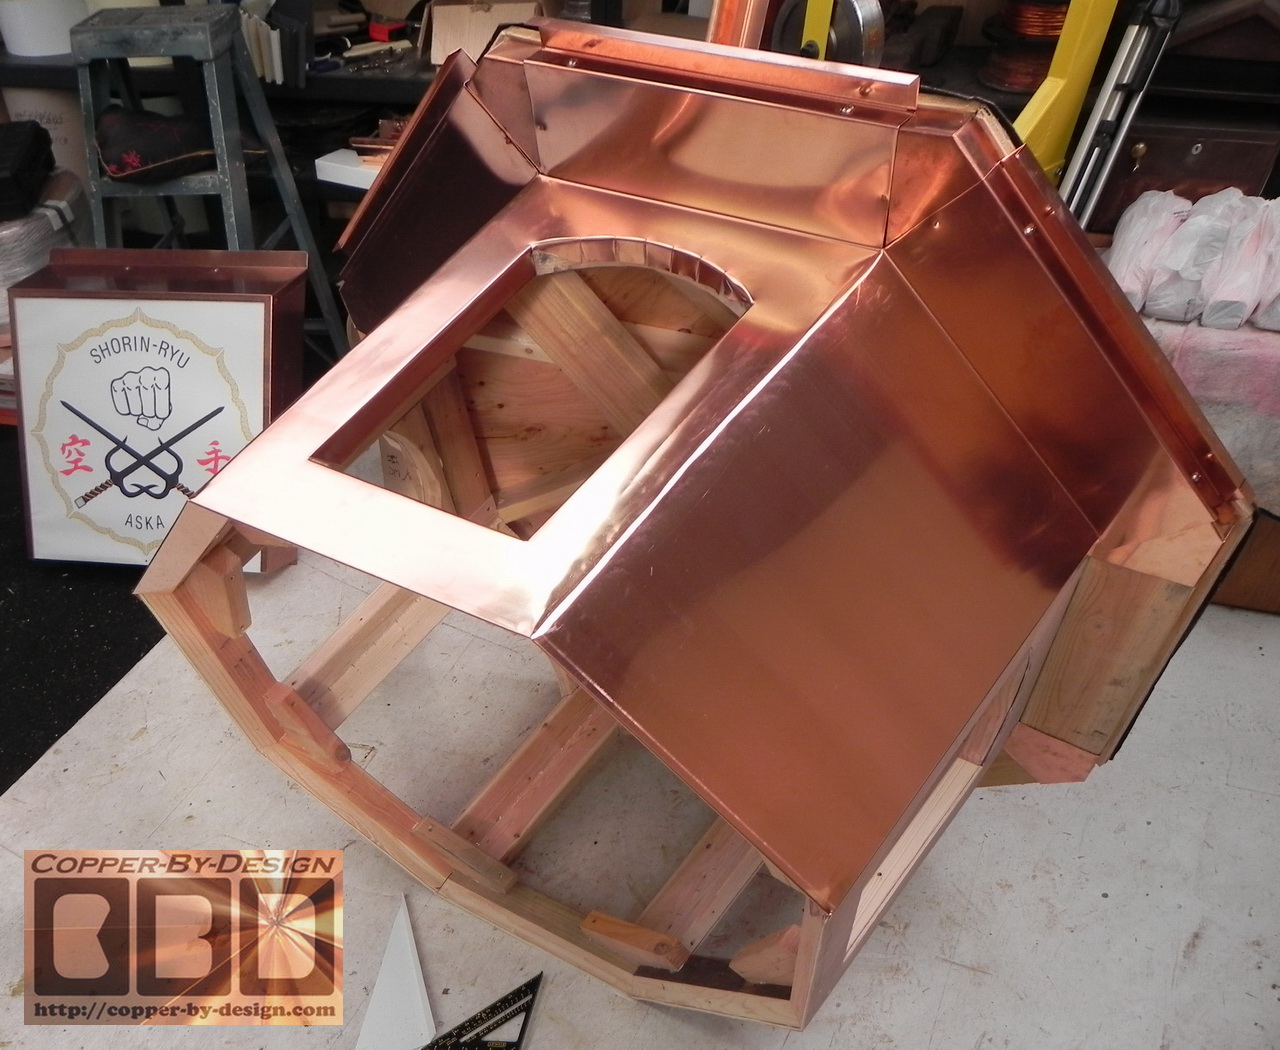
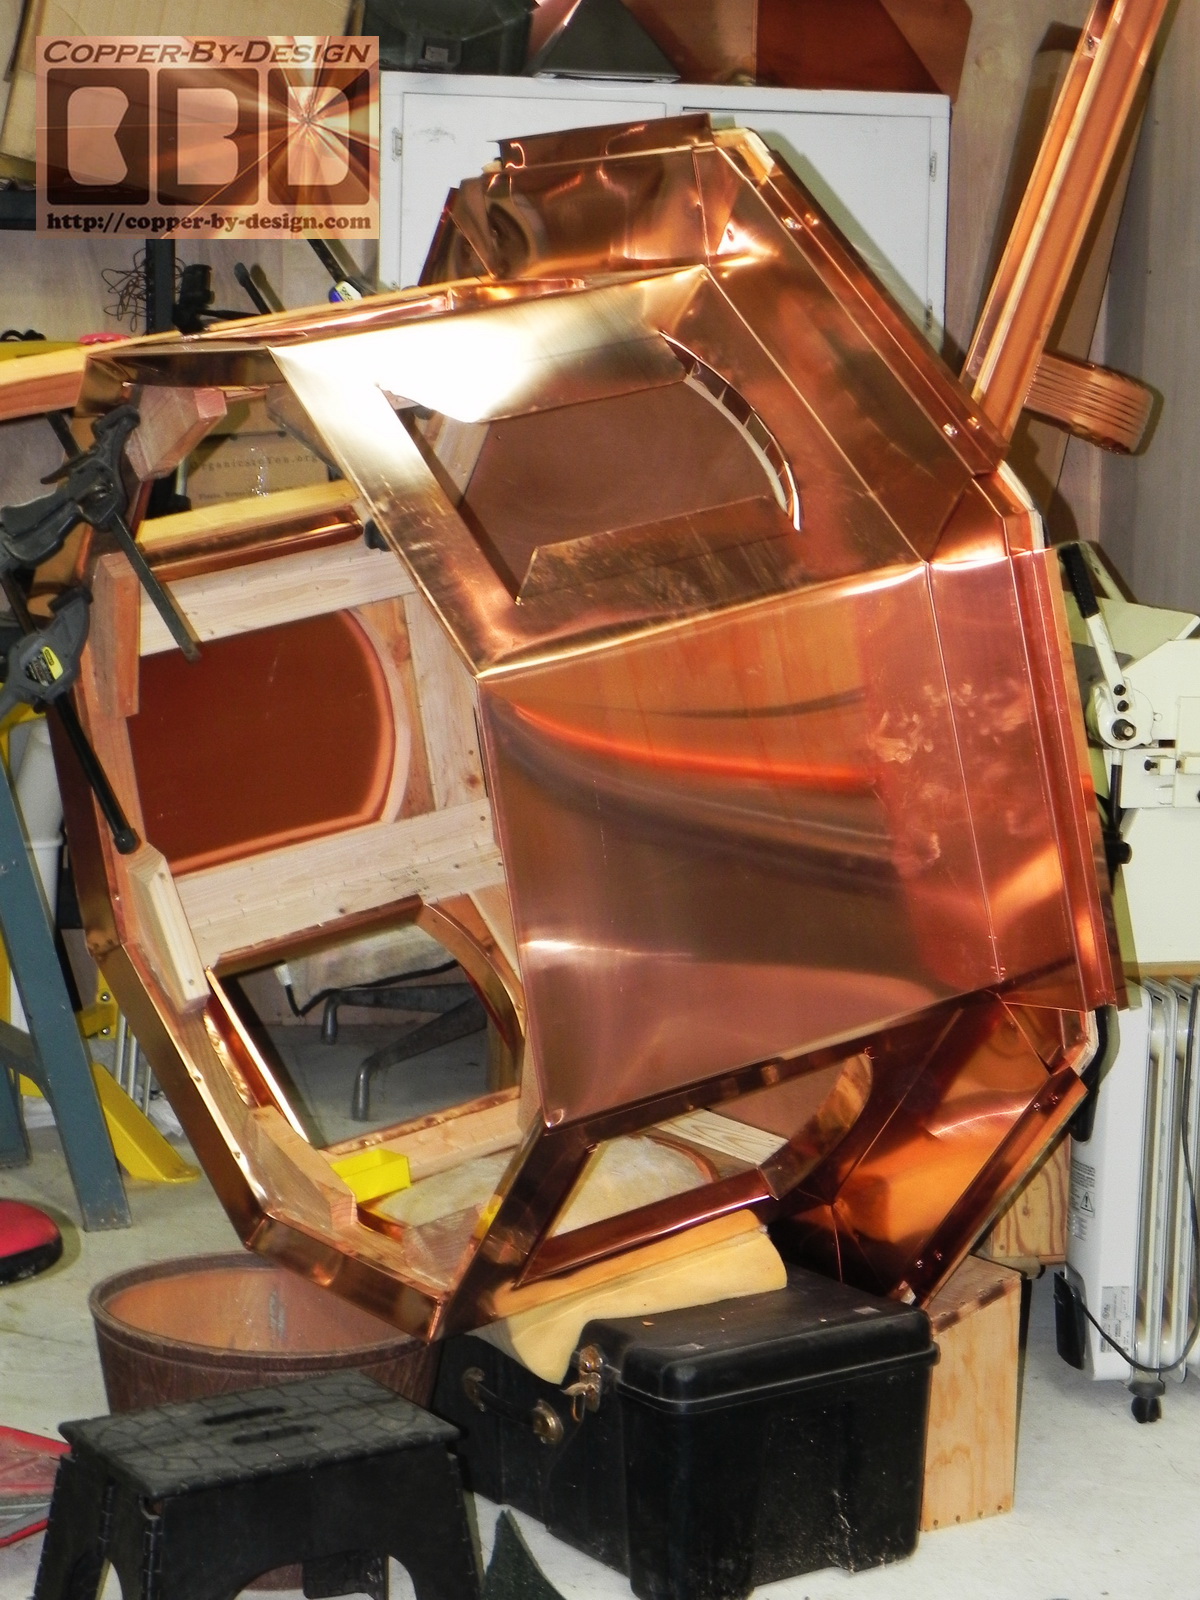
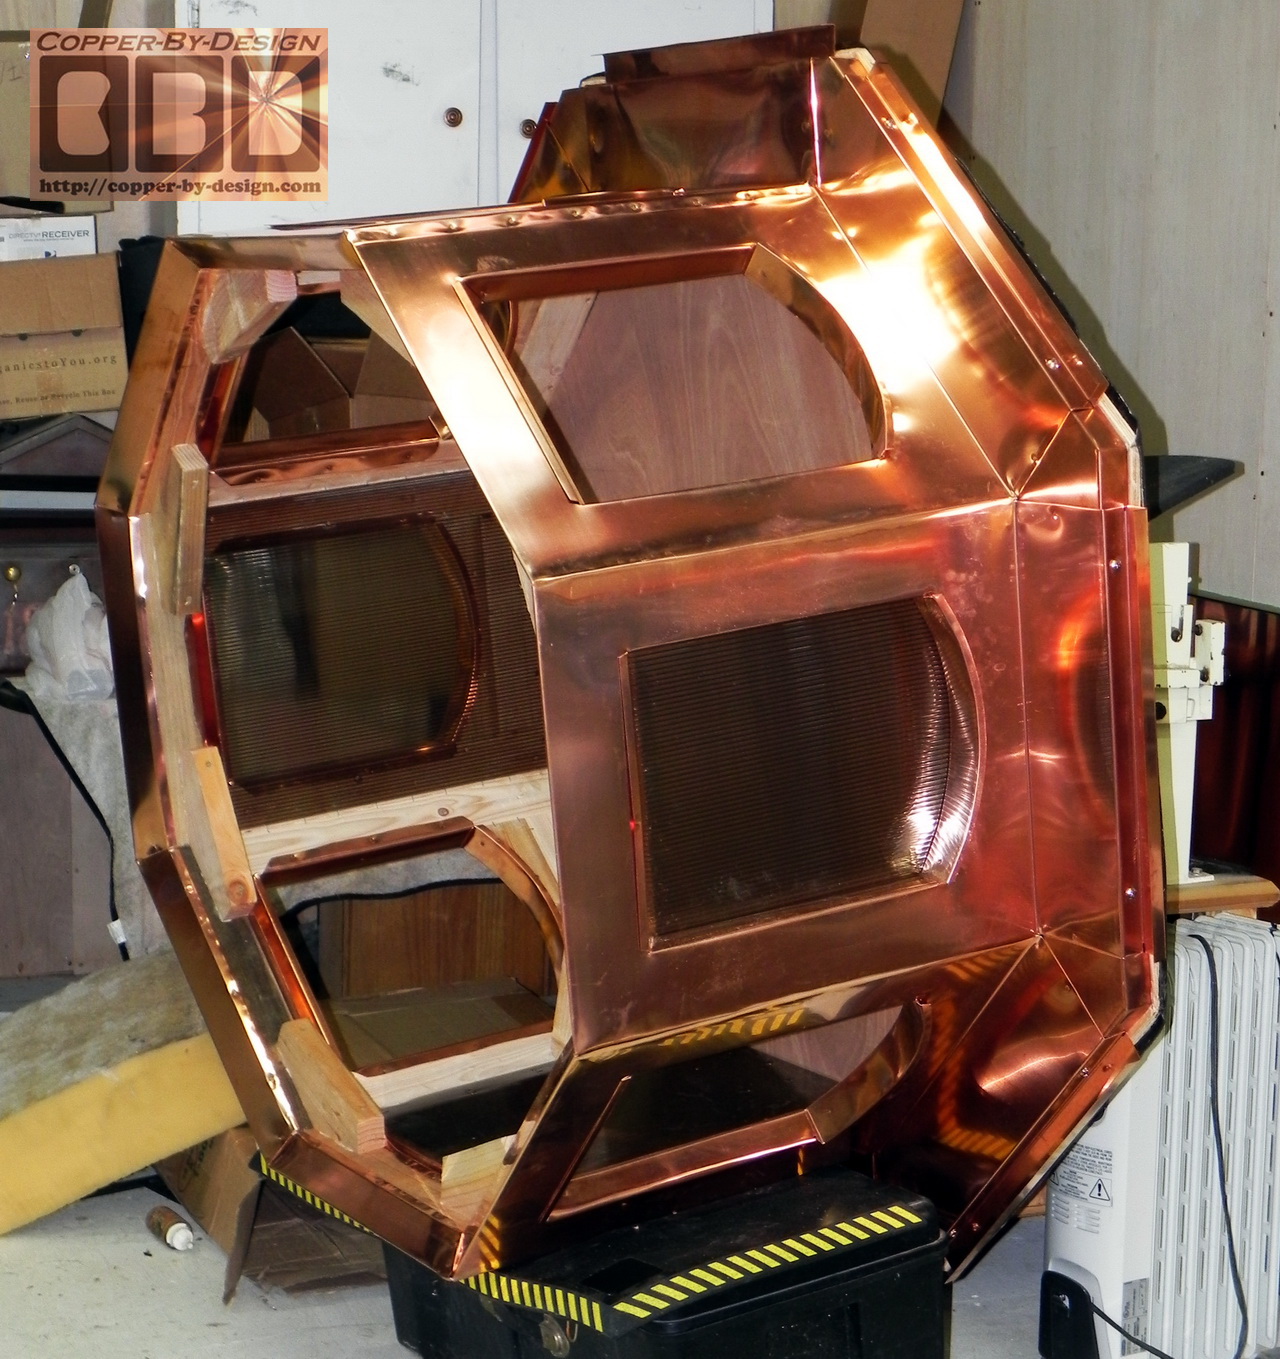
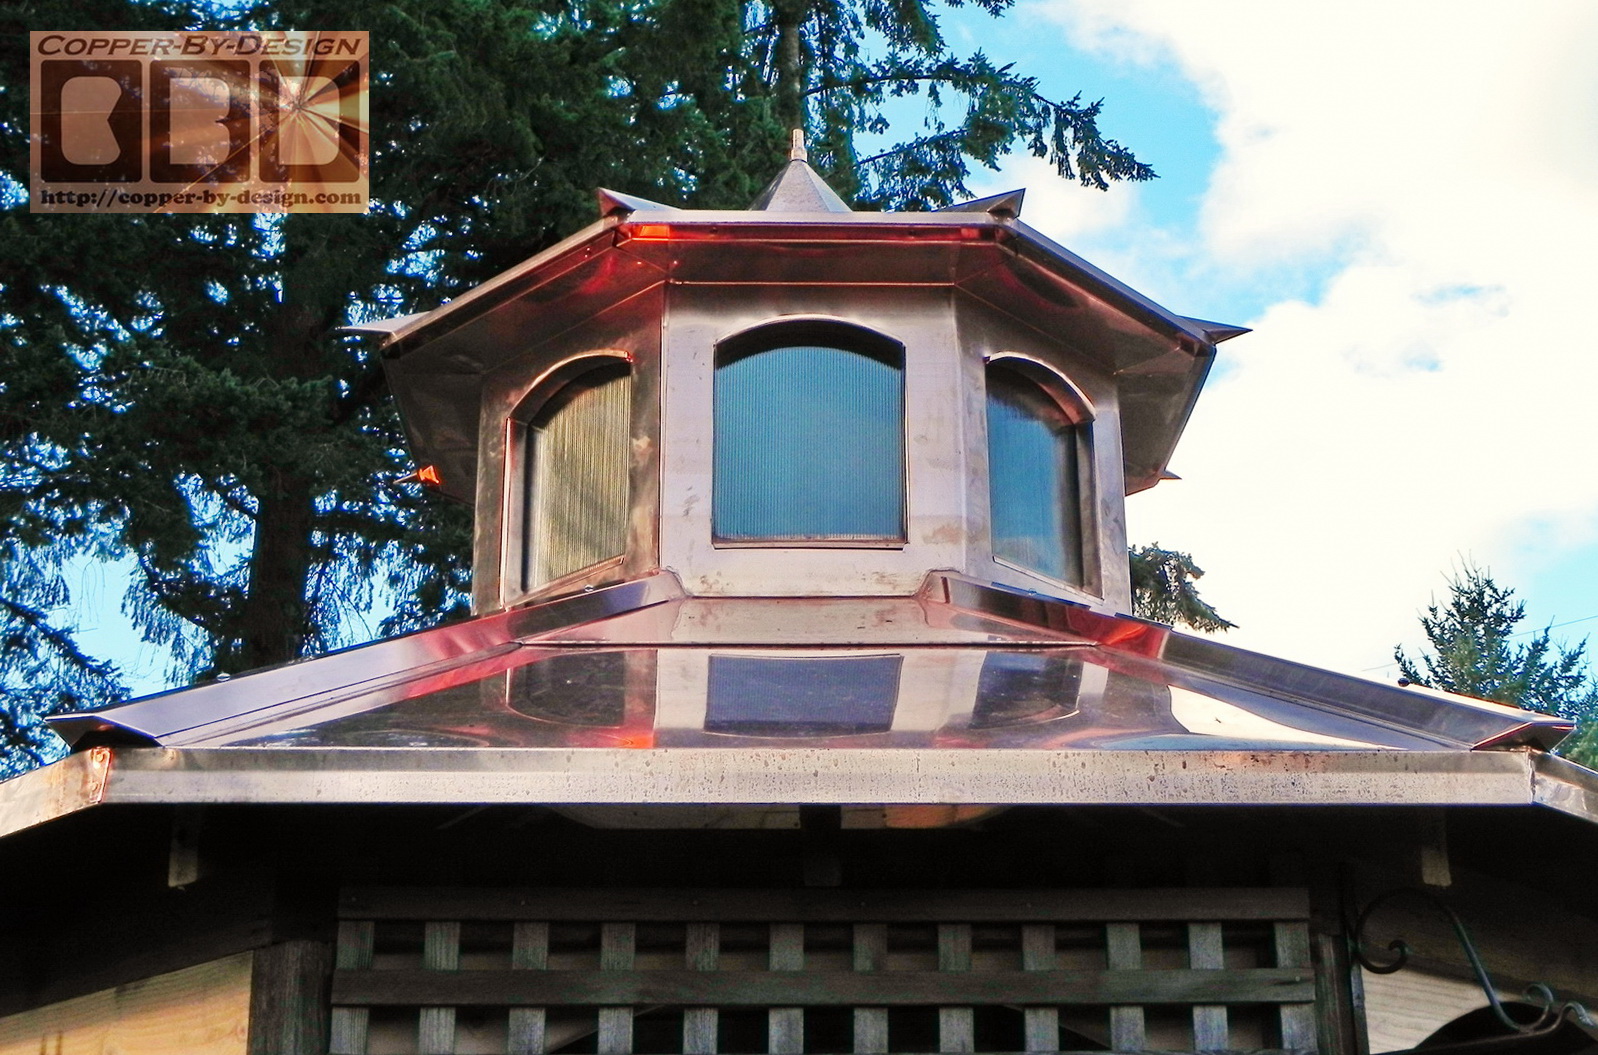
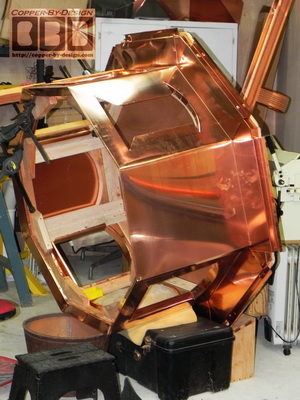
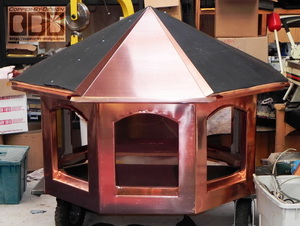
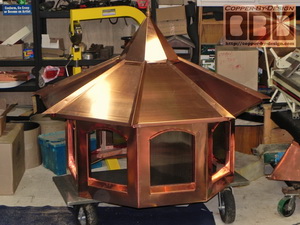
20oz Copper Sheeting Applied over the Cupola |
|
 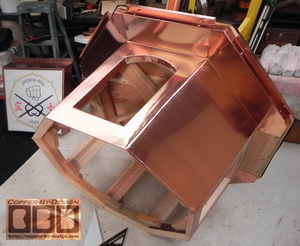
I covered this with copper. I managed to get
5 sides in one and the other 3 sides in the other piece for just
2 seams.
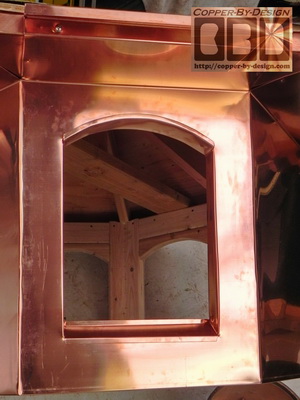 
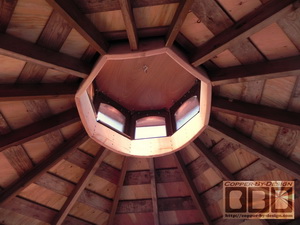
I got a wood soffit inside, so they are not
looking up into the bones of this structure.
We discussed what to do with the openings:
louvers, stainless steel screen, tinted plastic, and stained
glass windows. They want to have the 4 quarters changed out for
painted glass windows once their relative has completed them,
but for now there is the twin wall polycarbonate tinted plastic
panels in.
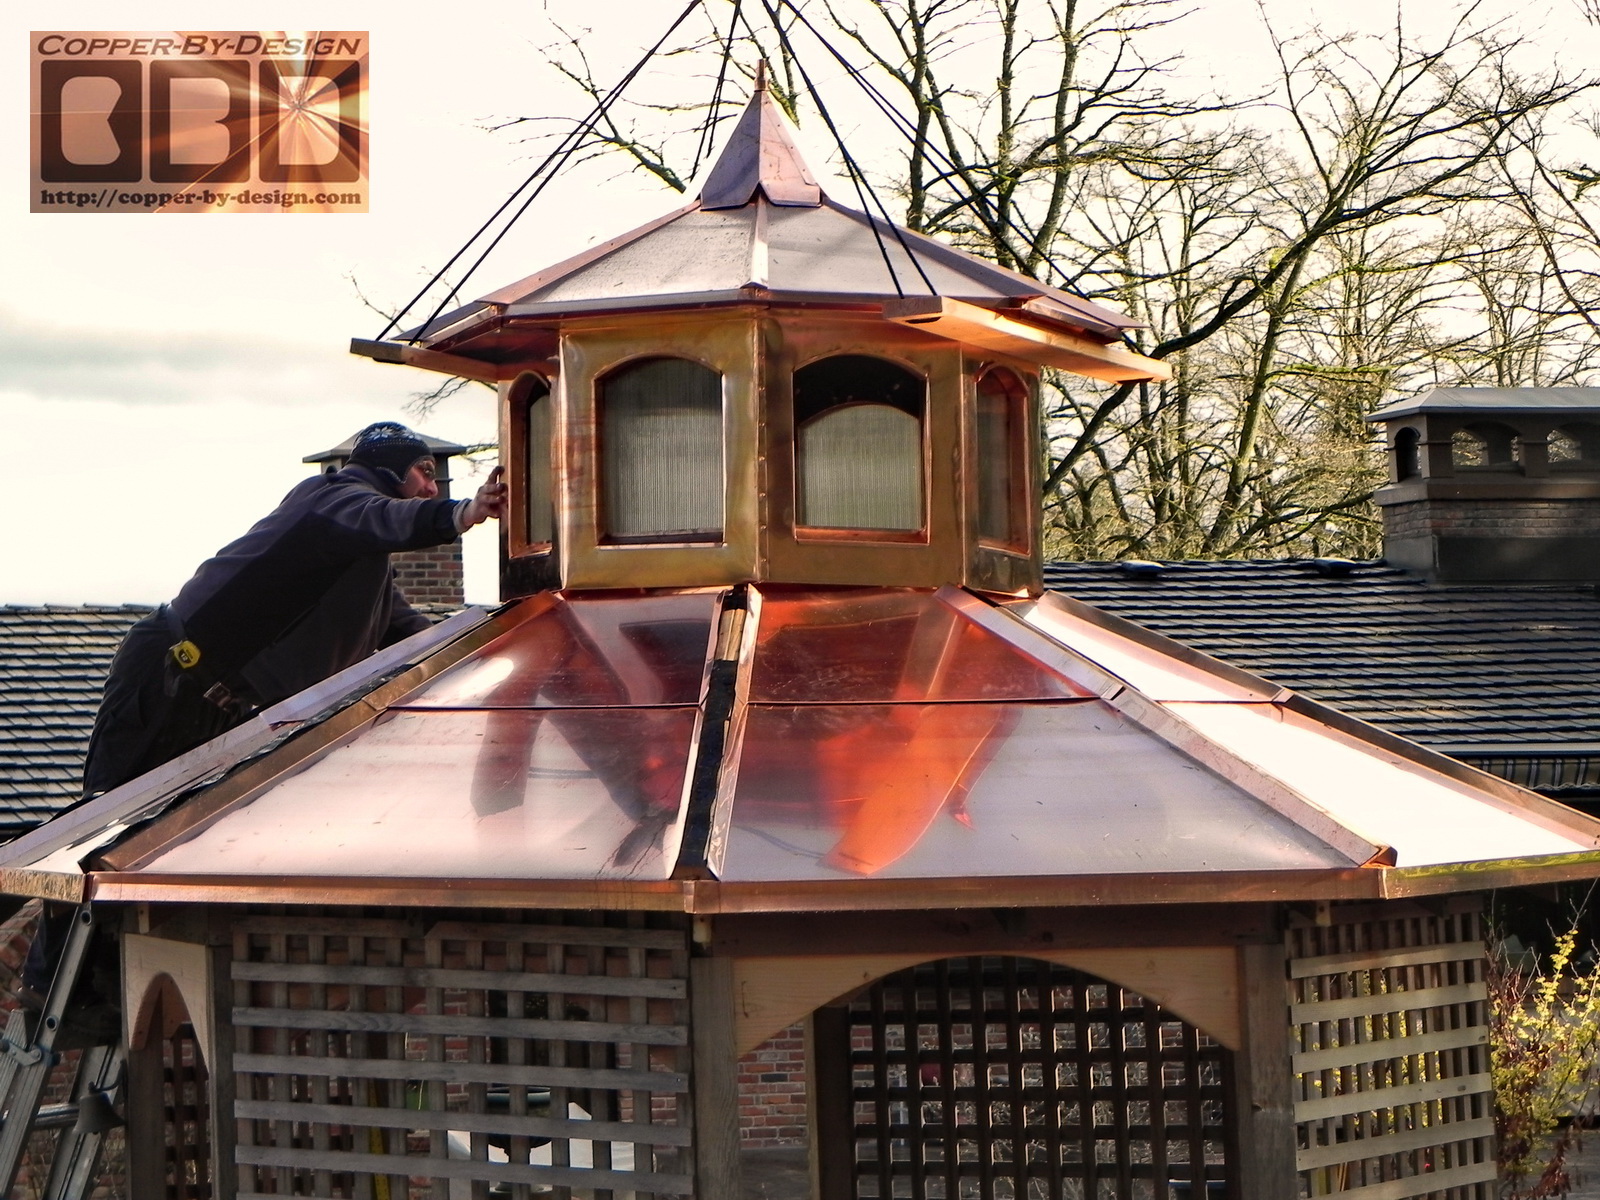
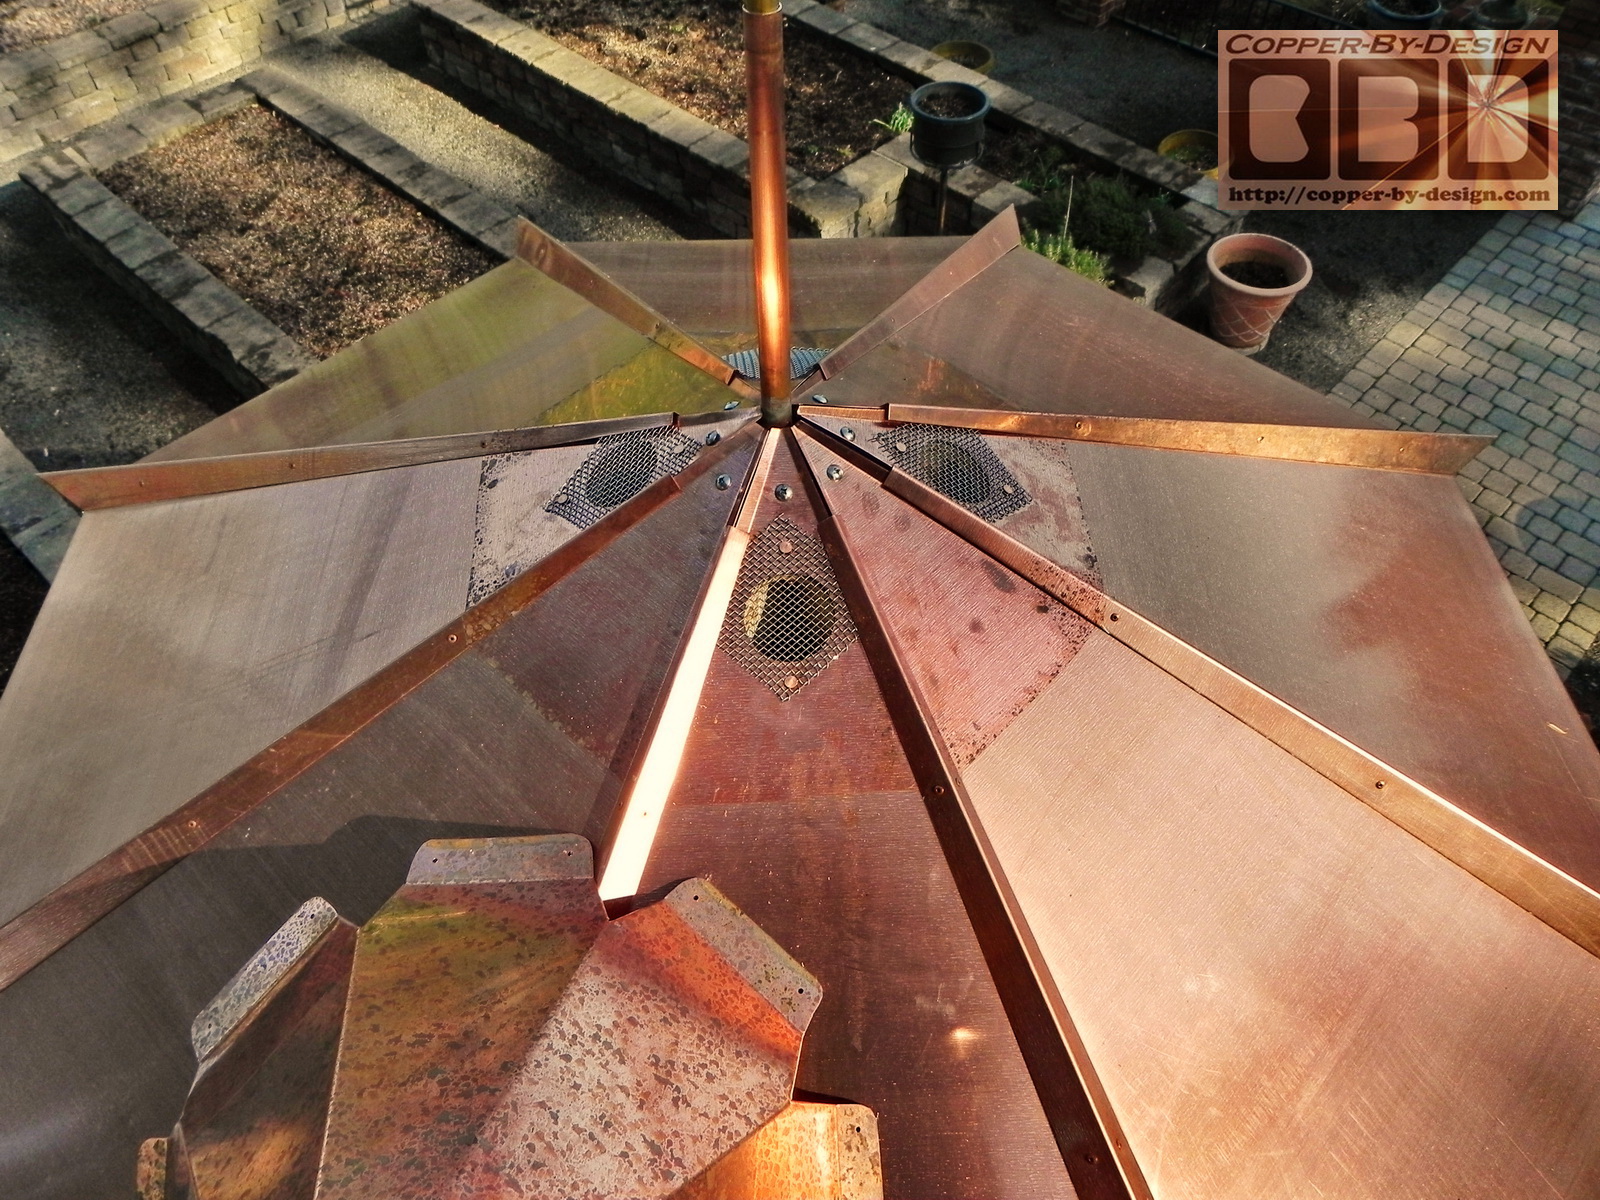
Once the side window framing was completed this
was ready for the 8 copper roof
skins that attach under the eaves with the hip cap metal. The
center cone is to hold the top of the weathervane support pipe.
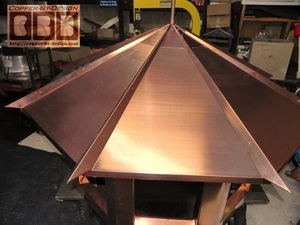 
I had a nice finial here to set in the
support pipe to see what it would look like.
|
|
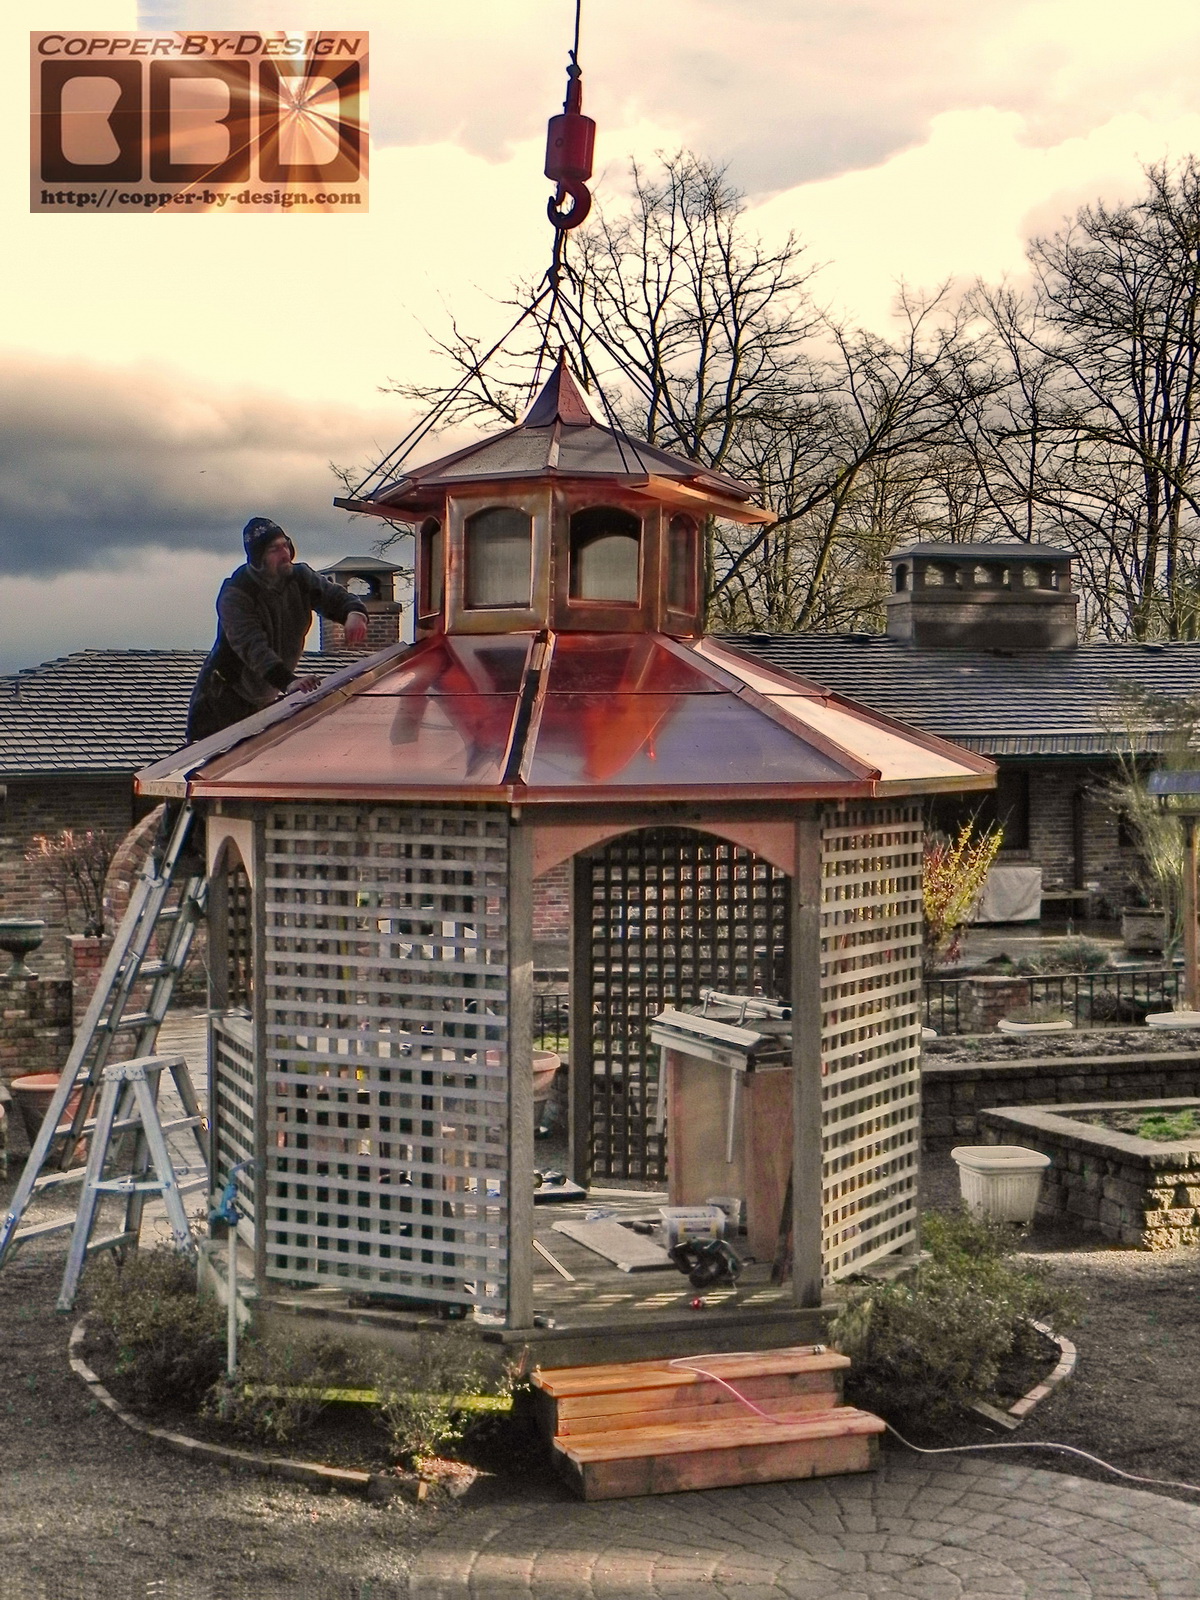
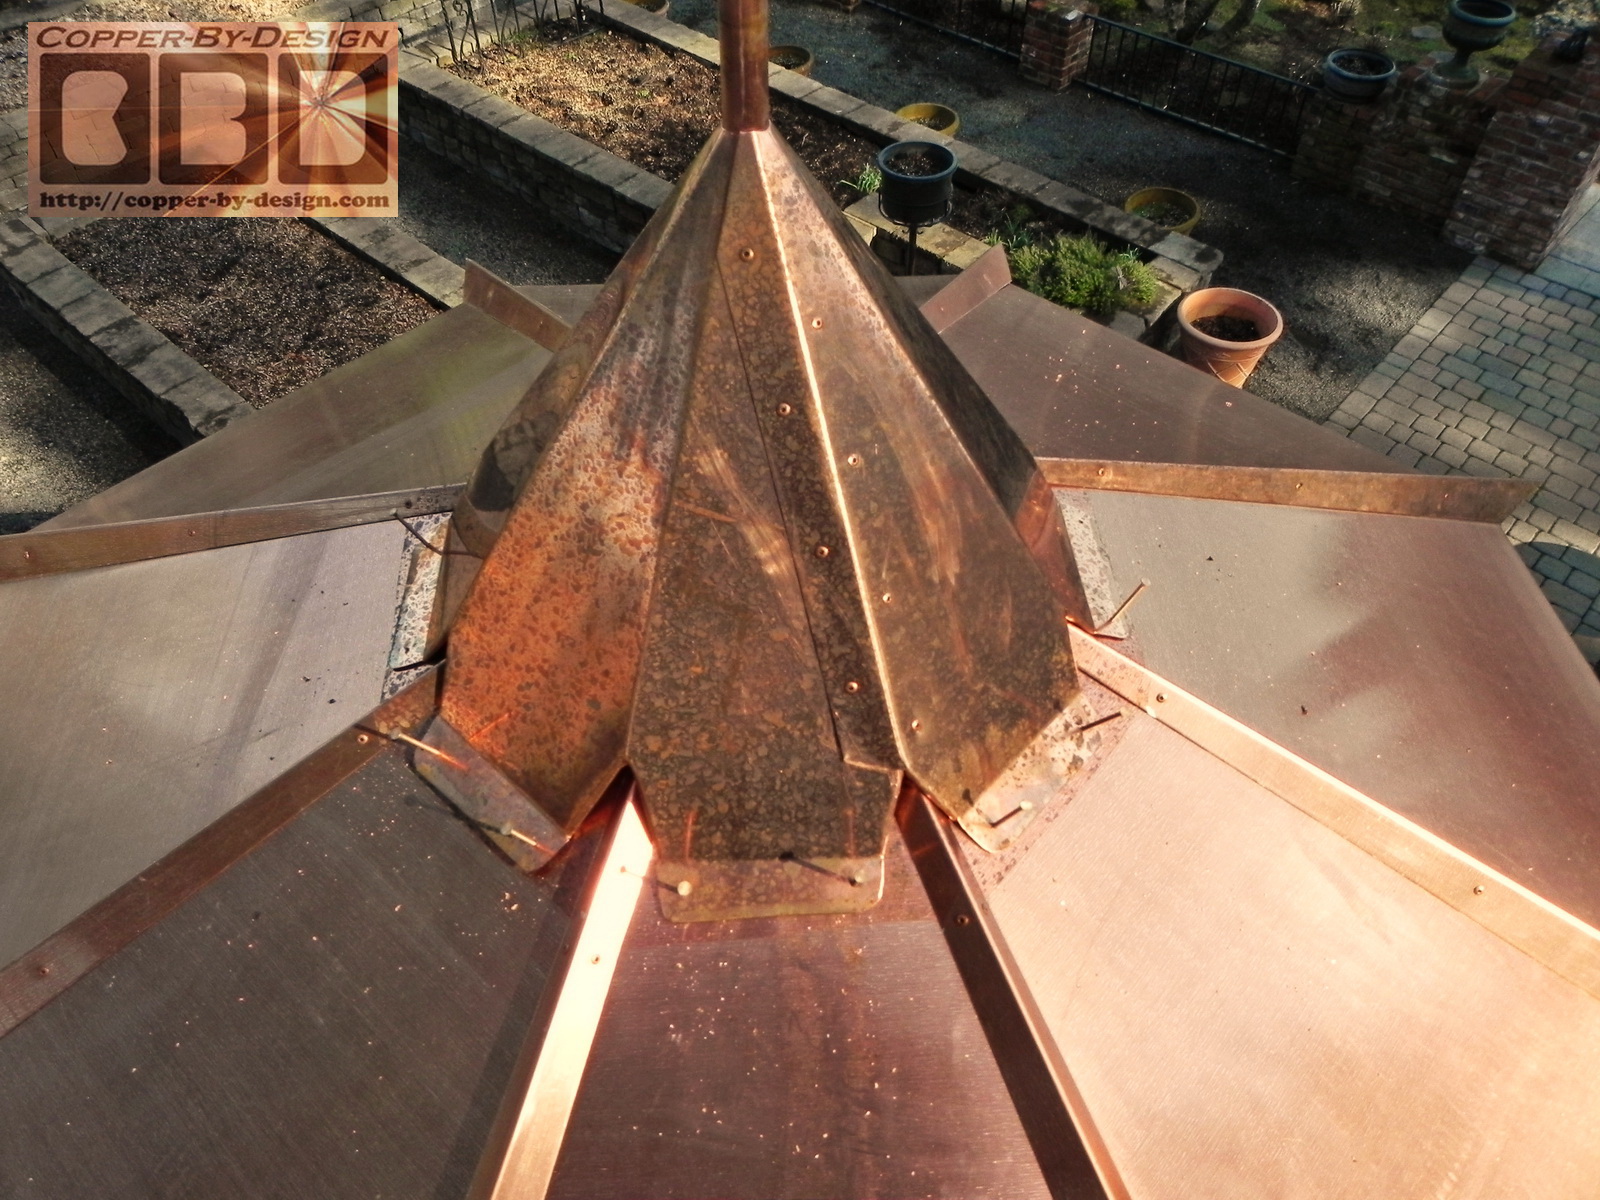
Cupola Lift |
|
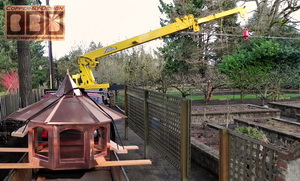 
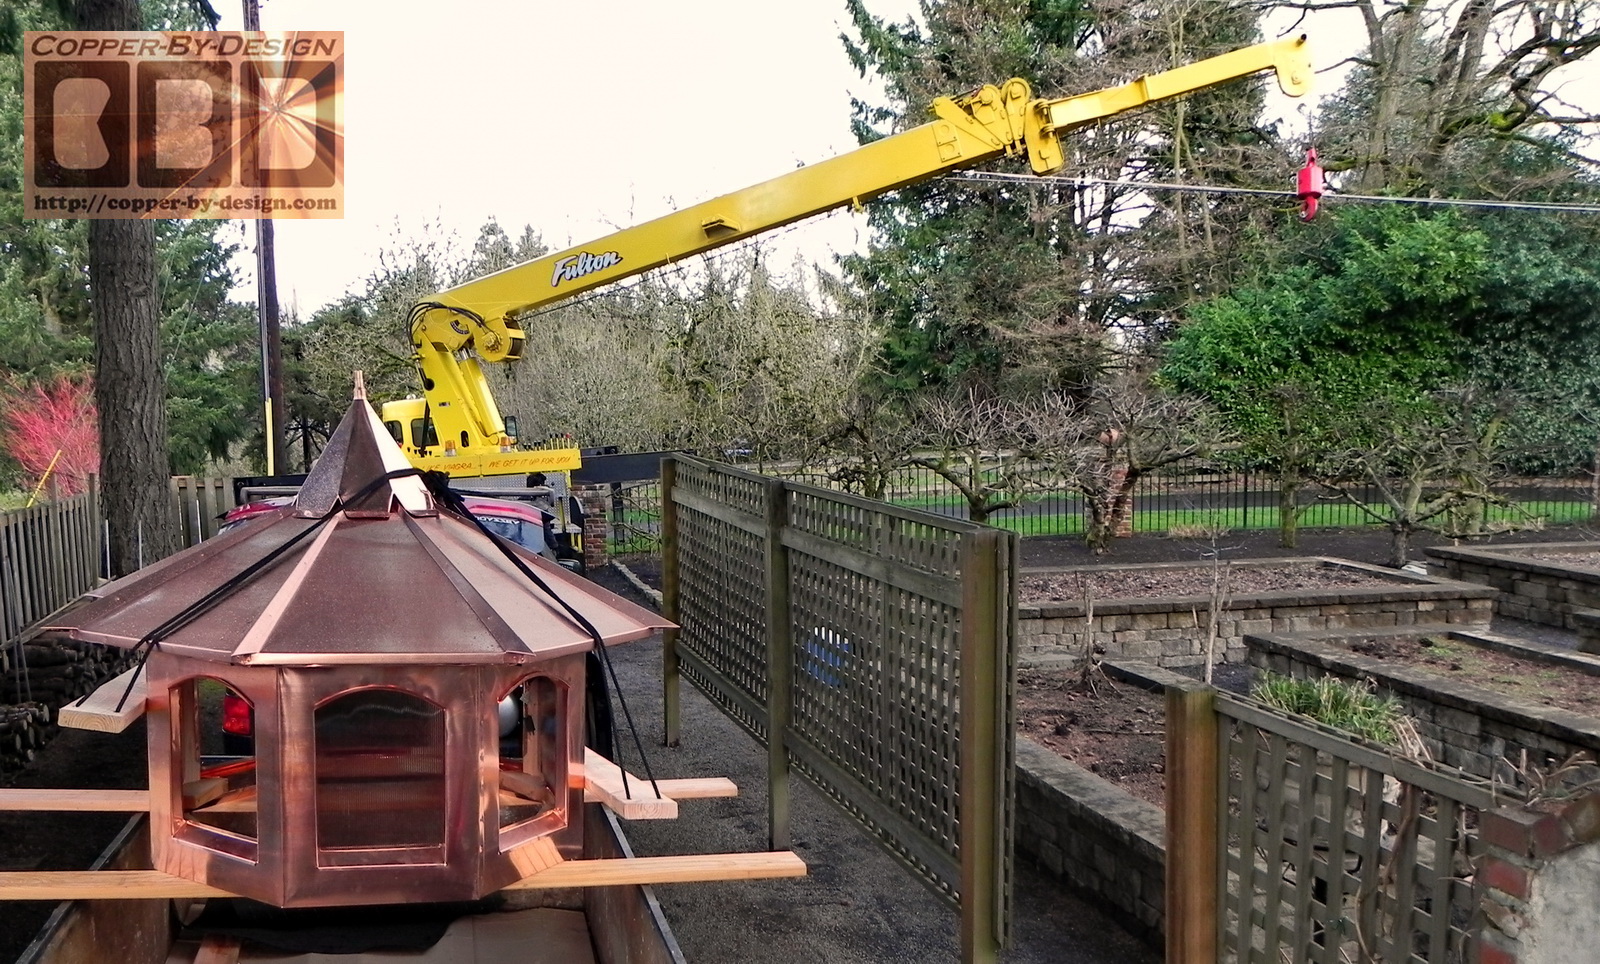
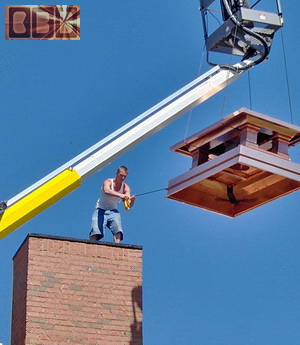
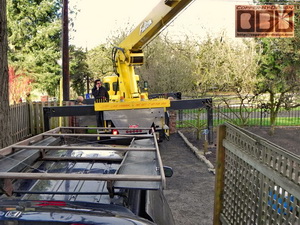
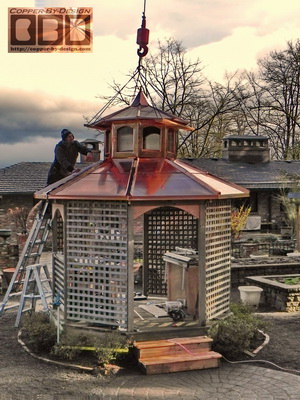
When the crane arrived I was still working on
the last piece of copper sheeting over the gazebo, but got it
done before he was set up. I had the cupola all set over my
trailer with the lift boards and ropes ready for his hook.
 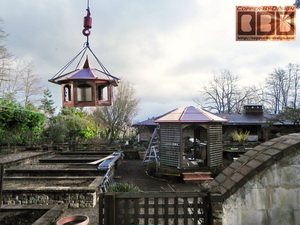
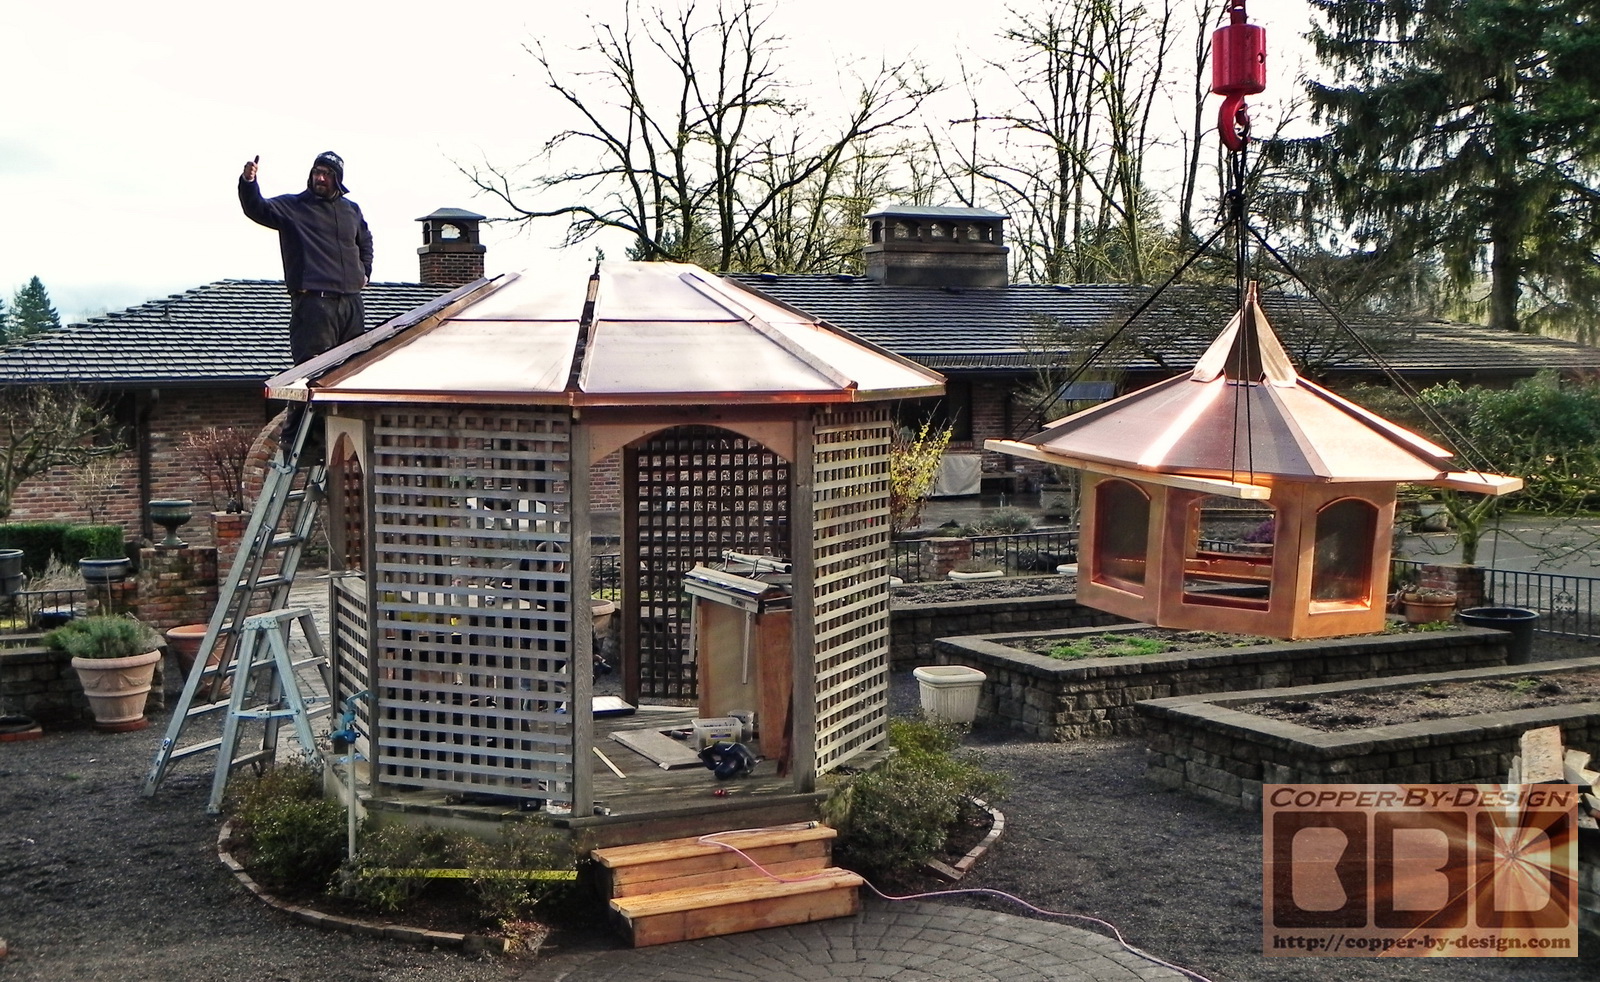
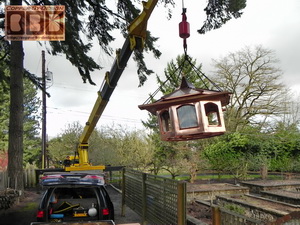
It only took a few minutes to get this set
over the gazebo. It's amazing what can be done with the right
equipment. He has a $200 minimum charge, but it still is a
bargain compared to what it would have taken us to wrestle this
300# cupola up there manually. It was enough of a struggle
getting it out of the shop and into the trailer.
 
The hip cap metal is not yet on. The cupola
needed to be centered and bolted down with the 6" lag screws
before they can be custom fitted and sealed to the corners of
the cupola.
|
|
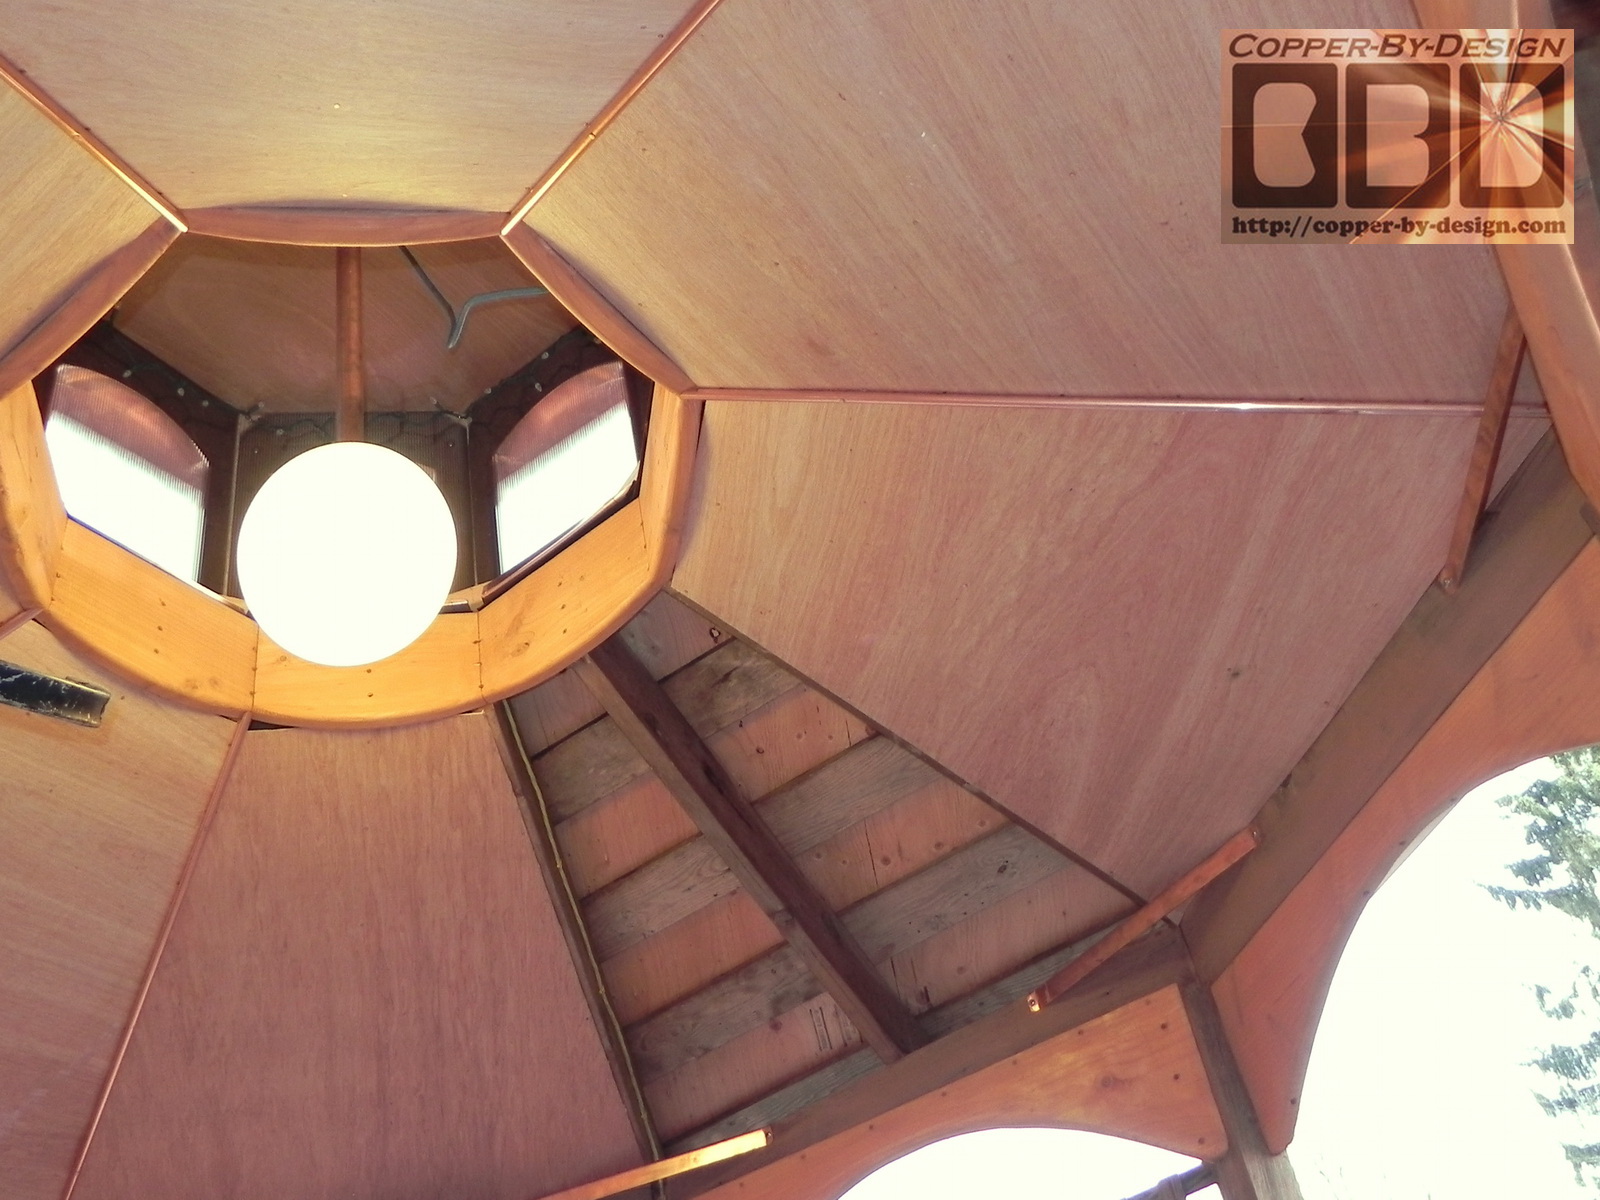
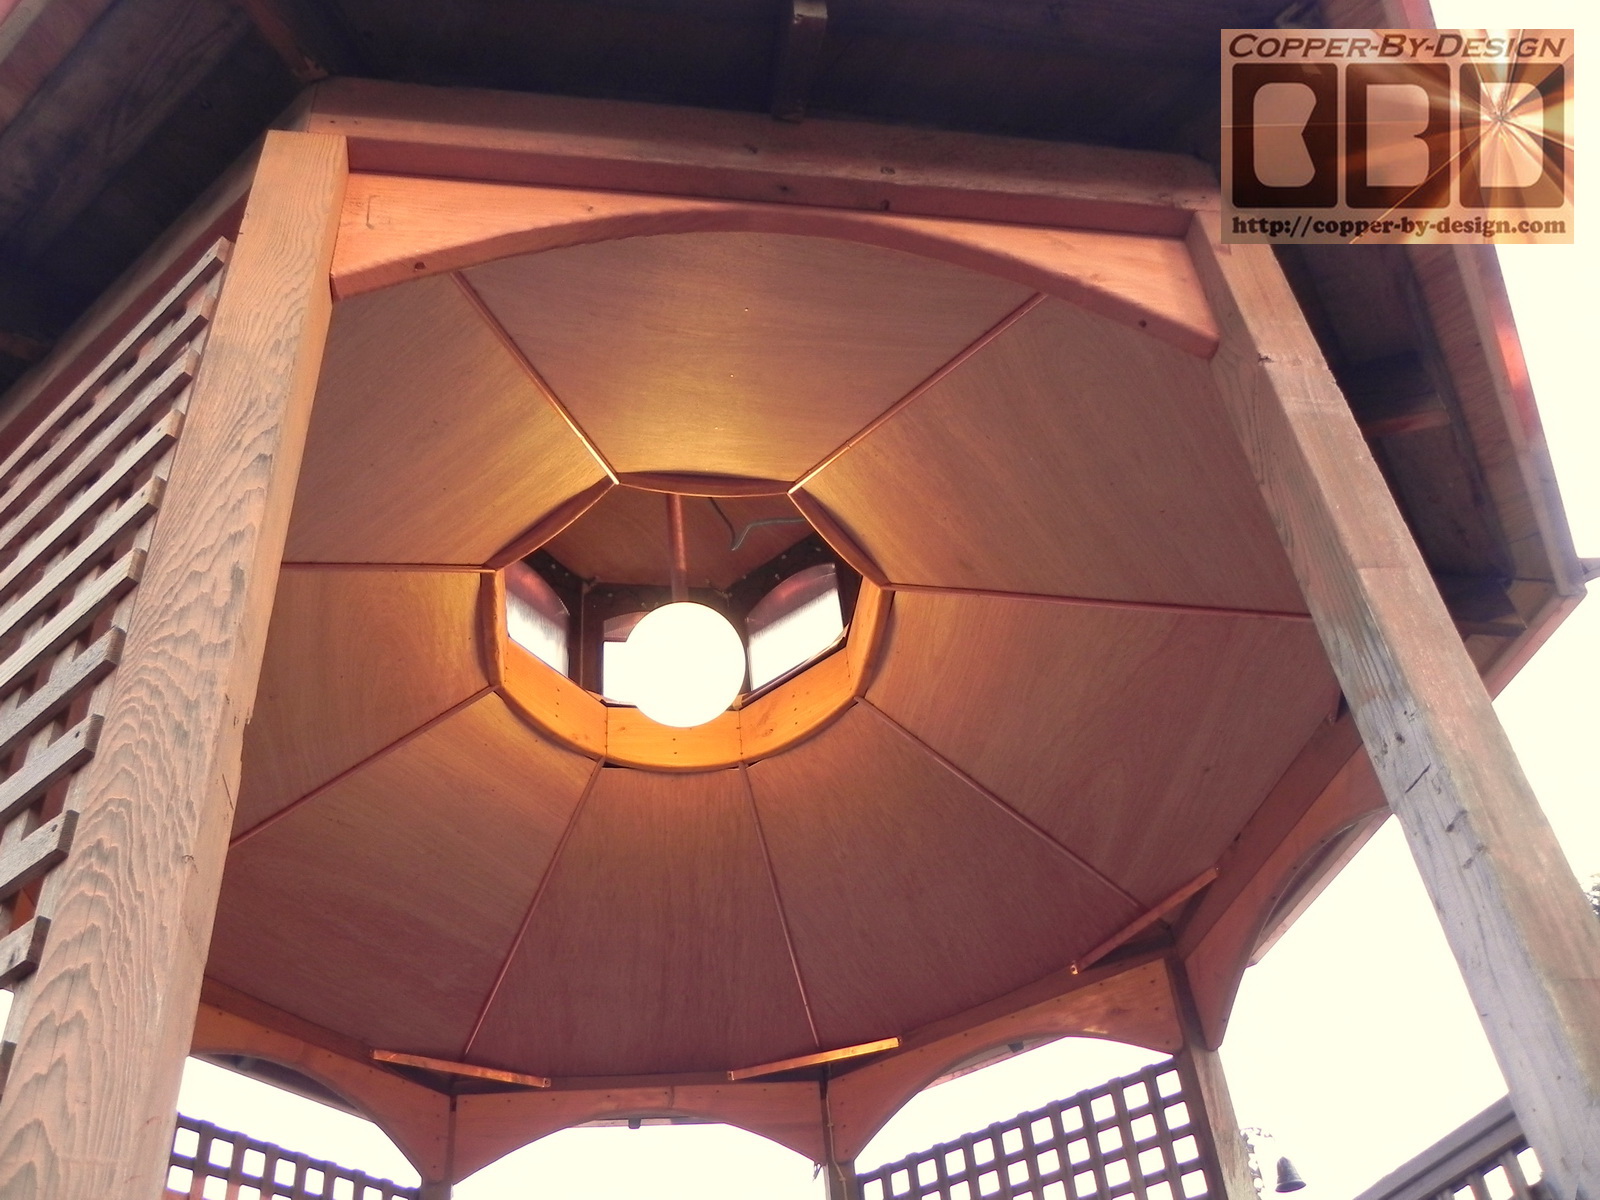
Soffit Fitting and Electrical |
|
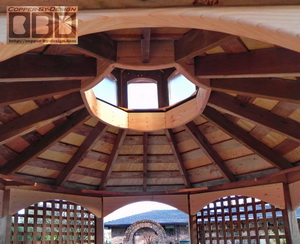 
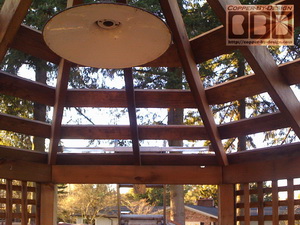
The inside of the gazebo was a bit rustic
looking still, which is fine, but I gave the clients the option
to have me install a nice hardwood plywood soffit up inside. I
knew with all the odd angles for each side I was not going to
get these in perfectly, so I decided to add this 1/2" copper
piping over the seams for a very clean look.
 
I was able to hide most of the new wiring
under the floor and up in the rafters above the new soffit. The
soft LED lights in the cupola are on a timer that turns them on
at dusk and off 6 hours later. It also has a wireless remote
control , as well as a separate light switch down below. The 12"
globe has a 24 watt florescent bulb that equals a 150 watt
incandescent, and has it's own switch near the entry.
|
|
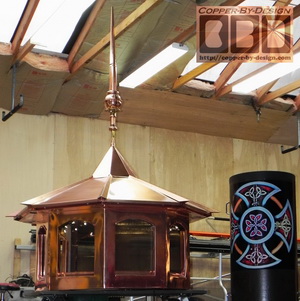
Weathervane Mount |
|
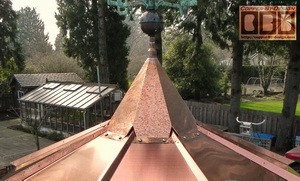
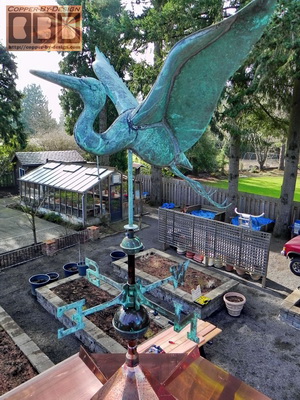
The support pipe in the top of the cupola had
to be set vertically level, so their Blue Heron shaped
weathervane would rotate properly in the wind before the steeple
cone could be locked down. You can see the 2.5" wide vent holes
in the roof of the cupola to release the heat that would build
up inside in the Summer months. It is screened with stainless
steel mesh.
|
 |
 |
|
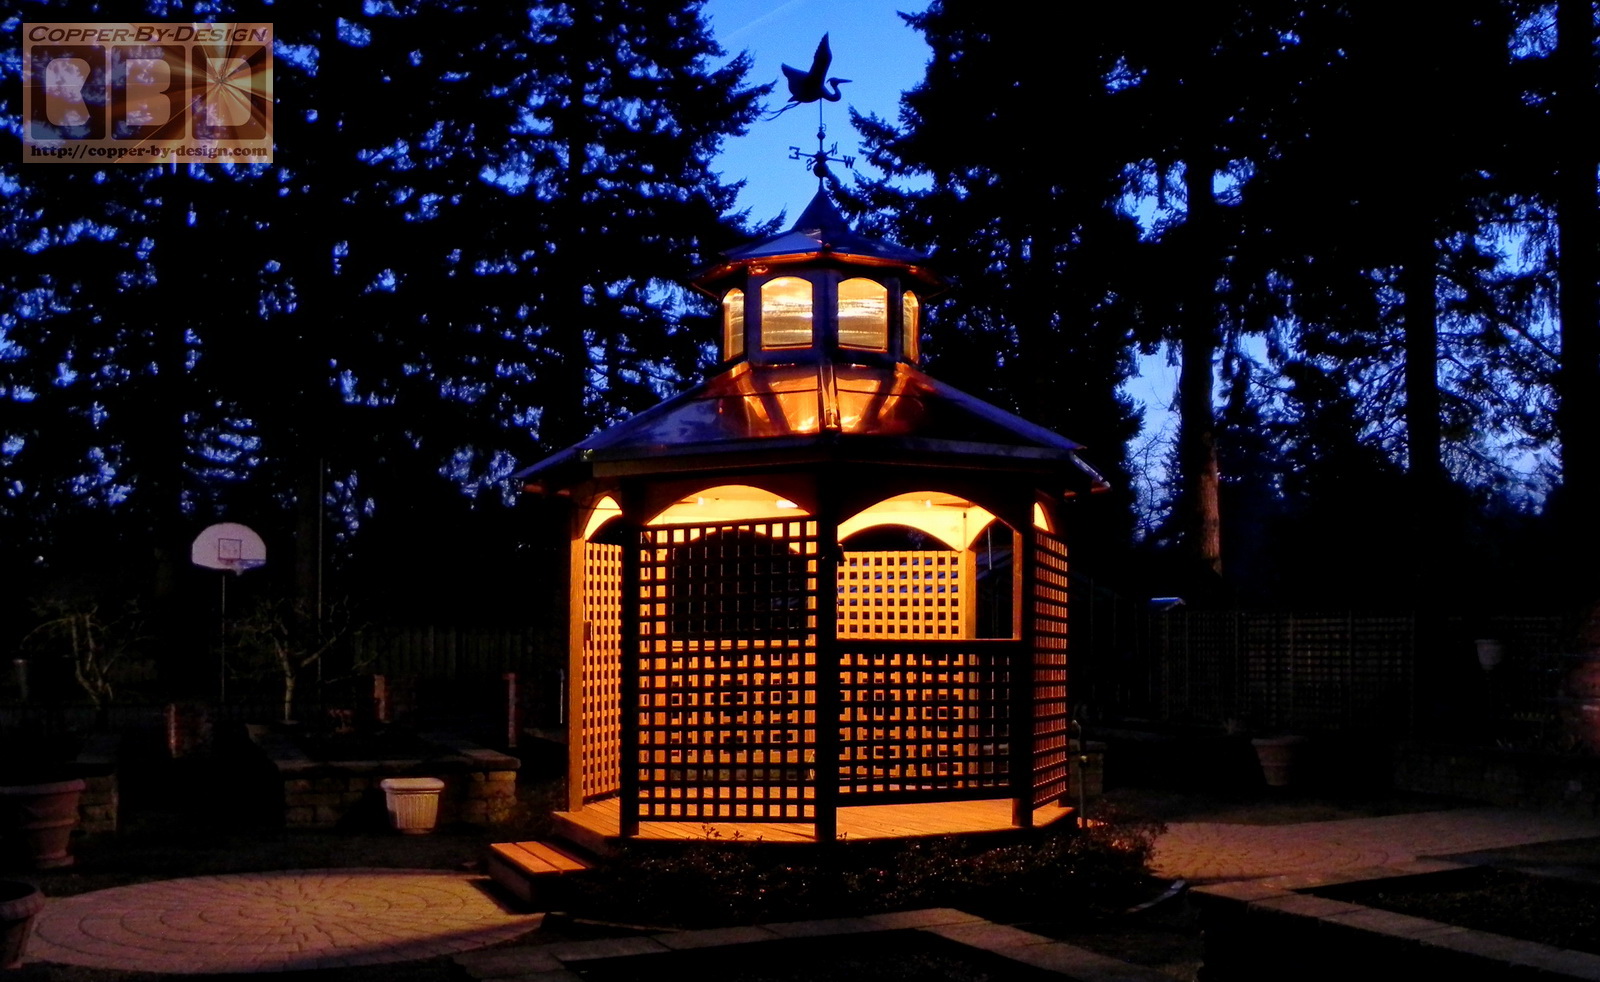
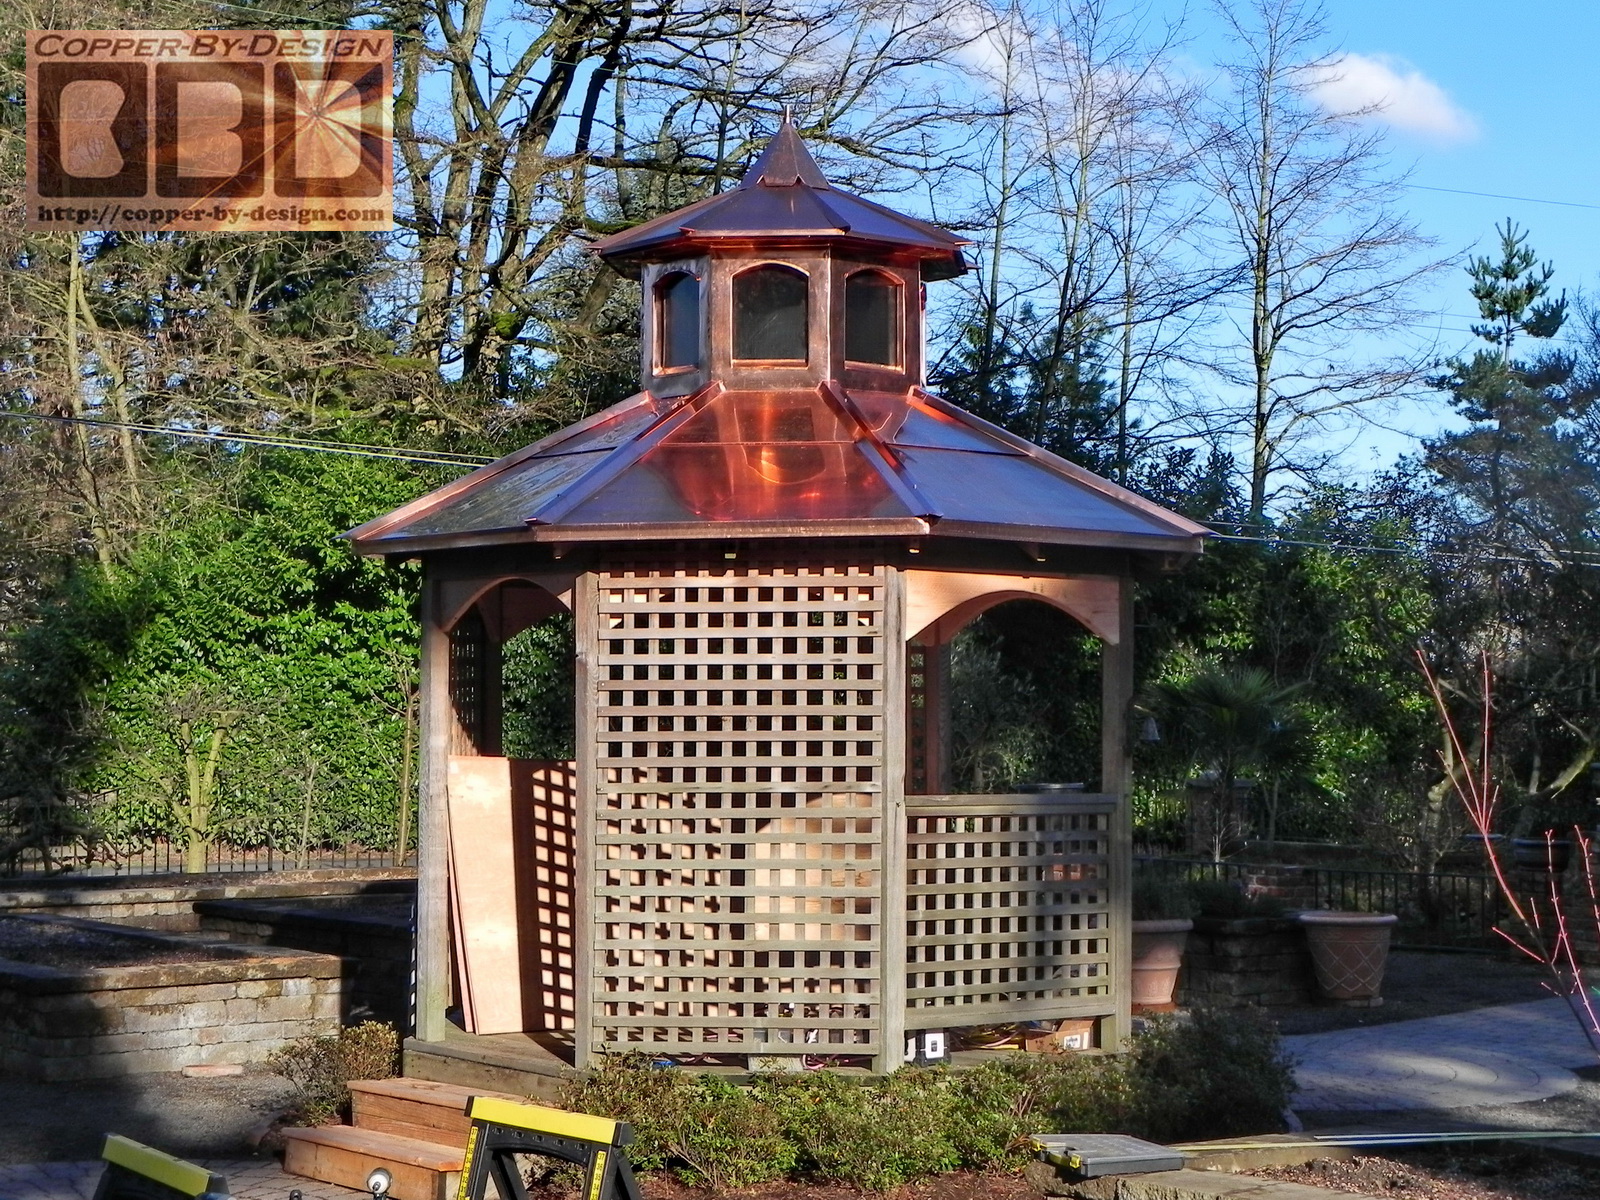
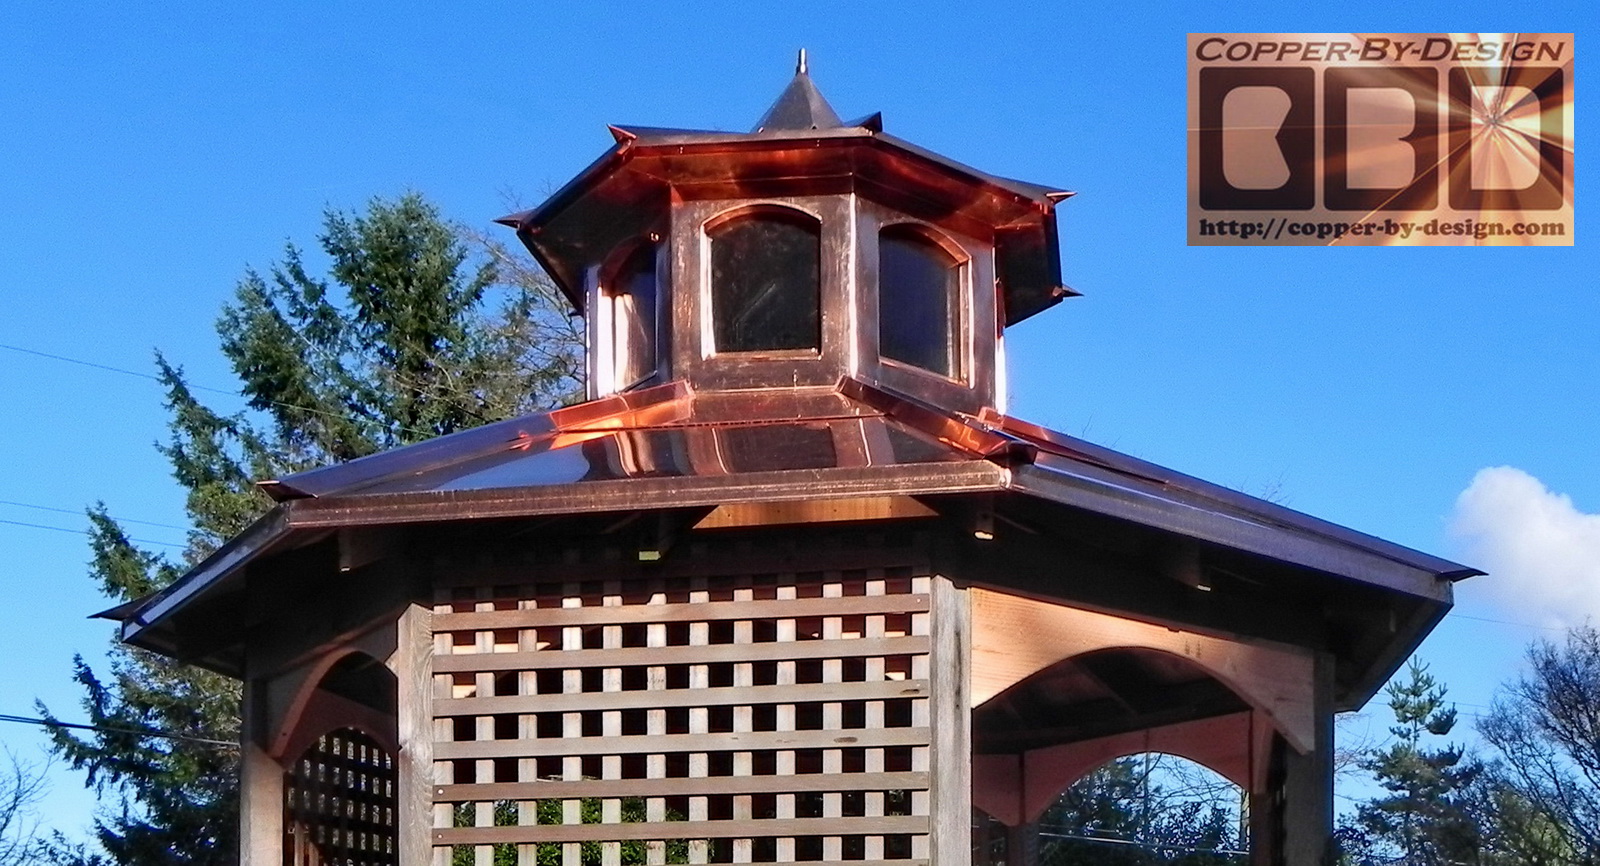
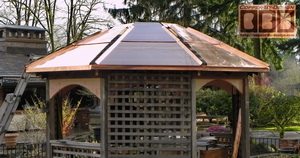
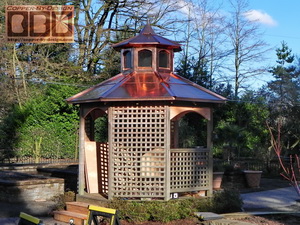
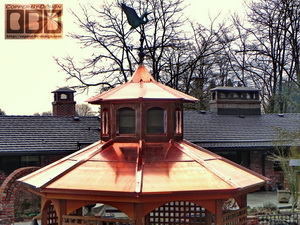
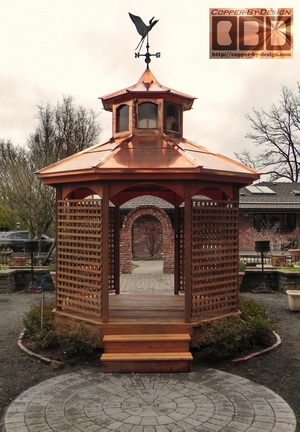
The Finished Look |
 |
 |
|
Cost Breakdown |
|
I had given them a substantial discount for this being a large
project and I was rather excited to restore this unique arched
version gazebo w/cupola.
I kept track of the weights for these different parts.
The weights and cost
breakdown of these pieces are as follows.
Lighted Cupola was 290# in all:
-
$800 for 166.3# wood frame inside: 70 ln'
2x4, 23 ln' 2x6 boards, 53 sq' plywood, 15.2# felt paper,
and
-
$120 for 5.8# = 20.75 sq' tinted twin wall
polycarbonate plastic windows
-
+ $150 for light sensor/timer w5 sets of 50
LED lights
-
+ $1,954 for
97.7# of 20oz copper sheet metal = 78.16 sq'
X $25
-
+ $125 for weathervane/finial mount on
top
-
+ $200 for the crane
operator
-
+ $150 for our part with installation
securing it to the gazebo
-
= $3,499 sub total for the lighted
cupola covered in 20oz copper
Gazebo Restoration:
-
$1,320 for stripping off the old shake roof, hauling off to the dump, renailing some of the step-sheeting, installing 19/32 CDX plywood cut at custom angles to fit each irregular side attached with 2.5" deck screws, and 30# roof felt.
-
+ $800 for adding 8 custom arch braces
between the main support beams at $100 ea.
-
+ $150 for replacement of the front and rear steps with cedar
34 ln' 2x6 boards
-
+ $400 for cutting the center rafters out and installing this custom center support ring
-
+ $3,240 for 162 sq' of 20oz copper to cover the lower roof w/ raised corner hip covers
-
+ $150 for the new light switch wiring and light fixture
-
+ $150 for the light sensor timer, wiring, and
250 LED lights
-
+ $250 to treat the old wood with
Thompsons oil stain preservative
-
$400 to install the 8 custom panels of 1/4" hardwood plywood soffit inside the roof at $50 each
-
$204 for 36' of 2x6 clear cedar fascia boards
-
= $7,064 sub total for the gazebo restoration, lighting and copper work
$10,563 Grand Total for both parts and labor

|