|
From: Jack Willard <jack_willard@hotmail.c*m>
Subject: Chimney Received
Date: Thu, 30 Aug 2007
David,
Sorry about that phone call
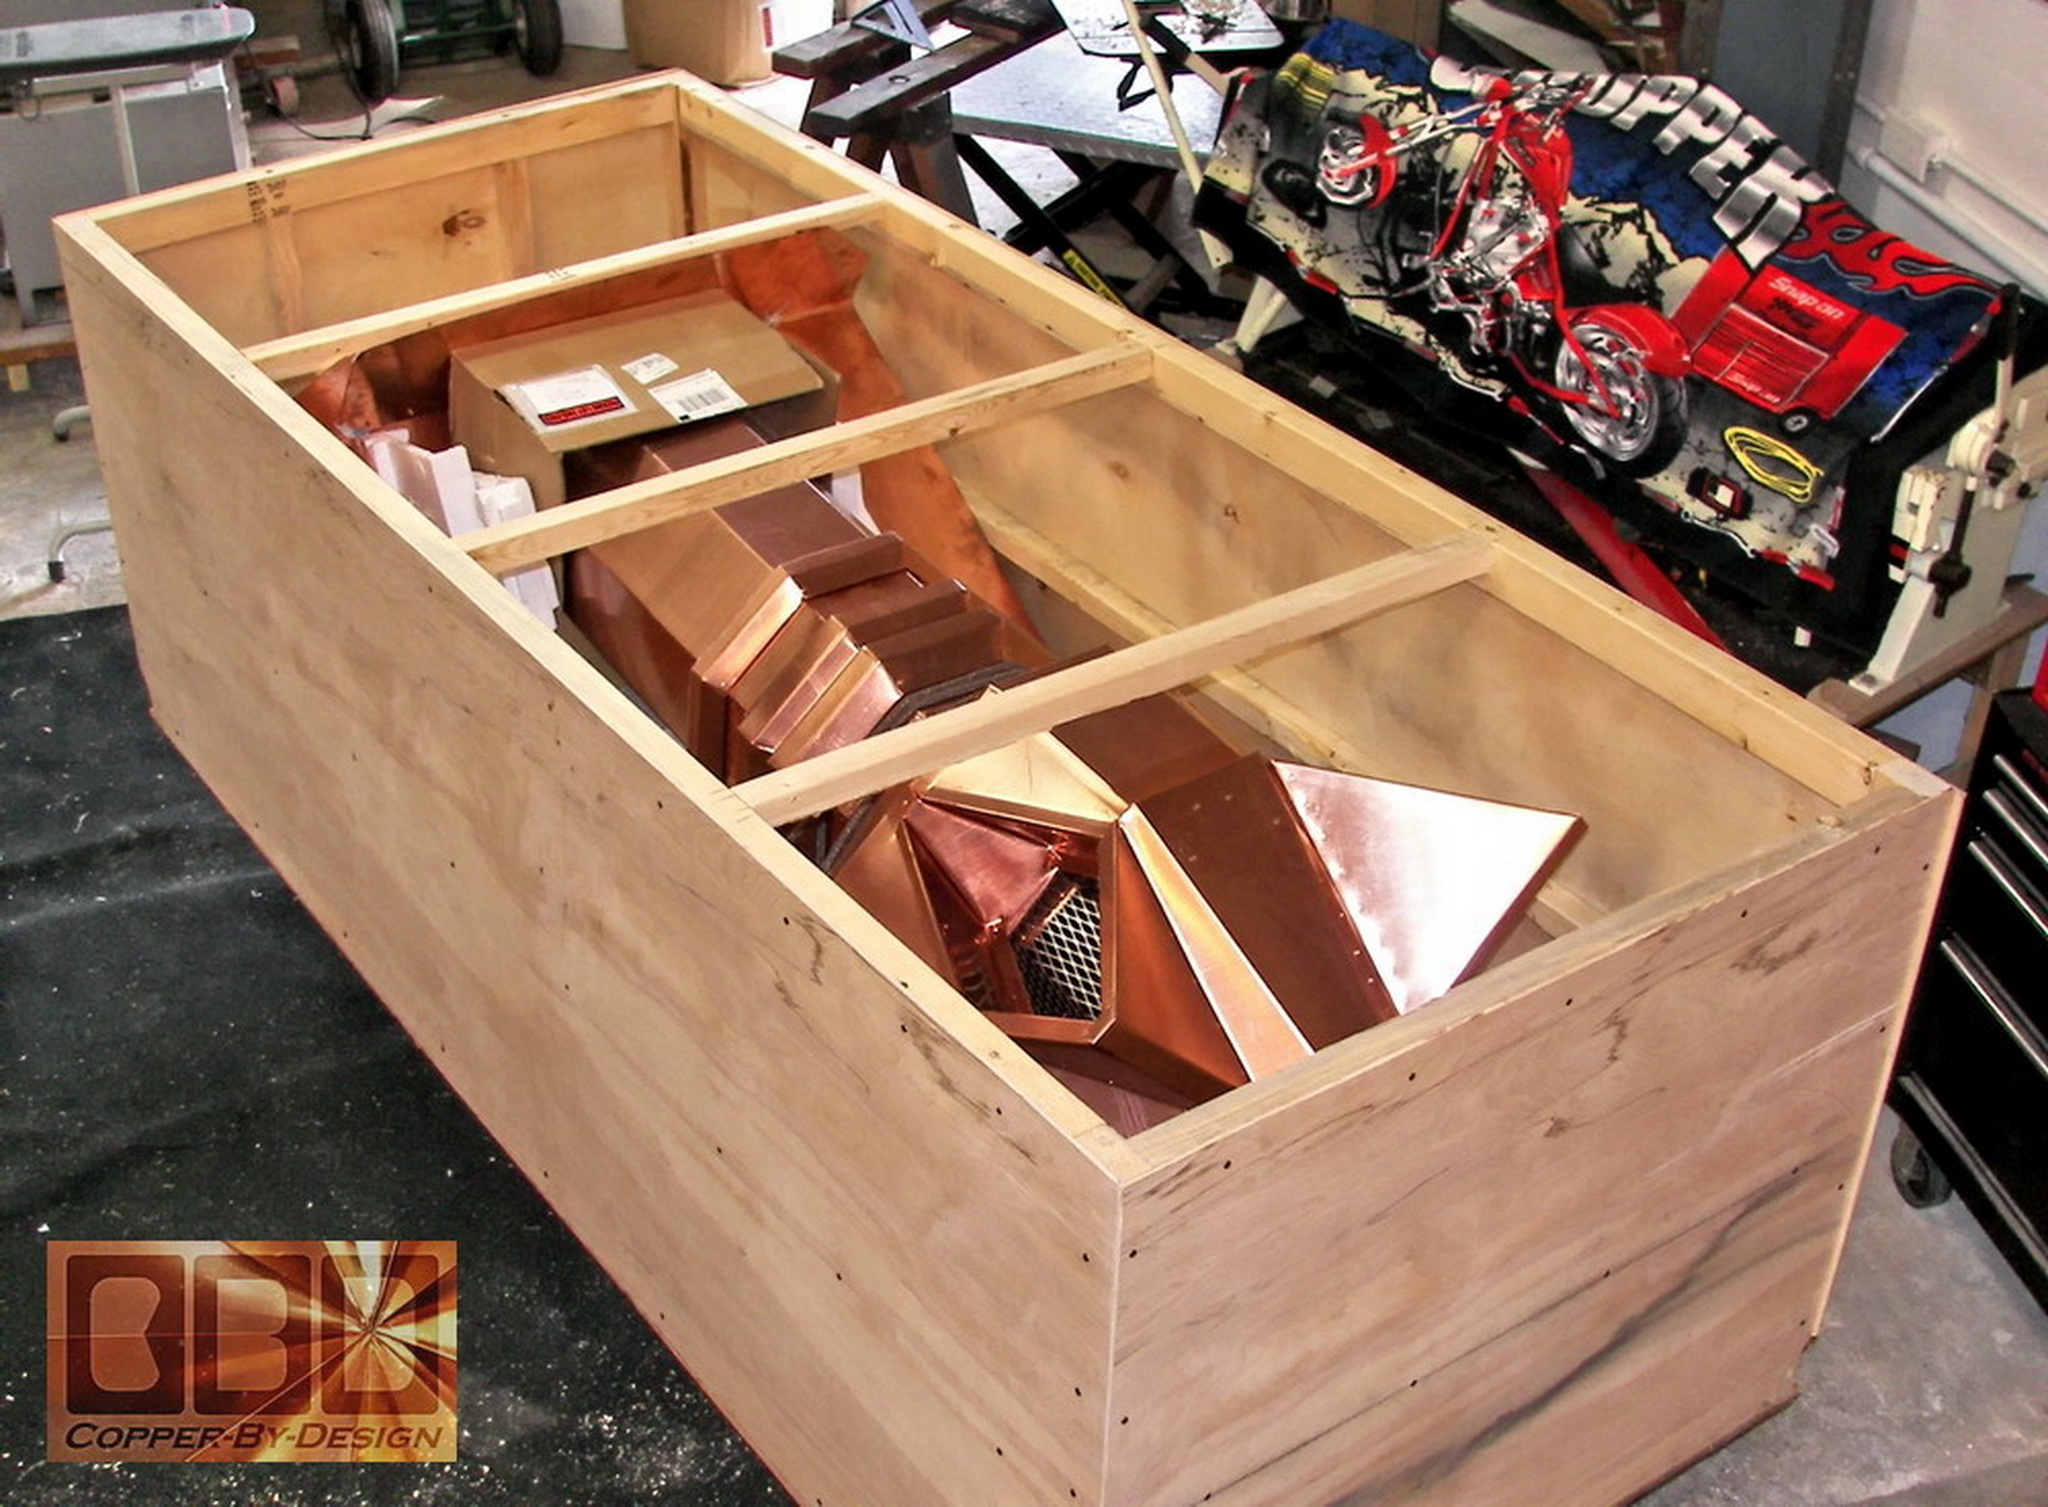
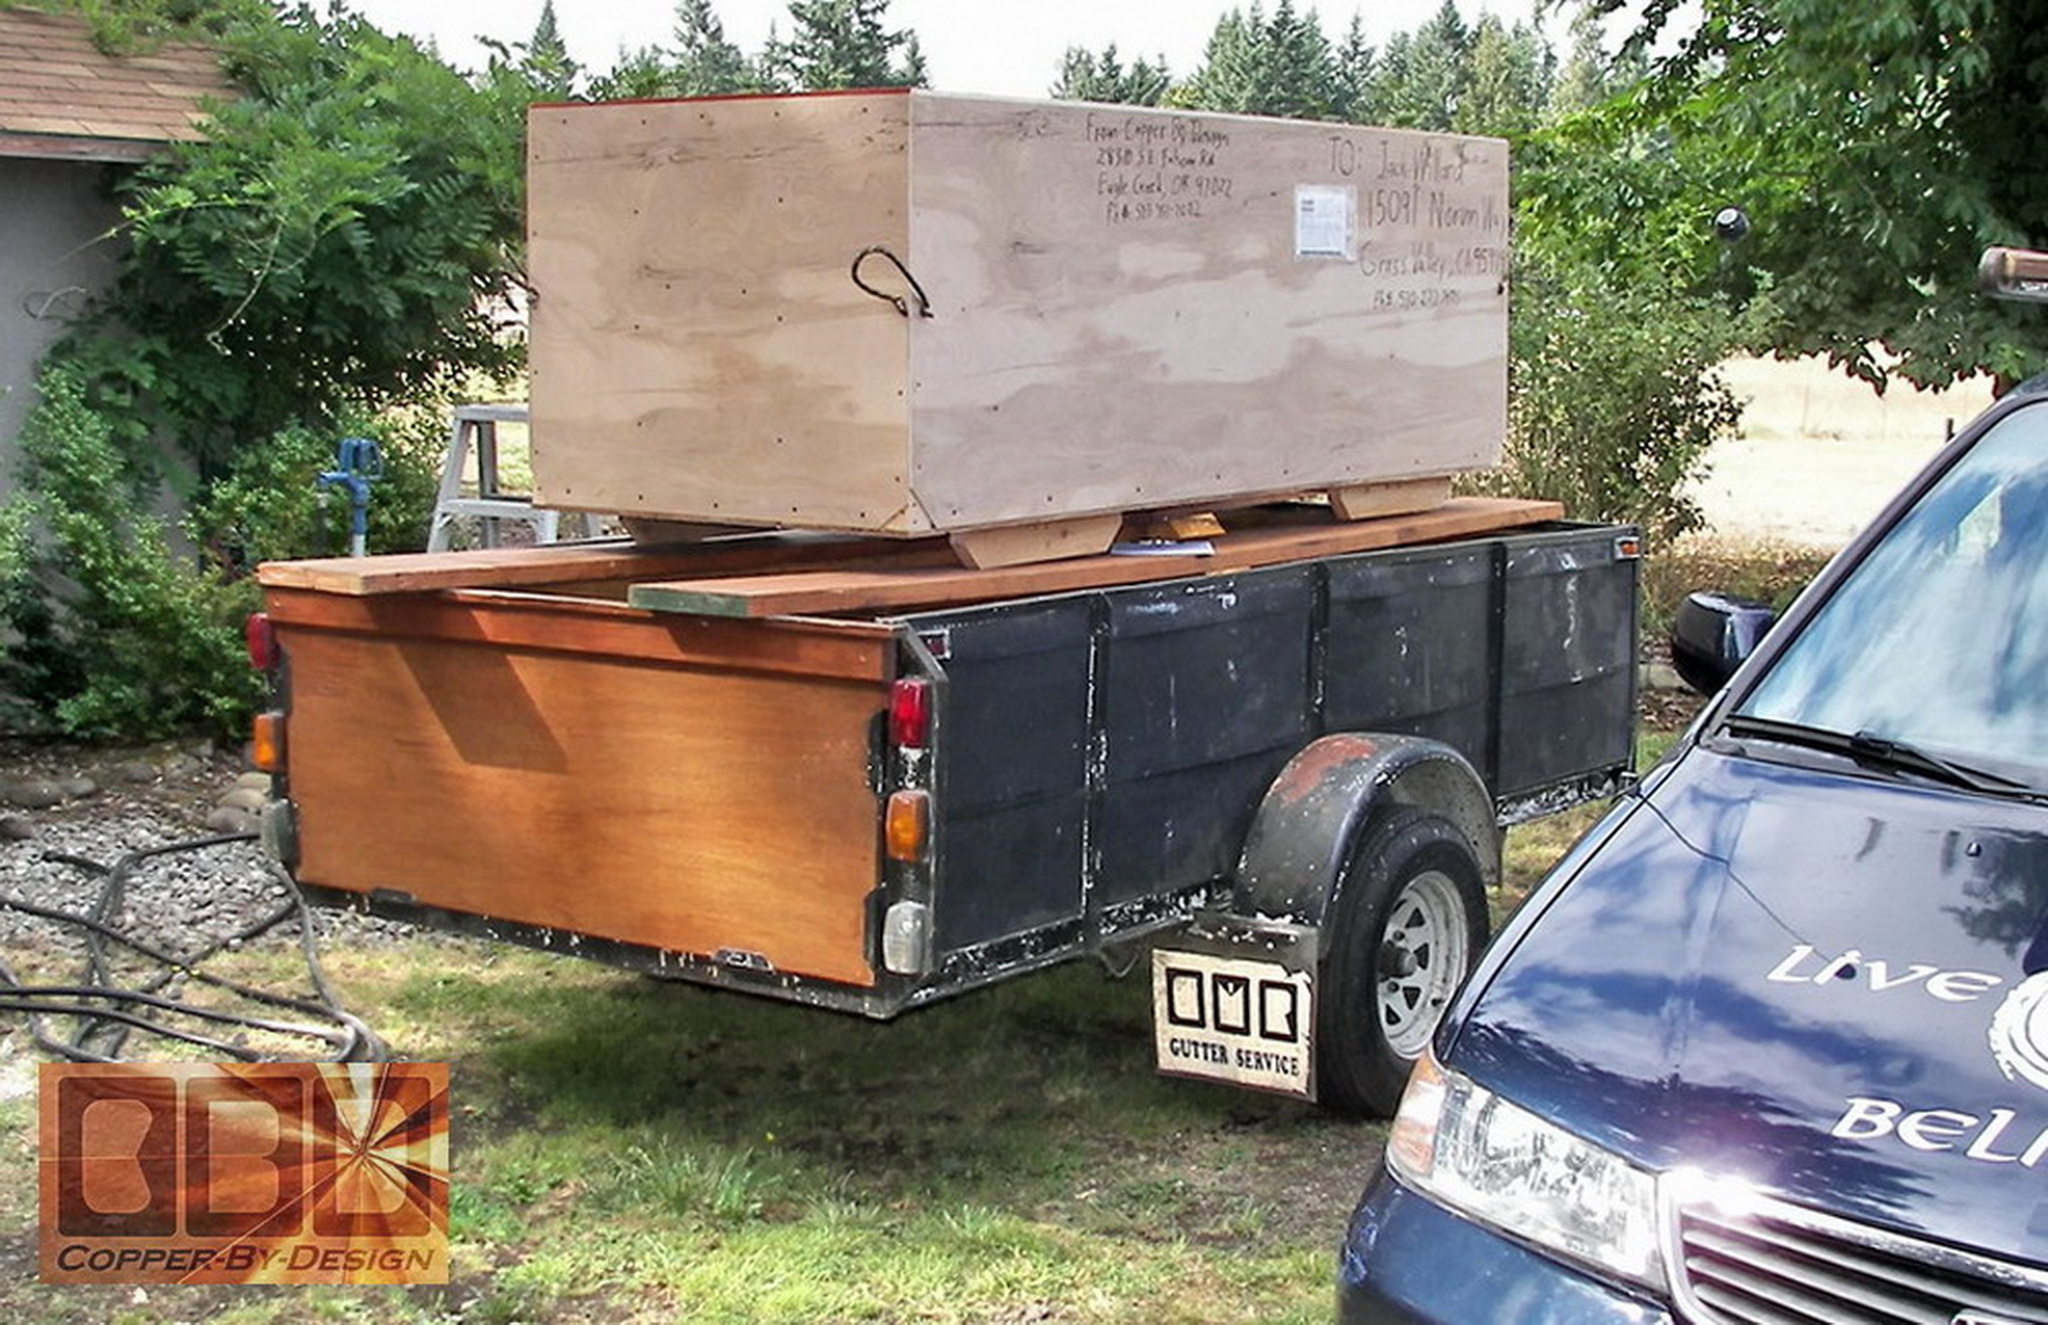
re: The Shipper. It turns out that it was a good thing I took the
day off yesterday to be home when the shipment arrived. They sent
it on a tractor-trailer and there was no way they could deliver
it to the house. A bobtail truck is no problem. But there is no
way to turn around a tractor-trailer. There was no other choice
than to have it taken to Kilroy's Towing where my wife Lynn works.
Kent Kilroy was nice enough to bring it back to our shop building
in his open pickup truck.
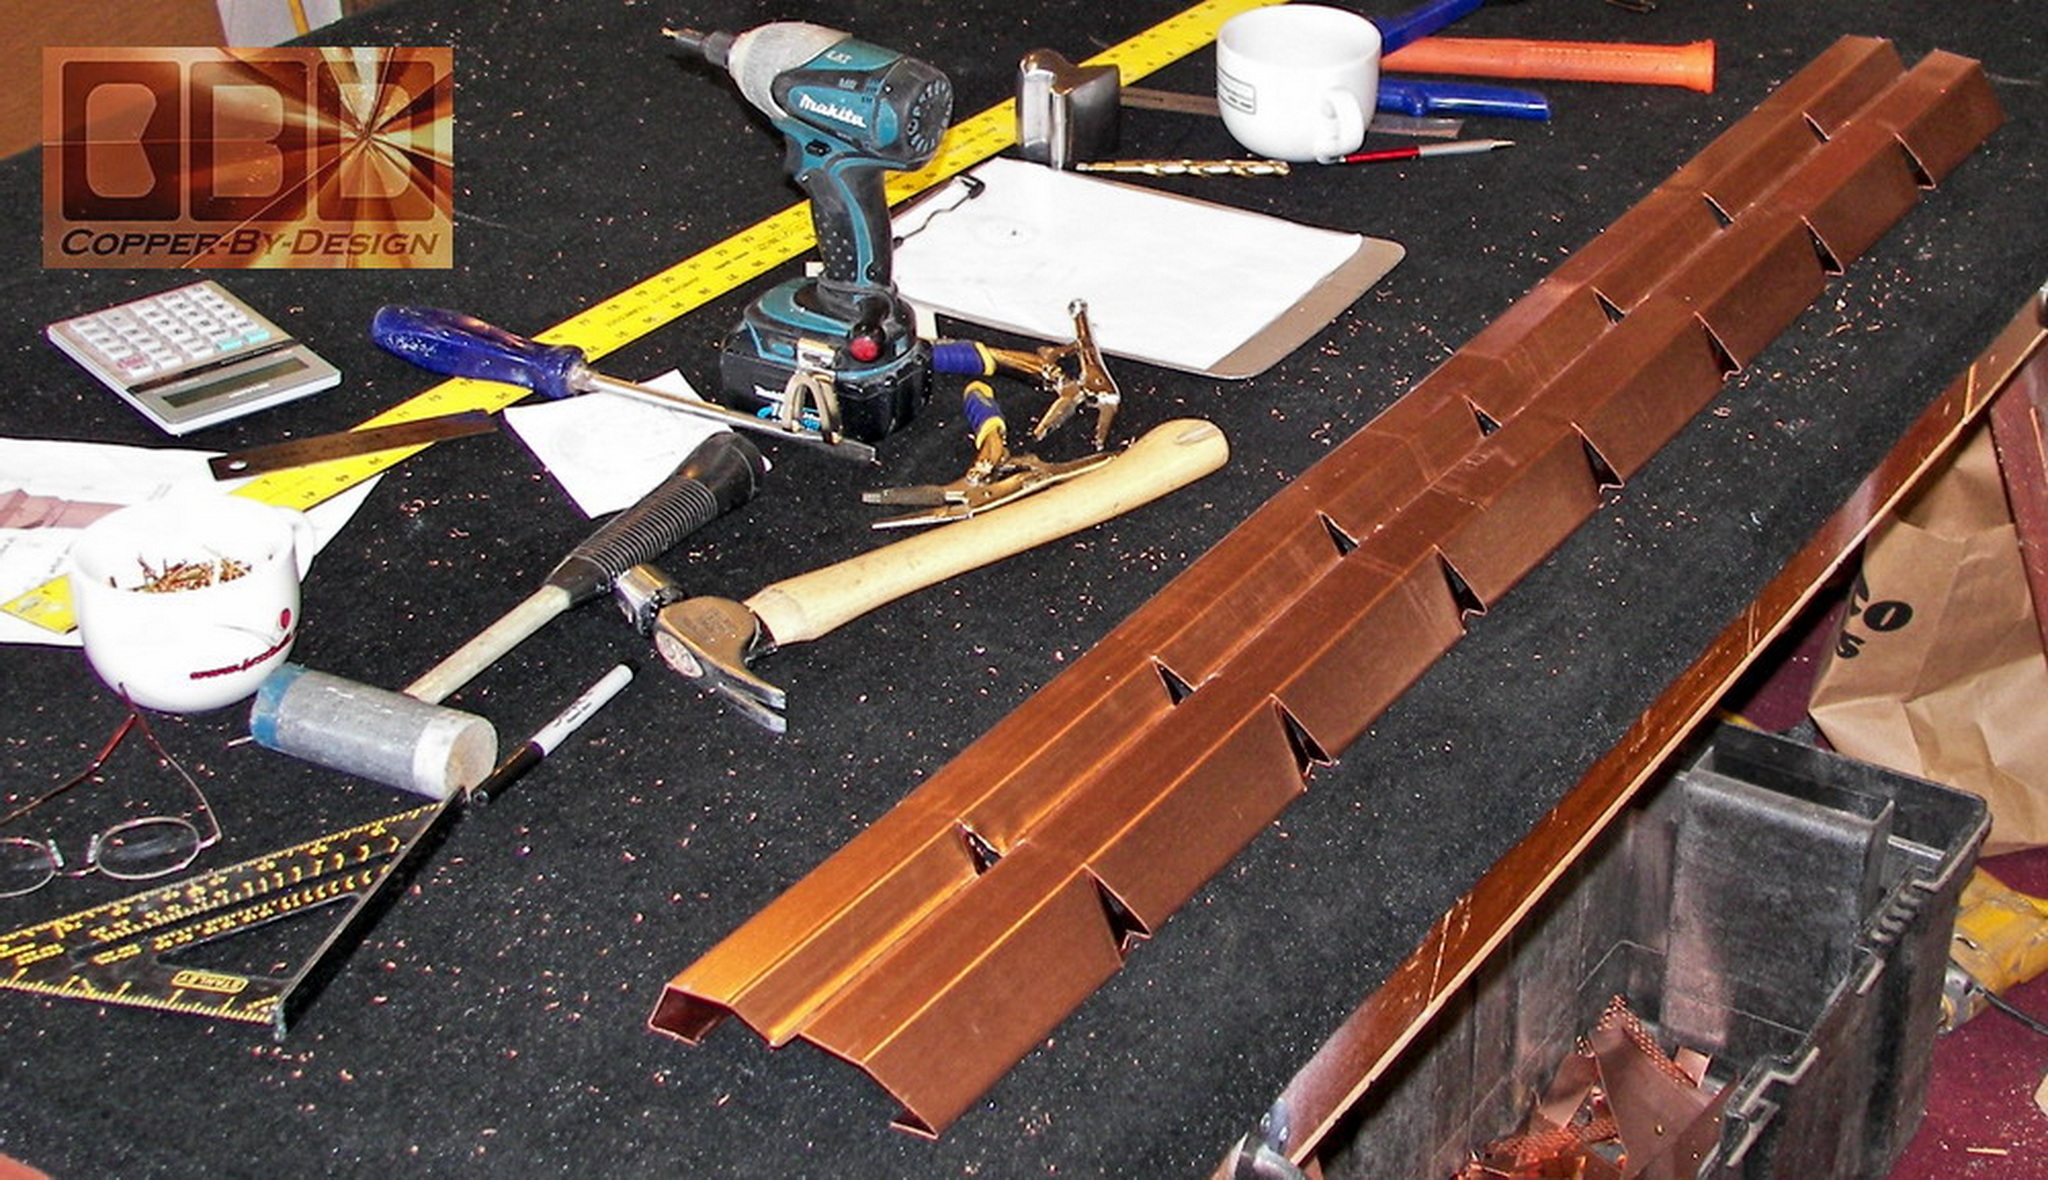
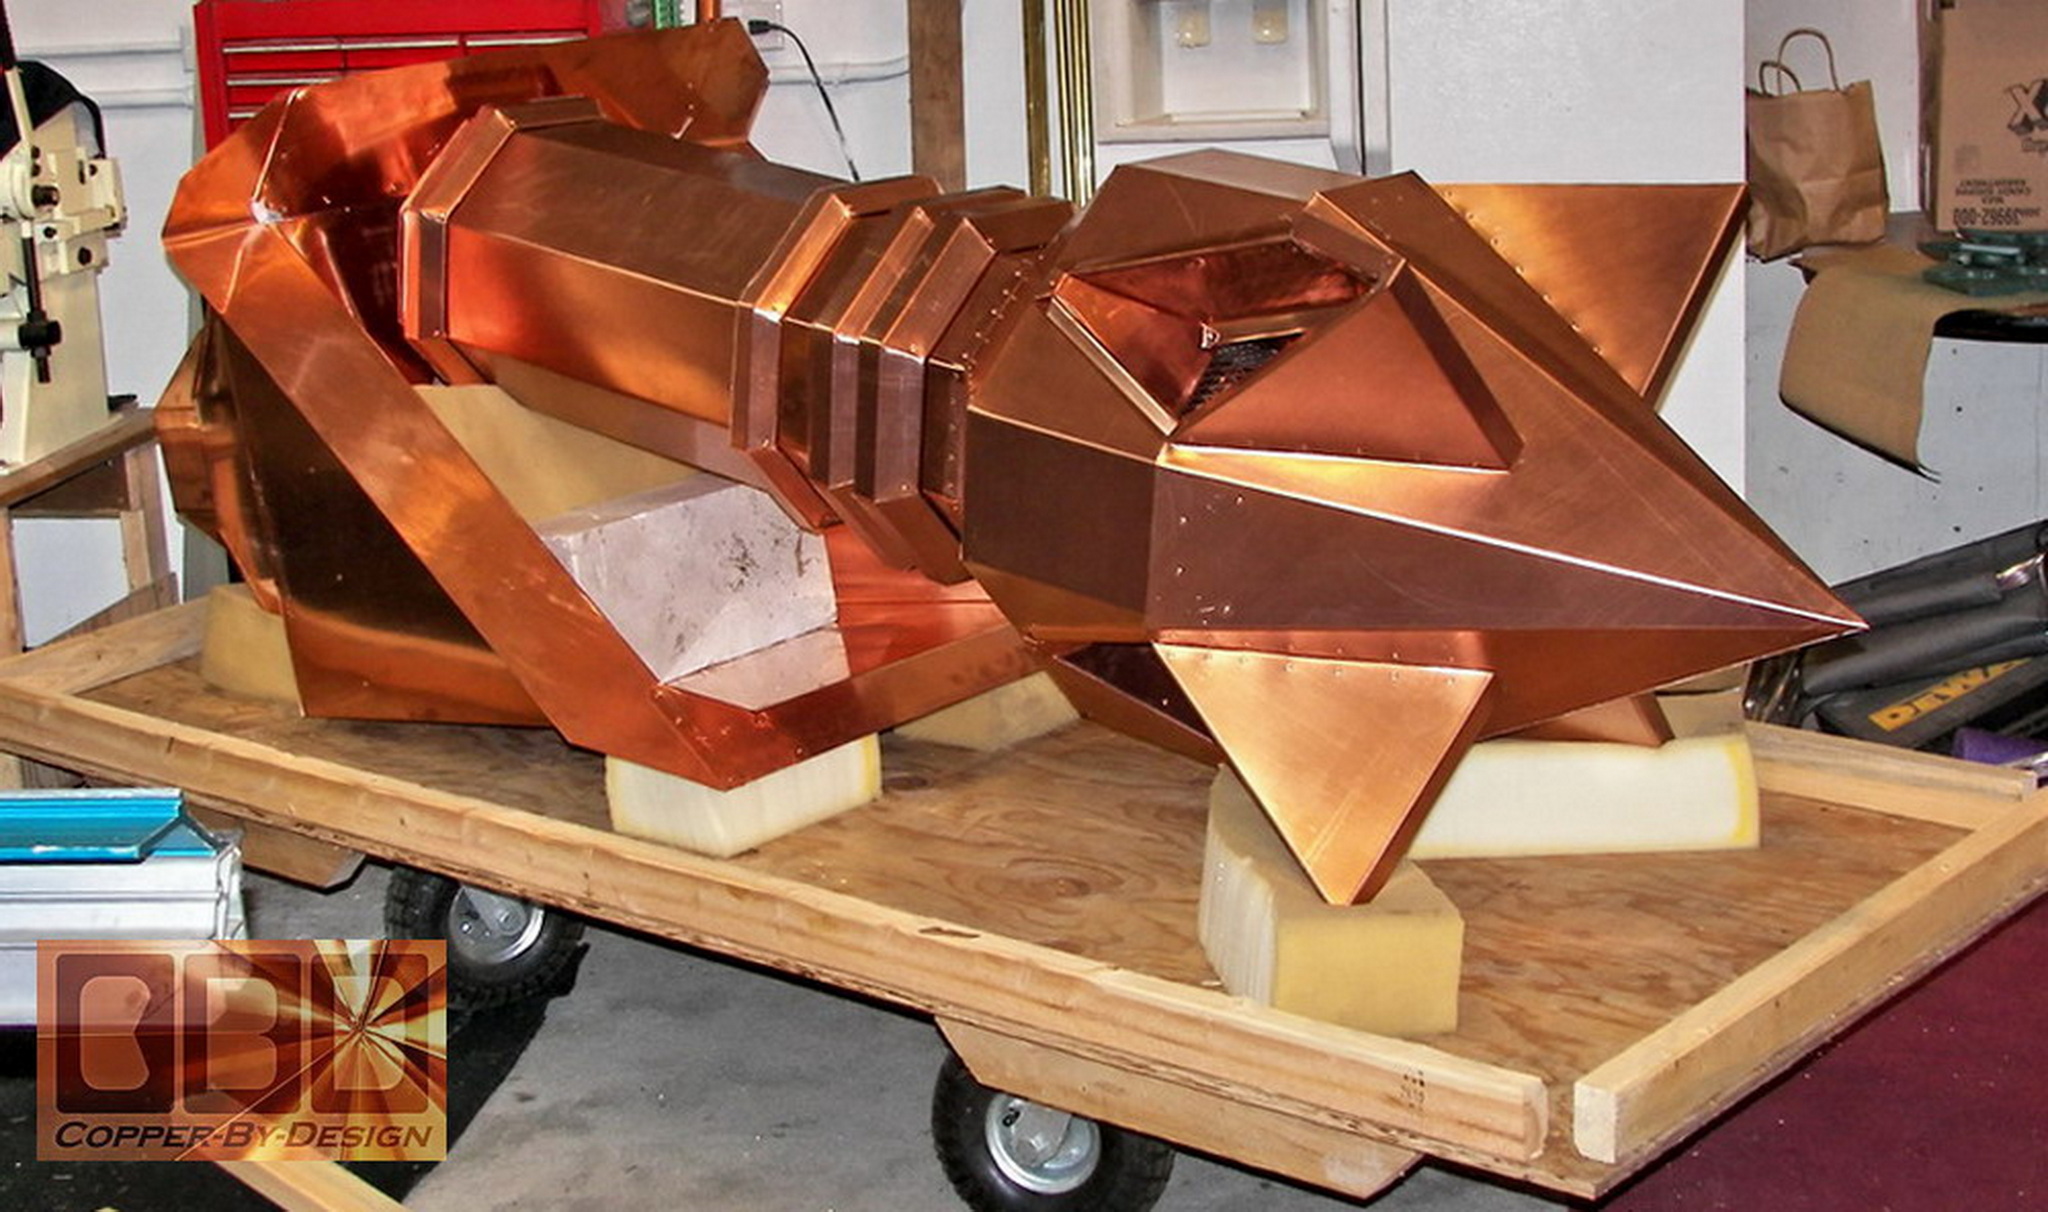
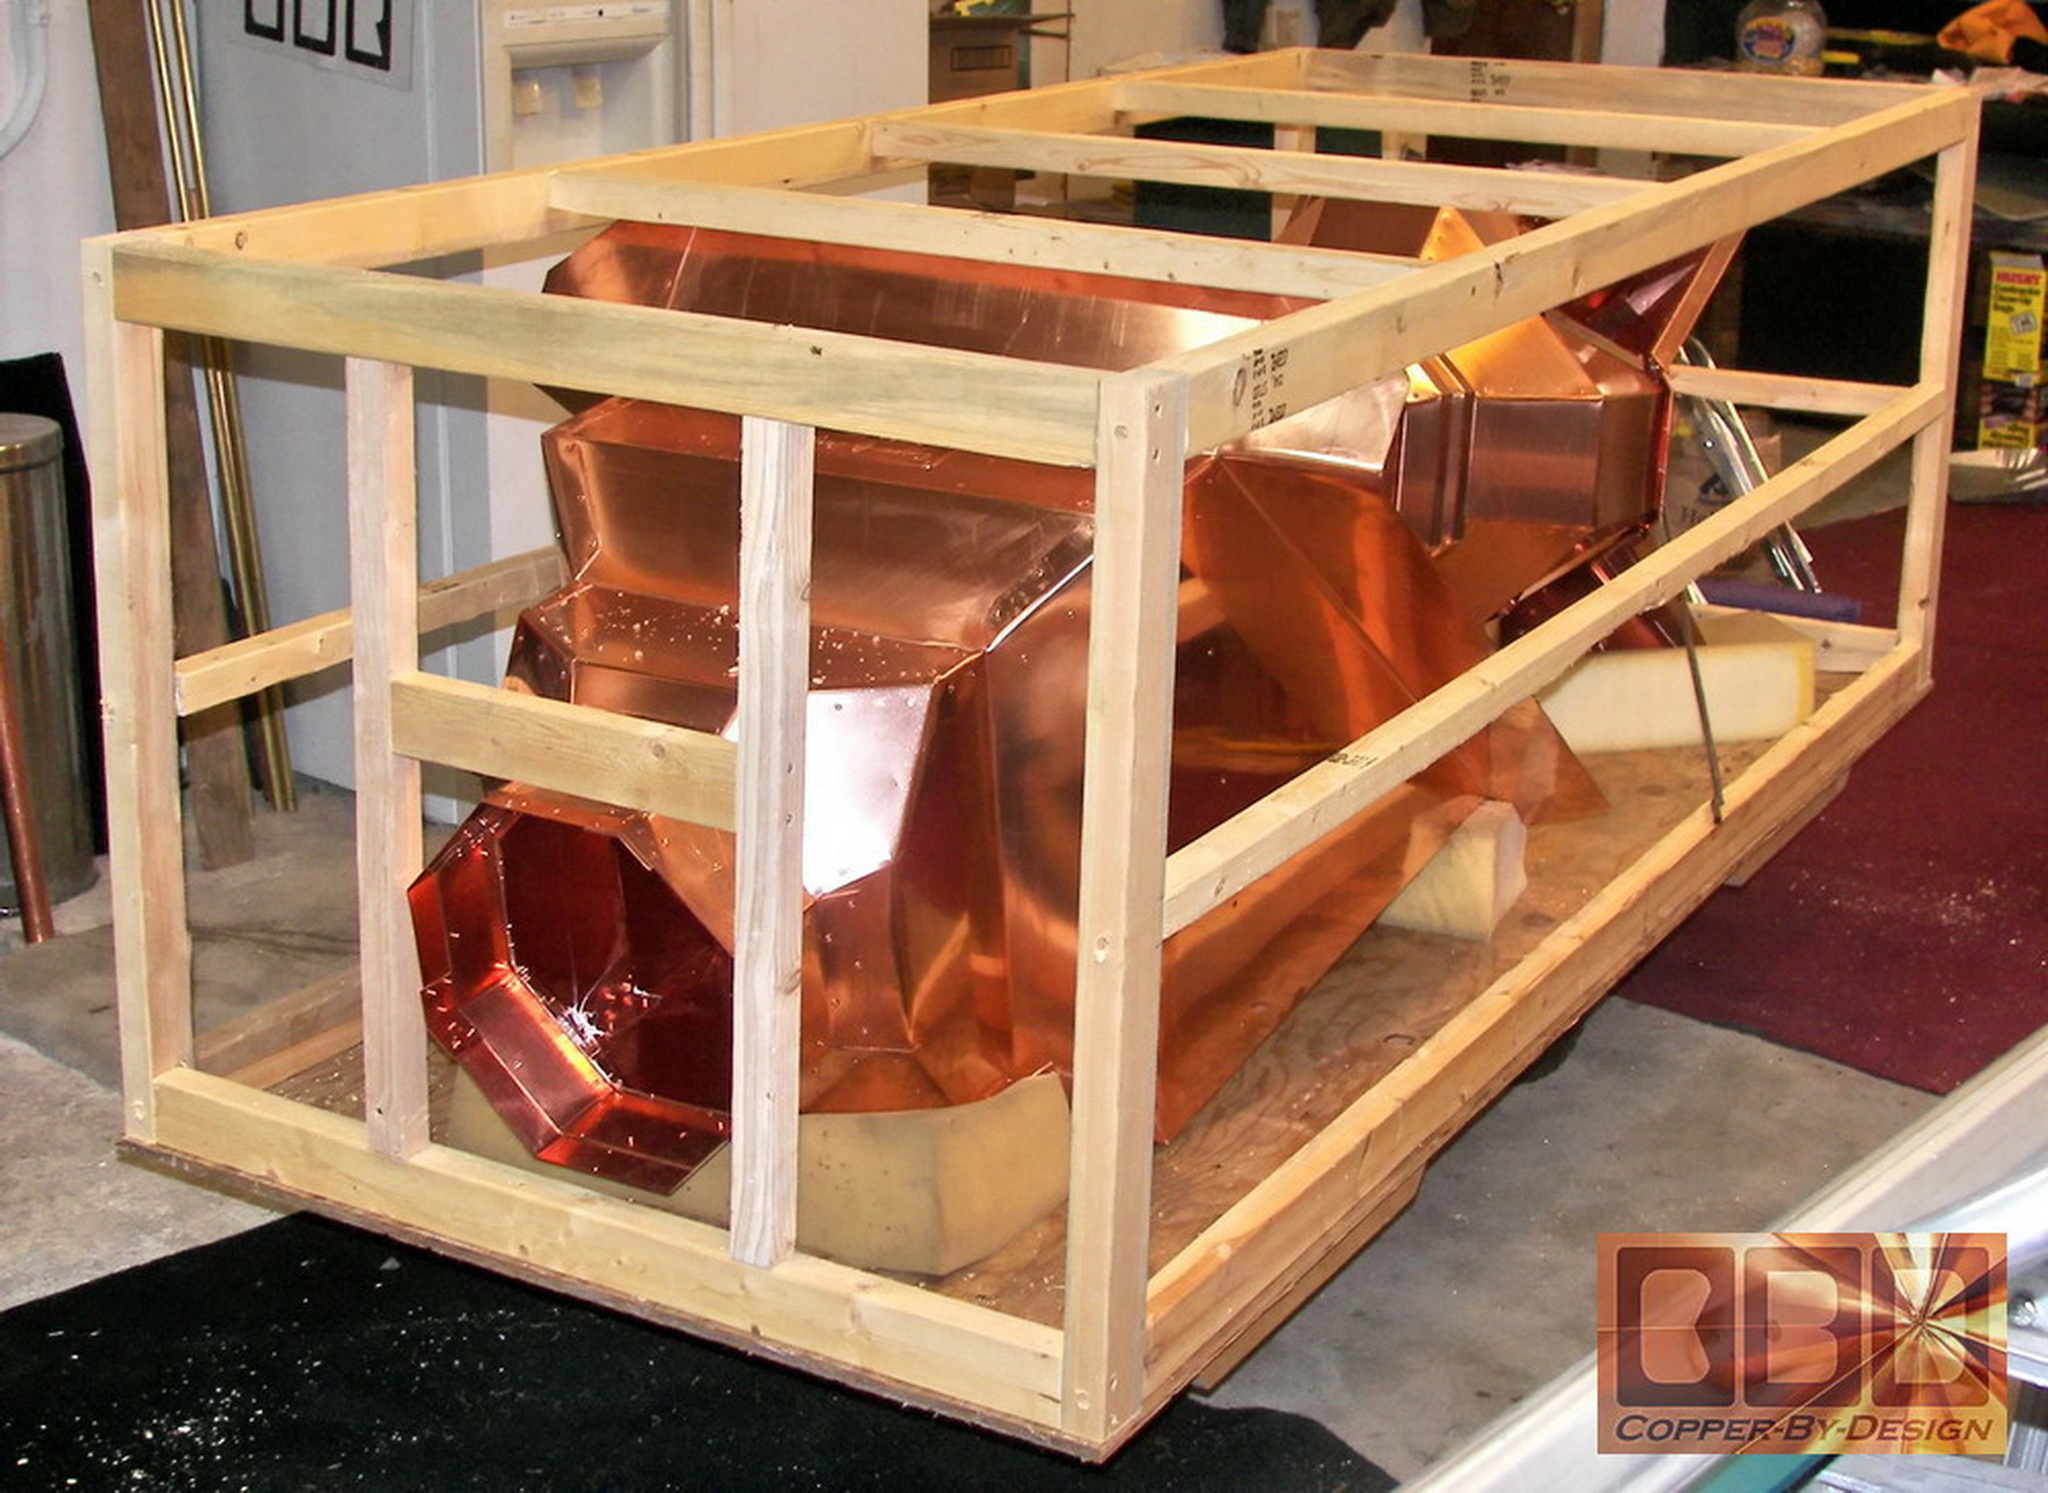
I had the top off the crate in
a very few minutes with the Makita impact driver. Your right, I
love that tool. Lifted the top off by myself, no sweat. Well, actually
there was a lot of sweat. But that was because it was very hot yesterday.
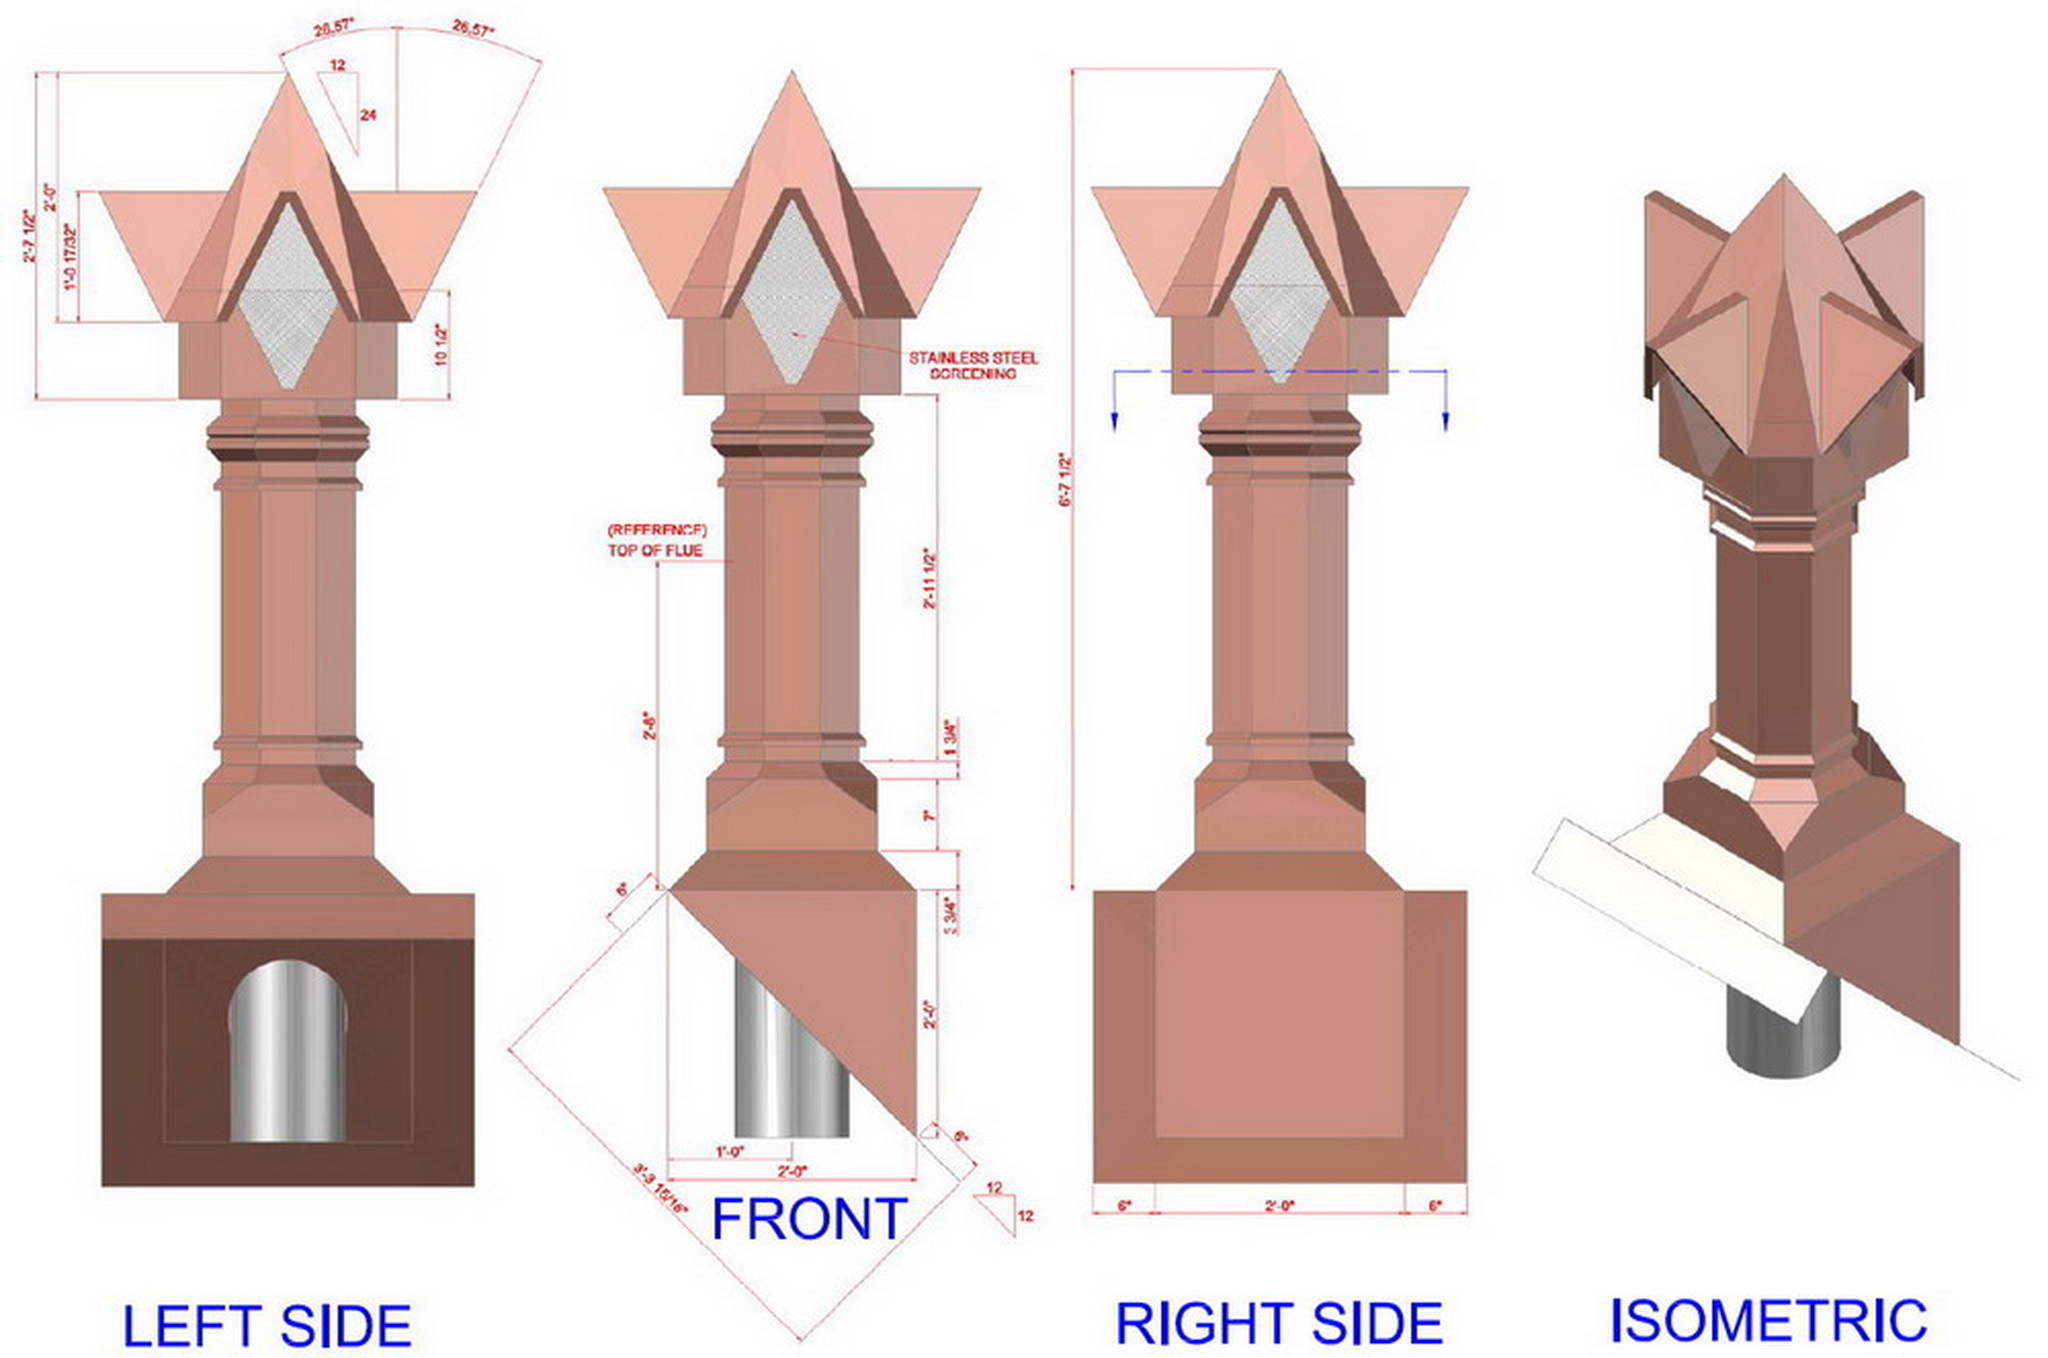
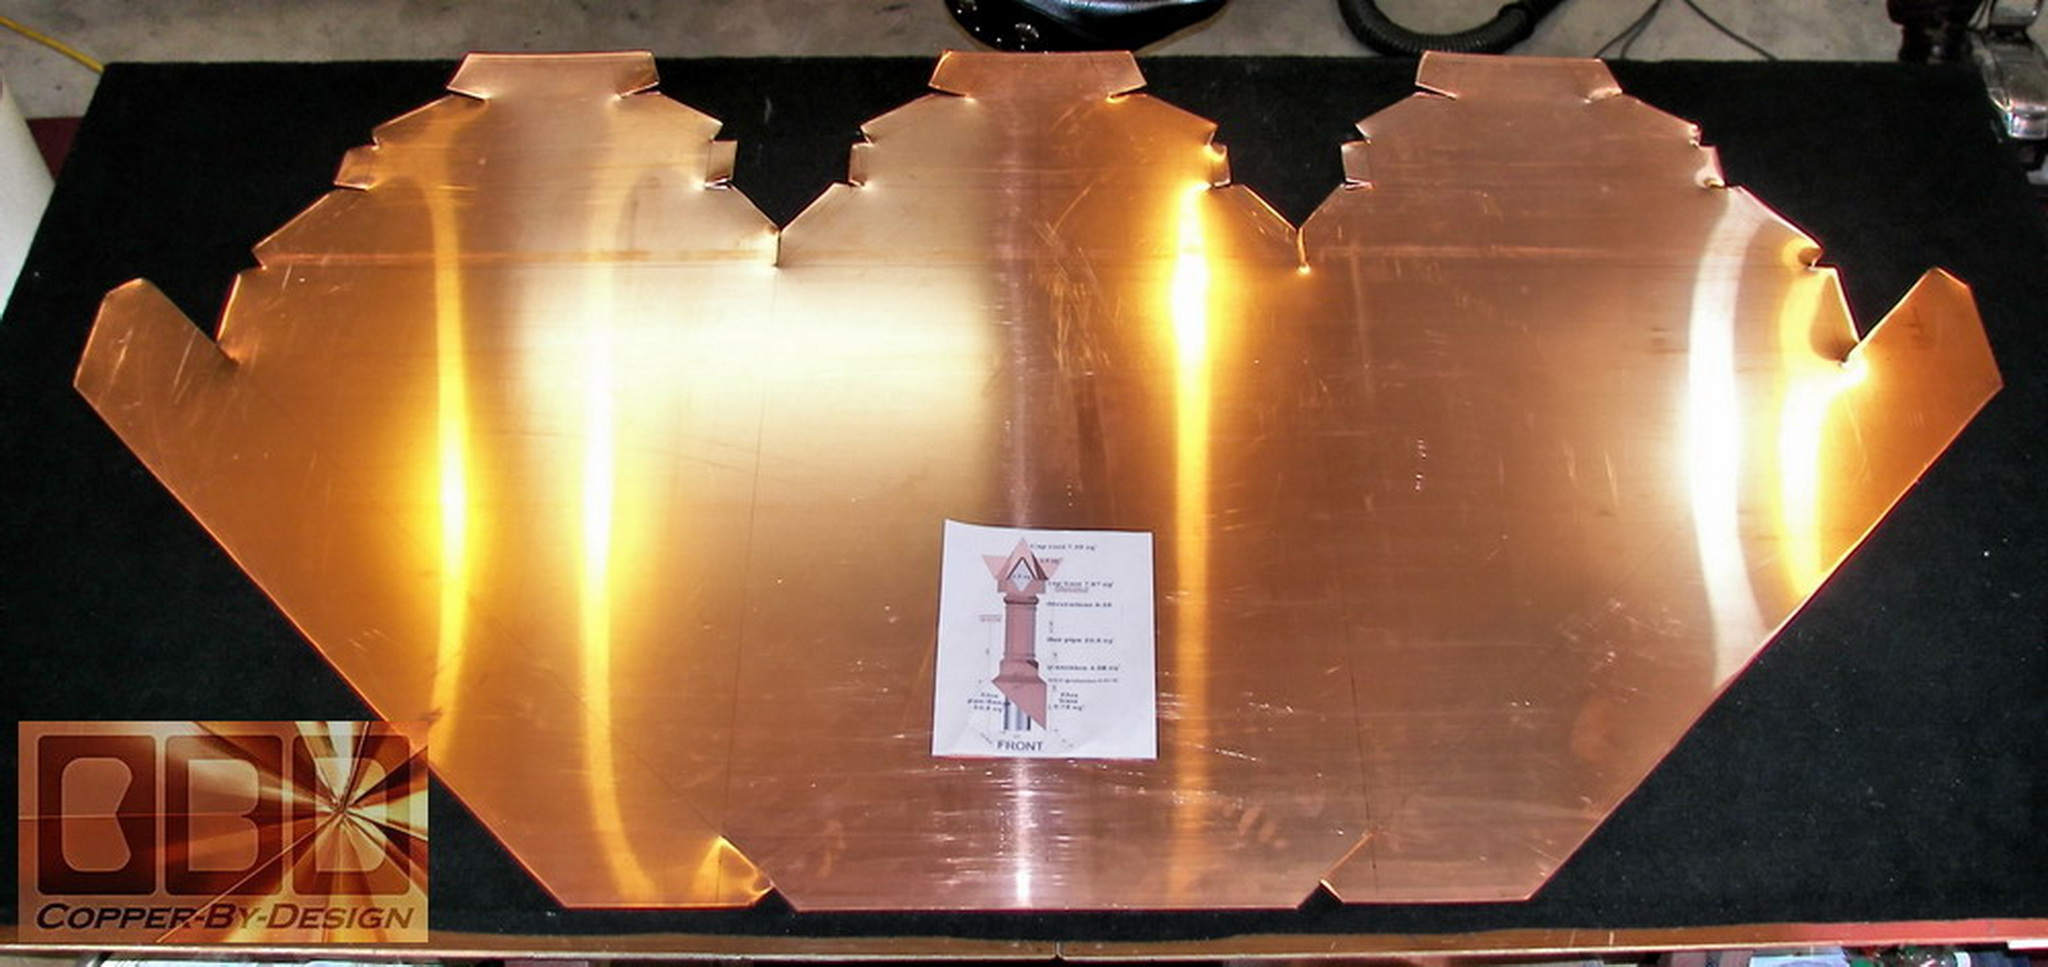
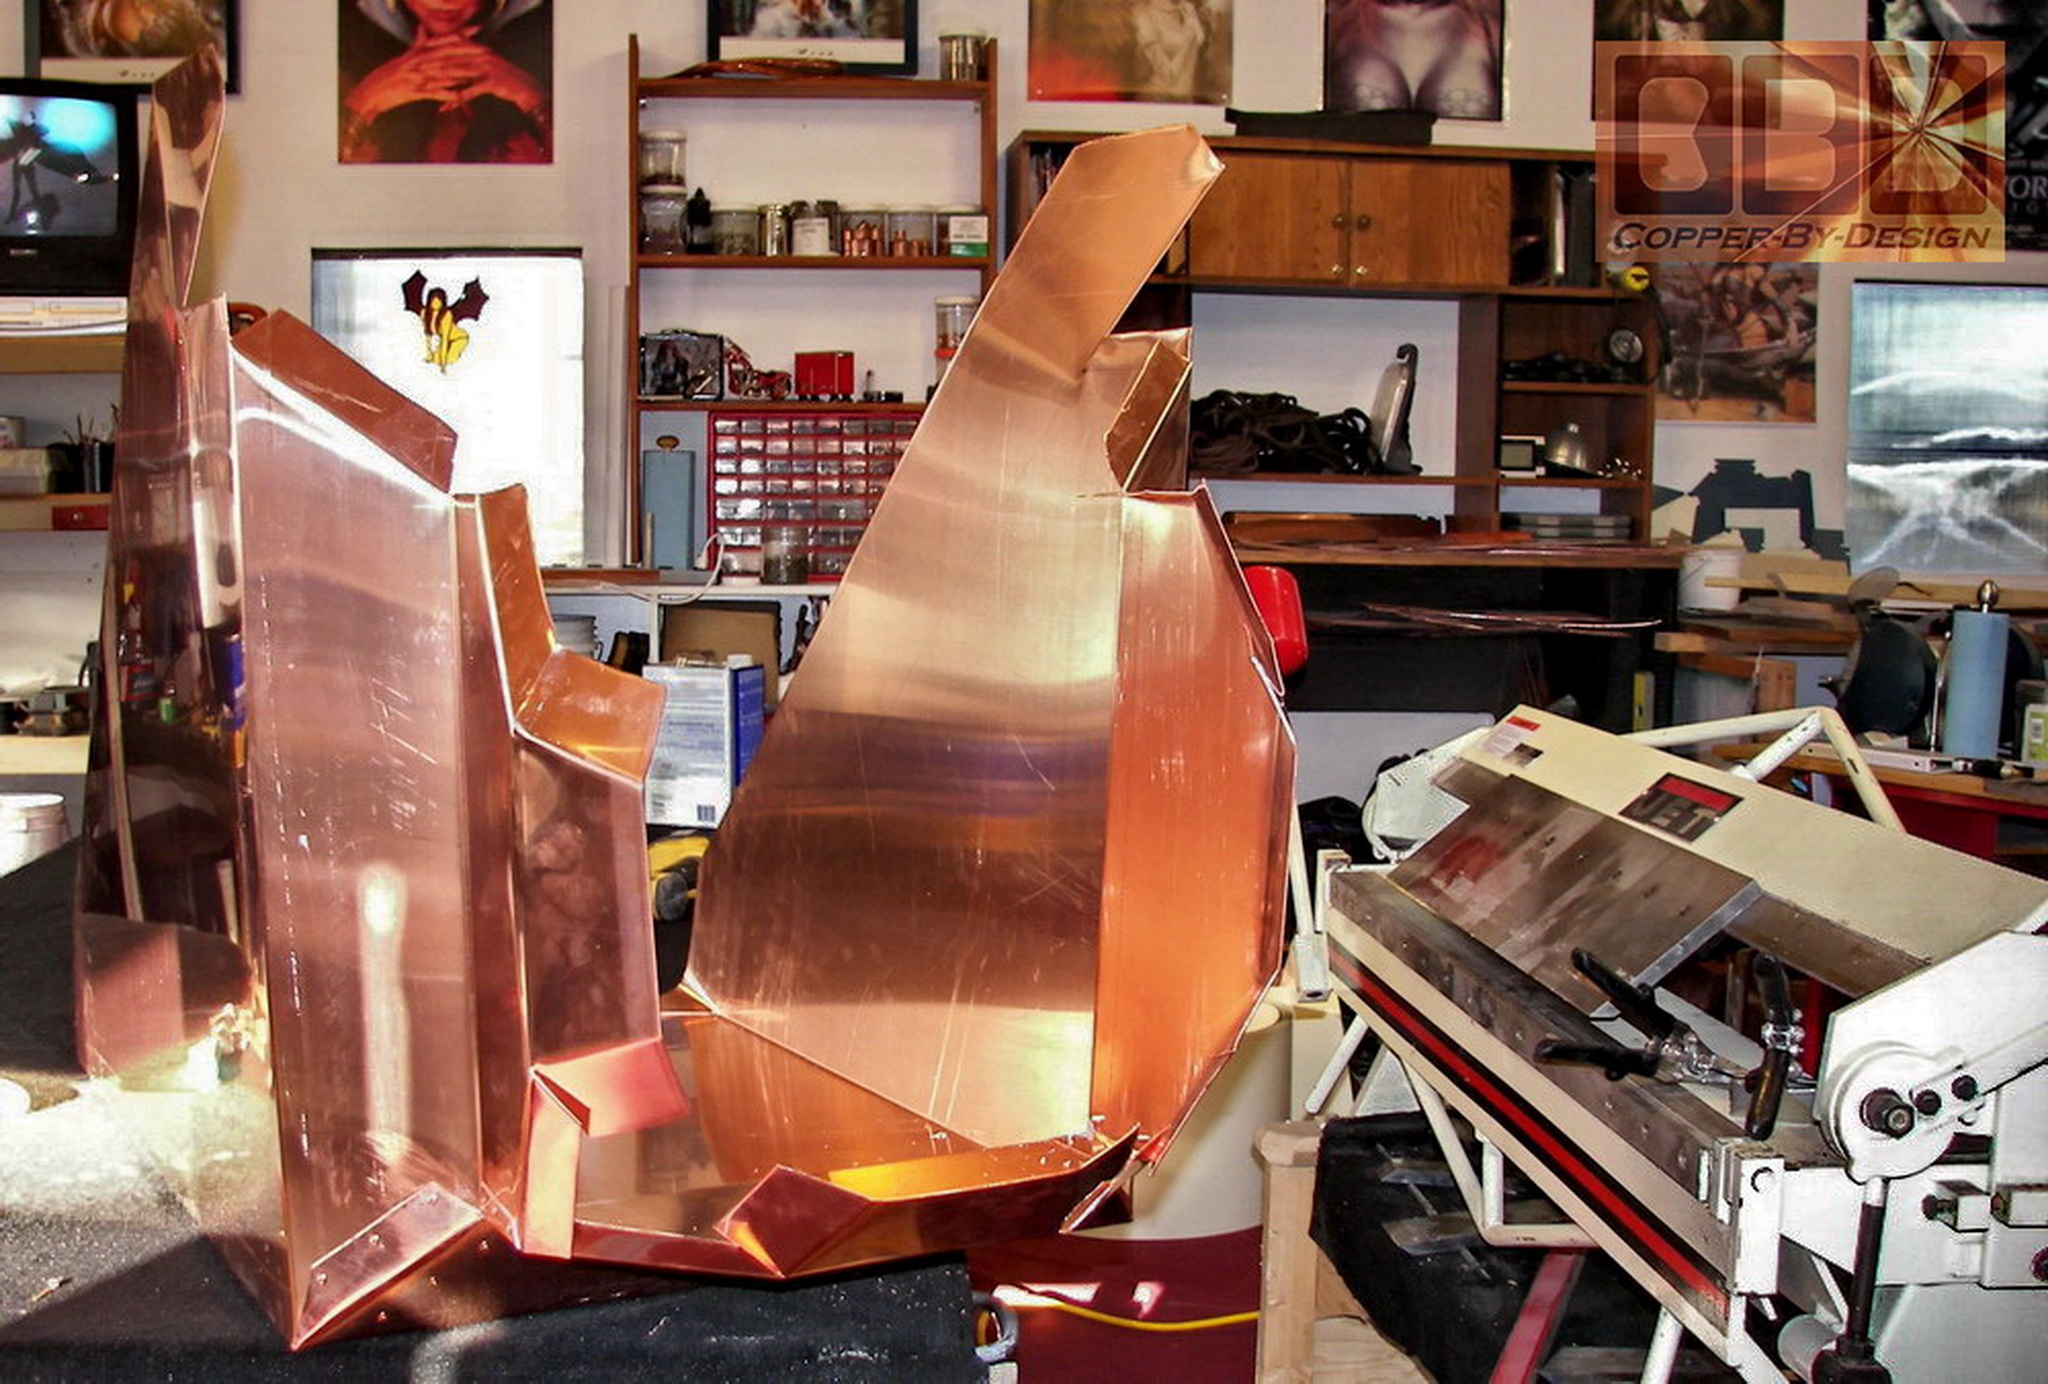
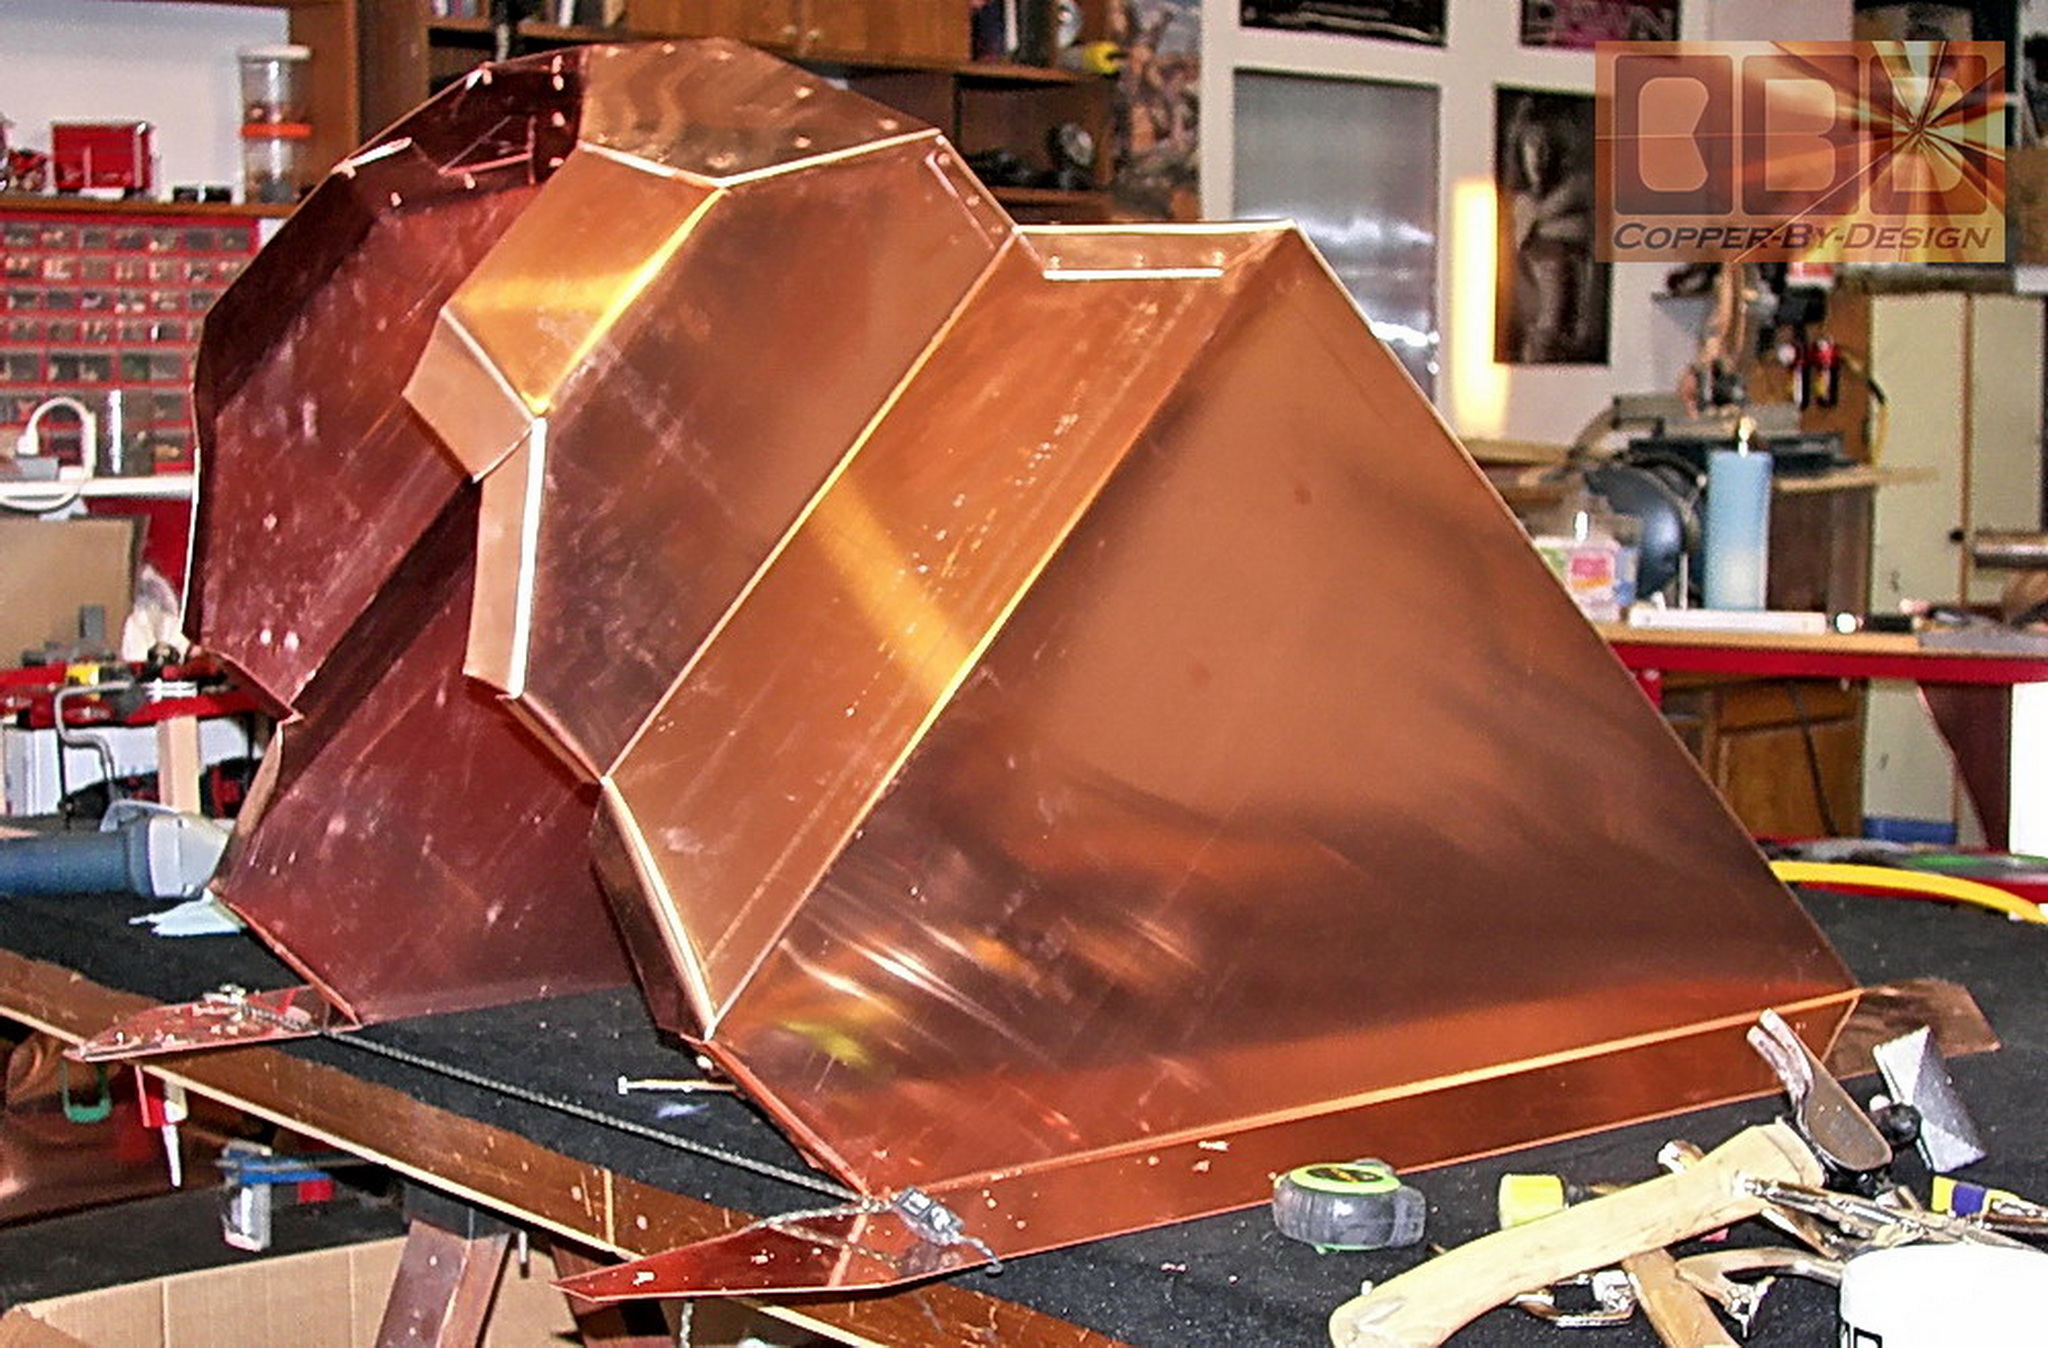
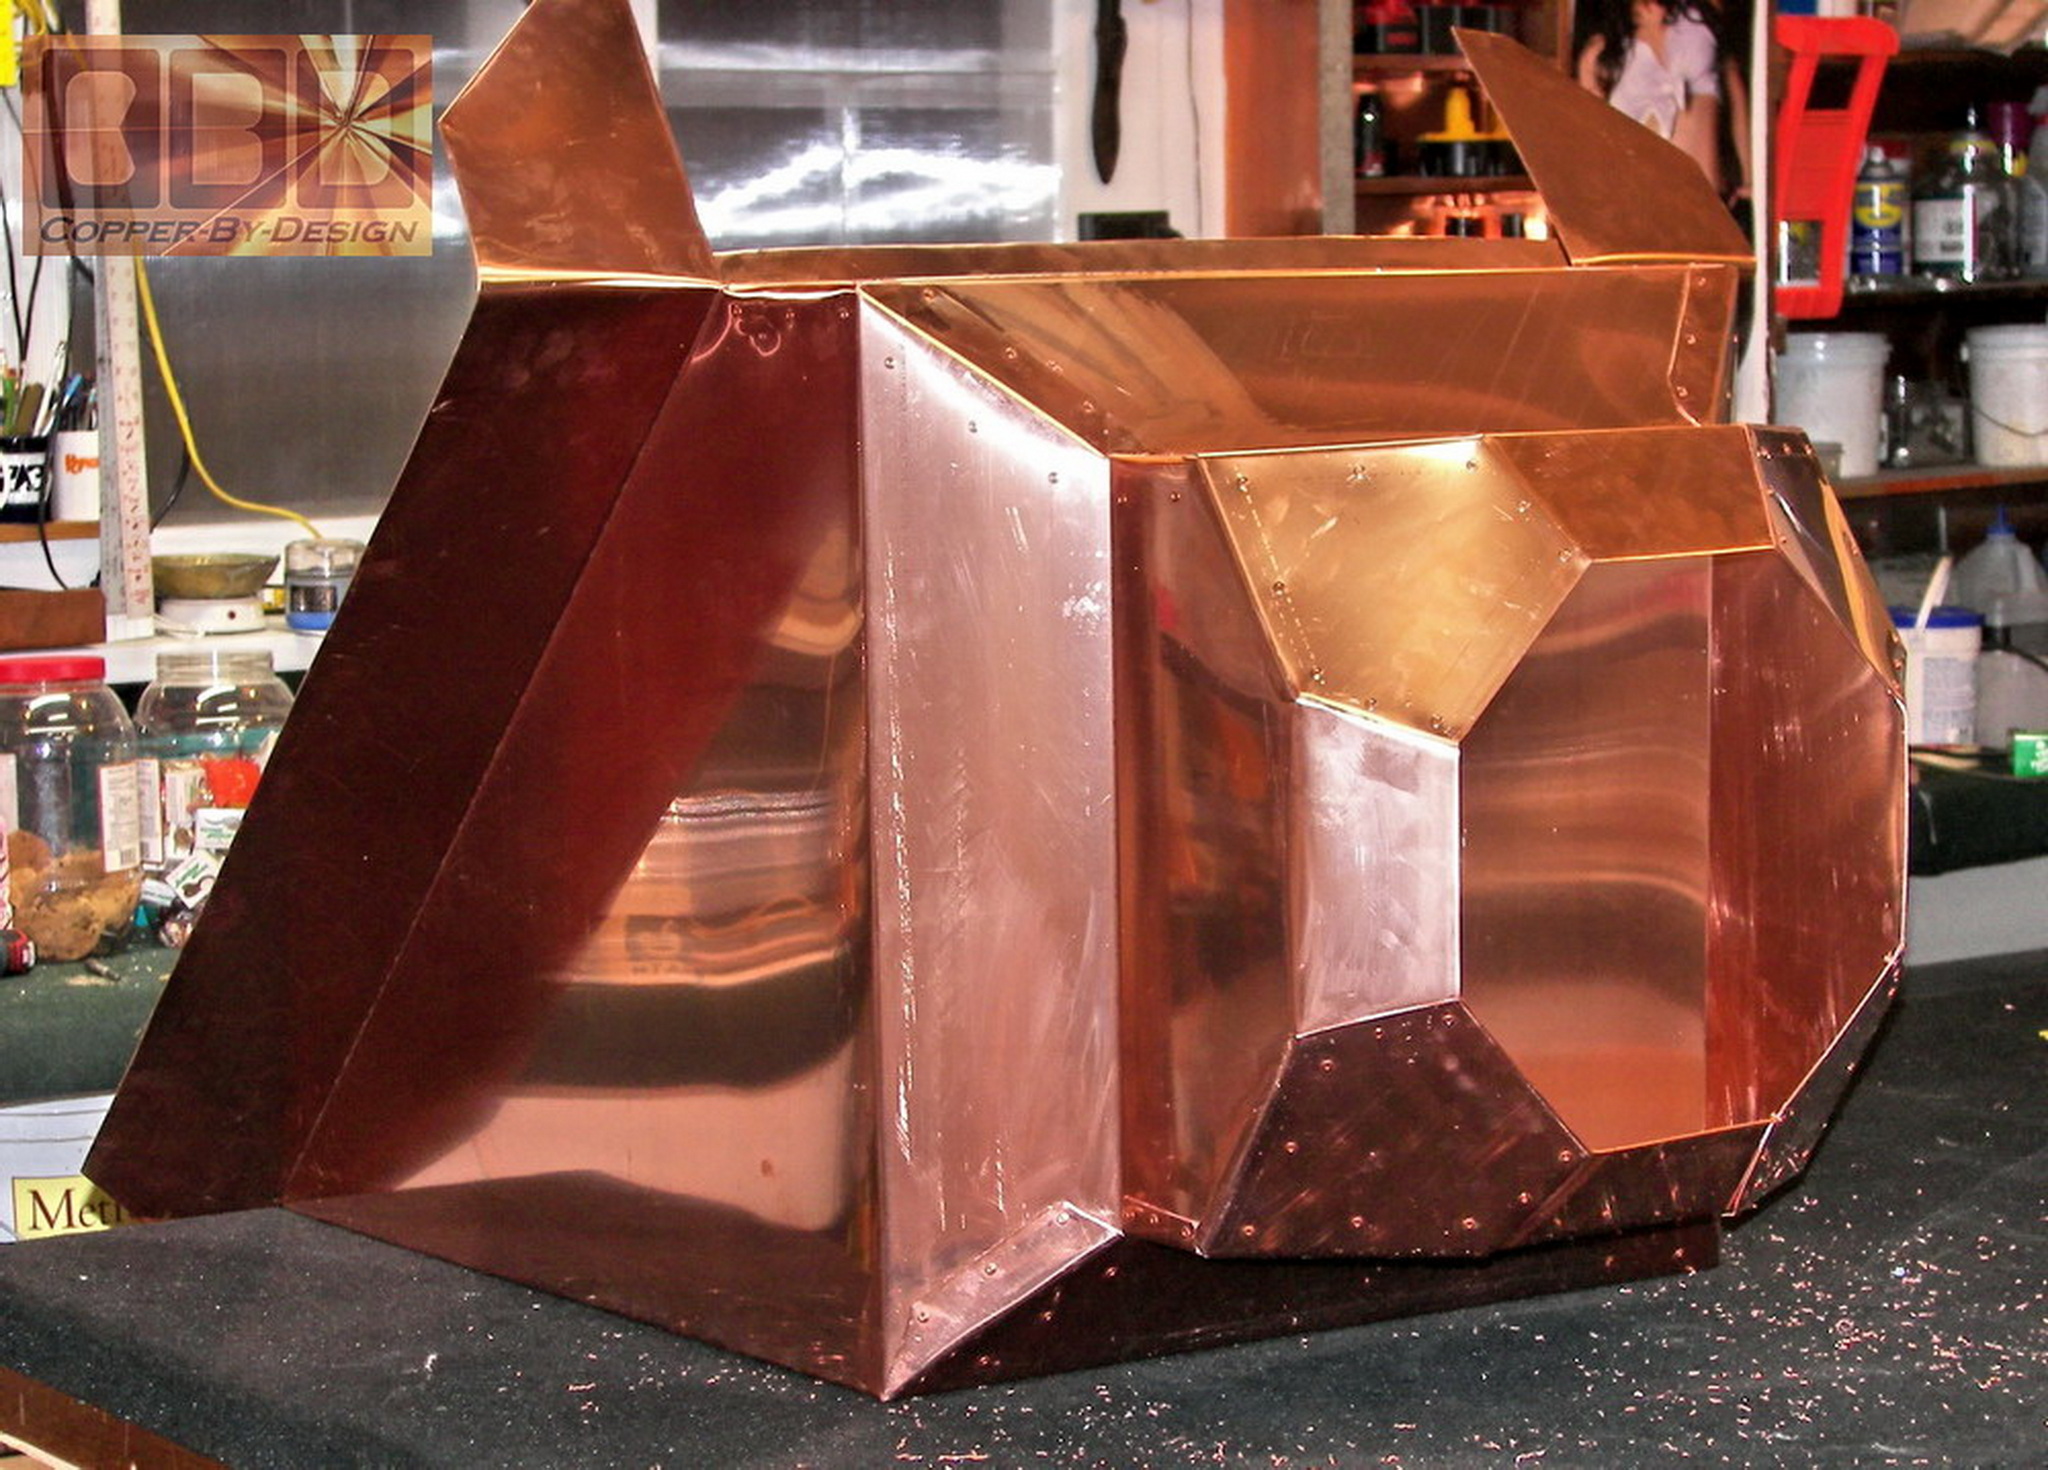
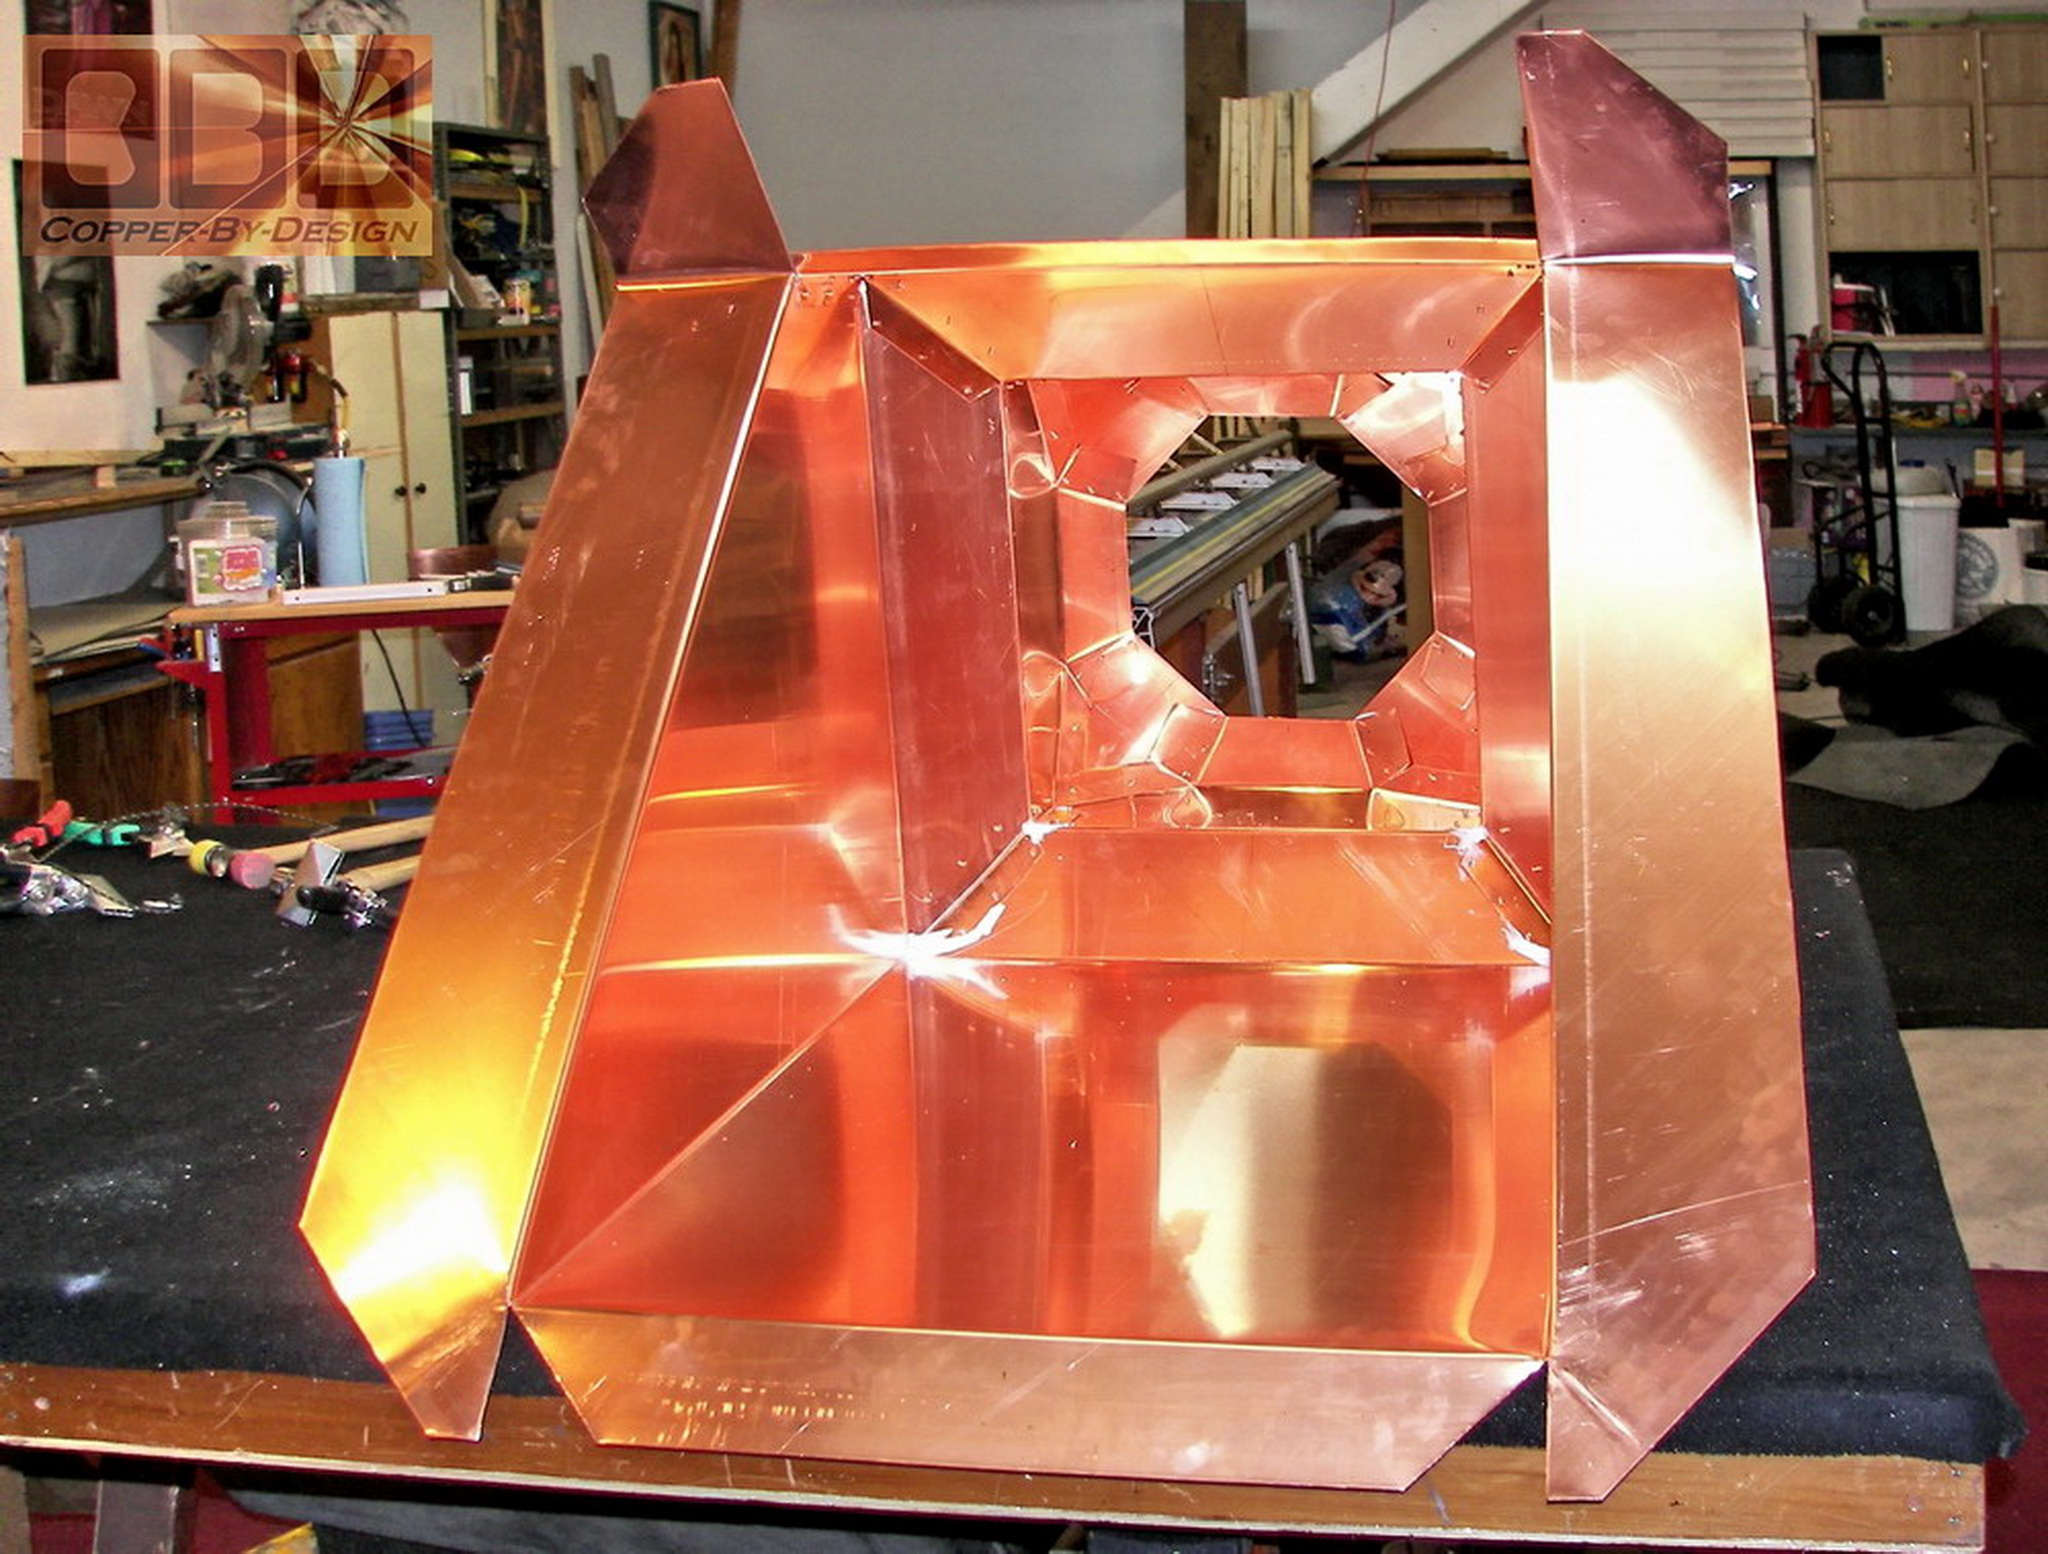
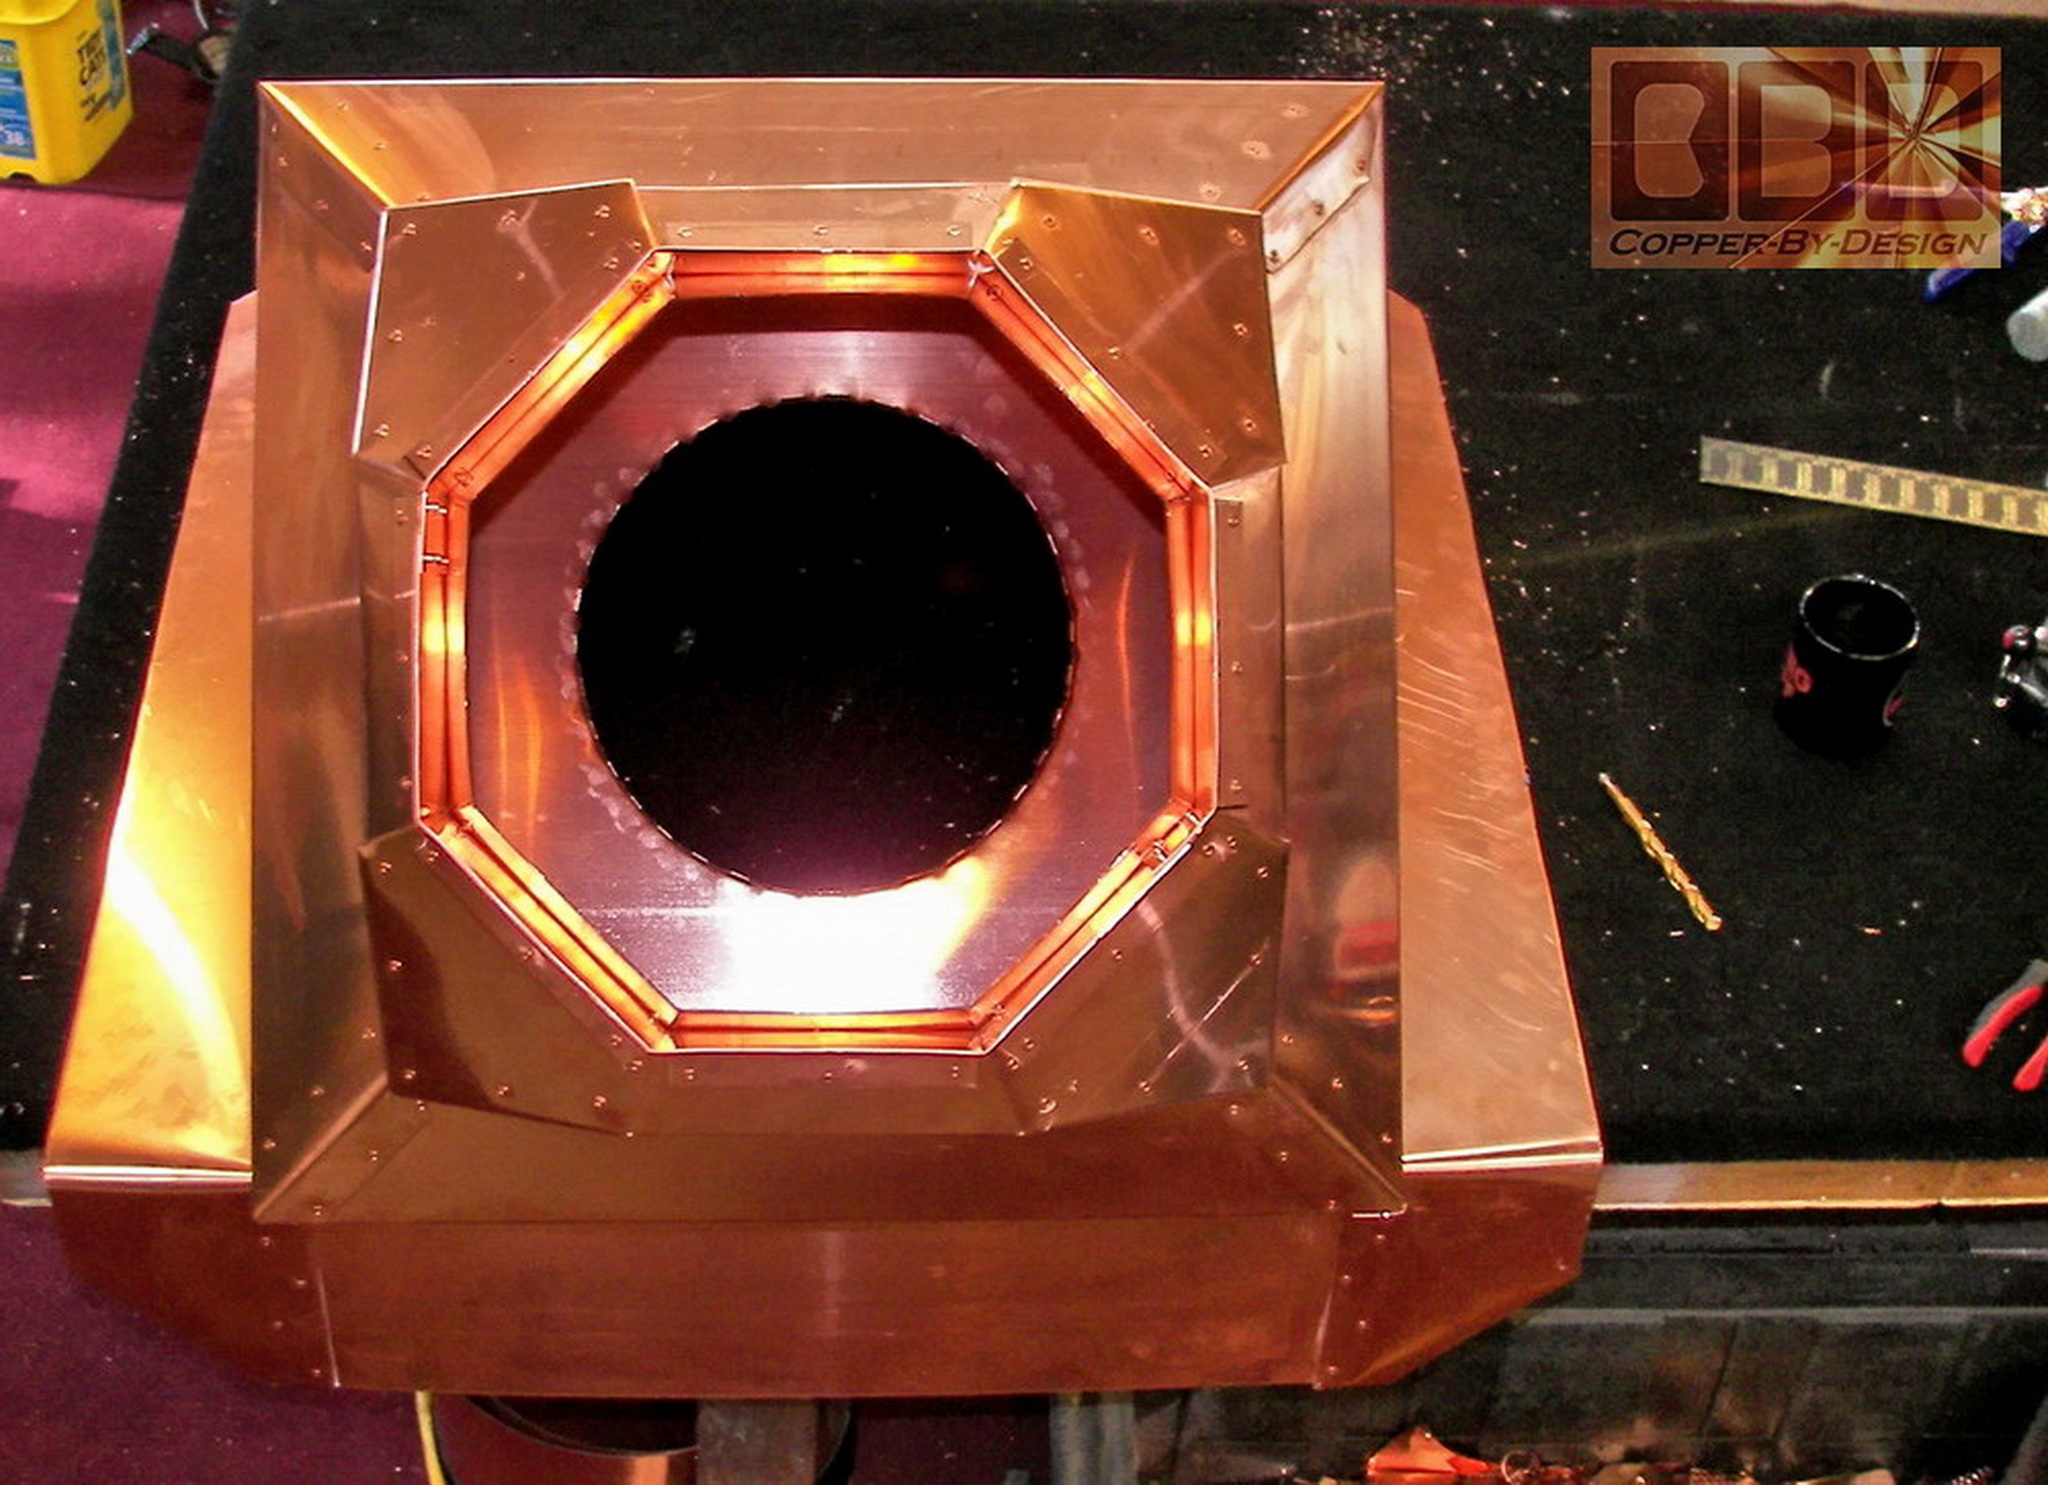
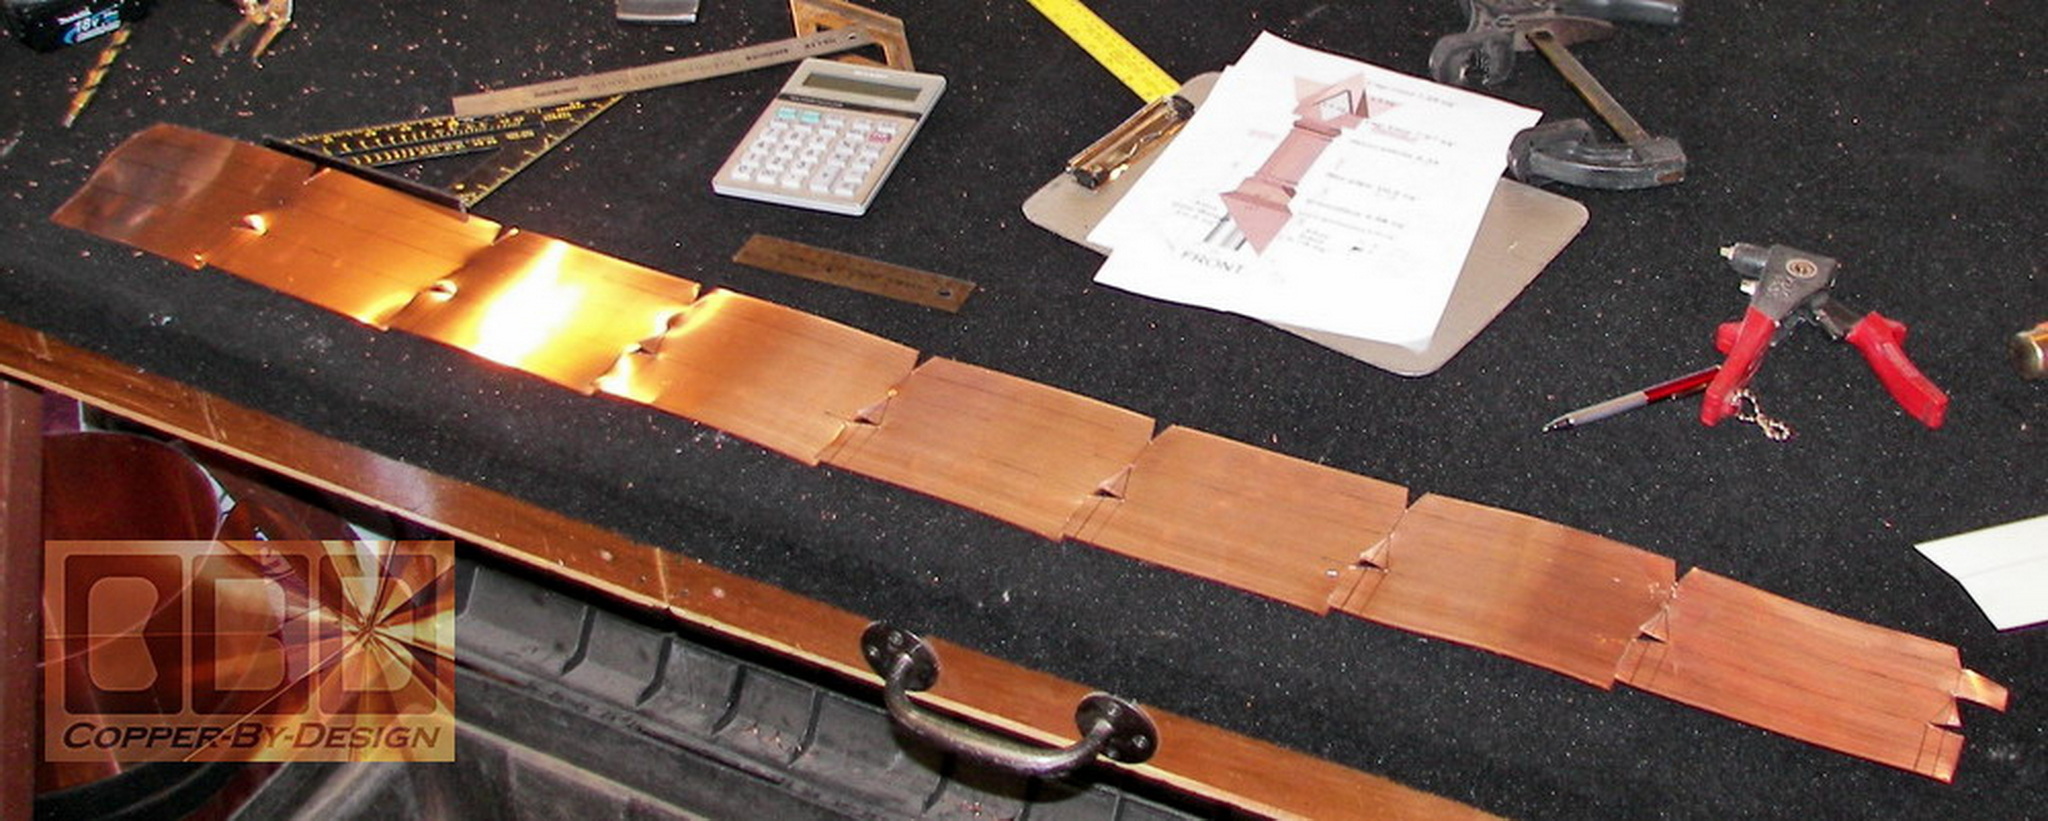
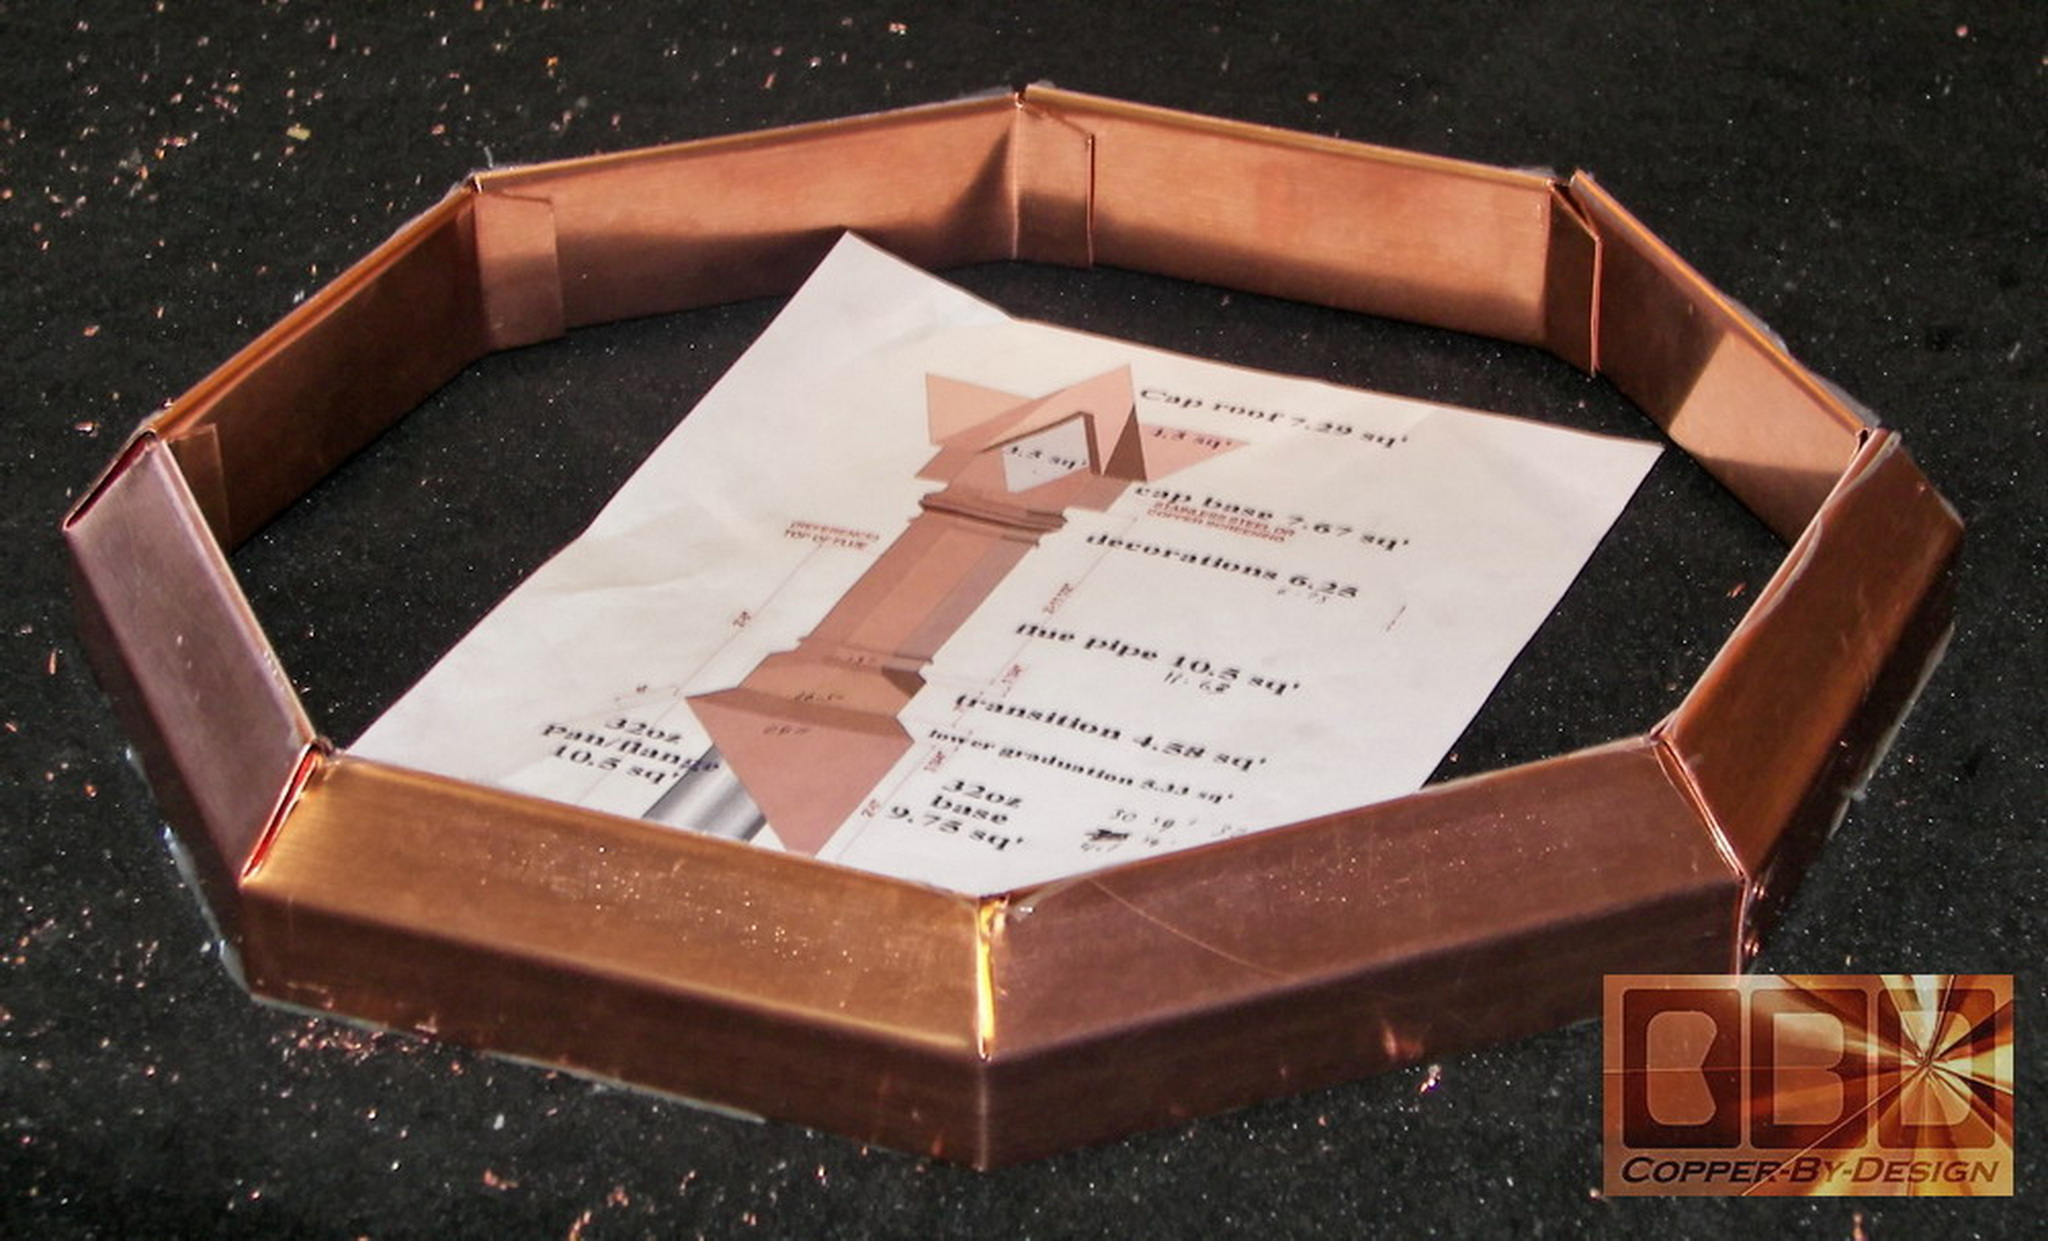
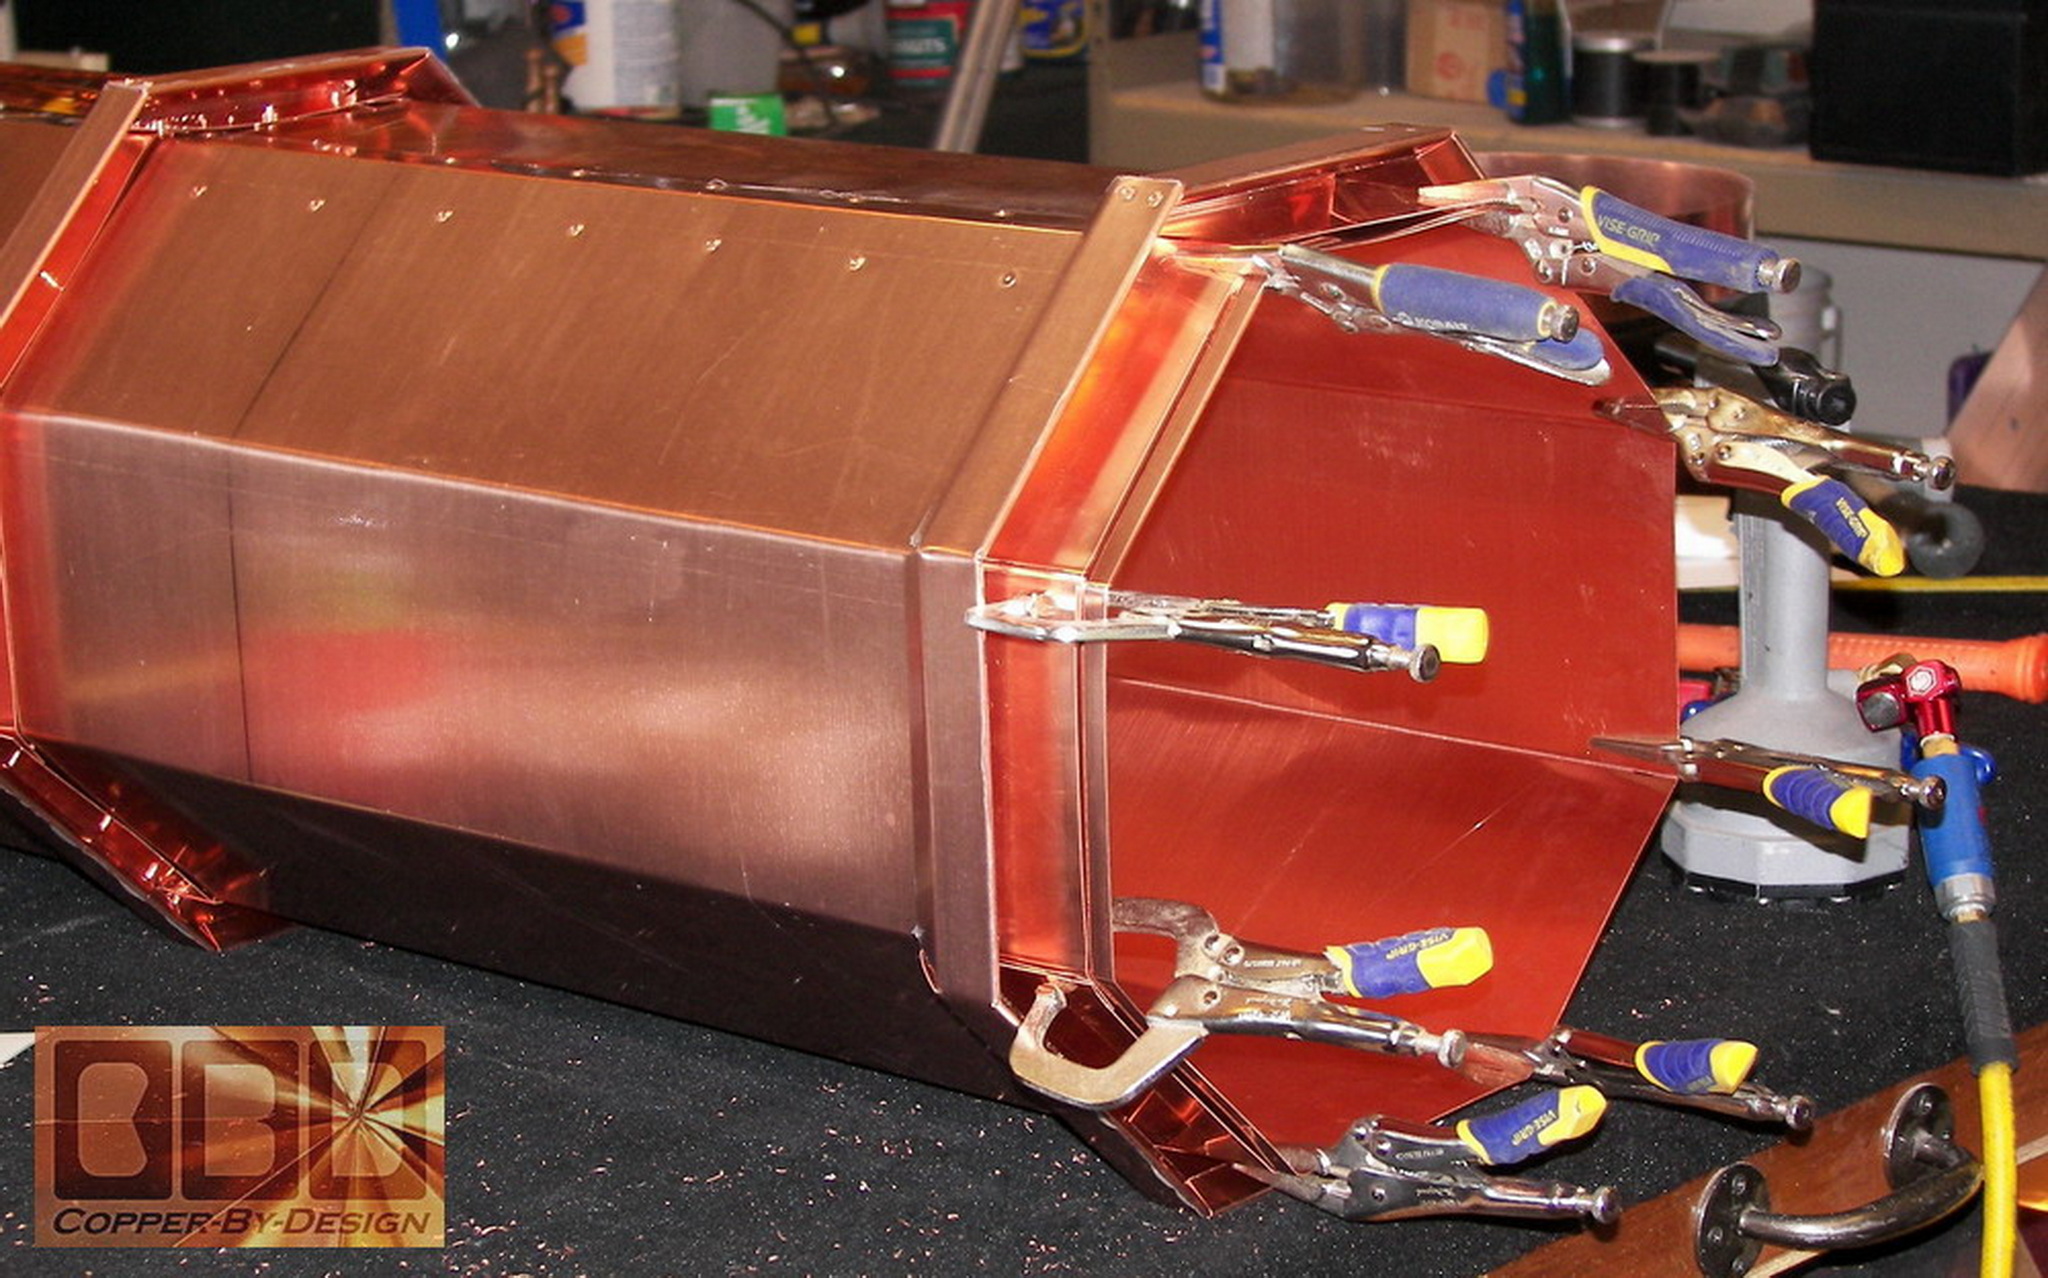
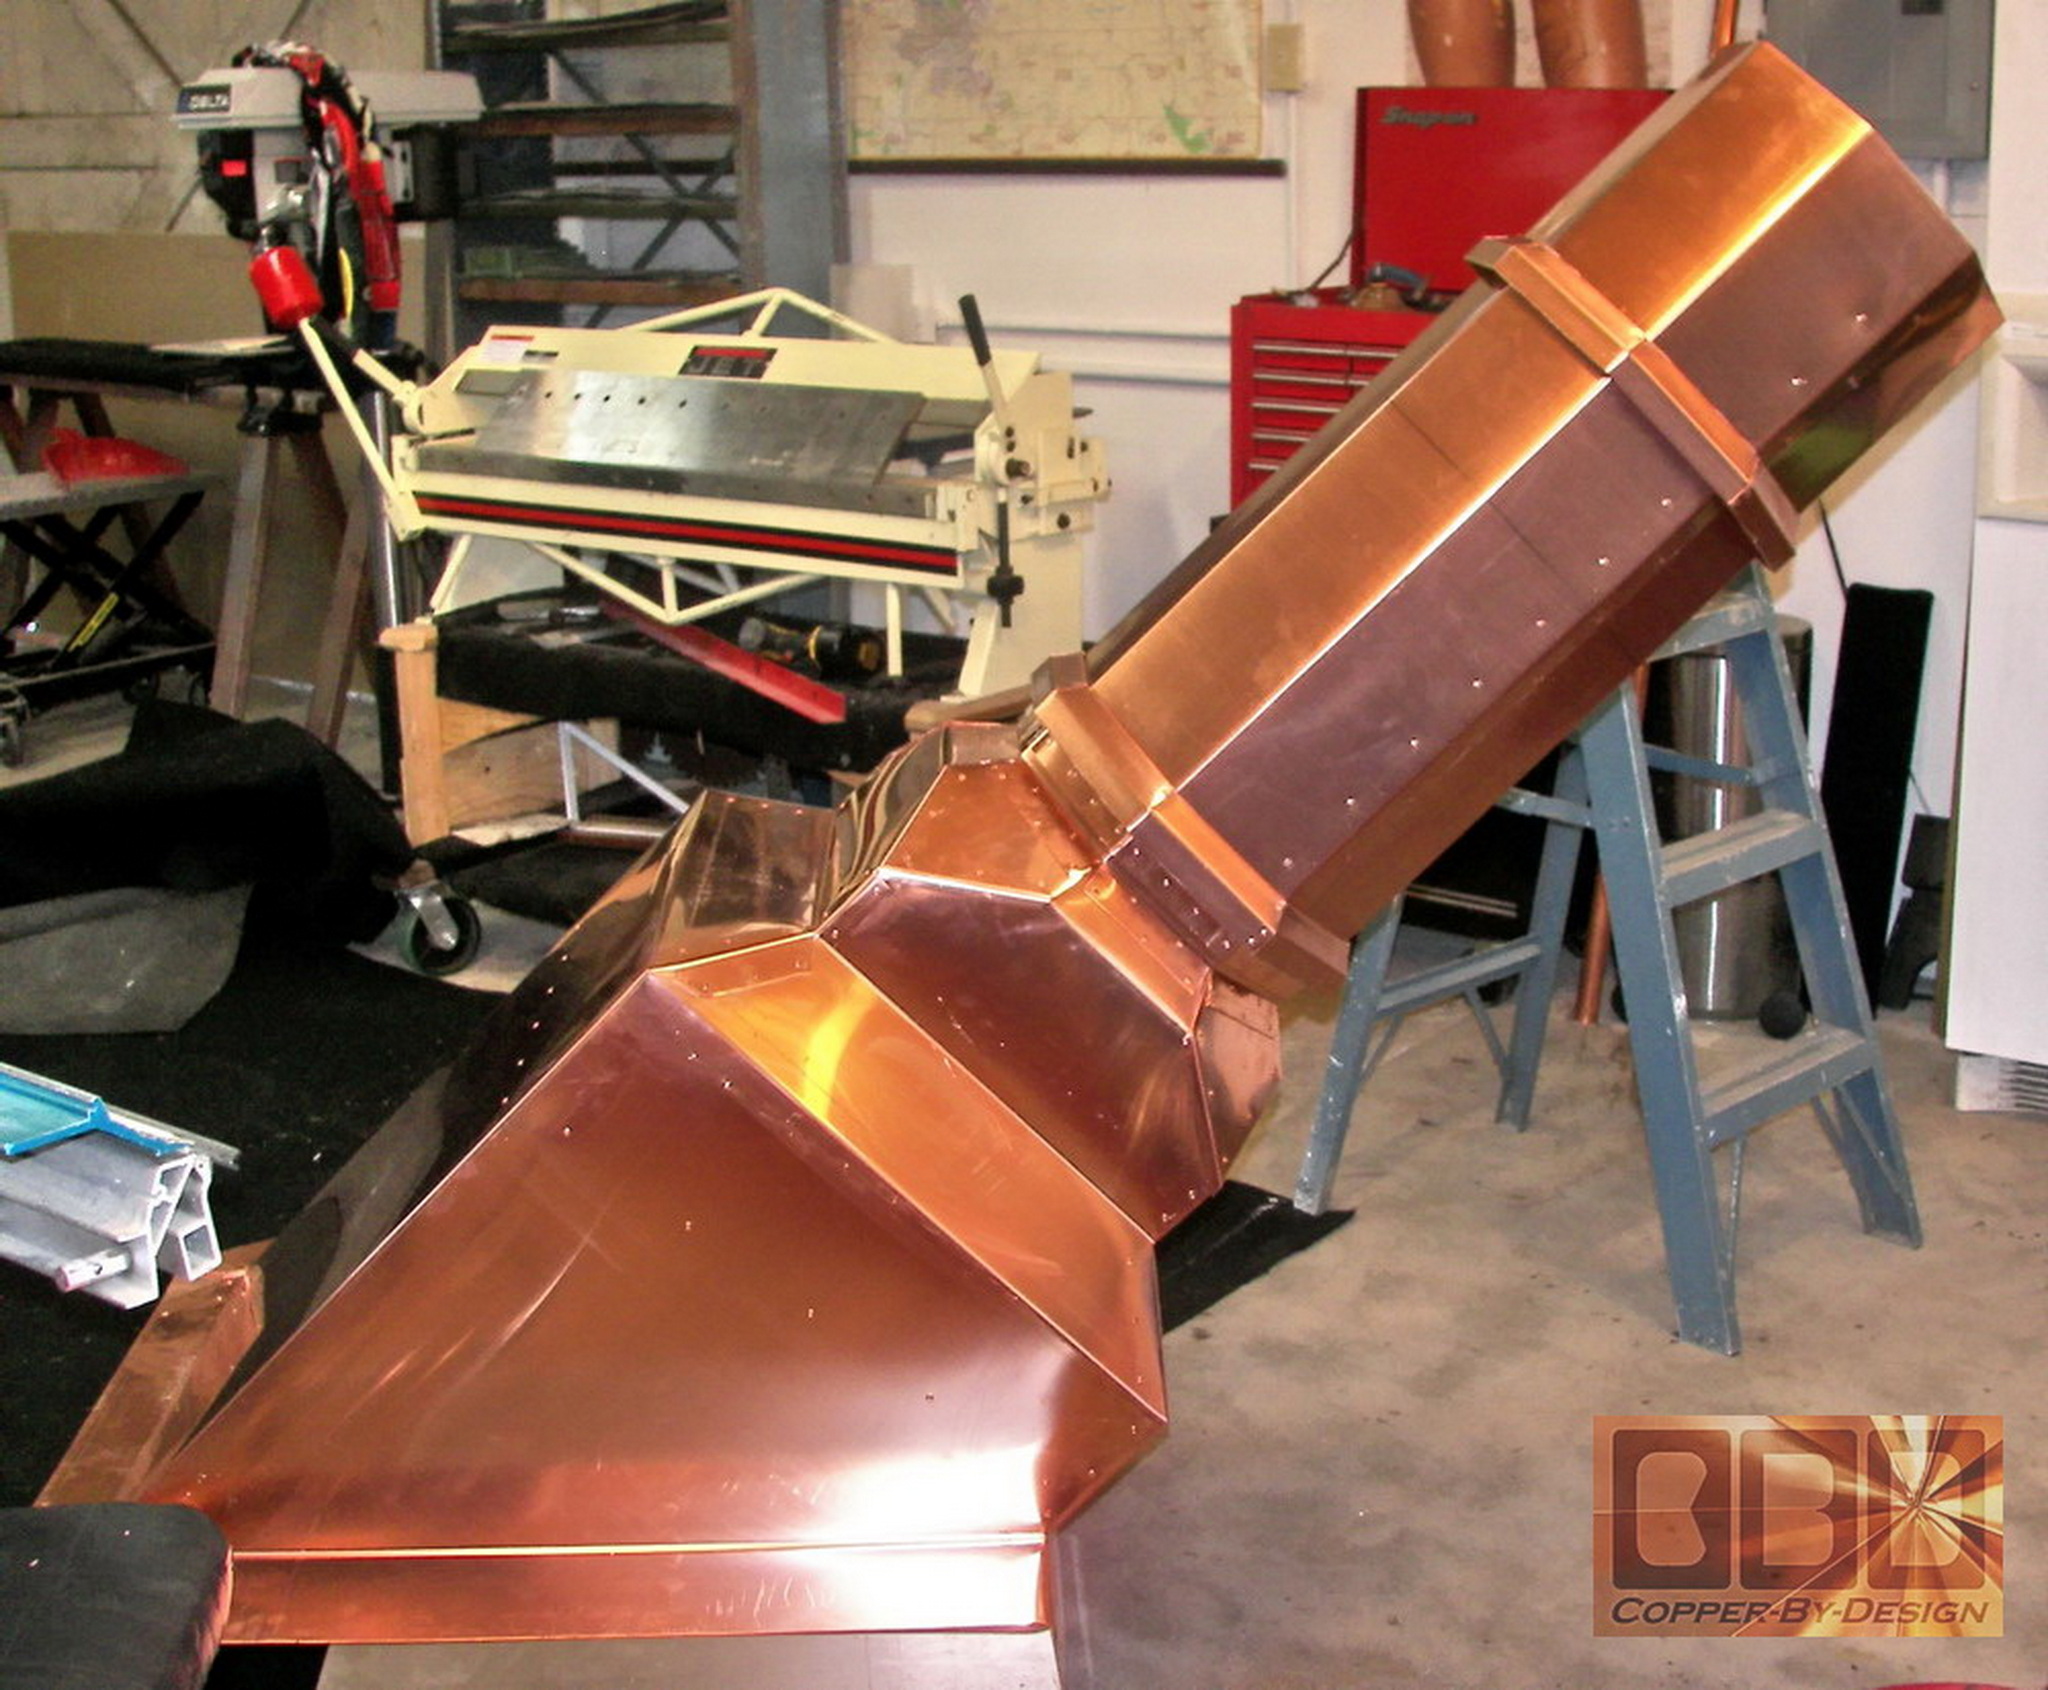
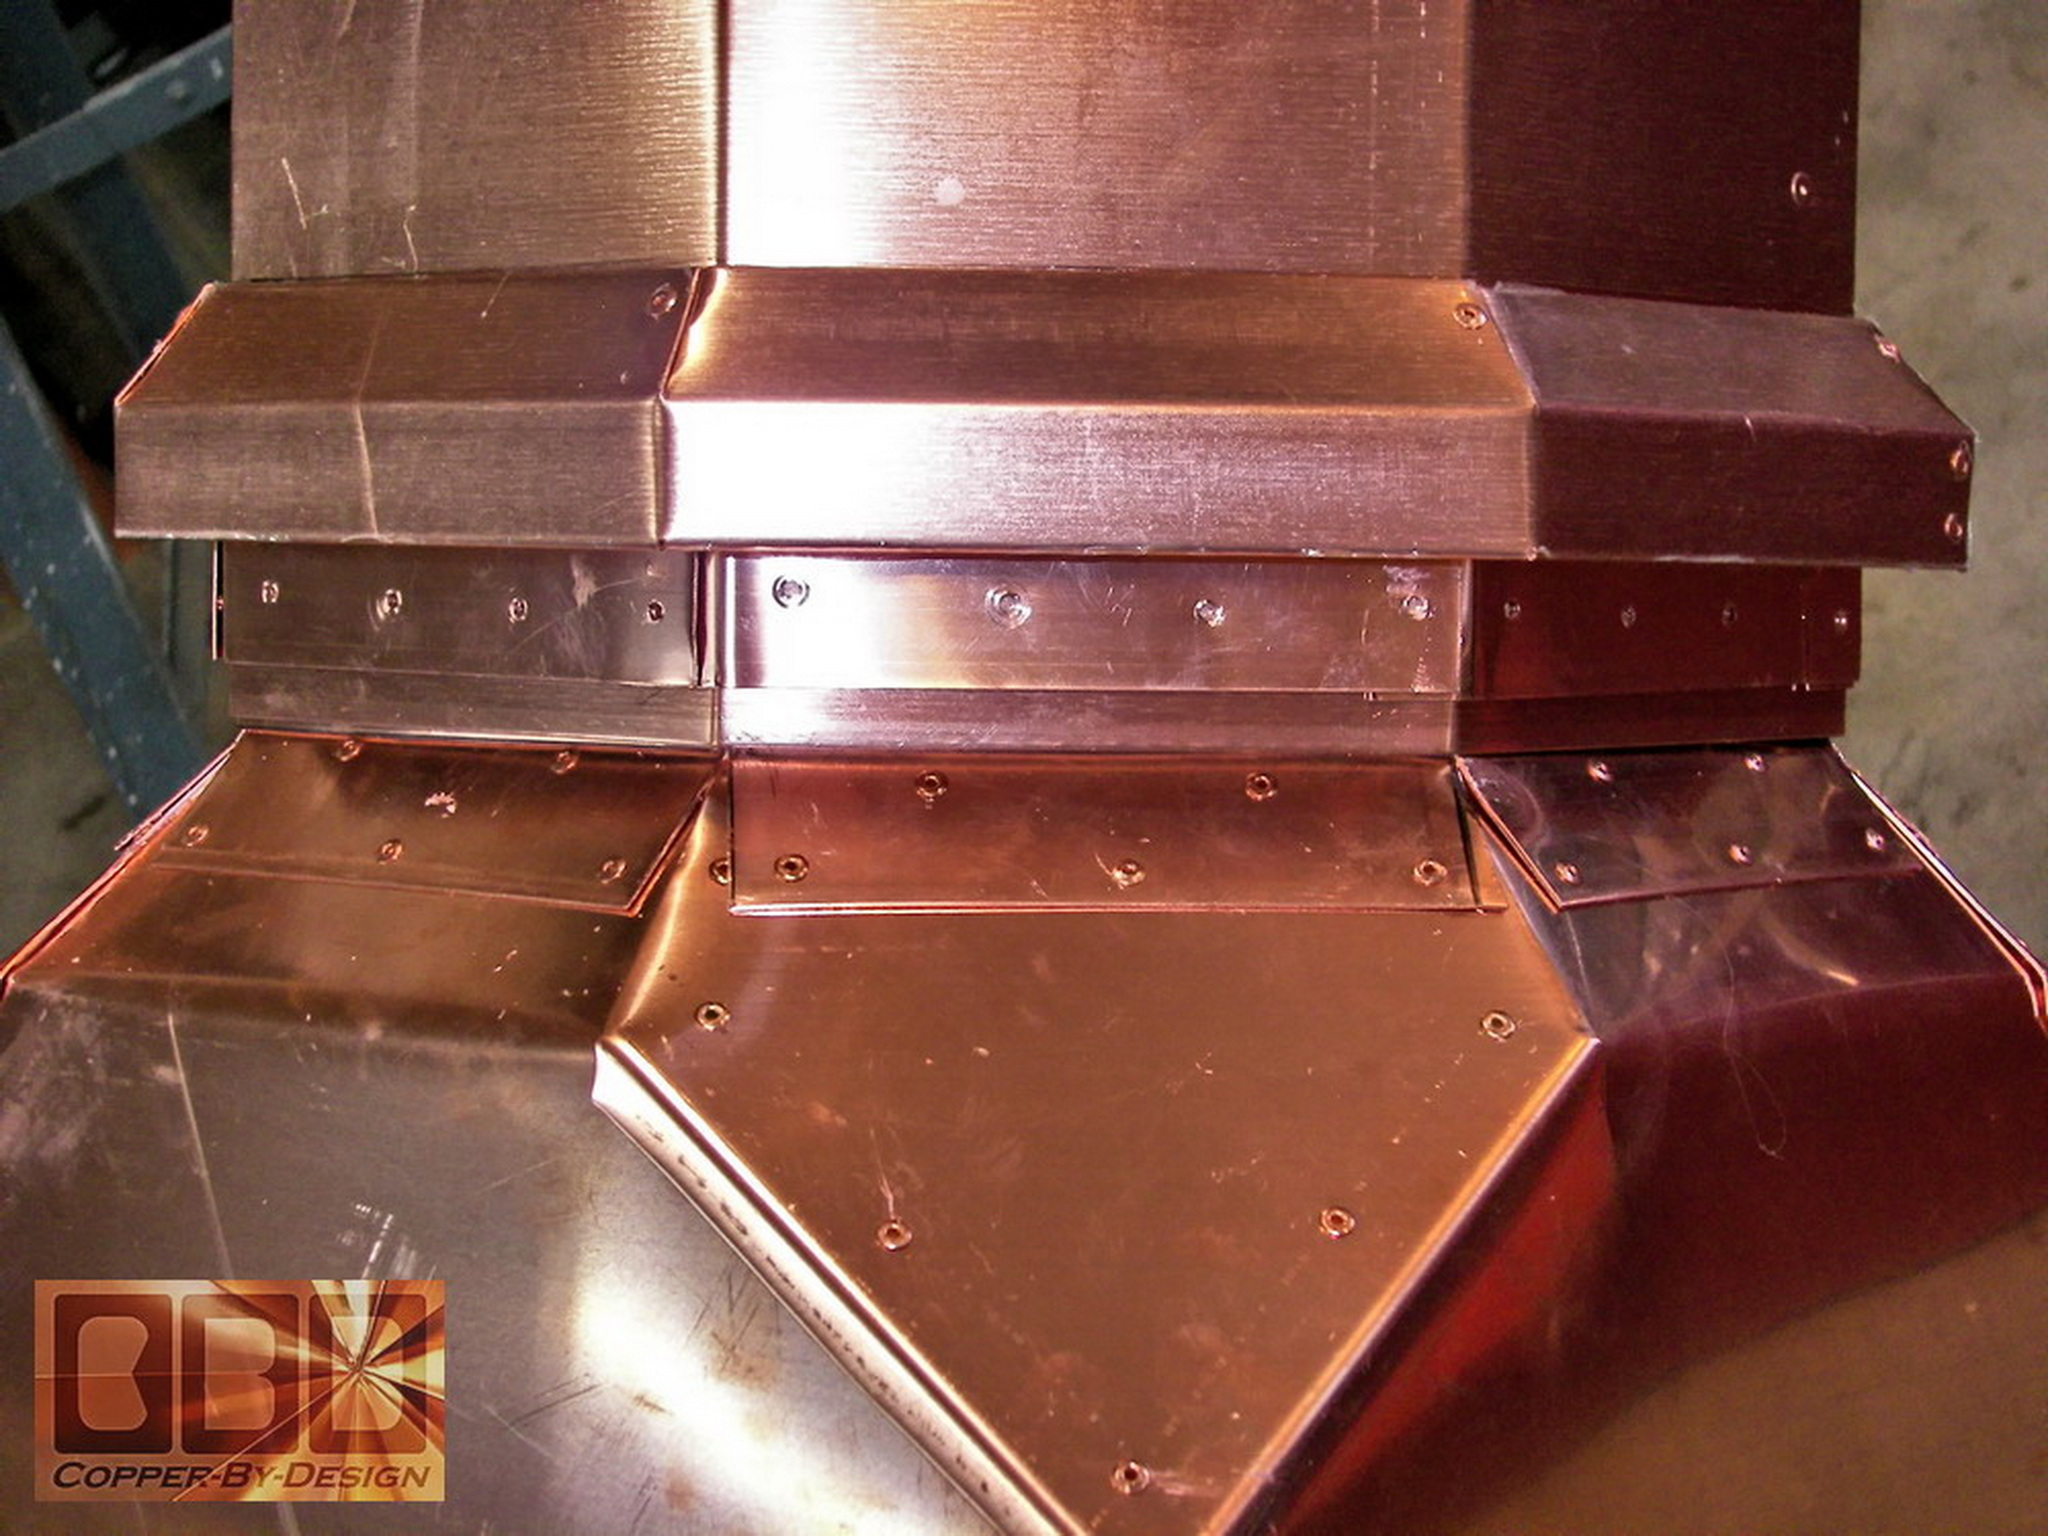
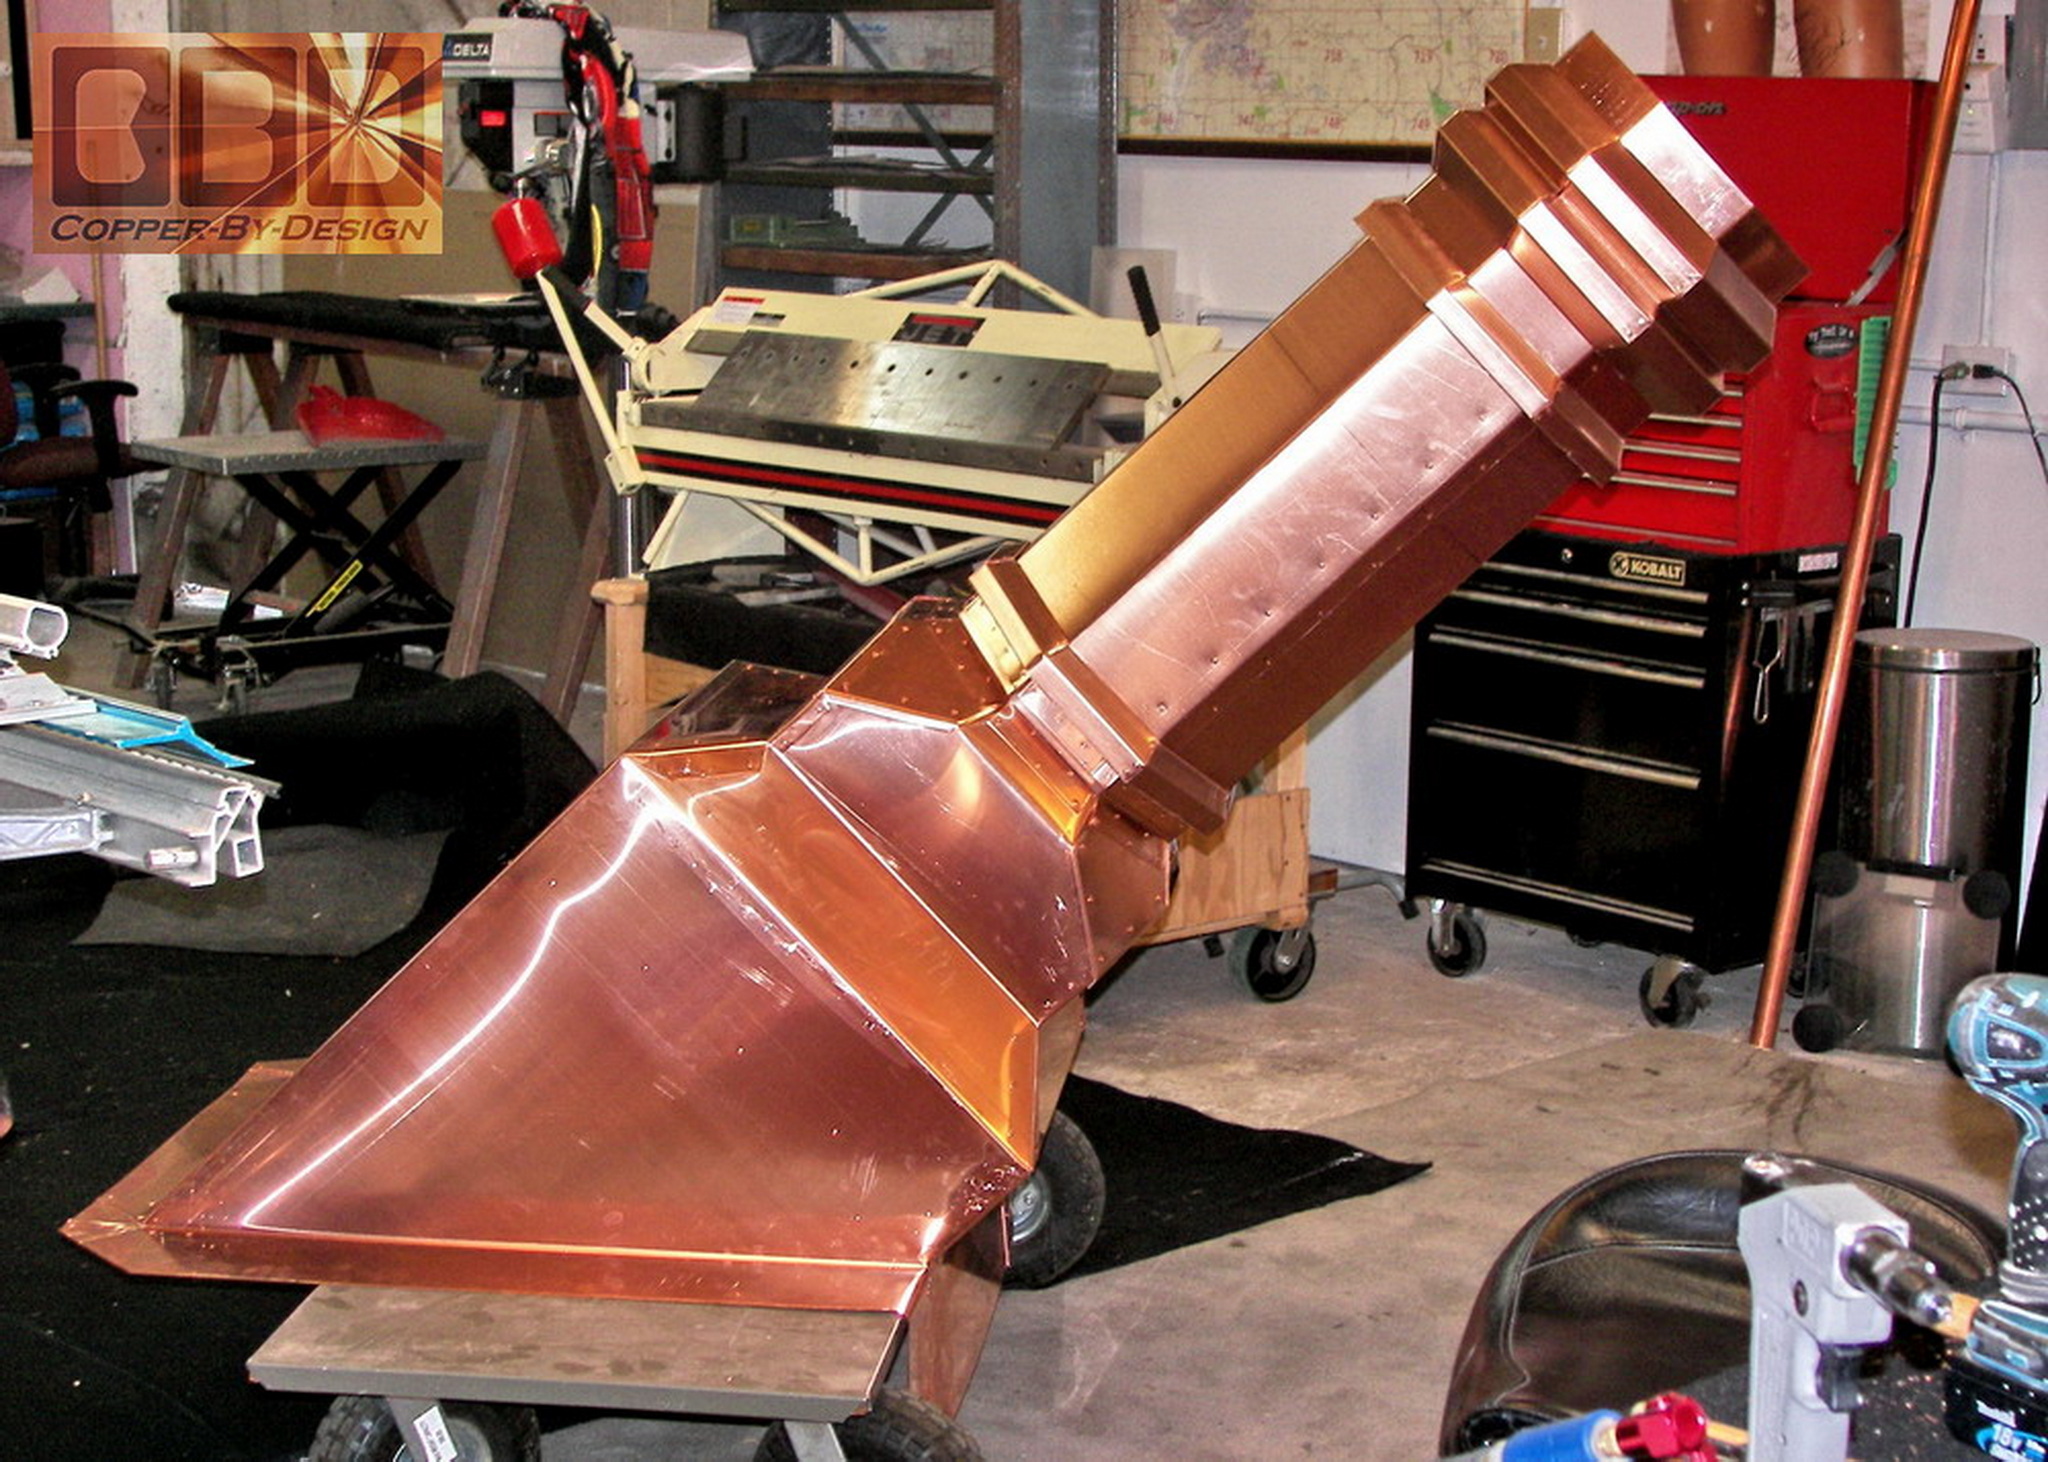
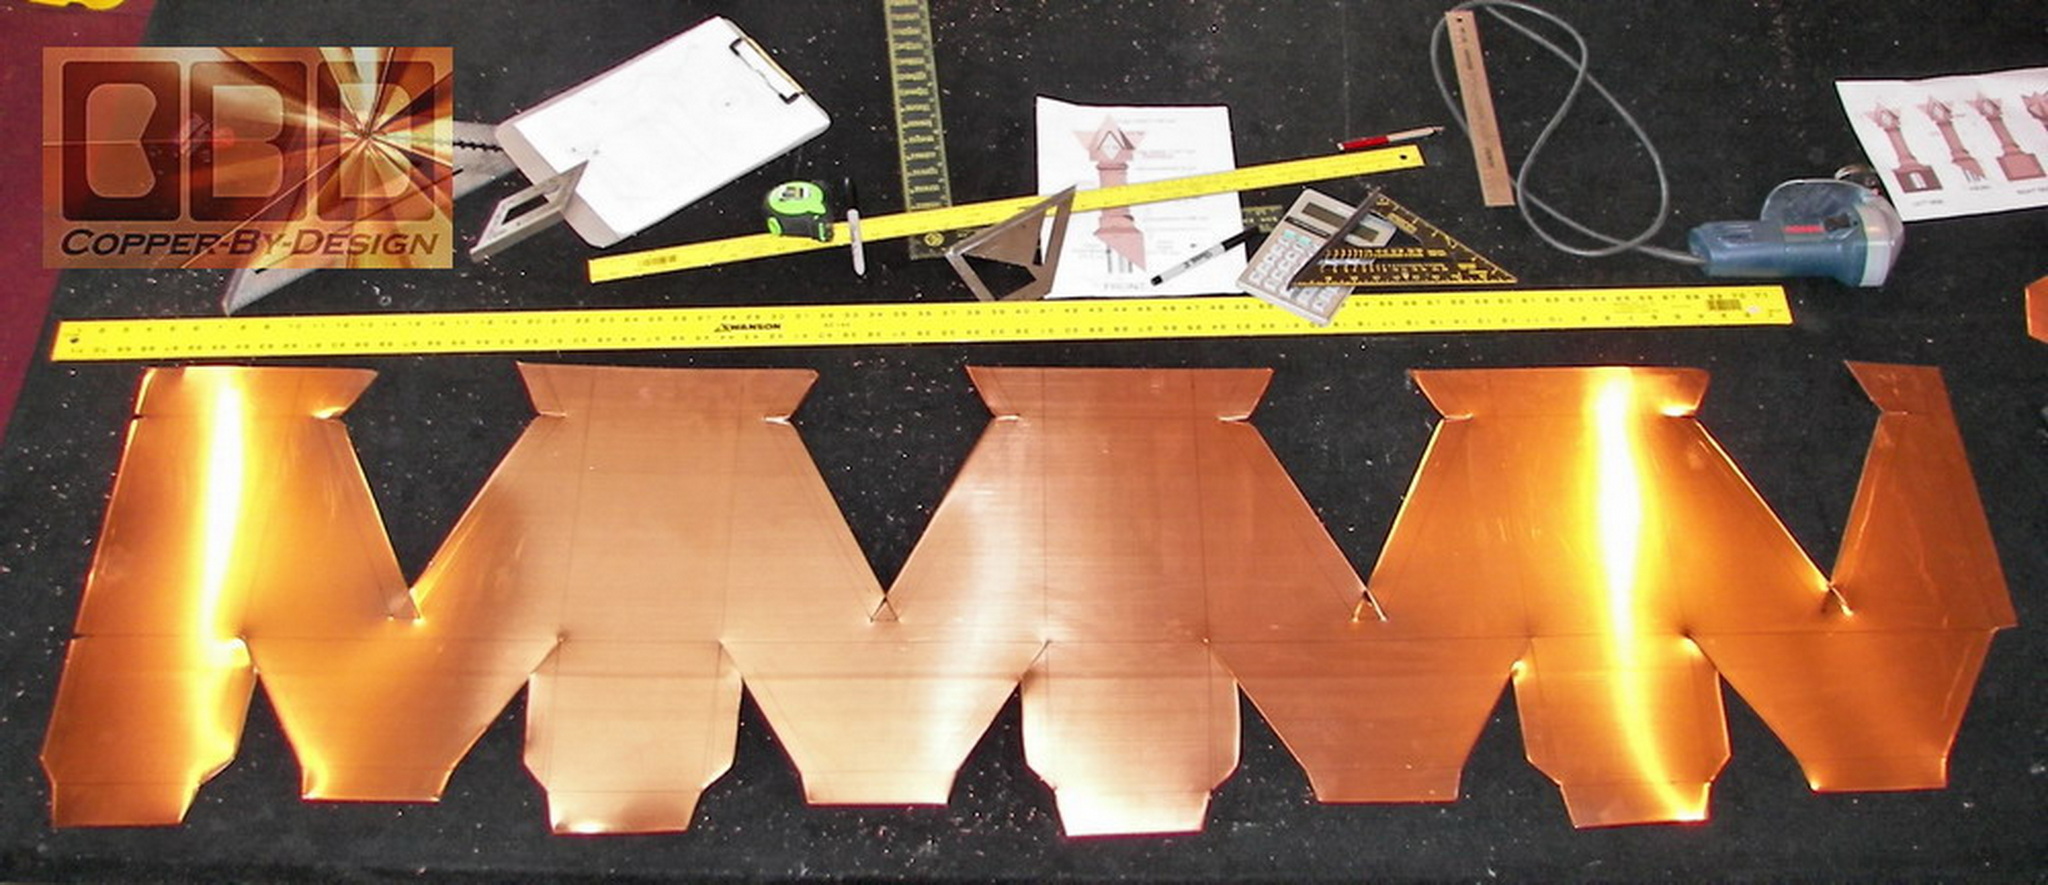
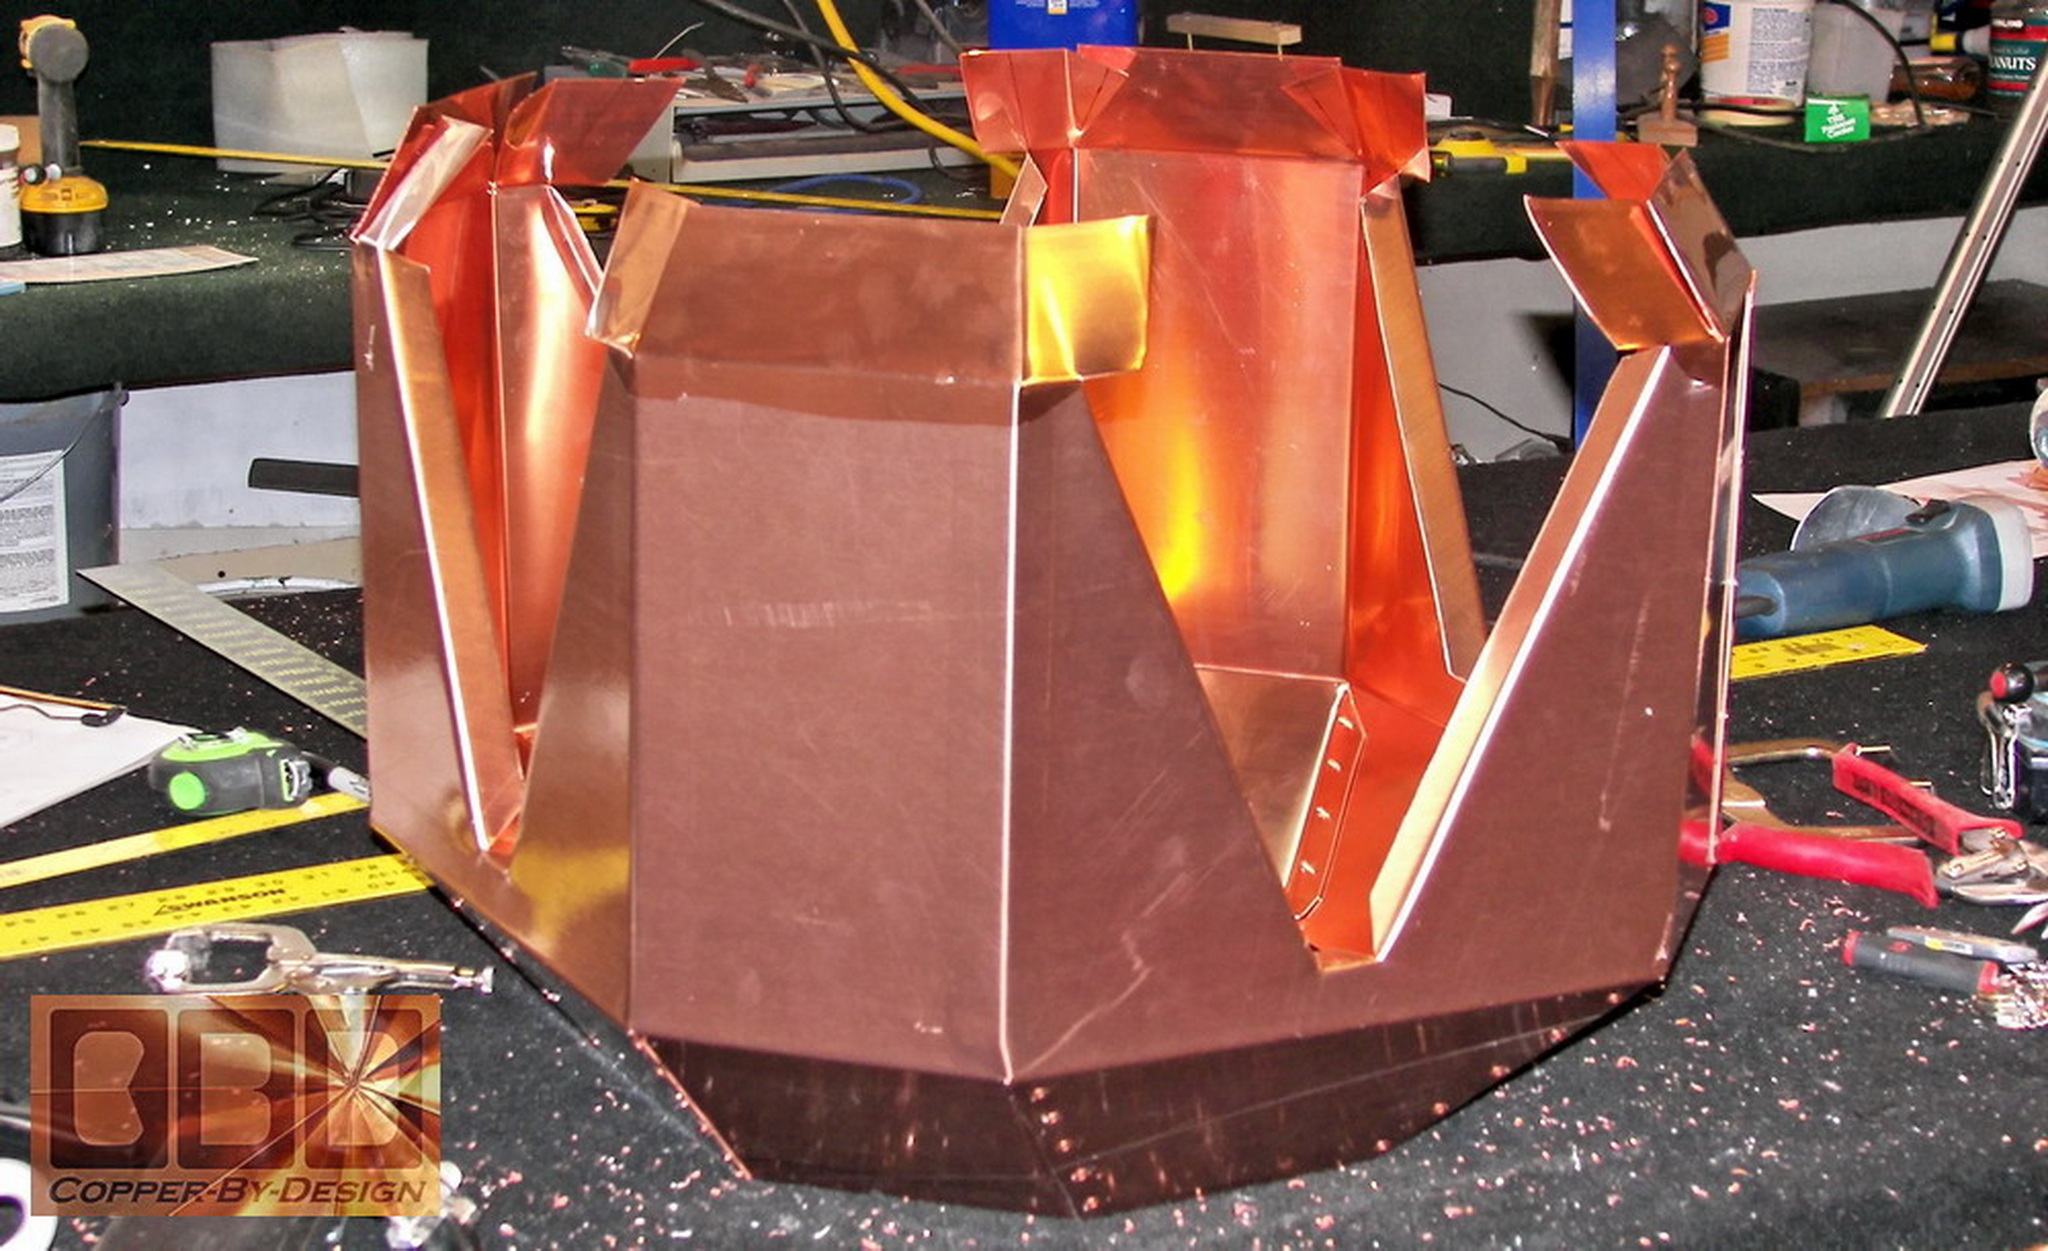
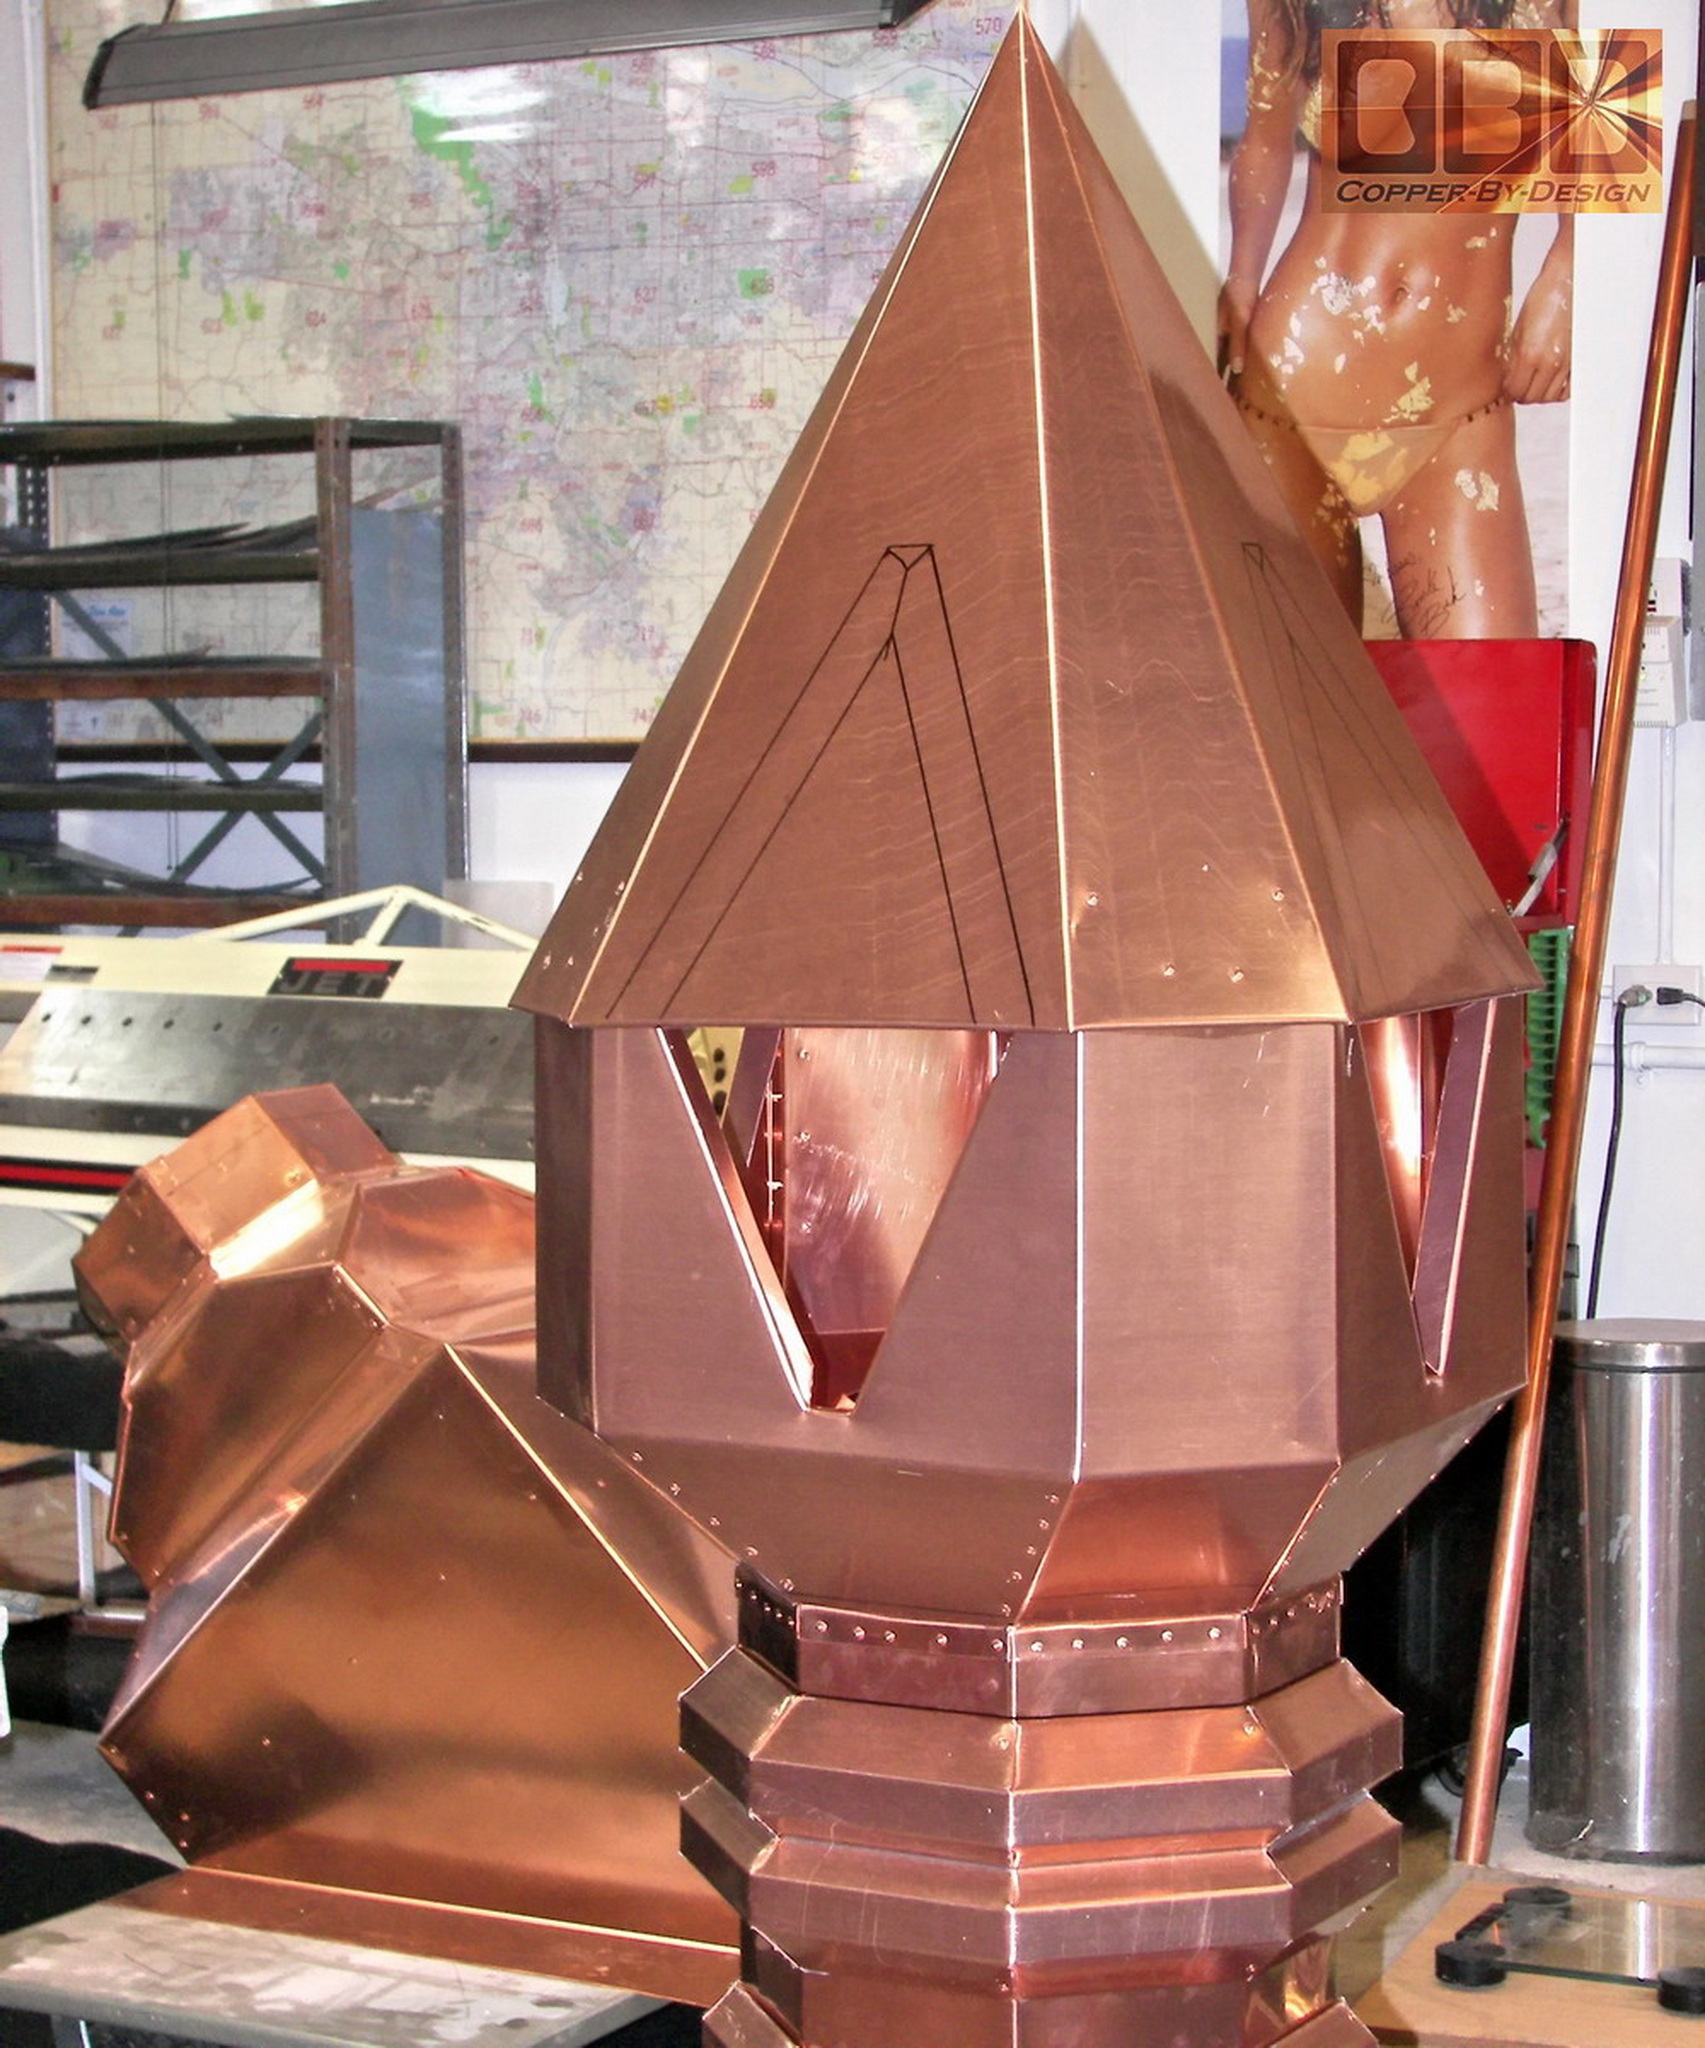
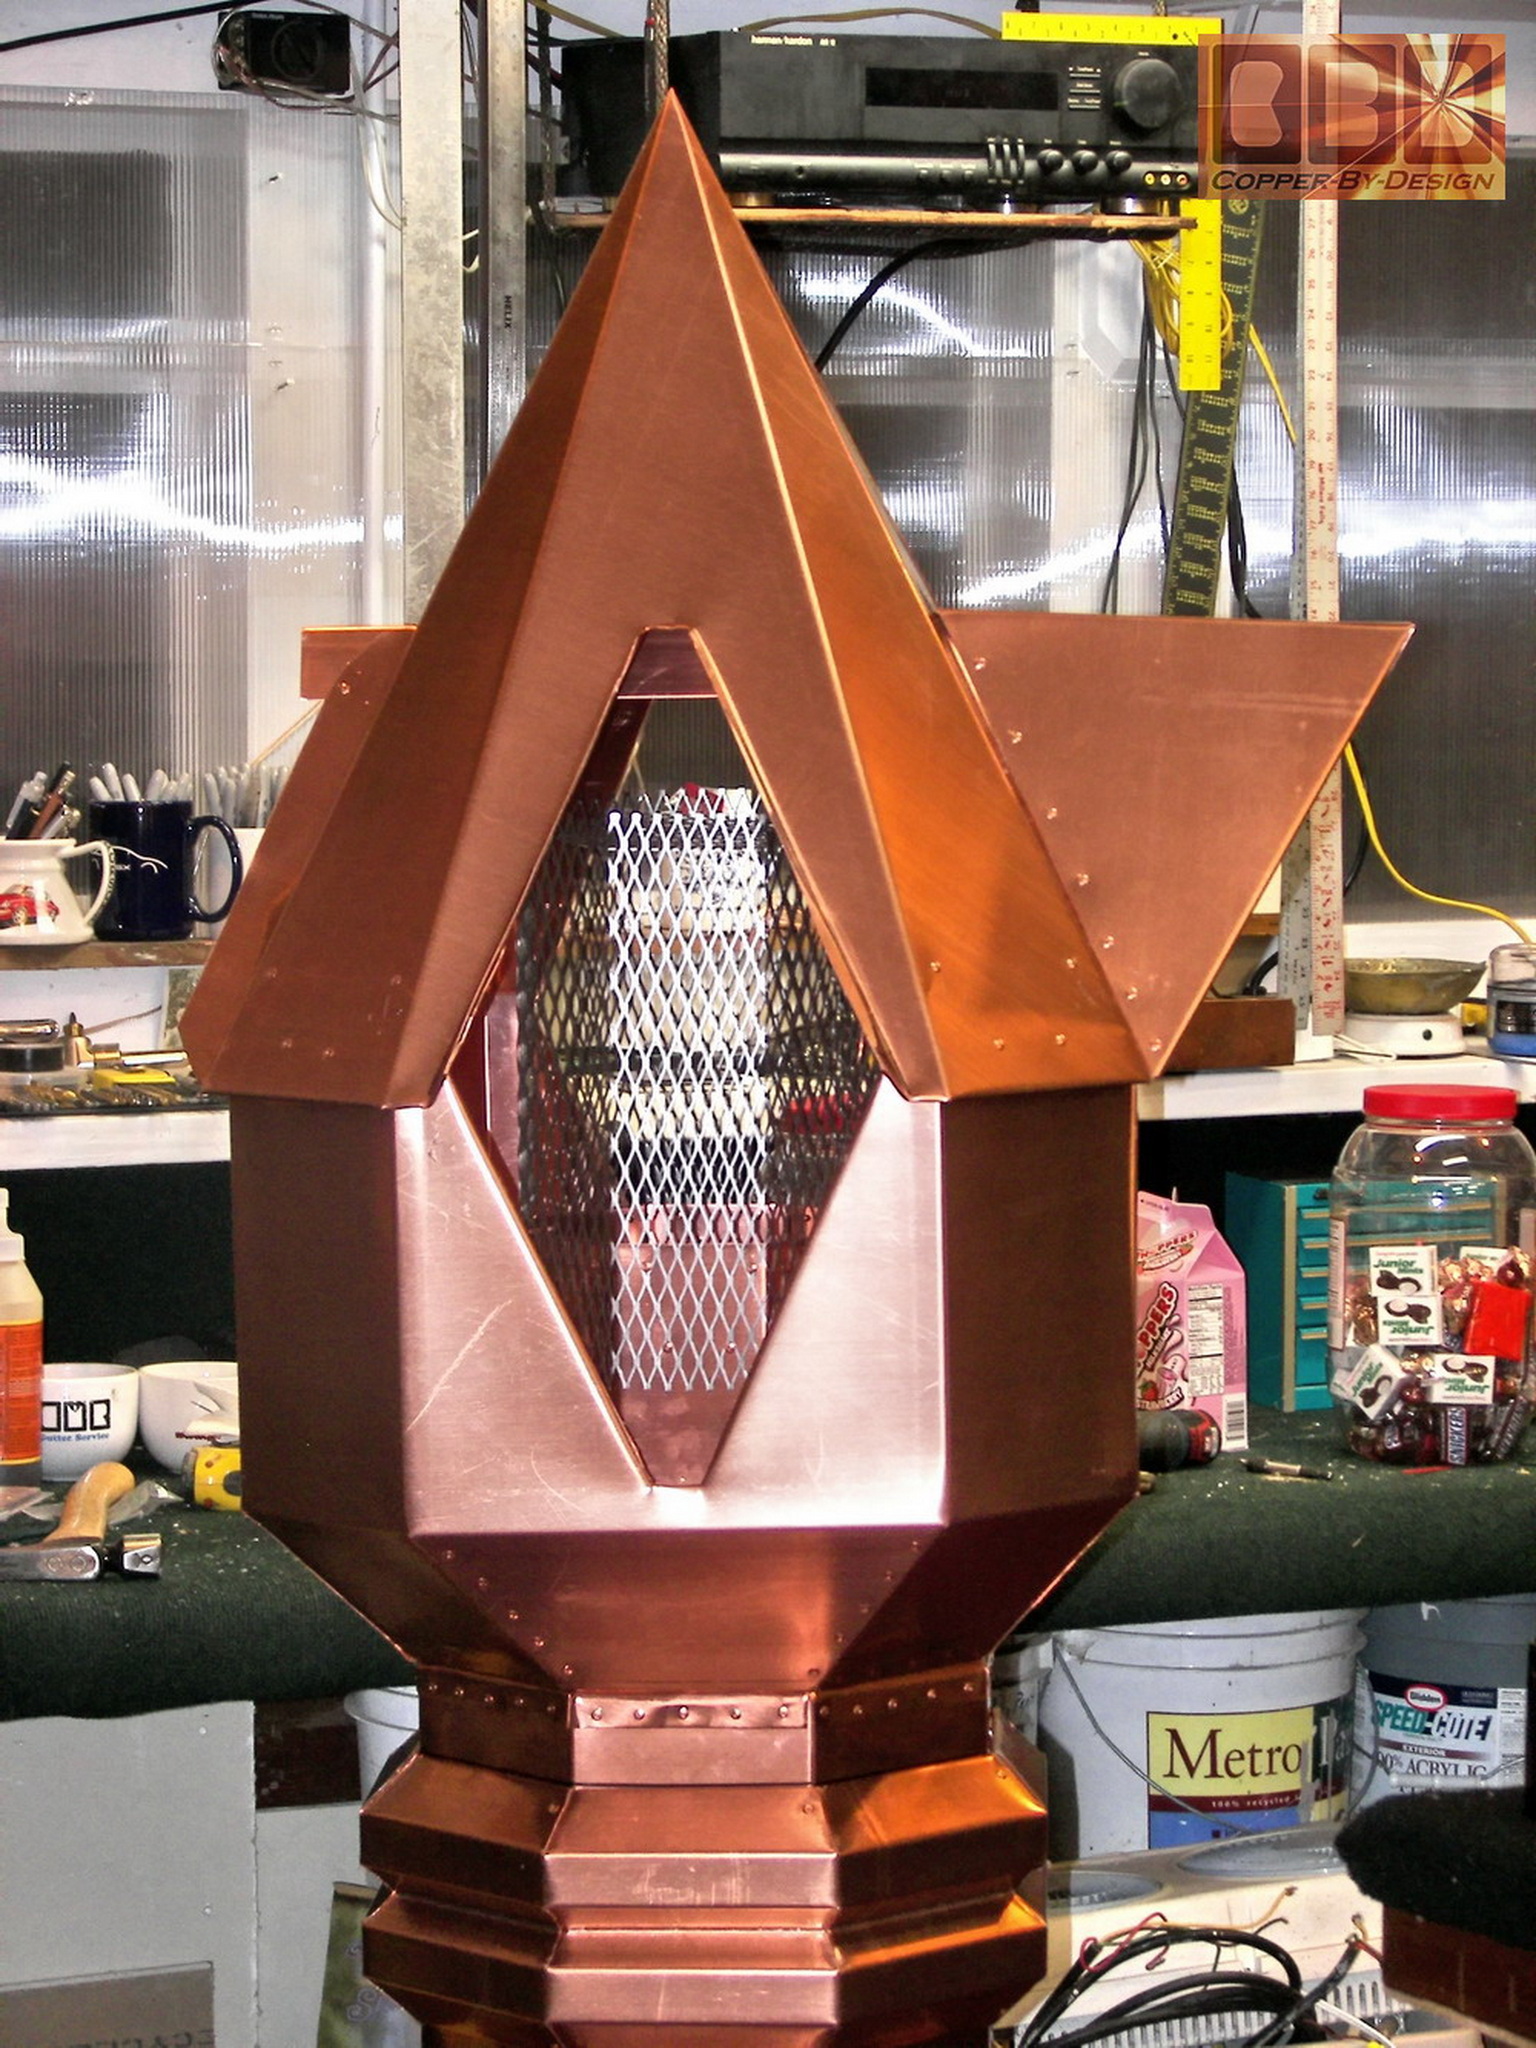
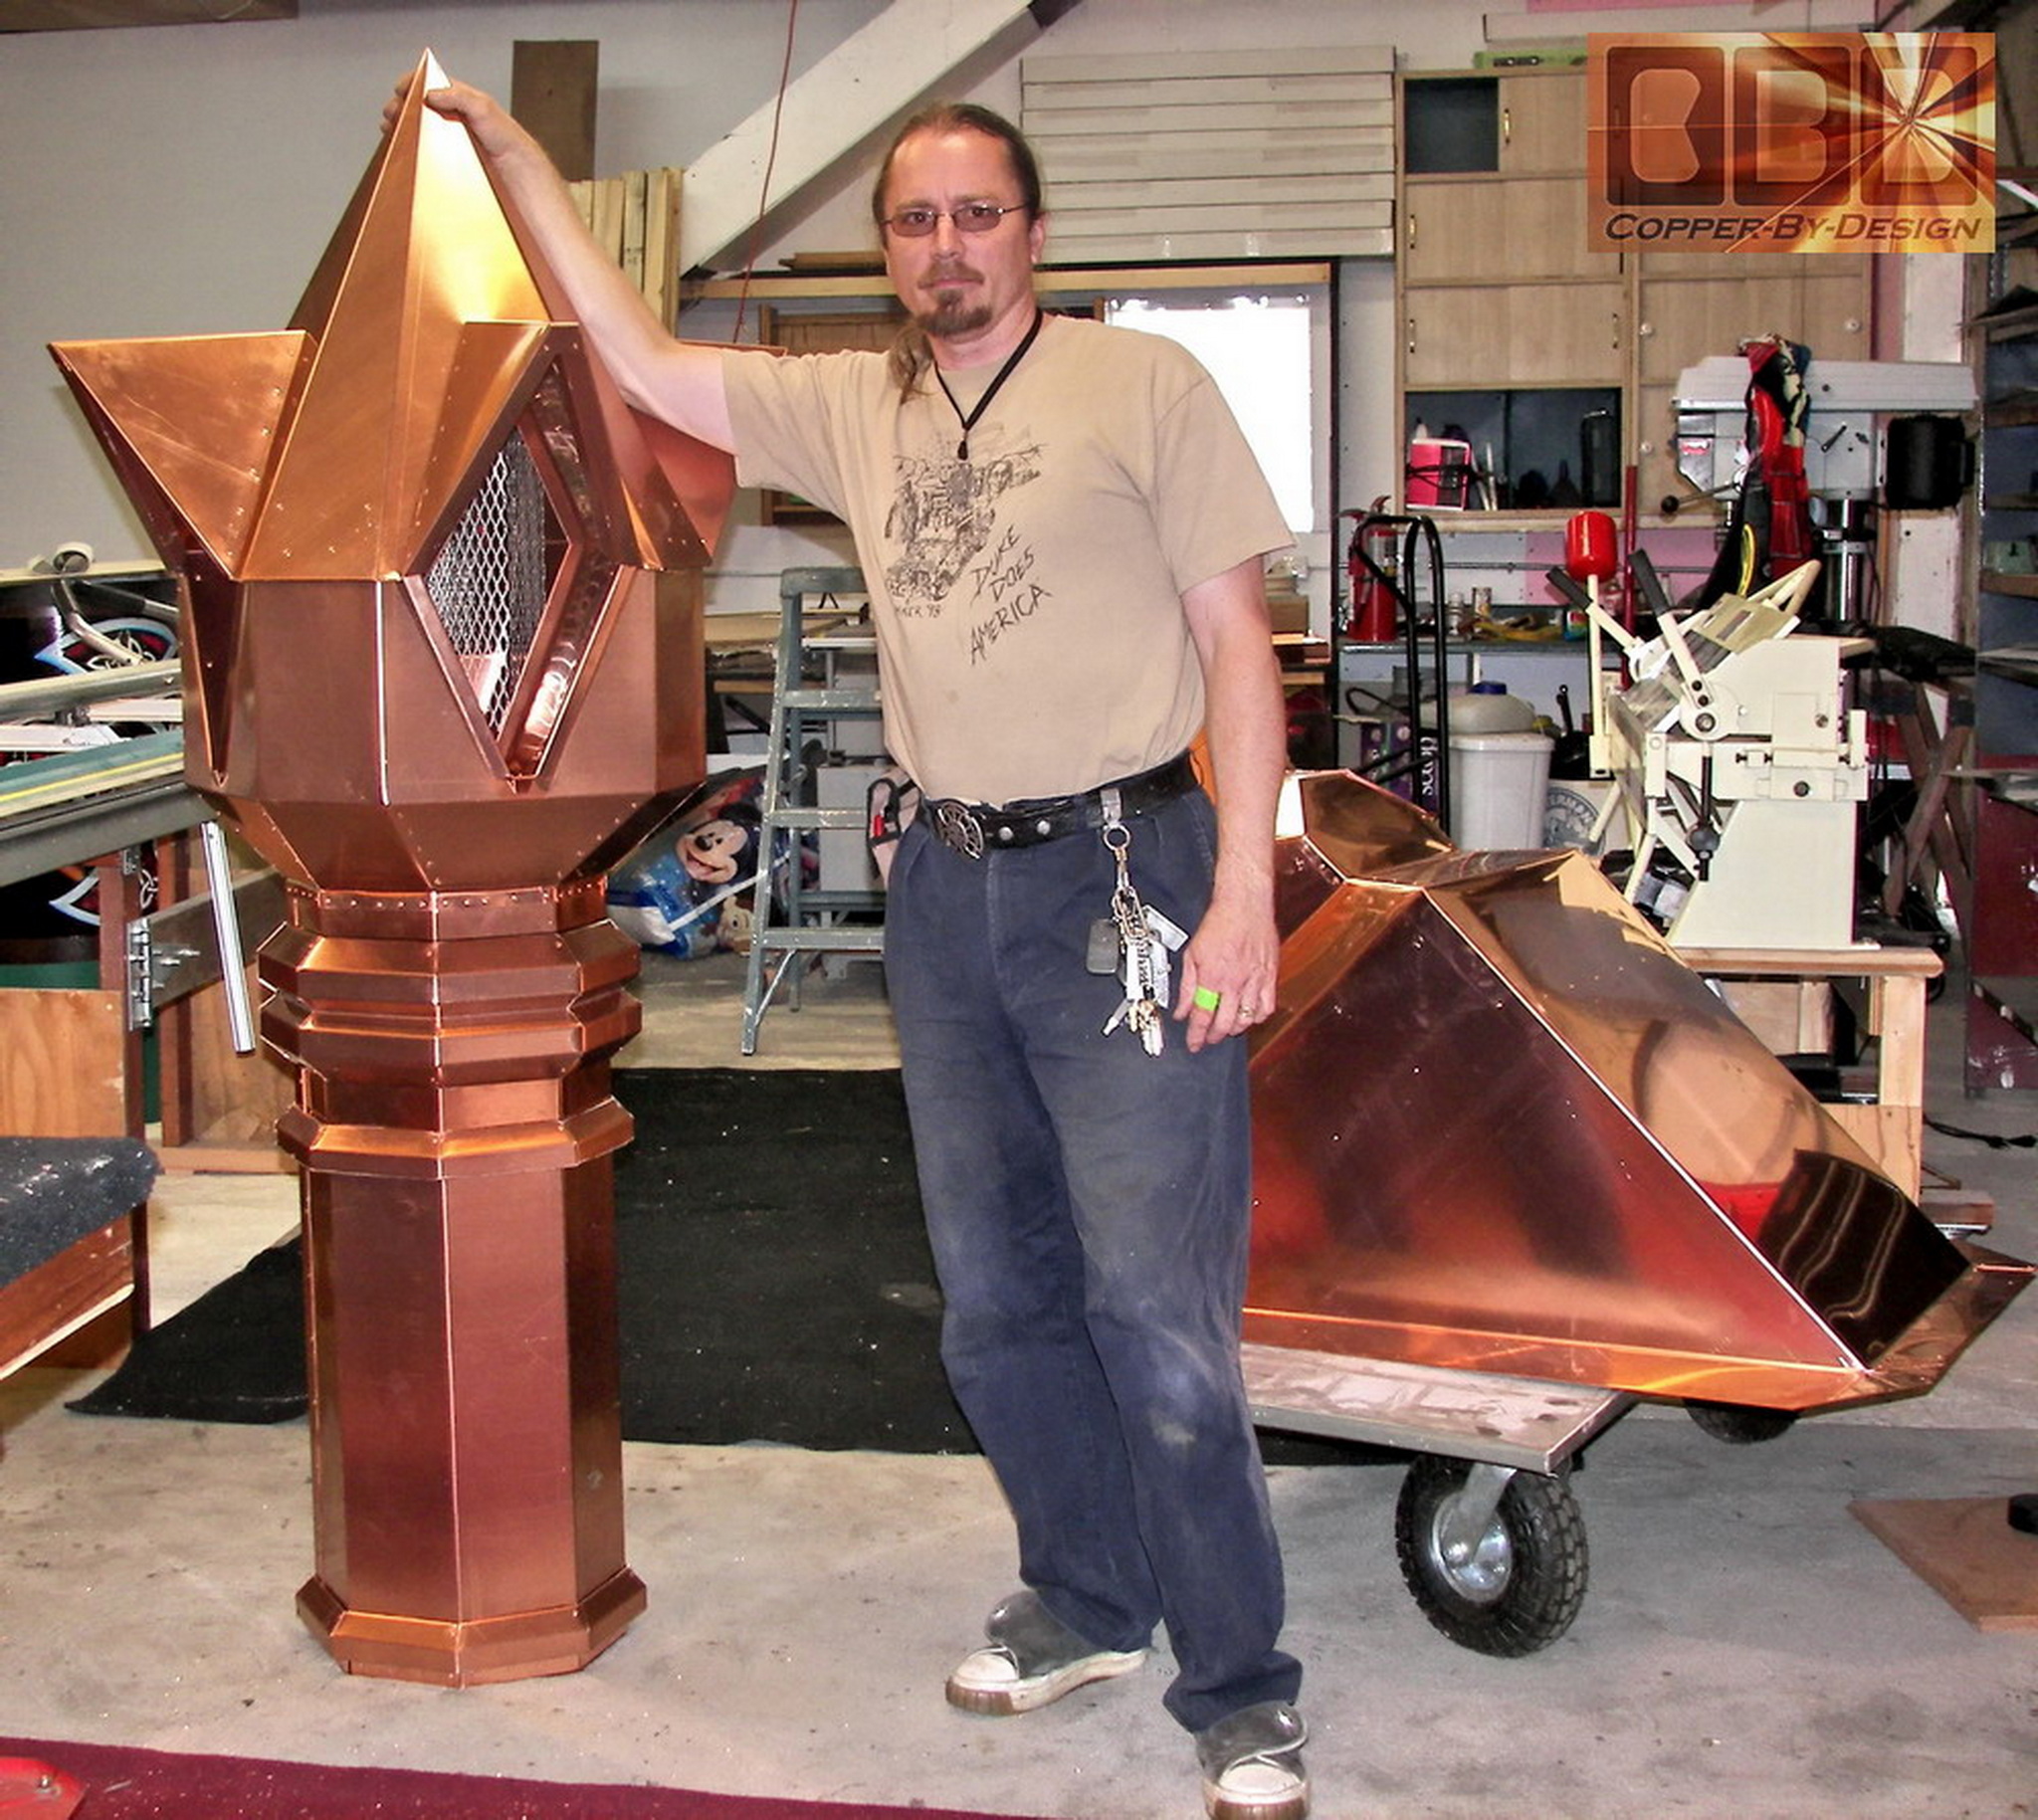
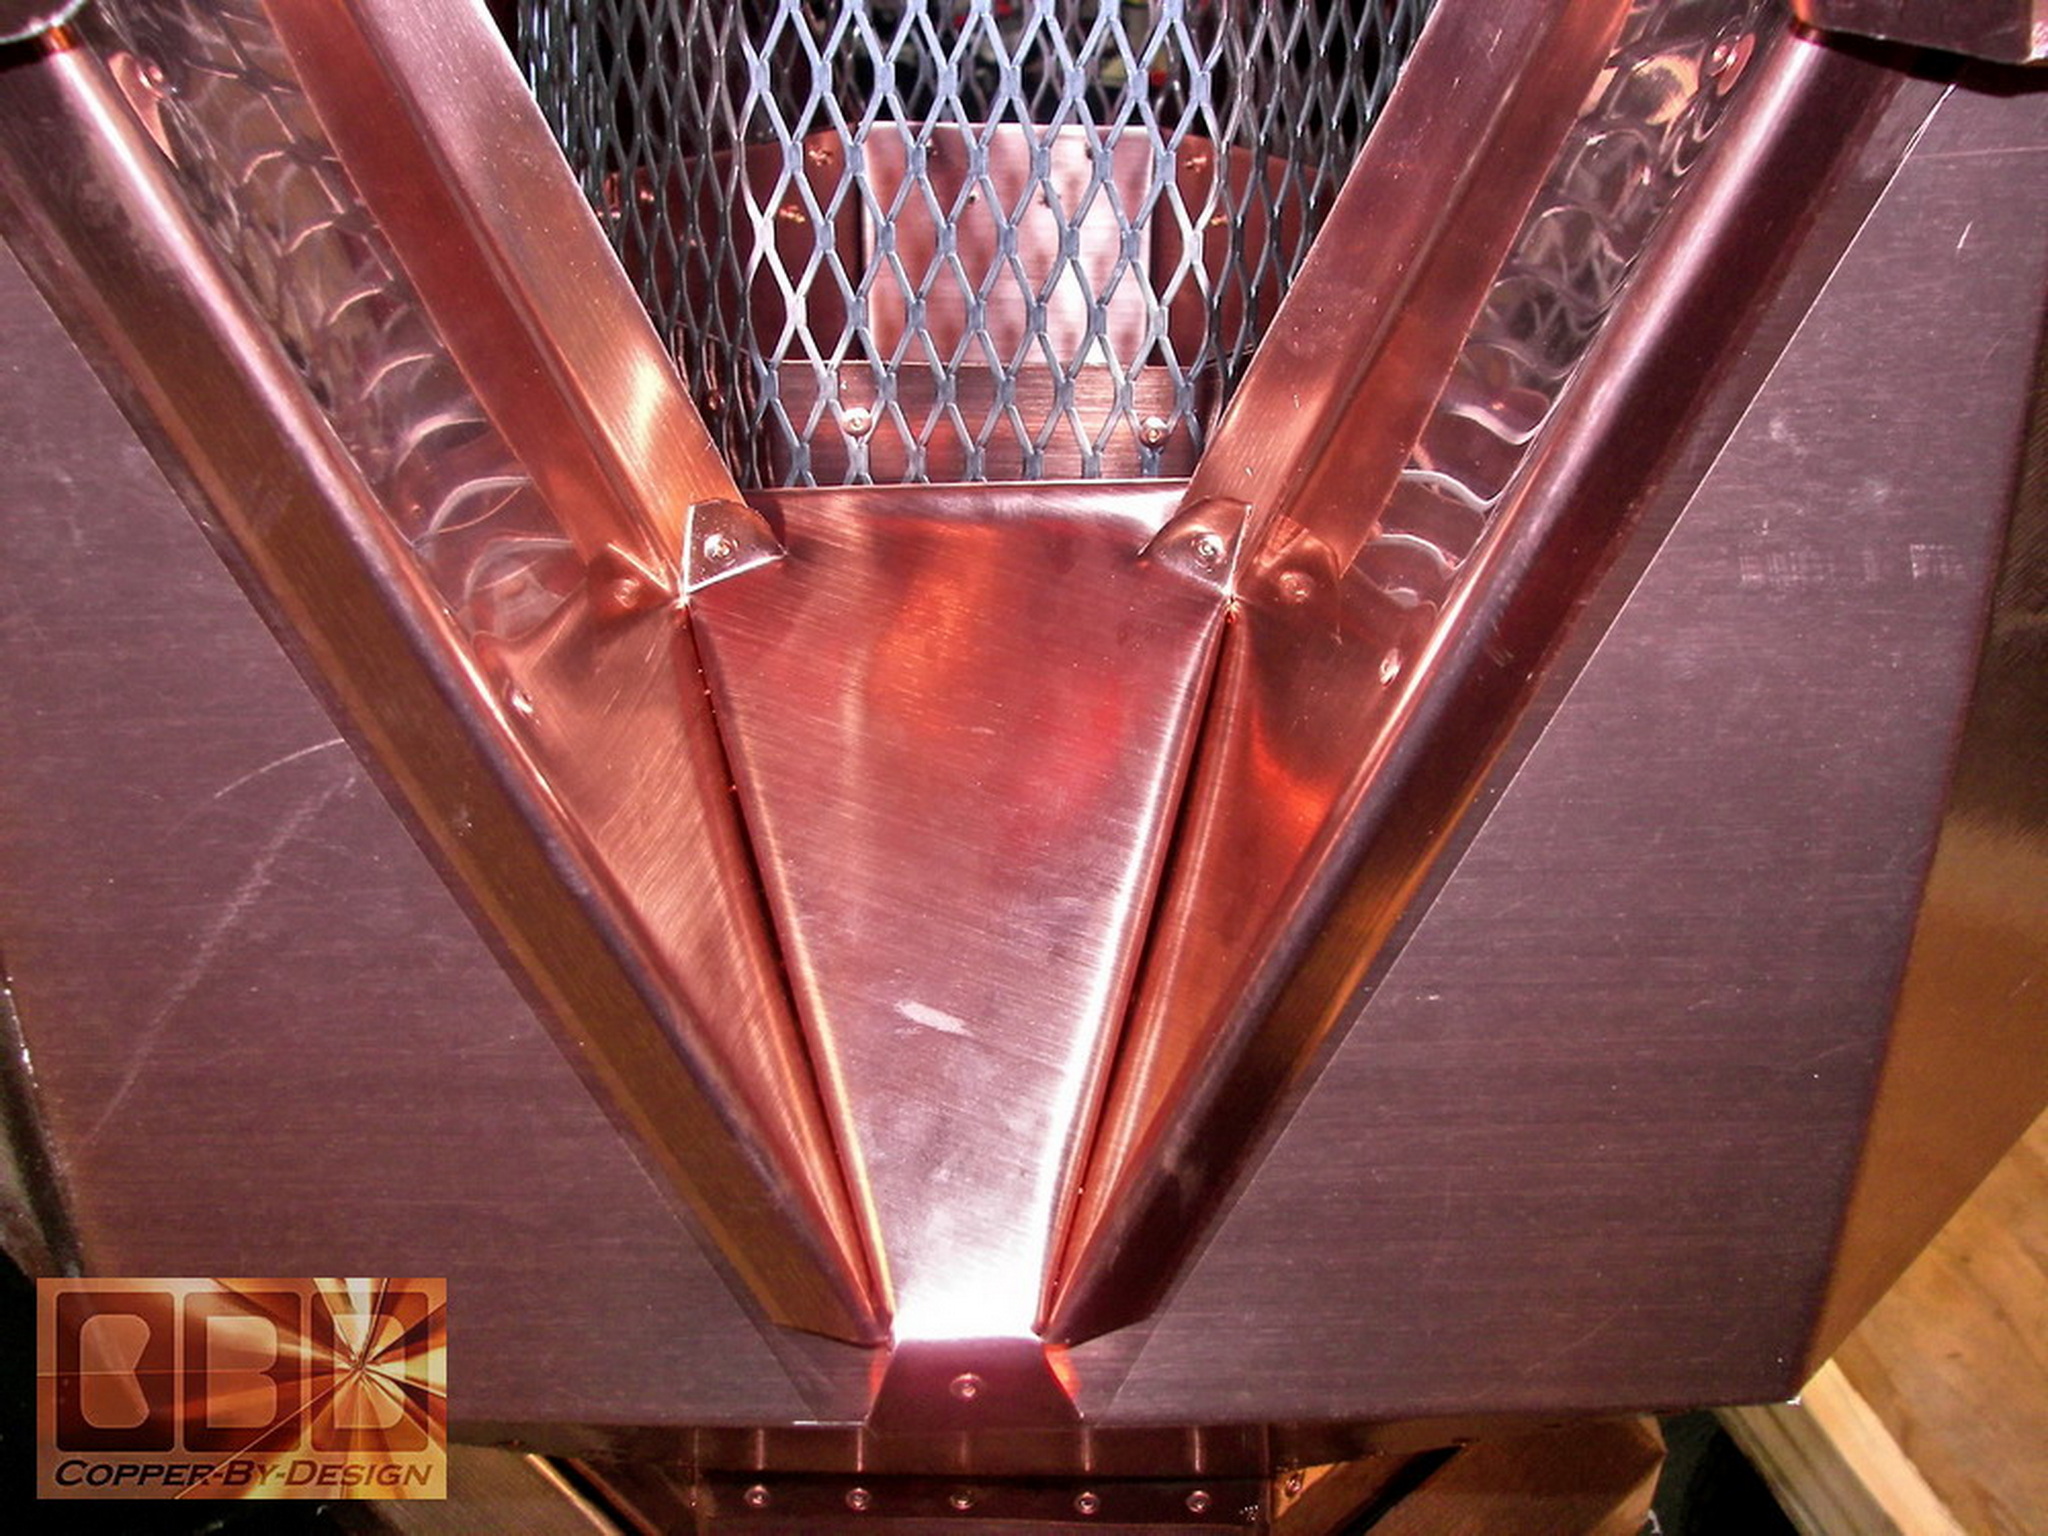
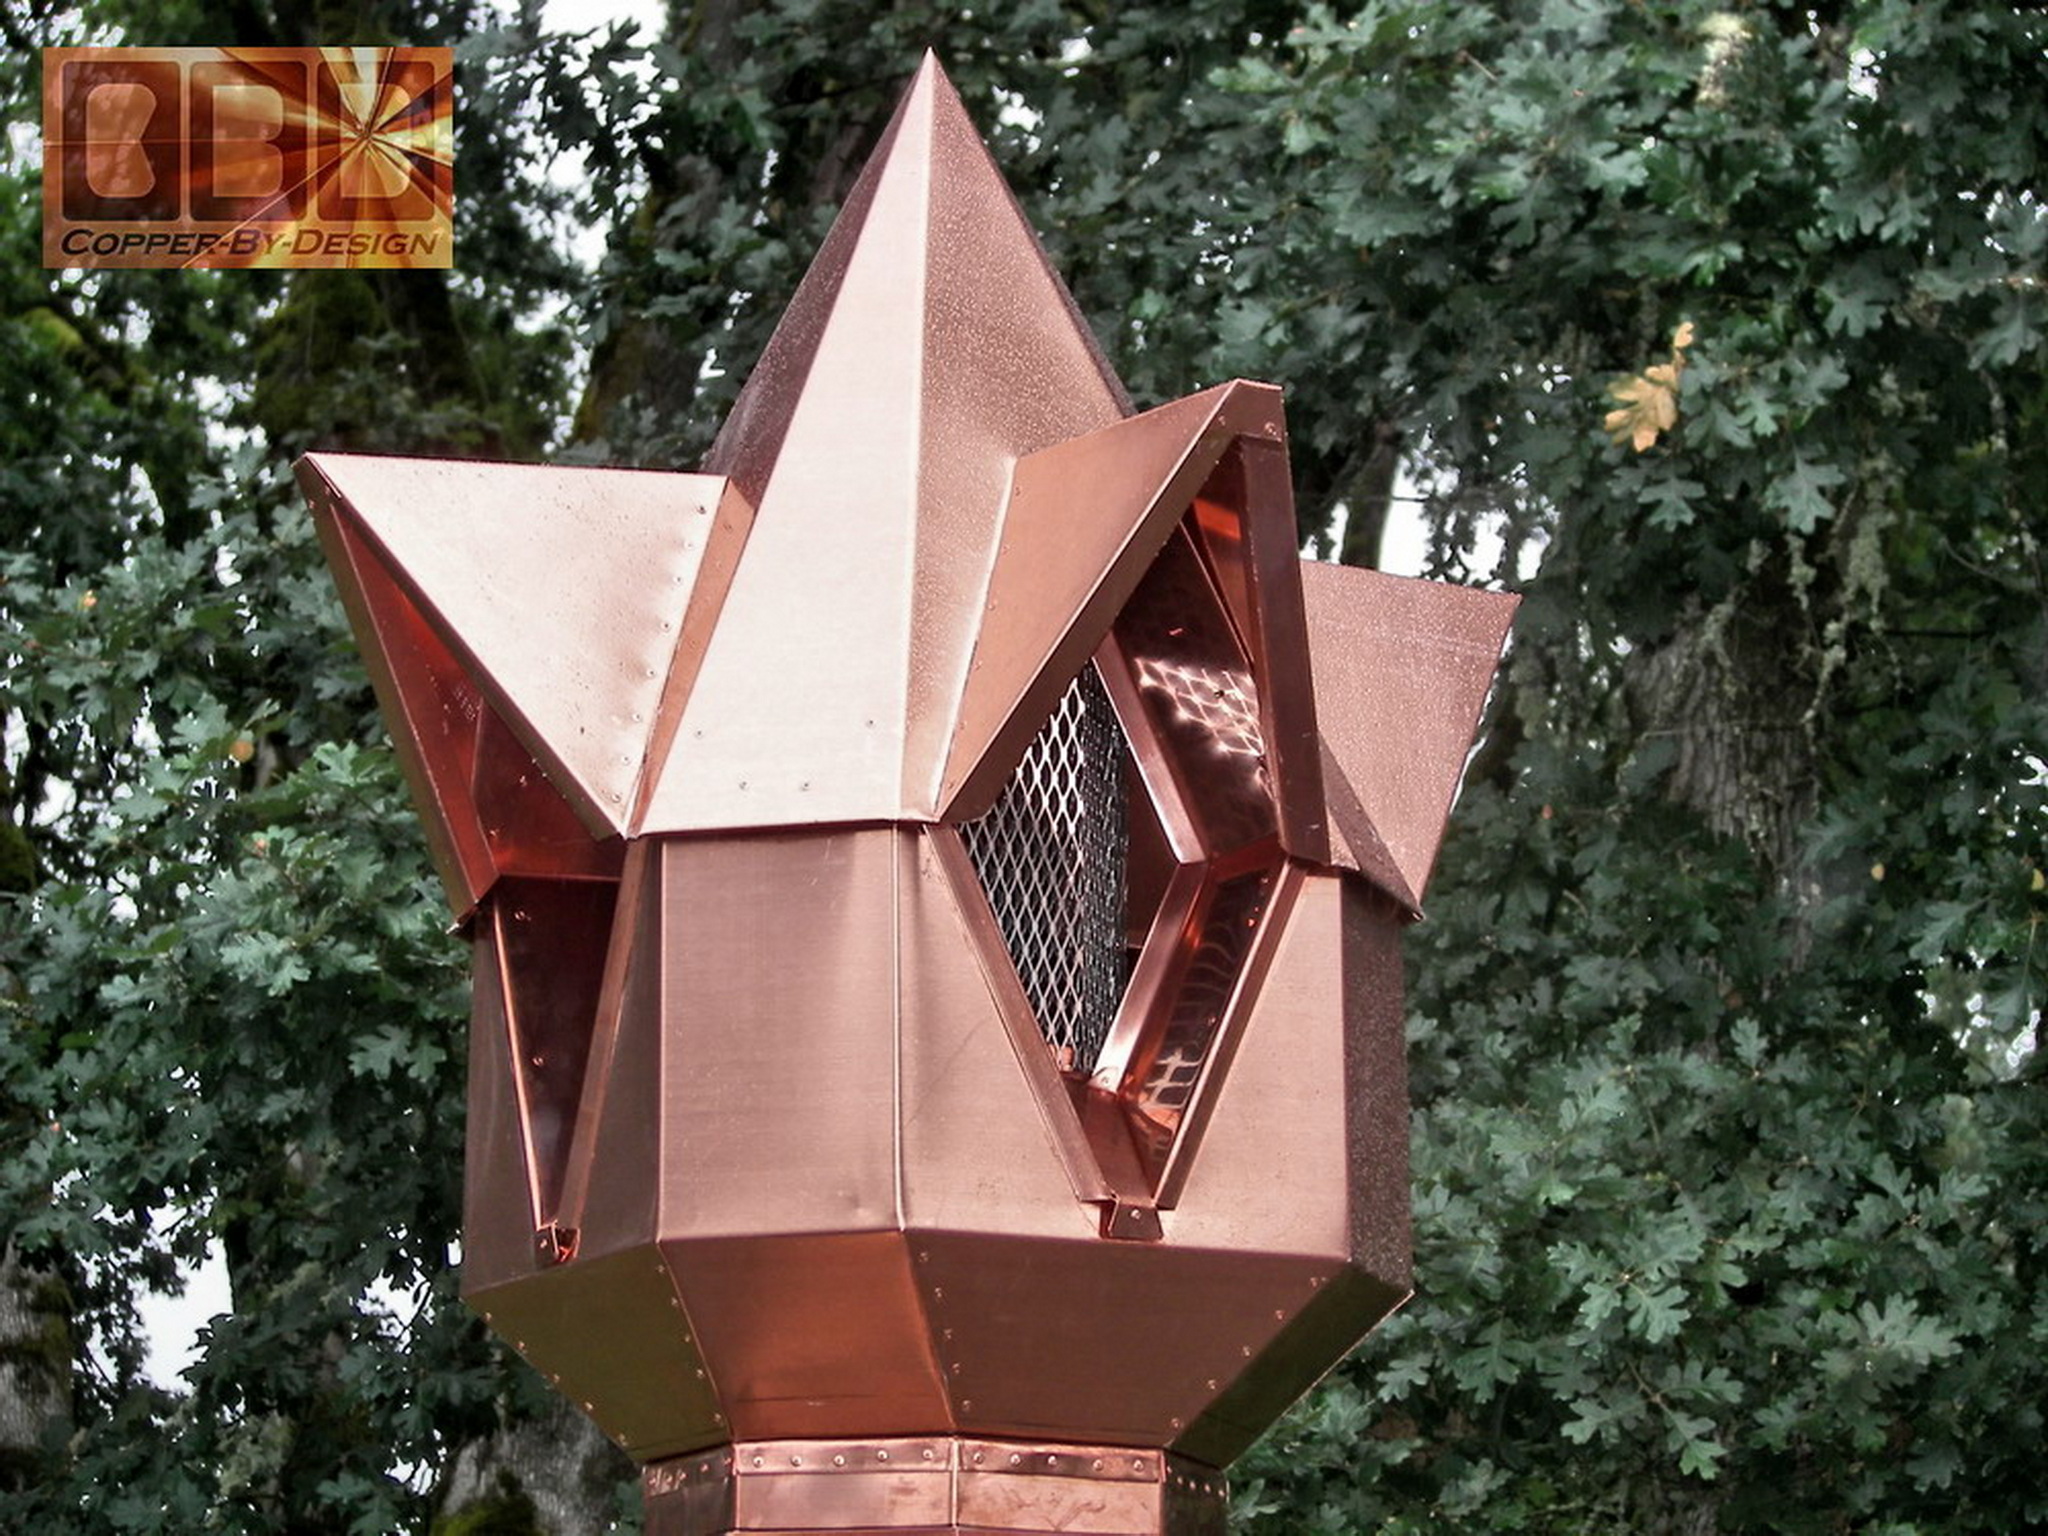
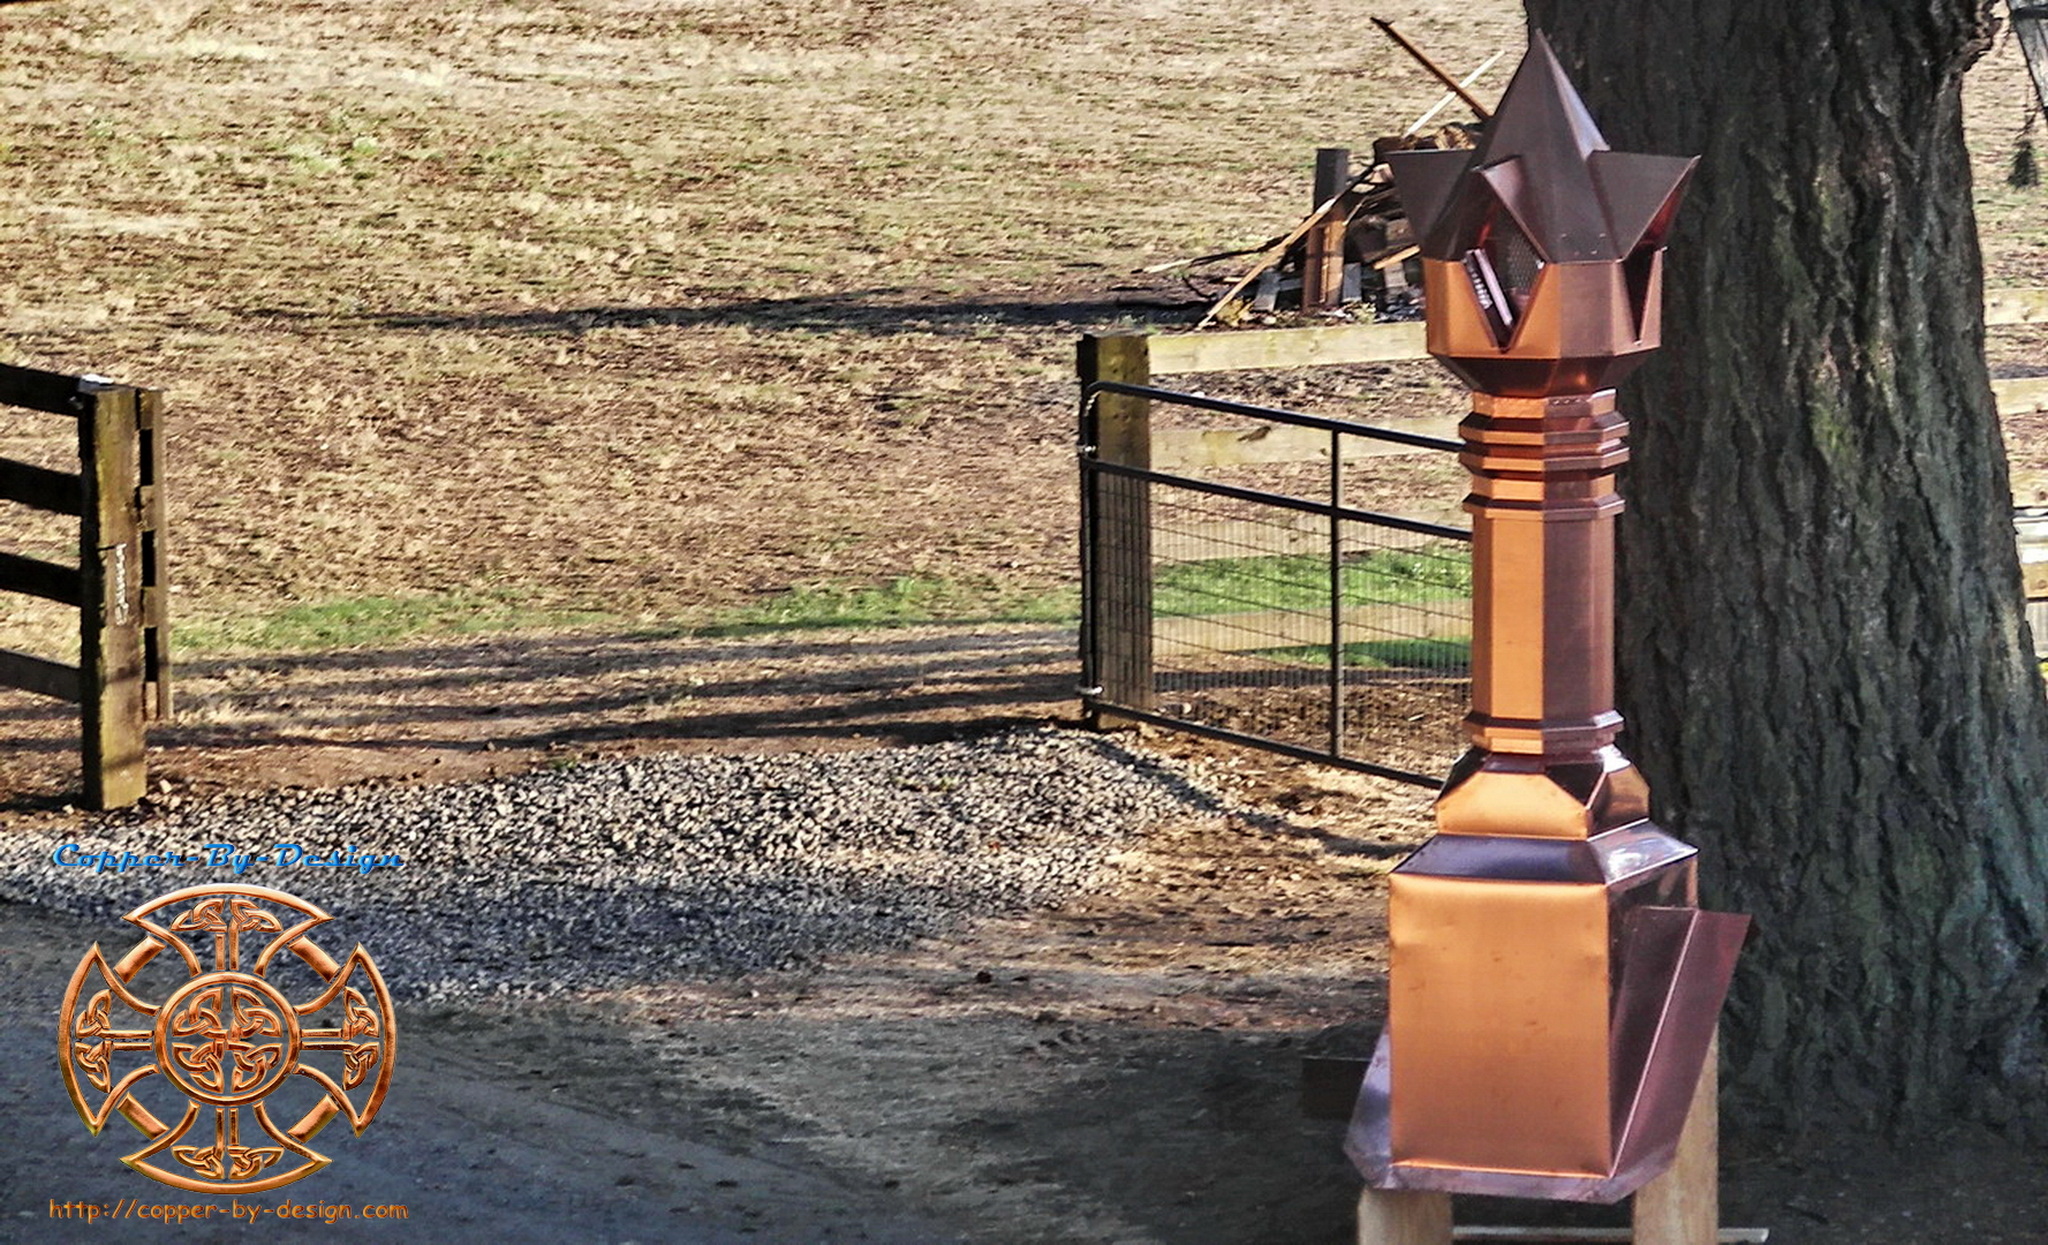
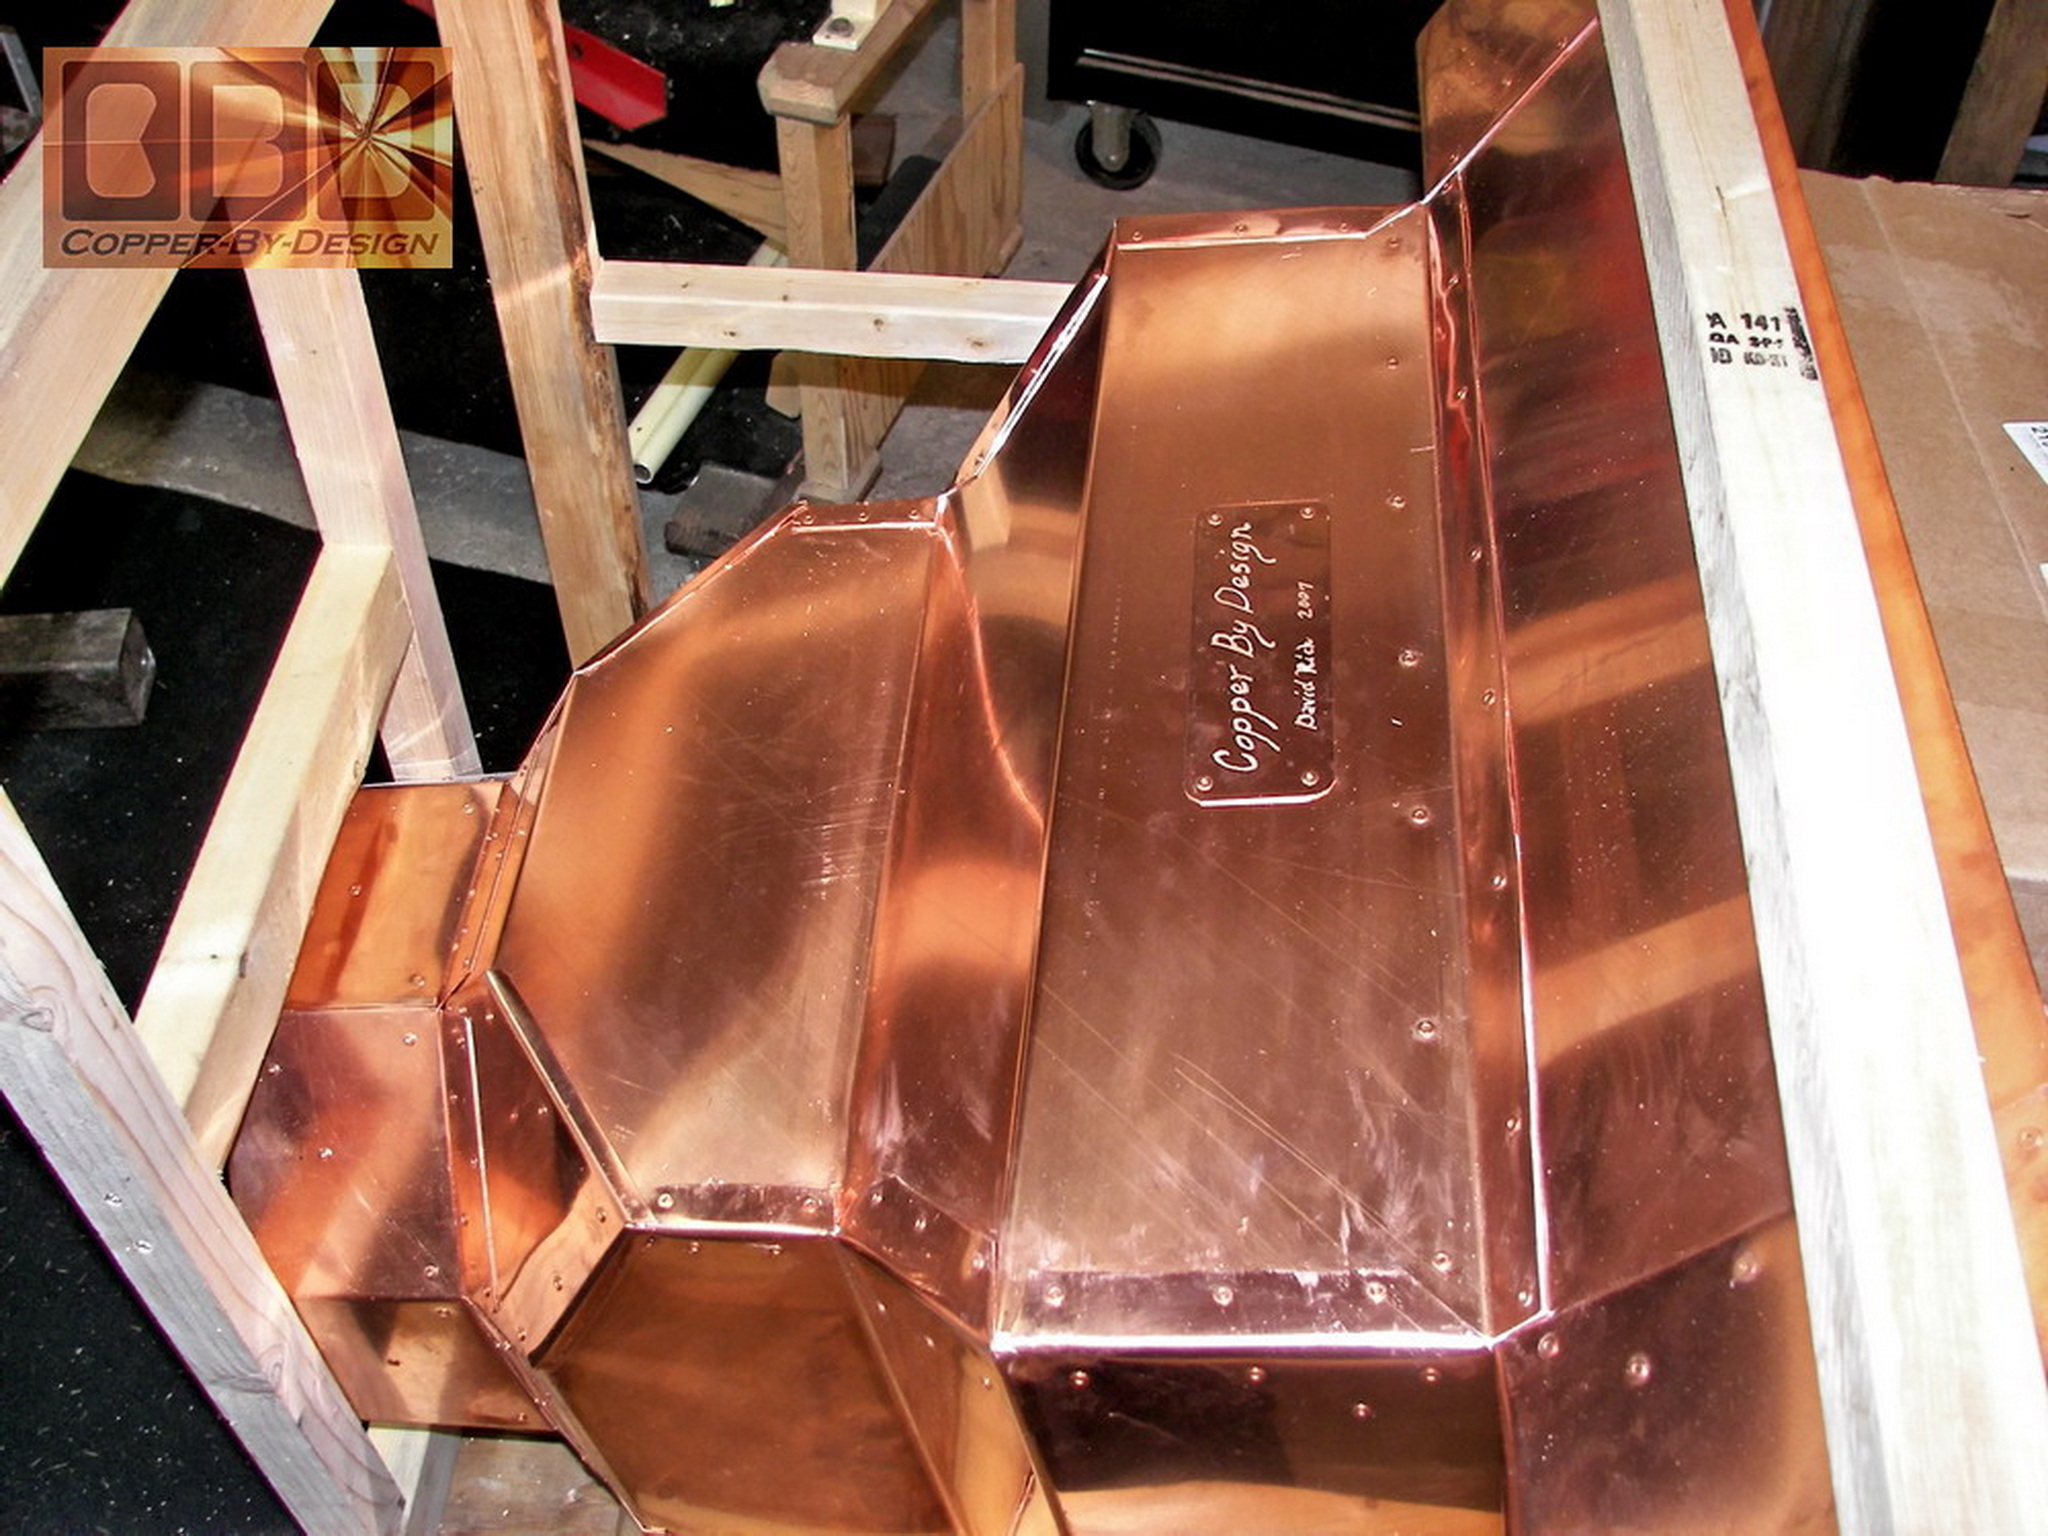
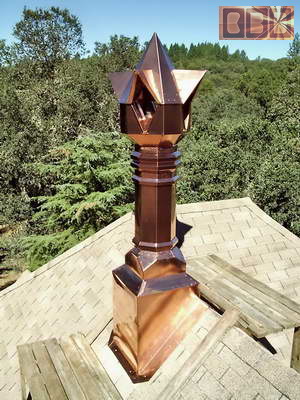
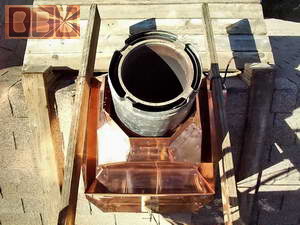
WOW! That's some incredible workmanship David! The top box is
like unbelievable. I have no idea how you managed to get the 24:12
roof point so perfect. That whole top box would impress anyone that
looked at it! I hope you took some more pictures during the interior
construction, showing the cross-bracing at the top of the exterior
hoods. Geez, I almost don't want to put it up on the roof, and instead
keep it inside the Parlor as an artistic sculpture! It's a good
thing I have the boom lift. No one will believe me unless I take
them for a lift ride to see it for themselves up close!
Am I to understand that the protective plastic covering has already
been removed on the base unit? That would actually be nice. There
is no way I wouldn't remove the plastic on either unit prior to
lifting them up onto the roof. It would be so stupid to try doing
that on the rooftop afterwards.
I'm going to need to spend some good time considering how to grab the base and suspend it from
the lift basket in order to drop it into place. A rope across underneath
the rooftop ridge bend flashing is the only place I see to support
it. Then another rope or two somehow from under the bottom flange
to rotate it to vertical, so I can drop it straight down over the
flue pipe. Don't worry. I'll figure it out. And how to get a bead
of caulk under the flashing flanges sounds like a challenge. I may
only be able to lay a bead around the outside edge, after screwing
the base unit down.
I told Lynn last night that she is going to need to go up in the lift basket with me. This sure seems like
a two person job. Plus, she can sure get much better pictures from
up there close. Guess I'll need to give her a quick lesson on how
to operate the basket controls.
This installation will be an adventure for both of us.
Jack Willard
Date: Tue, 4 Sep 2007
David,
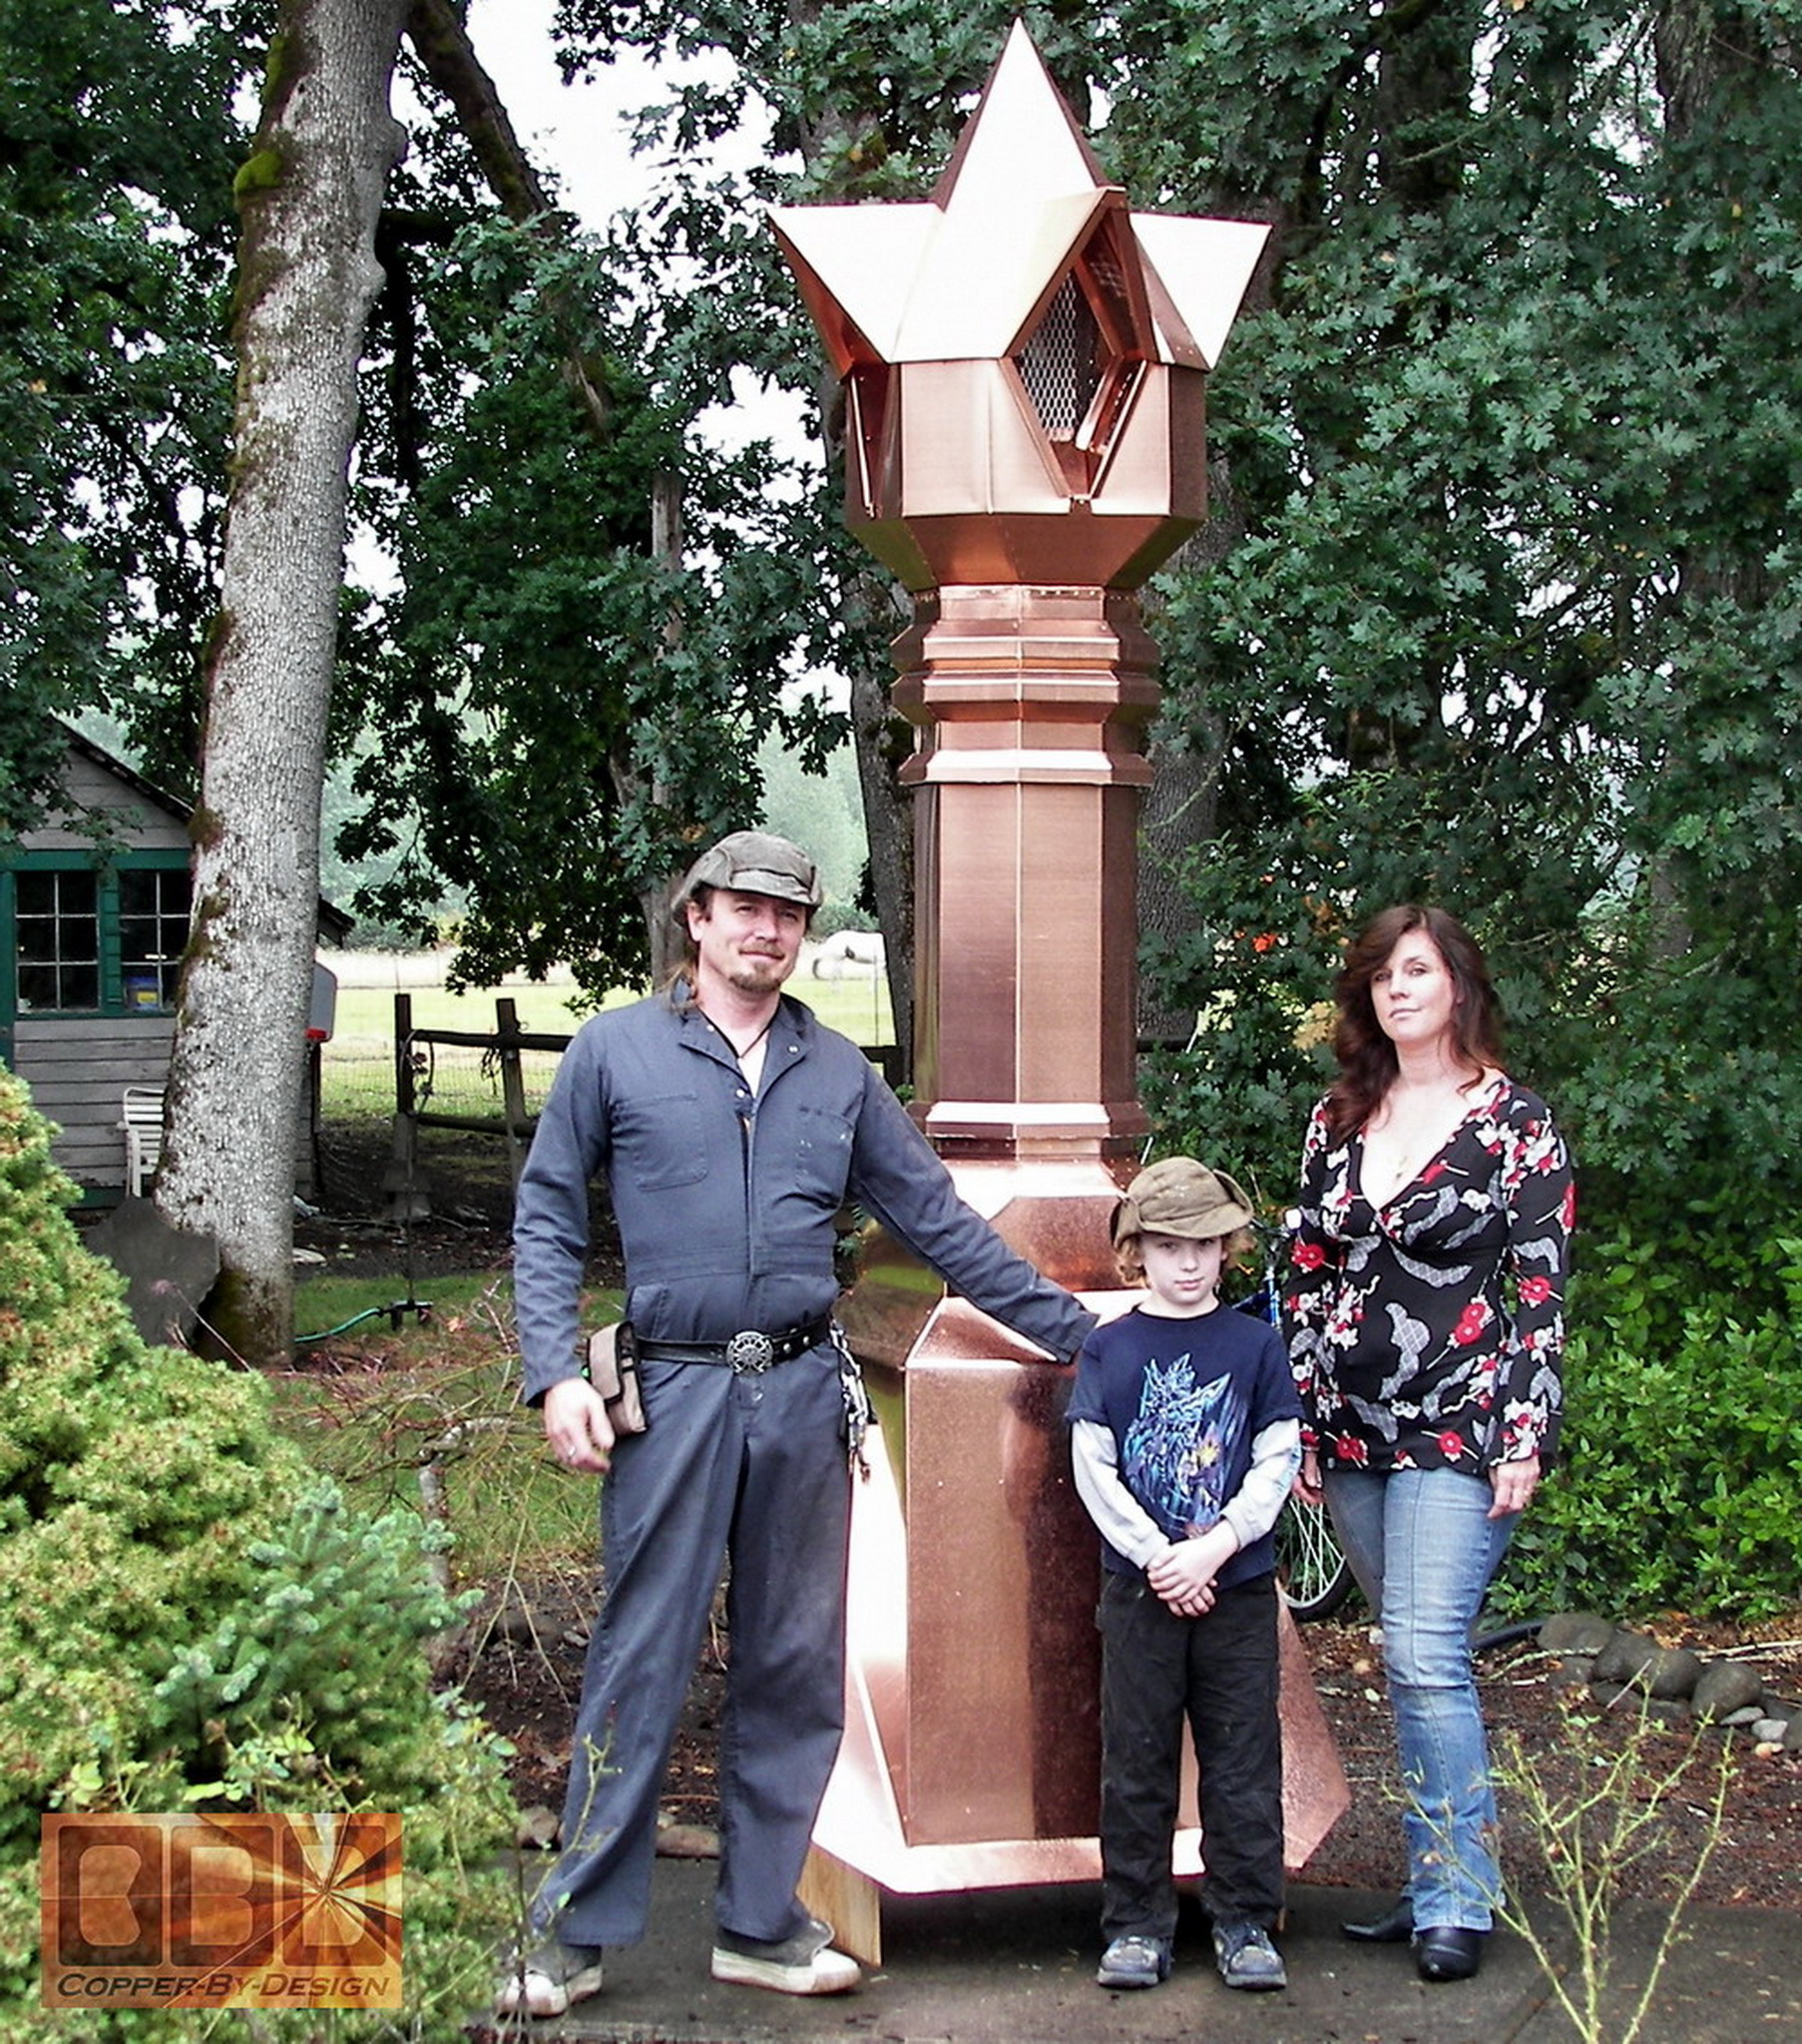
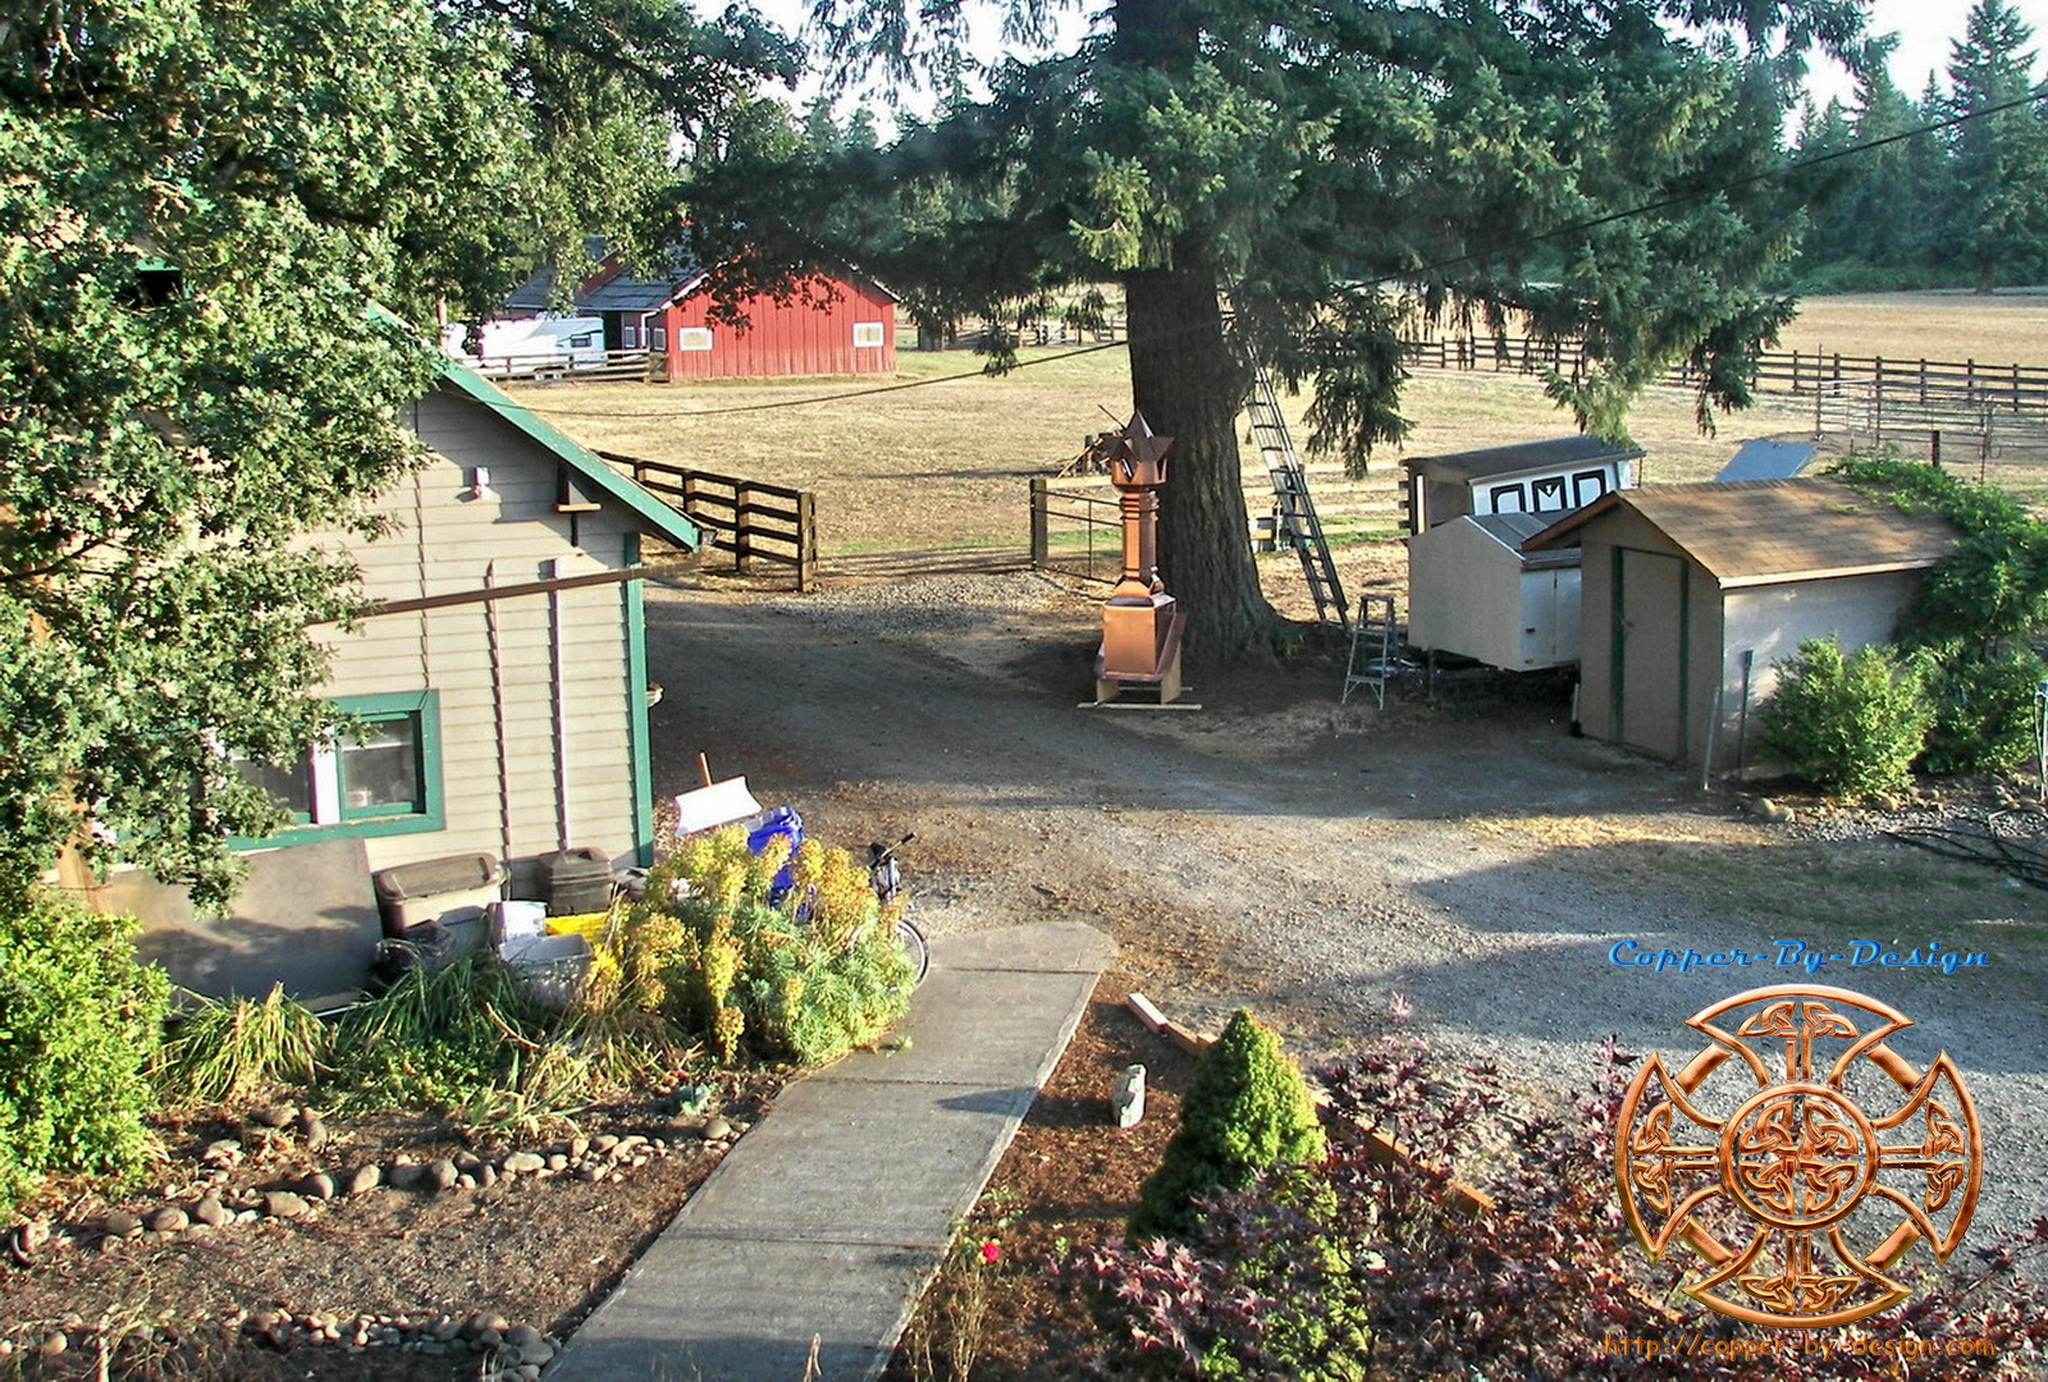
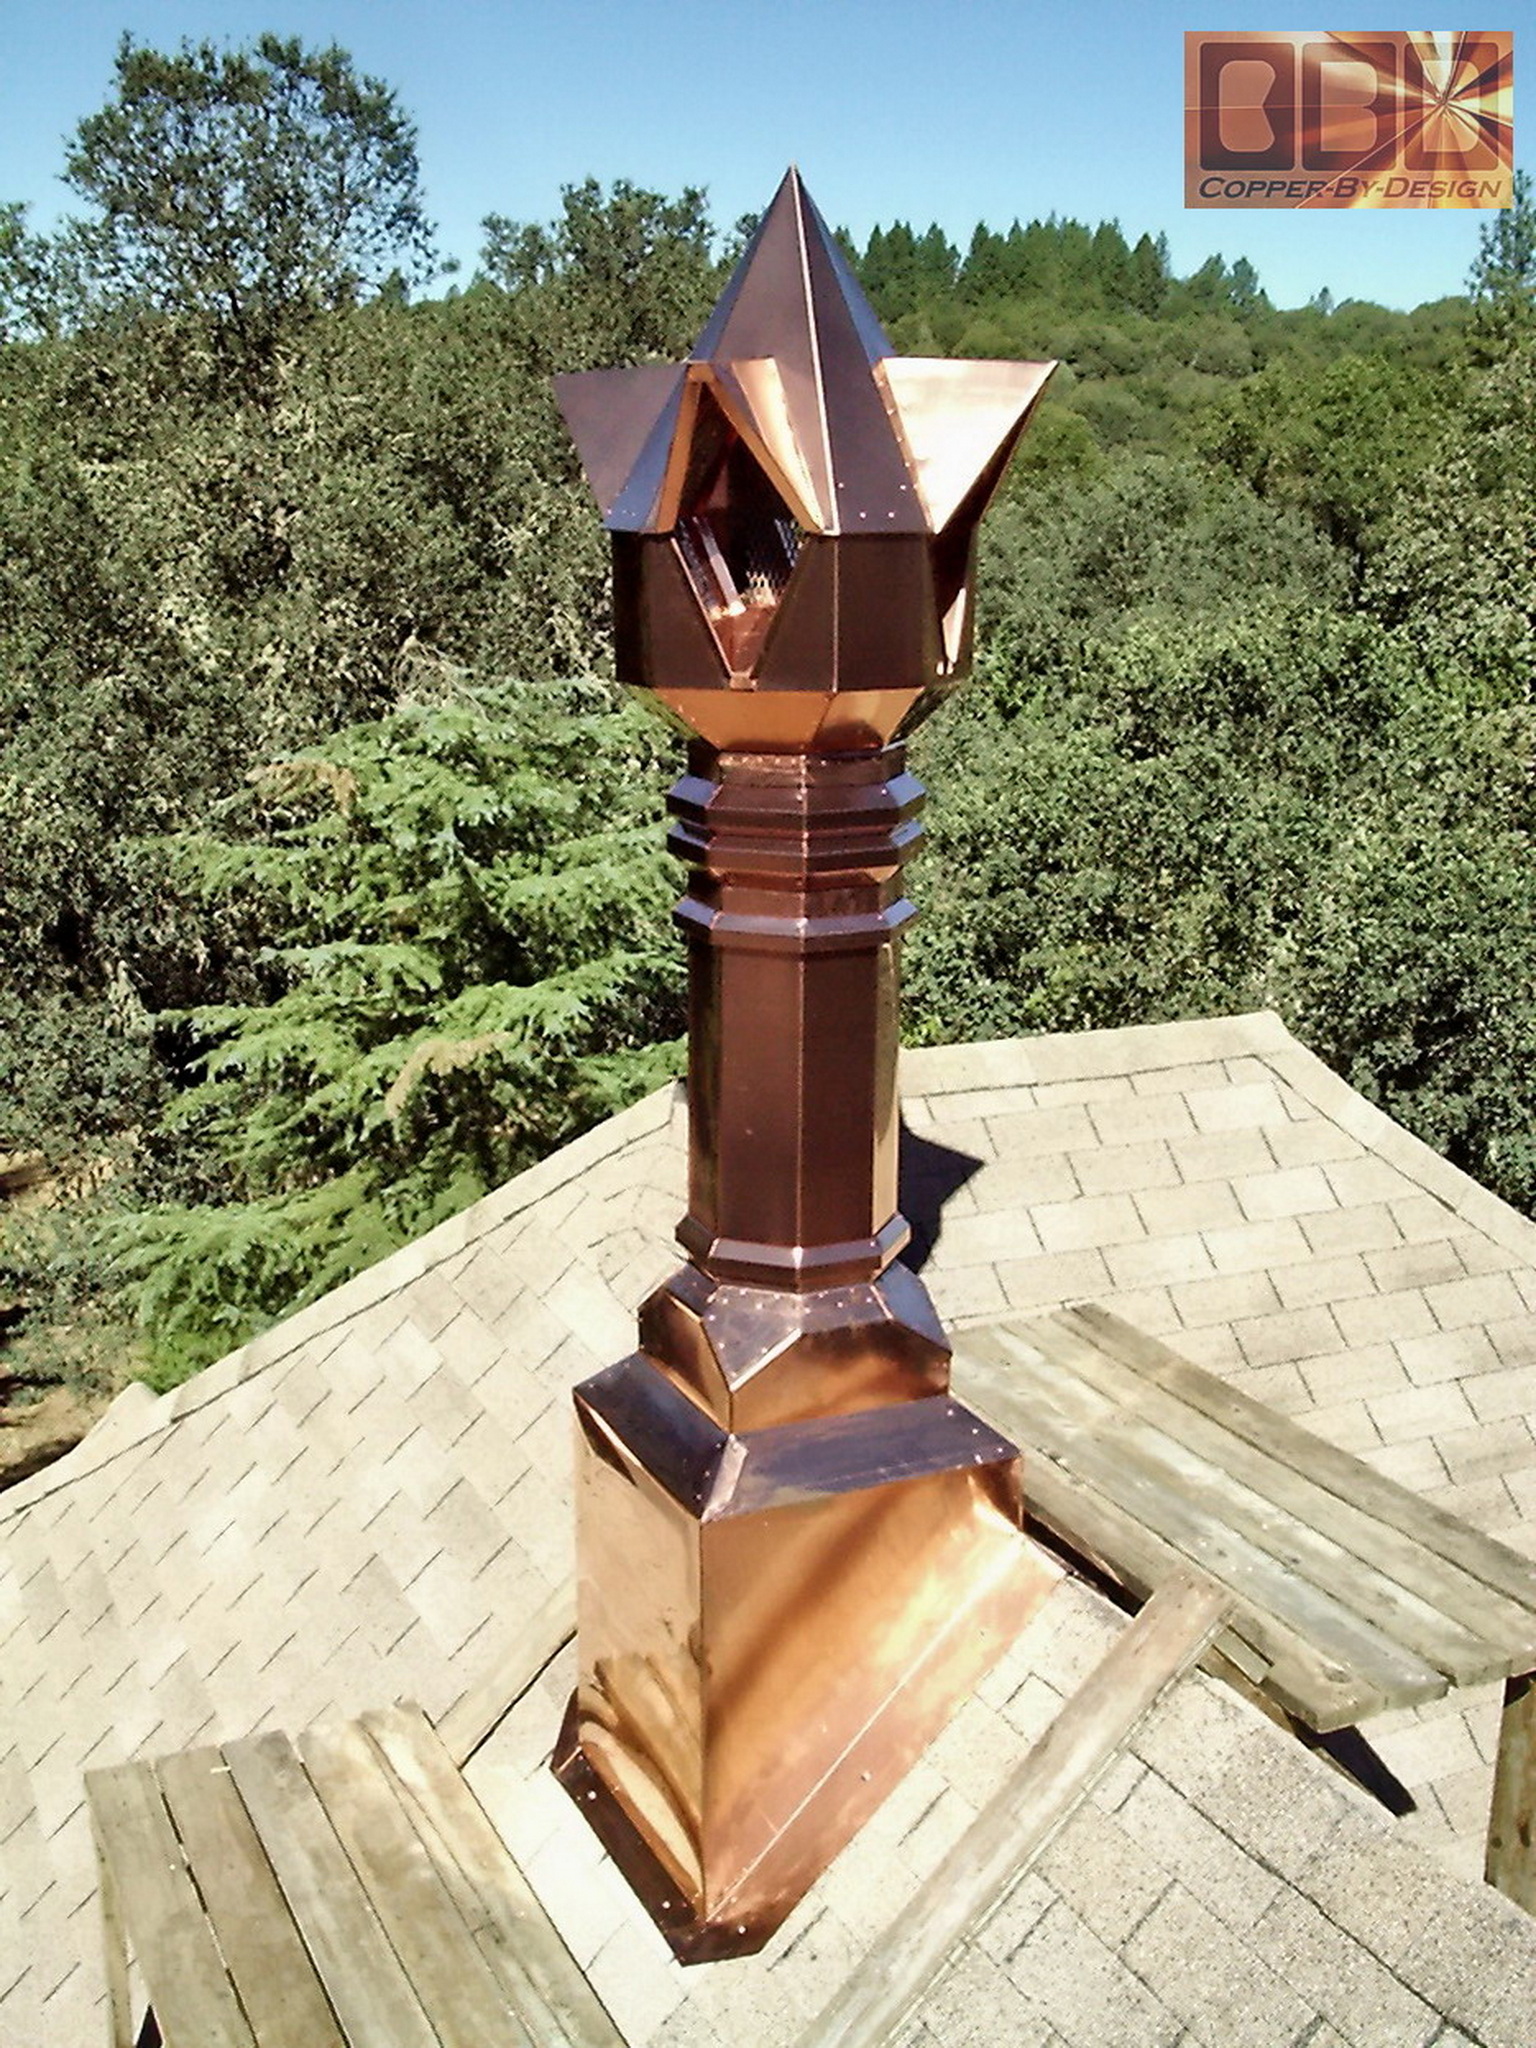
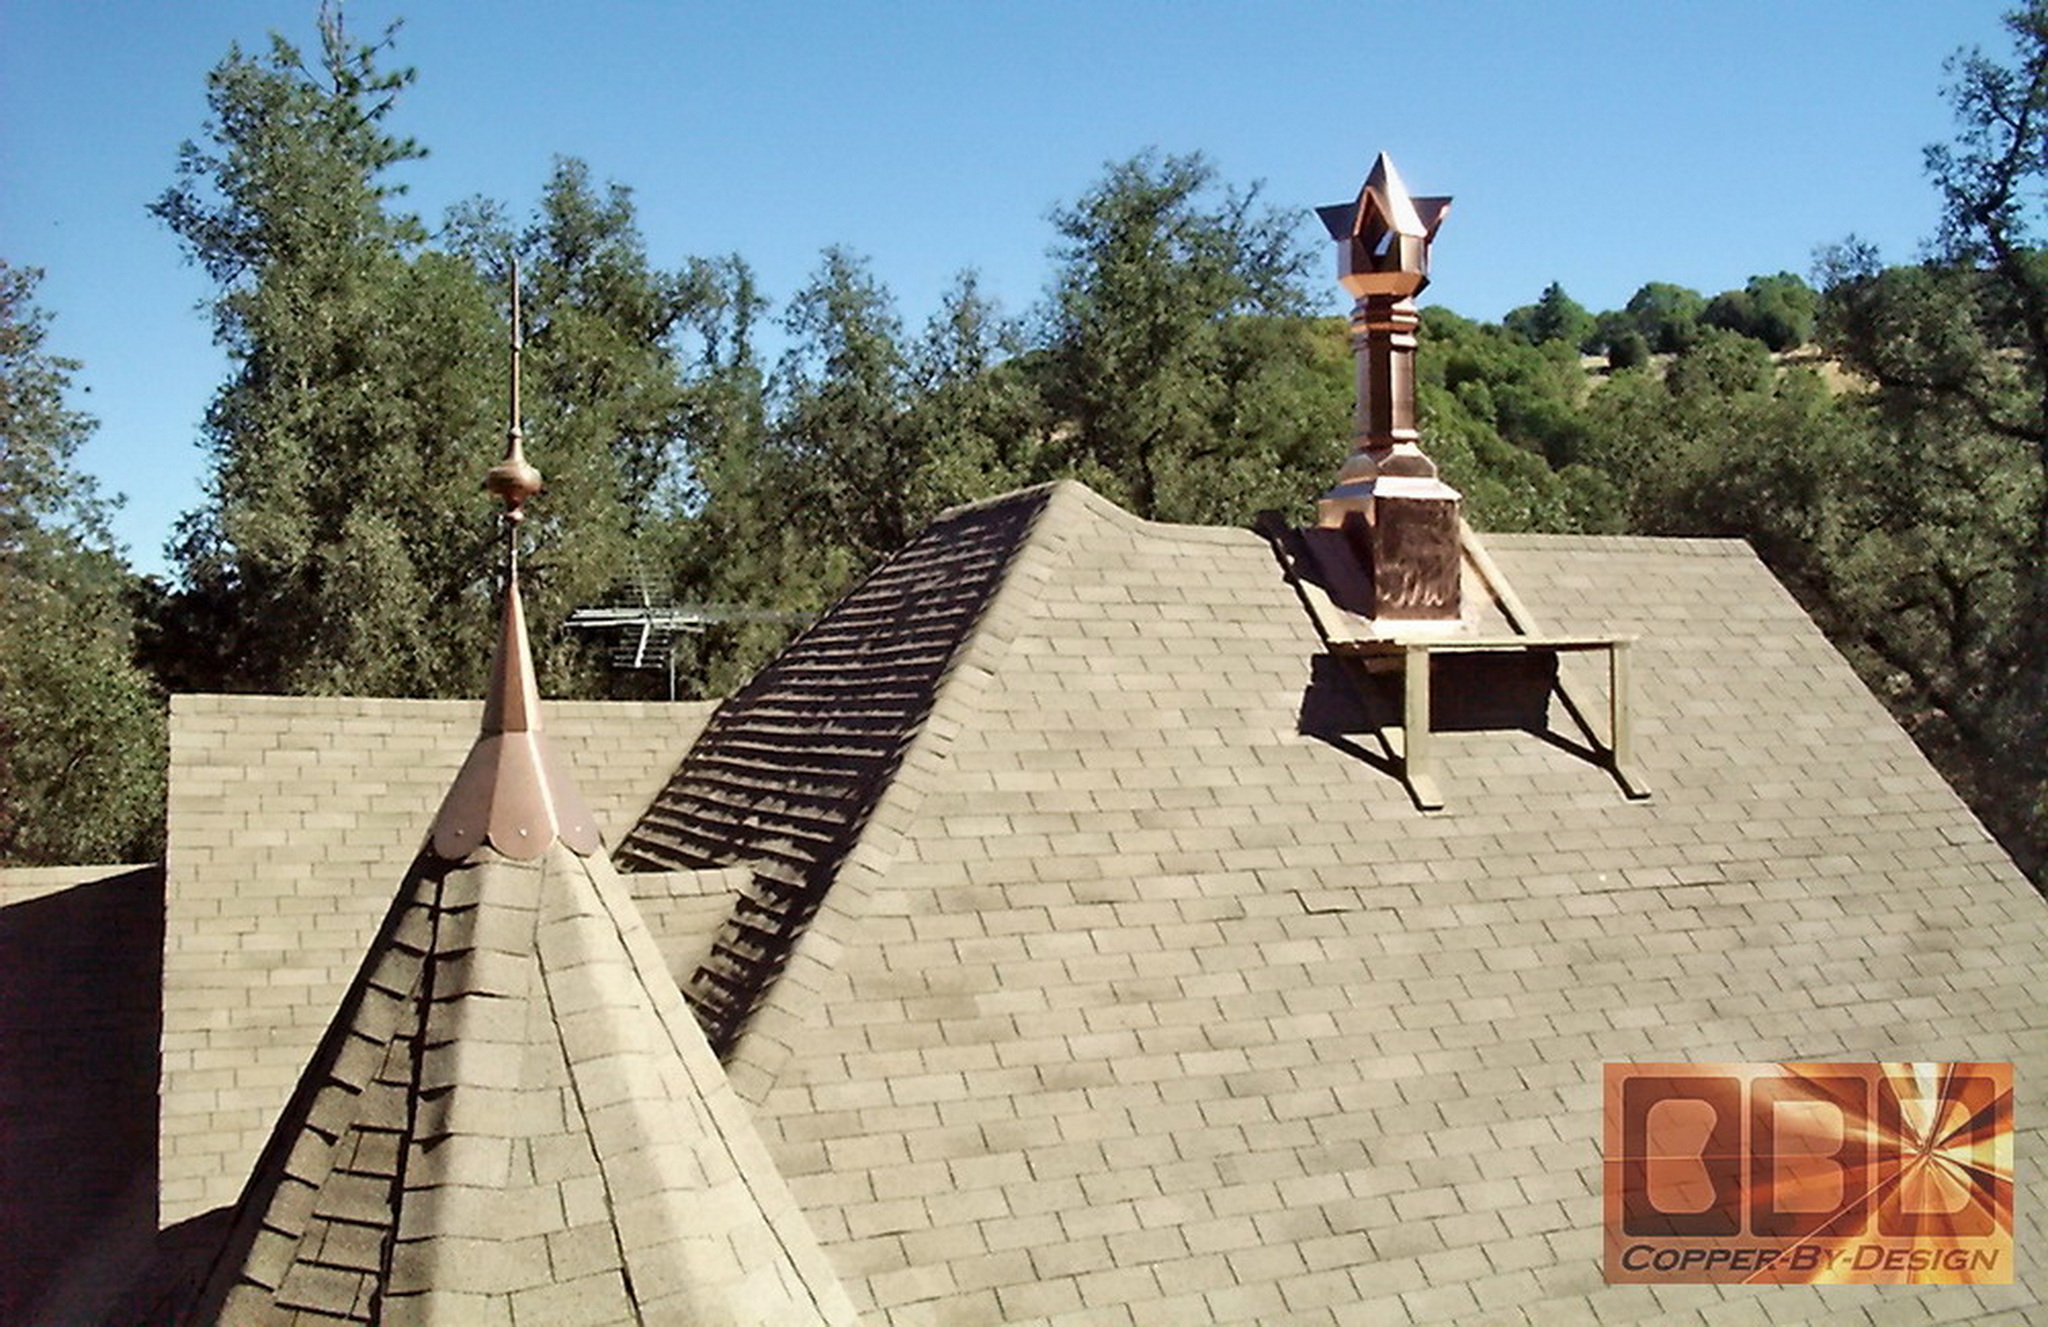
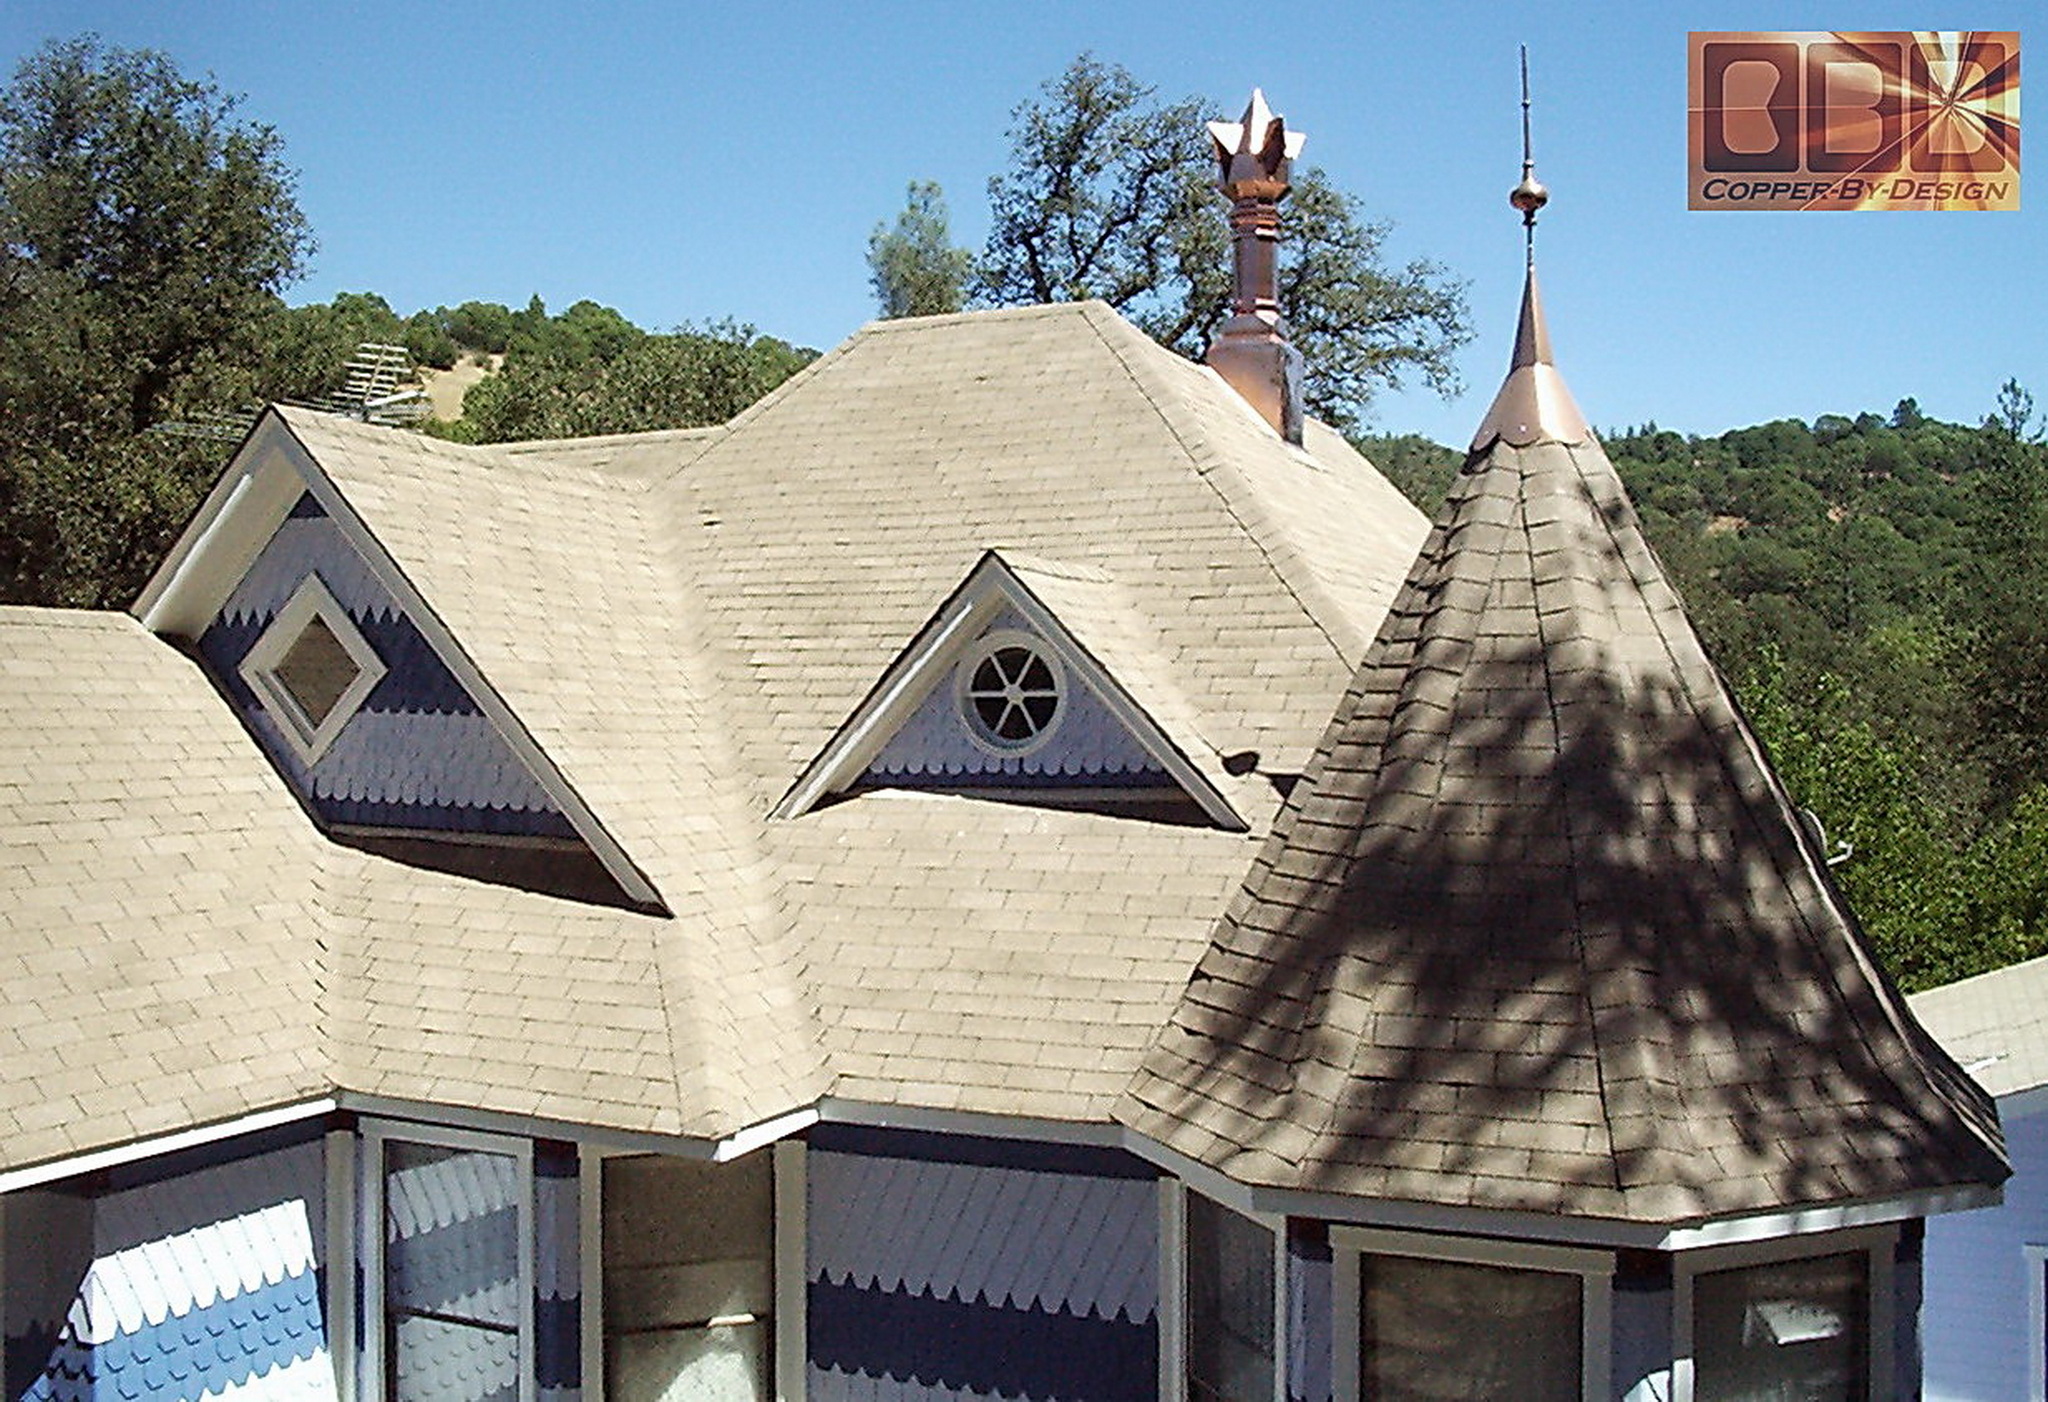
The chimney is all up on the roof and installed. It looks so gorgeous up there
that I can't describe it.
Installing the base
unit was really easy. Friday afternoon, I got Lynn to help me carry
it from the shop building down to the boom lift next to the house
and hold it steady while I ran a rope up under the ridgeline flashing
flange and tied it off to two 2 x 6 boards that I had attached to
the lift basket like a forklift. Then, I had a rope attached to
the bottom flange to hold the base up at the right angle. That was
all it took.
 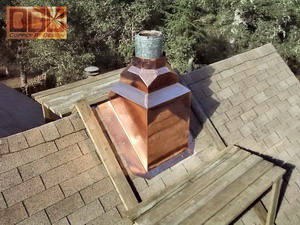
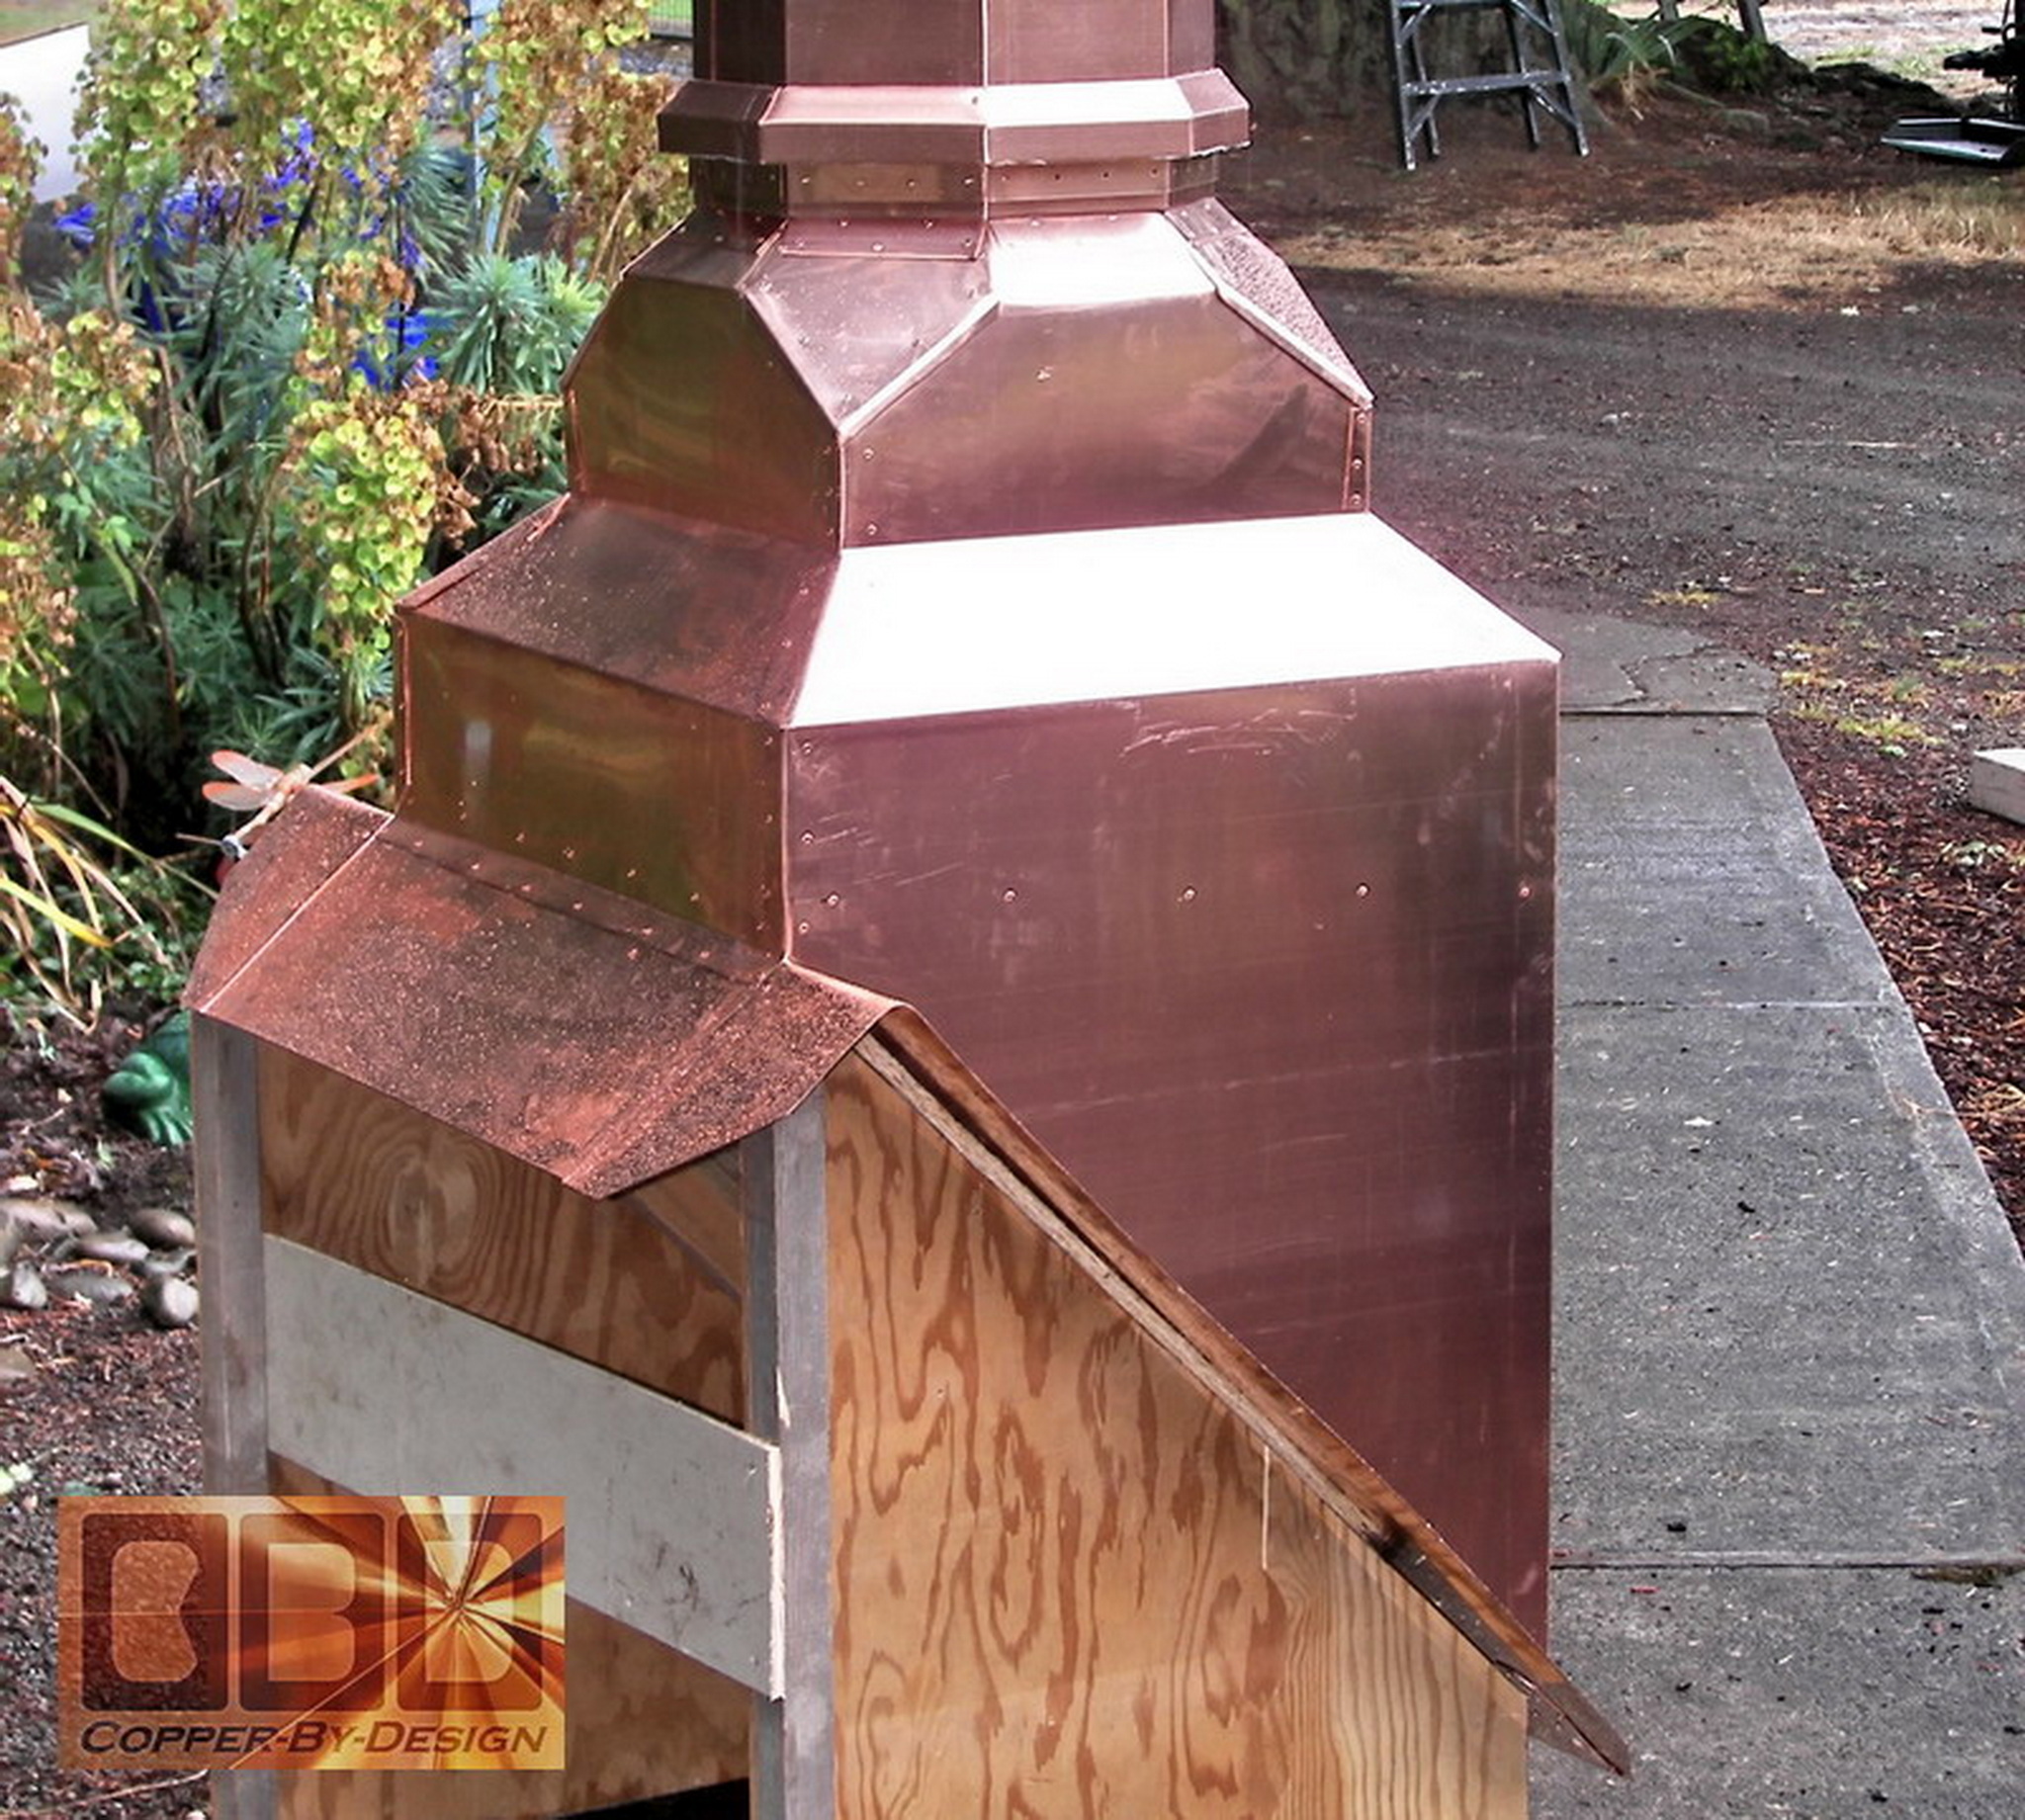
With the boom lift,
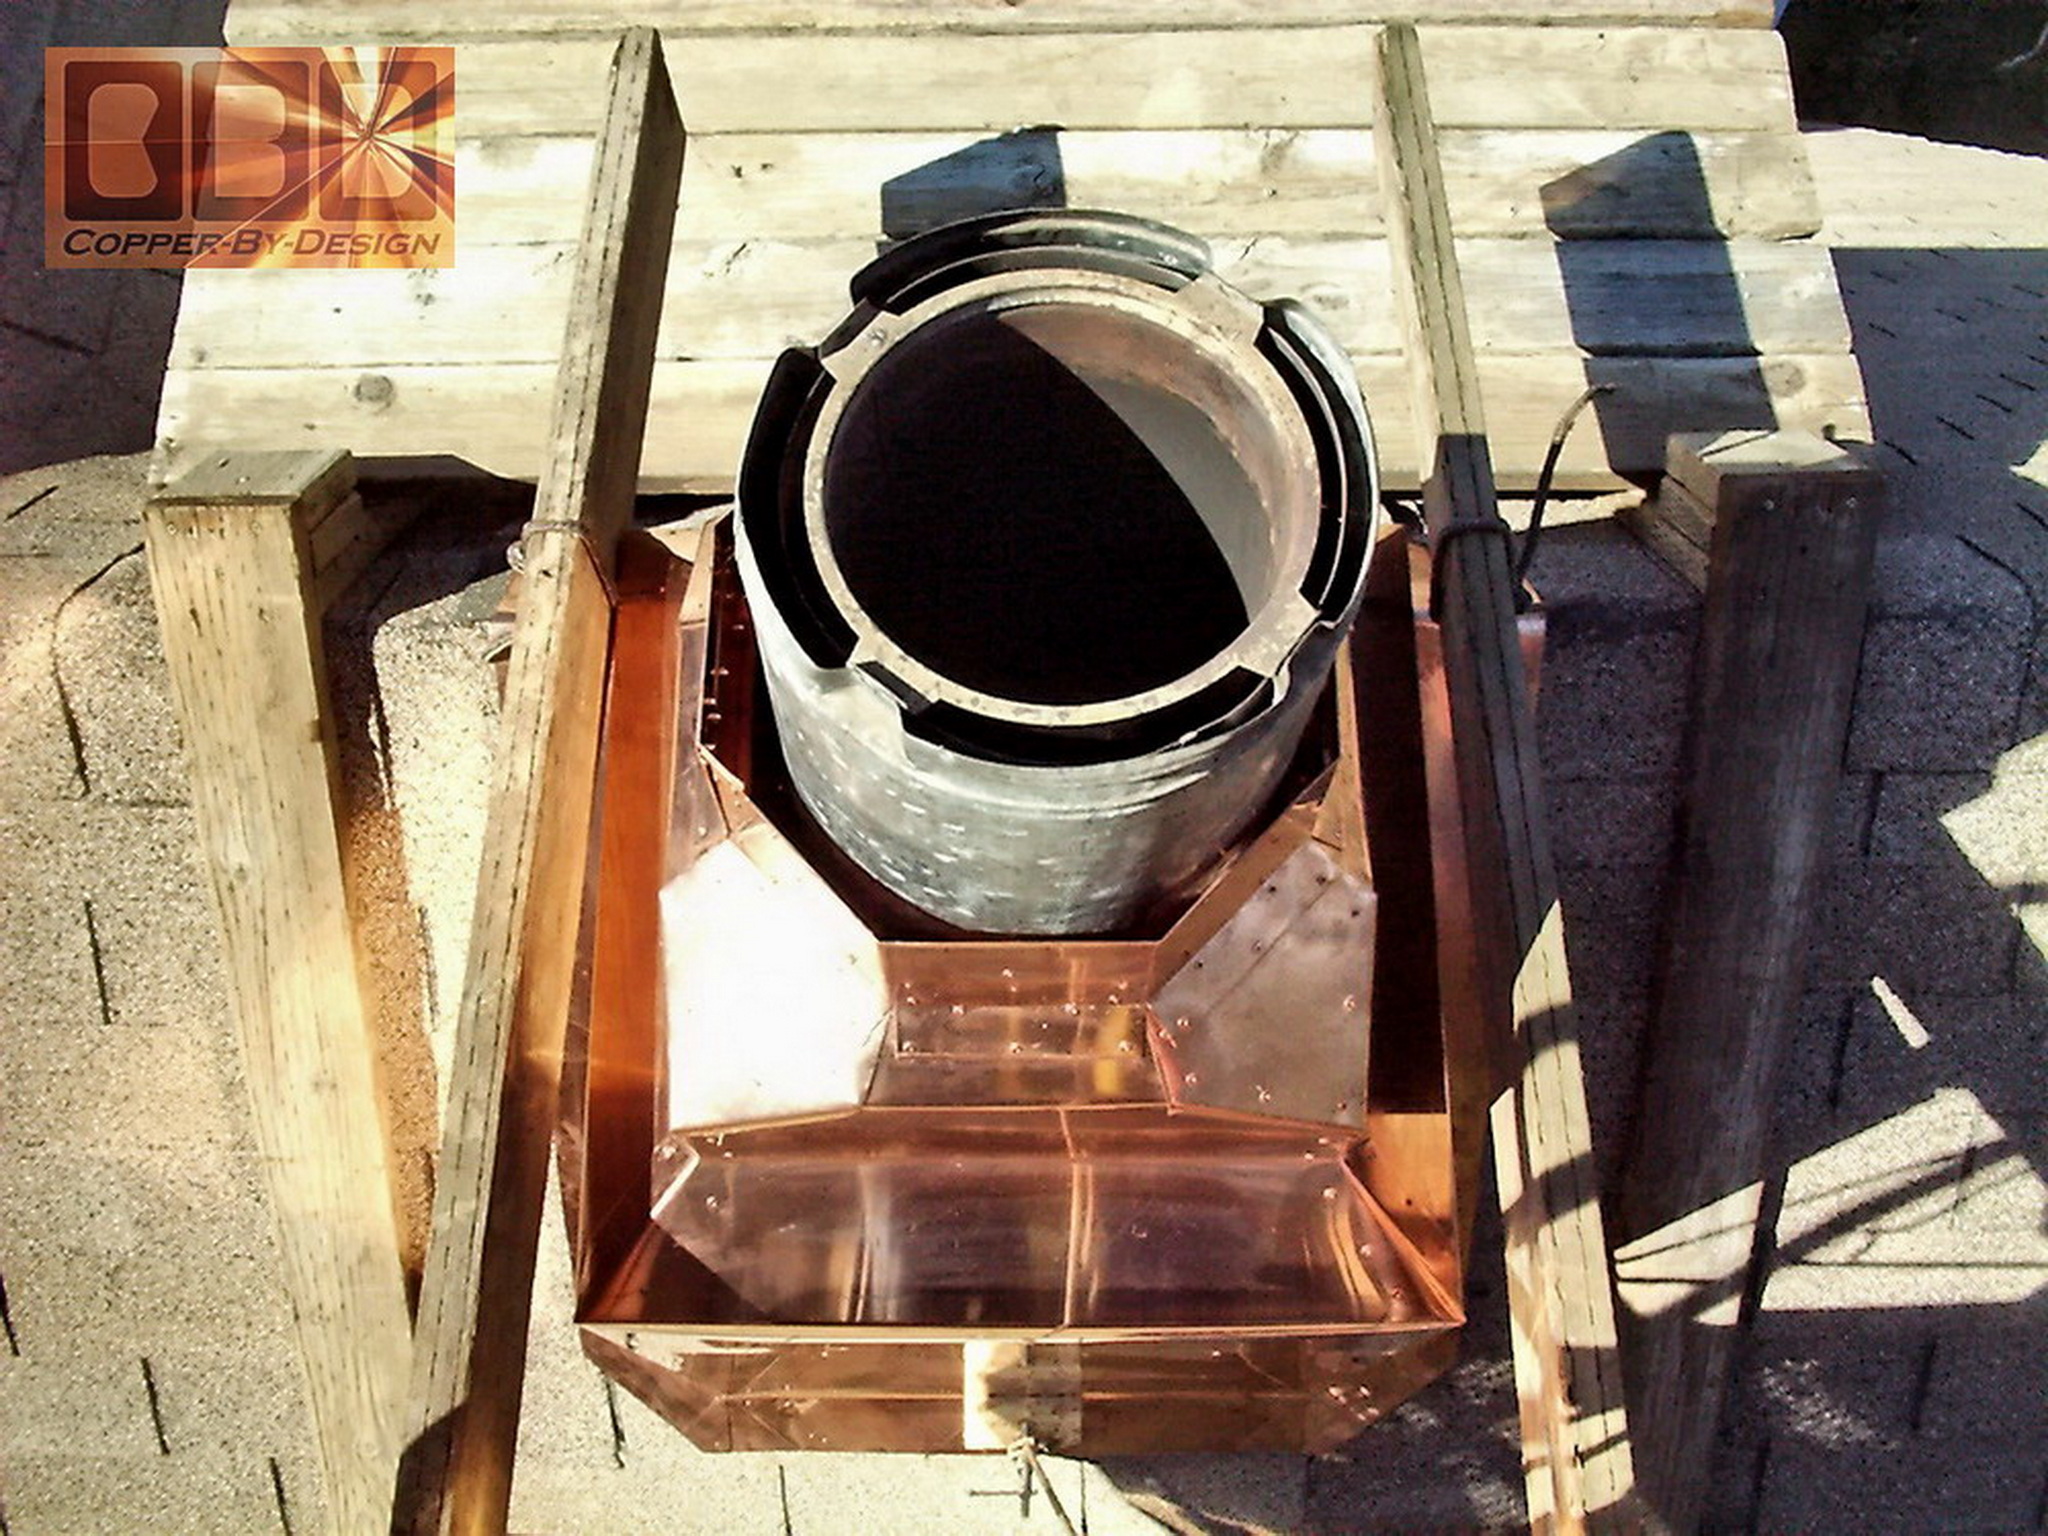
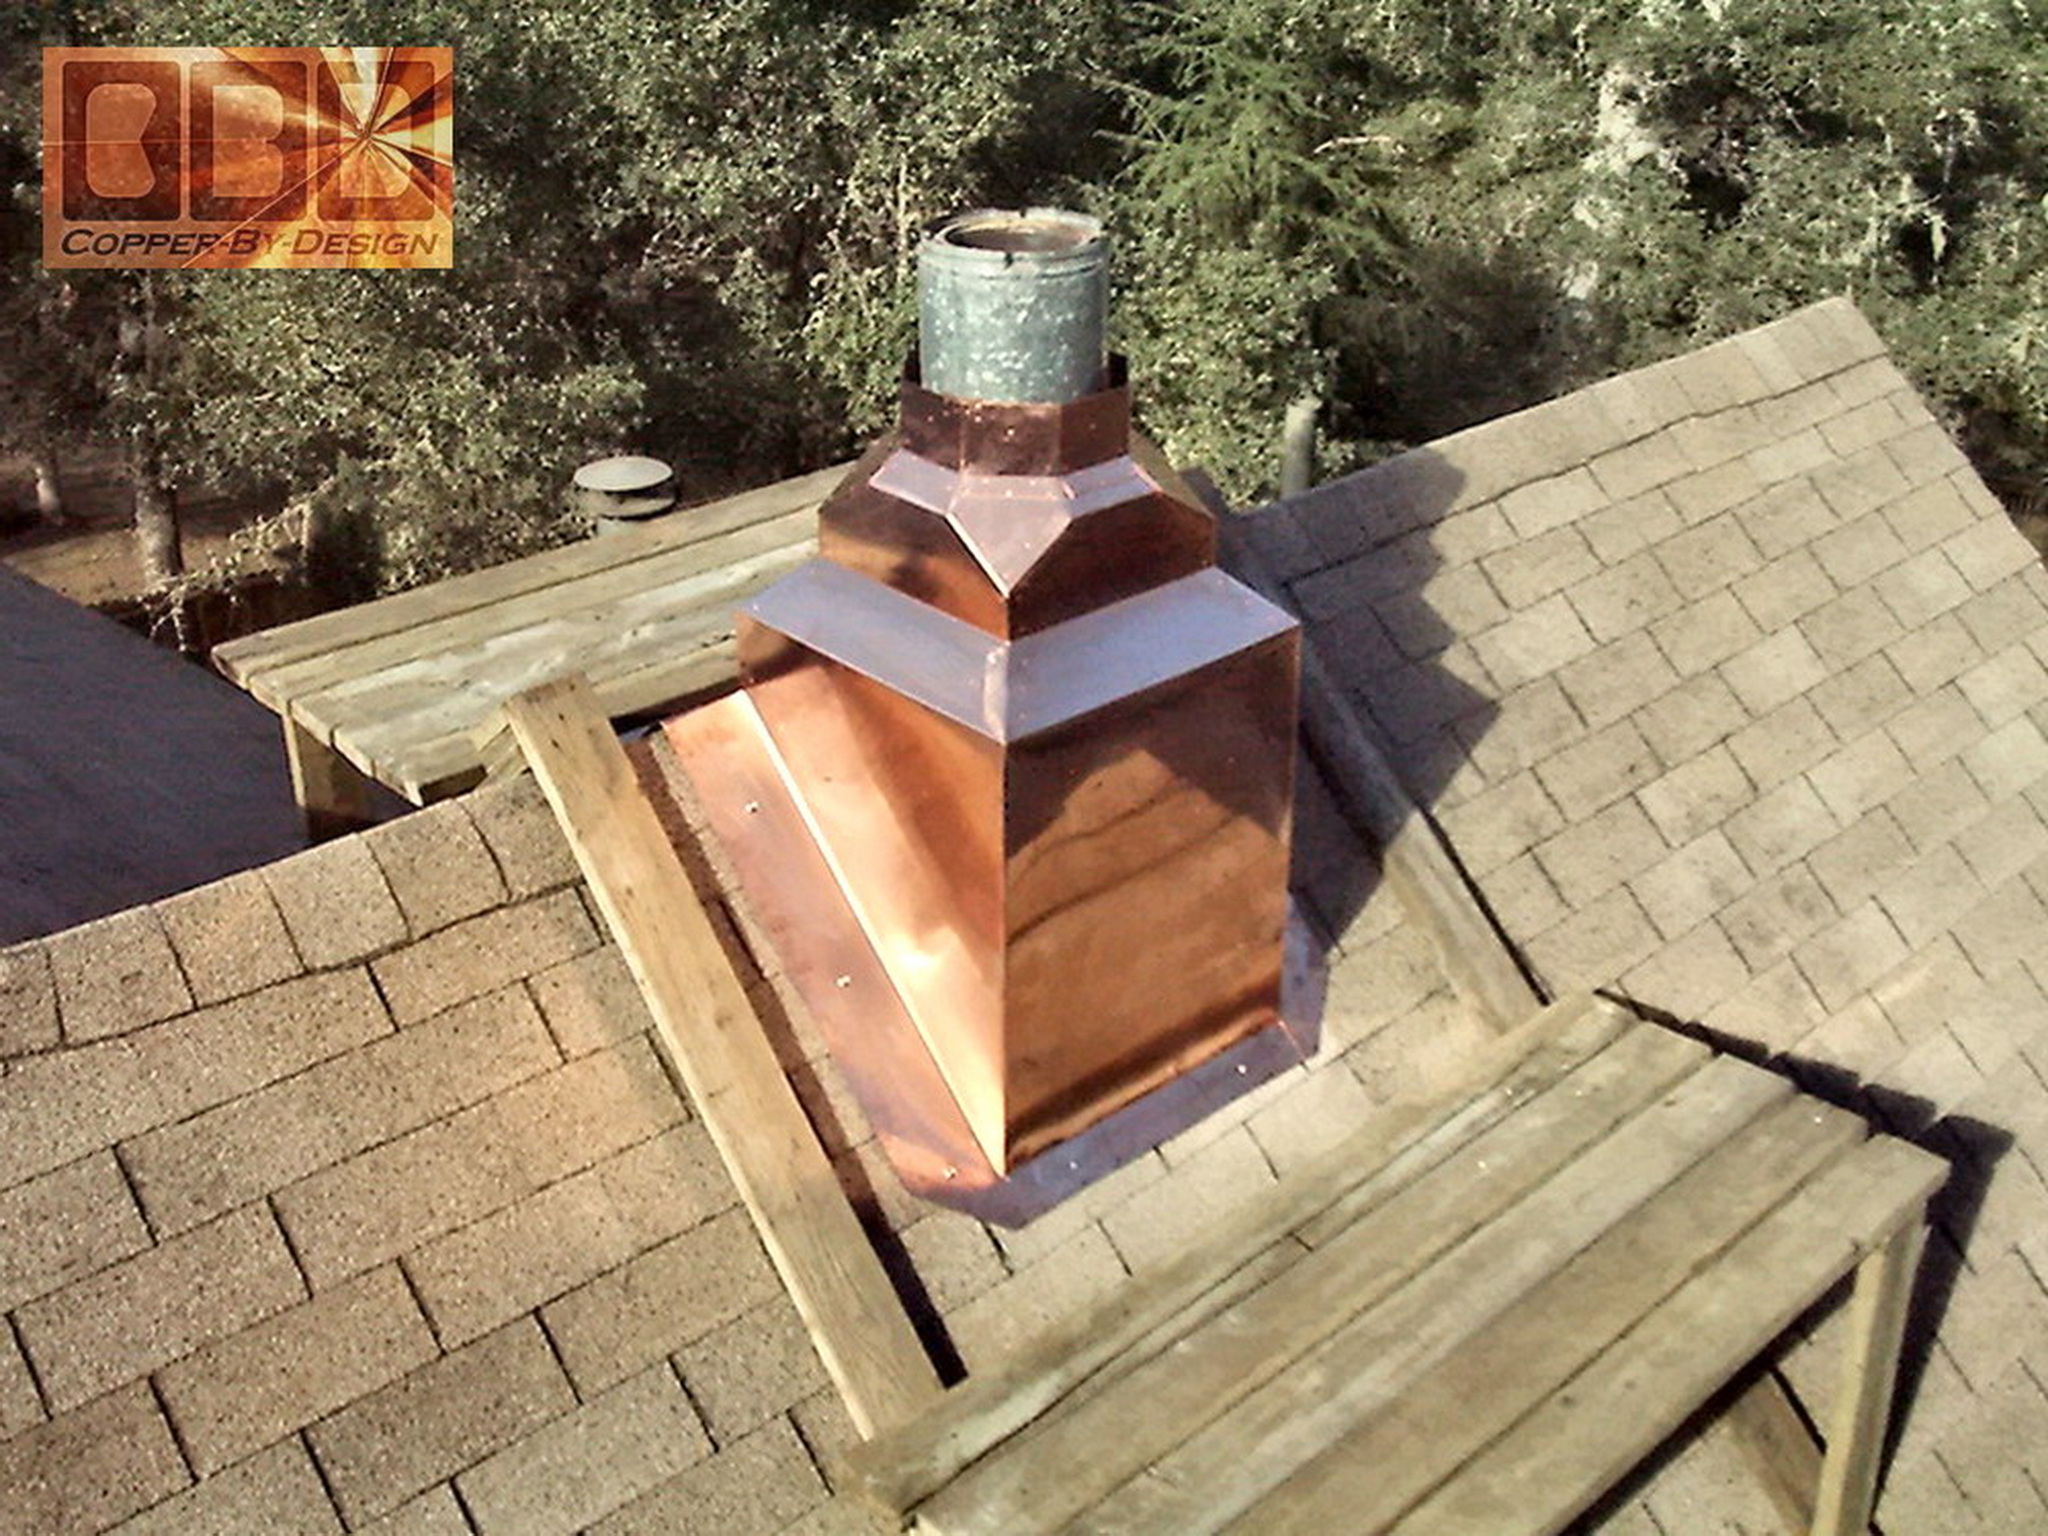
it was easy to maneuver and slip the base over and down the existing
flue pipe. It just dropped right into place. The fit was perfect
with the wooden frame that I had installed around the roof opening
to level it with the existing roofing. Line it up slightly and screw
it down to the roof. Done.
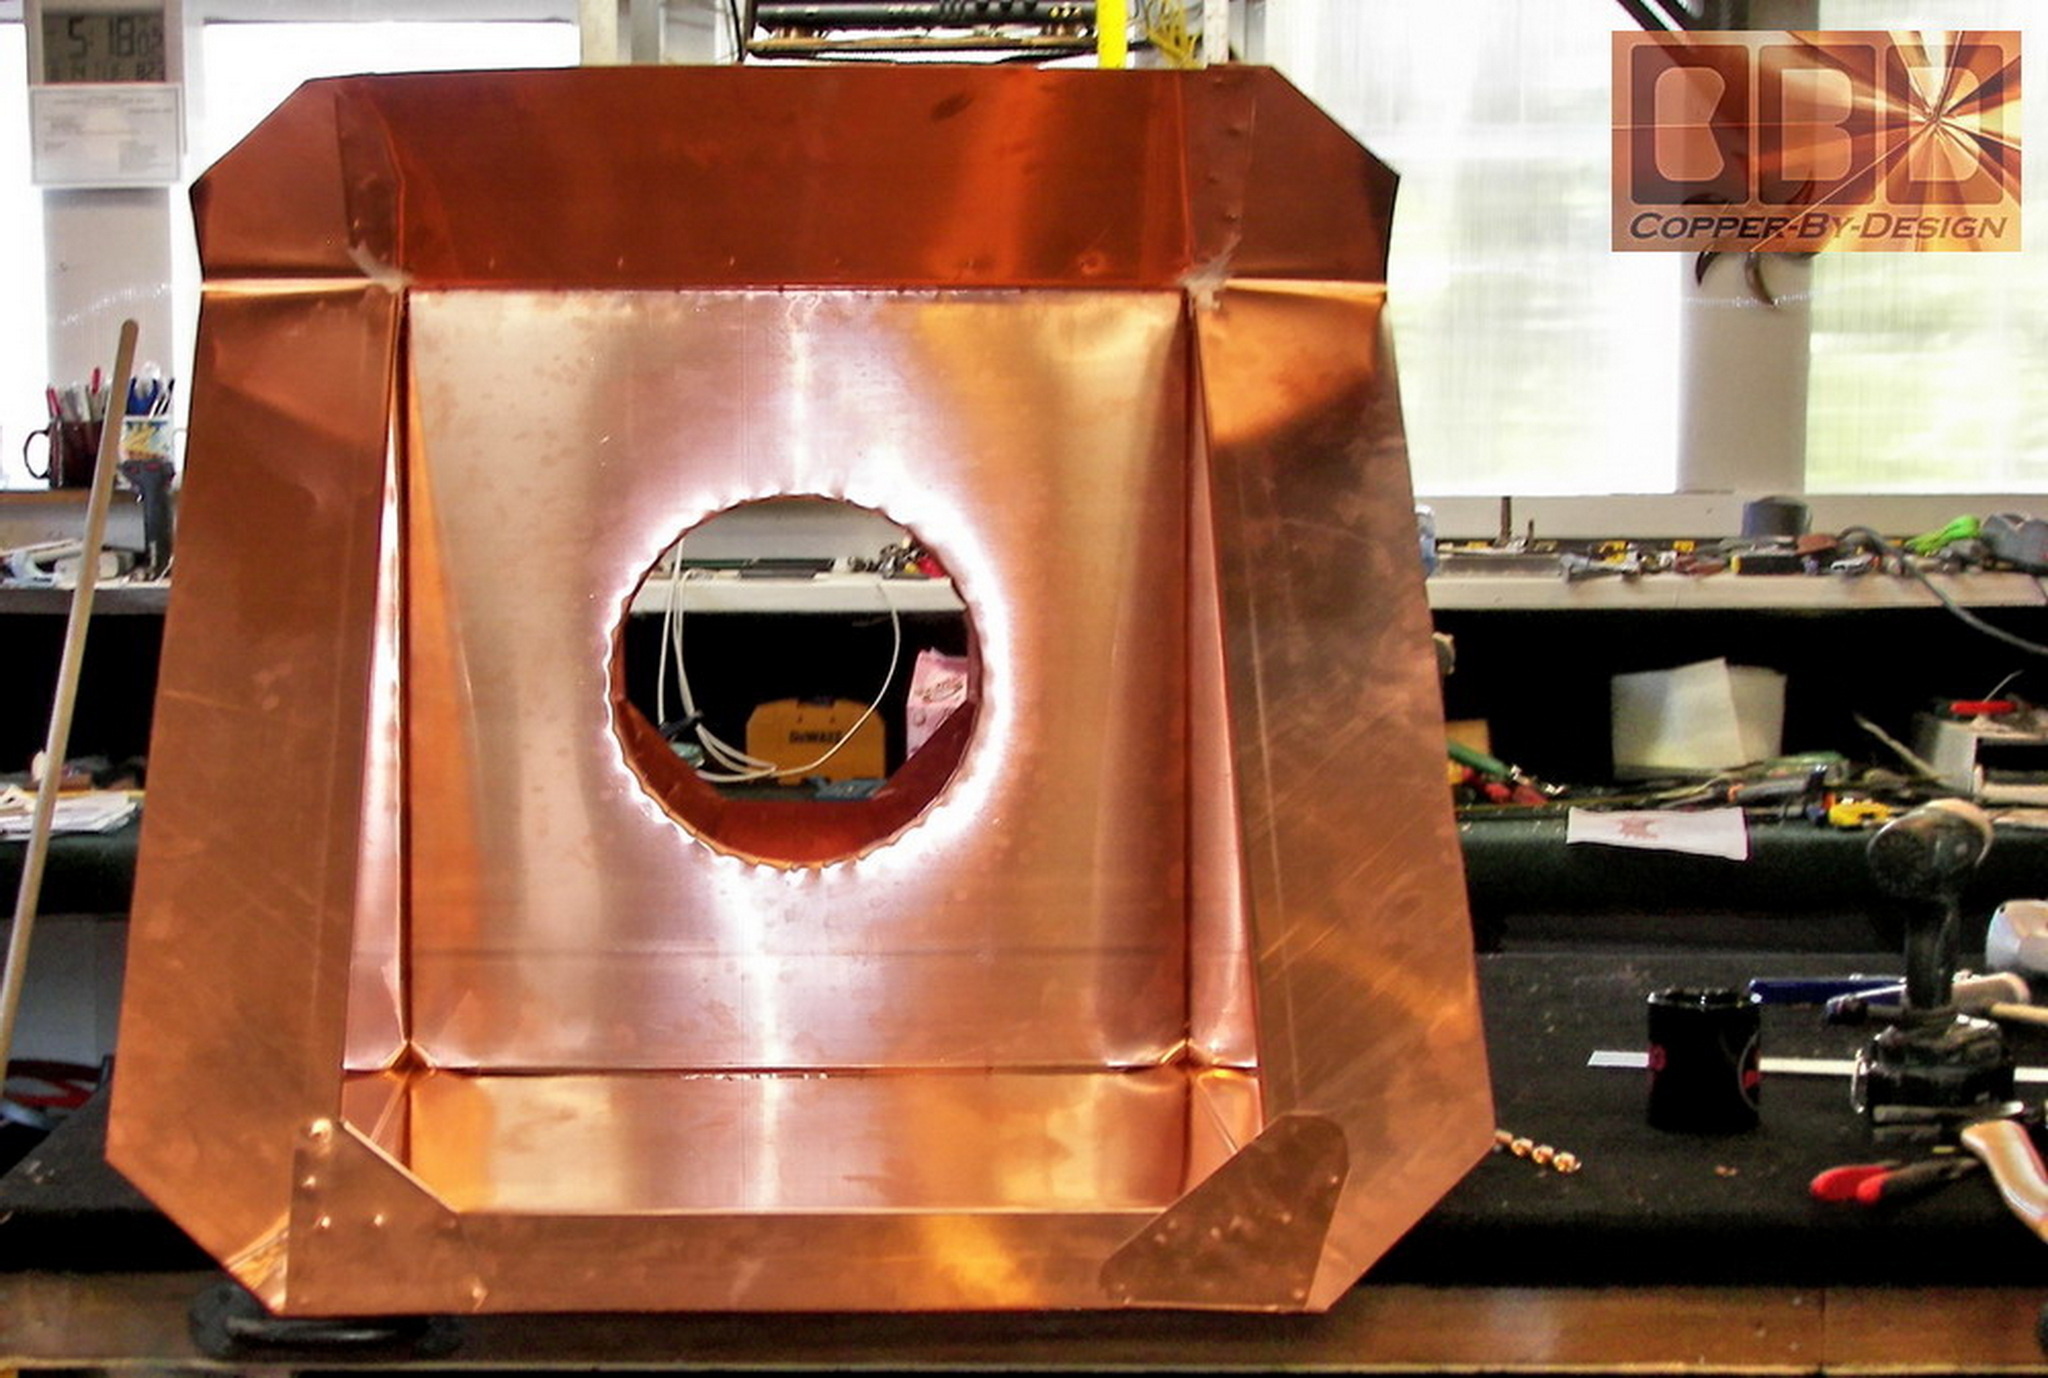
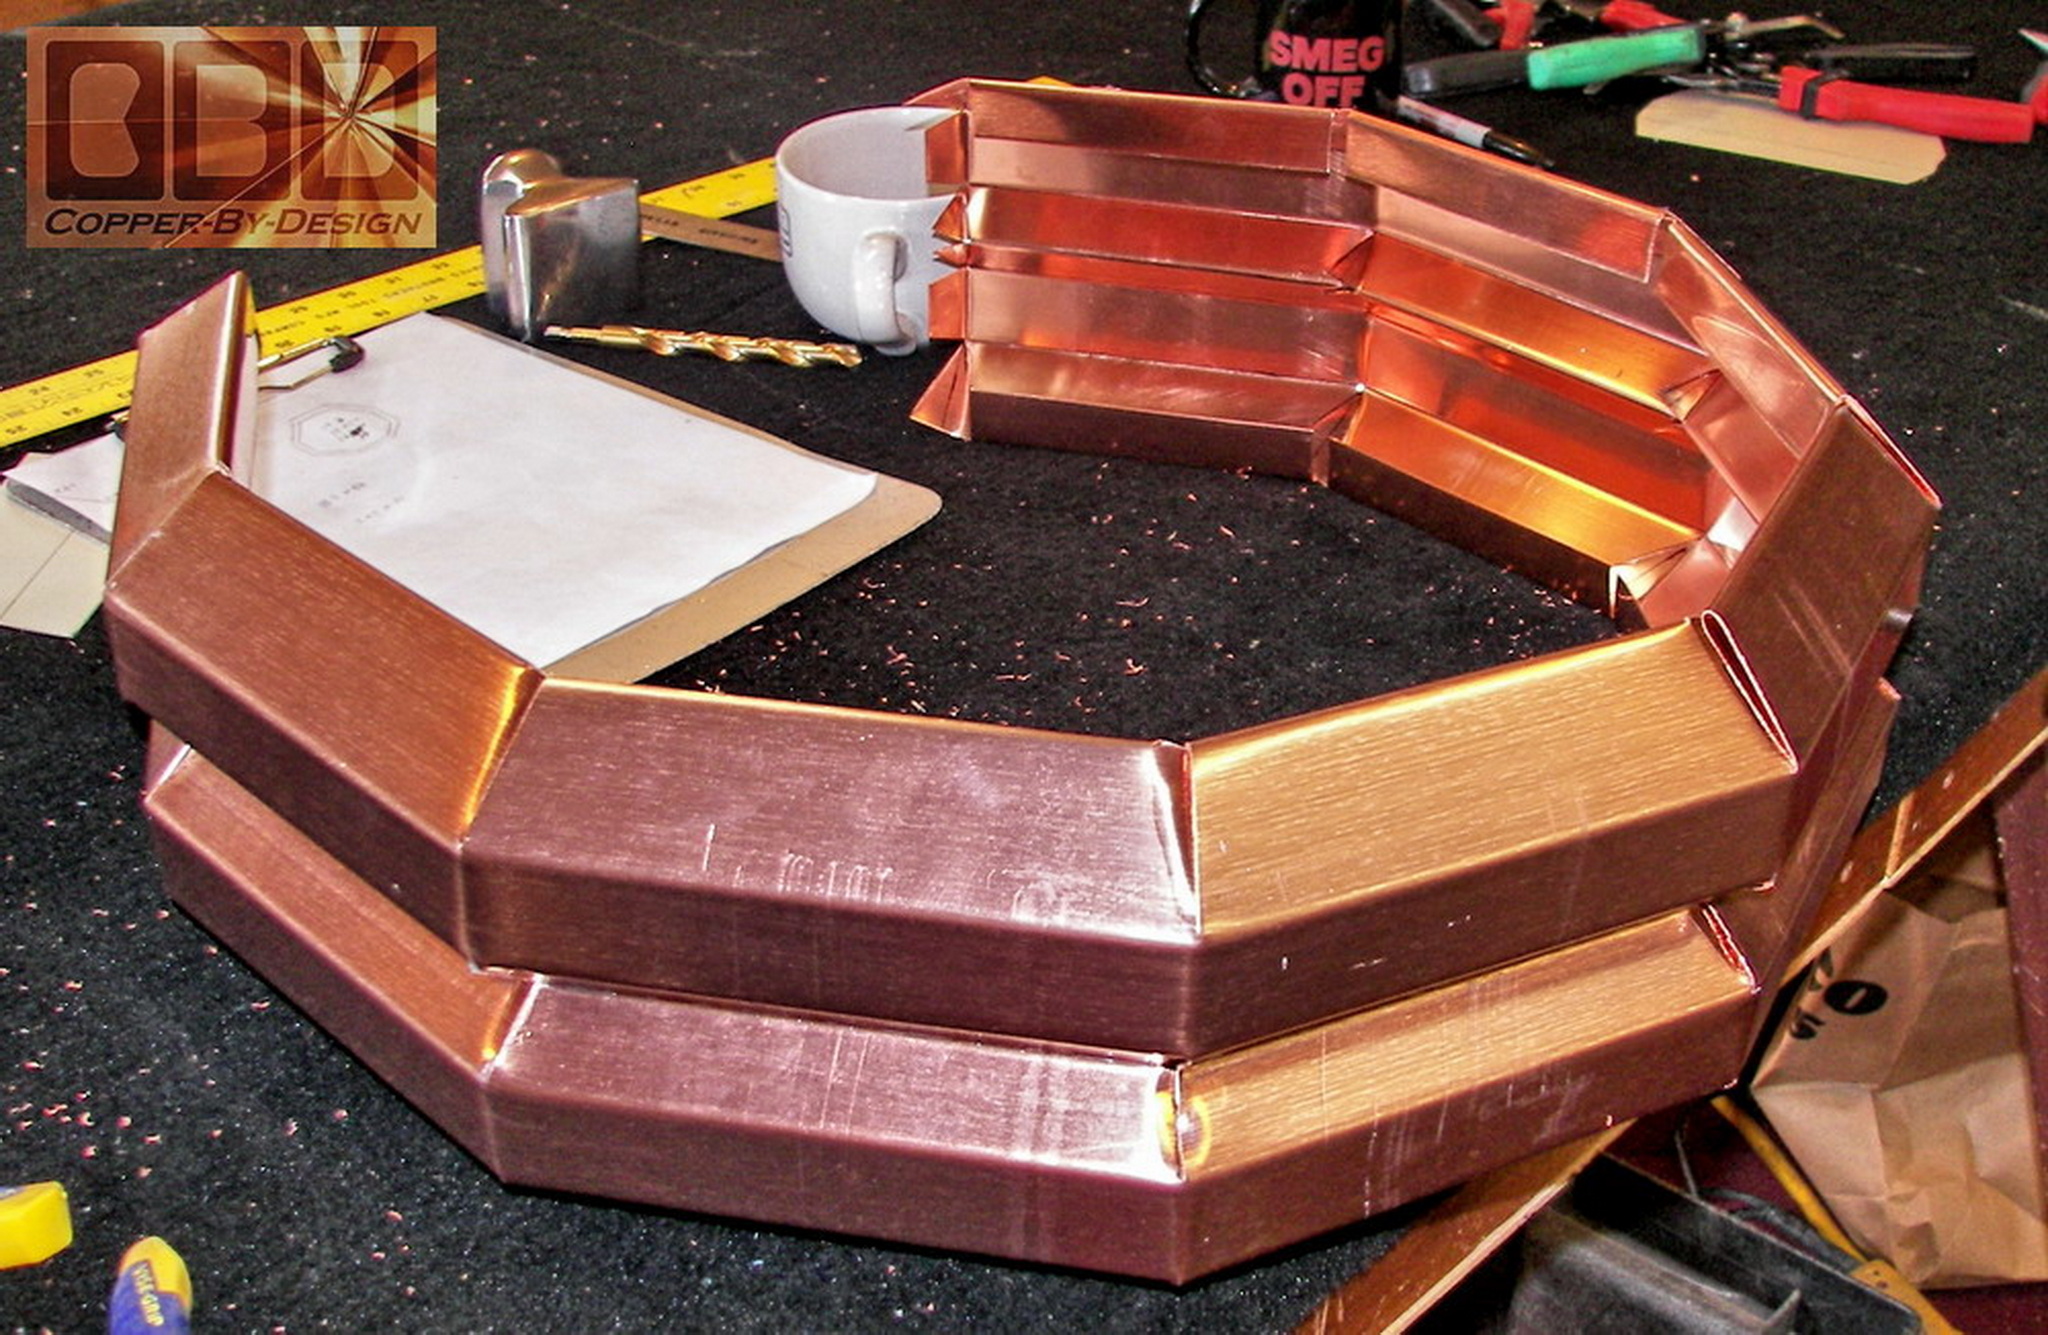
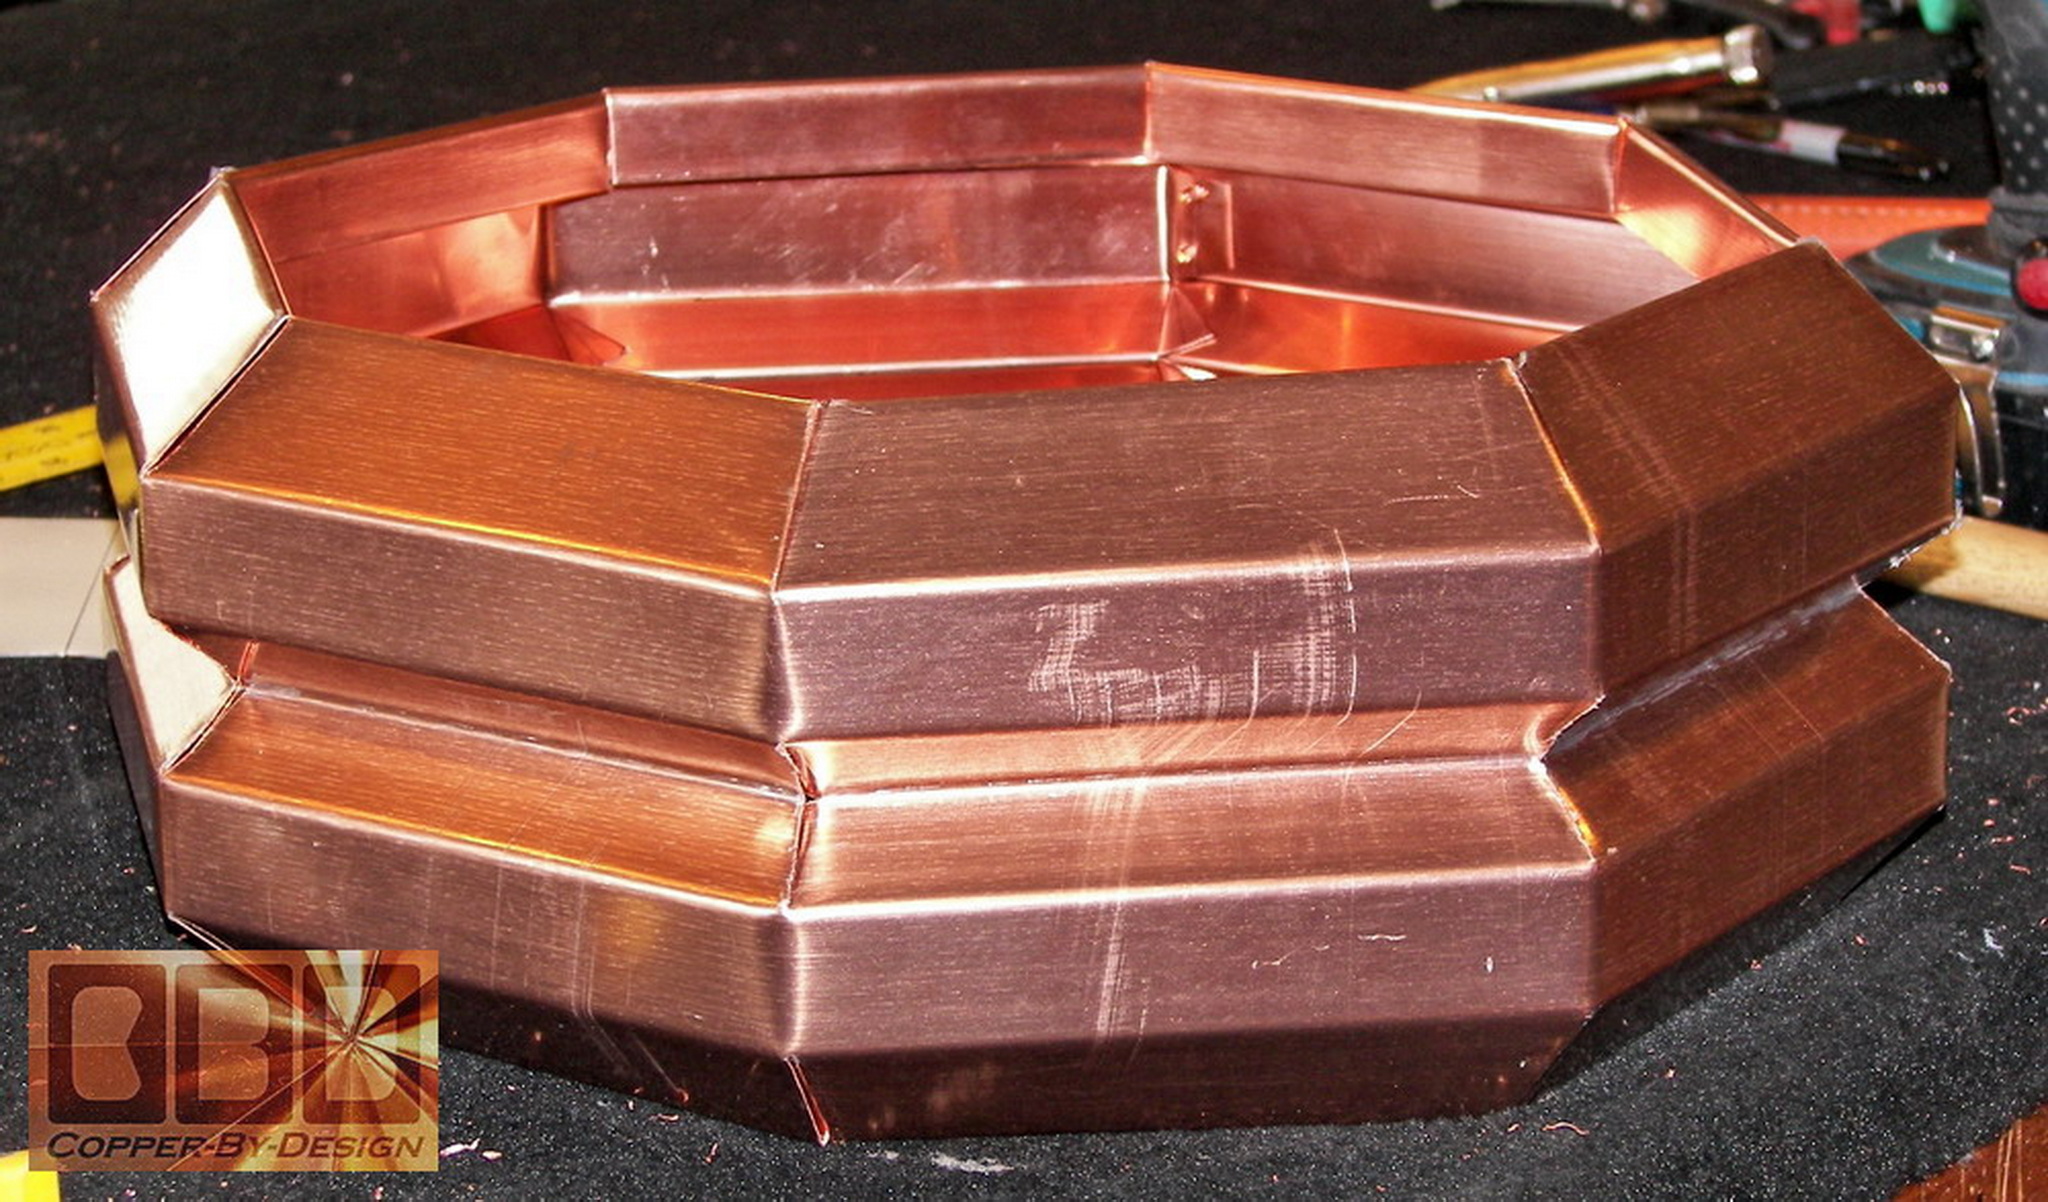
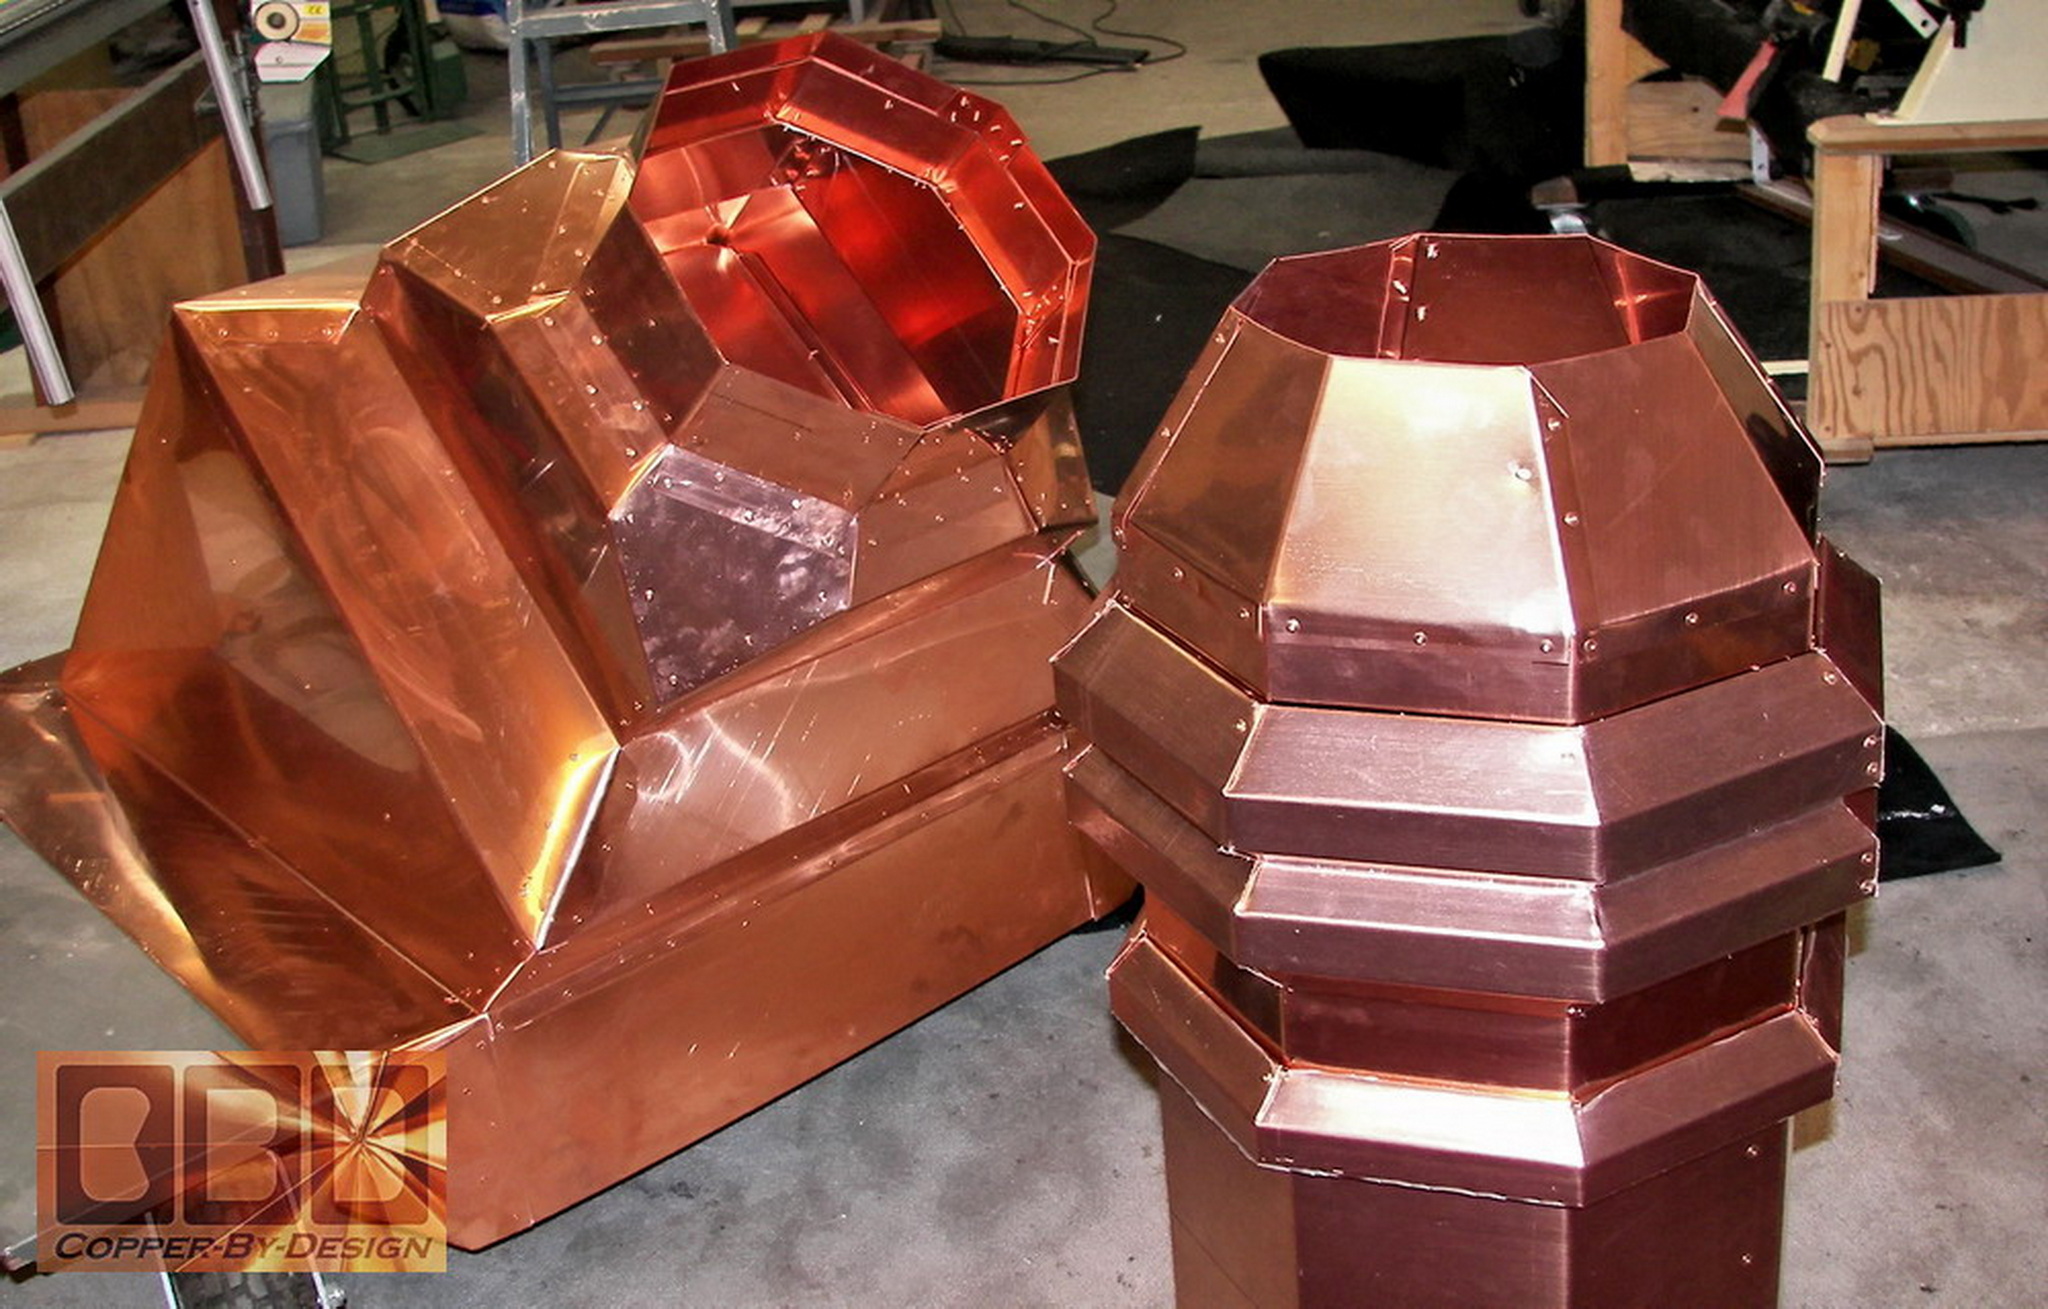
Saturday, I spent about
three hours peeling off all of the protective plastic from the octagon
stack and top box unit. And, I made a two piece plywood shelf with
an octagon hole to attach to the forklift like boards on the lift
basket to support it during the lift to the rooftop. Everything
was ready for the next morning. My backyard side neighbor Pat was
going to help me then.
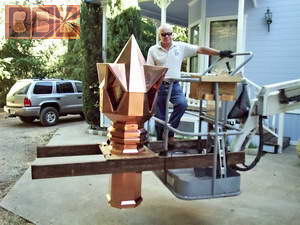 
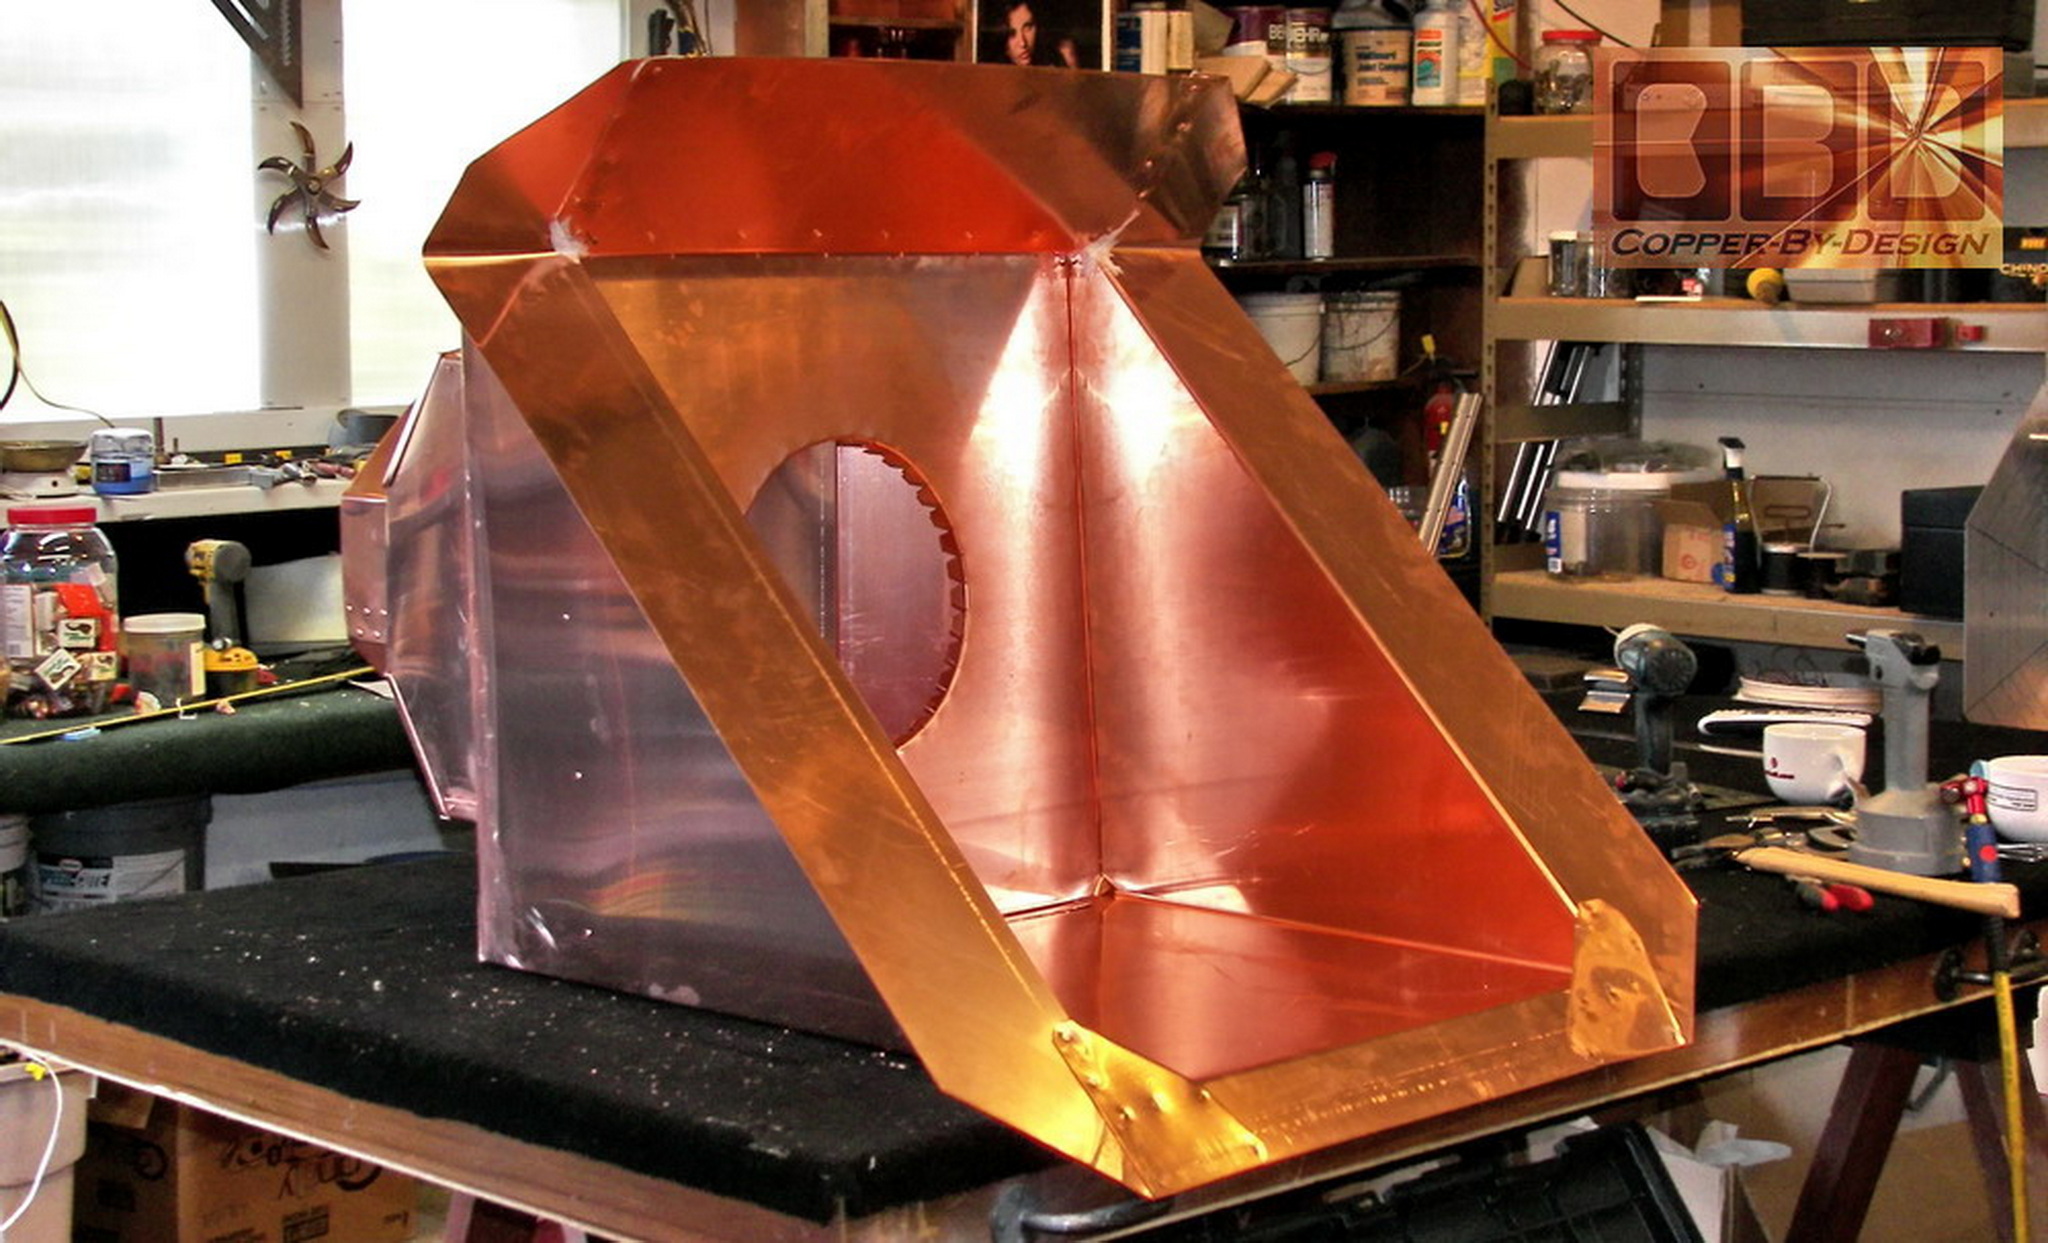
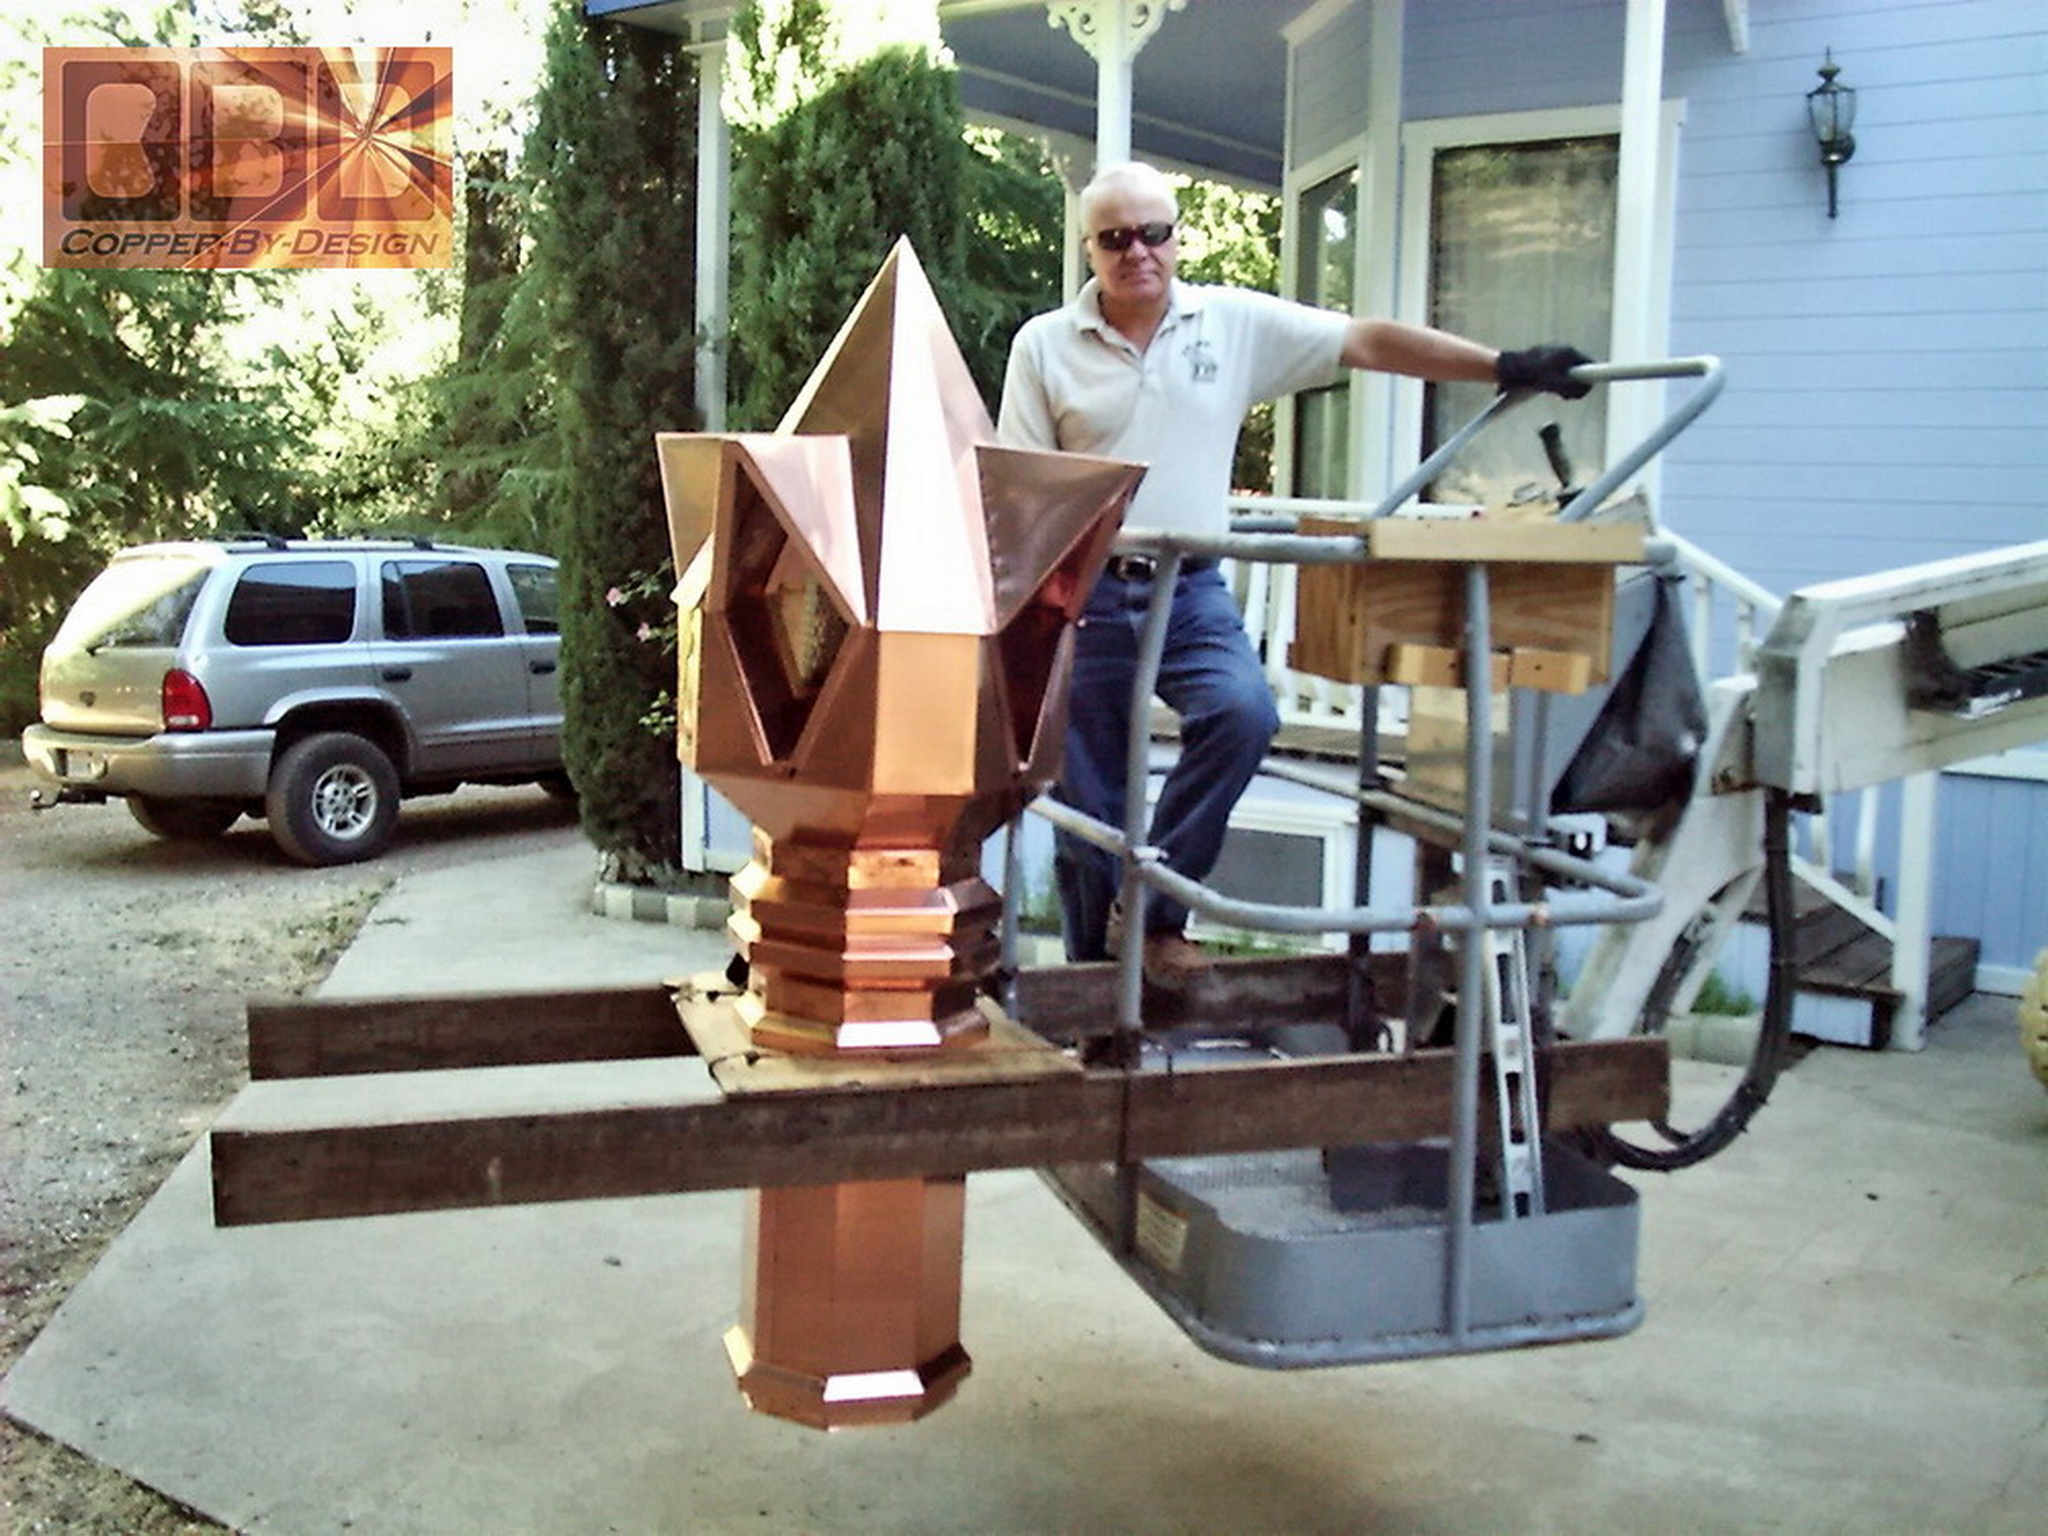
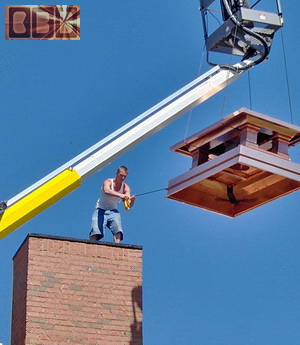
You can see him in the
lift basket picture, right after we had set the unit ready for the
roof lift. I maneuvered the lift up into place over the base unit
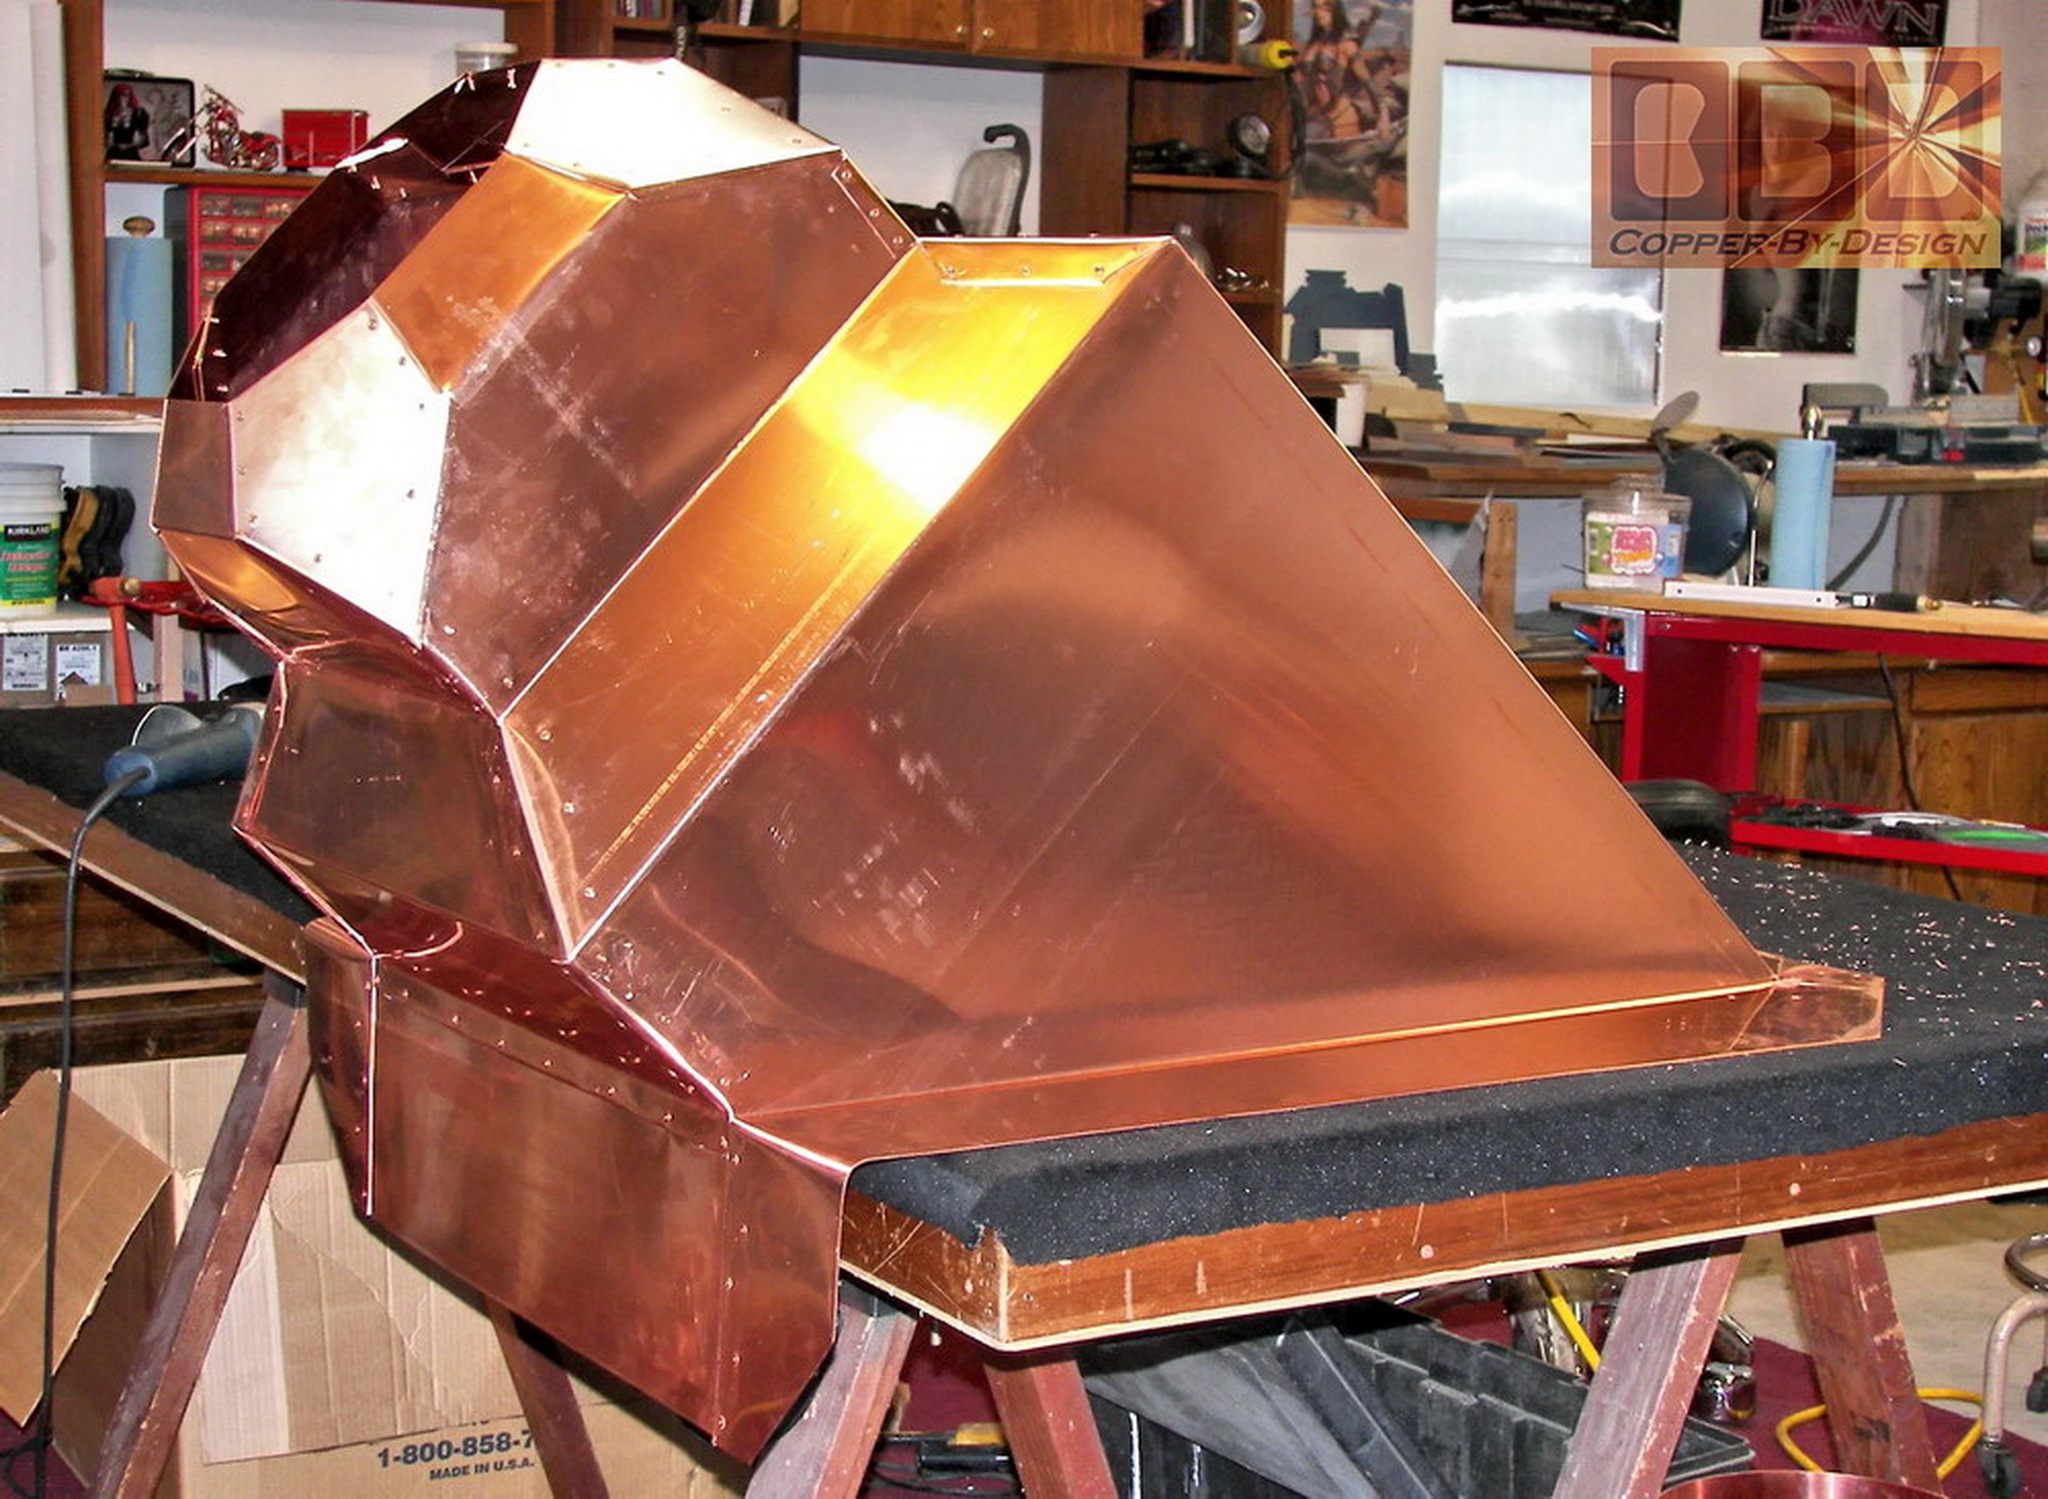
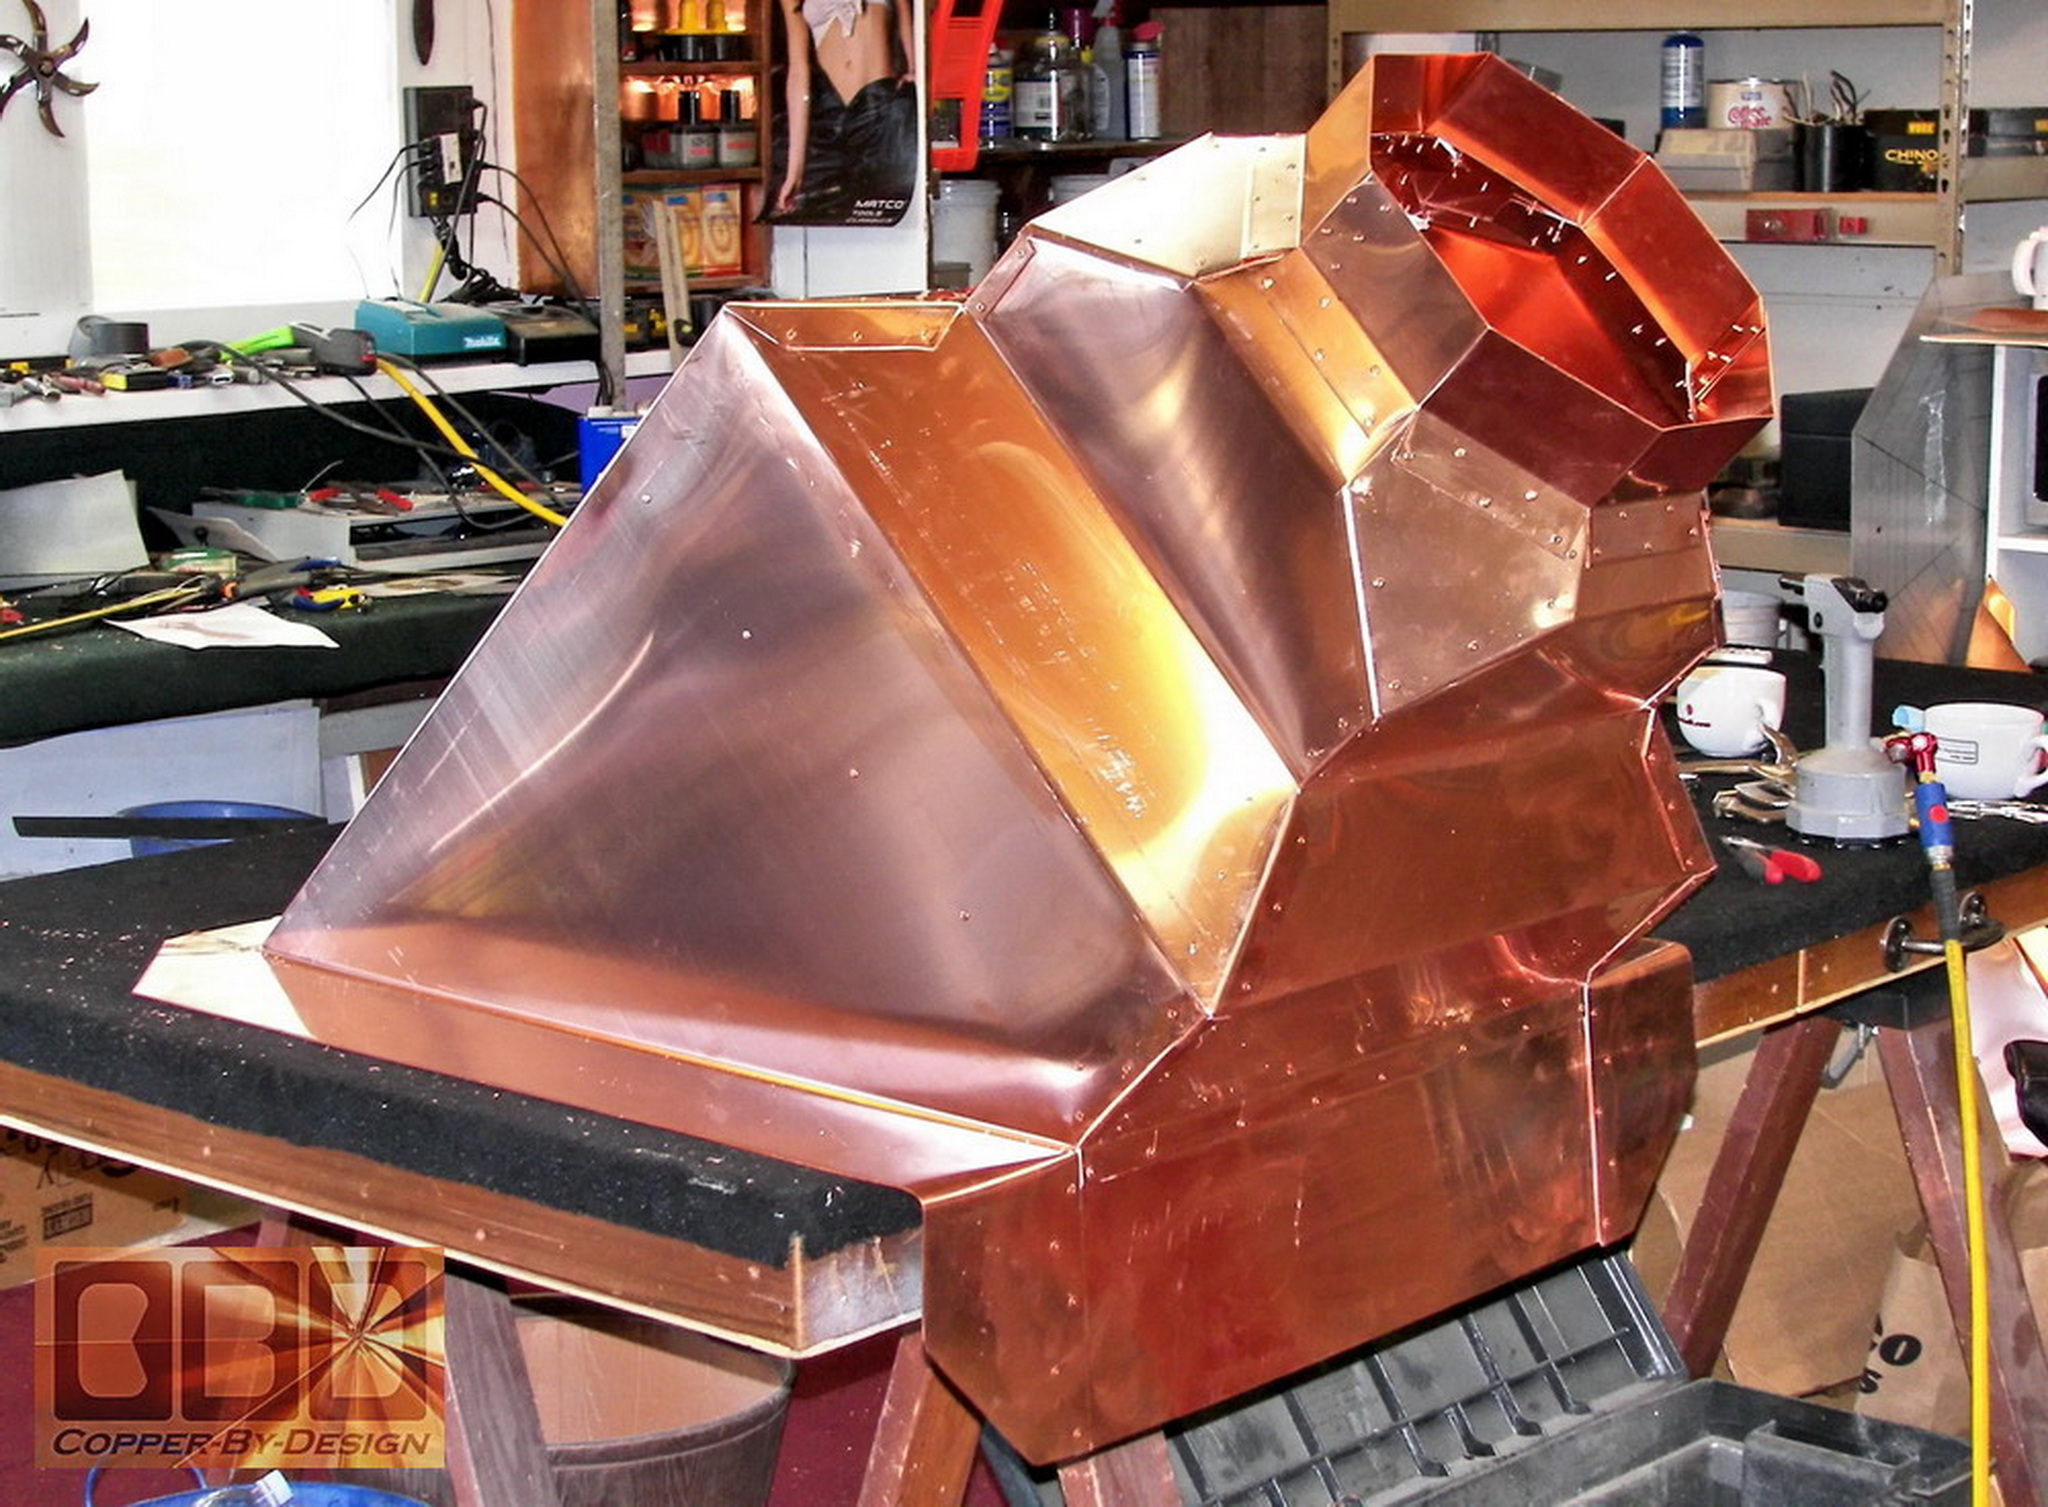
and dropped the top unit down on top of it. That turned out edge
on the bottom of the octagon stack made it pretty easy to line them
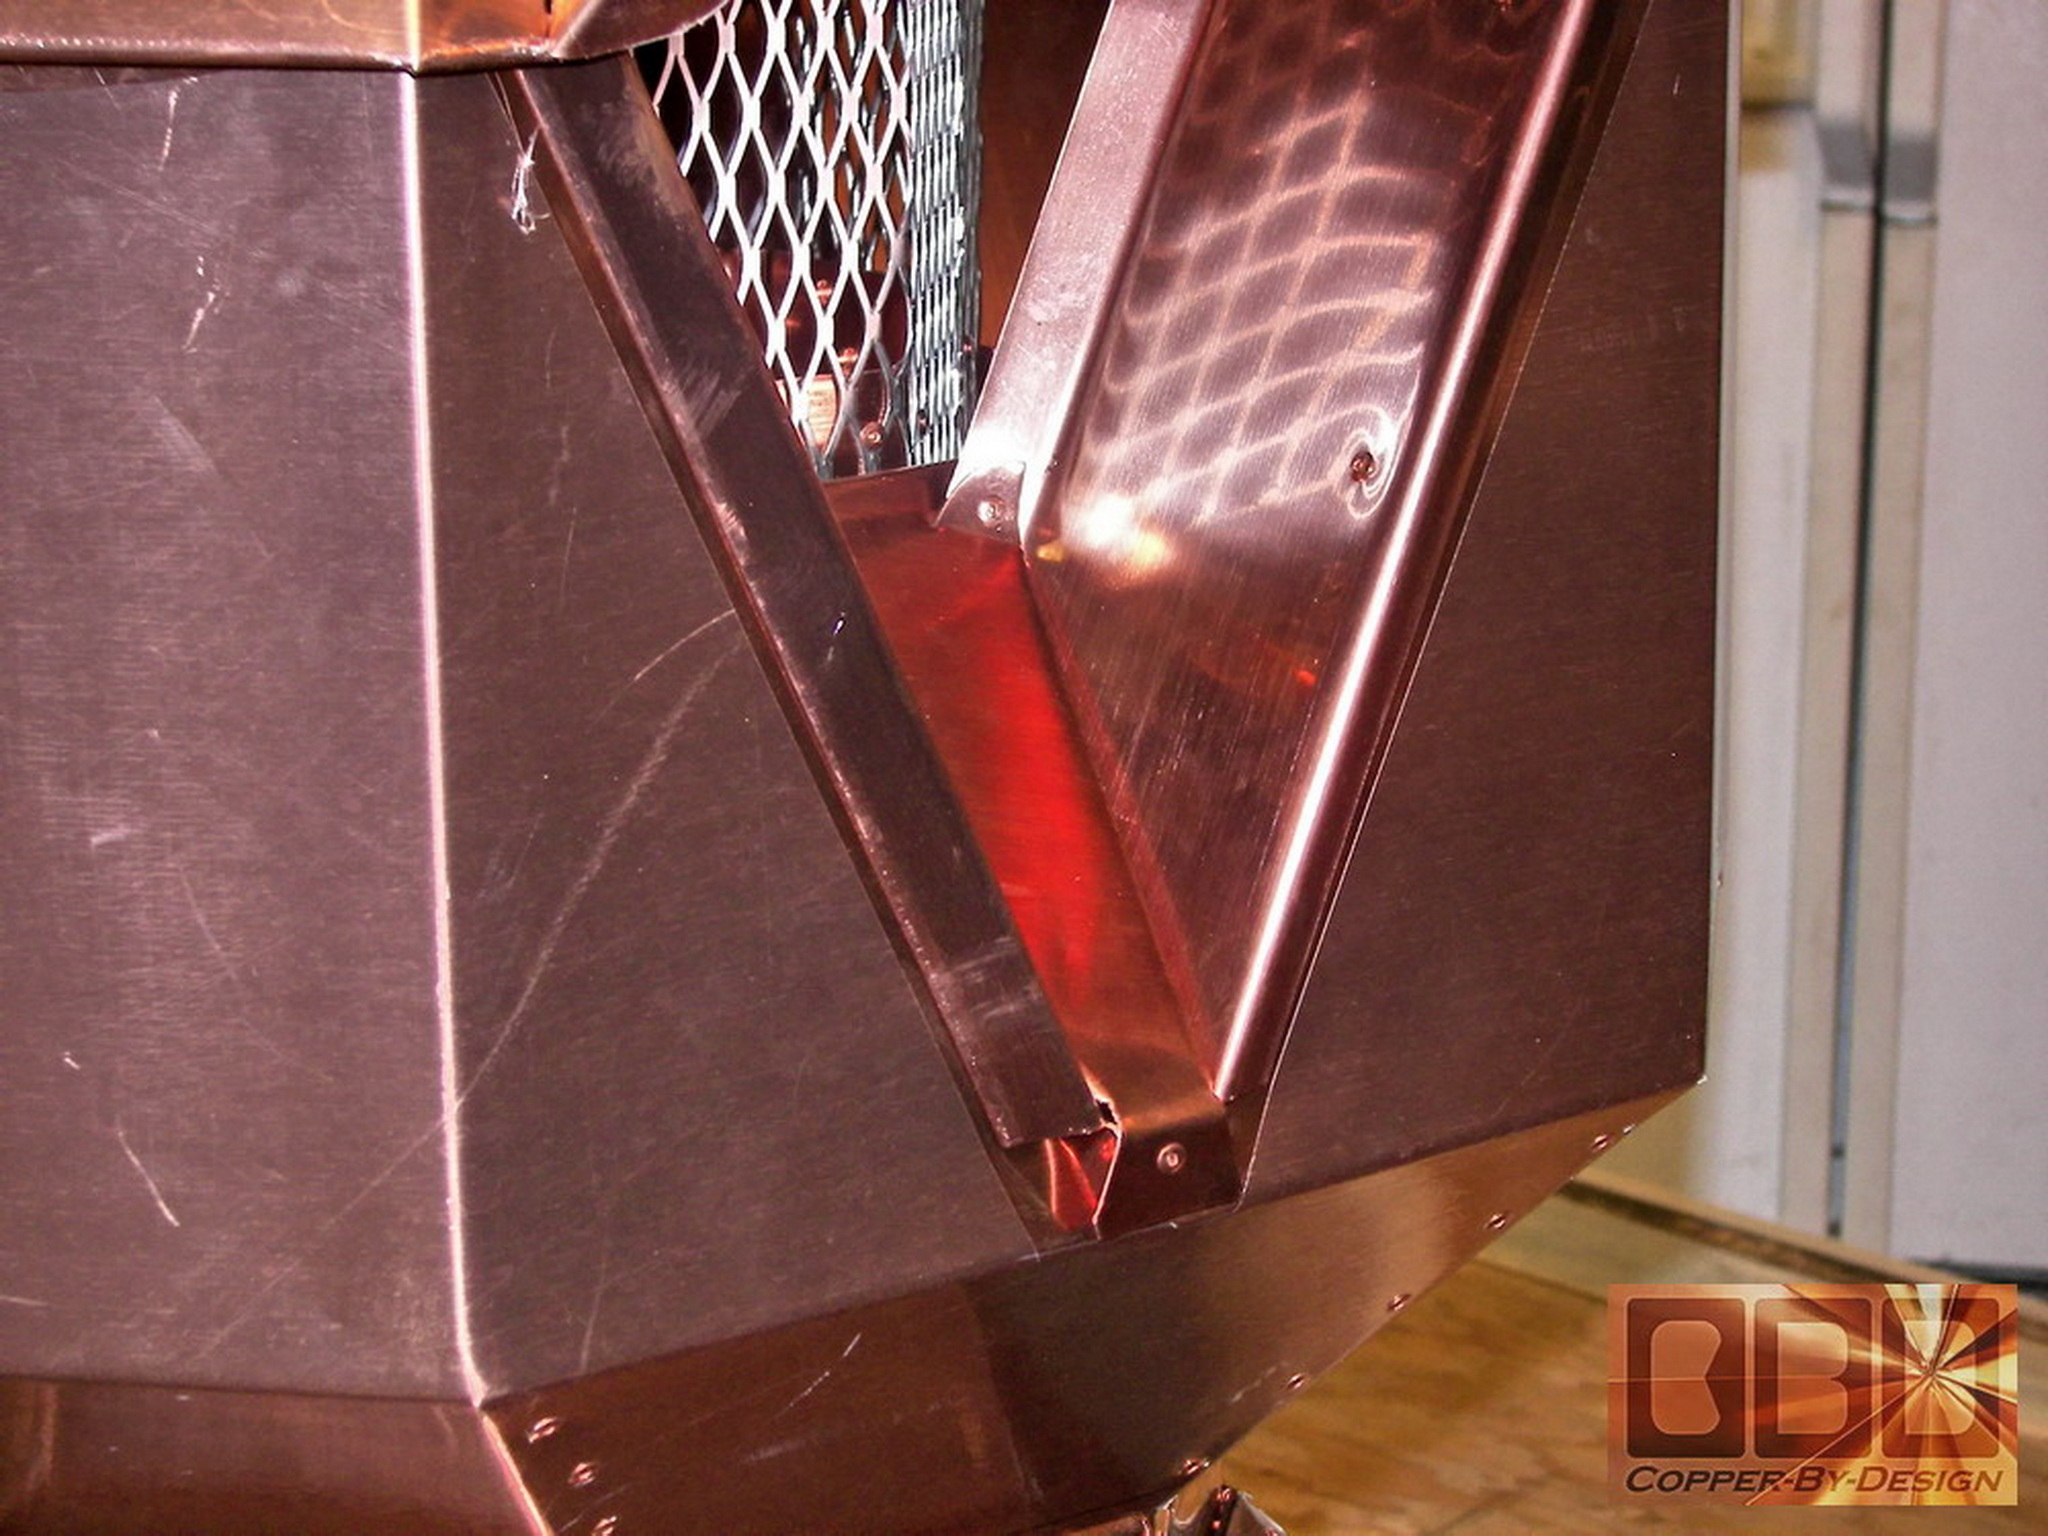
up. I decided to take your suggestion and turn the stack 45 degrees
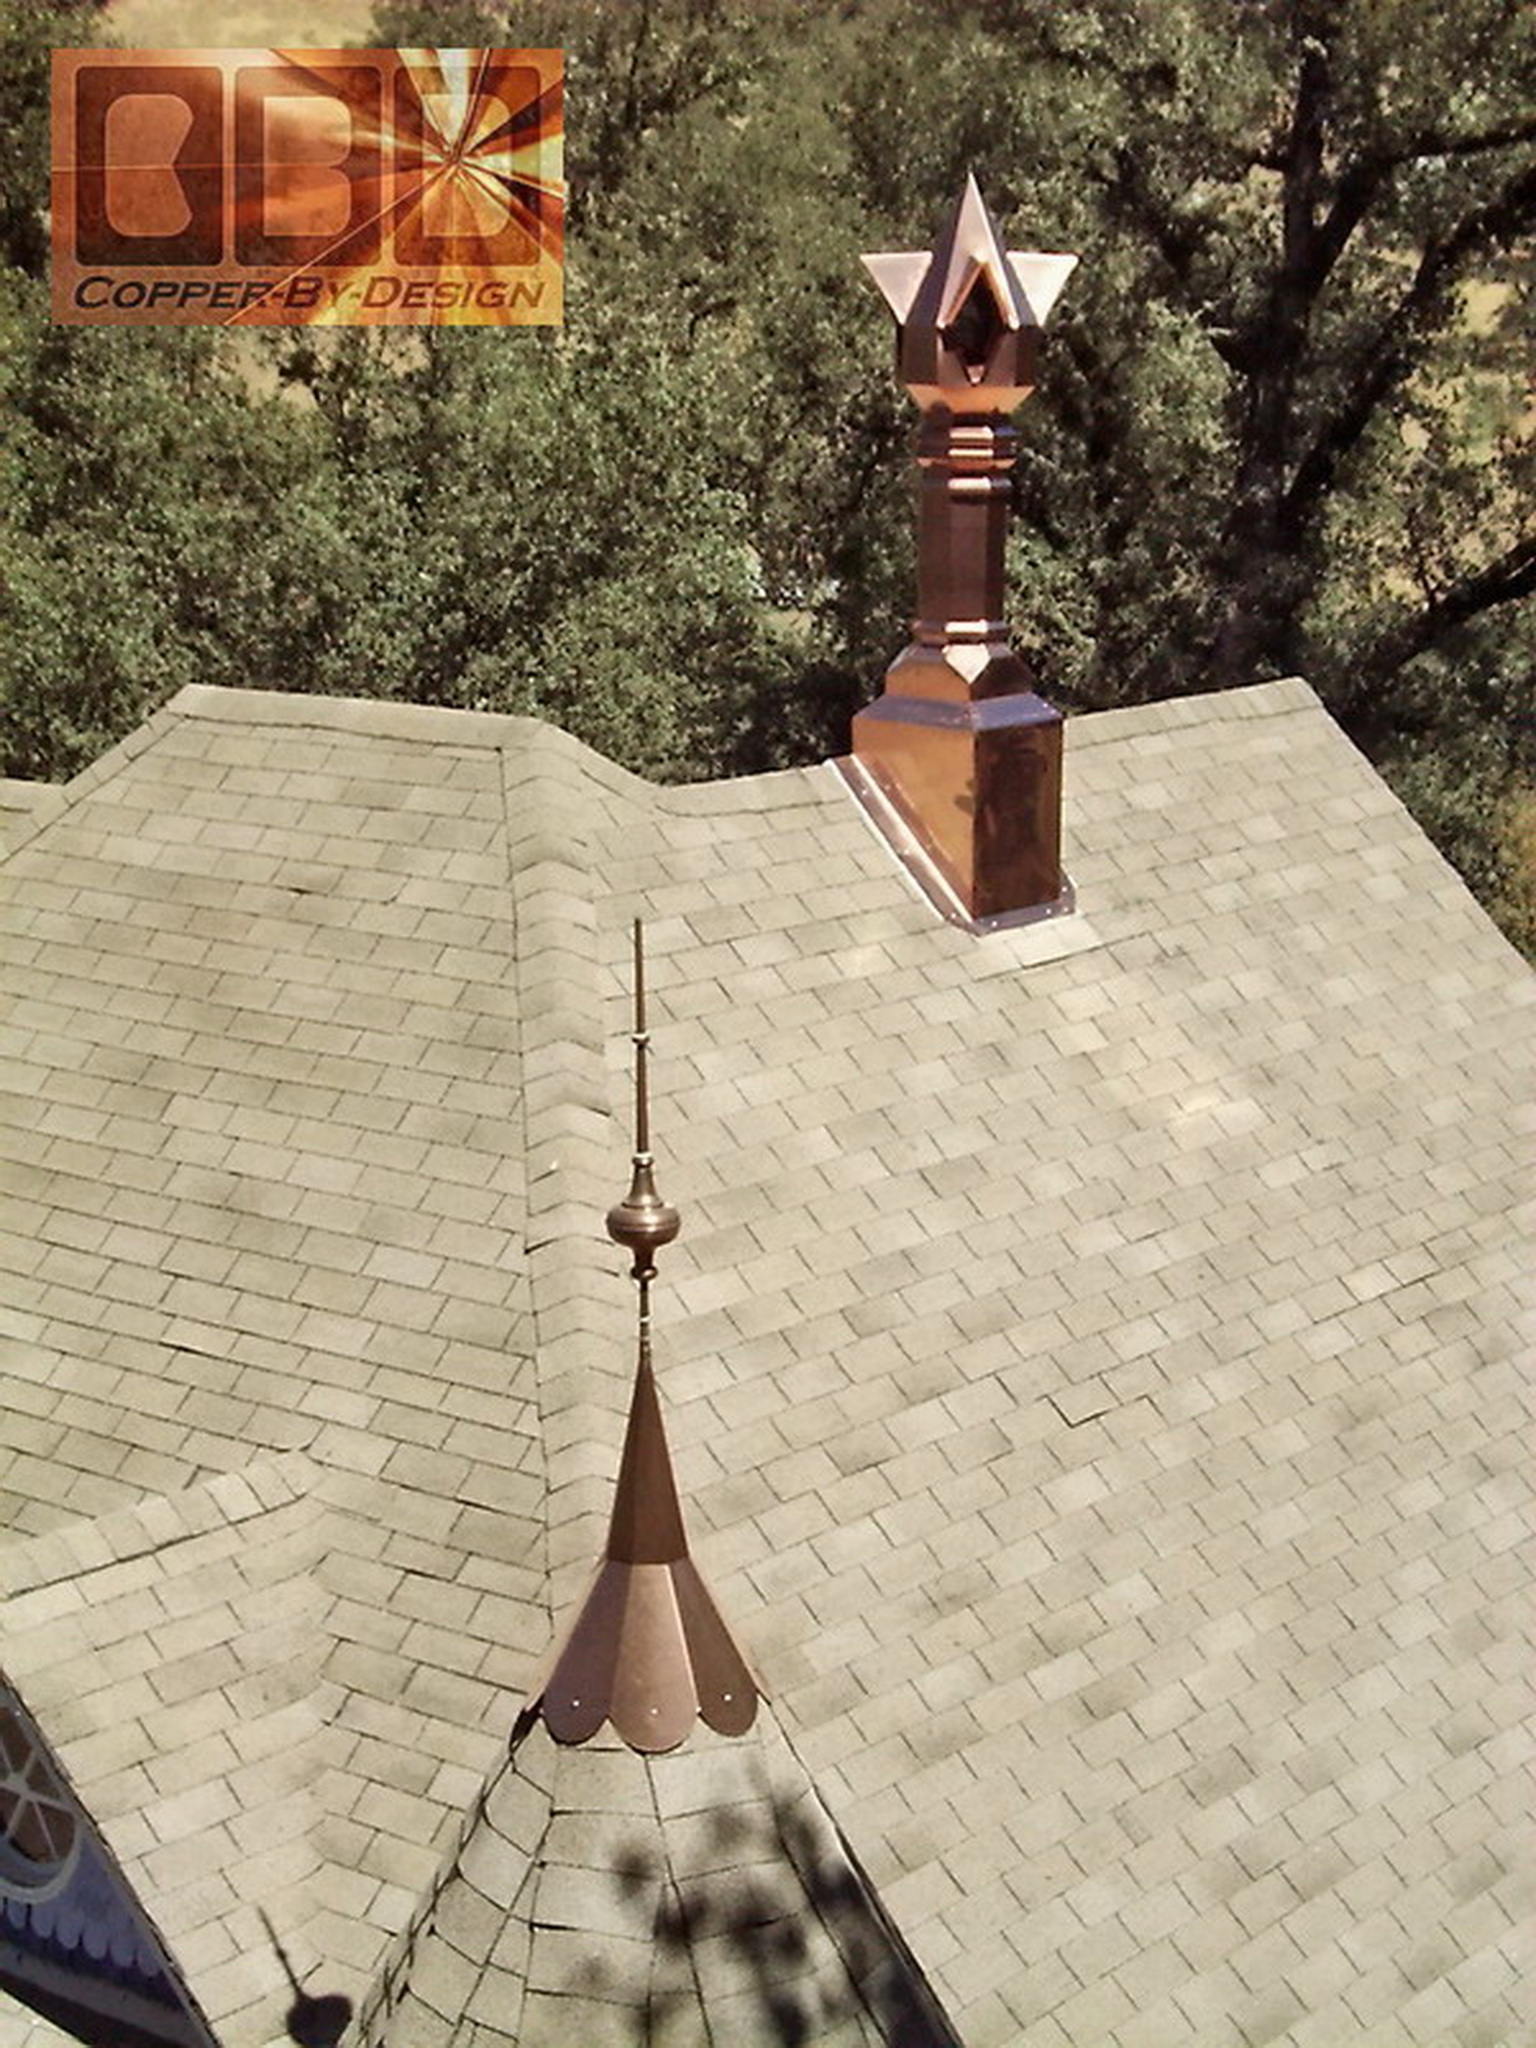
so the vent hoods were not parallel to the house. It really does
look better that way.
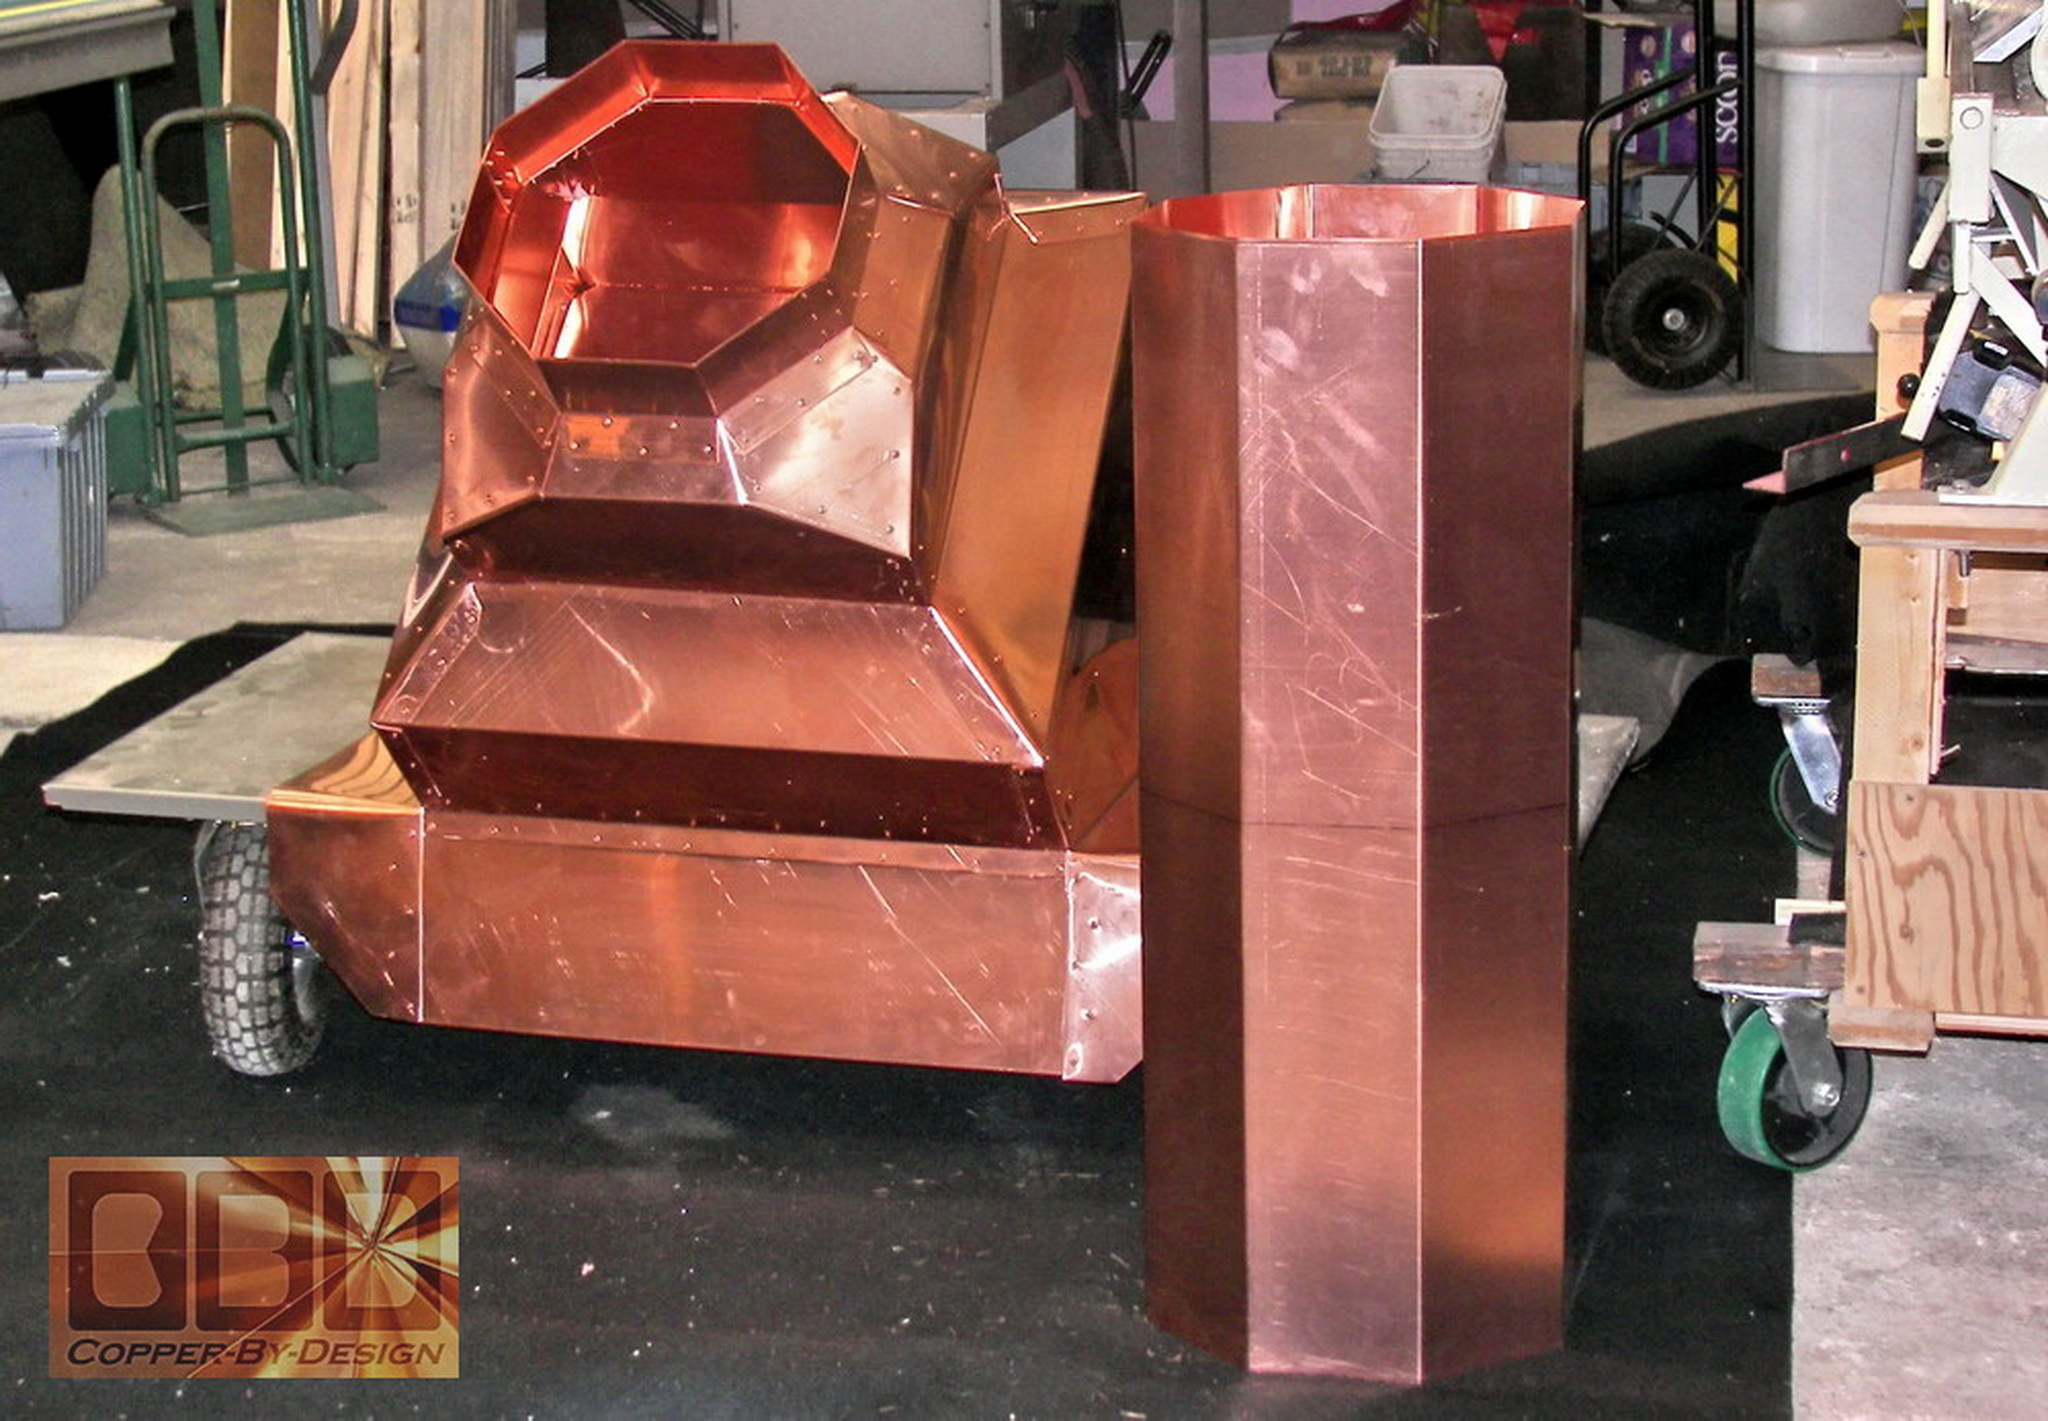
I had real trouble drilling
the first couple of holes for the alignment nails, until my neighbor
Pat pointed out that the drill bit was not even sharp. He had to
leave at that point to go direct a helper to do some work at his
place. After I got a good drill bit, everything went quick. I had
all of the 32 holes drilled and the copper rivets installed in short
order. Then, I took a number of pictures. Pat came back over and
was surprised to see that it was all done.
He was thoroughly impressed
with the chimney and said that it looked so... good from his house!
We got to talking and he said that his girlfriend also has a newer
Victorian style house (5,000 sf') on property that she had built
and has been working on for like 20 years. I thought we were the
only ones with anything like that! Now, Pat is thinking that he
may just have to get a copper cupola to put on his chimney top!
This 'eye candy' is so addictive! Don't be surprised if he contacts
you when he's ready! LOL
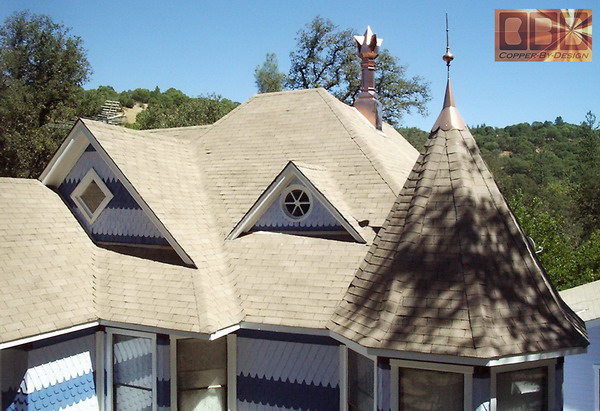
Sunday afternoon, I
stuffed some of that copper woven scrubbing pad material up under
the base flashing flange at the ridgeline to give me some backing
for a caulk seal and then ran a bead along both sides of the base.
It's all done now. I took the wooden rooftop work platform down
and blew off the roof area with a leaf blower. Then I took a bunch
of pictures from different angles for you, trying to get the copper
turret top and finial into the shots as well.
I'm sending you all
of the install pictures in a zip file. Pick through them and use
whichever you like on your website. When I can get around to it,
I will update my house website as well.
When I am finished painting
the outside of the house, maybe next year (I hope), don't be surprised
if I get back with you to make a cap for the fireplace chimney as
well. The previous owner's homemade cap is a POS and I'm sure that
I will want to replace it at some point.
Working with you on
the copper turret cap and the copper chimney has been such a pleasure.
You have not heard the last from me! LOL
White Light to you,
Jack Willard
Date: Wed, 25 Sep 2013
David is so much
more than a great craftsman. I must describe his work as art. He
made a beautiful rooftop turret first and I was quite impressed.
Then he made me a rather large, and unbelievably gorgeous,
copper chimney. I seriously did consider not installing the big
chimney, and instead displaying it as an art sculpture in my
Parlor. I did install it of course and it really set off that
Victorian house I had.
David Rich has been a real
pleasure to work with on four occasions now. He has my highest
recommendations.
Jack Willard
|