|
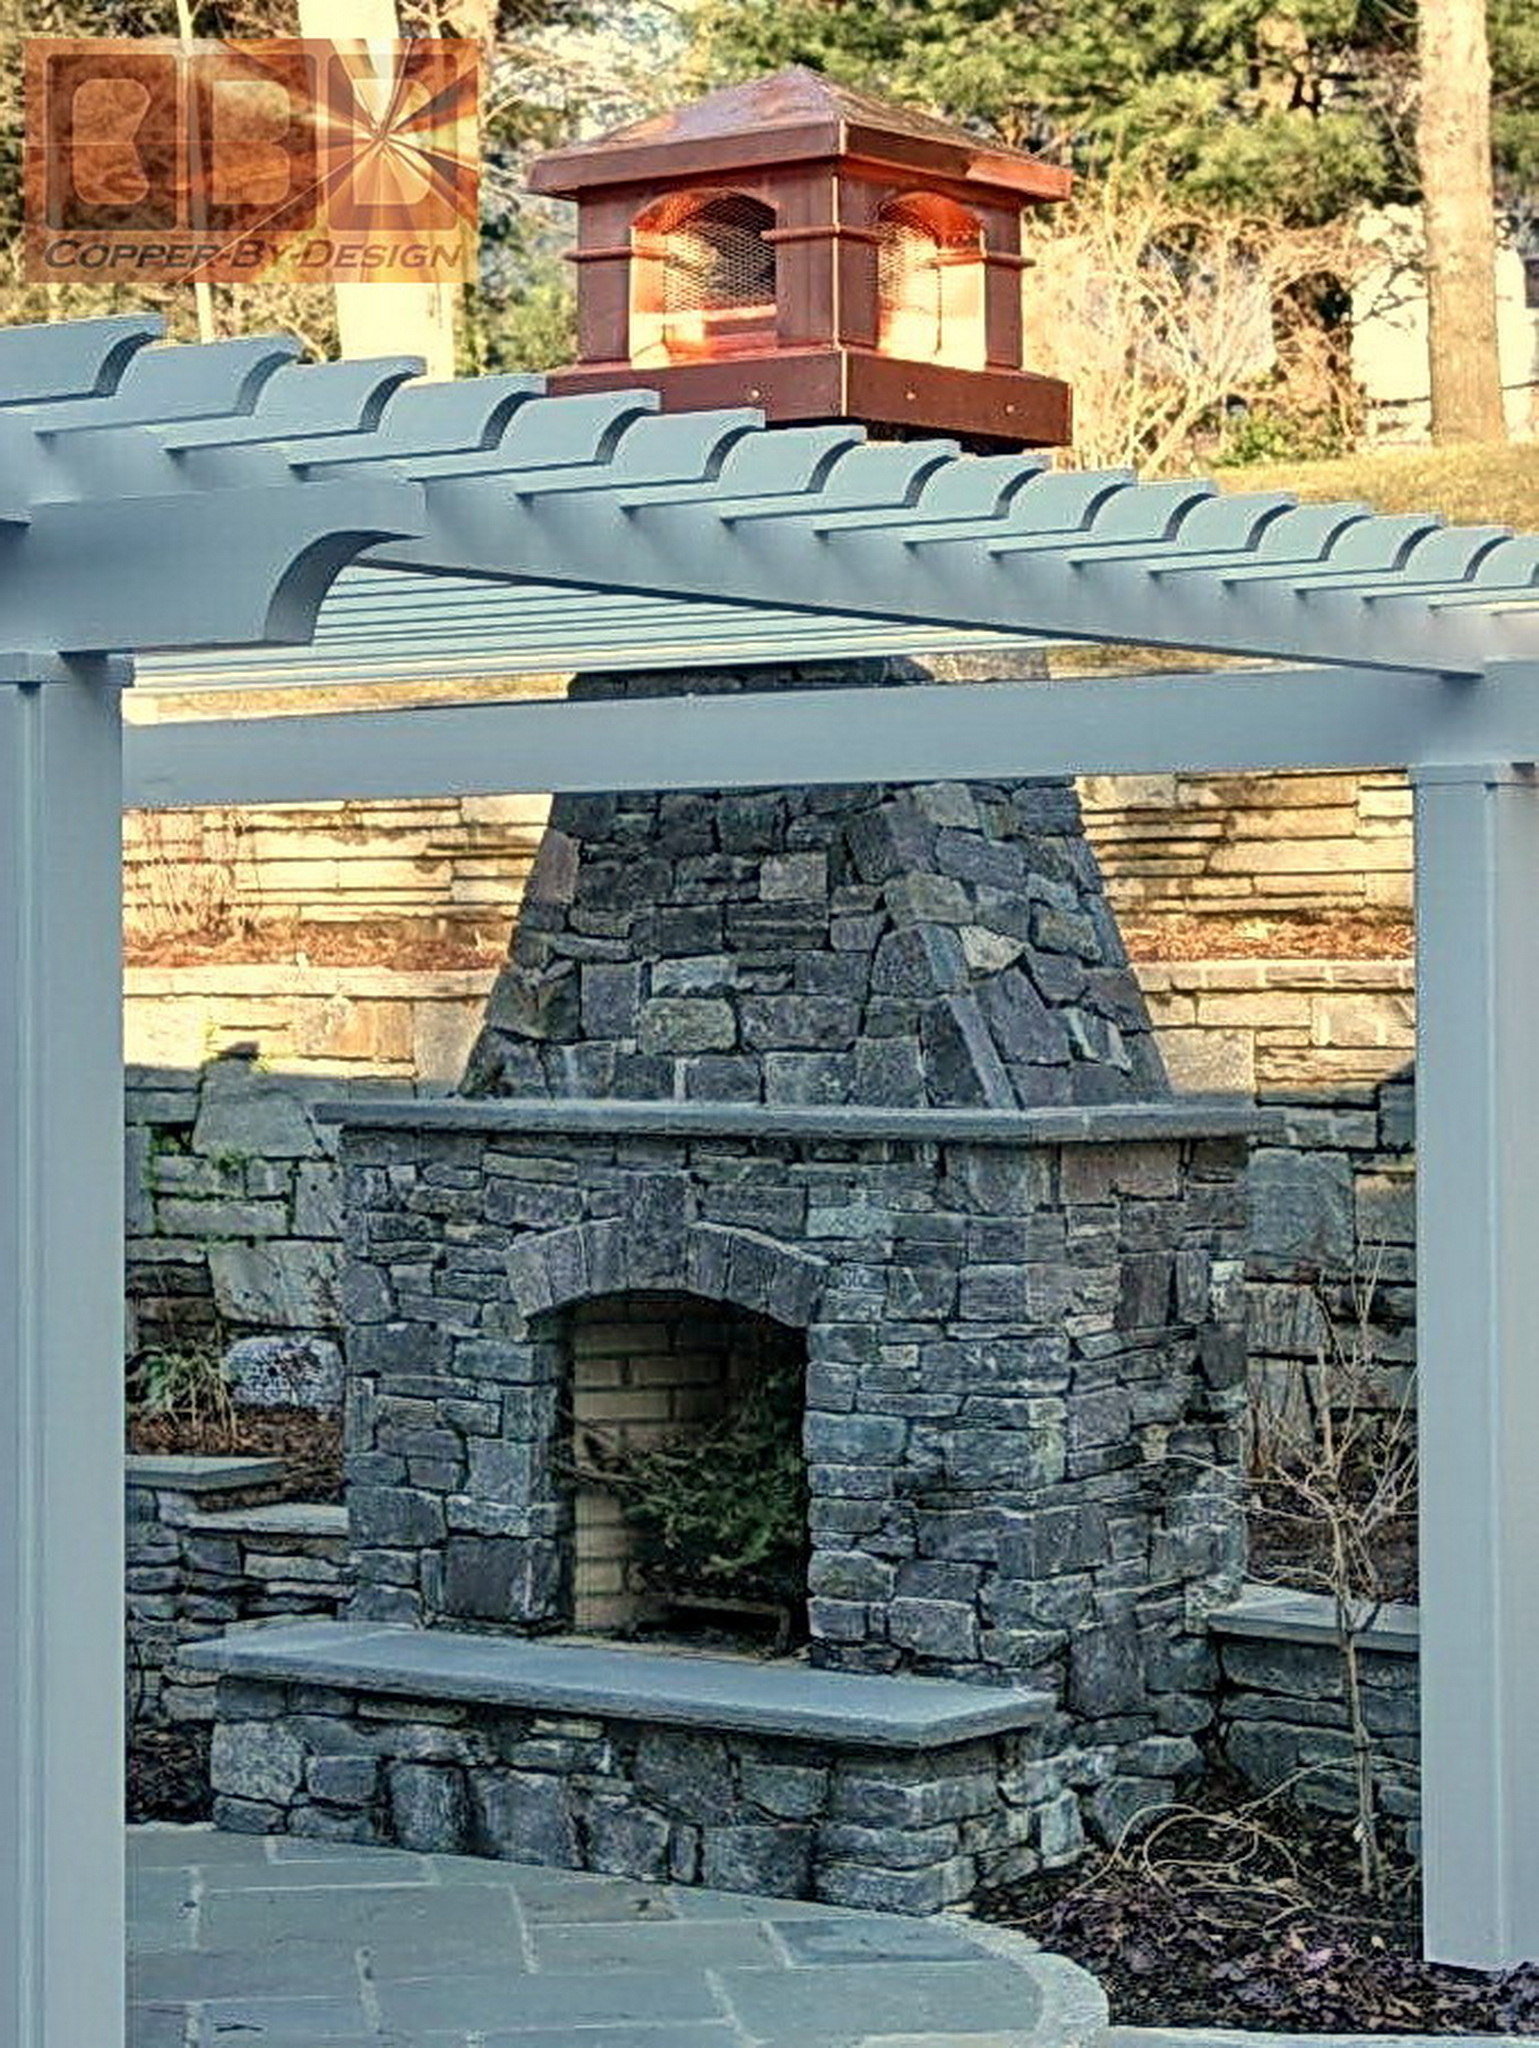
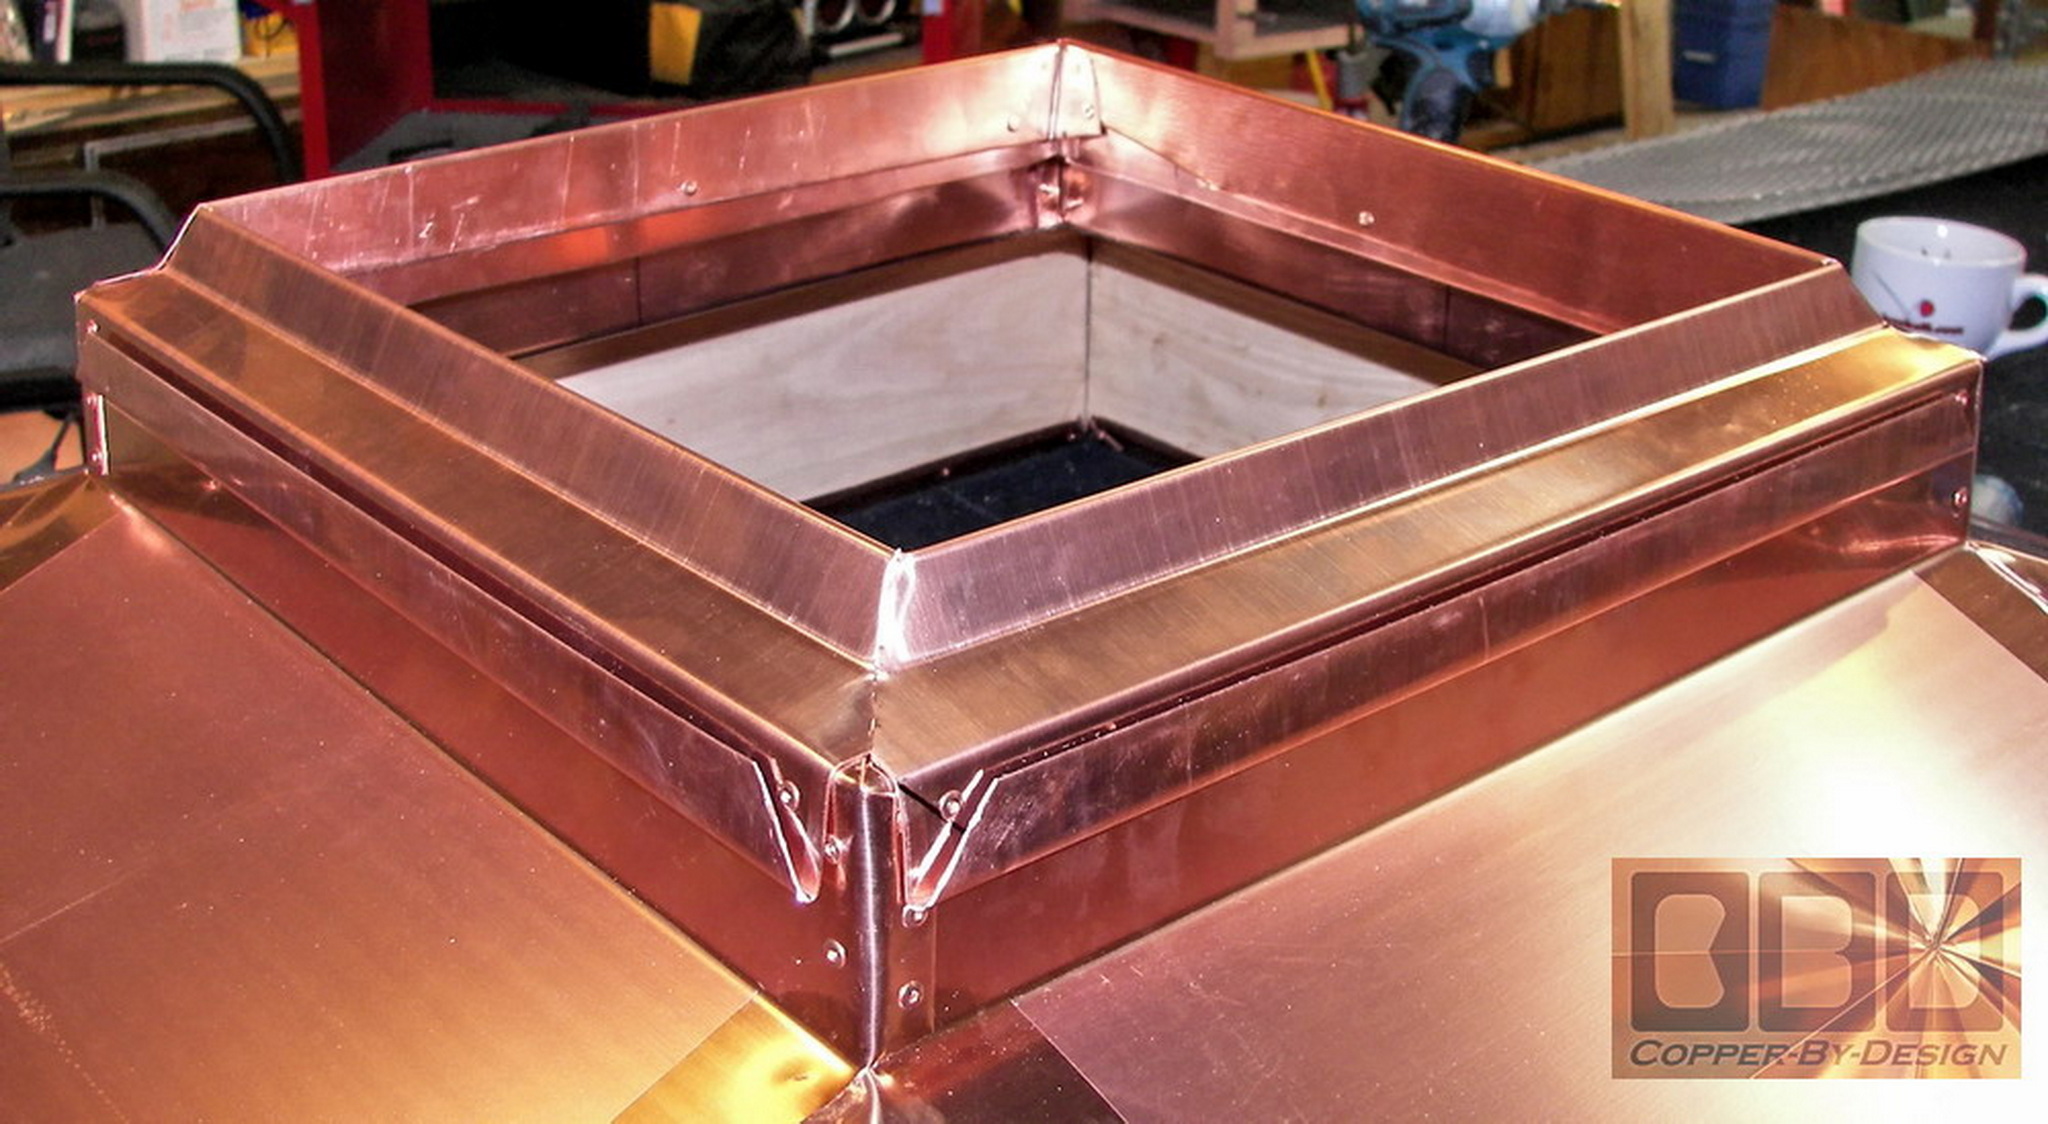
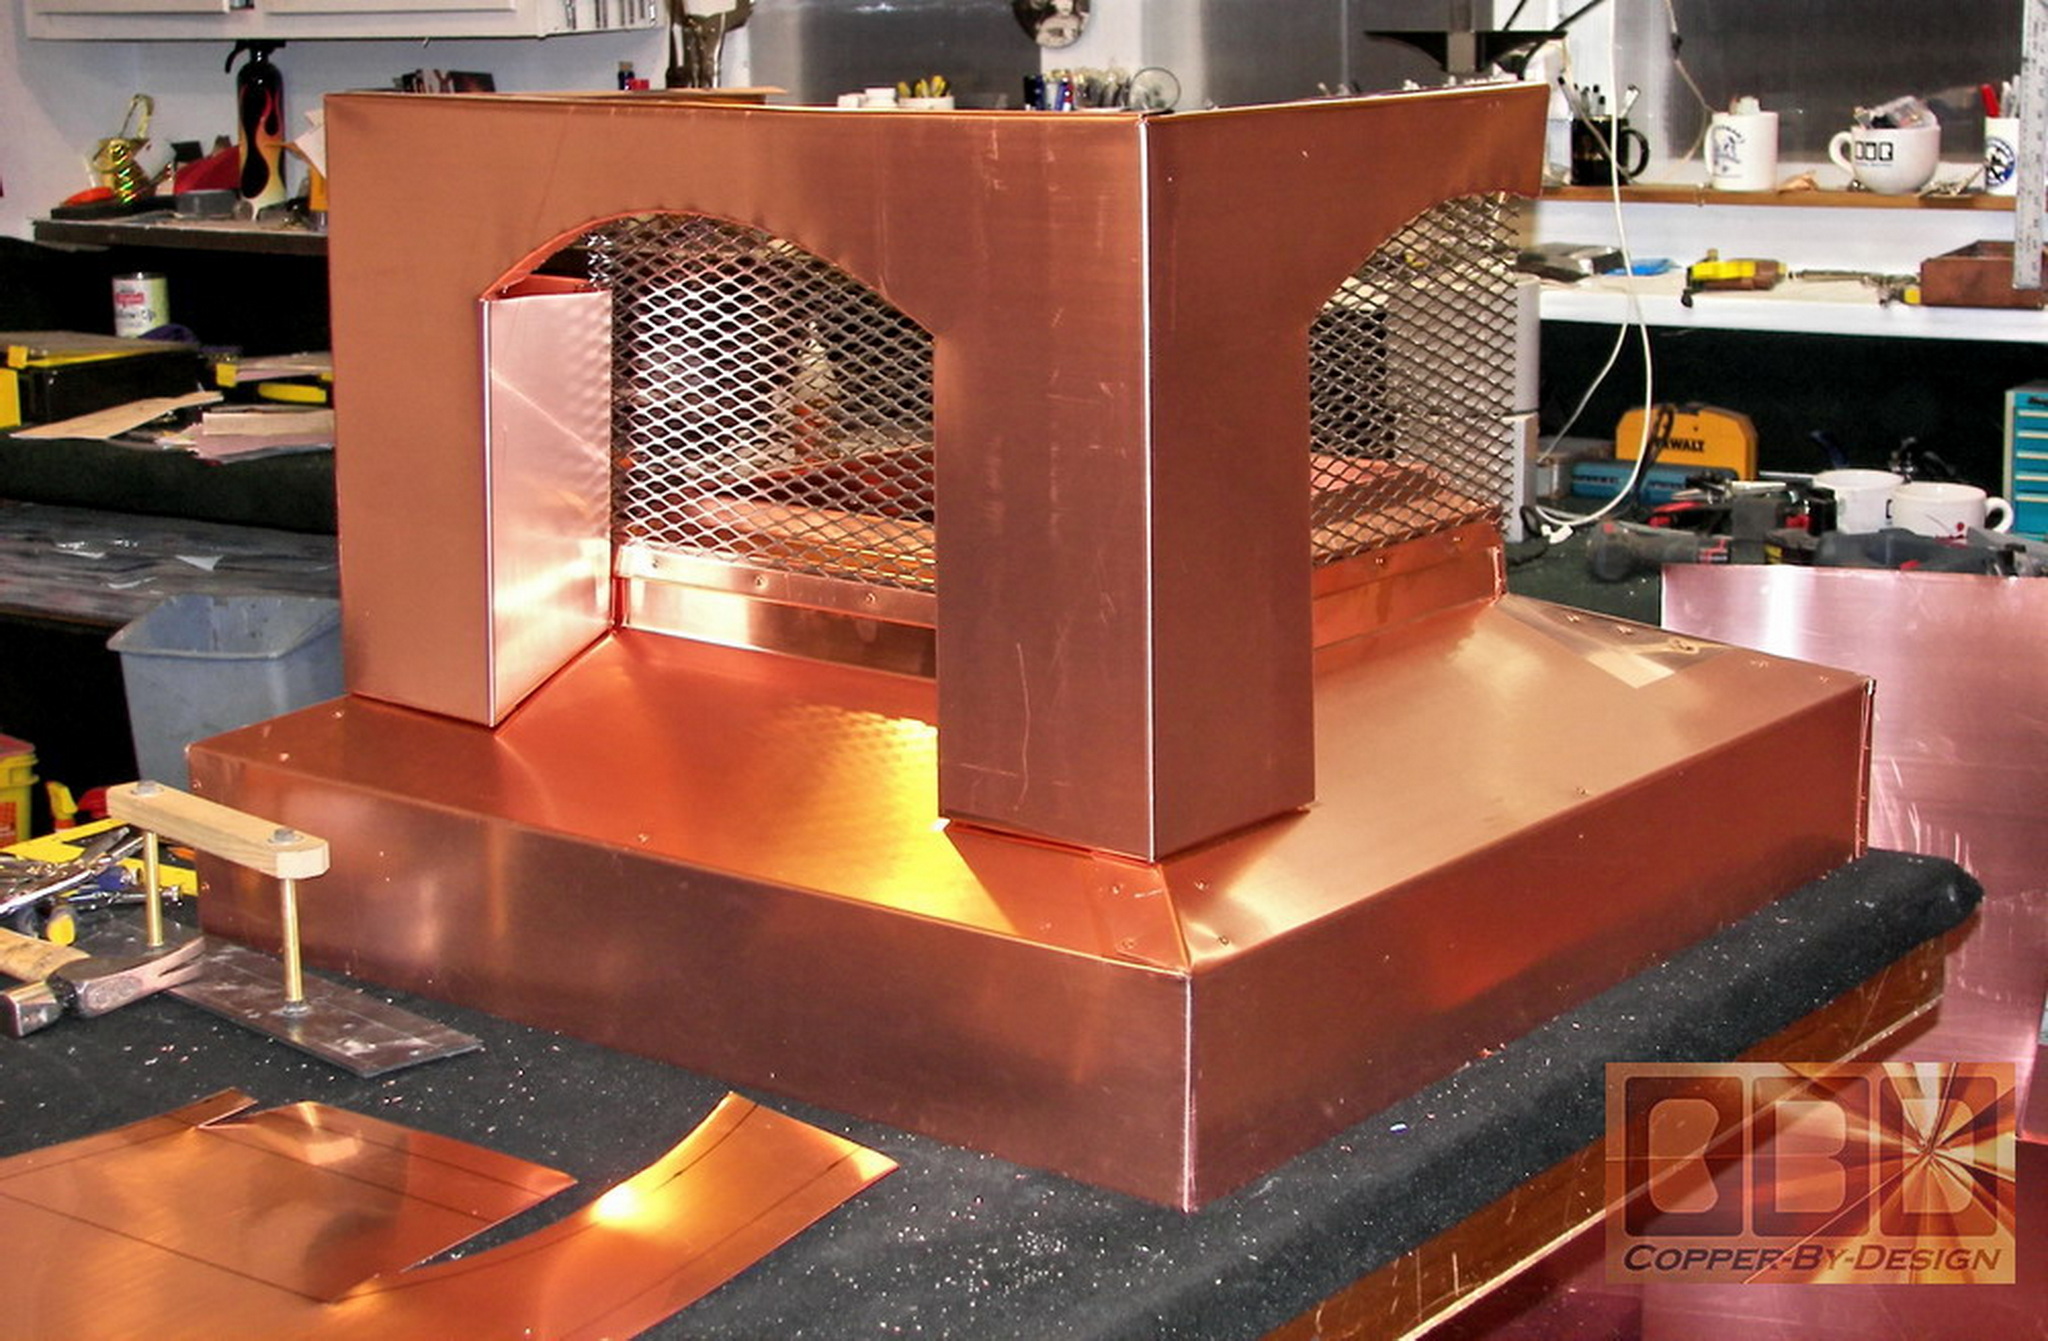
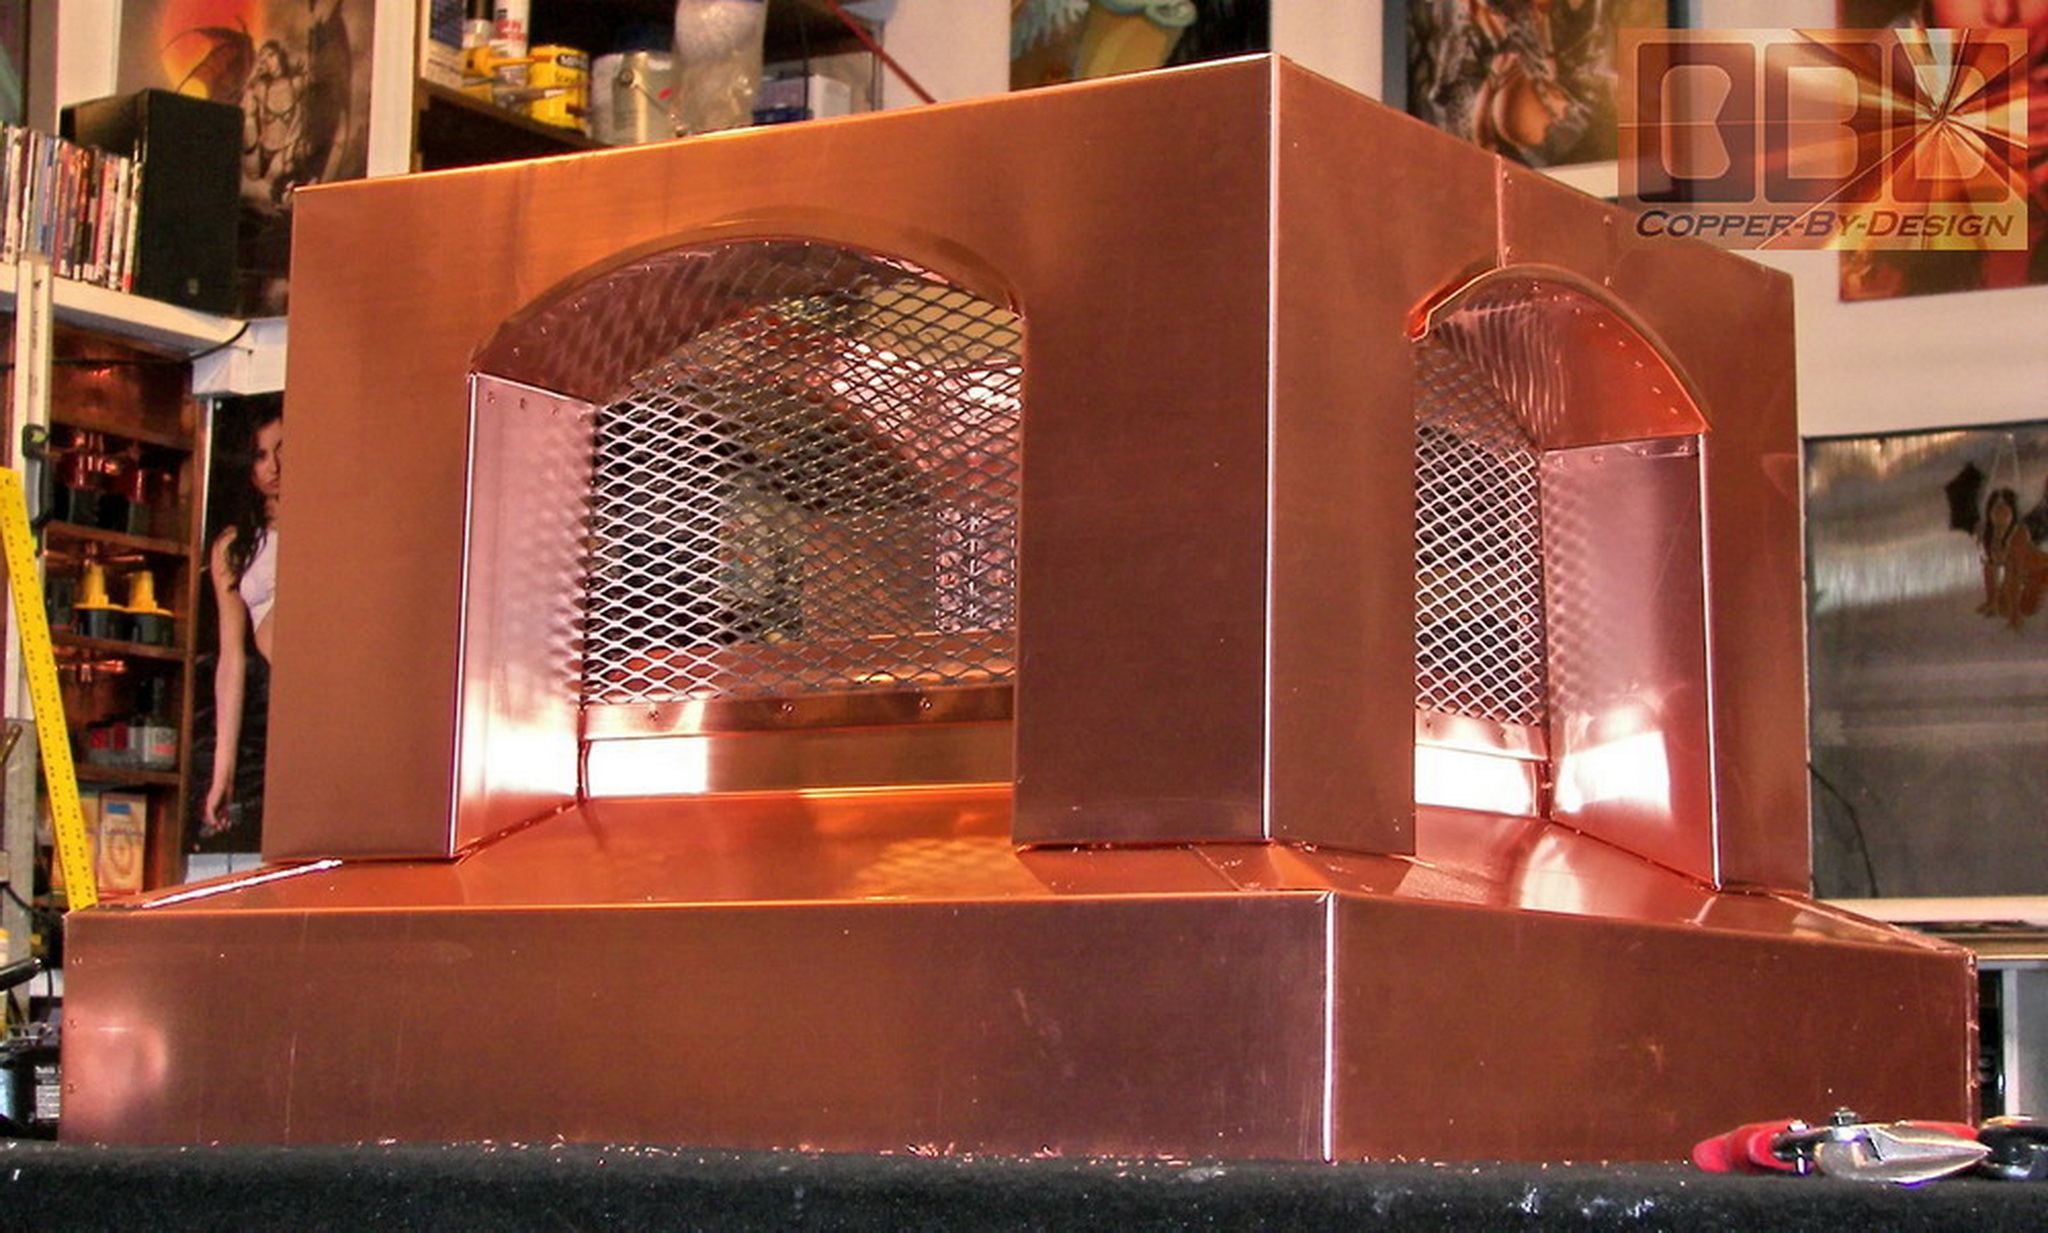
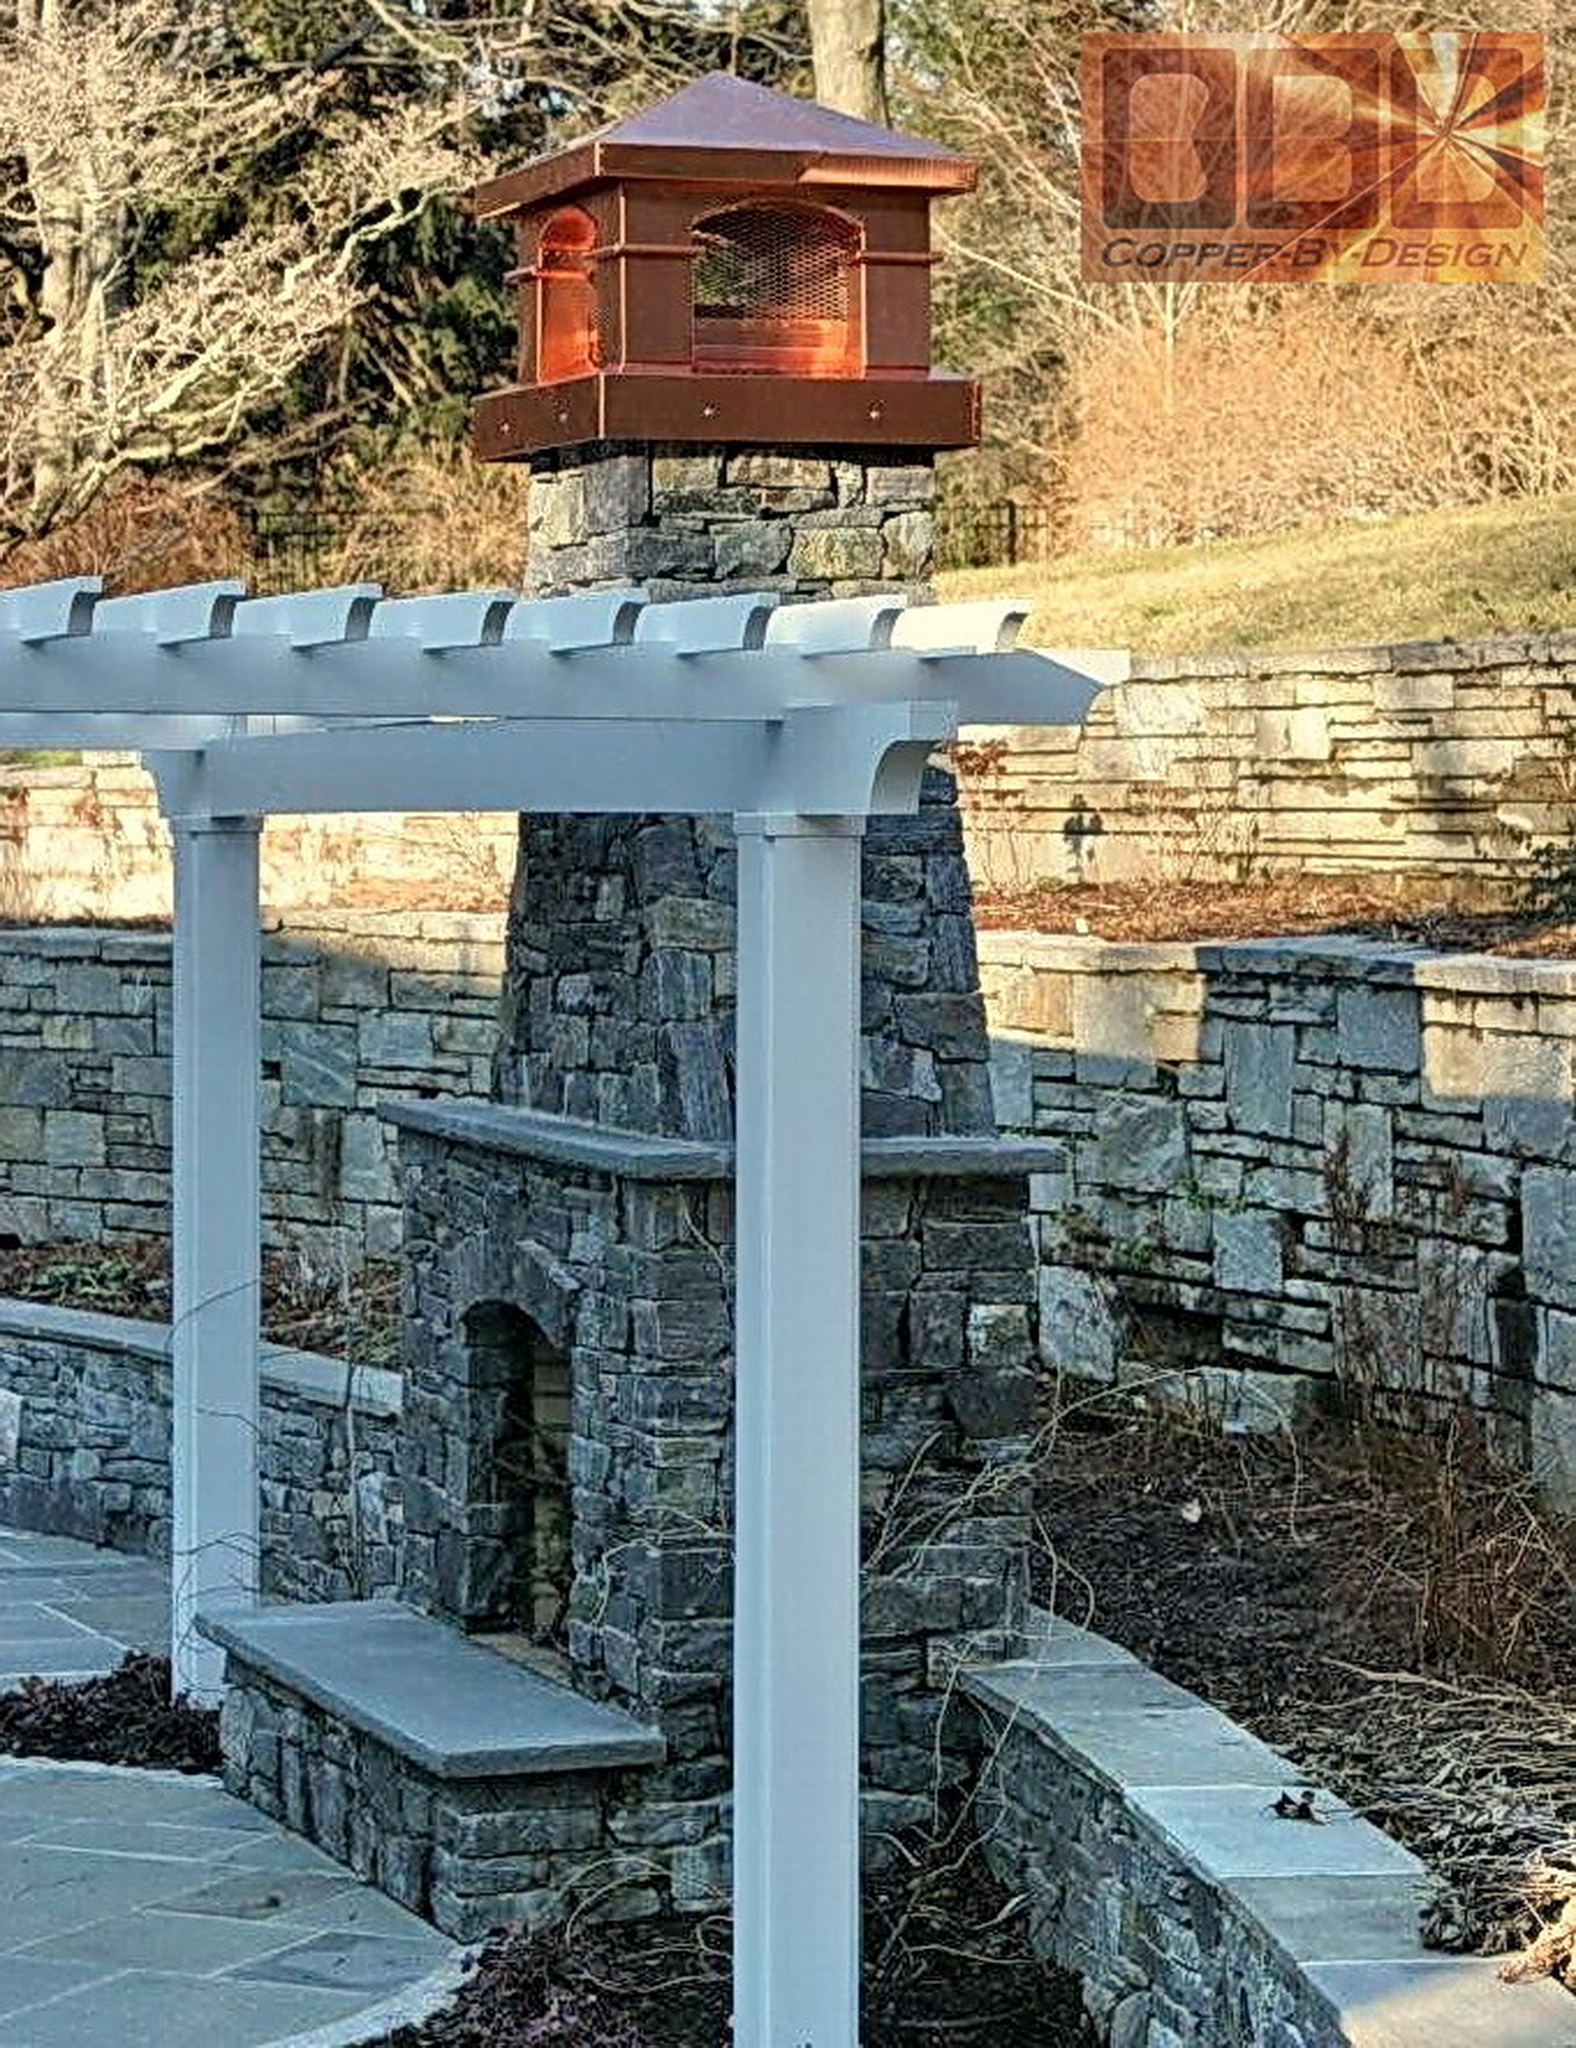
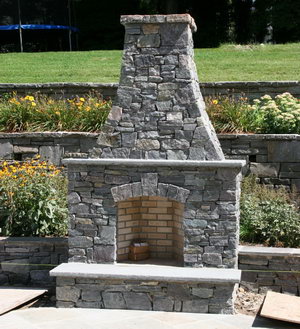
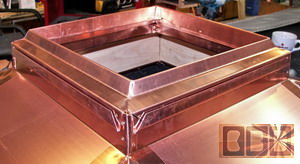
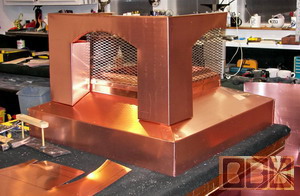
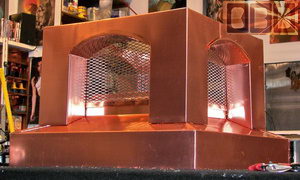
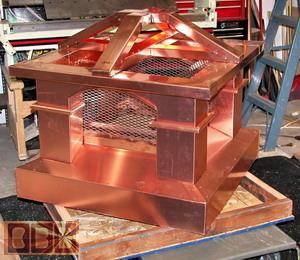
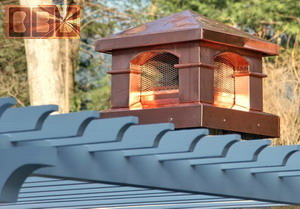
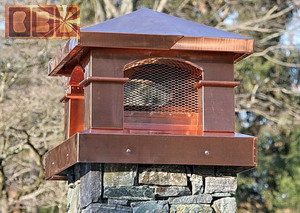
This copper chimney
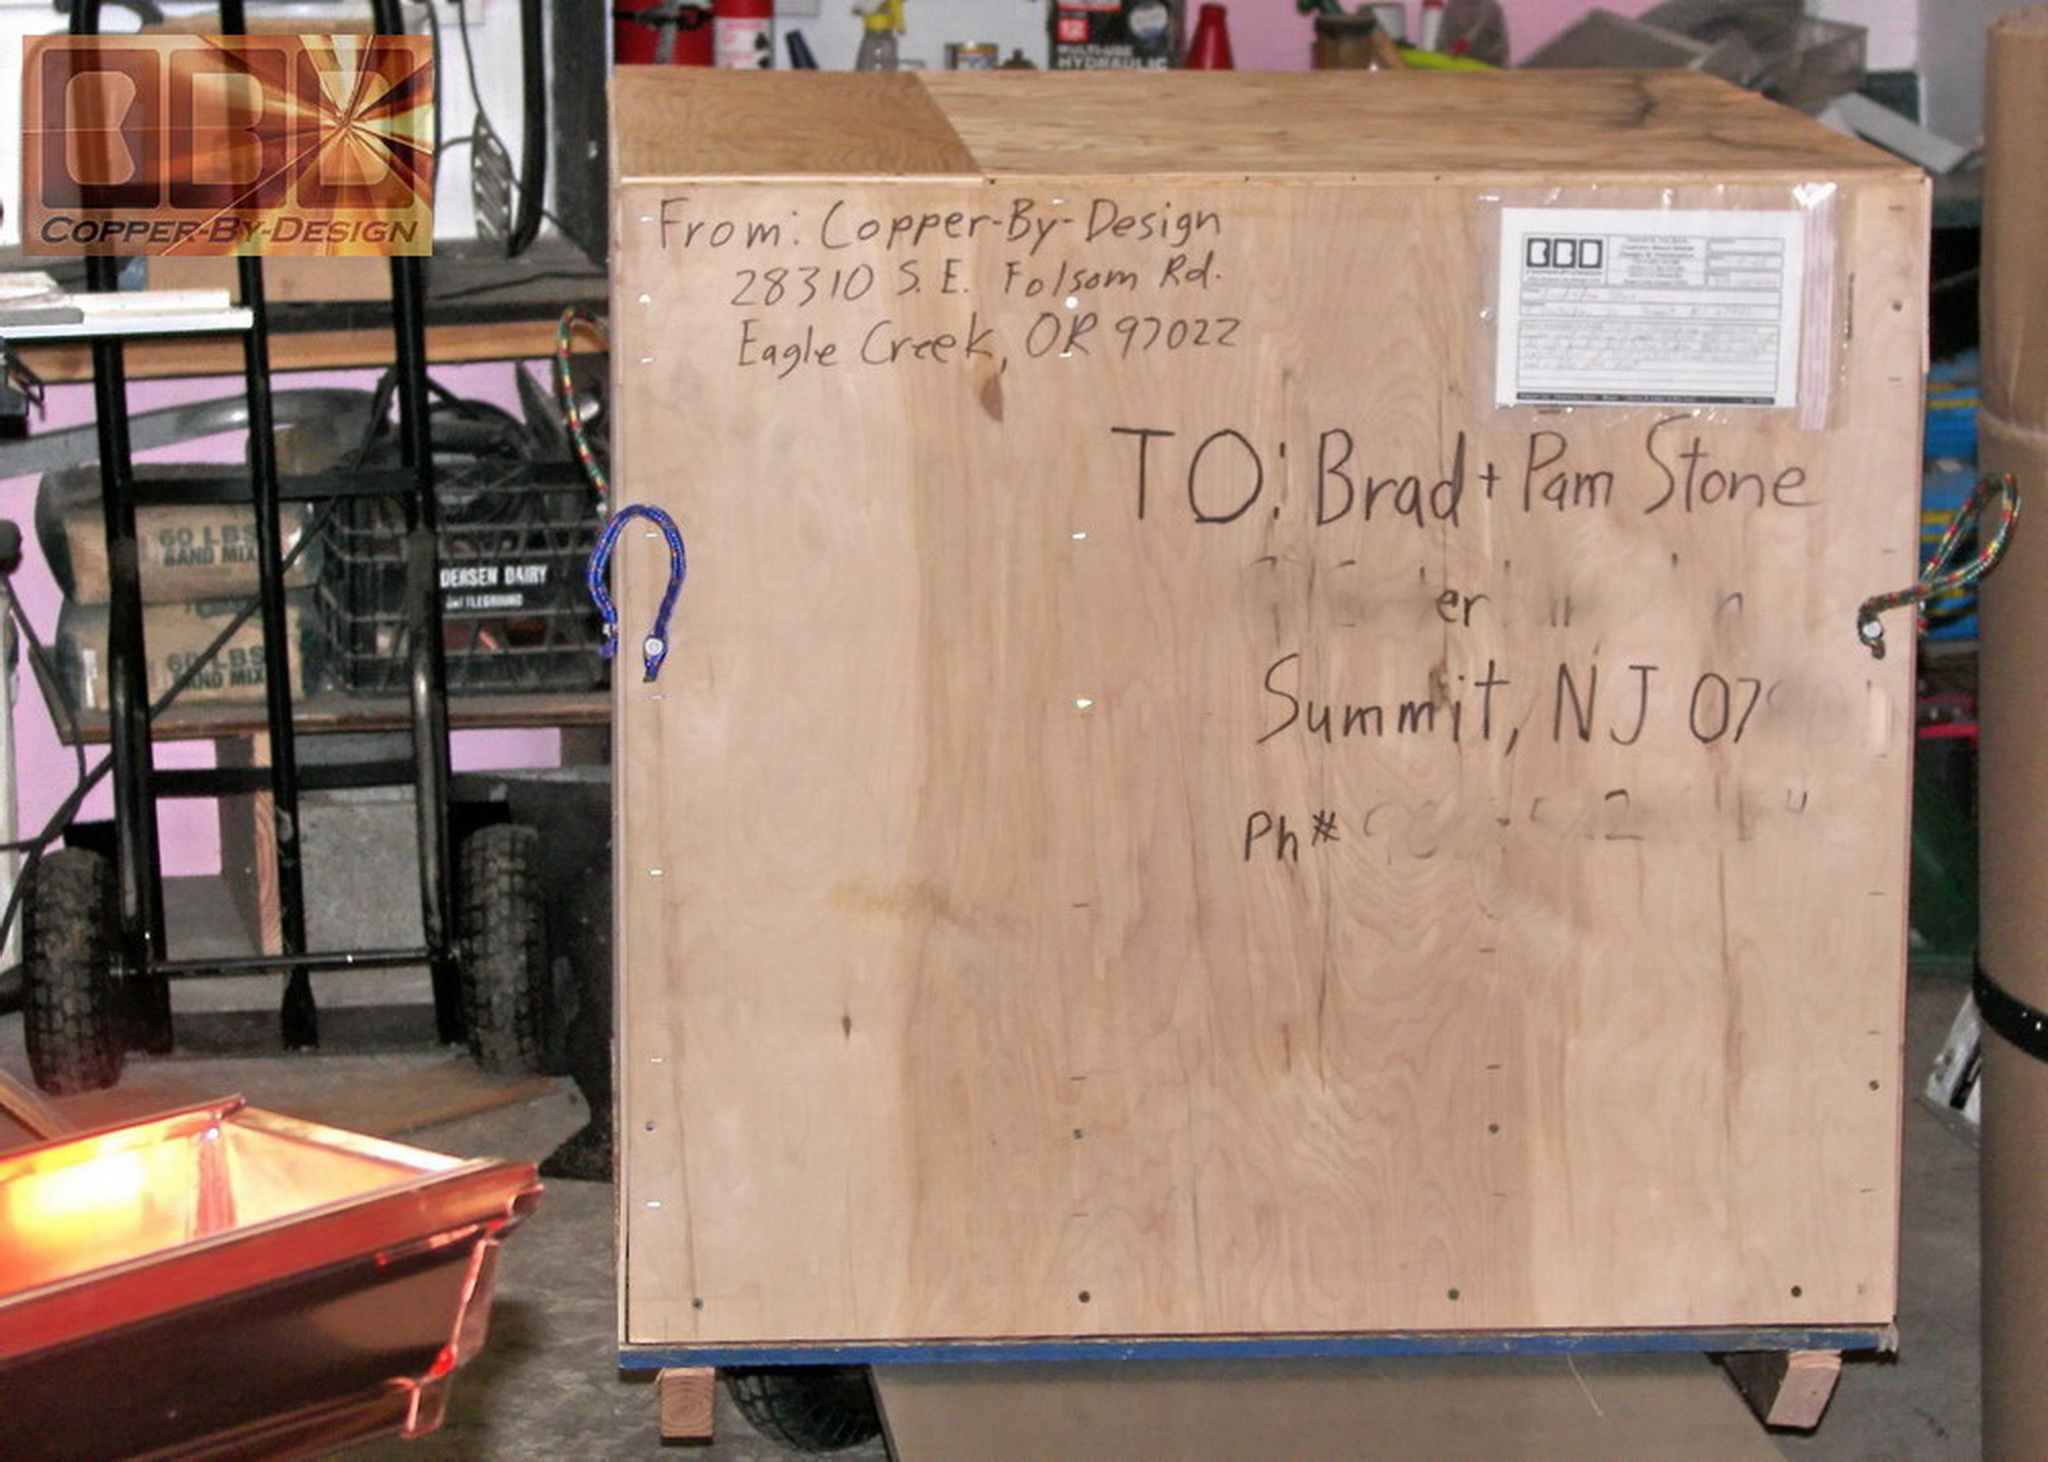
cap projects is for Brad and Pam Stone in Summit, New Jersey.
It is actually for their outdoor fireplace. He may have me build
some chimney caps for his house as well that match this design.
The inside of the base is 31.25".
|
|
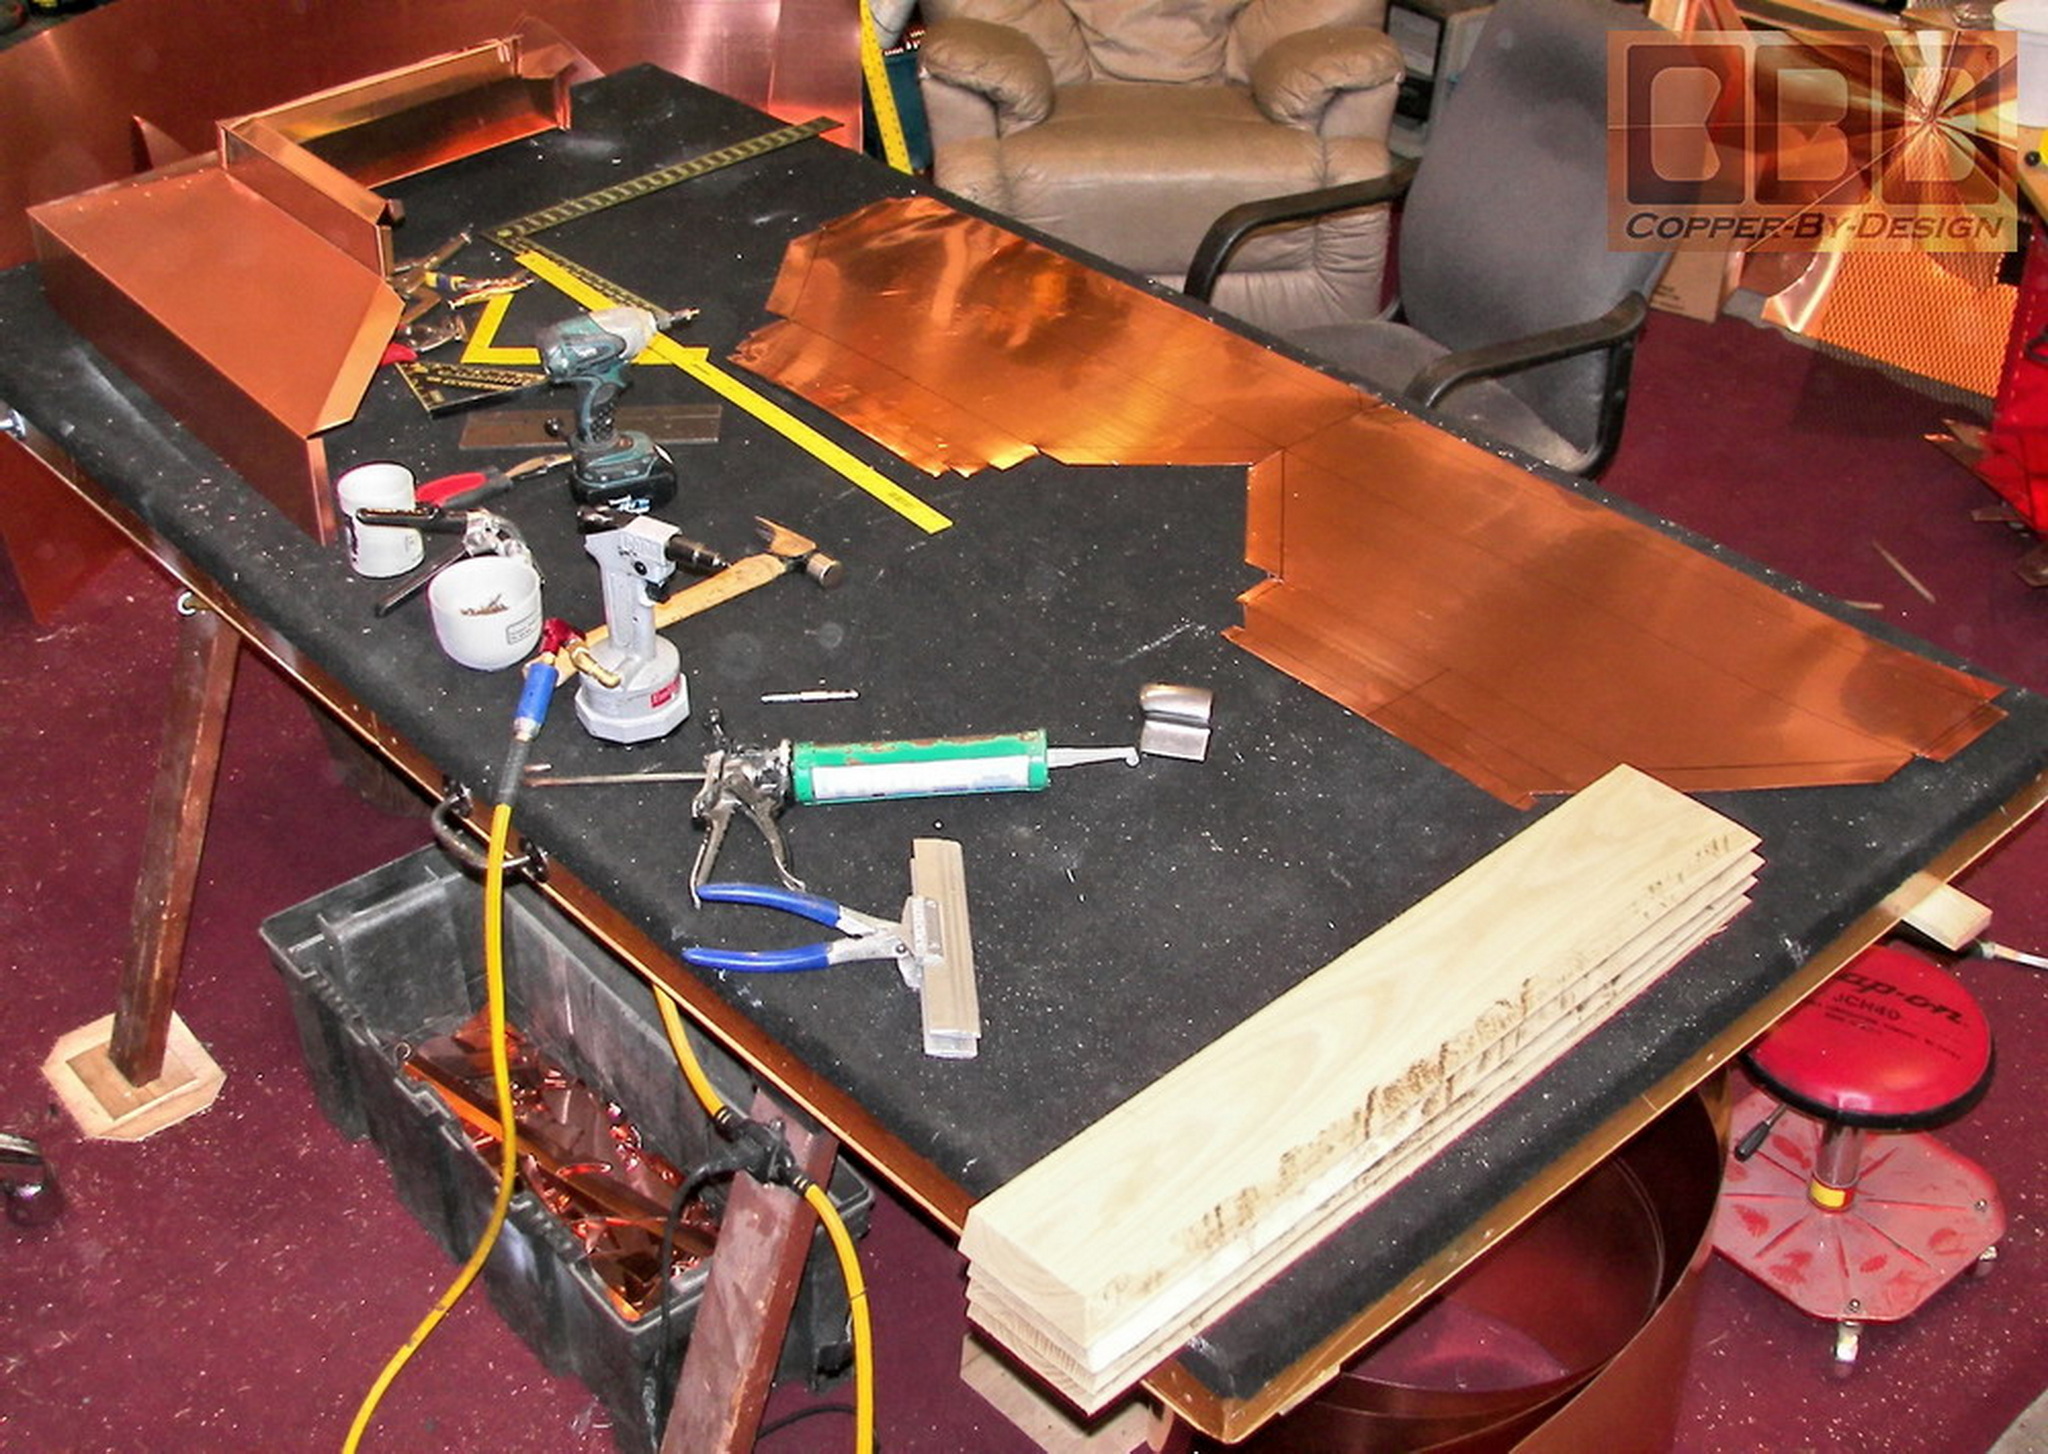
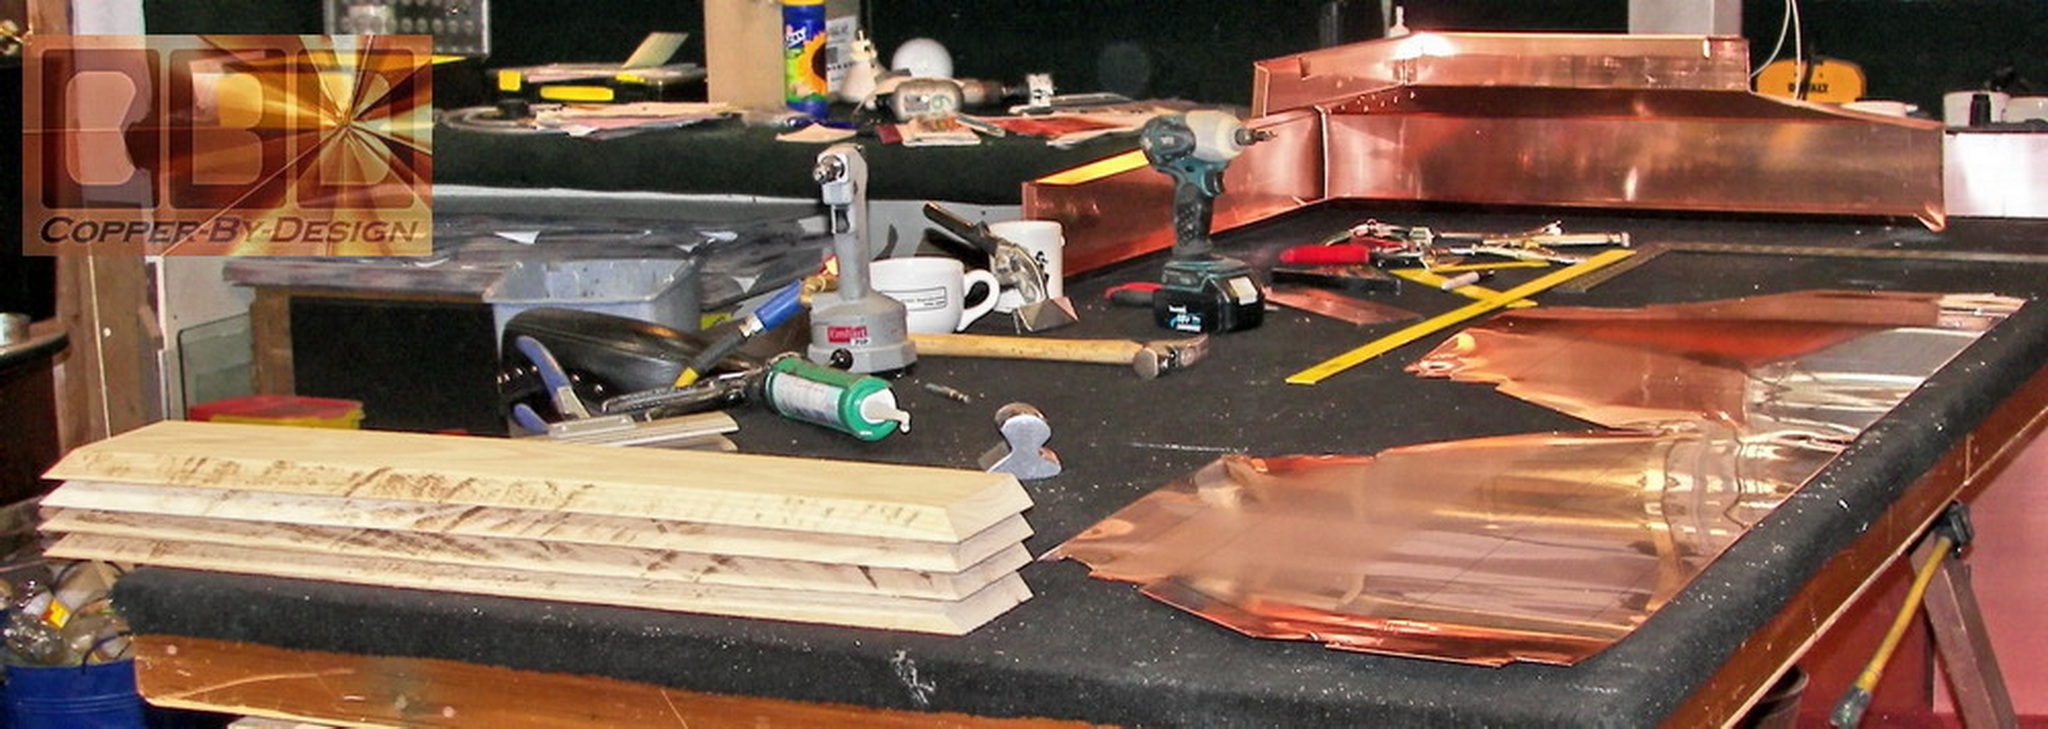
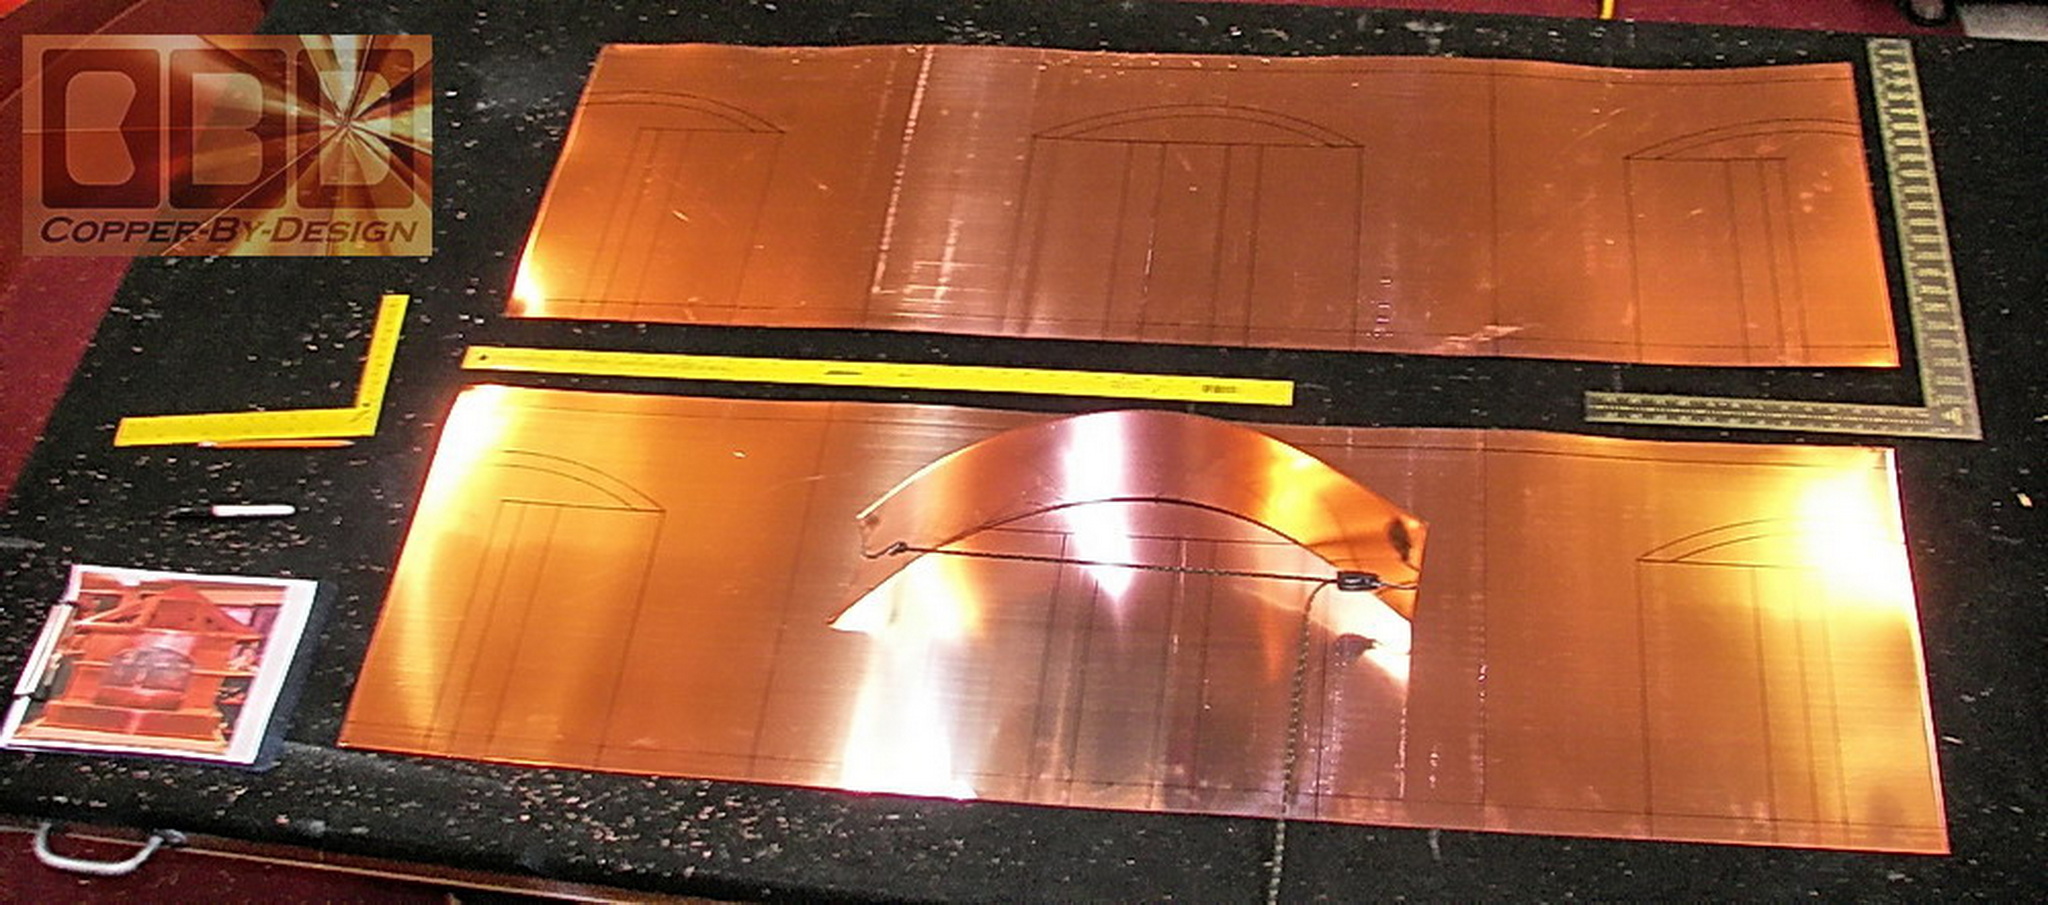
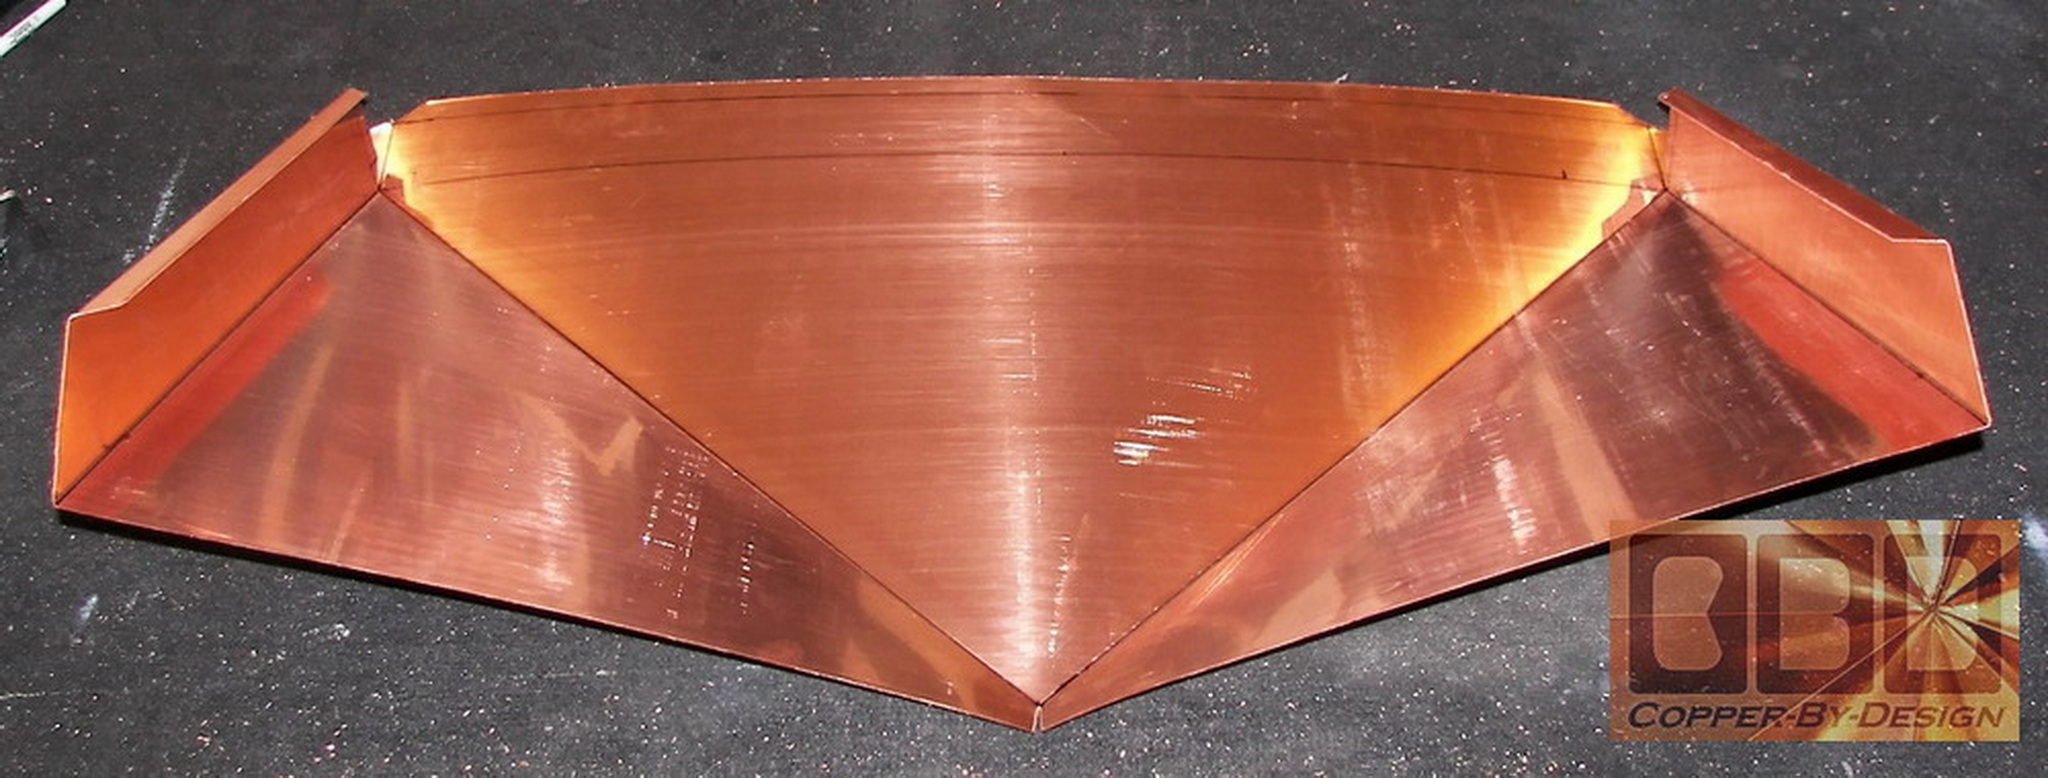
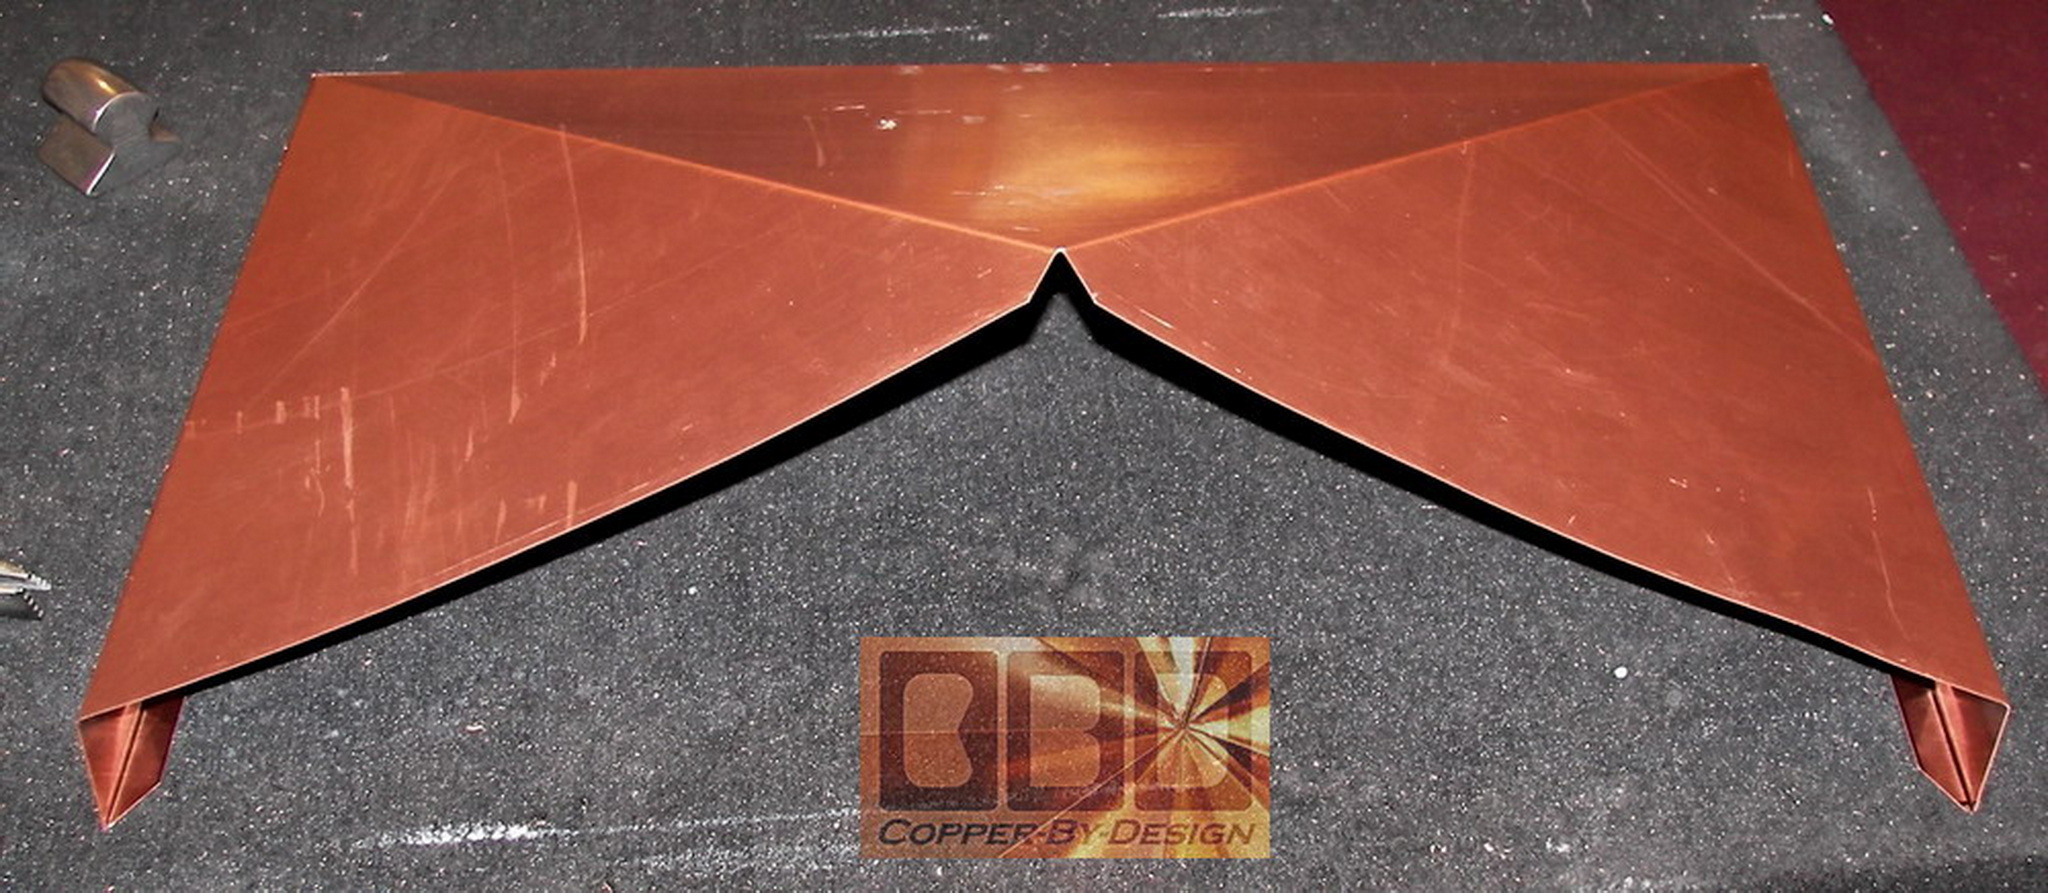
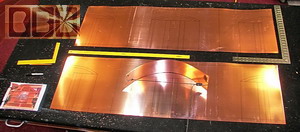
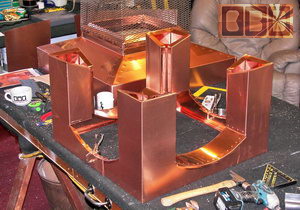
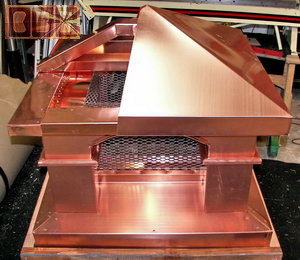
This shows the flat
sheet of copper cut out to form the base/skirt with
all the bends and cuts to be made. Then I bent them
into shape and cut the wood support frame using 1x6 oak hardwood
boards this time for inside for added strength, weight, and to thread
the screws through for fastening it to the stone covered chimney.
Then I seal the 2 halves together to form the full base/skirt.
|
|
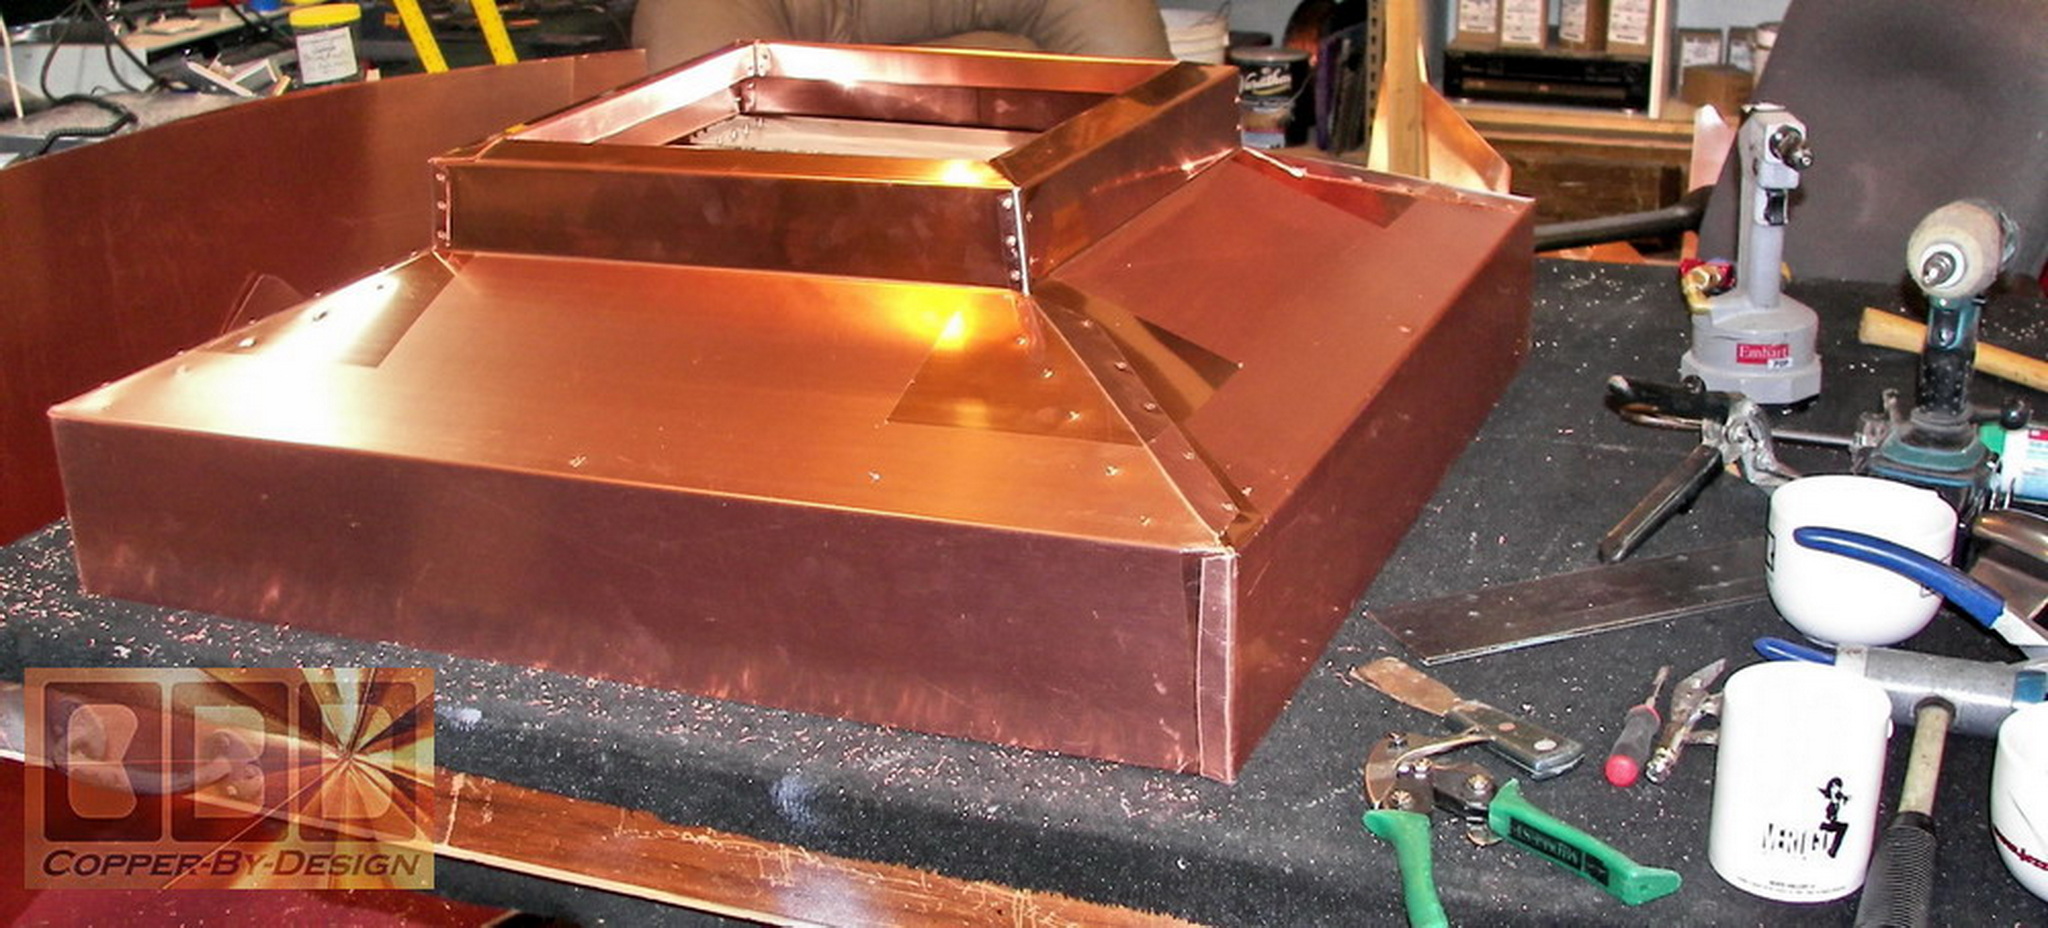
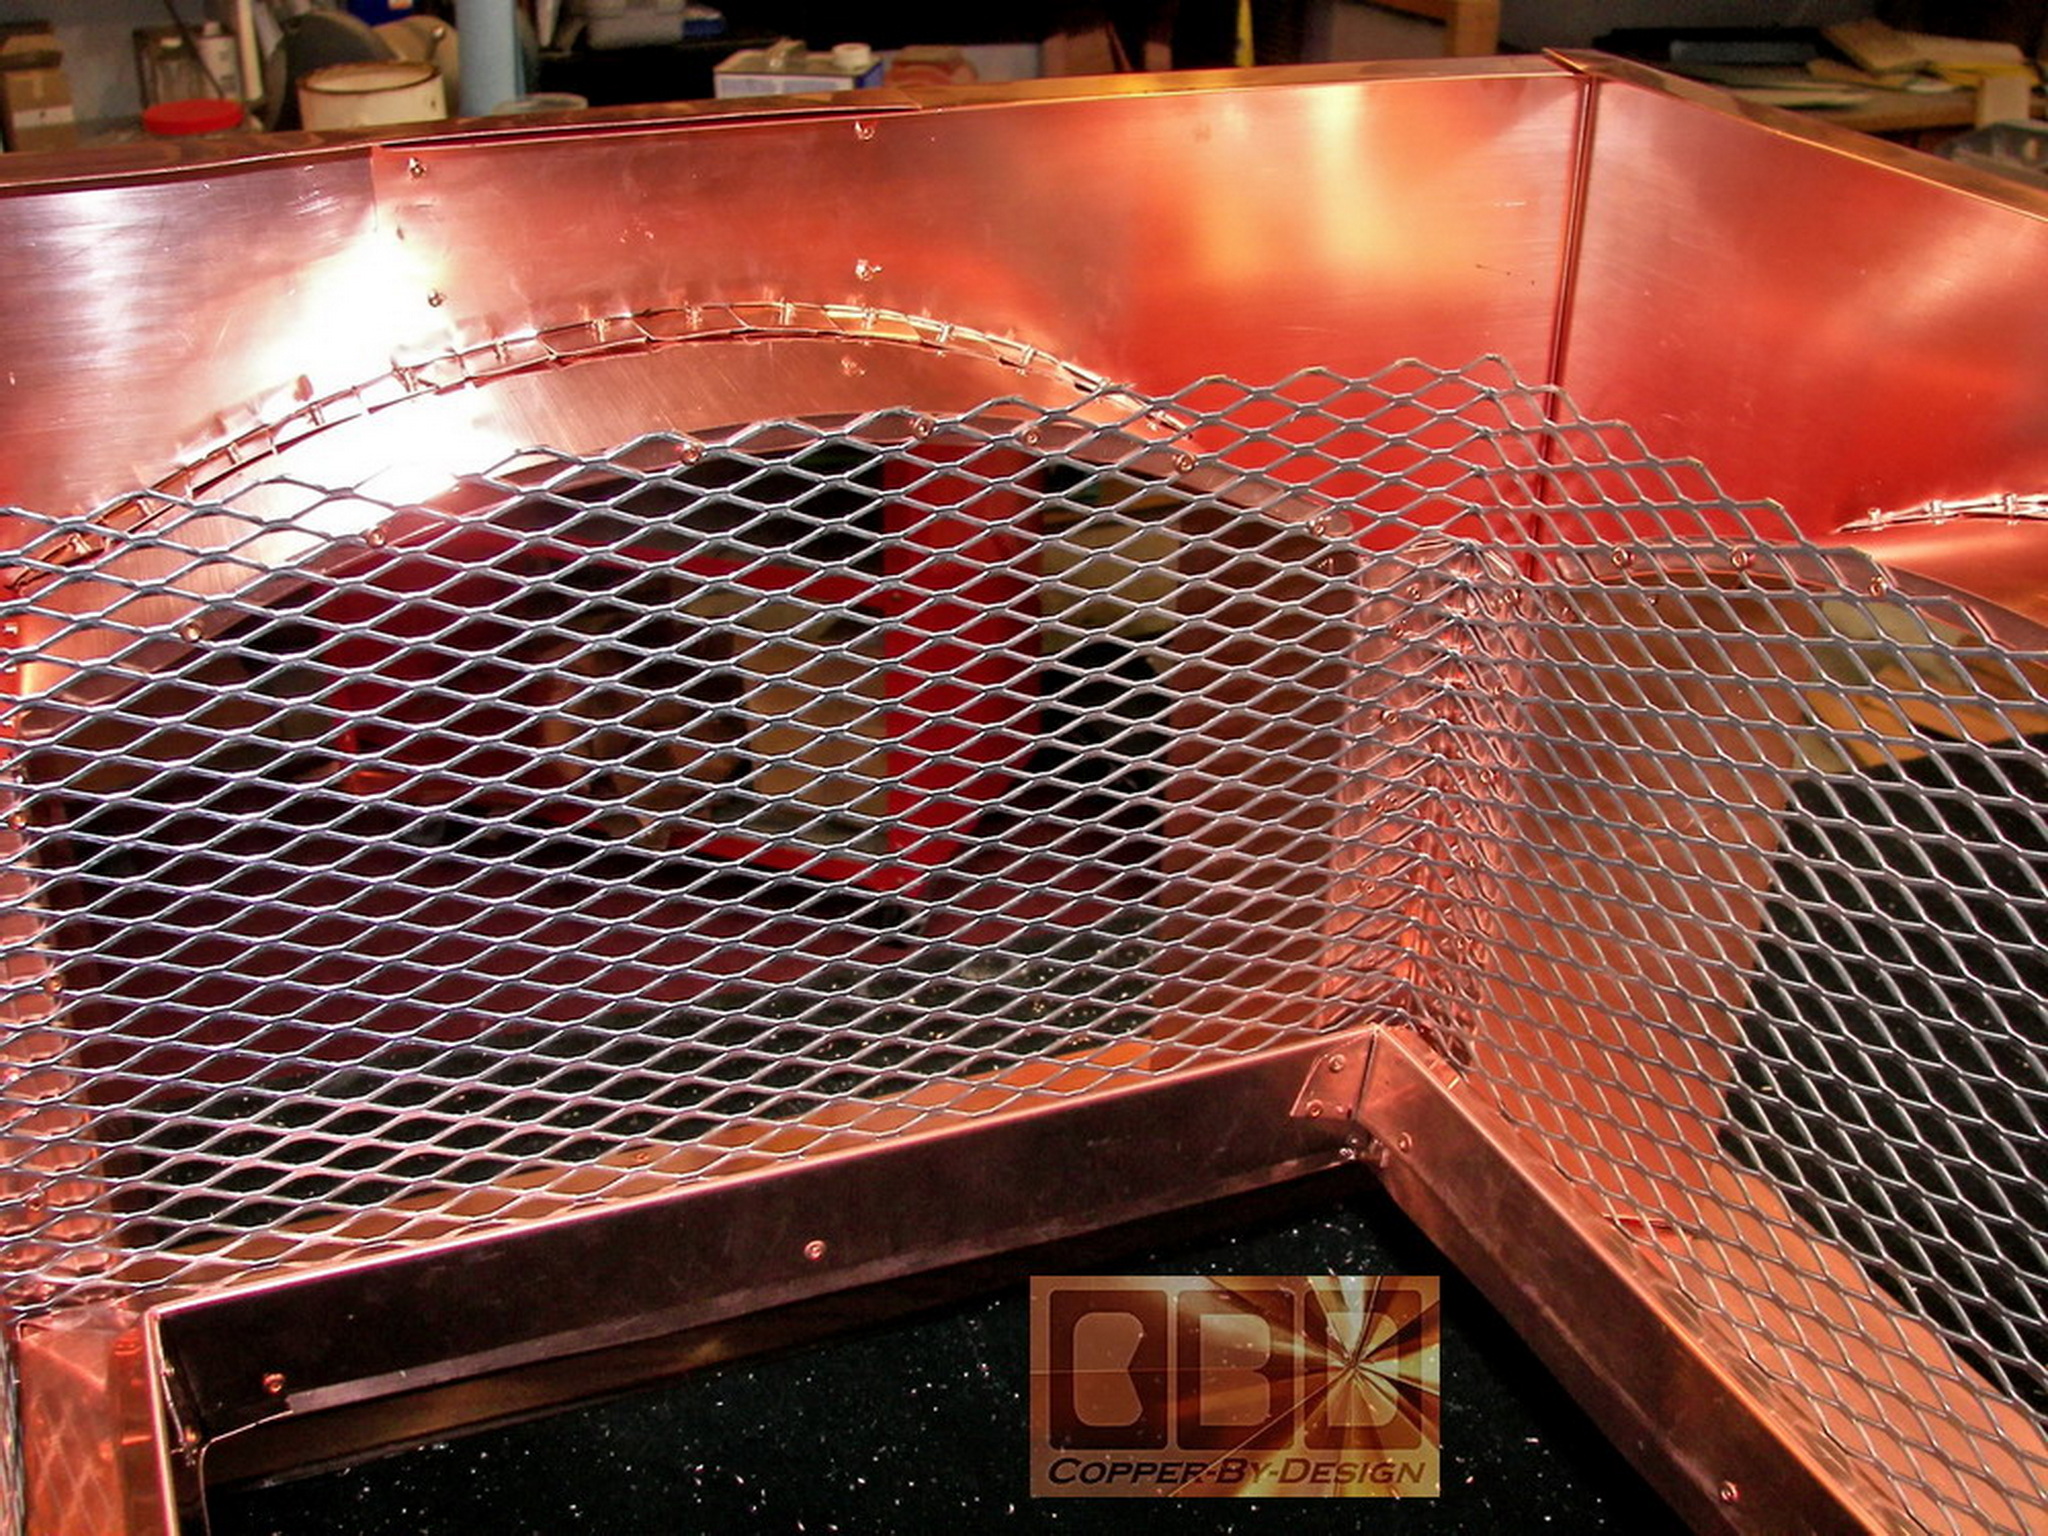
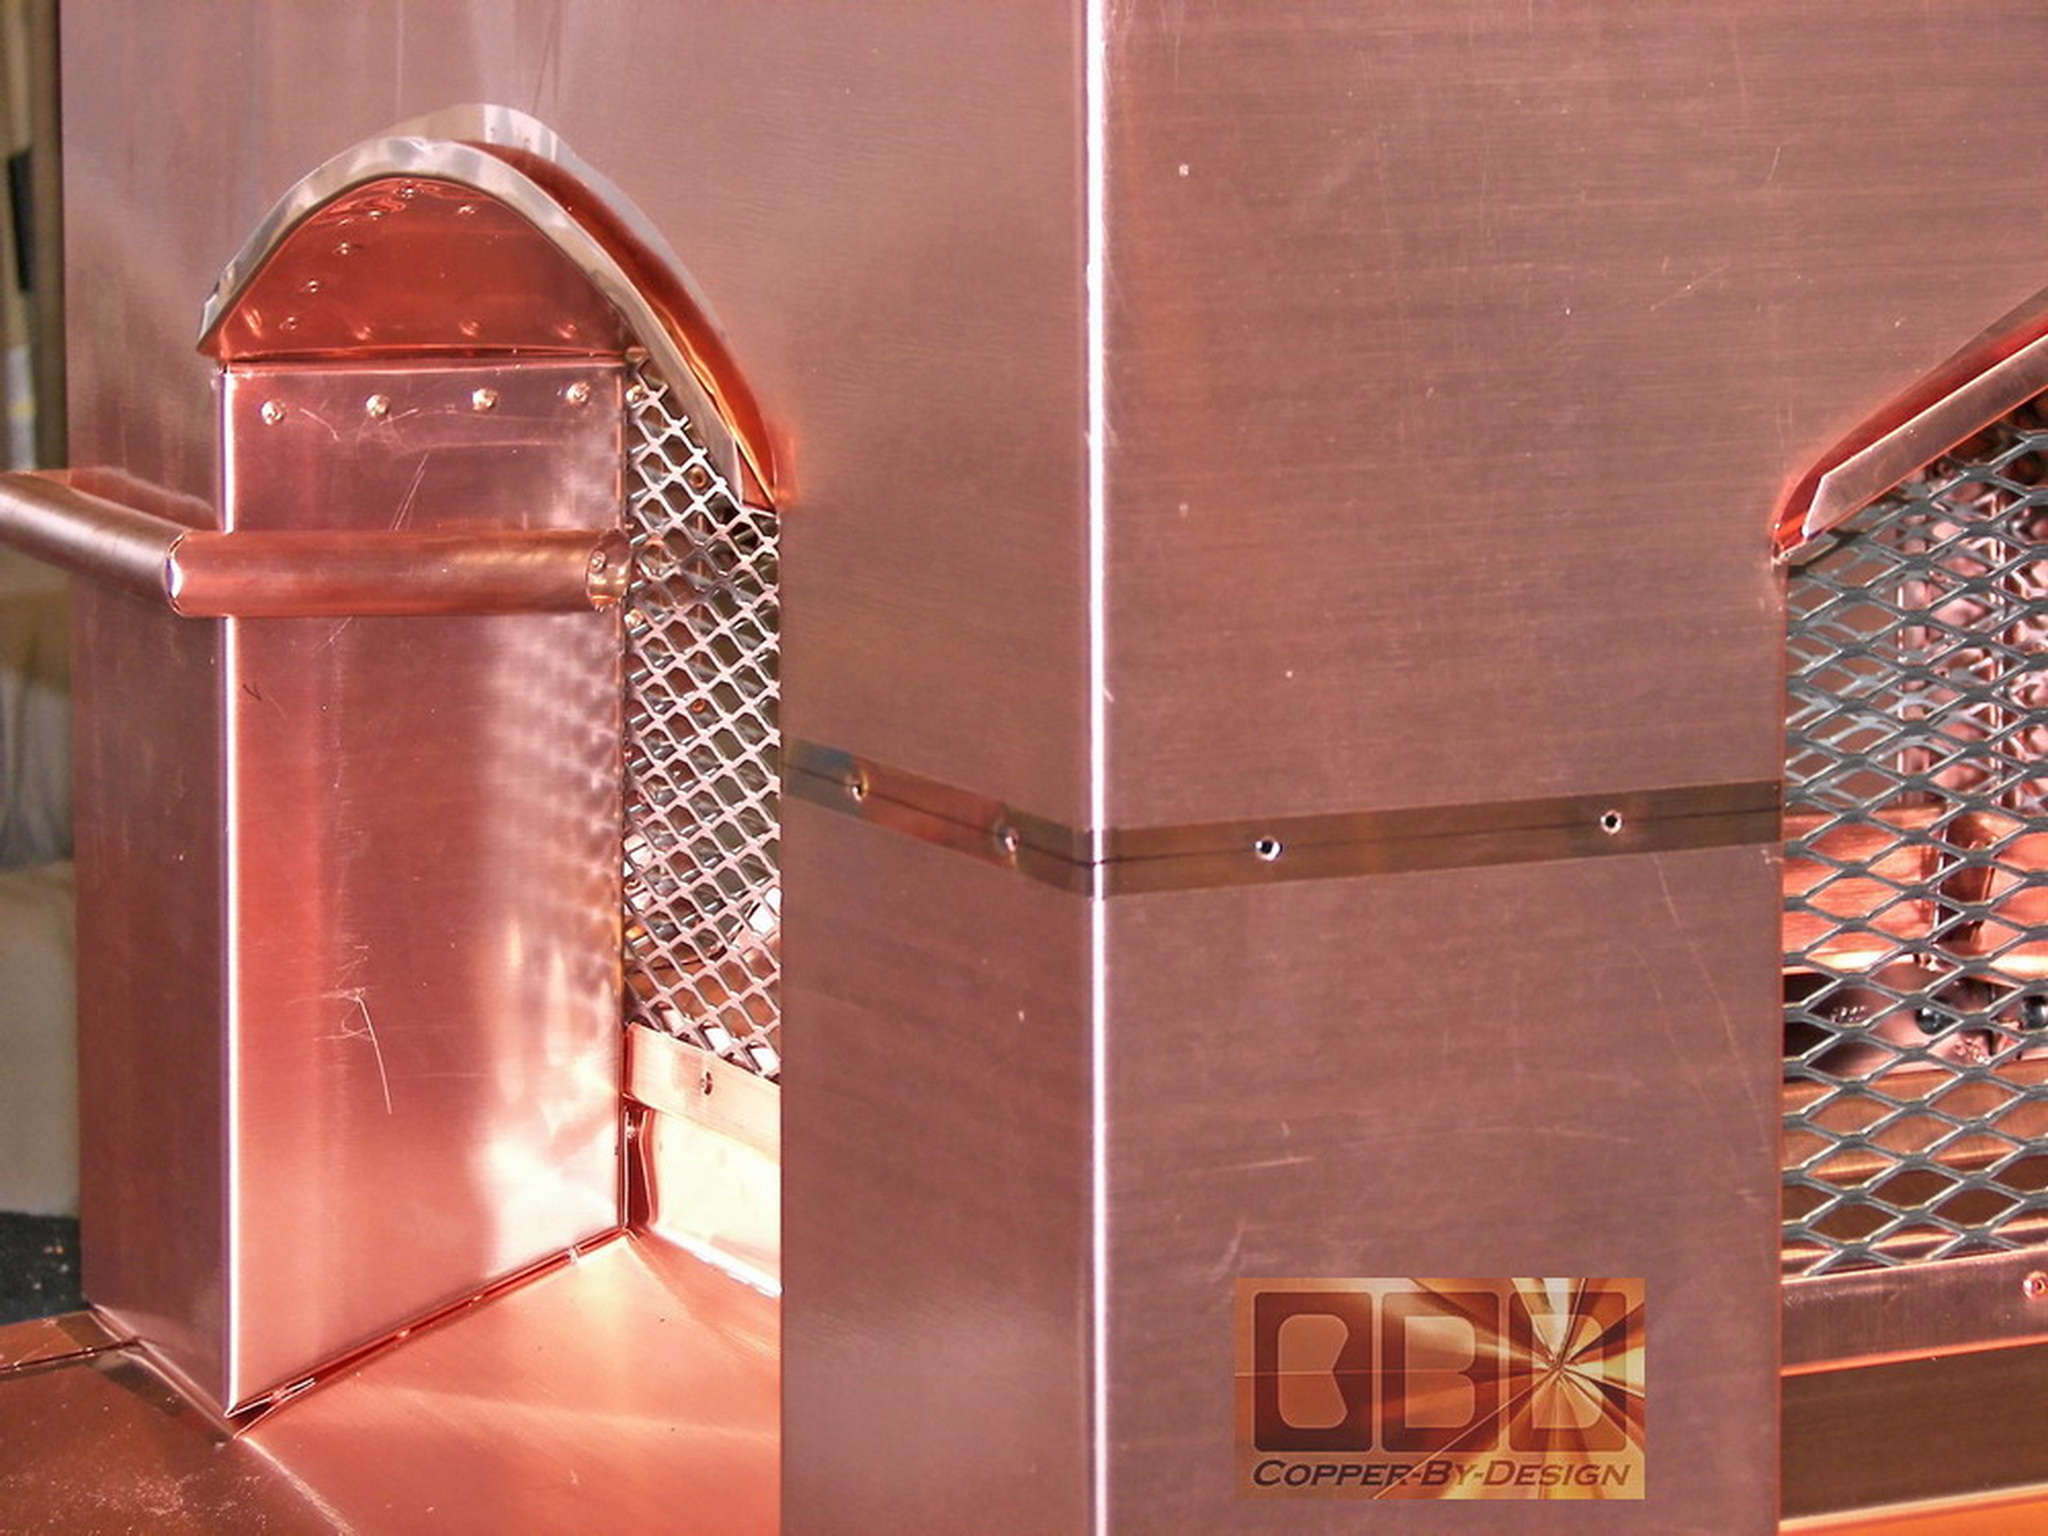
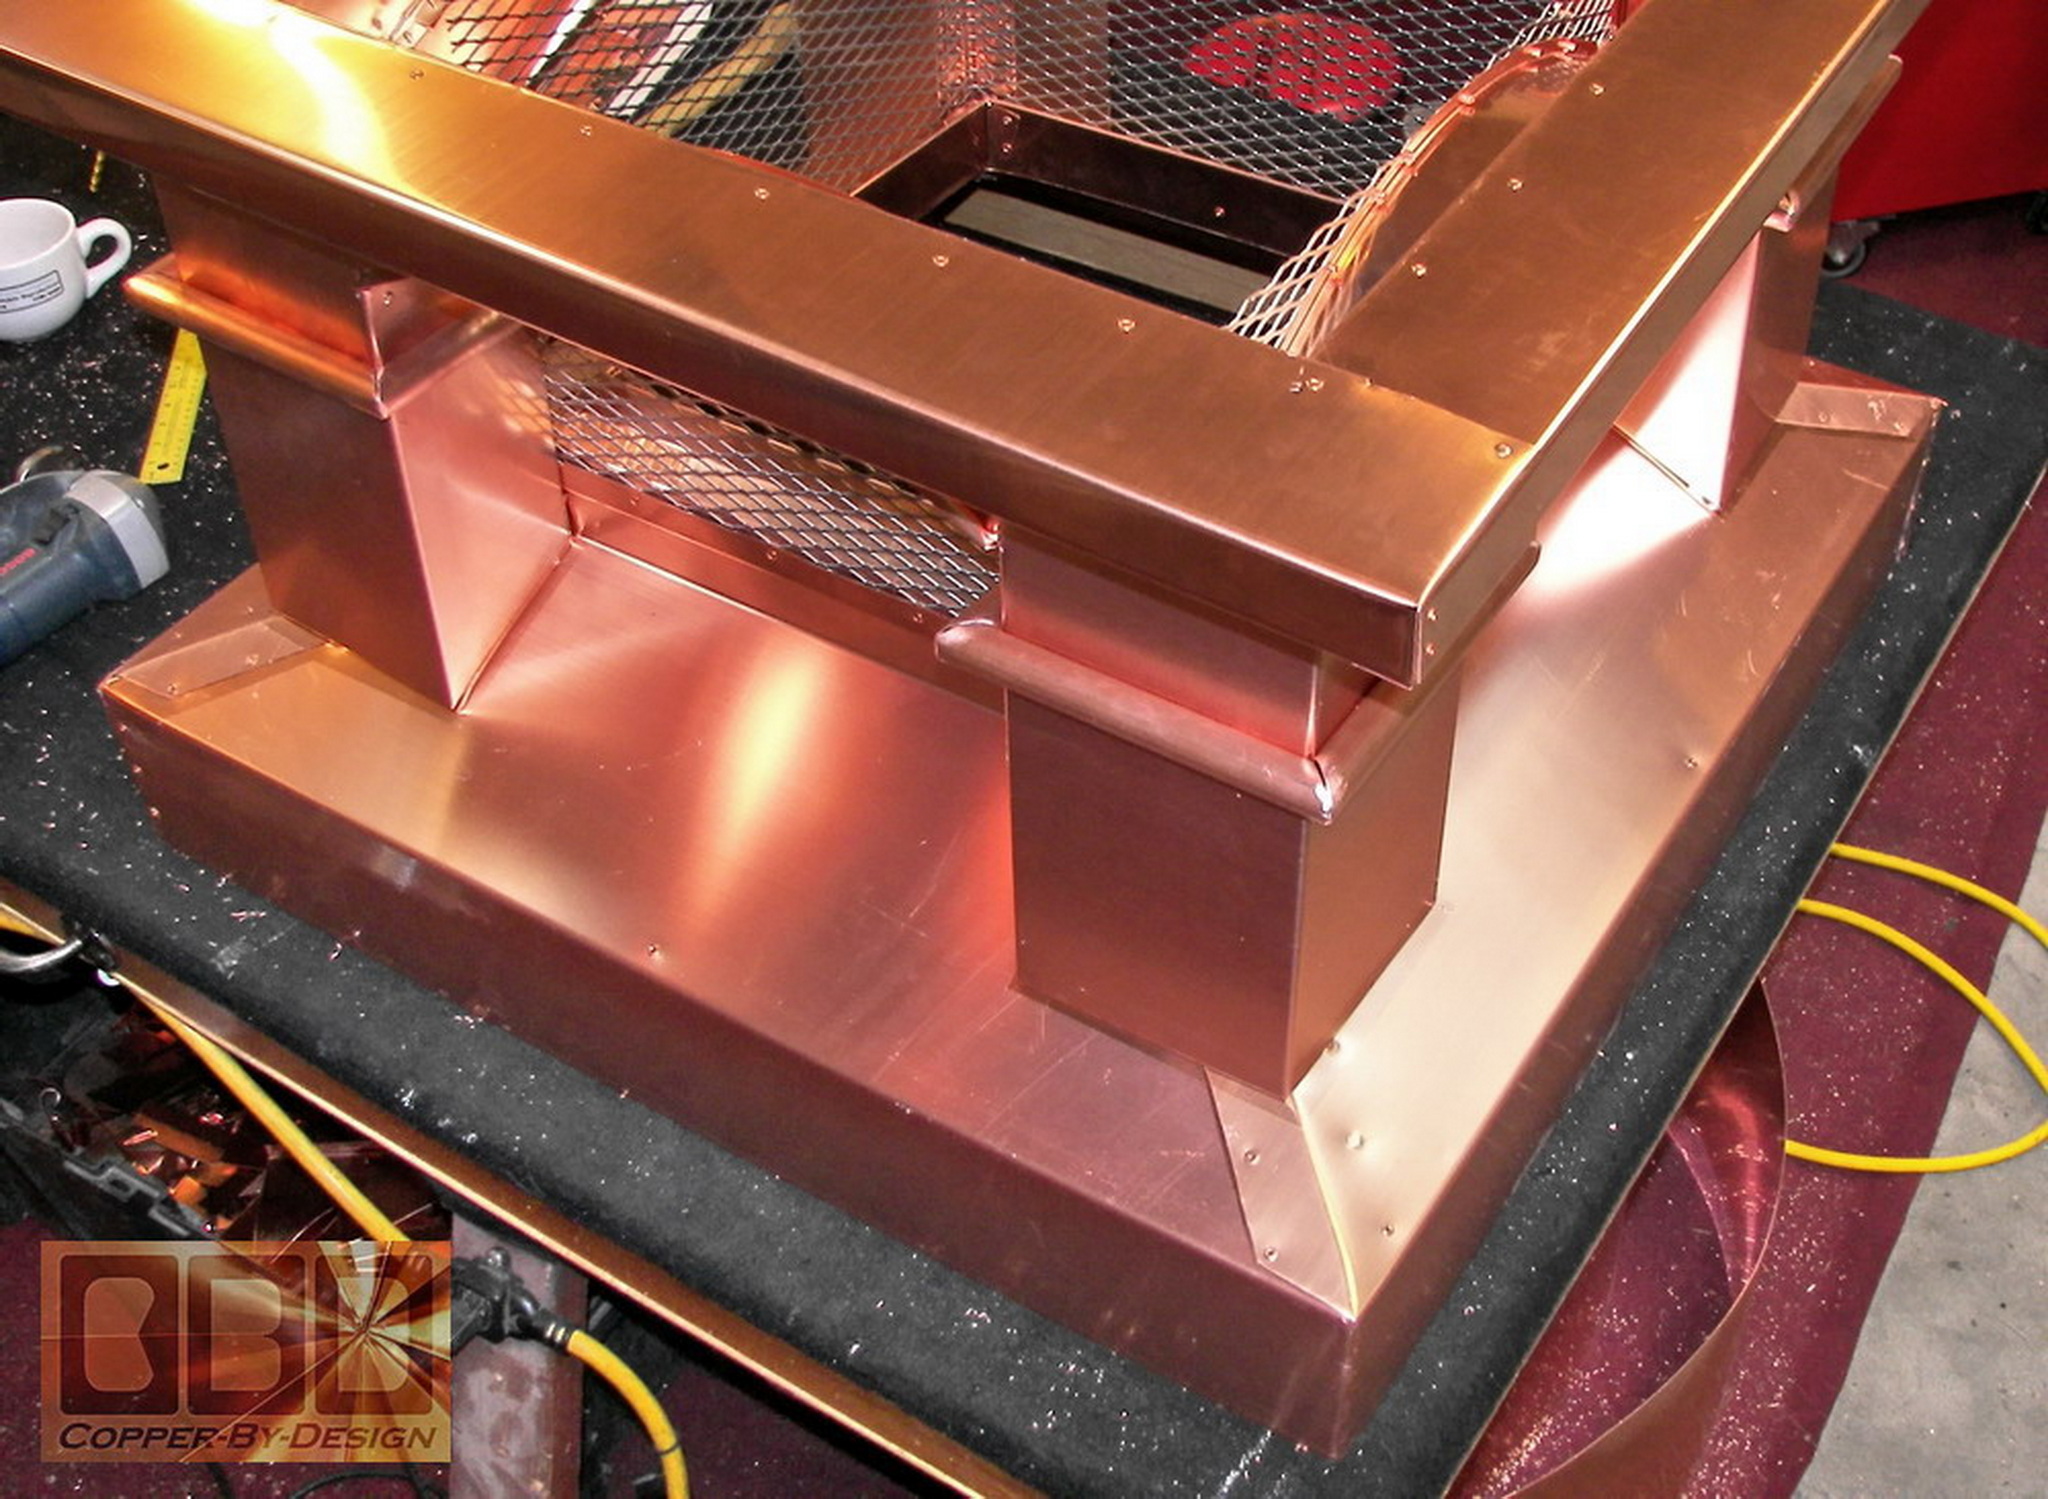
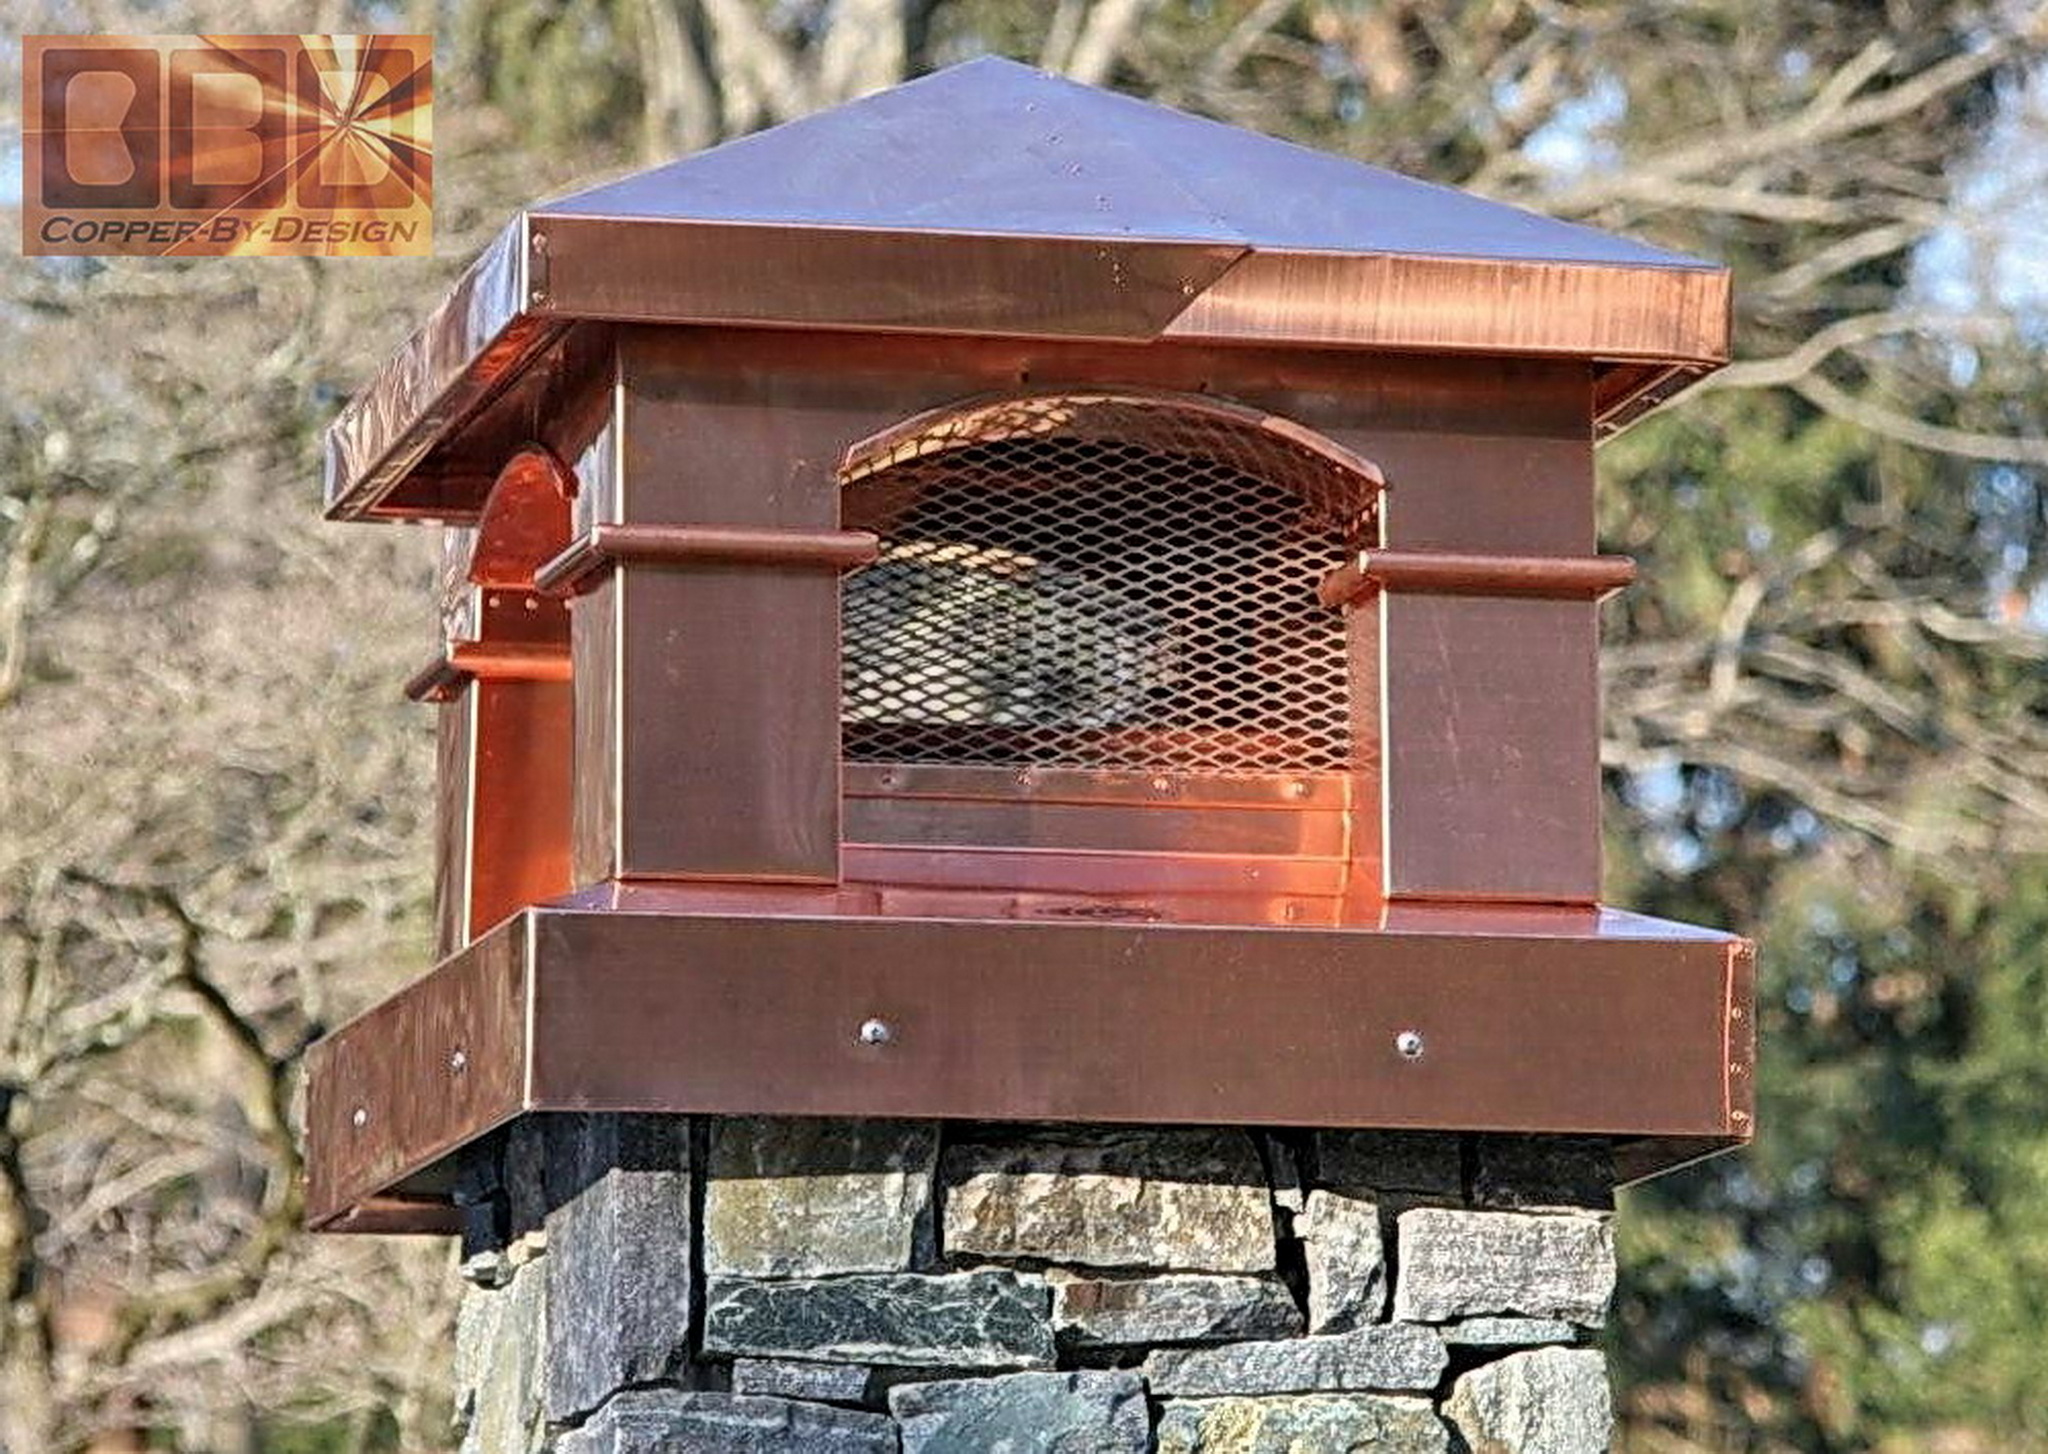
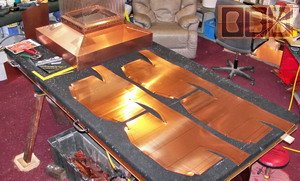
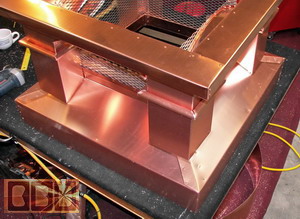
Here is the flange attached
over the base with a channel to hold the stainless steel screen
in place along the bottom edge. I made a rise in the inside to help
the rain water that might get blown through the screen to shed outwards.
This also helps add a lot of strength along this edge with the double
sheet of copper.
|
|
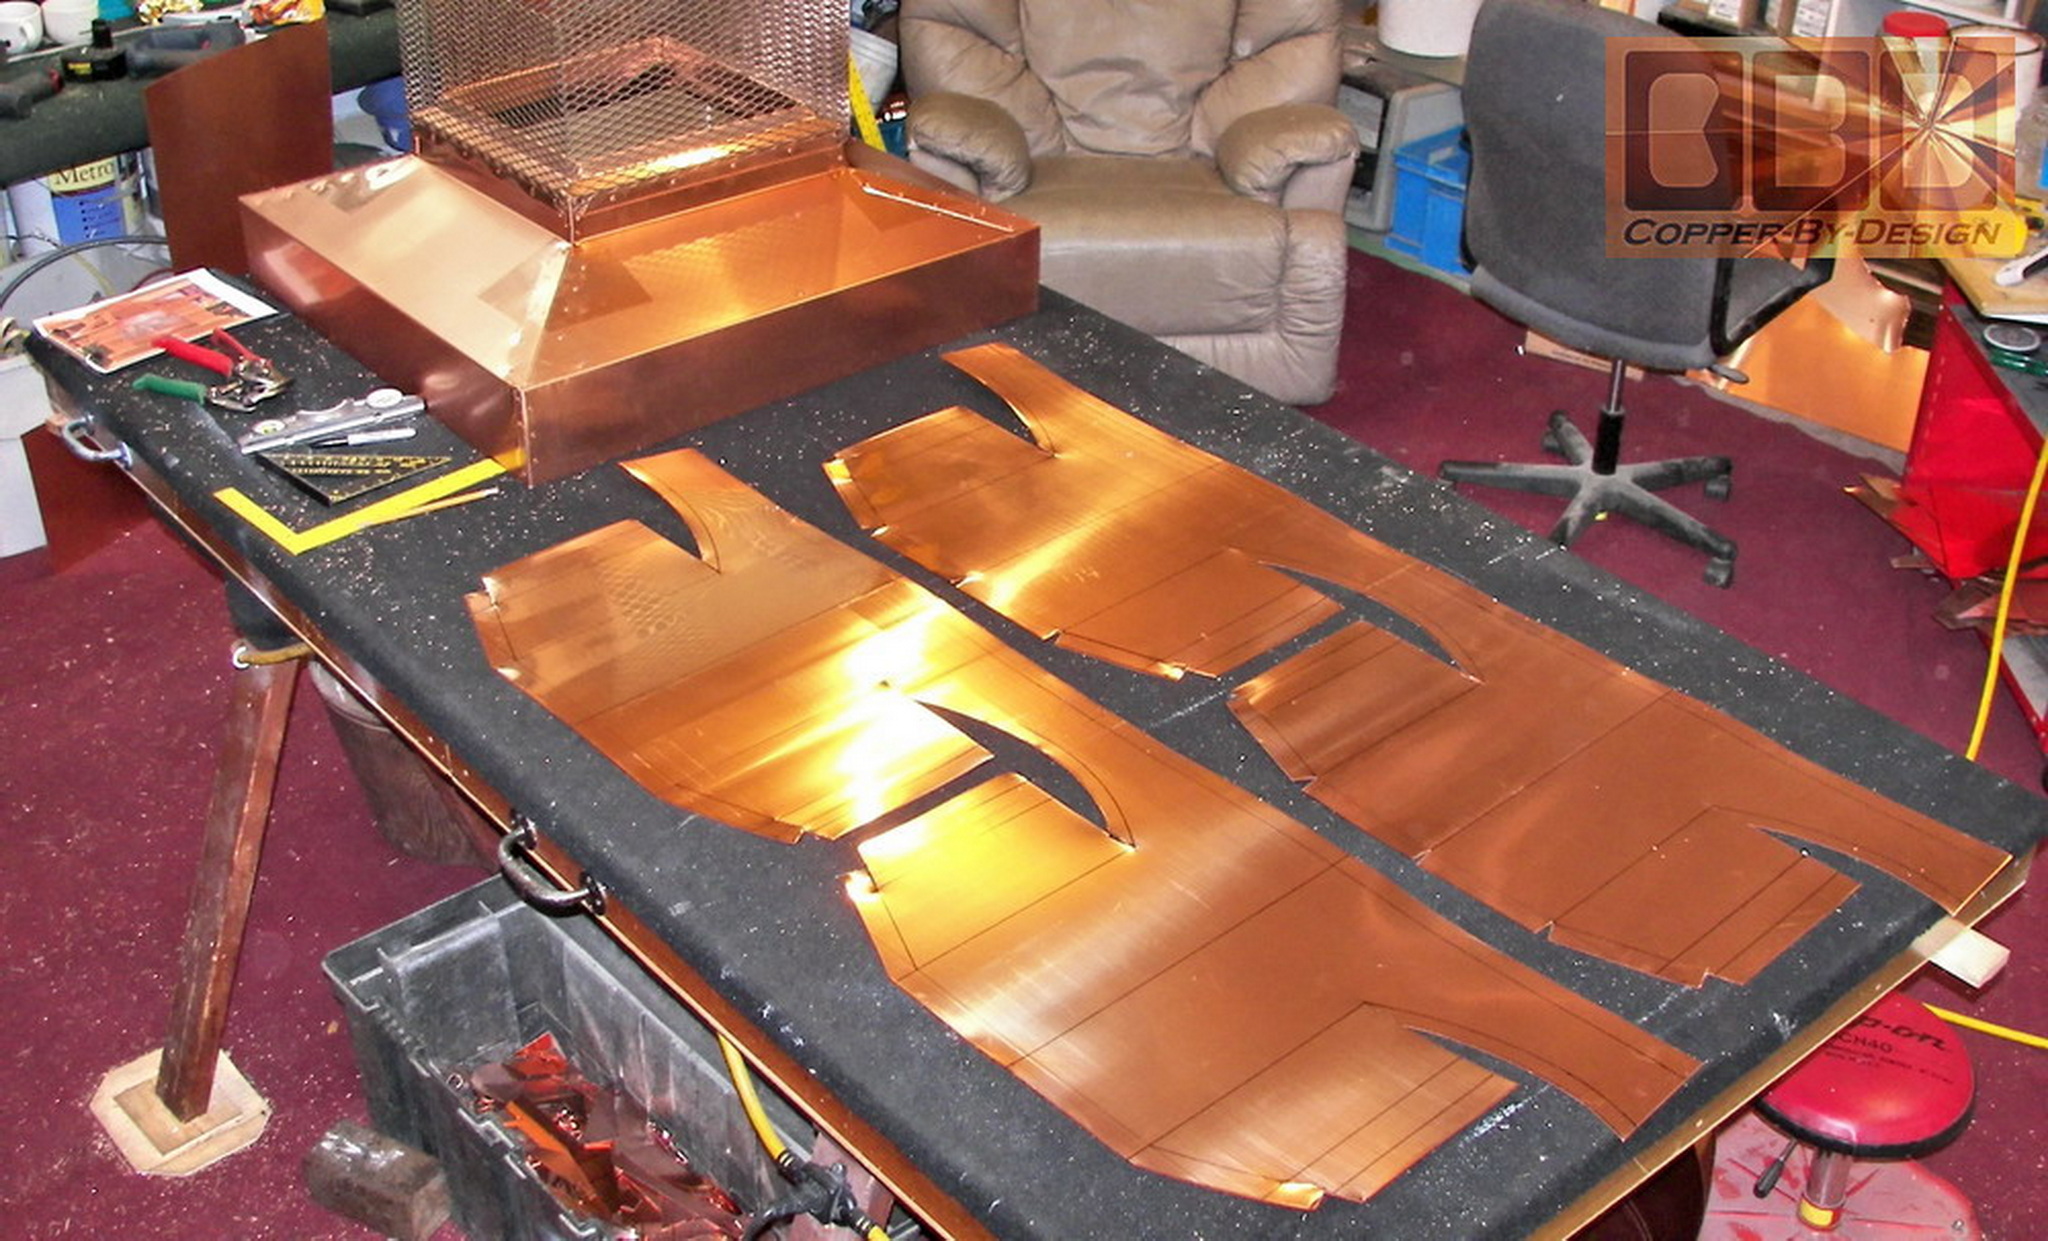
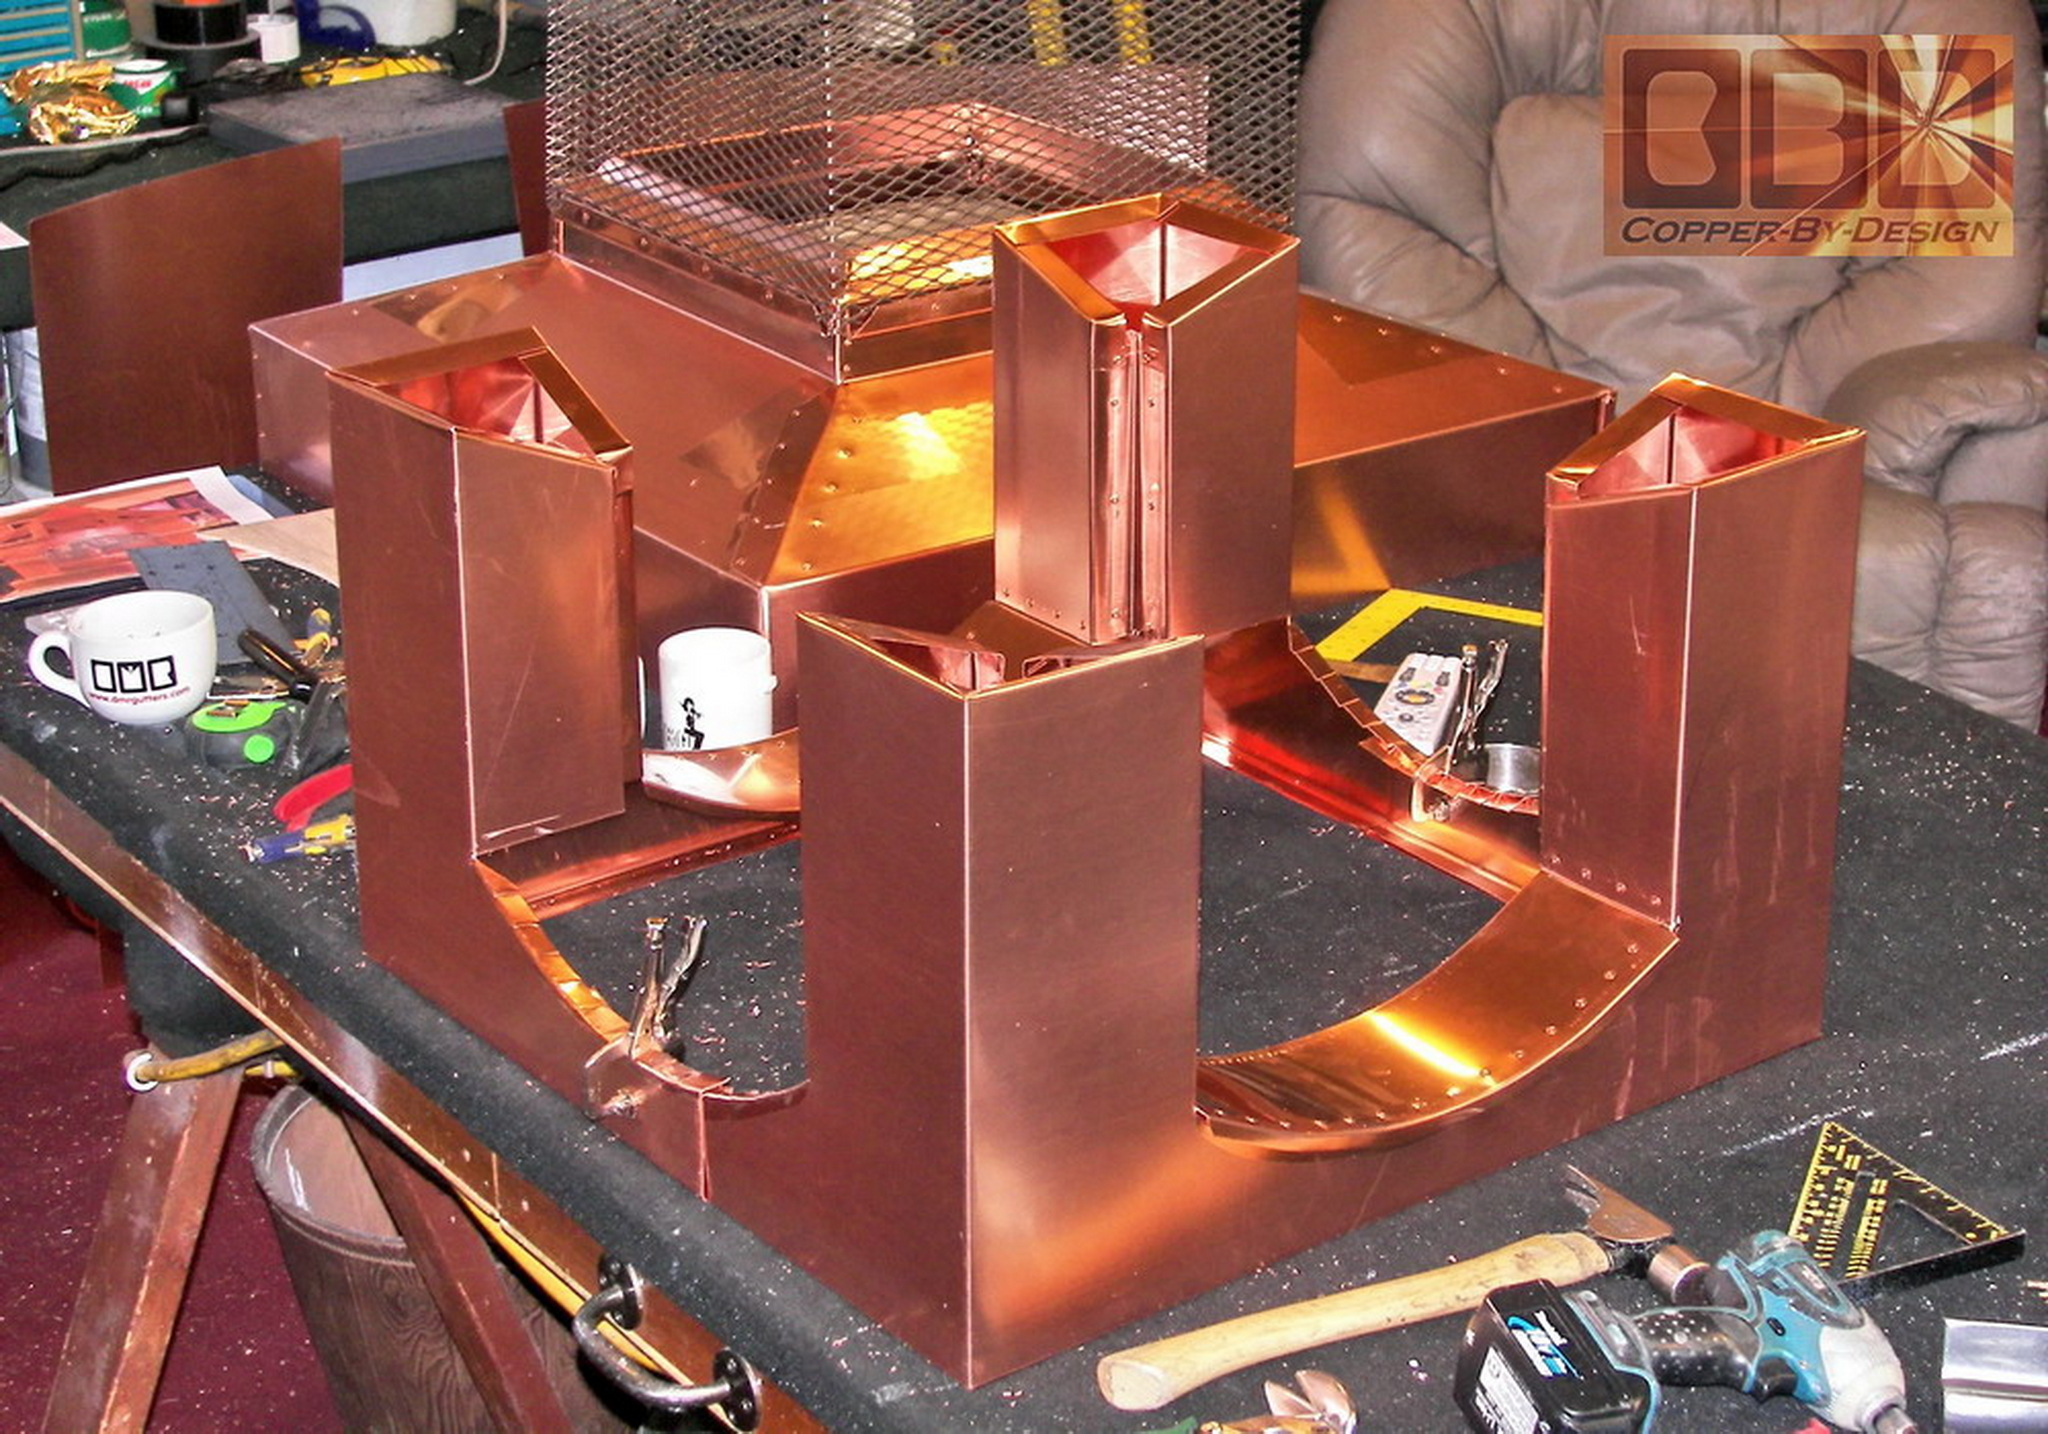
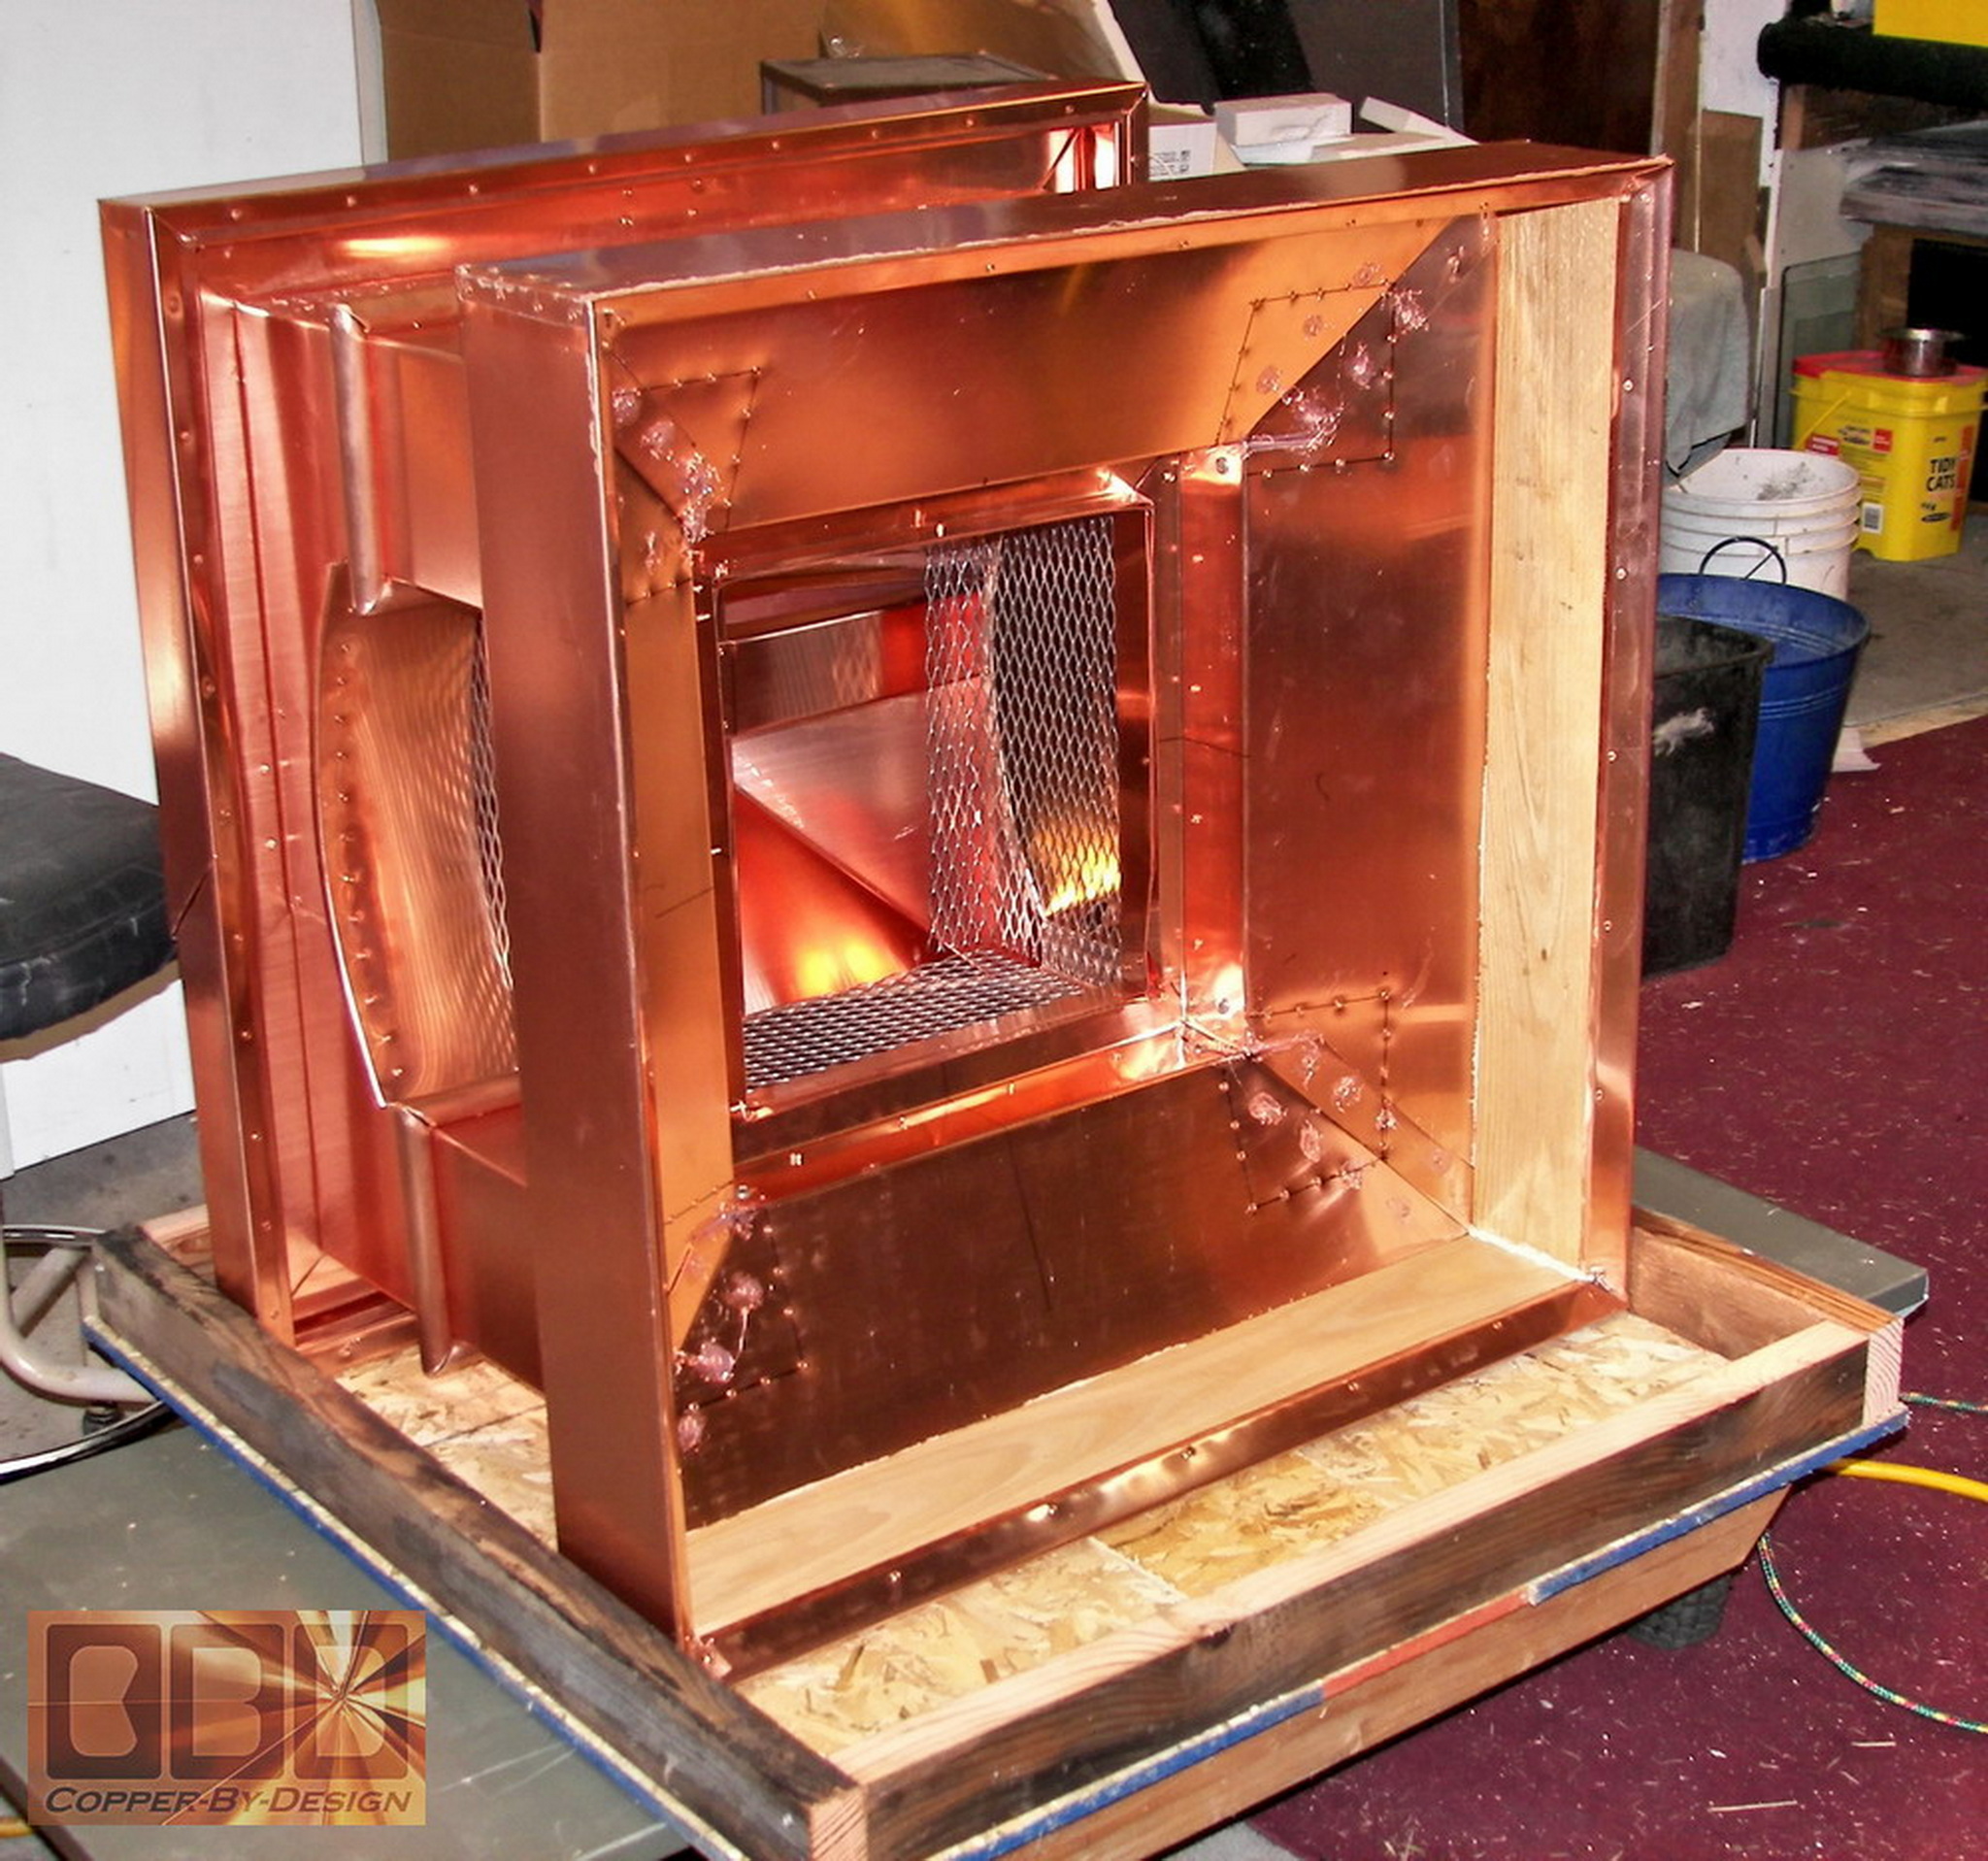
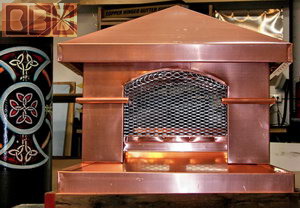
Here is the 2 pieces of sheet metal for the
arched columns being drawn out and cut where needed.
|
|
Then the arched column ways
get formed and built. The bottom of the columns are angled to fit
over the base at the 6/12 pitch that will shed the rain and debris
that may get in under the eaves. then a liner is attached up inside
each arch way.
|
|
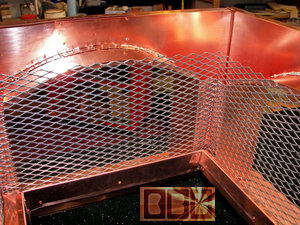 
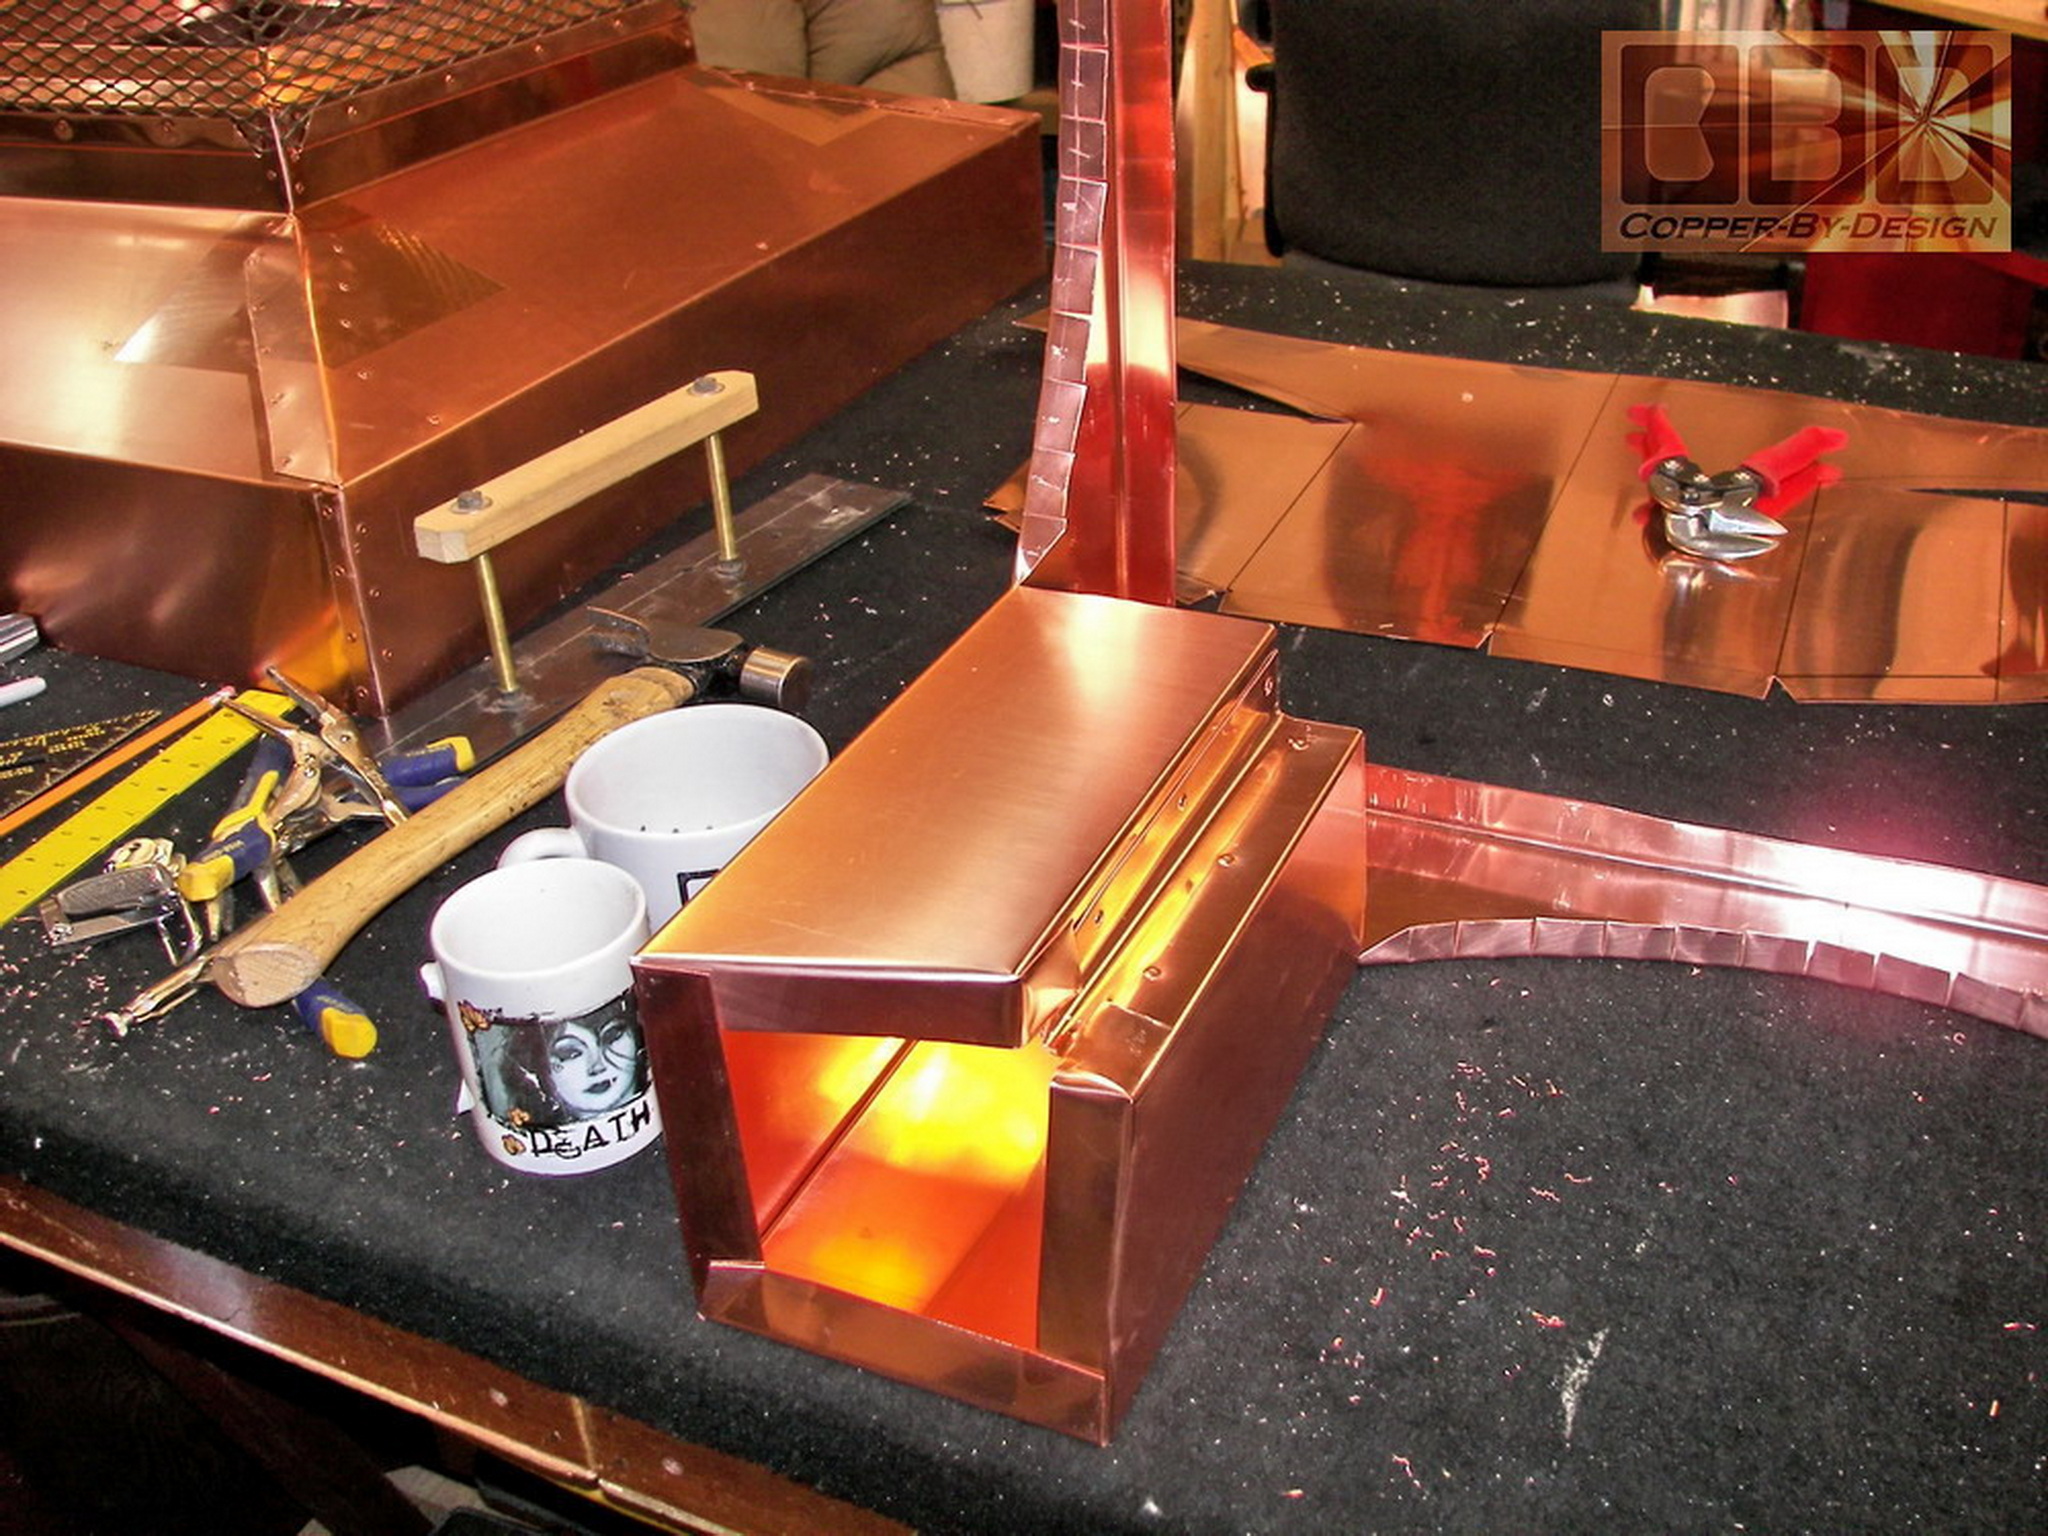
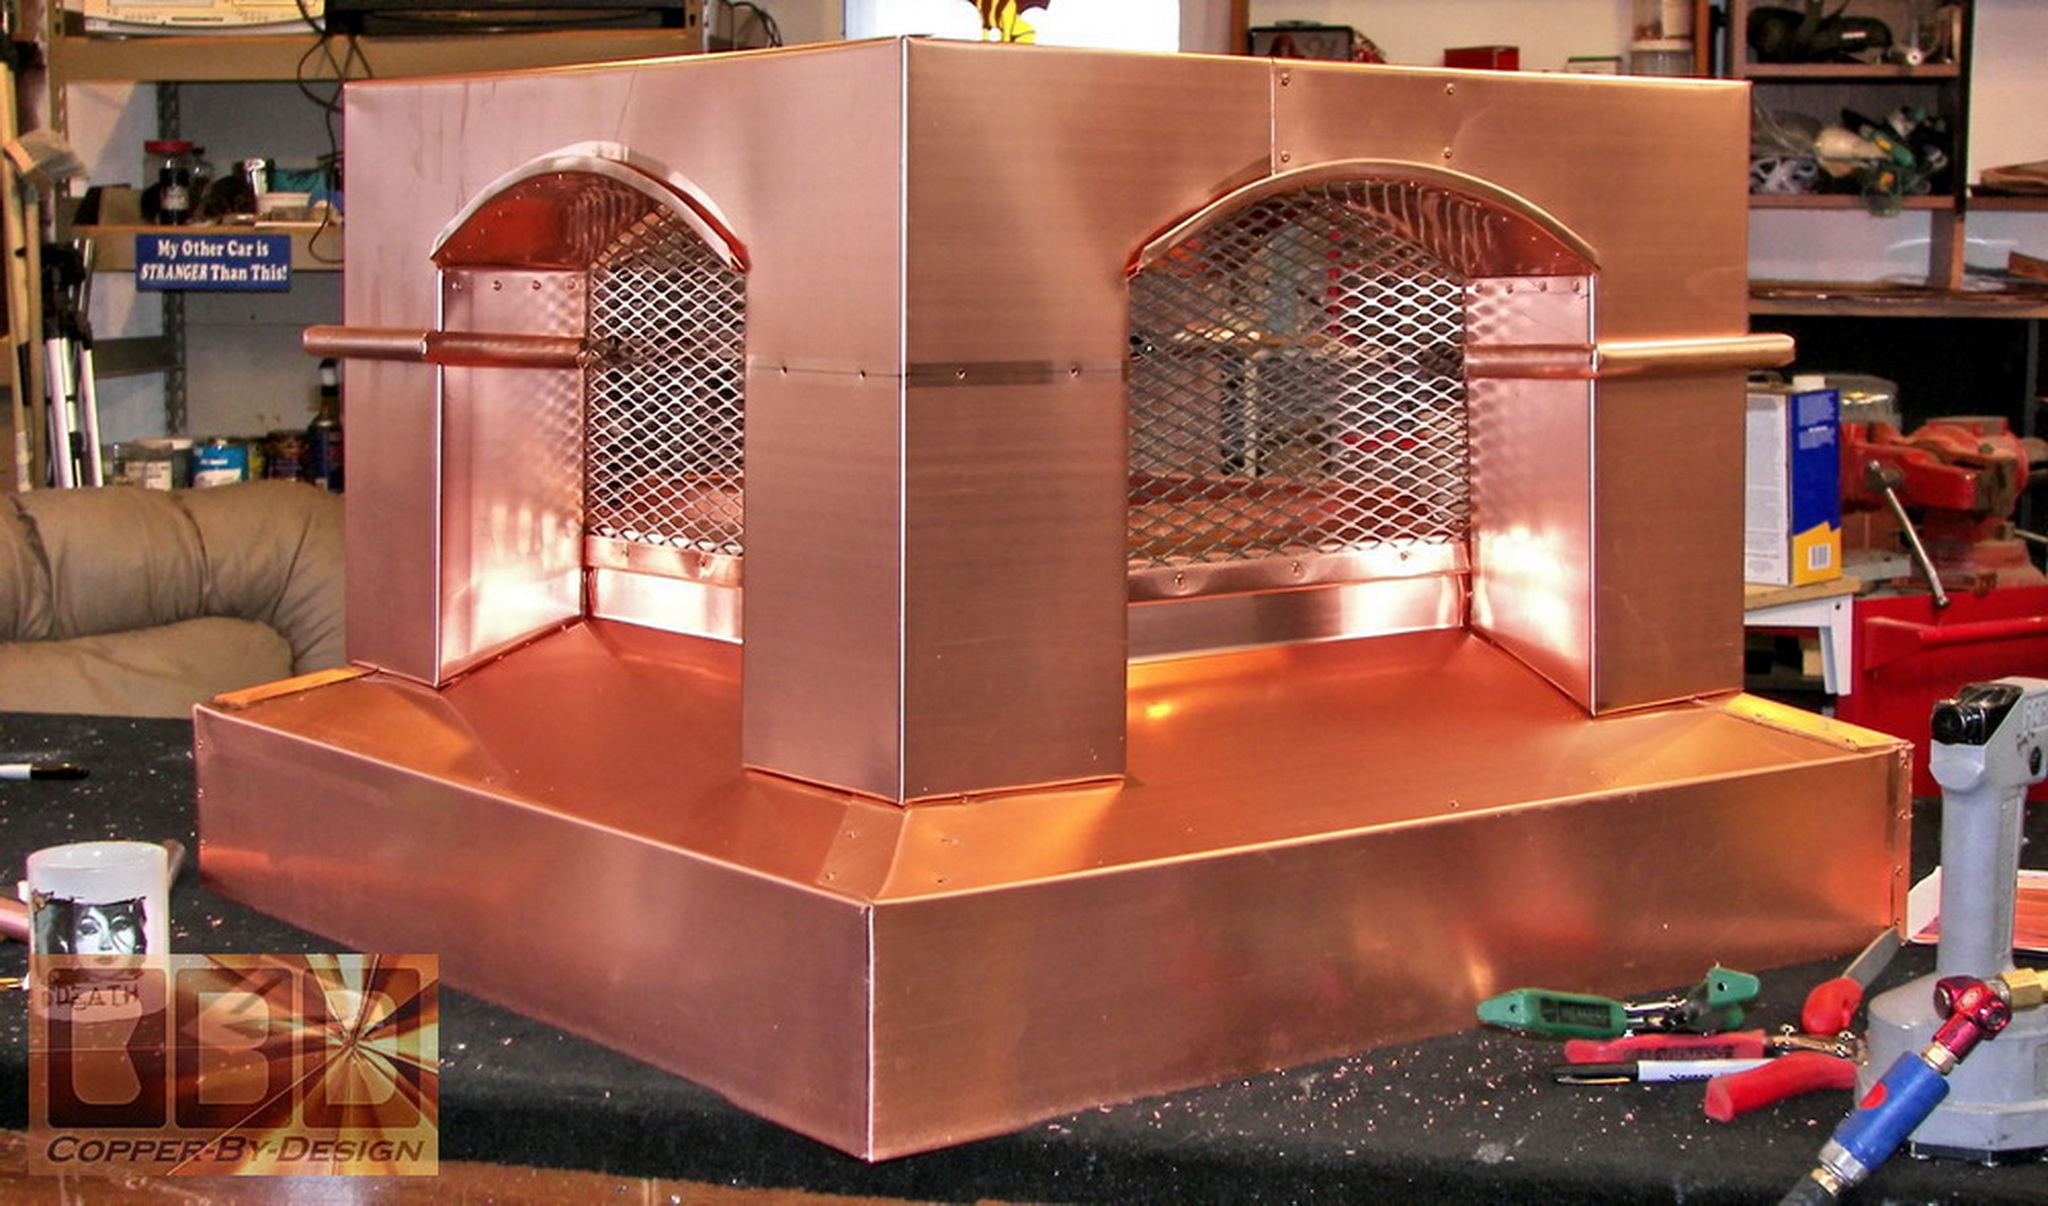
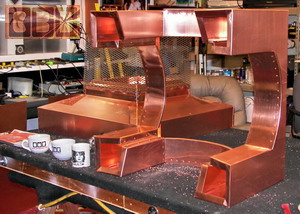
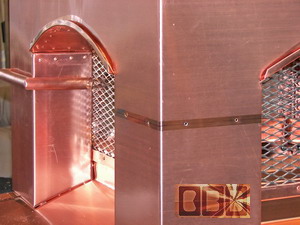
The stainless steel screens
are riveted in behind the columns which helps add a lot of strength
and stability to these columns. Then the decorative piping is added
to the outside of the columns riveted on from inside. This
decorative trim is very trick and time consuming to form just
right and attach to the columns, but adds a nice touch of class.
|
|
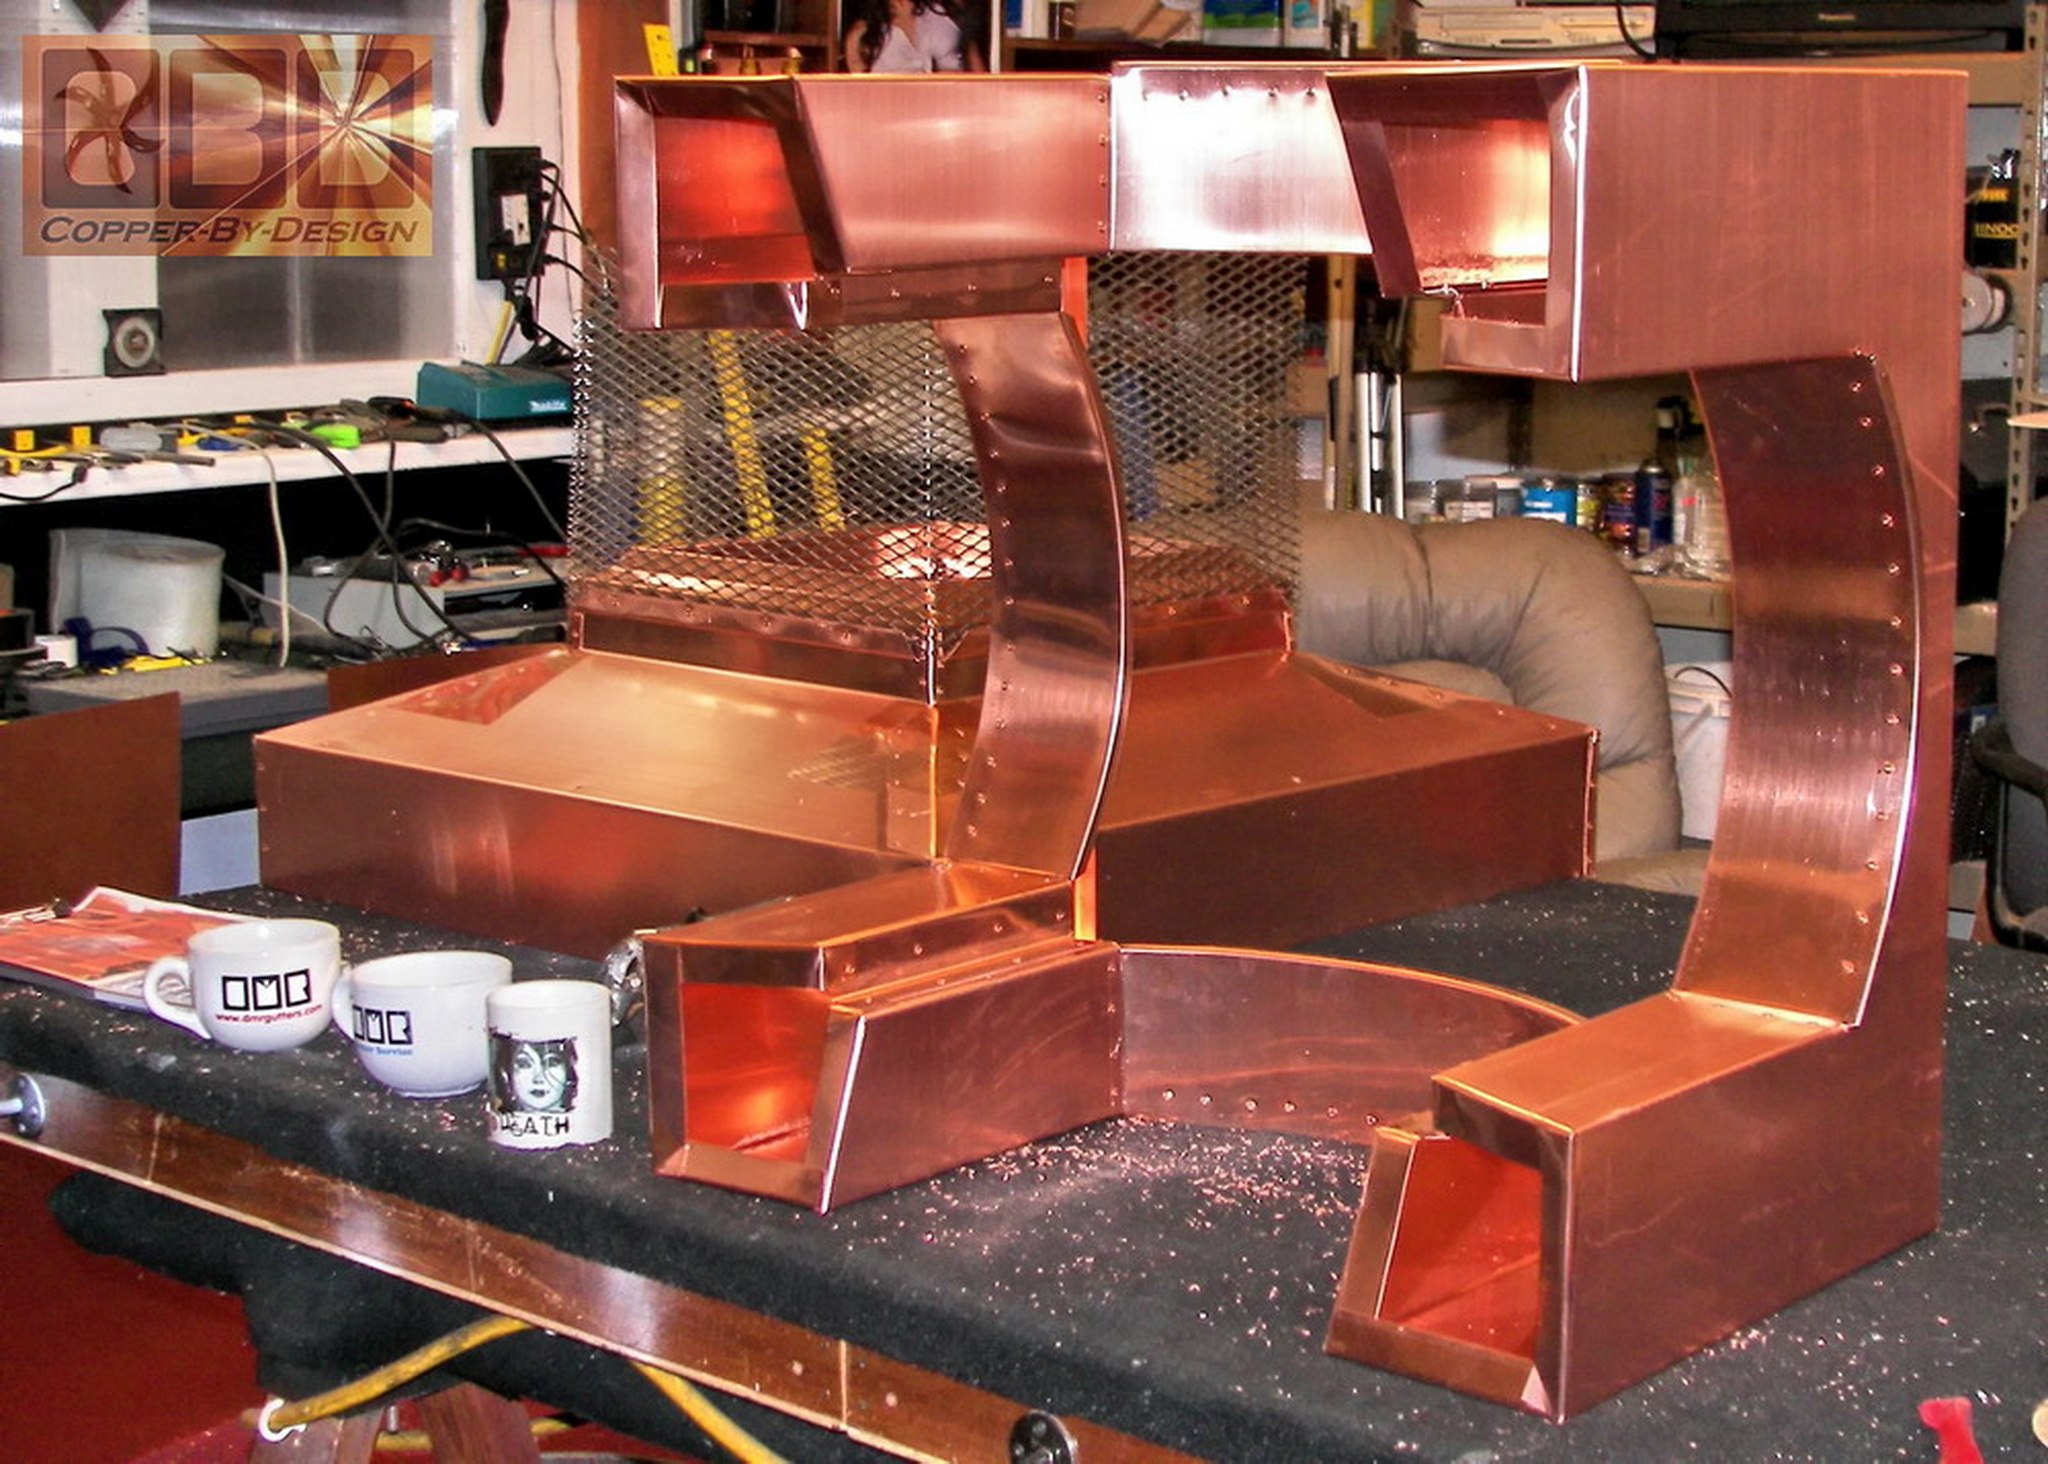
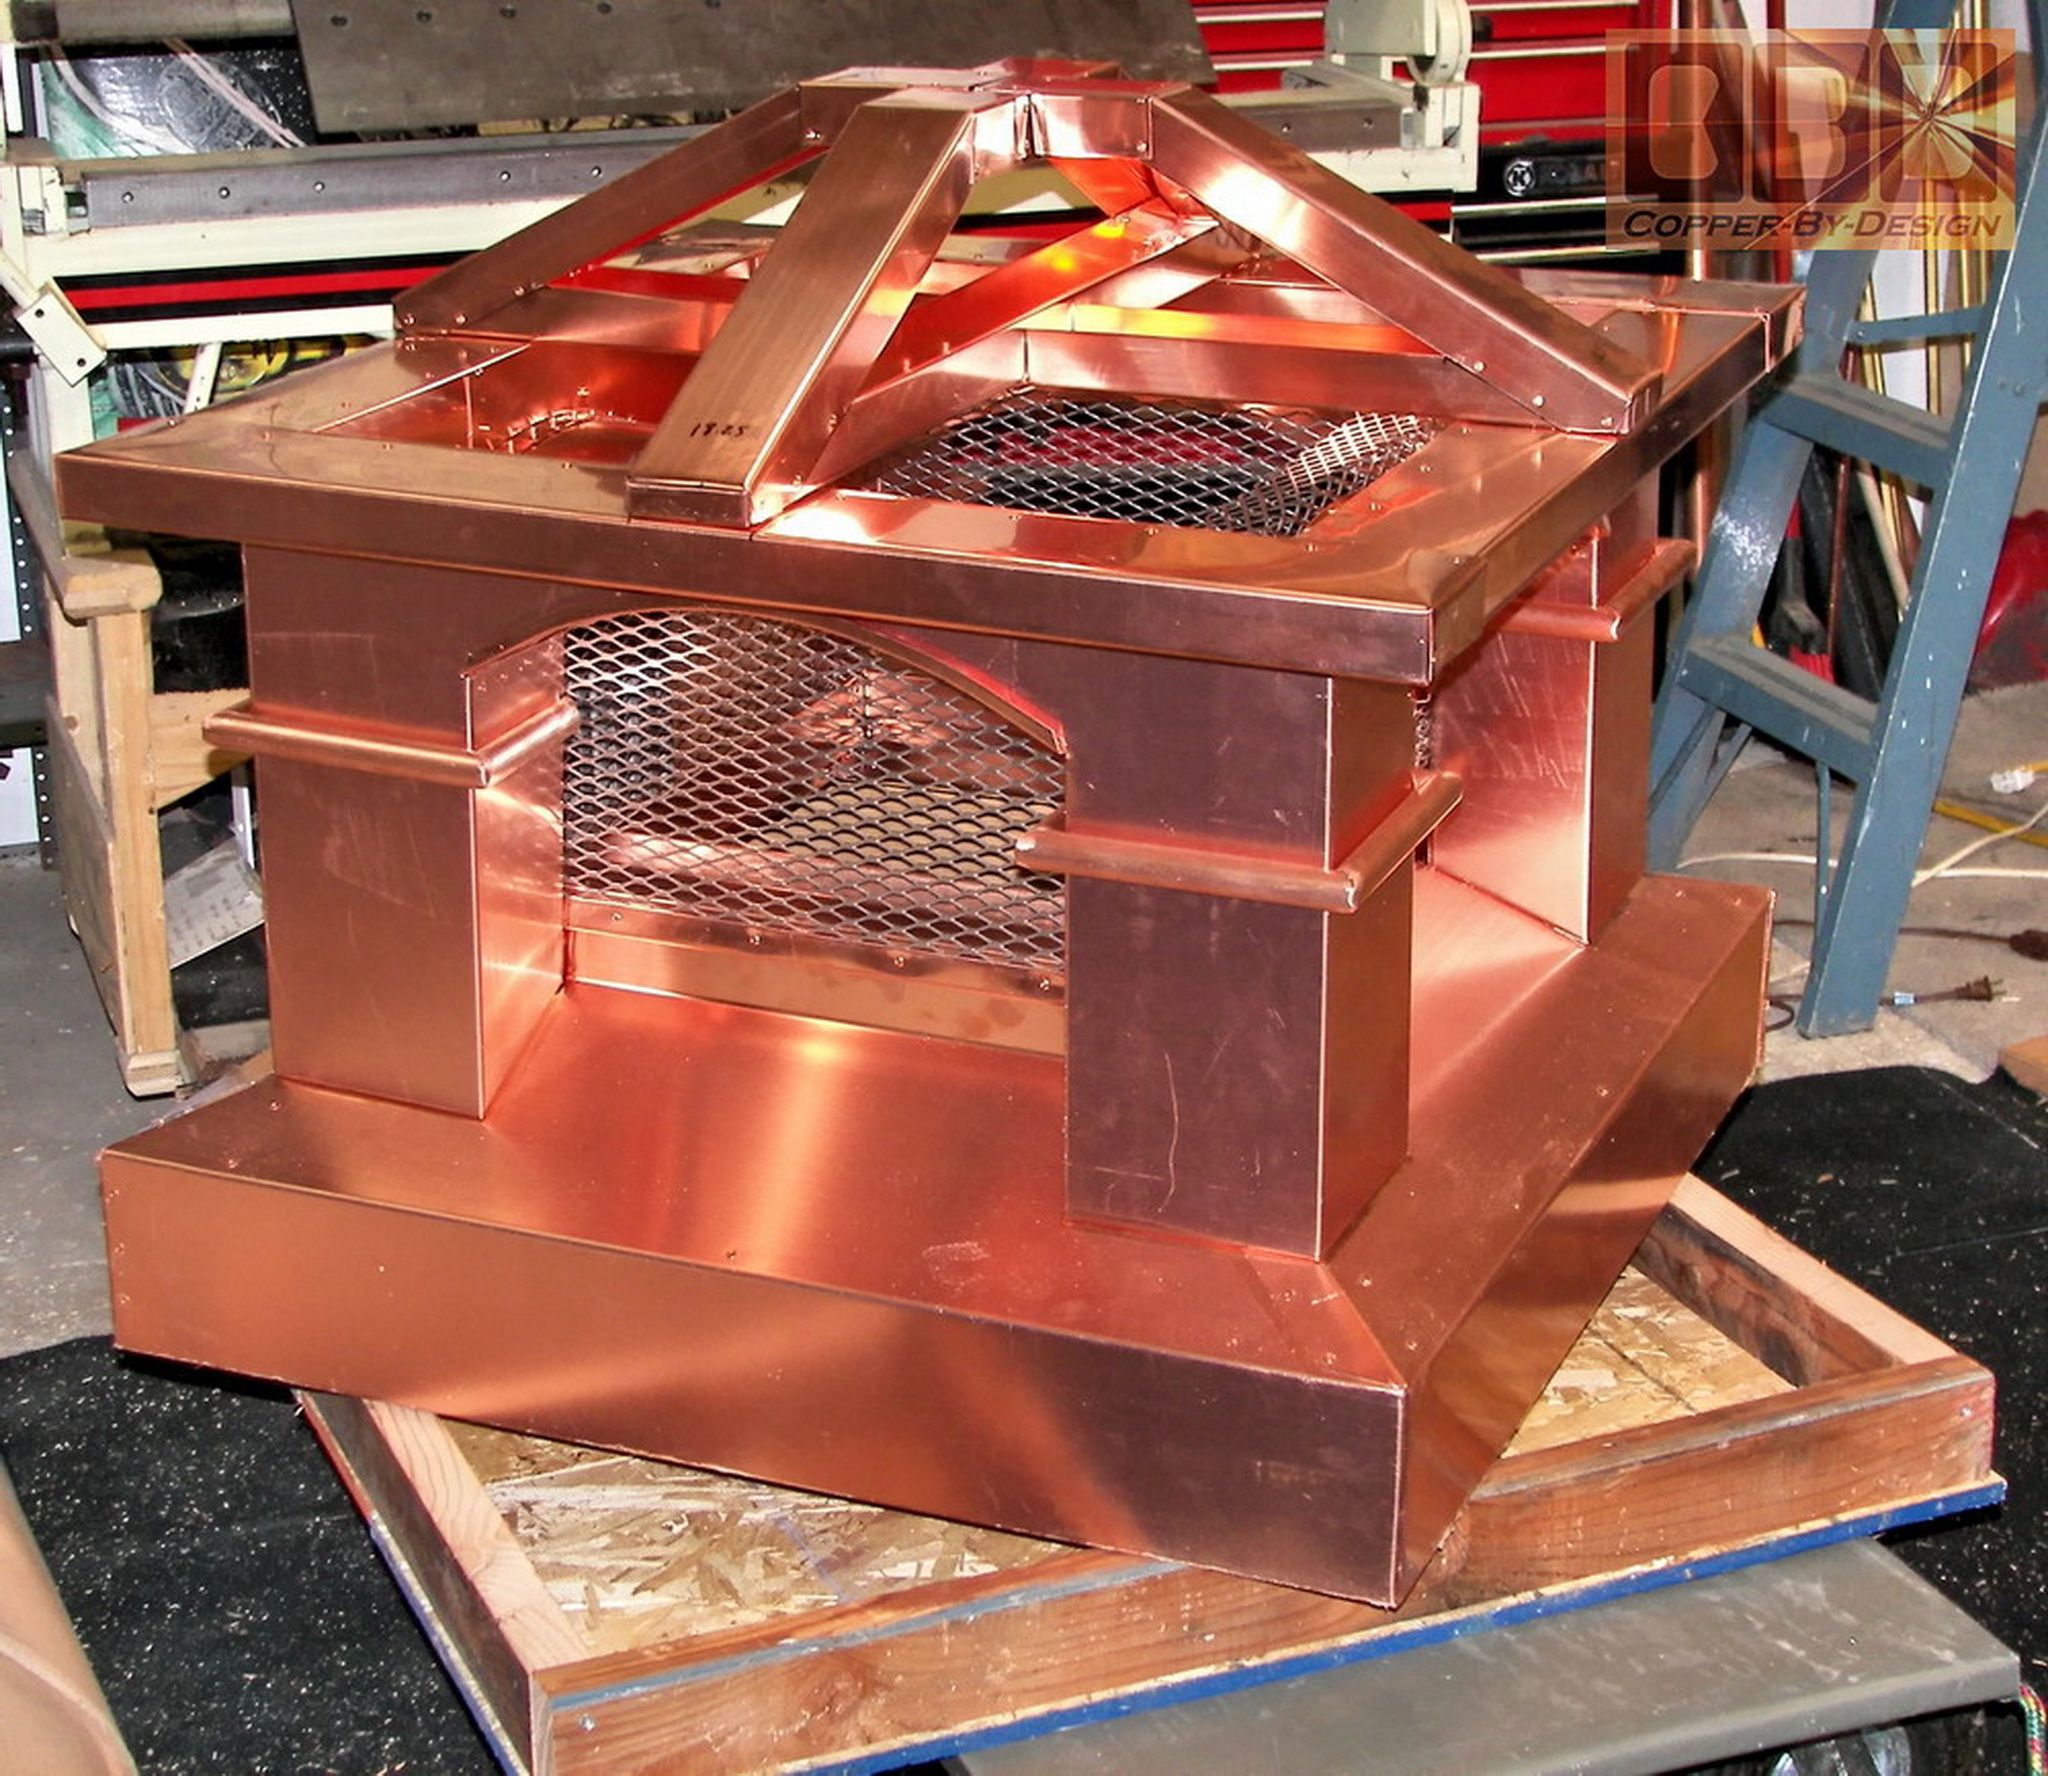
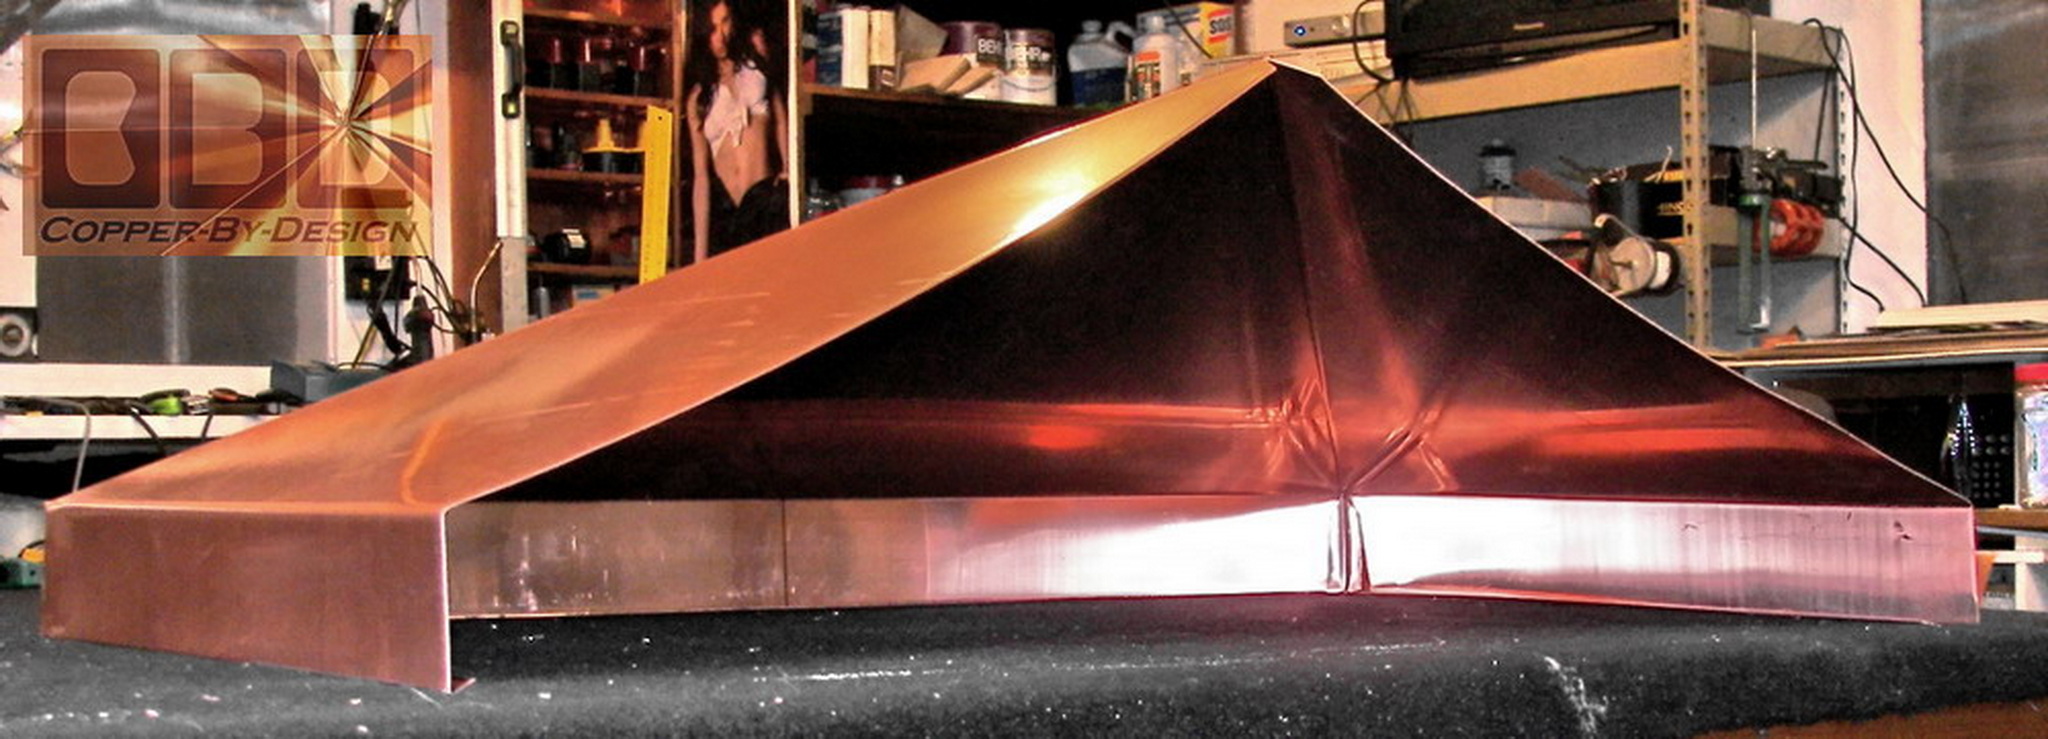
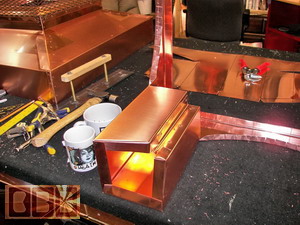
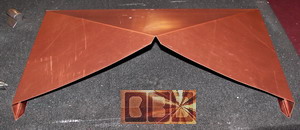
The eave is attached over these
columns that I will attach the roof to. Then finishing the roof
braces built over the eaves to help support the eaves from sagging
under the weight of the roof and snow that will settle on top.
I then cover this with a 3
part roof skin. I covered it a bit different than I had done in
the past; in stead of making the seams over each corner bend, I
covered each end and then draped a rectangular sheet over the center
for a nice clean look that is more seamless.
|
|
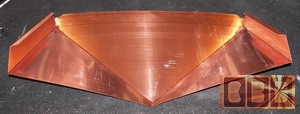
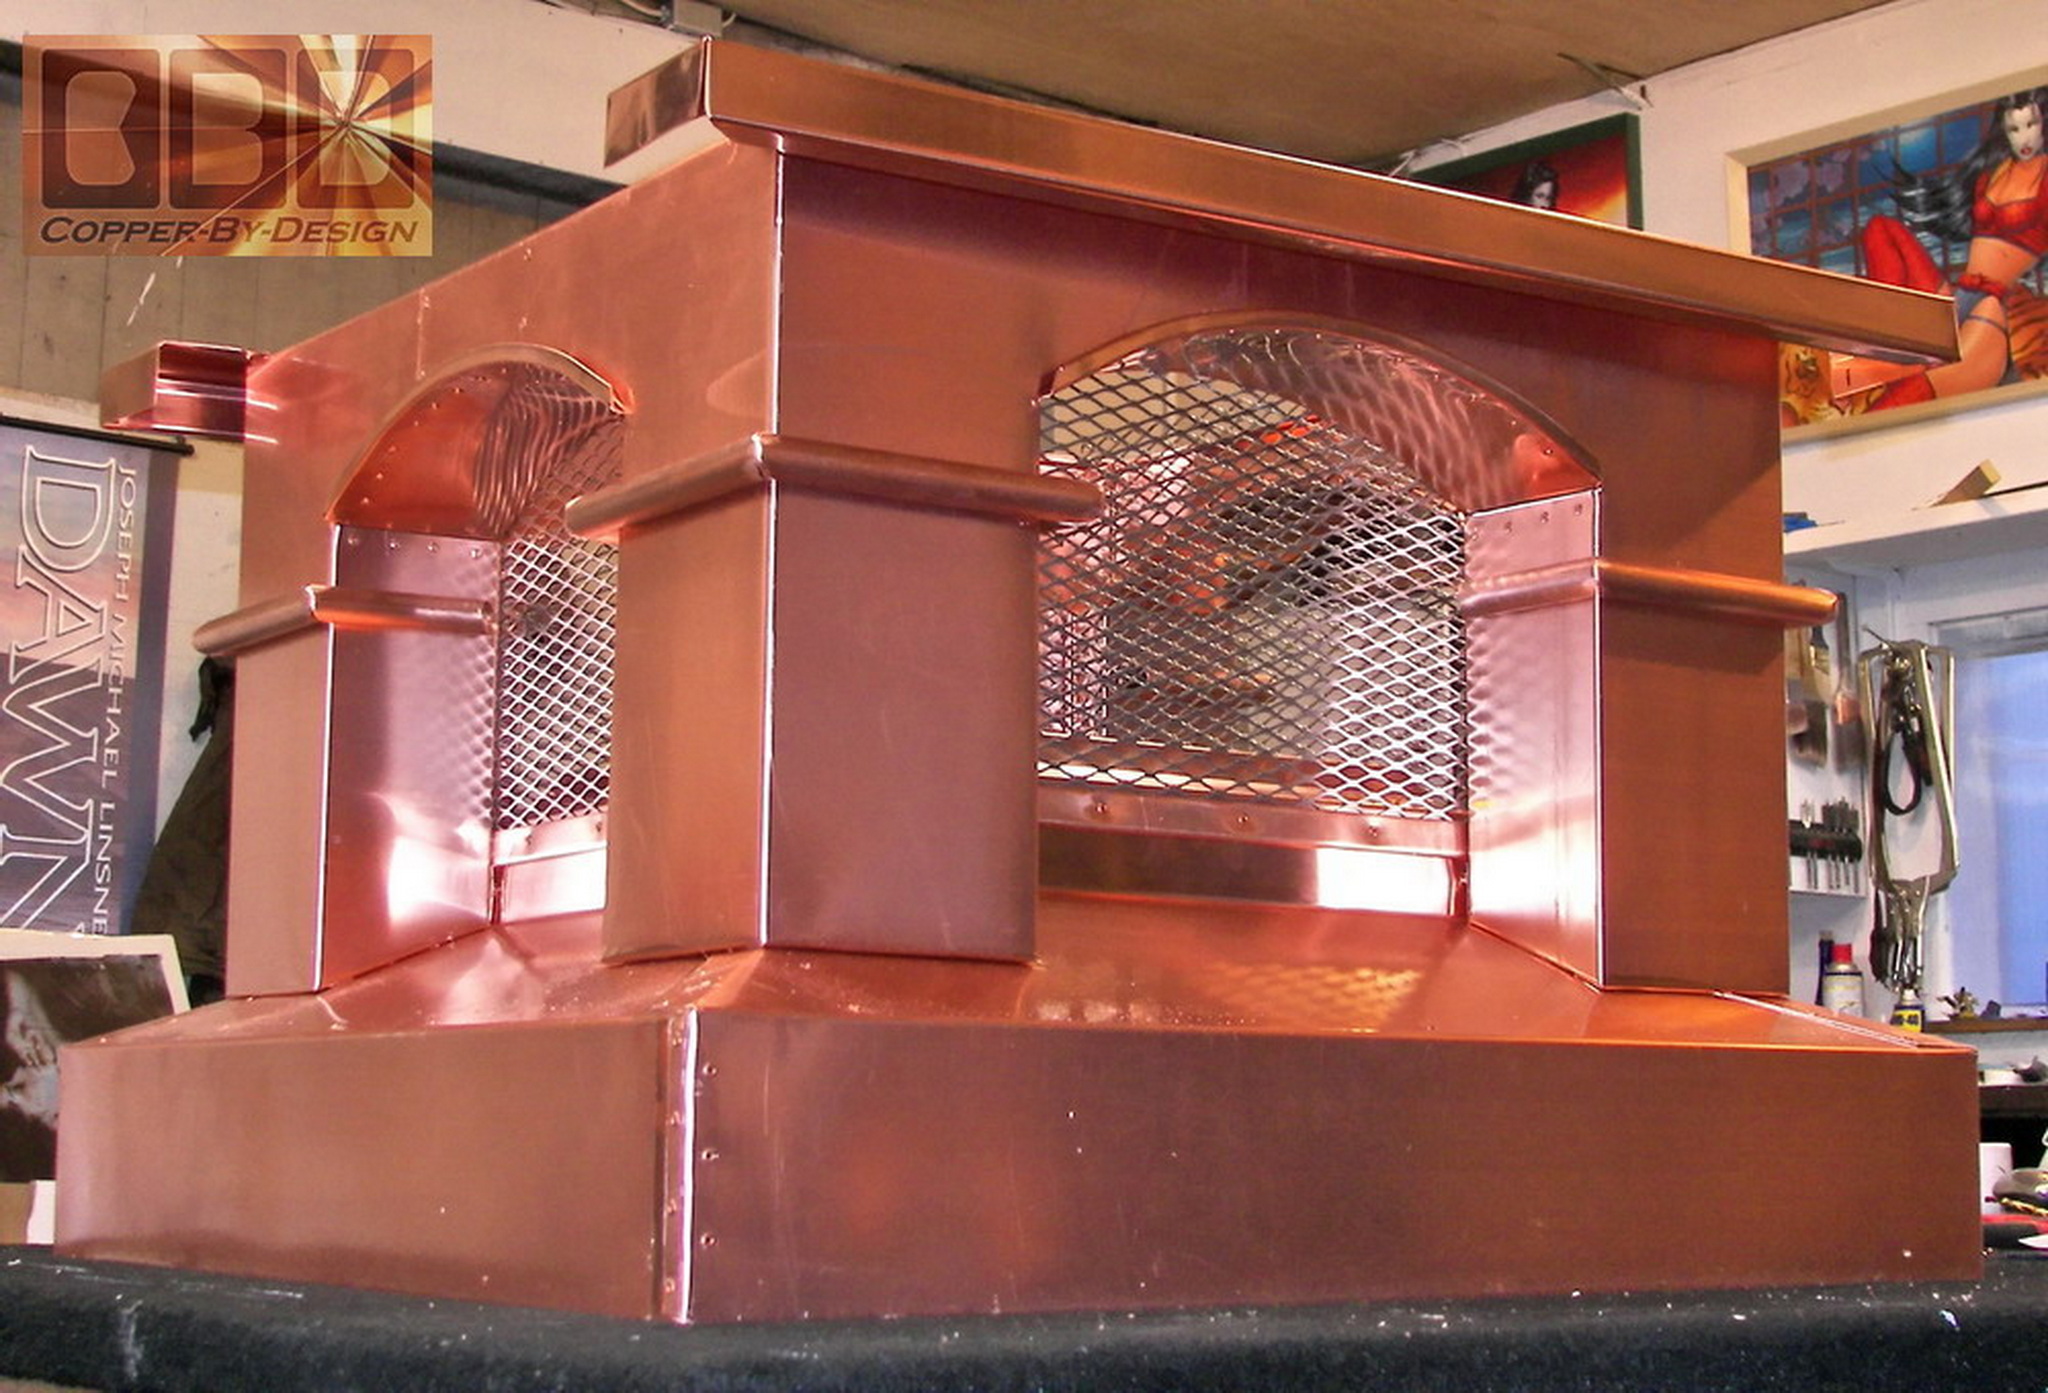
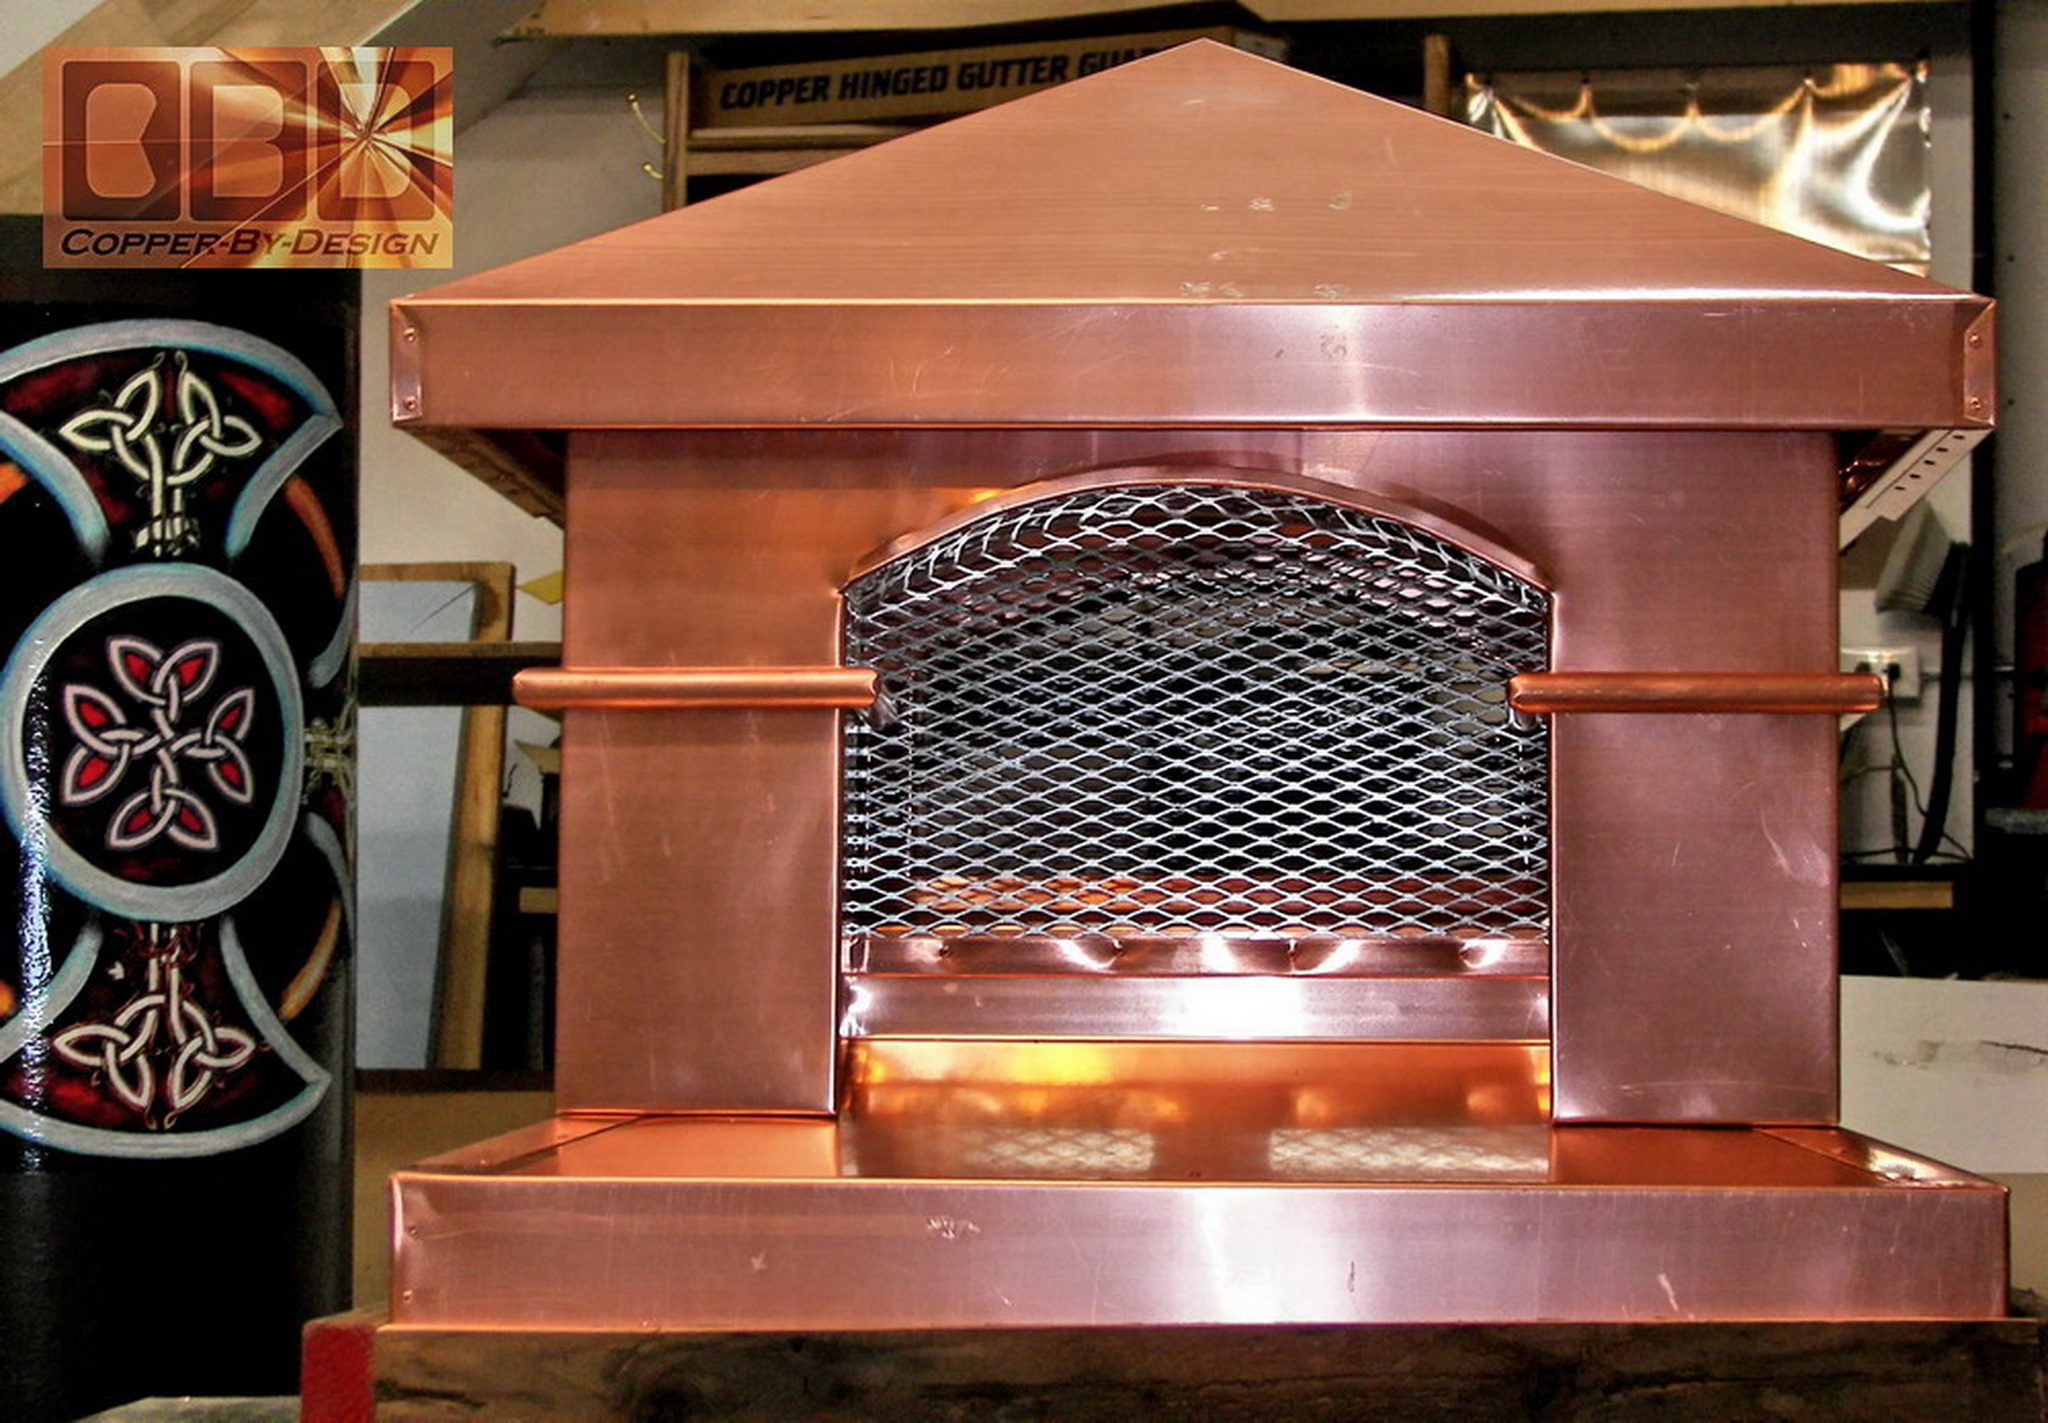
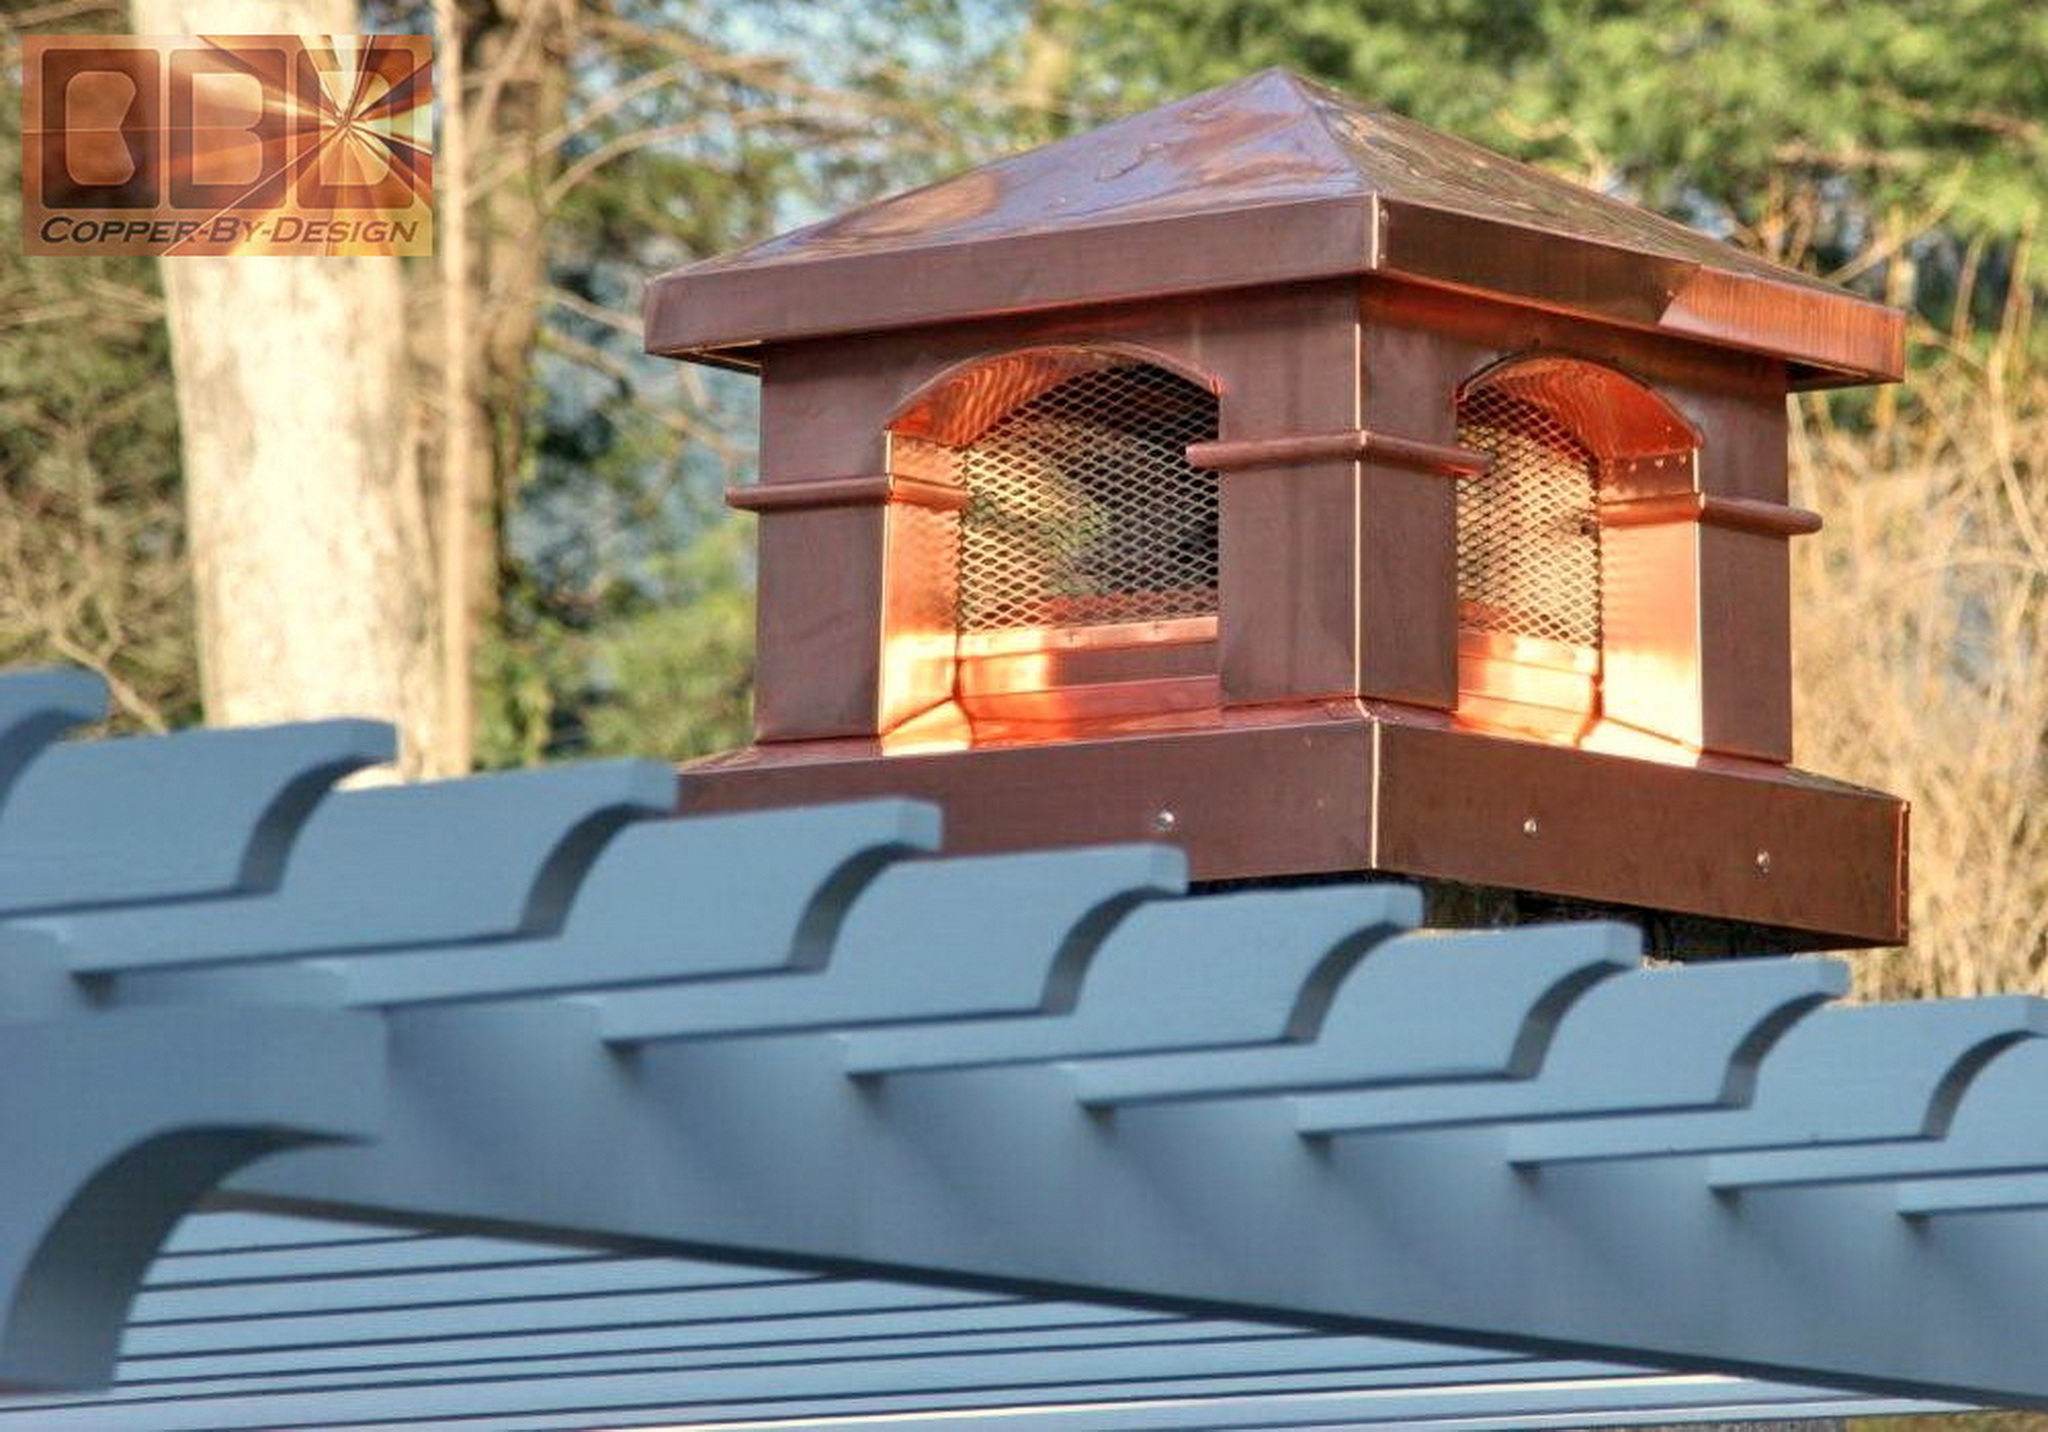
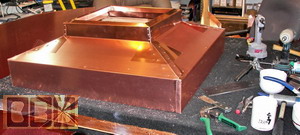
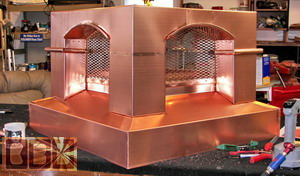
Here is the roof skins to go over the bracing
and attach to the eaves to make a nice sturdy structure.
I made this to resemble the Tuscan style I made to
Mr. Gross, yet it will have no eave past the base and it has a deeper
set stainless steel screen in the archway than I had made in the
past. It has solid oak boards inside the base skirt.
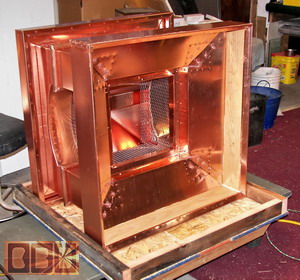
Here it is finished sitting over the custom
crate base.
|
|
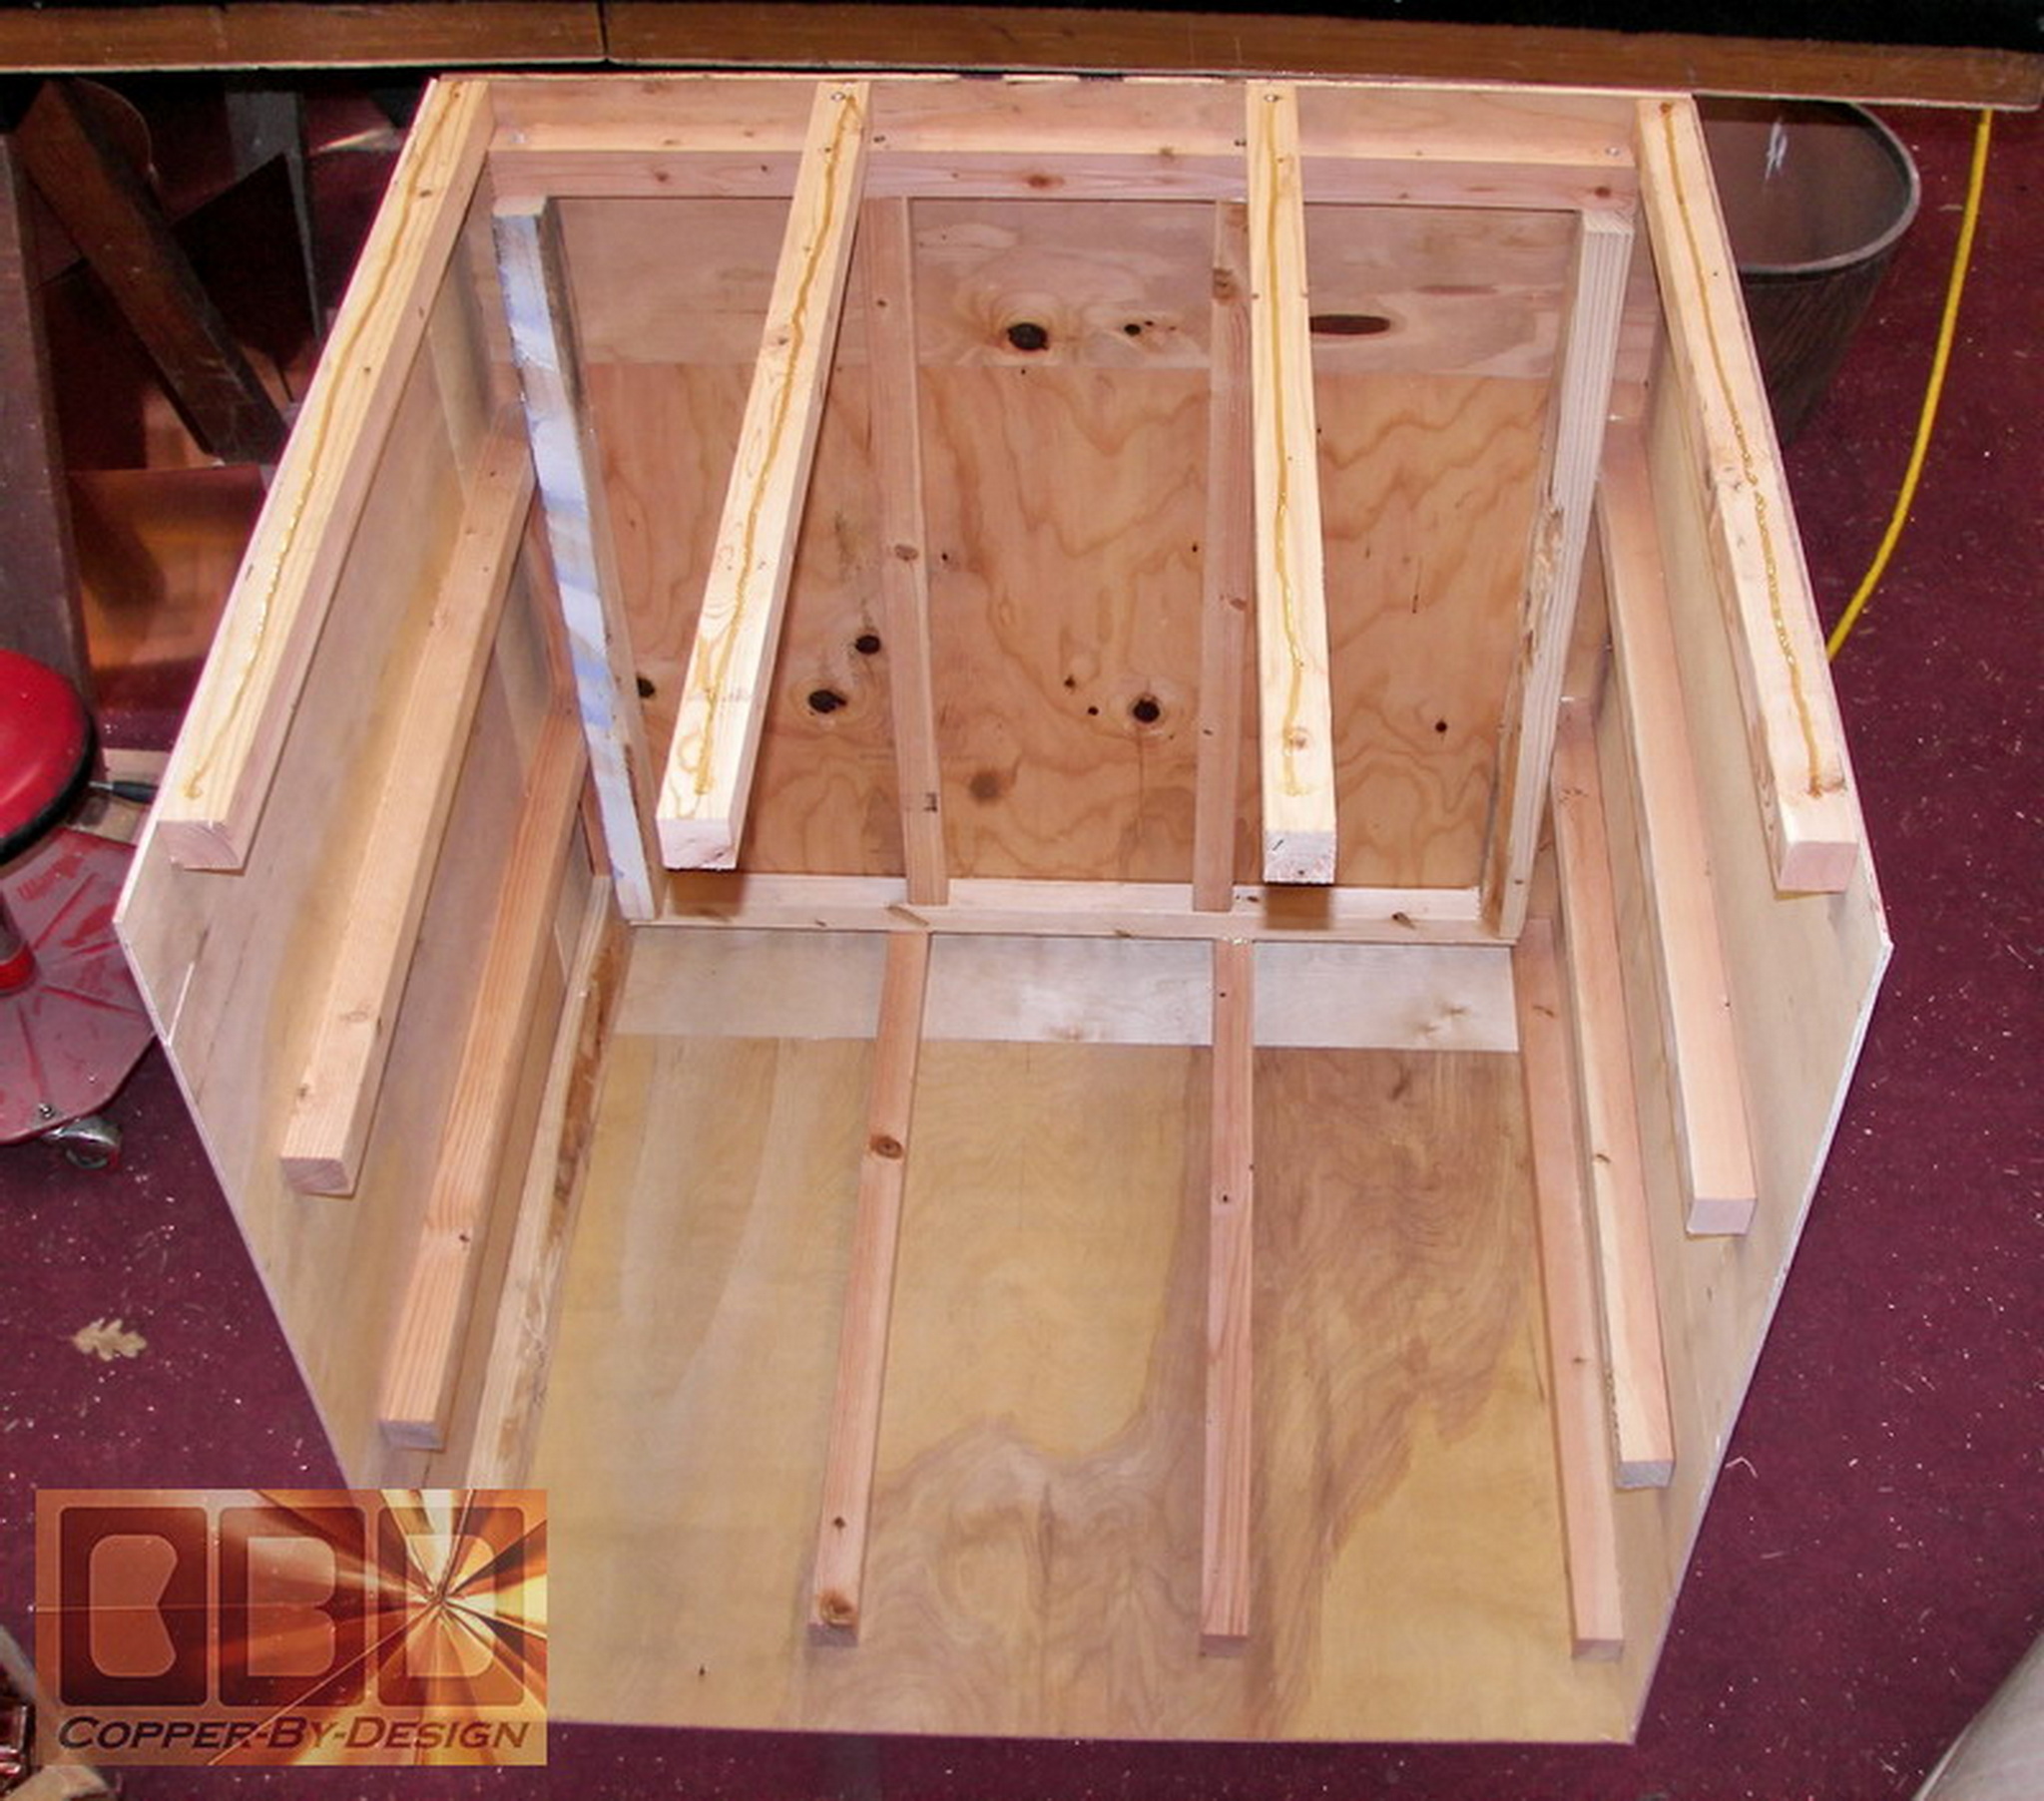
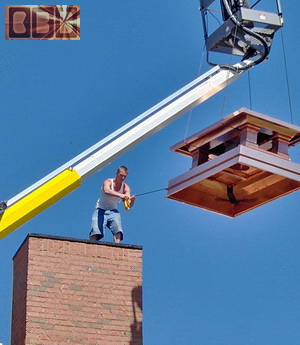
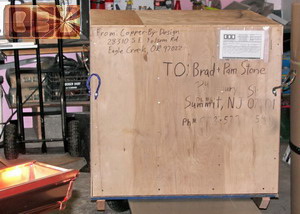
Here is the crate to carry
the chimney cap safely across the country in a large semi truck.
The left photo shows the 5 sided top of the crate laying
on it's side with one wood cover to be attached.
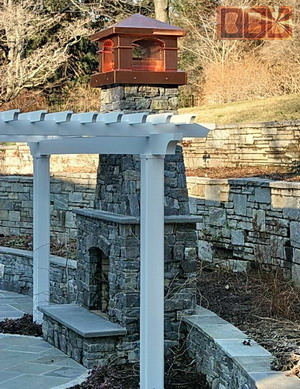
The Installation
We exchanged 32 e-mails in the course of working
out all these details and providing them with 40 digital photos
of the progress. Here is the feedback from this client:
From: "Brad Stone" <bradstone@comcast.n*t>
Subject: Stone Photos
Date: Sun, 6 Apr 2008
David,
At long last (old computer crashed) I am sending you photos of the chimney cap you crafted for me. I got it installed relatively easily, and it looks fantastic,
as you can see. It is weathering nicely and adds a great dimension to the look of the fireplace. Thanks for doing such a wonderful job.
Regards,
Brad Stone
Cost for this
project: $2,503.20 w/shipping
186#
total weight w/crate
96#
total weight of just the chimney cap
- 16.5# wood
- 3.75#
SS screen
= 75.75# of copper
x .8 = 60.6 sq' of copper sheet
metal
112.2 x $30 = $1,818
$1,818.00 - copper
+ $122.20 - SS screen (6.11
sq' x $20)
+ $88.00 -
1x6 hardwood (11' x $8)
+ $250.00 - wood crate
+ $225.00 -
shipping - residential with lift-gate
$2,503.20 total
- $1,500 deposit paid
=
$1,003.20
balance
|