|
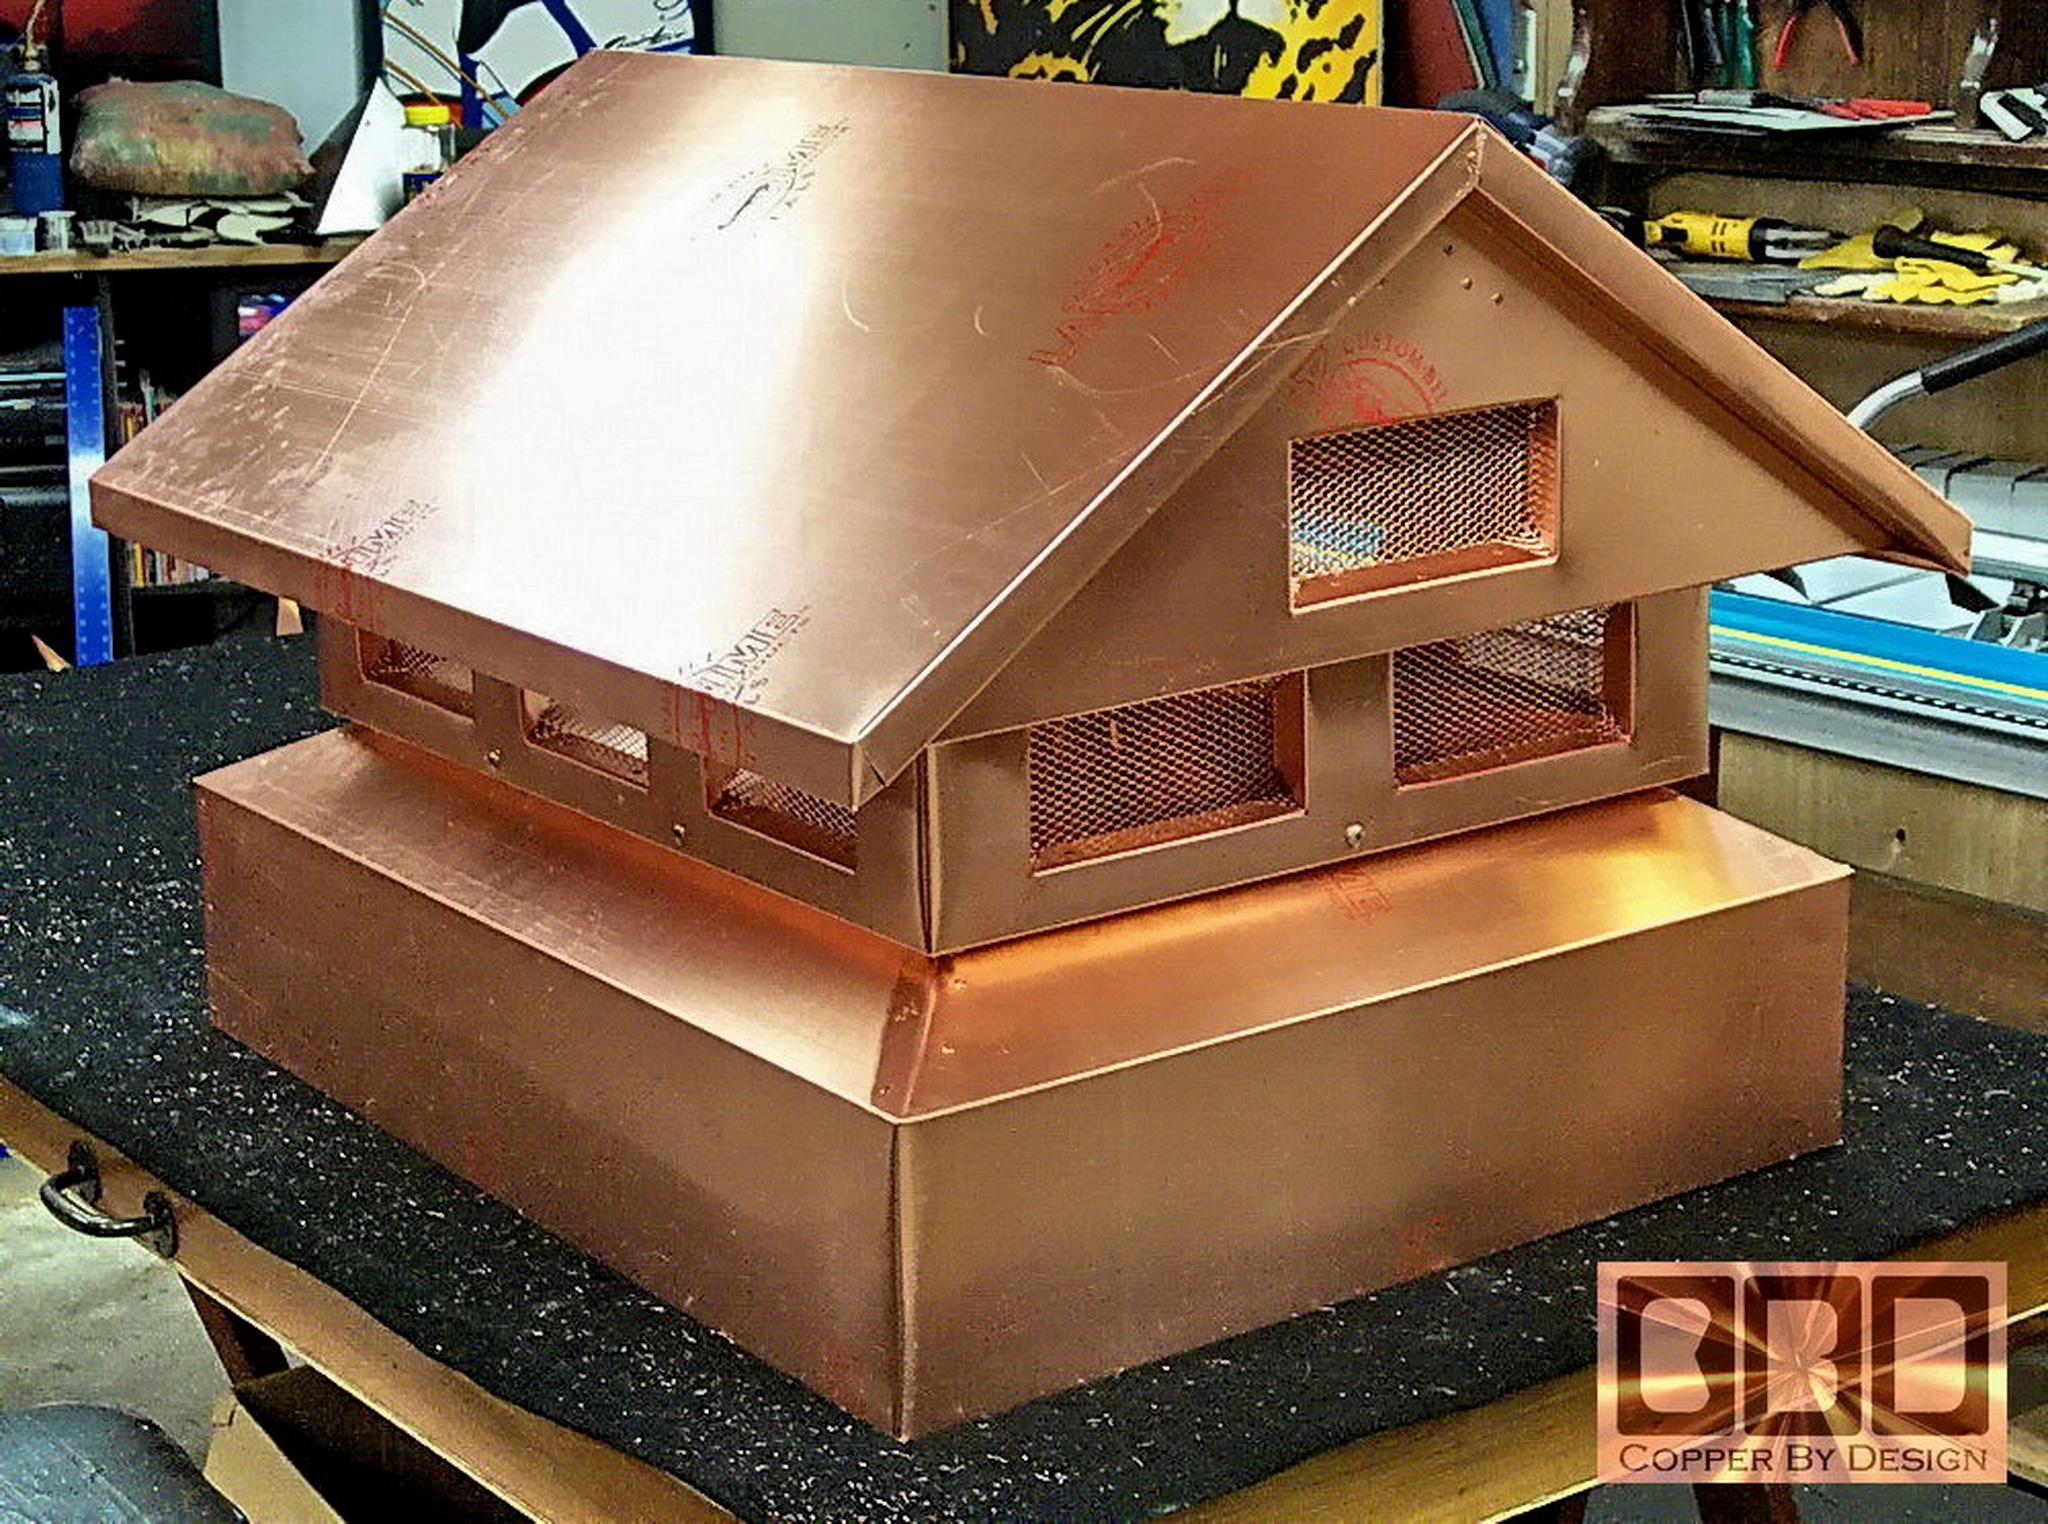
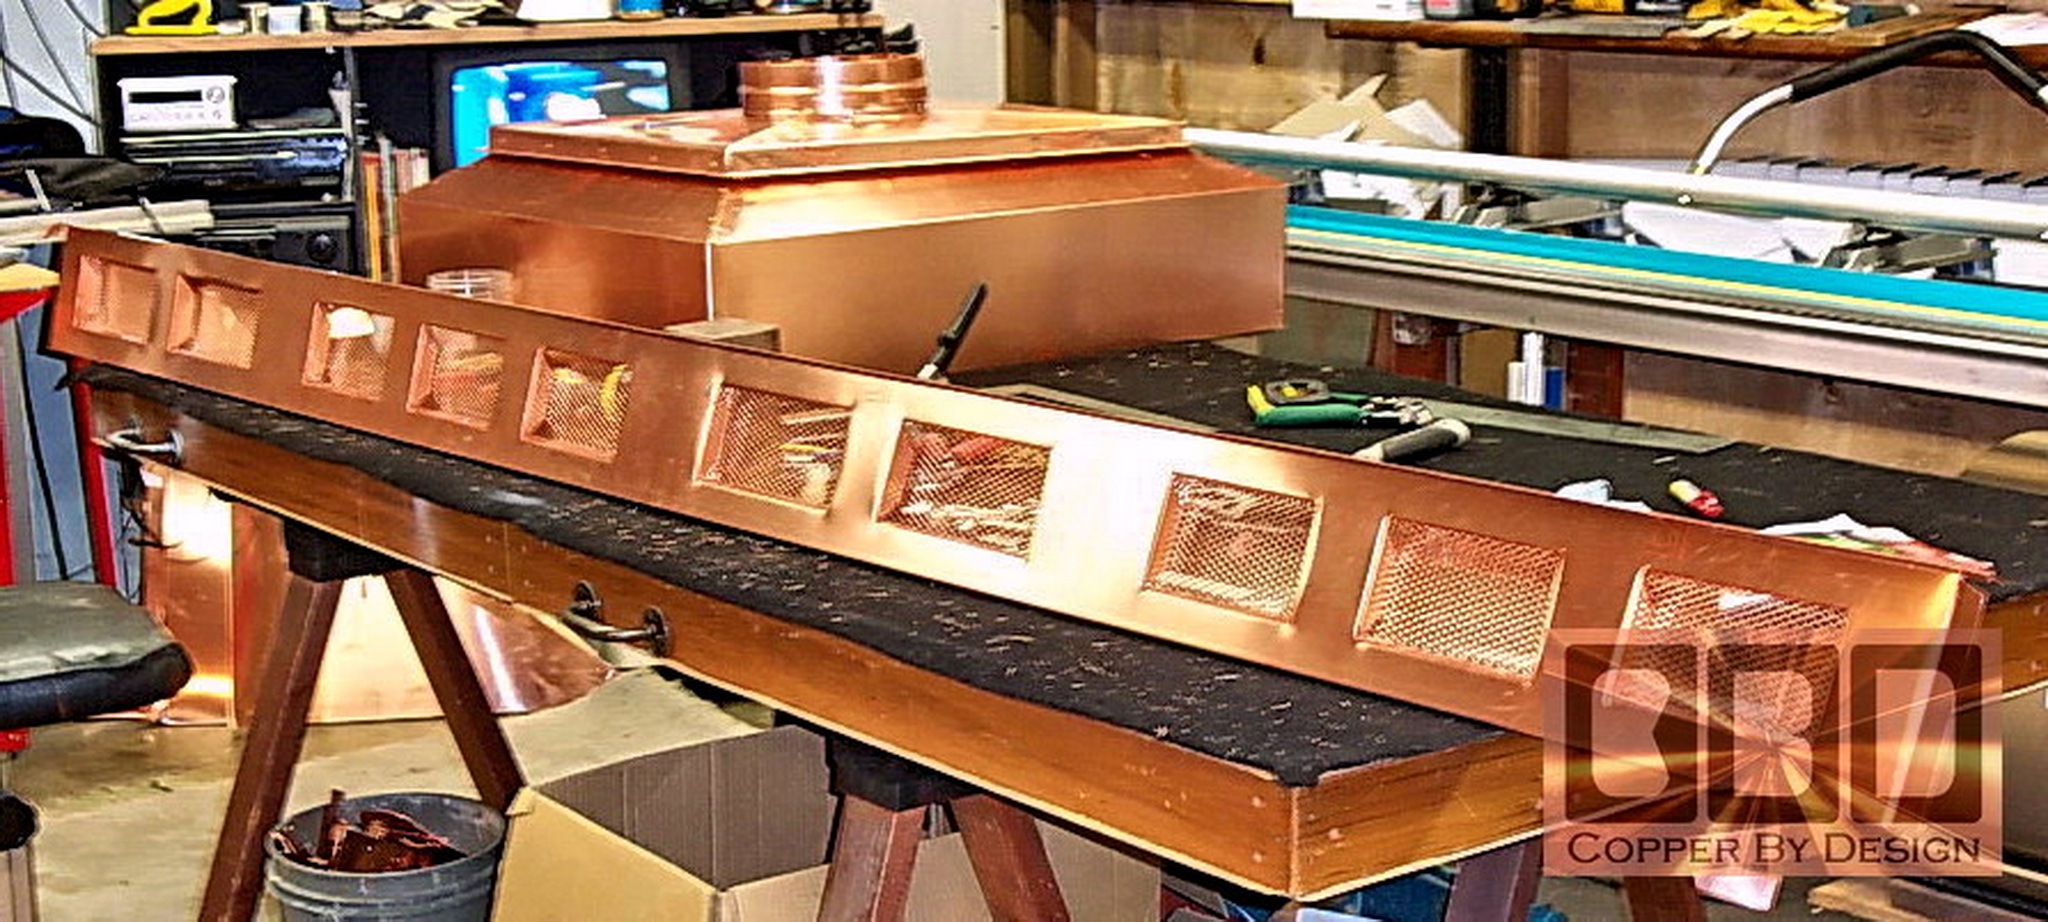
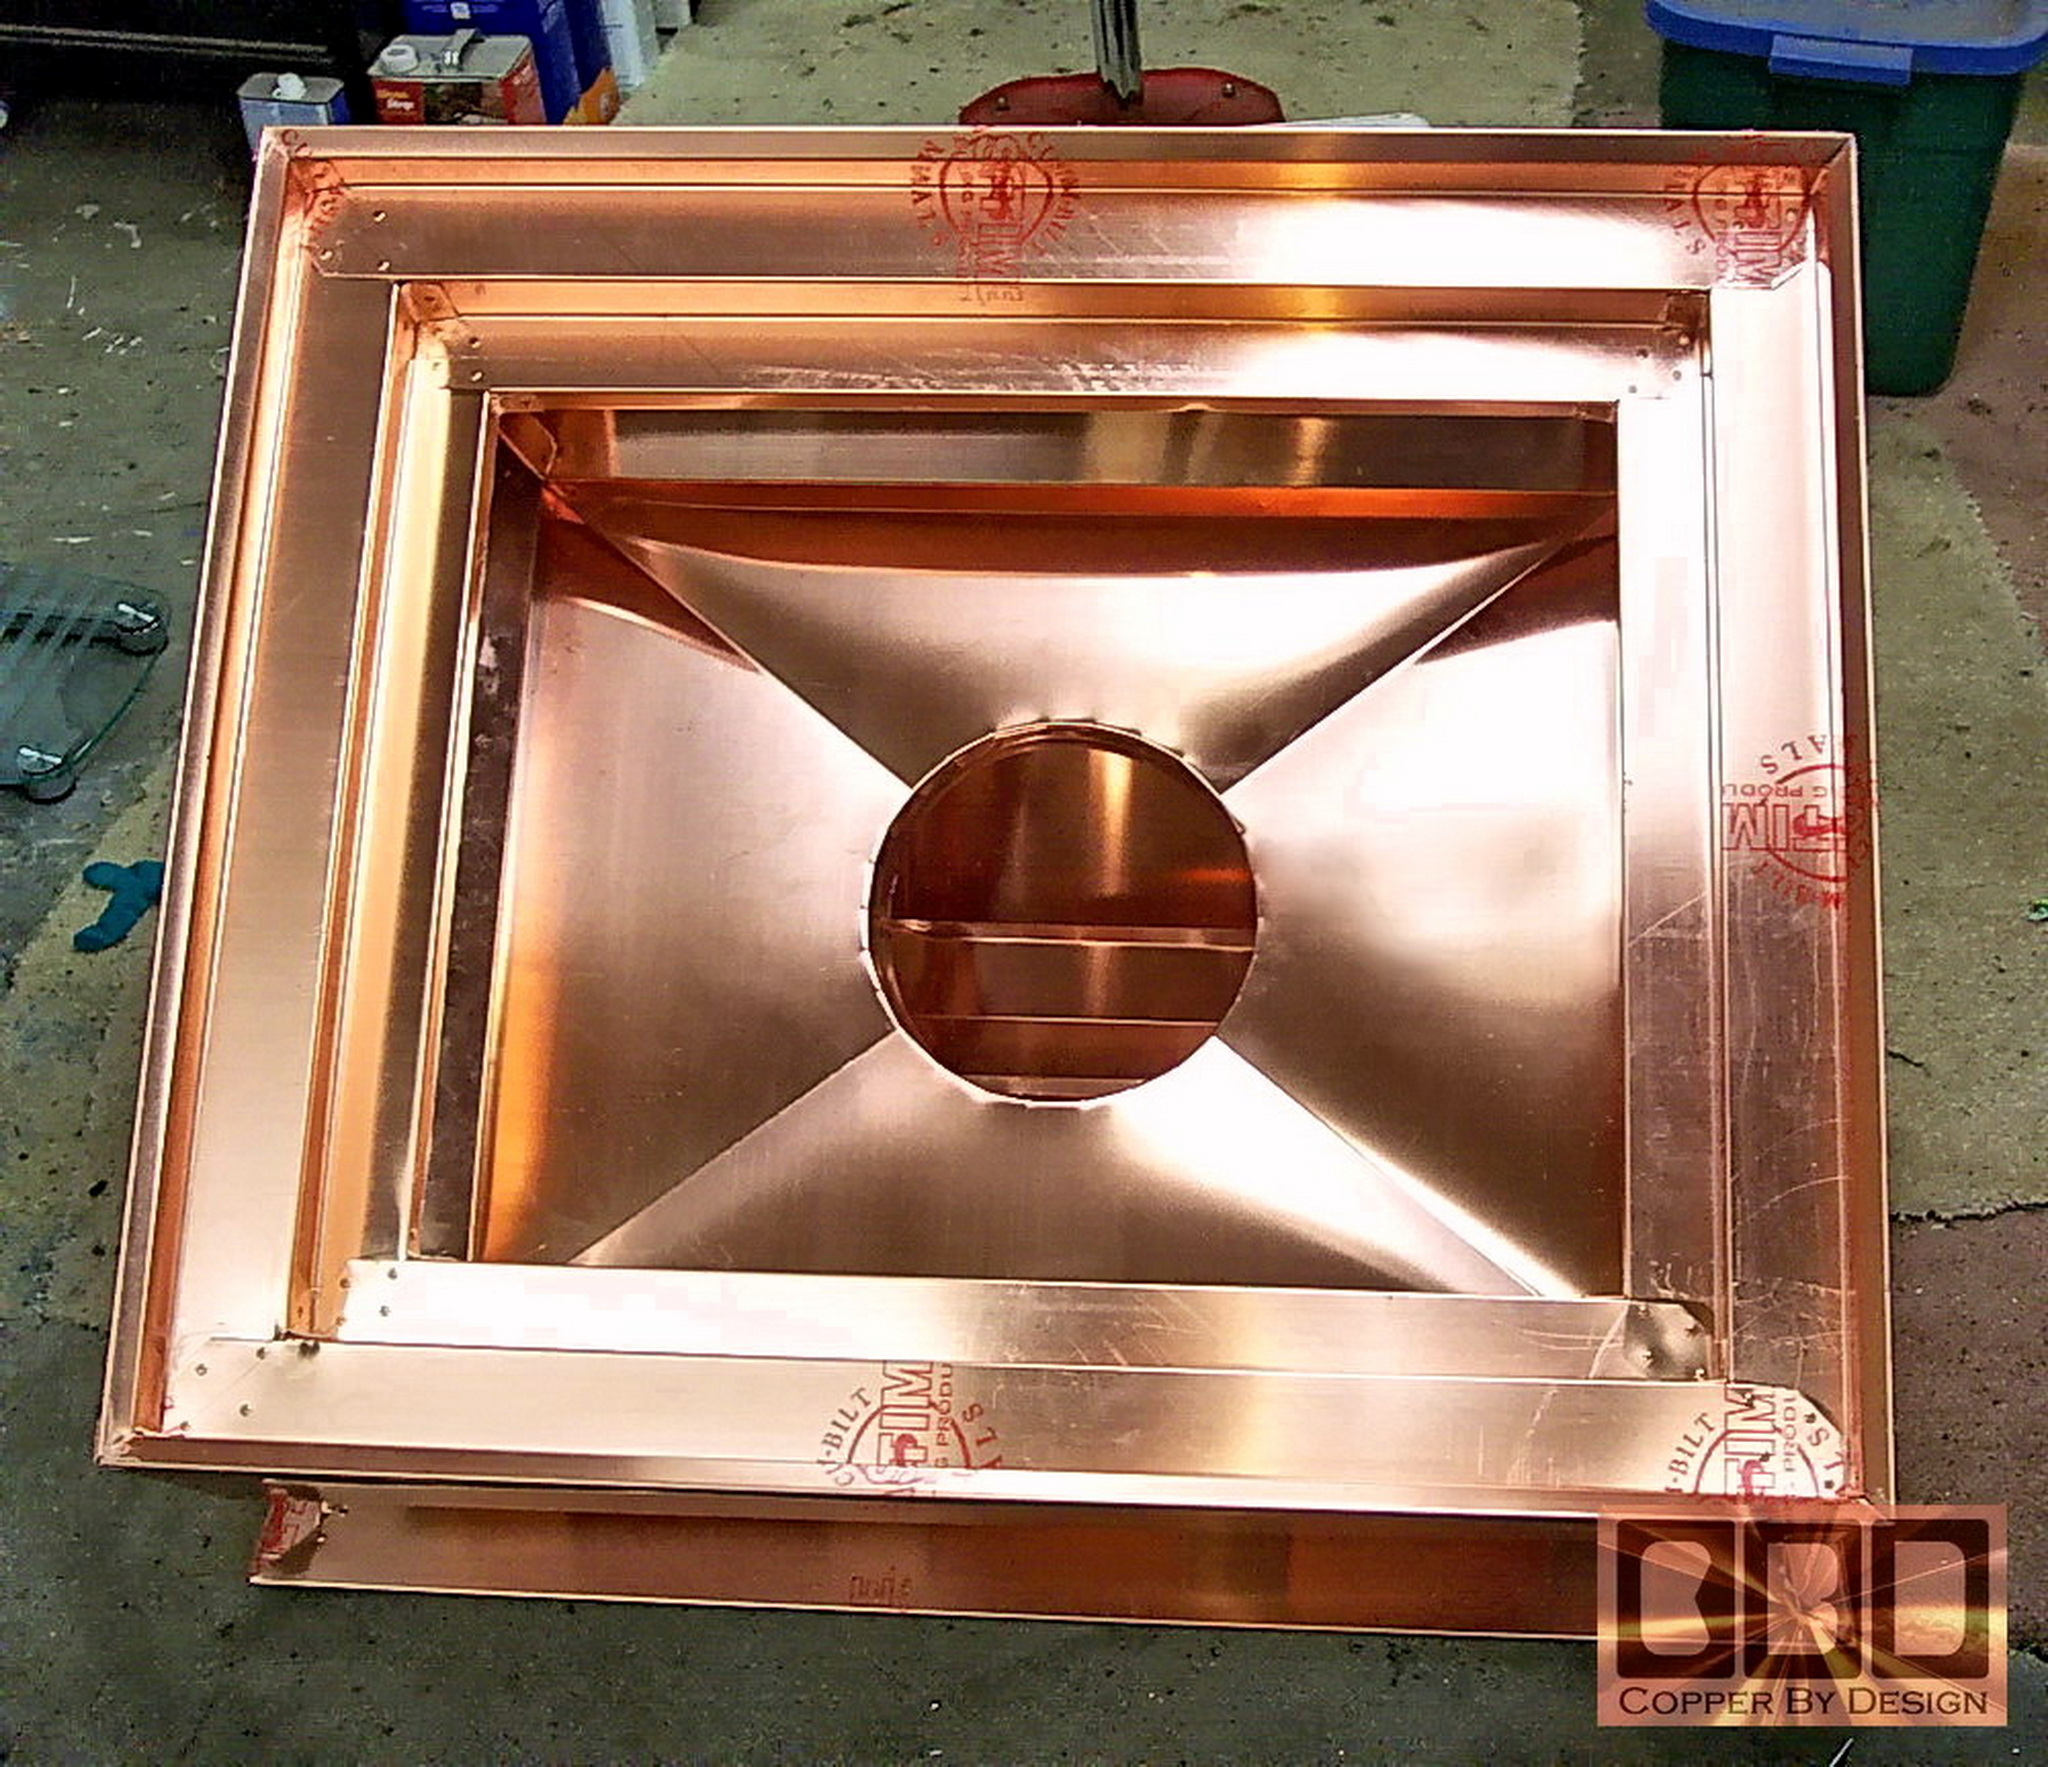
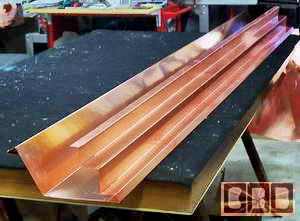
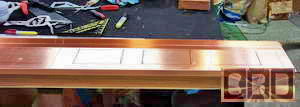
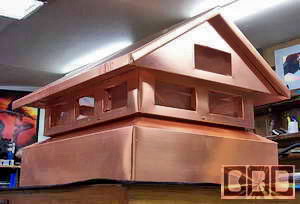
The detailed custom fabrication of a 36" wide x 41.5"
long copper chimney cap
(11-05) |
|
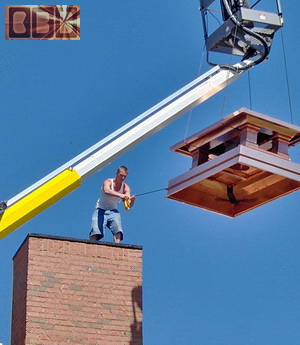
Here is what we made with the design help from
the client: Van Smith in Yacolt Washington, just North of Portland Oregon.
It was designed to cover a wood frame chimney case that will be covered
with a stone facing, and to support the stainless steel insolated exhaust
flue.
It took about 74.8 square feet of copper to make
this chimney cap, and weighs in at 93.5lb. Even though it has
very few visible rivets it is so sturdy that when lifting it up on one
corner it has no detectible flex to it. Made as seamless as possible.
This chimney cap sits down to cover the top 2" of the wood frame and
another 1.5" of a rock facing over the wood. It took 4 days just
to build this cap in our shop.
The final cost not
delivered or installed was $1,496,
since
the client took care of that part personally
Including the end caps for the roof, there are 4 cross-braces
to support the roof of this chimney cap. See below for the 46 other
photos of this custom fabrication.
|
|
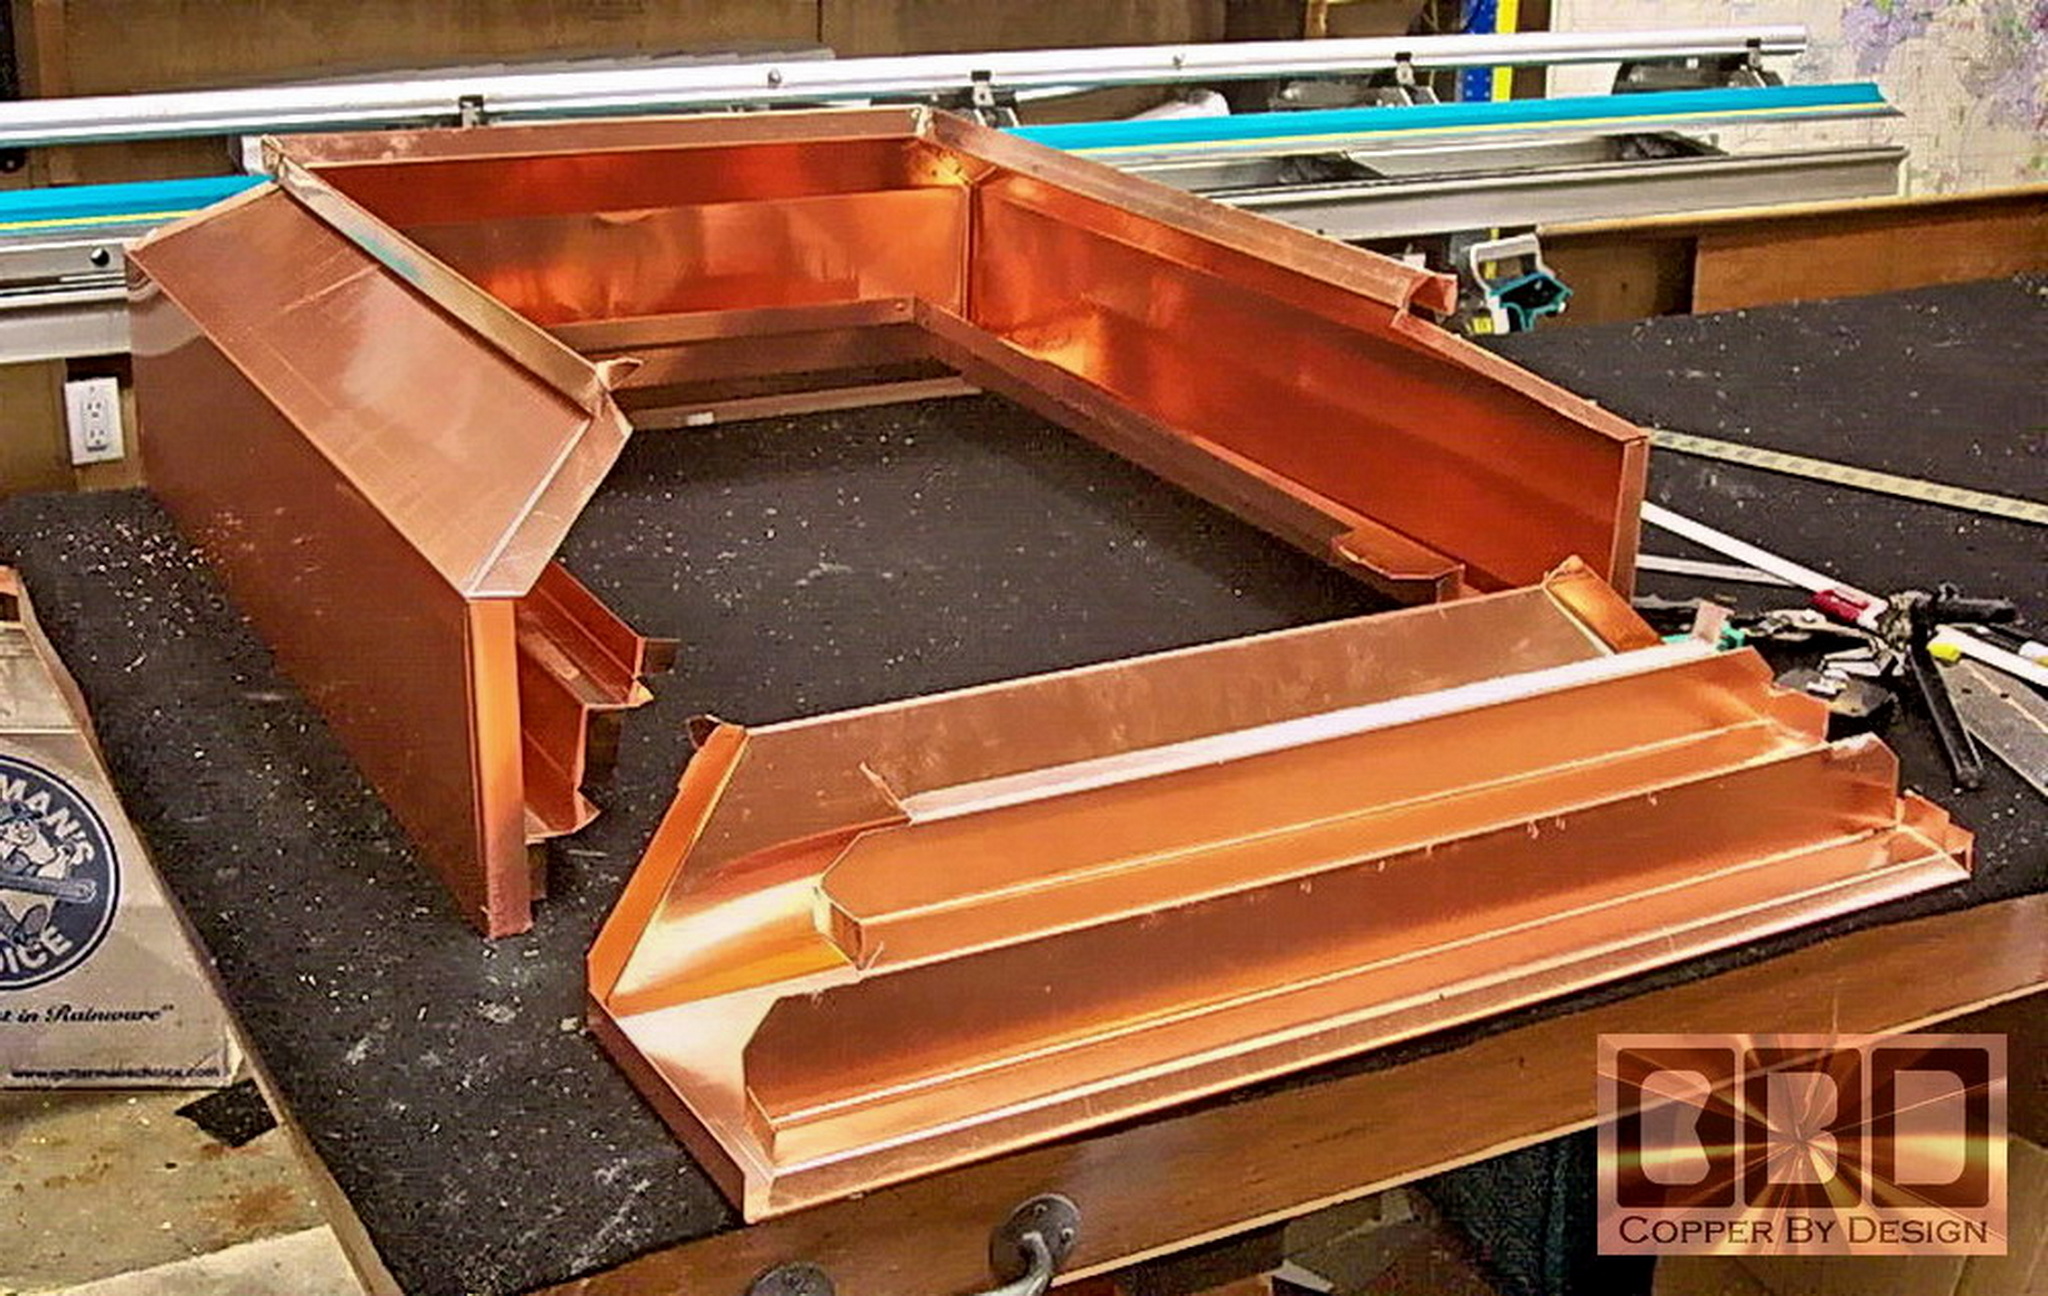
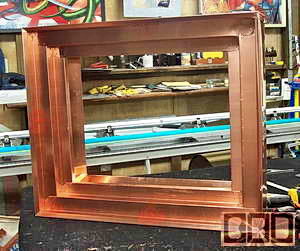
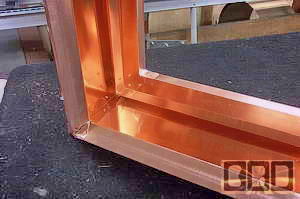
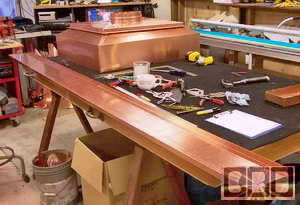
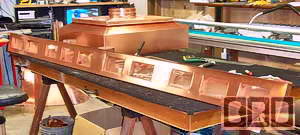
This shows the three sides of the base bent longwise, but not
having the corners formed yet.
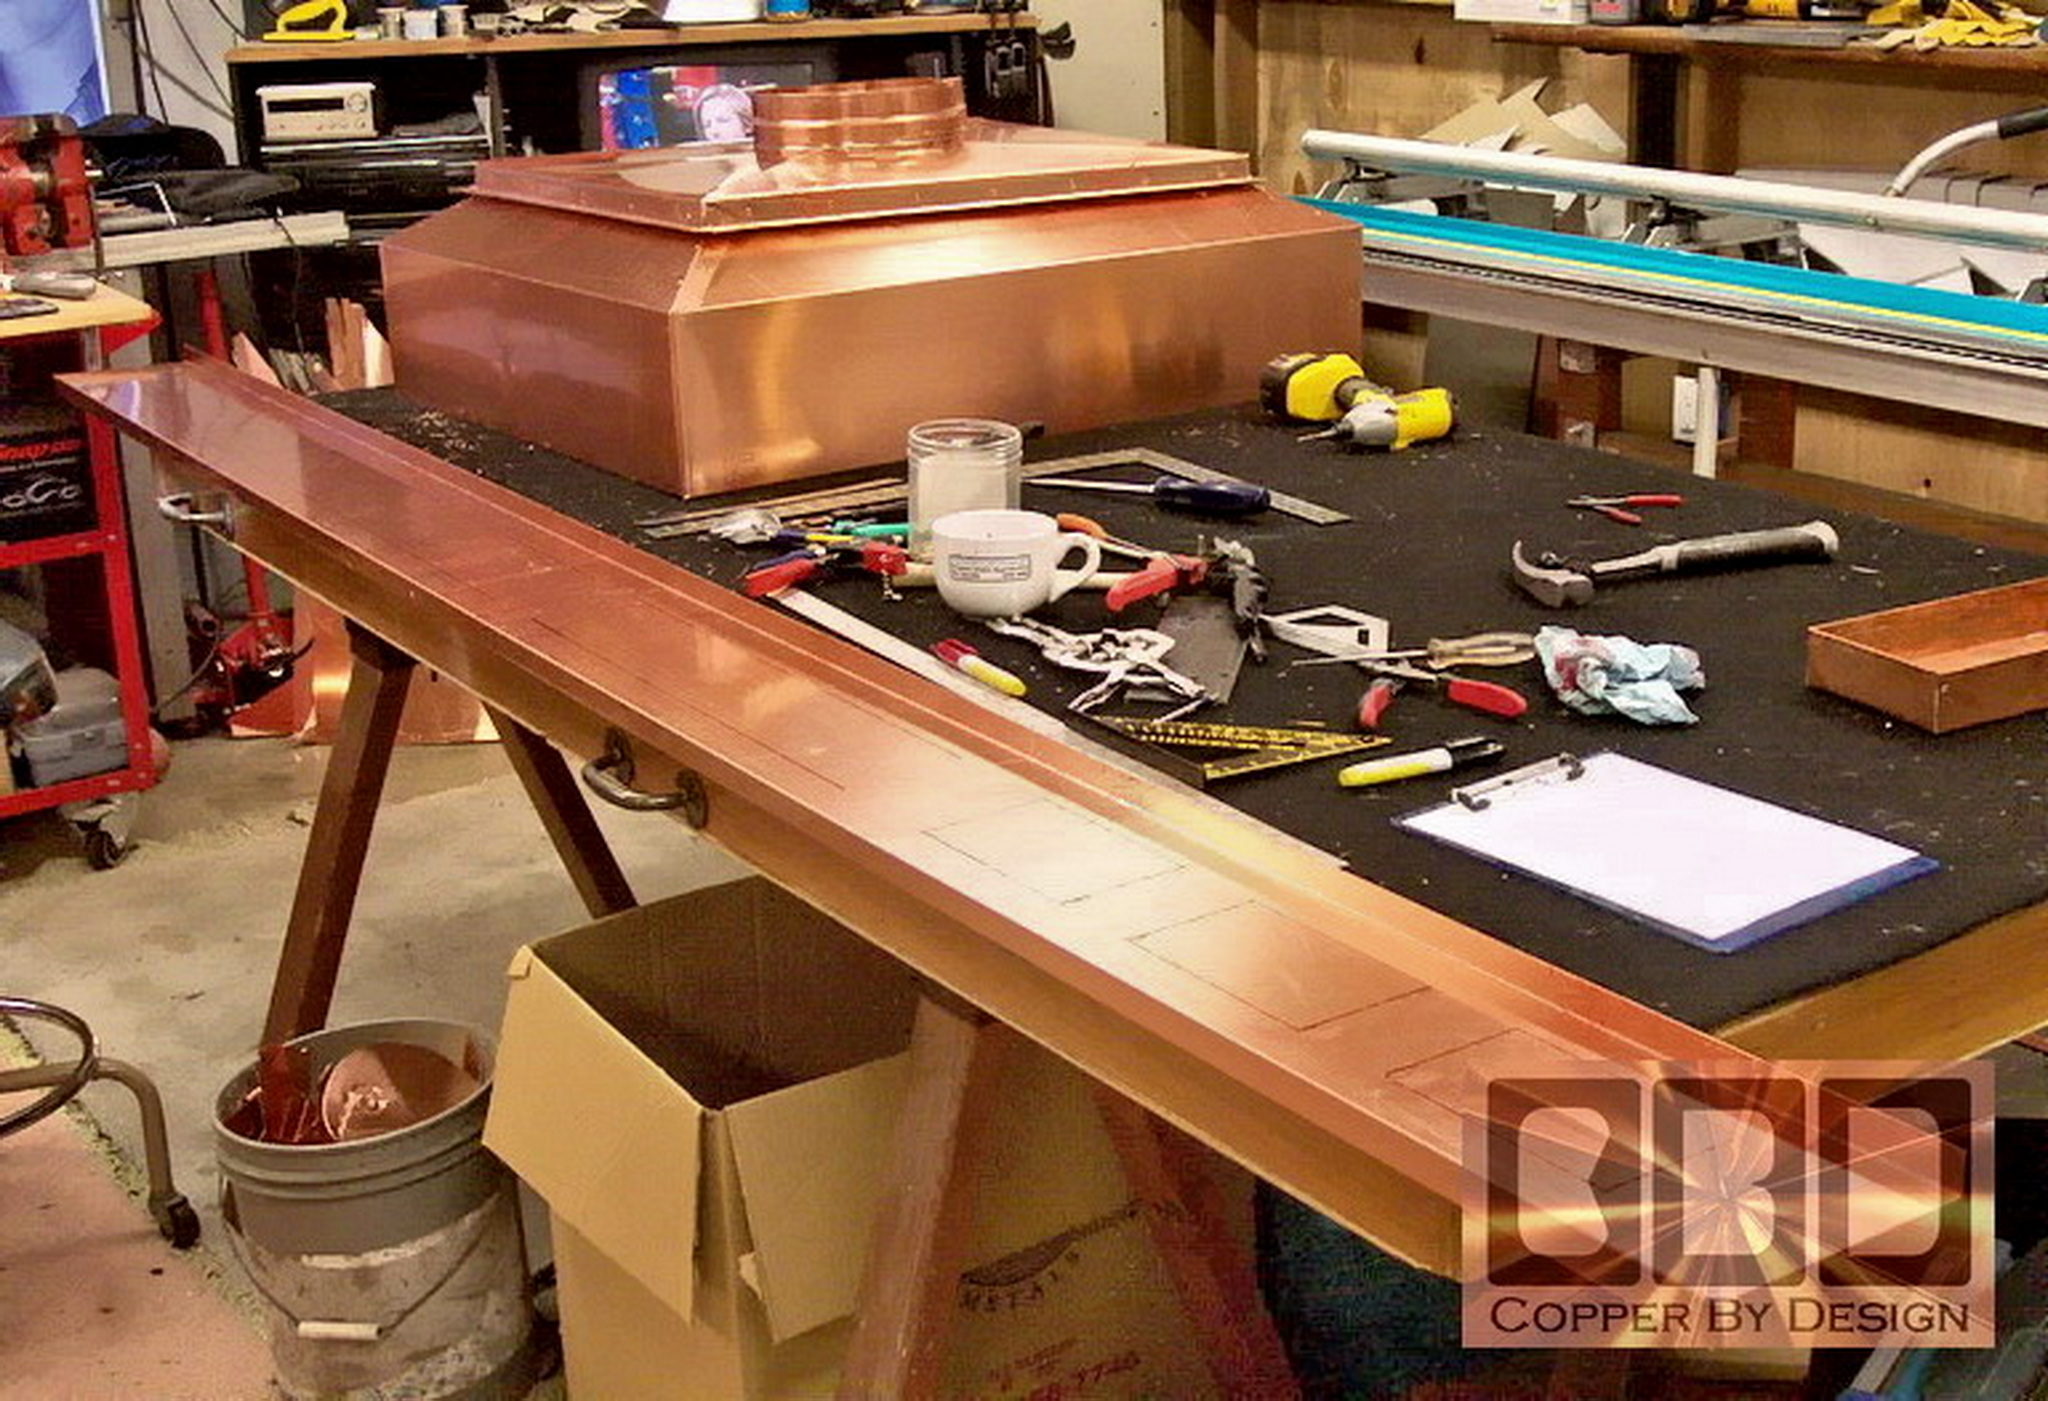
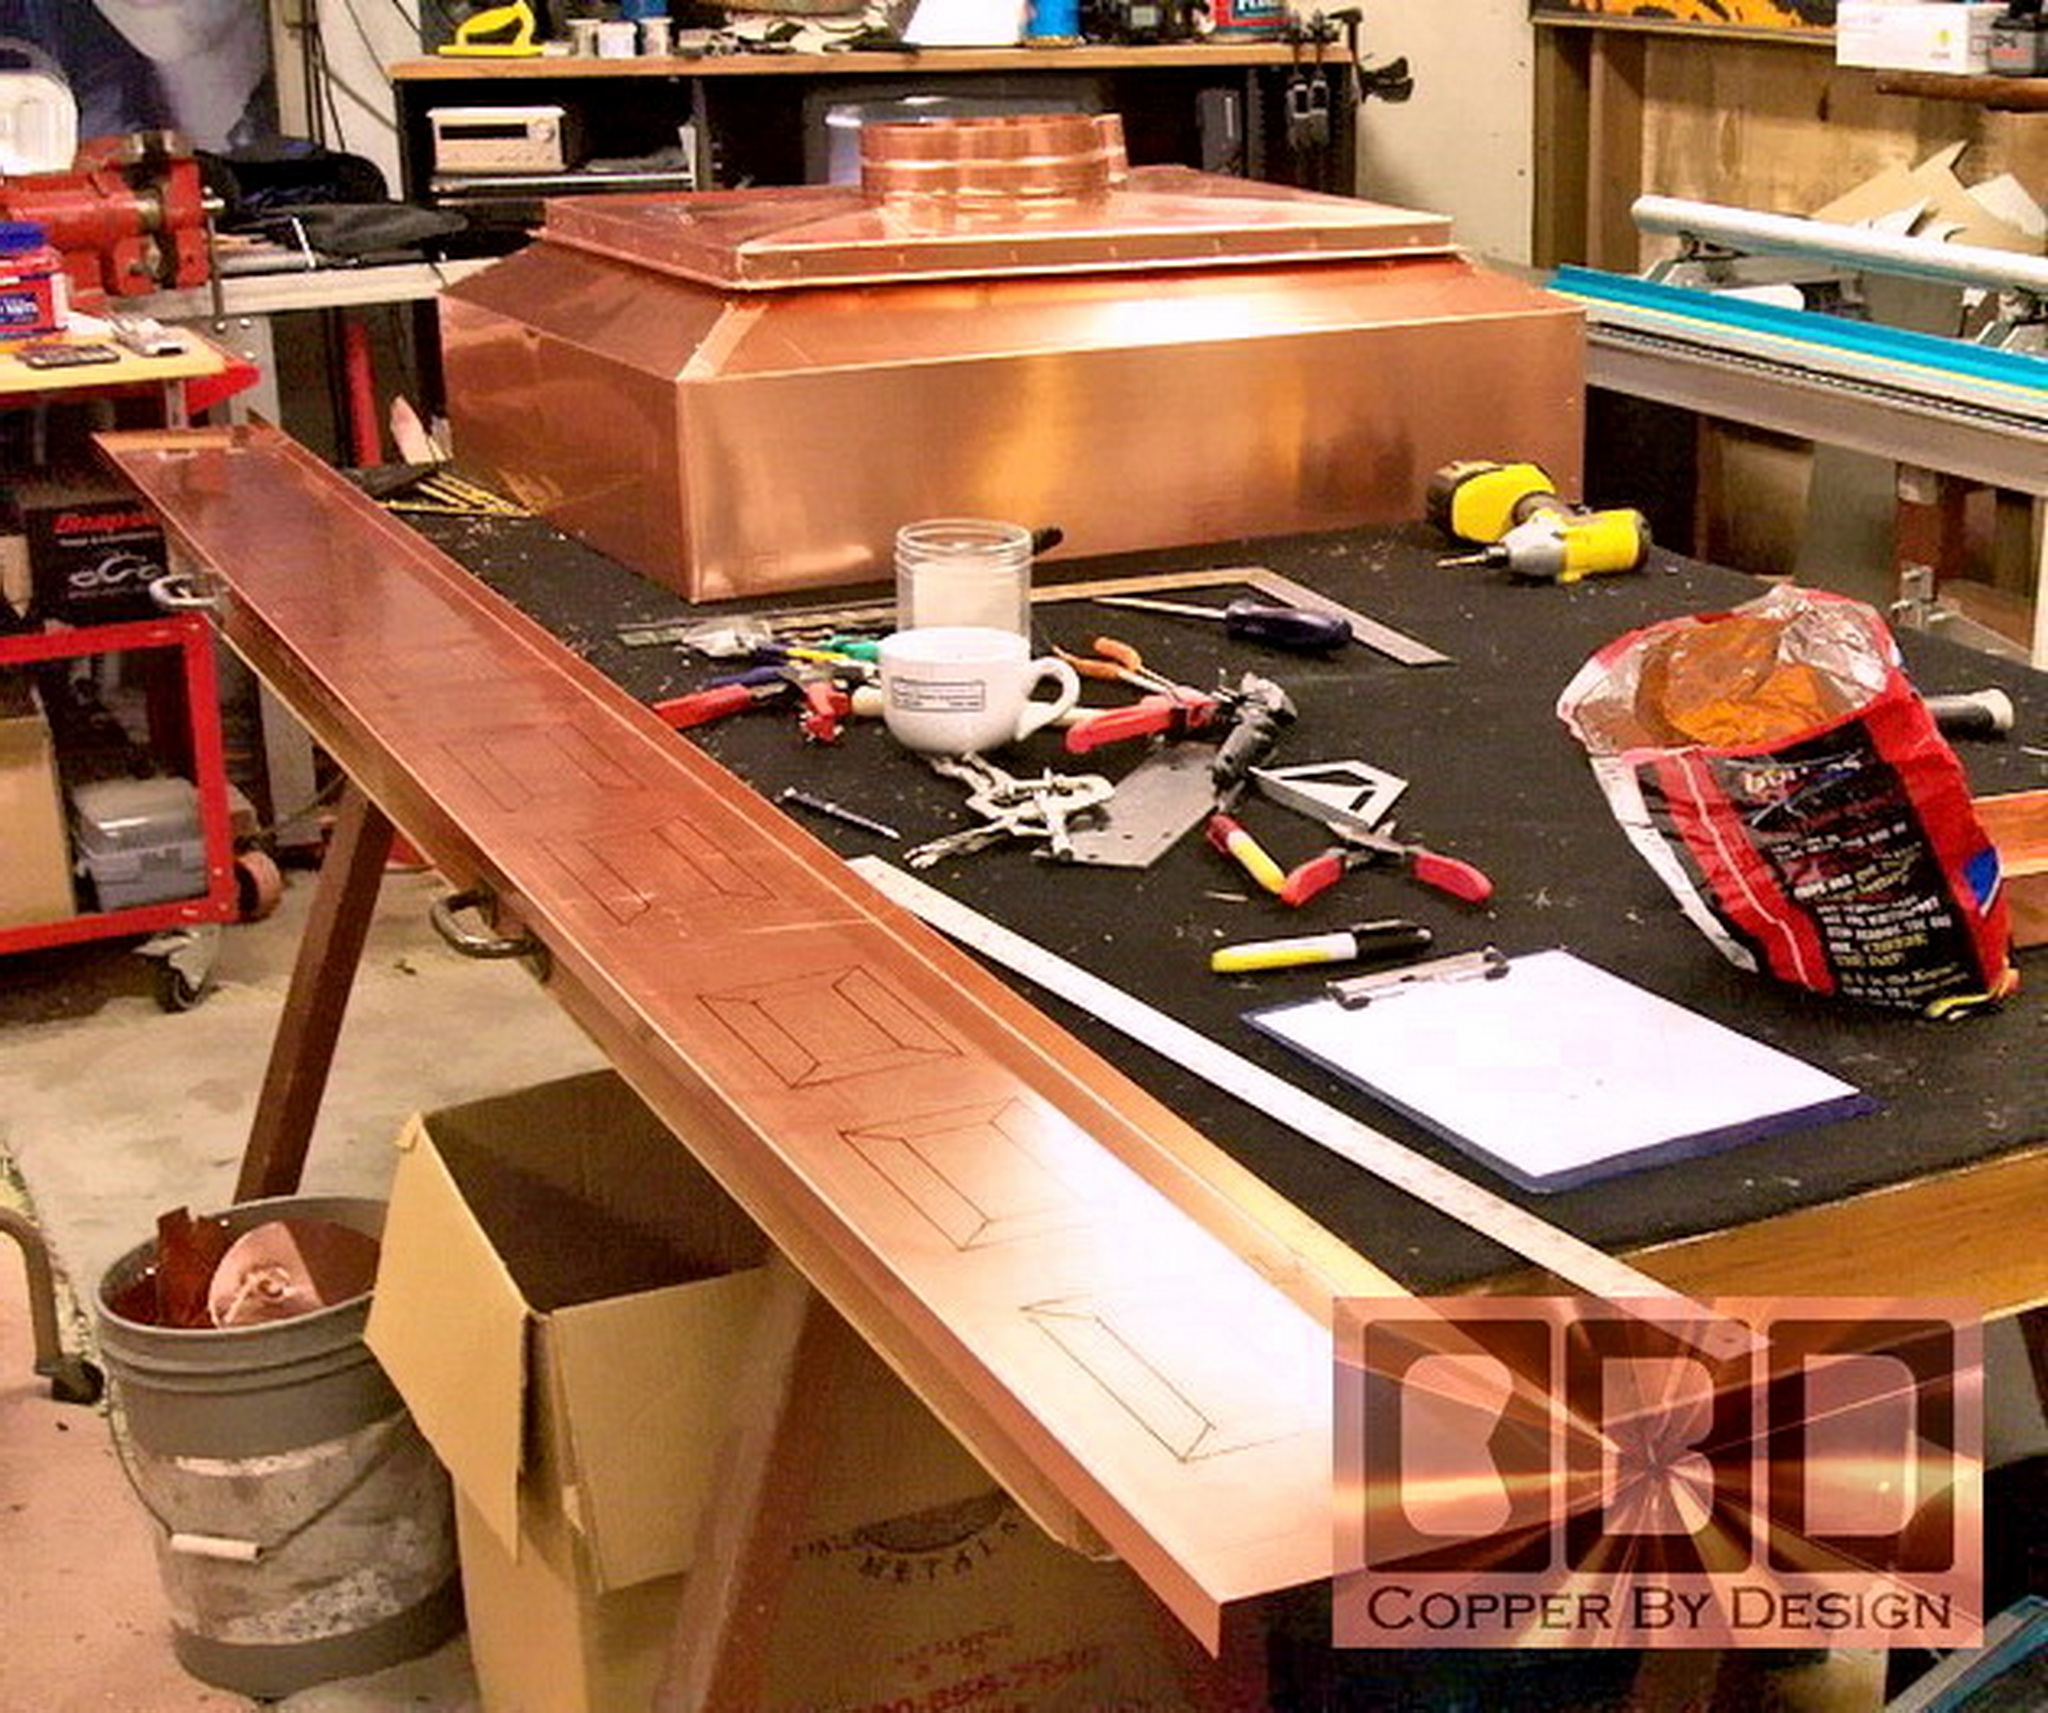
Our work table is 4' x 8'.
The sheet of copper shown come 10' long and 3 feet wide. Keep in mind
that the copper sheet metal still has a clear plastic film over one
side that will be used for the outside of this copper chimney cap to
protect it from finger prints and scratches. It is to be pealed off
after installation. The cap angles need to be carefully calculated
so there are no errors or unexpected complications. We have to think
several steps ahead, like working out the problems of a Rubixs Cube.
If we are in error, we may ruin some very costly copper material.
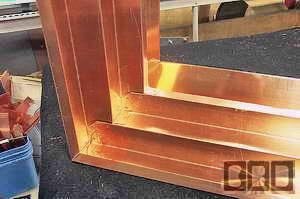
The lower section design has been drawn
out on the copper on both the film side and the underside, since there
are several bends and cuts to be made in both direction. It is
careful work to bend and fasten the corners here so they are perfect
right angles before riveting them together. The cuts in the inside
of the corners are also tricky to calculate so it will fit together
just right.
This shows the under side of the cap. The second photo shows the
three sides bent and folded. It feels like it is really coming
together now.
|
|
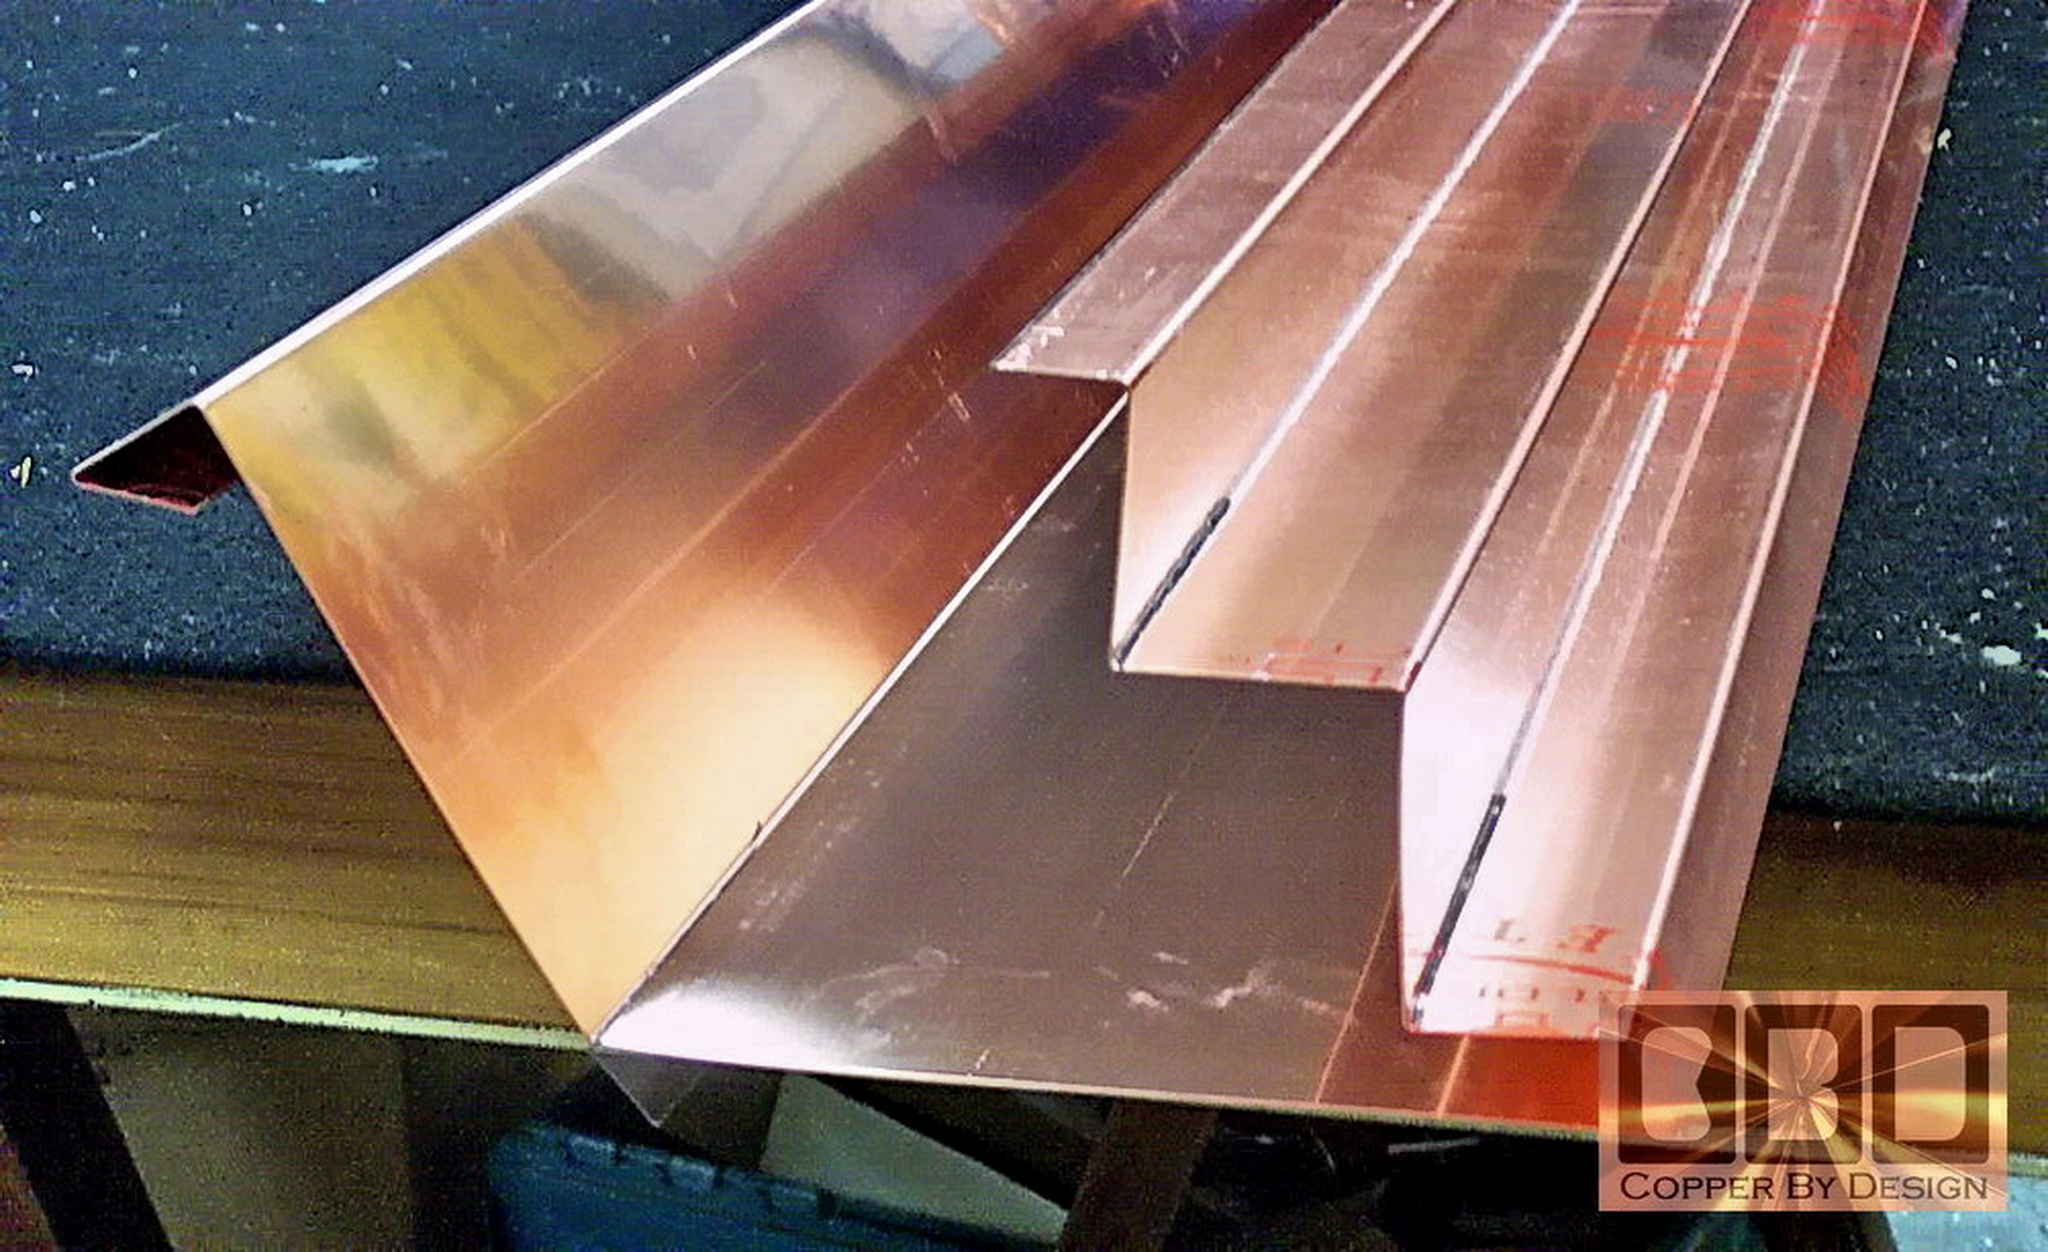
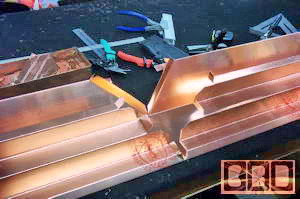
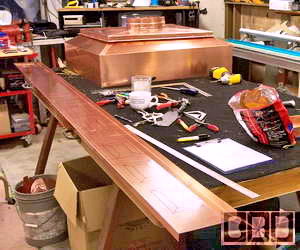
It is very important the angles will be true 90
degrees. It was still plenty wobbly at this point without the fourth
side riveted in place.
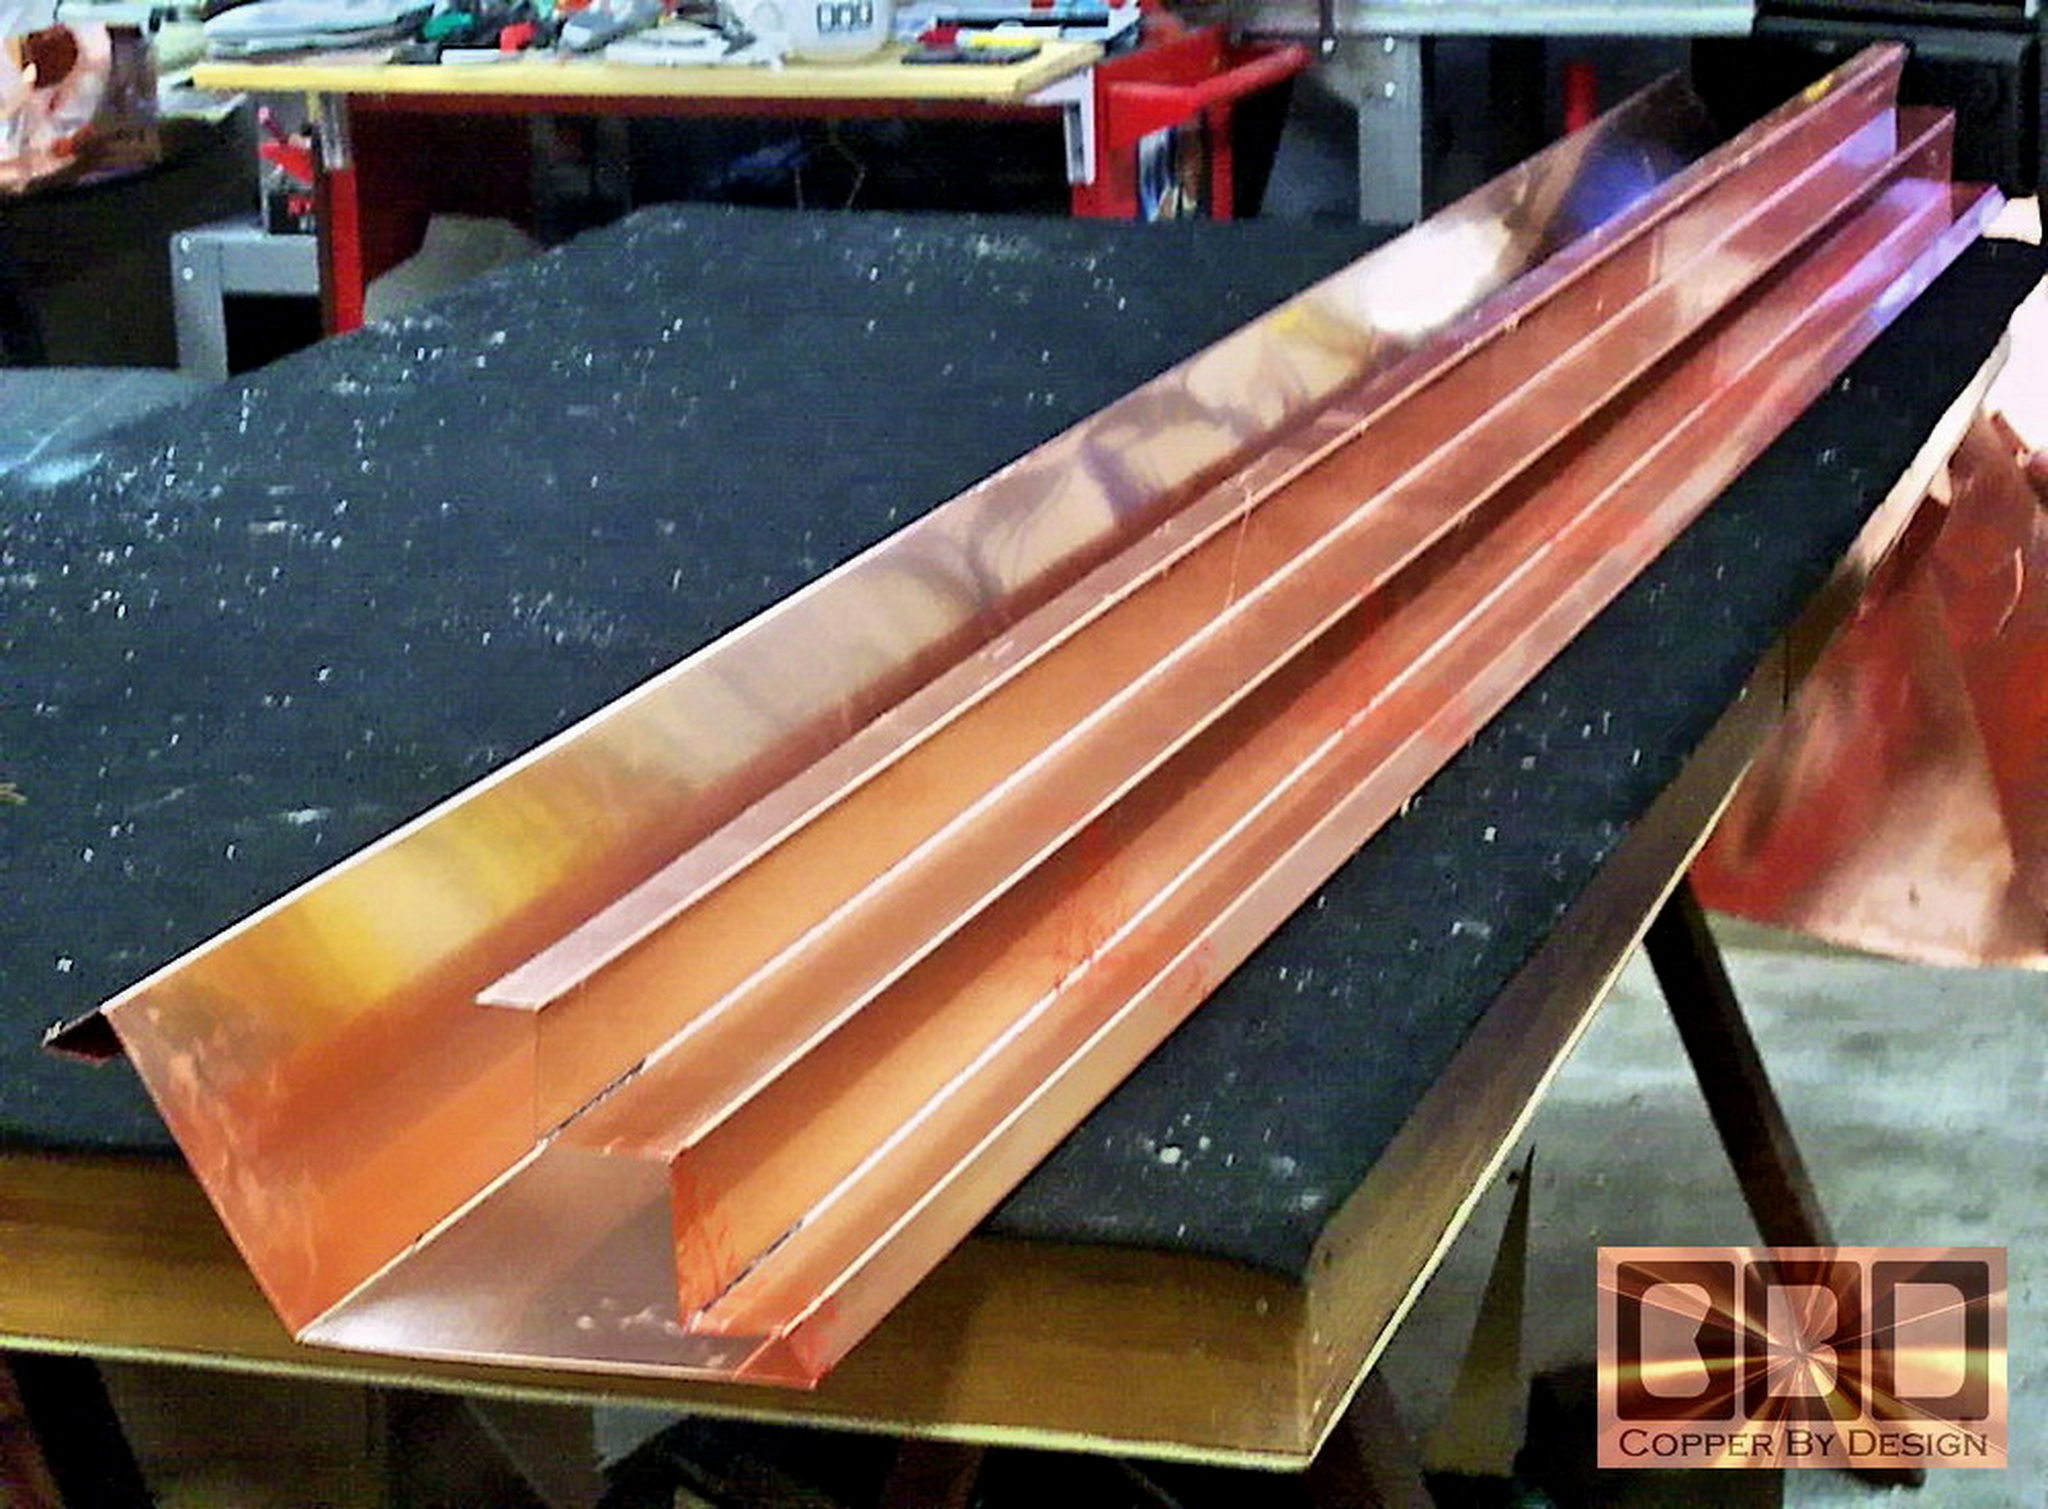
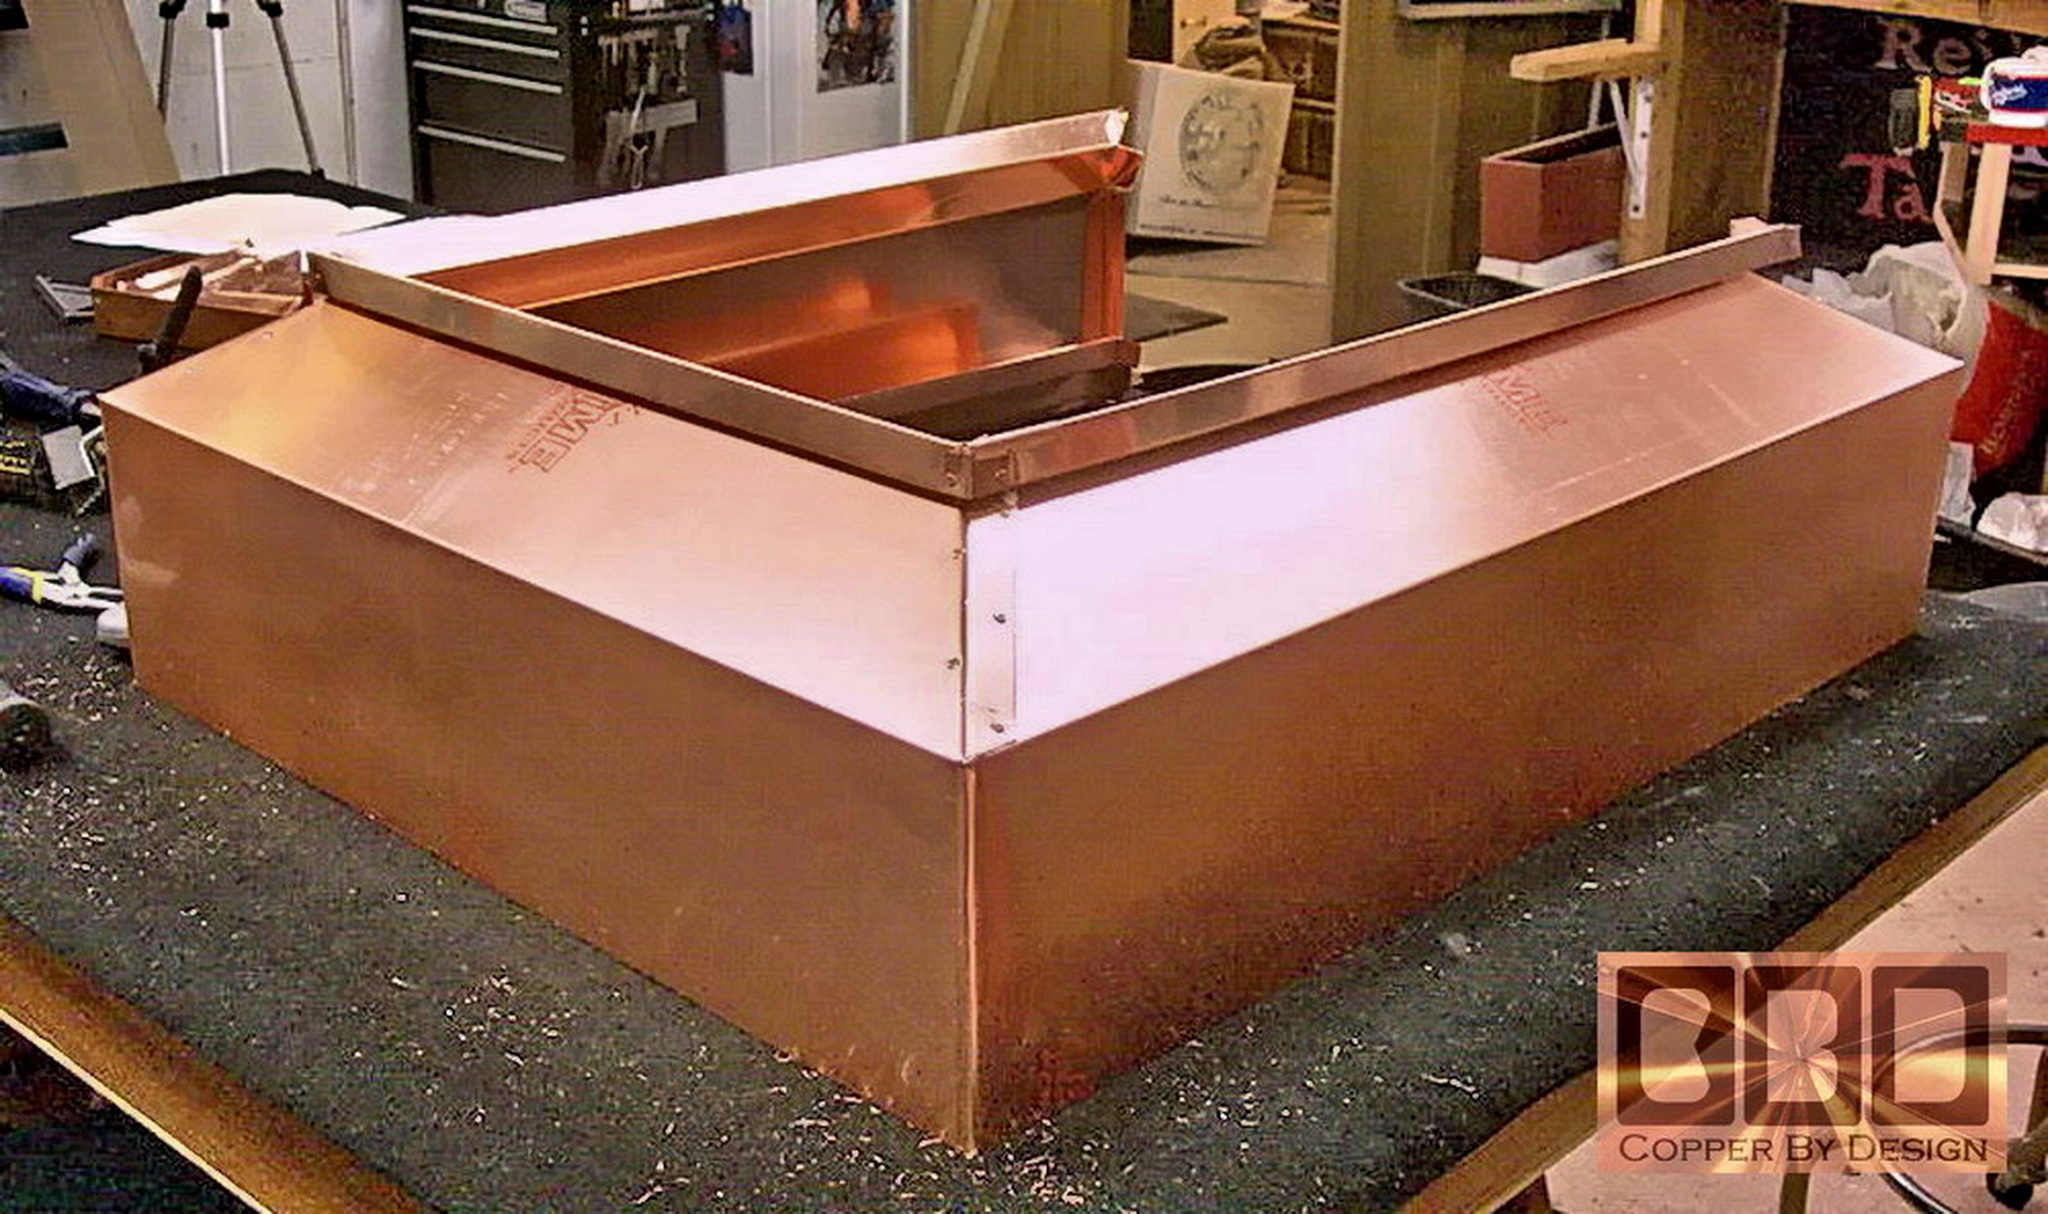
The lower body of this cap is one piece on 3 sides
as seen here. It is only 8" high on the flat side wall of it,
but that piece of copper was 25.5" wide and nearly 10' long. We
then made the back side and seamed the base together with a pair of
1" overlapping seams over both back corners. It was no longer wobbly.
|
|
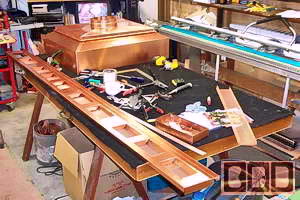
Here is the underside standing up to finish riveting
the corners together. The photos below in this section are from the
top side. The seams are so tight that even ants should not be
able to get inside the base. The client may place a layer of fiberglass
insulation on the wood frame first to seal it from under the base to
keep out insects and drafts.
|
|
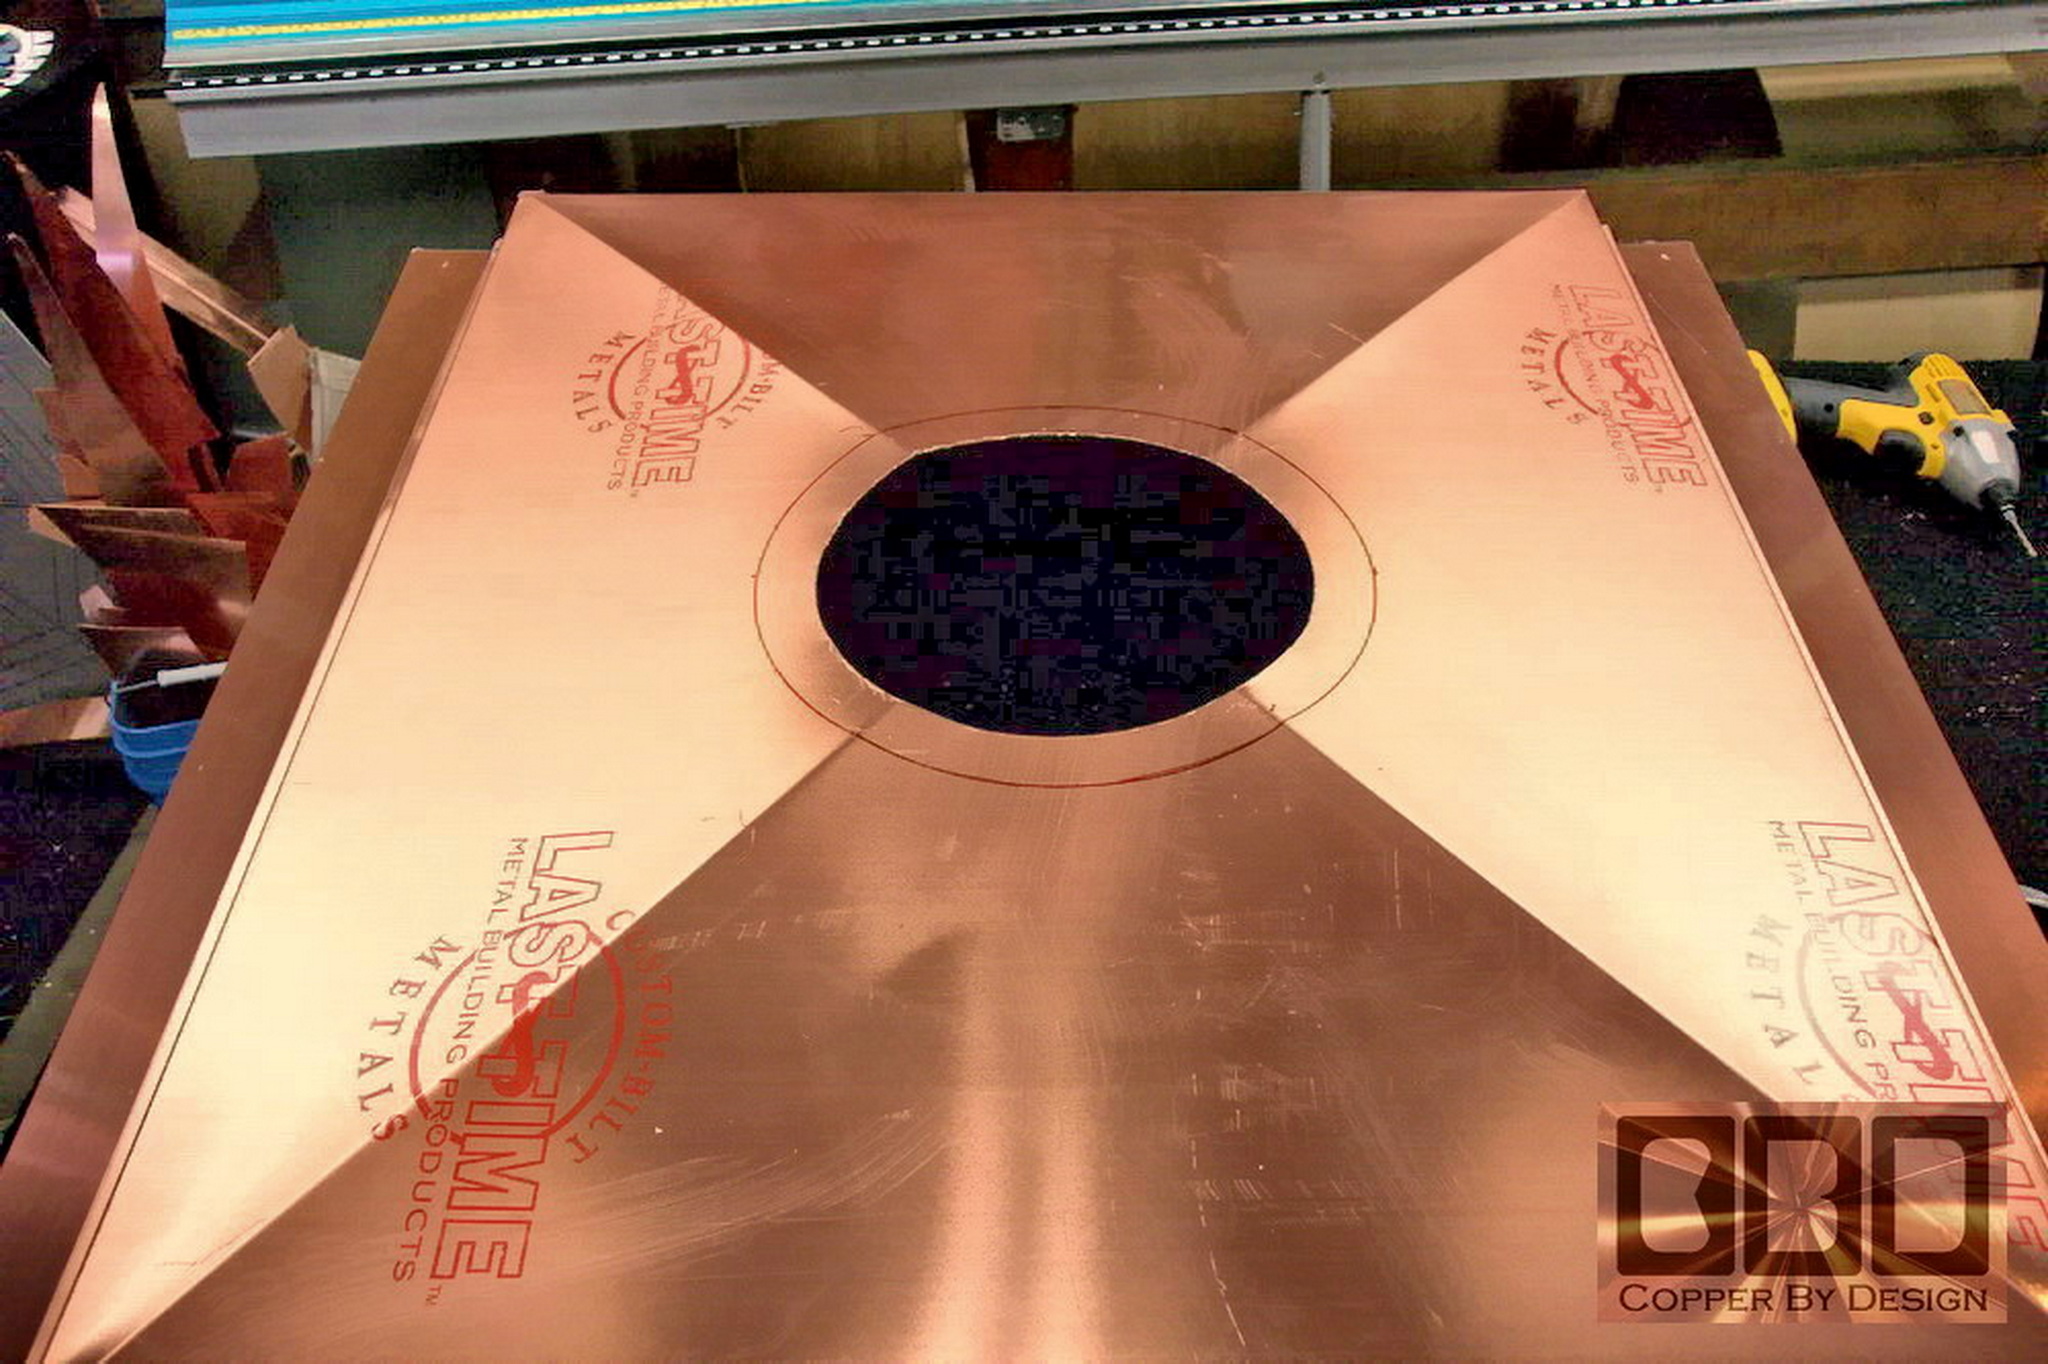
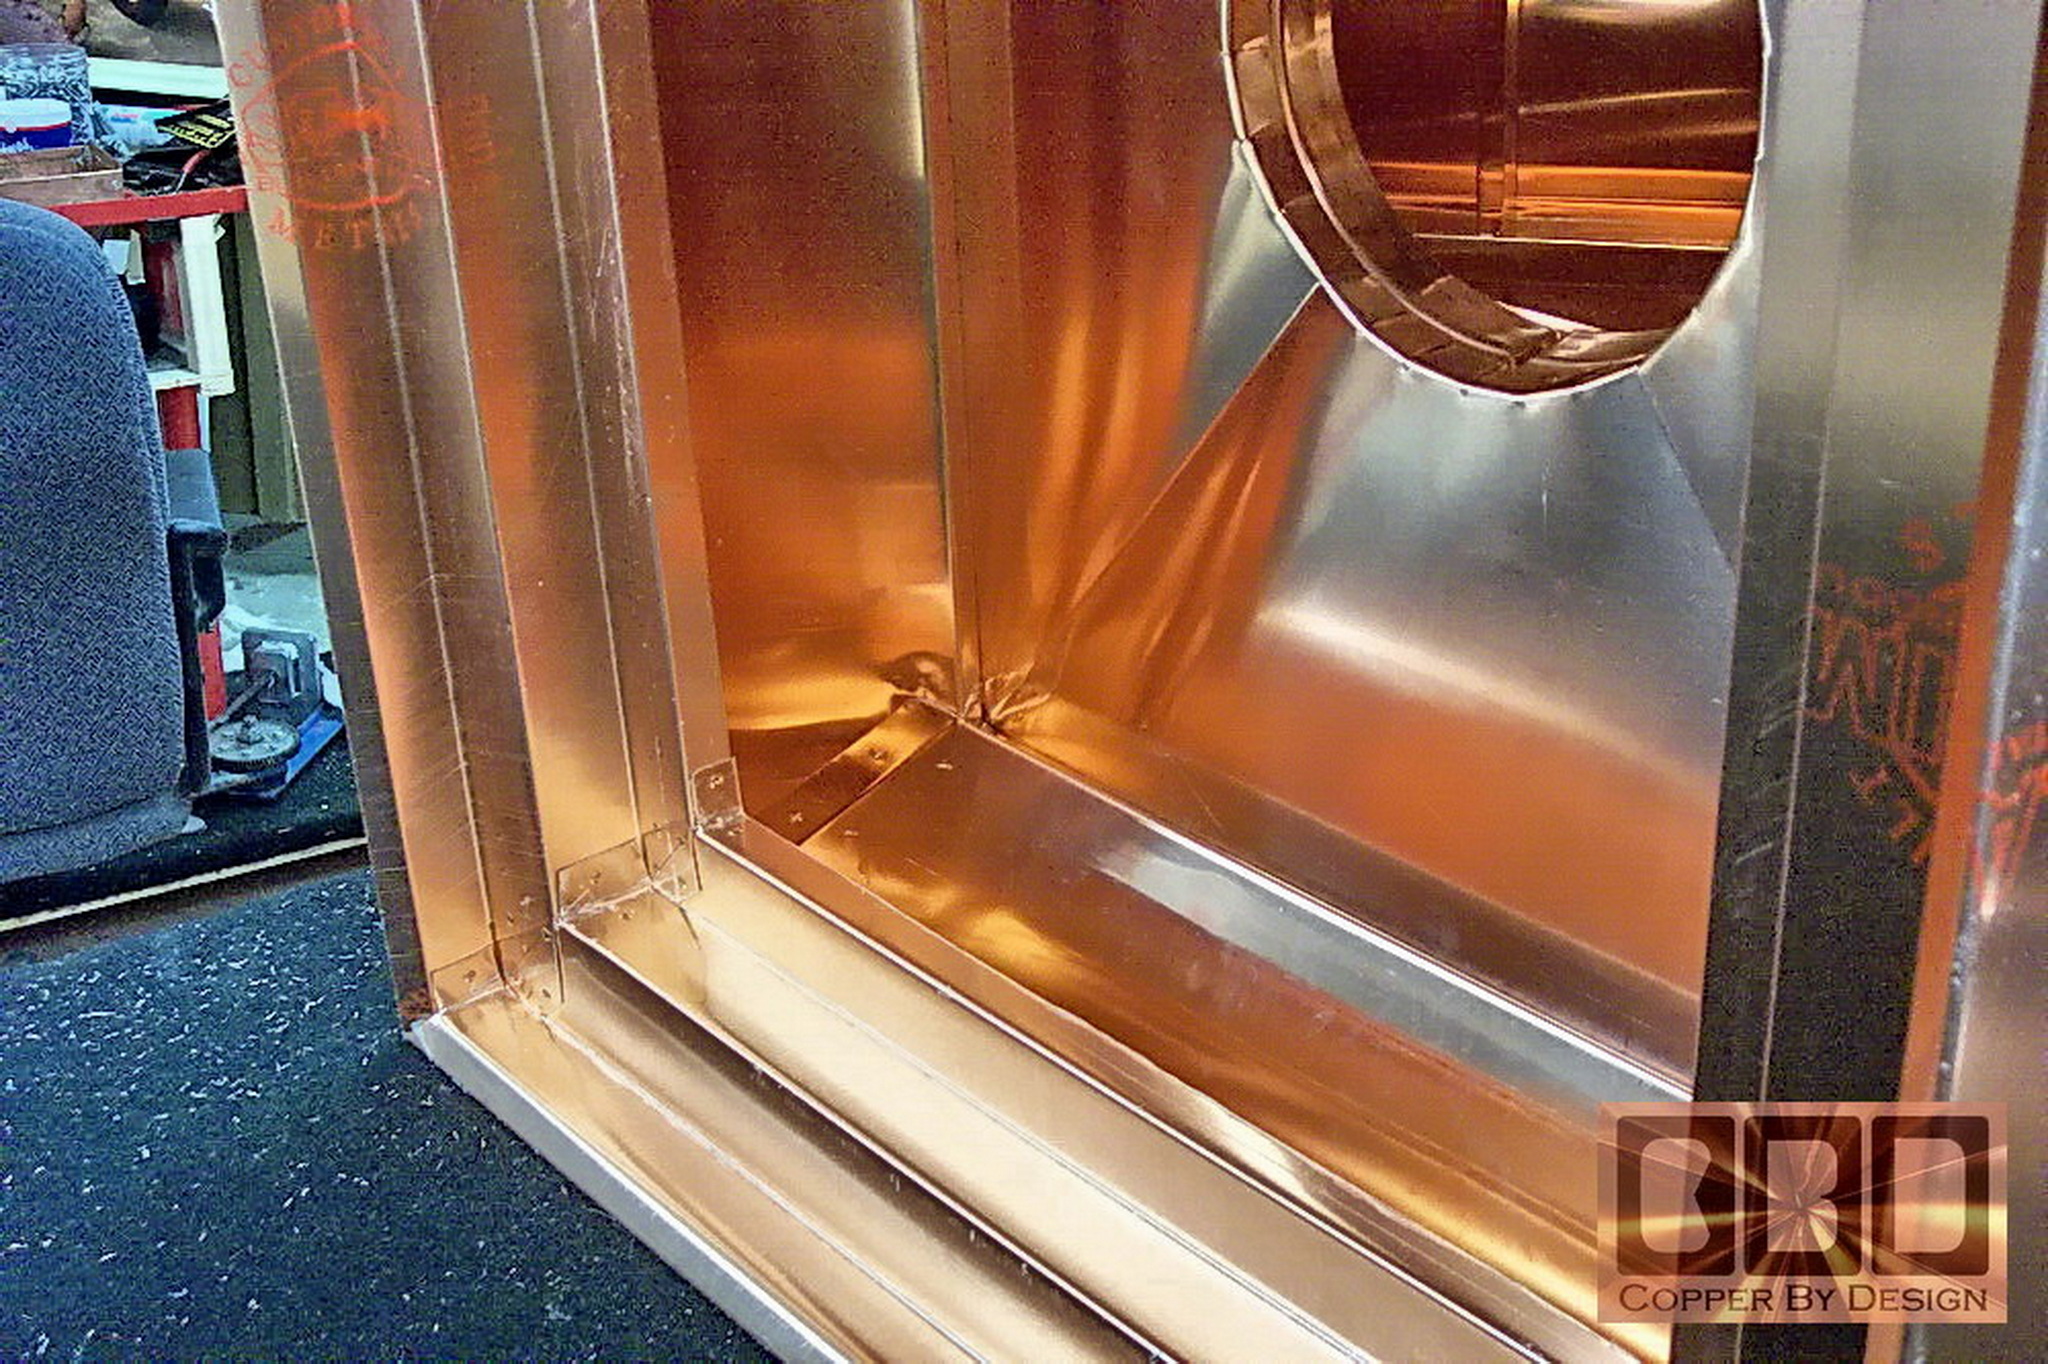
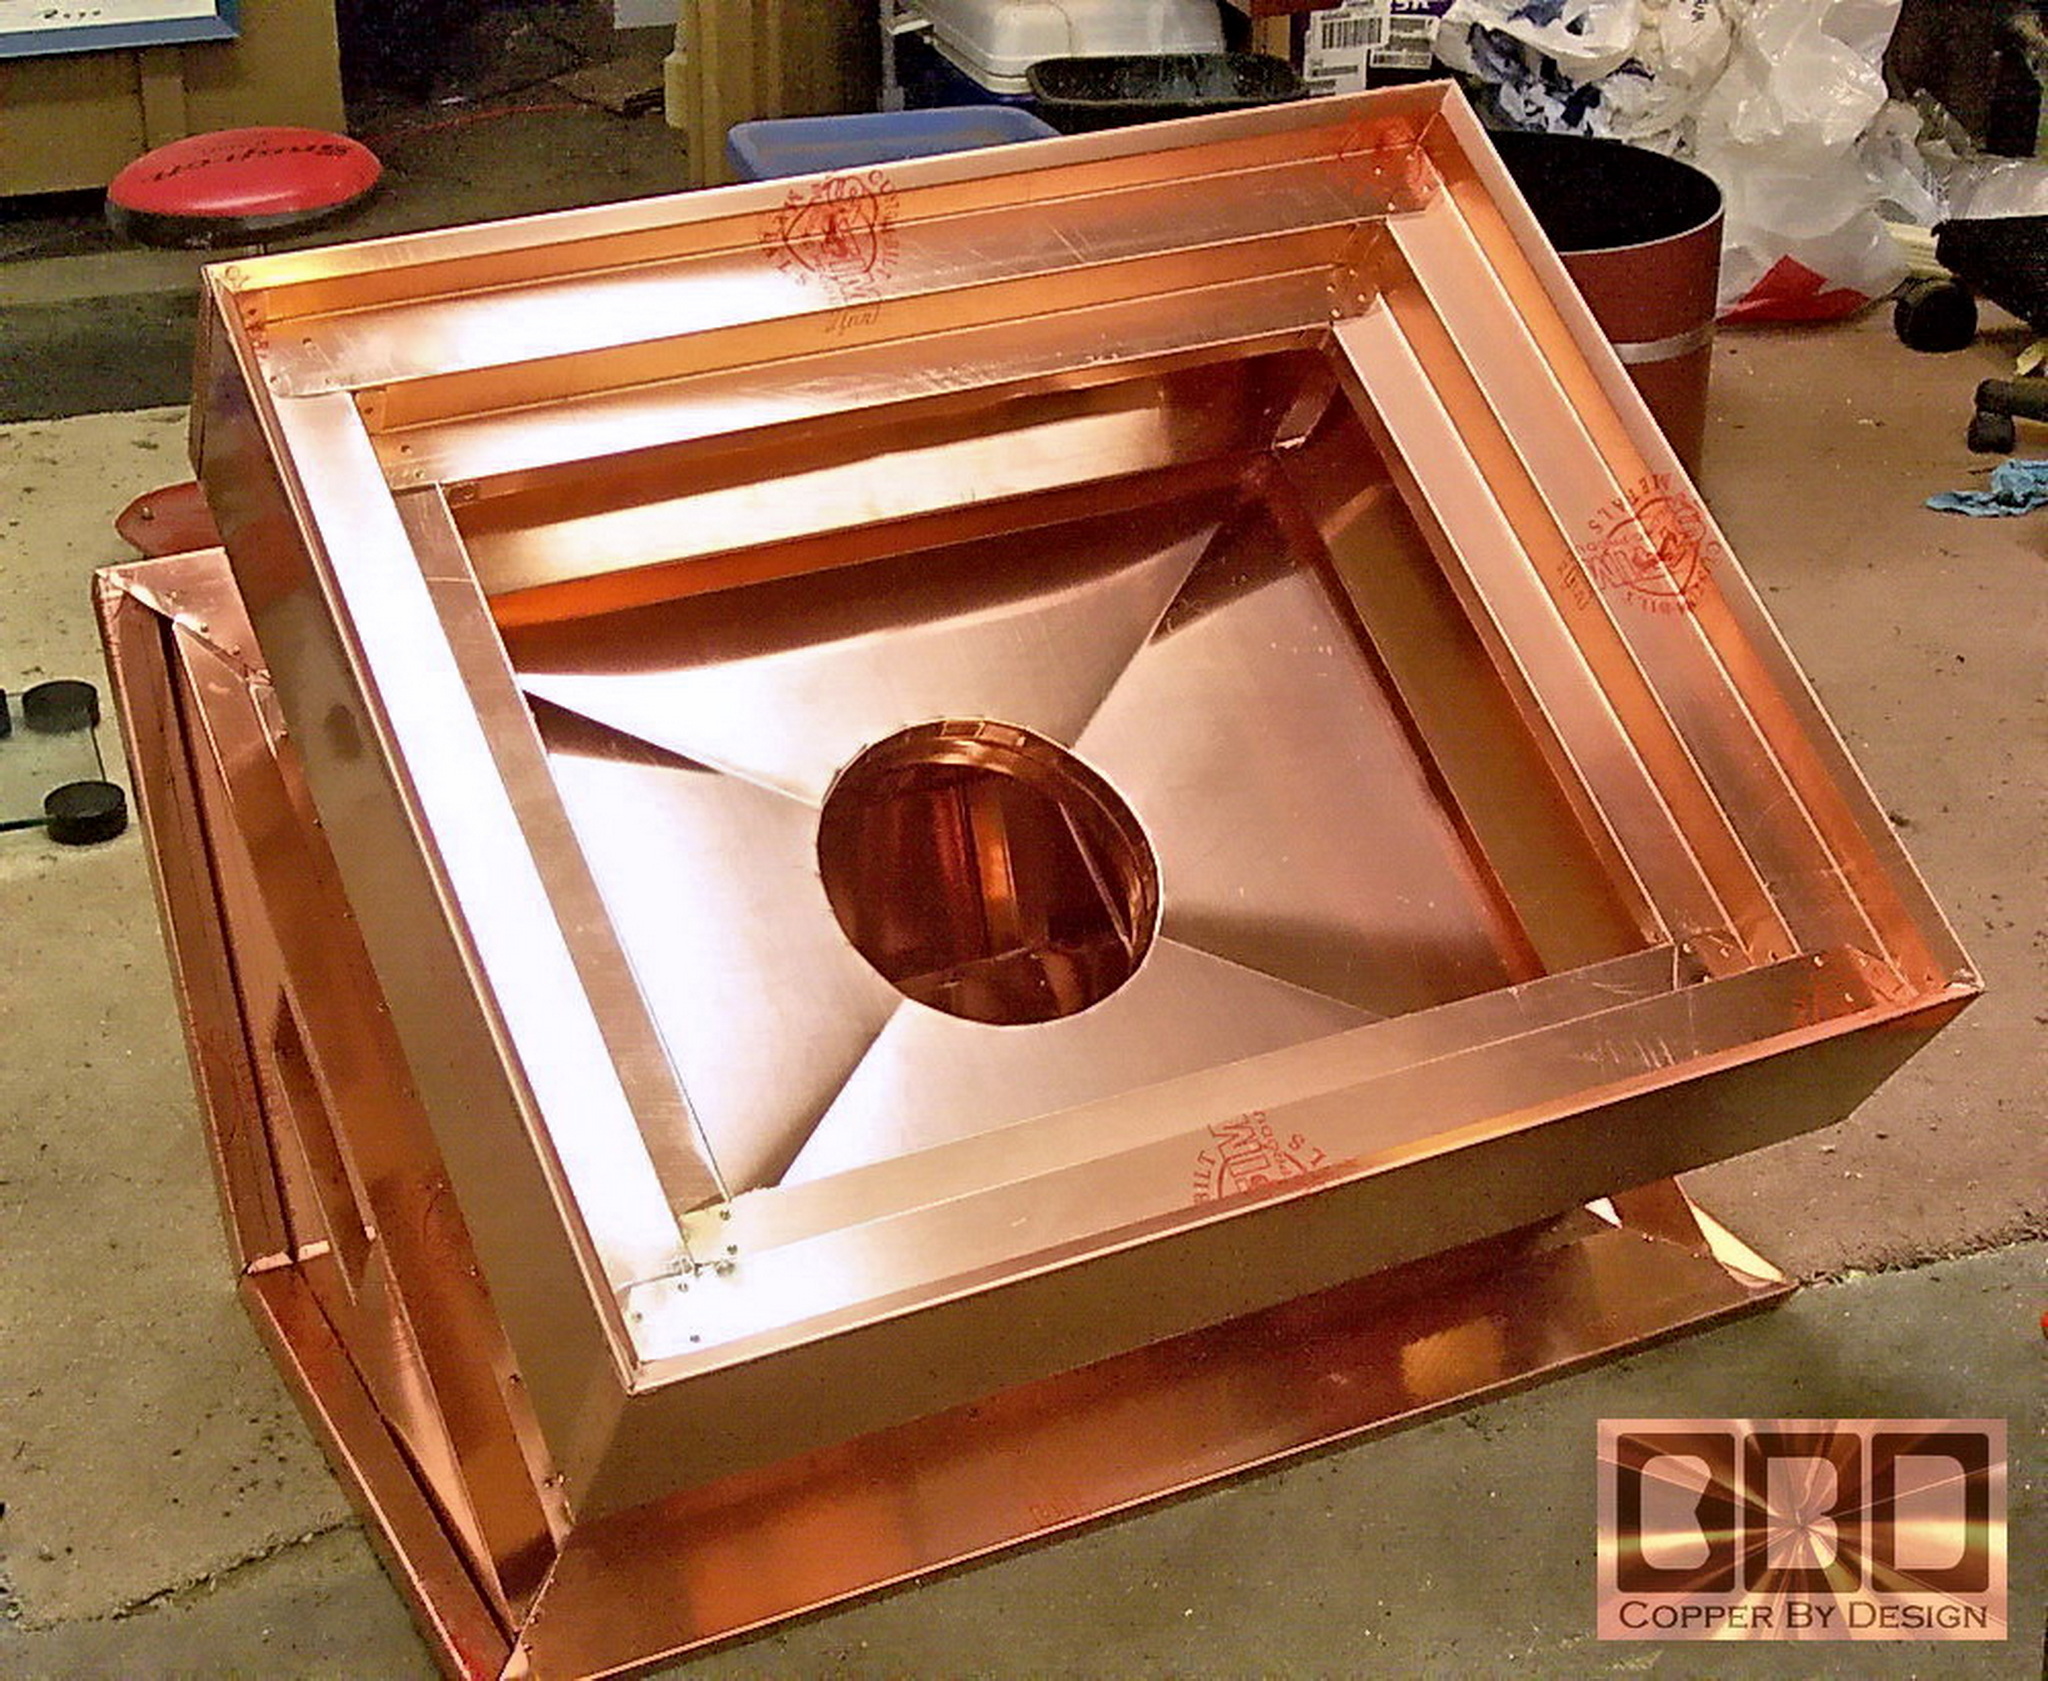
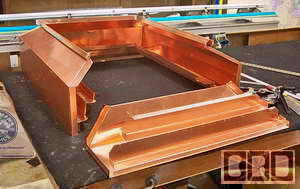
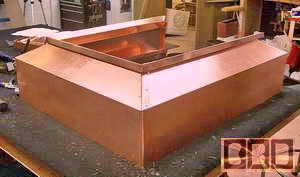
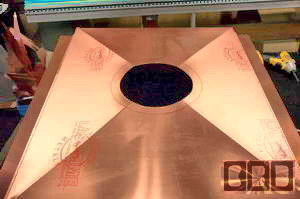
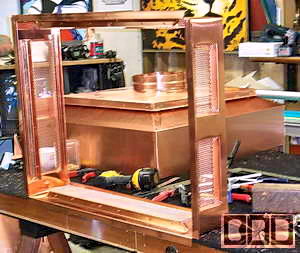
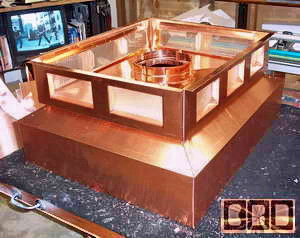
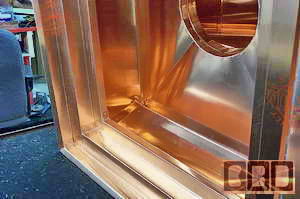
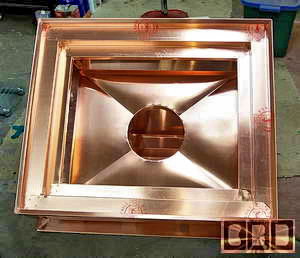
Here is the base section
getting the flue pan secured in place. Designed to make sure any rain
that could blow into the screened area will have to drain out the sides
still. We cut an 8" hole in the center for the 10.25" outside diameter
flue pipe that will go up the middle. Remember that you can click on
all the photos you see here to get a better look at that photo.
|
|
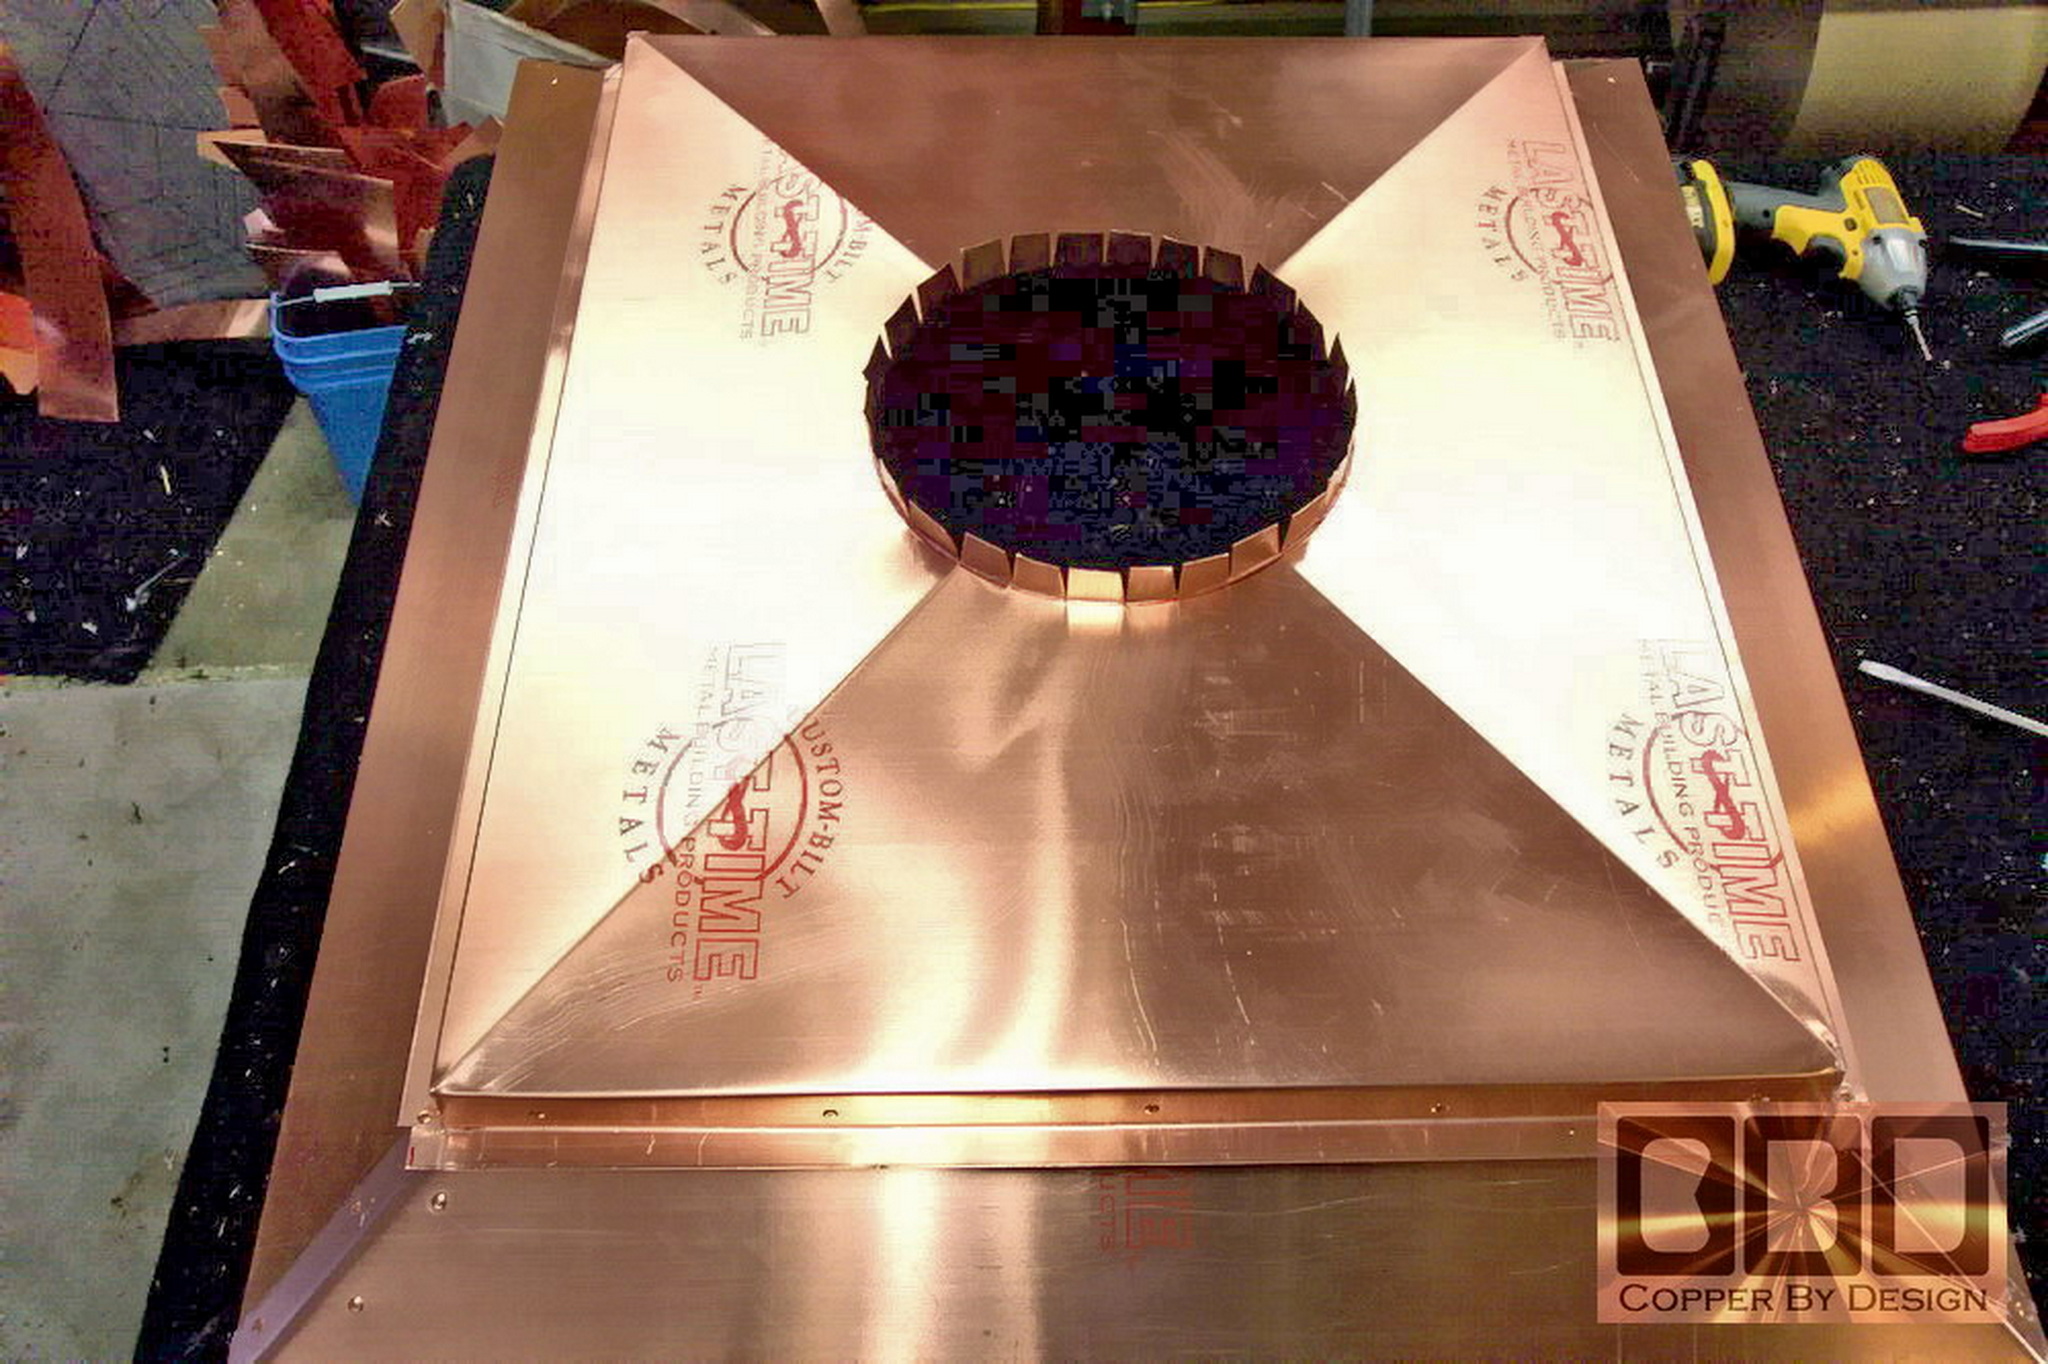
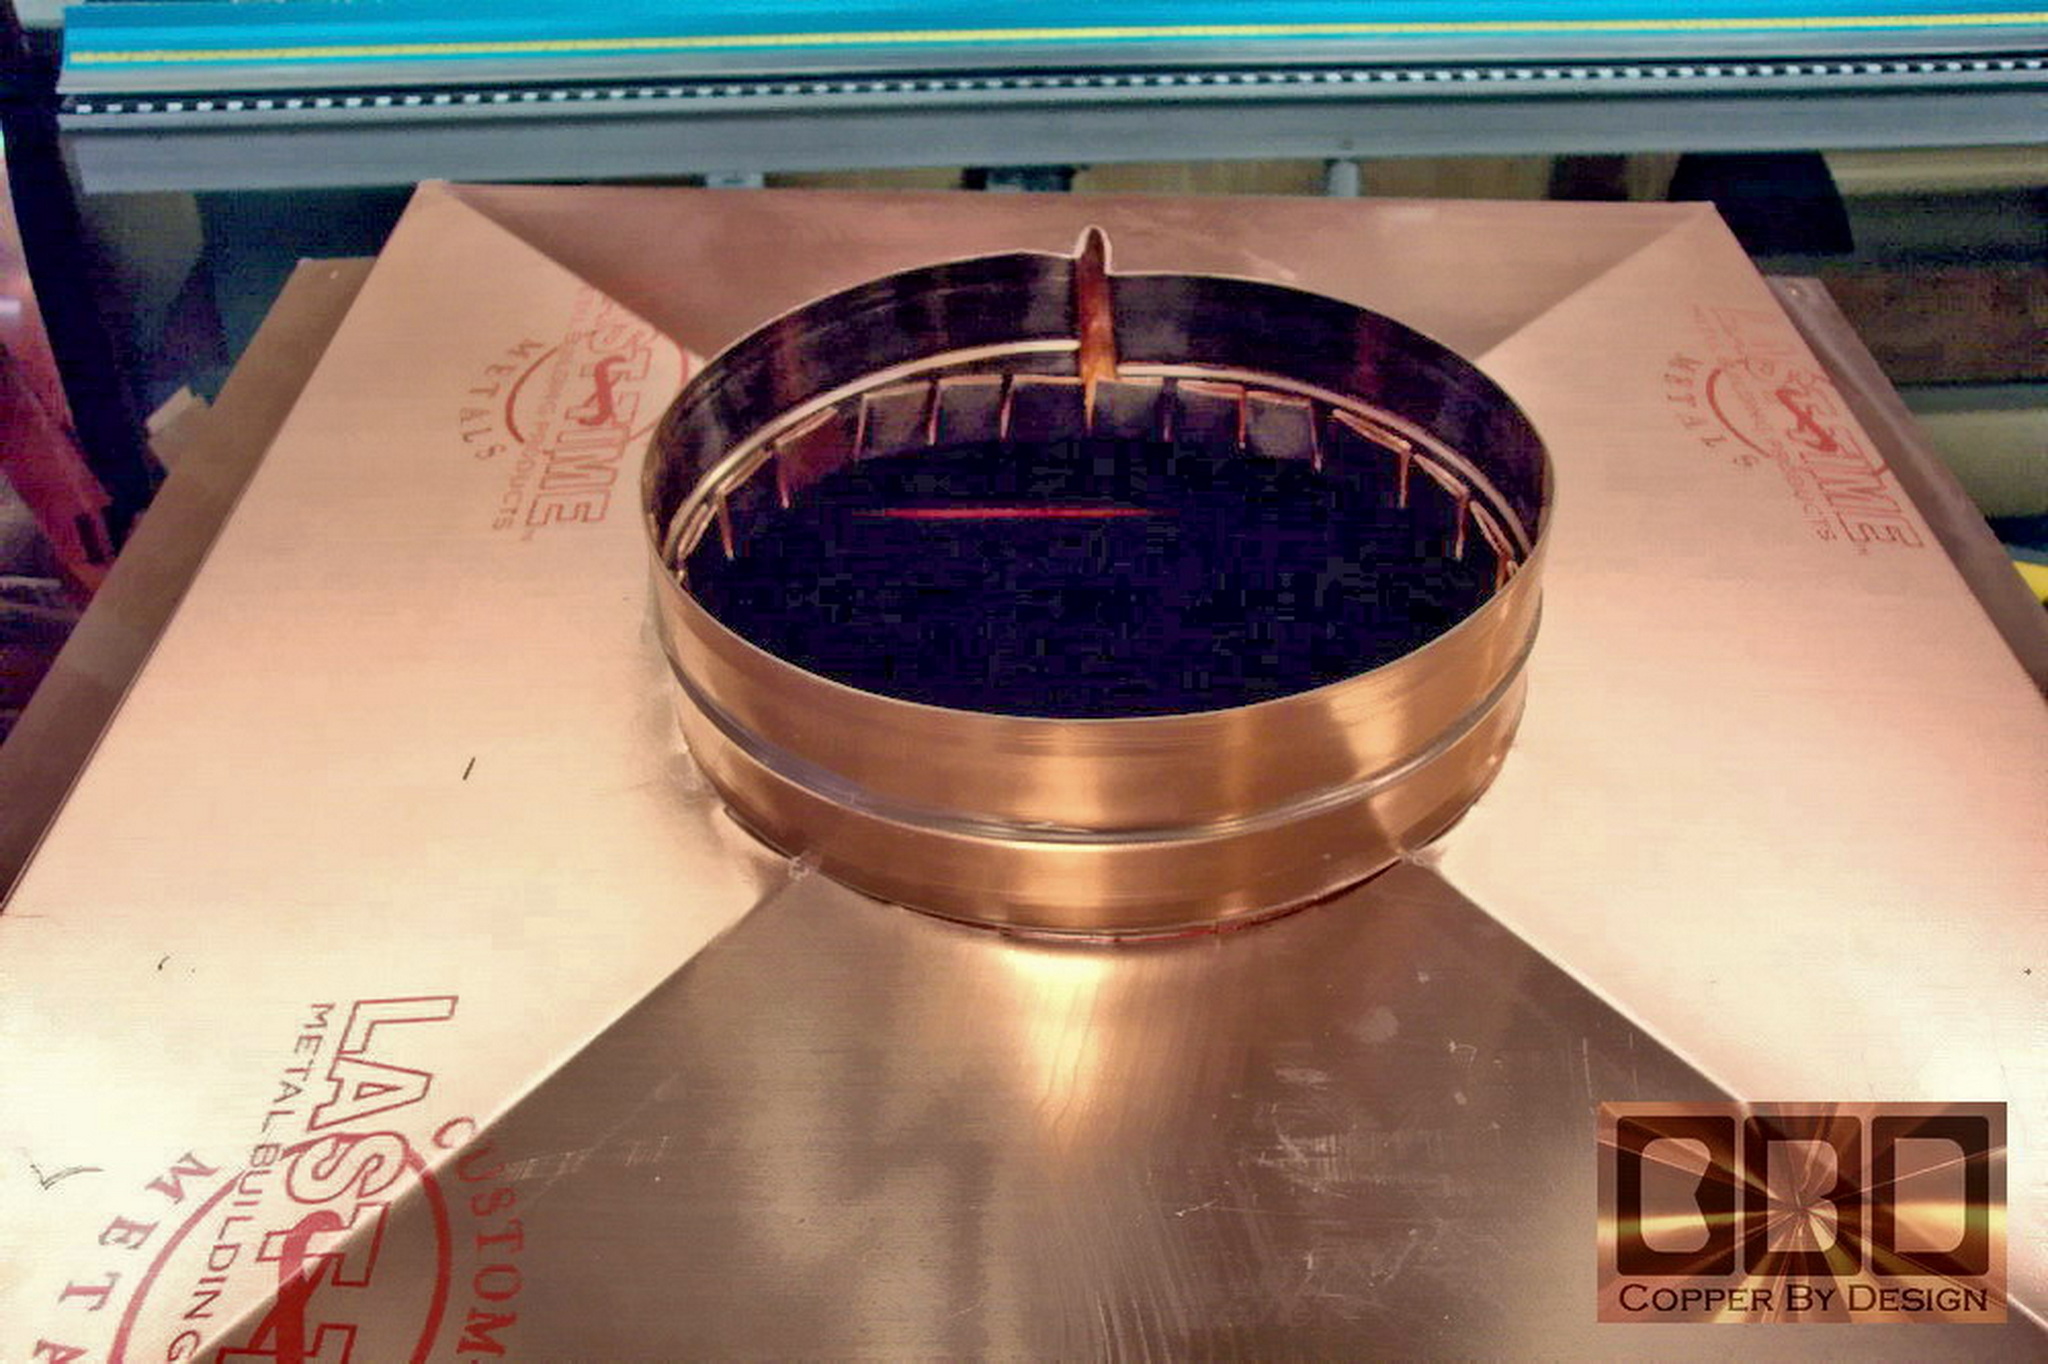
We then cut the tabs to bend up that will be clamped
against the flue pipe. with this copper straps and the stainless steel
bolts with lock nuts. In the photo below I had pealed off the protective
film off the pan. That is why it looks so different.
|
|
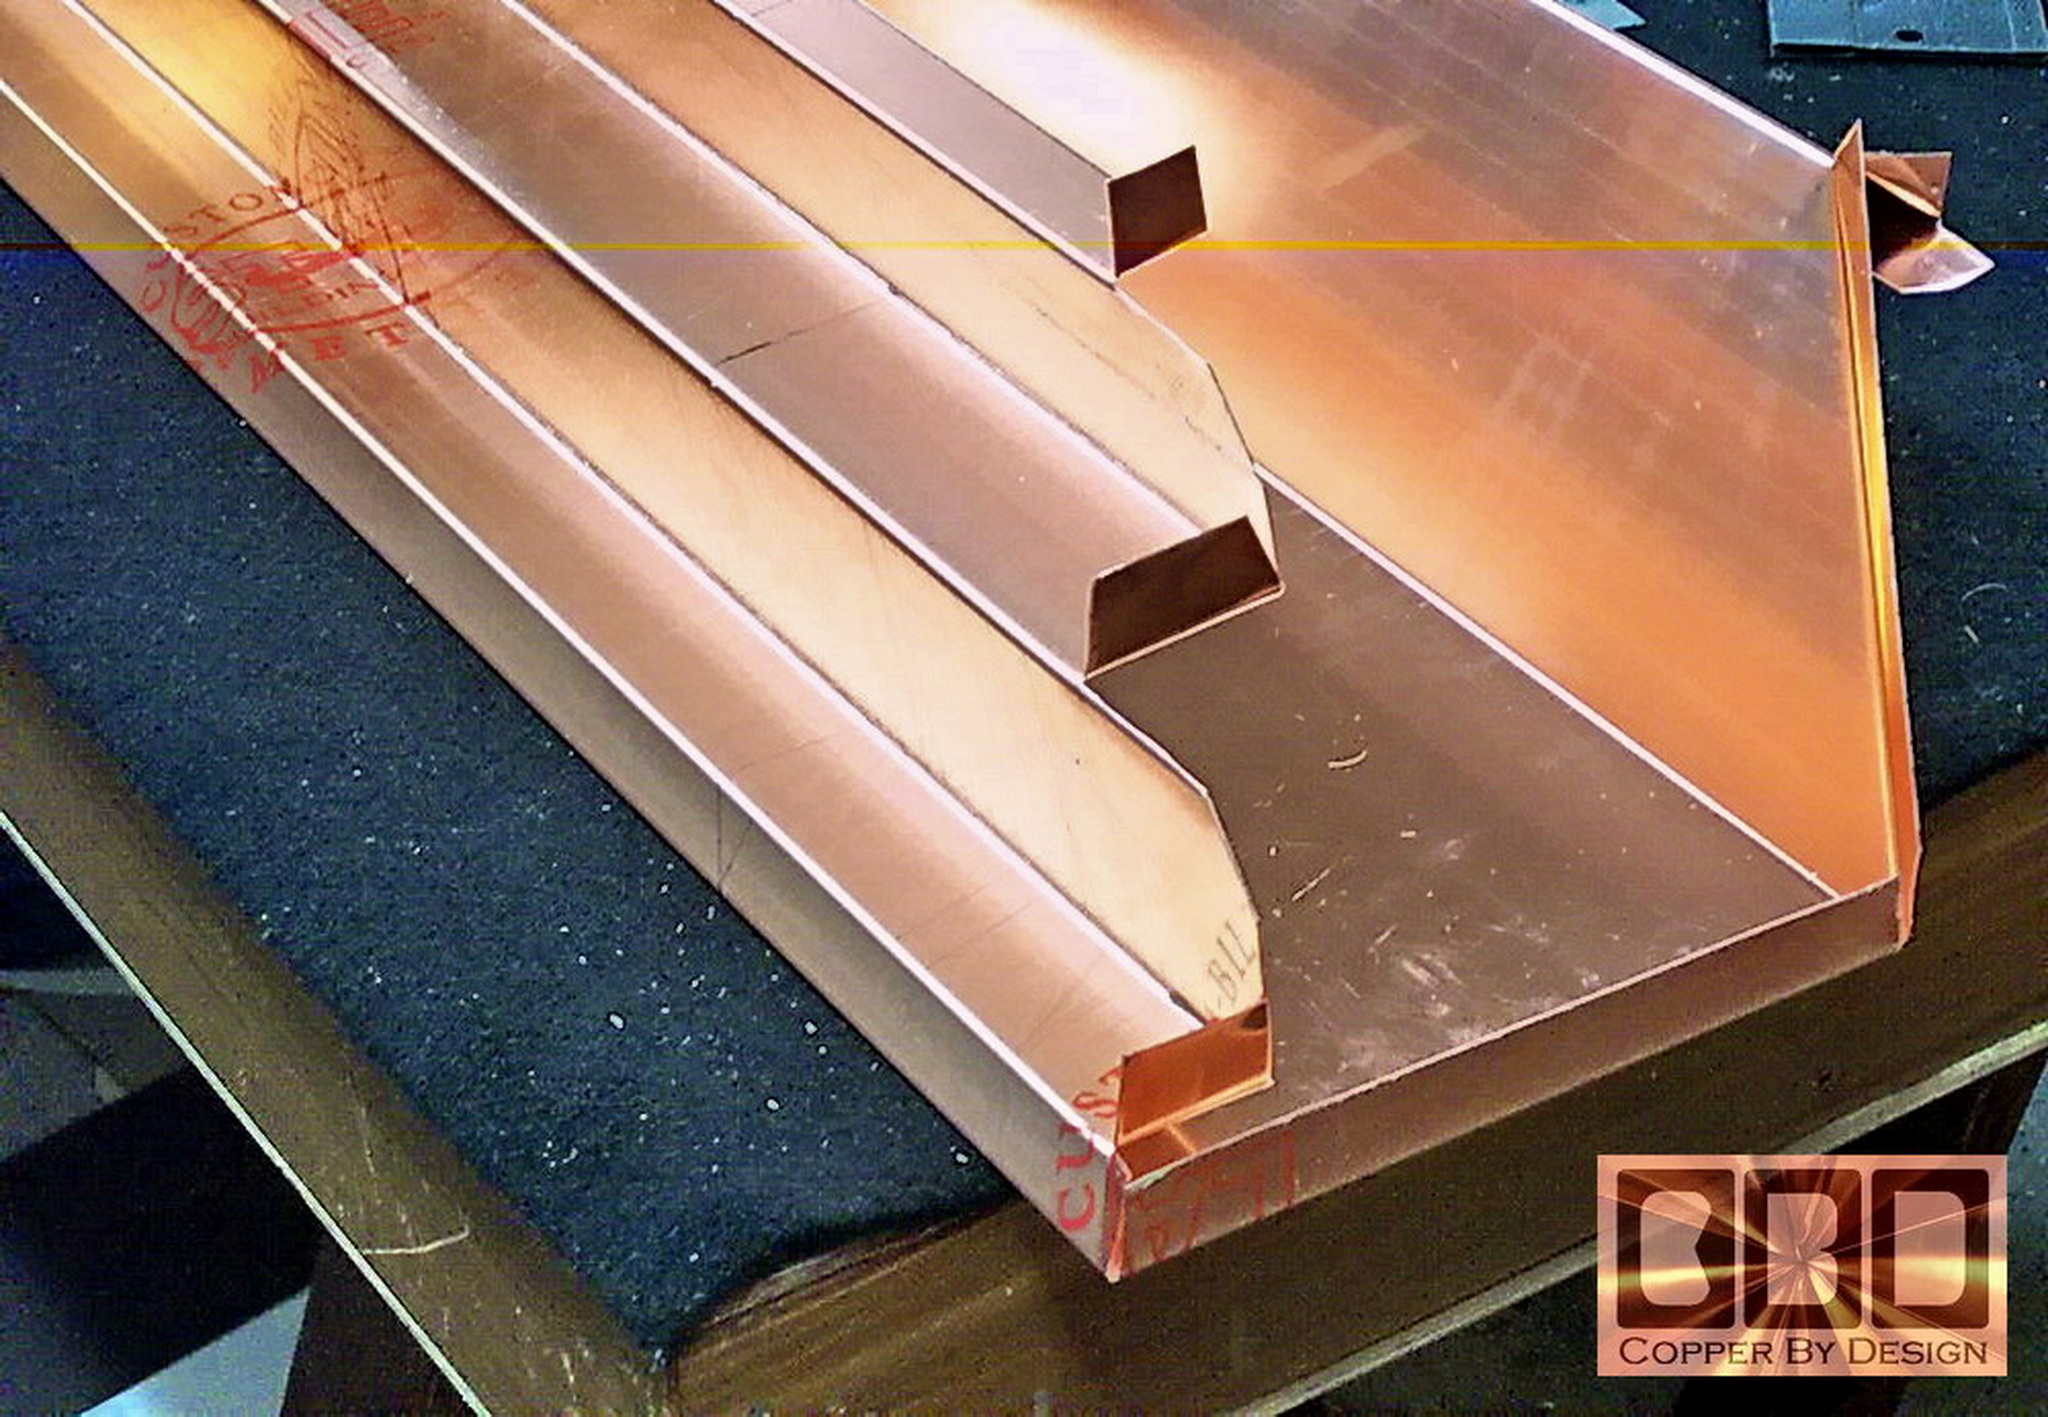
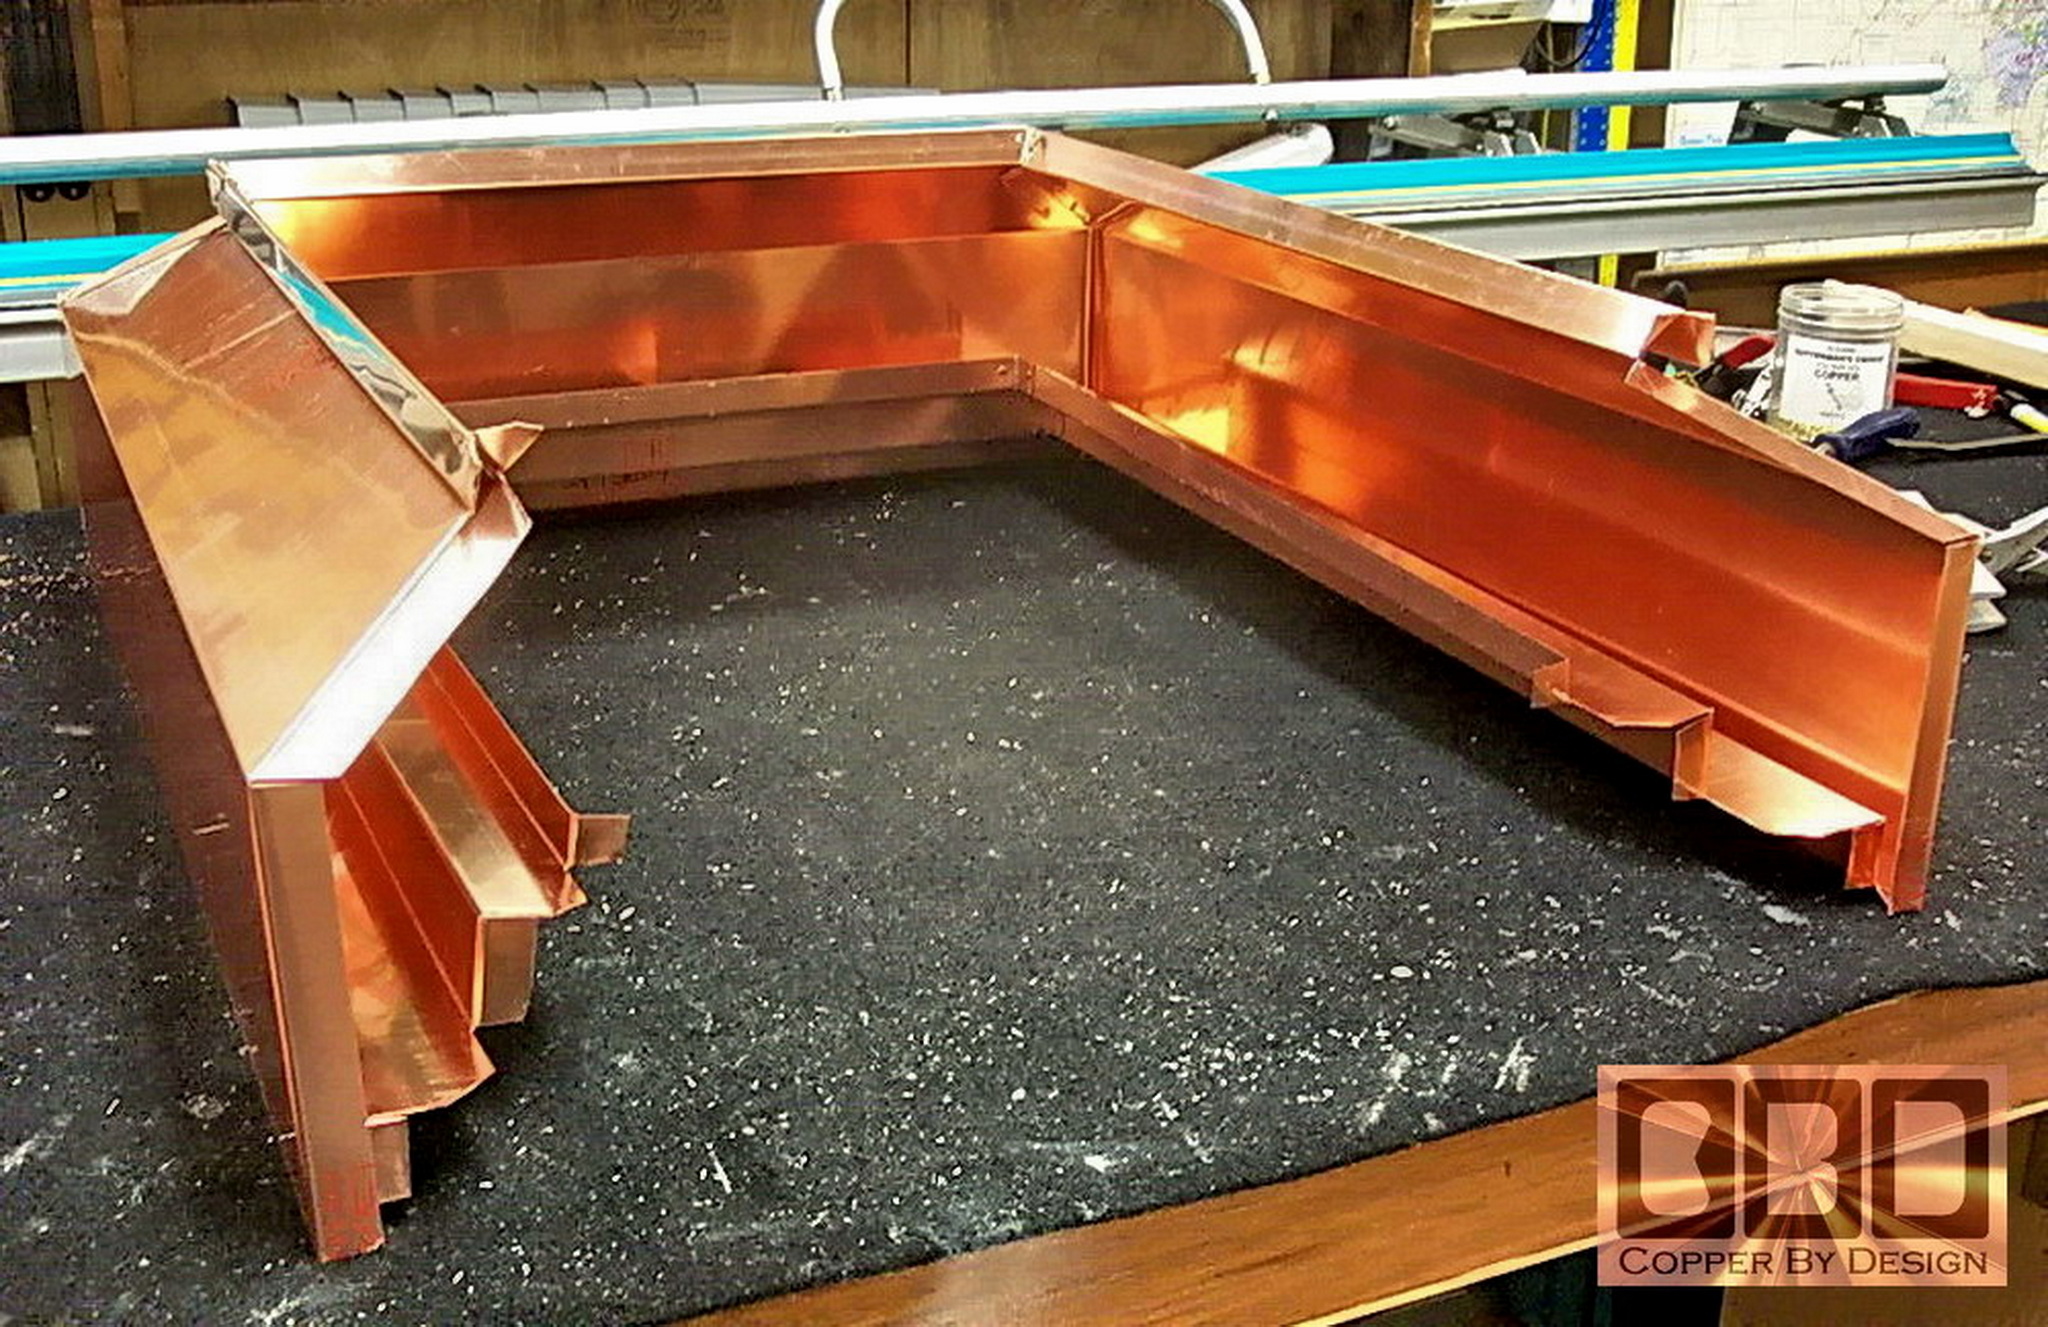
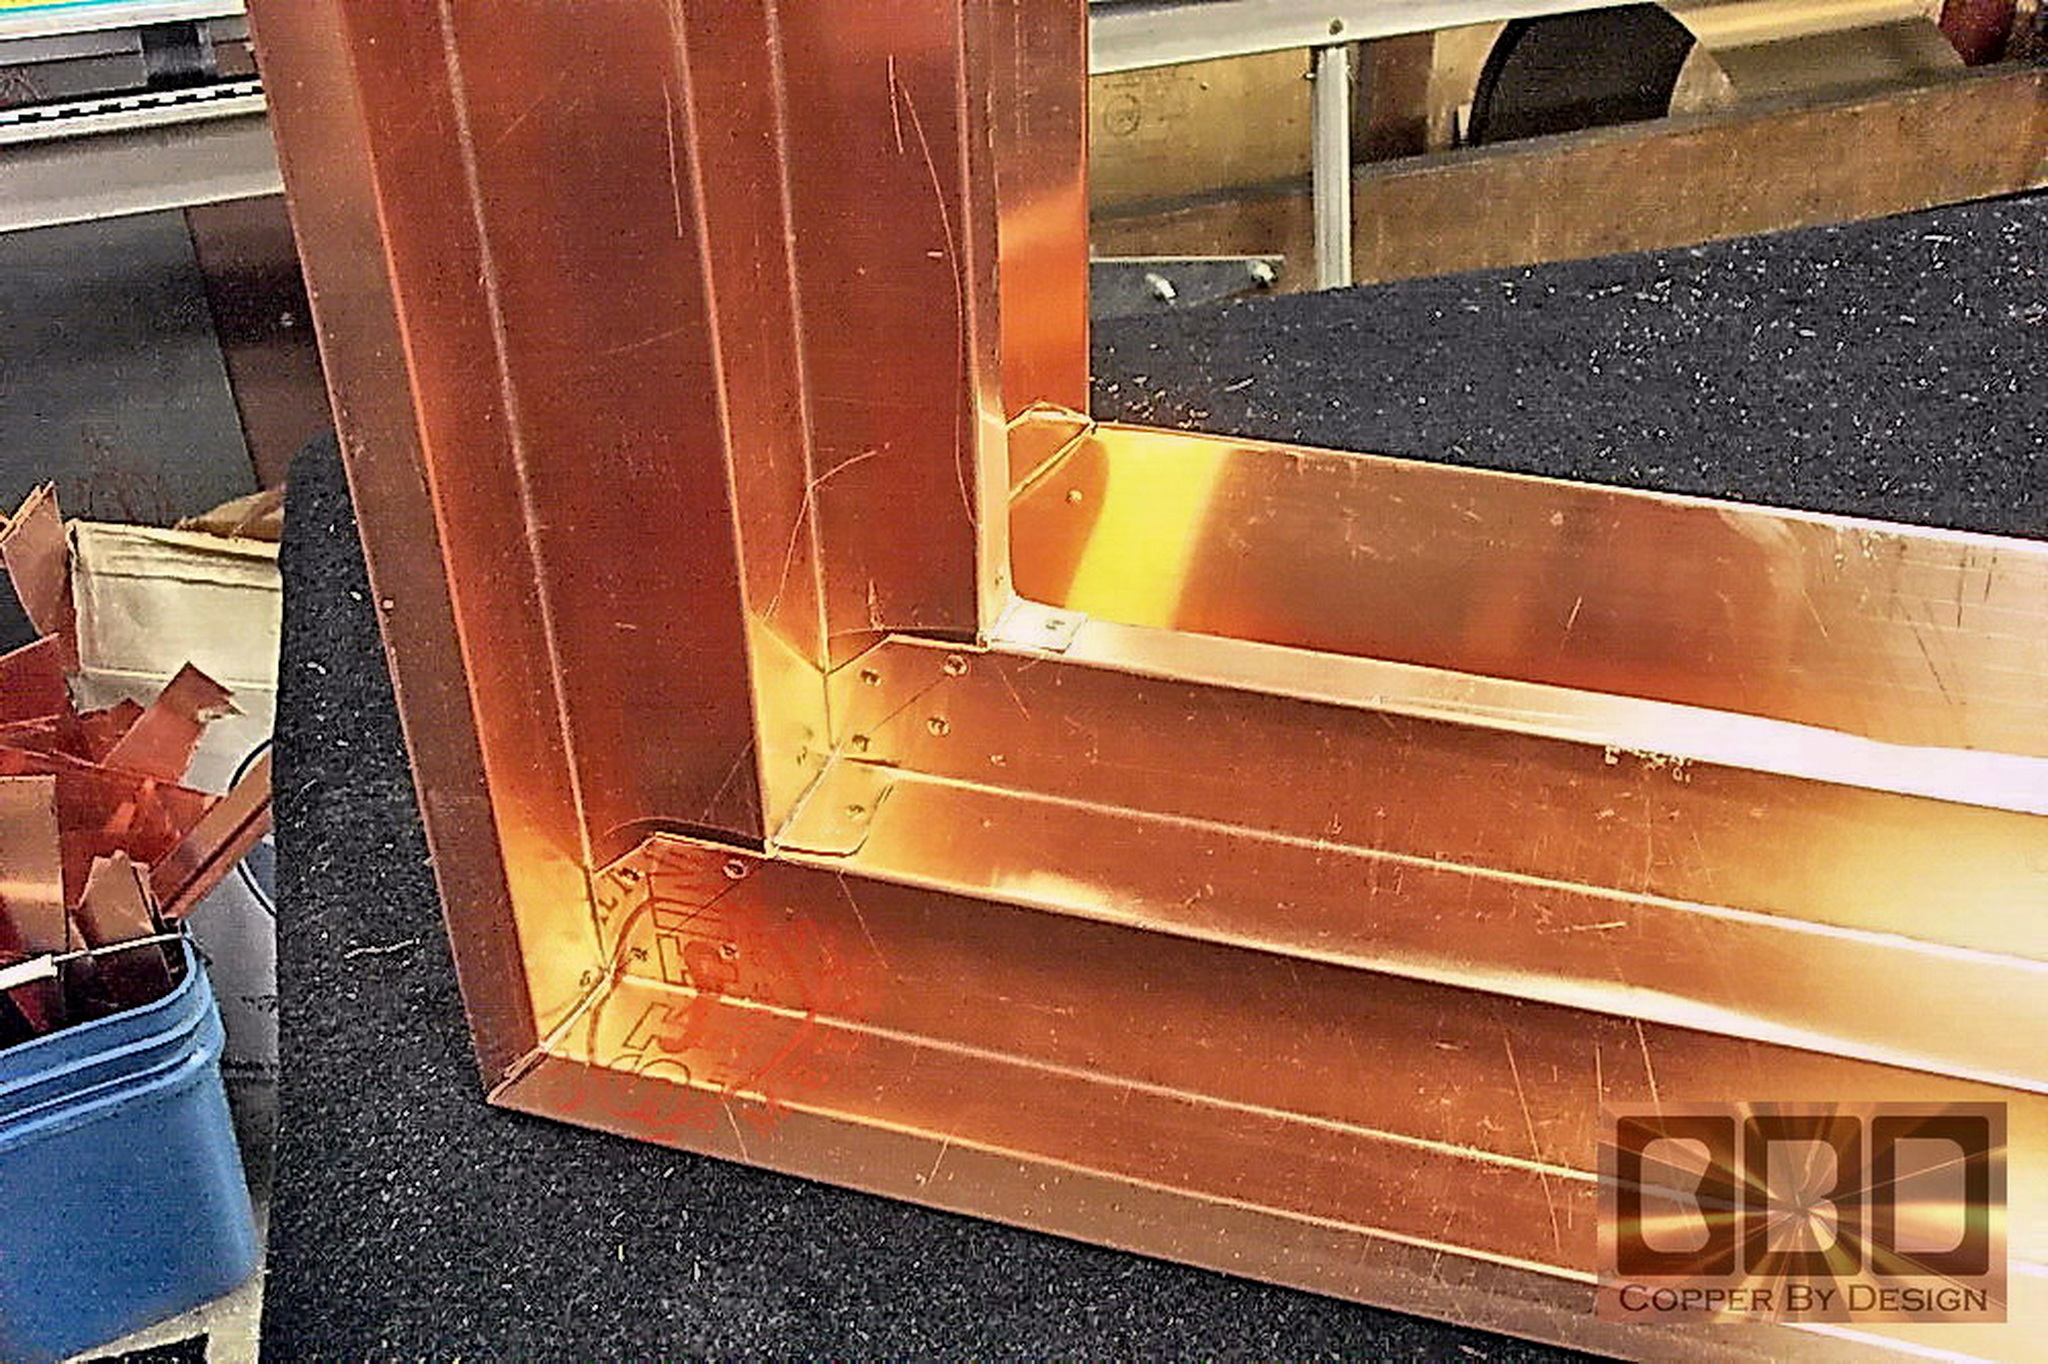
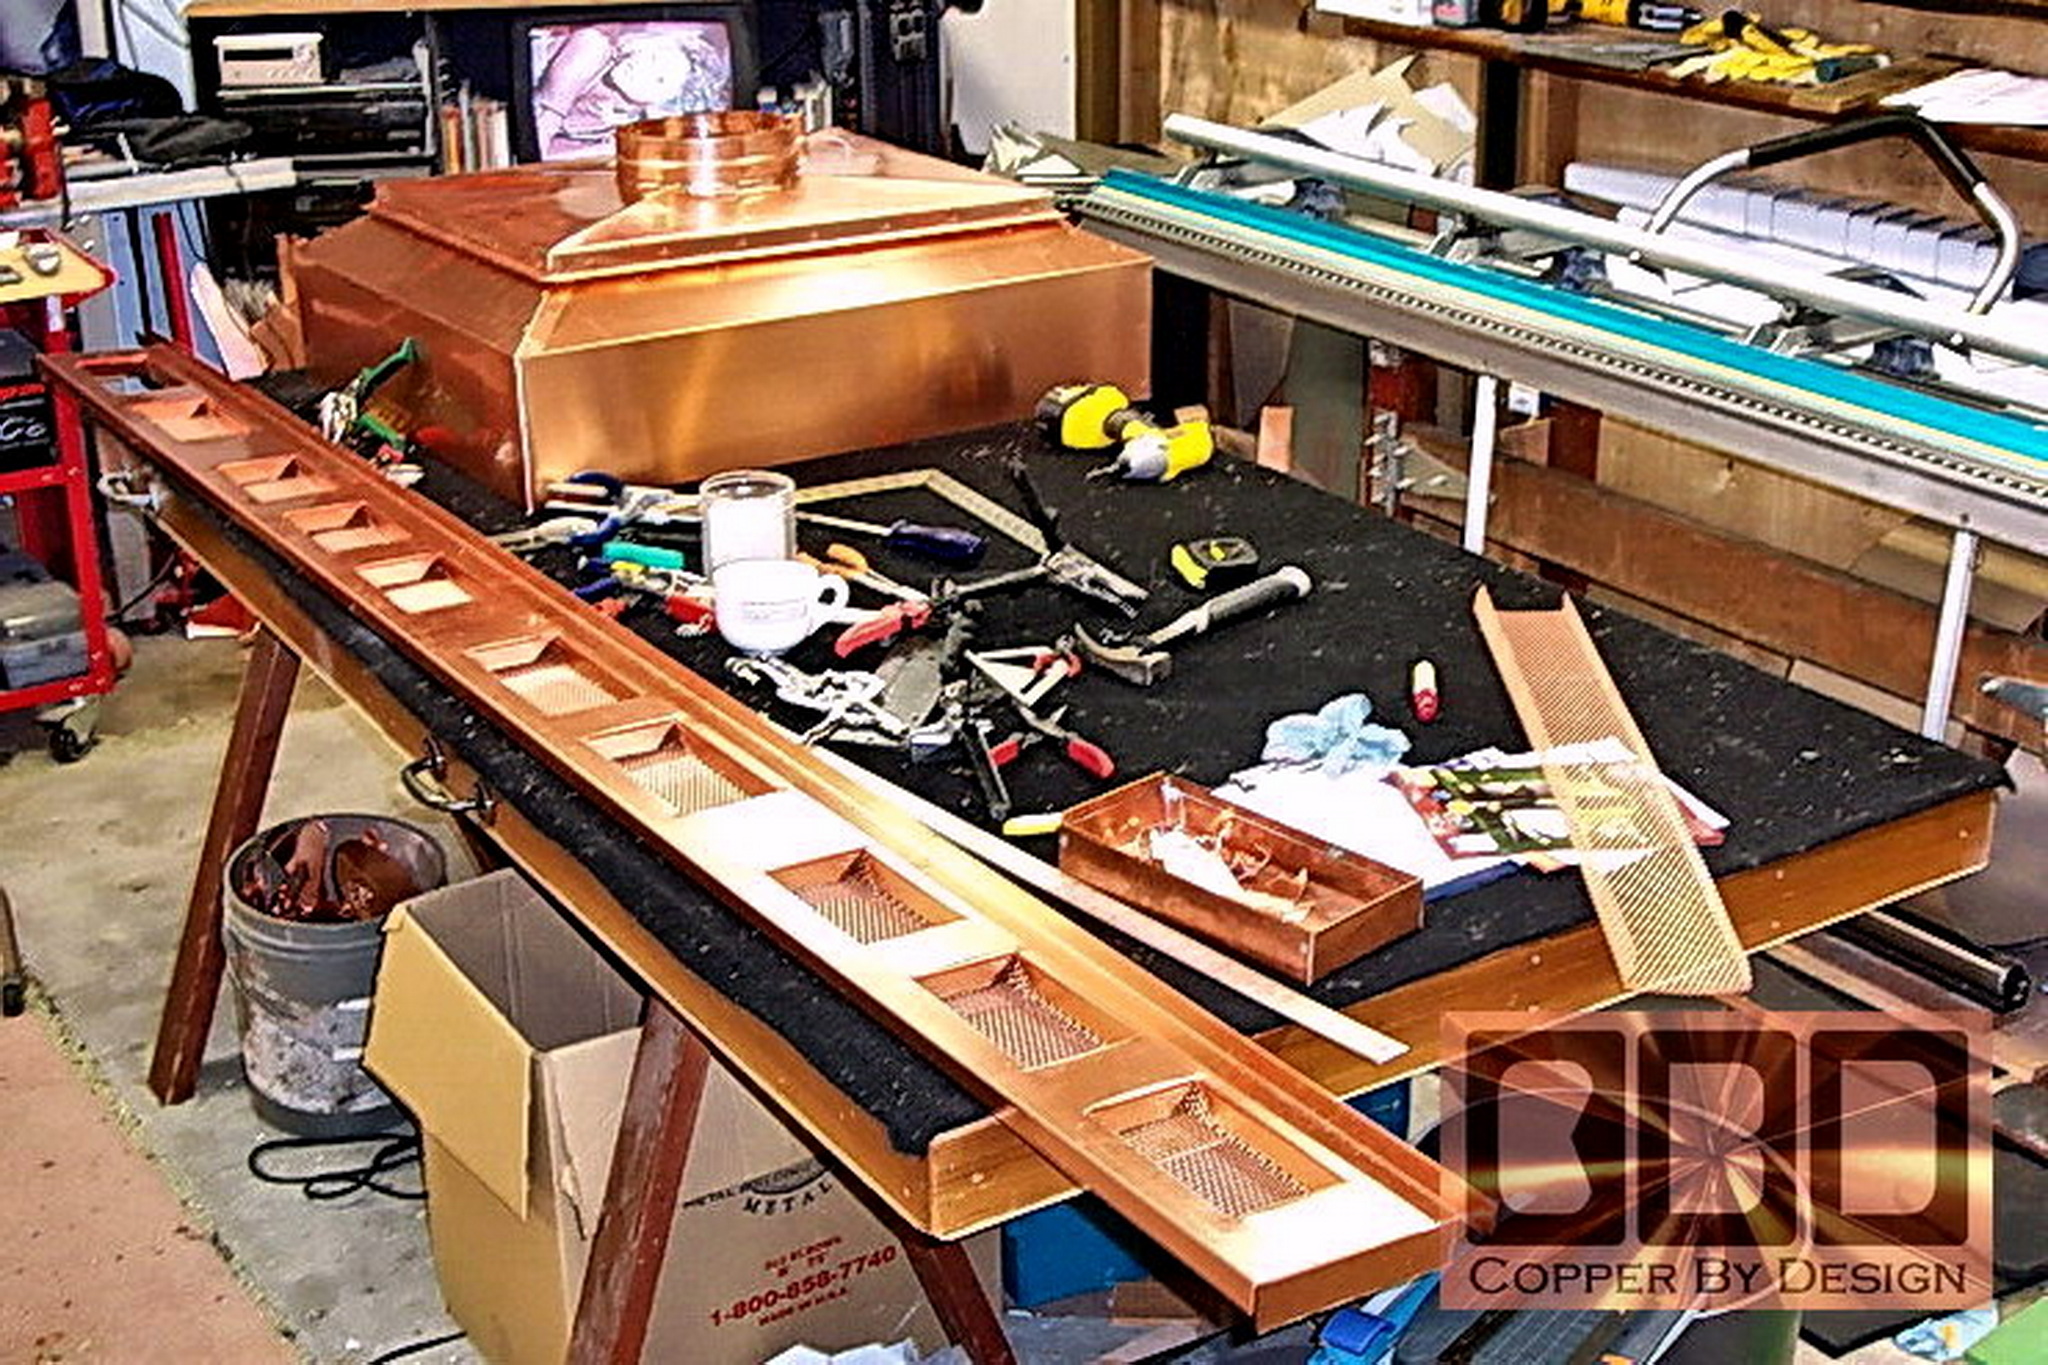
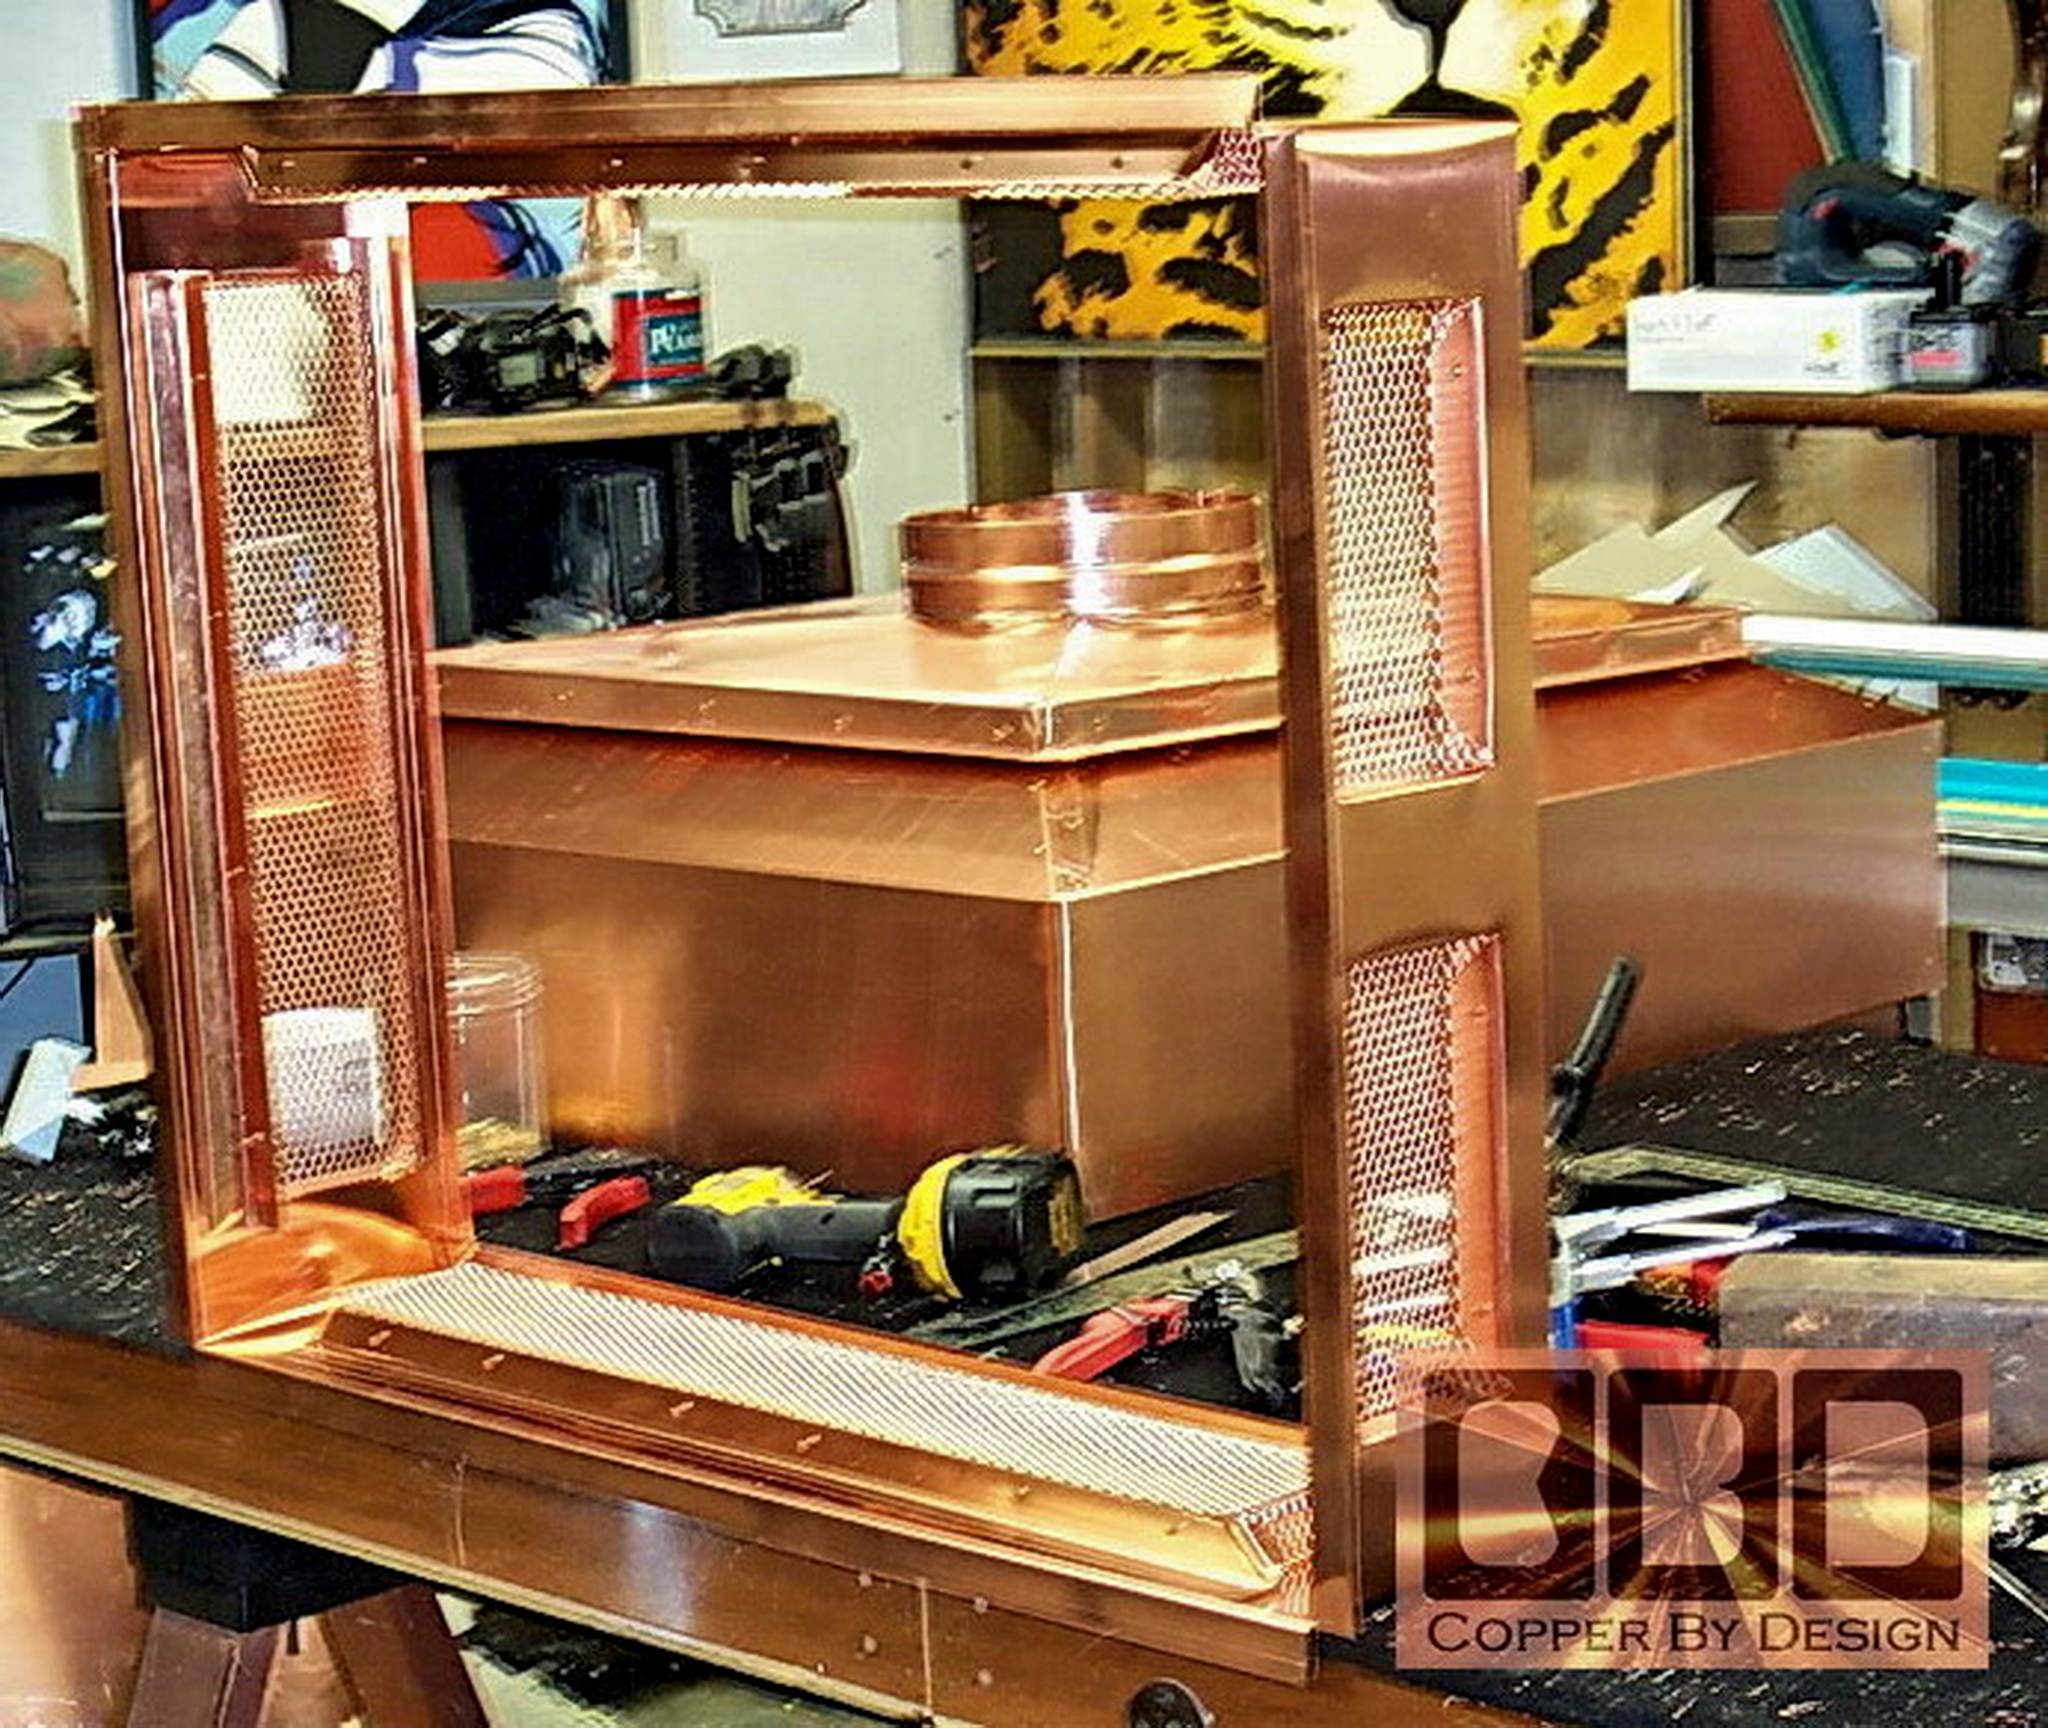
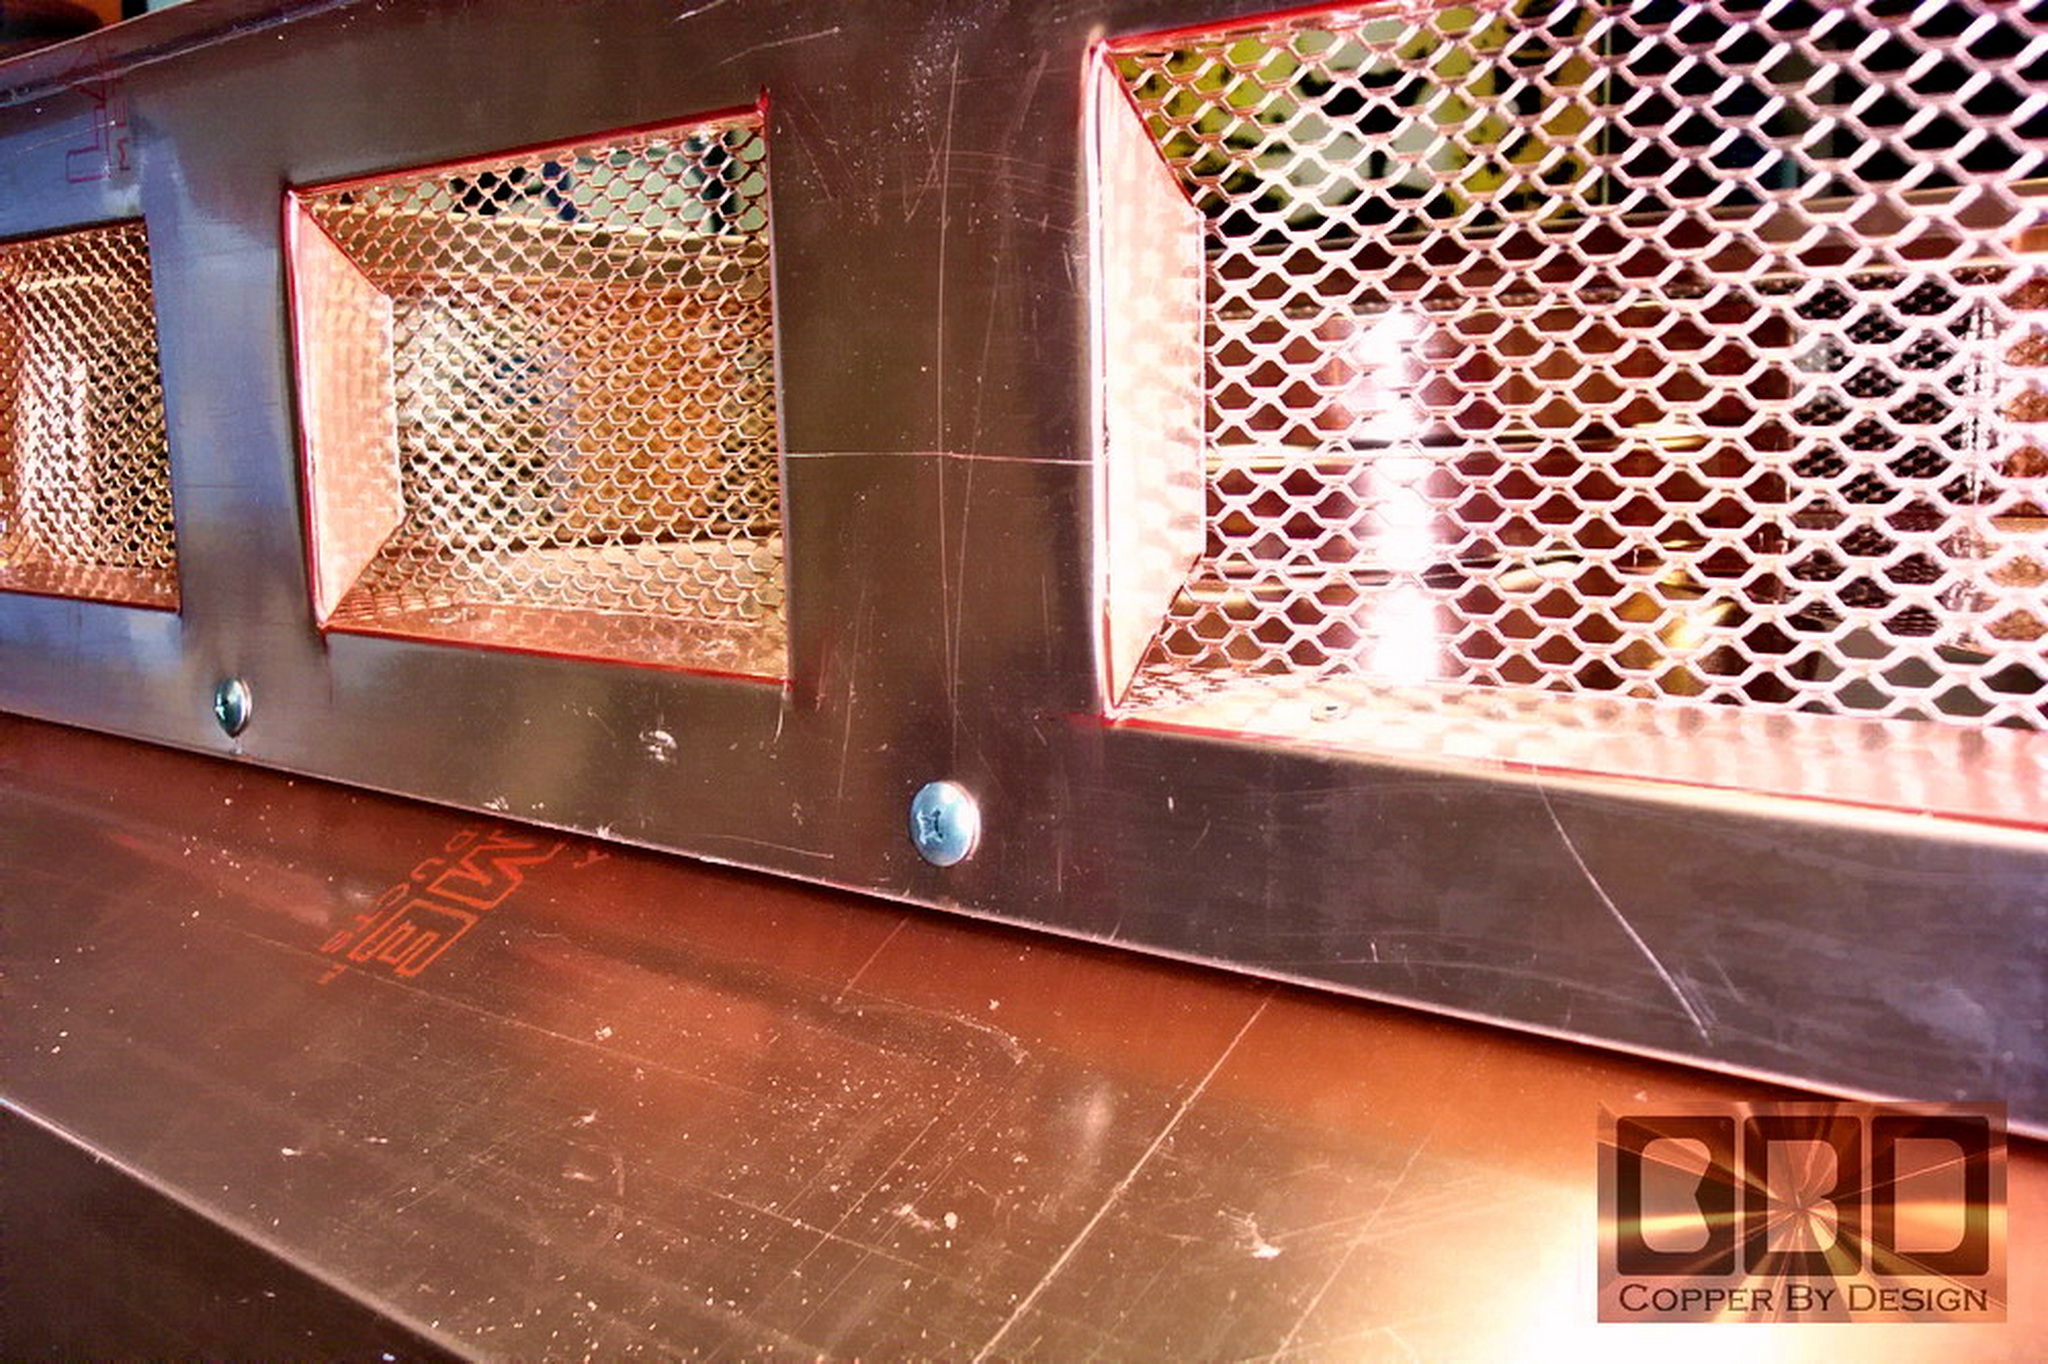
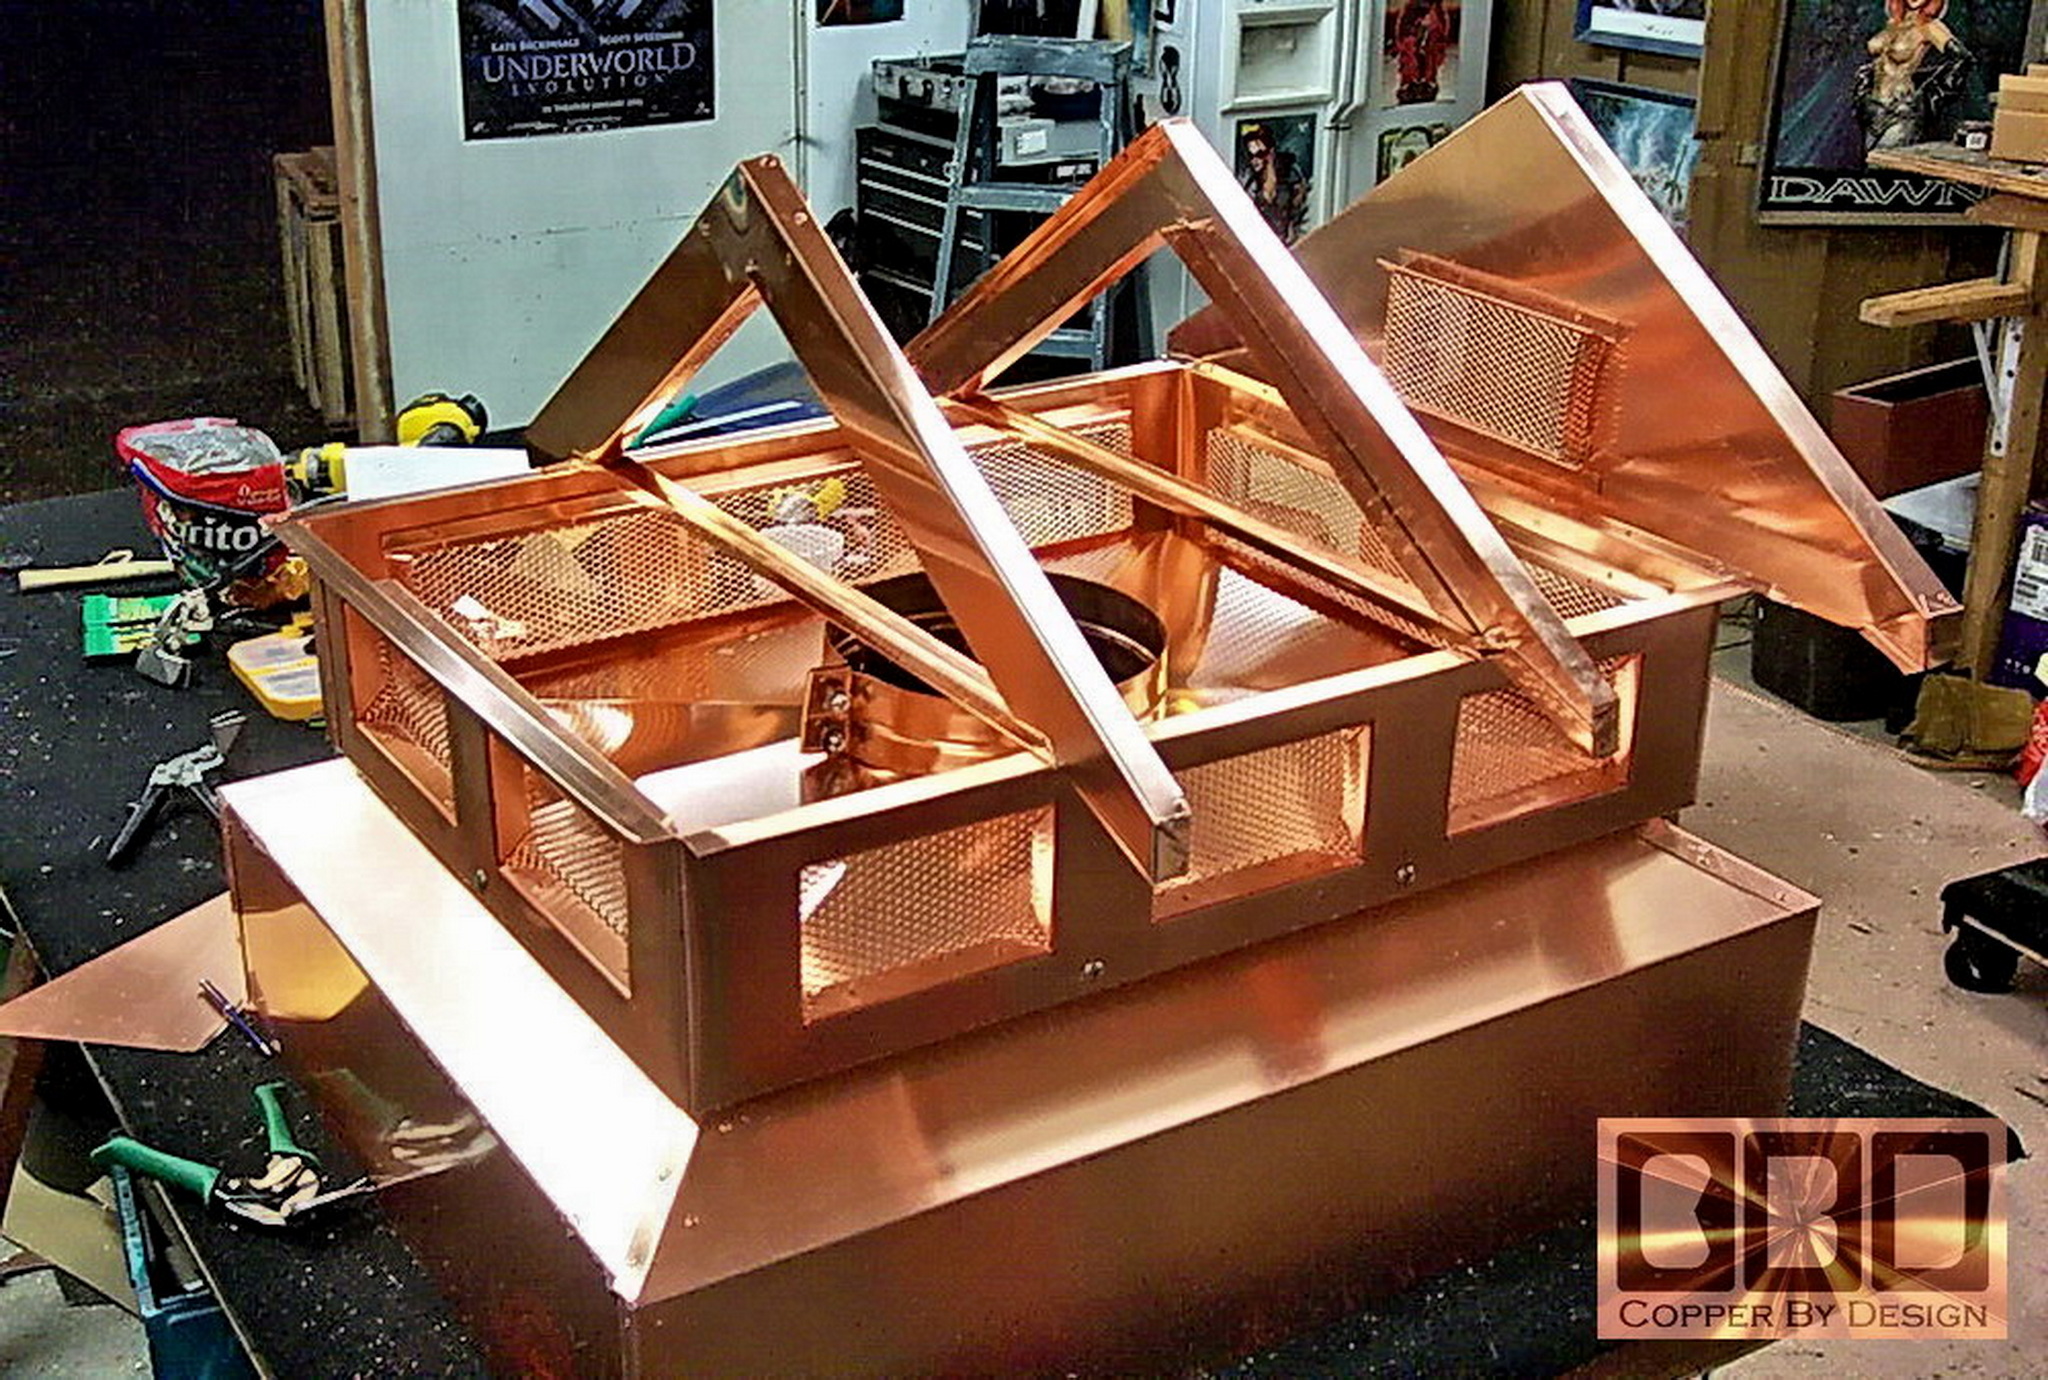
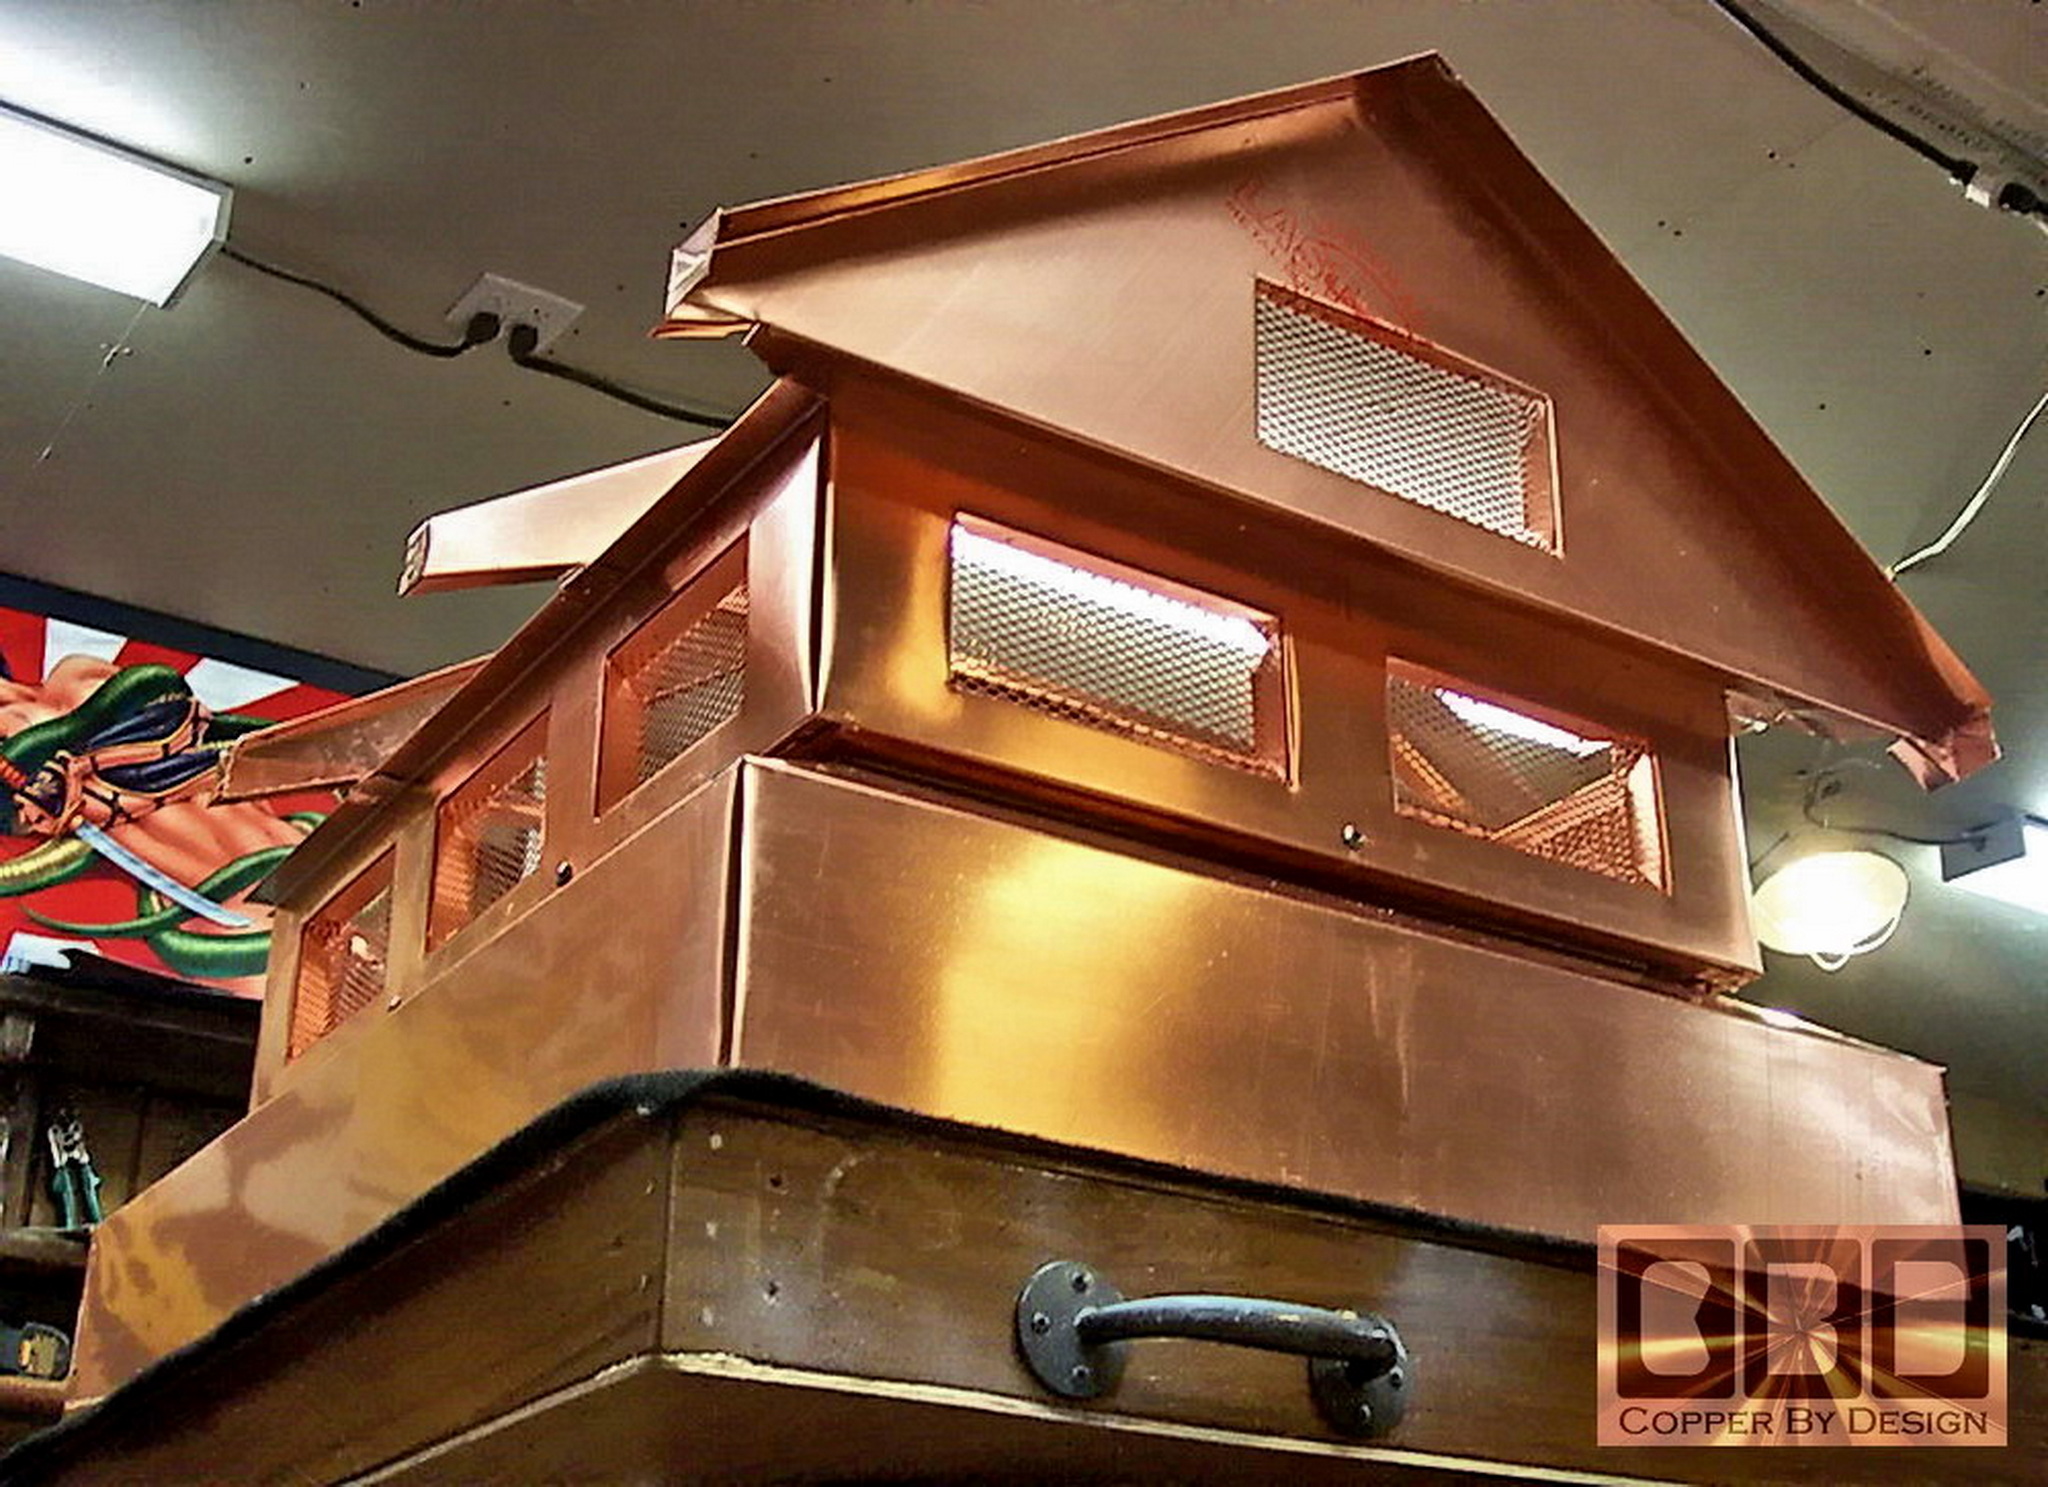
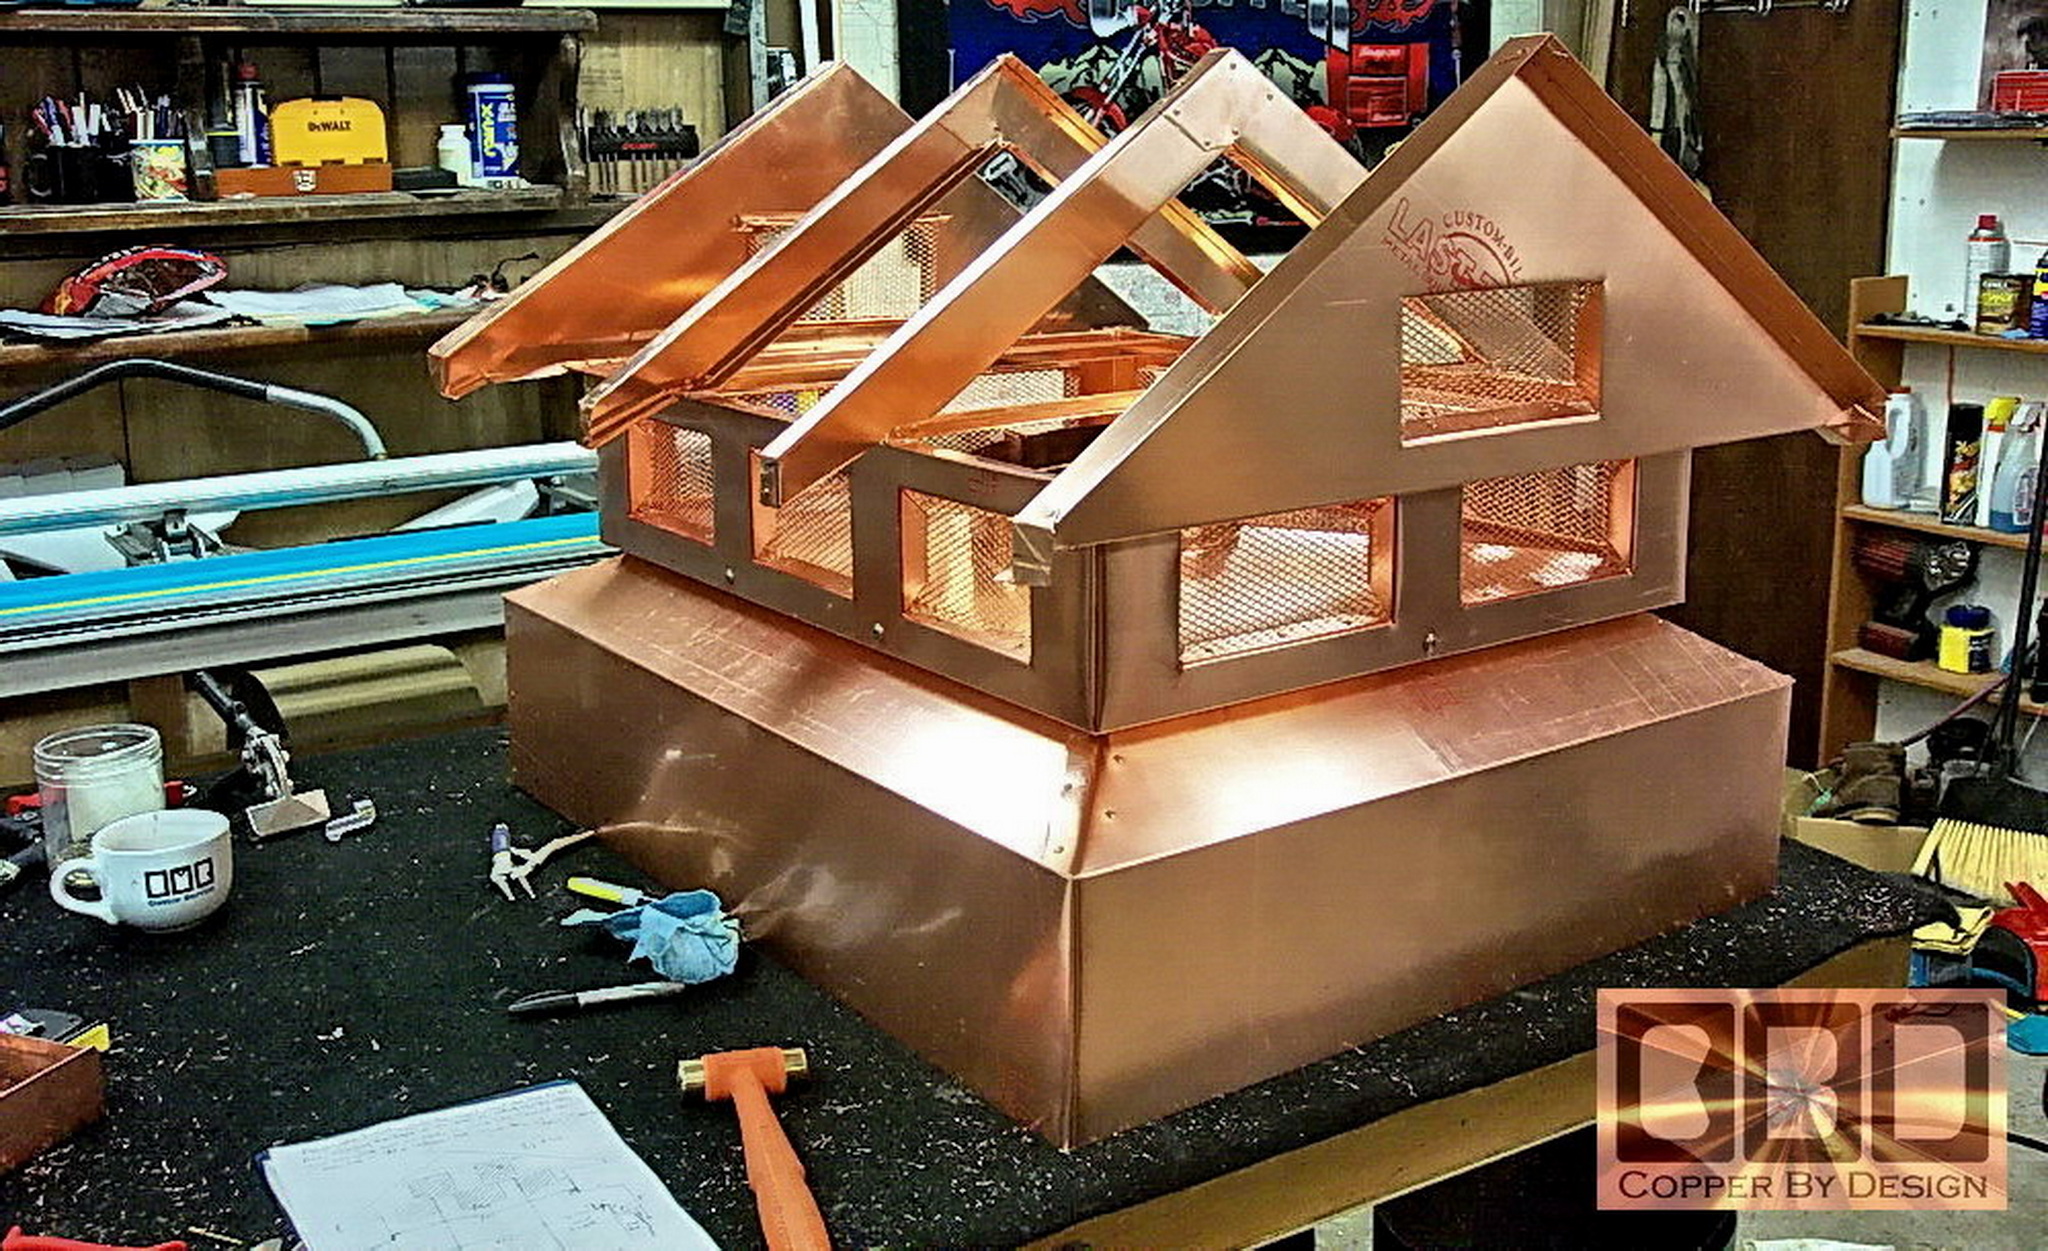
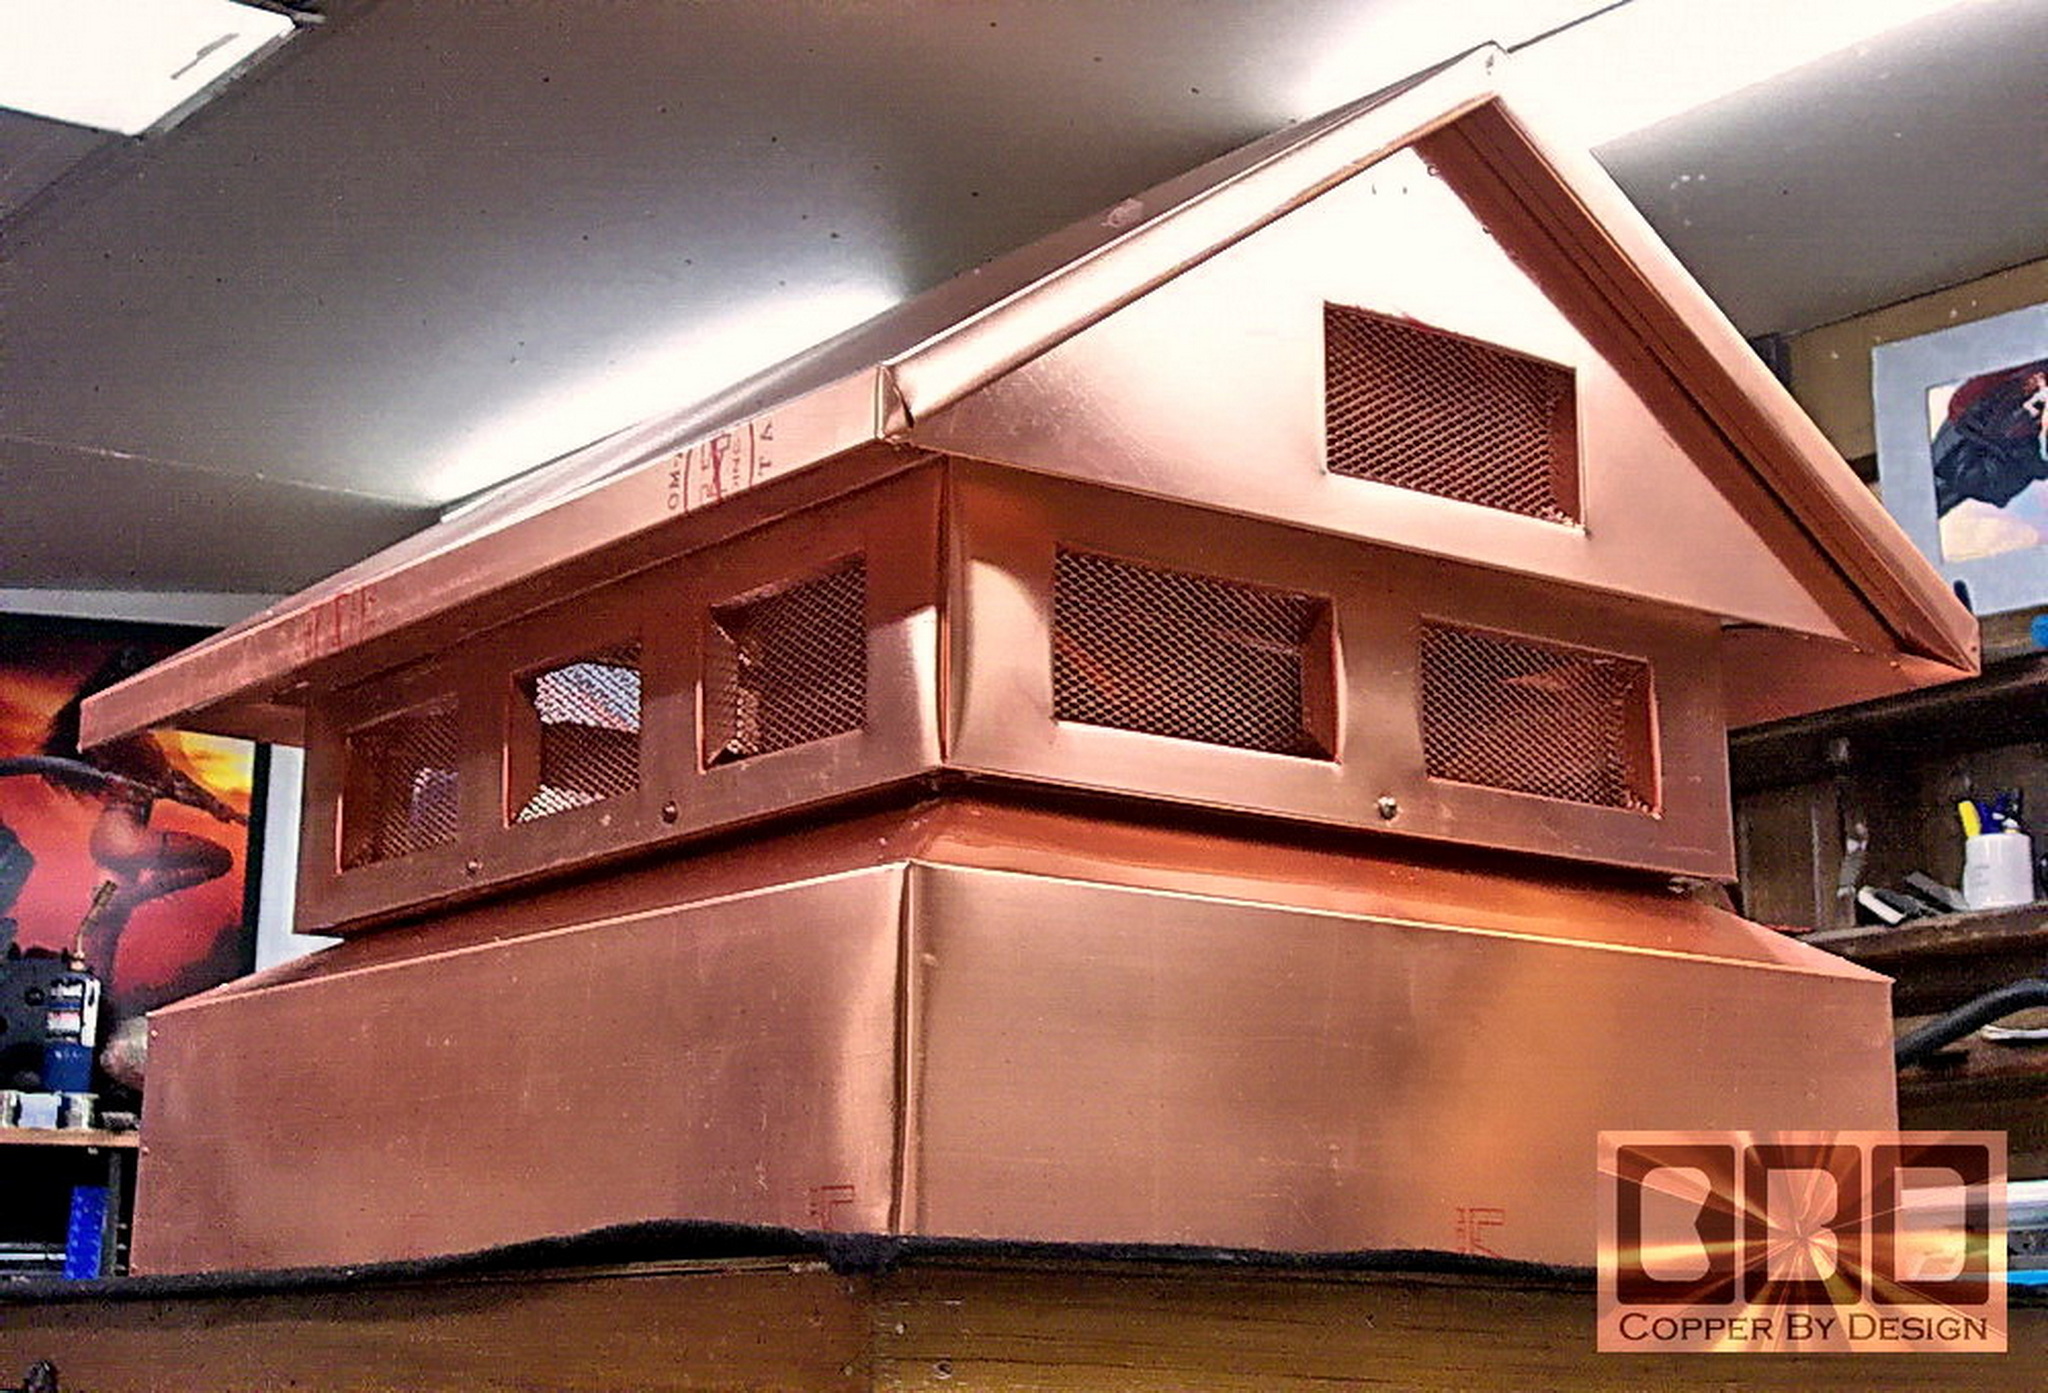
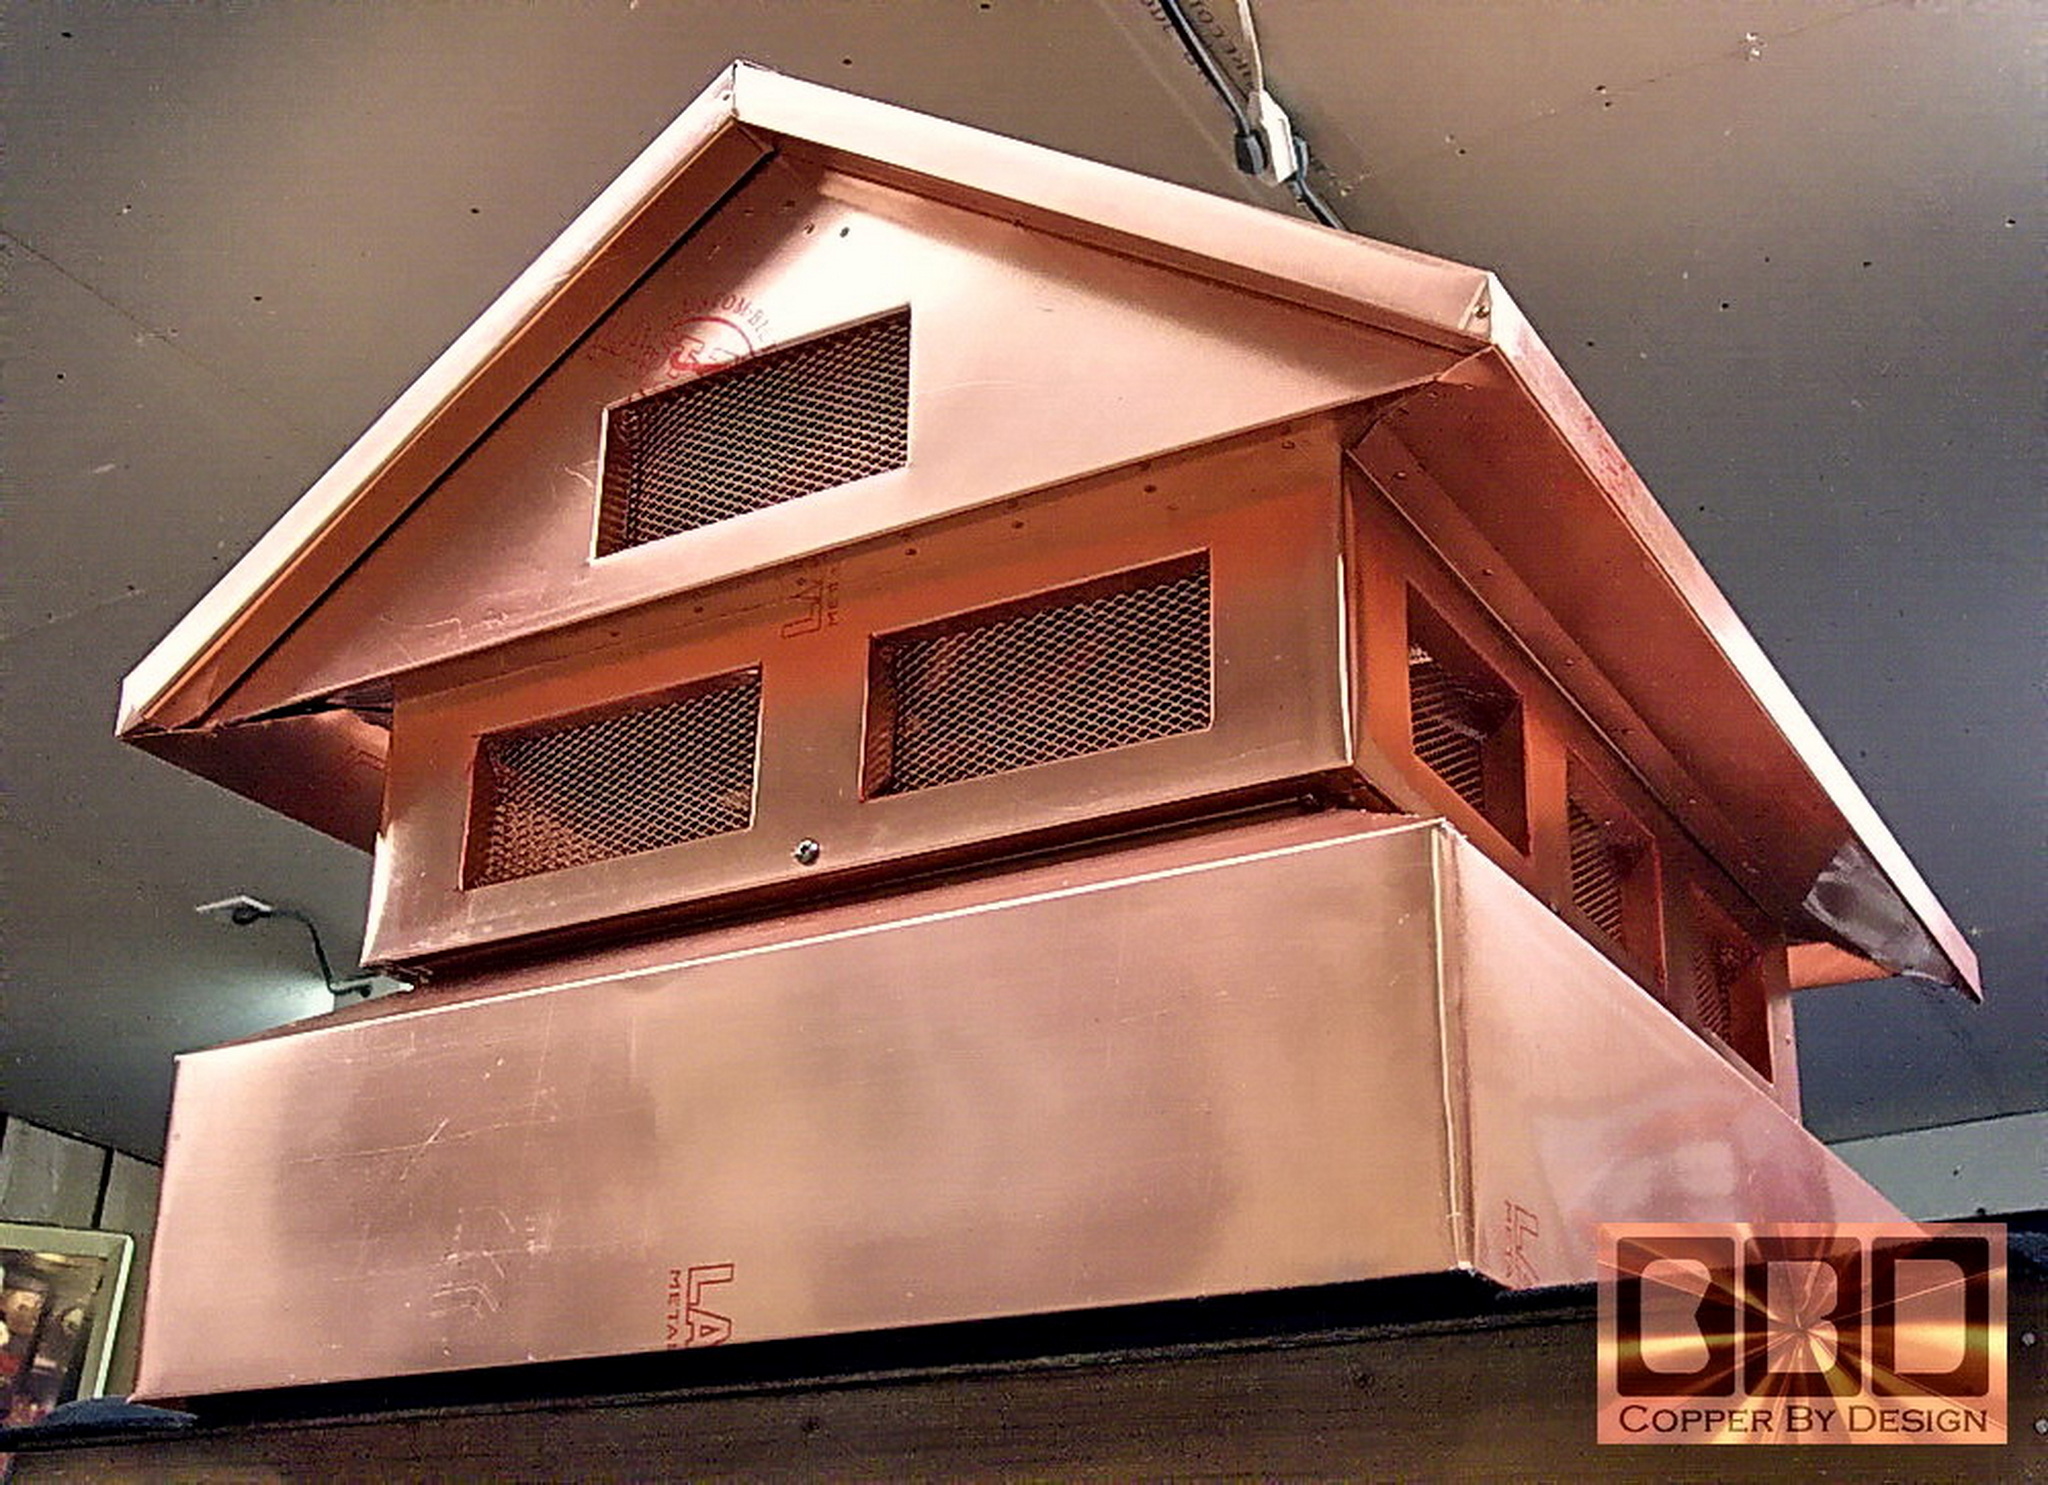
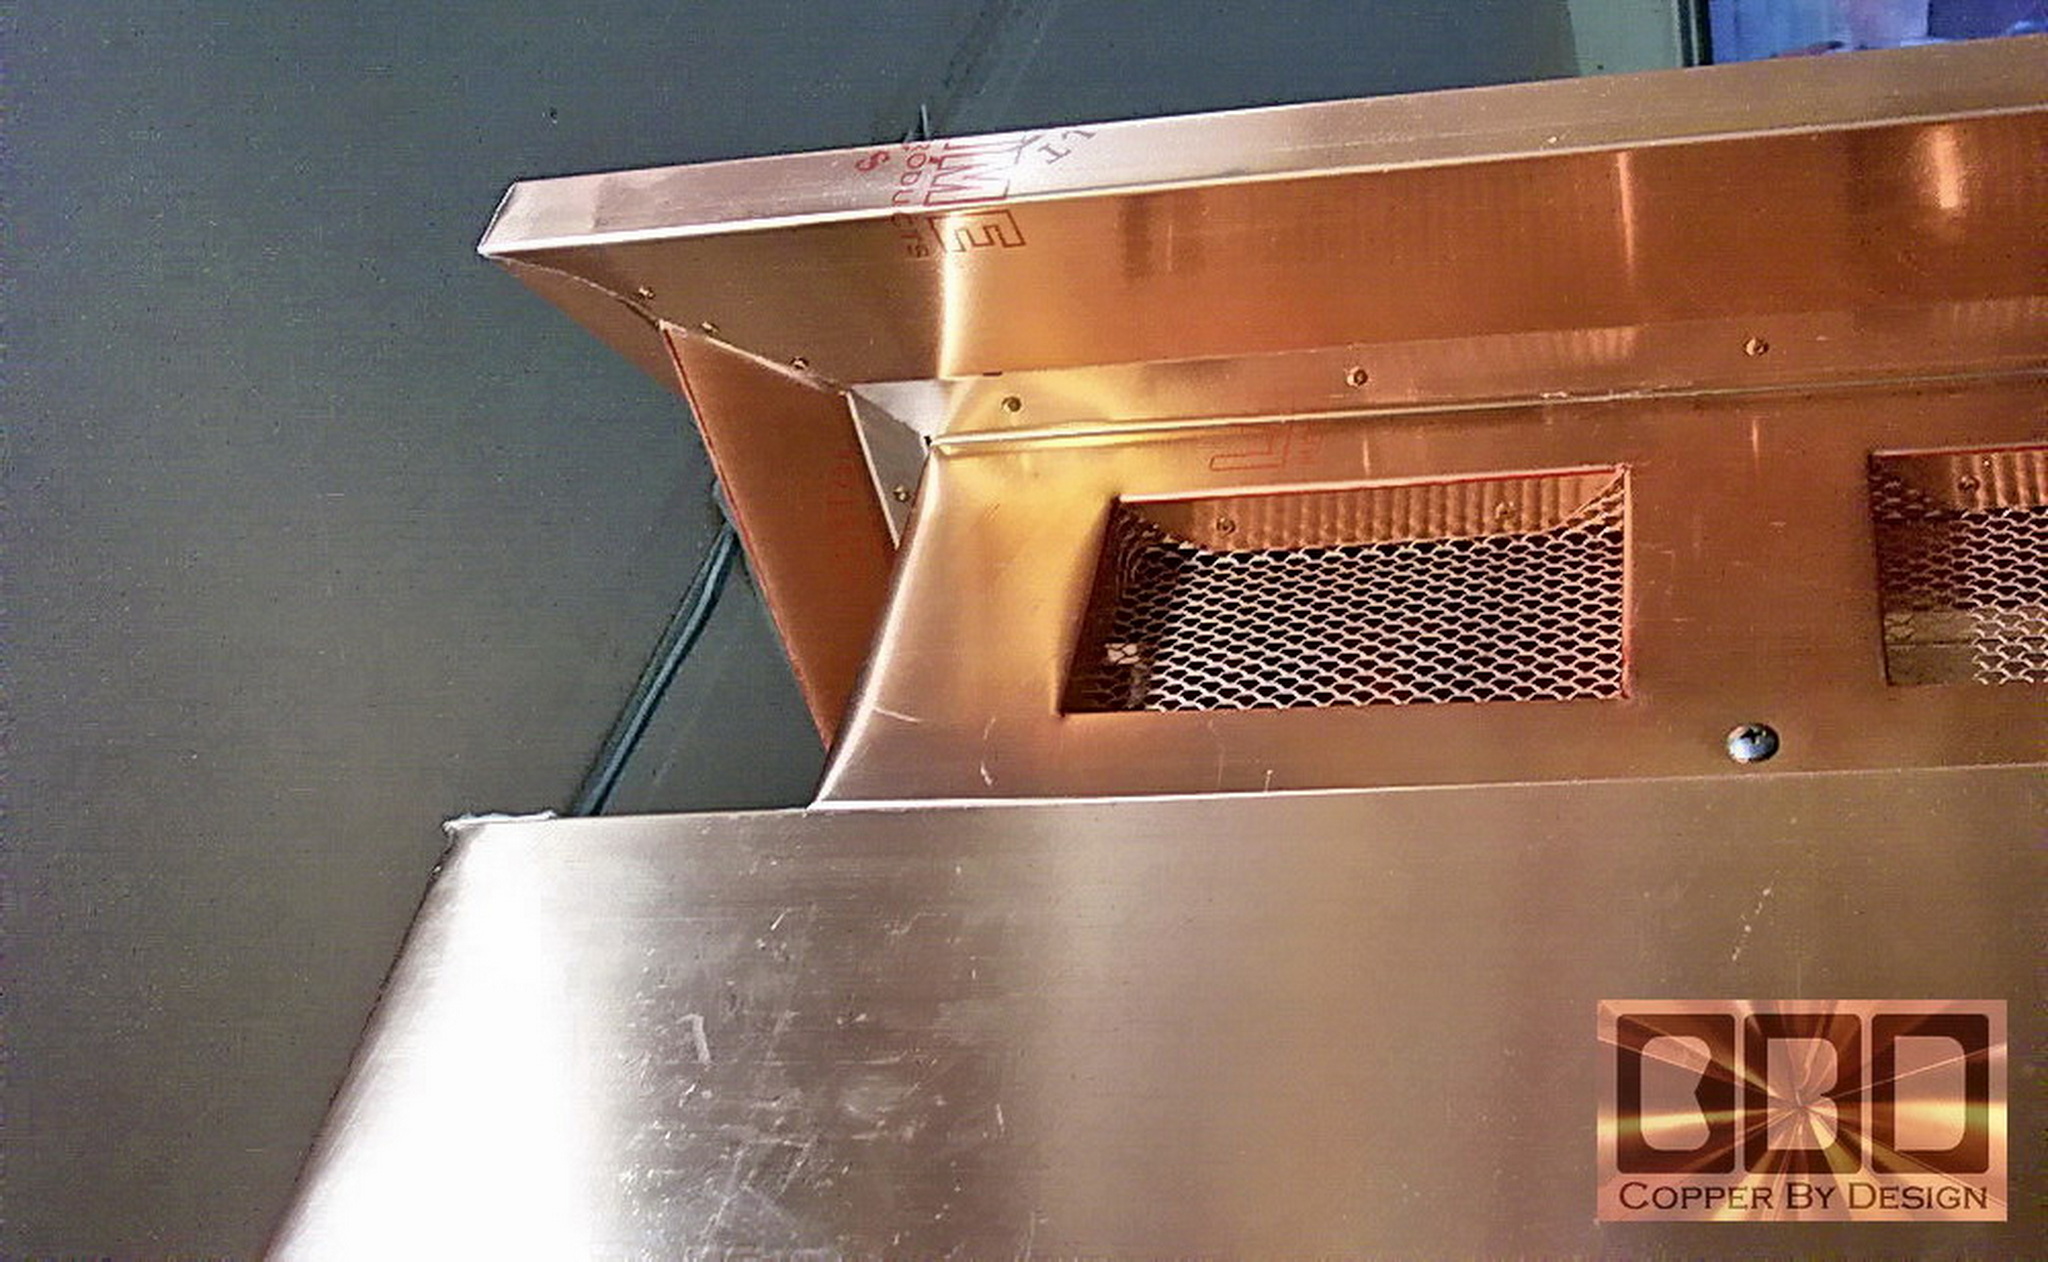
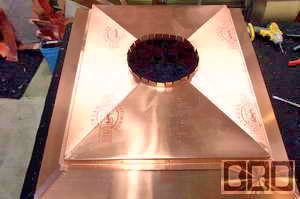
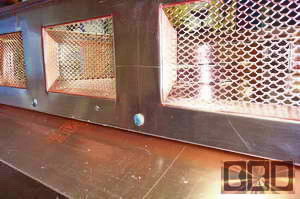
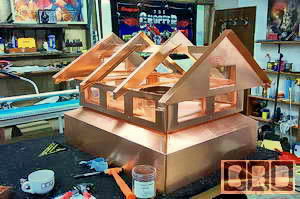
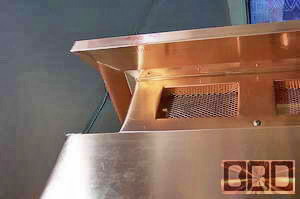
Then we made the spark arrest screened roof support
frame area to set over the pan. The screened area is 4" high and 6.75"
wide. The vents on the shorter ends are 8" wide.
This shows the vent windows we cut into the copper and bent the
flanges down for better stability. We secured the screen behind those
flanges that give the screened area some 3 dimensional look.
|
|
 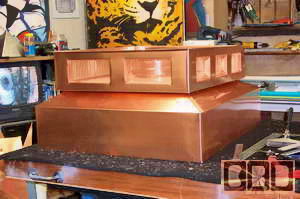
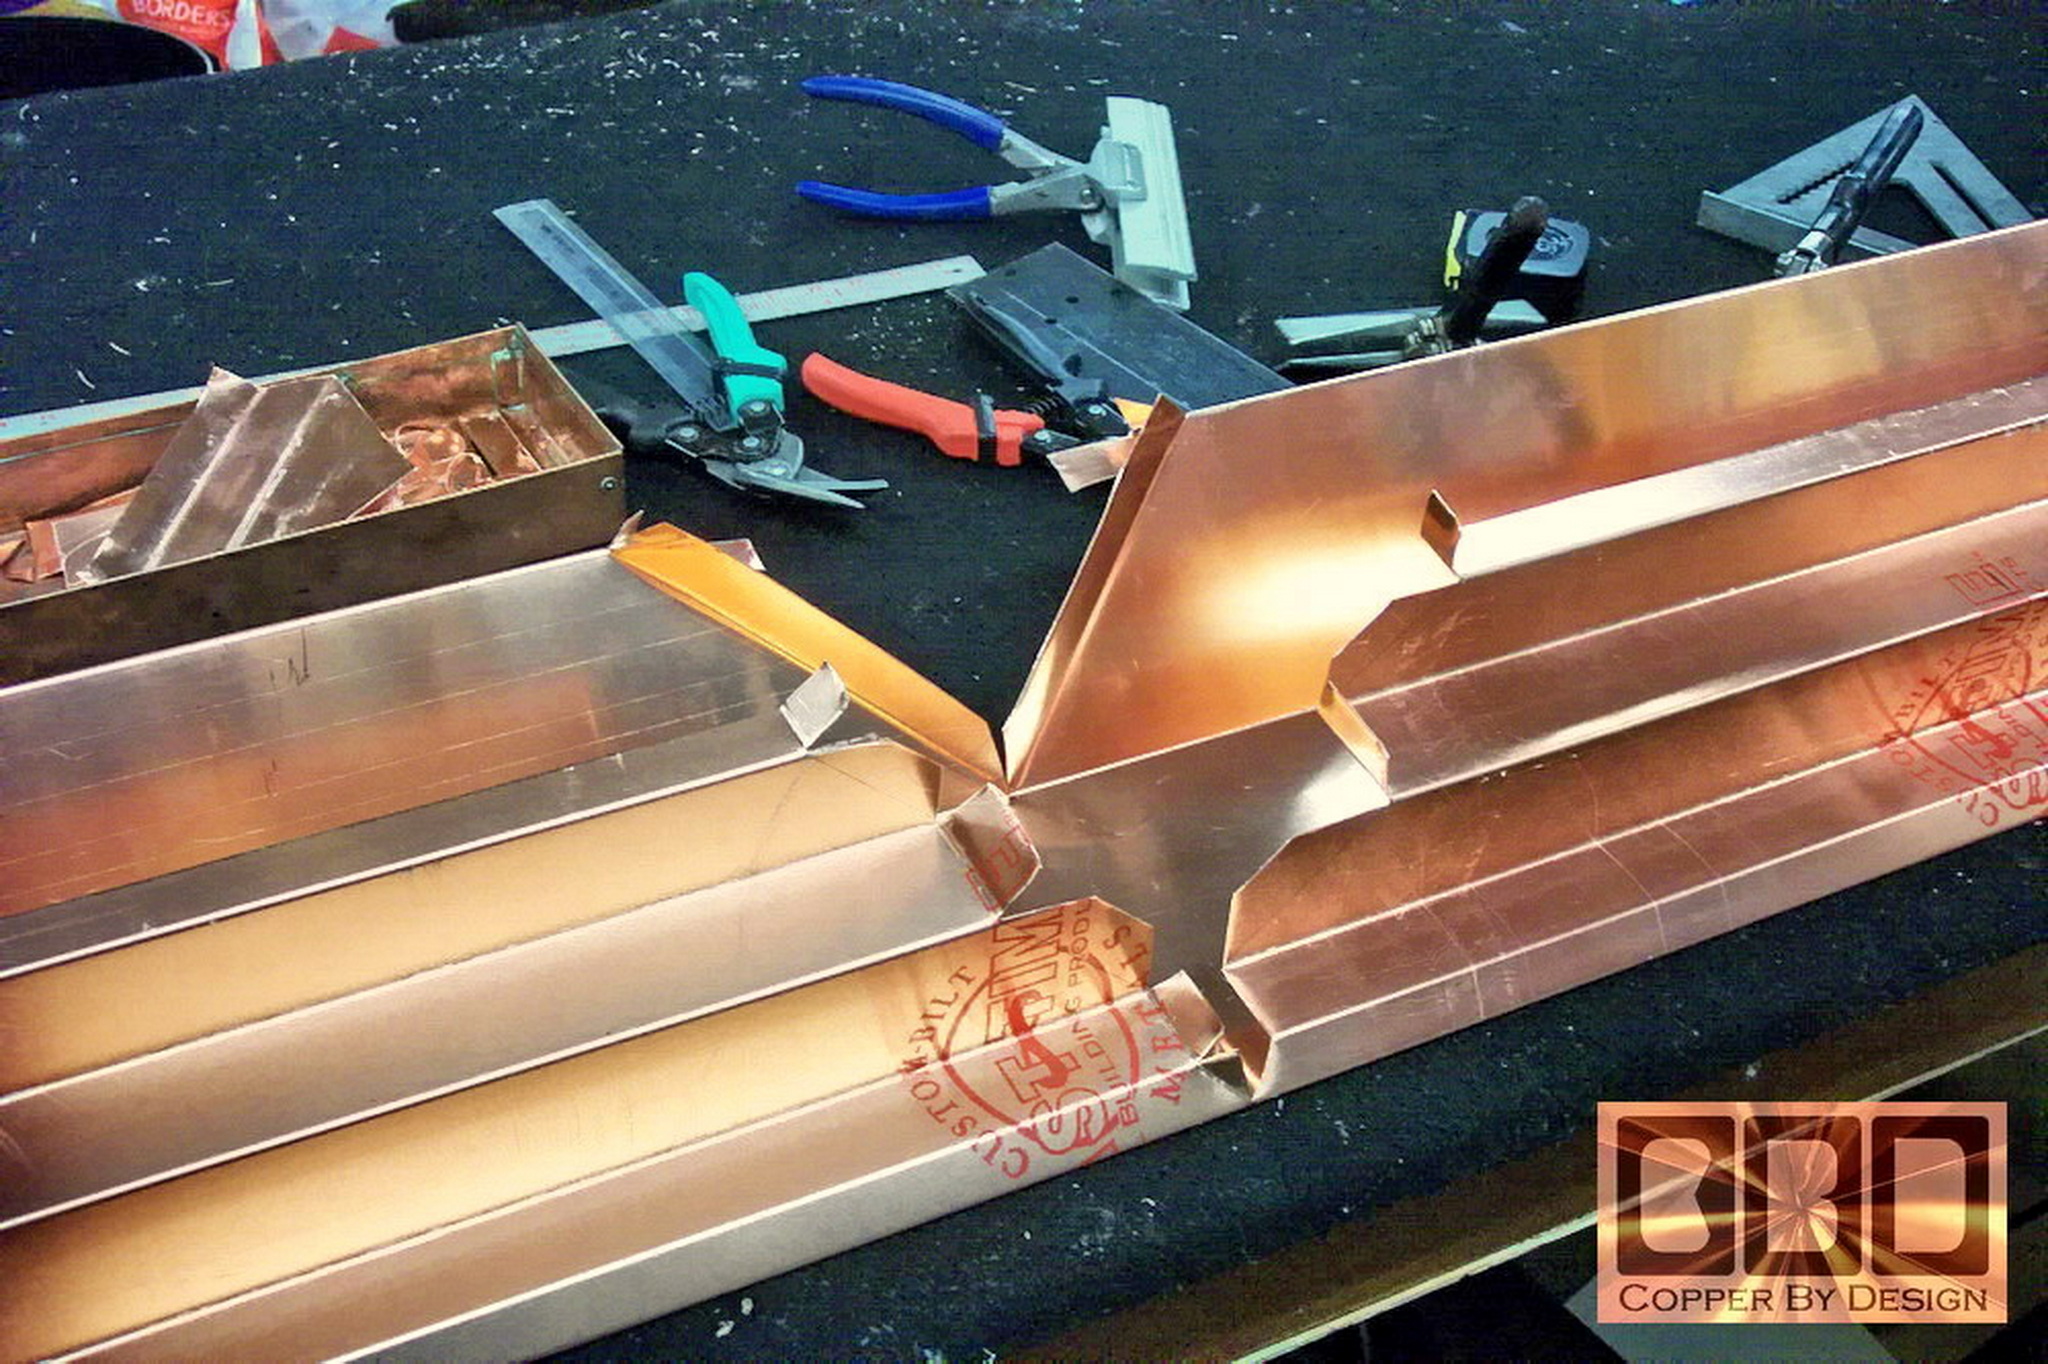
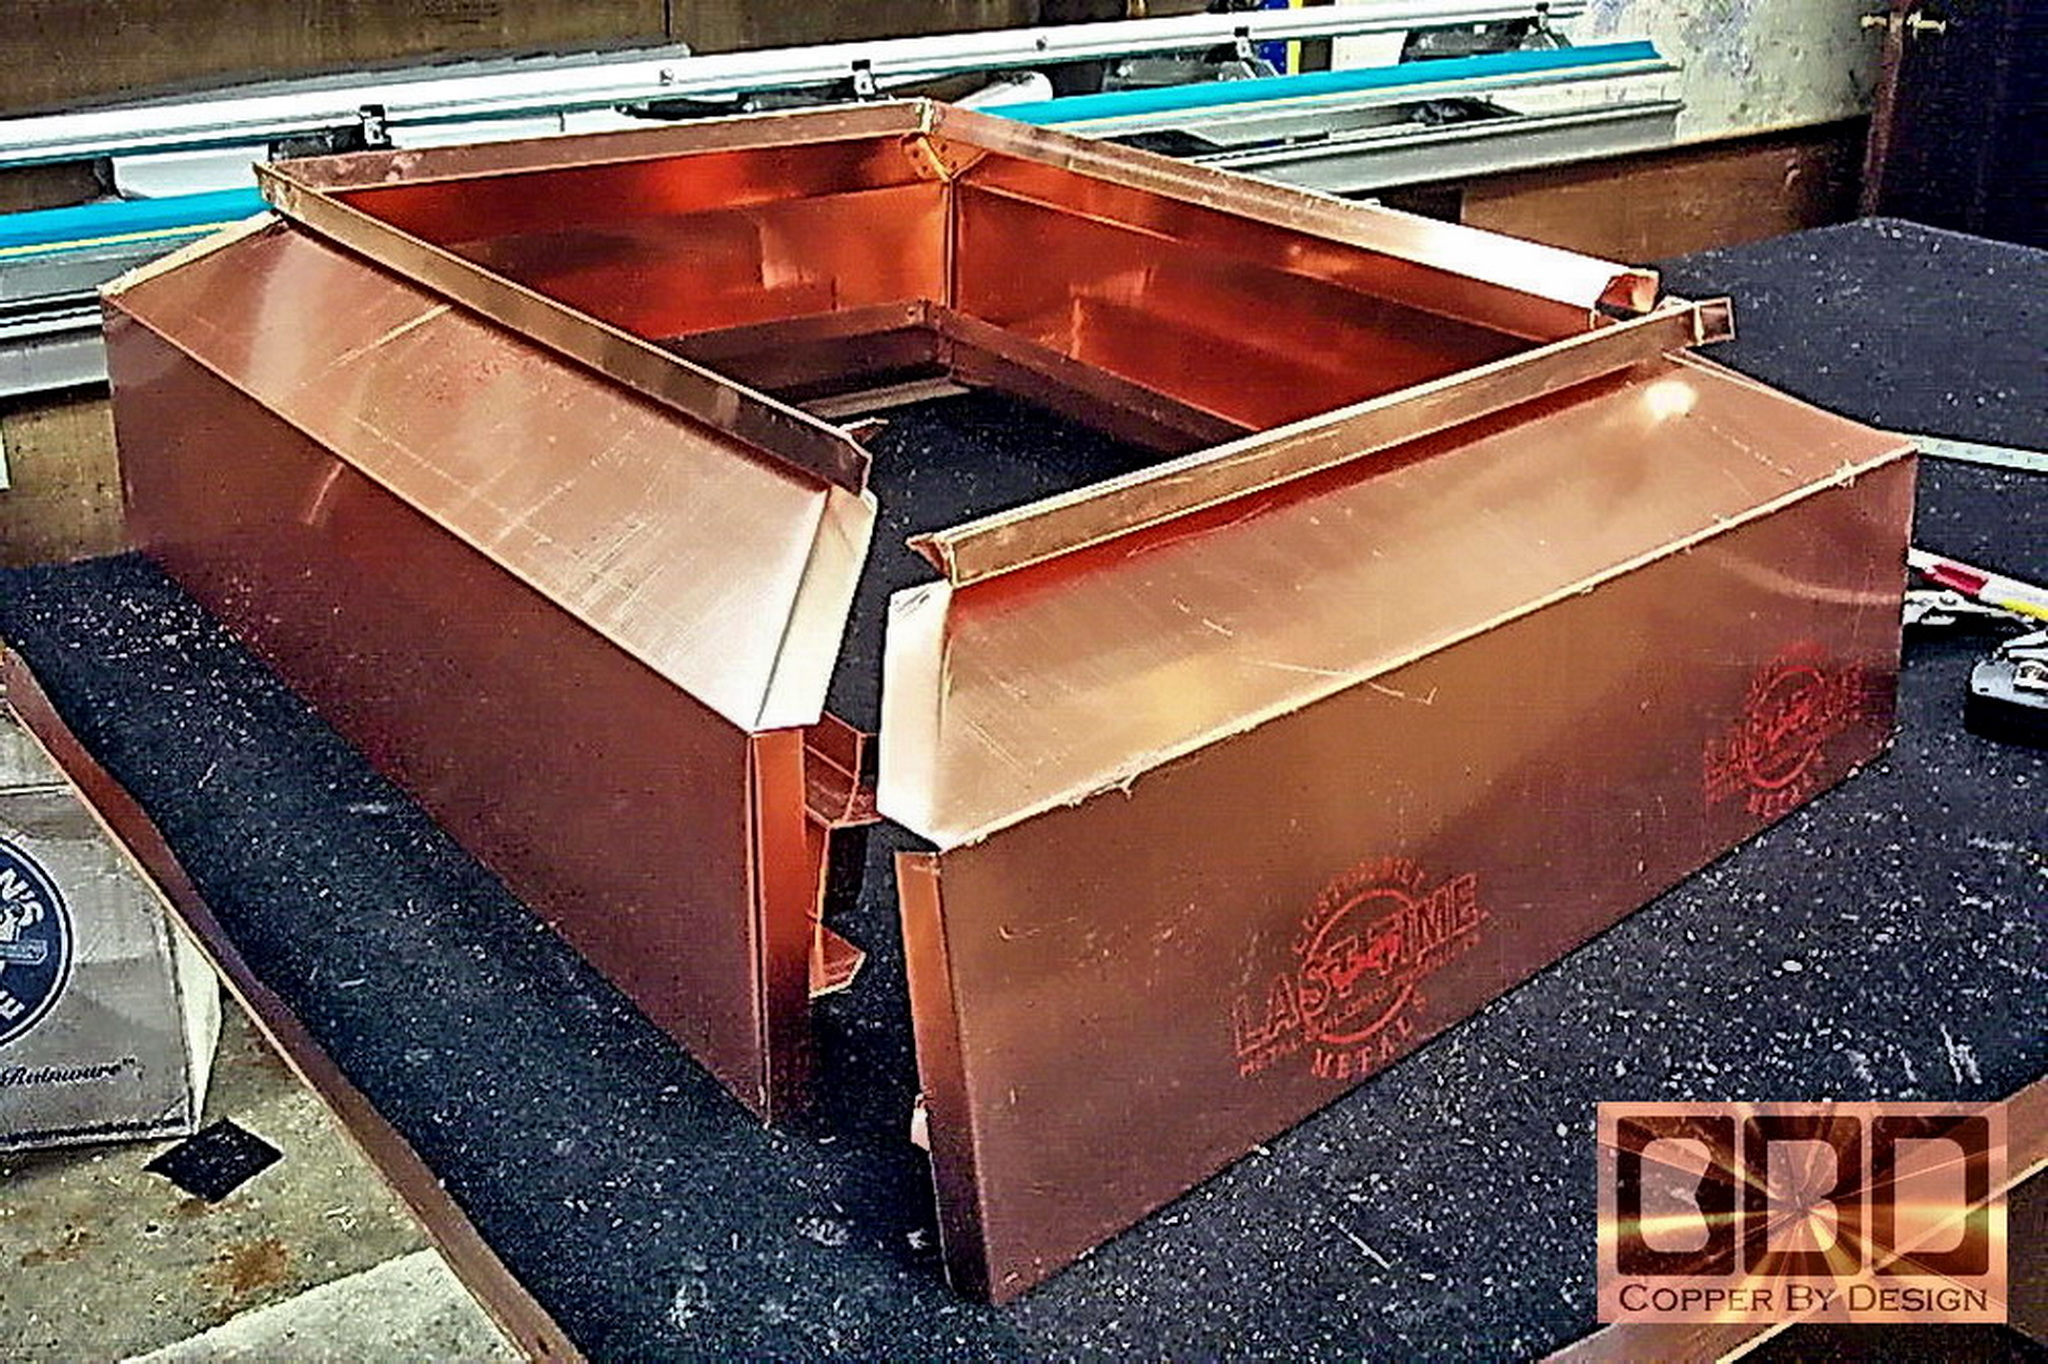
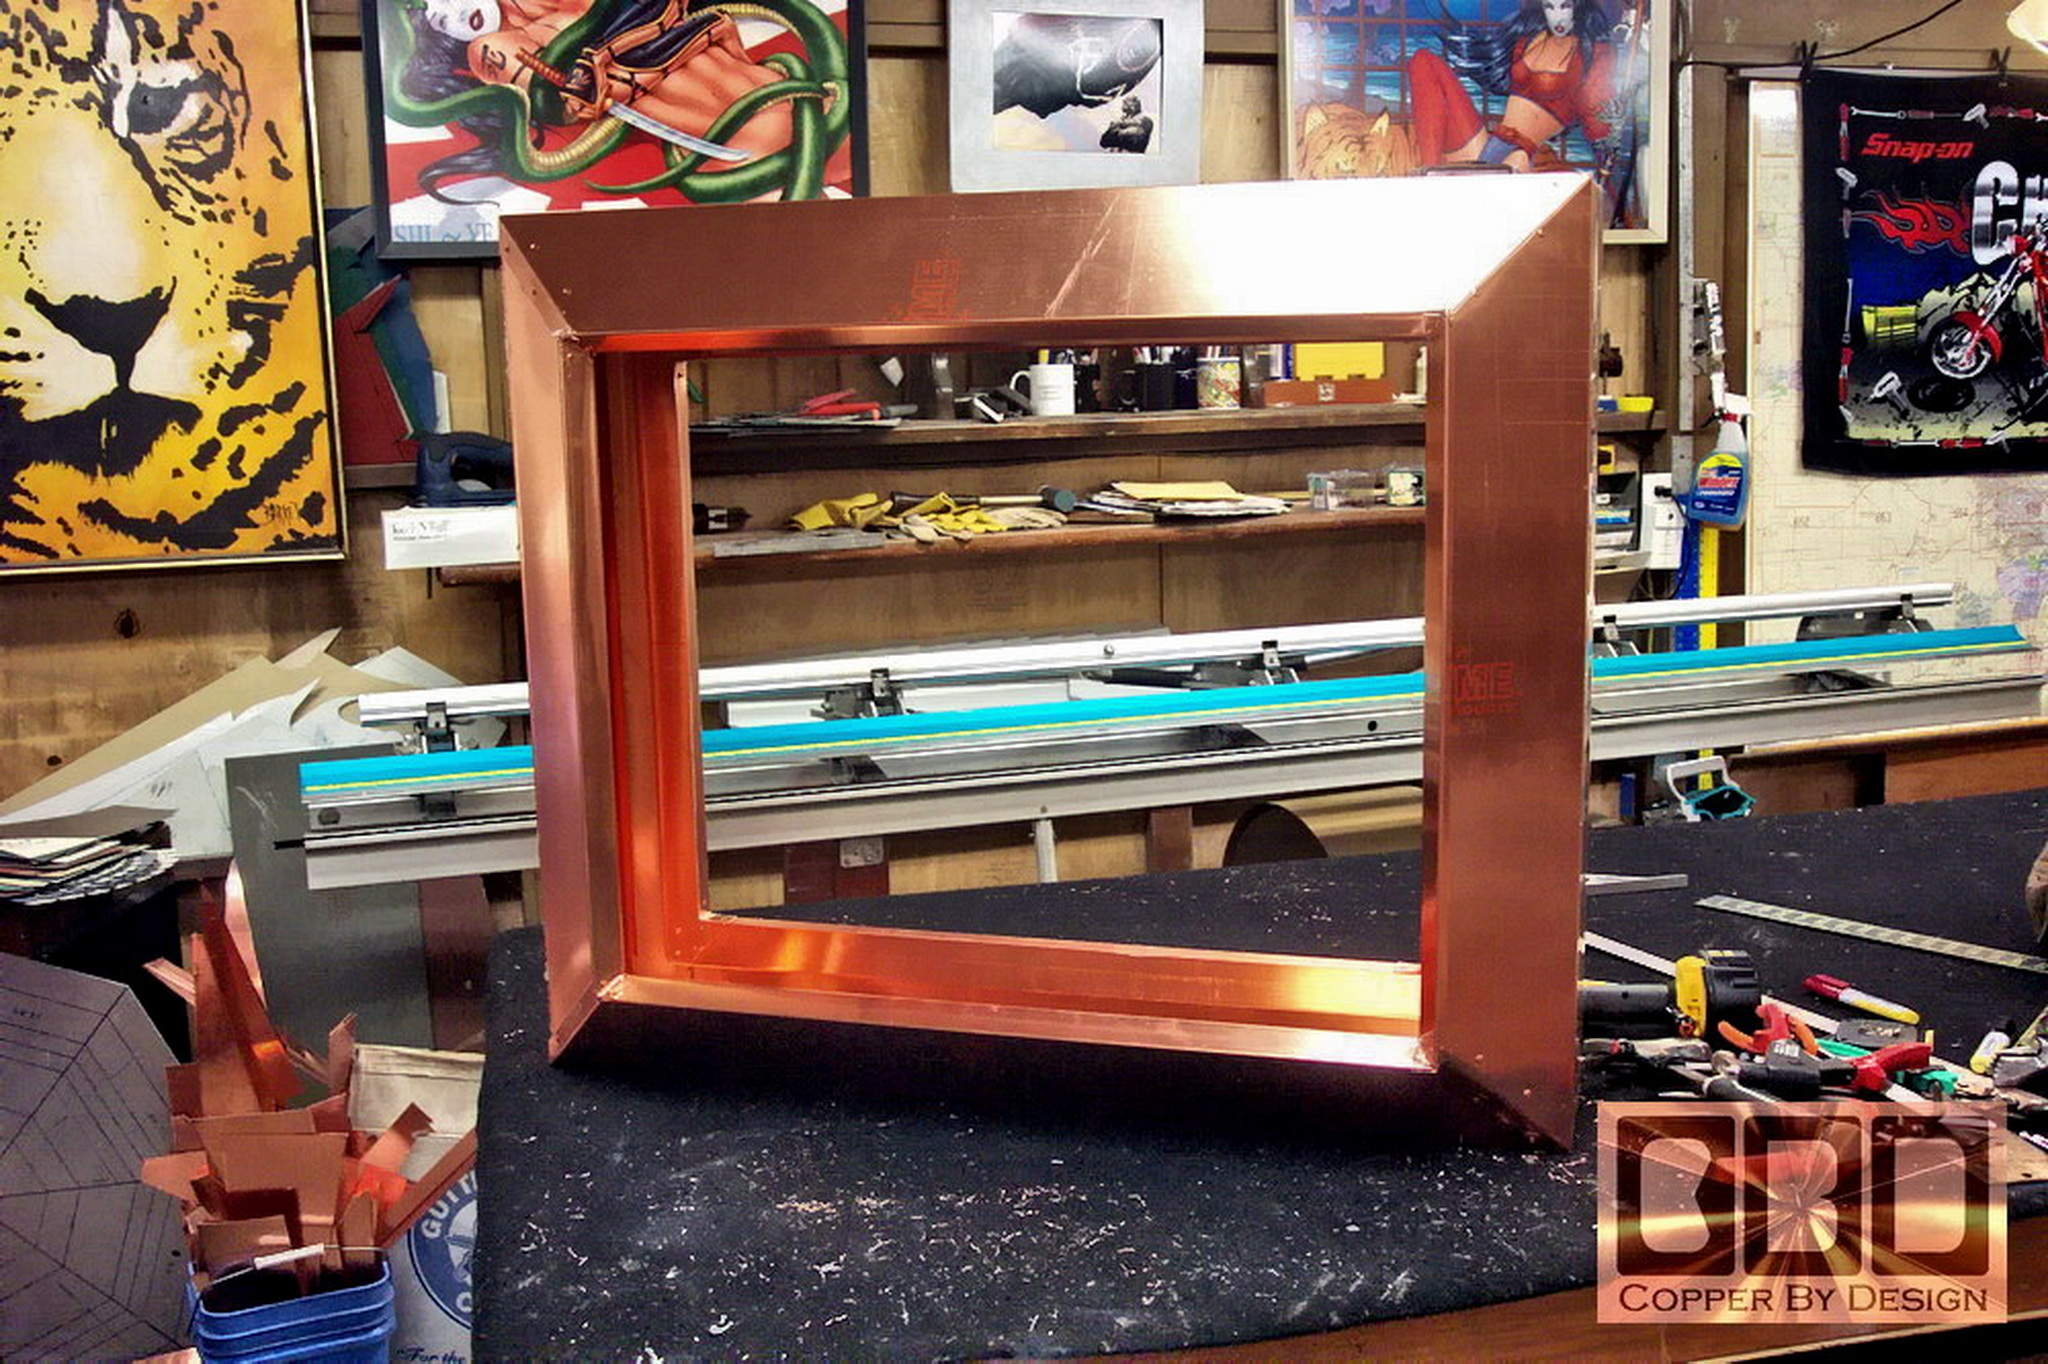
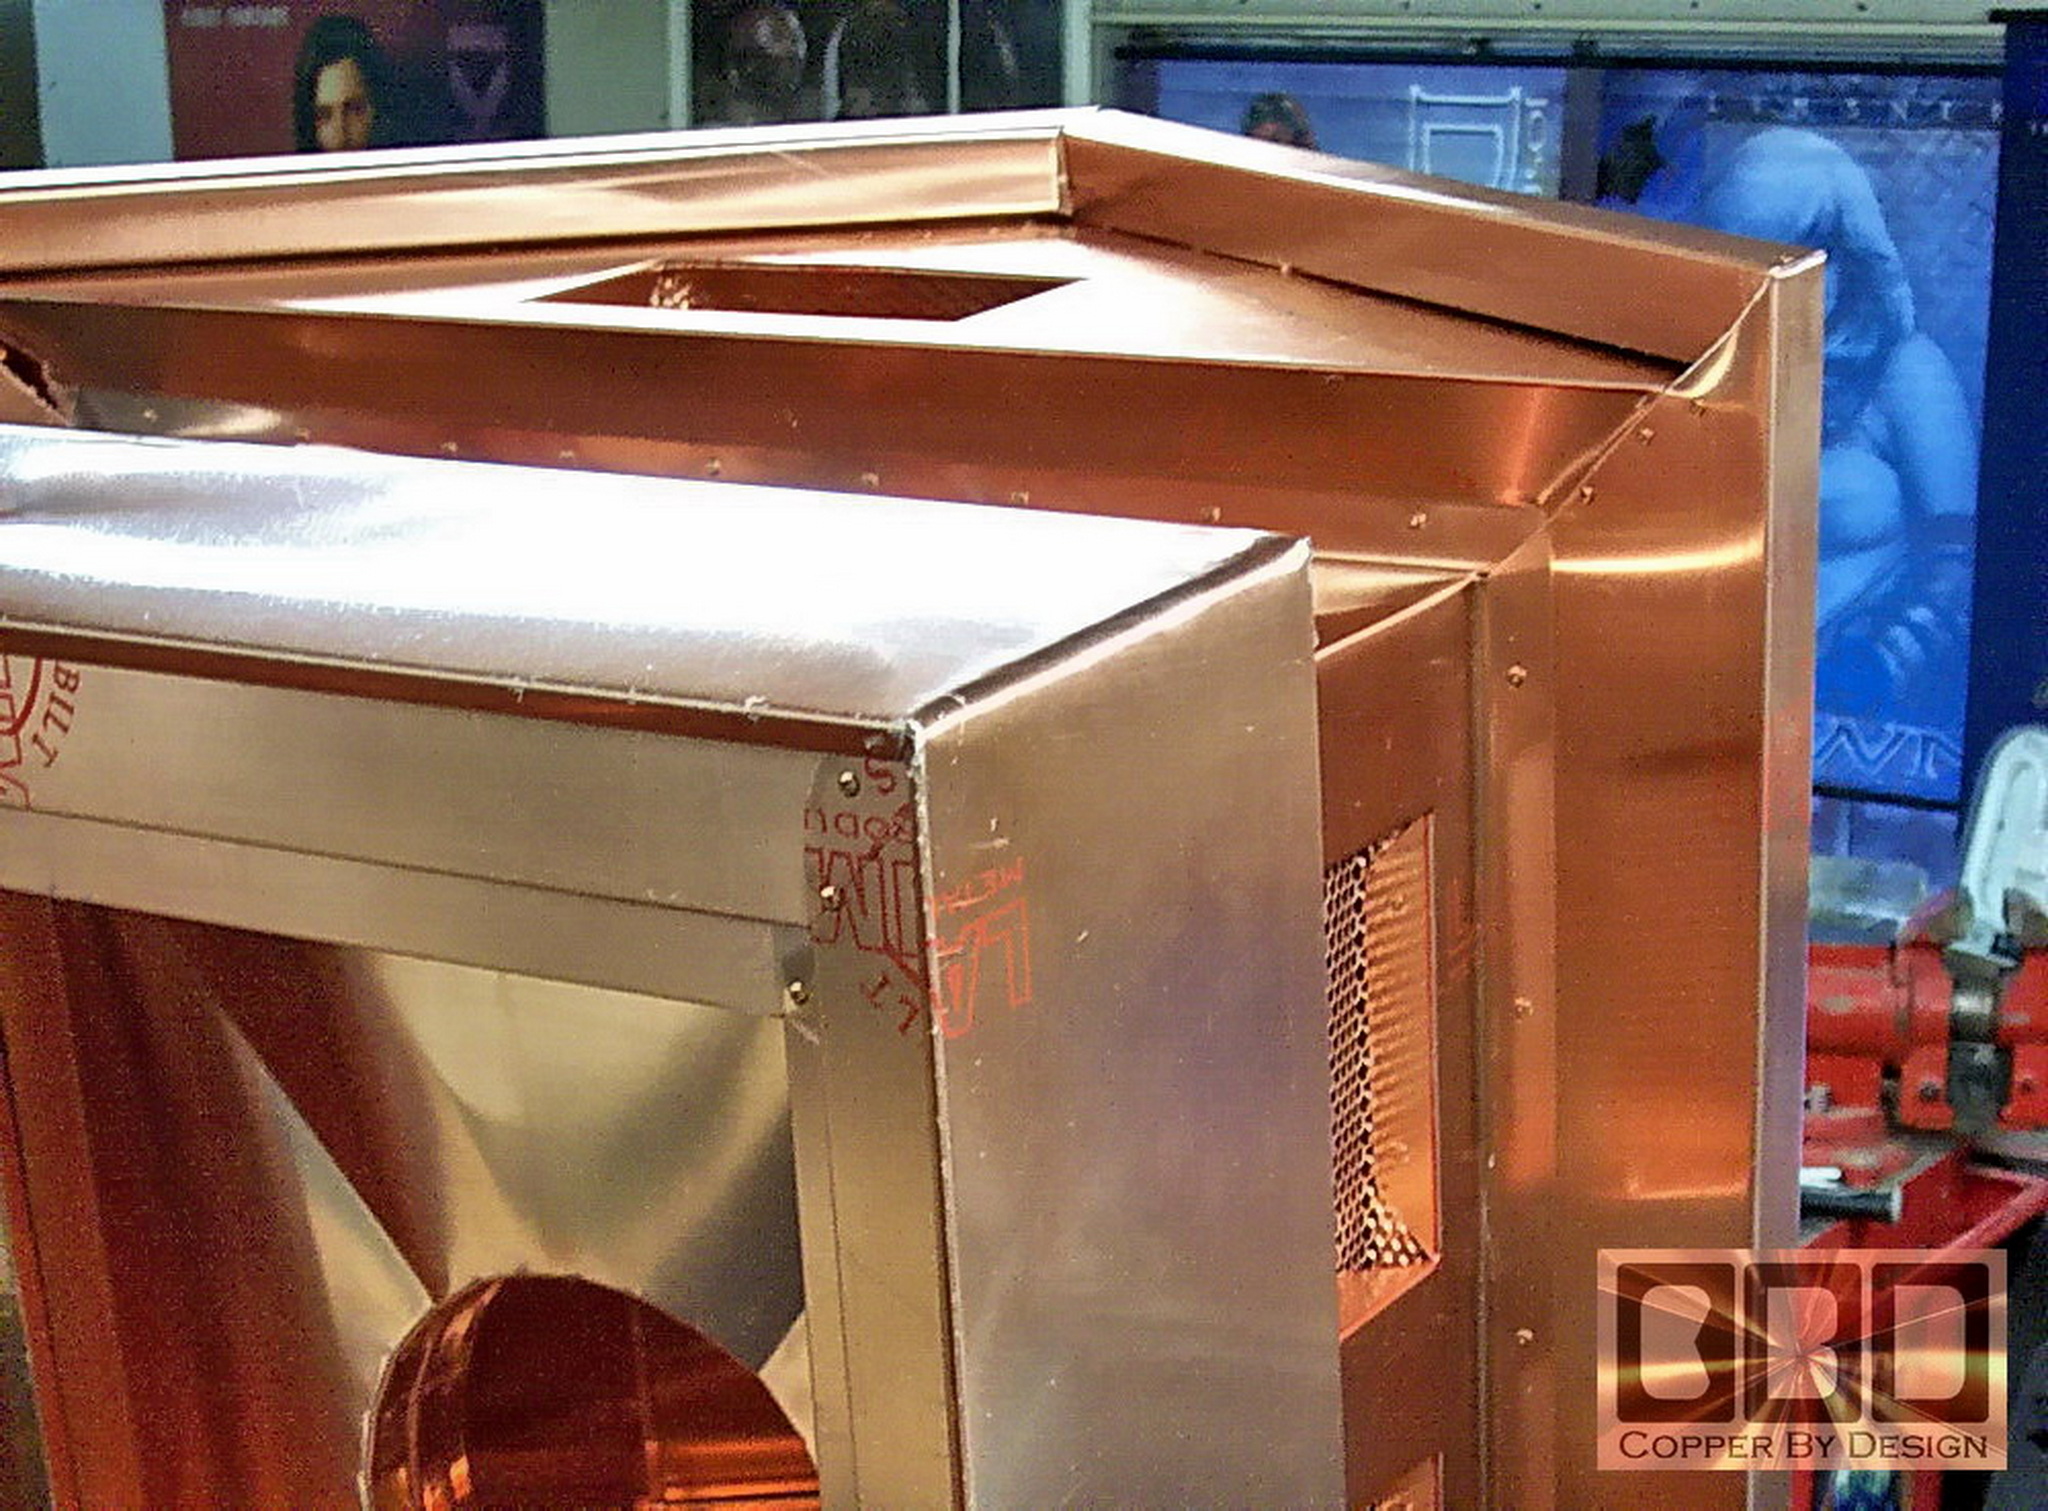
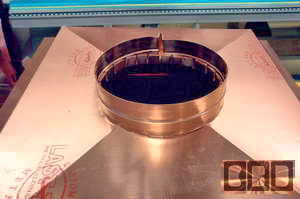
This is showing the one piece screens area bent
into shape. The span in between the vent windows and out to the
corners was 3" wide. We used 6 large diameter 1.5" stainless steel screws
to secure this section to the pan and base. The screws are going through
3 layers of copper and are still not penetrating the inside of the base,
so there is no chance of this leaking.
|
|
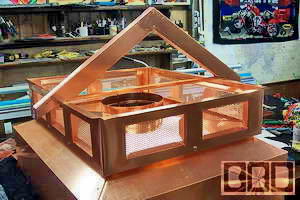 
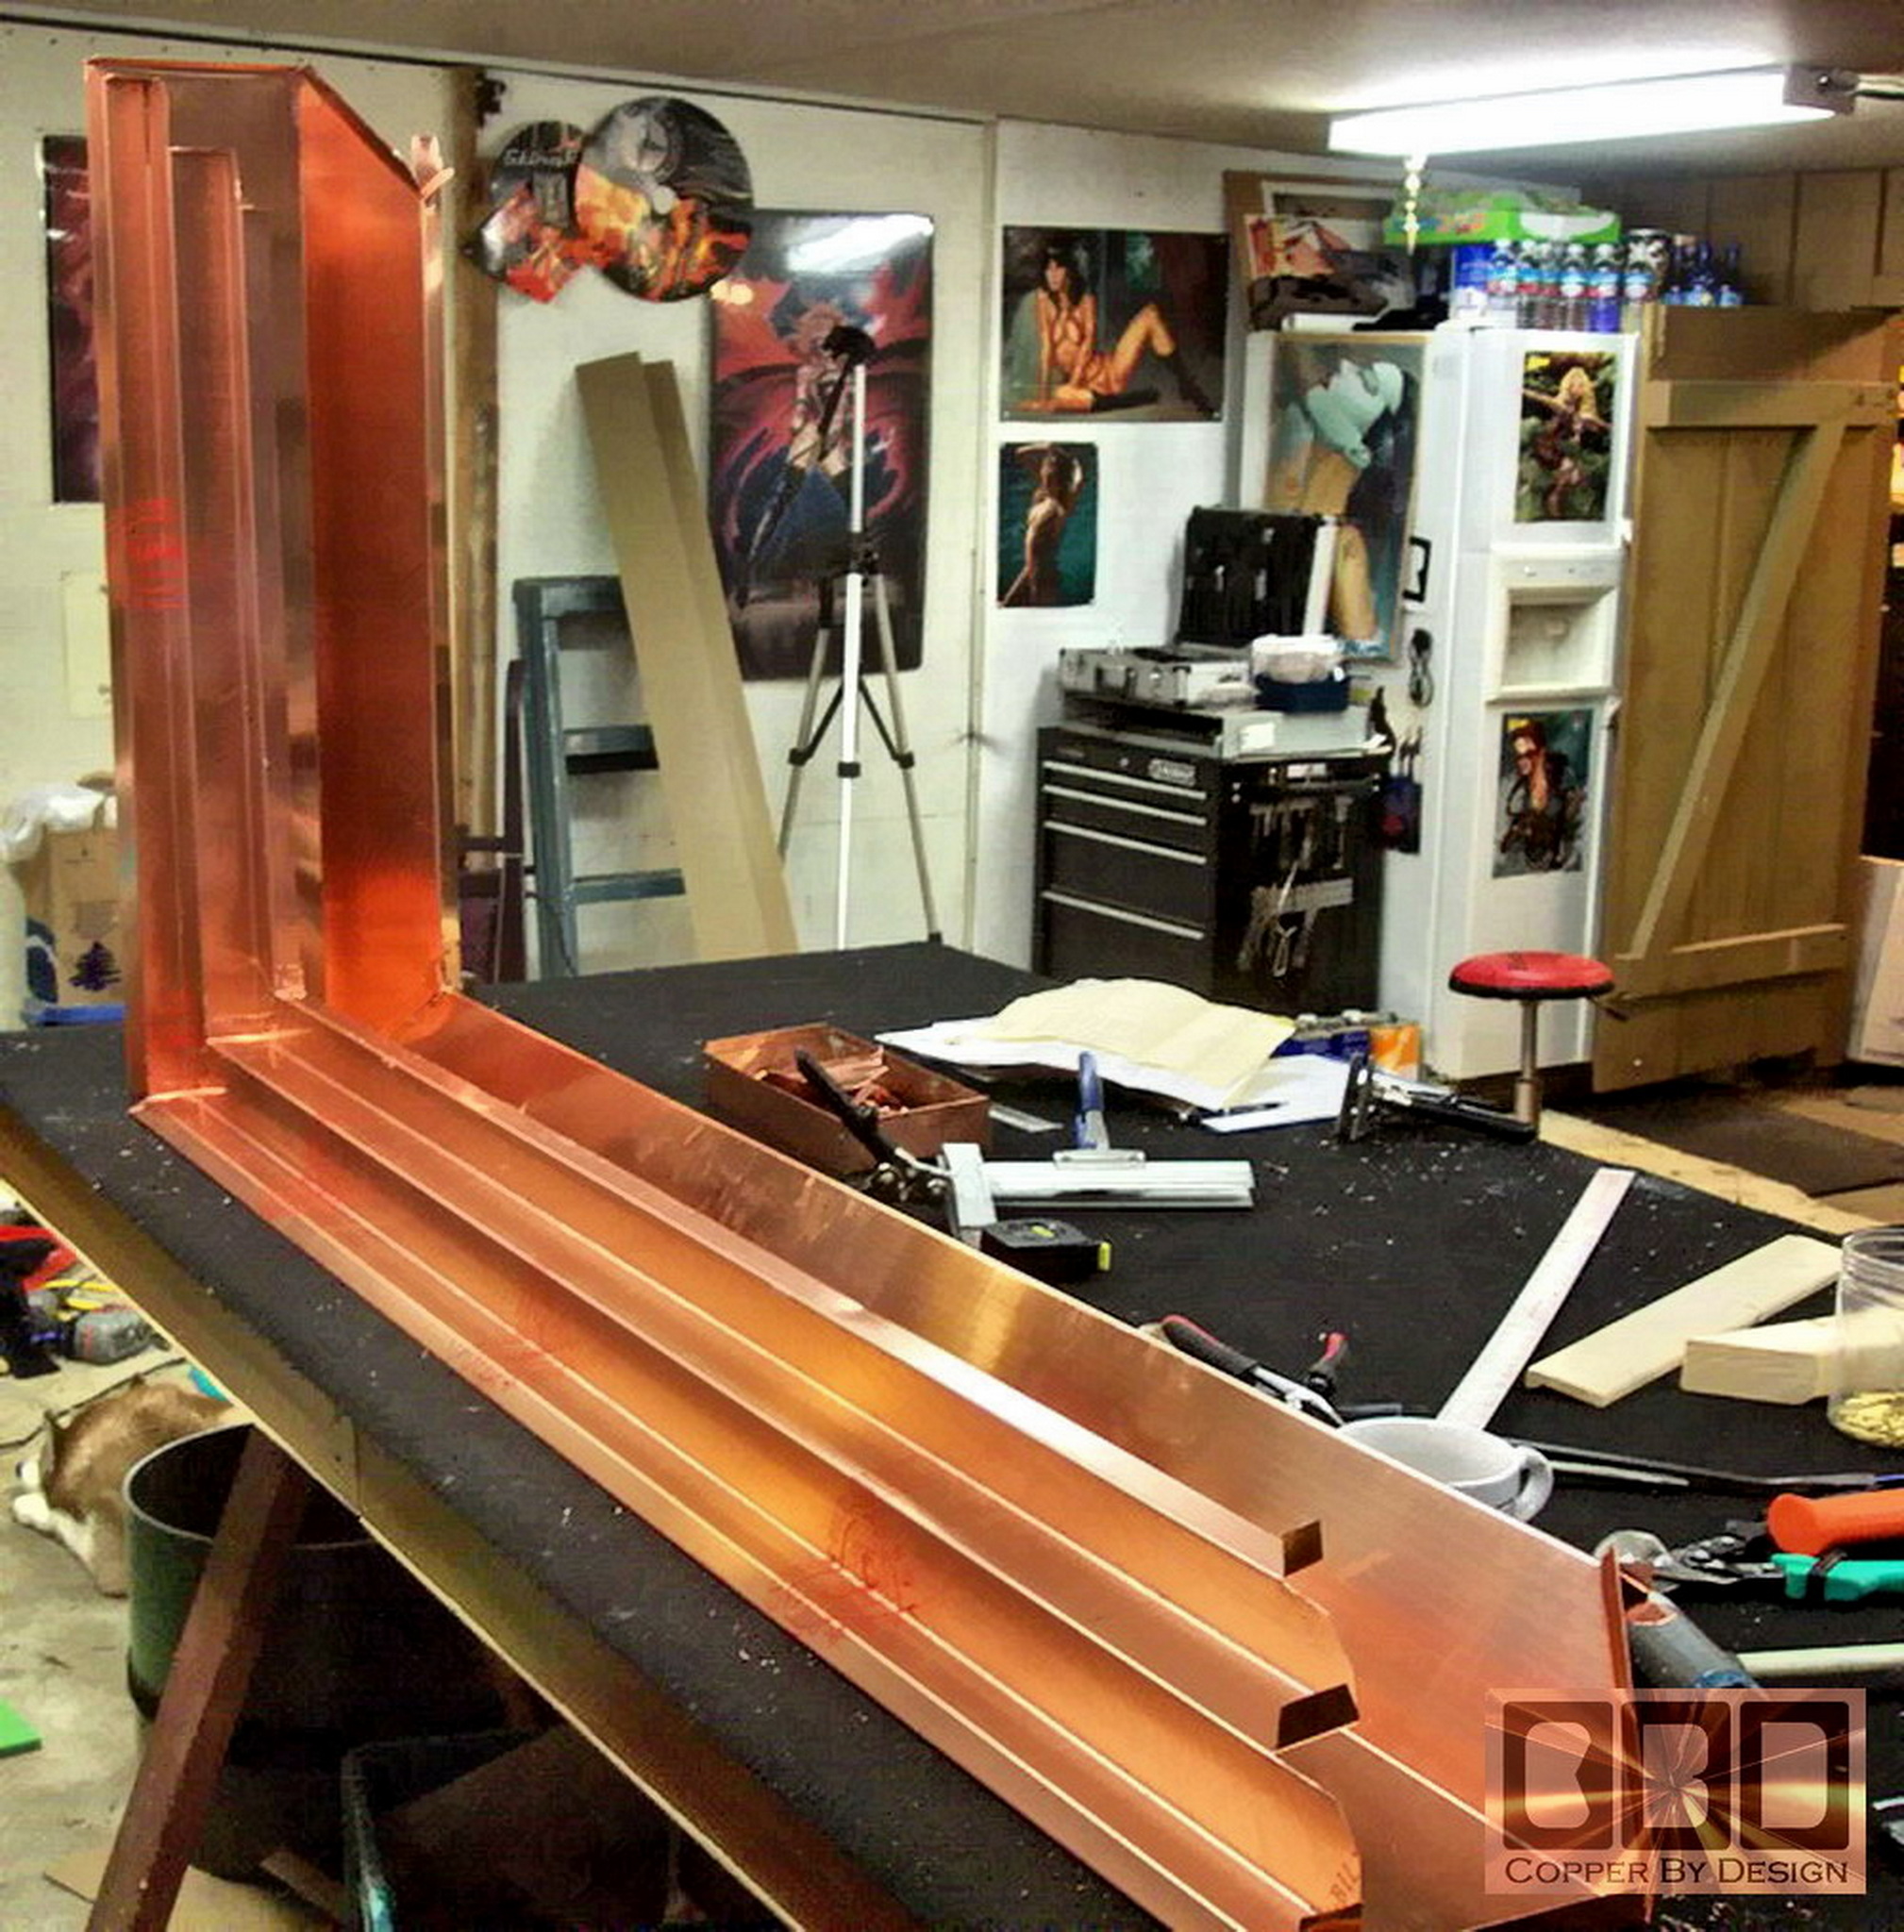
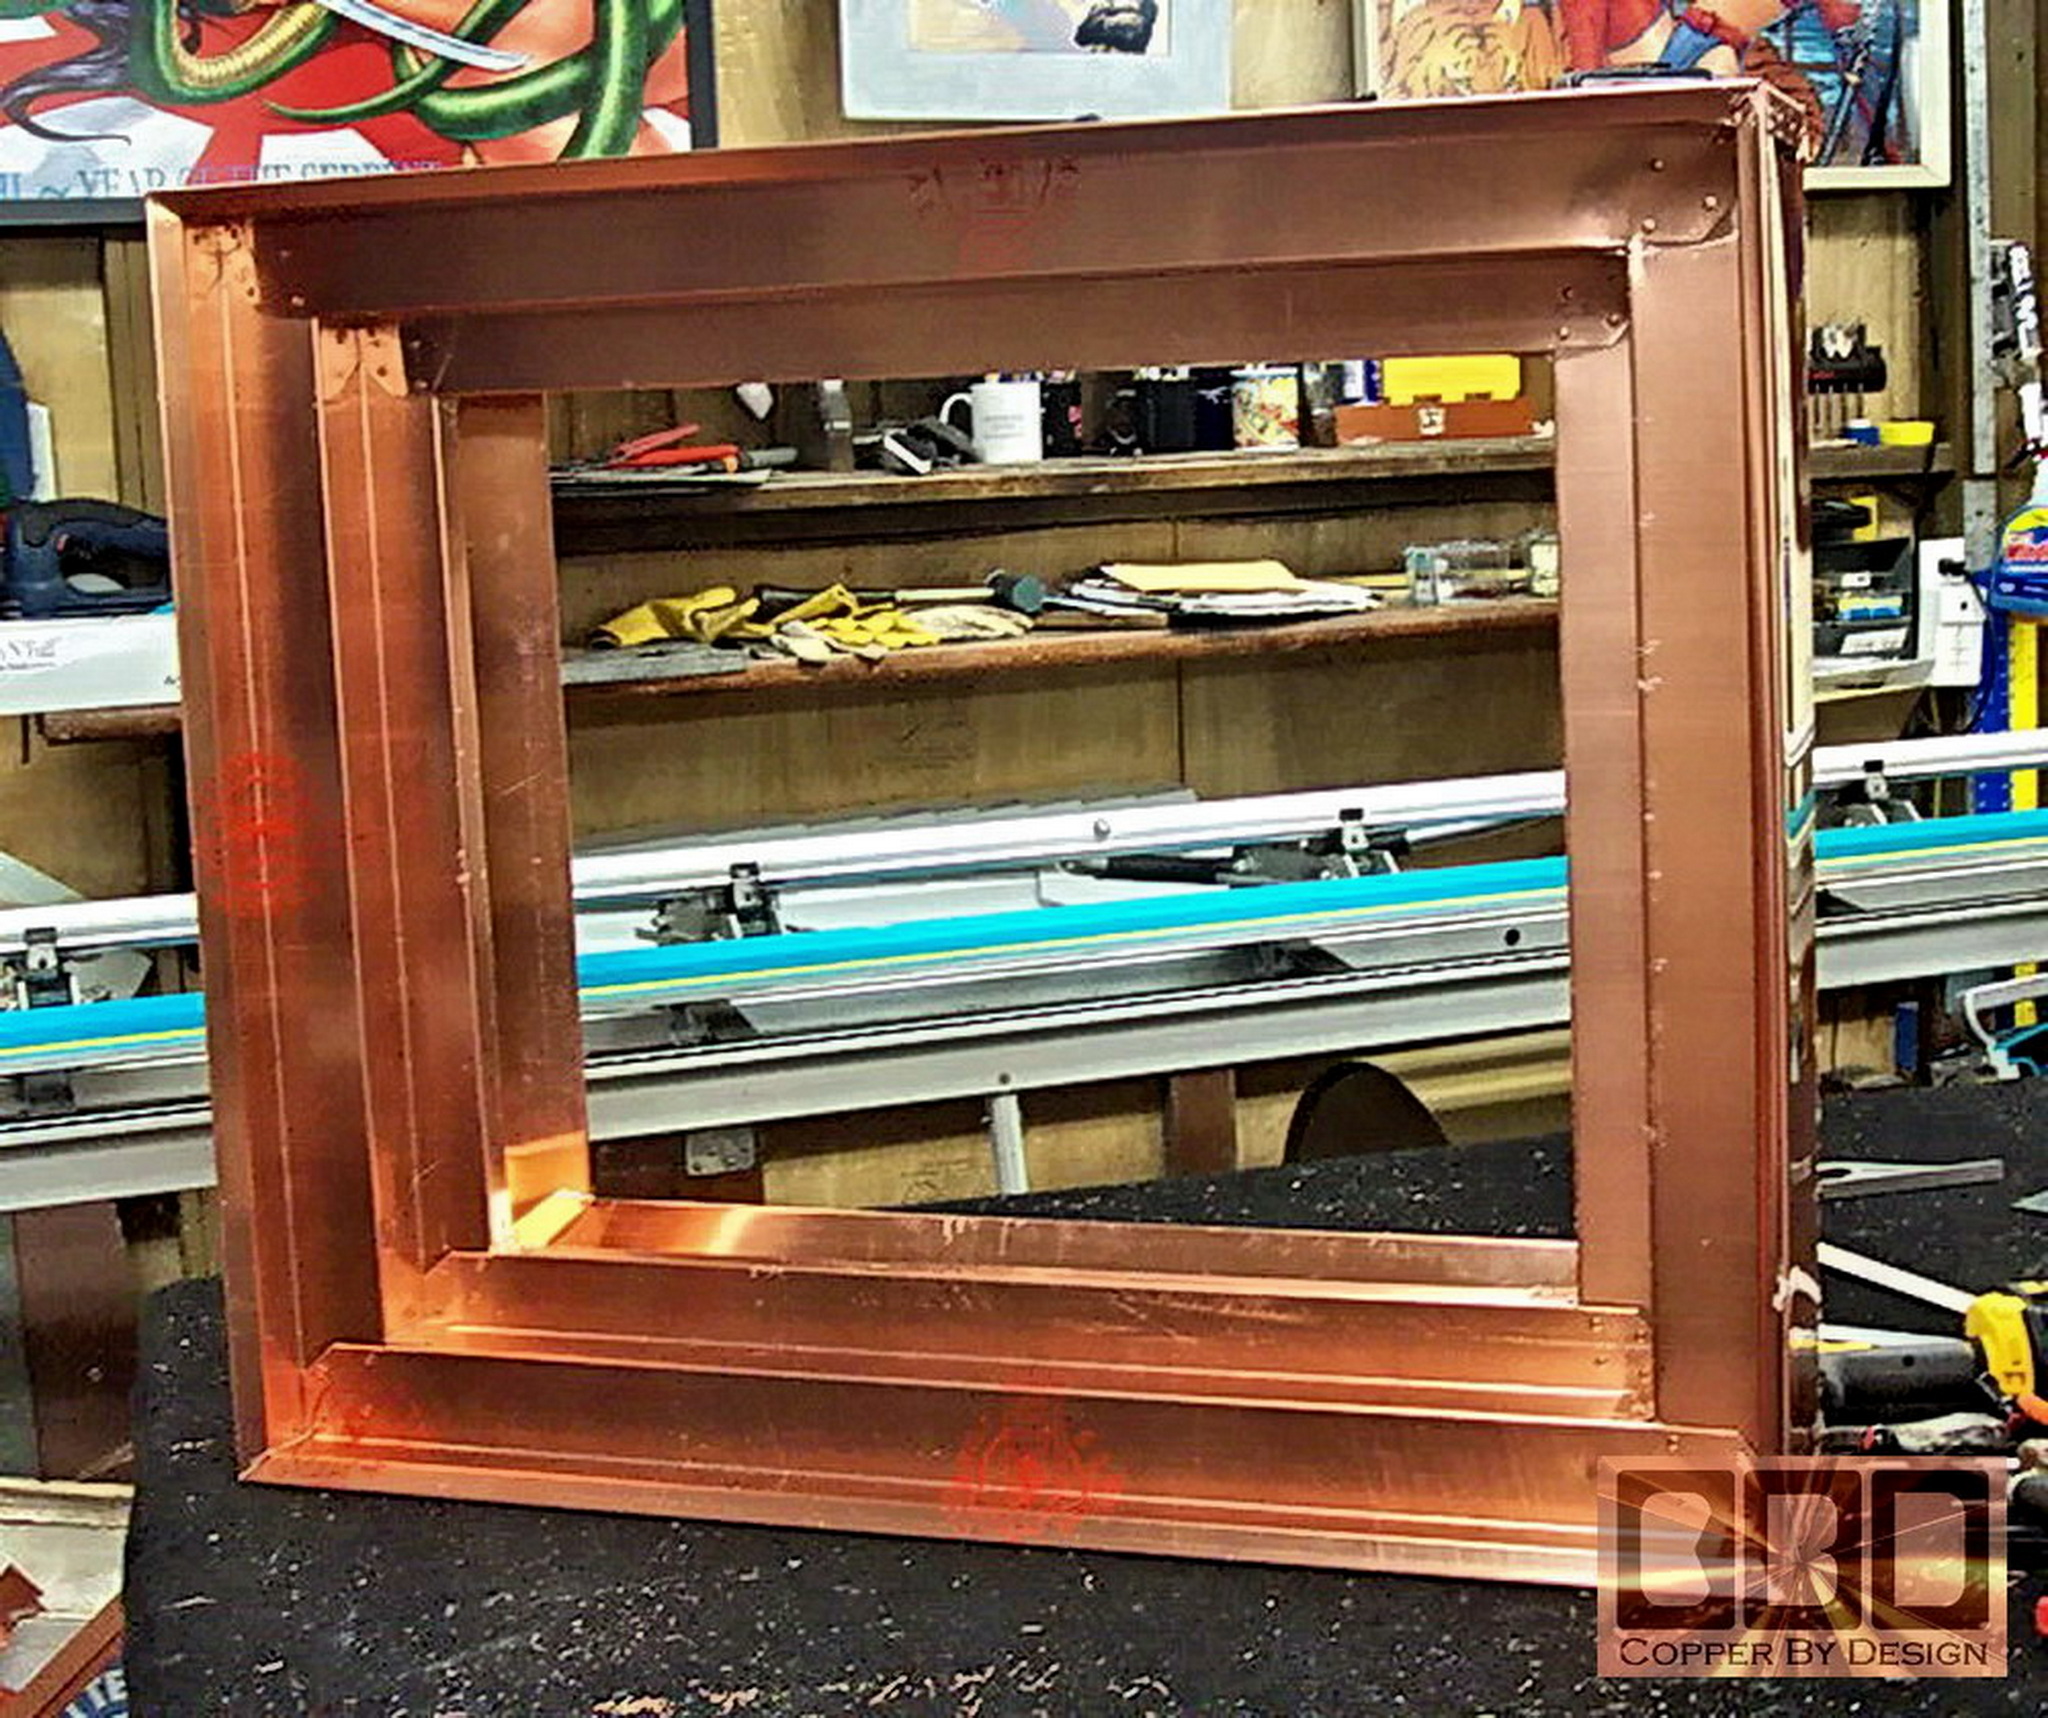
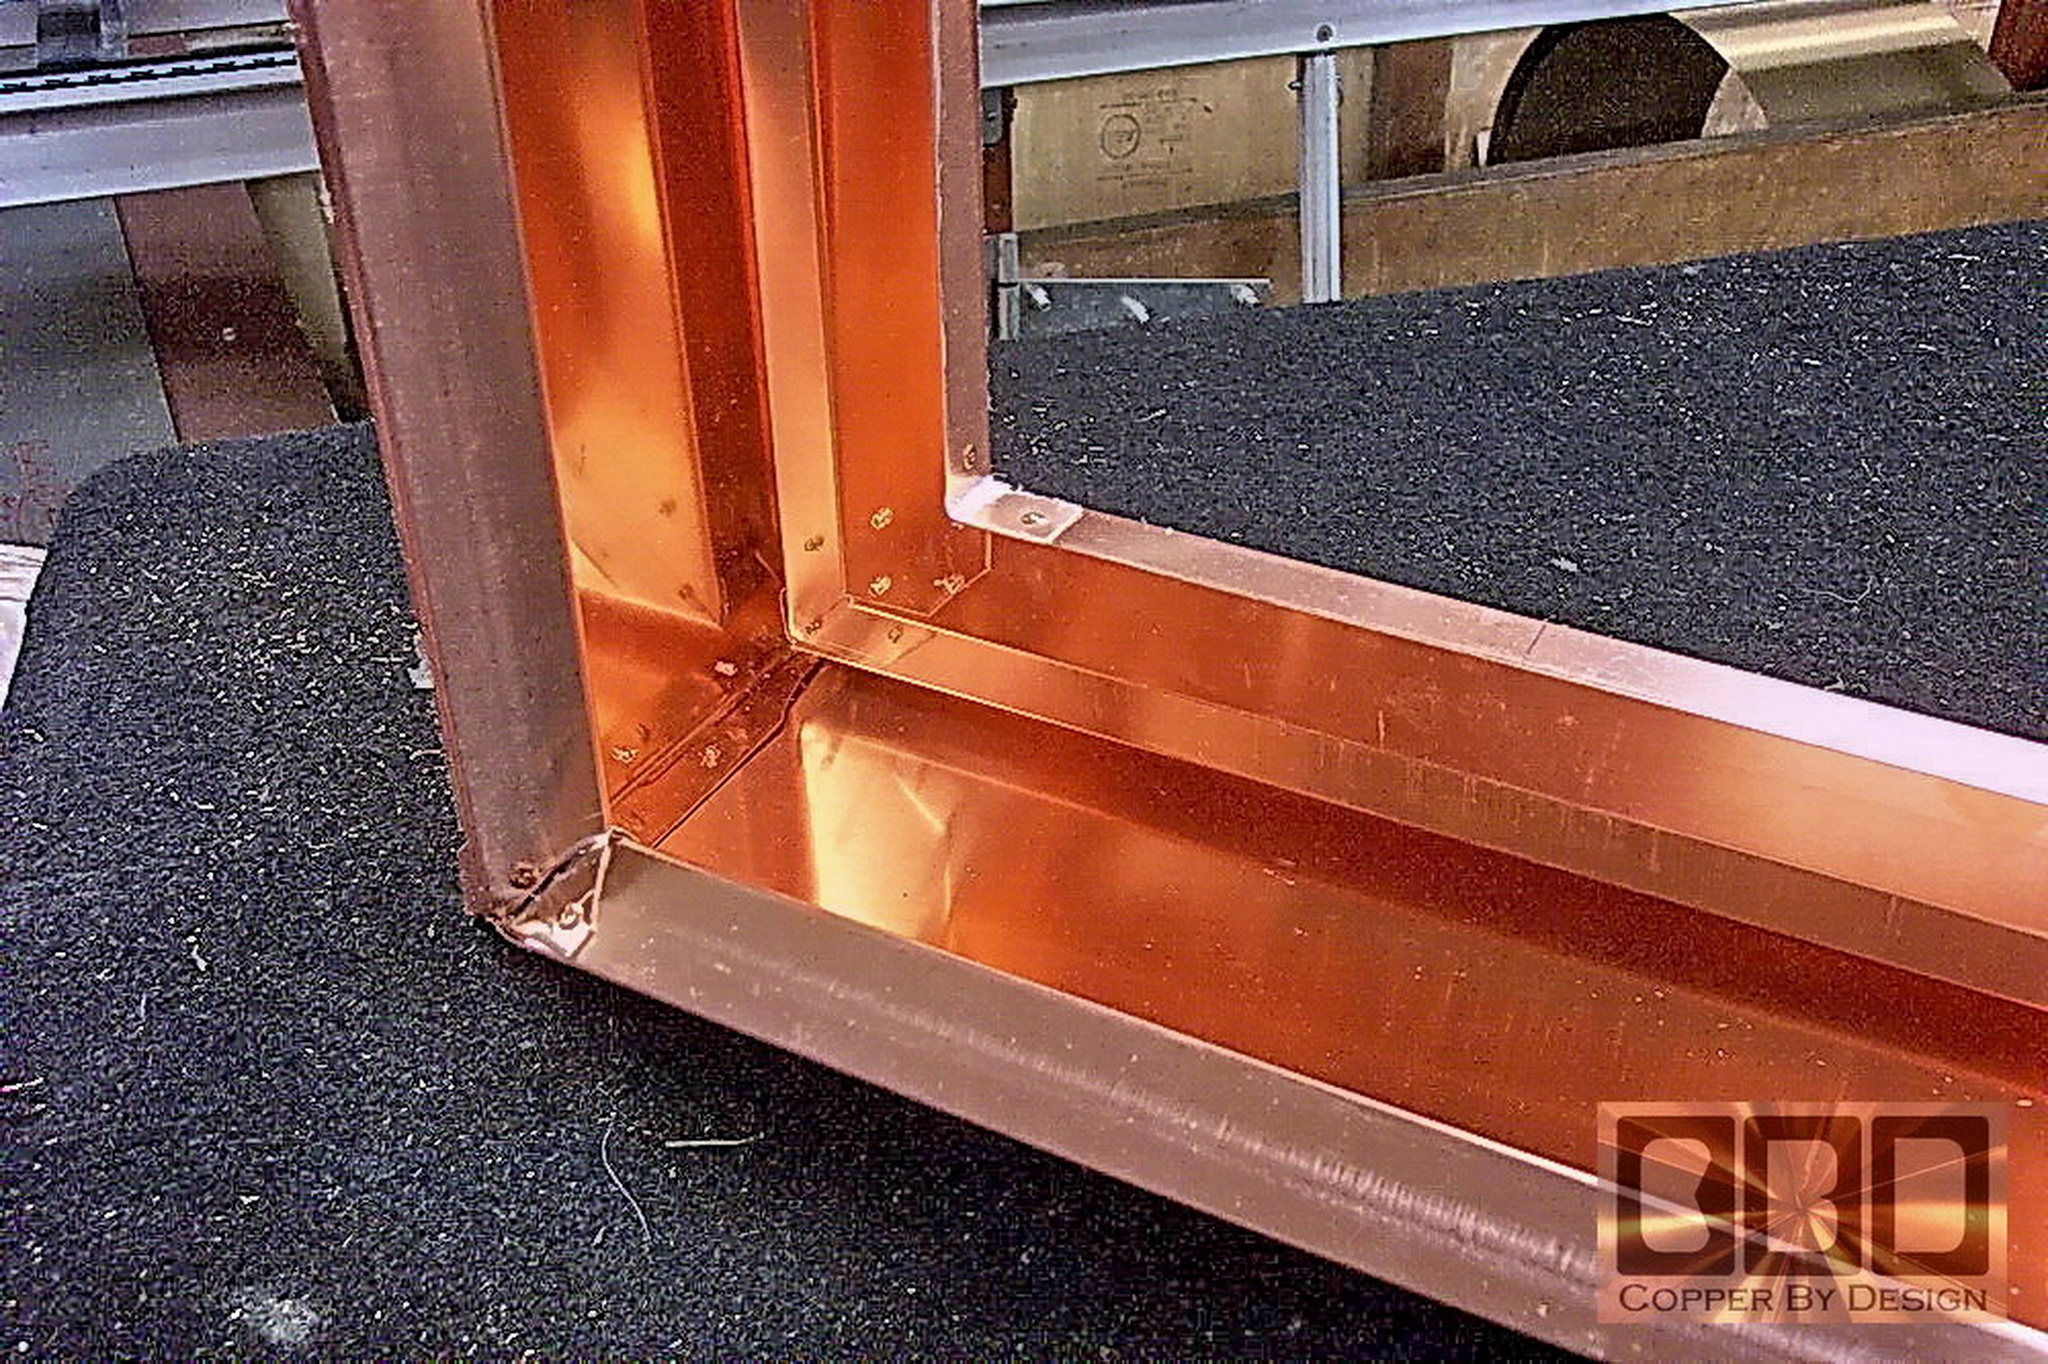
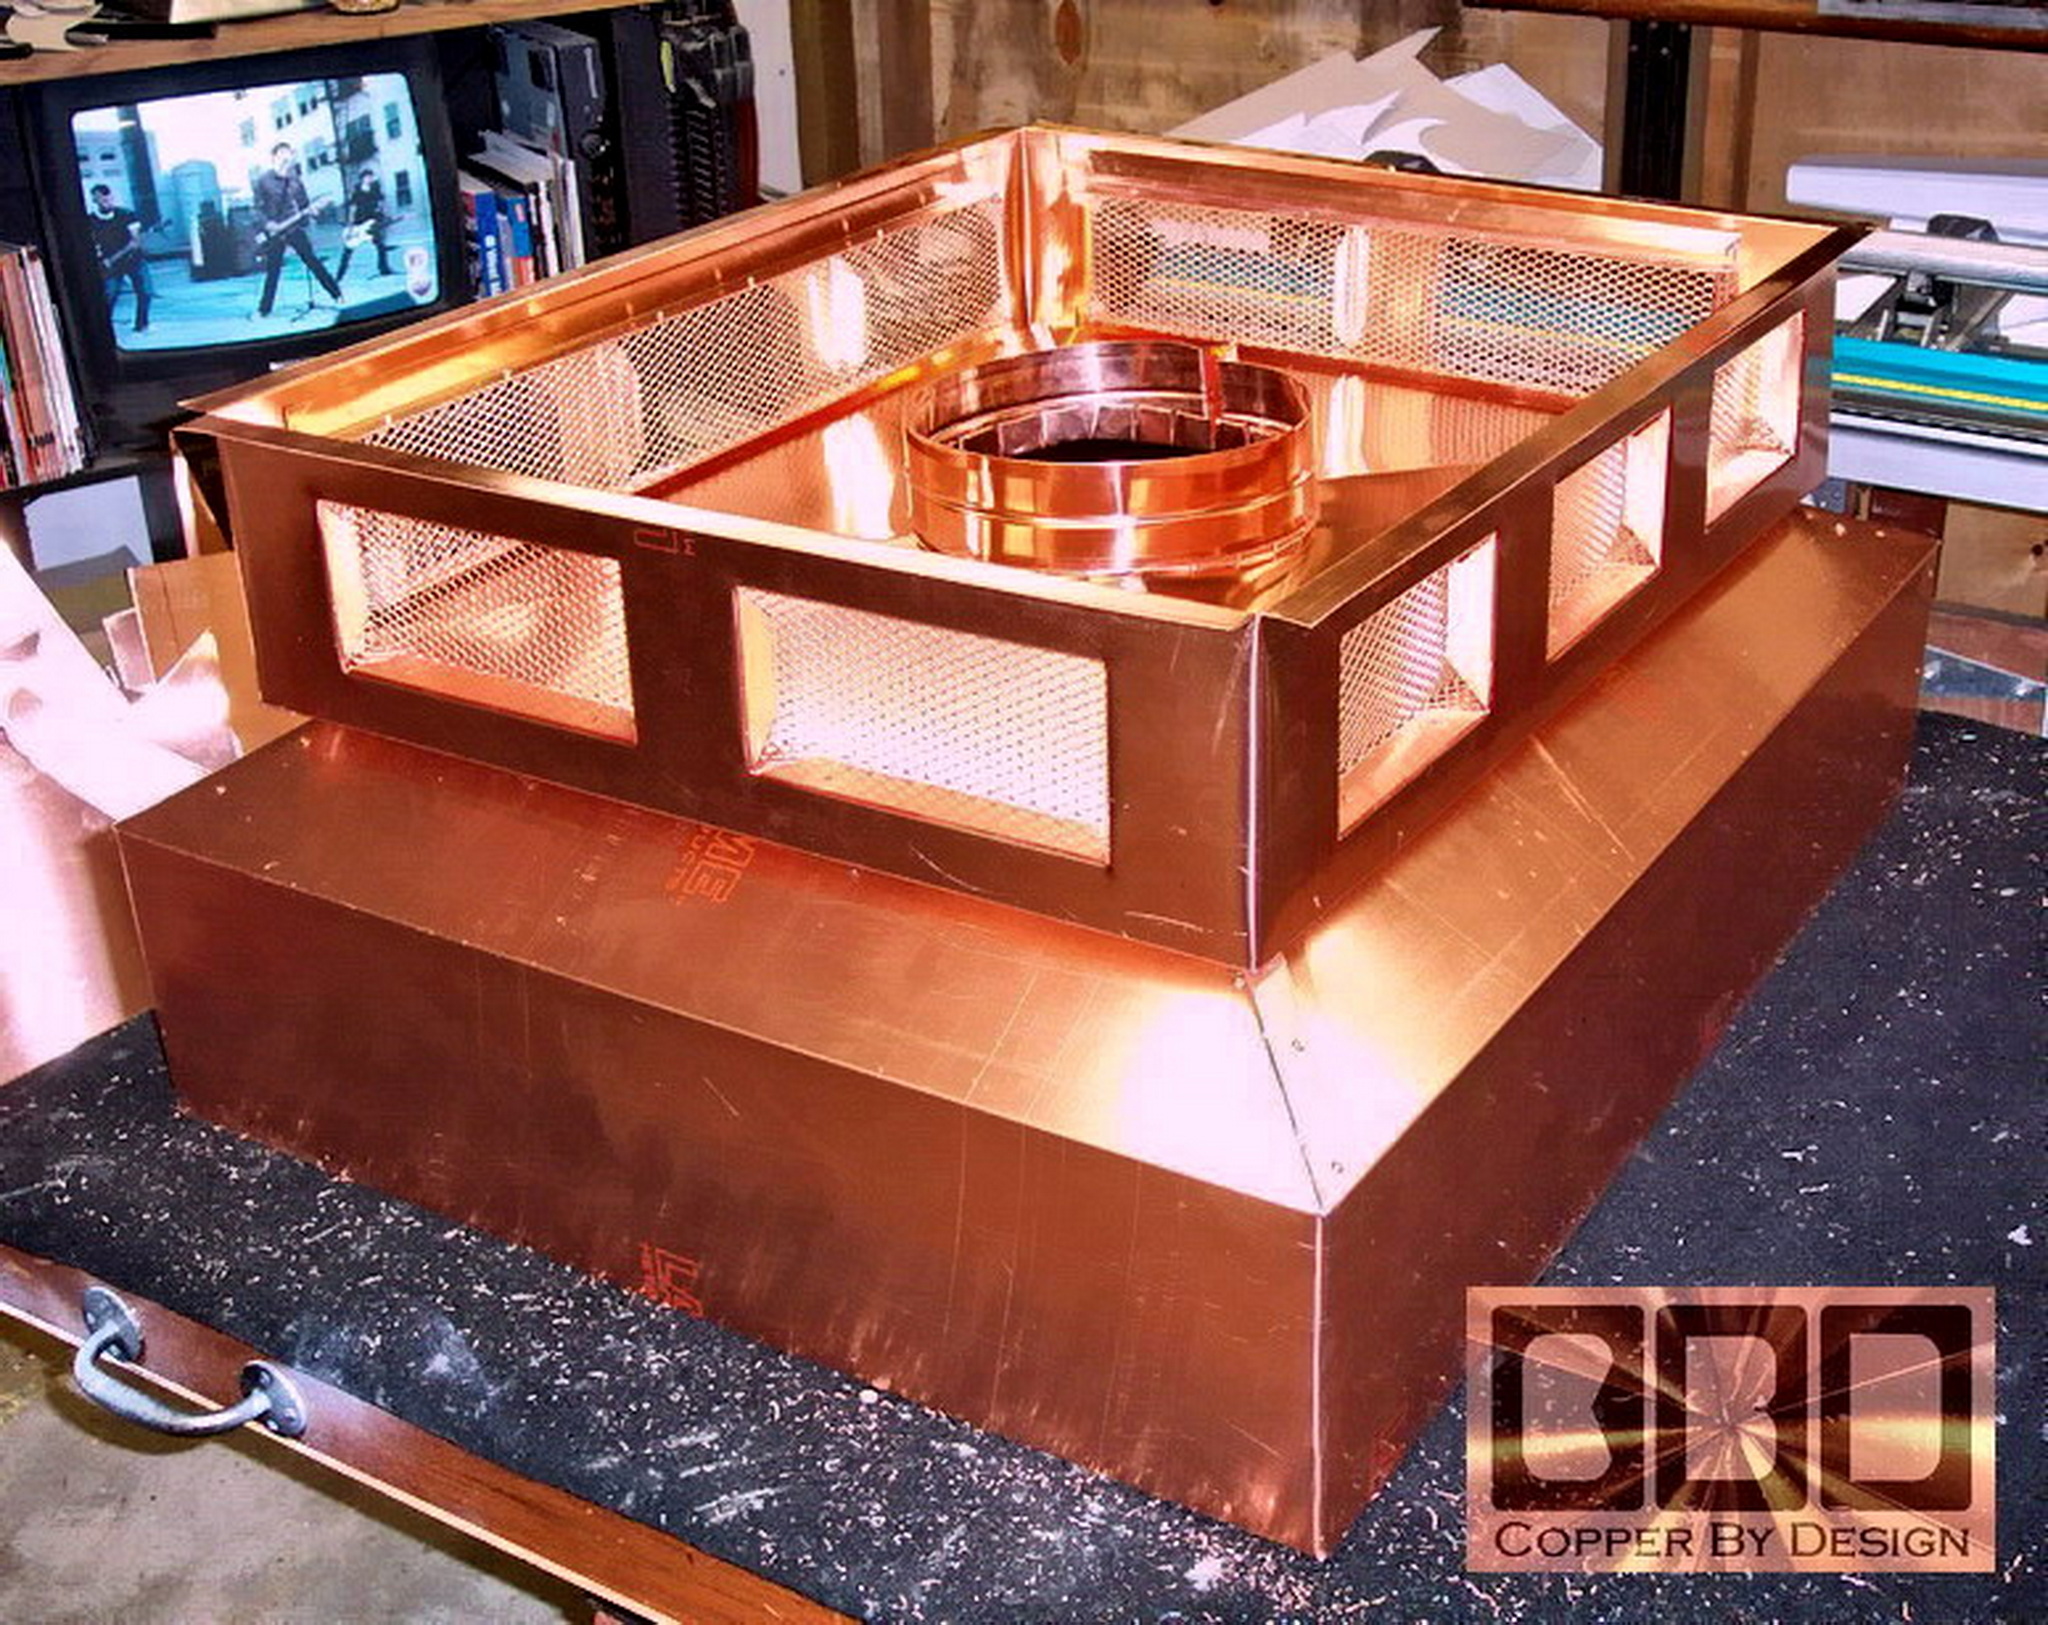
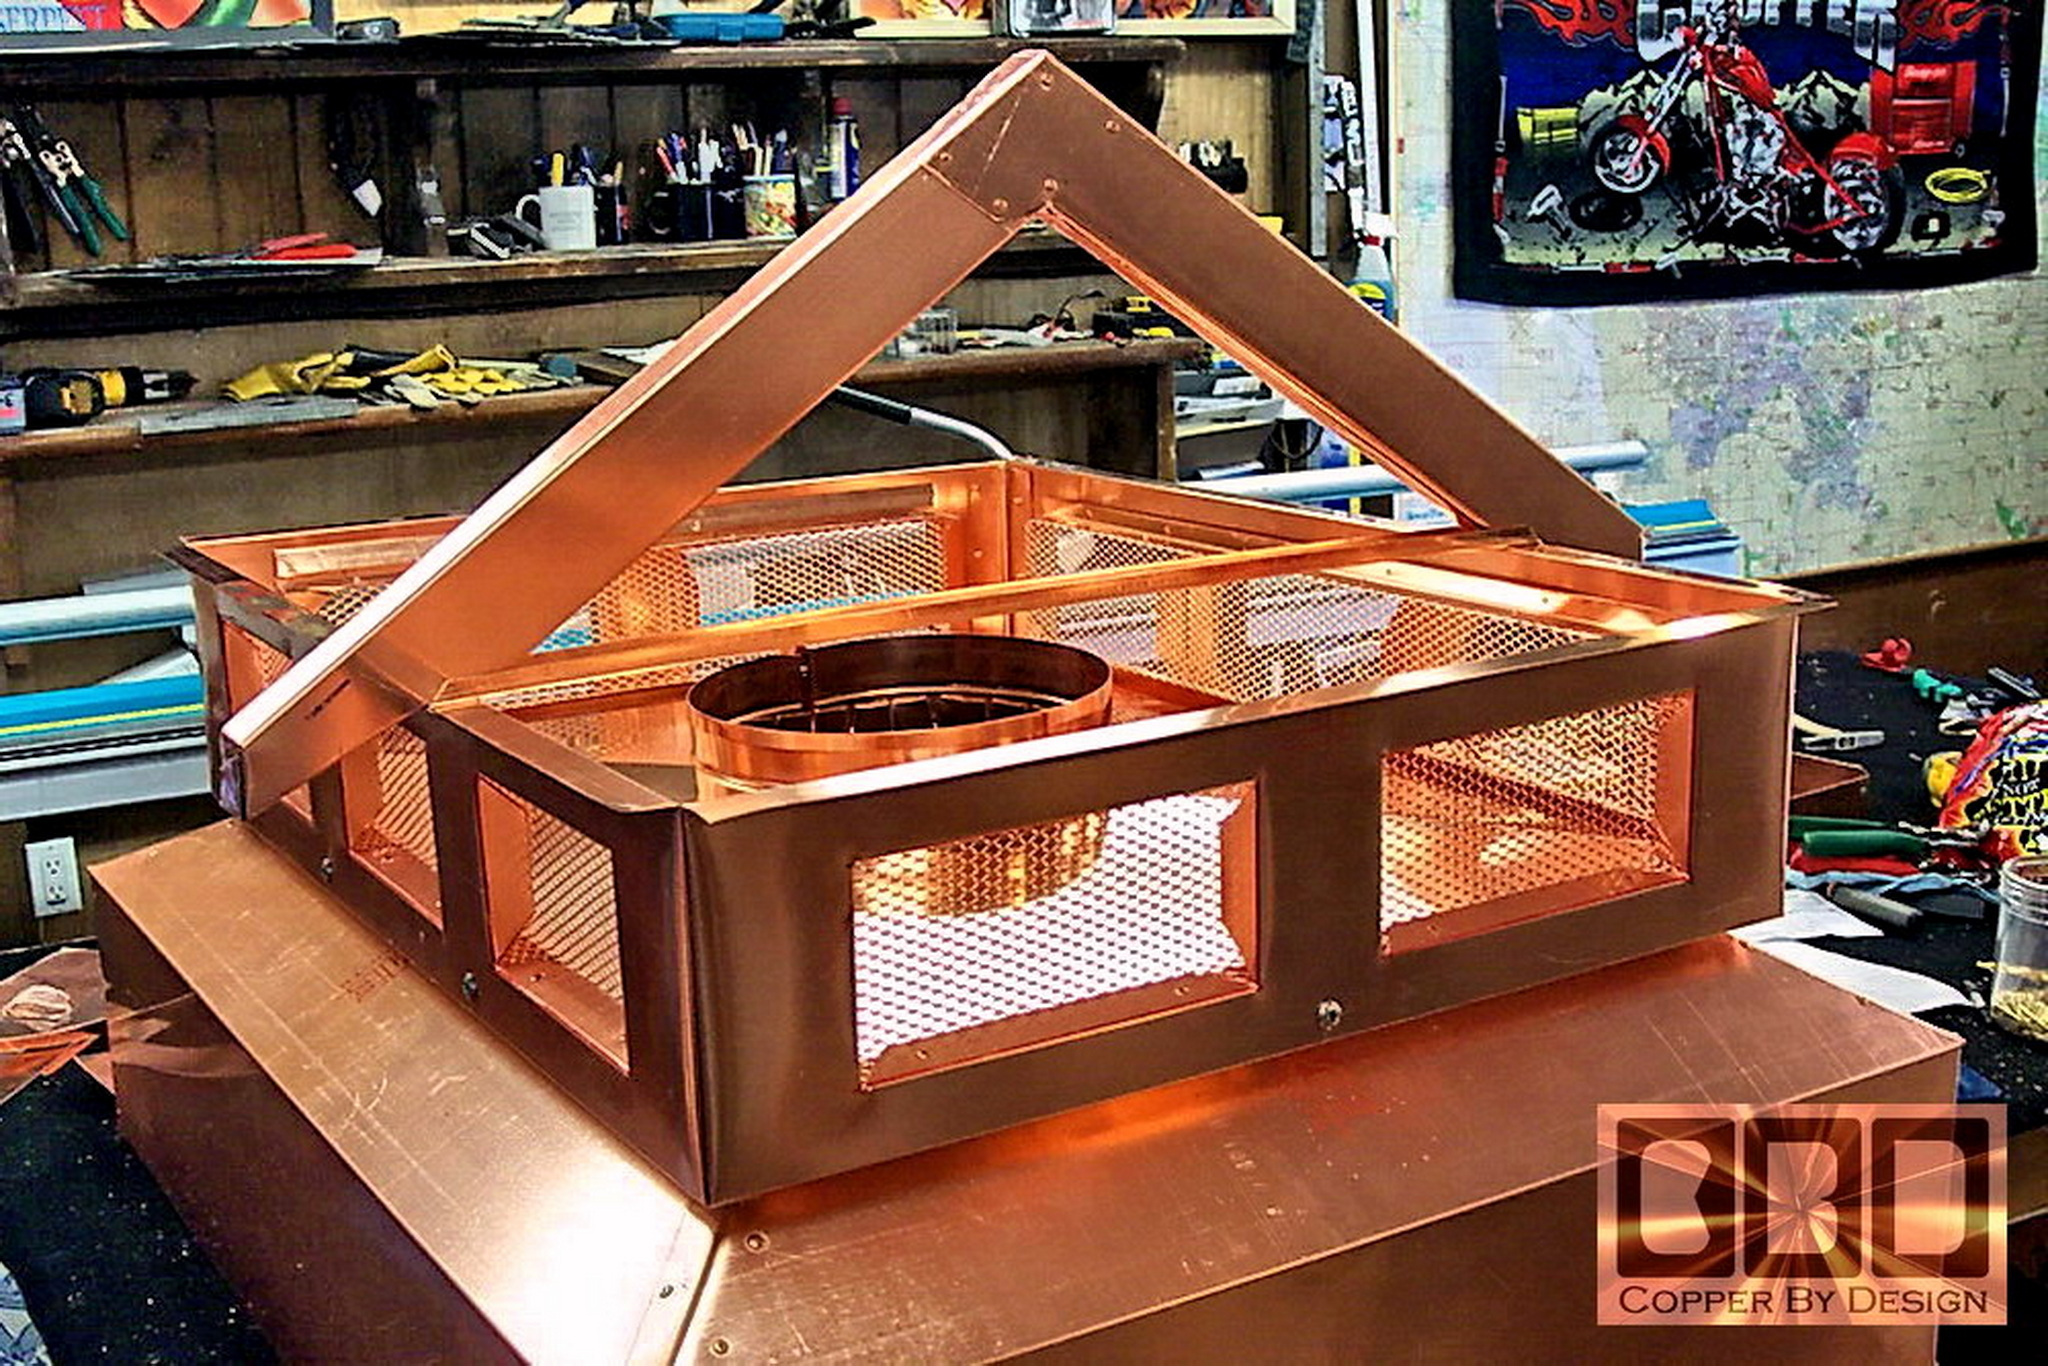
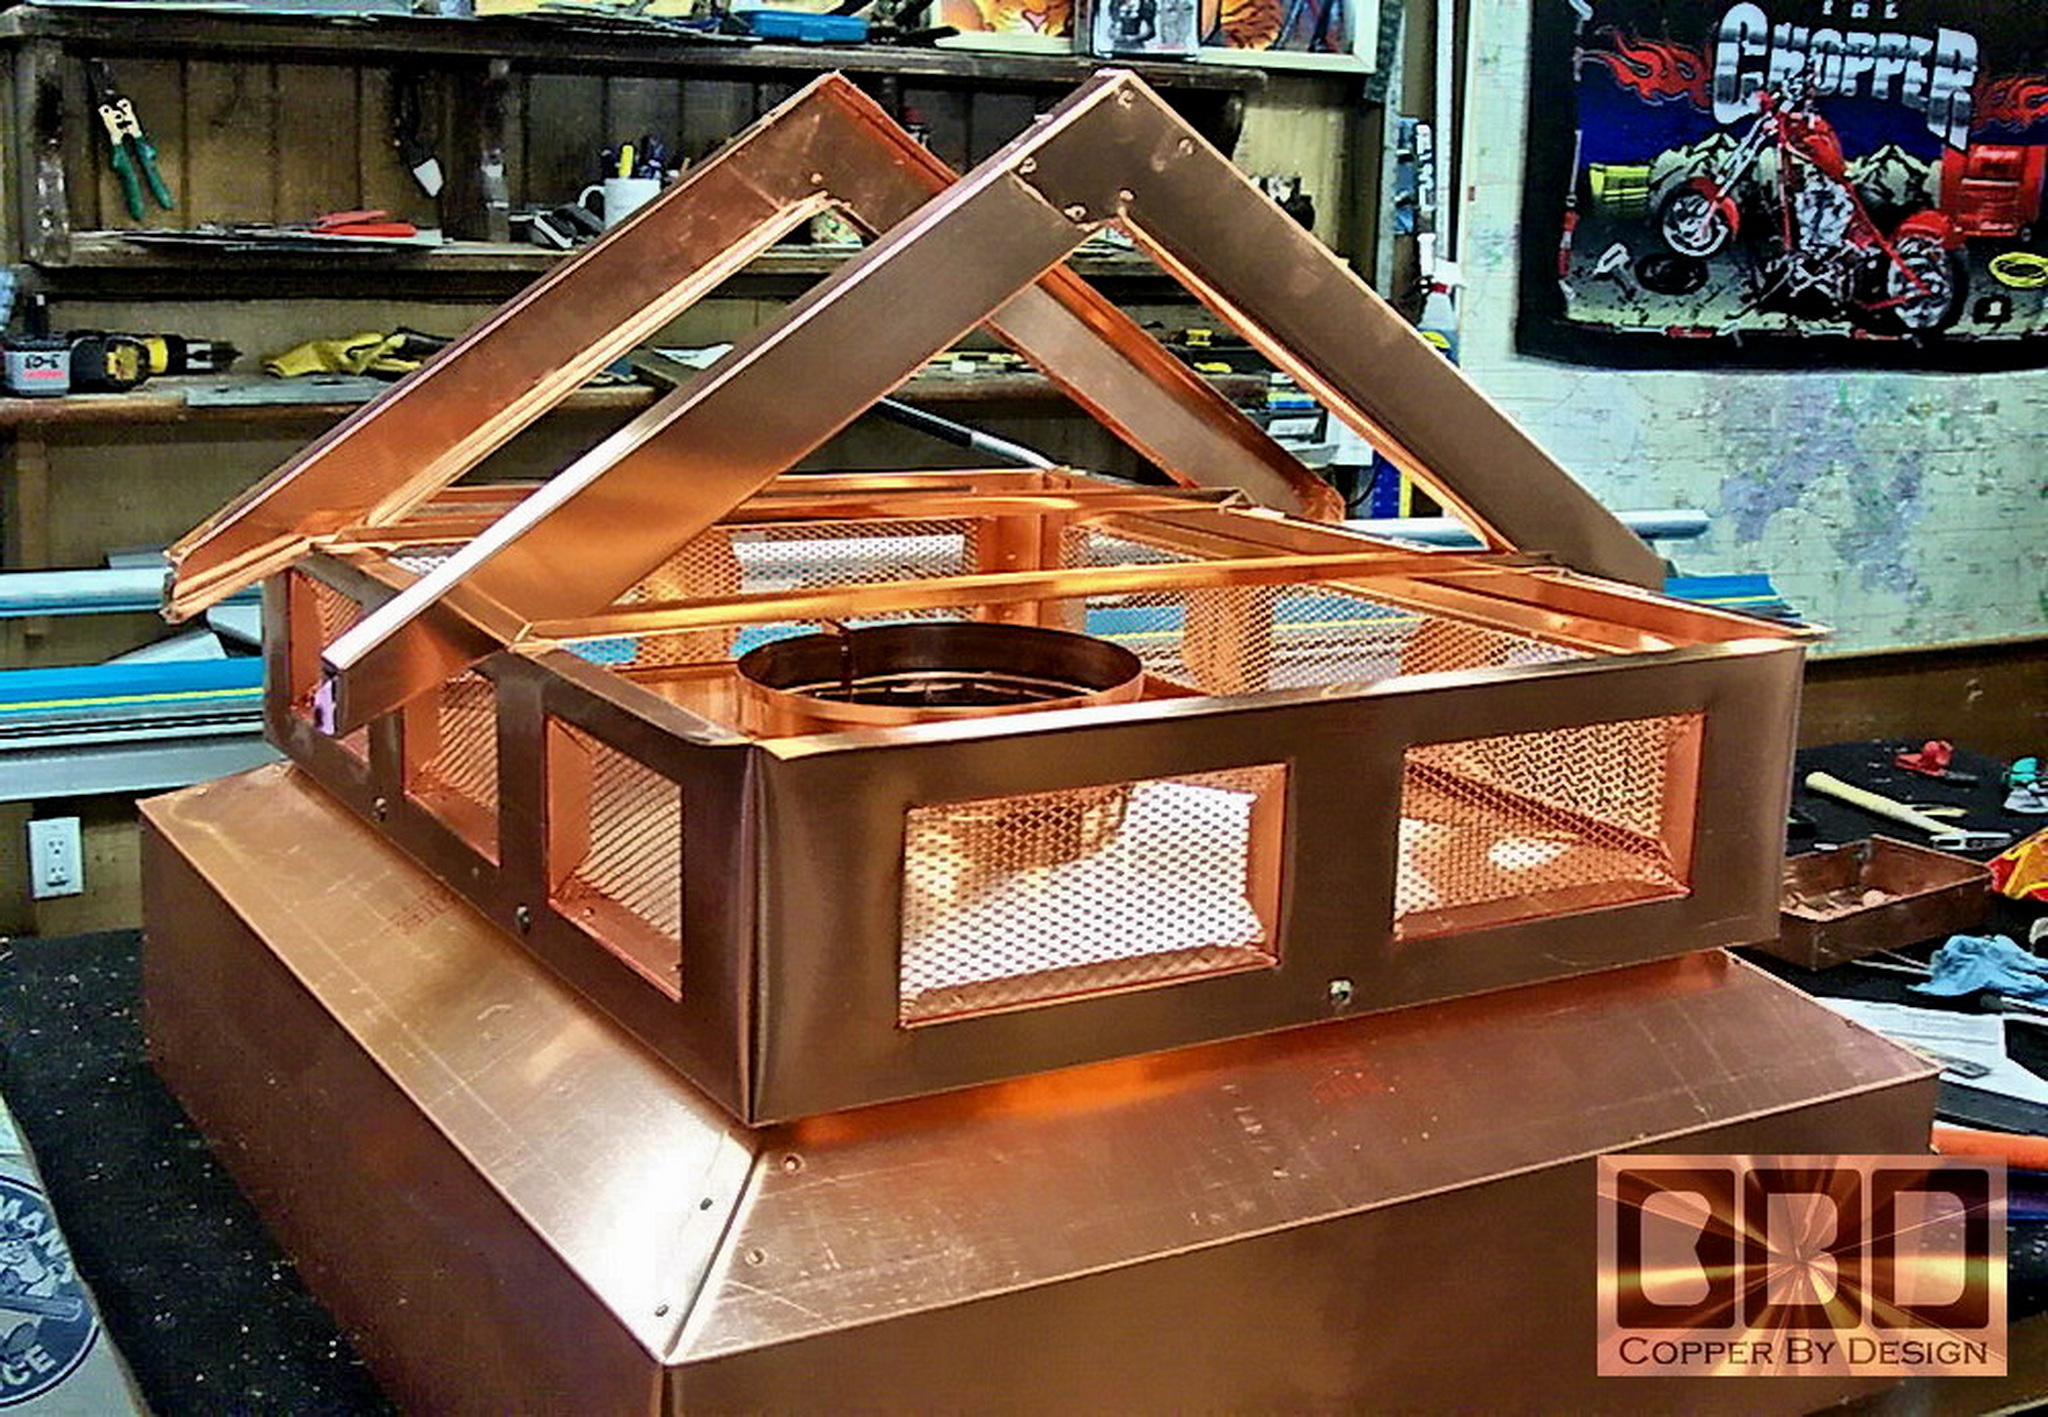
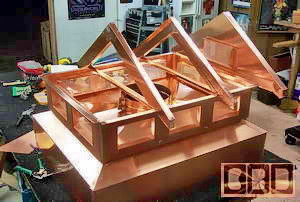
This is the assembly of the internal roof frame
work over the screened area 12" apart with a cross brace so the walls
cannot spread. Then there is the ends with another screened vent window.
|
|
We made these internal supports and braces between
these roof frames to hold them steady. By making this sturdy internal
frame work this way; we will not need to add lots of external rivets
that could perhaps leak, and also making this very strong without many
visible rivets.
|
|
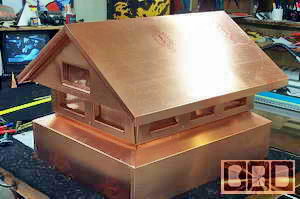 
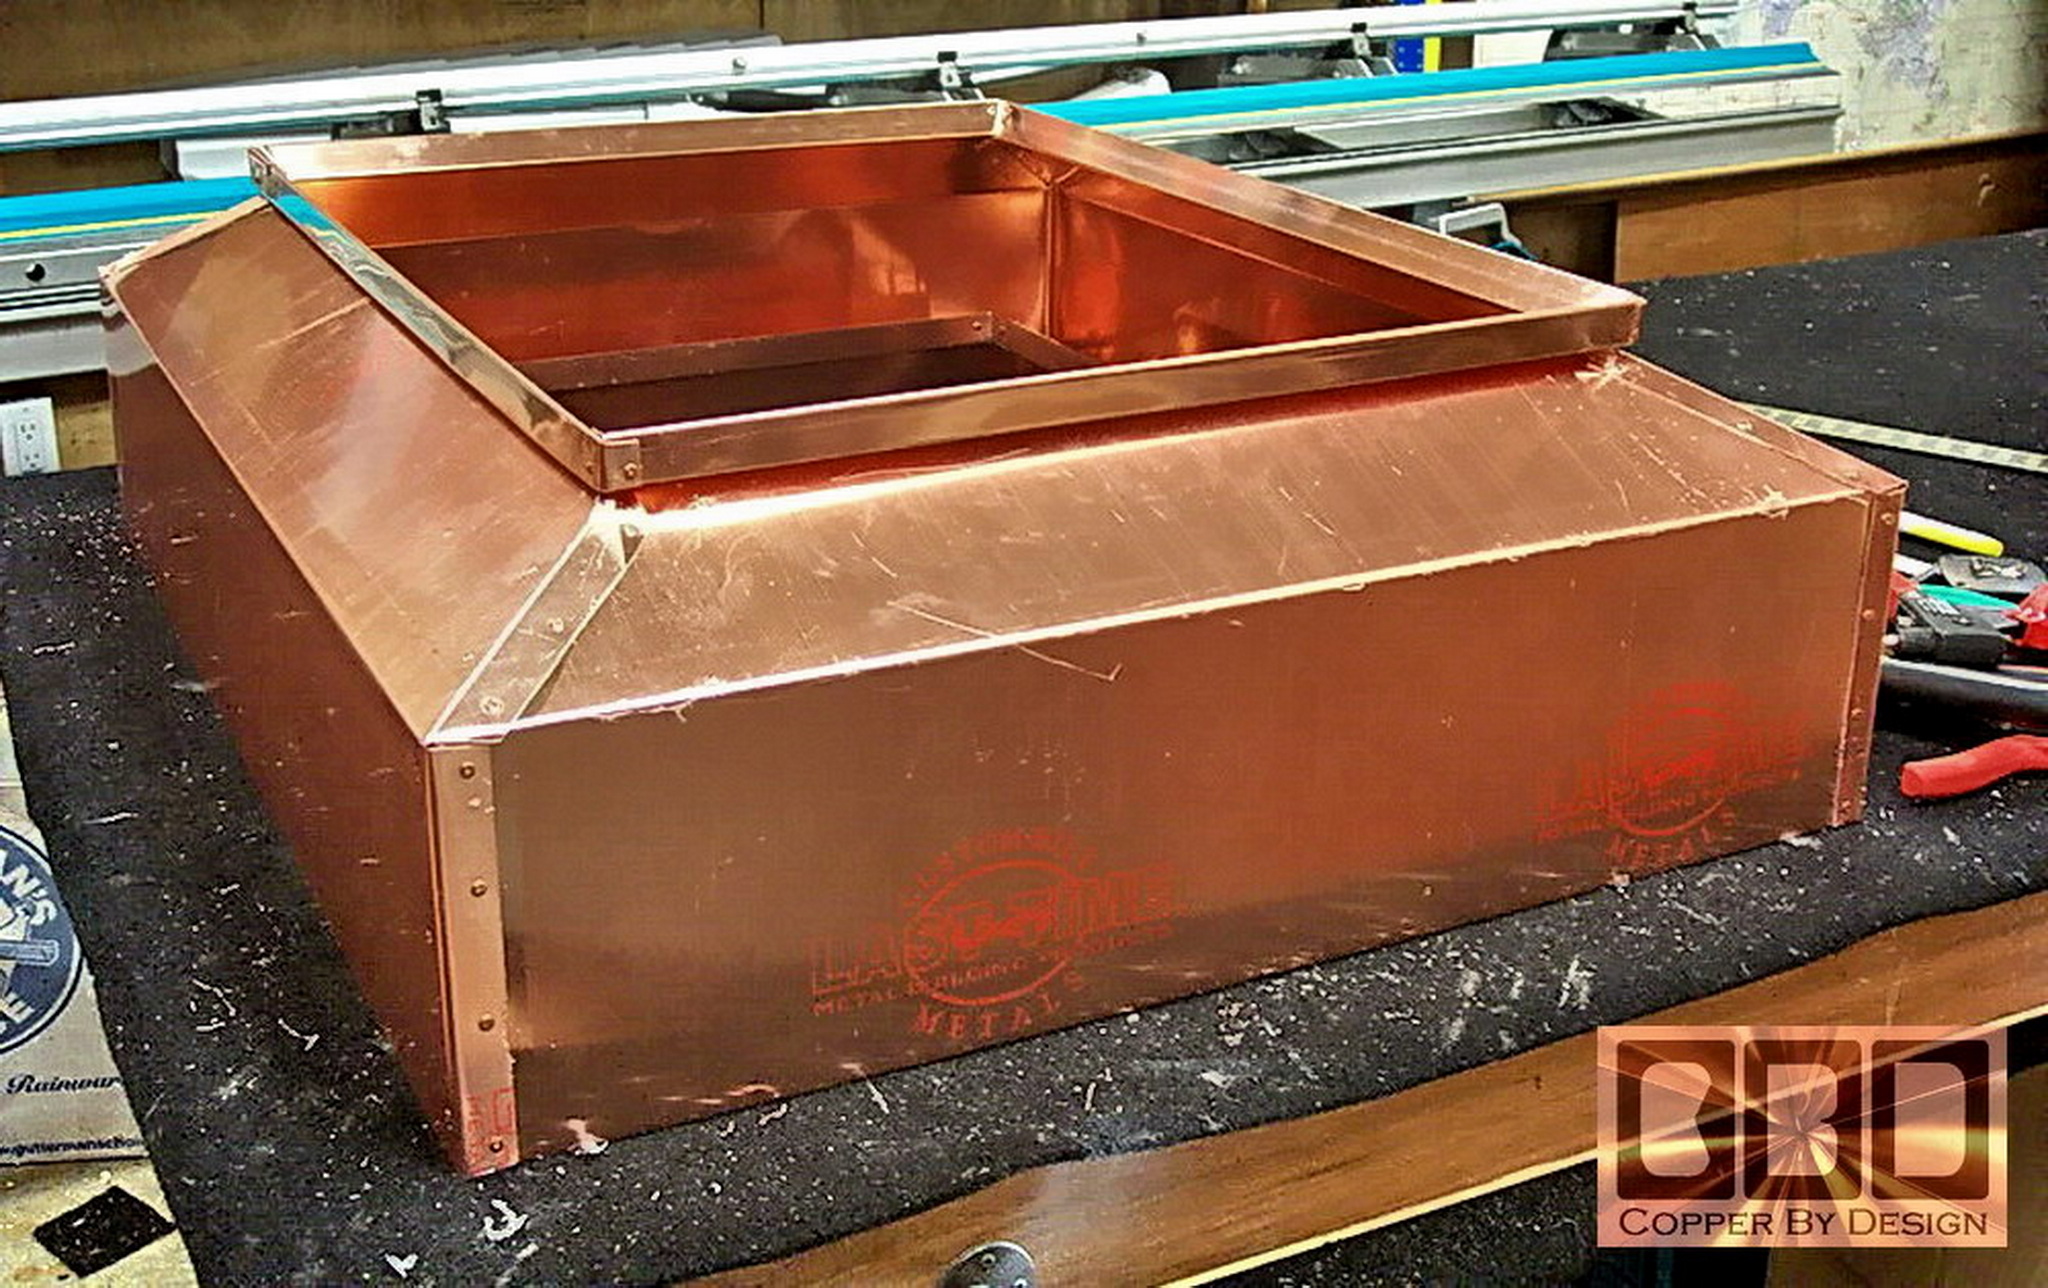
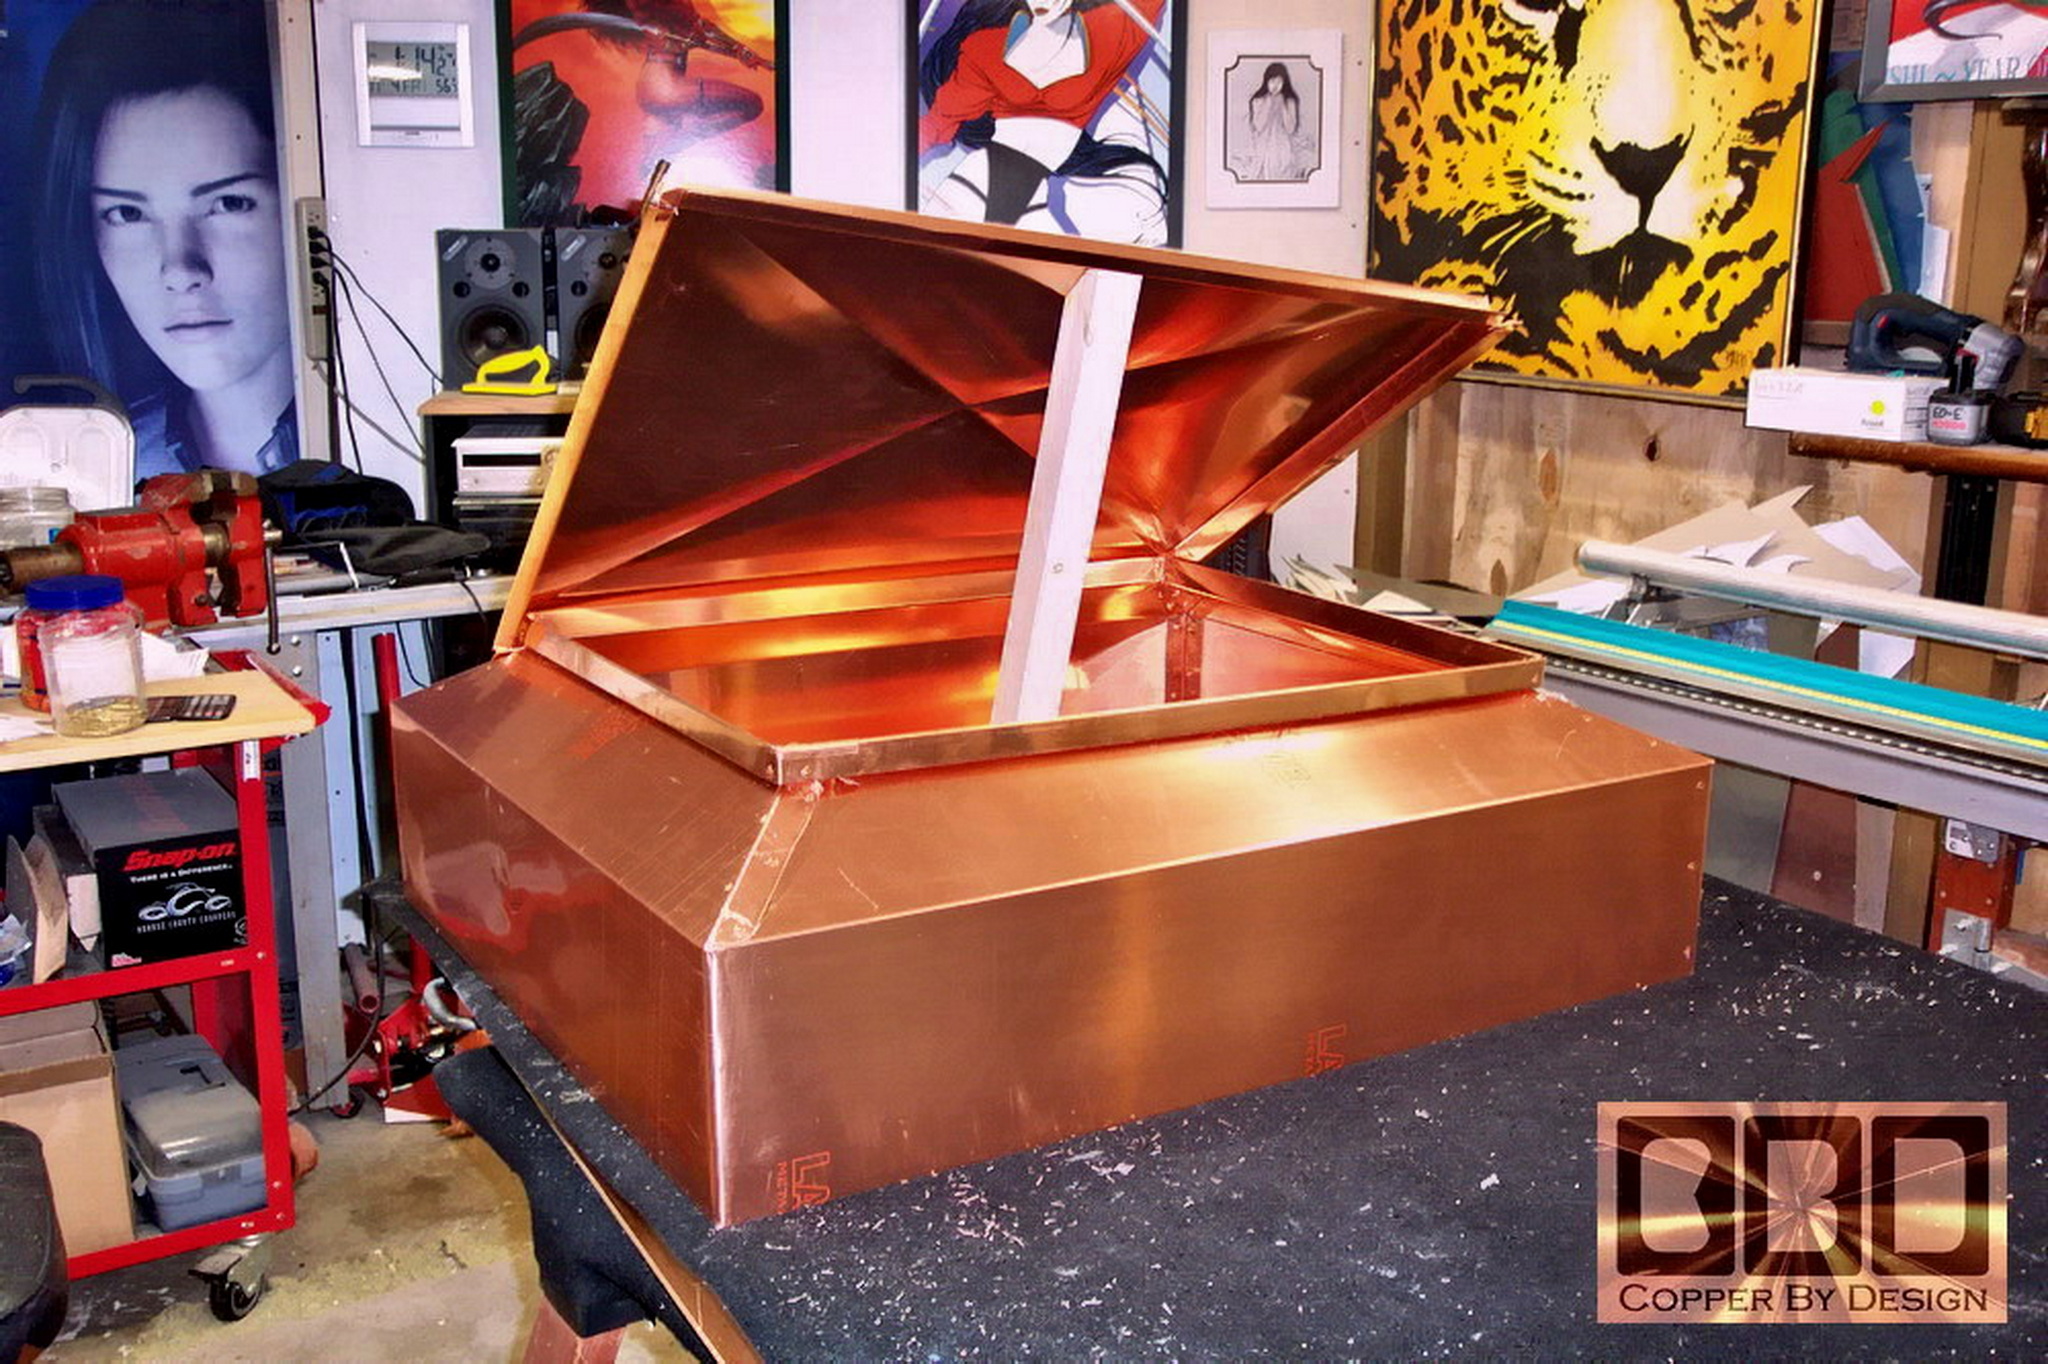
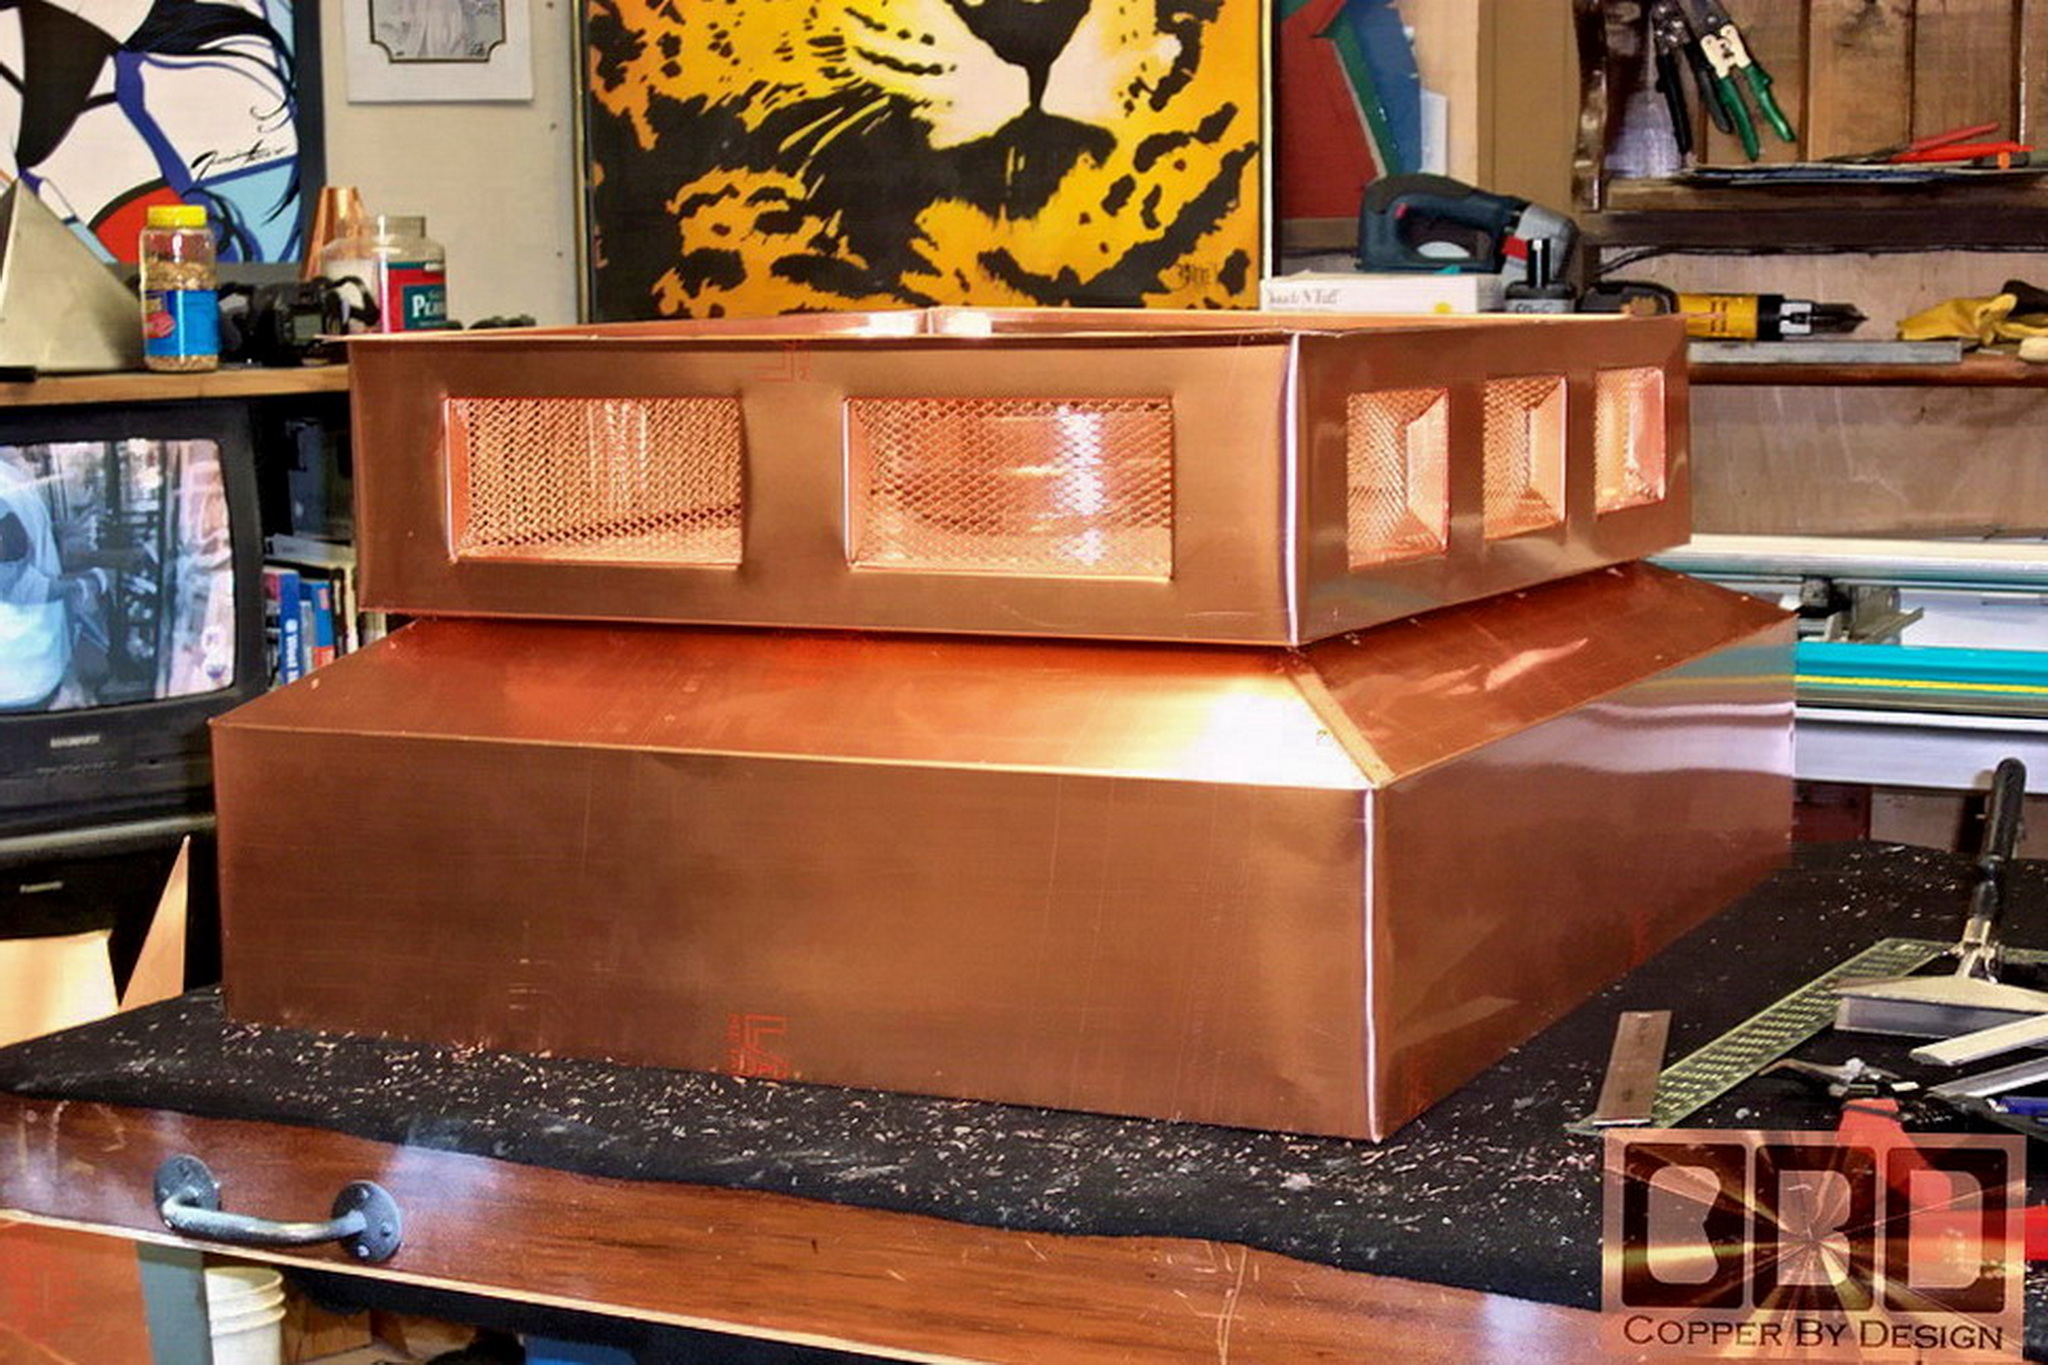
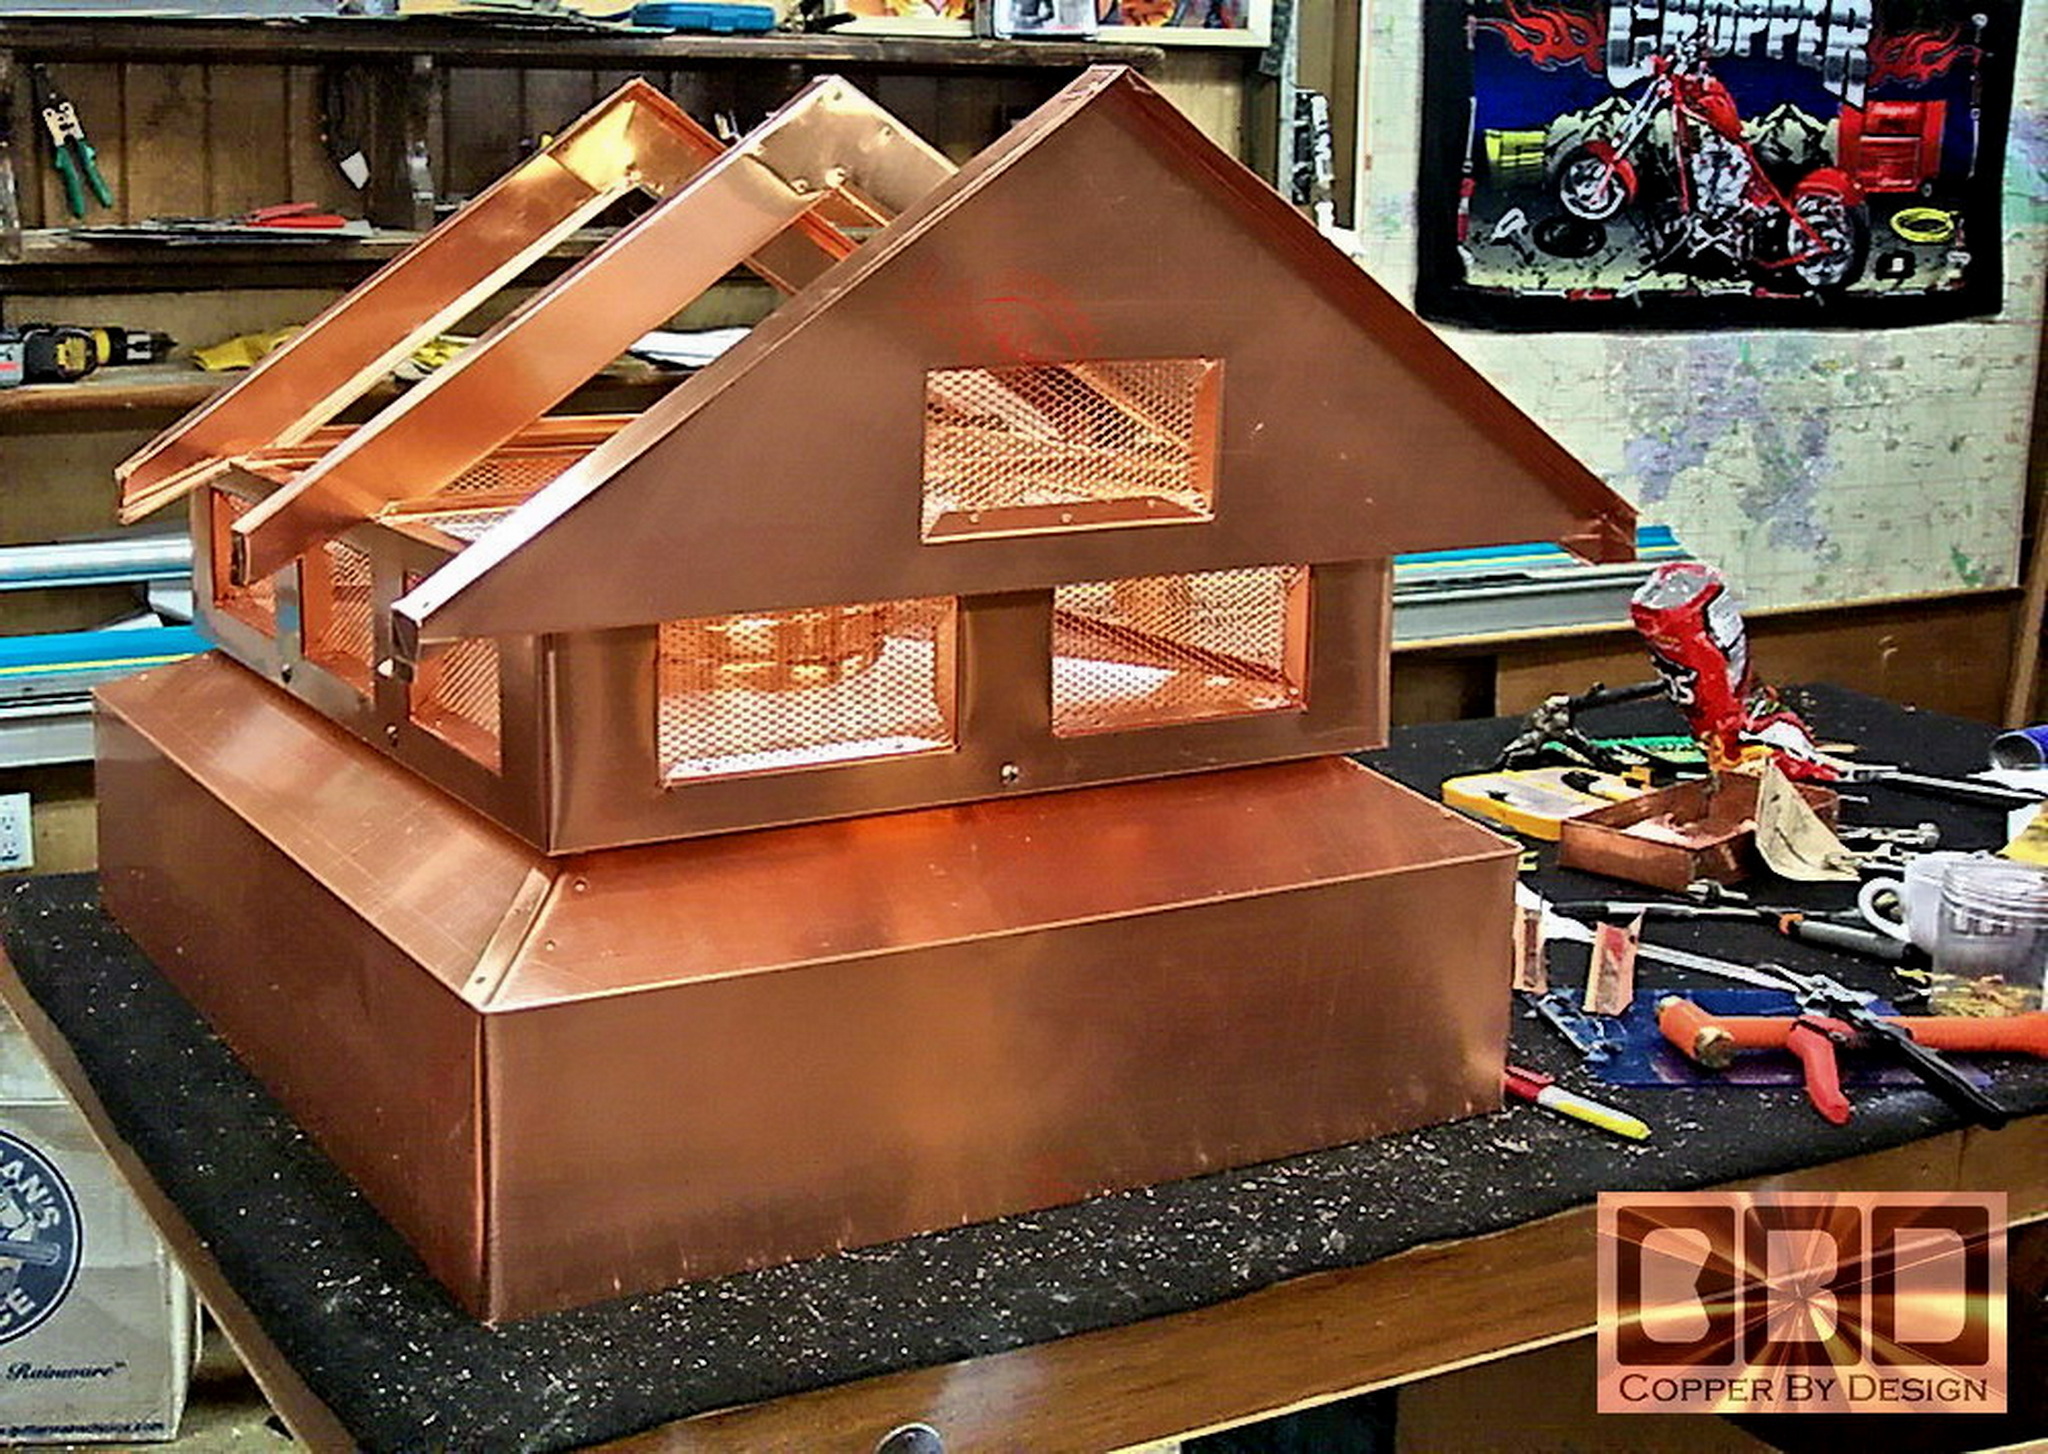
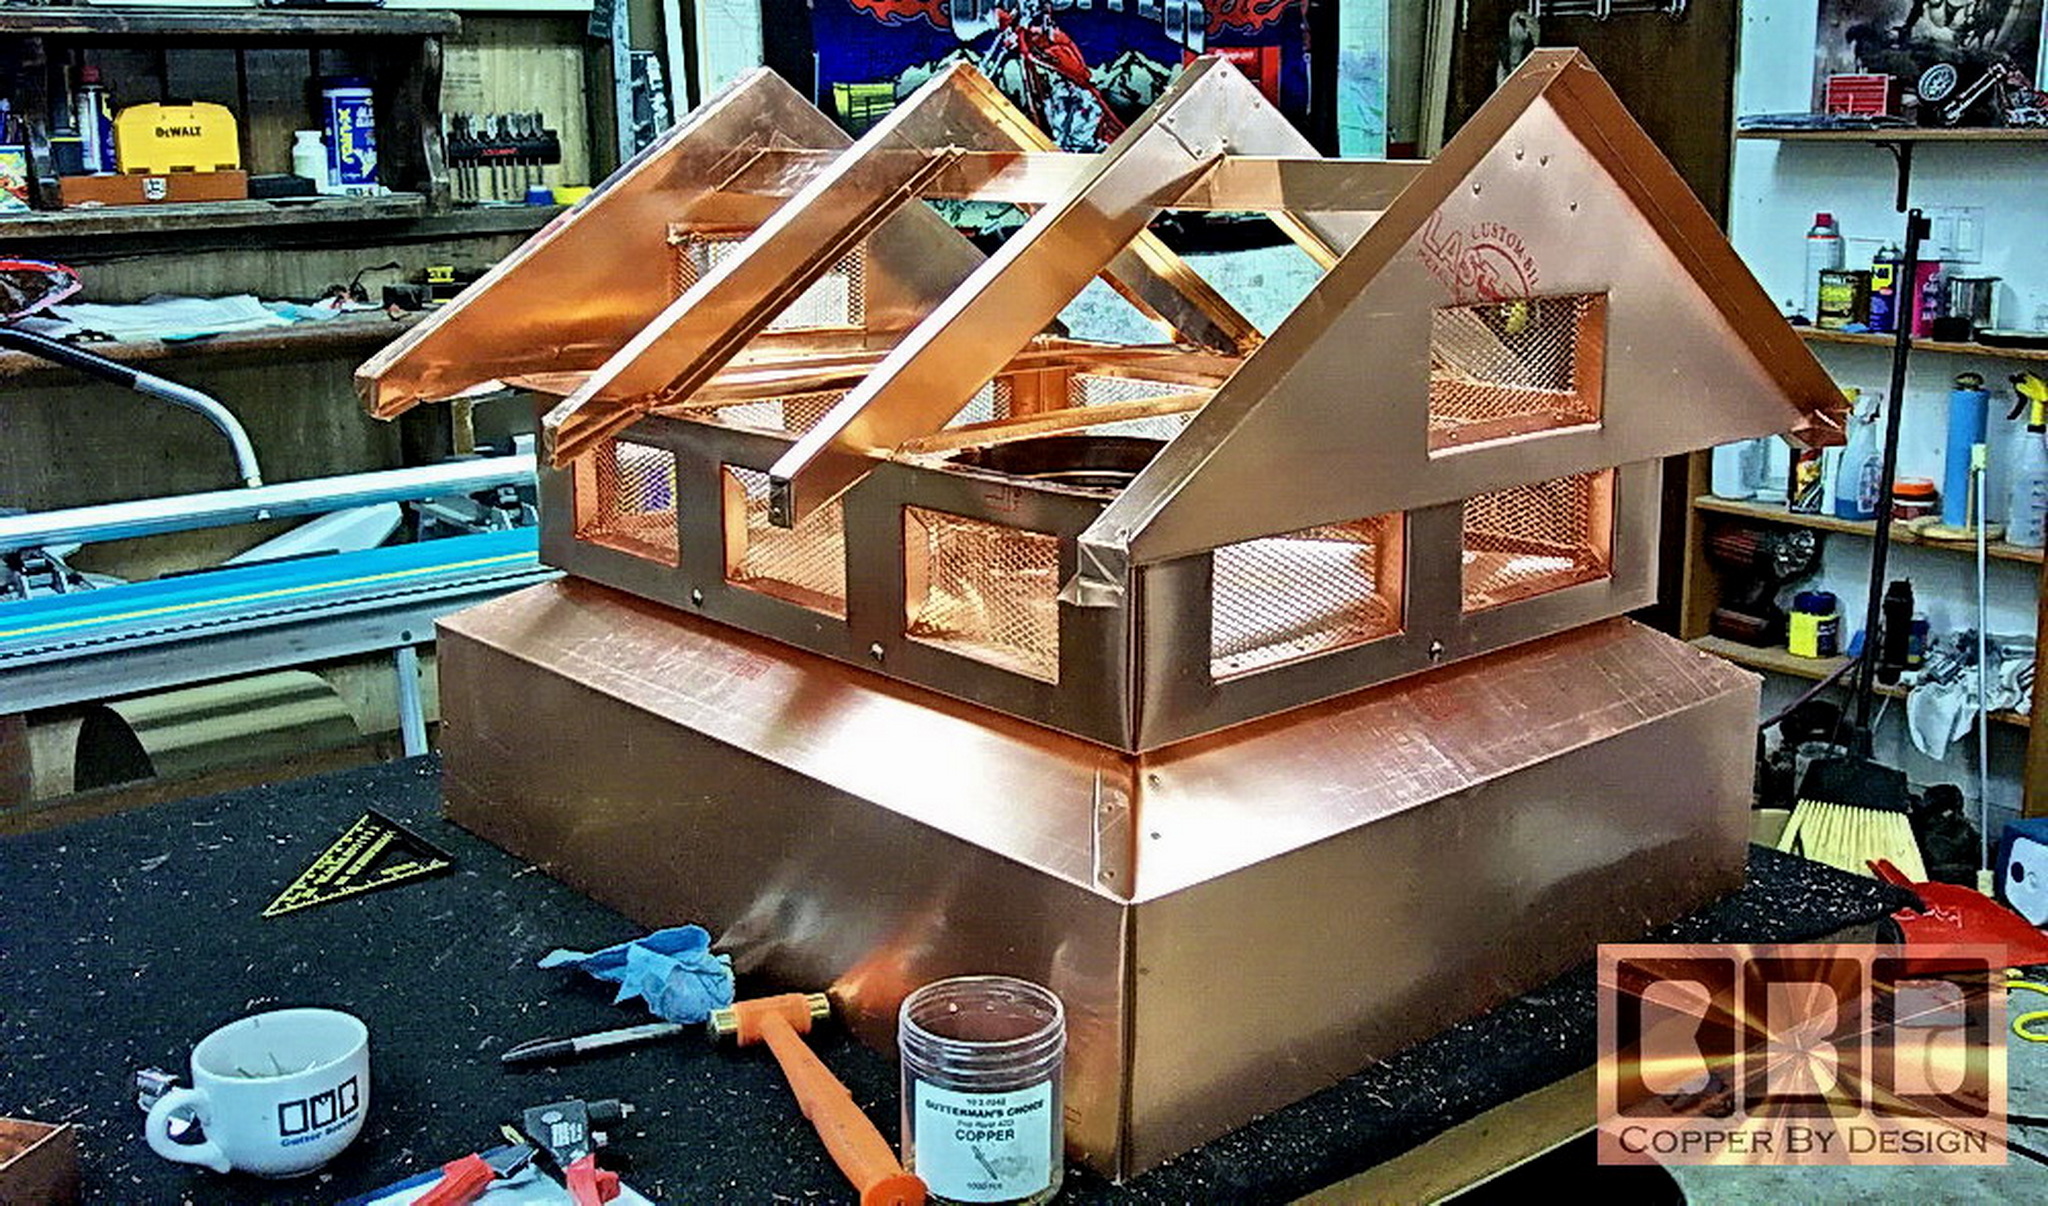
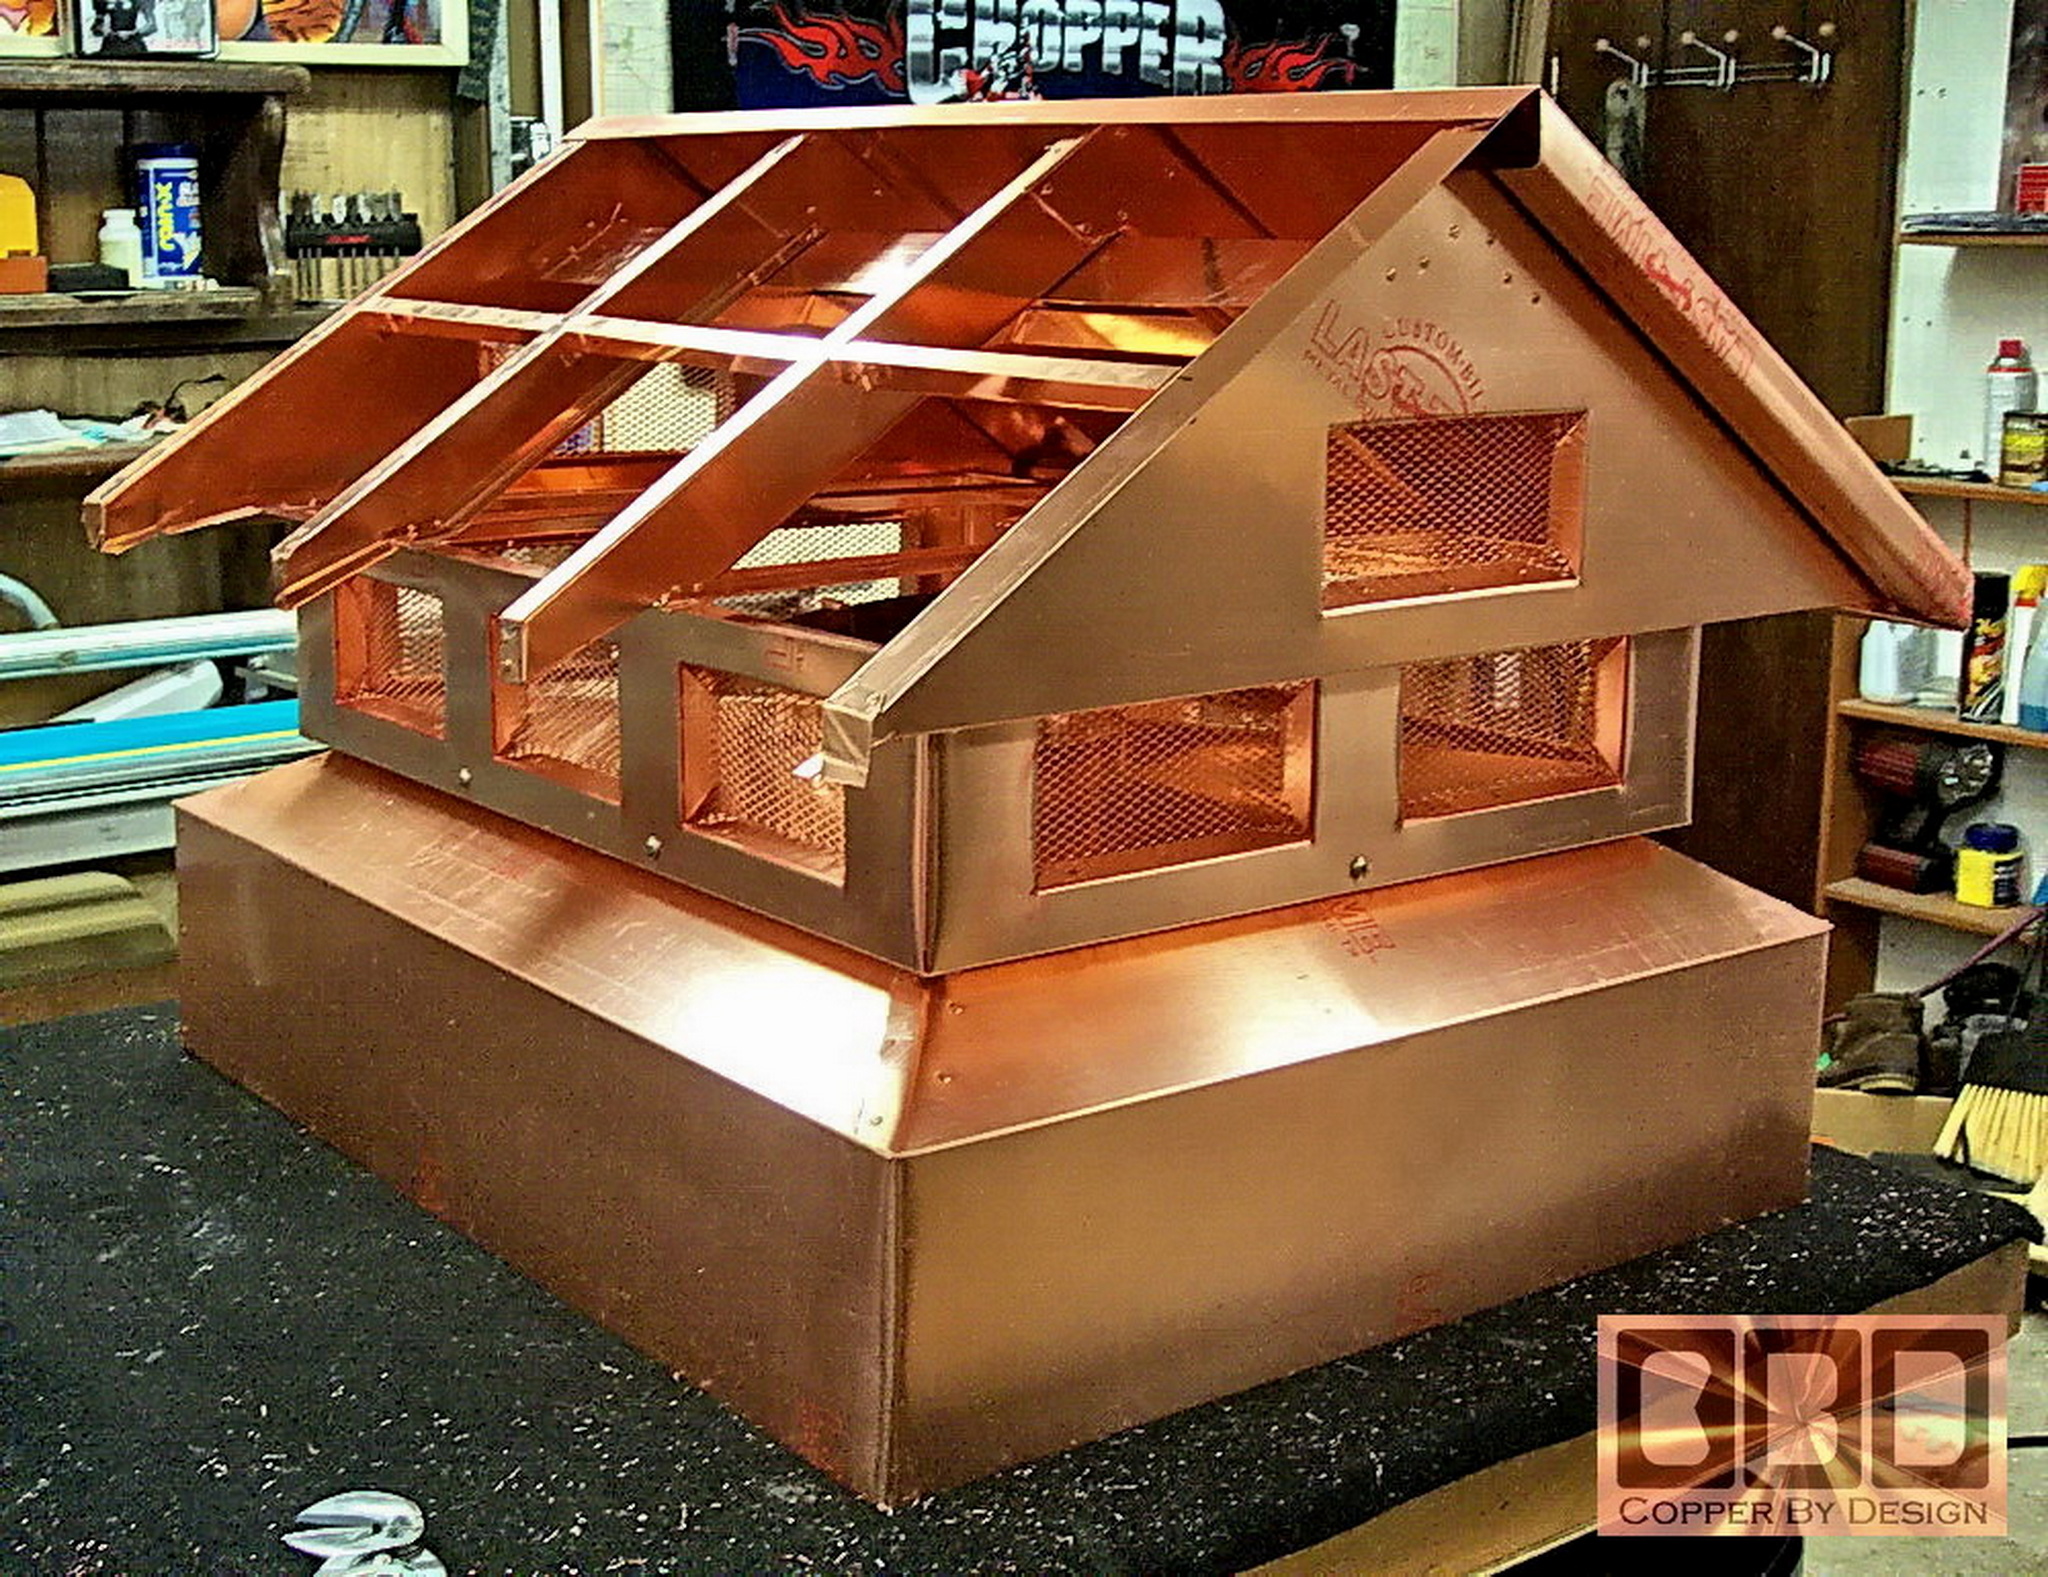
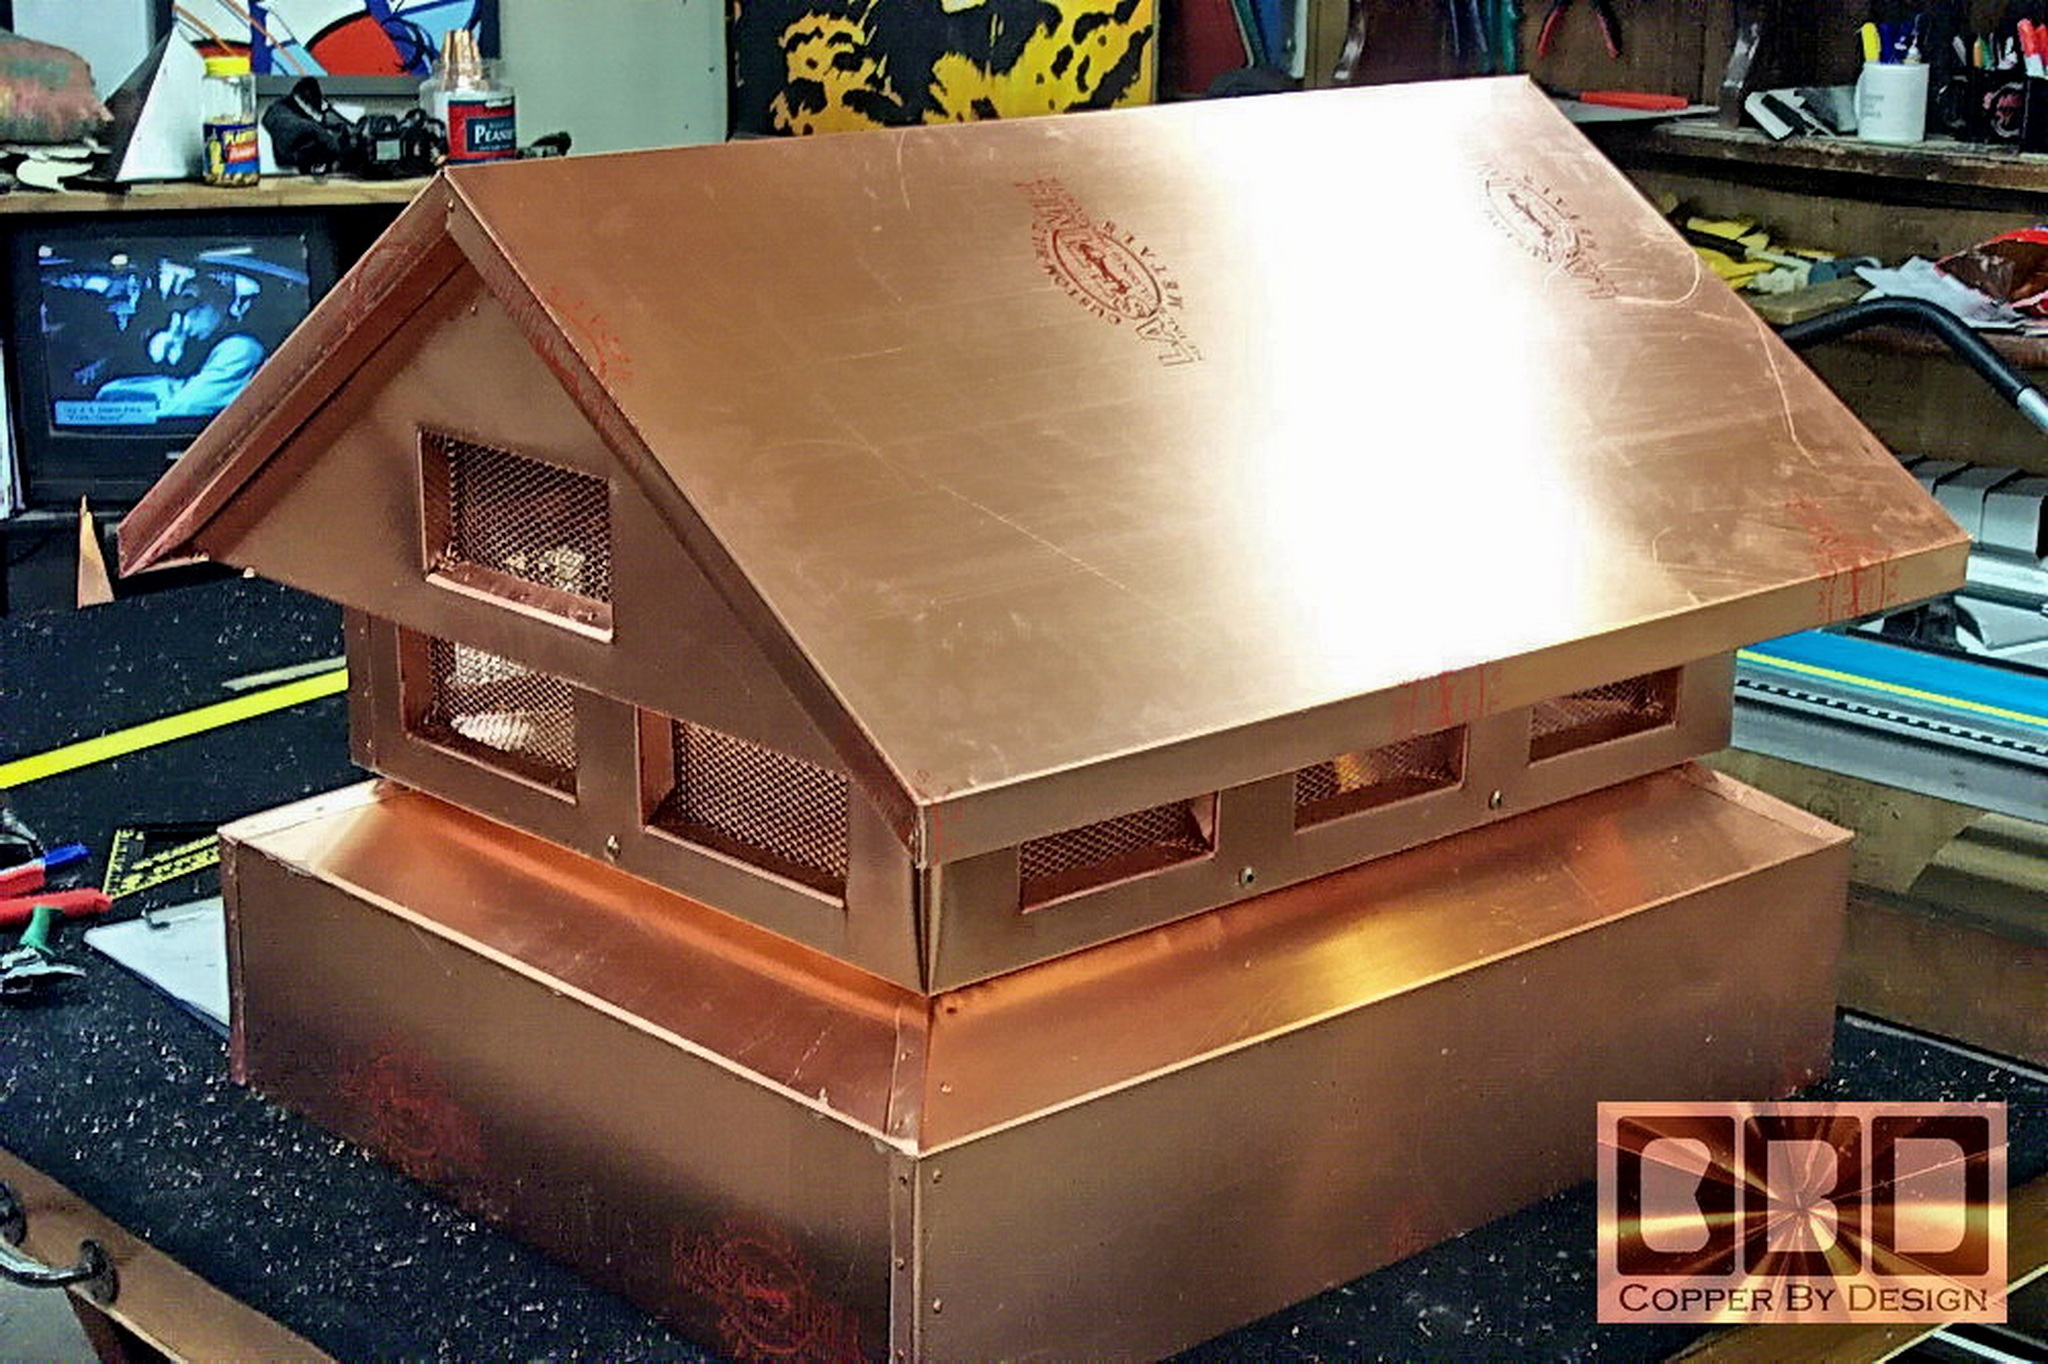
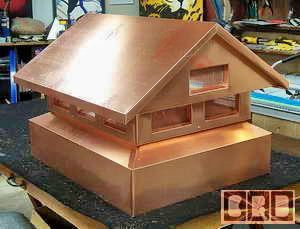
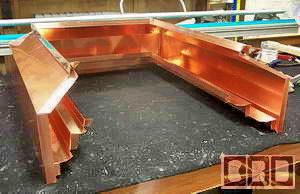
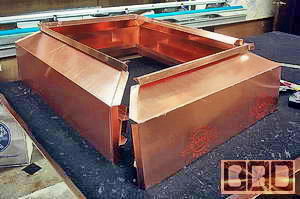
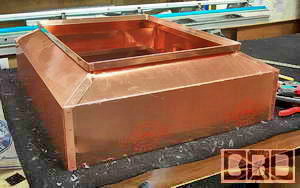
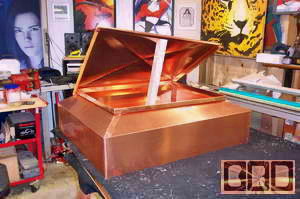
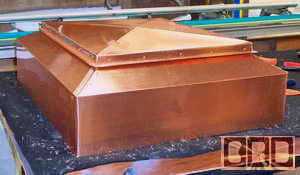
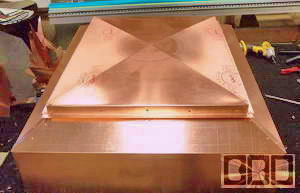
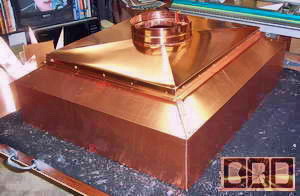
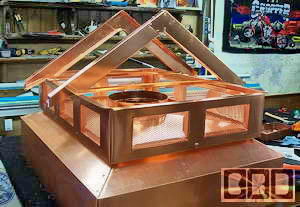
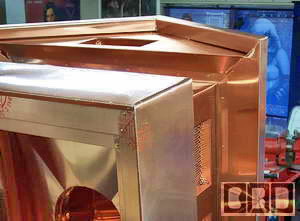
The roof has a 1.5" overlap across the top ridge,
so there is 2 layers of copper 3" wide along the ridge making it extra
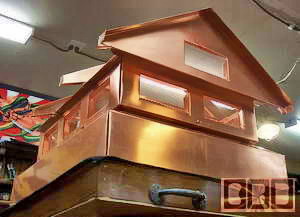
strong. This chimney cap also has a covered soffit, so there is
no bones of the construction to see from the ground and making it look
a lot more solid.
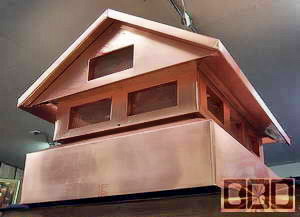 
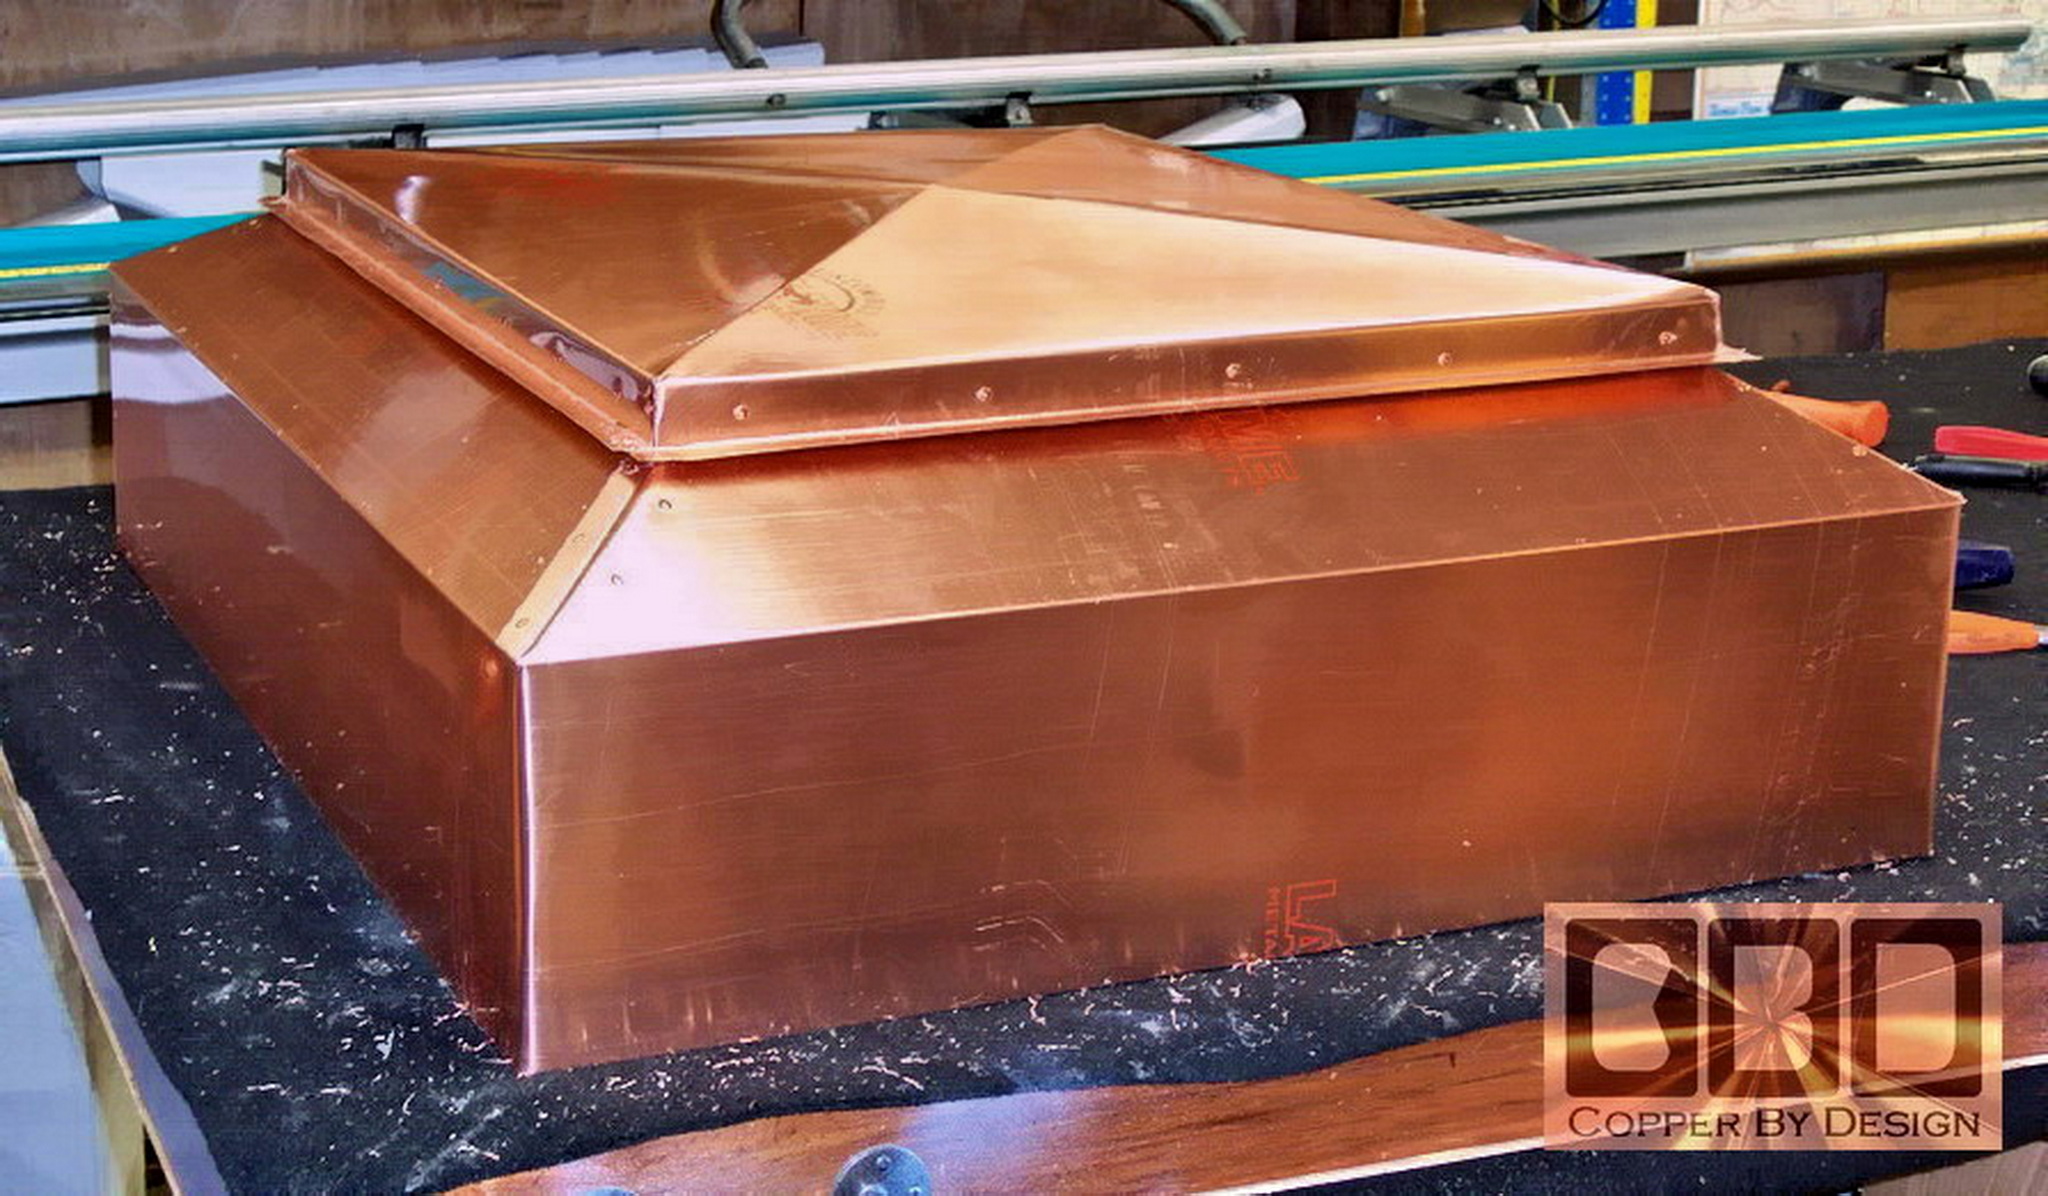
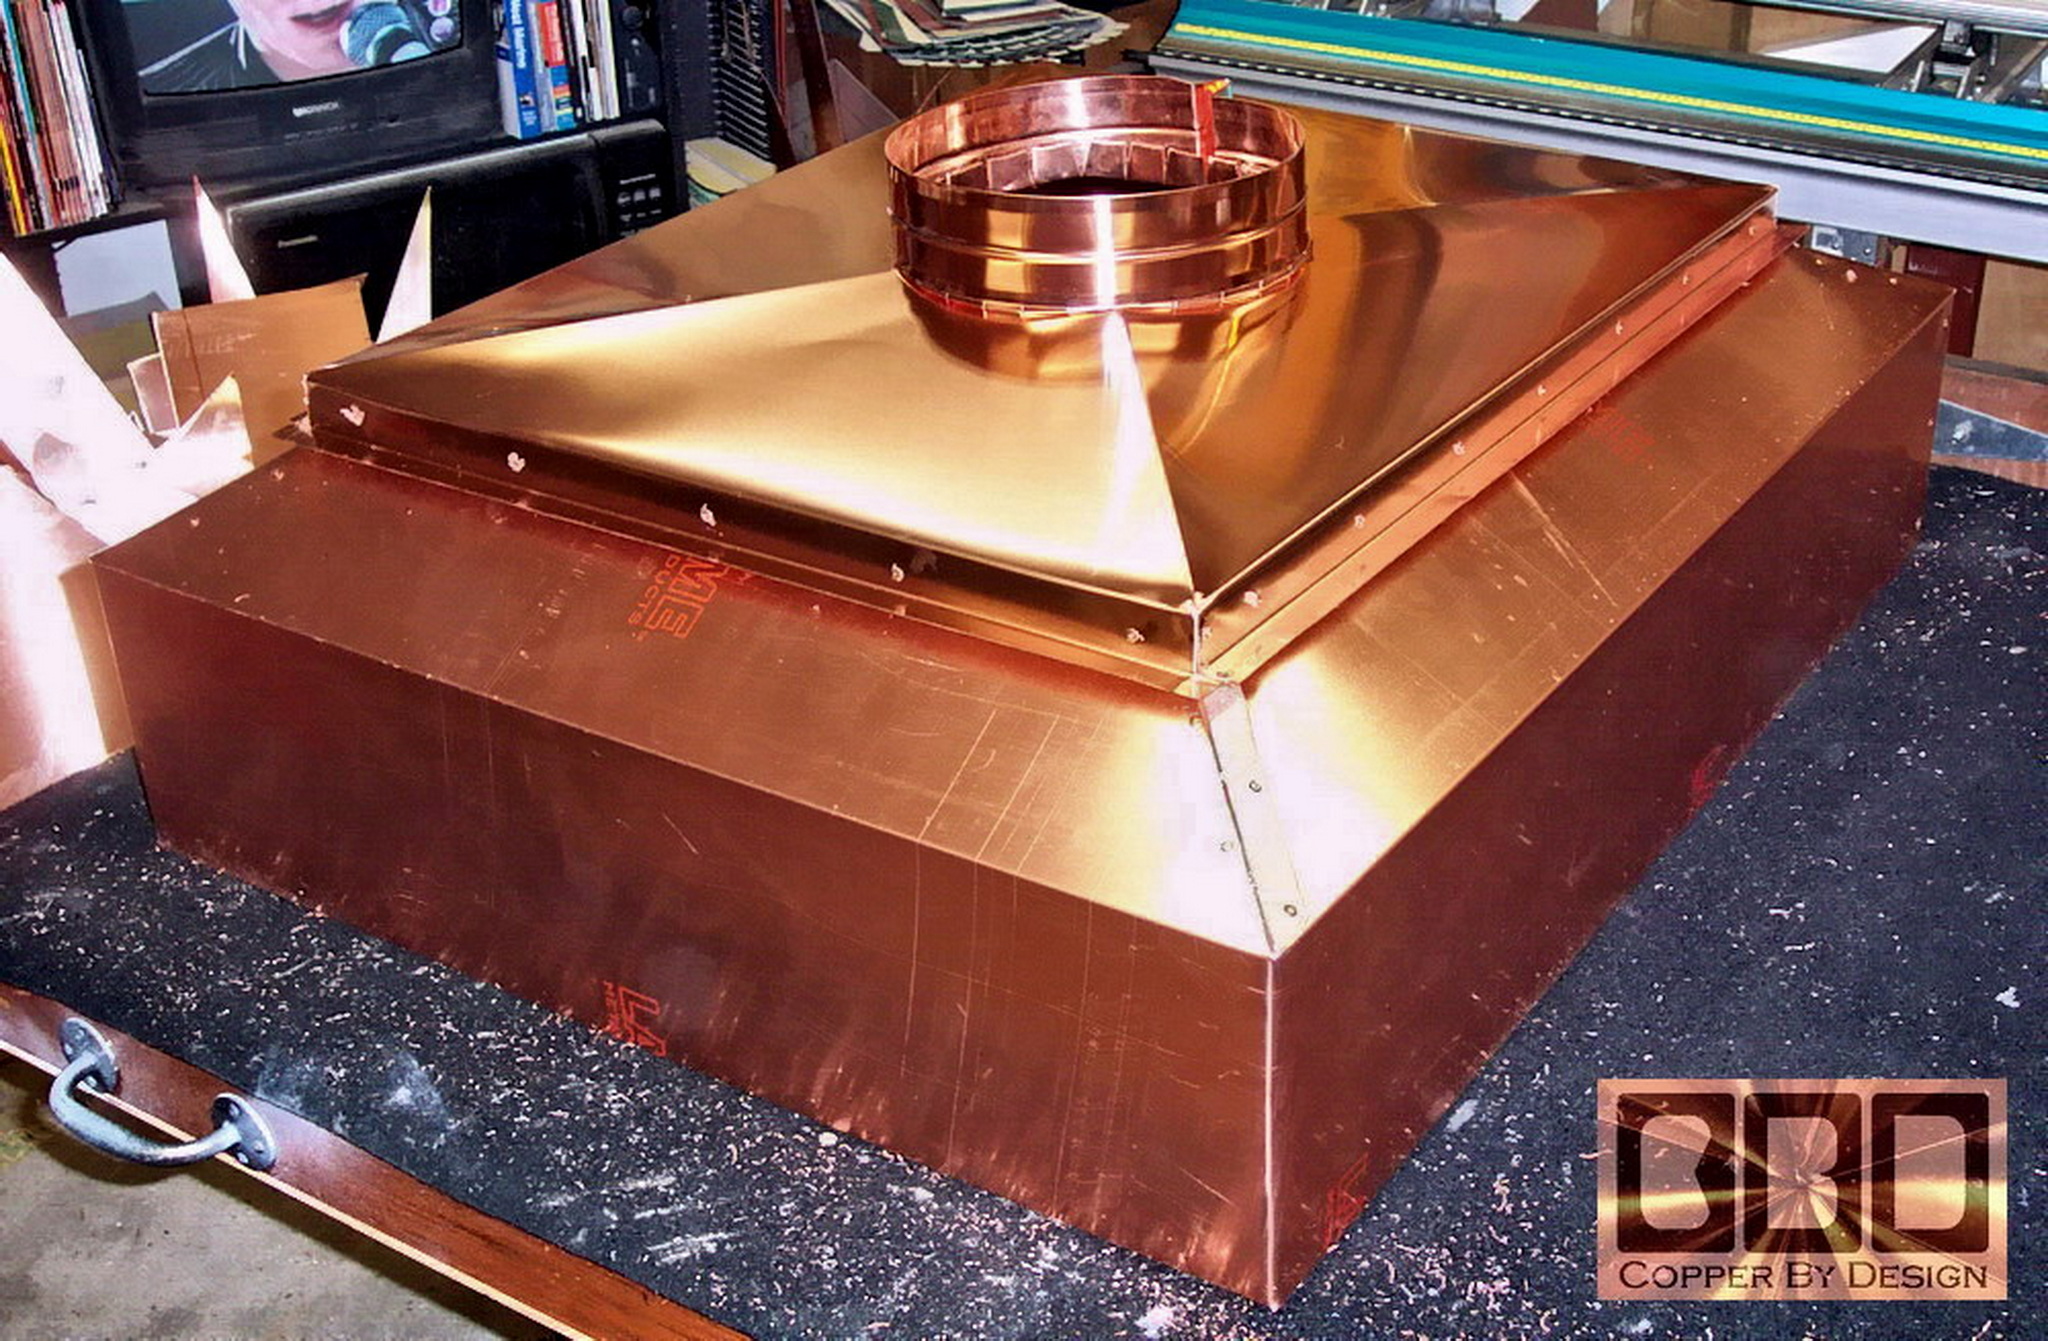
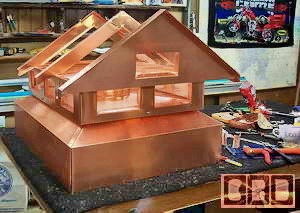
Here is the finished chimney cap from several
different angles to get a good look at it. It is not perfect, but the
client said he was very pleased, and that it had turned out even better
than he had imagined. That is one of the best compliments we can get.
-
|