|
This order was for Albert
Rossi in S. W. Palos Verdes Estates, California. He loved the chimney cap
and mantle set I made for a client
named Chris & Christine Sarkinen in St. Michael, Minnesota:
http://copper-by-design.com/cc/ccd7.htm#Sarkinen
The differences was it is a
little larger, the concave roof is scaled down, and it has no
weathervane mount. He had contacted me on 1/23/13 and laid down a $1.2k
deposit on 2/2/13 after a rough quote, since he was not sure
about the final measurements. We were then able to take time to
work out all the details before
fabrication began.
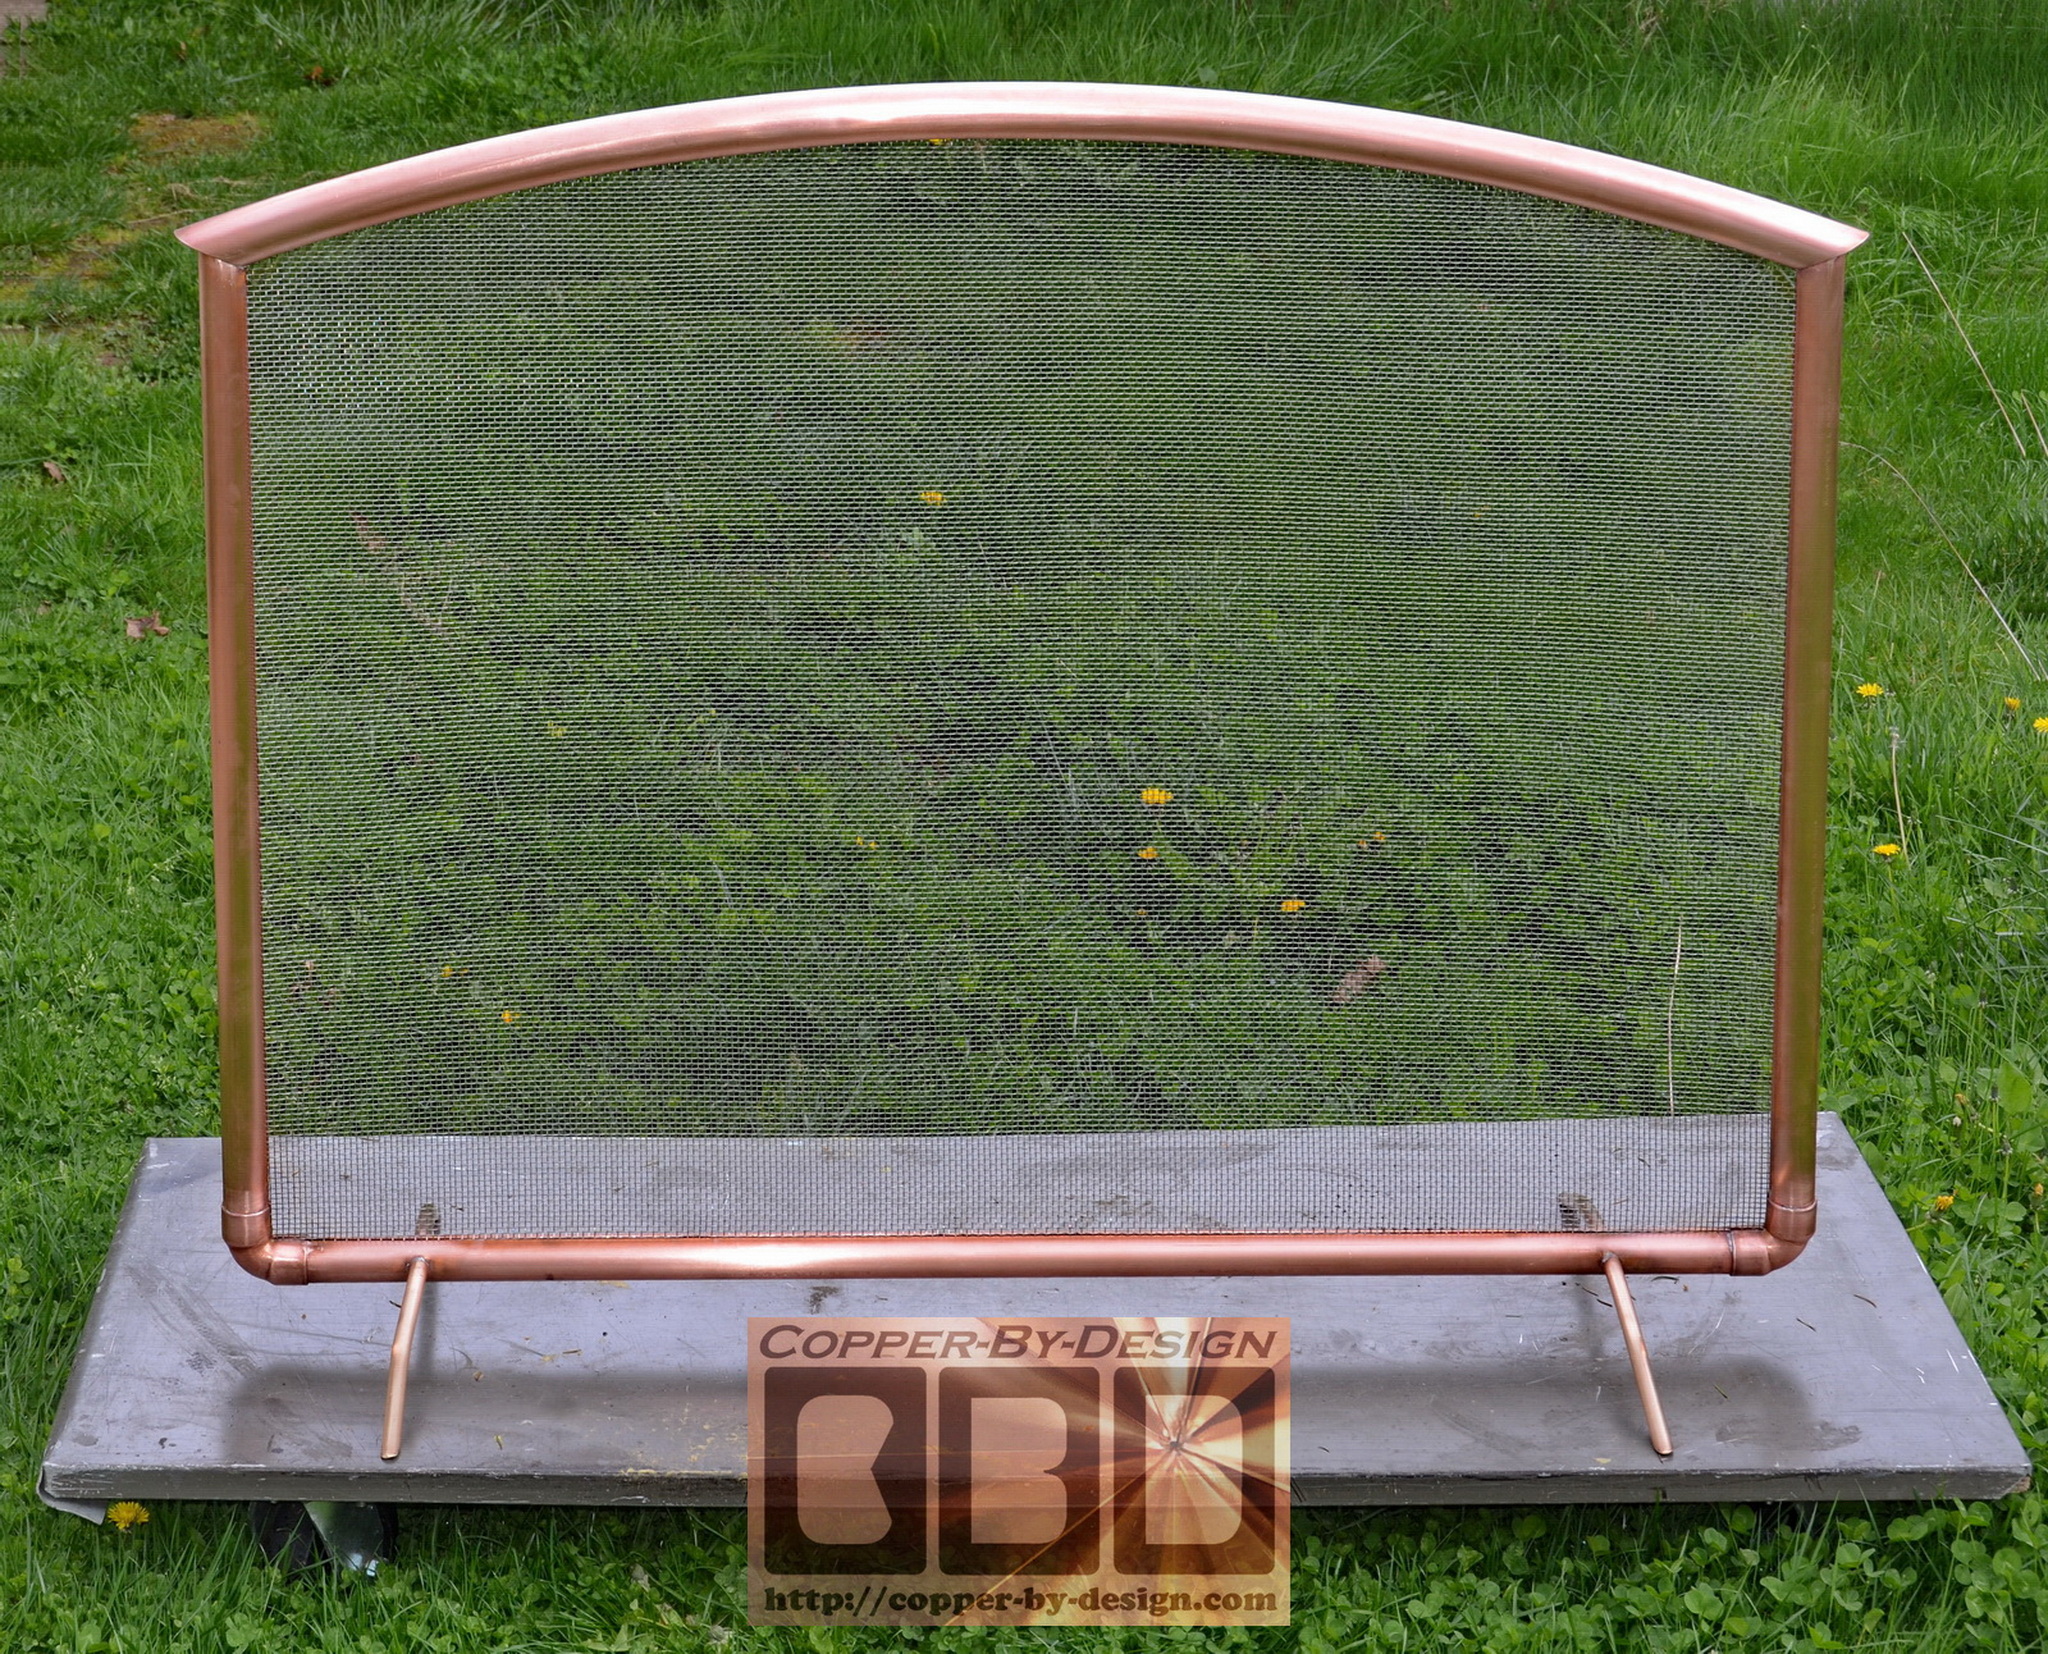
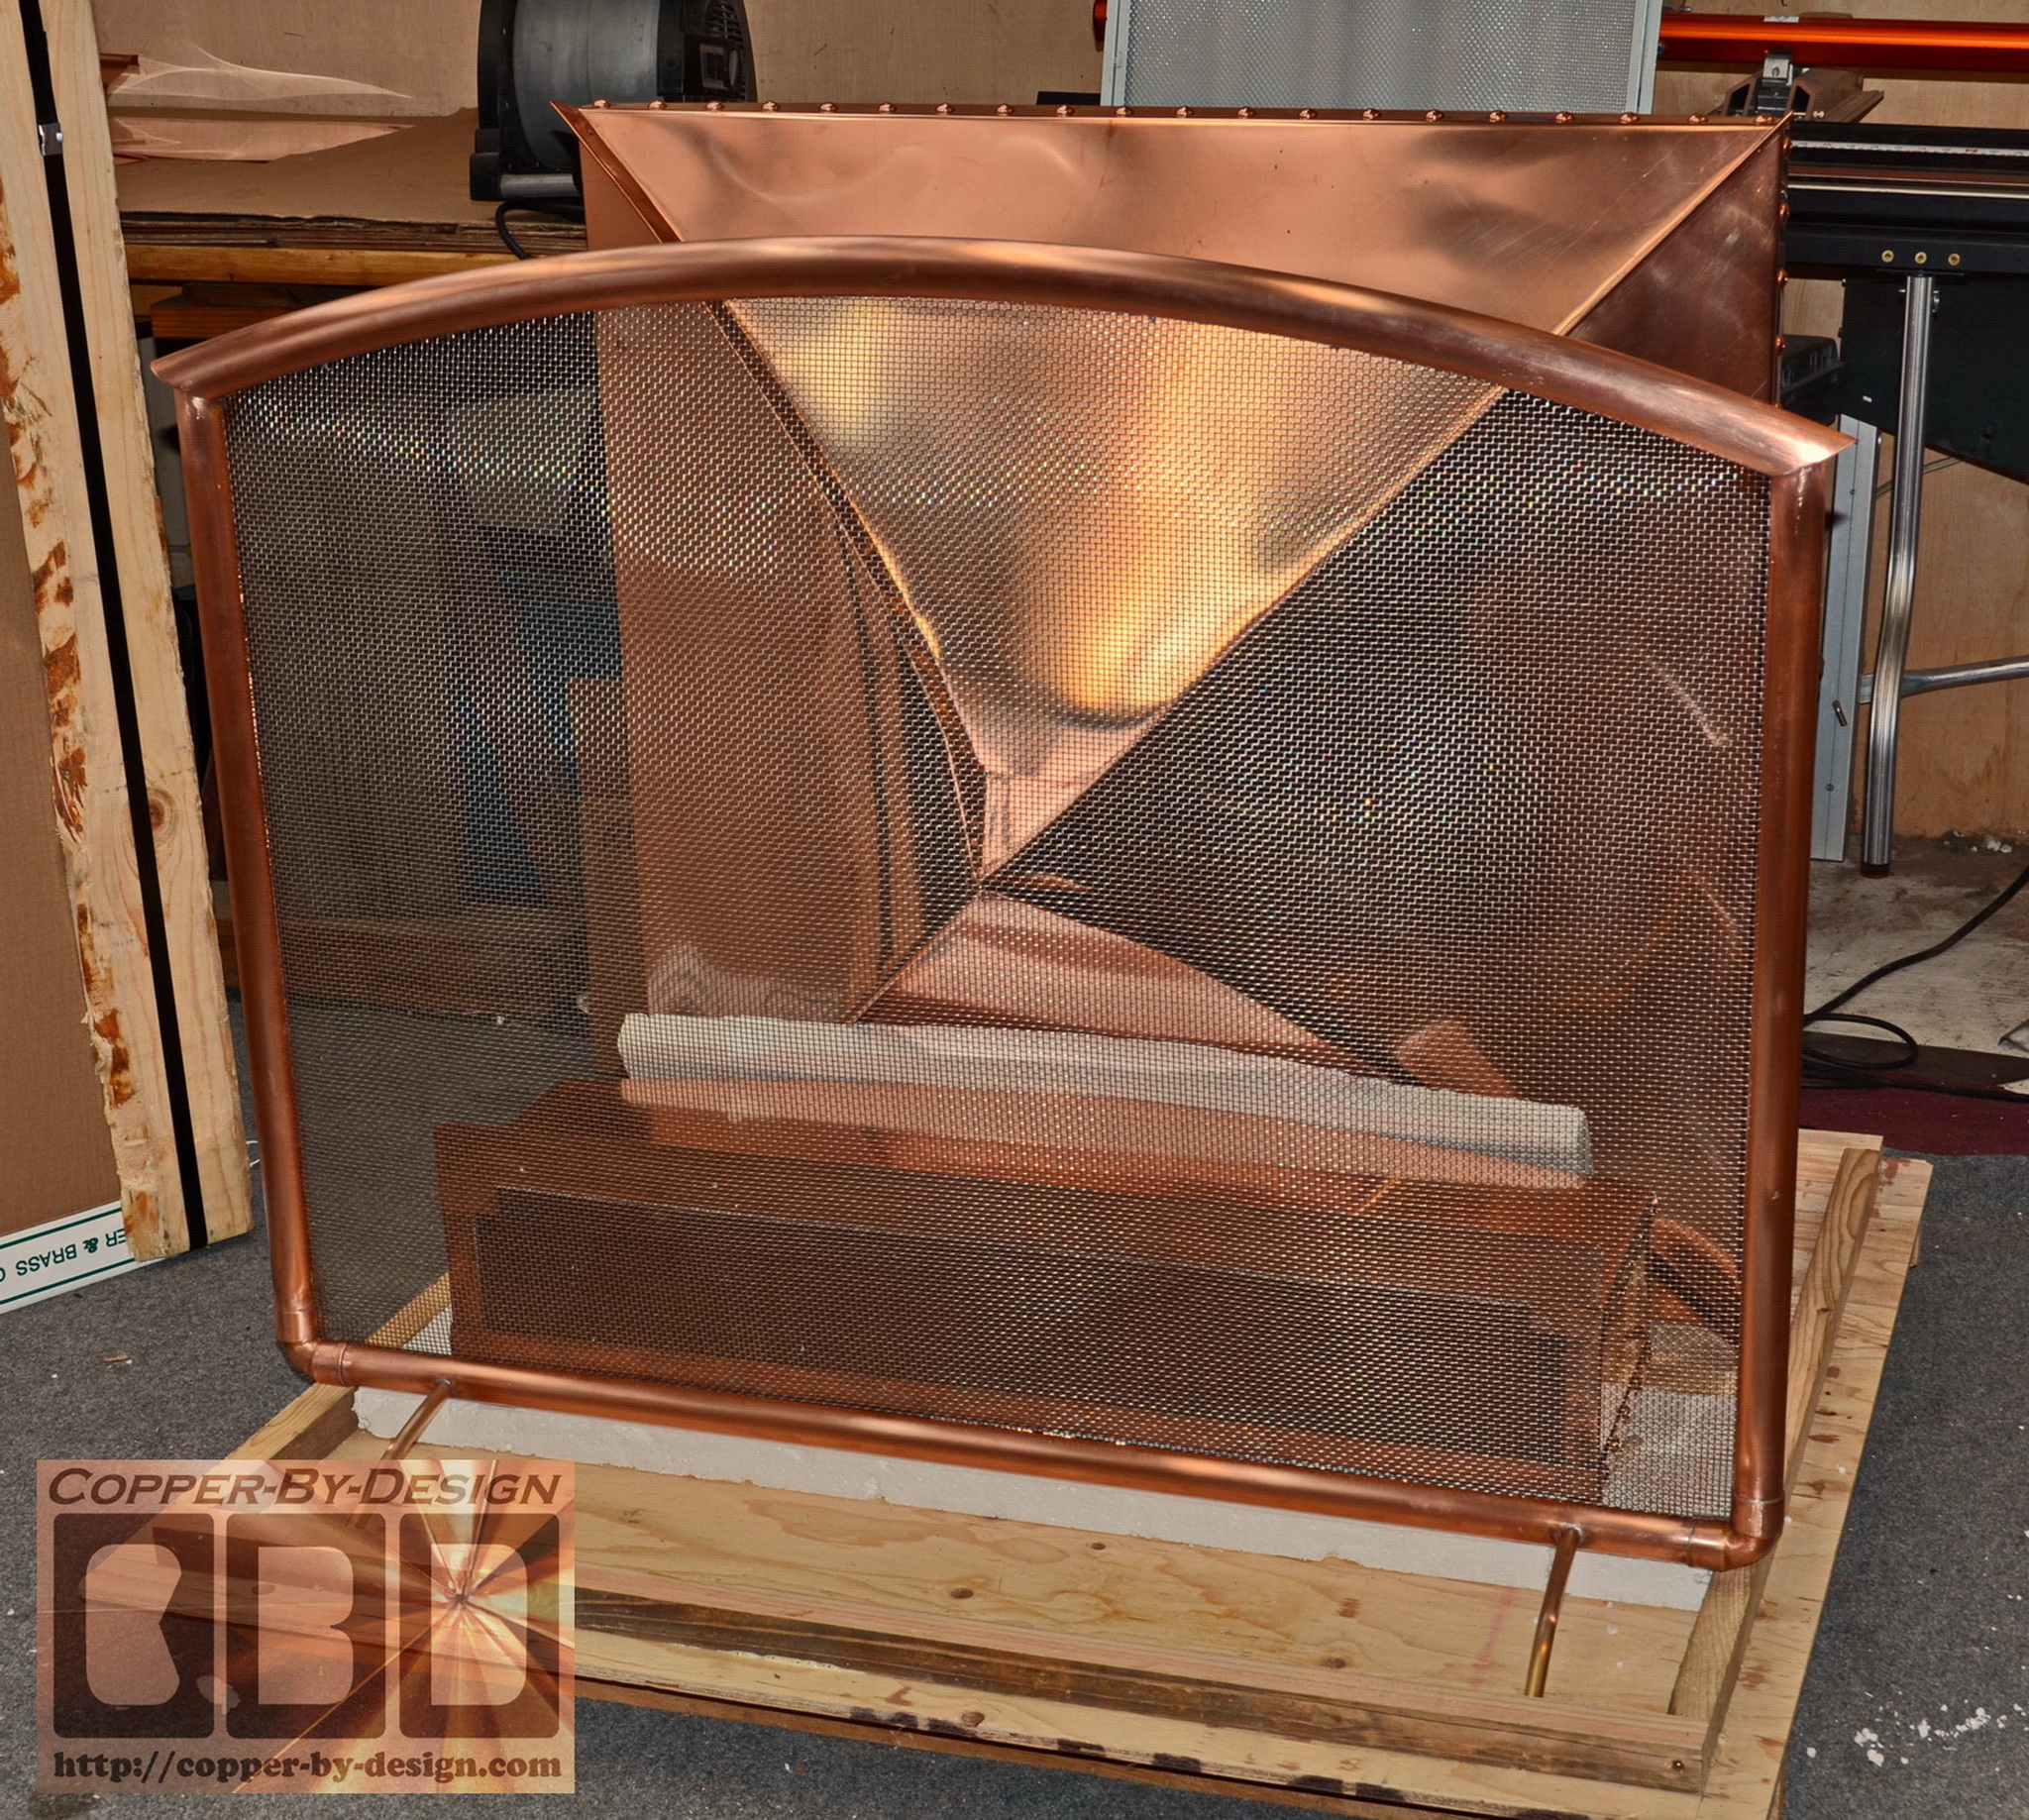
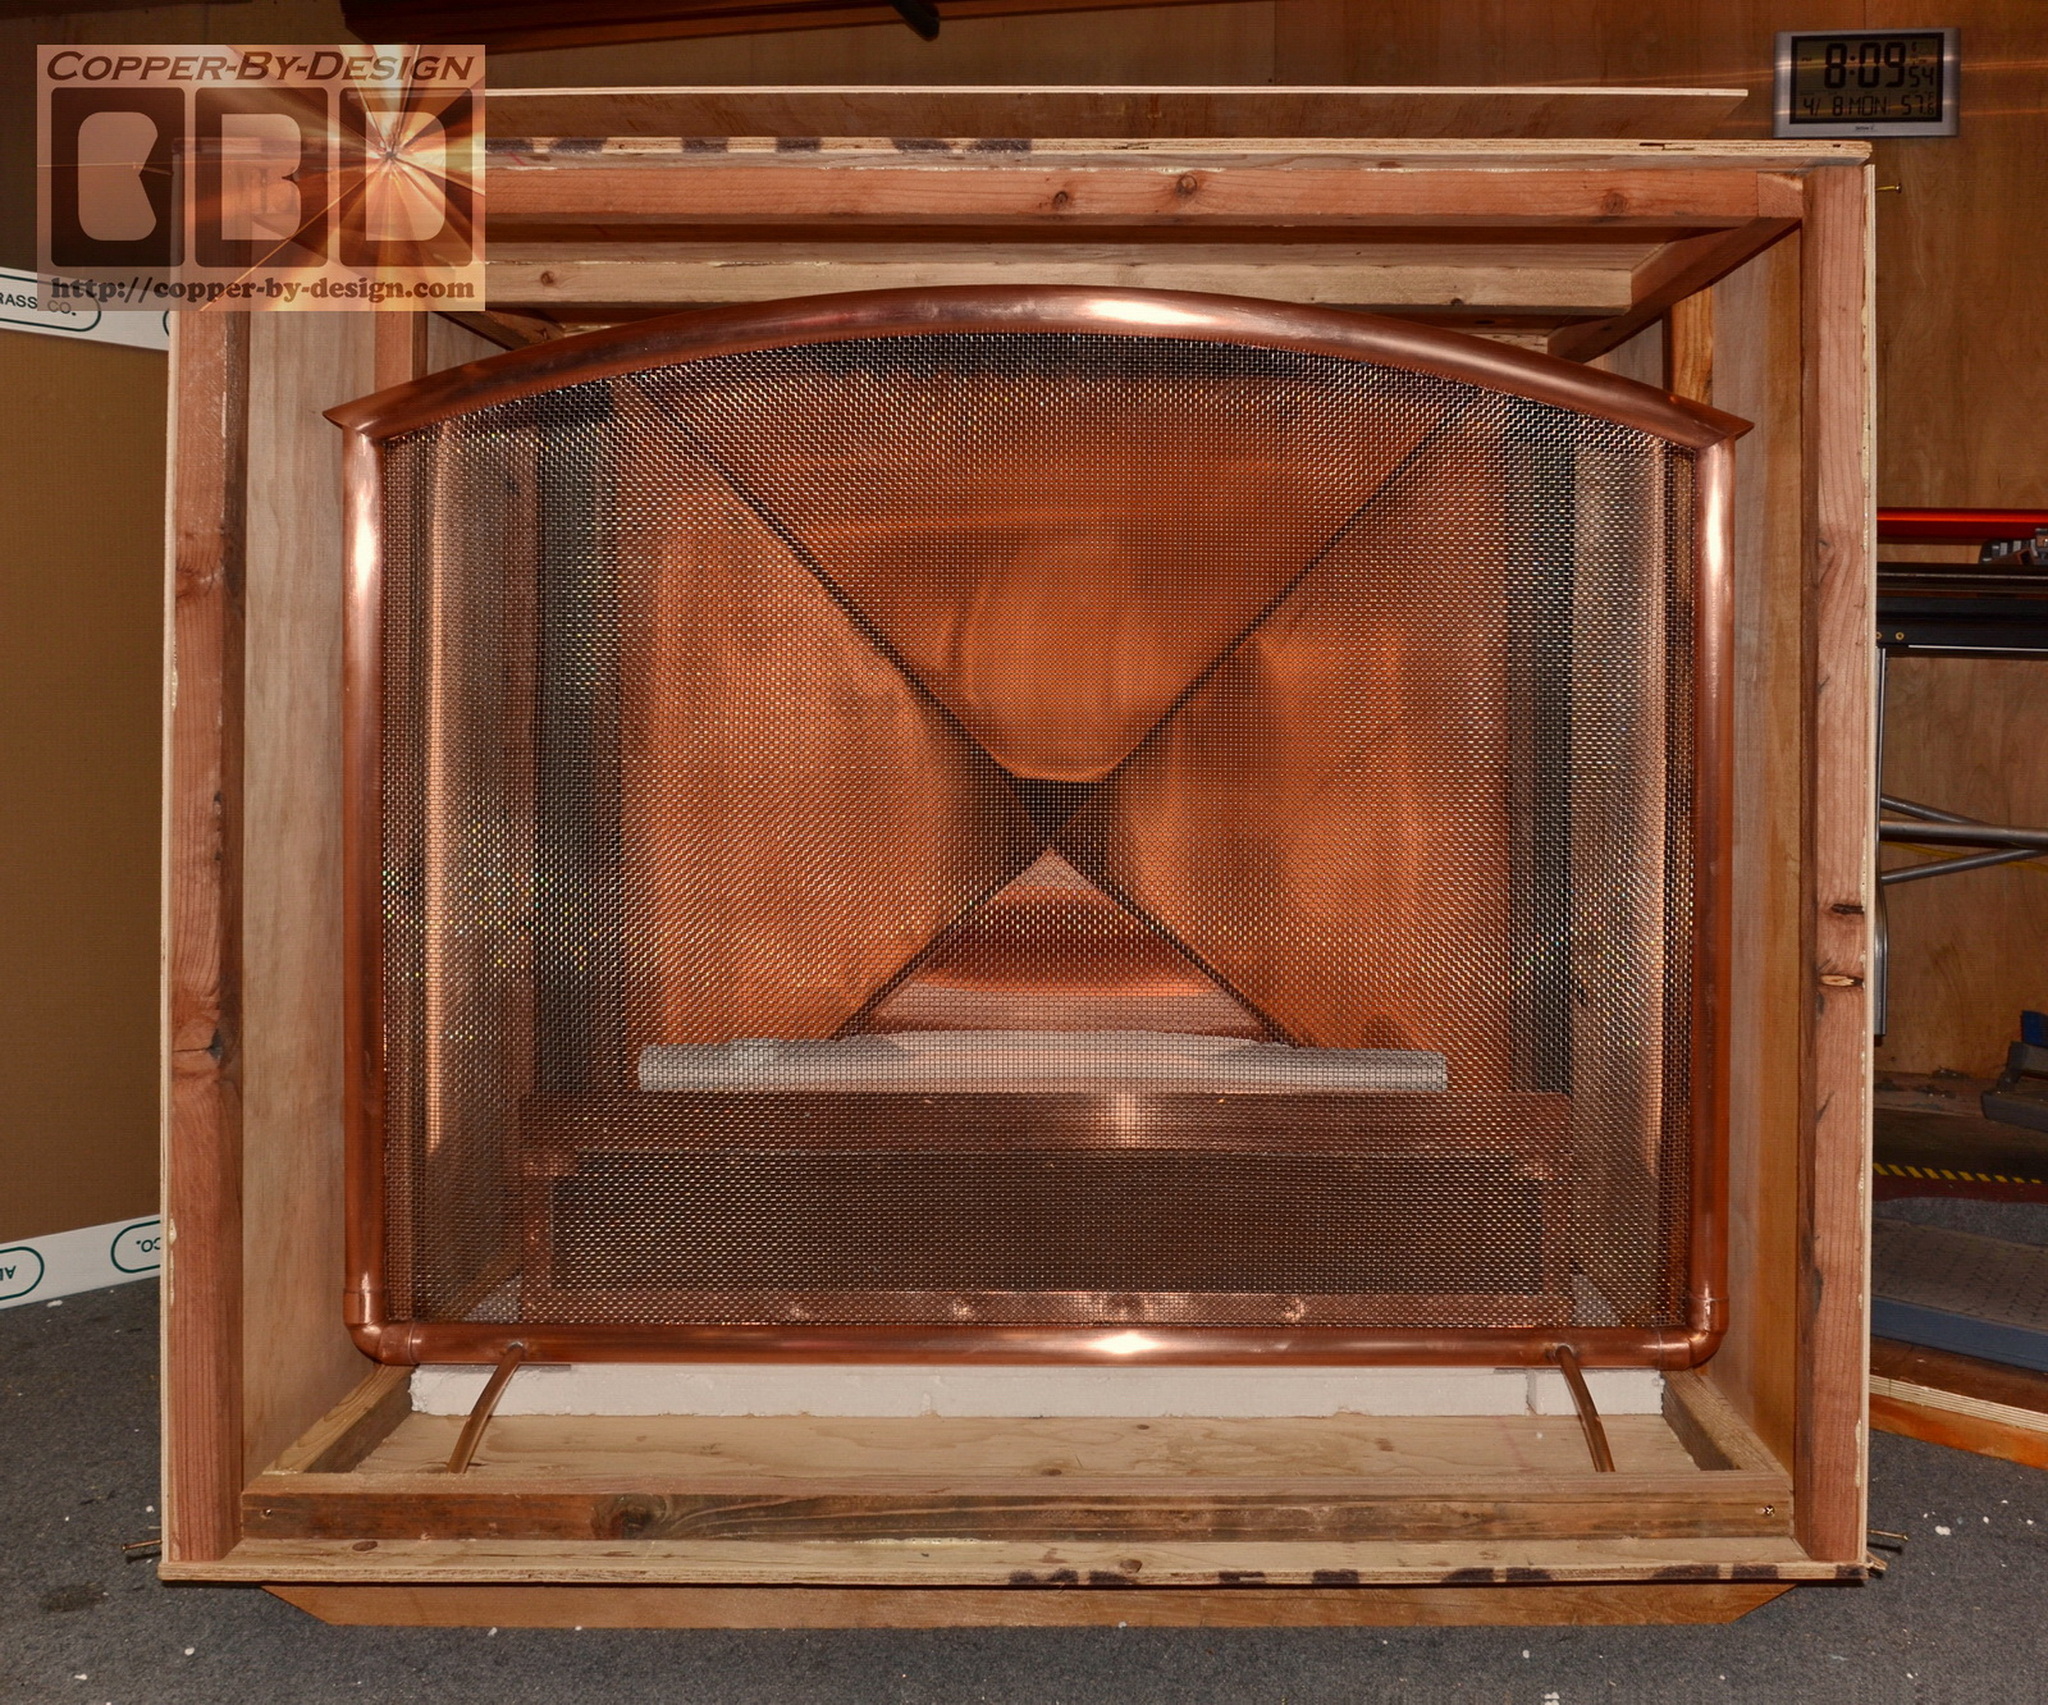
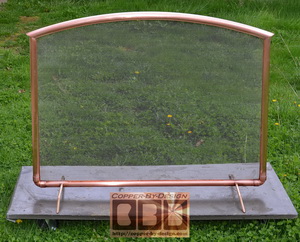
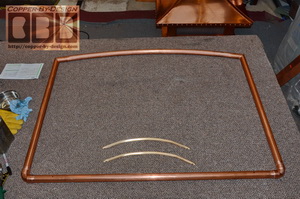
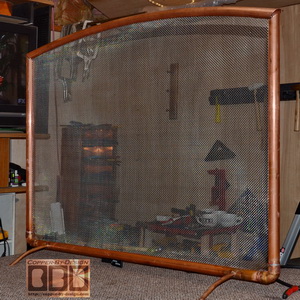
Al asked me to make my first
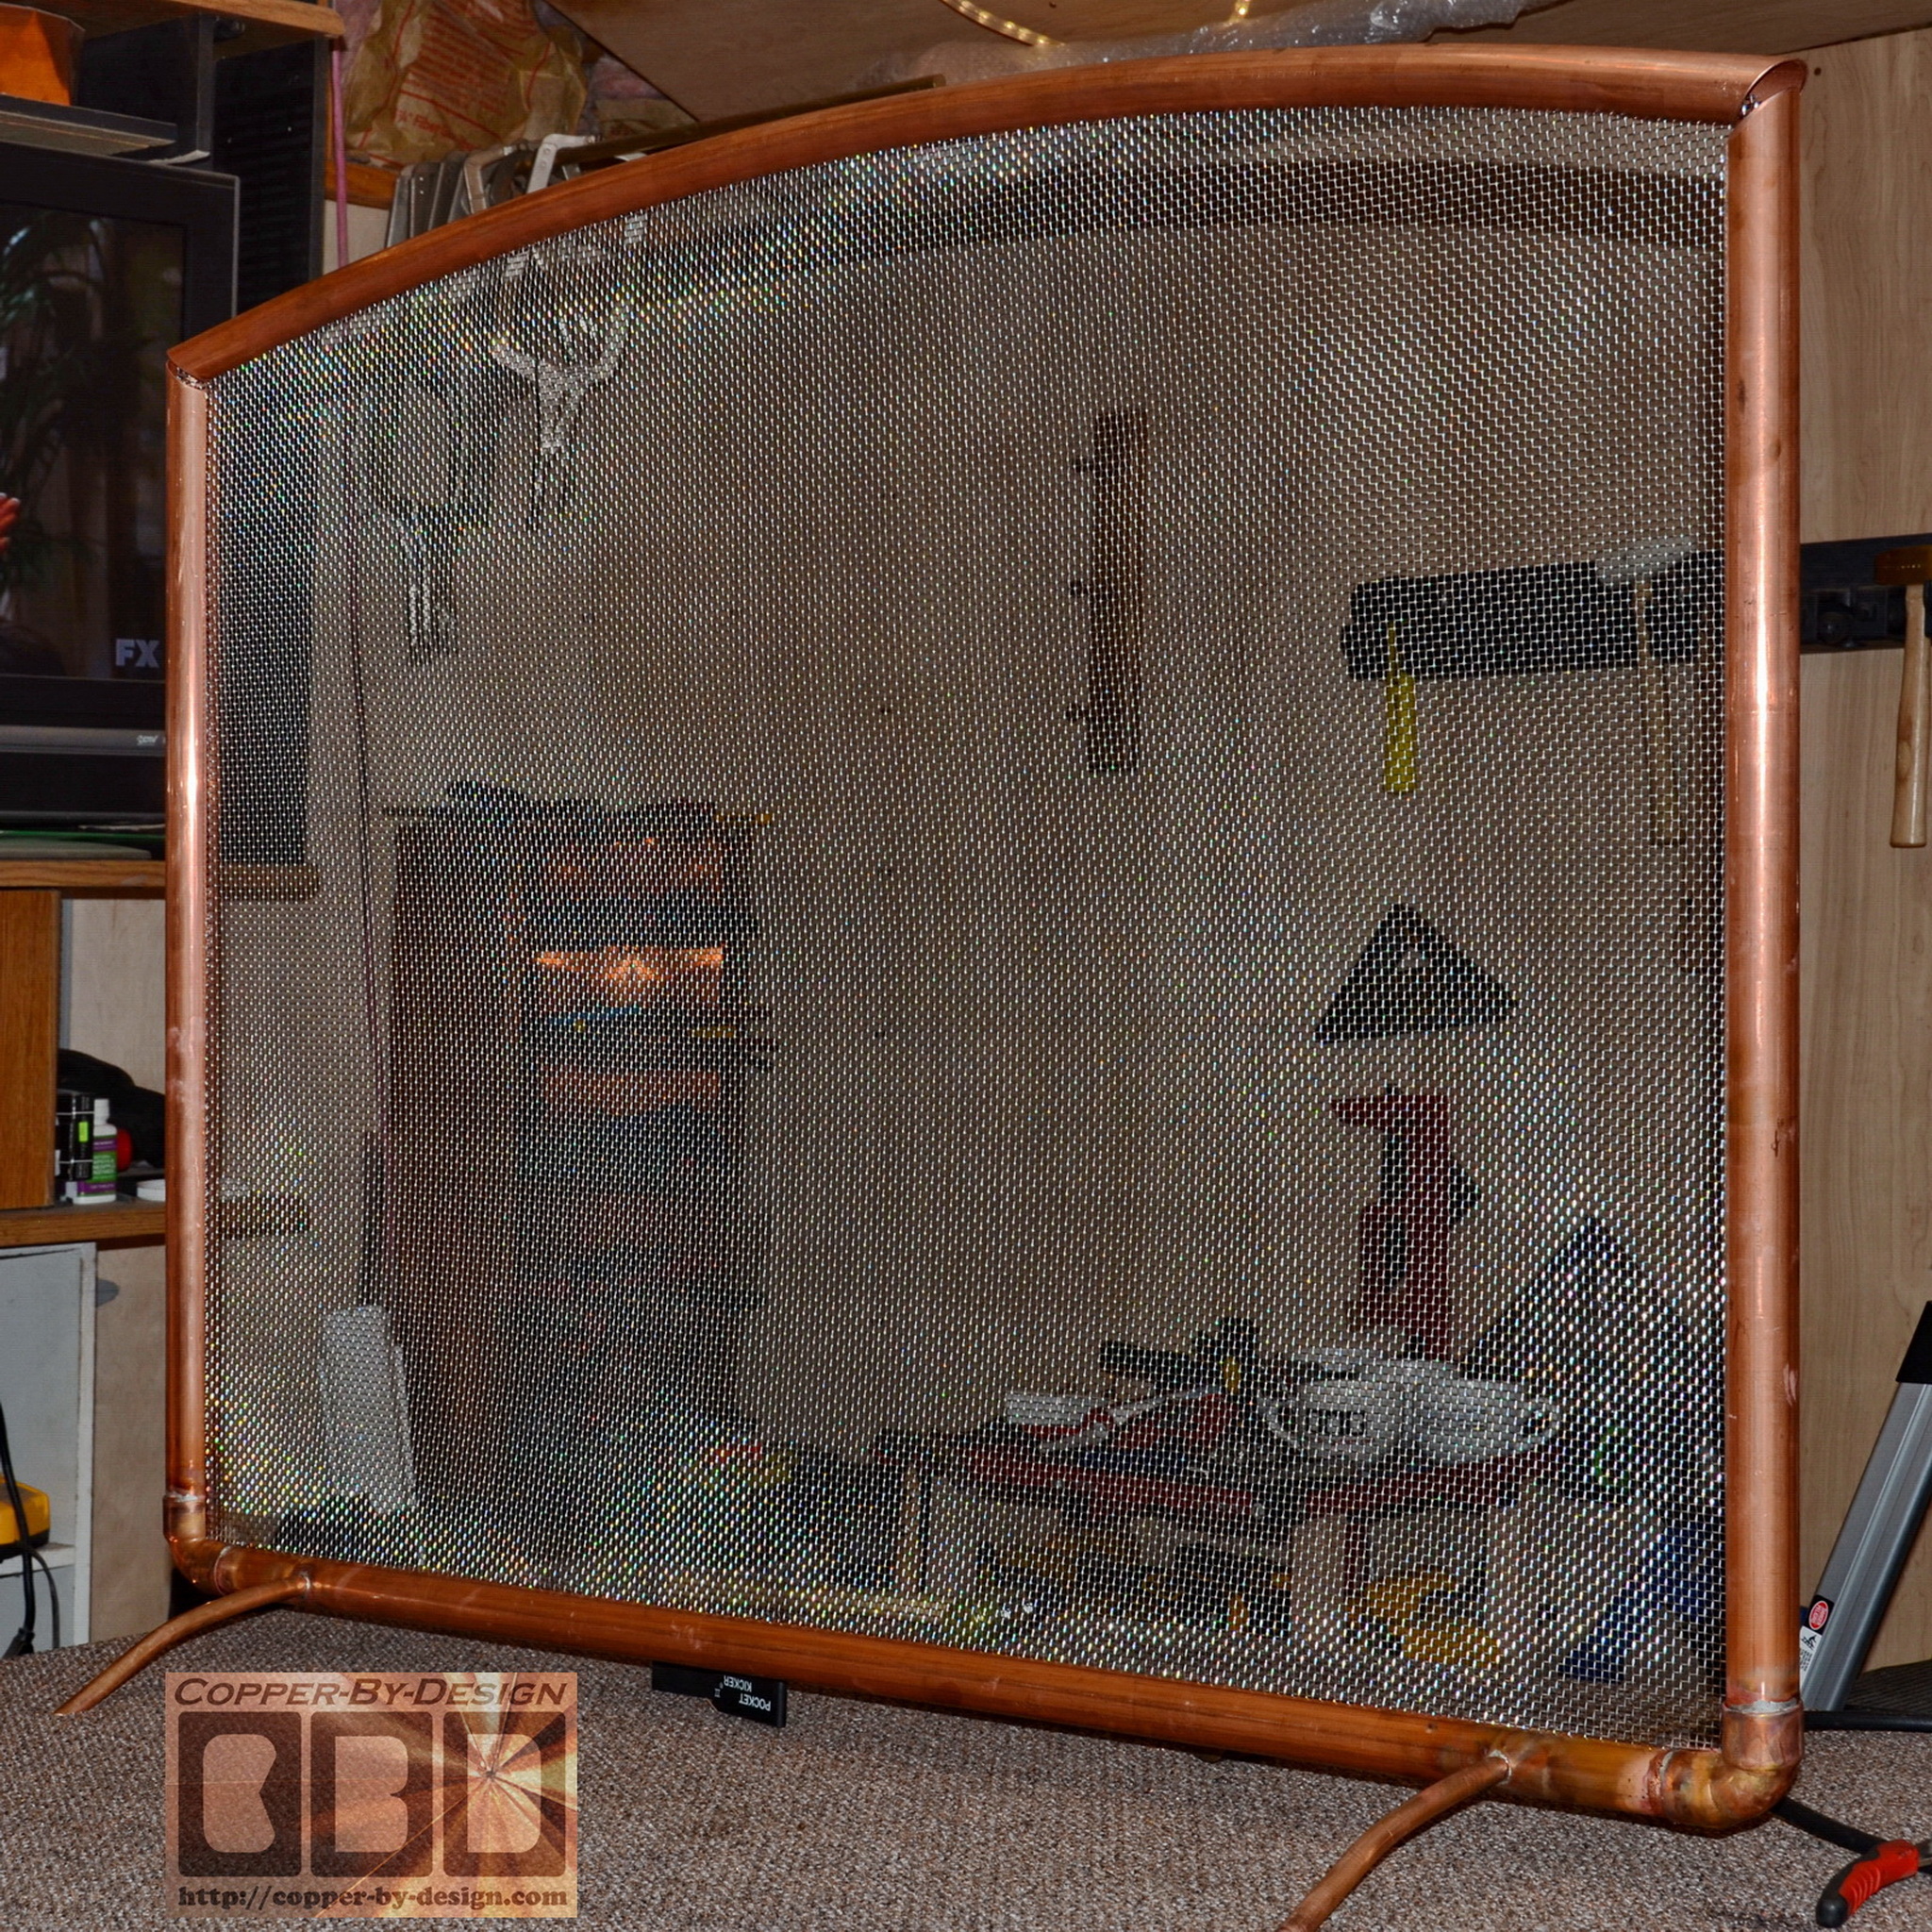
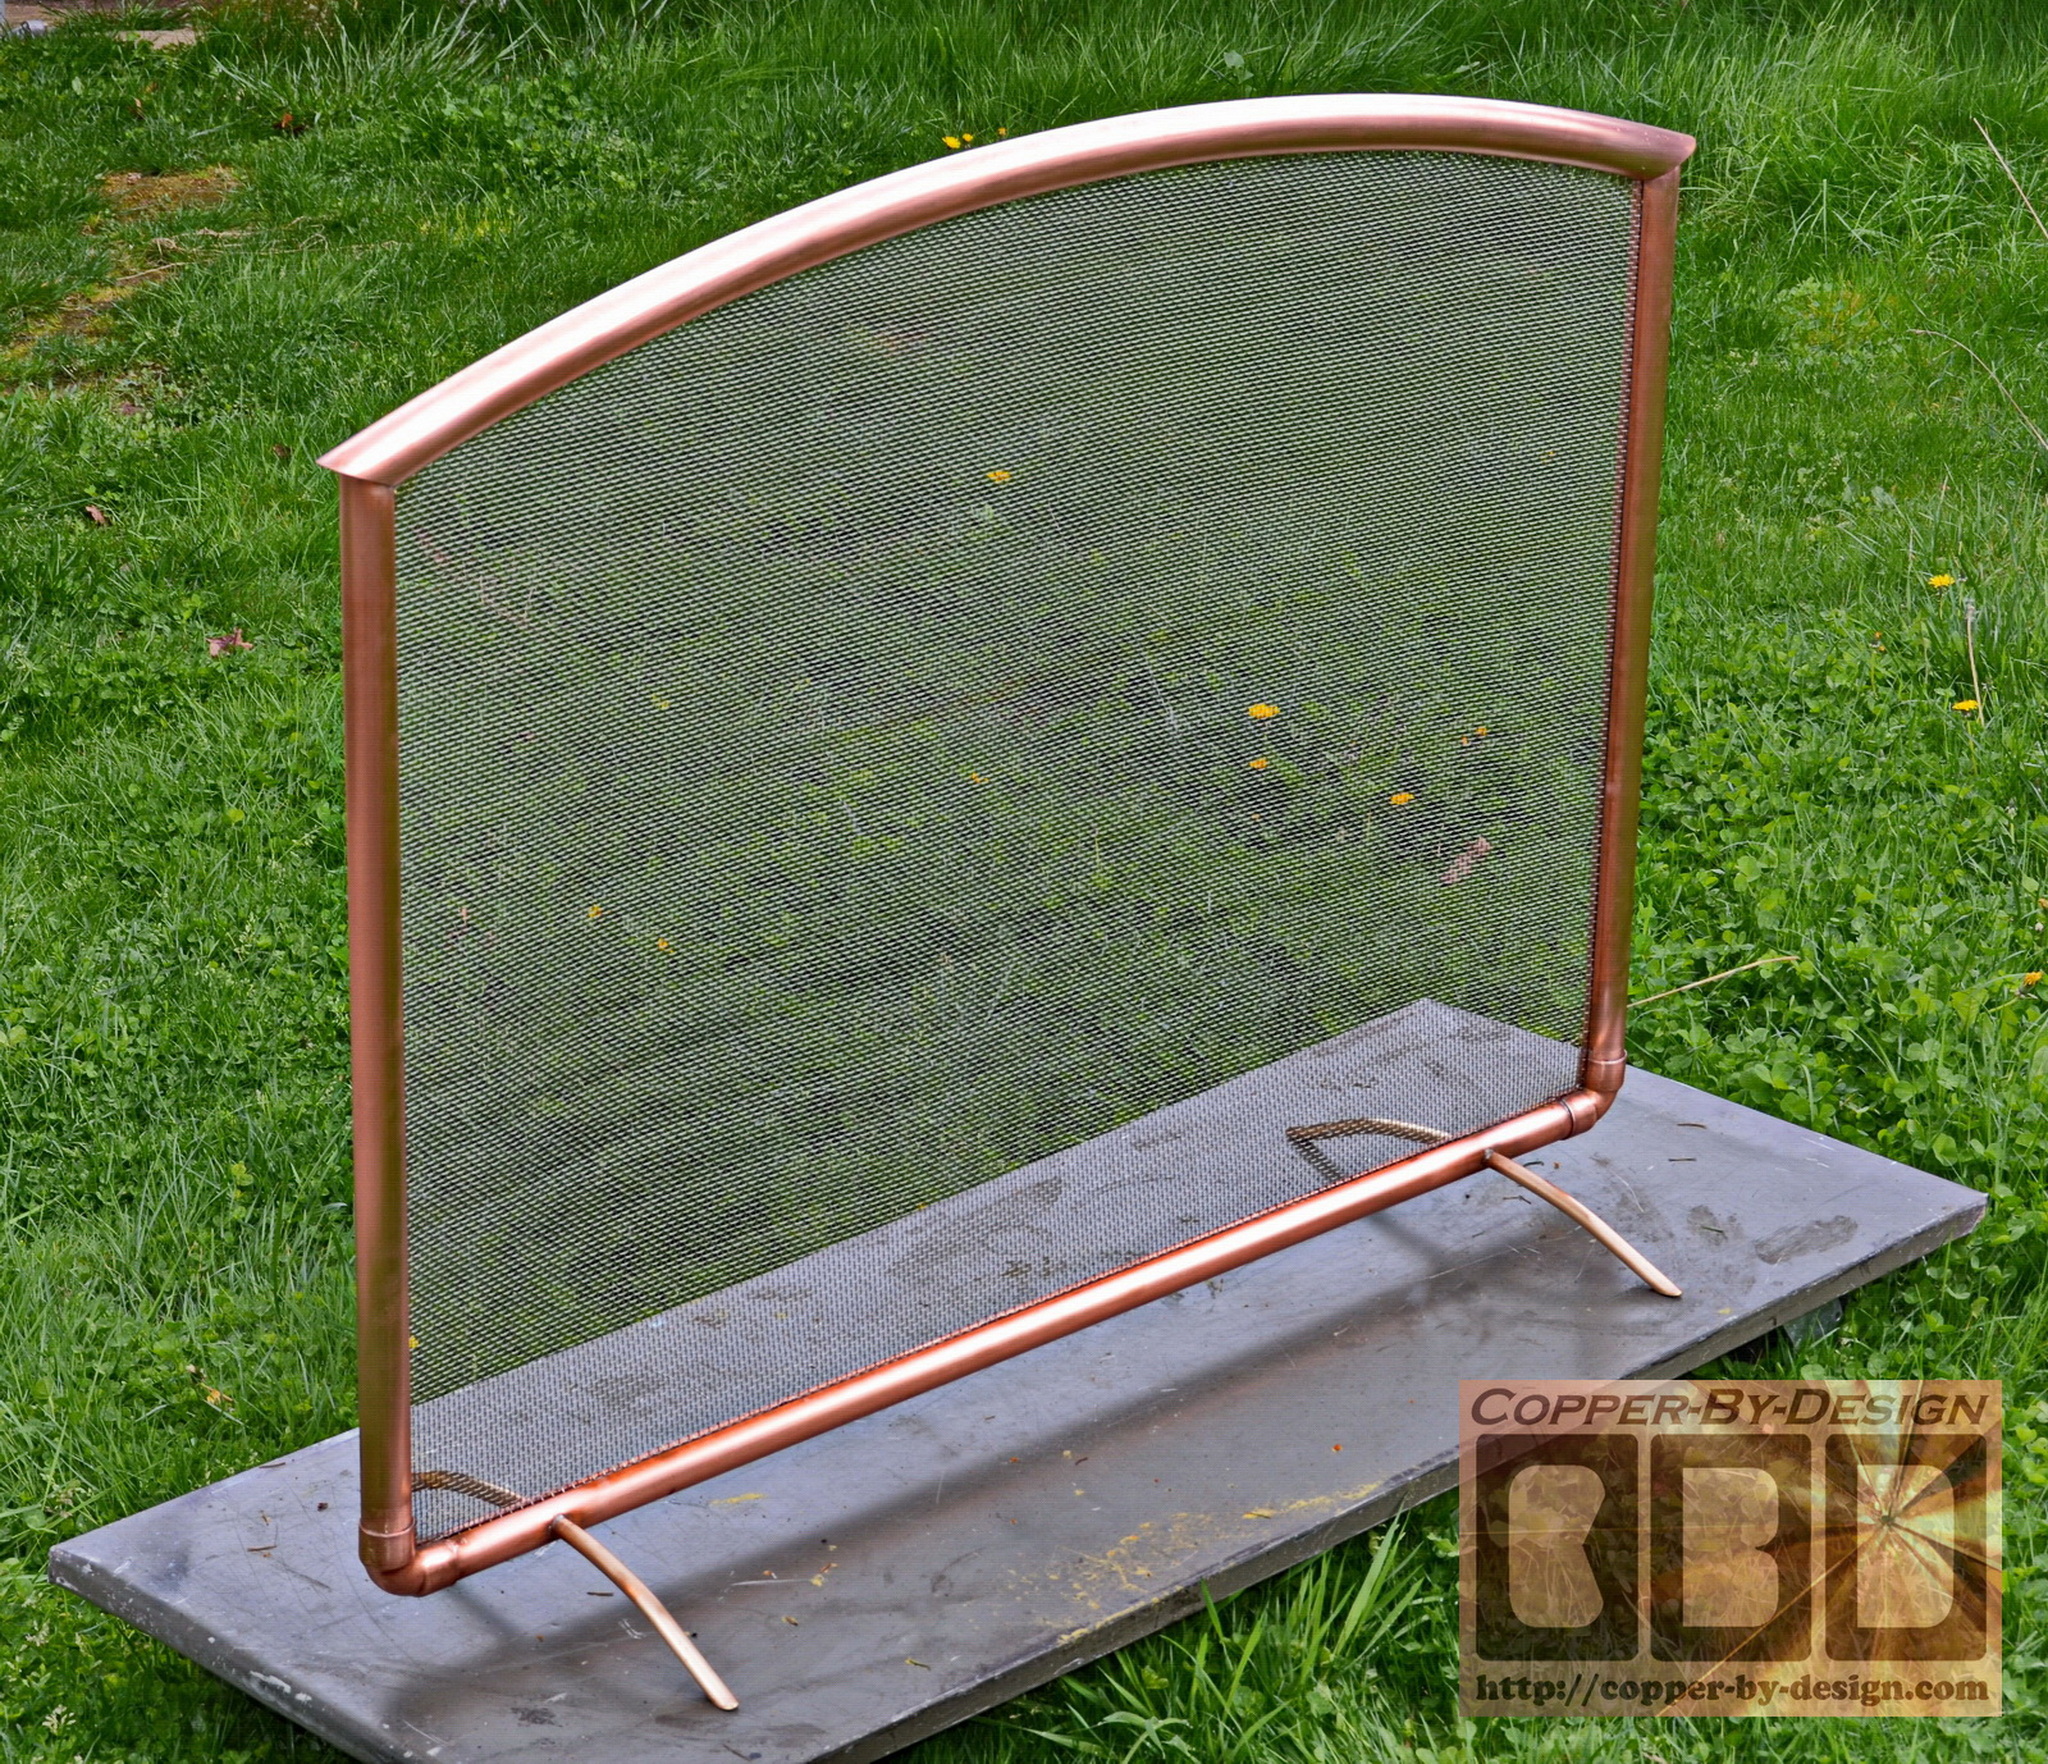
fire-screen as well. It is 48" wide and 39" high in the center.
It has a 1.25" copper pipe frame with a larger 1.5" pipe
arch. I made this all with rust-free metals for outdoor use,
unlike most fire-screens. It has a finished look on both sides,
so it's reversable.
|
|
Building the Base/Skirt
Section
|
|
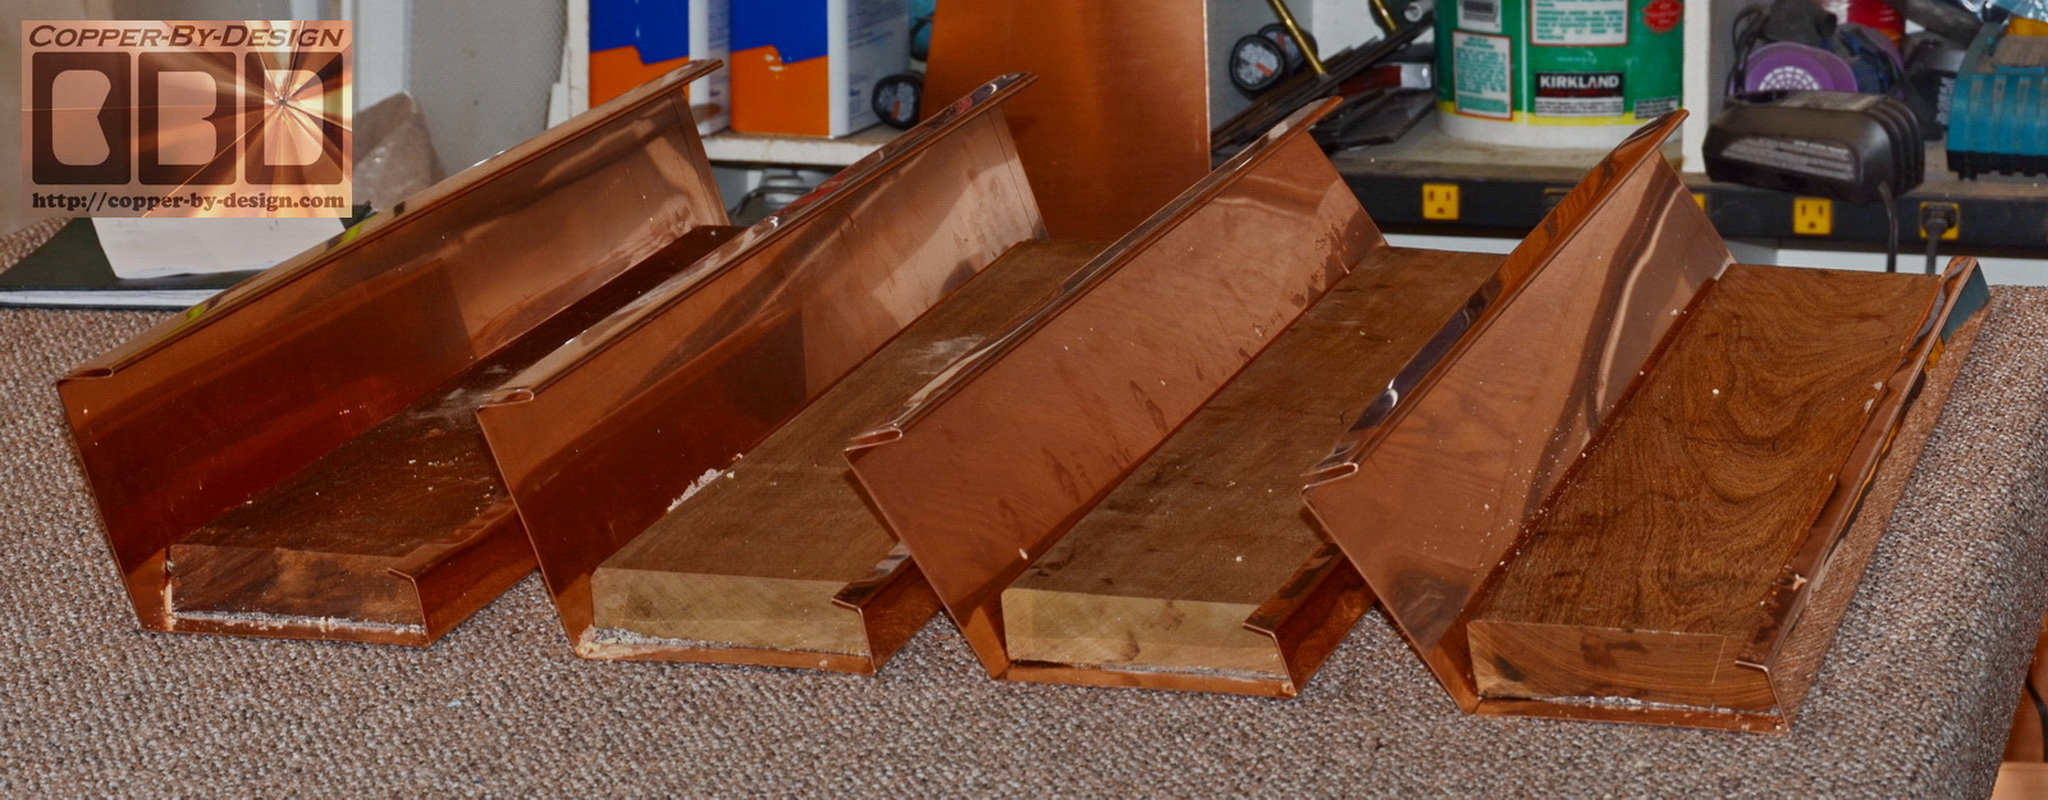
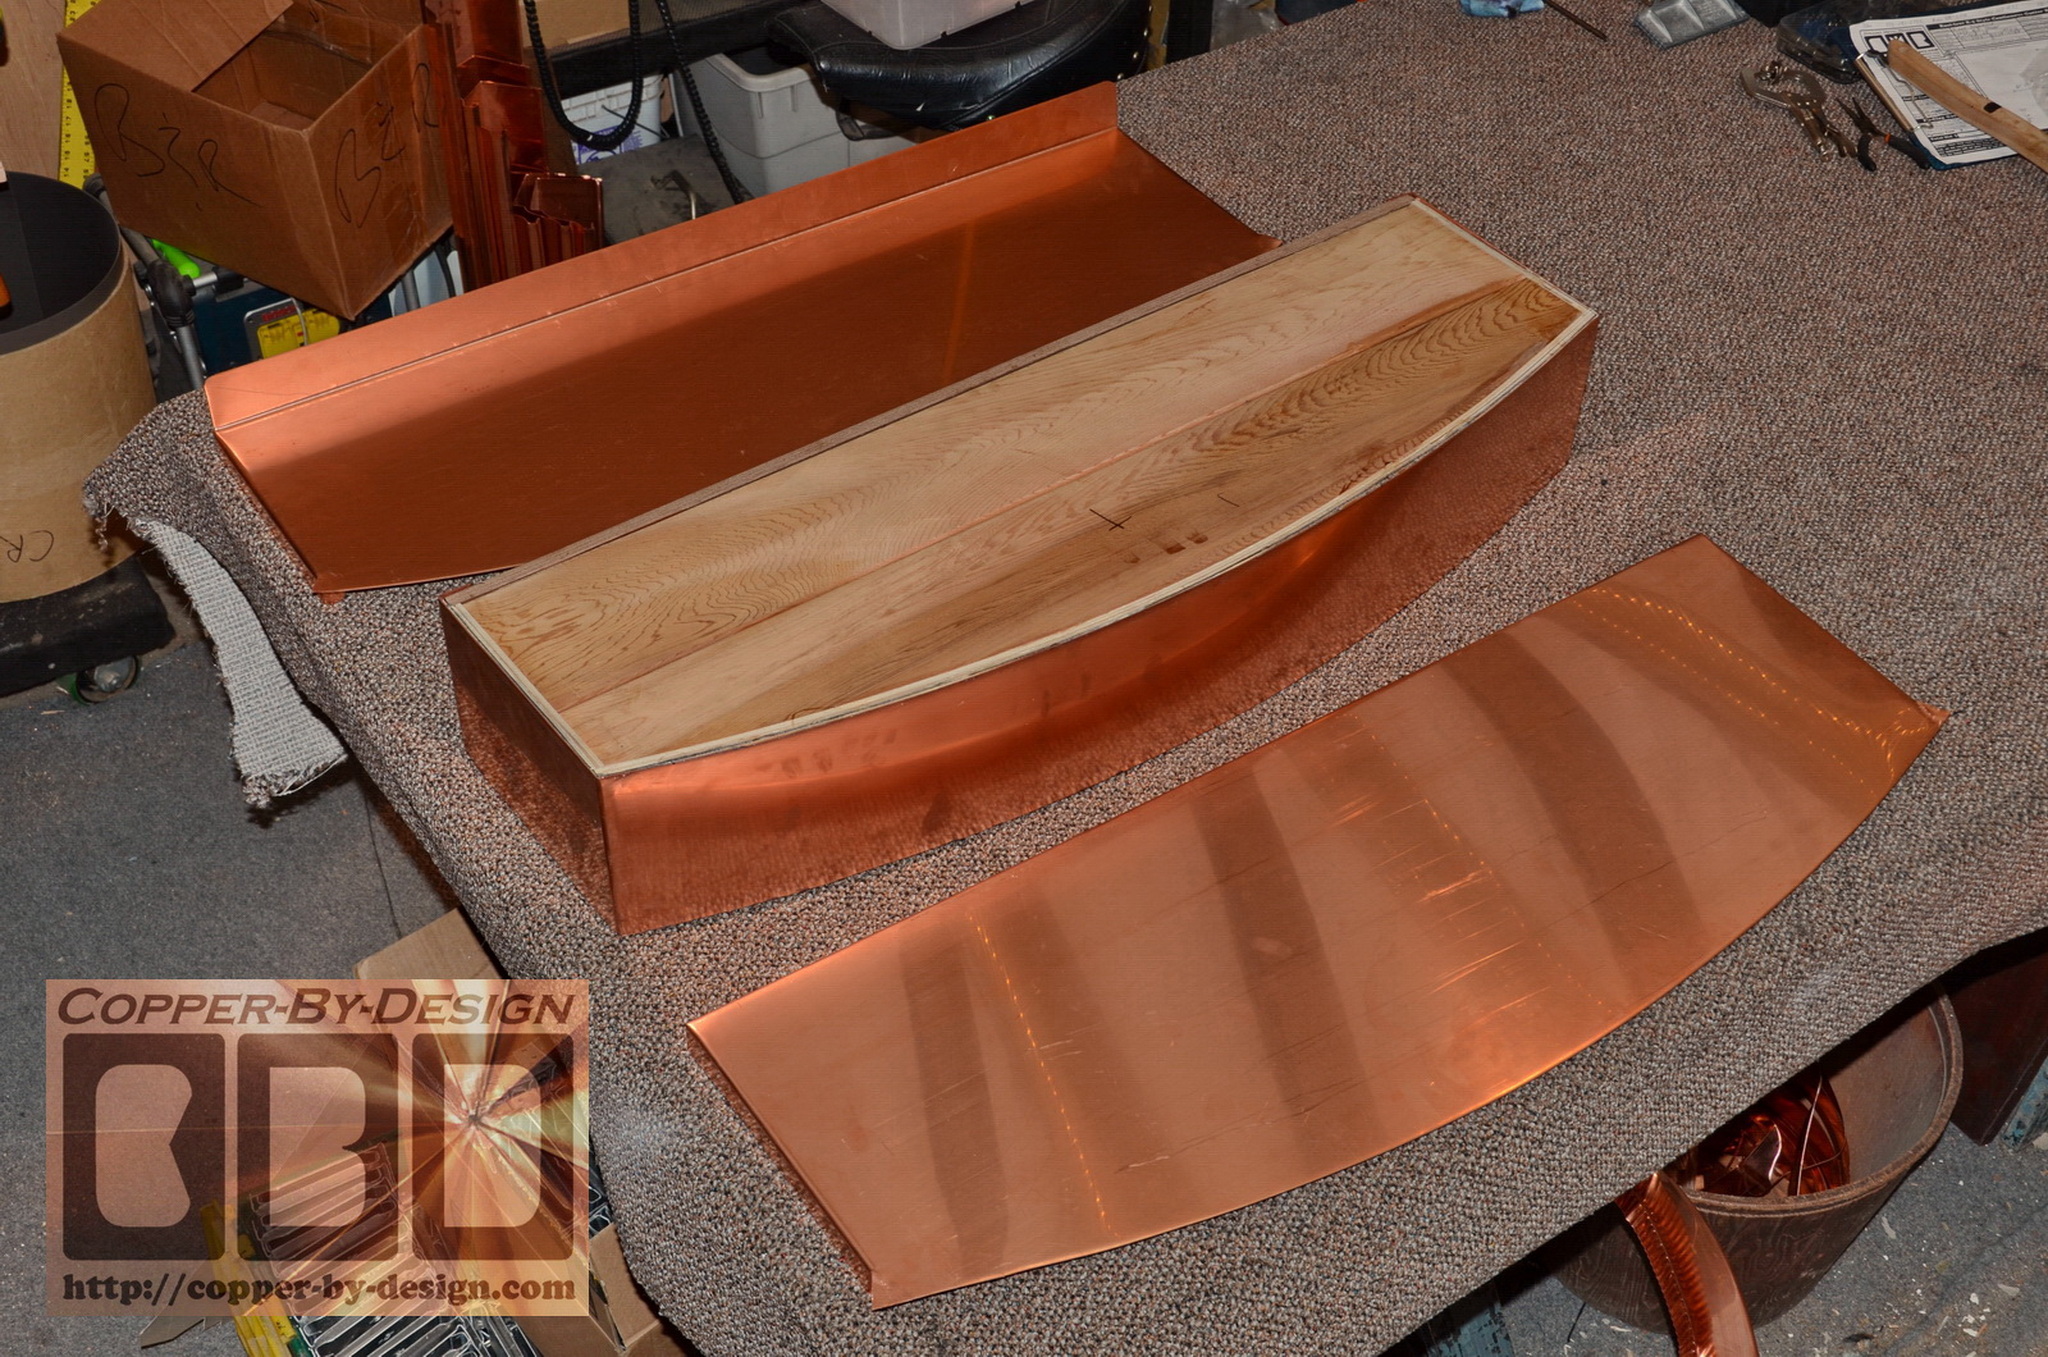
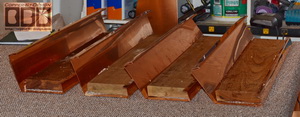
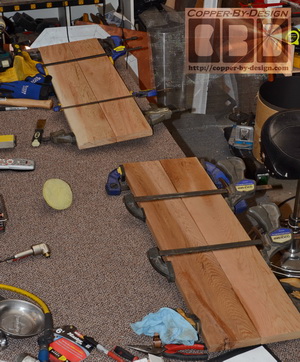
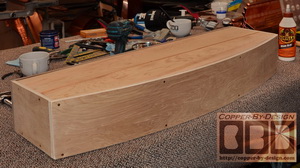
Here's the 4 pieces of 5/4X6 Ipe hardwood support frame
we needed to build inside the copper base that helps anchor this down
in high wind storms. Each board has been cut on all 4 sides at an
angle. The top and bottom were cut on my table saw at a 18 degree angle and the ends were cut at a 45 degree angle
to miter them together. They weigh 26.4# and will be positioned down low where it
should not suffer heat from the chimney and shielded from the
elements. They are glued in and we also treat the inside with tung oil to keep them dry.
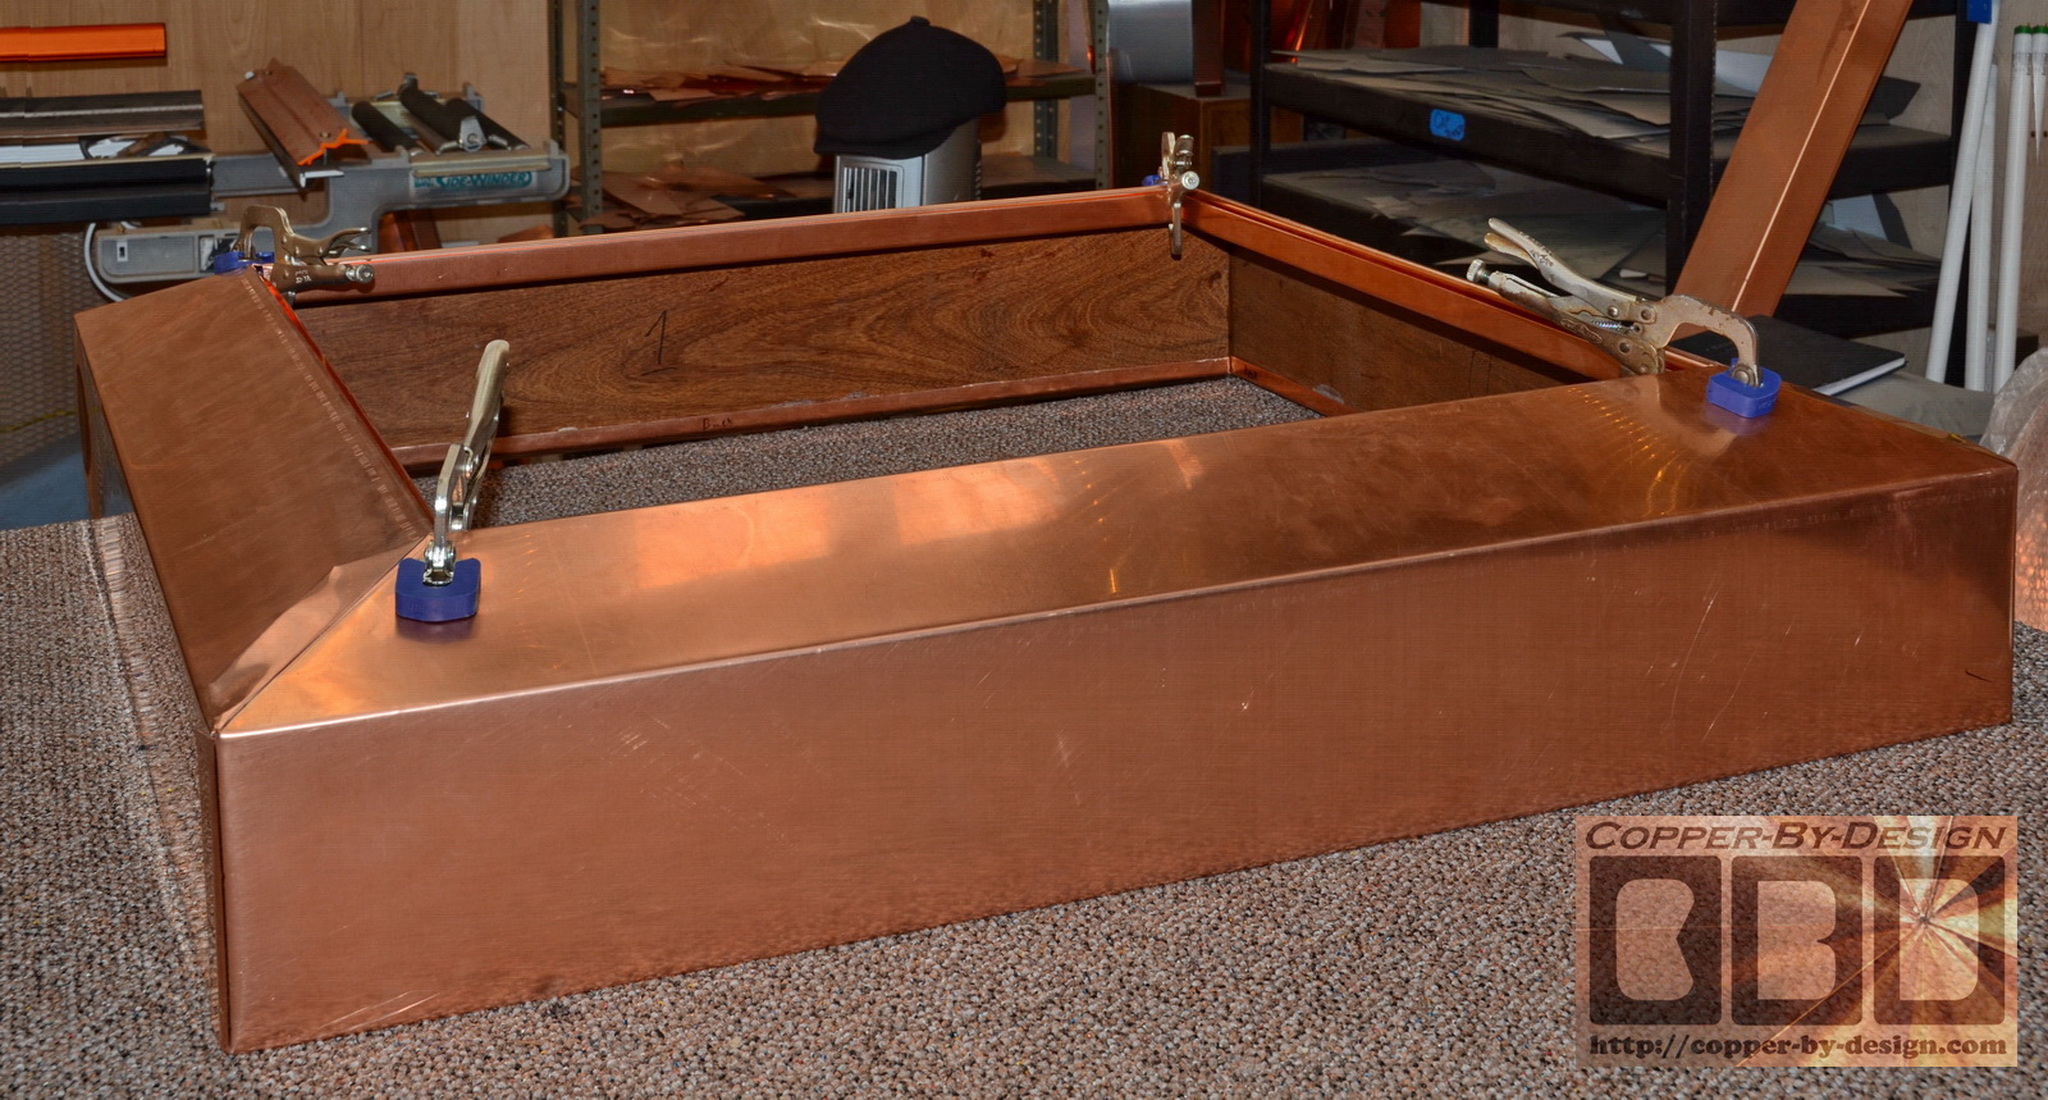
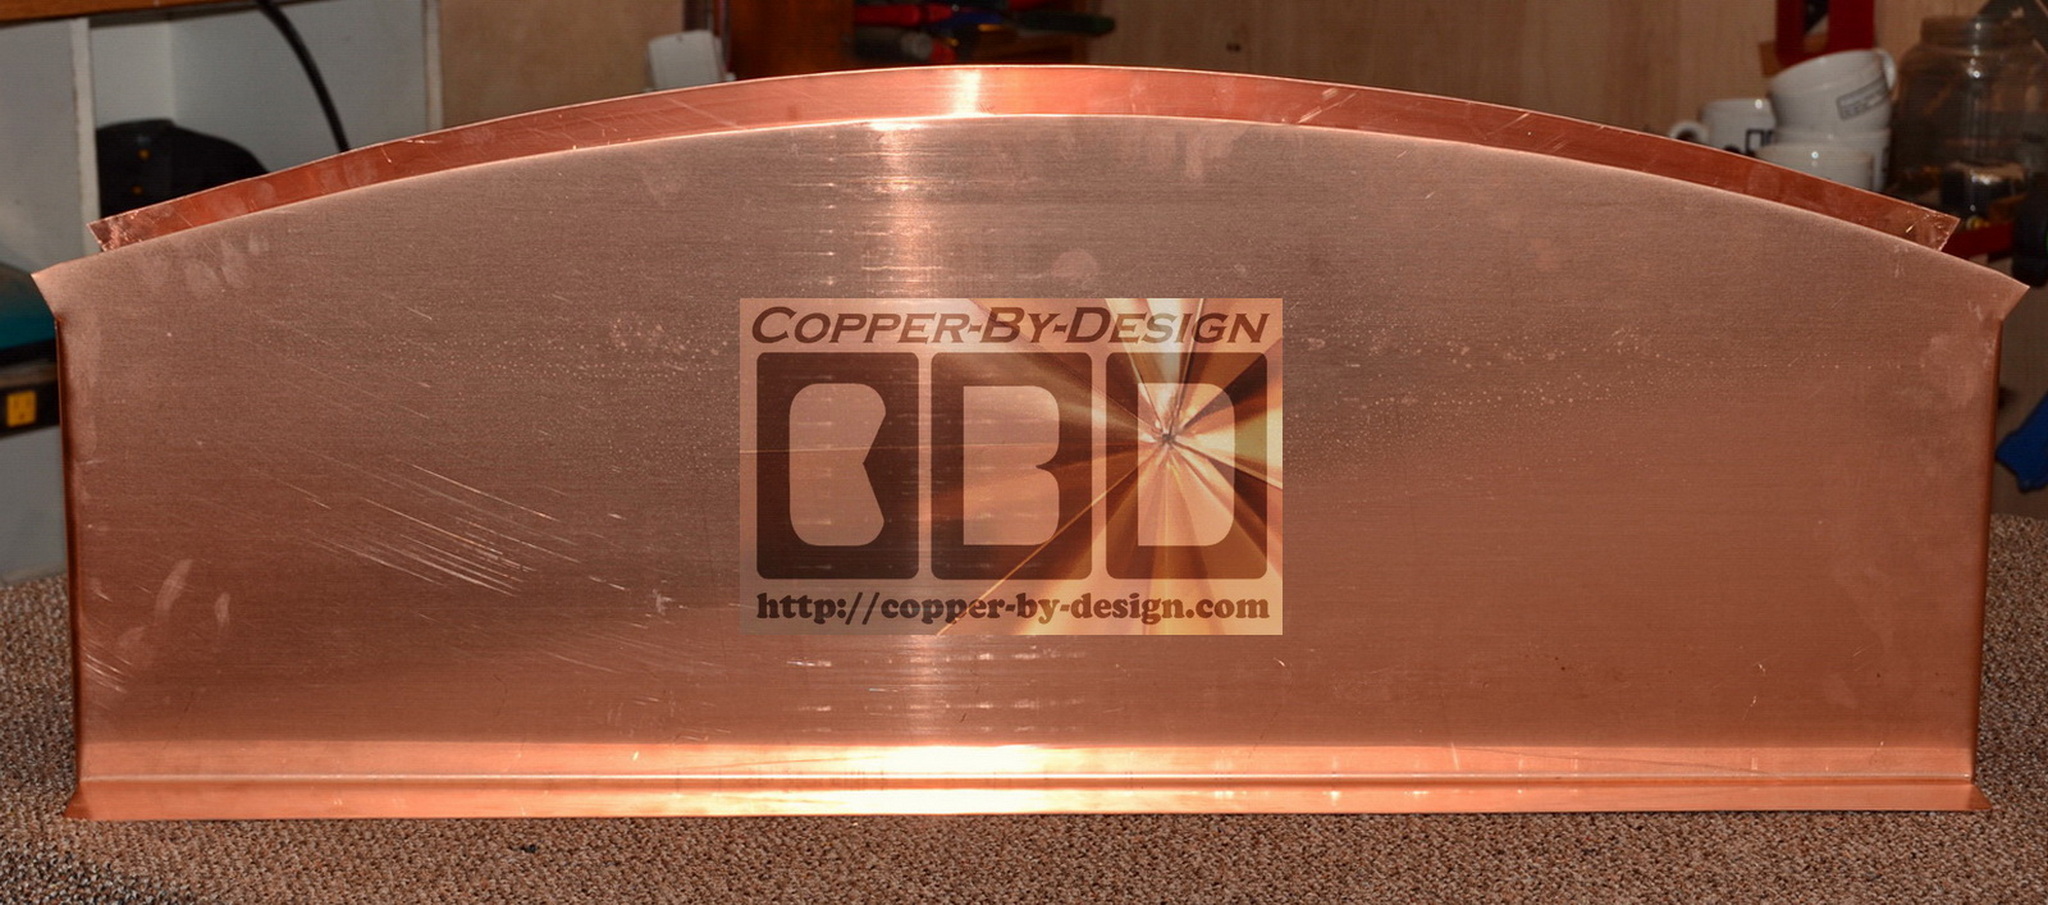
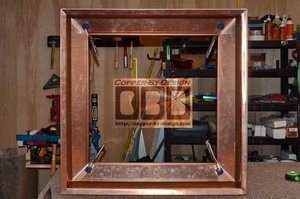
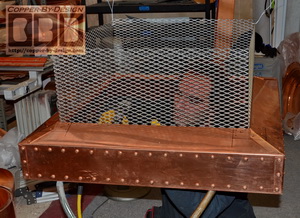
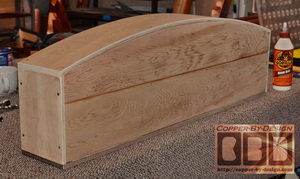
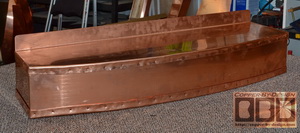
The base/skirt for the
chimney cap cut out and shaped with the wood being pressed
down into the frame while the expanding Gorilla Glue sets. Then
it is ready to be assembled into this base/skirt. There's a
channel for the SS spark arrest screen already in this section
as well.
 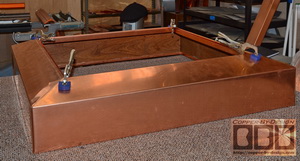
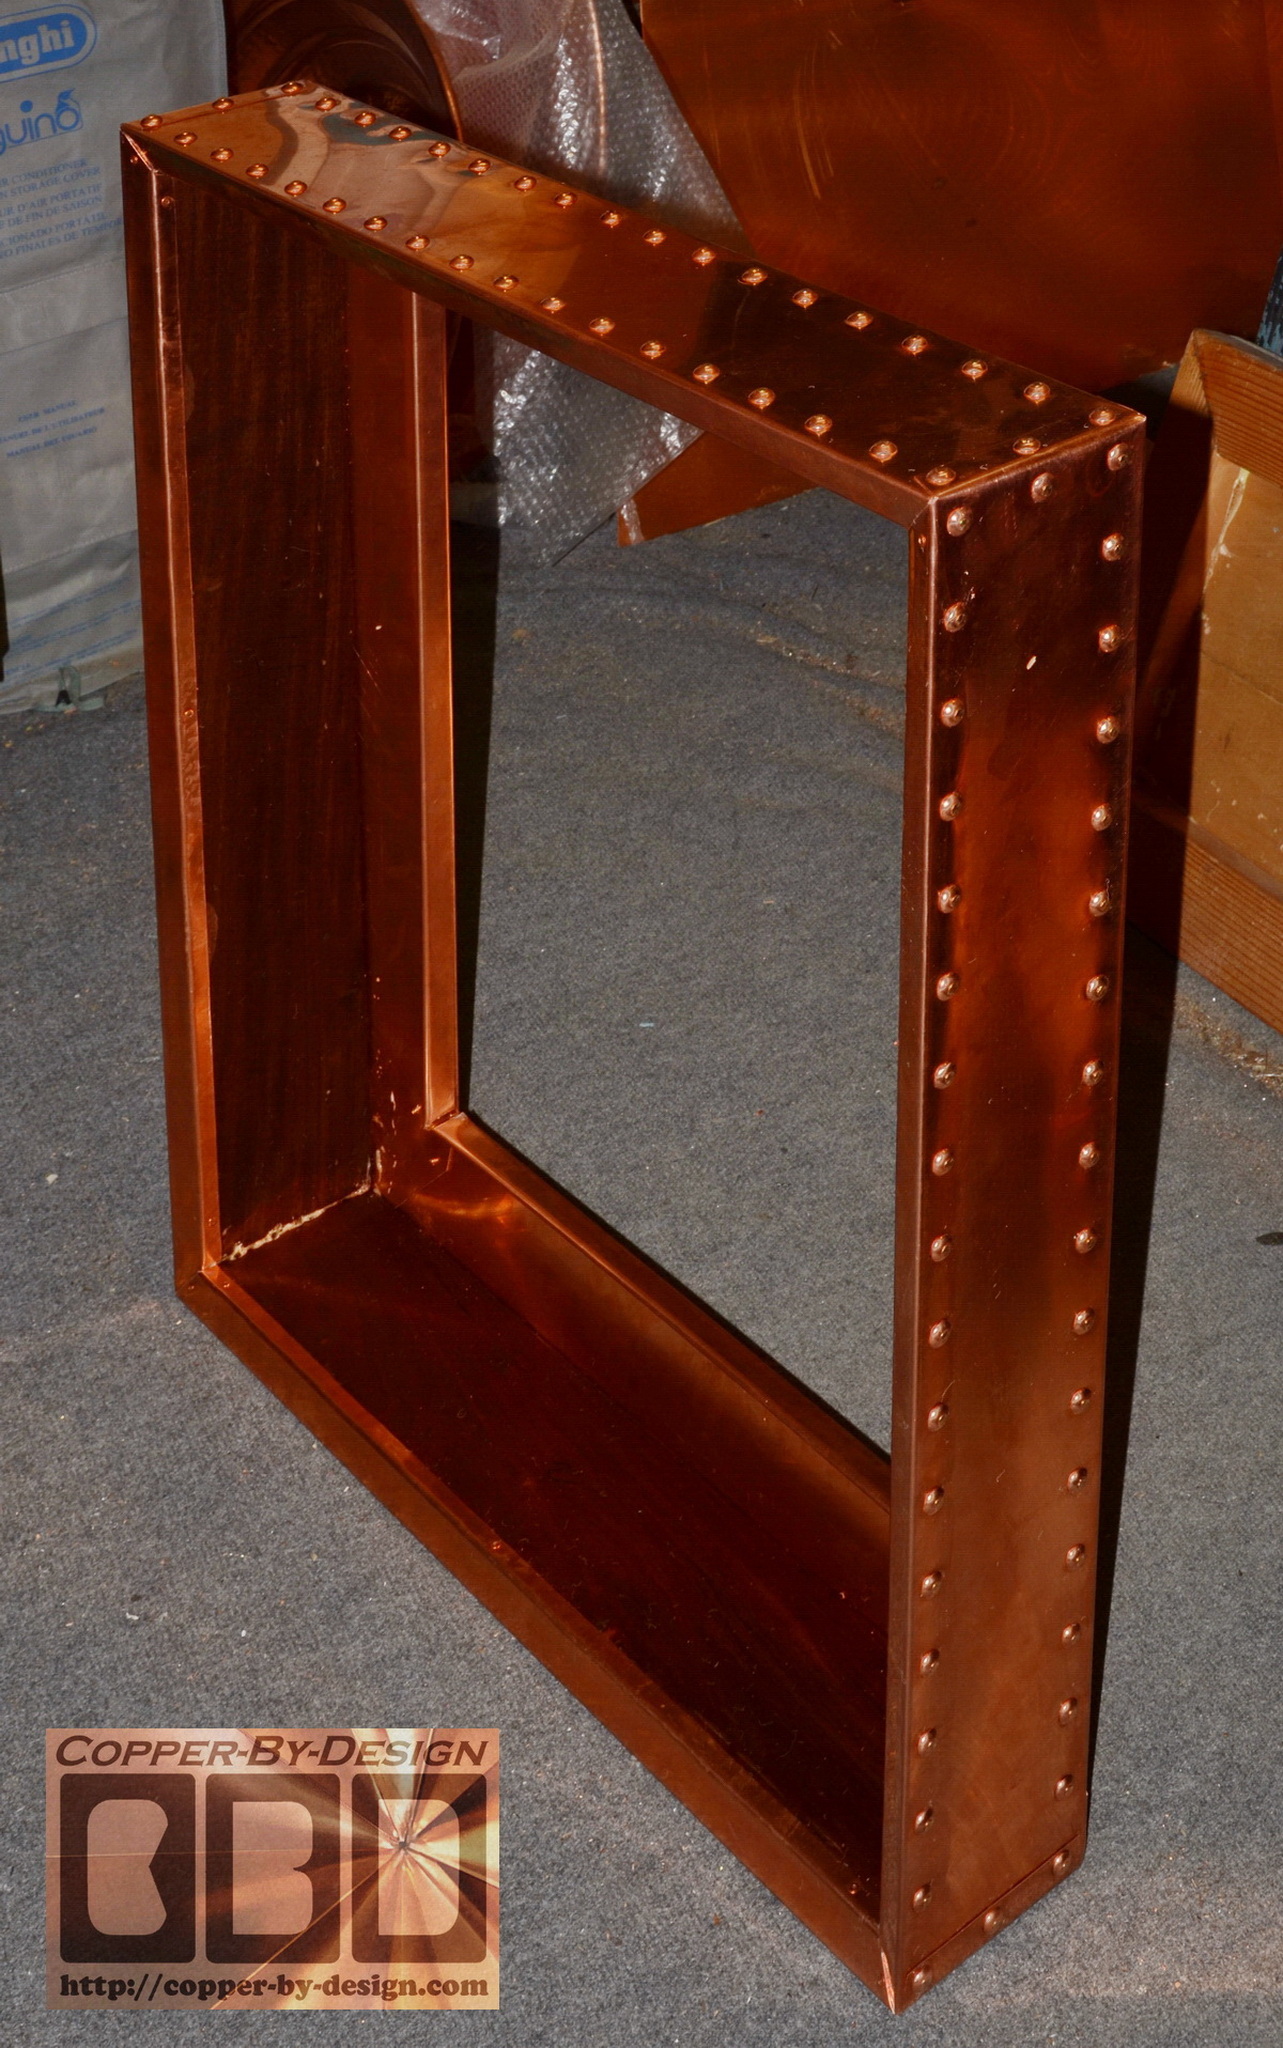
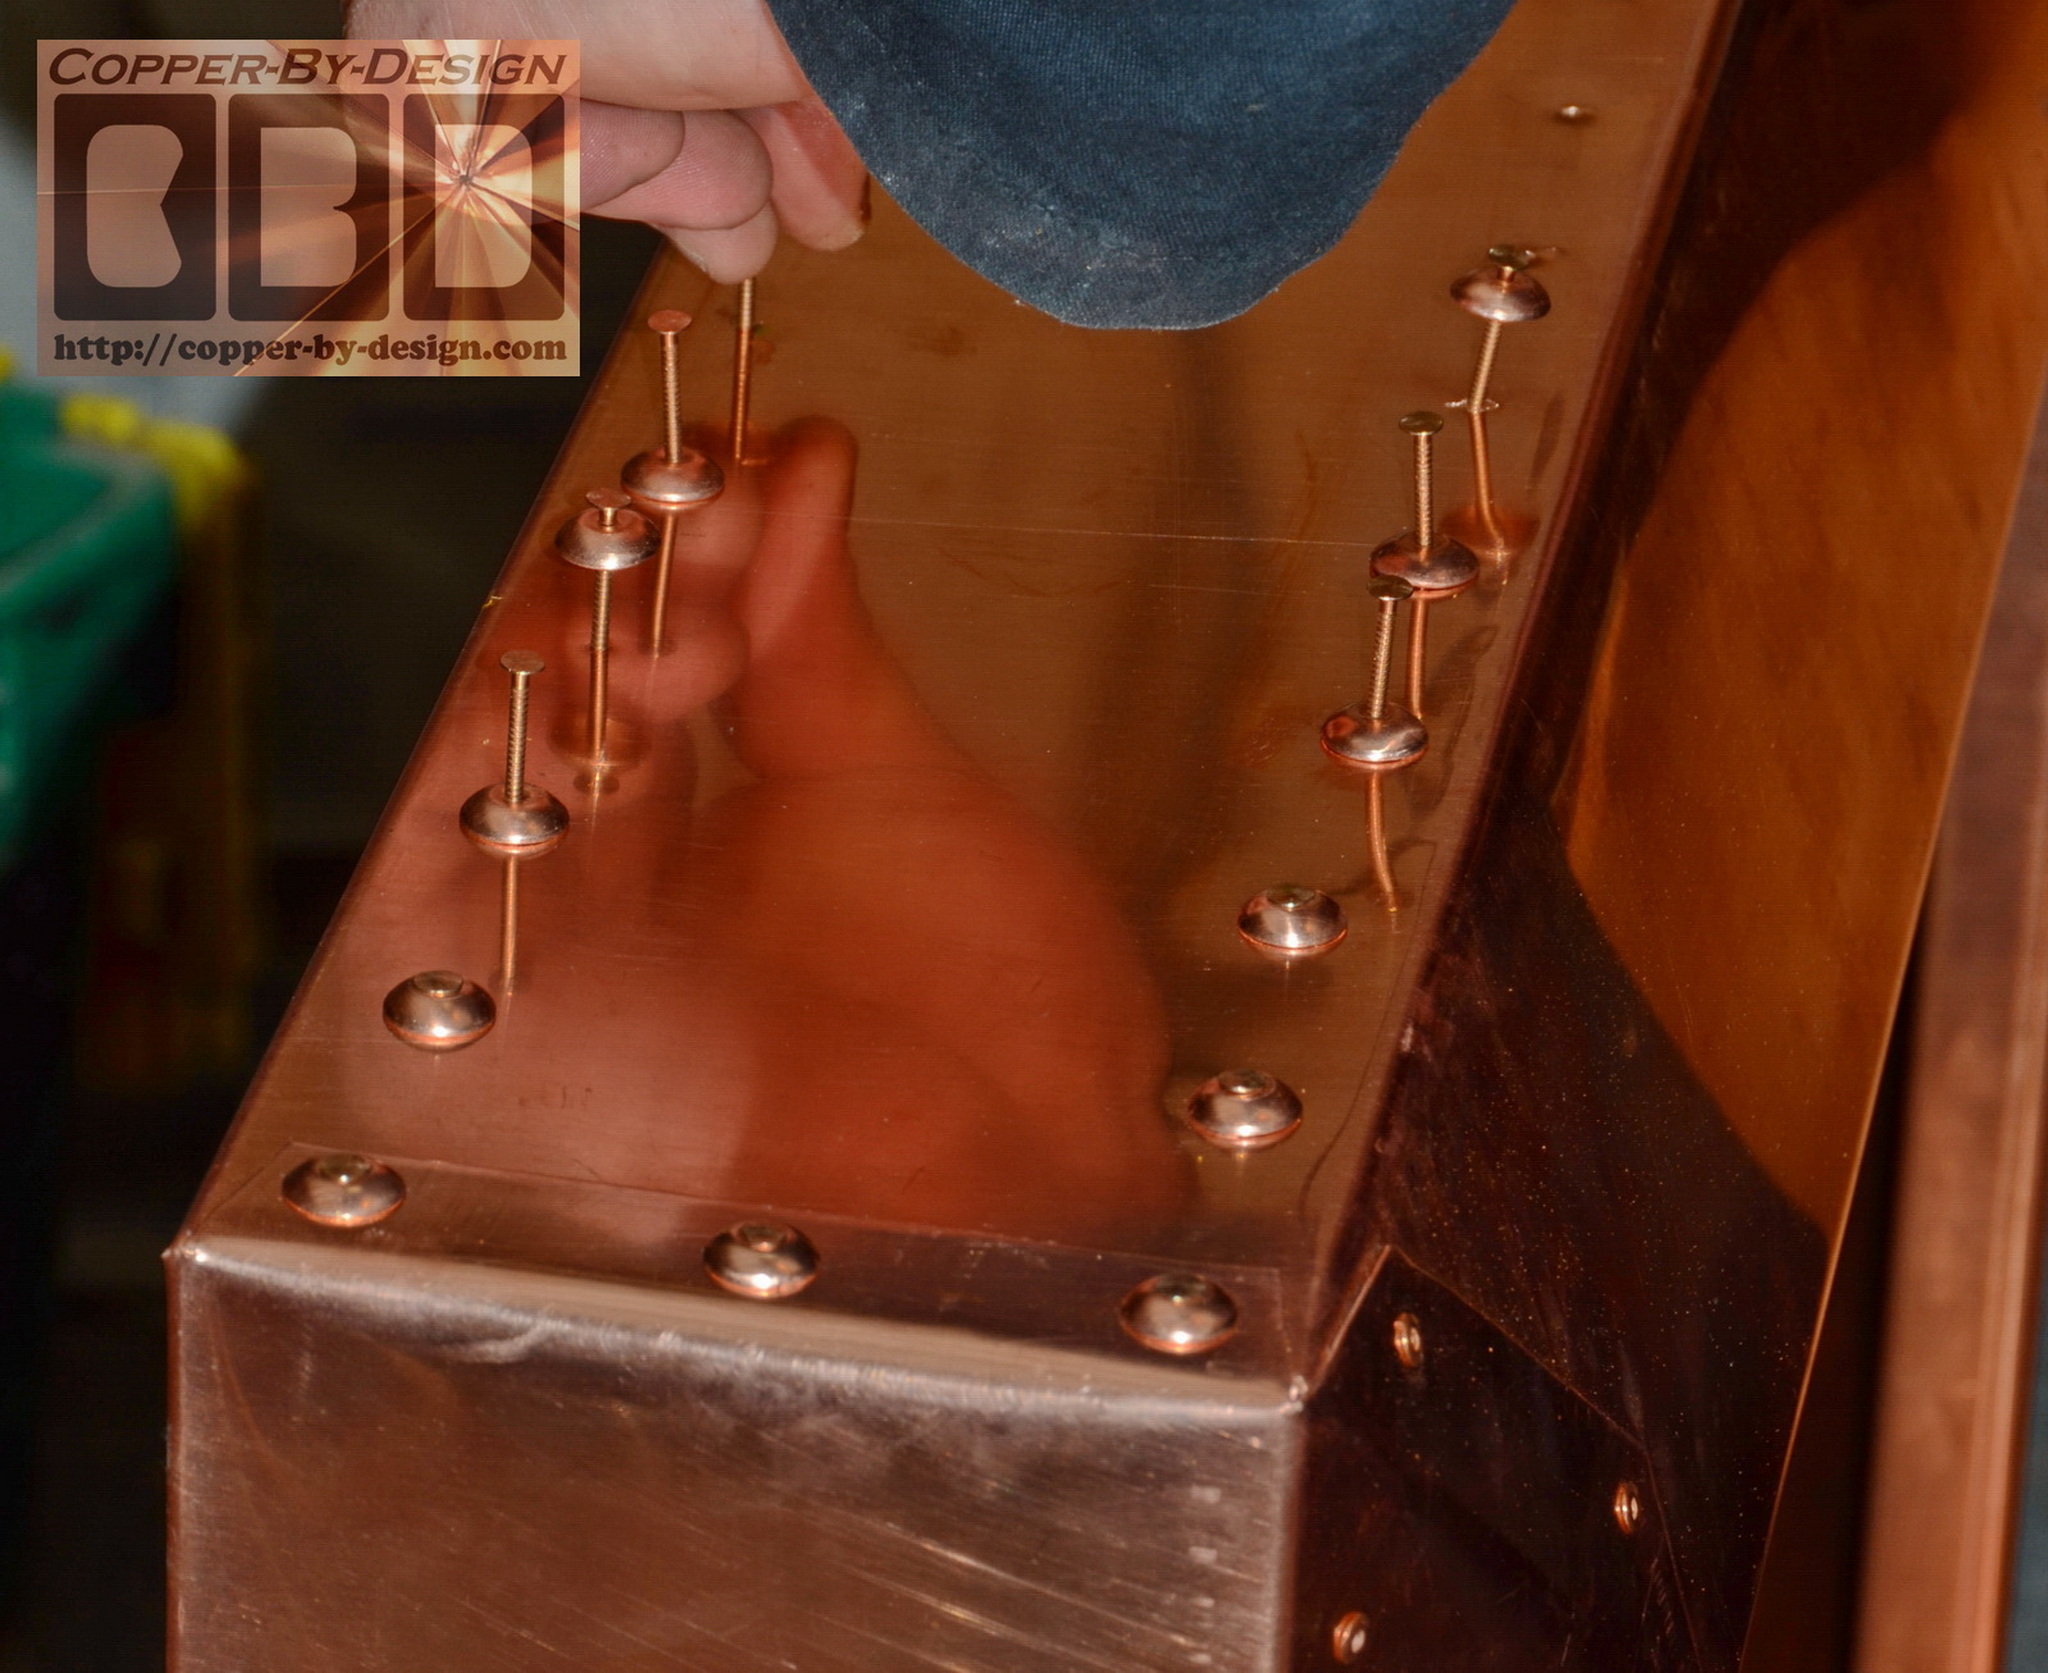
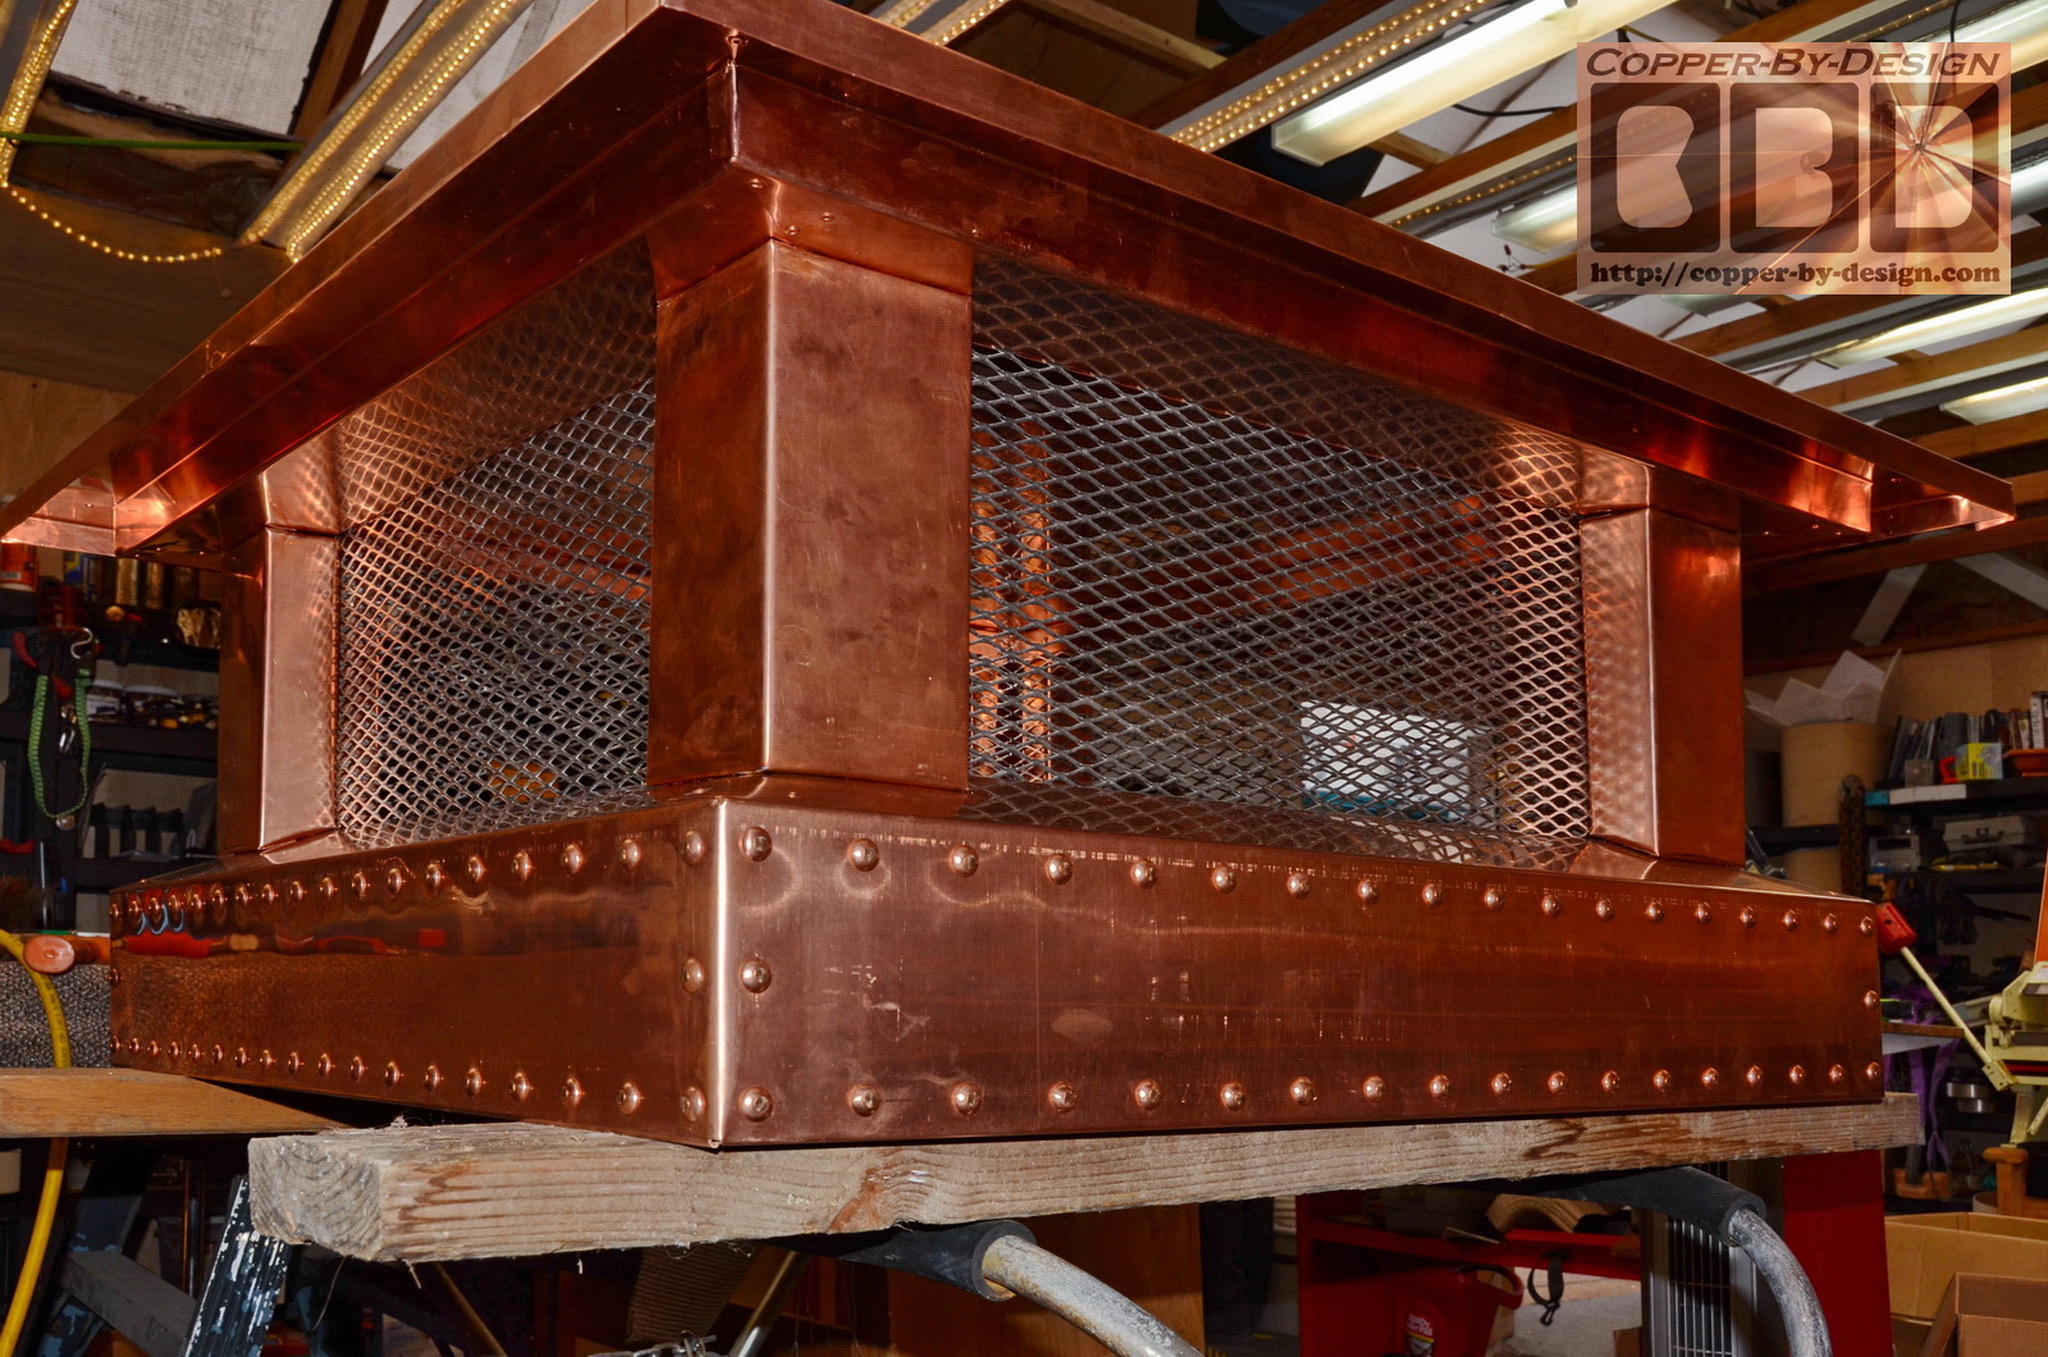
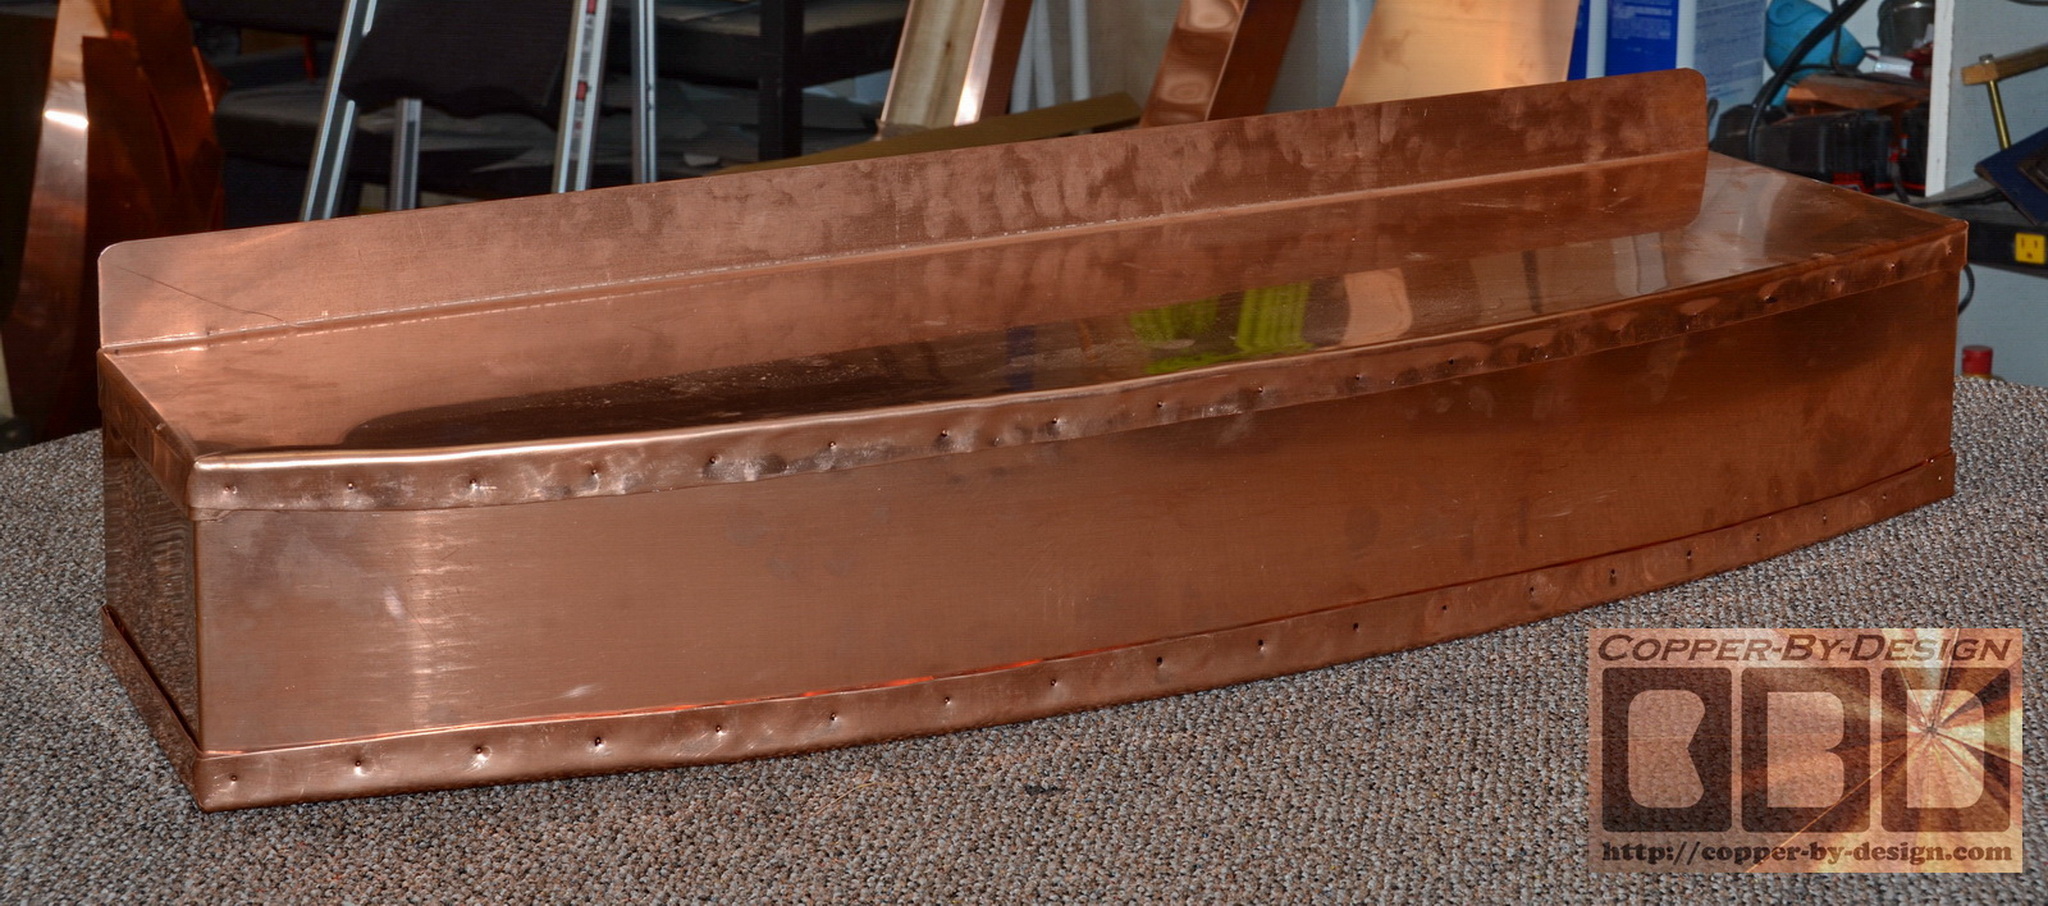
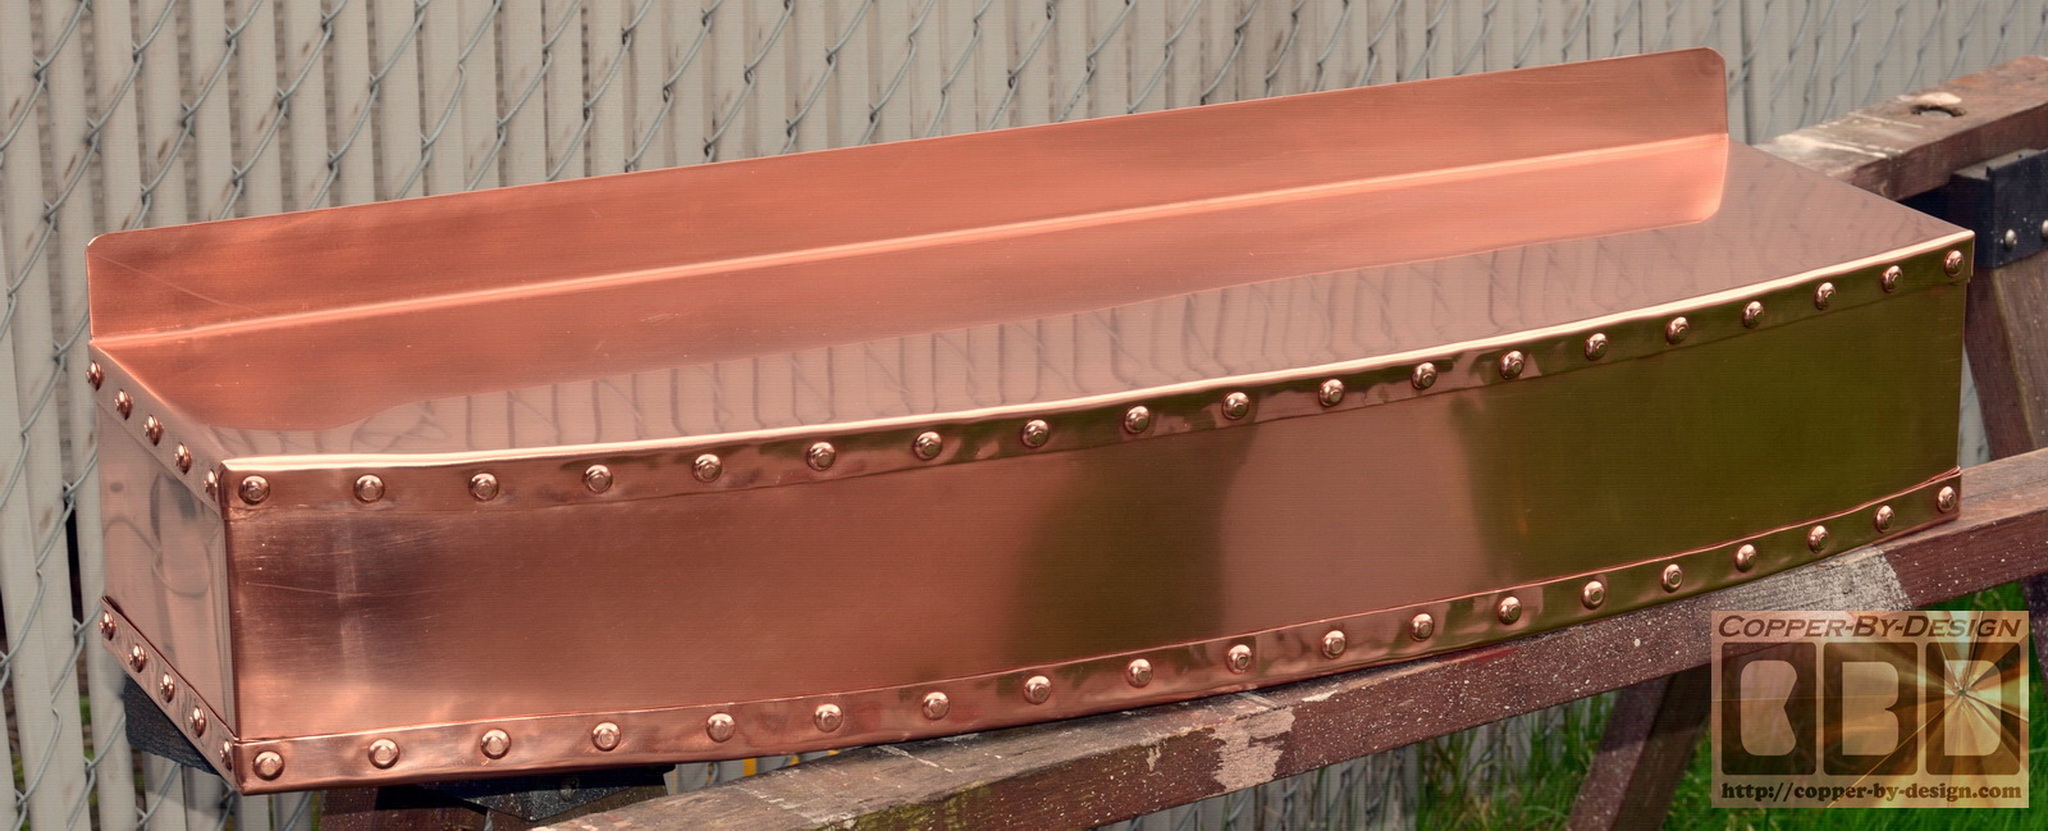
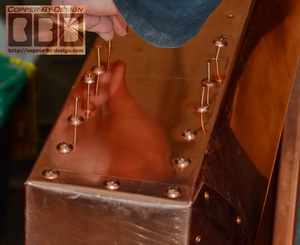
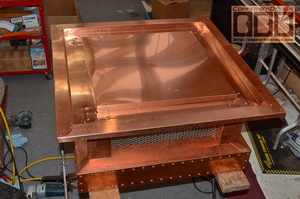
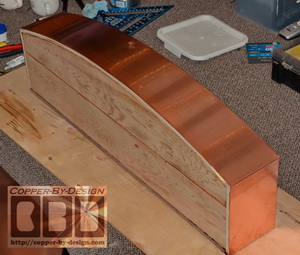
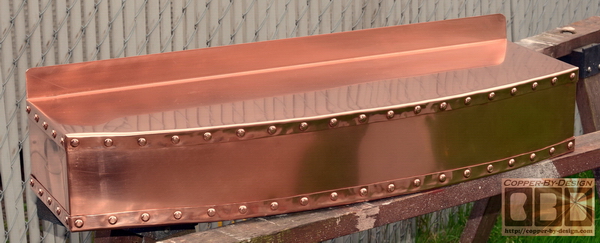
 These
hundreds of over-sized industrial looking rivet are tediously
punched, stamped into a dome, and a nail hole puched one at a
time. Then we had to predrill all these nail holes before we
could hammer them in place. Spaced about 2" apart that makes 38
per side = 152 on this base. These
hundreds of over-sized industrial looking rivet are tediously
punched, stamped into a dome, and a nail hole puched one at a
time. Then we had to predrill all these nail holes before we
could hammer them in place. Spaced about 2" apart that makes 38
per side = 152 on this base.
From: "Al Rossi" <AlR@rdfcpas.c*m>
Date: Mon, 25 Mar 2013
Looks beautiful!
Al Rossi
|
|
Building the Mid Exhaust
Section
|
|
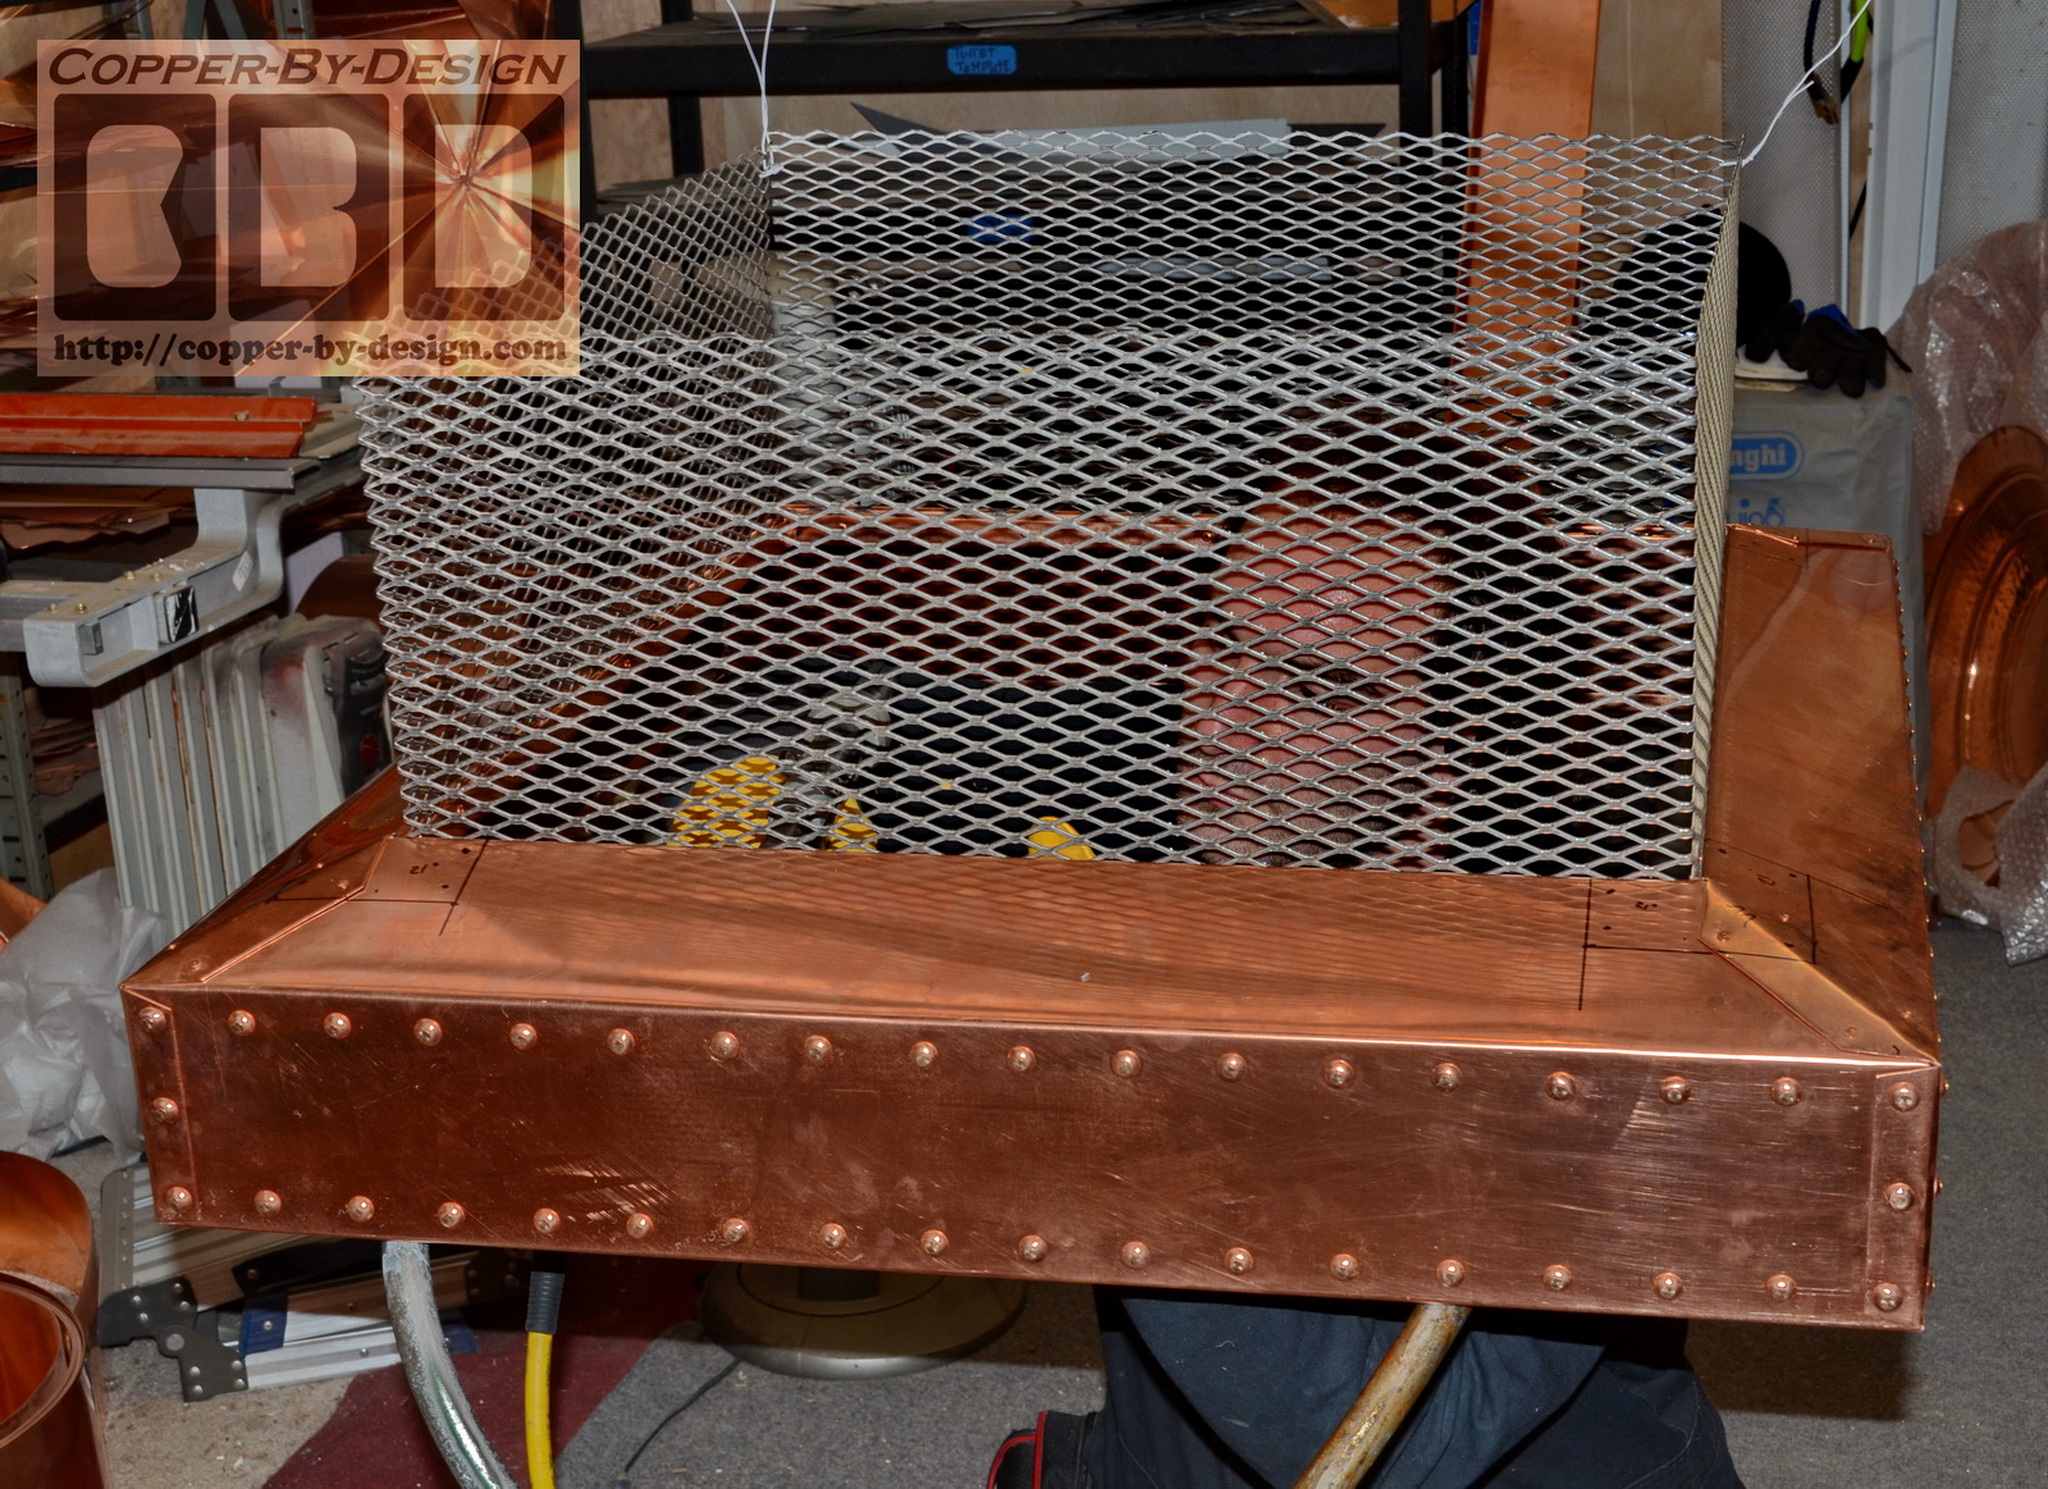
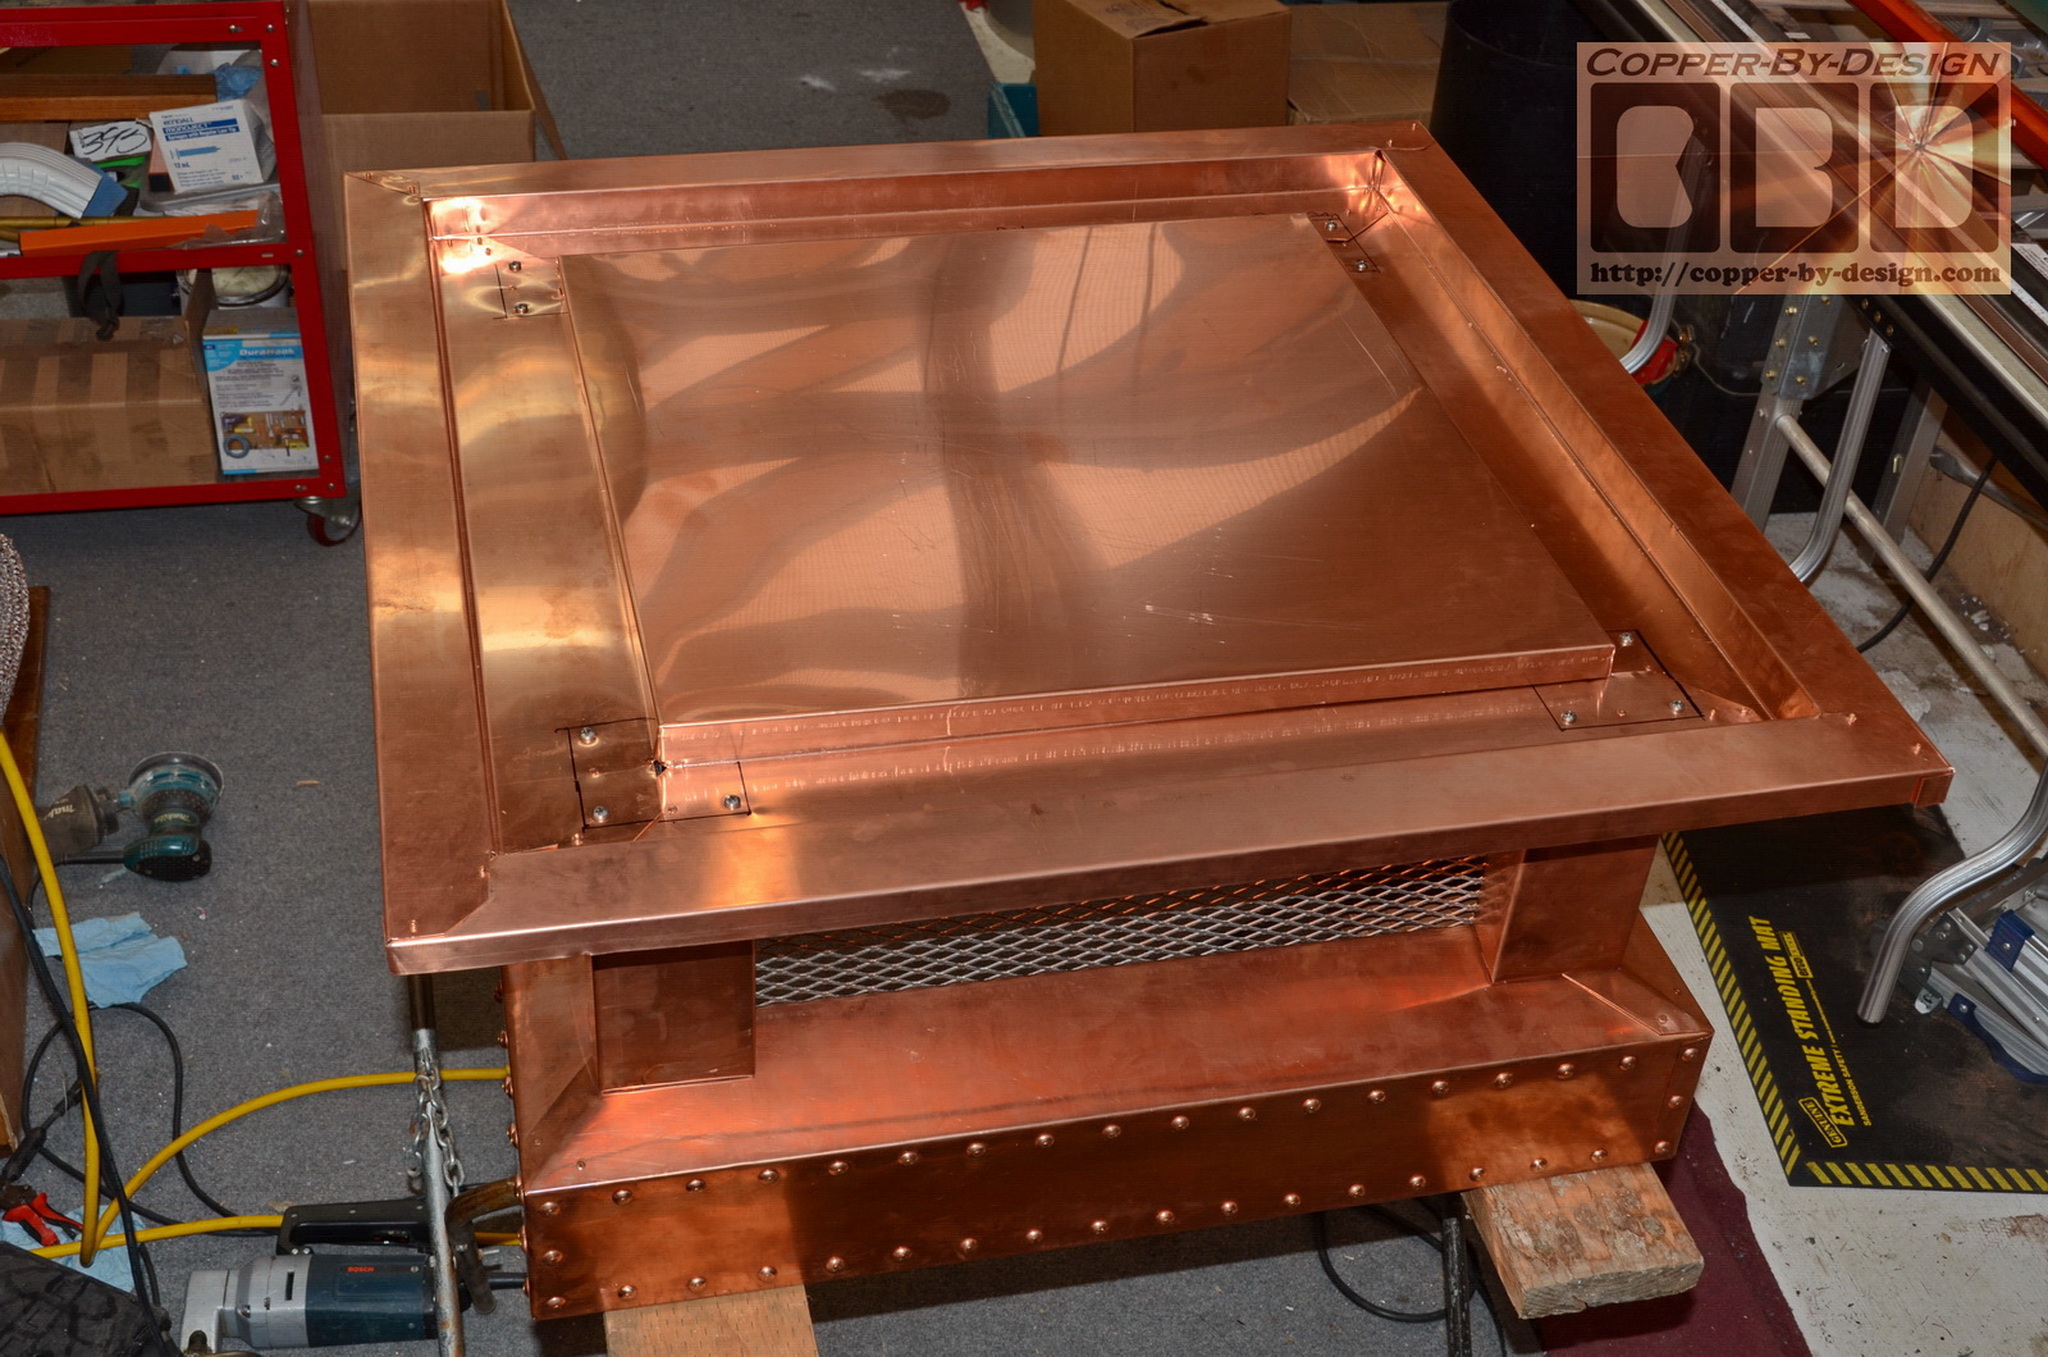
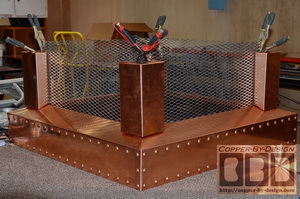
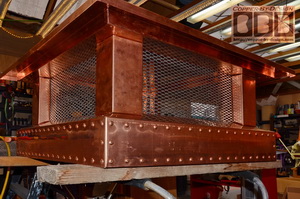
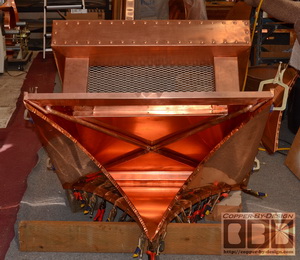
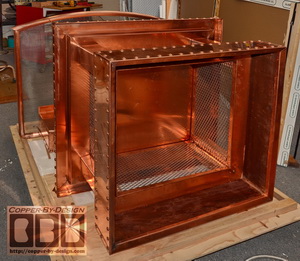
This shows the
13 gauge stainless steel
spark arrest screen getting attached and the 4
columns being attached to this mid-section. We cut and bent the
screen to set into a channel along the inside rim of the bases.
These screens are what we get my hands lacerated on more than
any other aspect of our work, so it's important to hide all the
edges of this SS screen, so these are safe for anyone else
handling this.
There is a good deal of math
and geometry involved here, so it's all in the right proportions,
and the bottom of the columns rest on the angled base just right.
The SS screen is secured to the base through the 2 layers of
copper with dozens of longer rivets, and then riveted into the
back of each arch and column. Once it is fully attached with
hundreds of fasteners the SS screen adds a great deal of
strength to this structure.
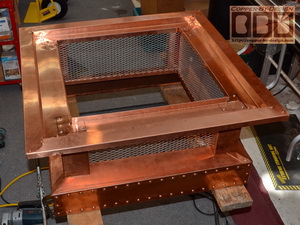 
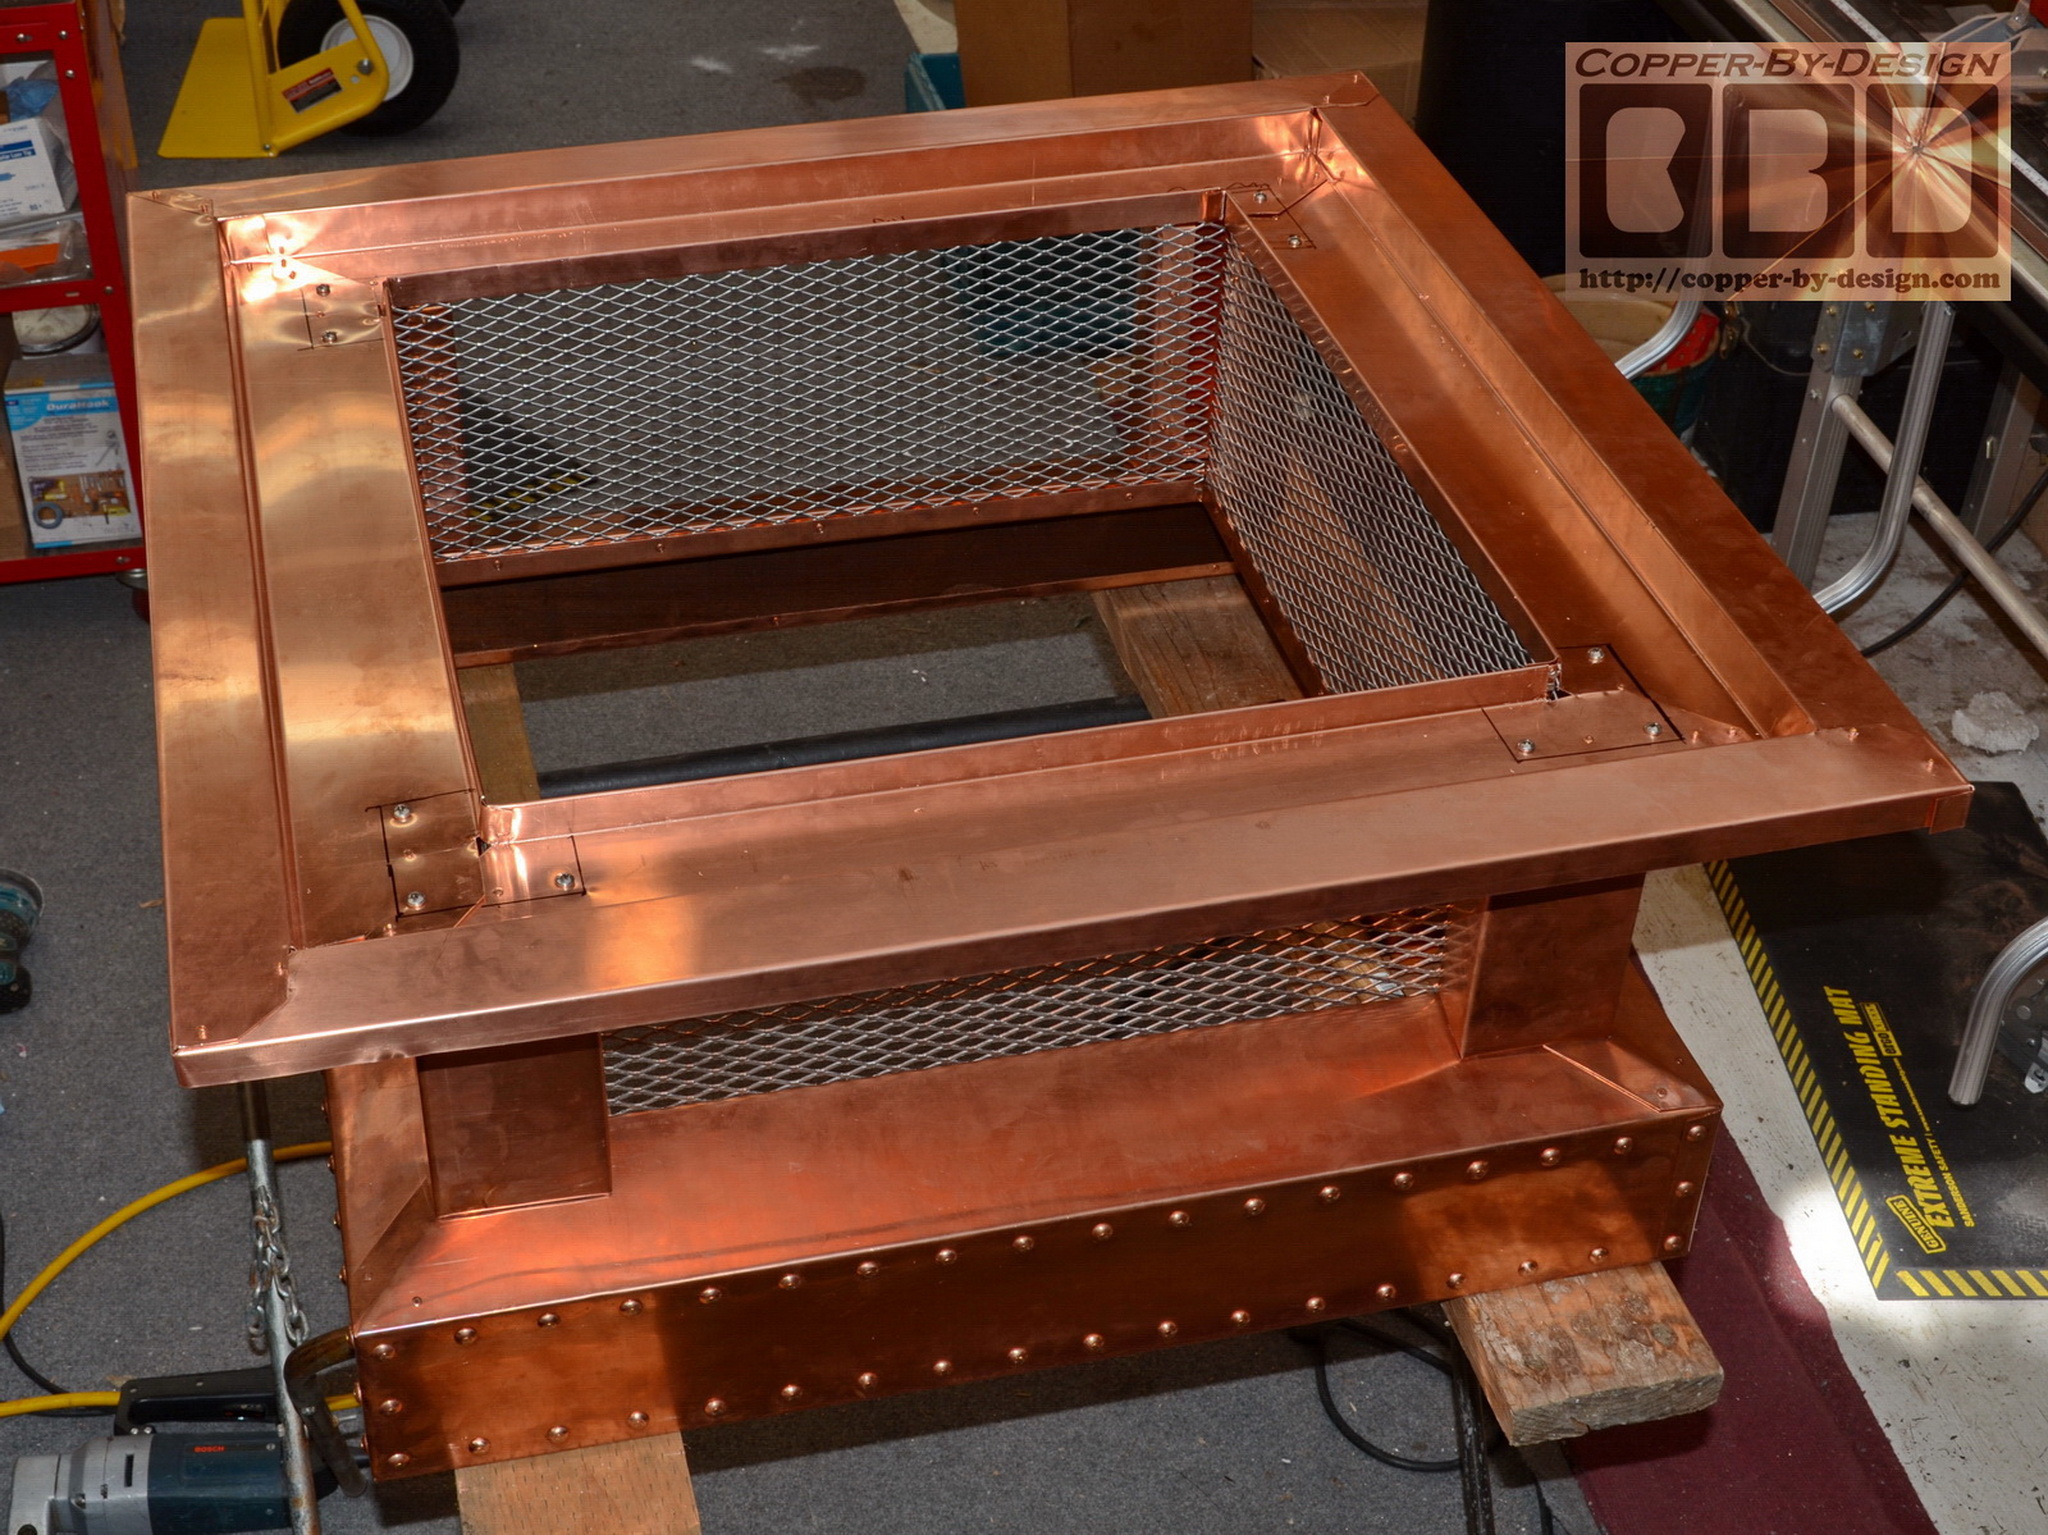
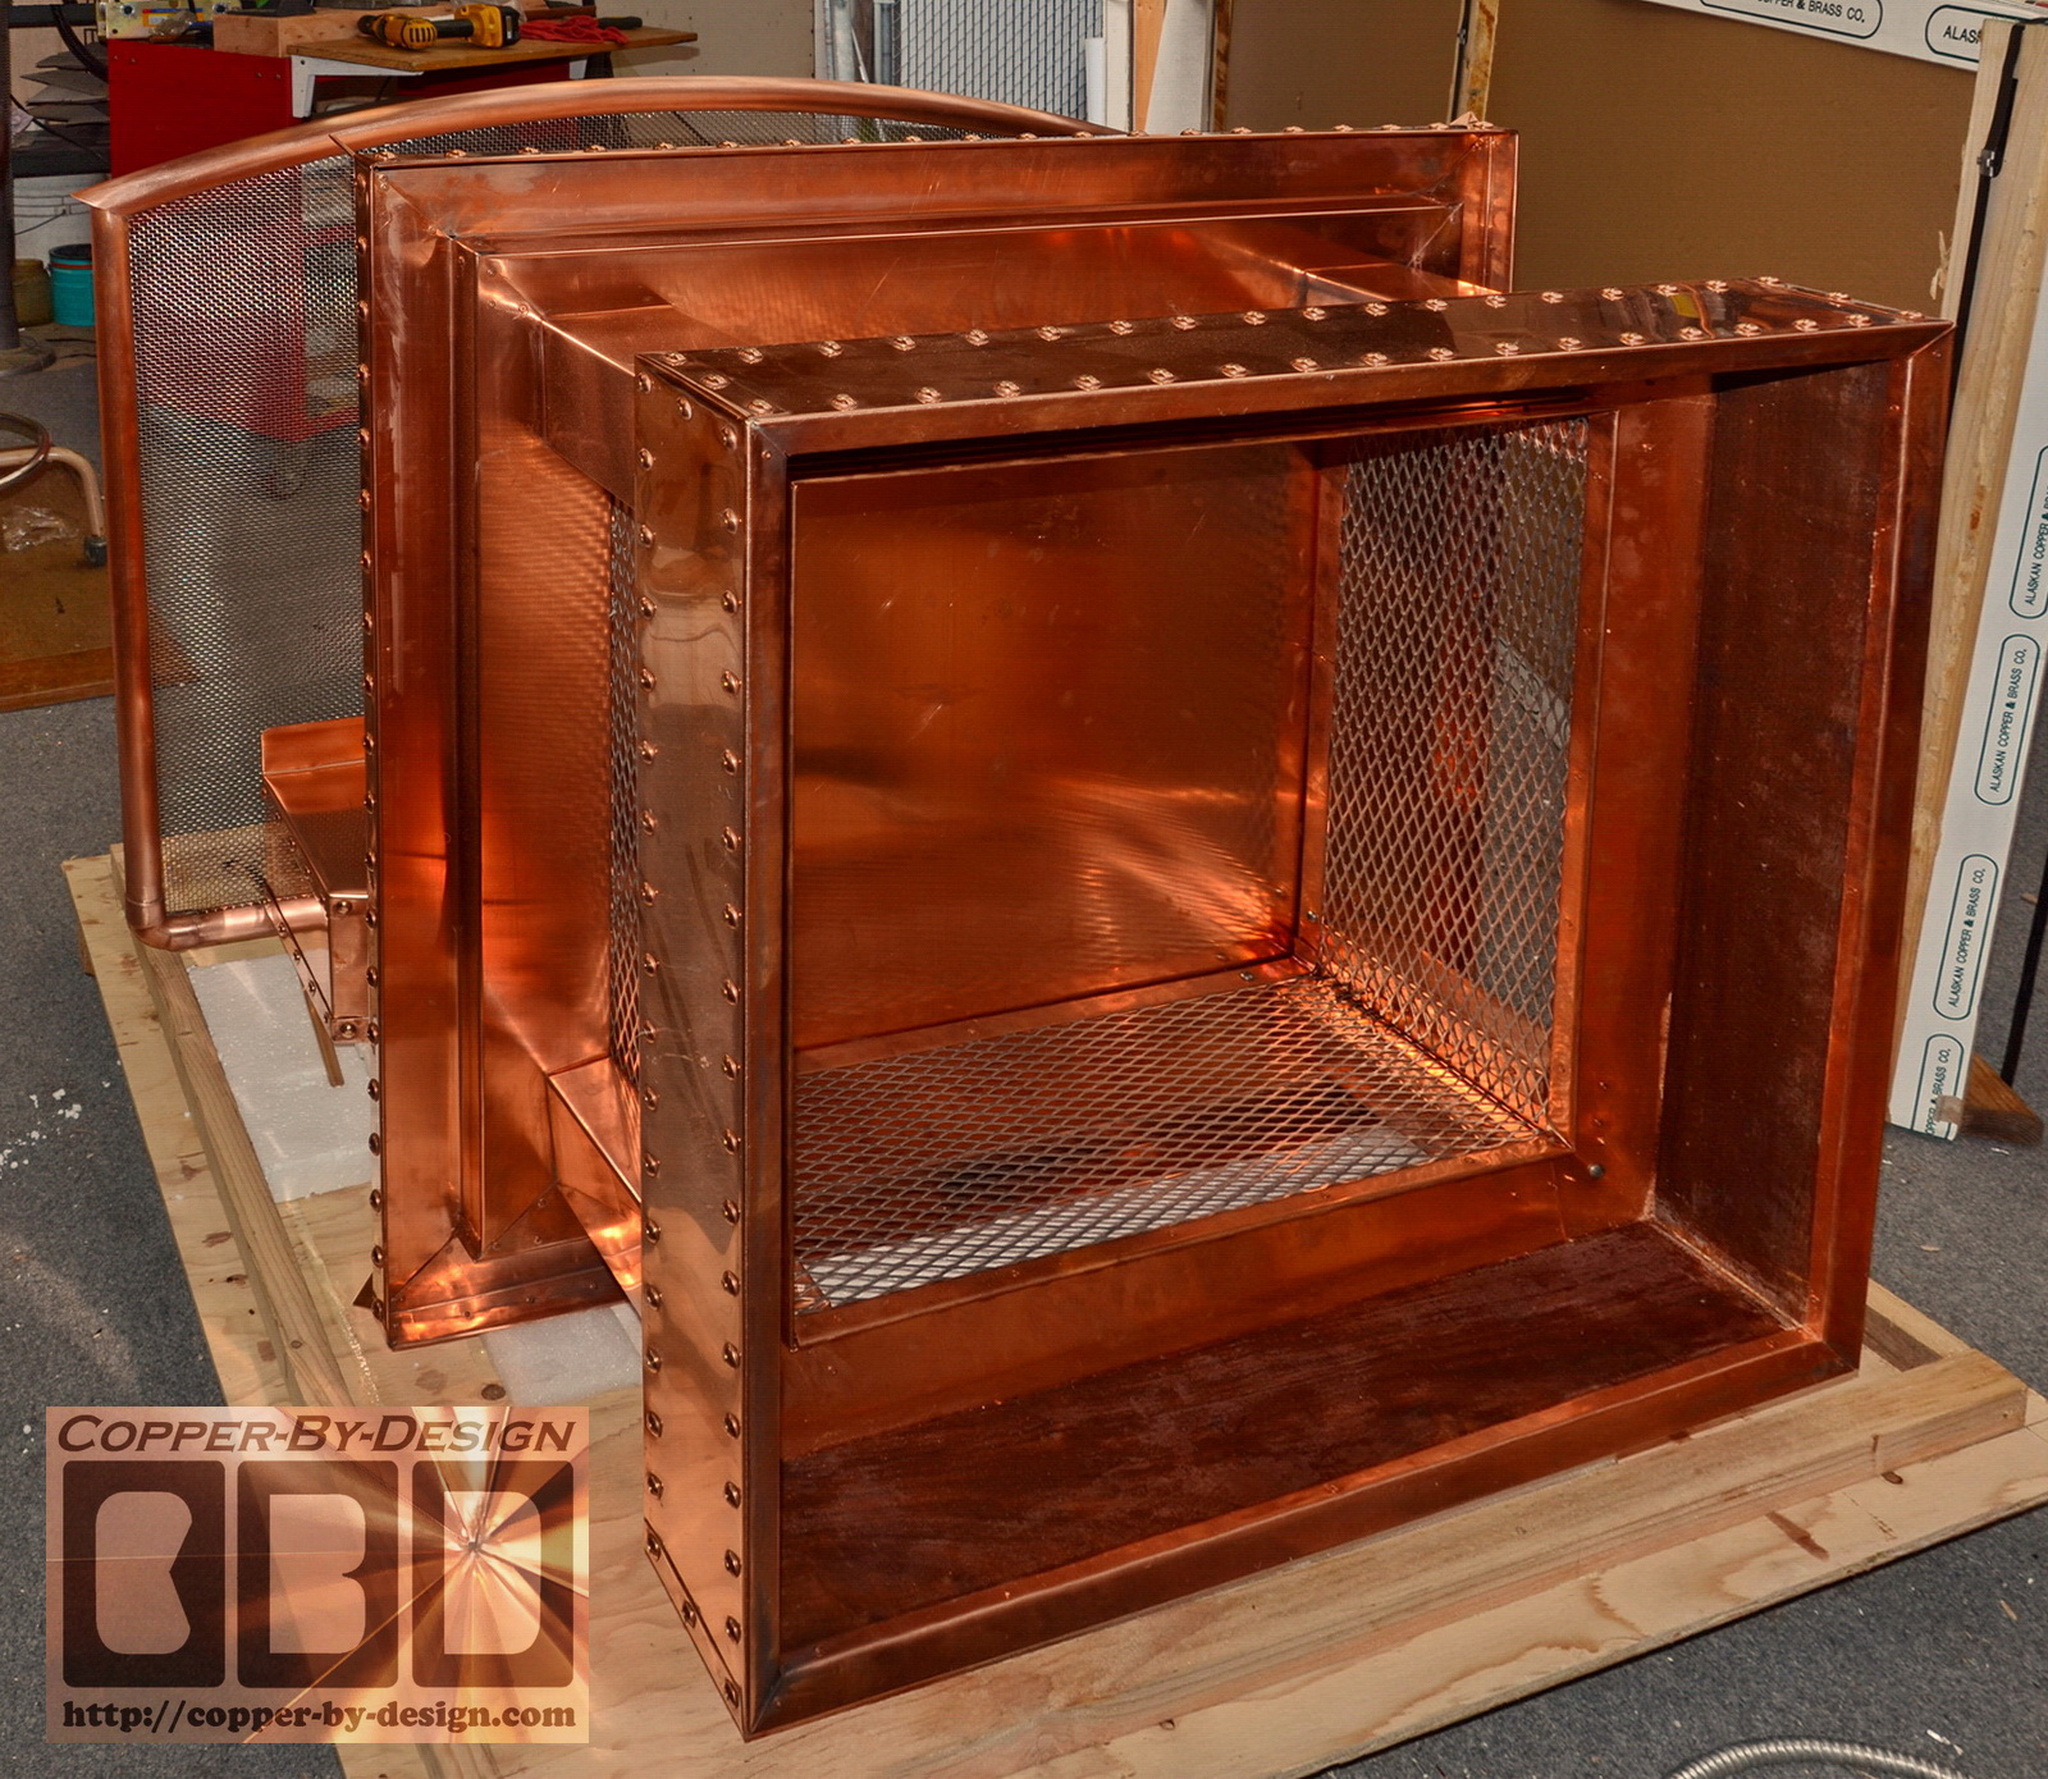
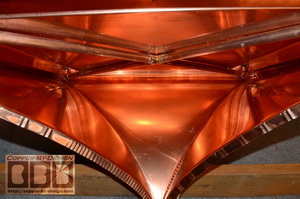
We were able to make these
columns from a single sheet of
copper for a strong structure with a clean look that has very few seams
or rivets showing. There were numerous test fittings before we
could fasten it down to the base. These eaves were engineered to
extend 2" out past the base for a width of 39".
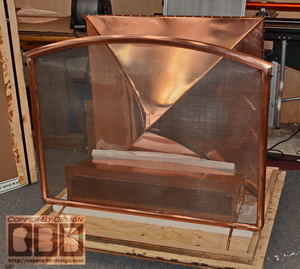
The eaves are attached to cup
over the SS screen and over the columns. We added this pan
across the center, so this will have a clean finished look as
they see up through the screen. We don't normally do this in
most chimney caps, since they are several stories high, and not
seen up close like this will.
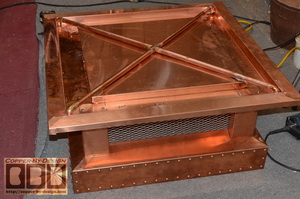 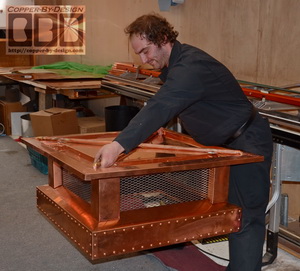
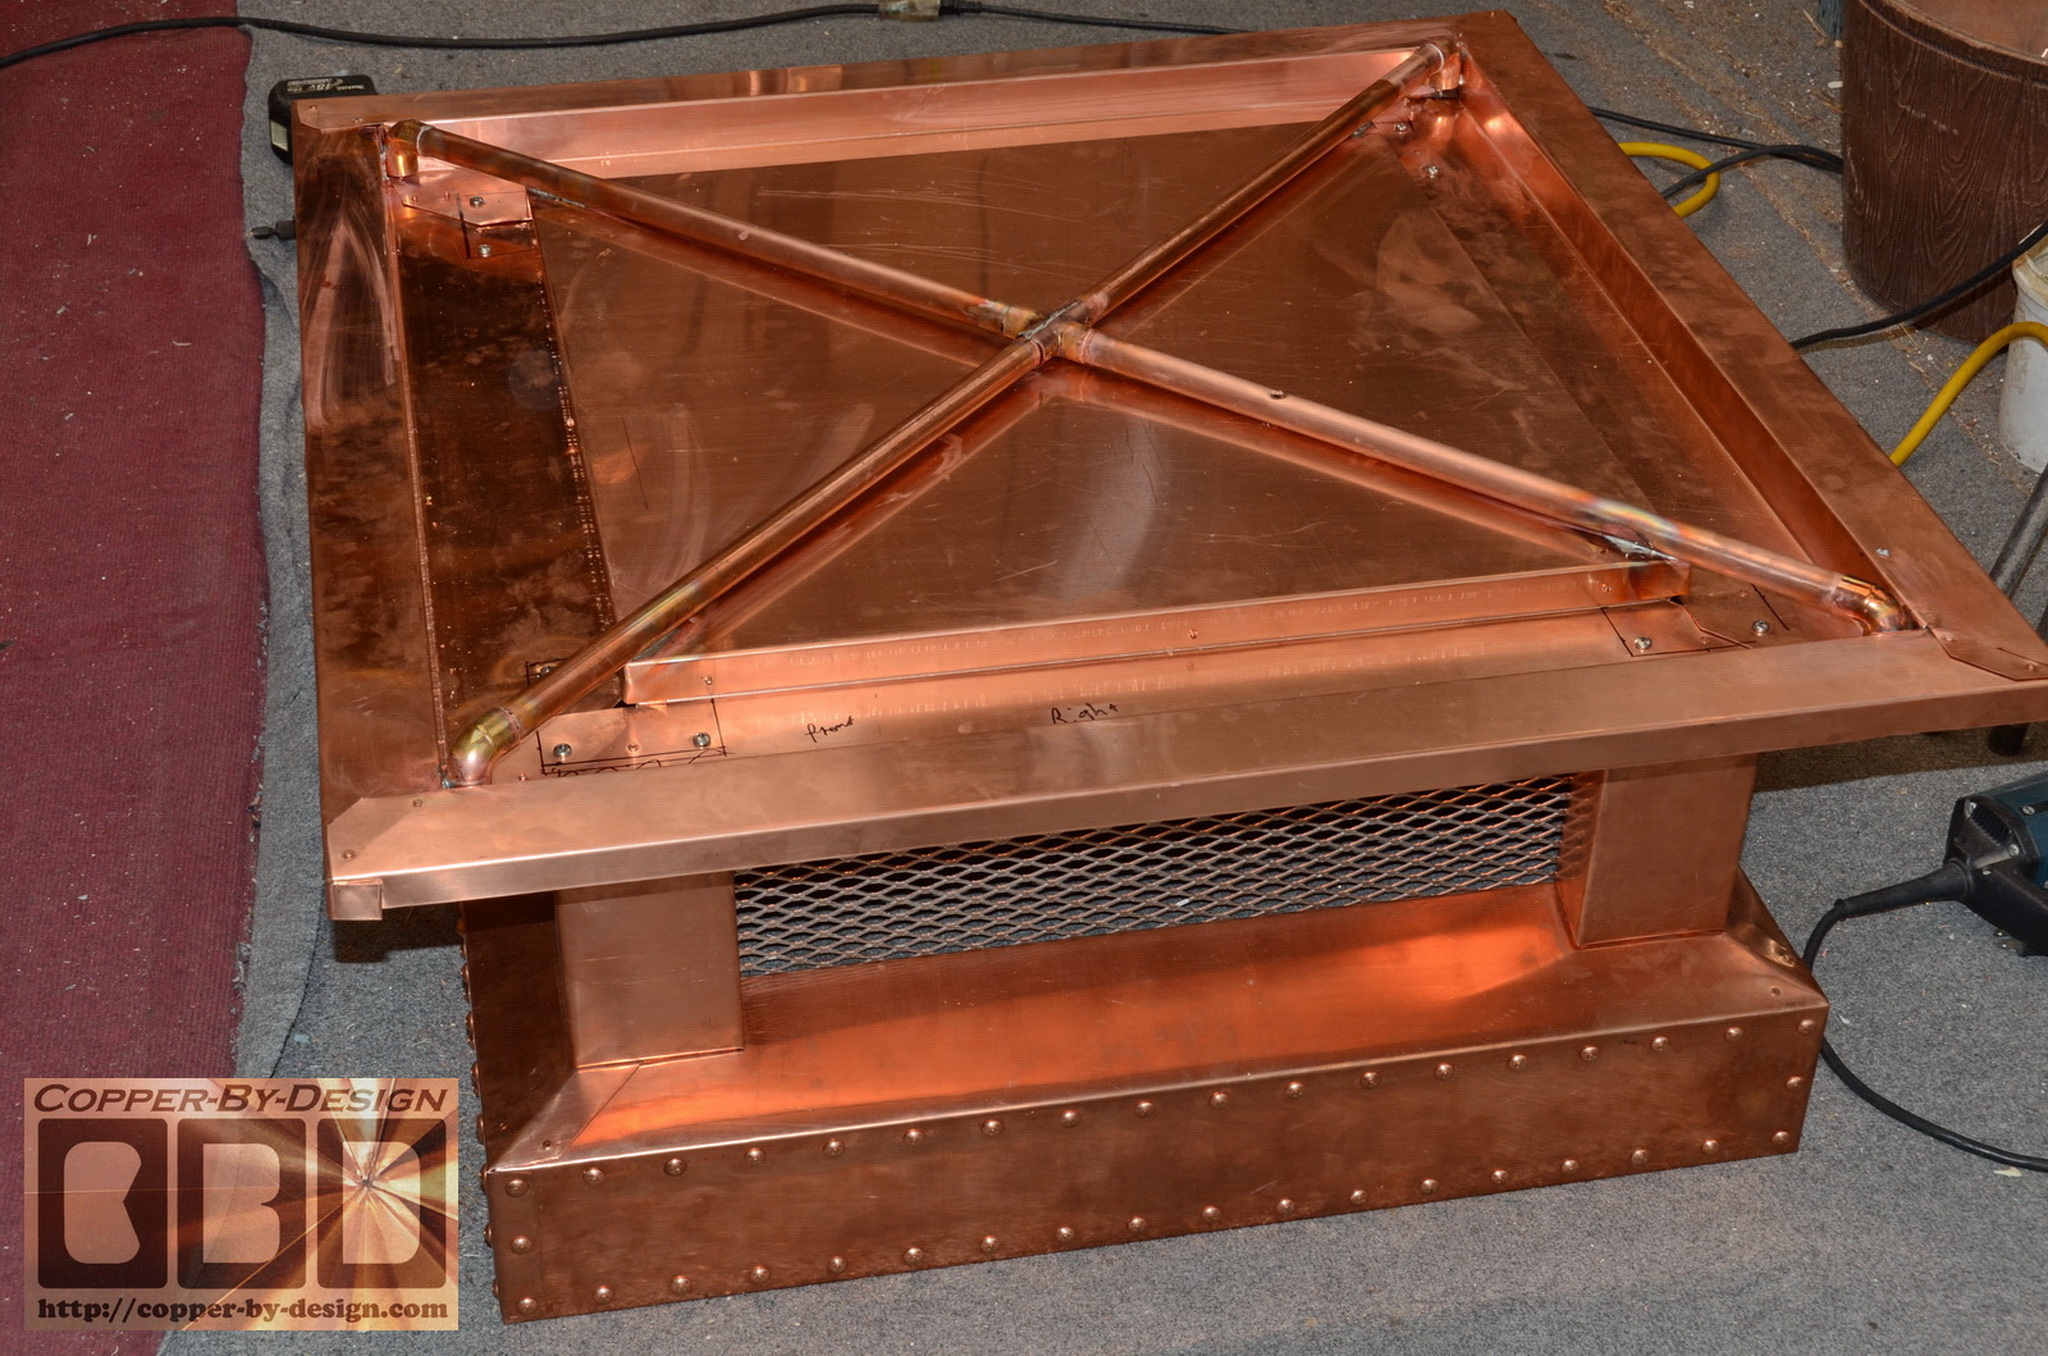
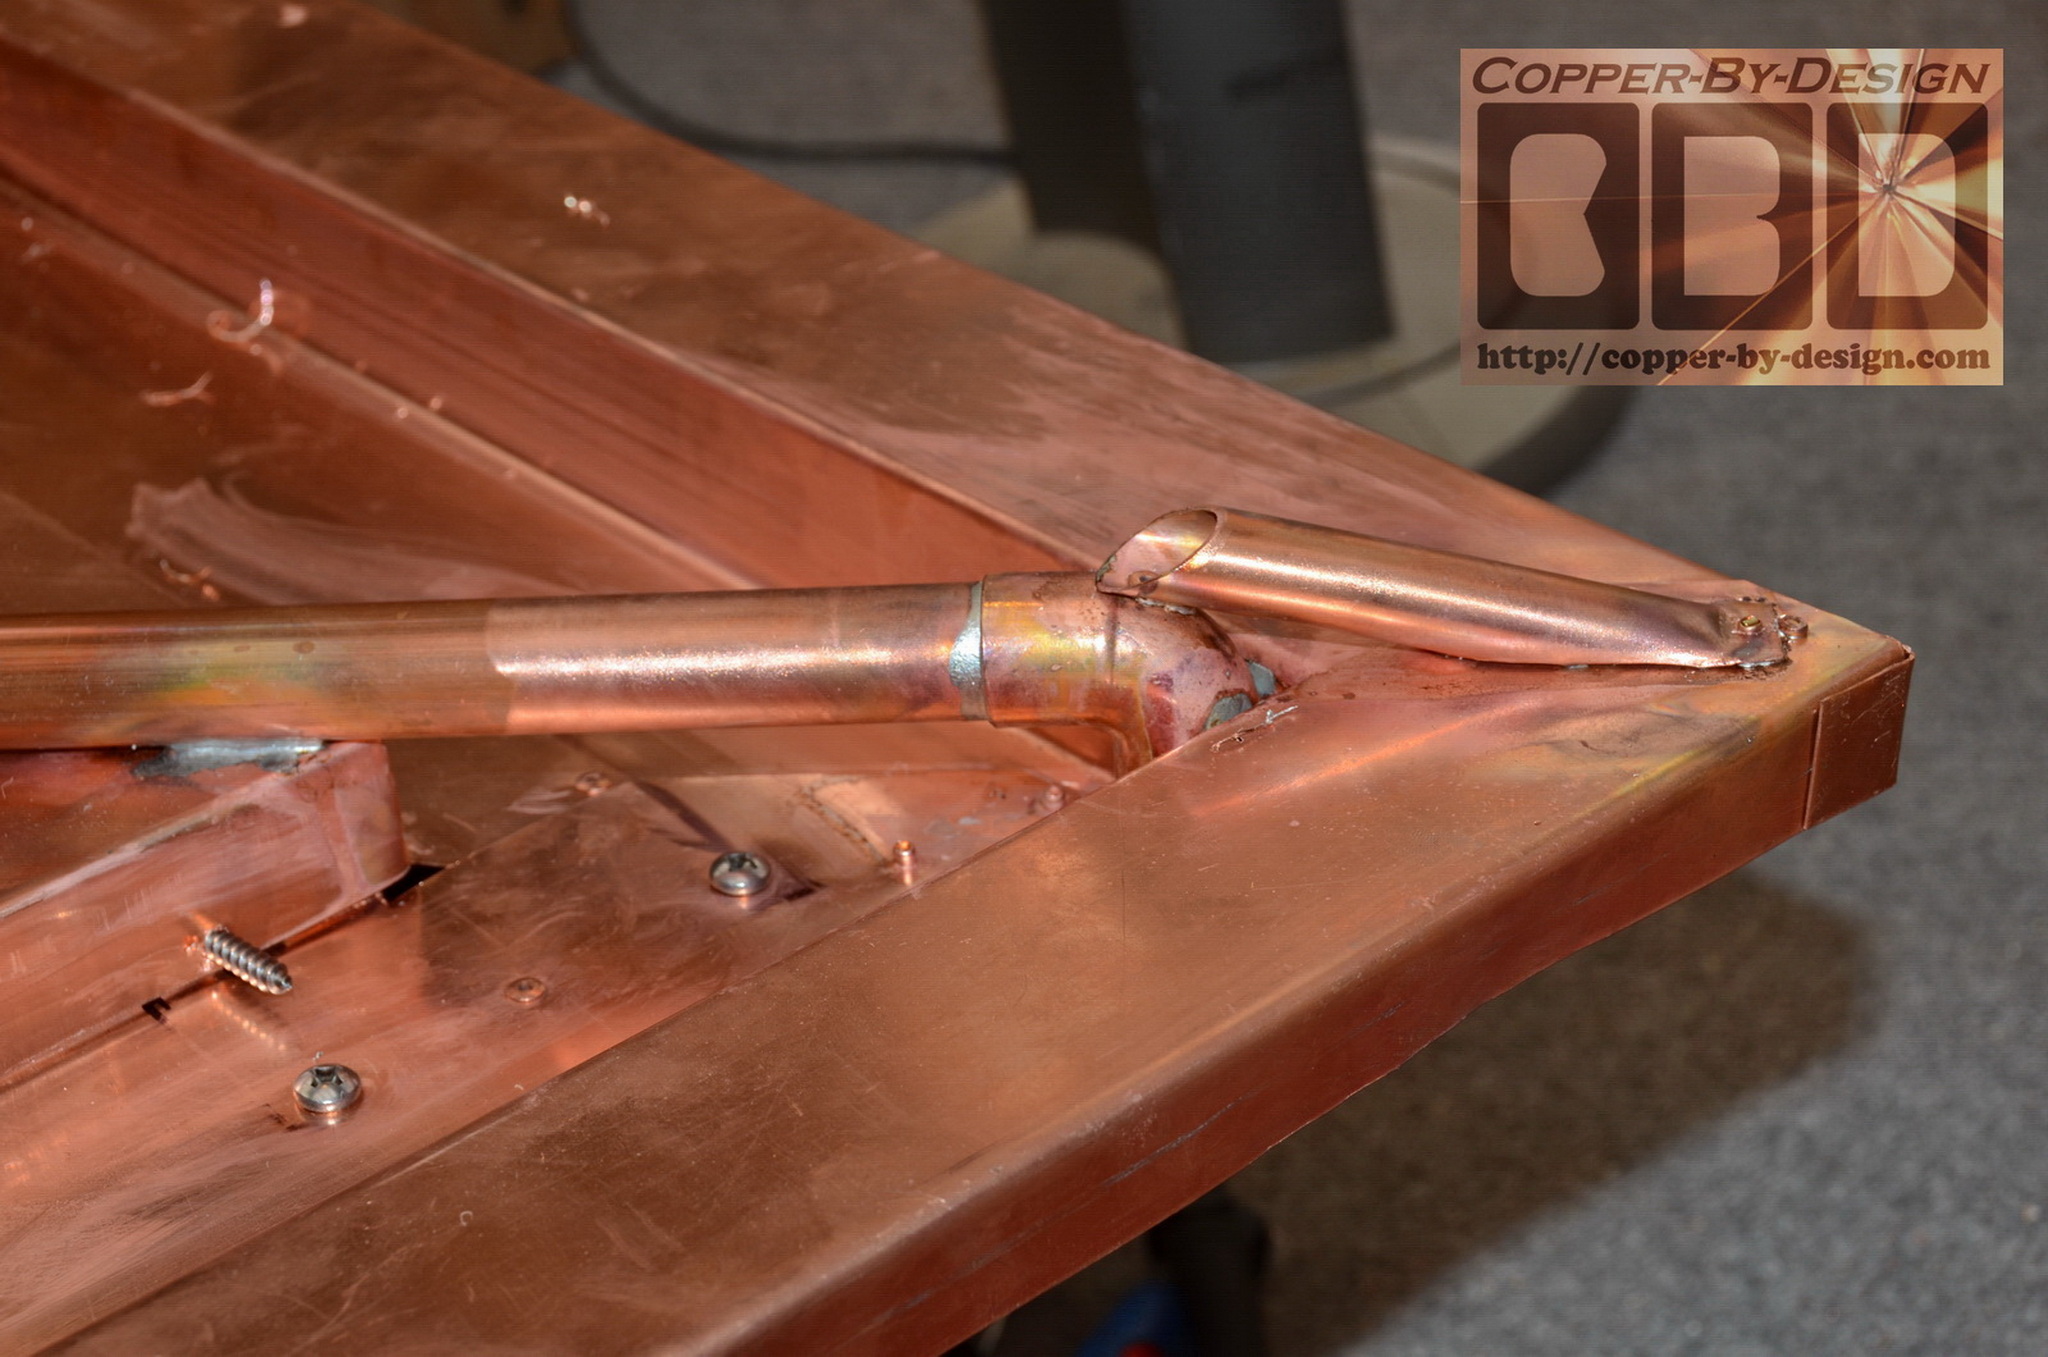
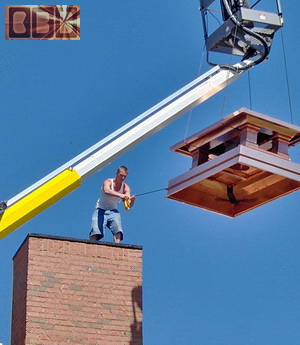
We added this 3/4" pipe cross member to help support the eaves.
The shot of Chris lifting it up by the cross brace demonstrates
how sturdy it is already. Then we added this short pipe cross
member to help support the outer eaves, demonstrating how anal I
am about these details. We had to keep this low profile, so it's
not in the way of the roof skin that needs to go over all this.
From: "Al Rossi" <AlR@rdfcpas.c*m>
Date: Fri, 29 Mar 2013
Looking beautiful!
I can tell the product is nothing but great quality.
Thanks,
Albert Rossi, CPA
|
|
Building the Roof
Section
|
|
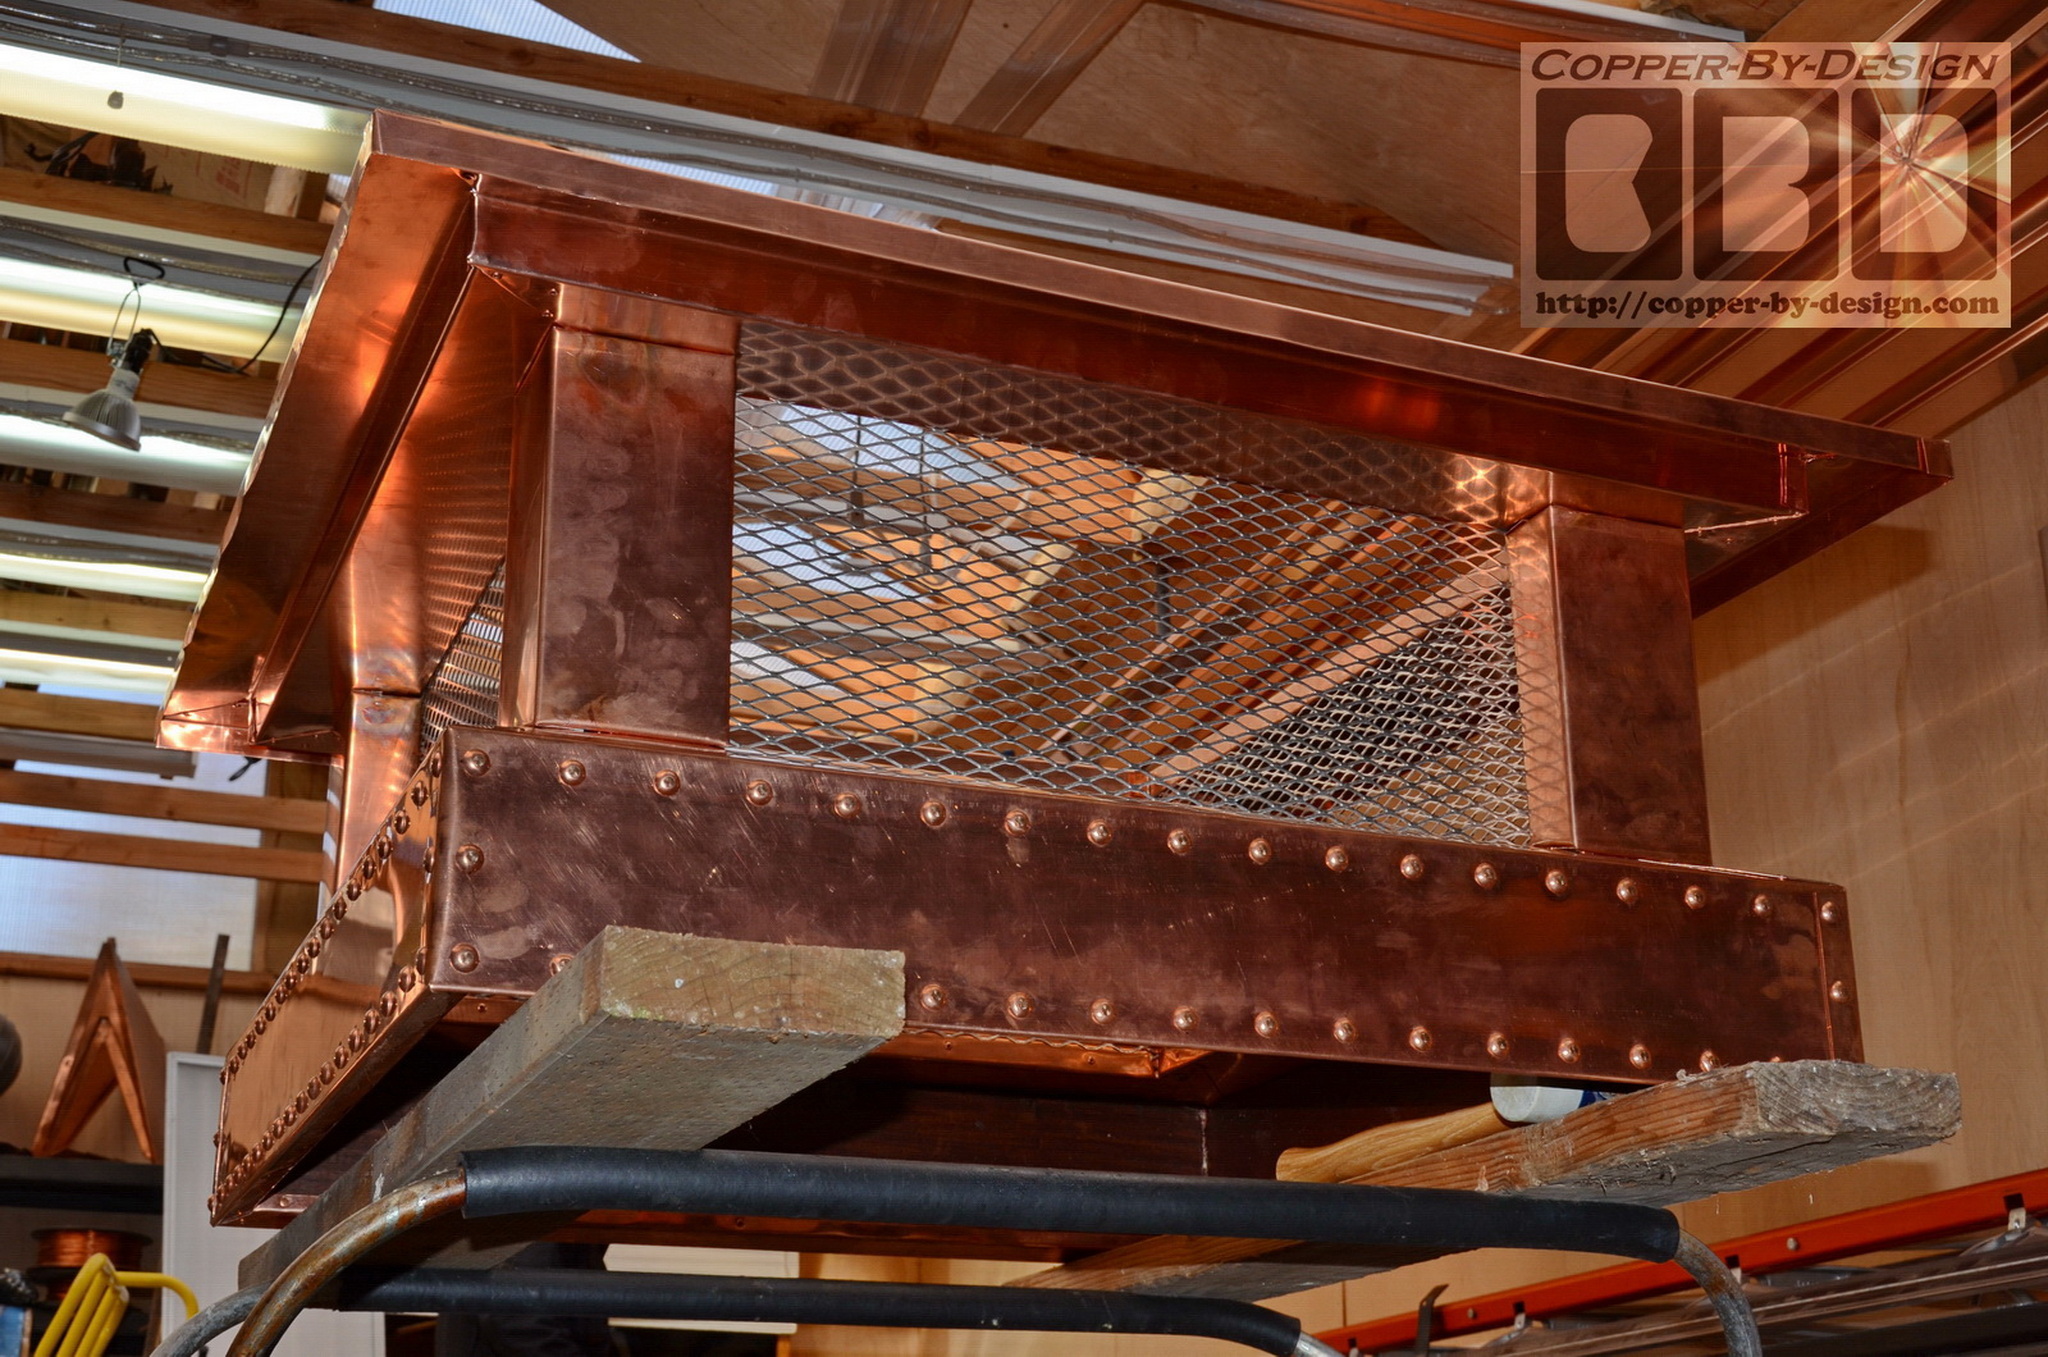
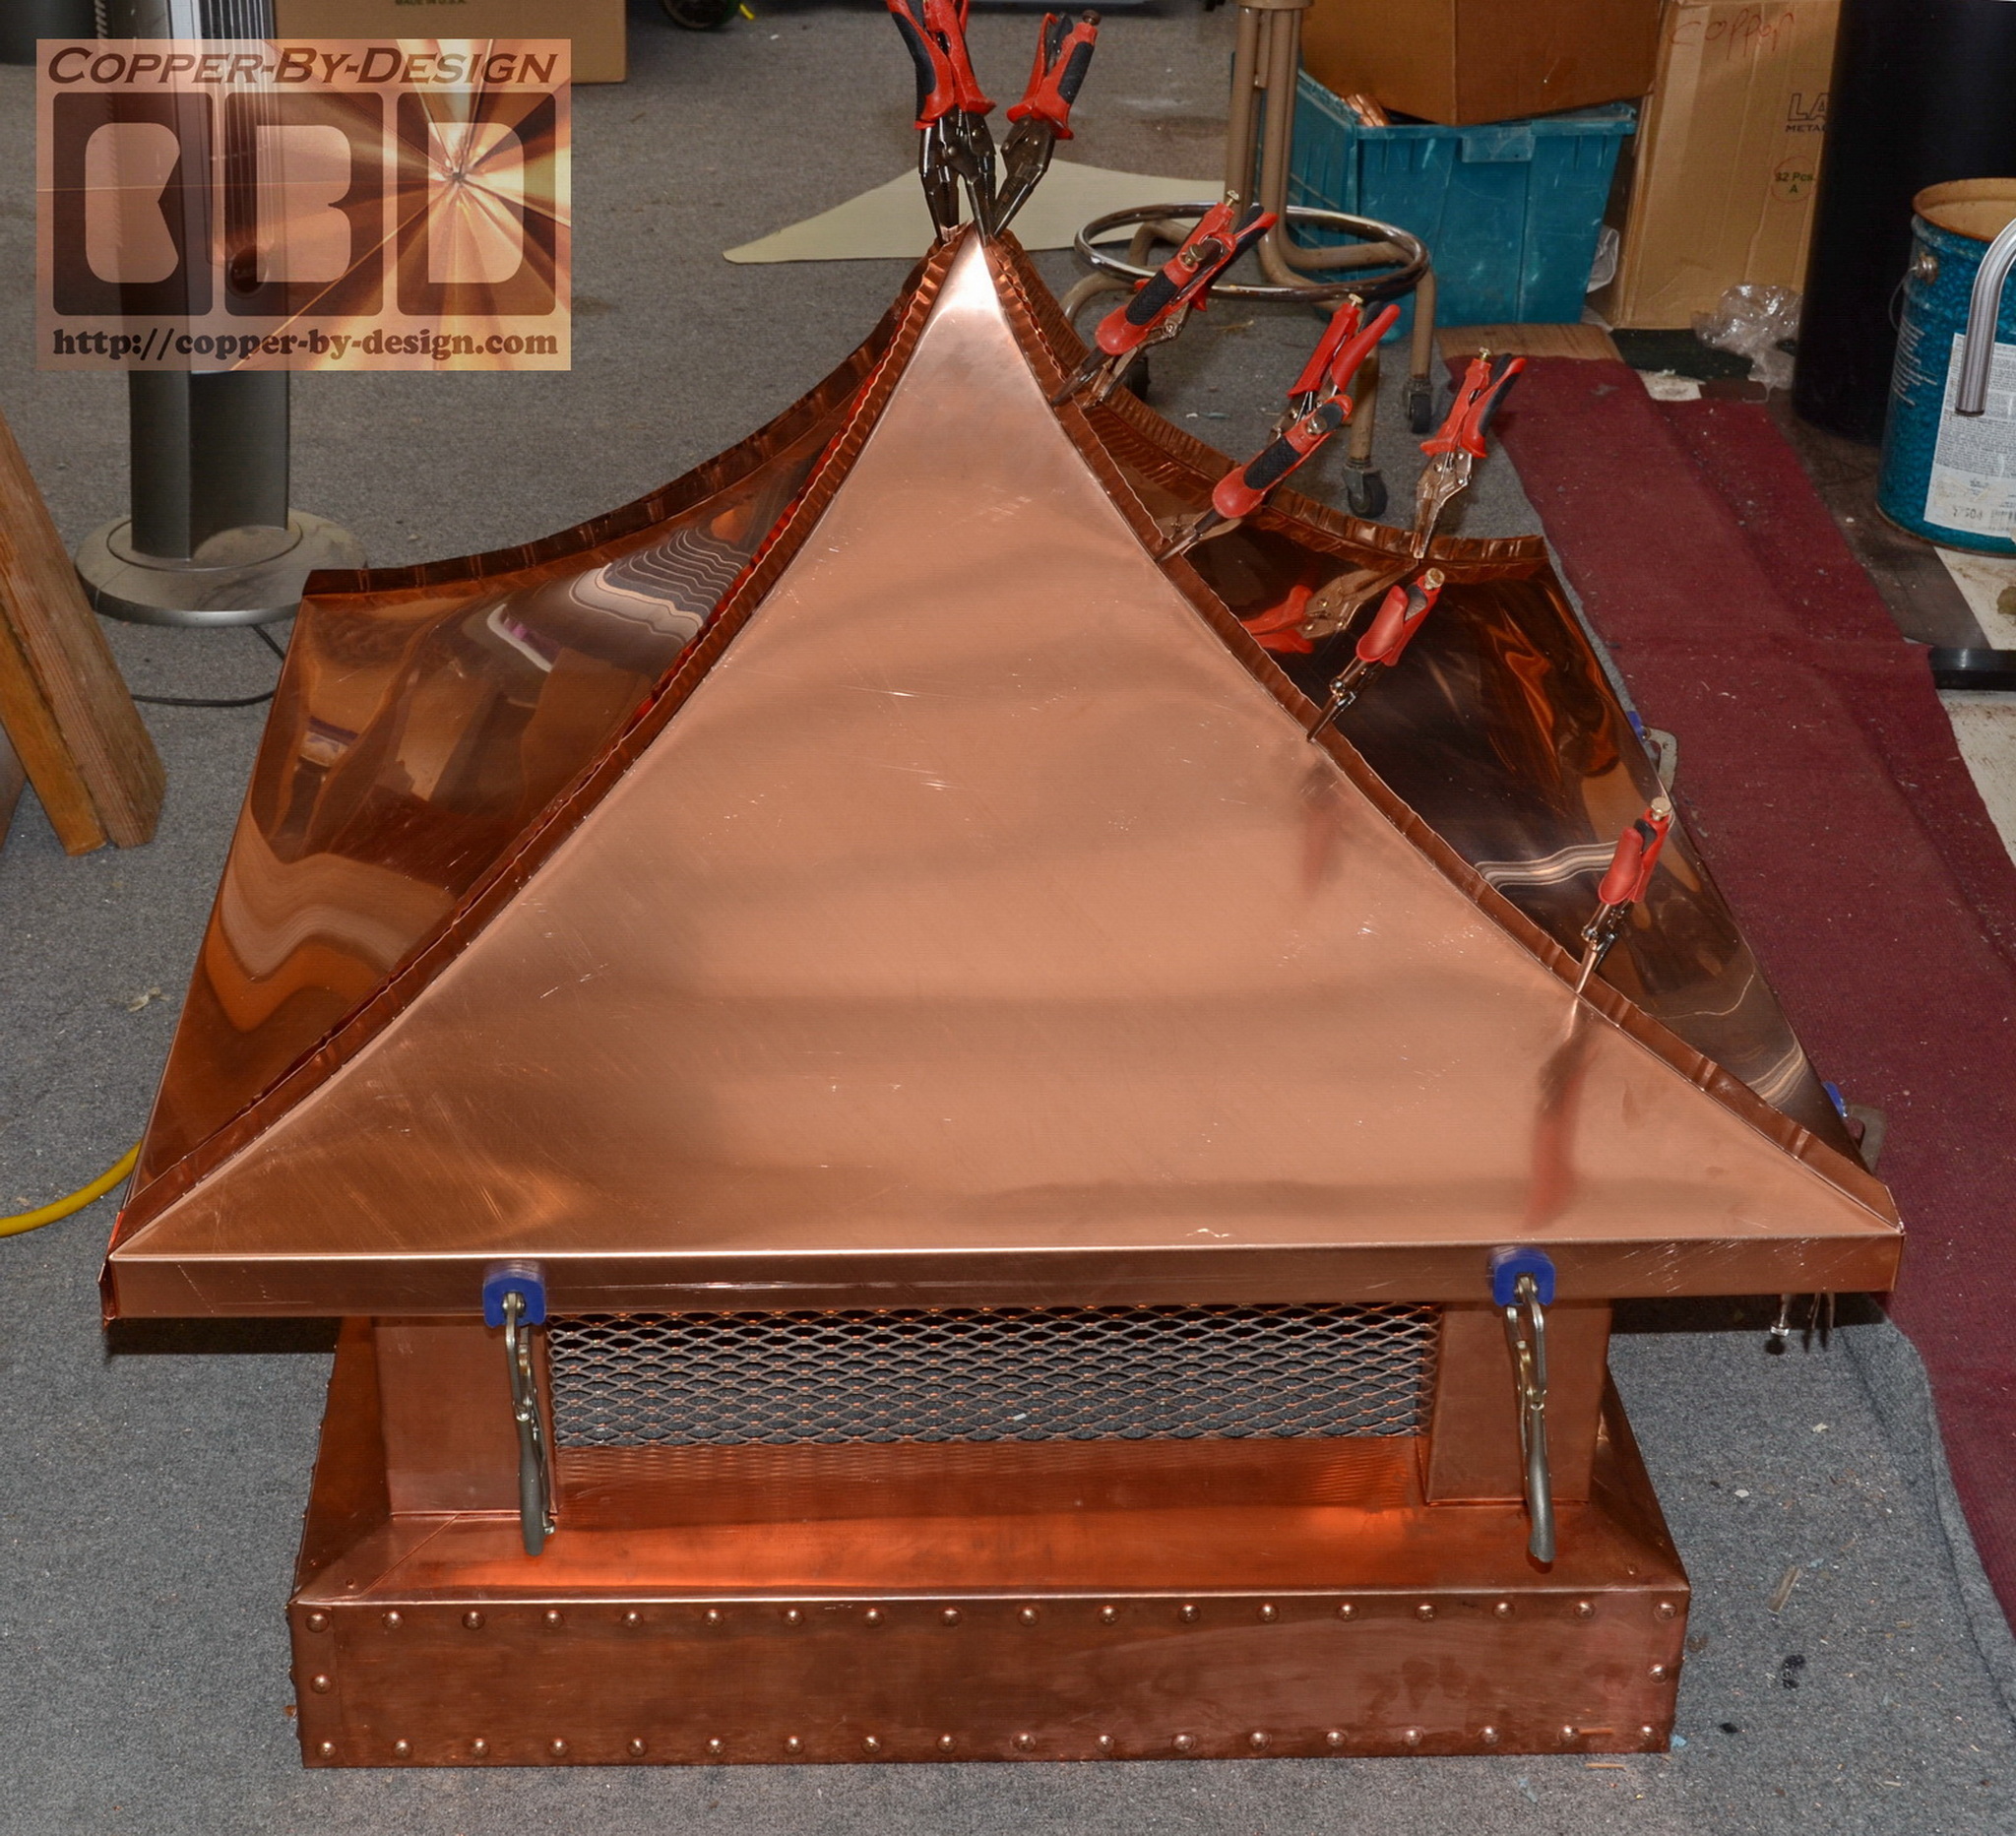
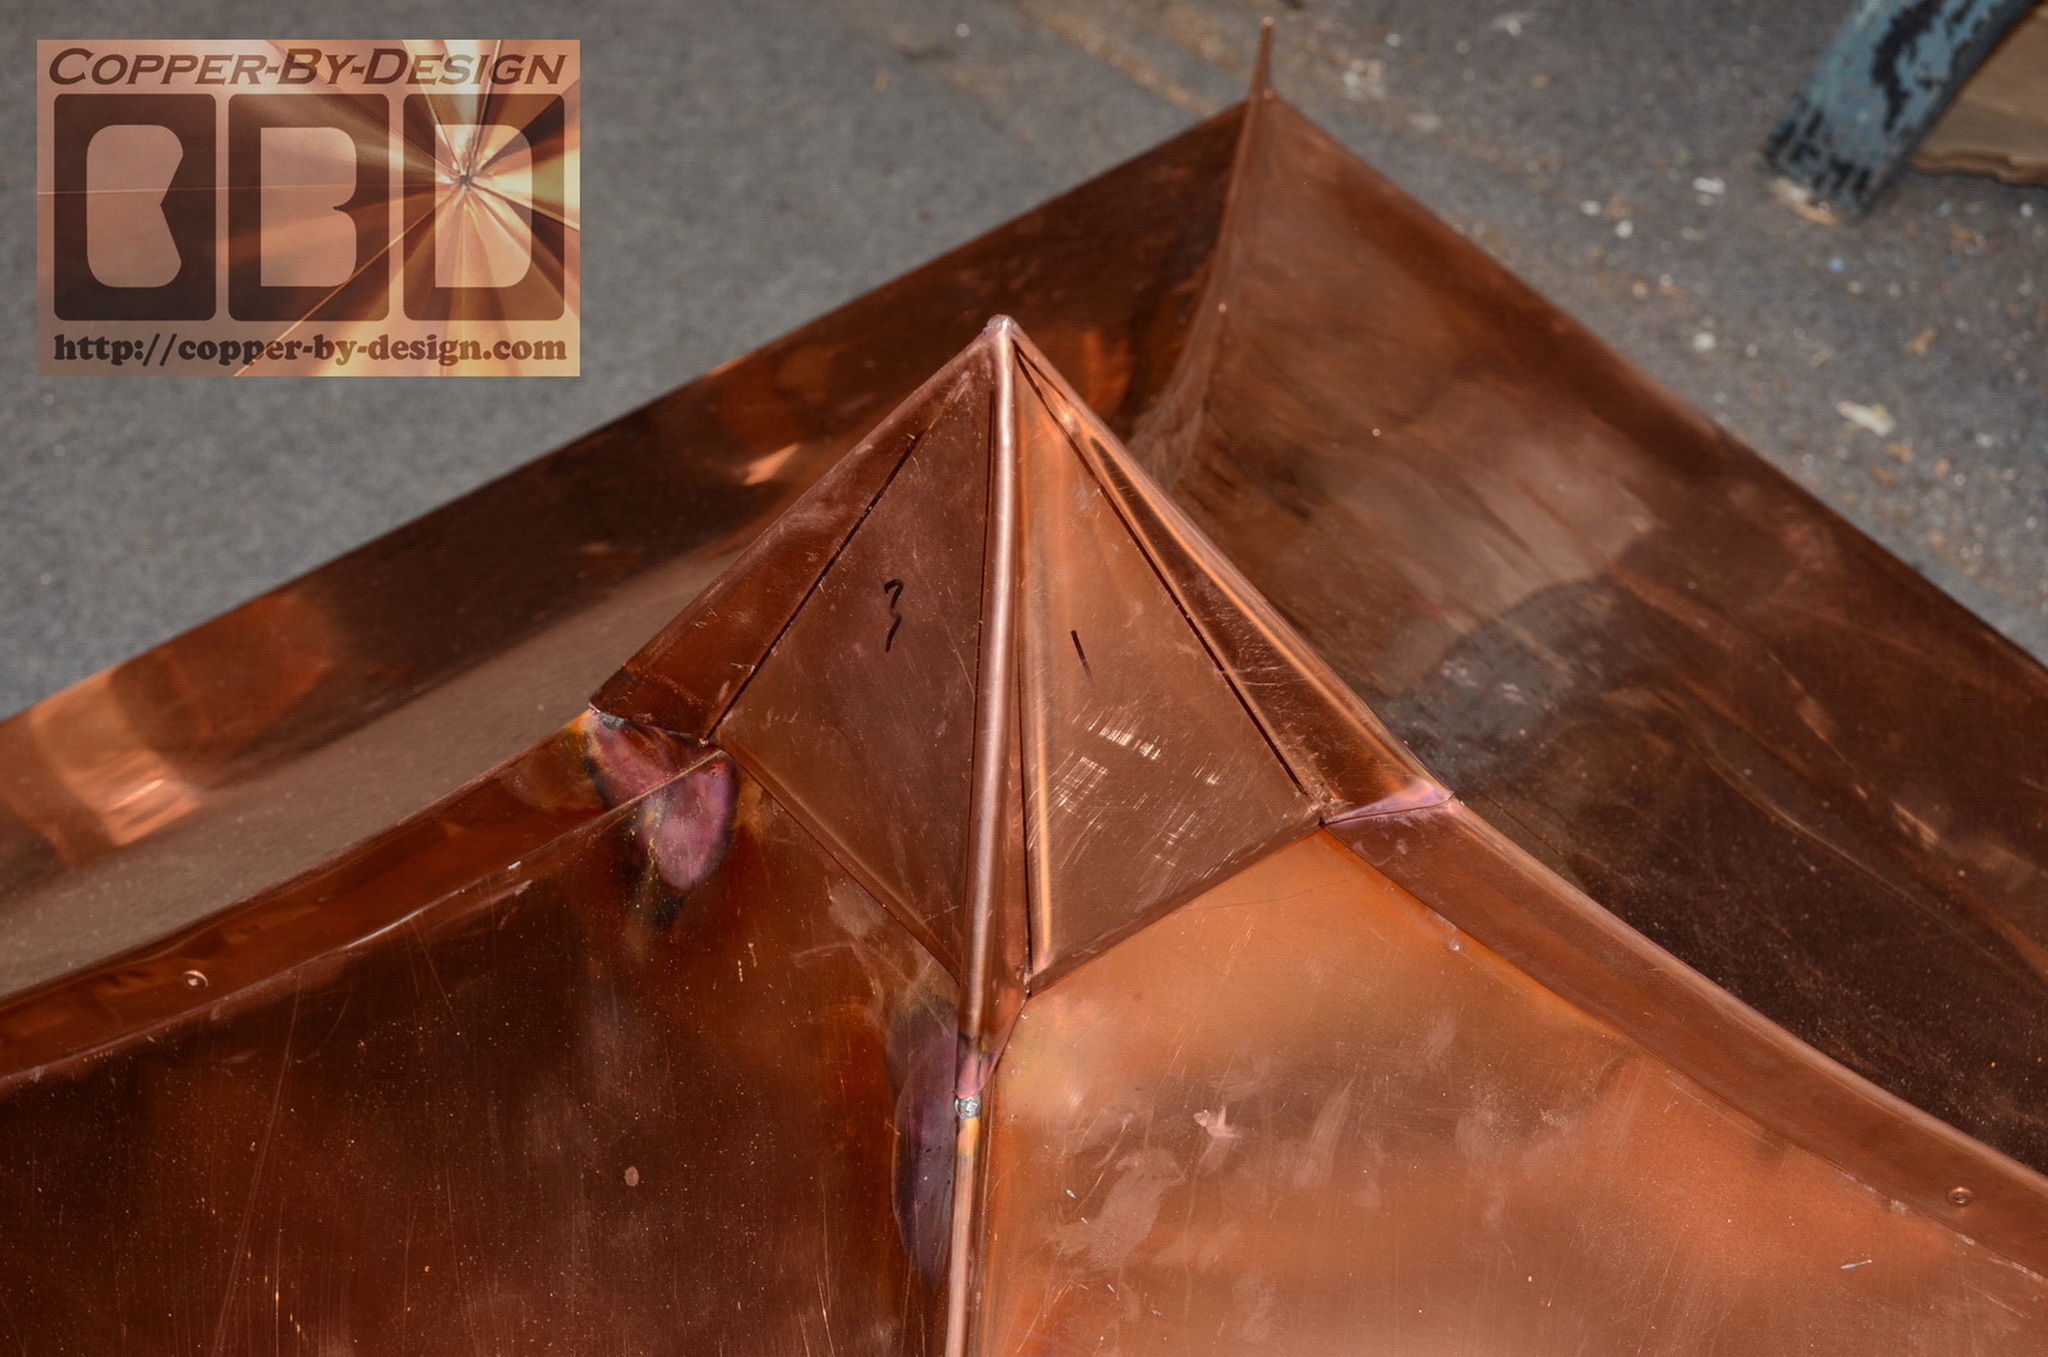
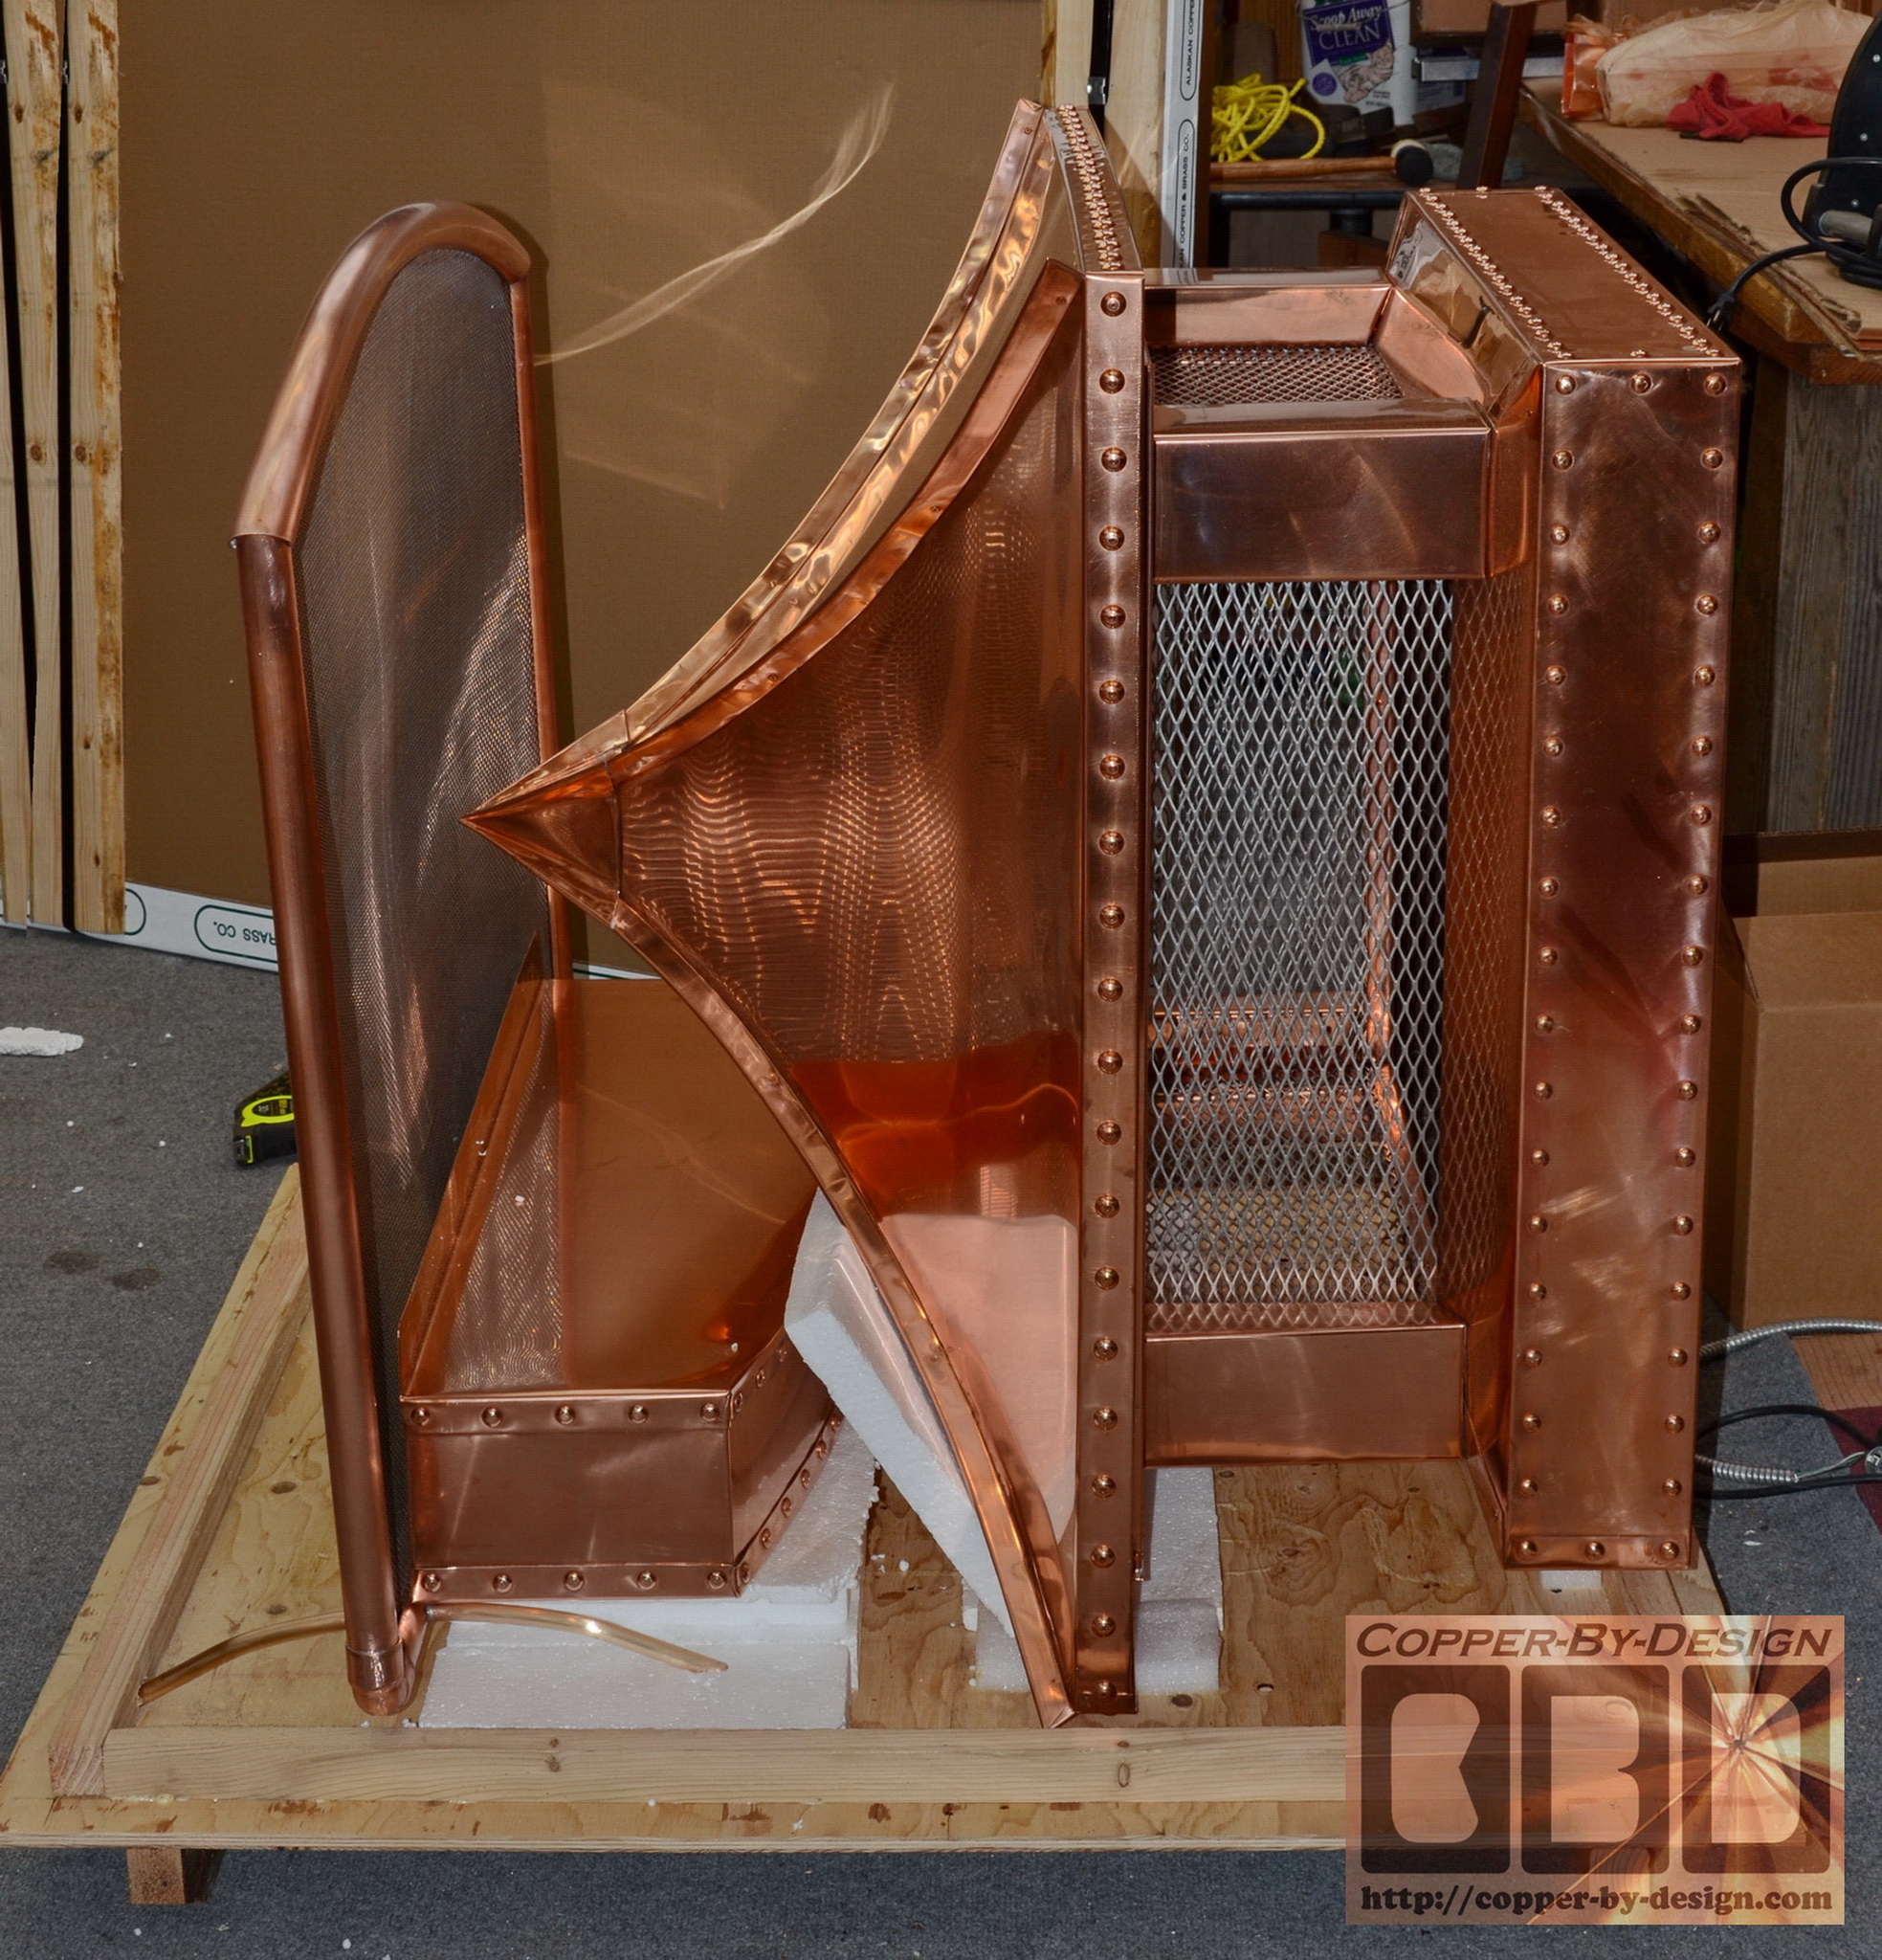
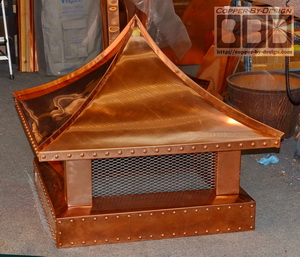
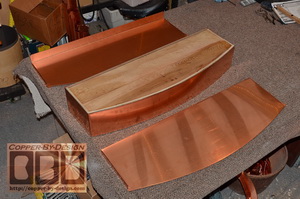
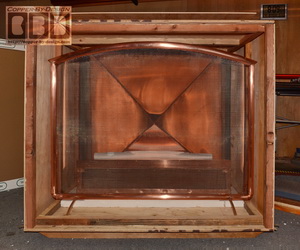
As you can imagine it's
tricky to determine the right shape for the template to have the
roof skins form this concave shape as they come together in the
corners. Just a couple mm off and this would look quite
different.
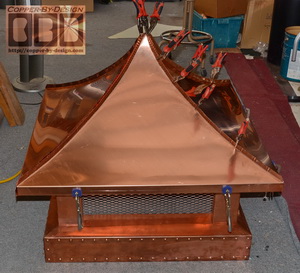 
The bottom edge of the roof
skins cup the outer edge of the eaves, so the sharp edges are
hidden. Then we clamp the hip flanges together to see if any
changes need to be made. Once we're confident this is the right
curvature we flux and soldered 2 of the seams from inside. The
last 2 seams for the final panel had to be soldered from
outside. Normally we would not use solder, because it melts at a
much lower temperature, but with the ceiling pan in this the
roof should never get nearly that hot.
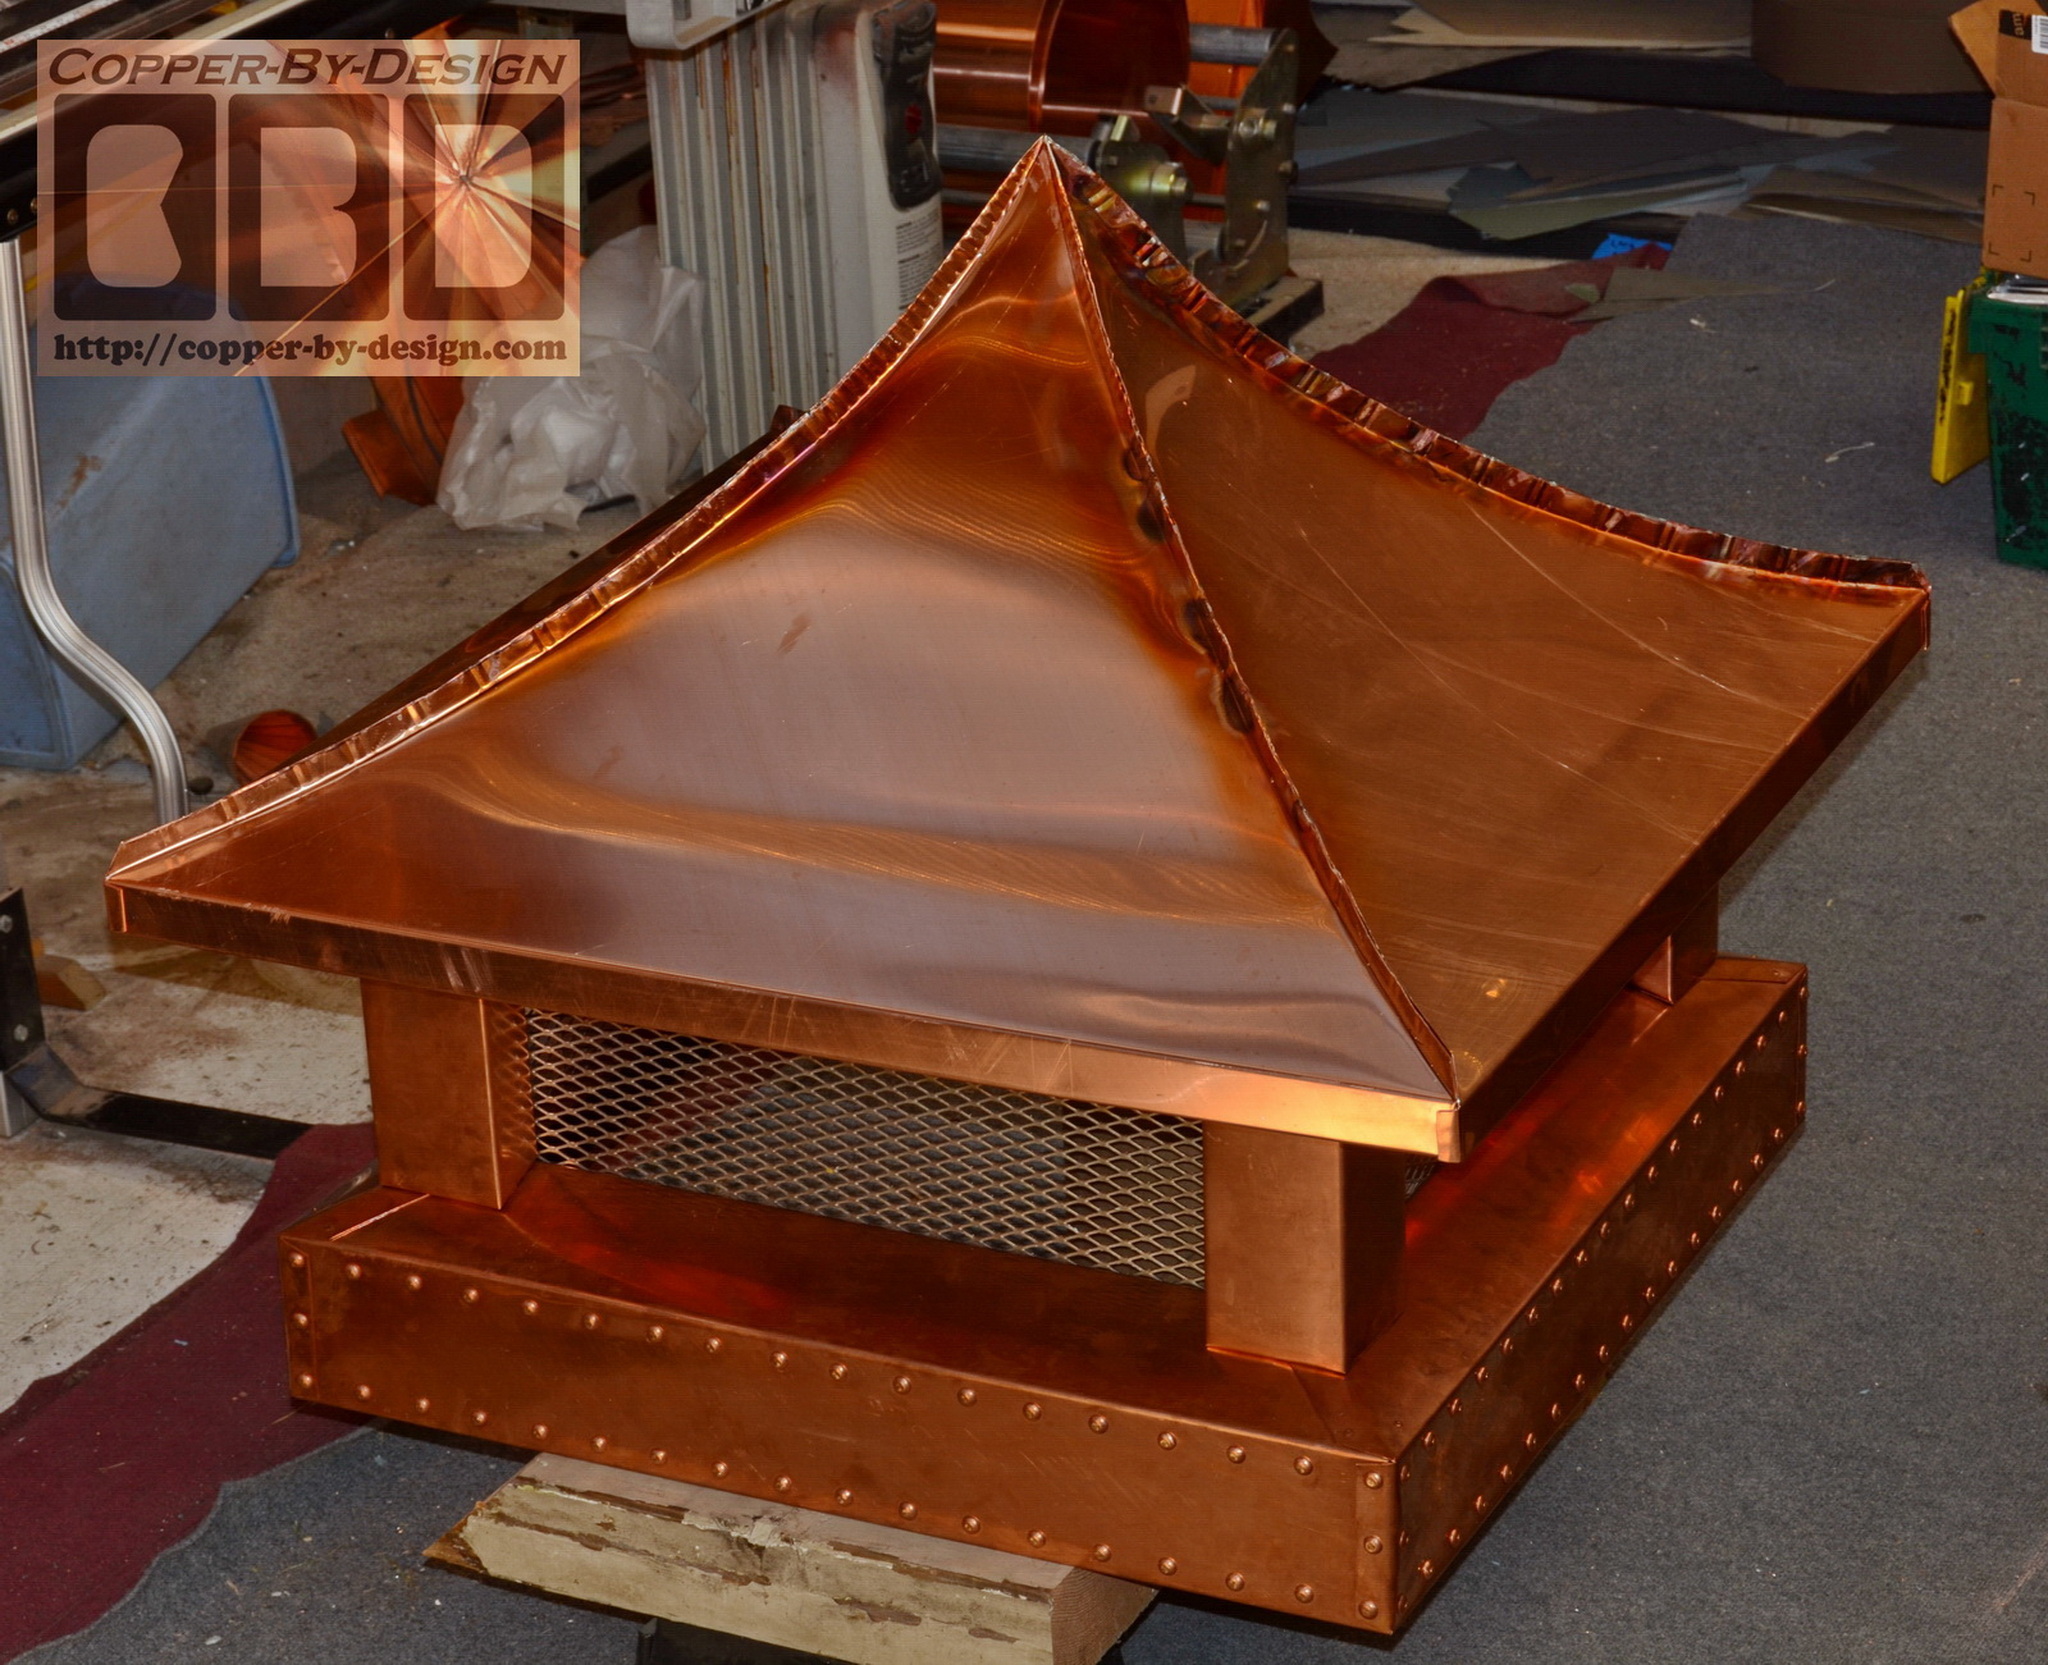
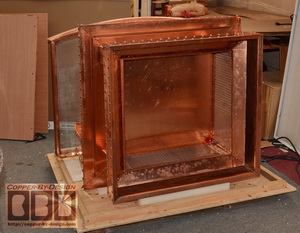
We're not relying solely on
the solder. The corners are also riveted together with the cover
caps. More over-sized industrial looking rivet are tediously
attached with long rivets onto the outer rim of the roof. We
attached 20 to each side for a total of 232 in all.
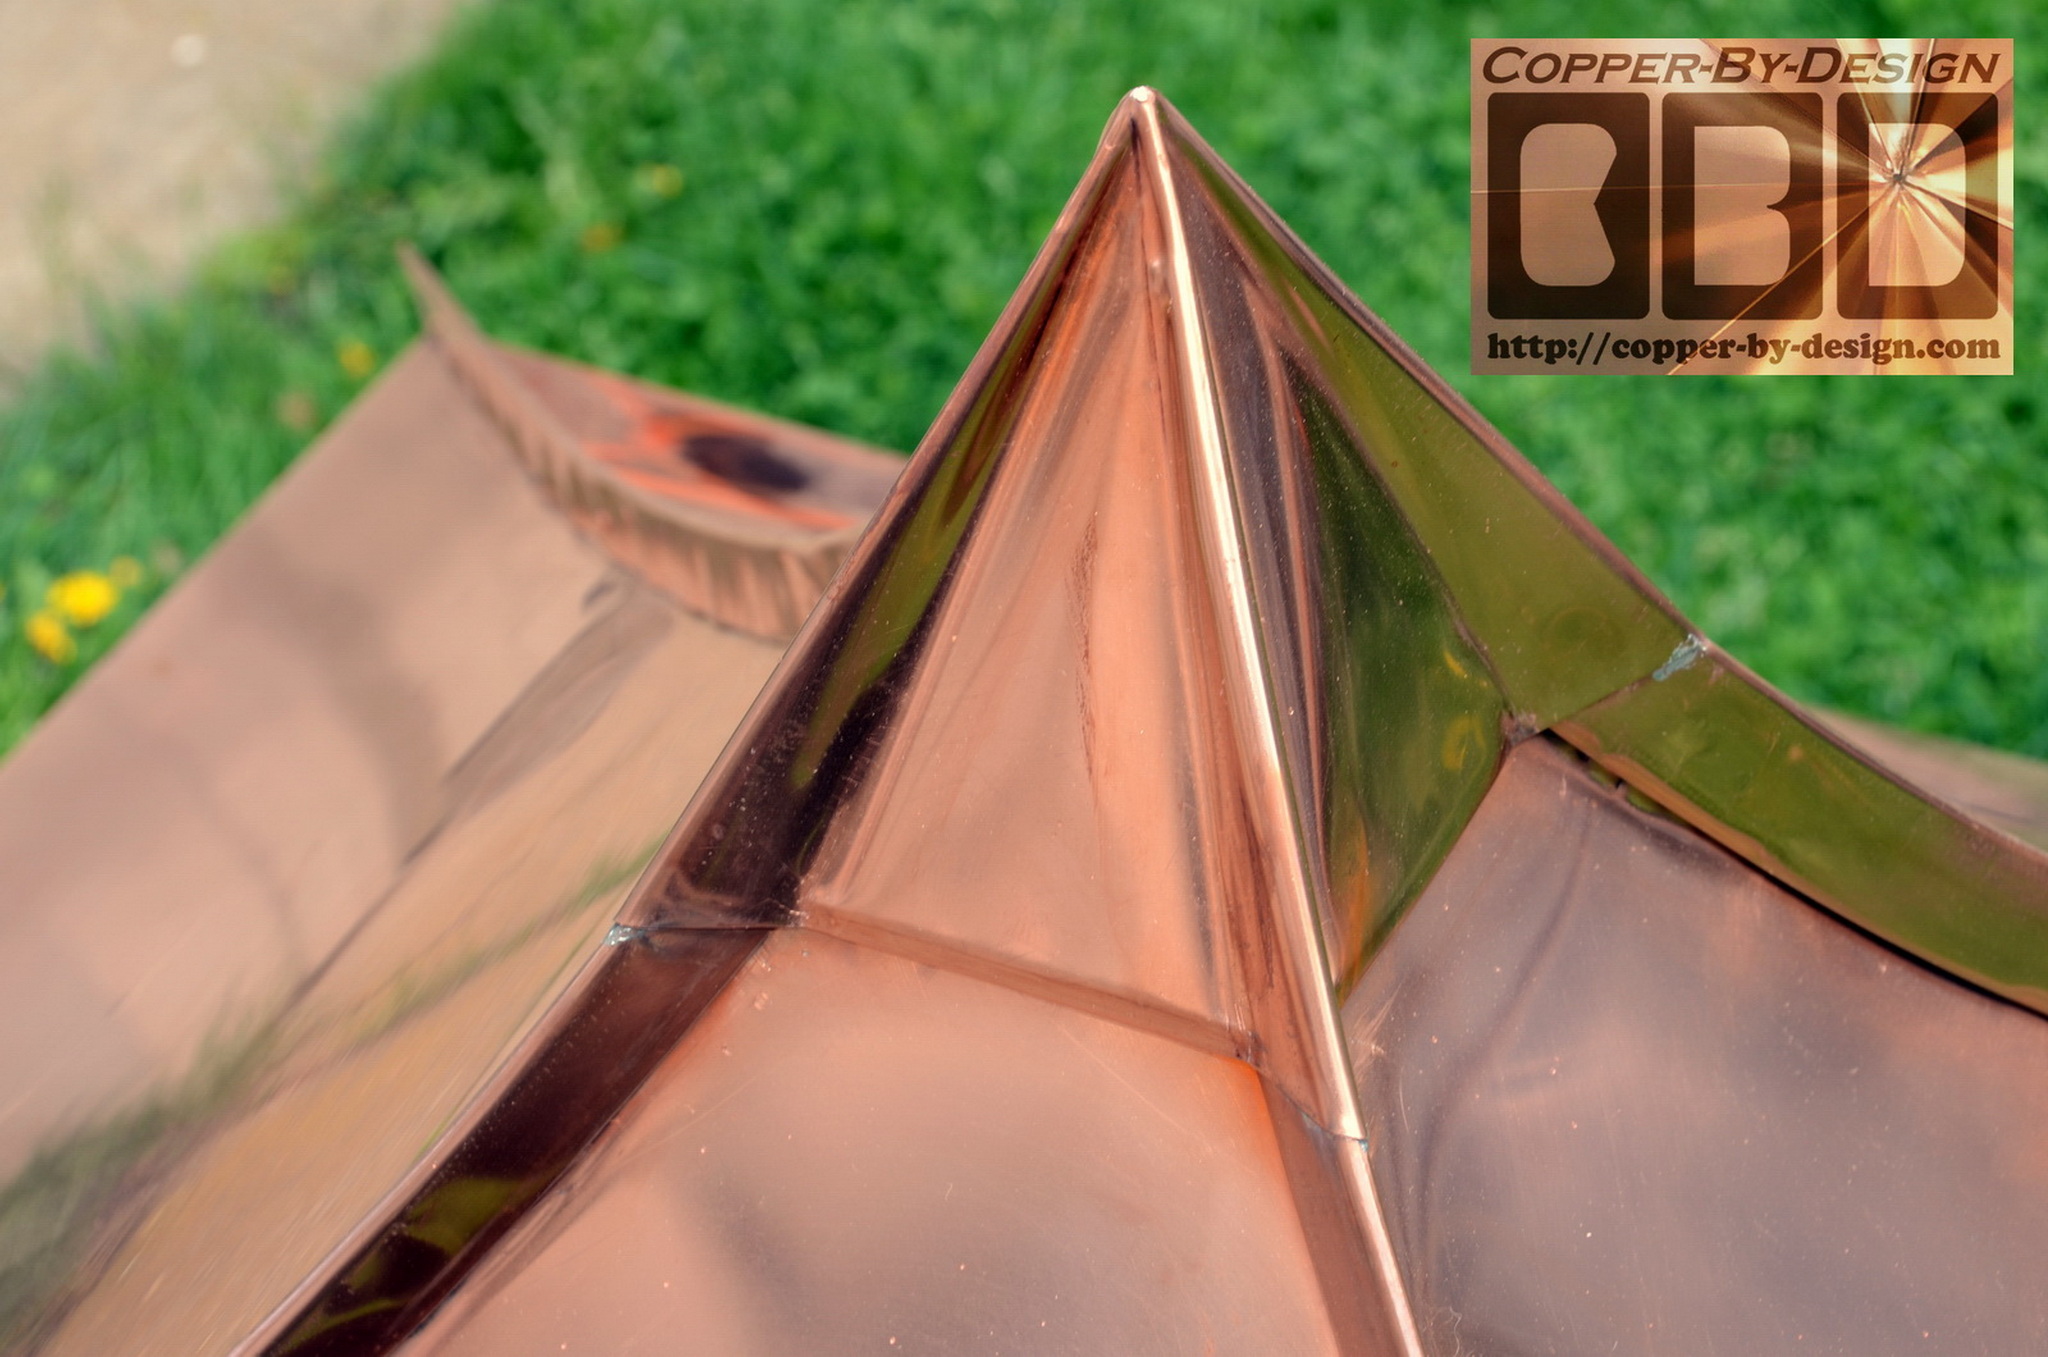
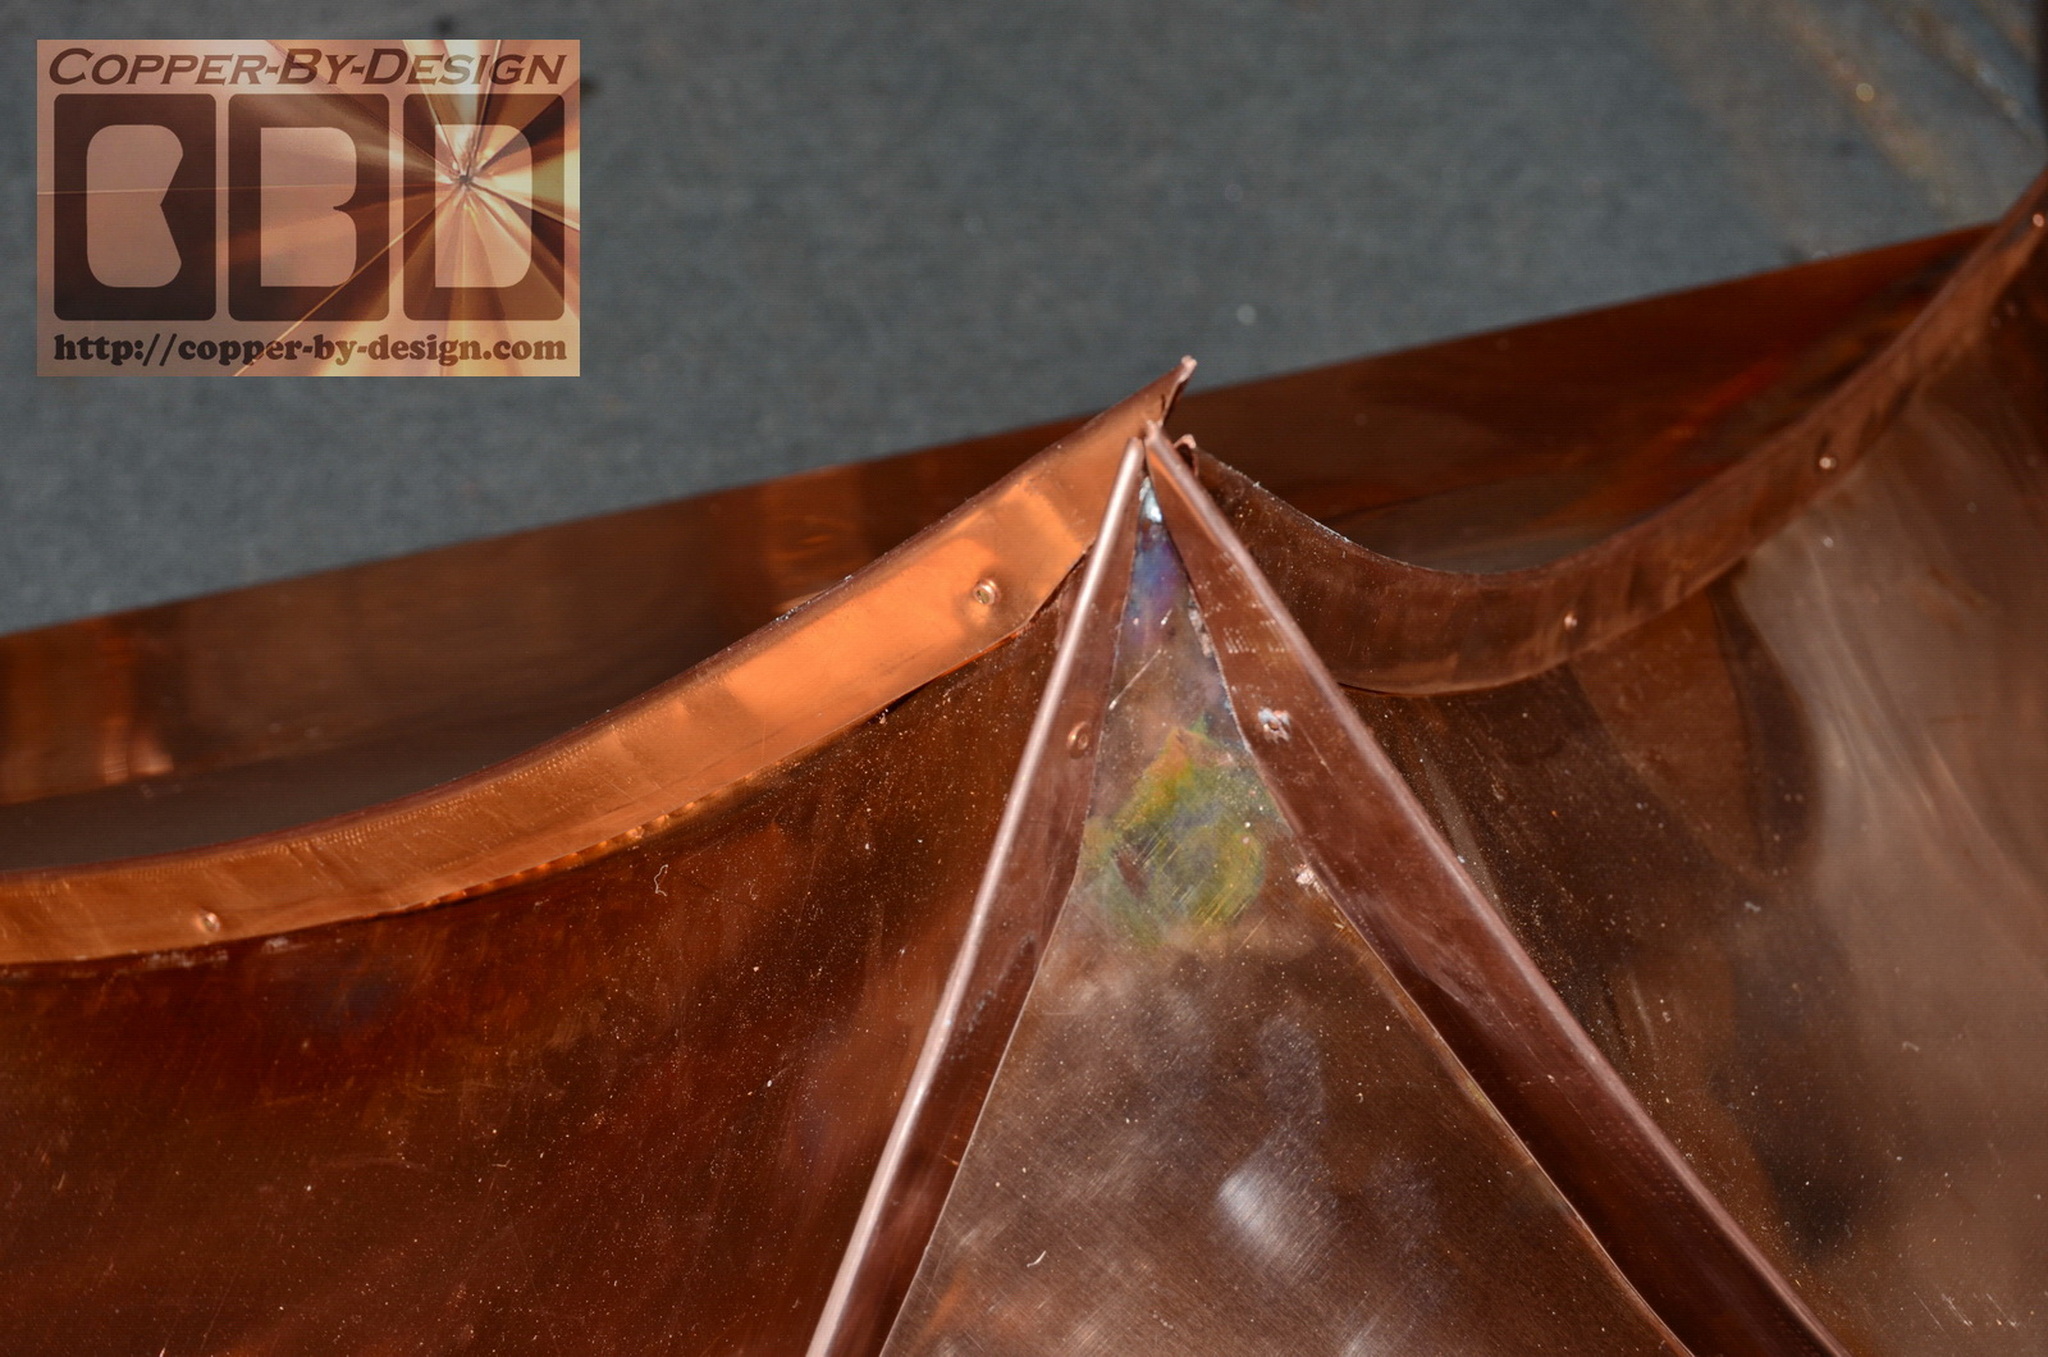
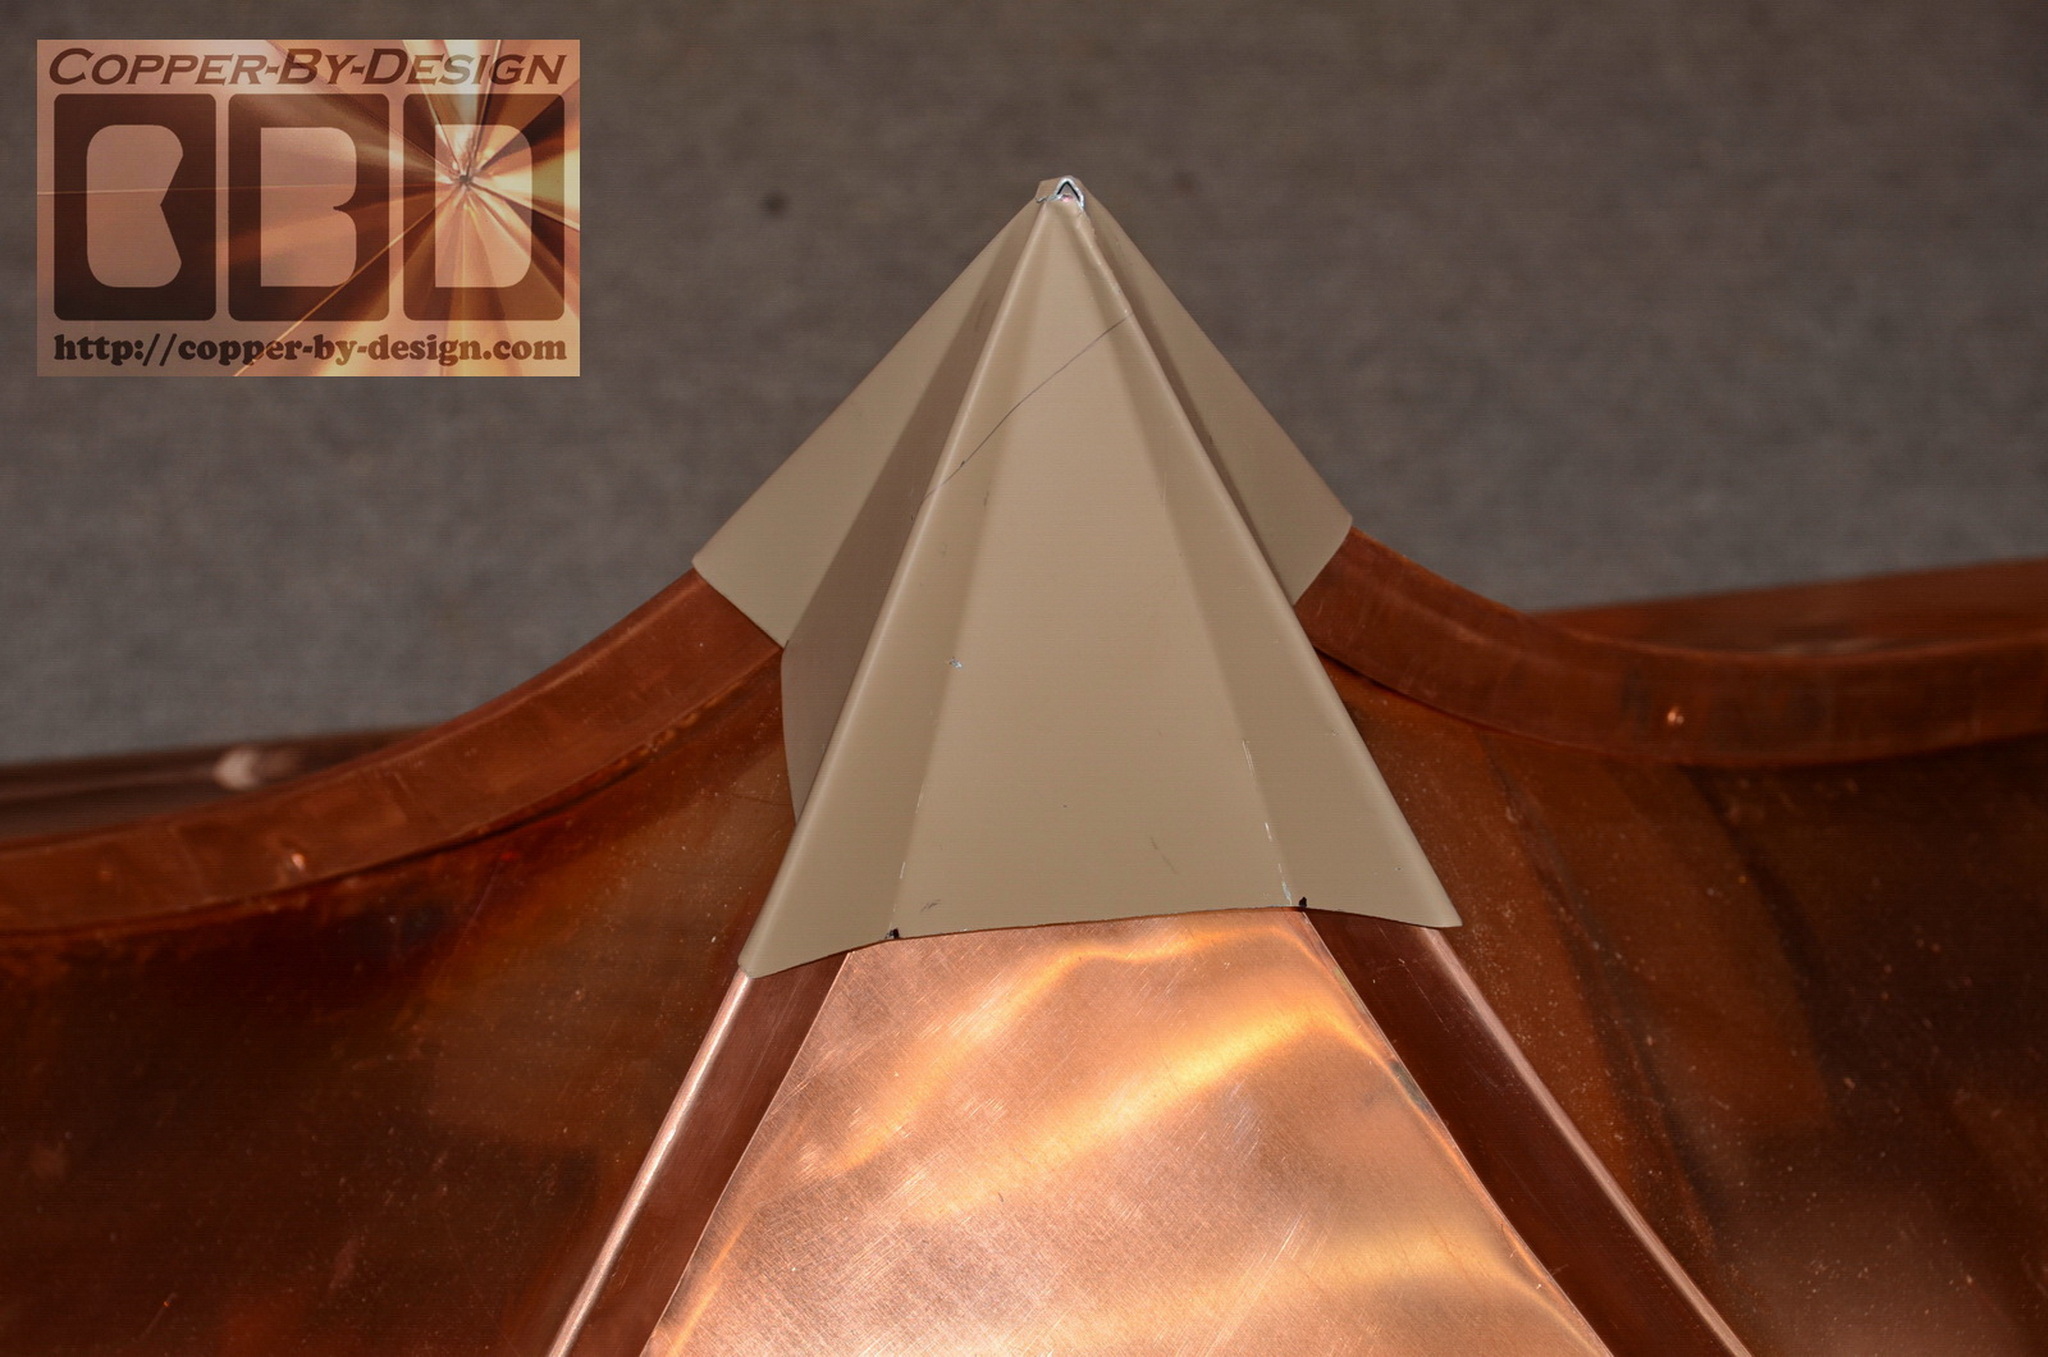
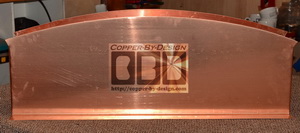
The hip corner caps did not
come together perfectly, as expected, so we made this peak cover
cap for a nice clean look and a better way to seal the peak The
aluminum template is designed and fitted to make sure this will
be just right before making the final copper cap.
 
That is 2 layers of 24oz
copper and 4 layers of 20oz copper at each hip for a combined
thickness of
128oz copper. I imagine this peak is strong enough to
take quite a hit.
Date: Mon, 1 Apr 2013
It looks really great! Beautiful work.
Thanks,
Albert Rossi, CPA
|
|
Building the Mantle
|
|
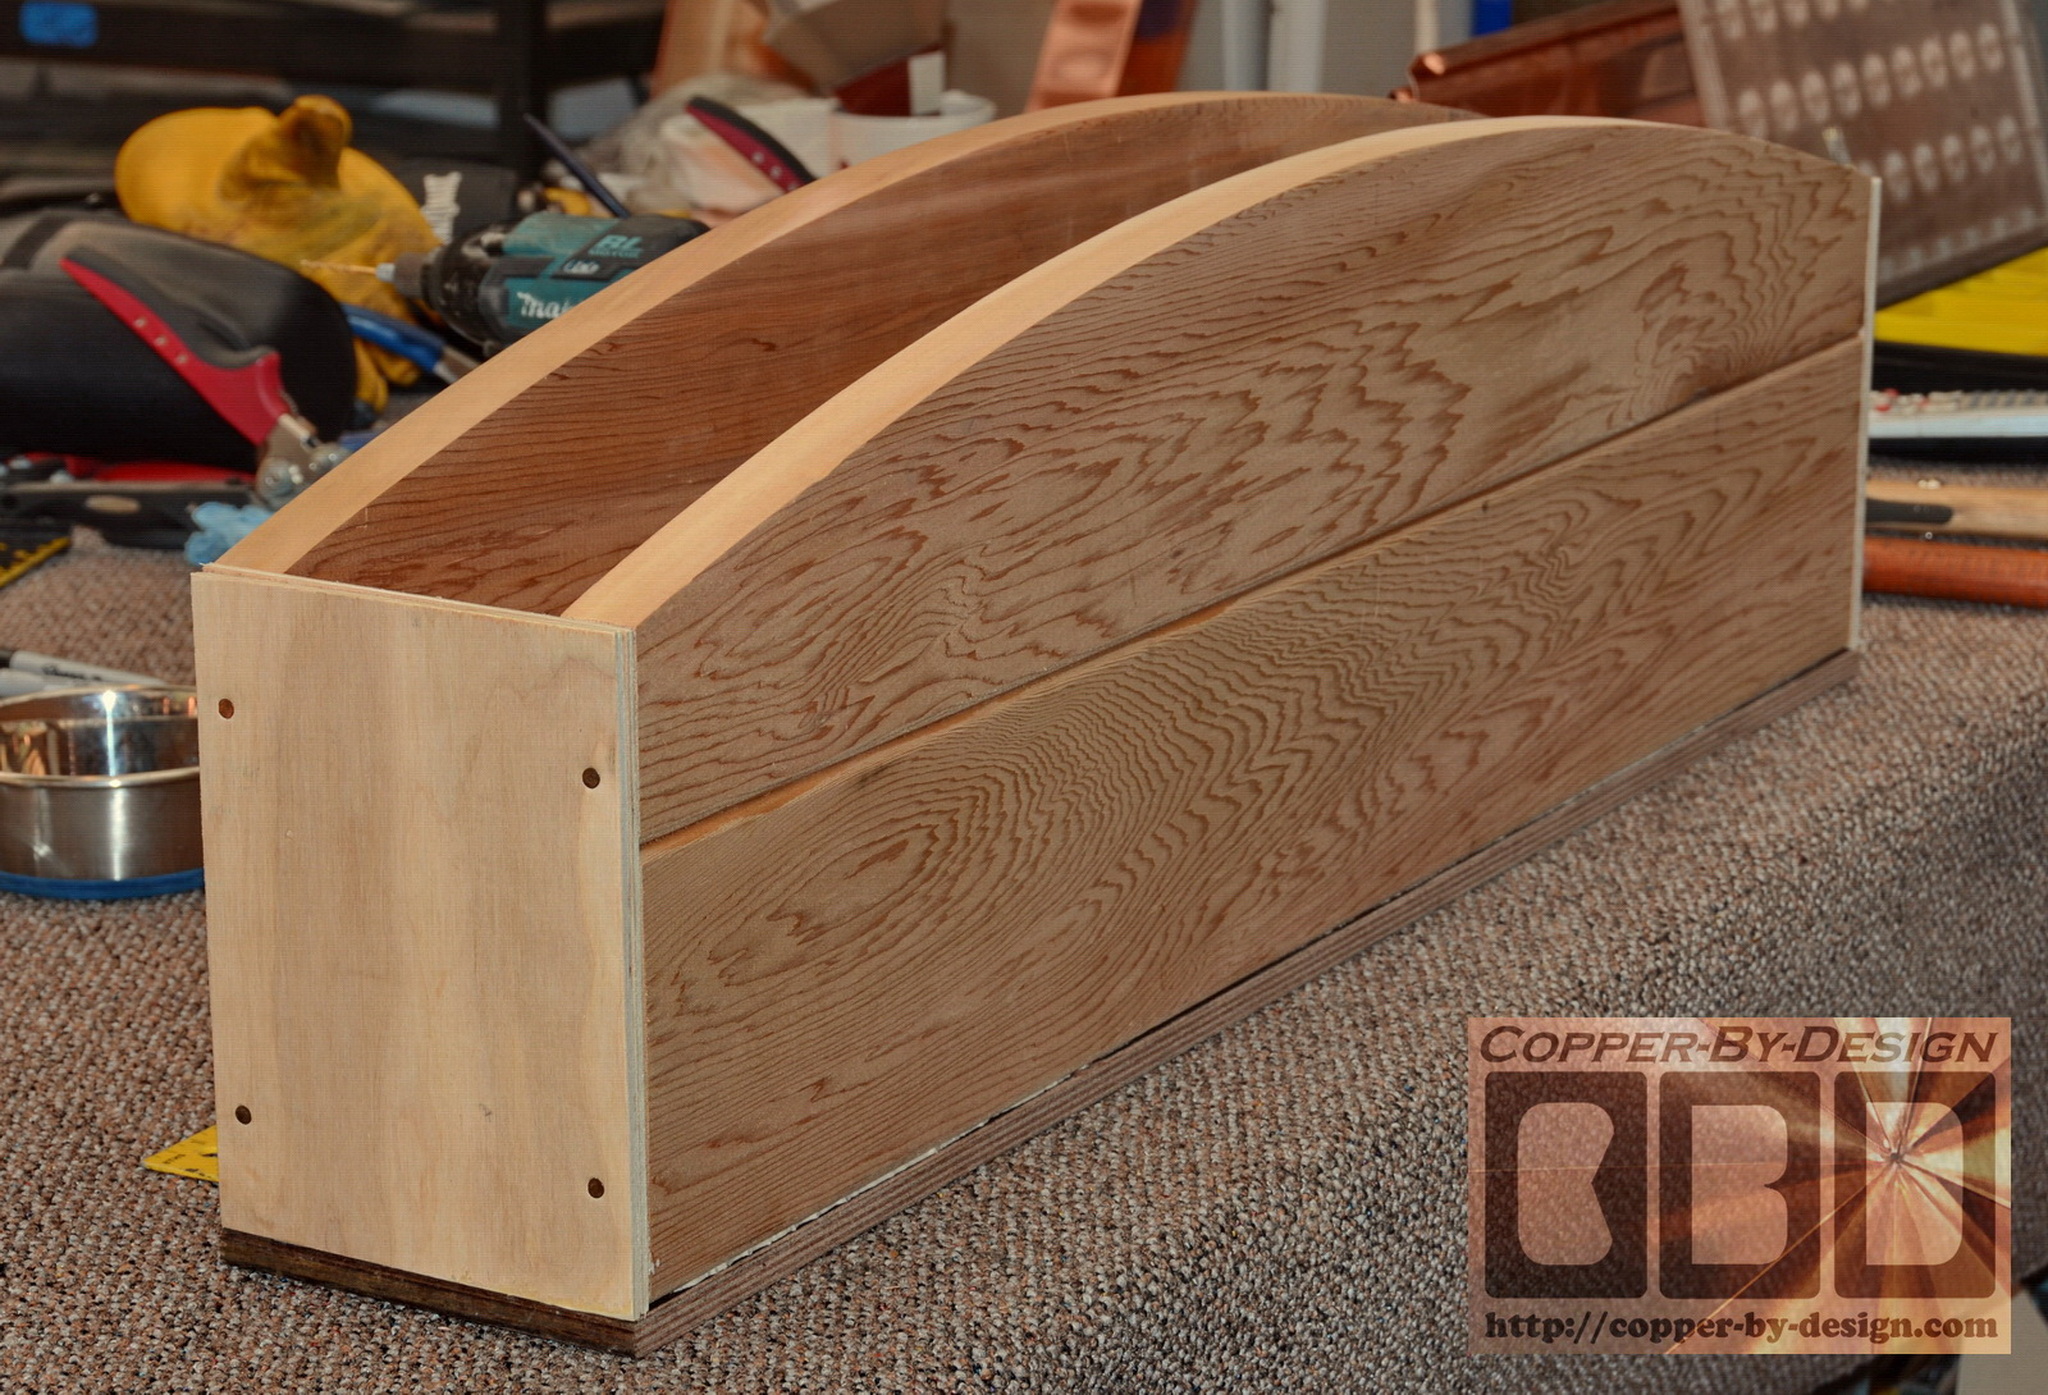
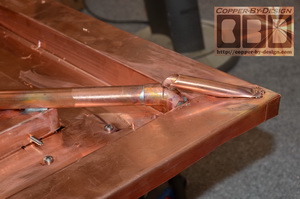
 These
clear cedar boards were glued and clamped together for the top
and bottom plates of this 36" wide mantle piece. These
clear cedar boards were glued and clamped together for the top
and bottom plates of this 36" wide mantle piece.
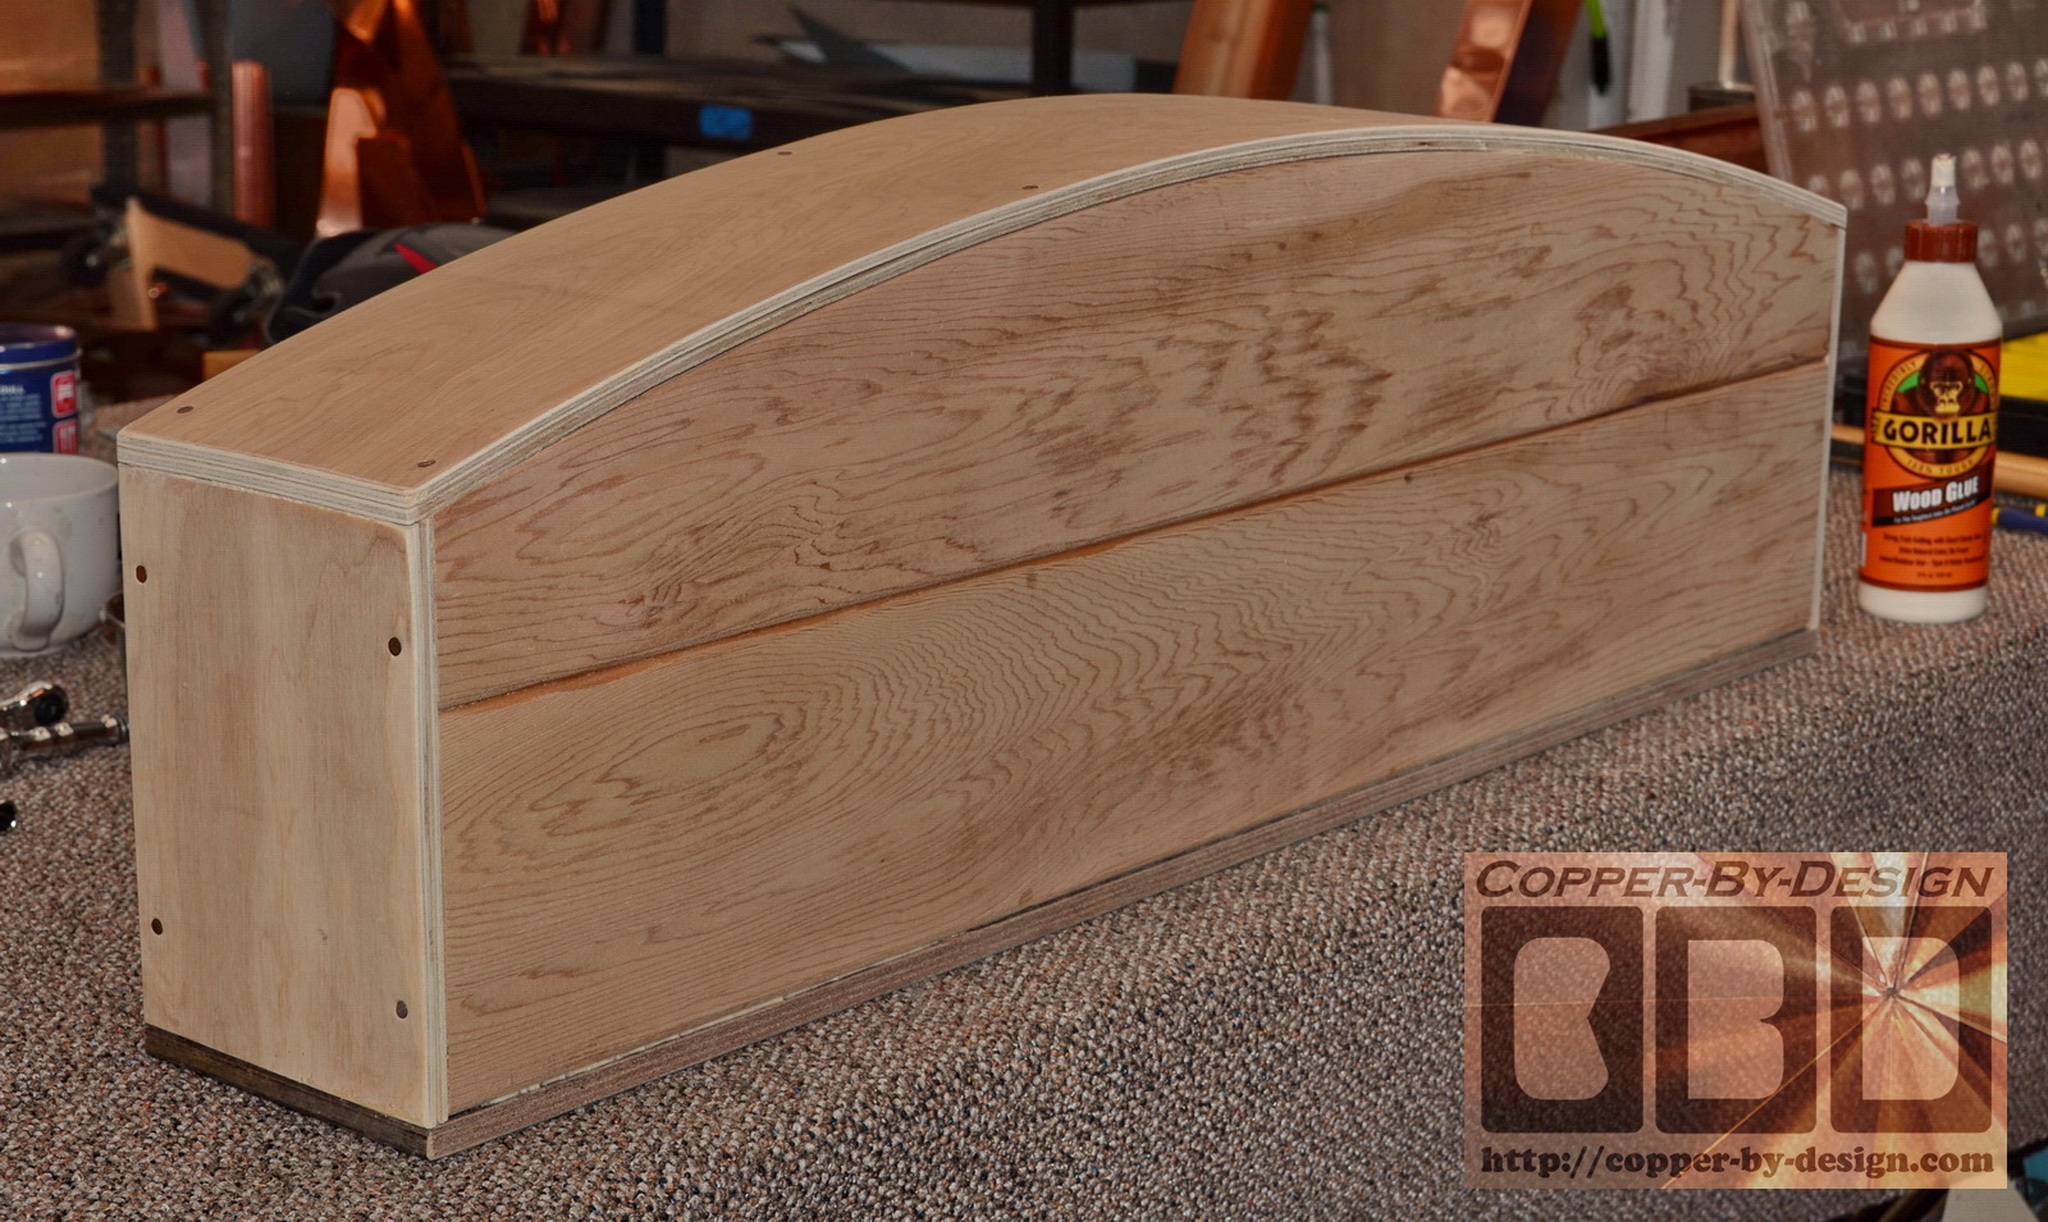
I used a 1/2" marine grade
plywood for the back plate, which was glued and screwed
together. A duel layer of 1/4" hardwood plywood was attached
across the sides and front face to allow for the curvature with
some bronze nails.
Then this was covered with a
3 piece 32oz copper skin attached with an expanding polyurethane
glue for a more solid feel and dent resistance. The outer rim
had to be hammered down over the edges, because of the curvature
in the outer face.
Then another 58 over-sized
industrial looking rivet are tediously attached with bronze
nails.
From: "Al Rossi" <AlR@rdfcpas.c*m>
Date: Thu, 4 Apr 2013
Hi David,
Looks good to me.
Fascinating to see the fabrication process. Couldn’t look any
better!
Albert Rossi, CPA
Managing Partner
|
|
Building the Fire-Screen
|
|
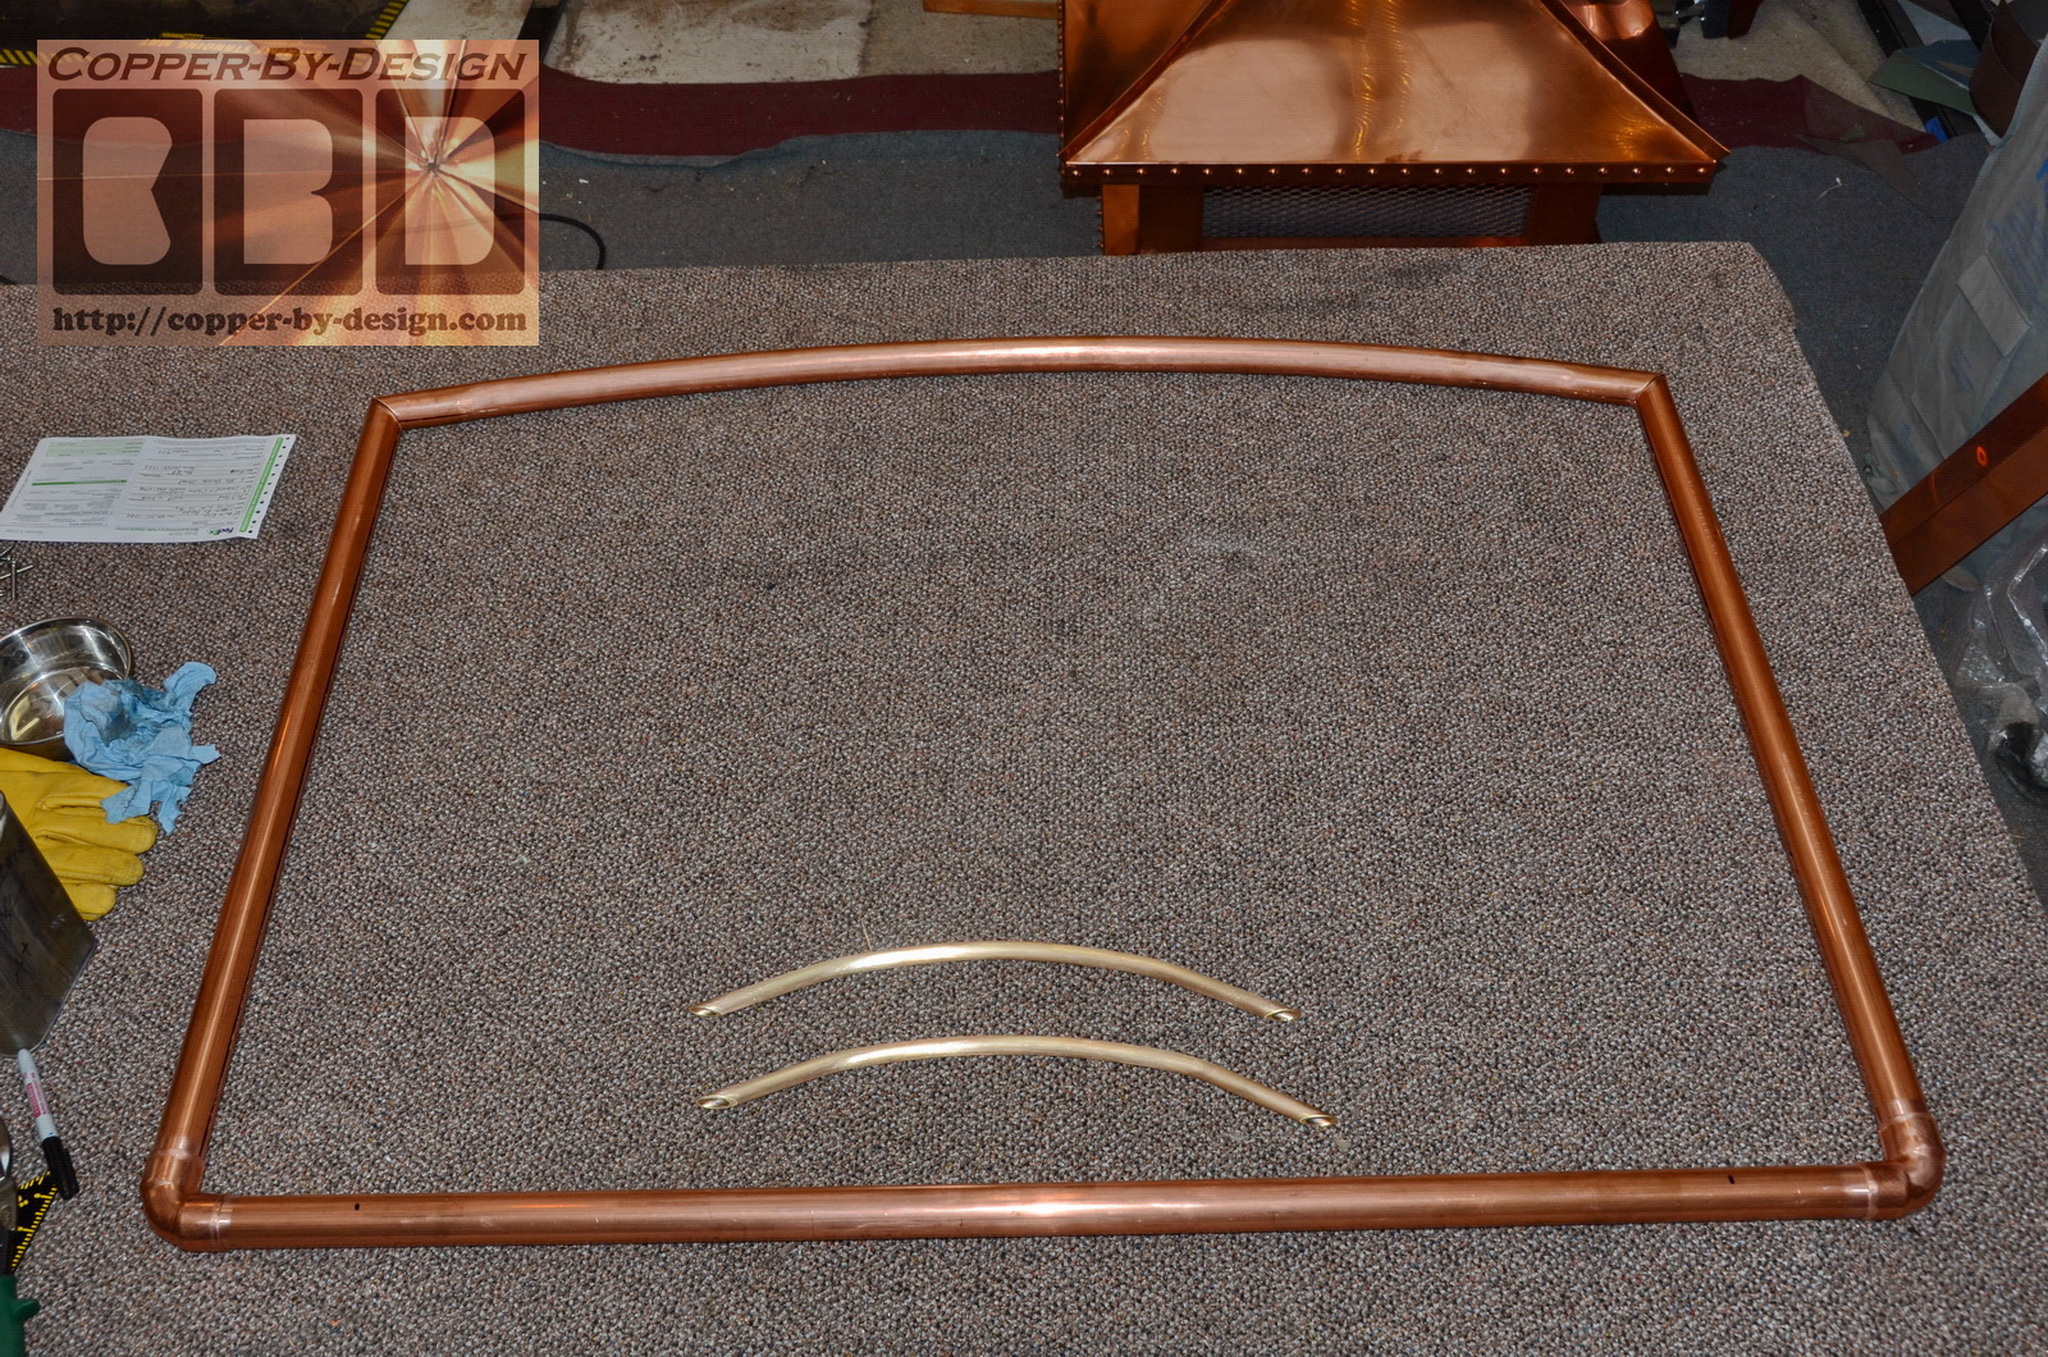
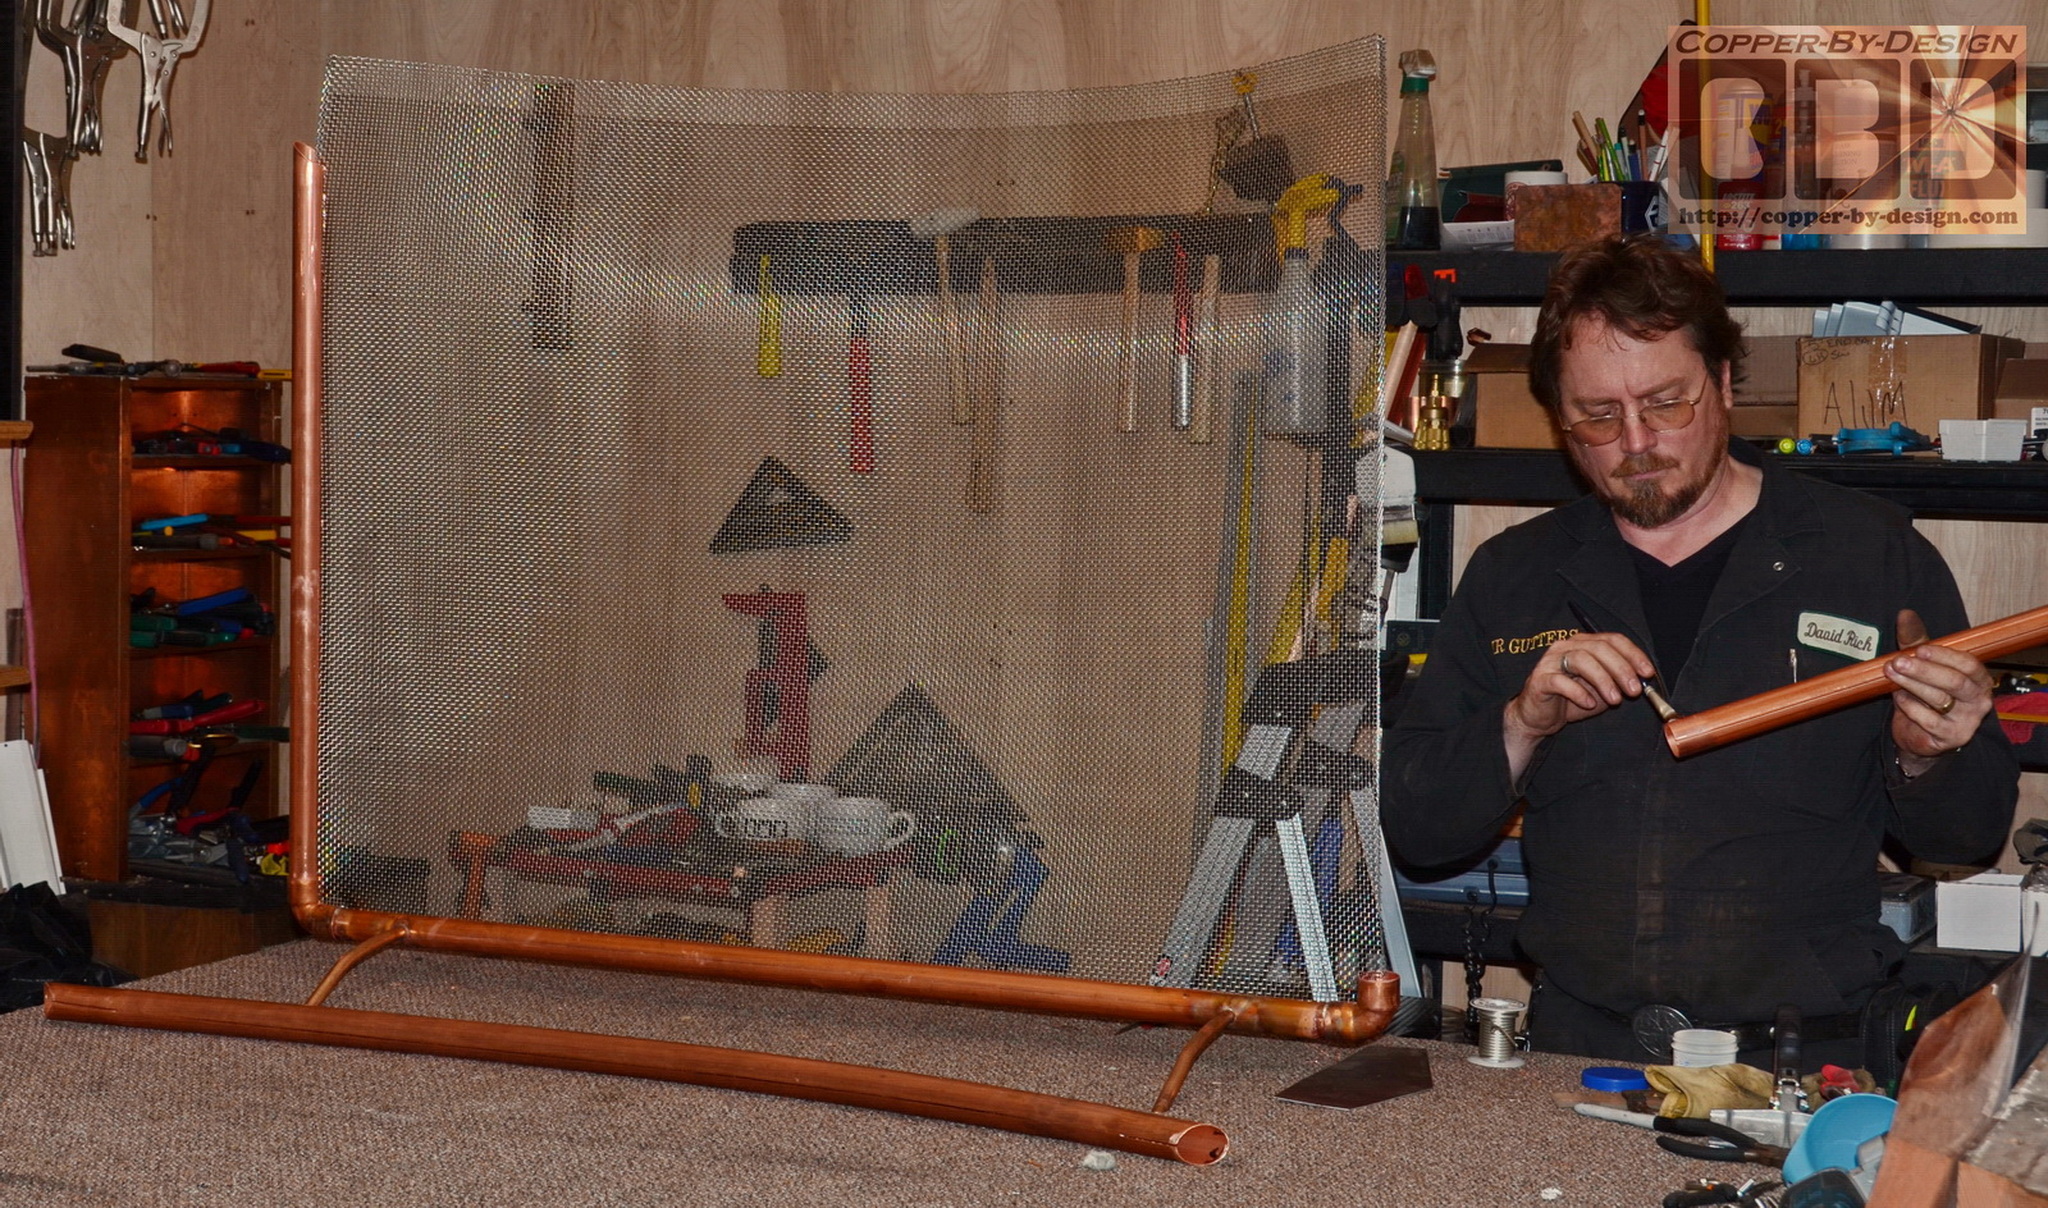
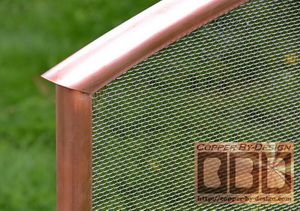
Al asked me to make my first
fire screen as well. I got some 1.25" copper pipes and cut a
groove out lengthwise to slide the stainless steel screen in
that slot.
 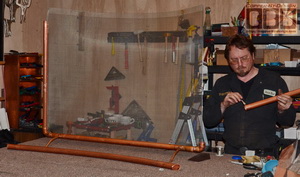
The screen has a bend along the edges, so it's not
going to come out of the channel. This SS screen is stiff enough
the bend is not going to be undone like flimsy window screen.
I
had made the arch with the same size pipe, but it turned out 1/2"
too short when I was done, so I had to remake it. I decided to
use a larger 1.5" pipe this time and it I feel it turned out
very nicely with a
little added style.
The feet are made with a pair of thick
walled 1/2" brass tubes. A typical fire screen might have just a
6" wide foot stance, but these feet have a 3X wider 18" stance,
since this is for an outdoor screen subject to wind.
From: "Al Rossi" <AlR@rdfcpas.c*m>
Date: Sat, 6 Apr 2013
Hi David,
All looks great.
What an outdoor fireplace we will have. I will send pics when
all installed. I will get a check out to you today.
Albert Rossi, CPA
Managing Partner
Rossi Doskocil &
Finkelstein
|
|
Mantle final weight is 33.6# - 13.8# wood weight = 19.8#
$156 for 19.5 ln' of 6" wood X $8
+ $396 for the 32oz copper covering this 19.8# X 20
+ $116 for 58 large rivets X $2
= $668 sub-total (from $750 quoted)
Chimney Cap final weight is 105.2#
$2,060.80 for 73.6# of copper X $28
+ $464 for 232 large copper rivets X $2
+ $142.40 for 7.12 sq' of SS spark arrest screen X $20
+ $175.05 for 11.67 ln' of 5/4 X 6 hardwood in the base/skirt X $15
= $2,842.25 sub-total
Fire Screen: $600 as quoted
Freight costs:
$400 for a 44" X 48" X 53" custom crate with packing for all 3 pieces
+ $218.25 truck freight cost w/liftgate to a residential
address
= $618.25 sub-total
|
|
Polish and Delivery
|
|
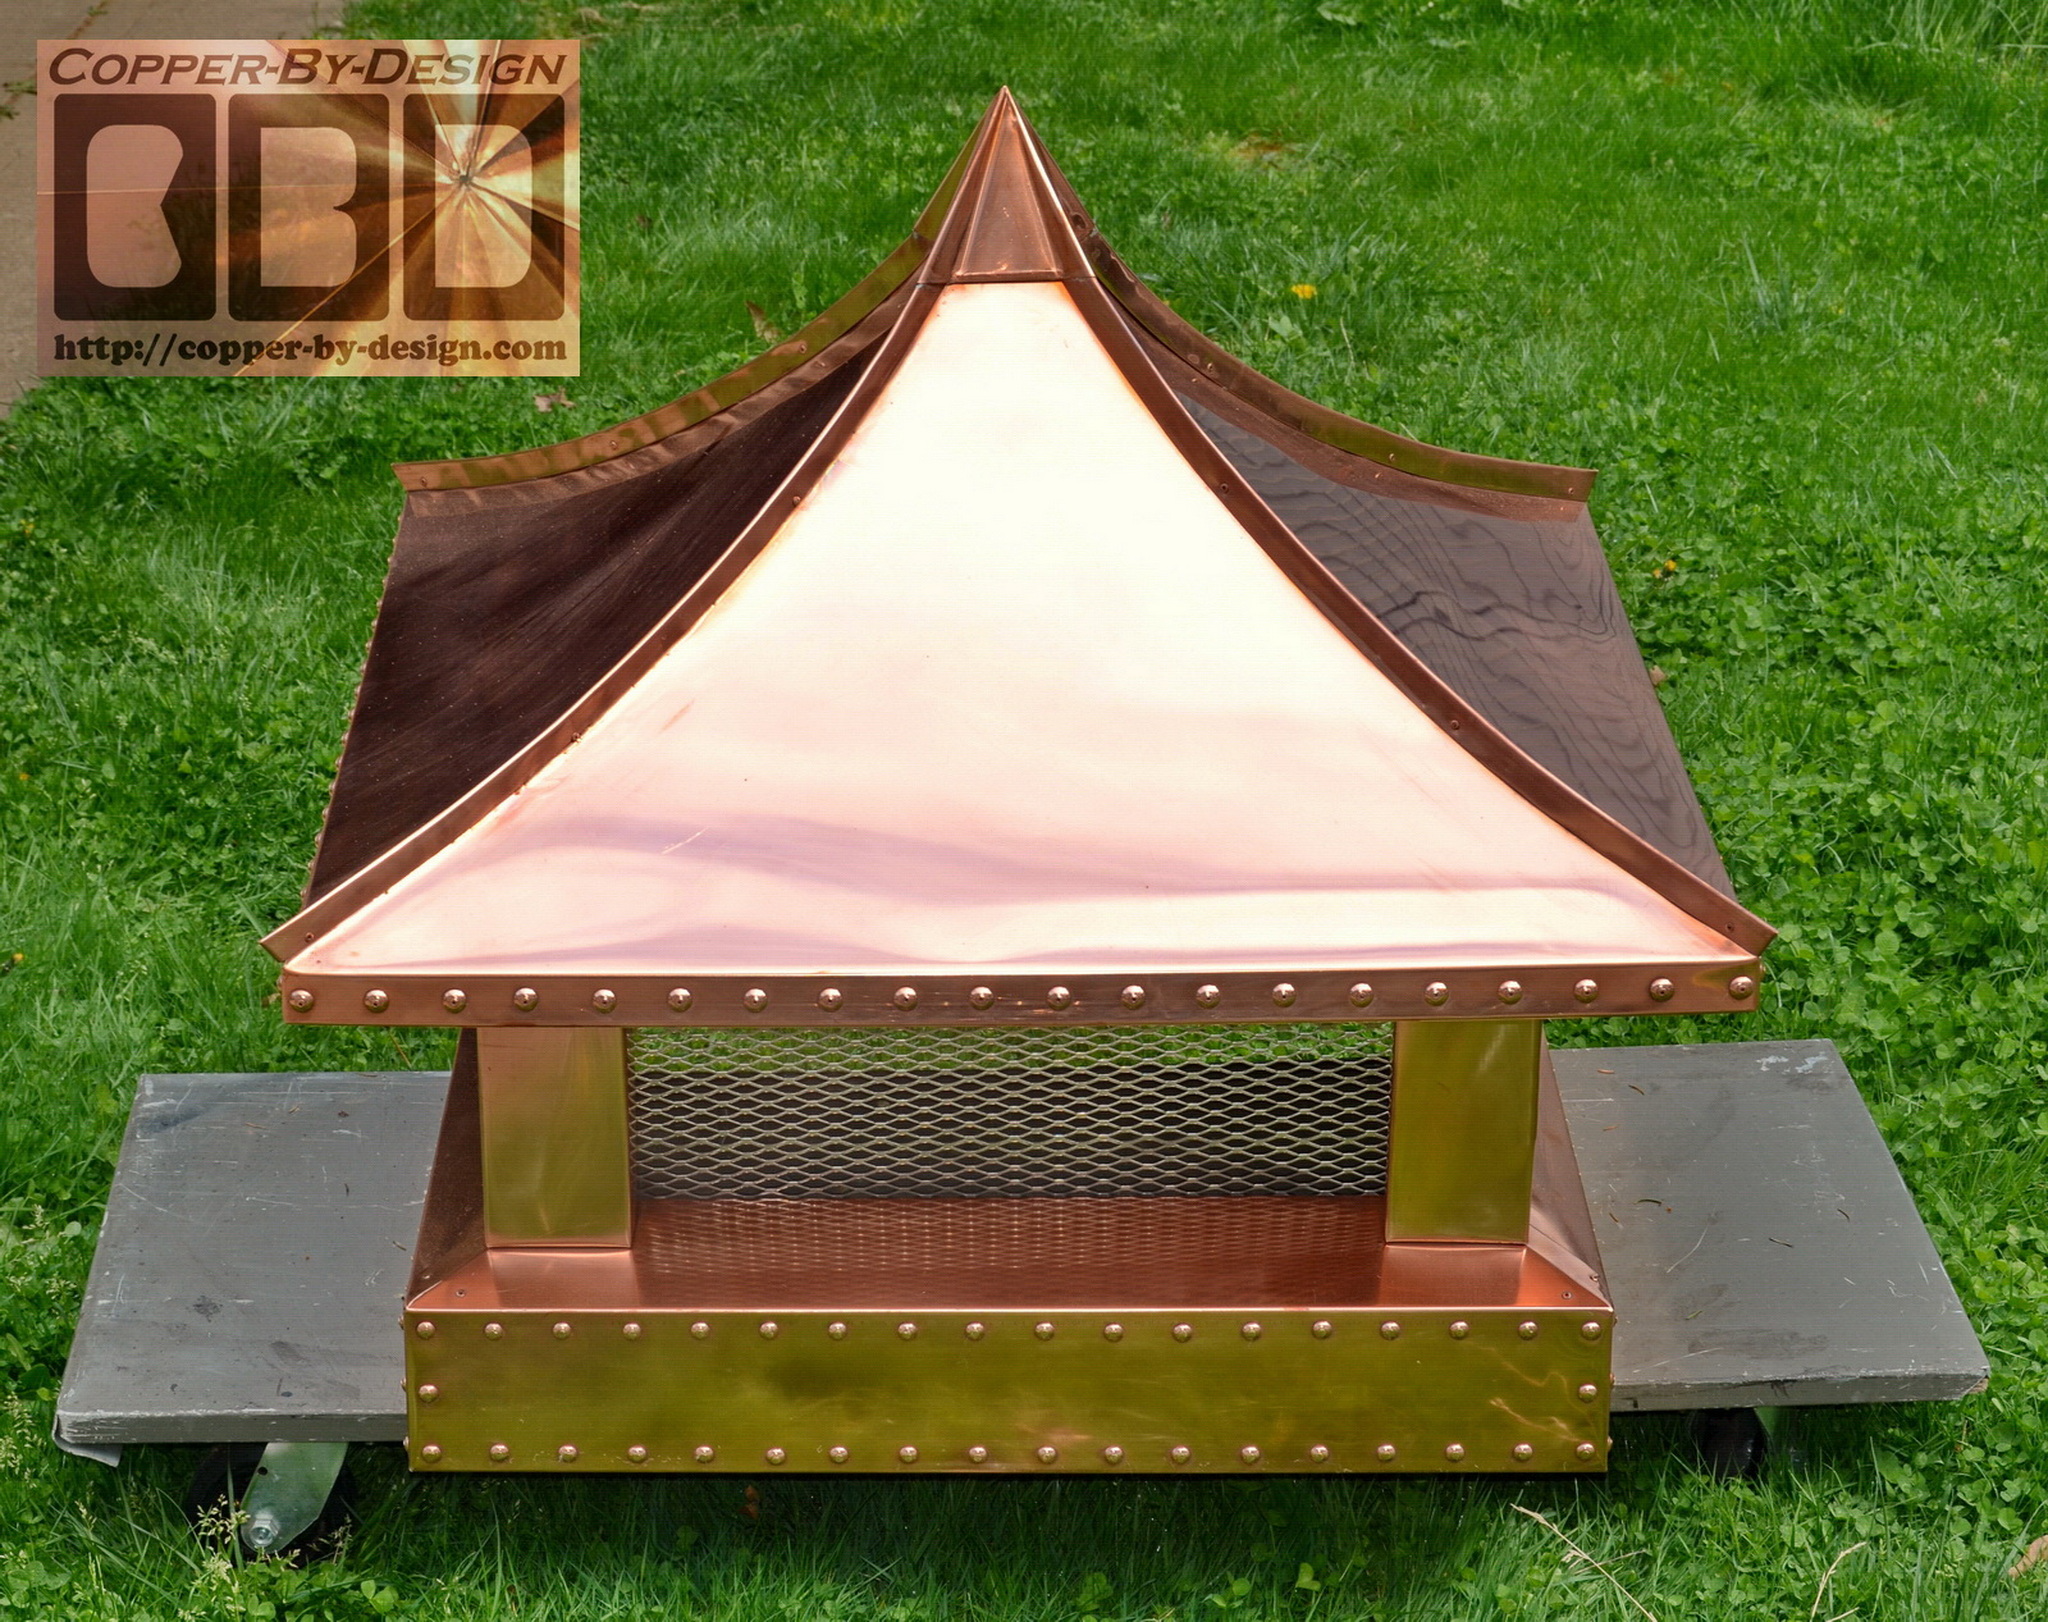
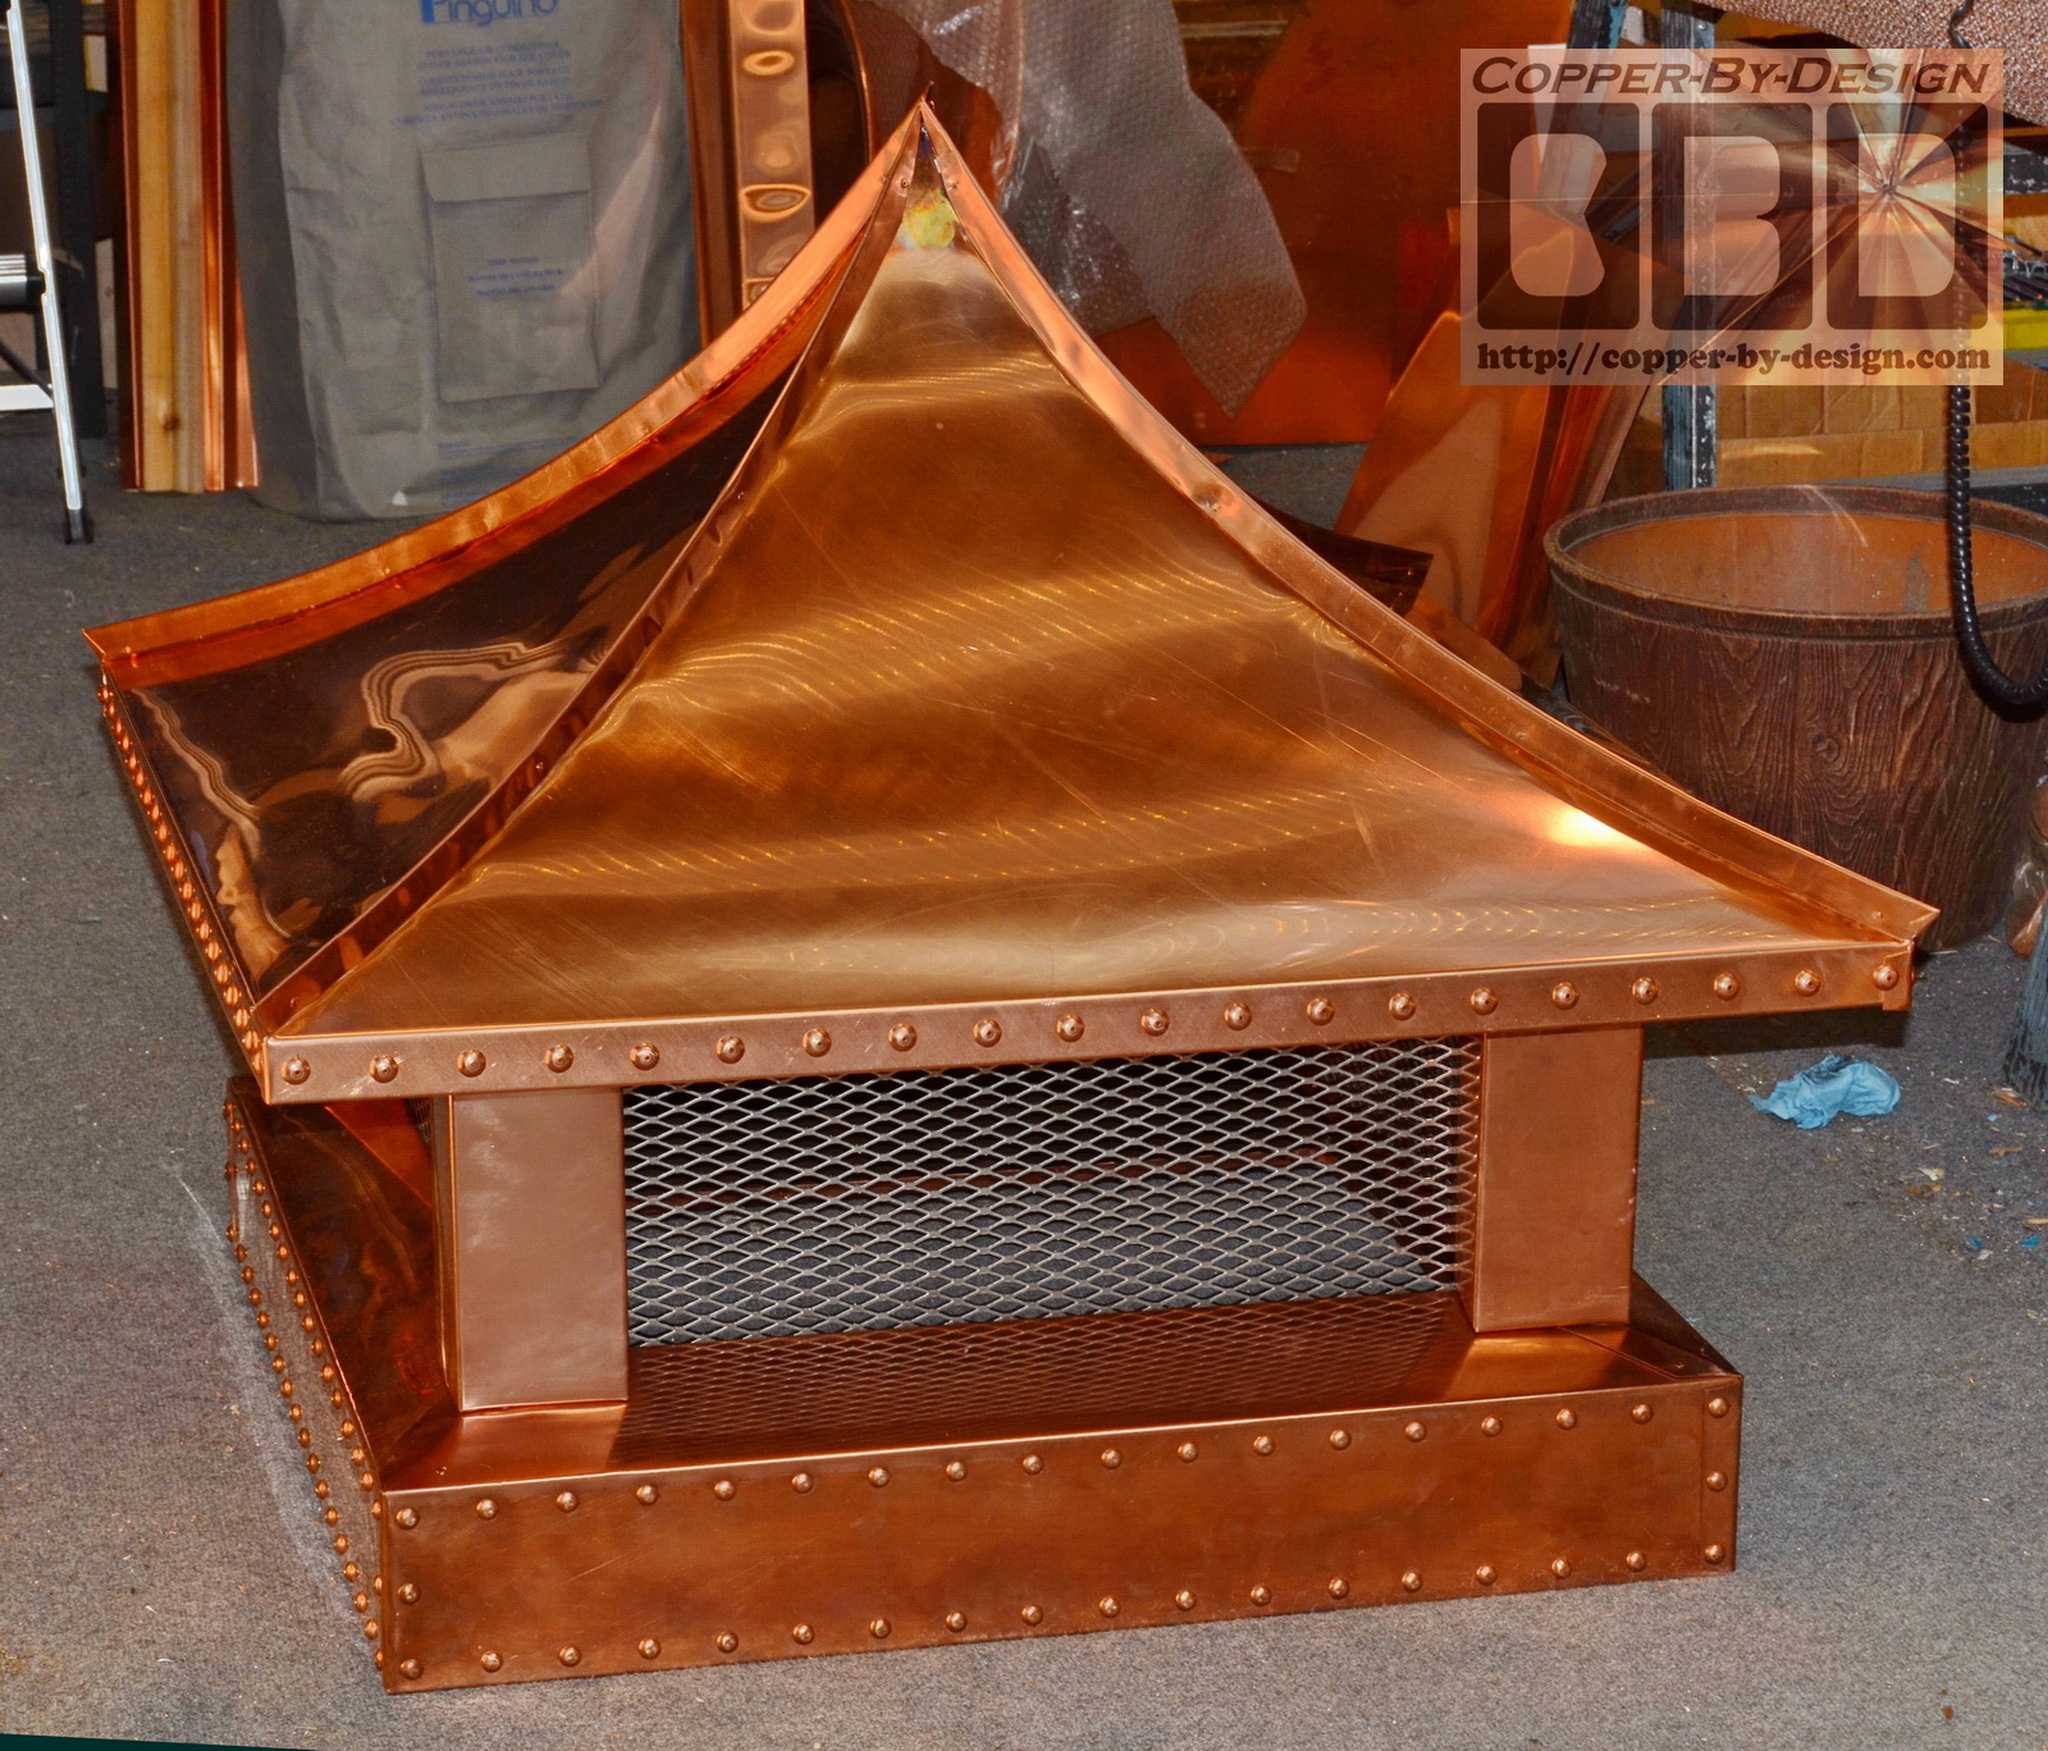
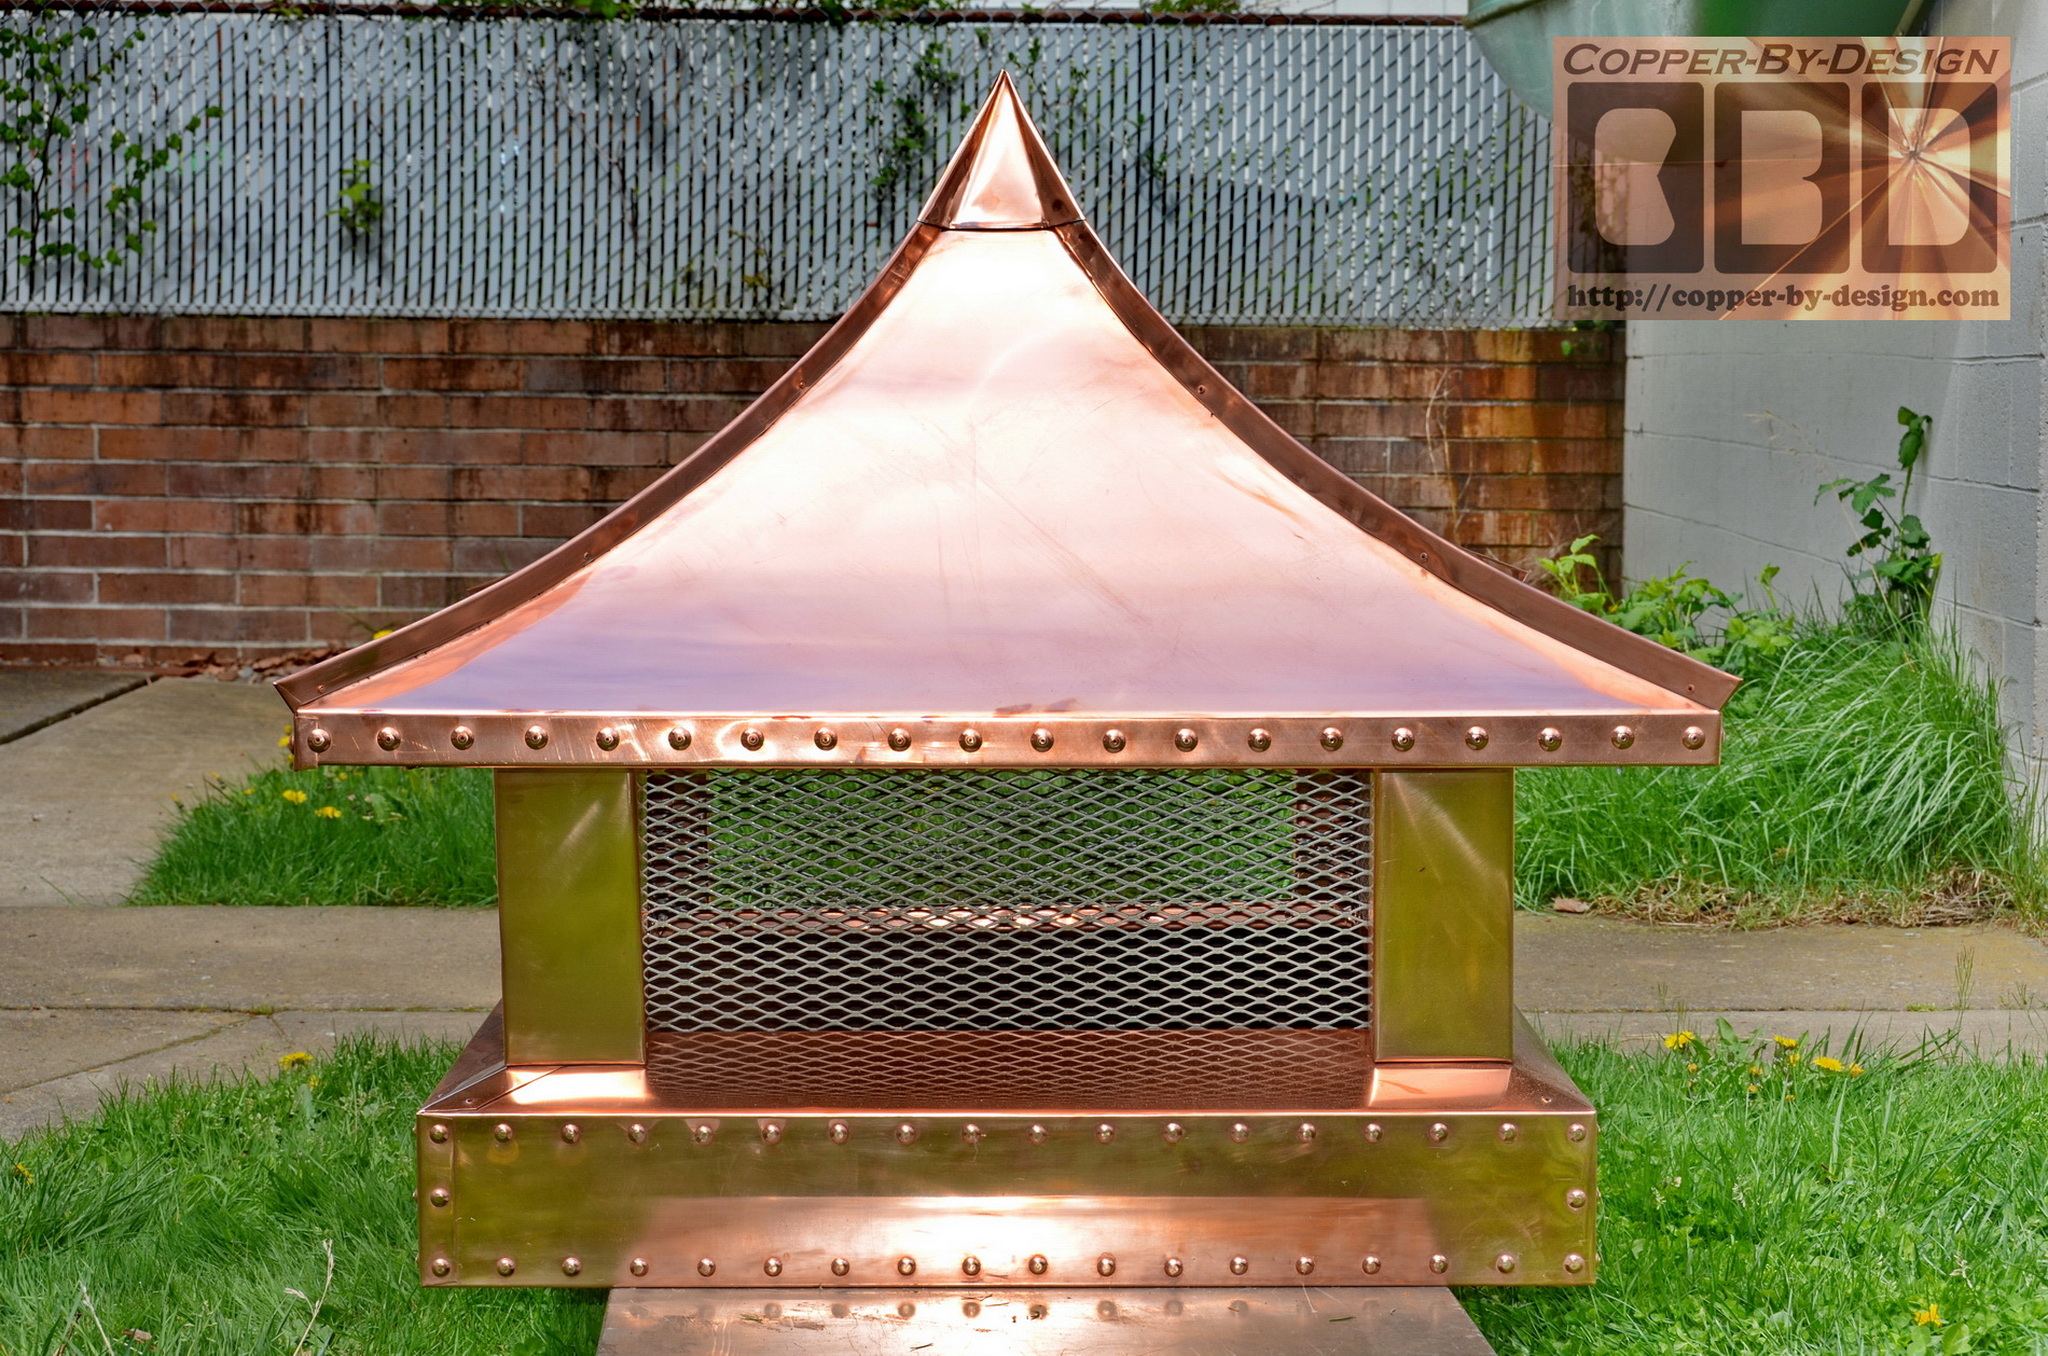
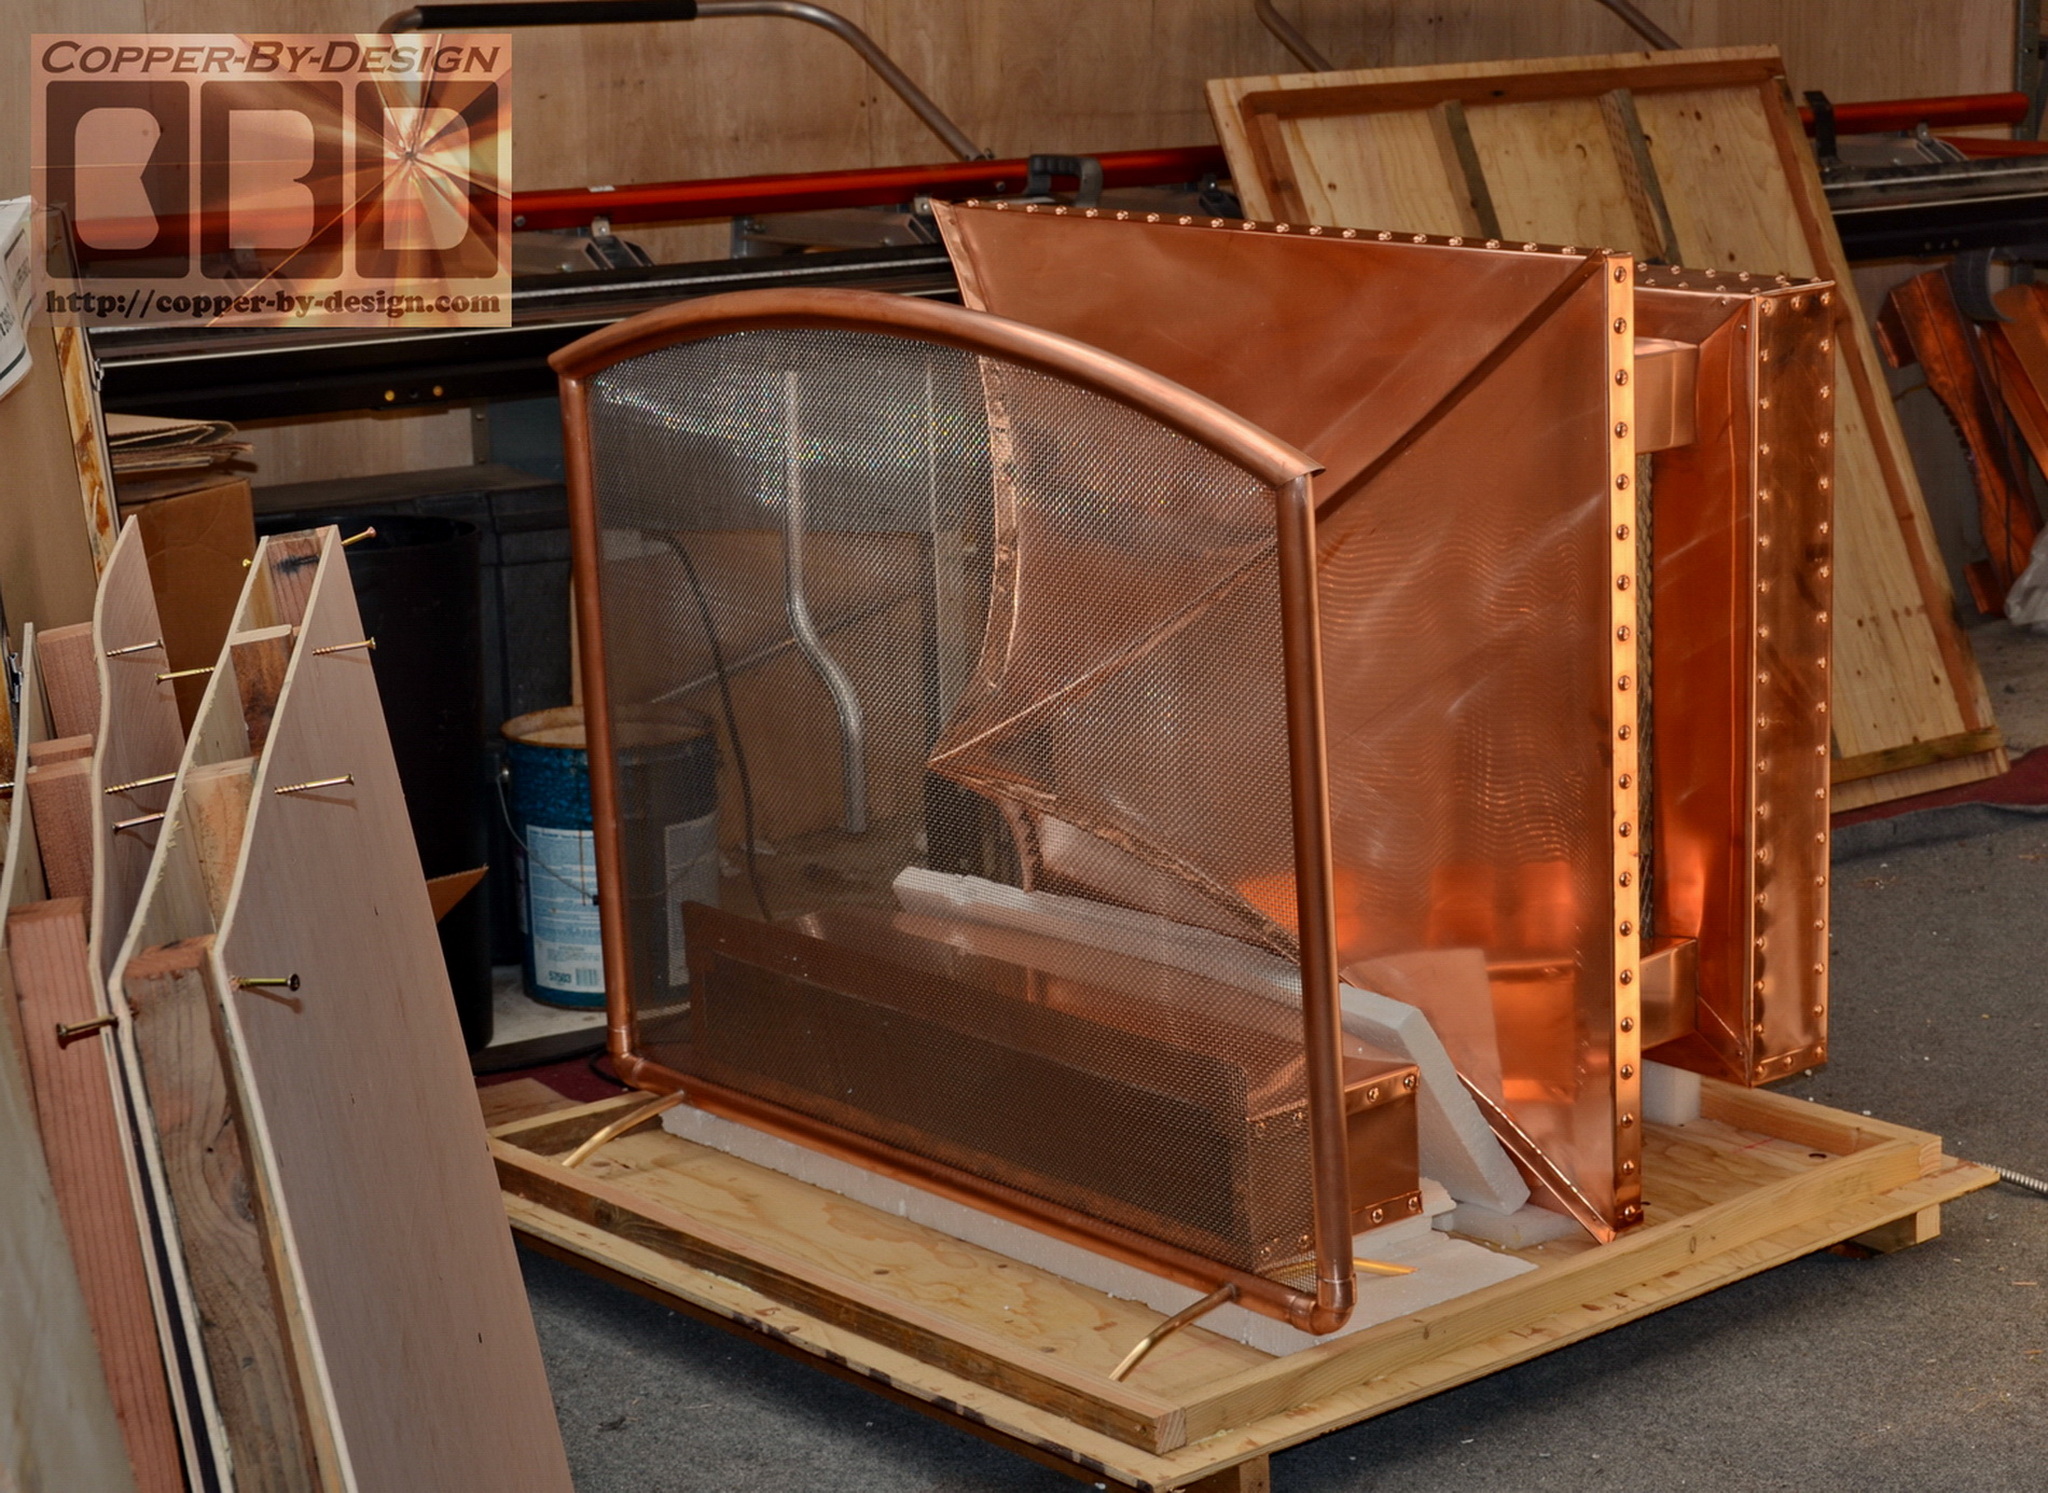
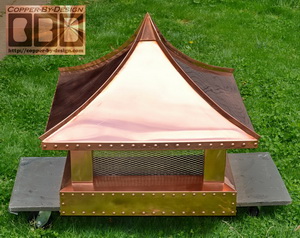
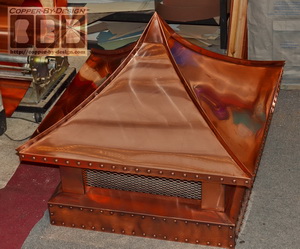
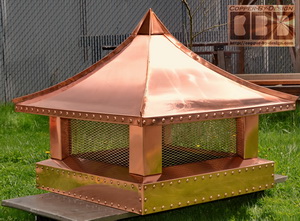
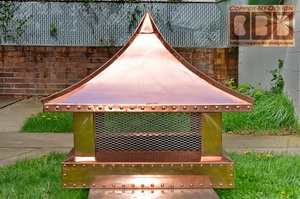
Here's a few pics of
the chimney cap out in the Sunlight.
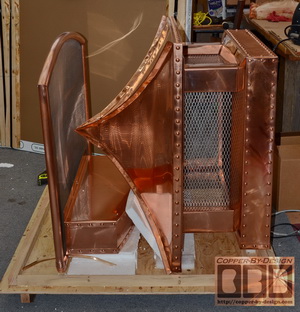
I had to be rather creative
to pack these in the smallest possible shipping crate, and pack
each piece, so they don't come in contact with other pieces.
|
|
Installation
|
|
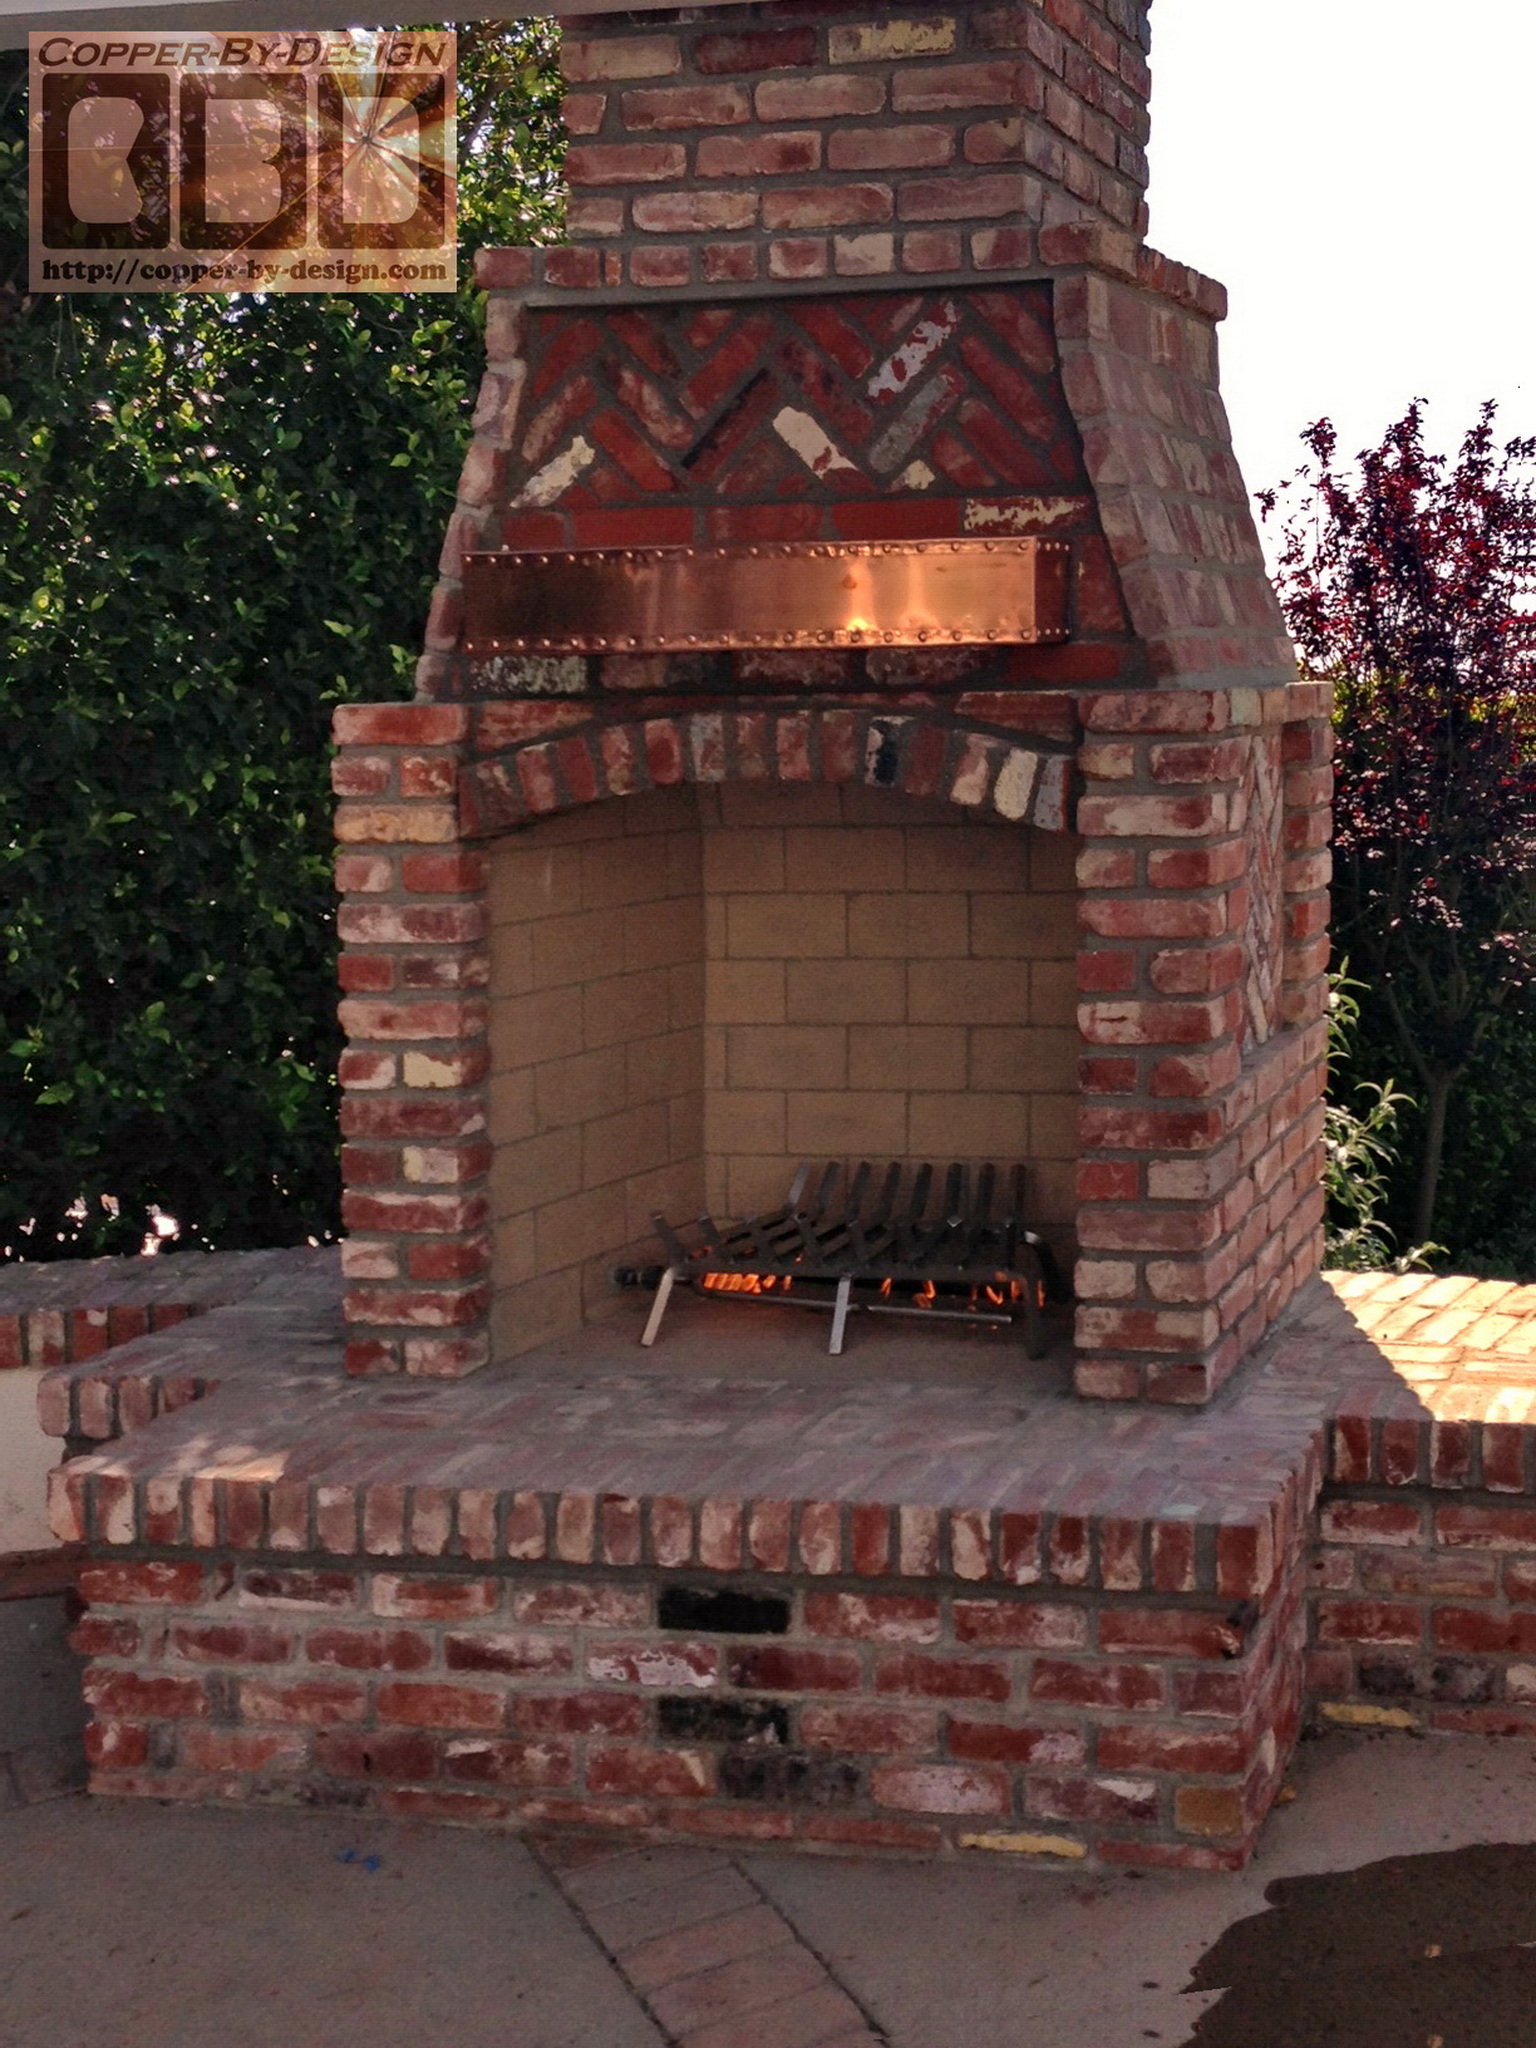
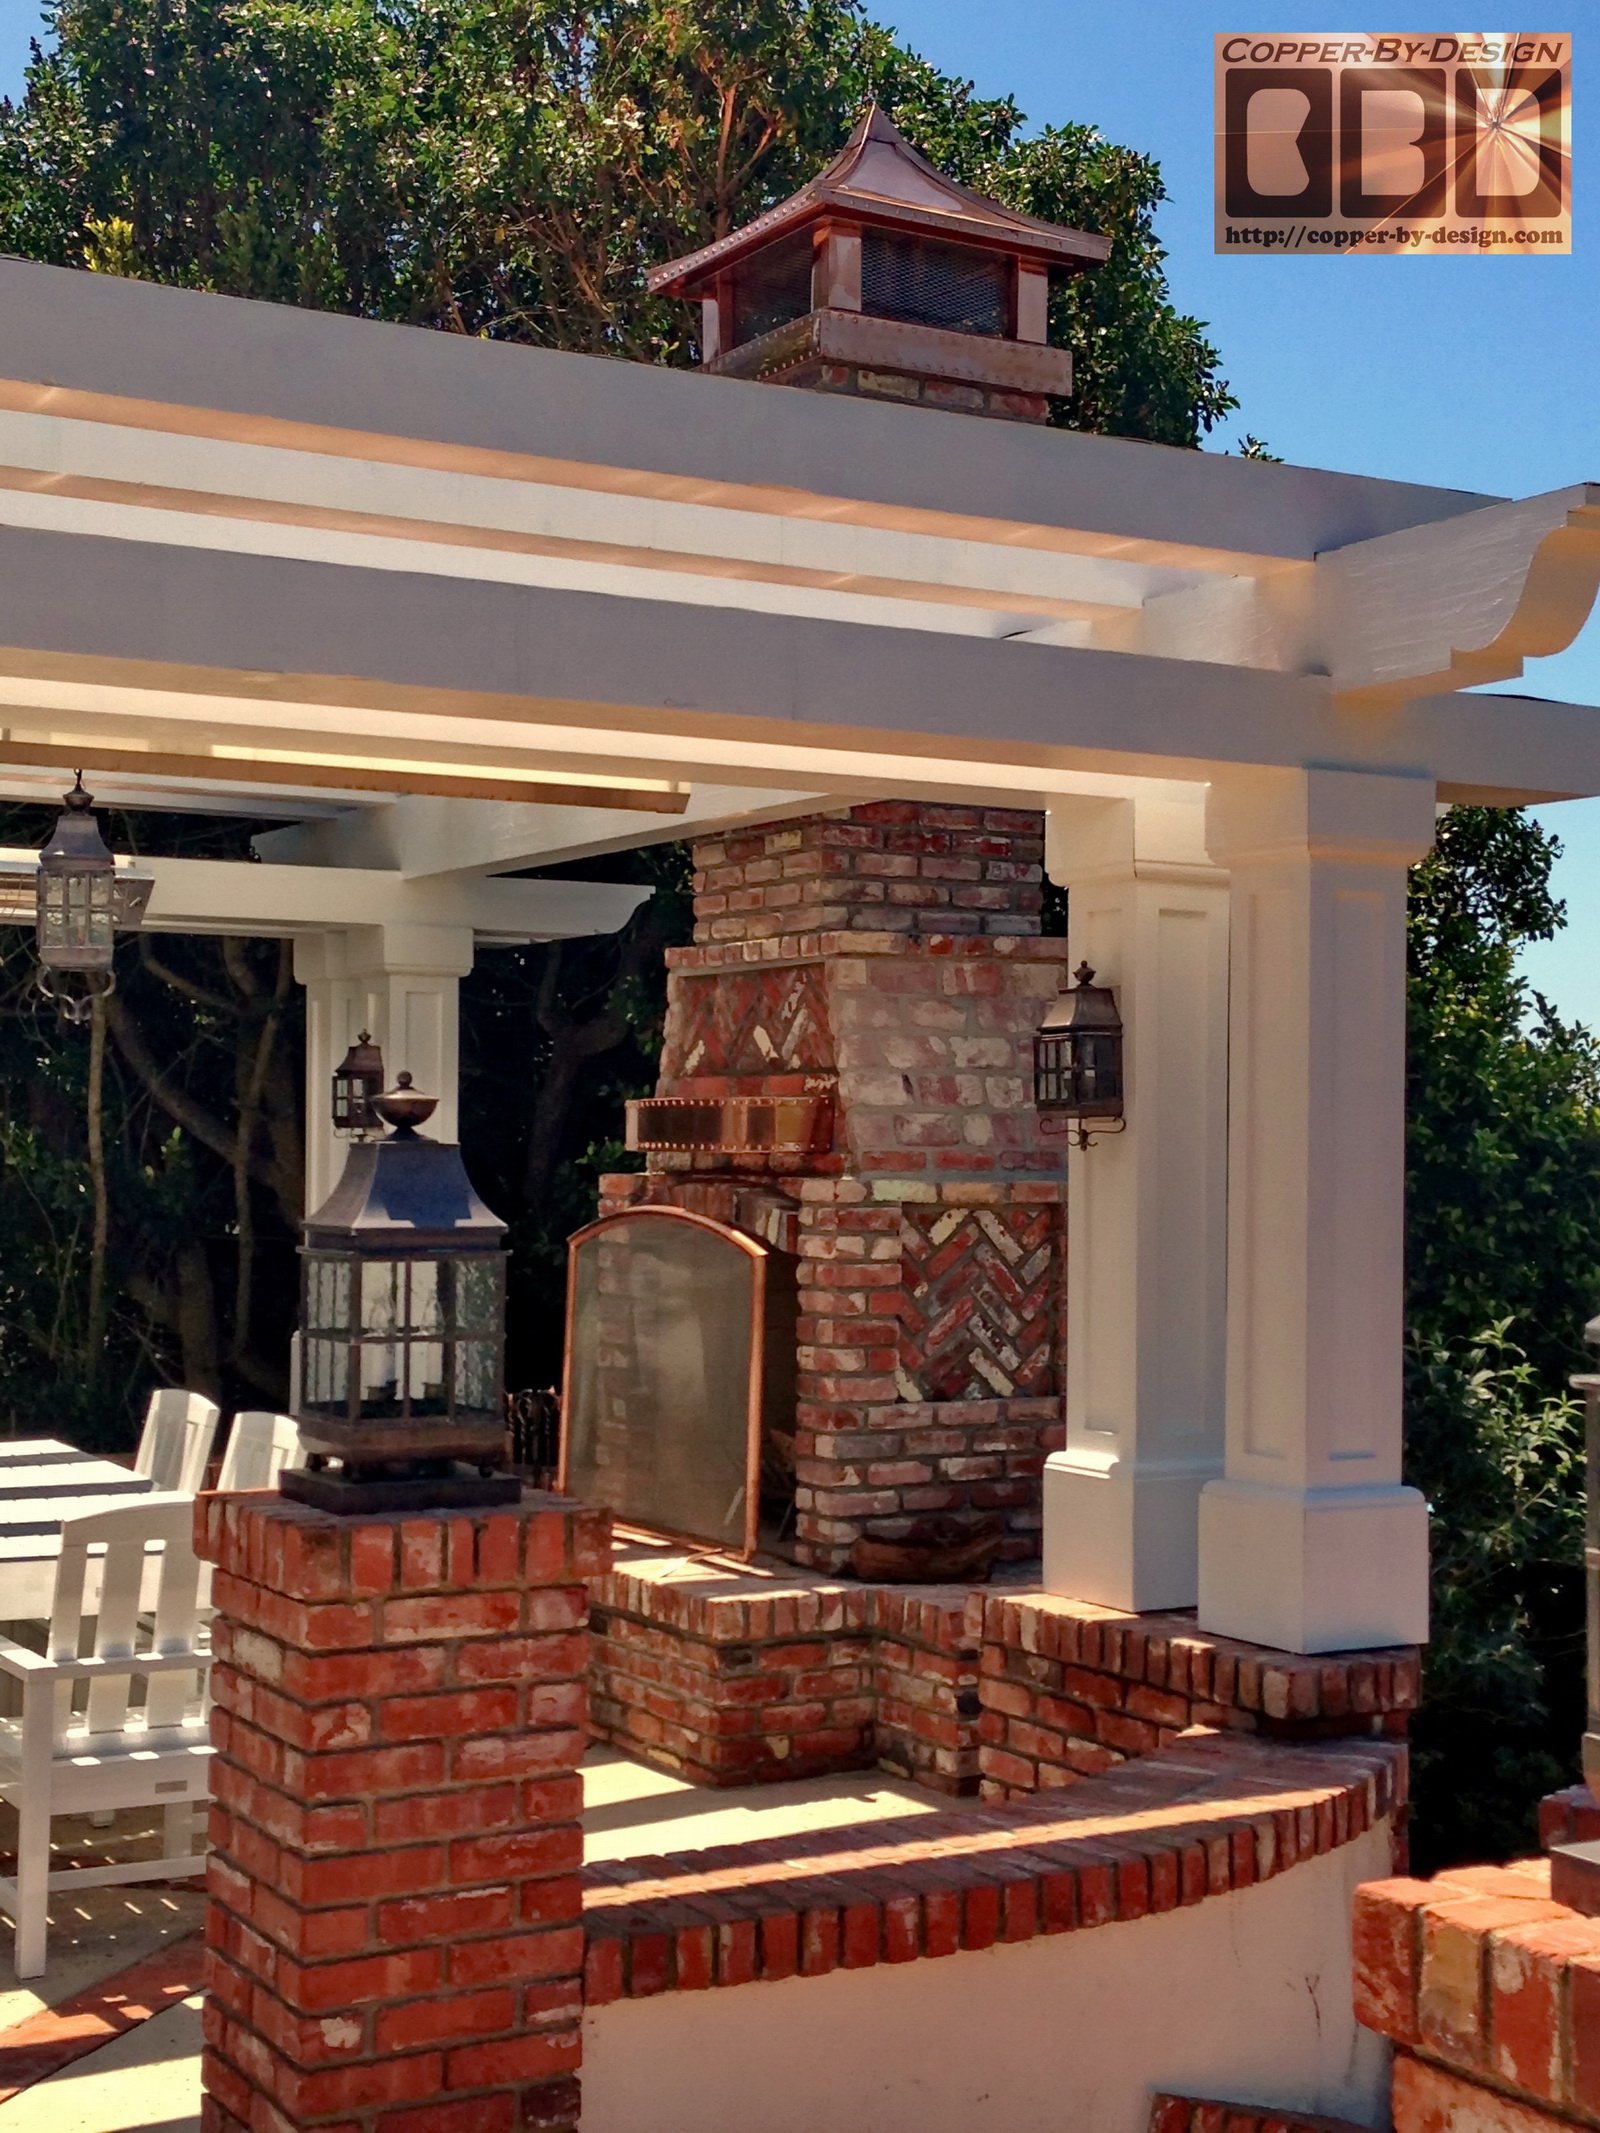
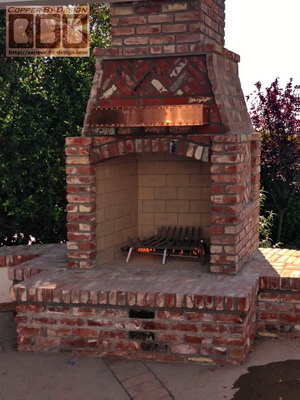
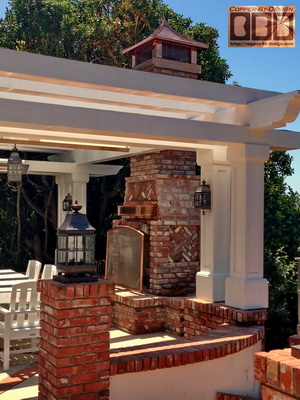
This client was kind enough
to send us these shots of the pieces we made for them installed.


From: "Al Rossi" <AlR@rdfcpas.c*m>
Date: Sat, 20 Apr 2013
David,
All looks great!
Thought you would like these shots.
Albert Rossi, CPA
Managing Partner
Rossi Doskocil &
Finkelstein
|