|
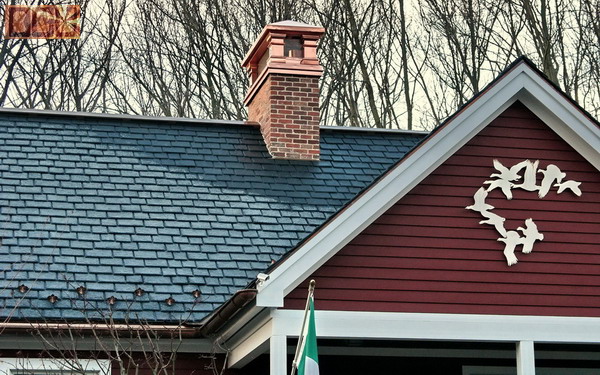
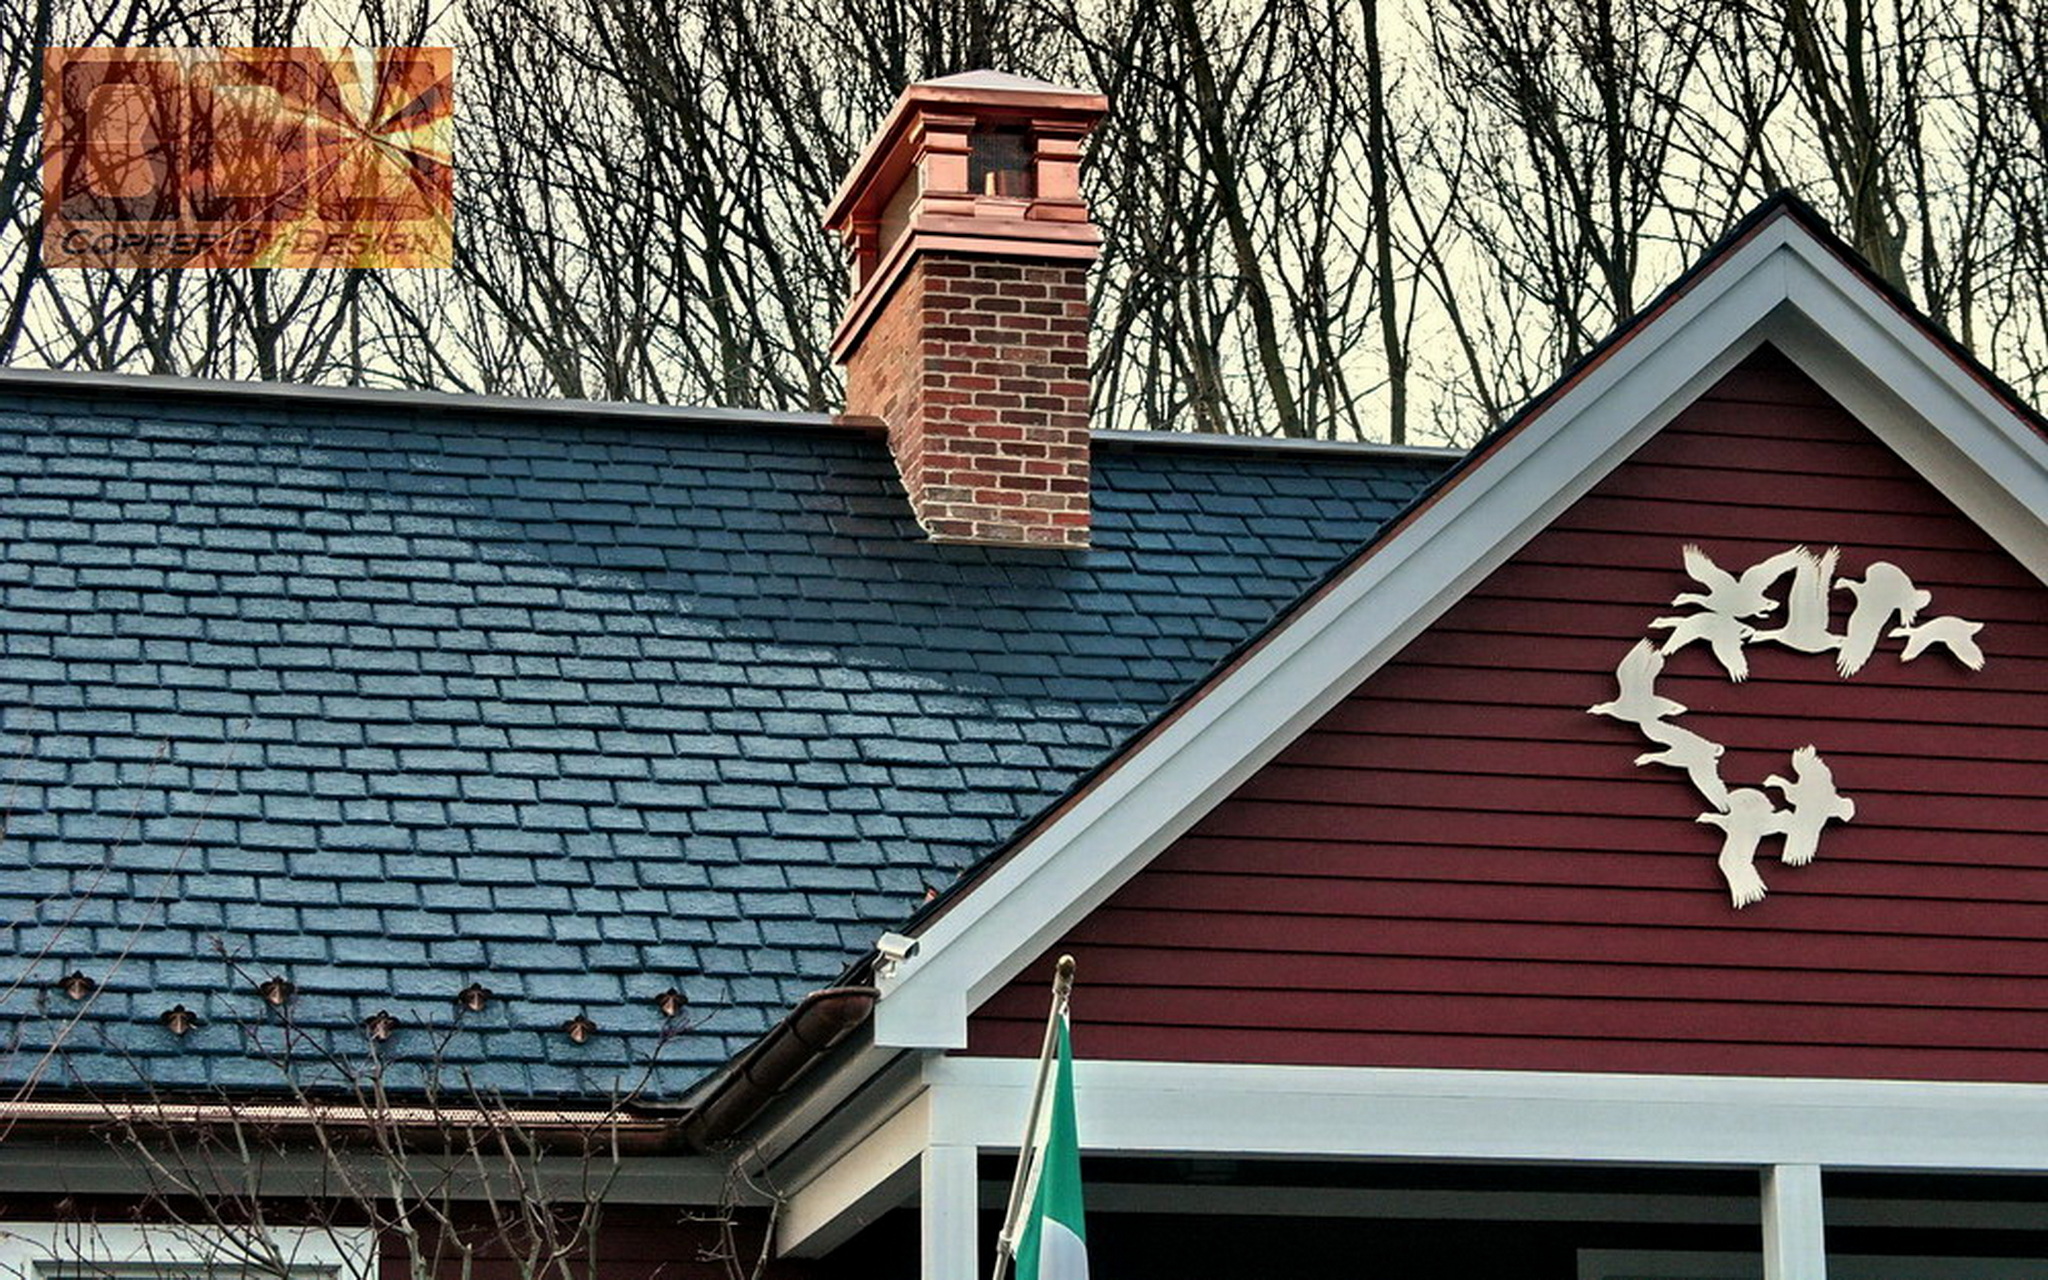
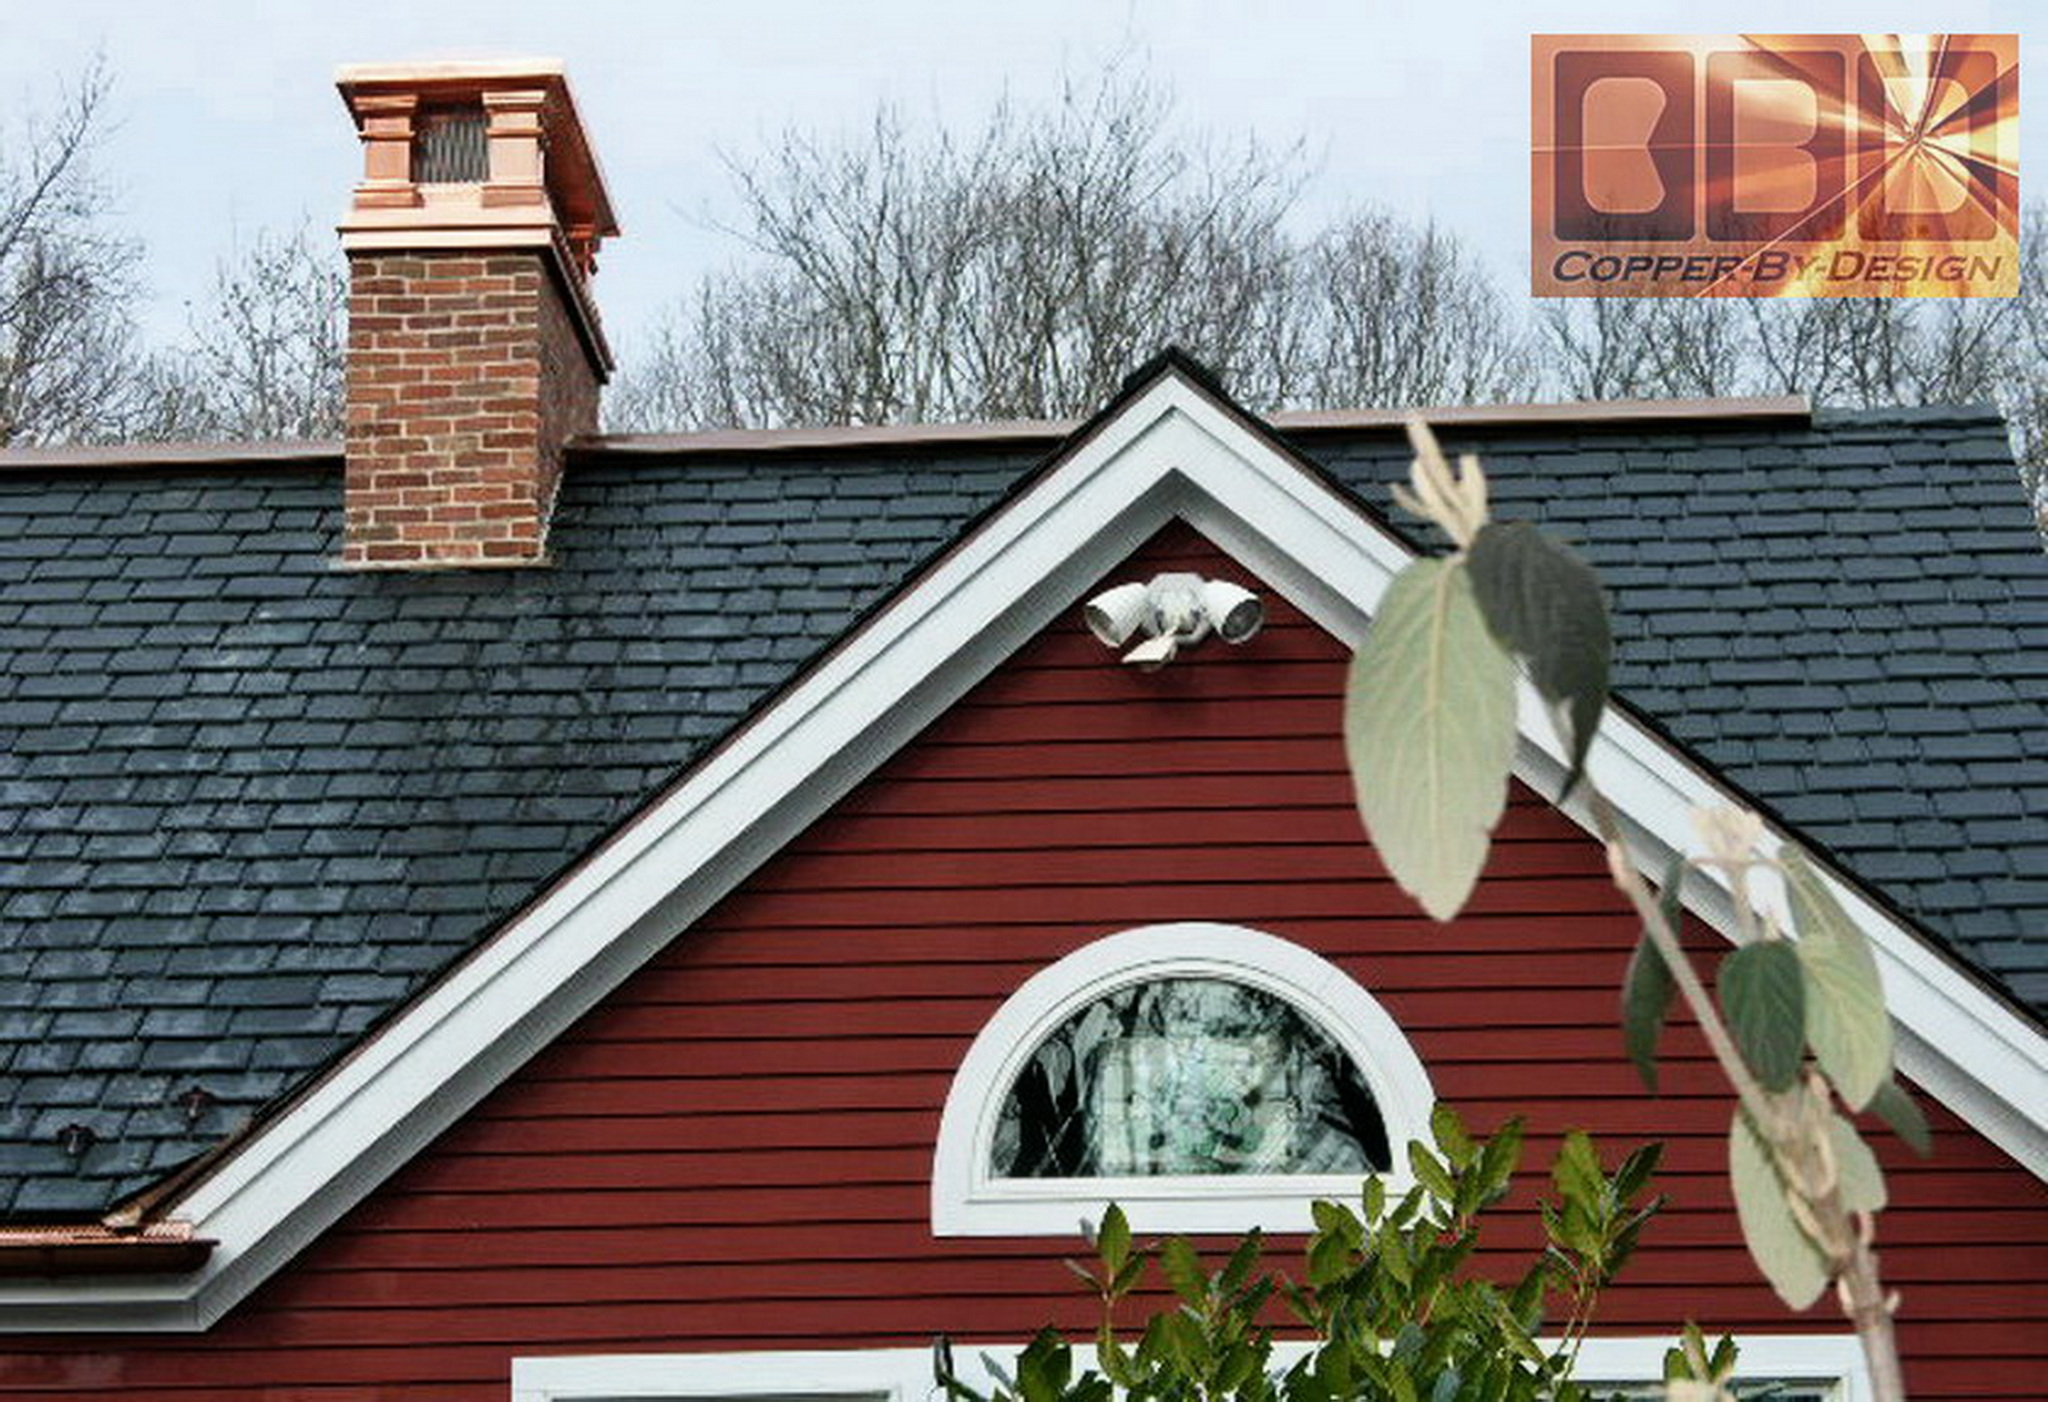
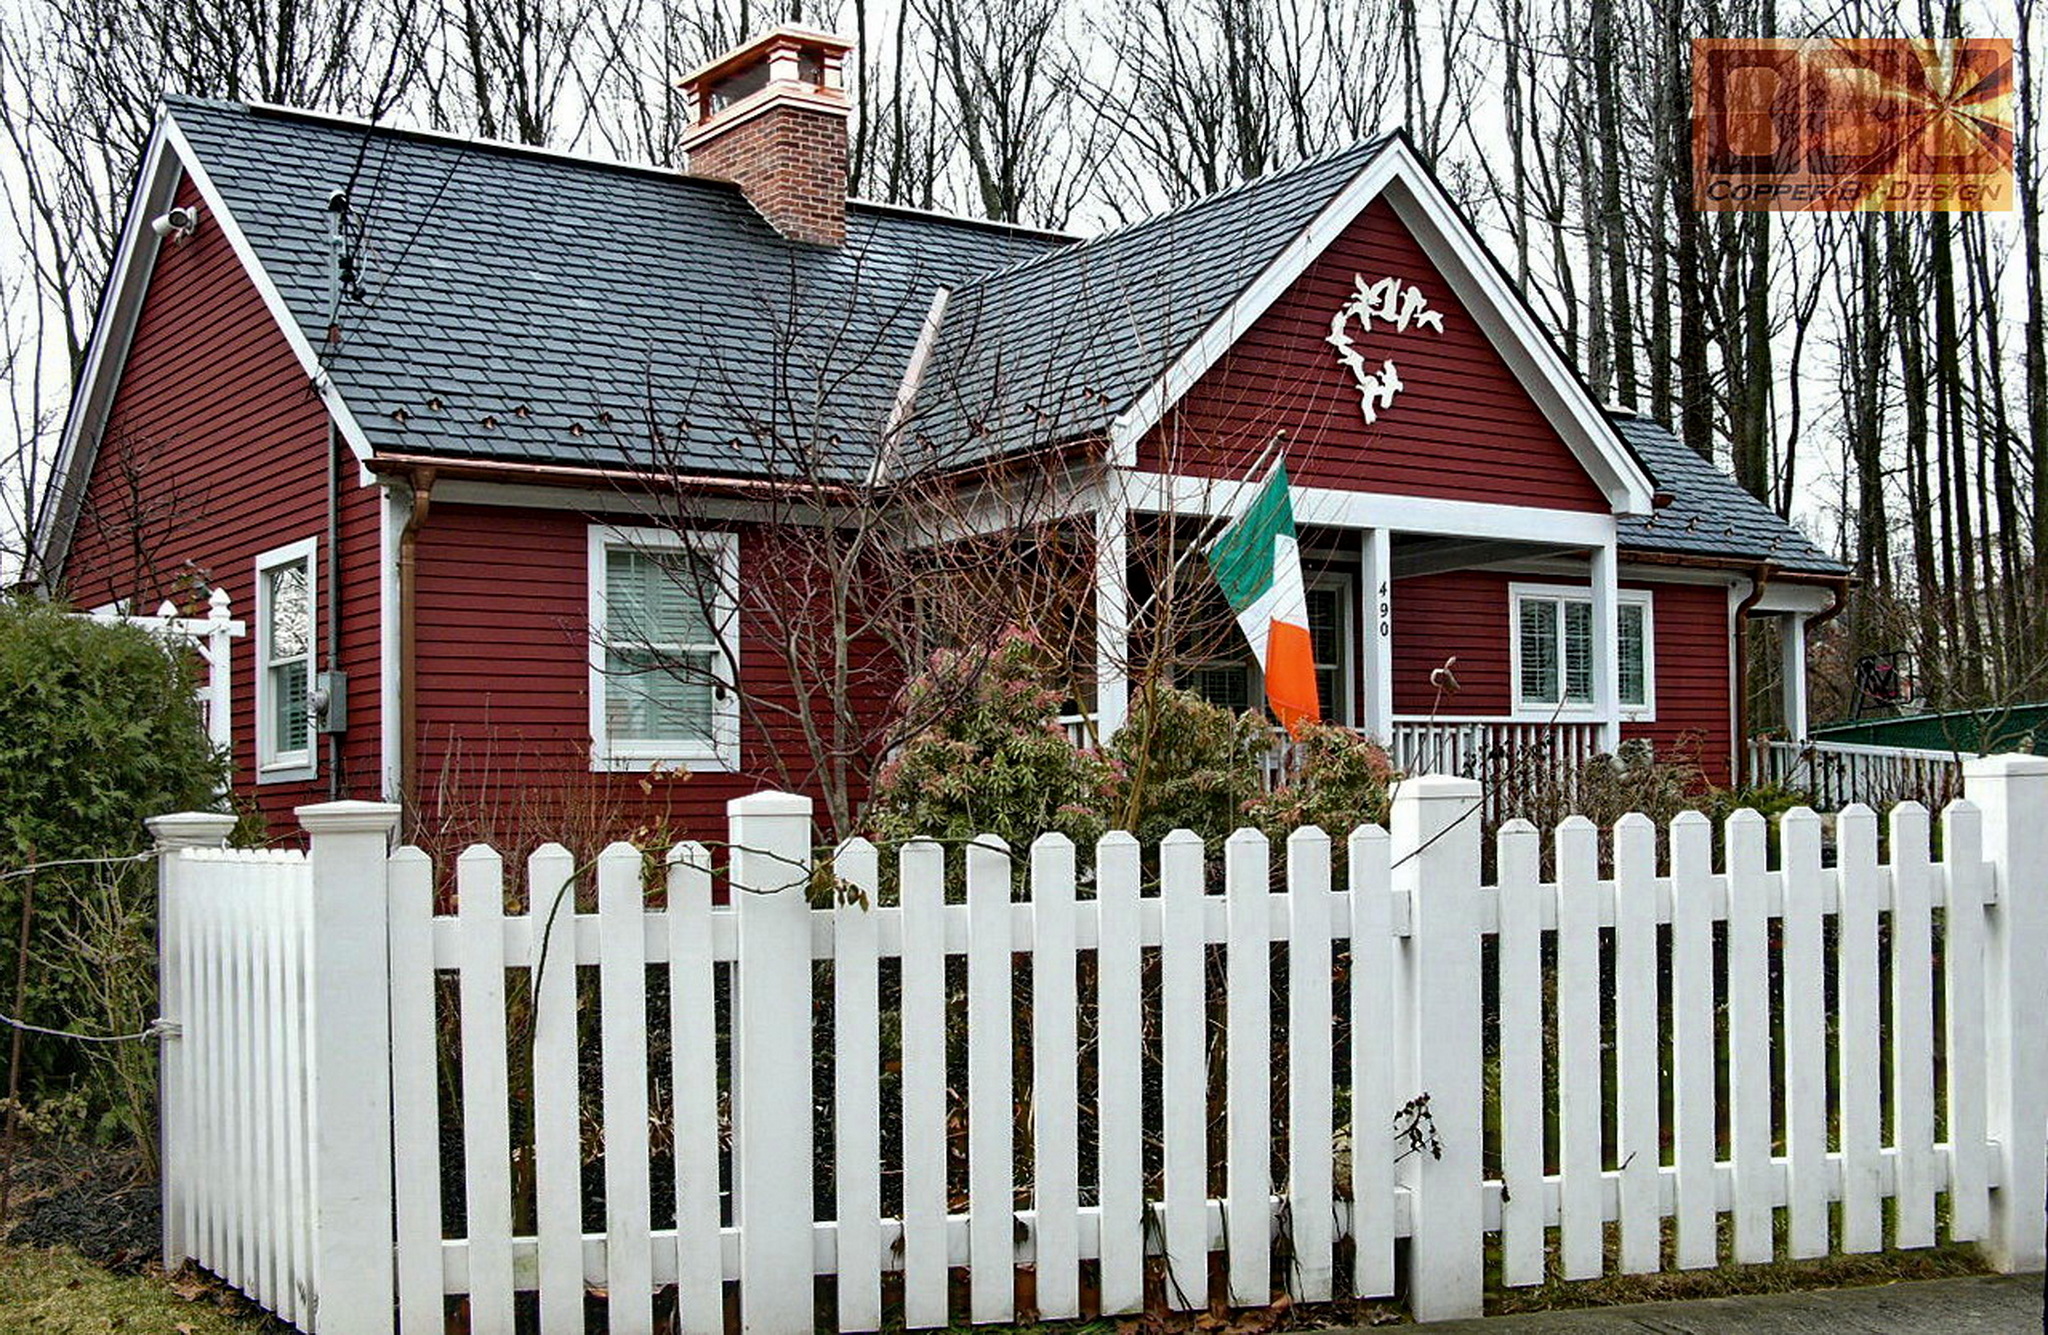
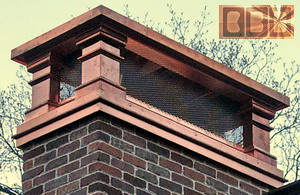
This copper chimney
cap projects is for Joe and Mary McLaughlin in Staten Island,
New York. They had just a metal chimney pipe sticking
up out of the roof. He had a contractor build a large rectangular
wood box around it and cover it with a thin layer of brick.
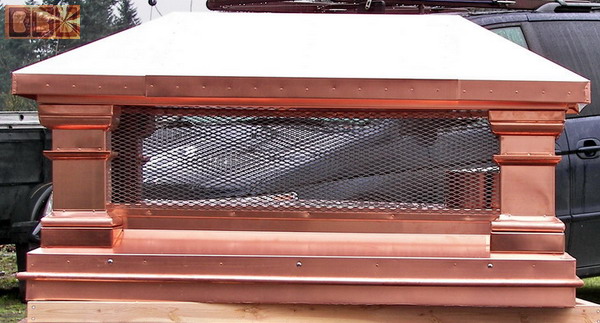
To cover this new traditional
looking chimney we worked with them for 3 months to finalize this
design, that best suited their needs and desires, and this was the
final diagram I made to represent the plan. as you can see here
the final production was pretty much just like the diagram.
|
|
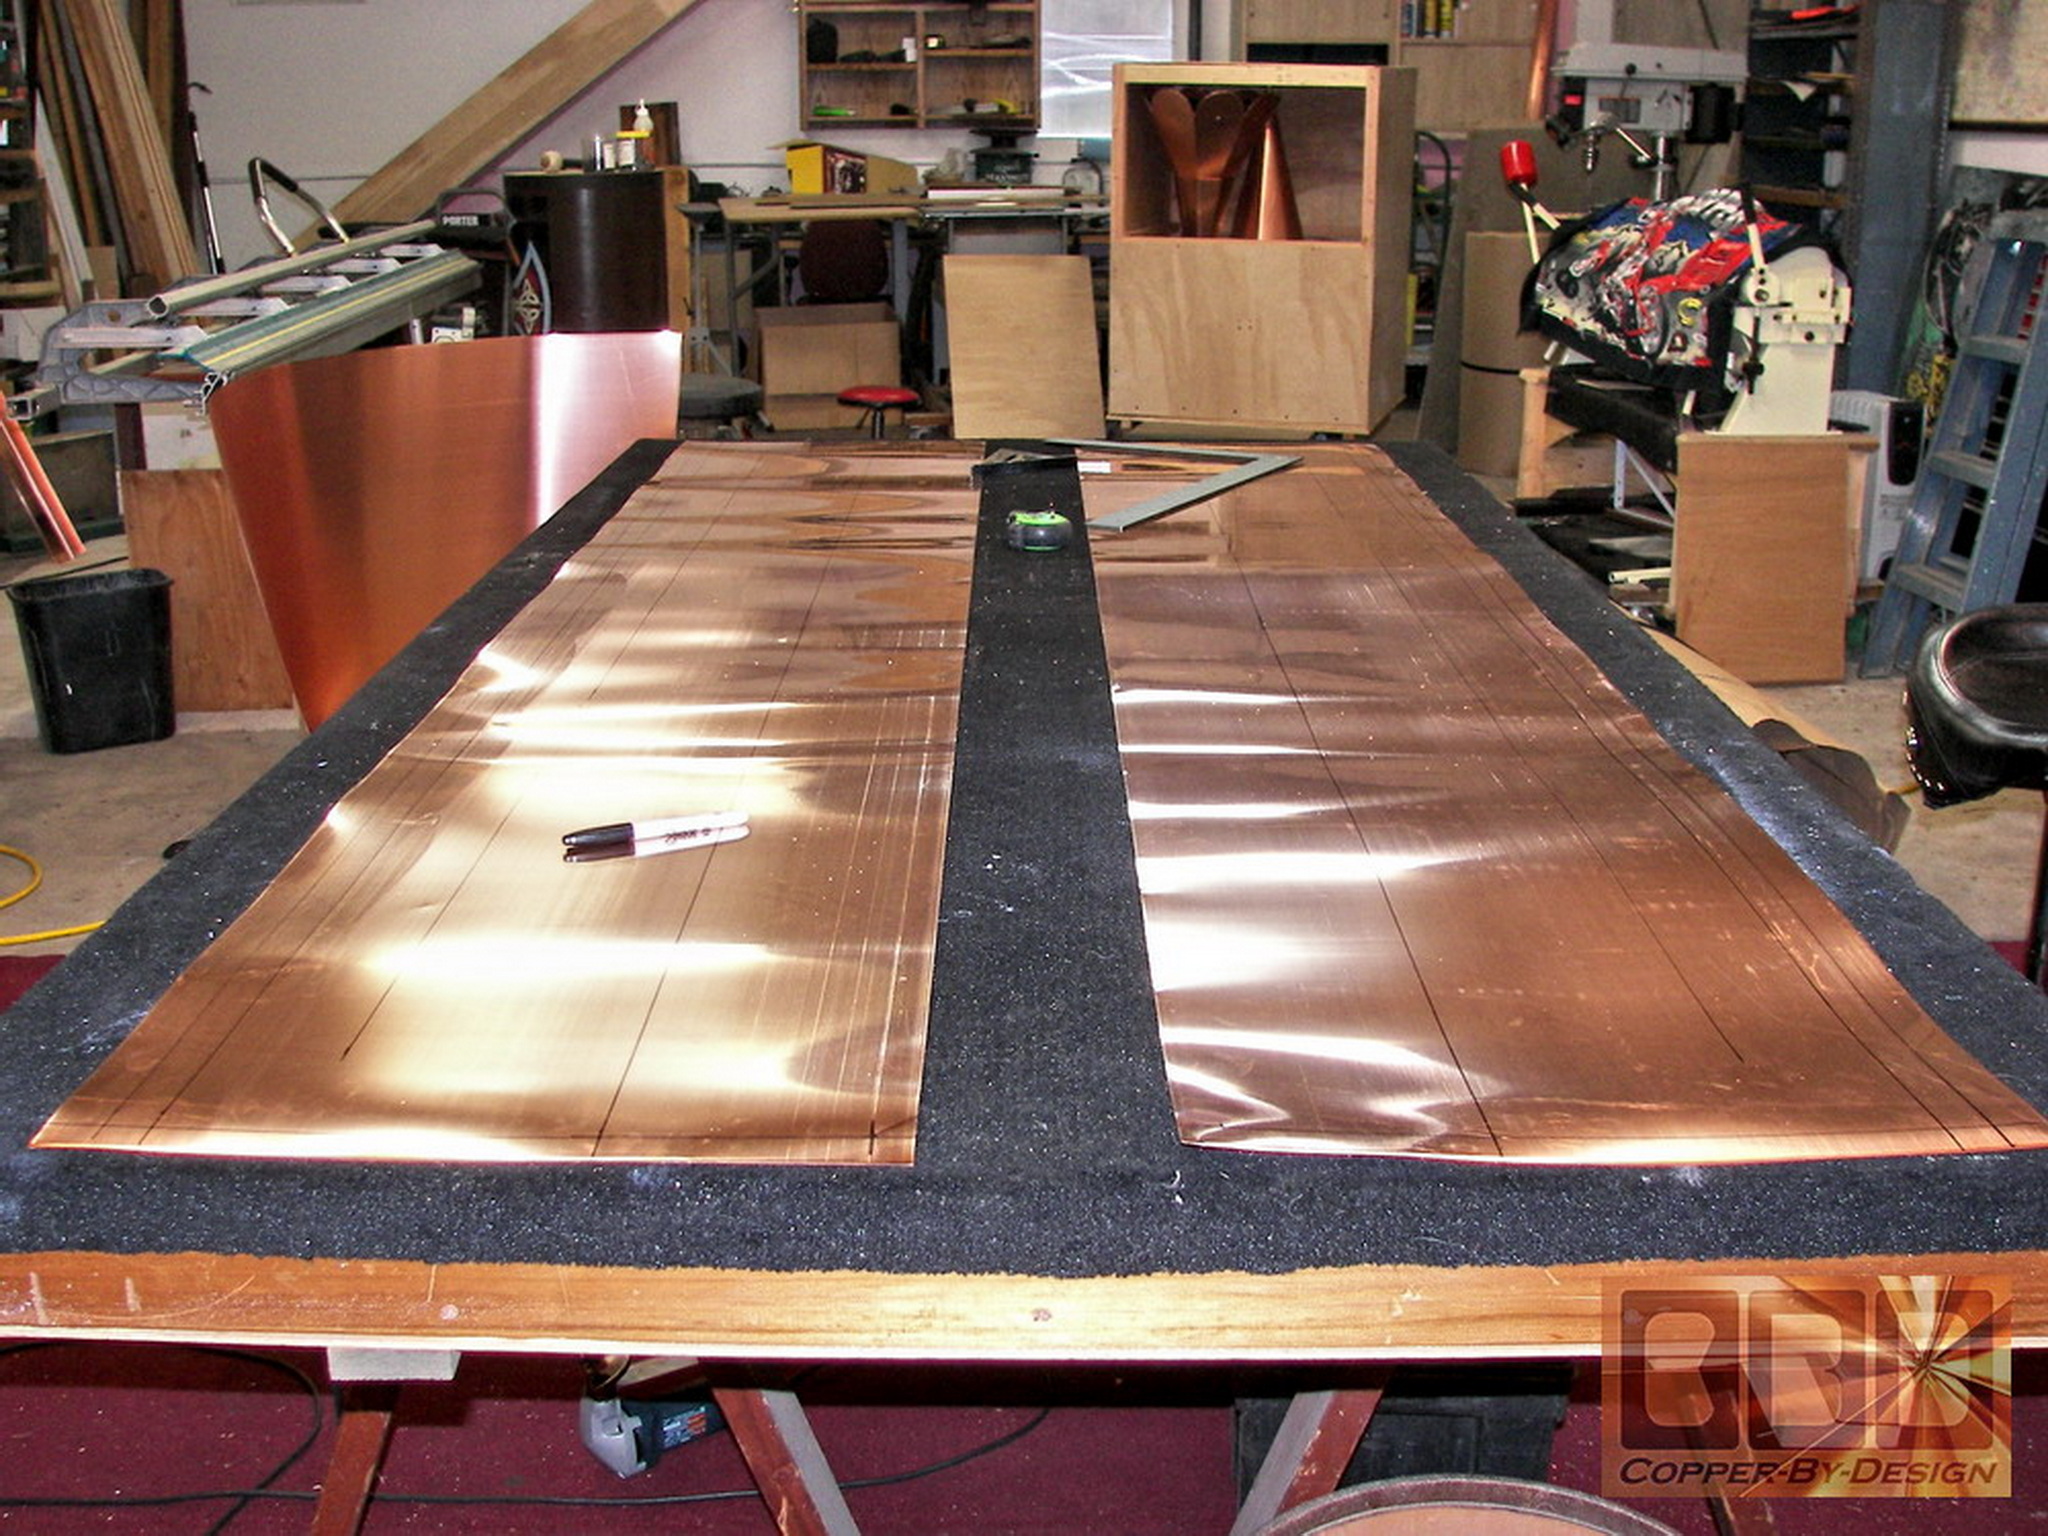
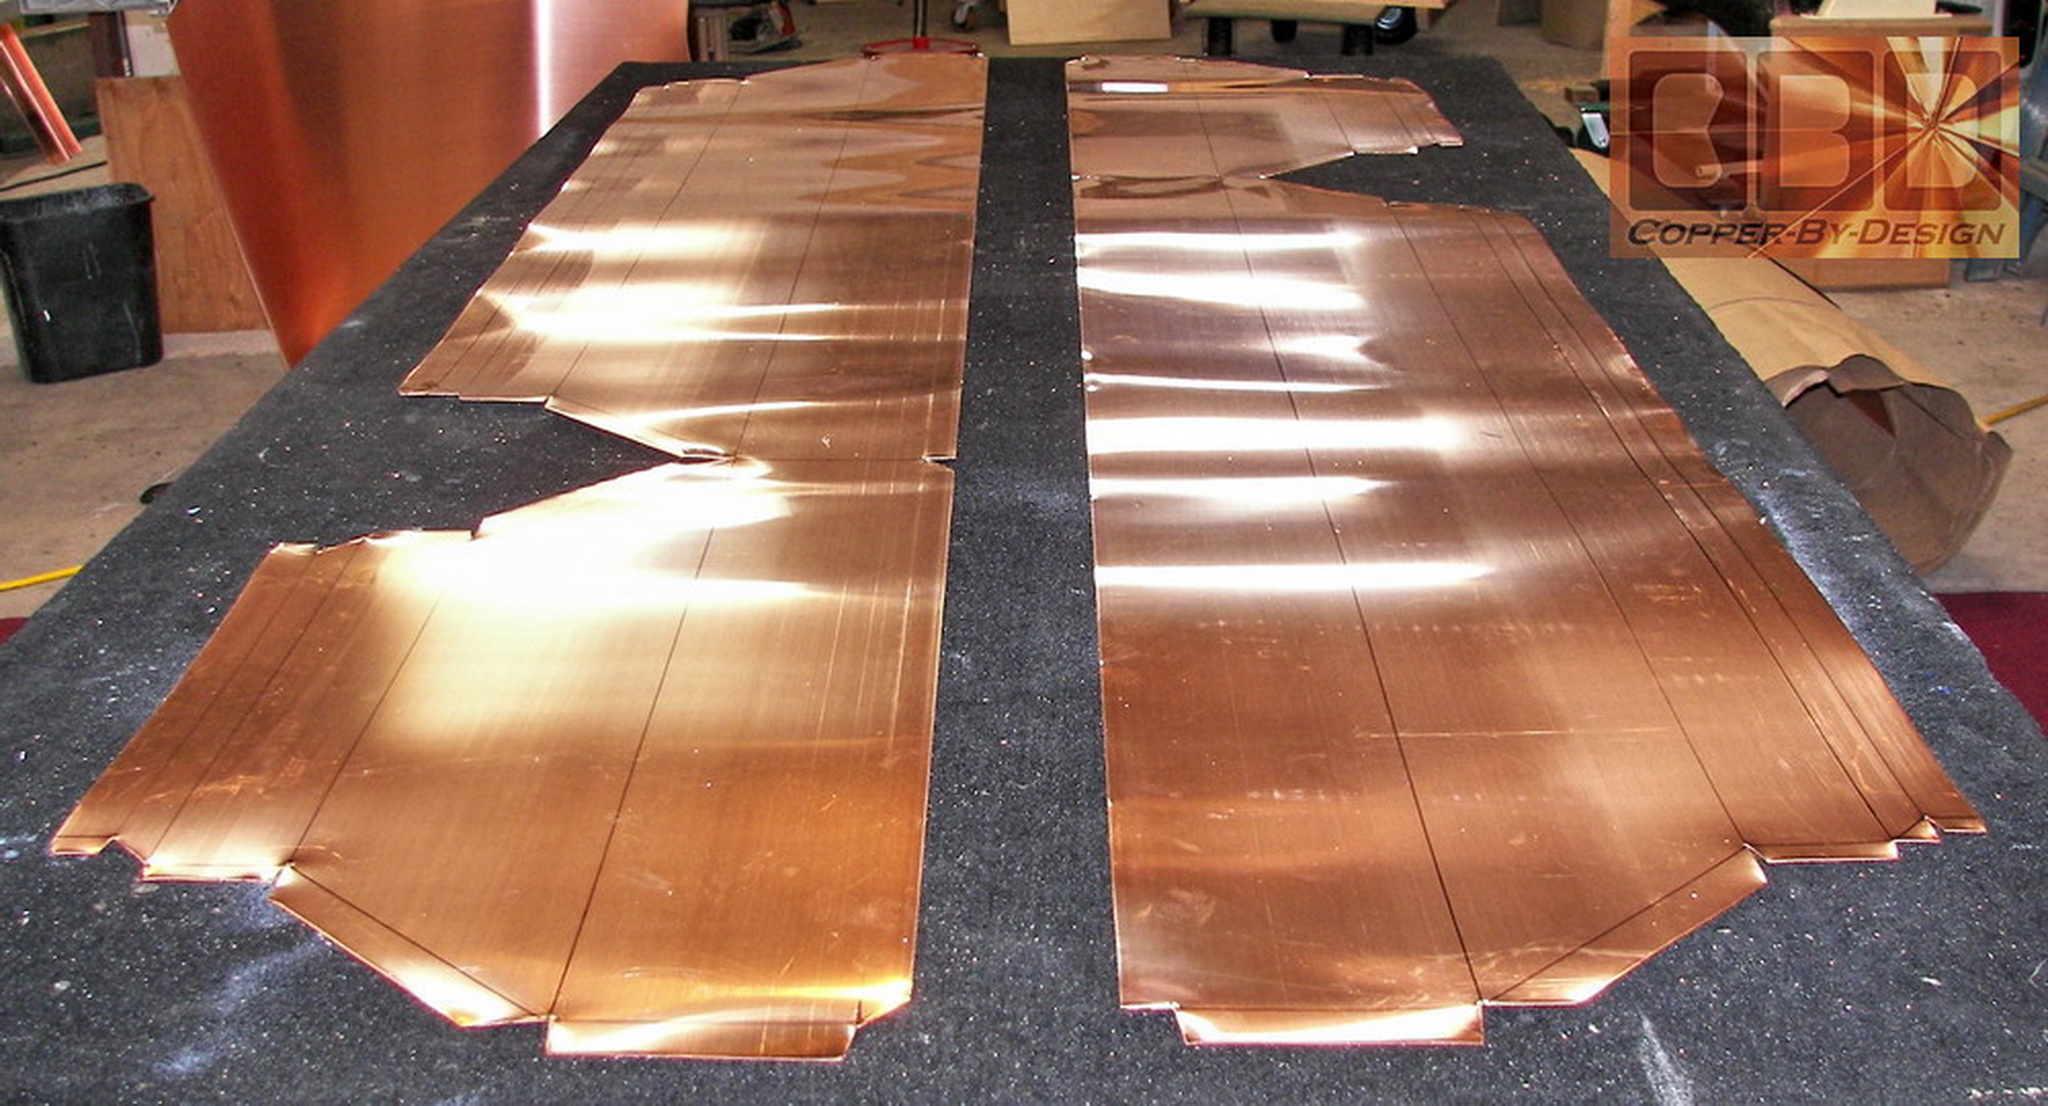
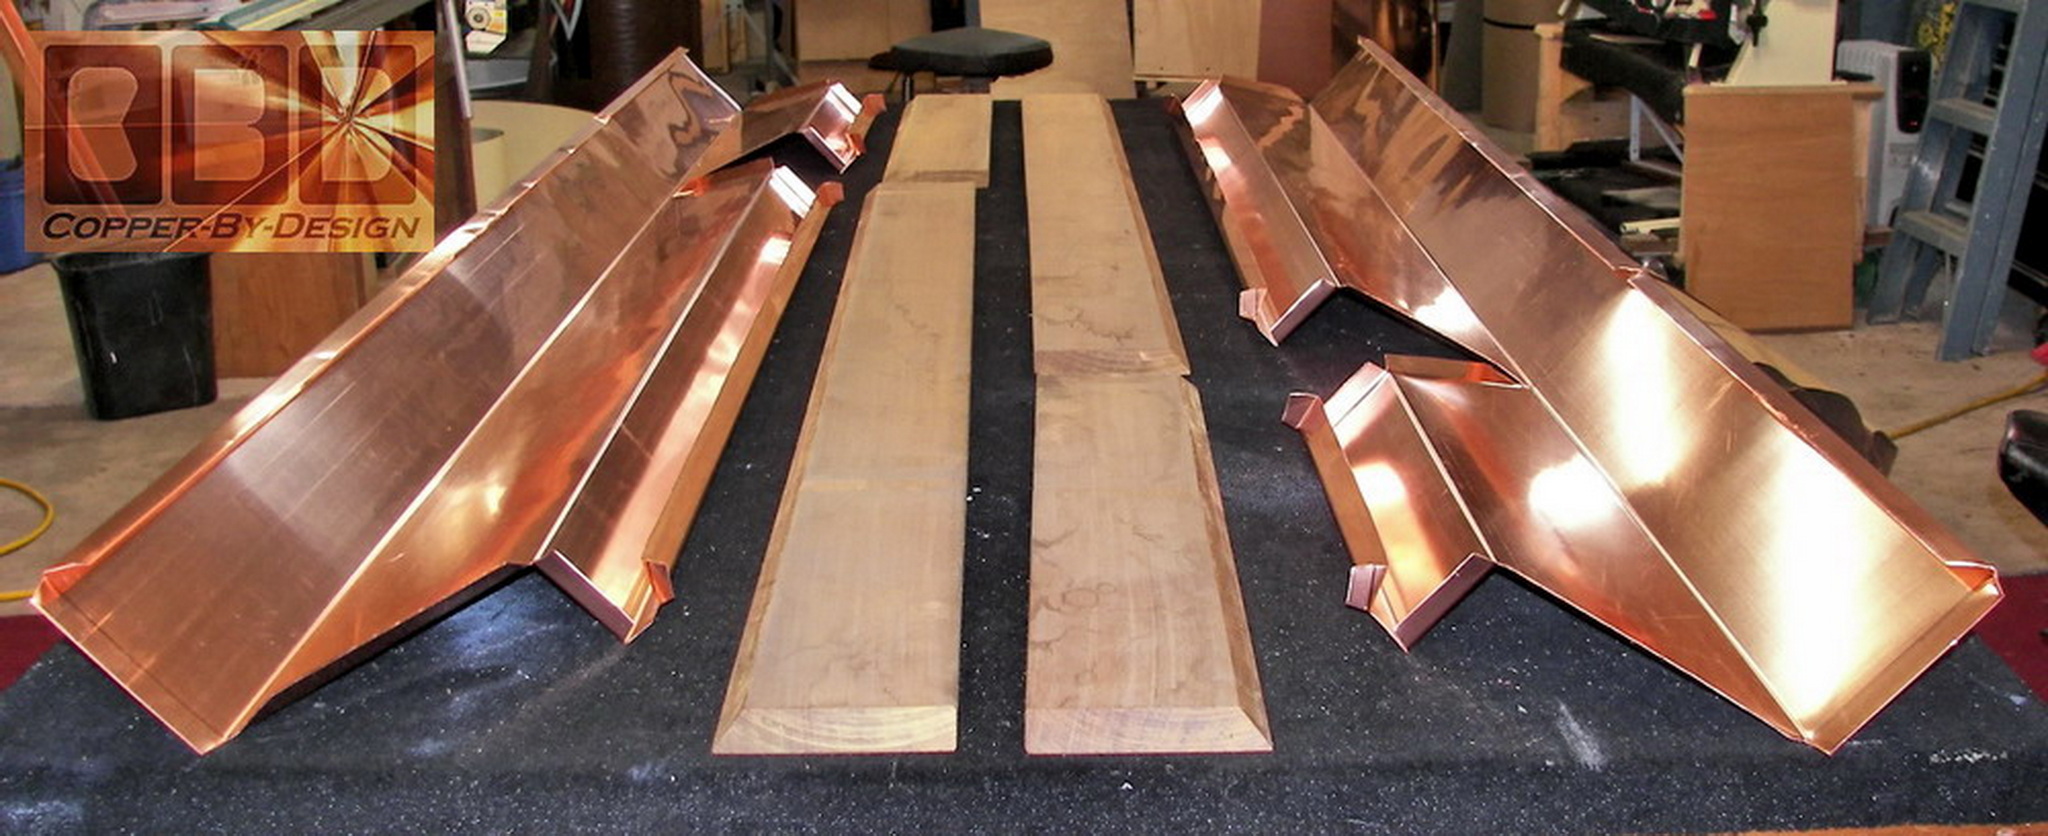
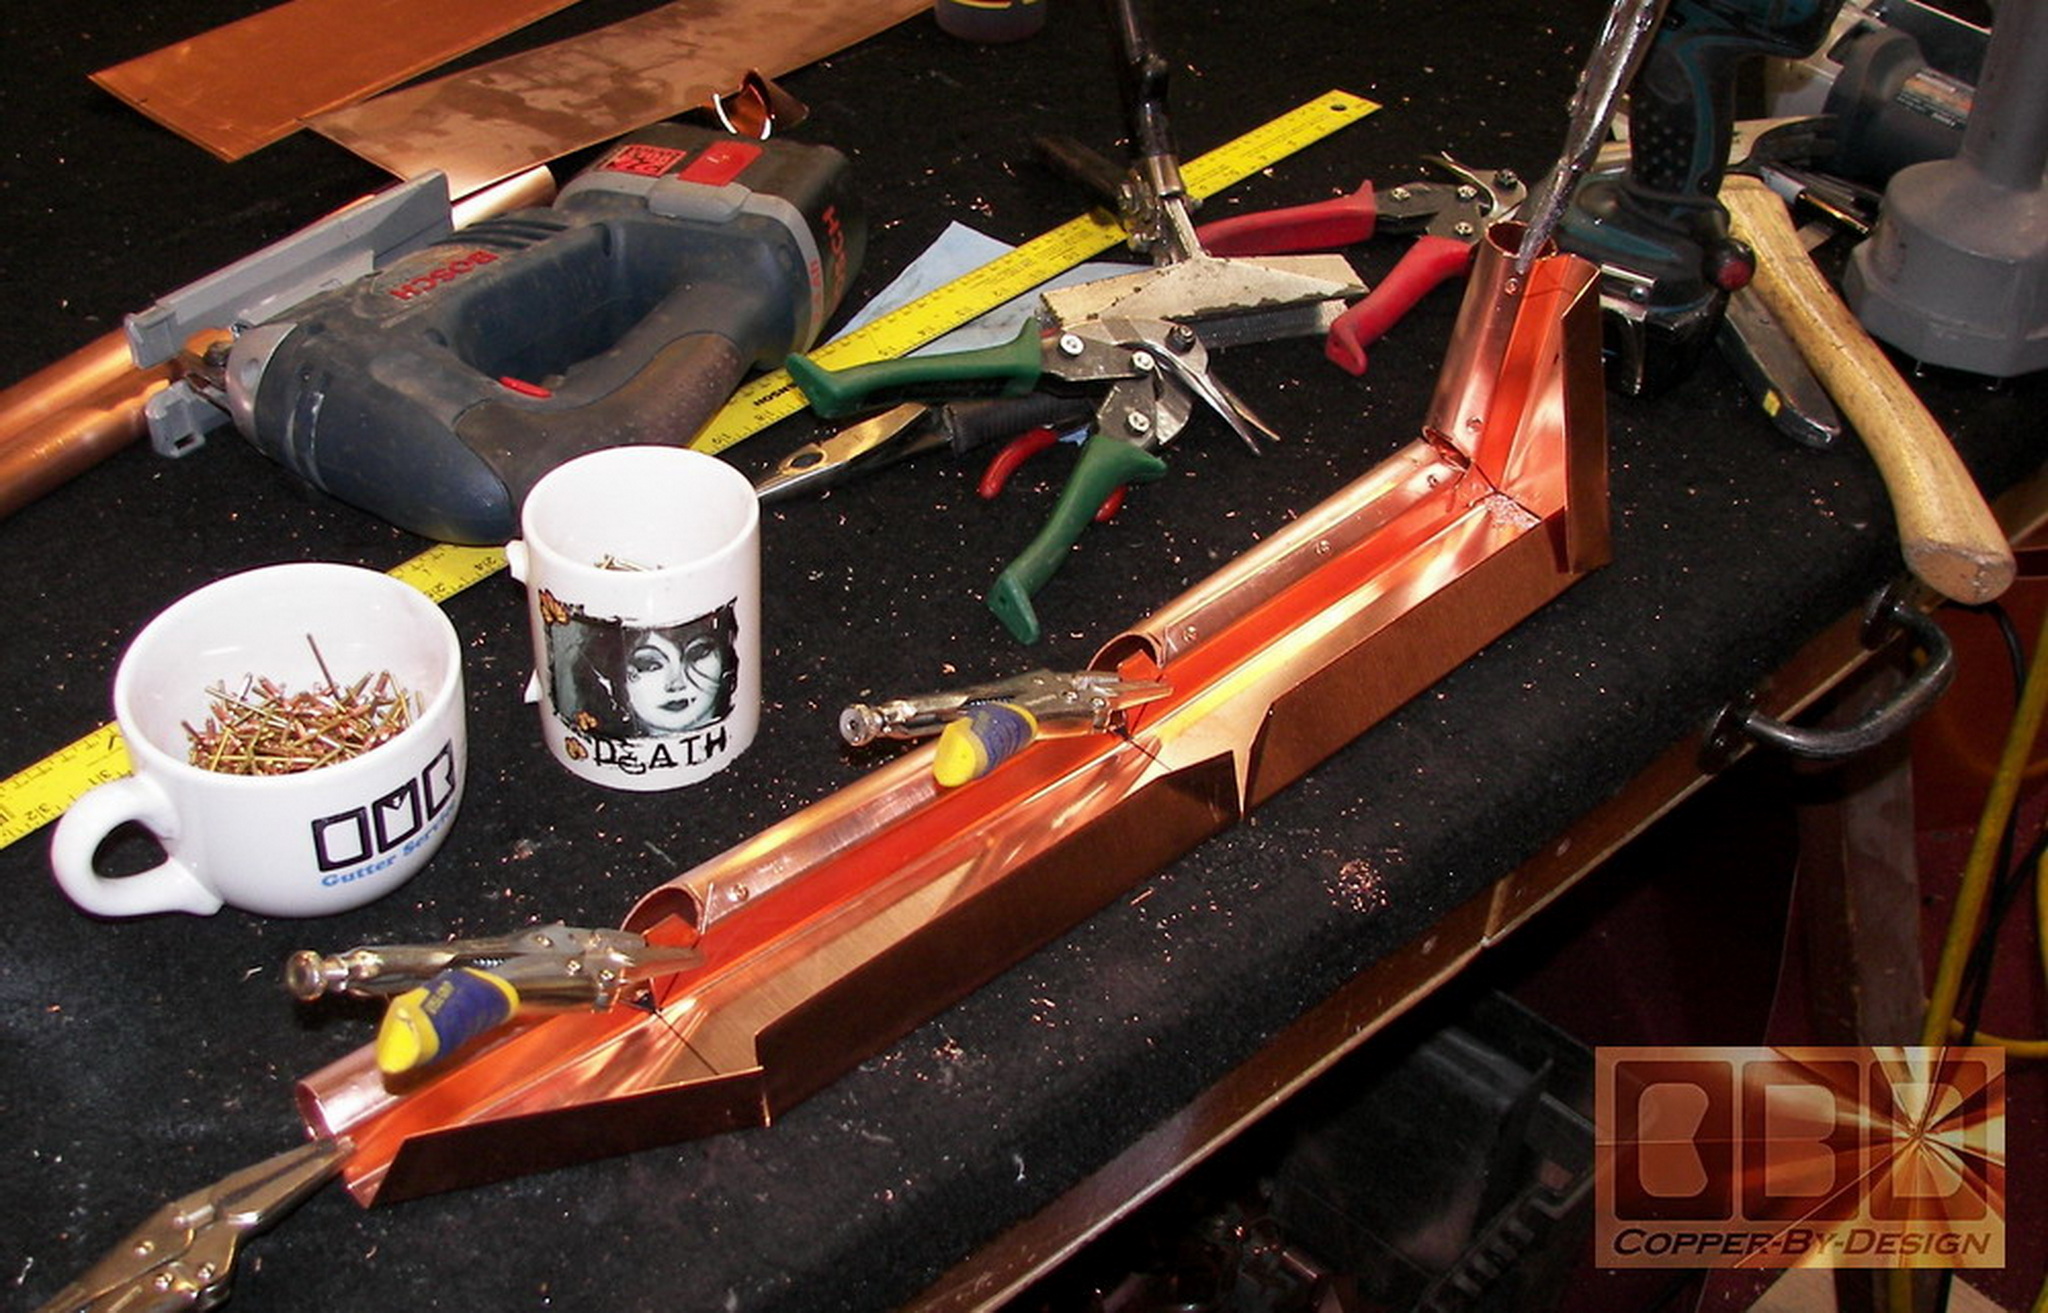
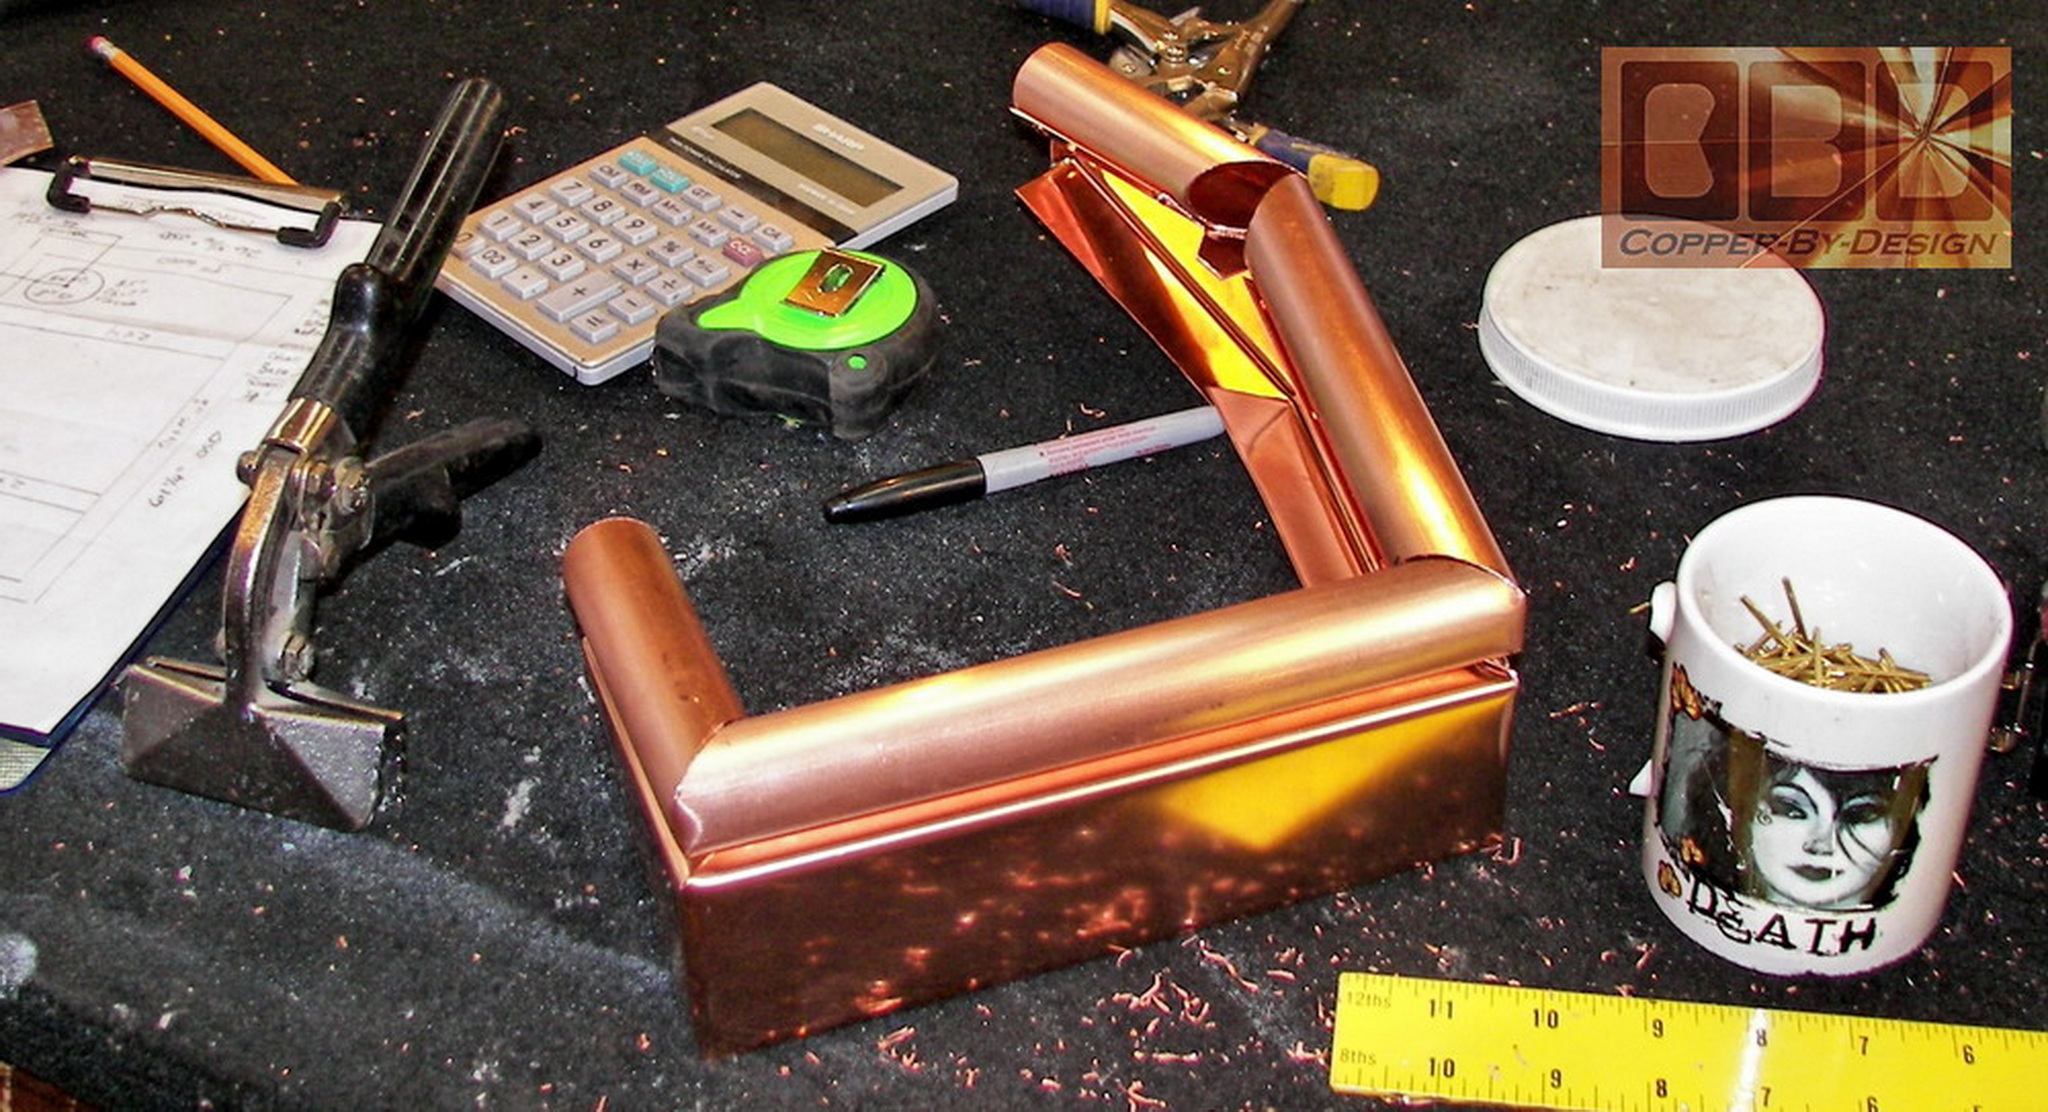
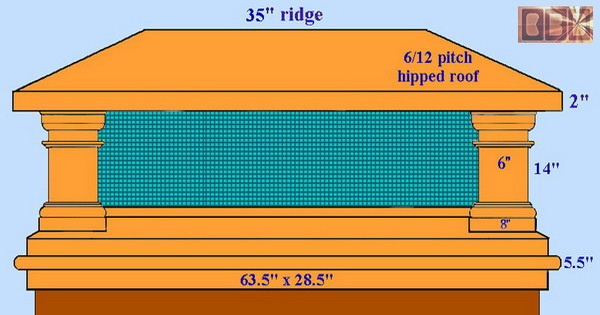
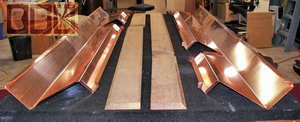
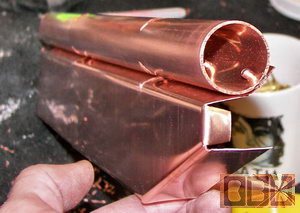
This is the flat sheet
of copper slit in half. Then I draft out all
the bends and cuts to be made. Then I bent them into shape and cut
the wood support frame using 1x6 Ipe hardwood boards for inside
for added strength, weight, and to thread the screws through for
fastening it to the chimney. Then I seal the 2 halves together to
form the full base/skirt.
|
|
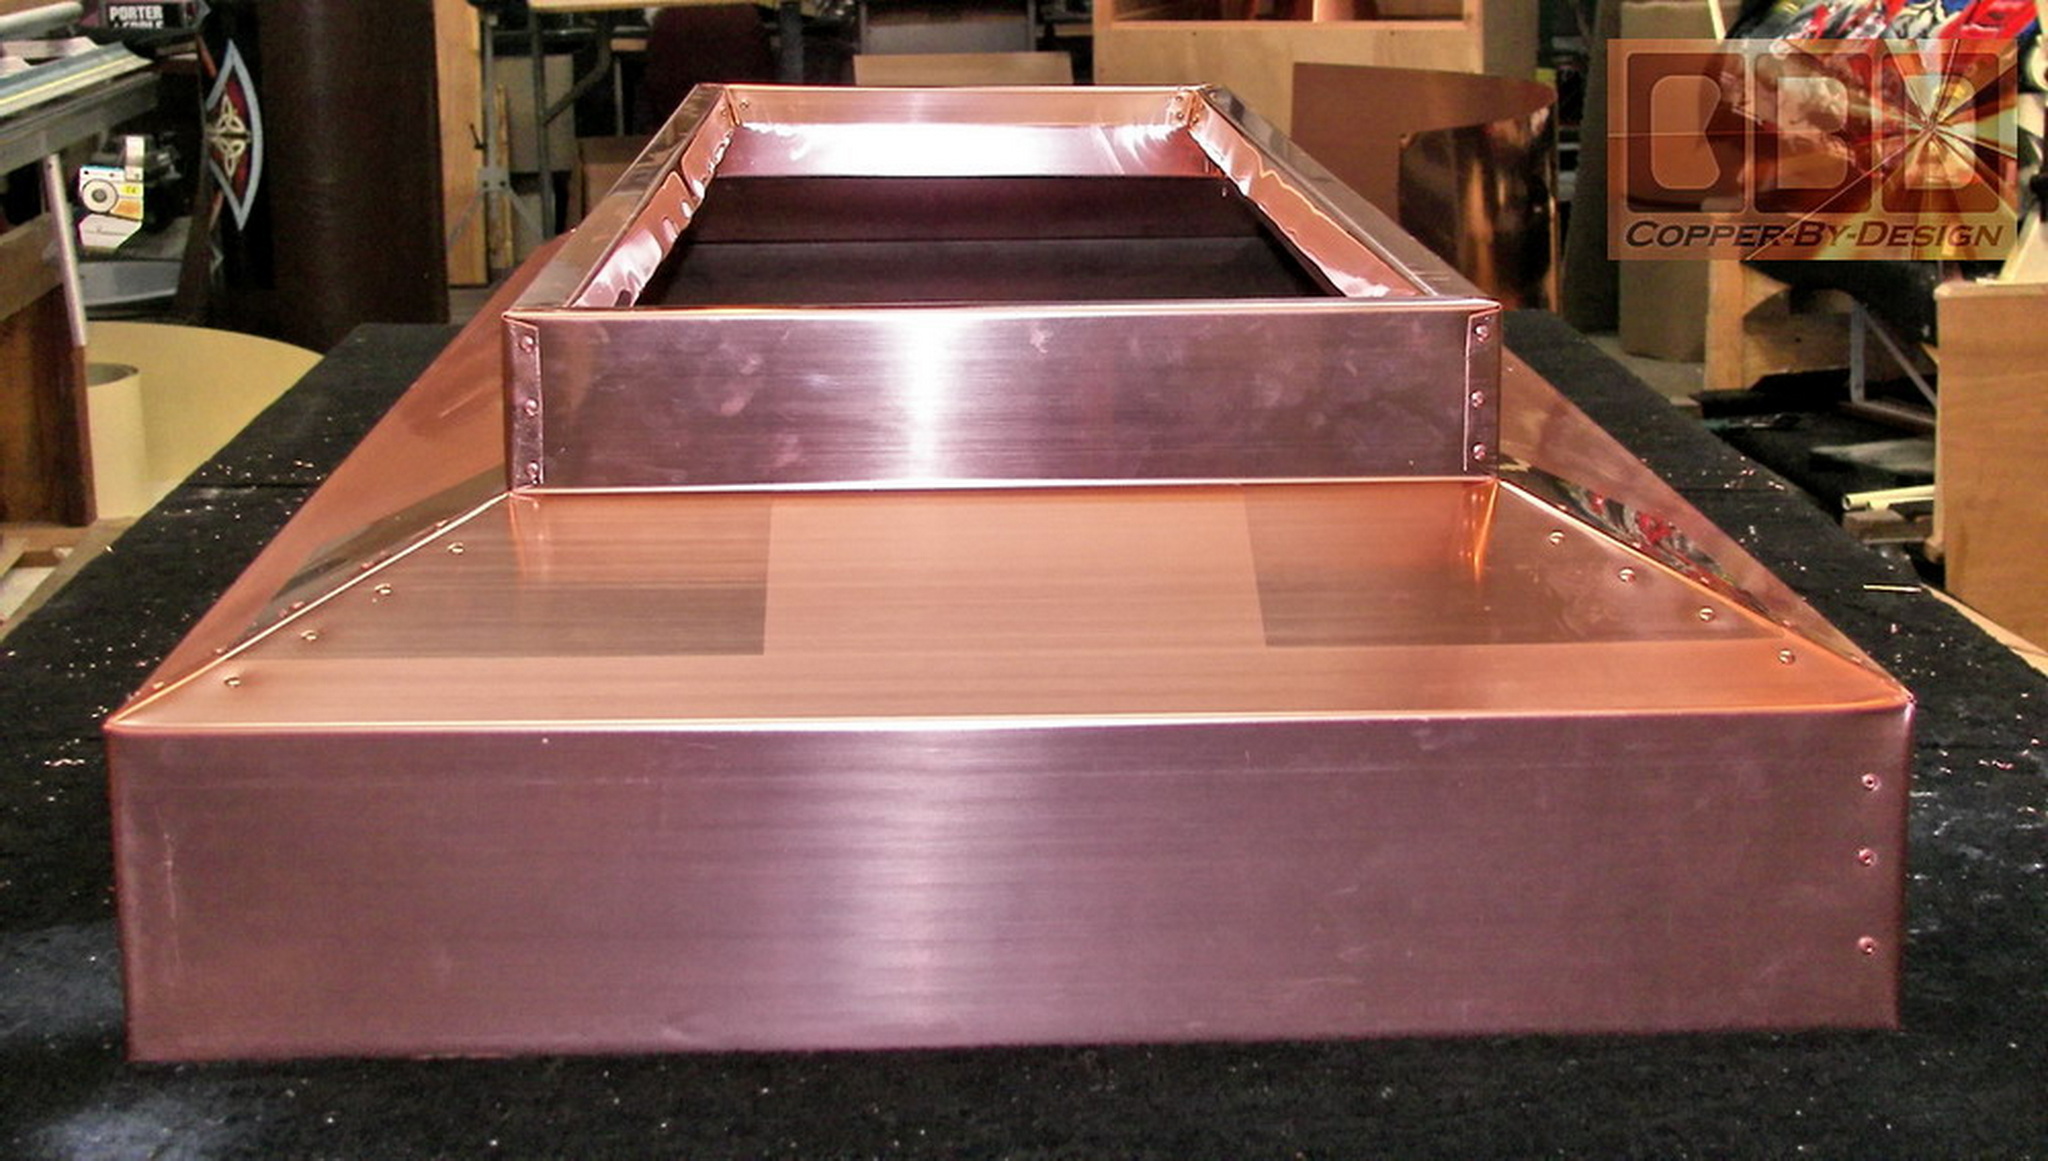
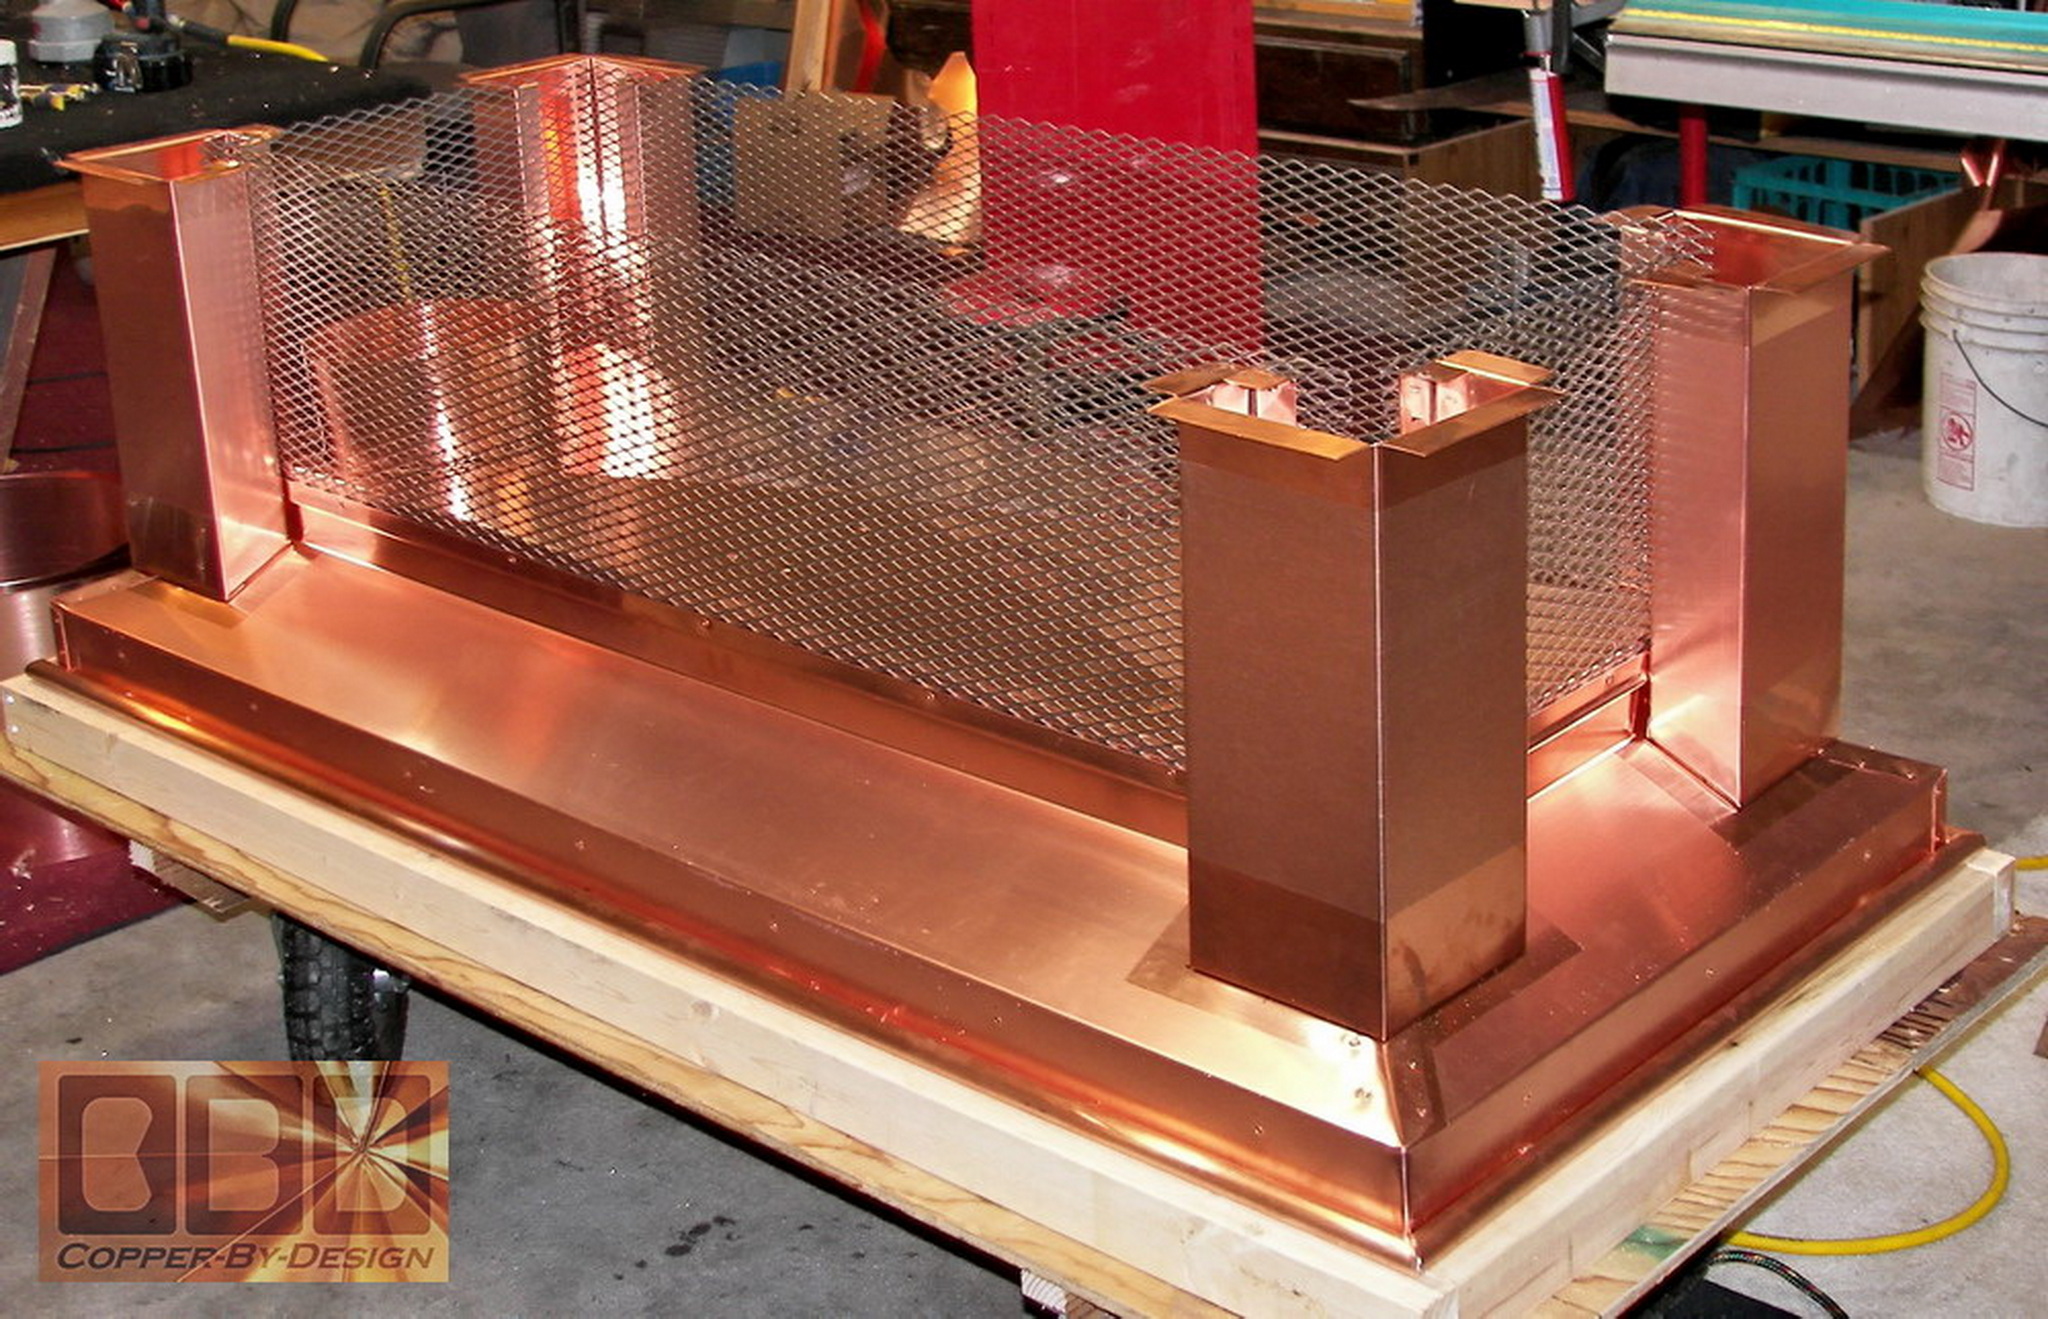
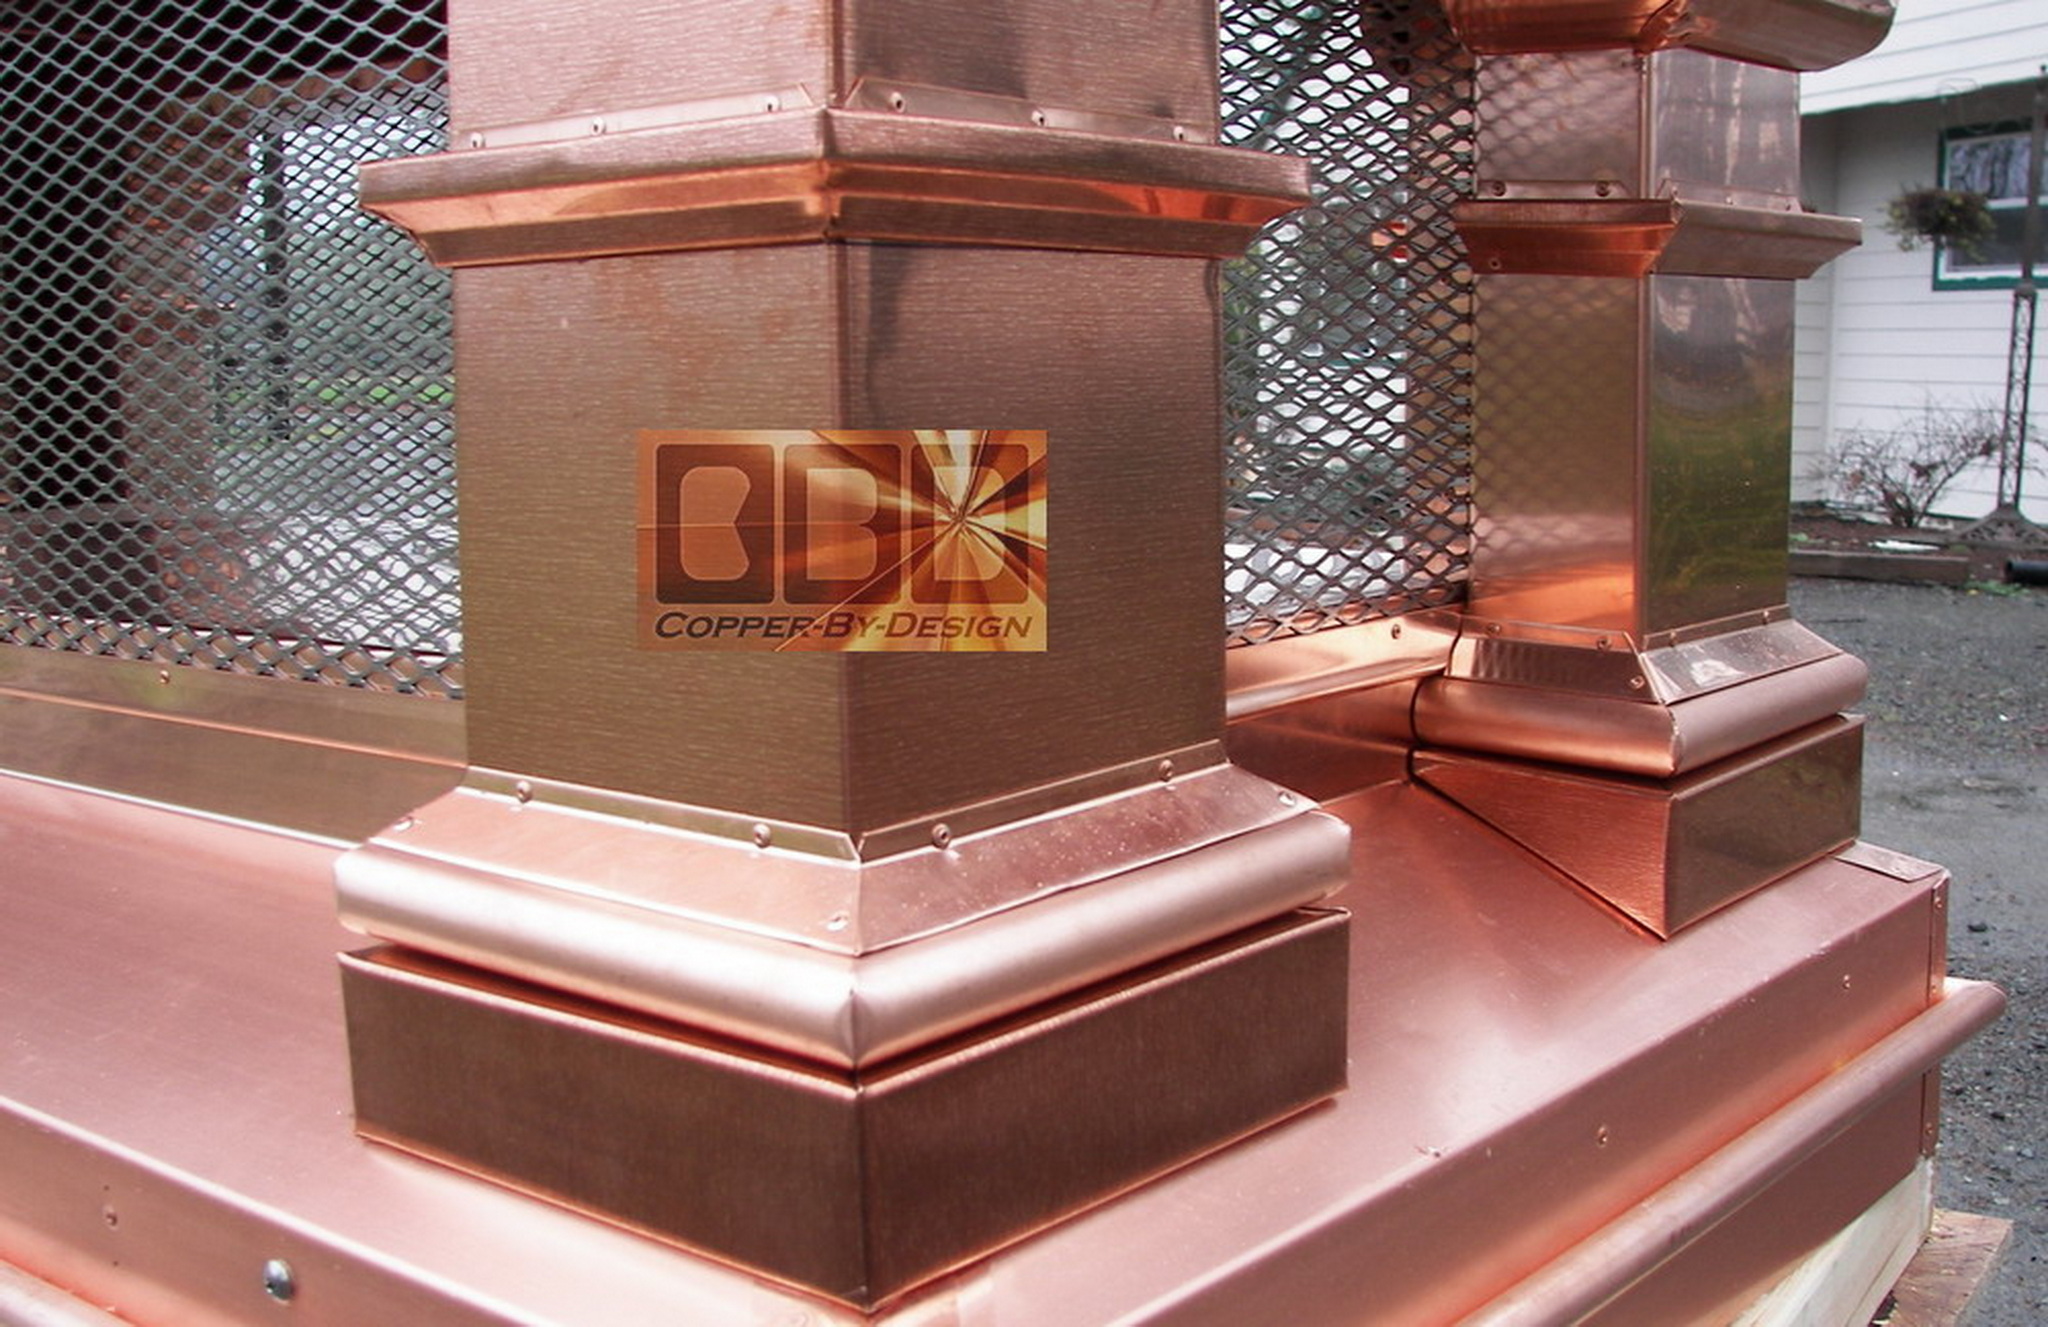
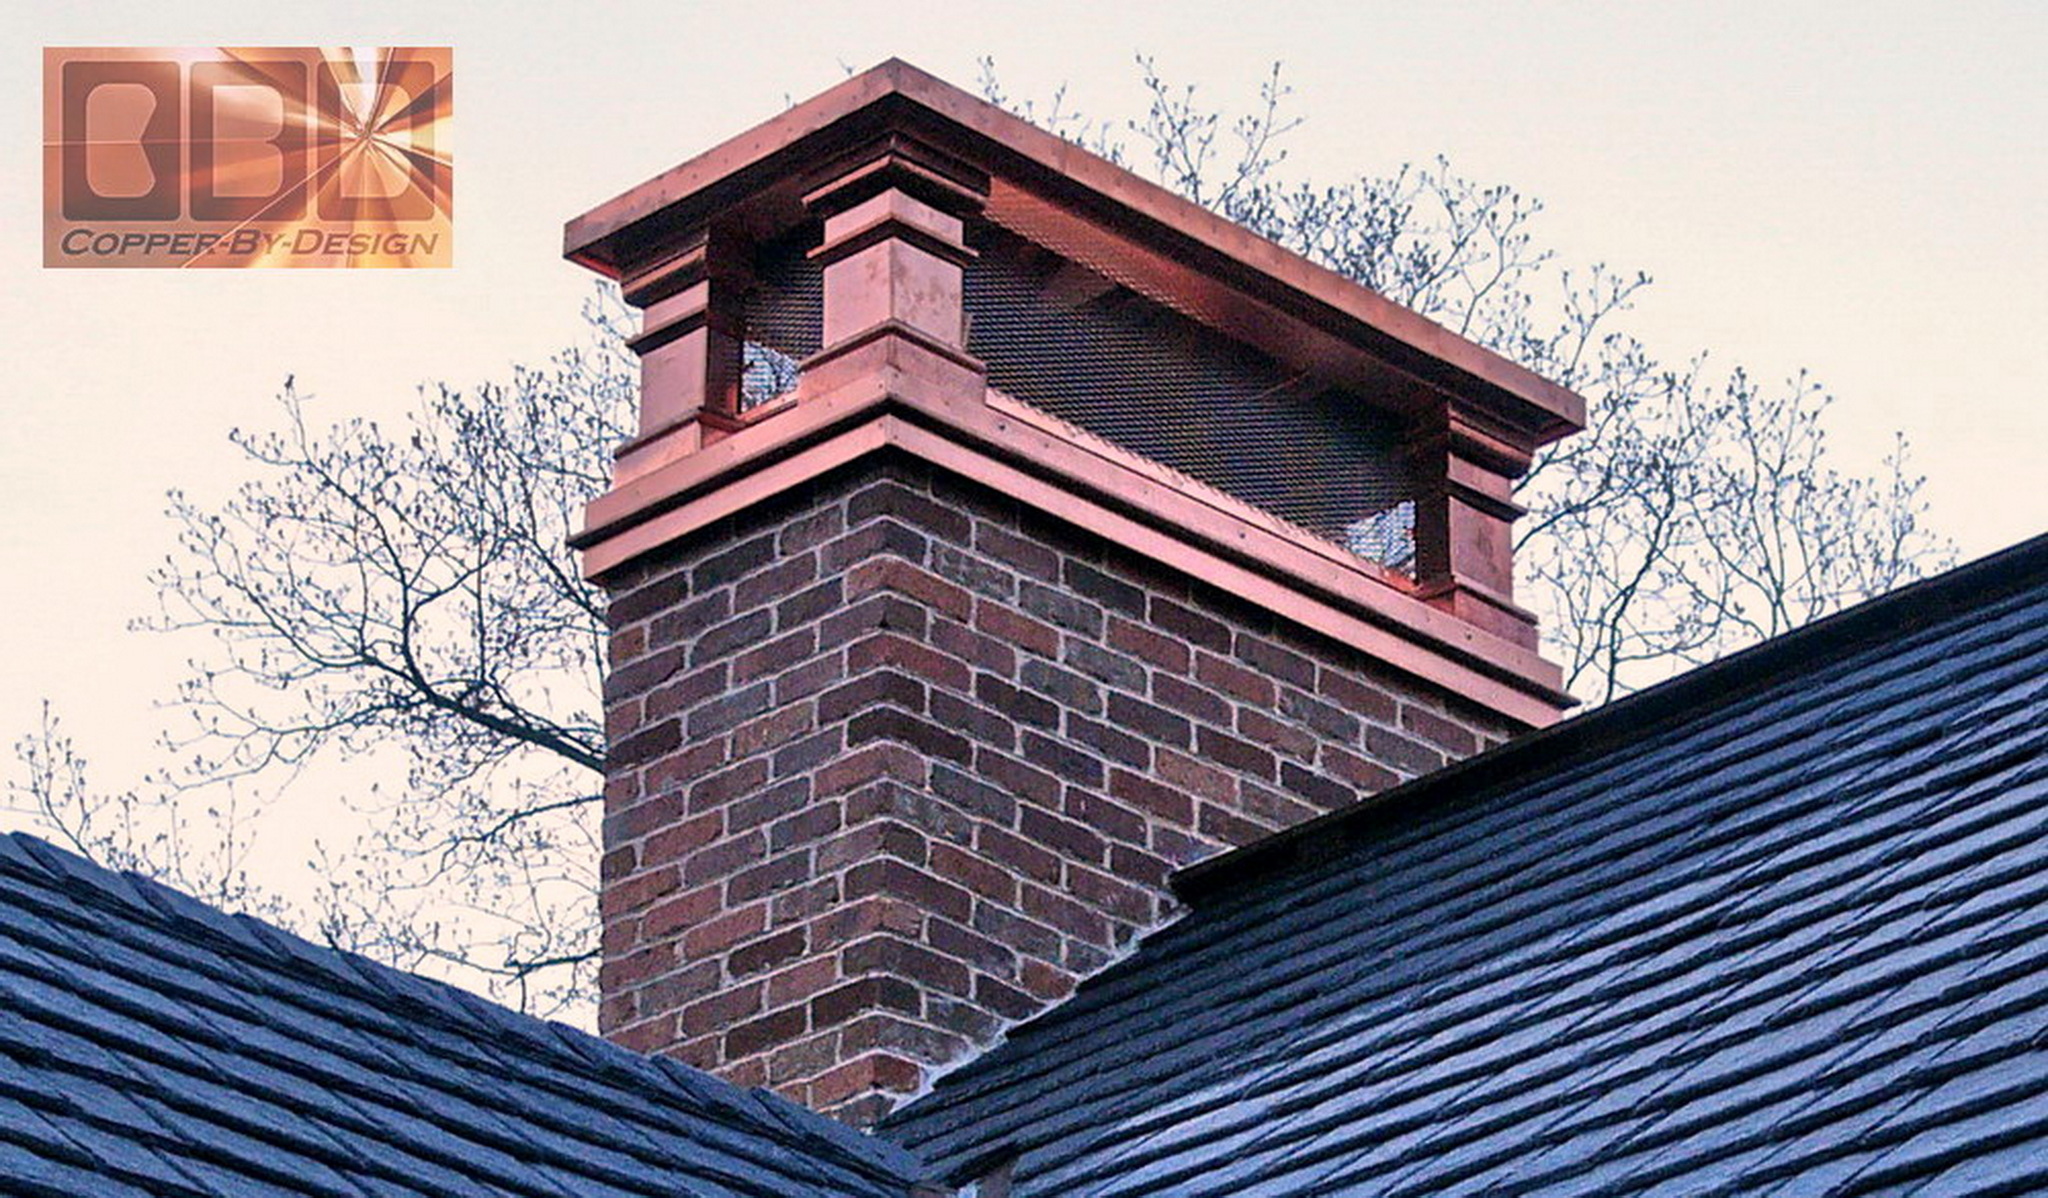
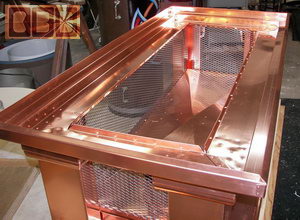
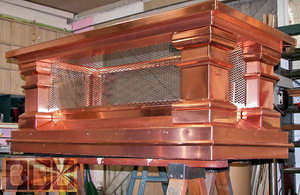
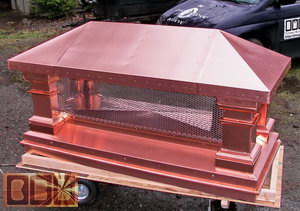
Here is the pan attached over
the base/skirt with a channel to hold the stainless steel screen
in place along the bottom edge. I made a mid-brace in the center
for support of the pan to keep it raised, so rain water that might
get blown through the screen with shed outwards and not puddle inside.
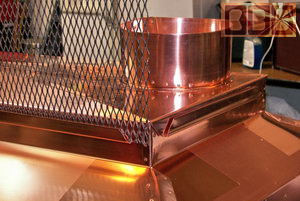 
I used stainless steel screws
from the inside to attach the piping over the outside of the skirting.
The stainless steel screens are riveted in behind the columns which
helps add a lot of strength to these columns.
The eave is attached over these
columns with a channel to hold the stainless steel screen in place
along the top edge.
|
|
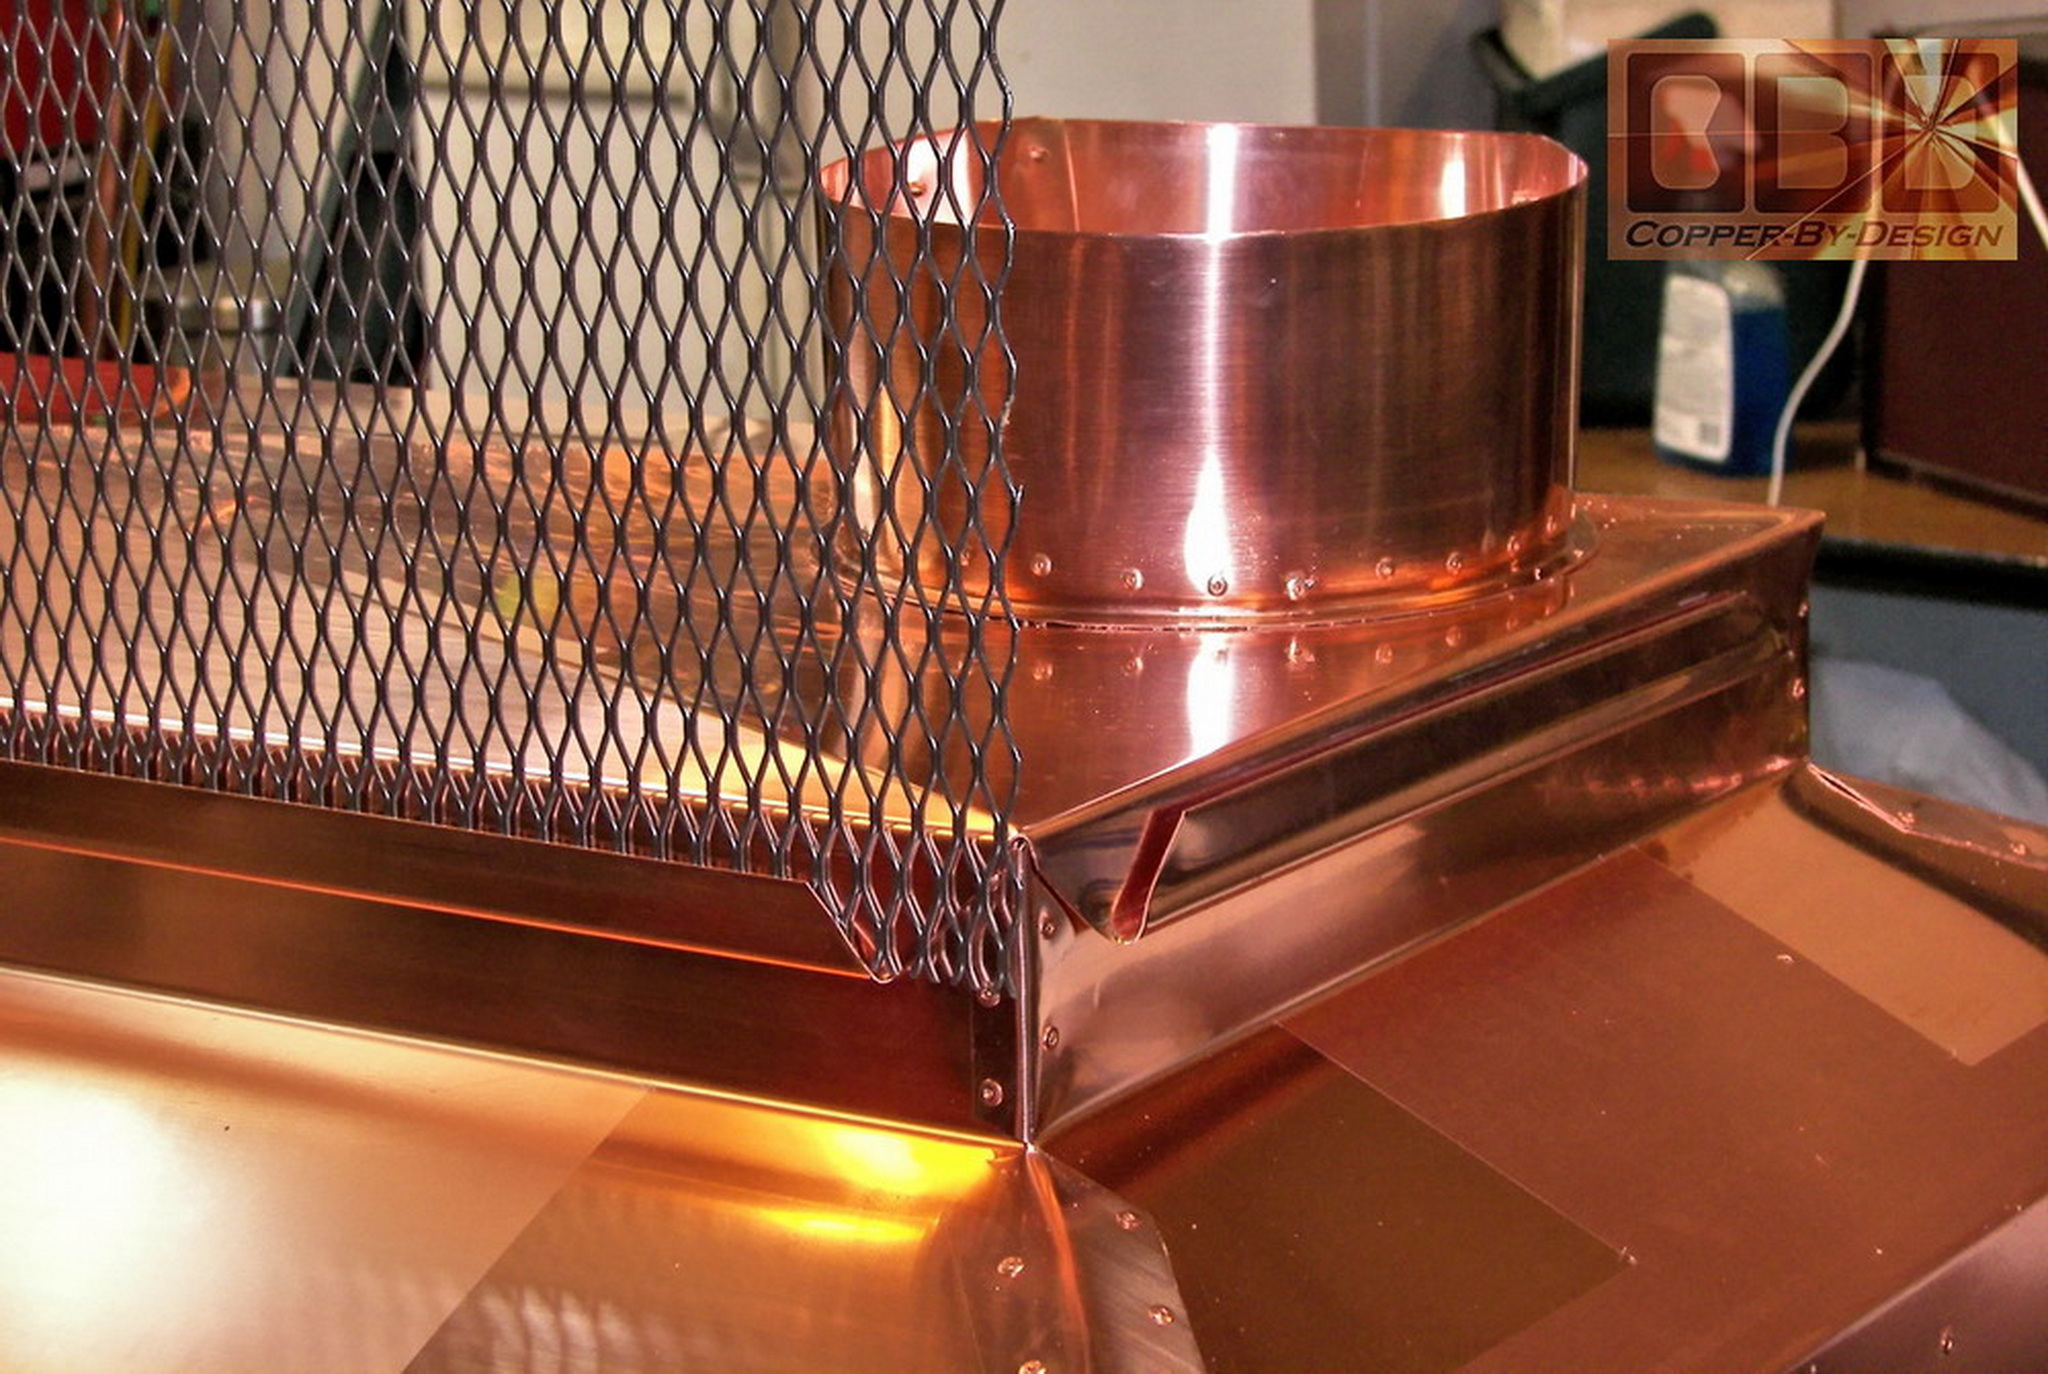
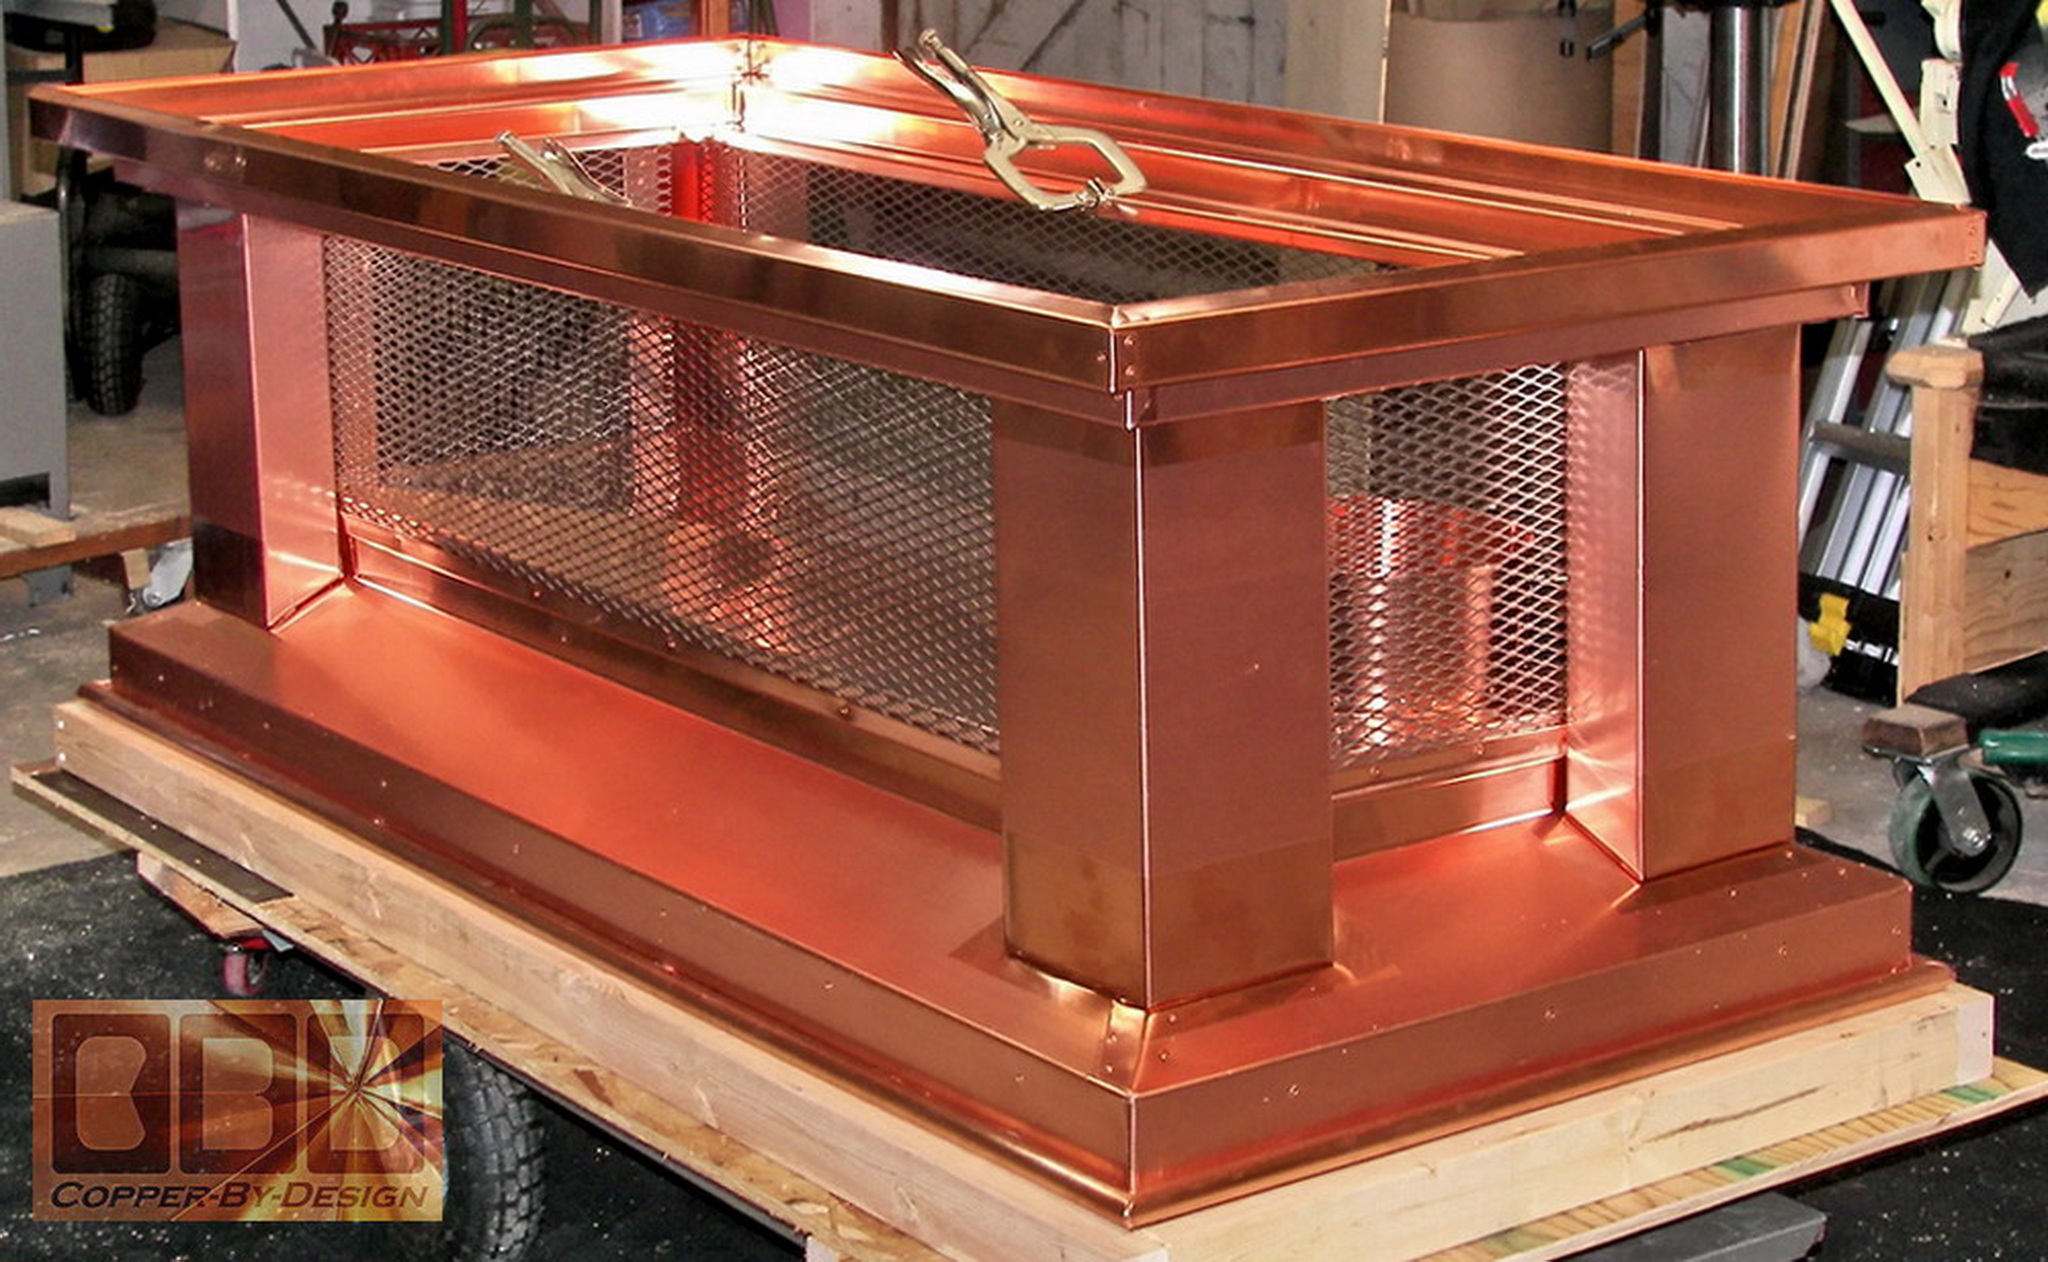
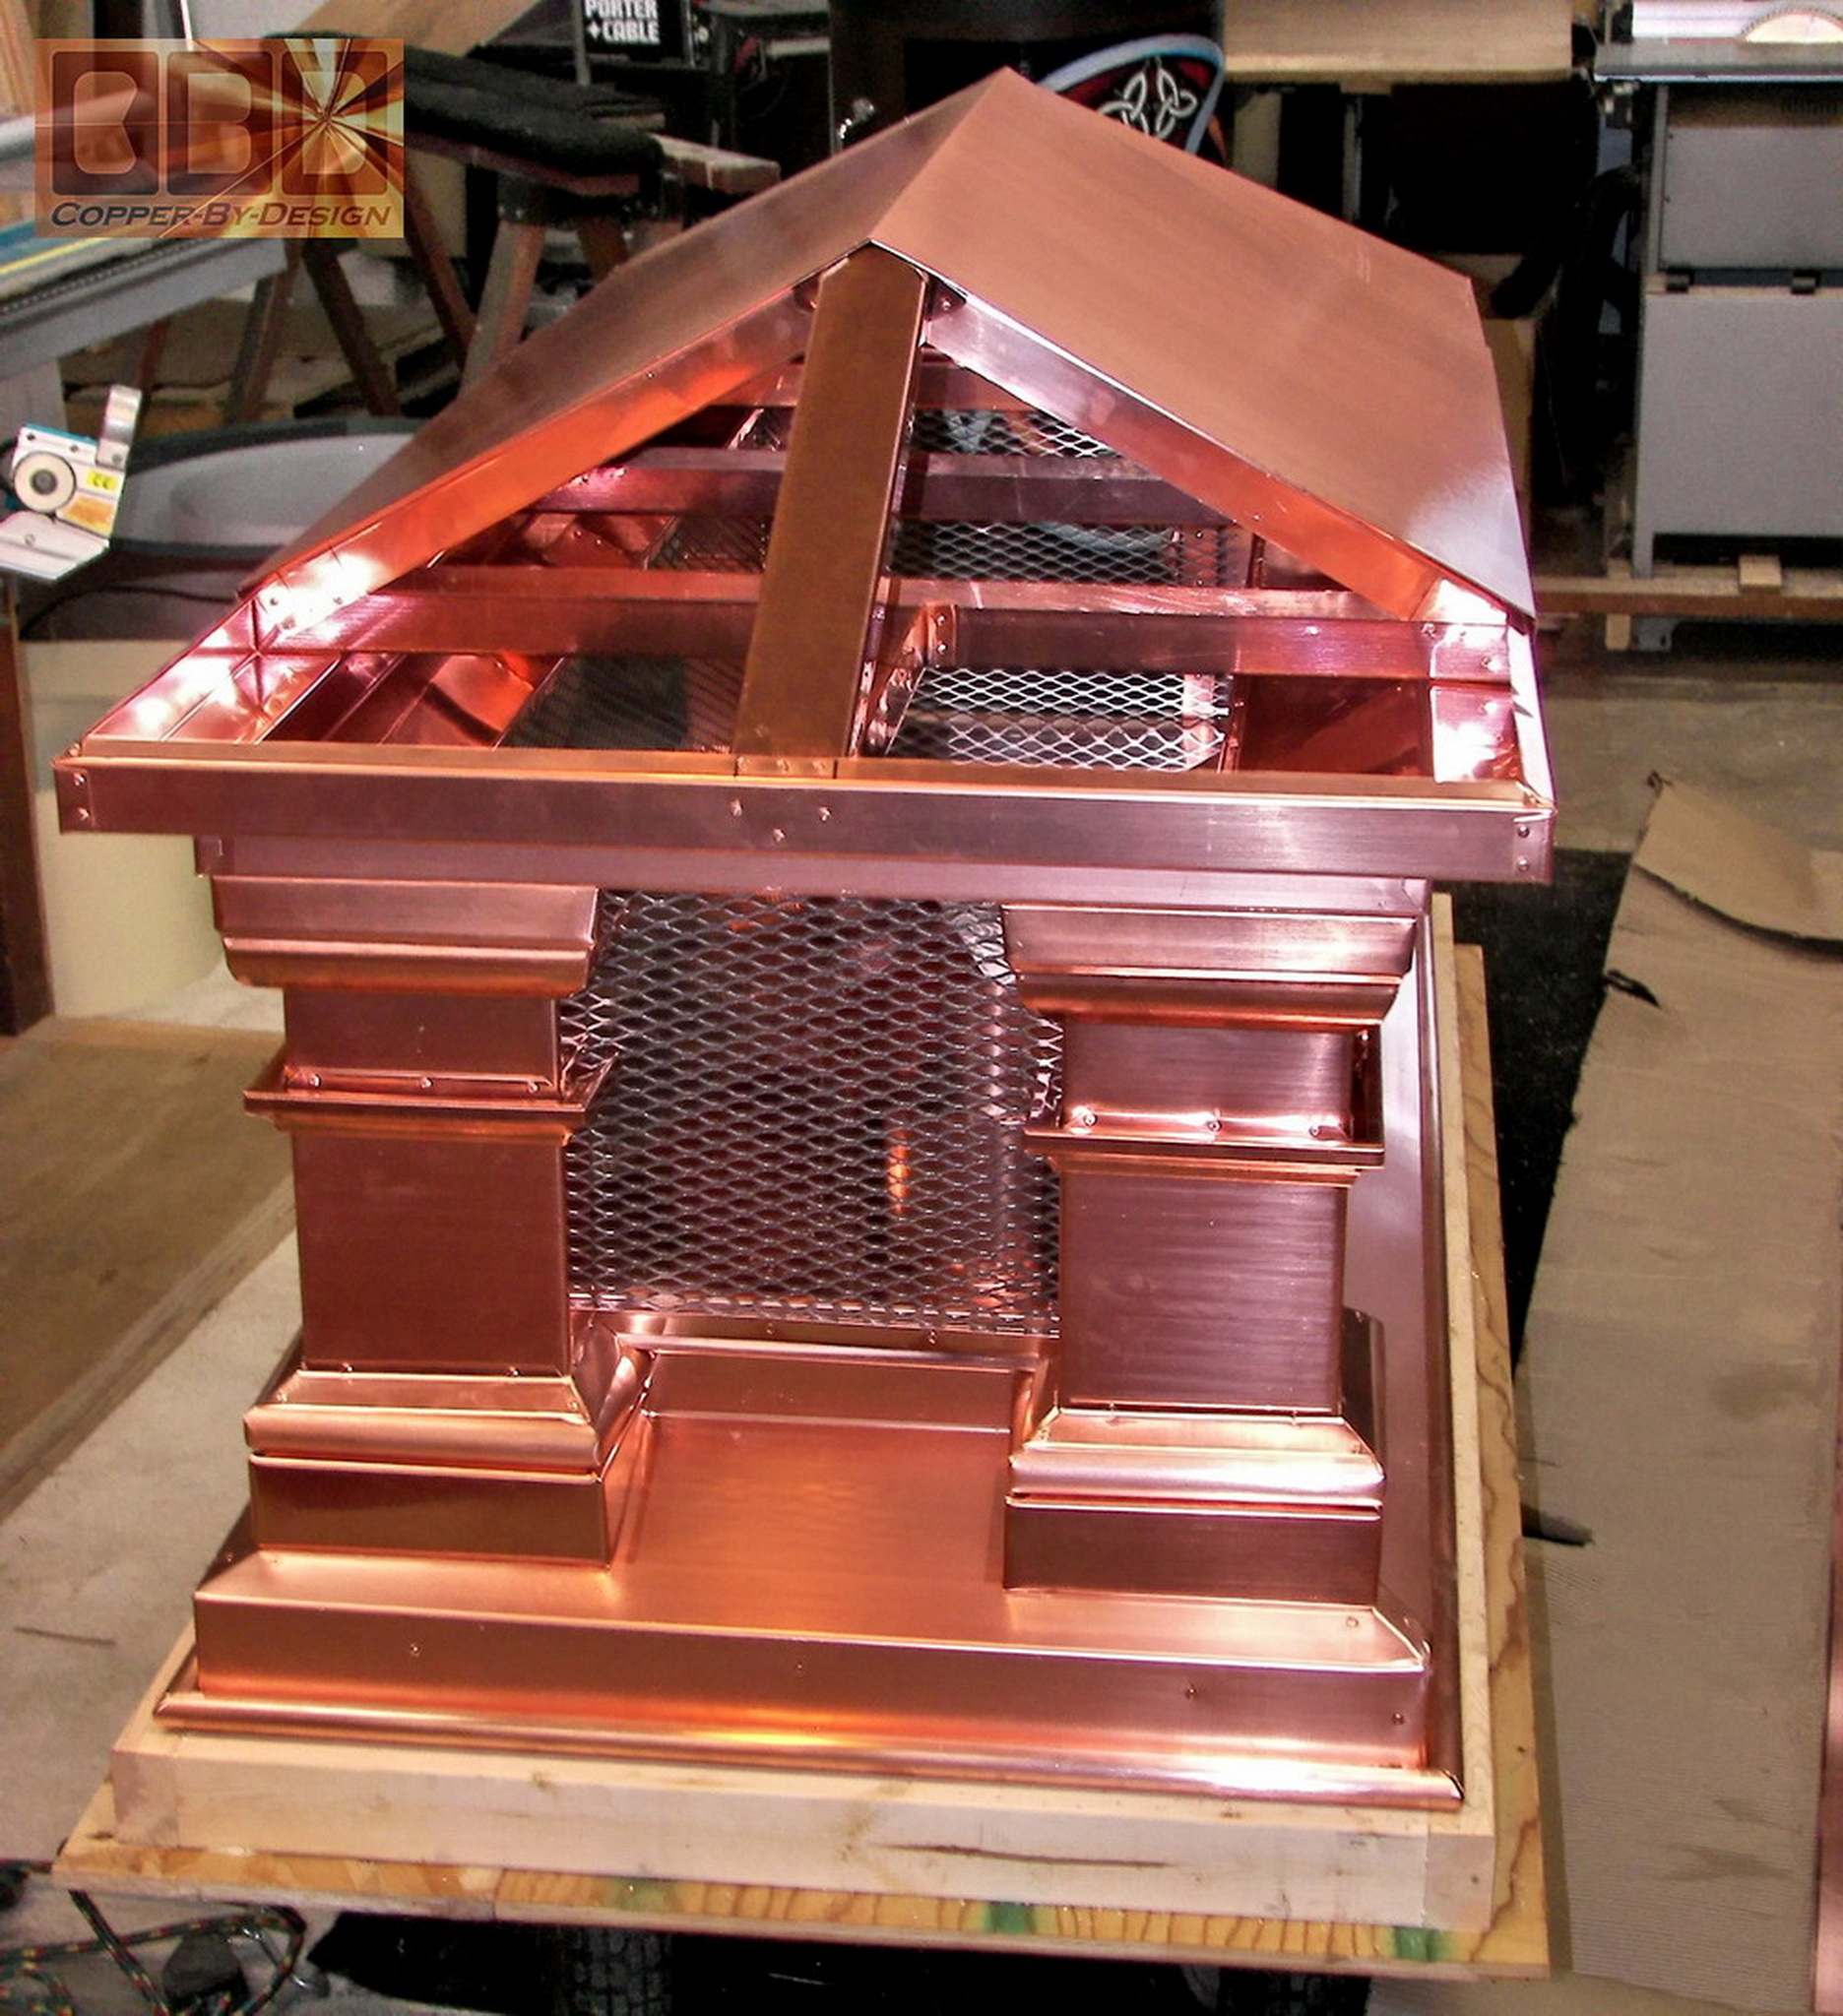
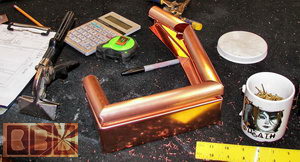
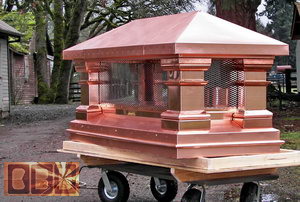
This decorative trim and piping
is very trick and time consuming to form just right and attach
to the columns, but adds a nice touch of regal class. |
|

|
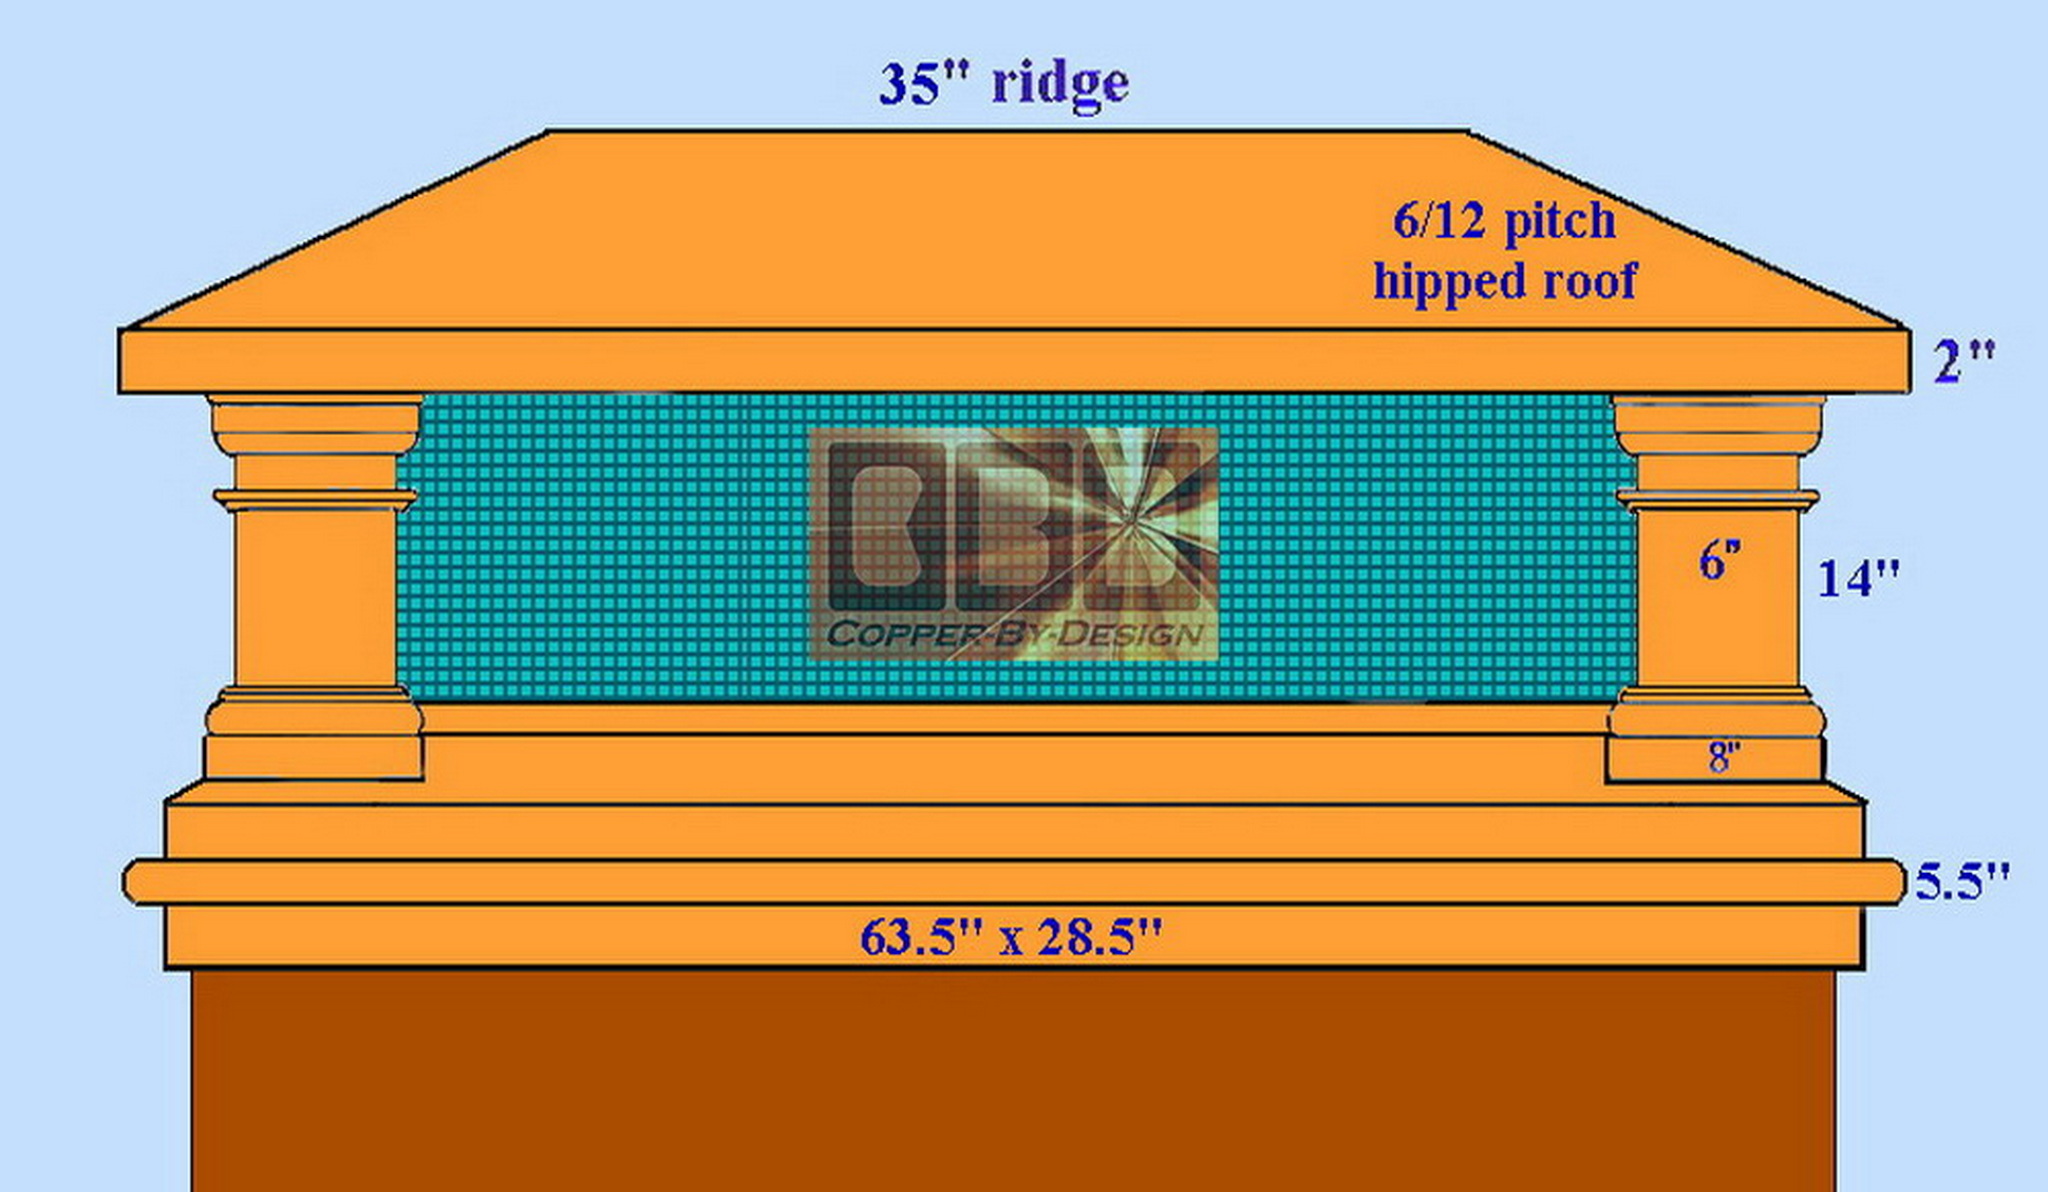
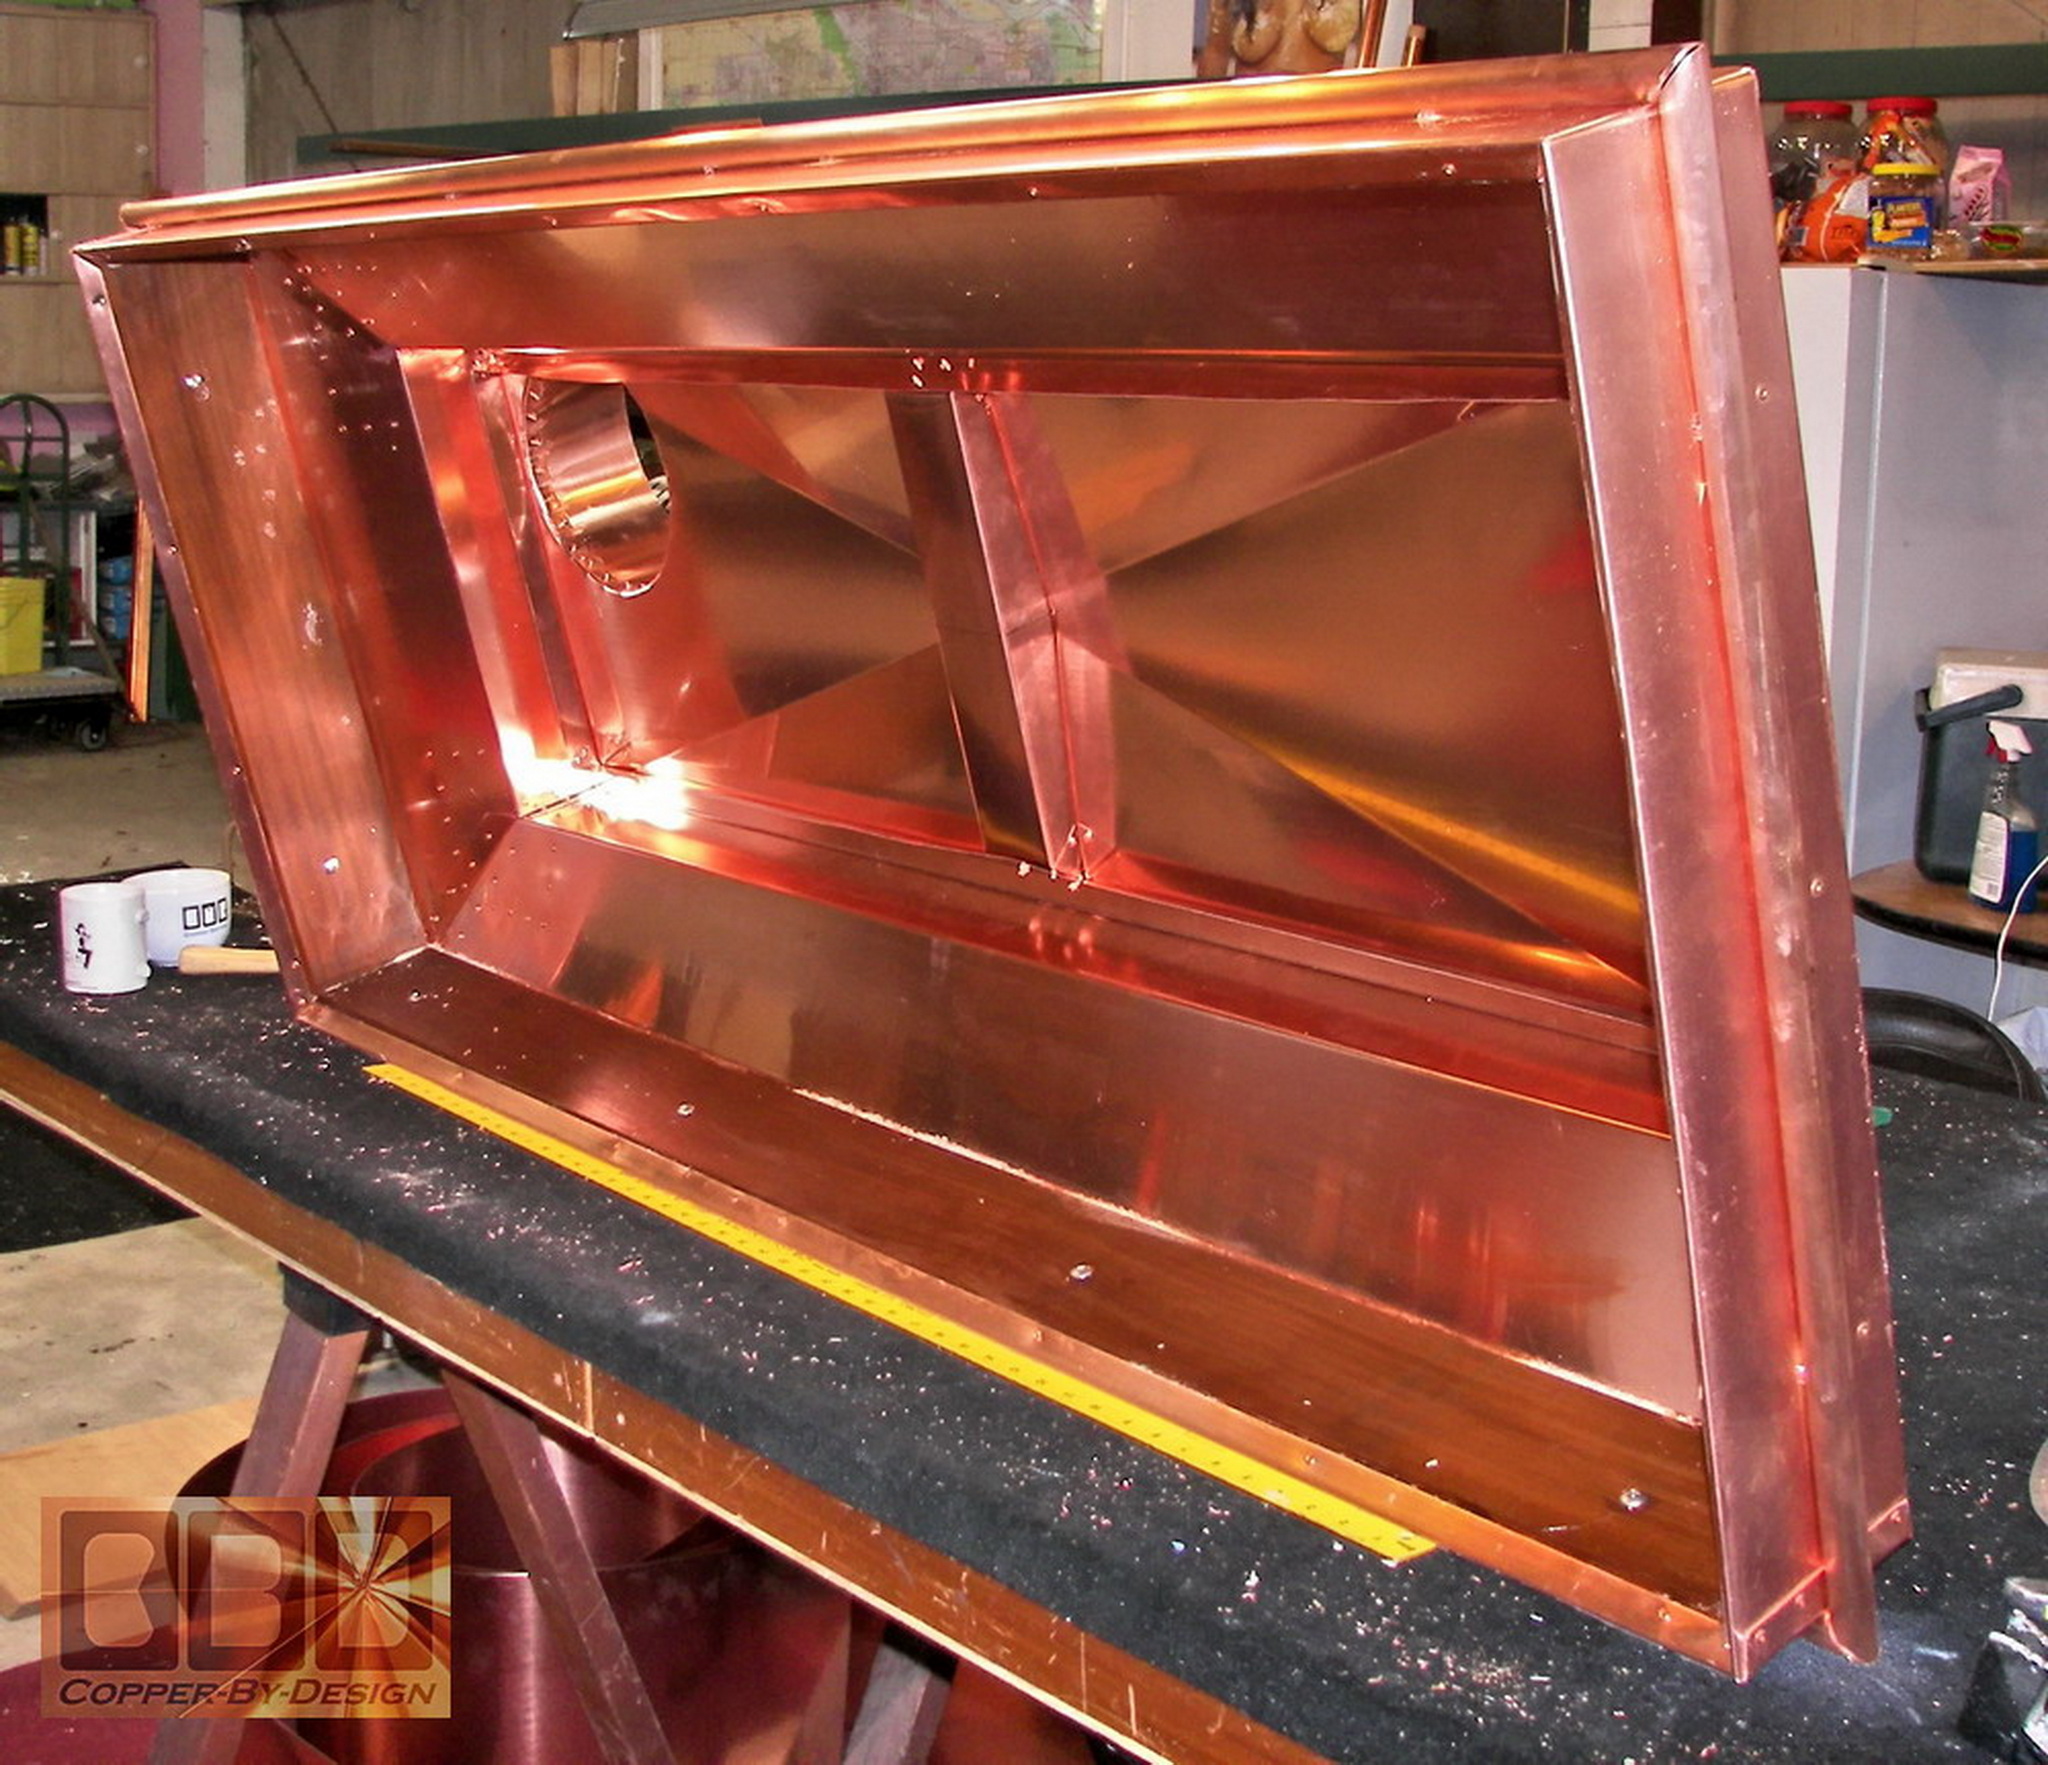
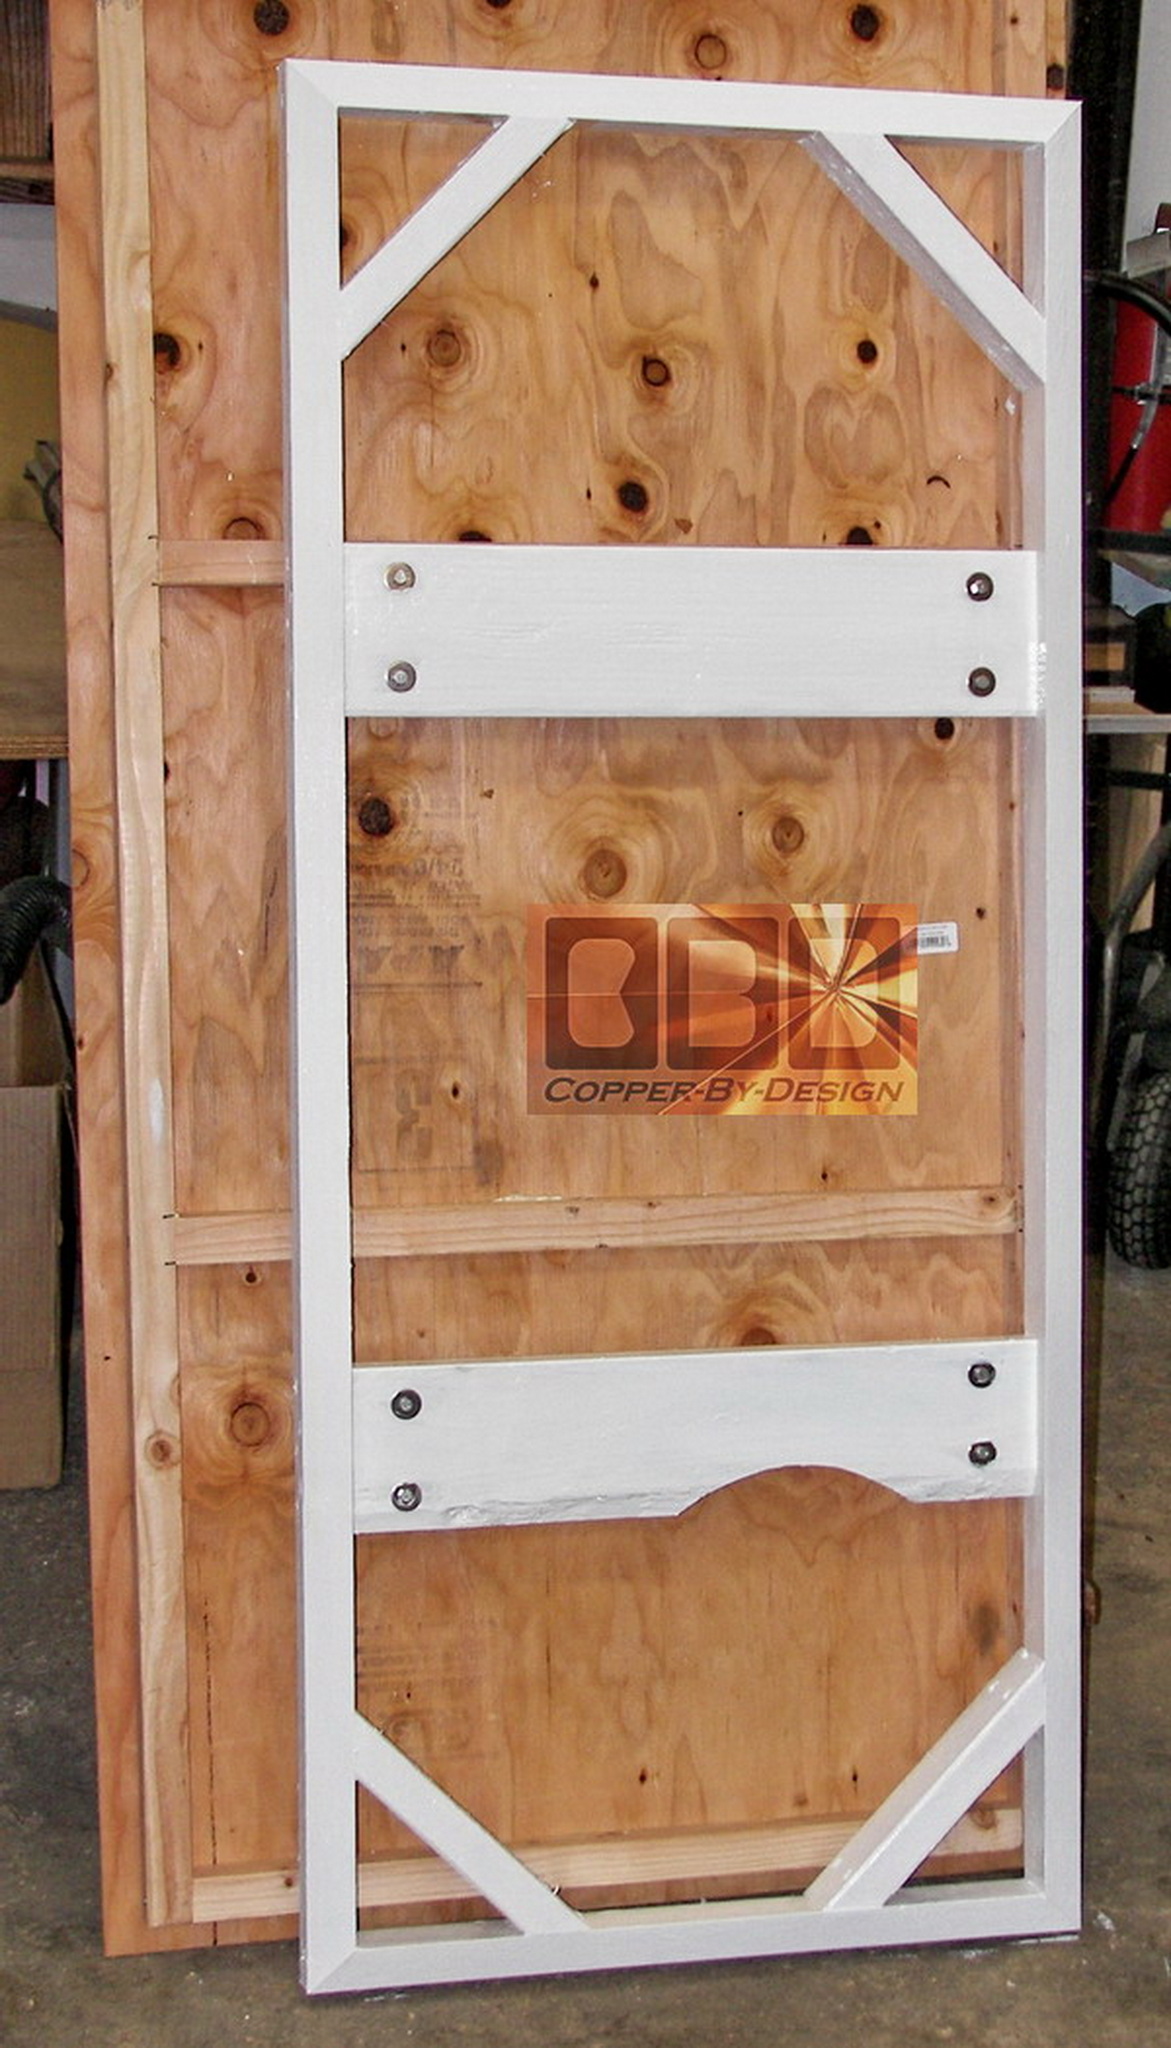
This is the custom angle cut wood frame I made
to be mounted over the chimney w/the 8 lag screws to properly seat
the 176# of this chimney cap.
|
|
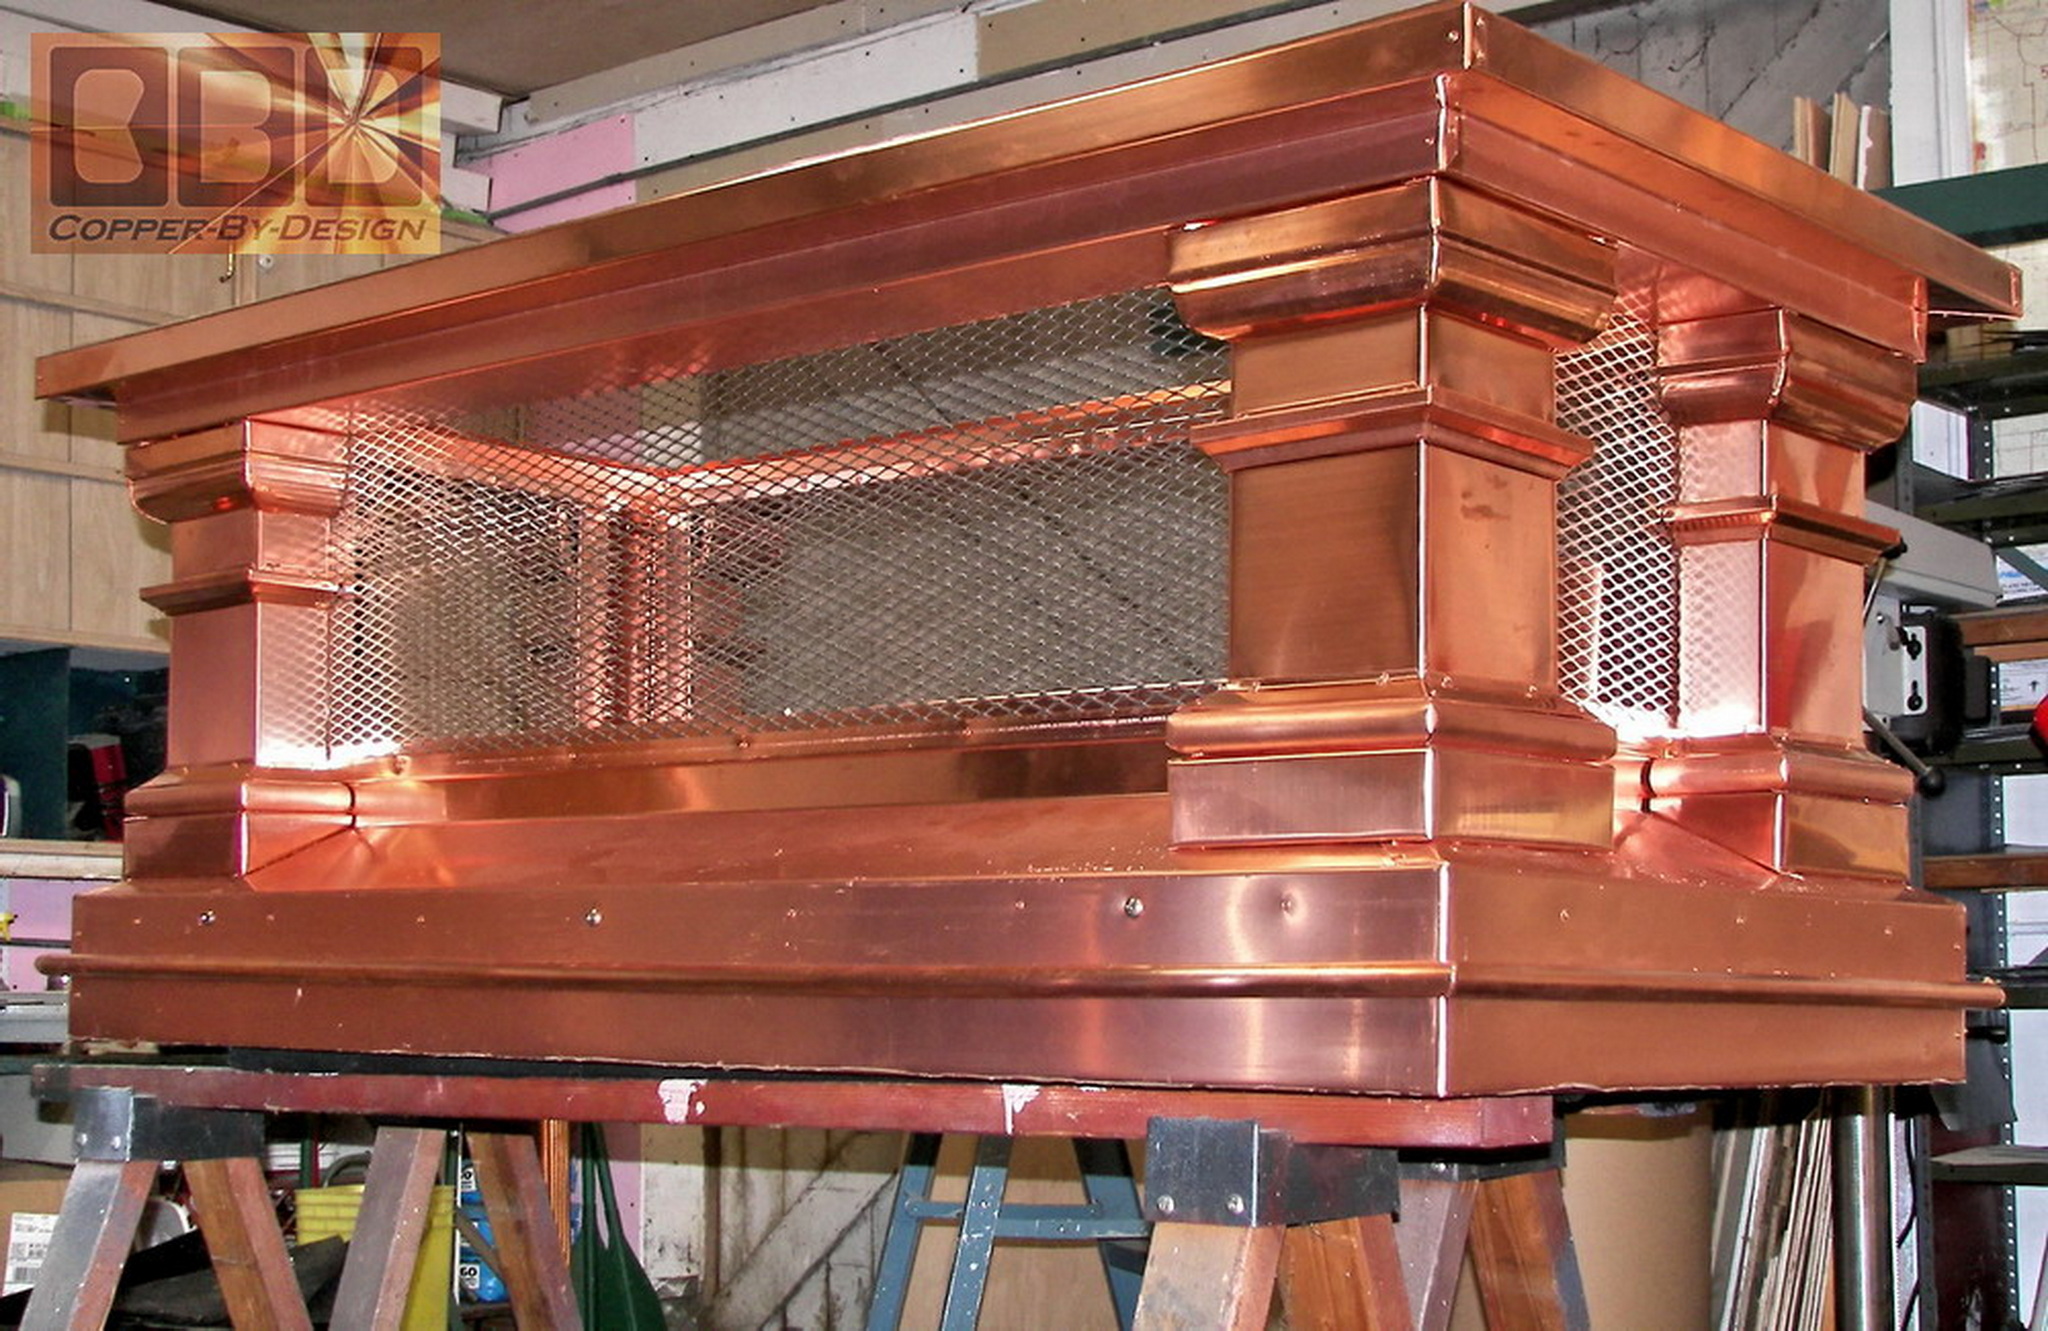
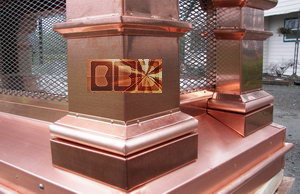
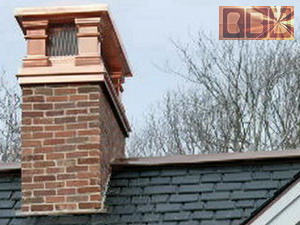
Here is the columns finished
and the roof braces built over the eaves.
 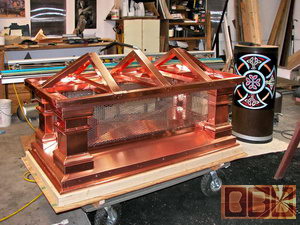
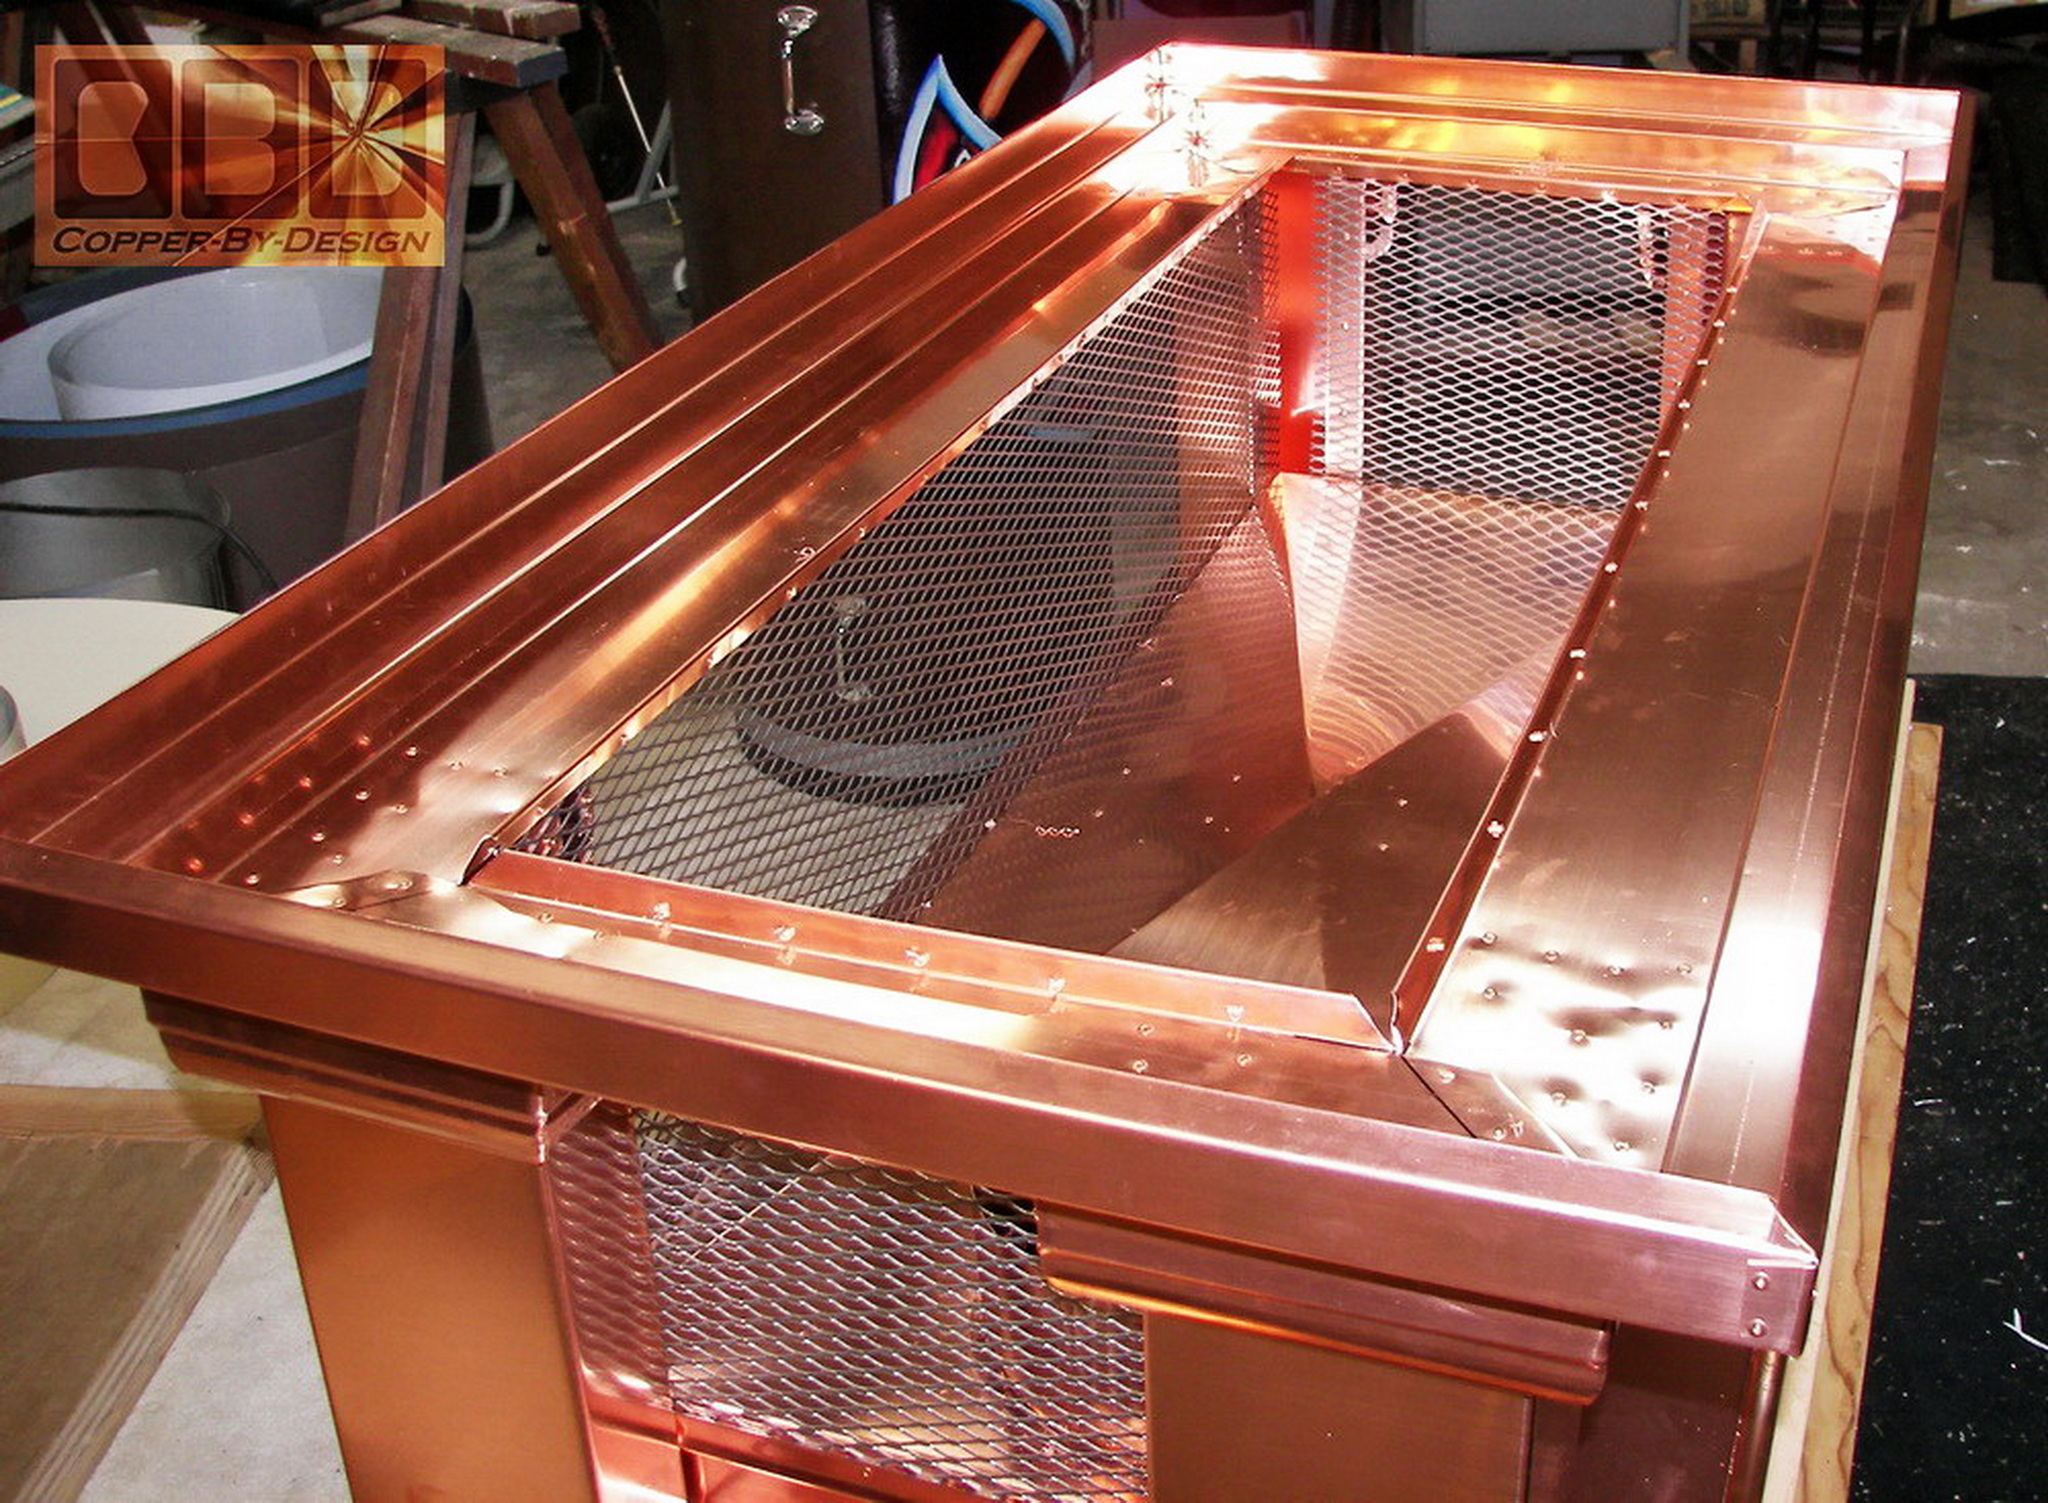
I then cover this with a 3
part roof skin. I covered it a bit different than I had done in
the past; in stead of making the seams over each corner bend, I
covered each end and then draped a rectangular sheet over the center
for a nice clean look that is more seamless.
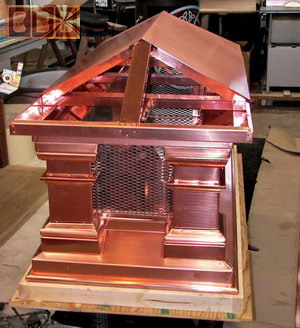 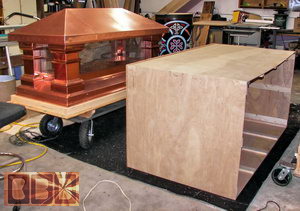
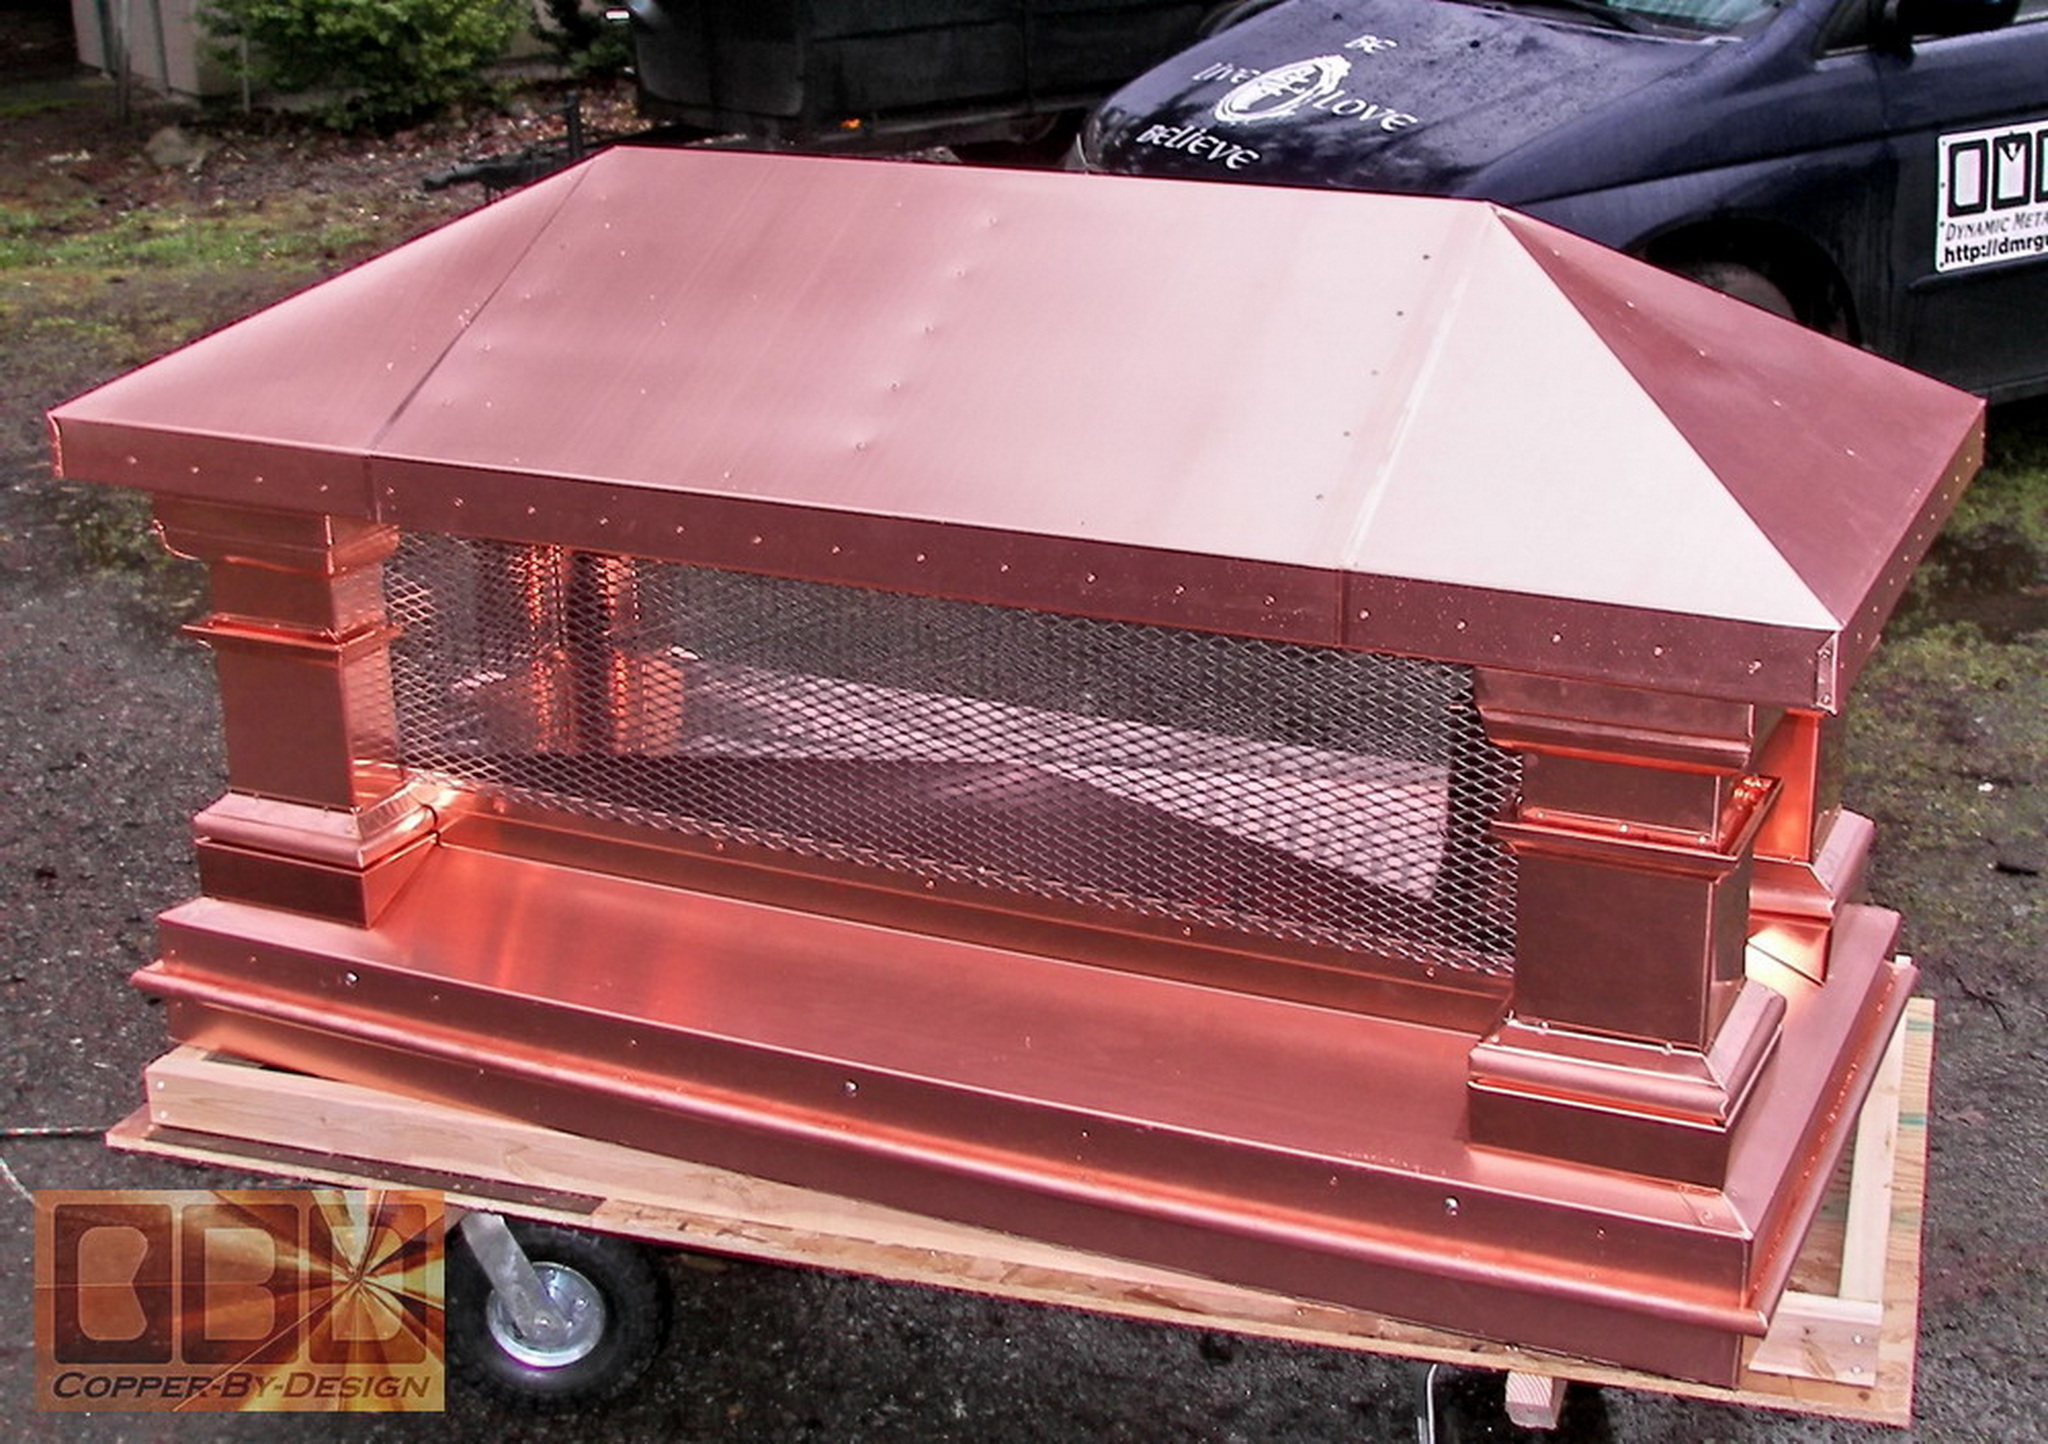
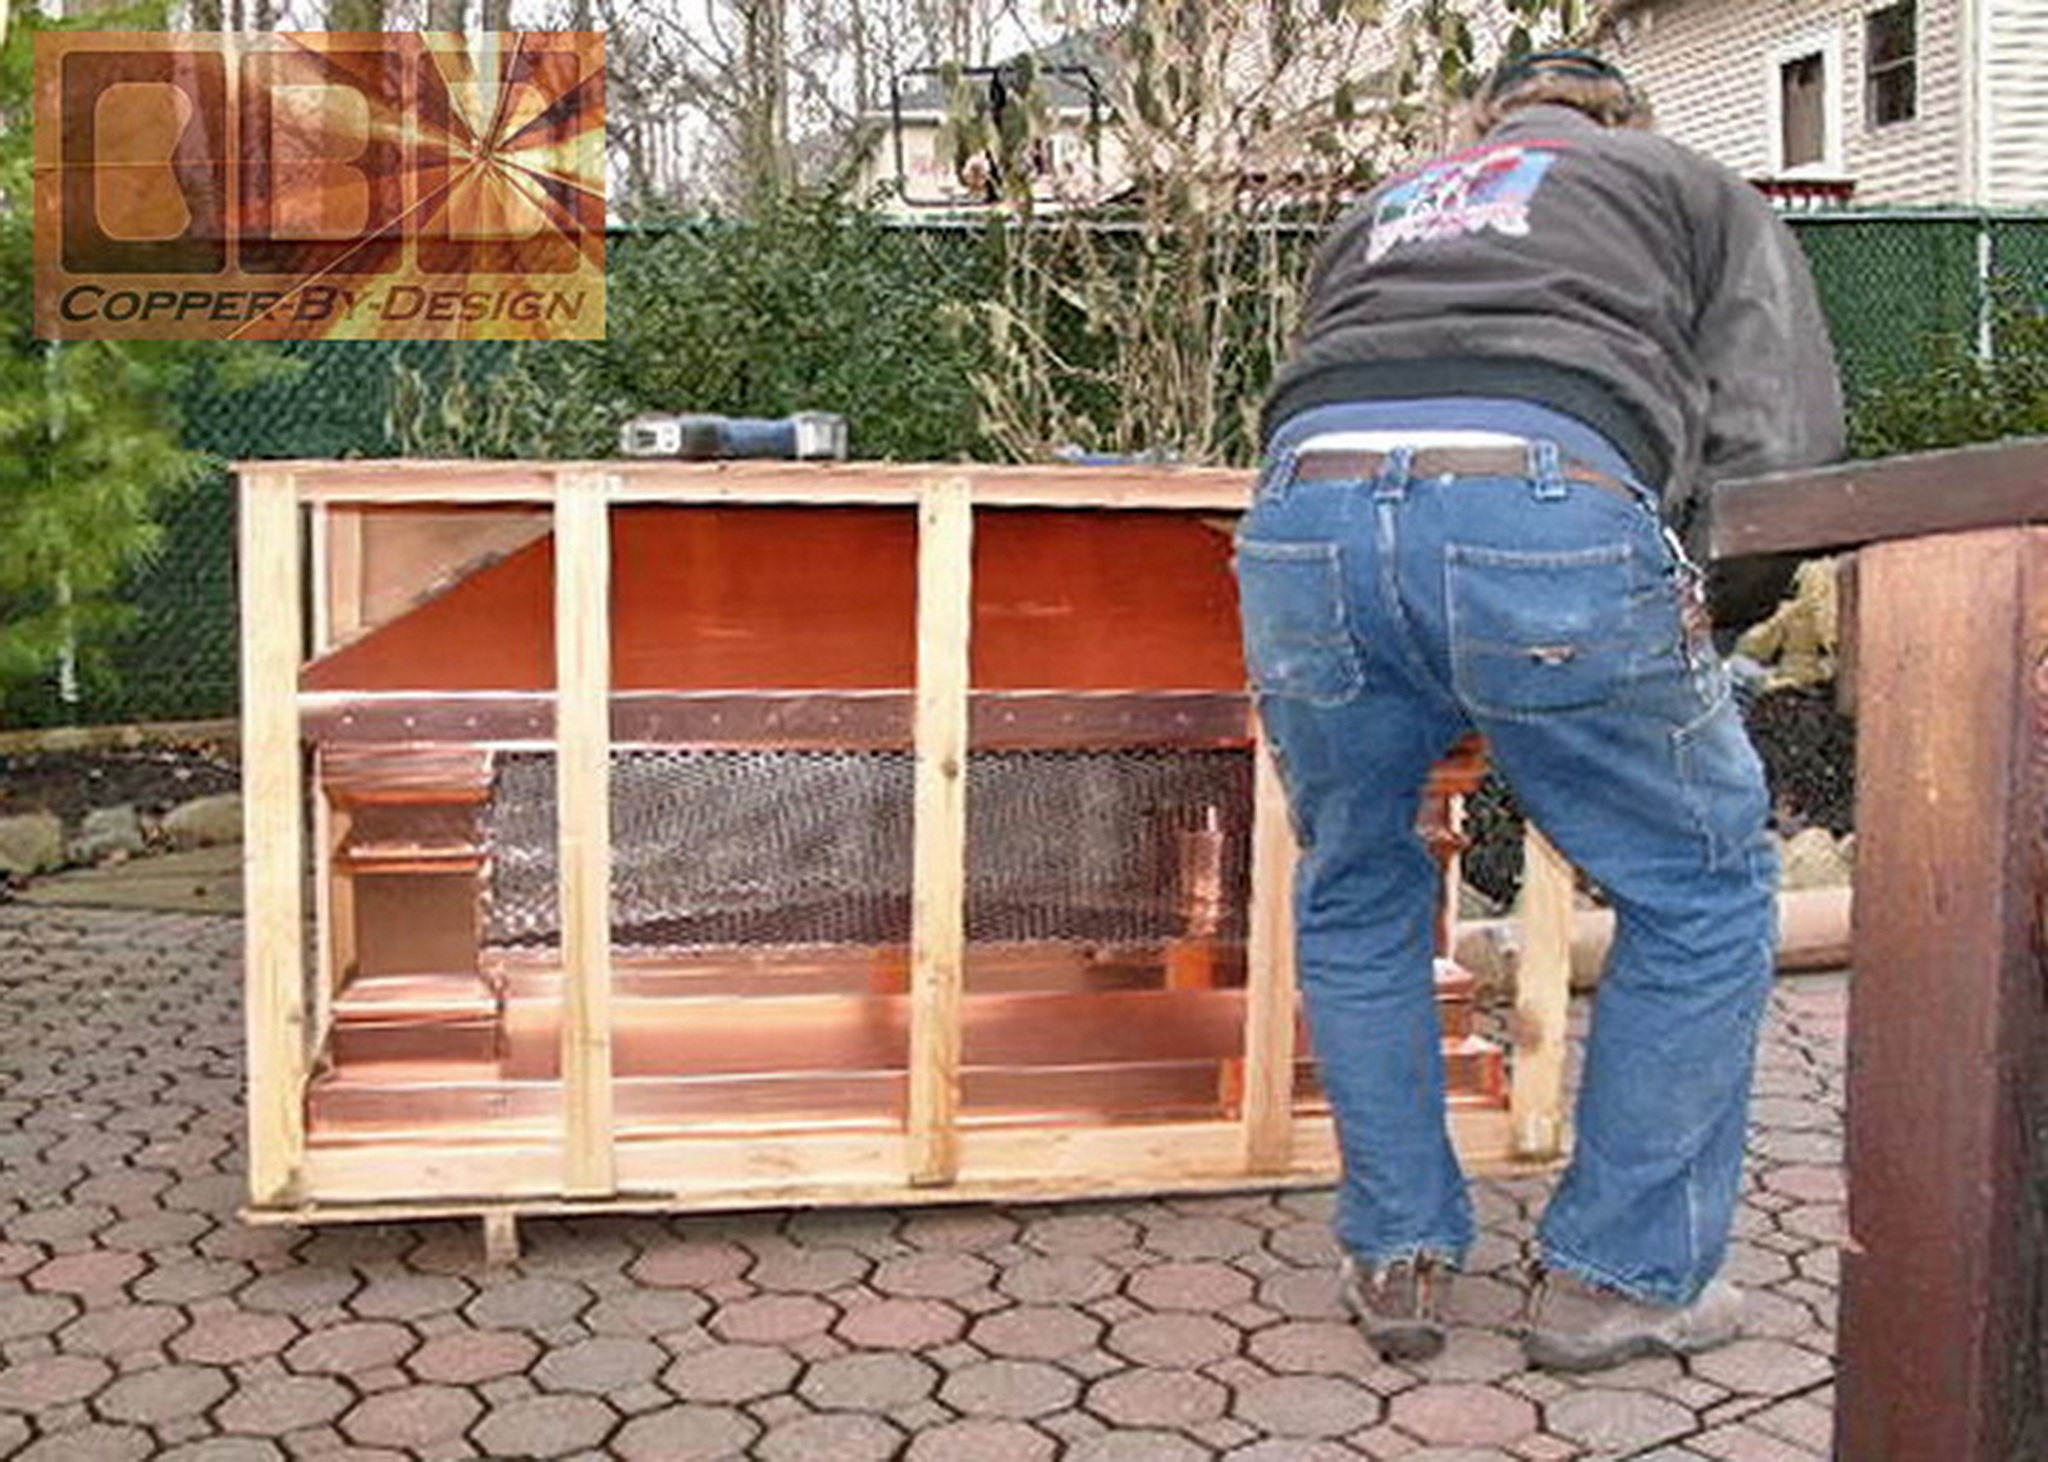
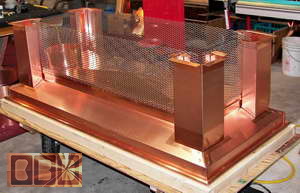
Here it is finished sitting over the custom
crate base. The top right photo shows the 5 sided top of the crate
laying on it's side.
Cost for the
project: $5,098.24 w/crate & shipping
175.95#
total weight
- 27.3# wood
- 8.4# SS screen
= 140.25# of
copper
x .8 = 112.2 sq' of copper sheet metal
112.2 x $30
= $3,366
$3,366.00 - copper
+ $500.00 - extra labor
for additional design & fancy trim work
+ $259.60 - SS screen
(12.98
sq' x $20)
+ $122.64 -
1x6 hardwood (15.33' x $8)
+ $450.00 - wood crate
+ $400.00
- shipping to residential location with lift-gate service
=$5,098.24 total cost delivered
|
| We exchanged 72 e-mails
in the course of working out all these details and providing them
with these 44 digital photos of the progress. Here is some feedback
from this client:
From: StateniLand@aol.c*m
Date: Sat, 29 Dec 2007
Subject: Re: Last Chimney Cap Photos
Hi Dave
Pics came through just fine and it looks grand. The columns look Regal! Perfect! It came out beautiful!
Just hope they can get it up to its final resting place. I will have your final check sent out this morning Sat. 12/29/07.
Thank you for everything.
I will take pictures as it is installed for your website. Any suggestions (as you asked) for any problems
that may arise.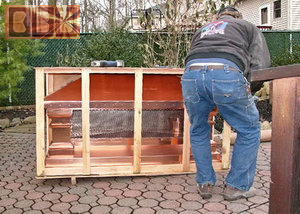
Date: Mon, 21 Jan 2008
Well,
its up! Was kinda hard with 2 men and no lift or crane but mission accomplished. Worst part was trying to get that
protective plastic off the roof. The cold made it an hours job with 3 of us picking at it and using a small butane
torch to warm it.
My roofer said to mention to you that it would have been easier to attach the flue extension if
your rivets on the flue were put on inside facing out instead of the opposite way. The extension kept getting caught up
on the rivets as they attempted to lower the cap down, but they did it and it looks real nice.
My roofer who has been doing slate and copper all his life (learned from his Dad
who did it all his life) was impressed with your work. he said "You got enough rivets to build a Battle ship!".. and
he liked your "bends".
 I took plenty of pics and will be sending shortly for your webpage if you like.
Thanks again Dave,
Date: Mon, 28 Jan 2008
Here are the PICS of the house. O yeah! Thanks for the "MUG". My wife took it and uses it every
morning now.
Date: Wed, 30 Jan 2008
Your welcome Dave.......
Keep me in mind when u make a larger CBD mug LOL. Nothing but compliments when people
see the house finished off with your cap!
Joe & Mary T. McLaughlin
|
|
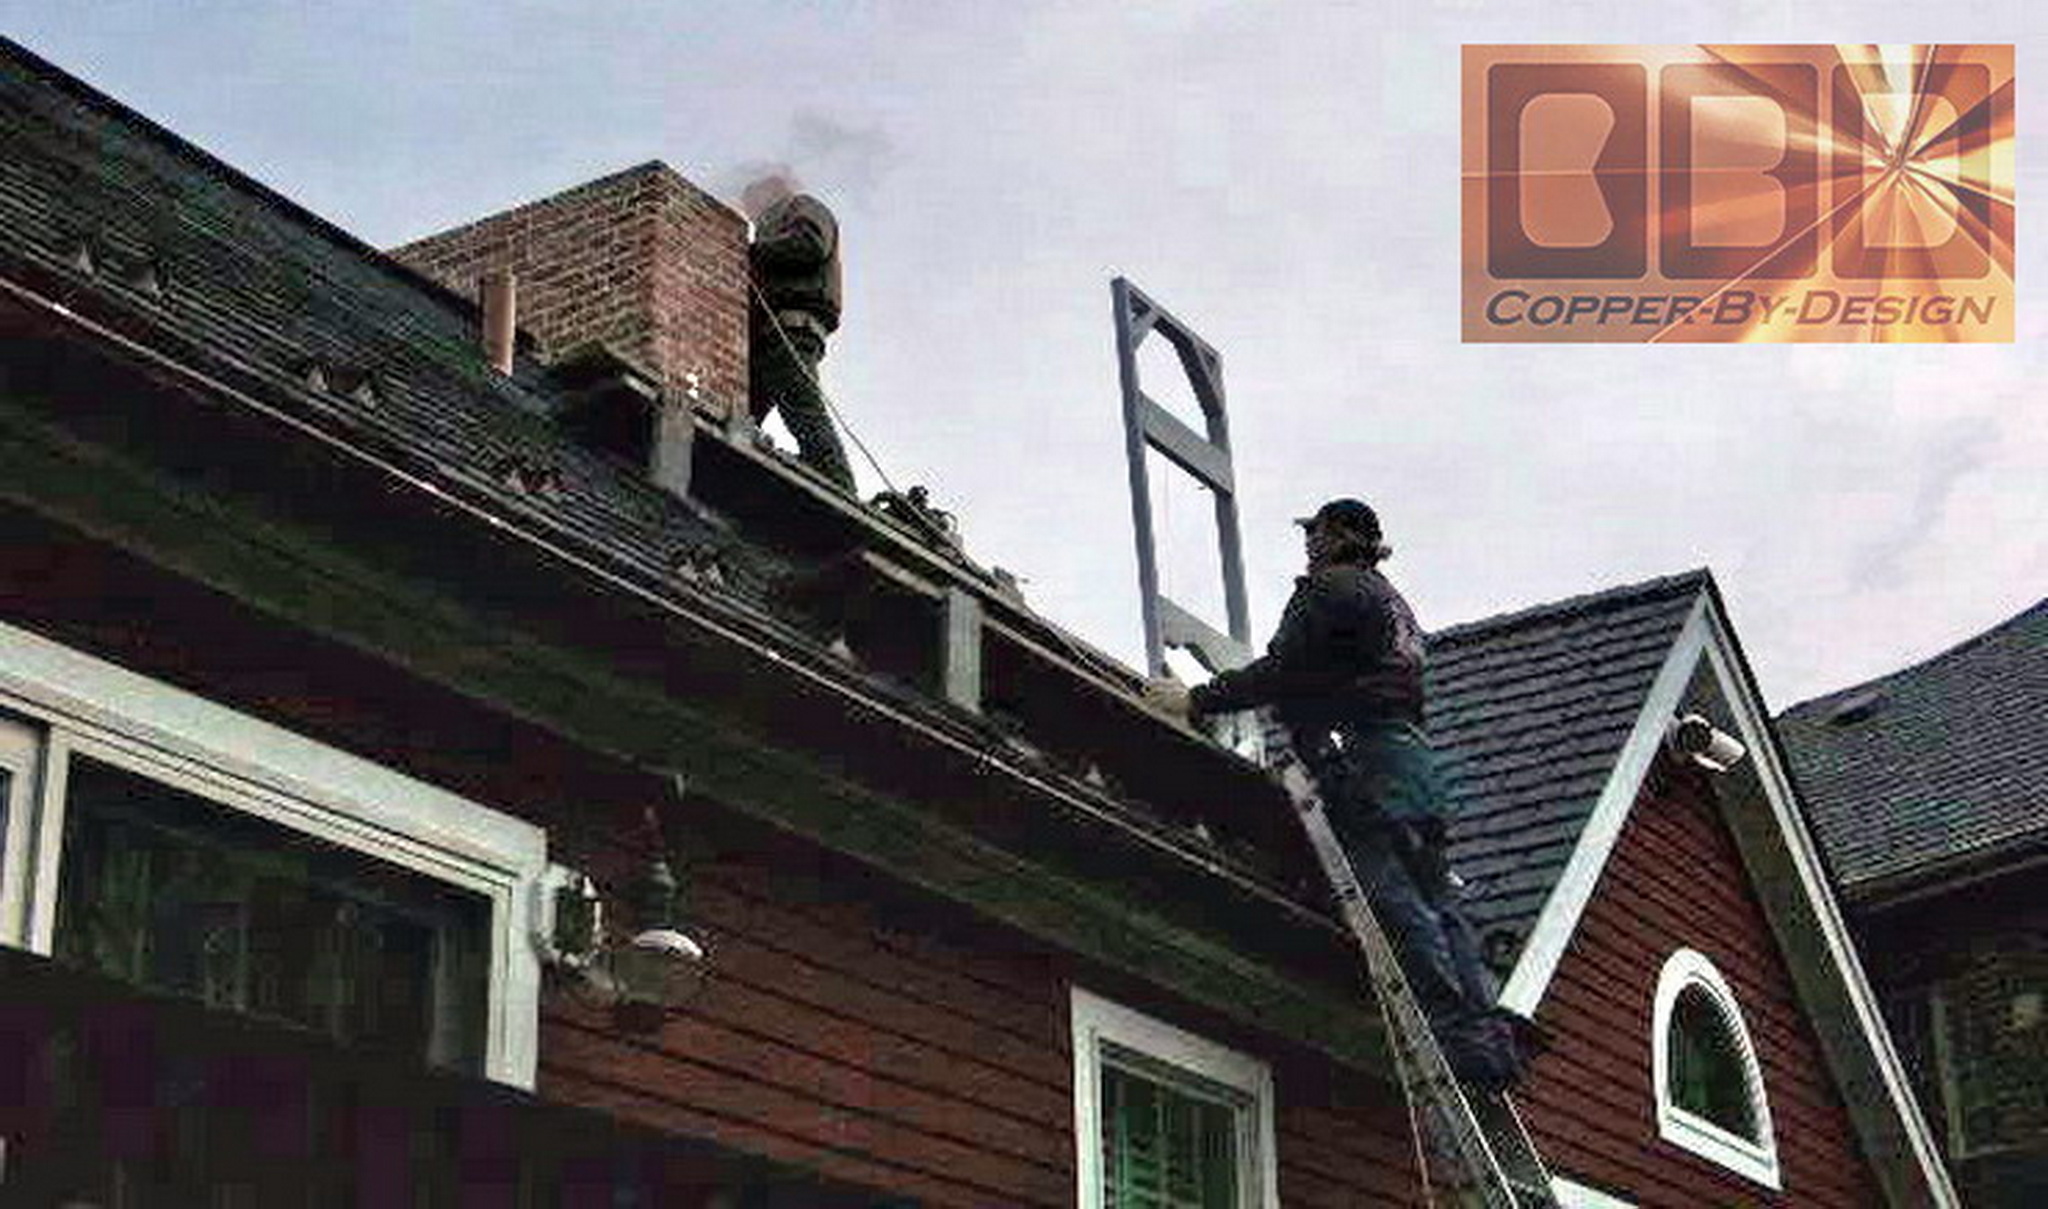
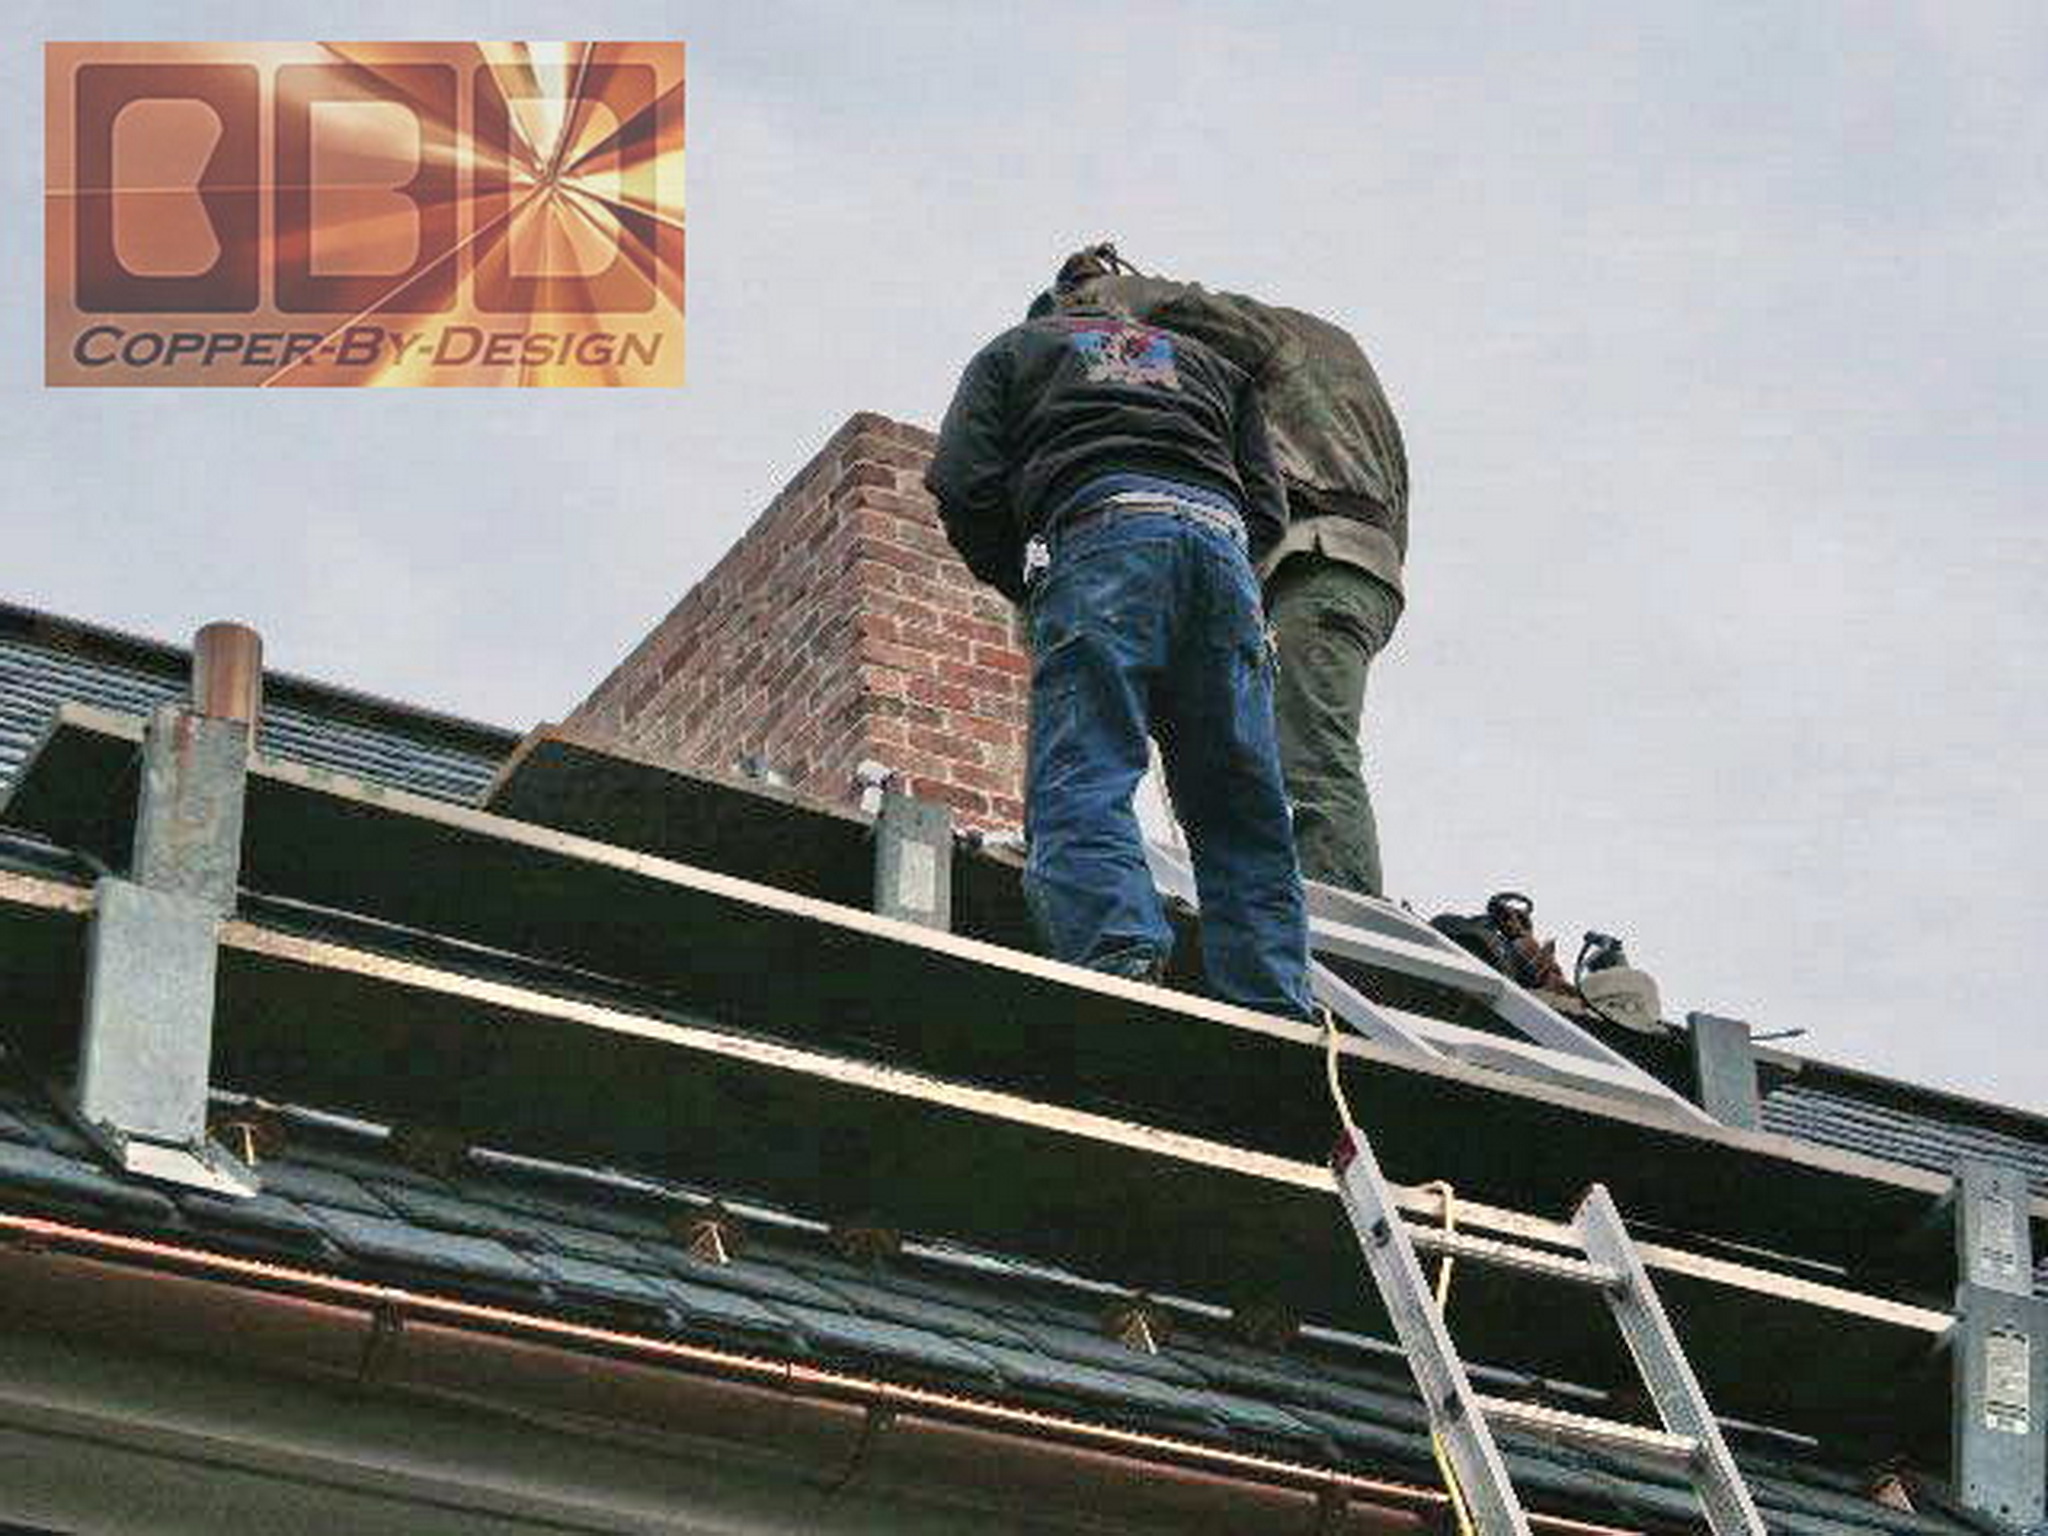
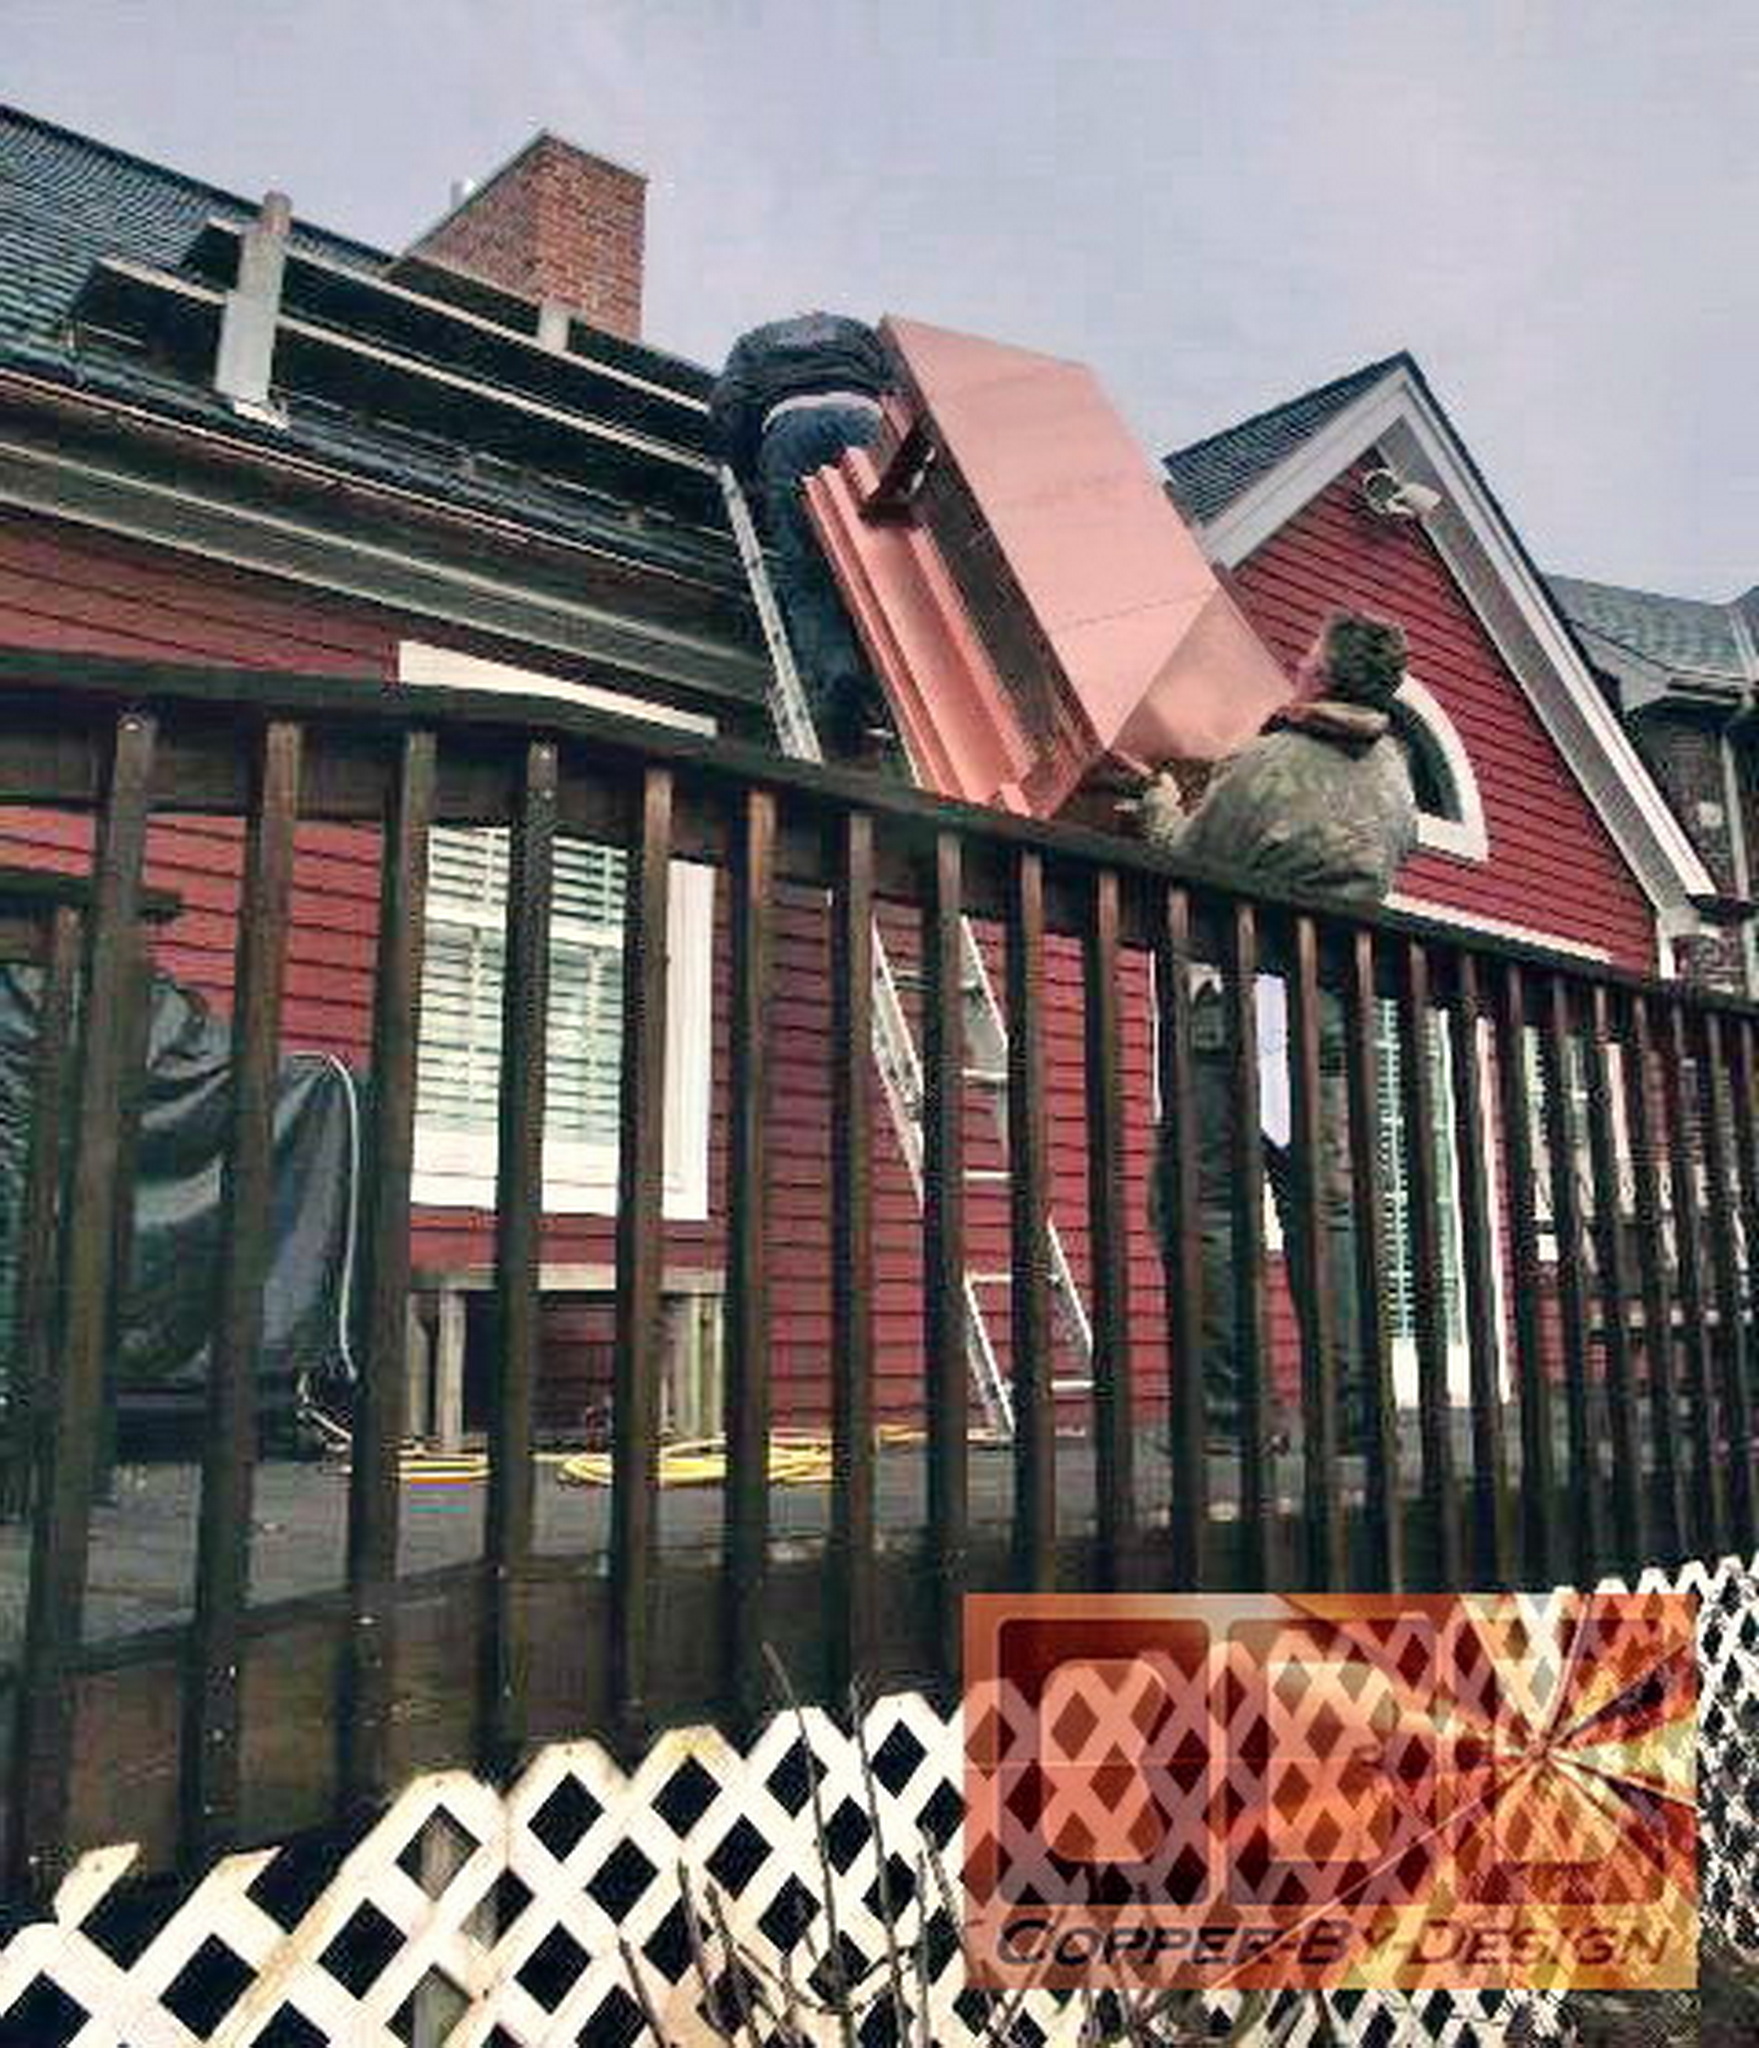
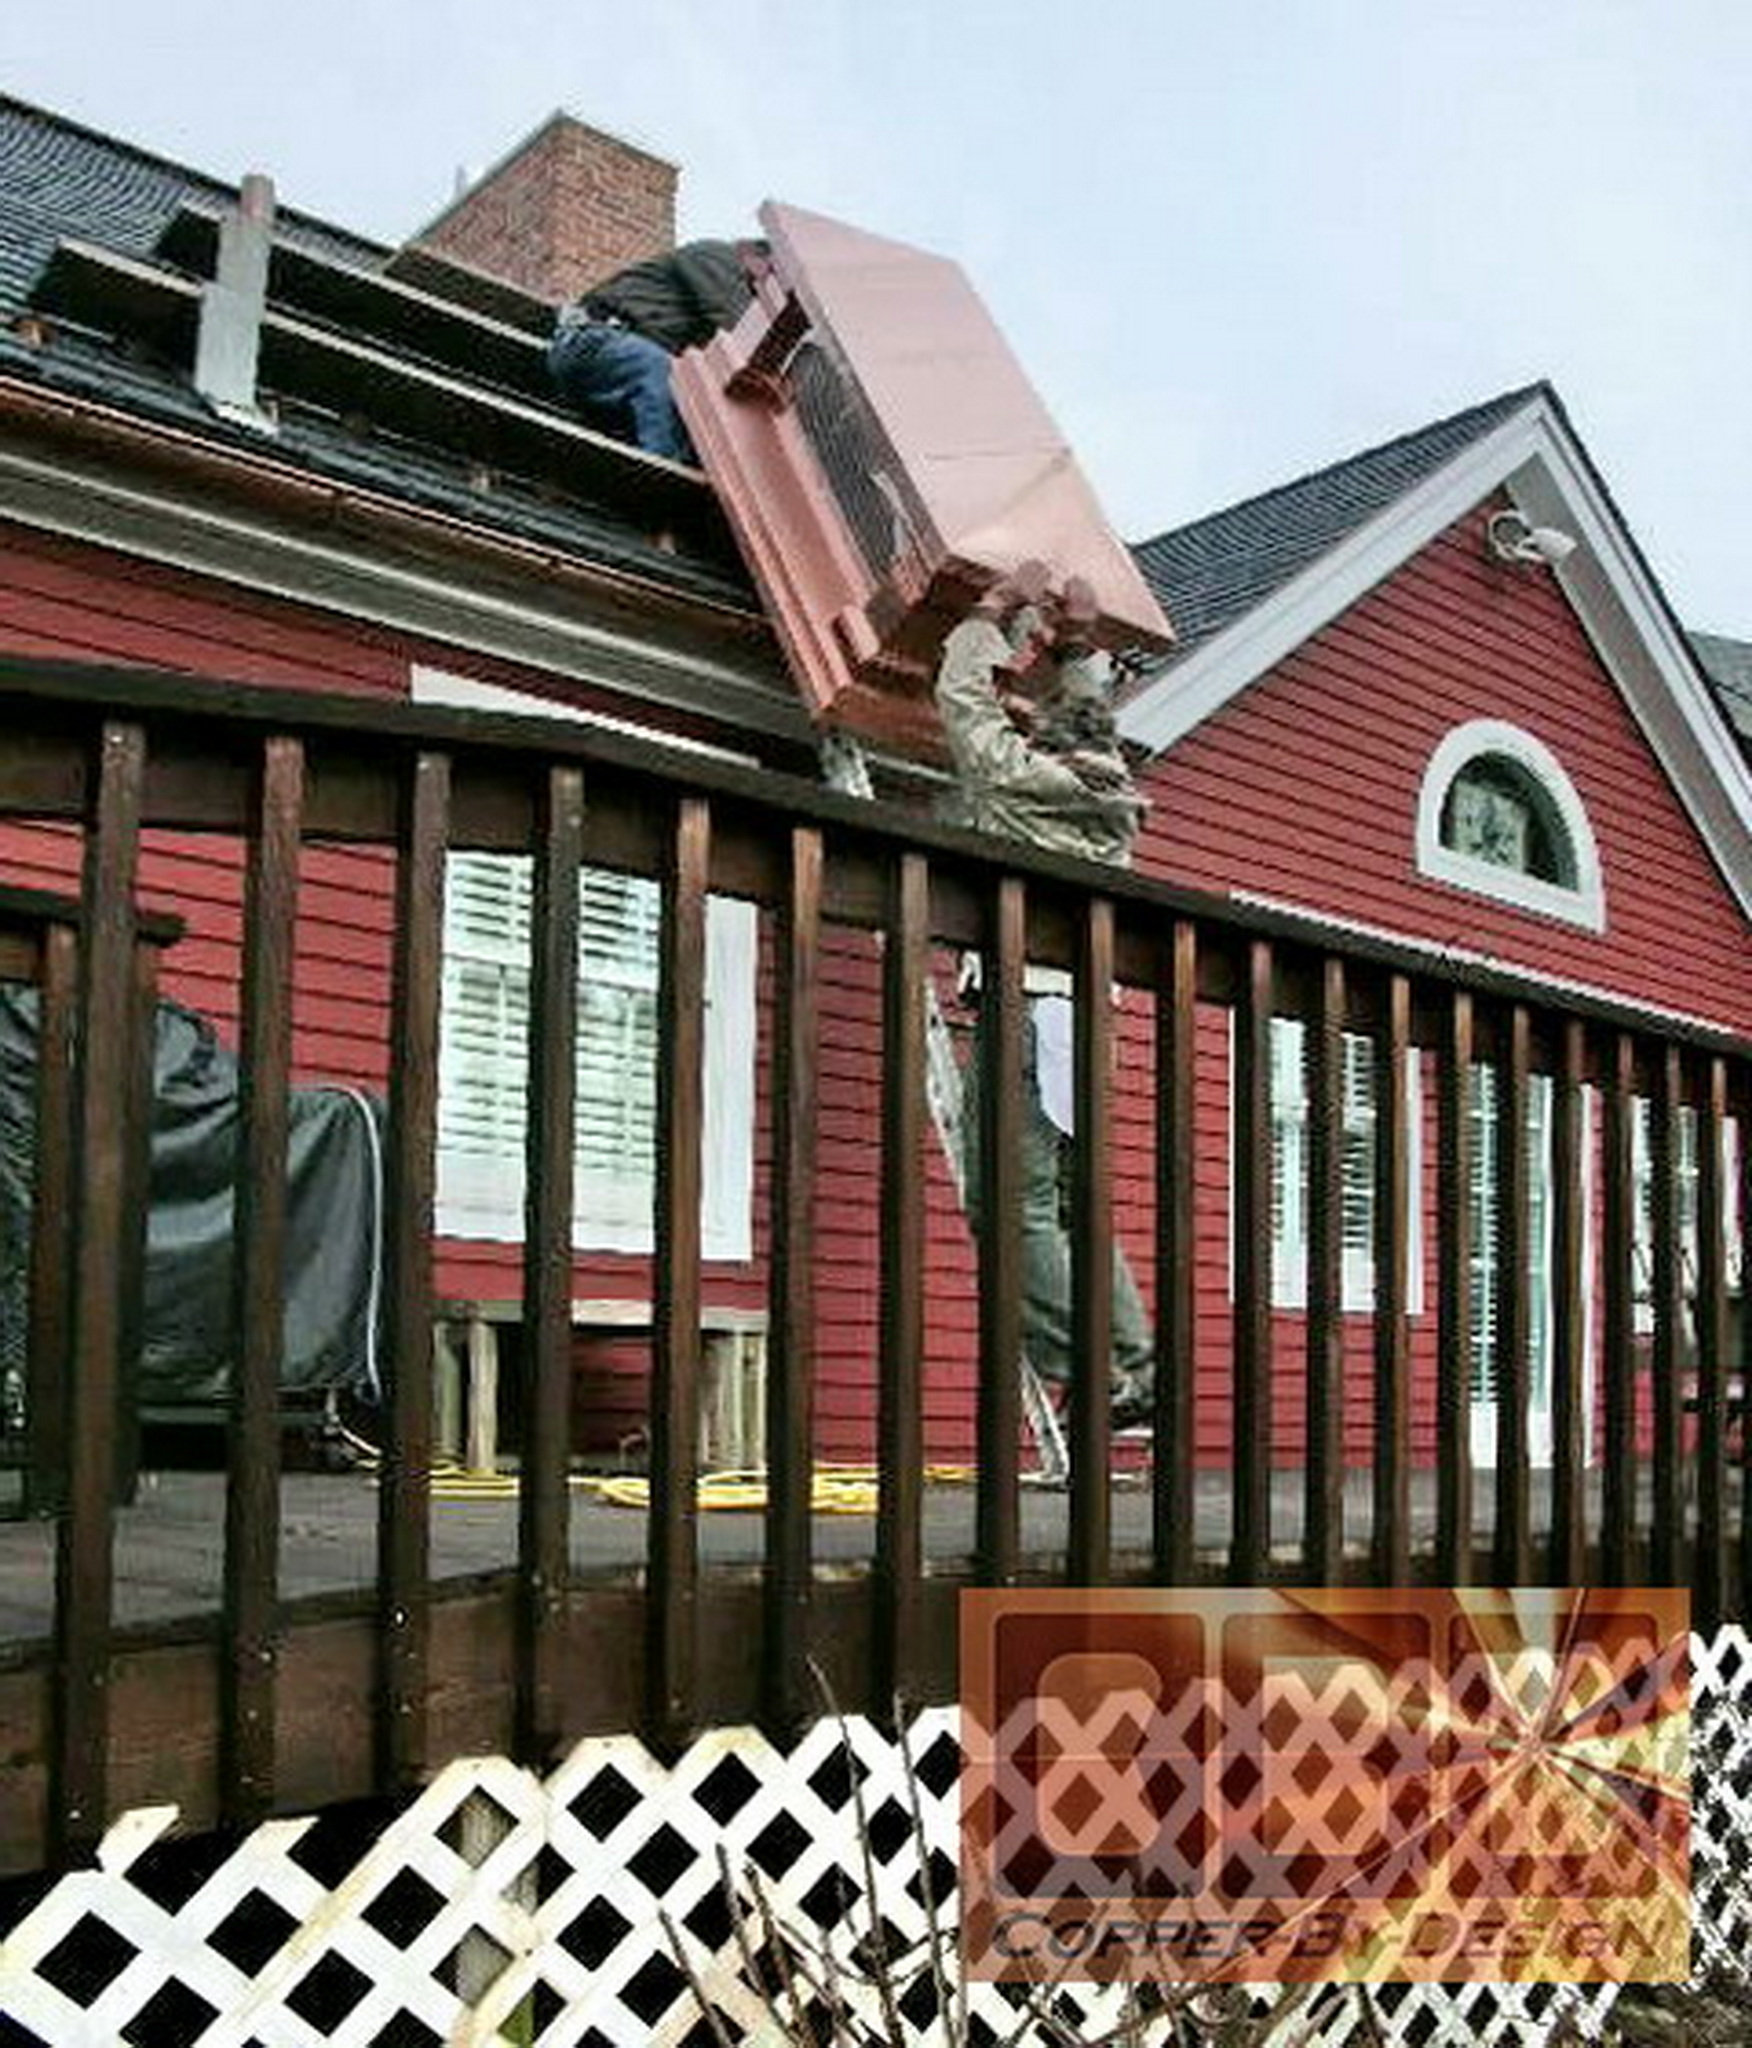
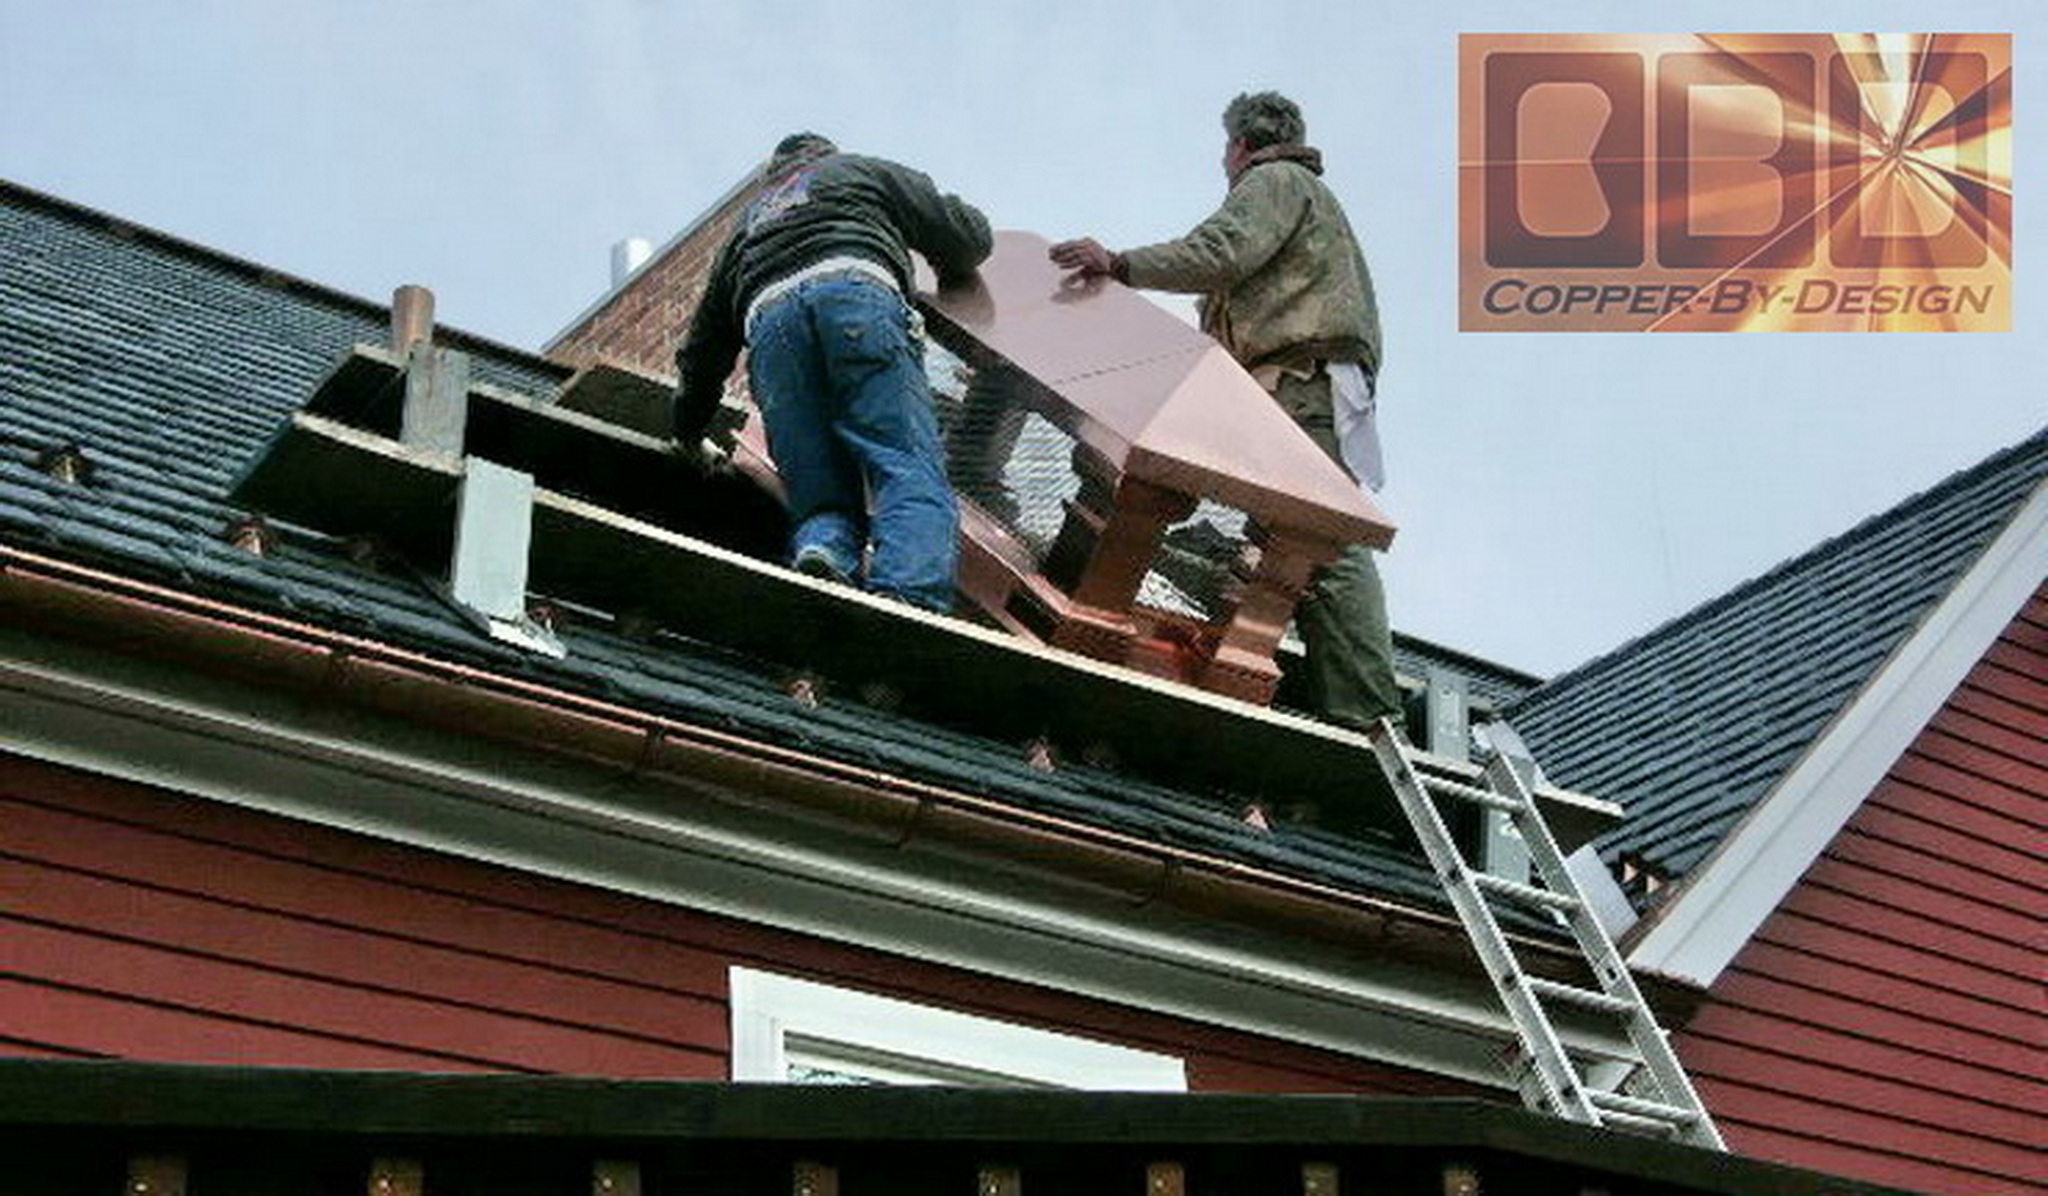
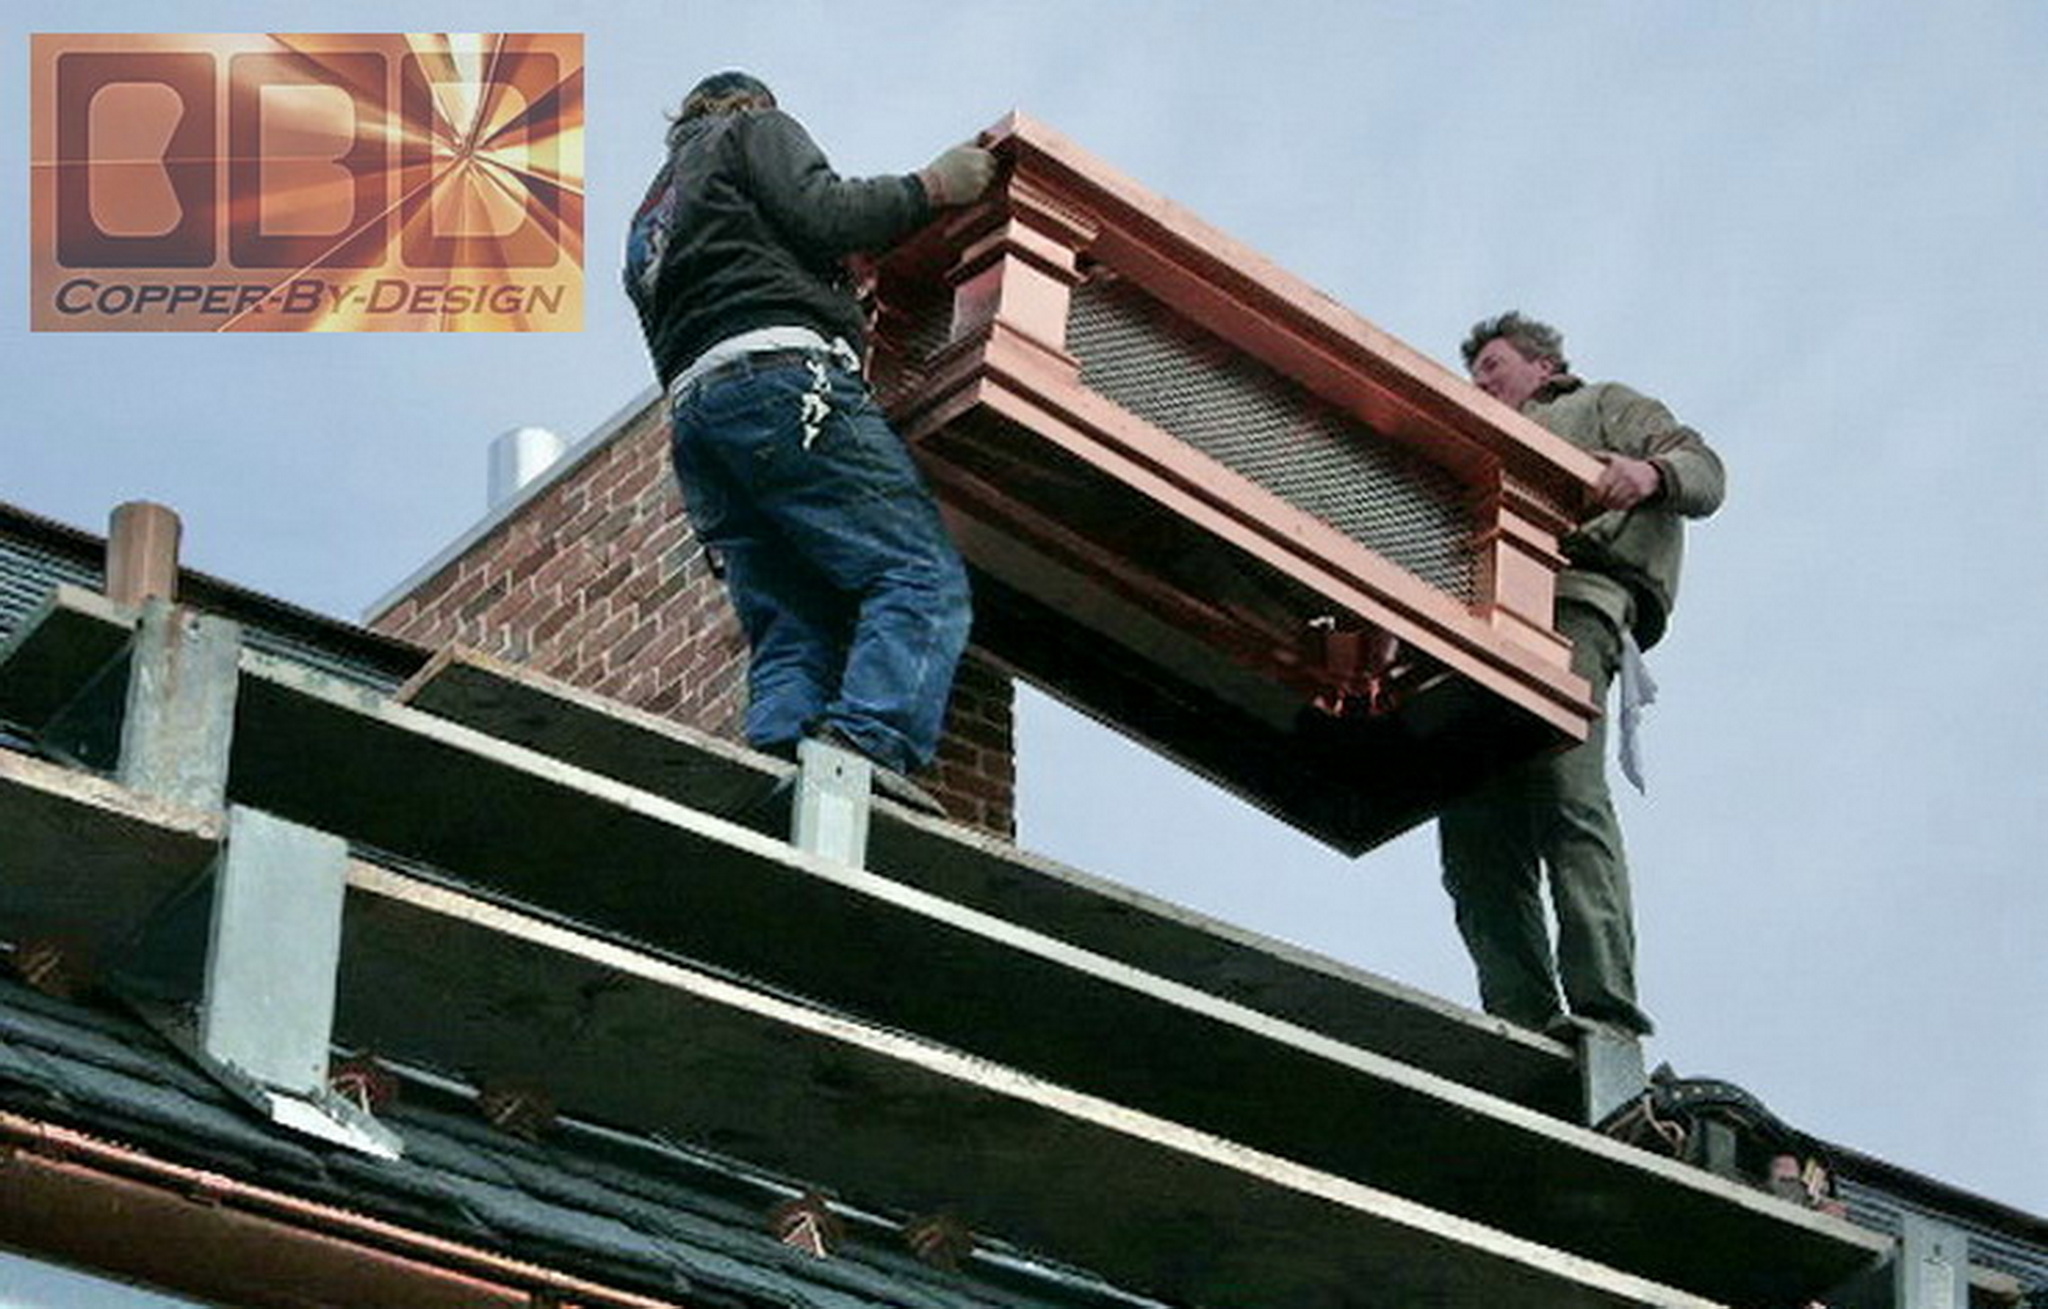
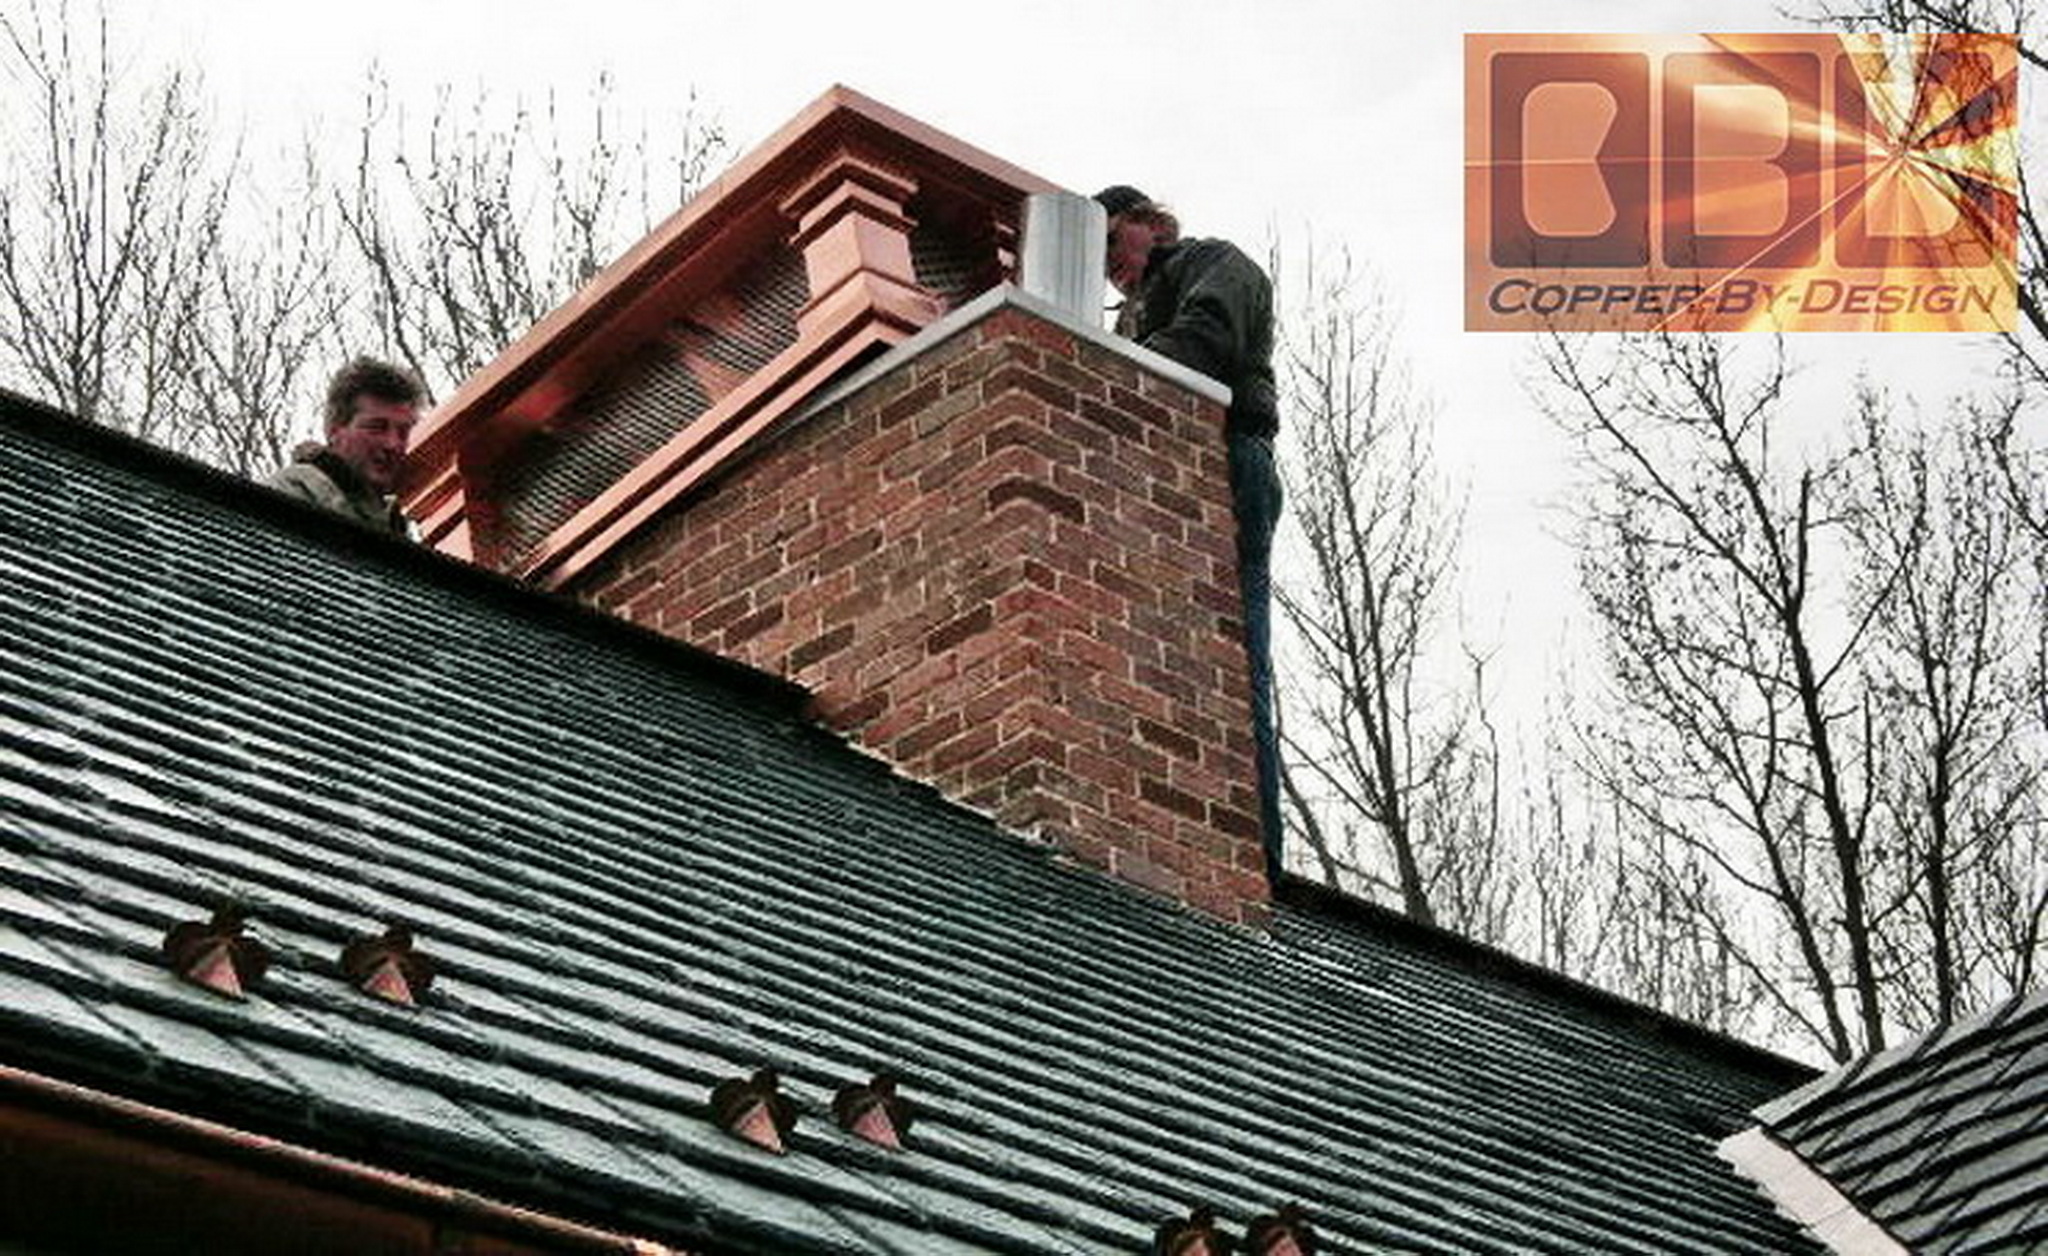
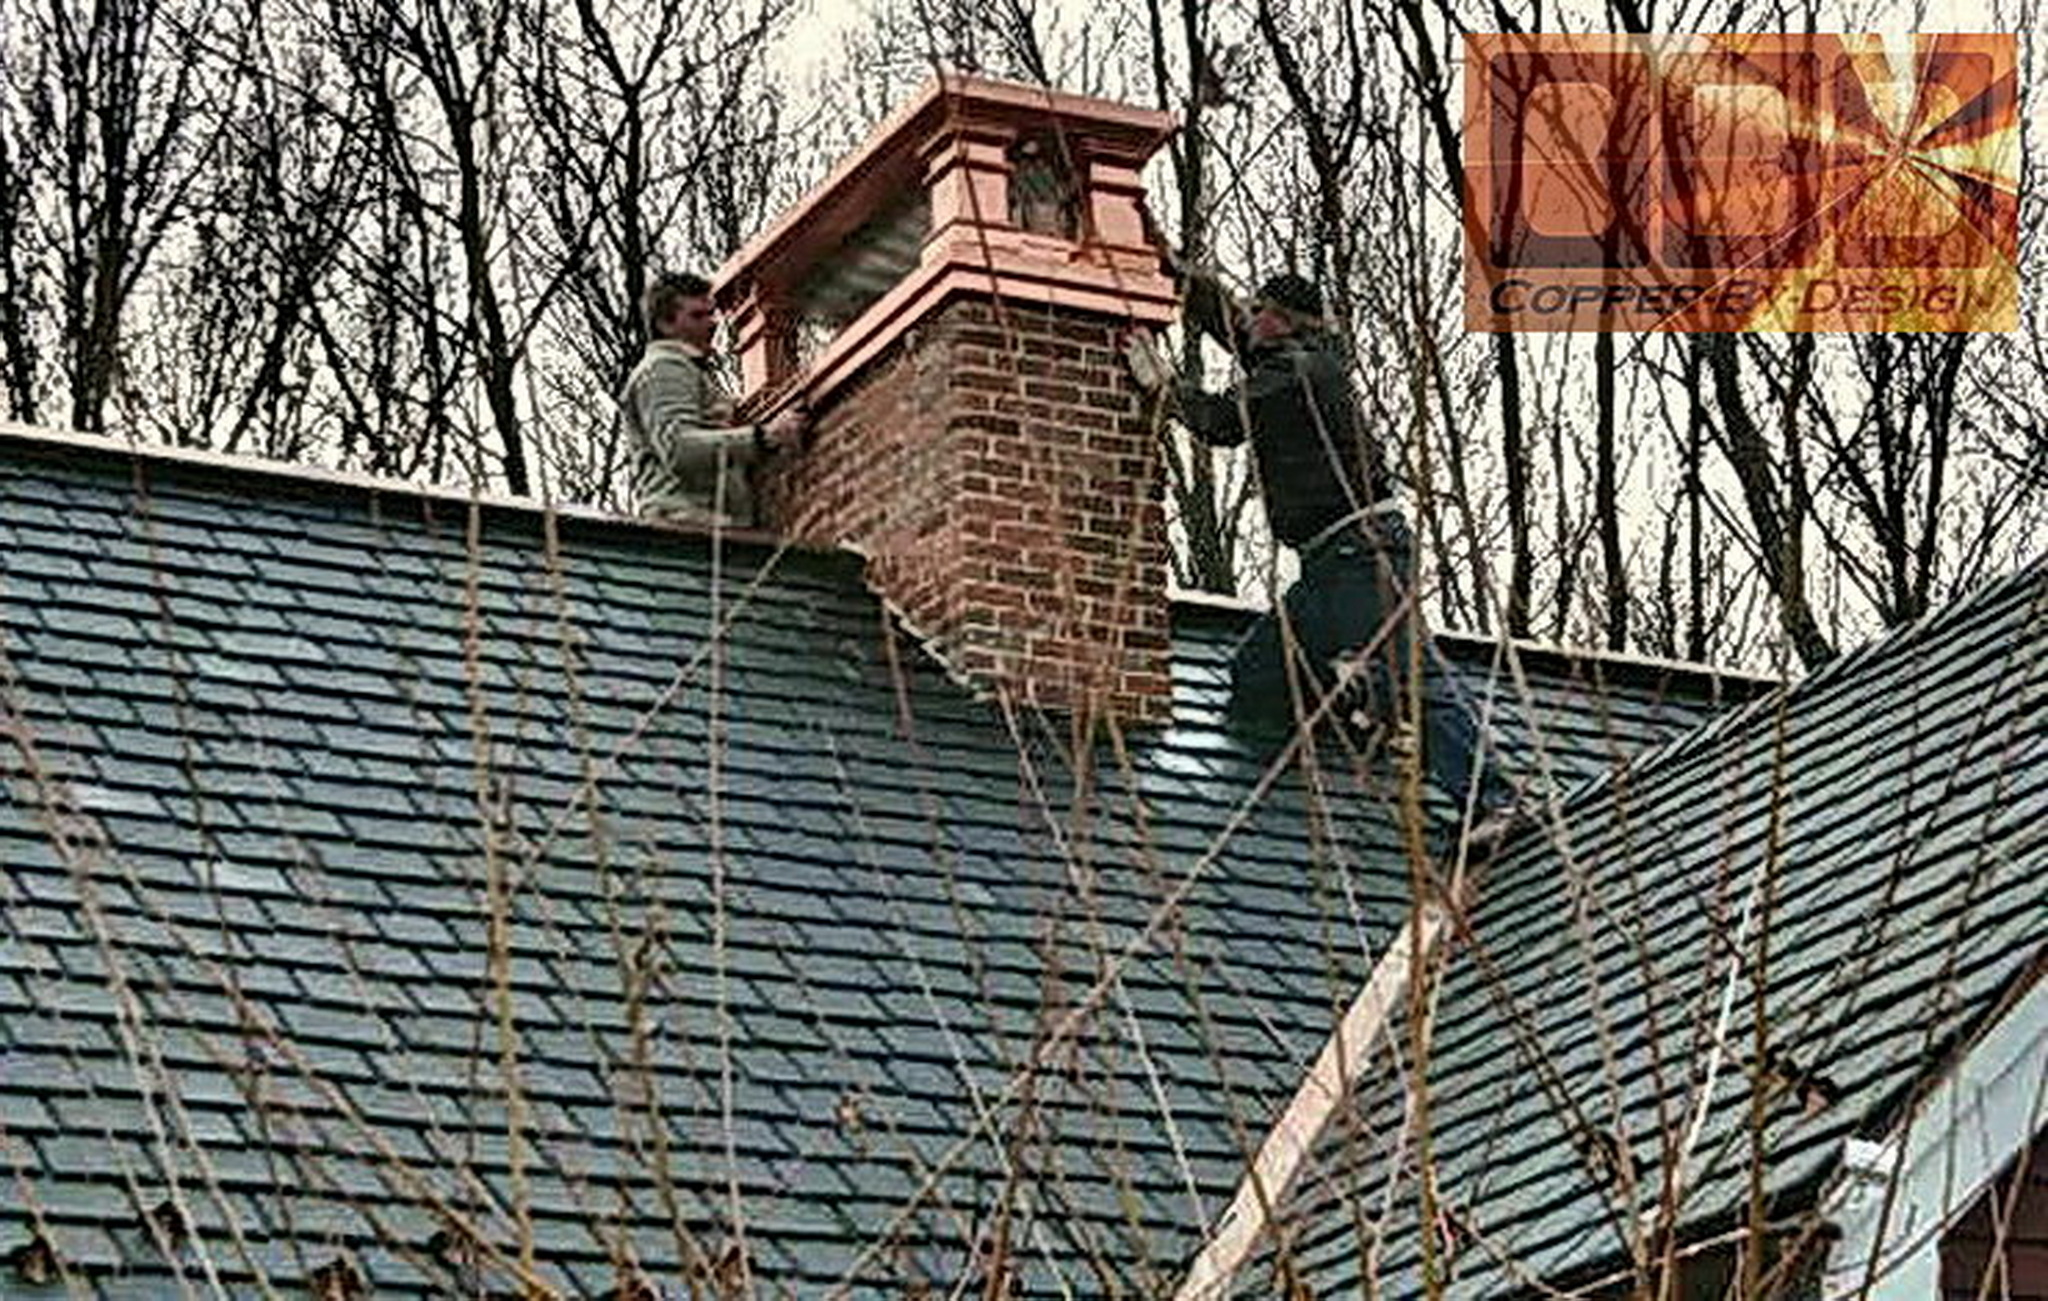
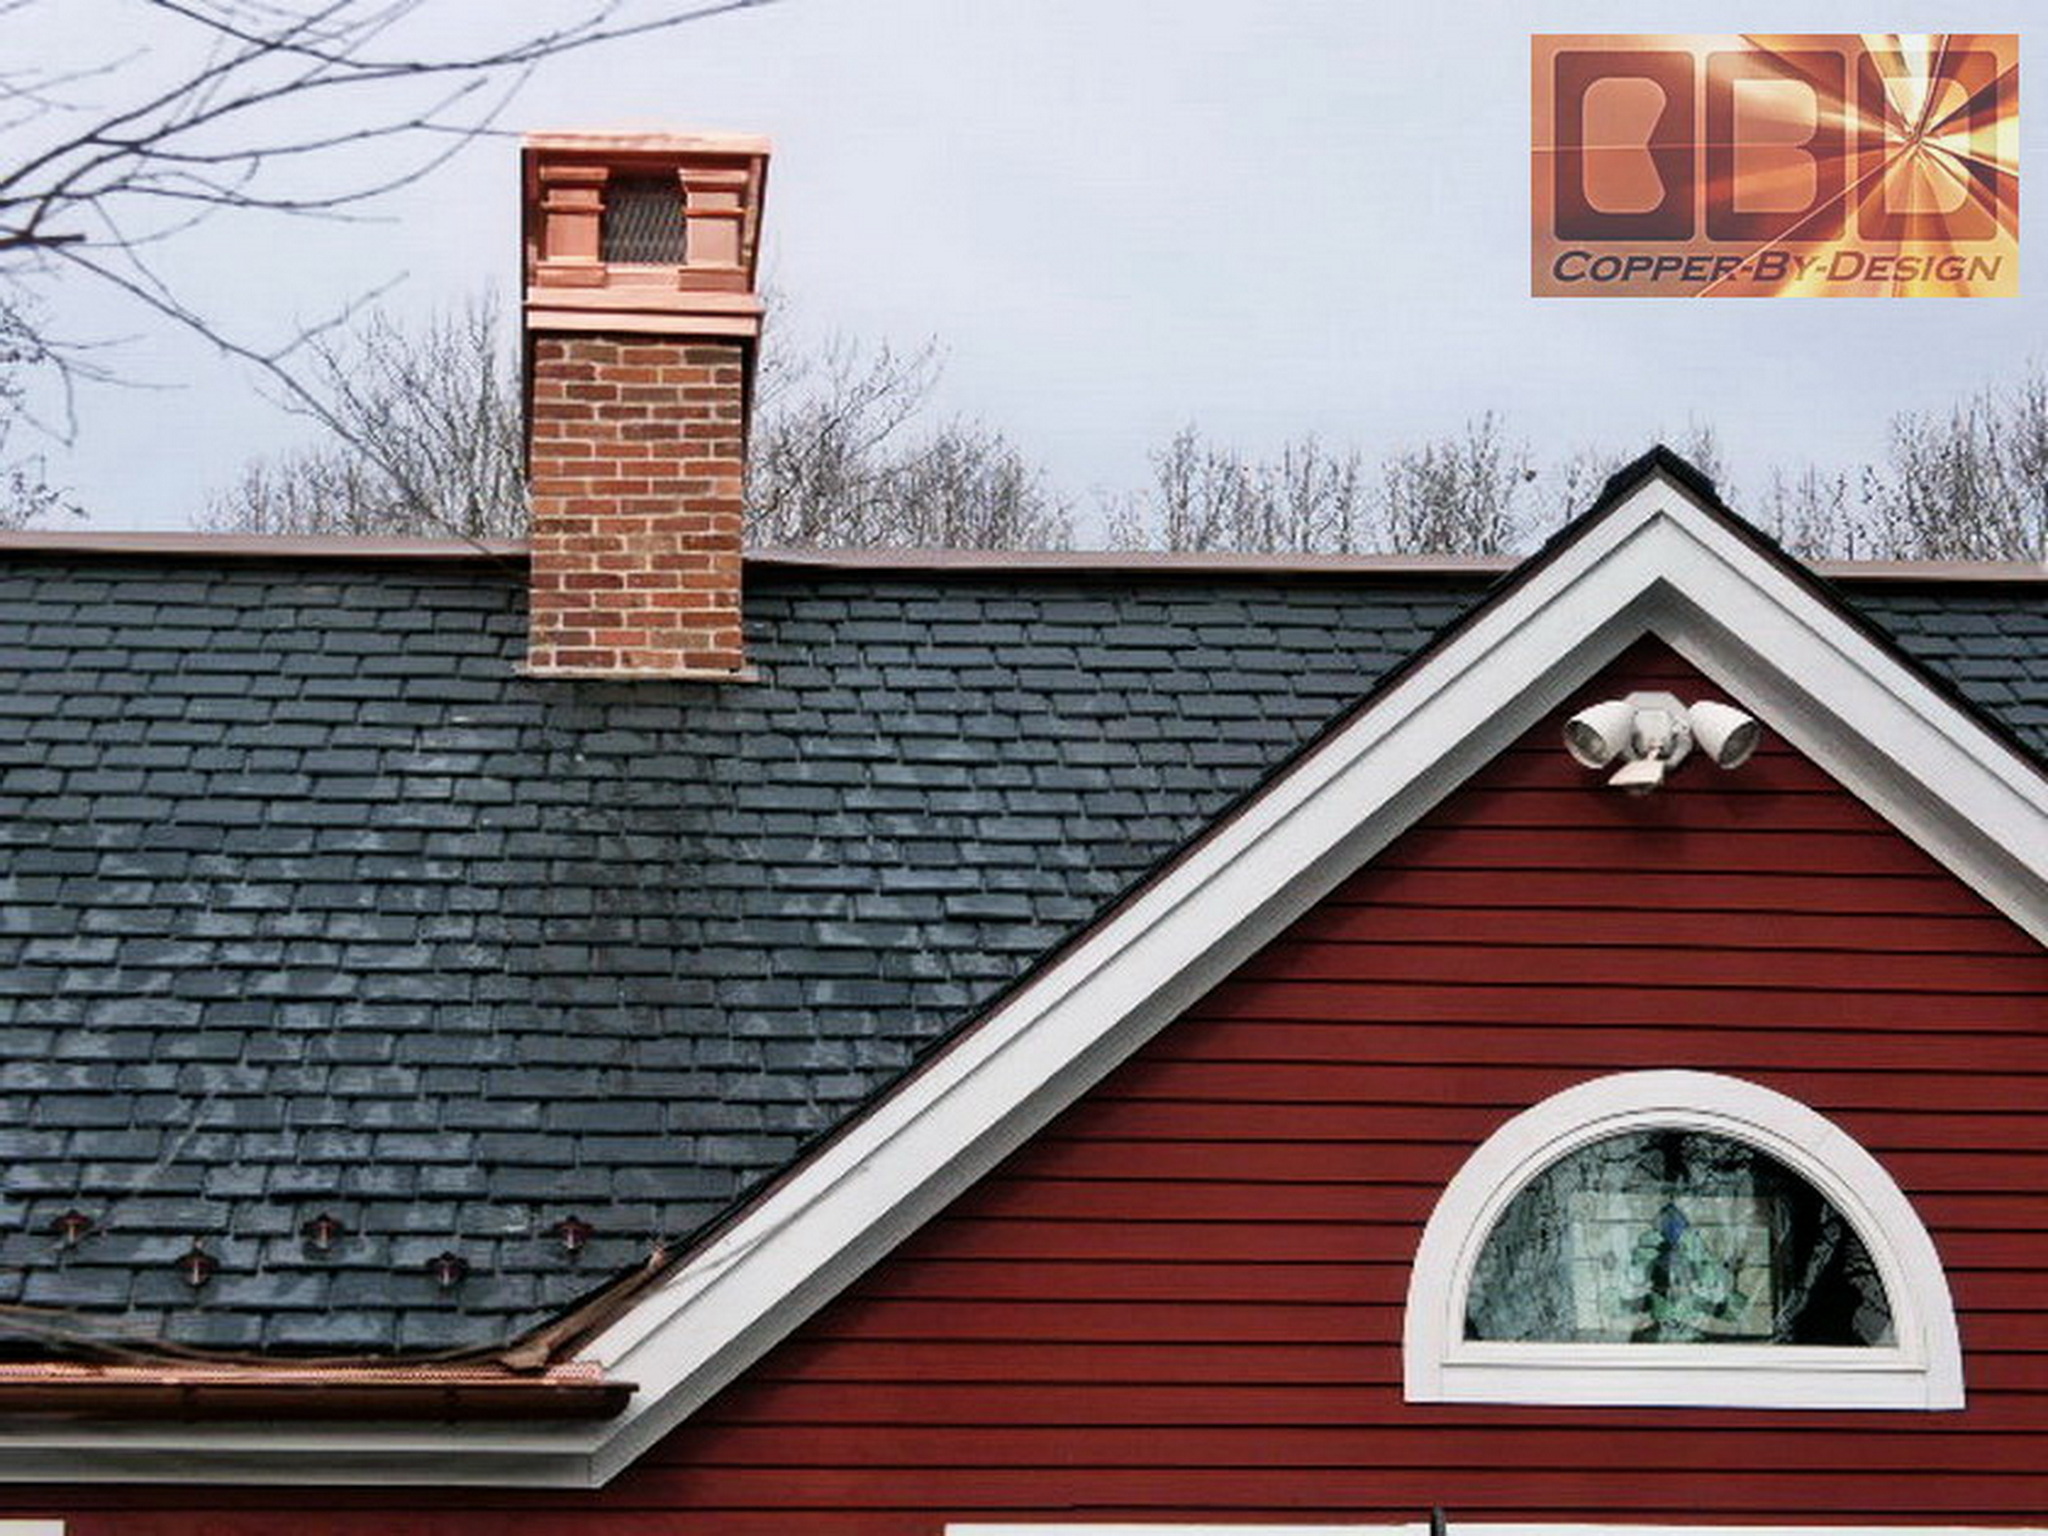
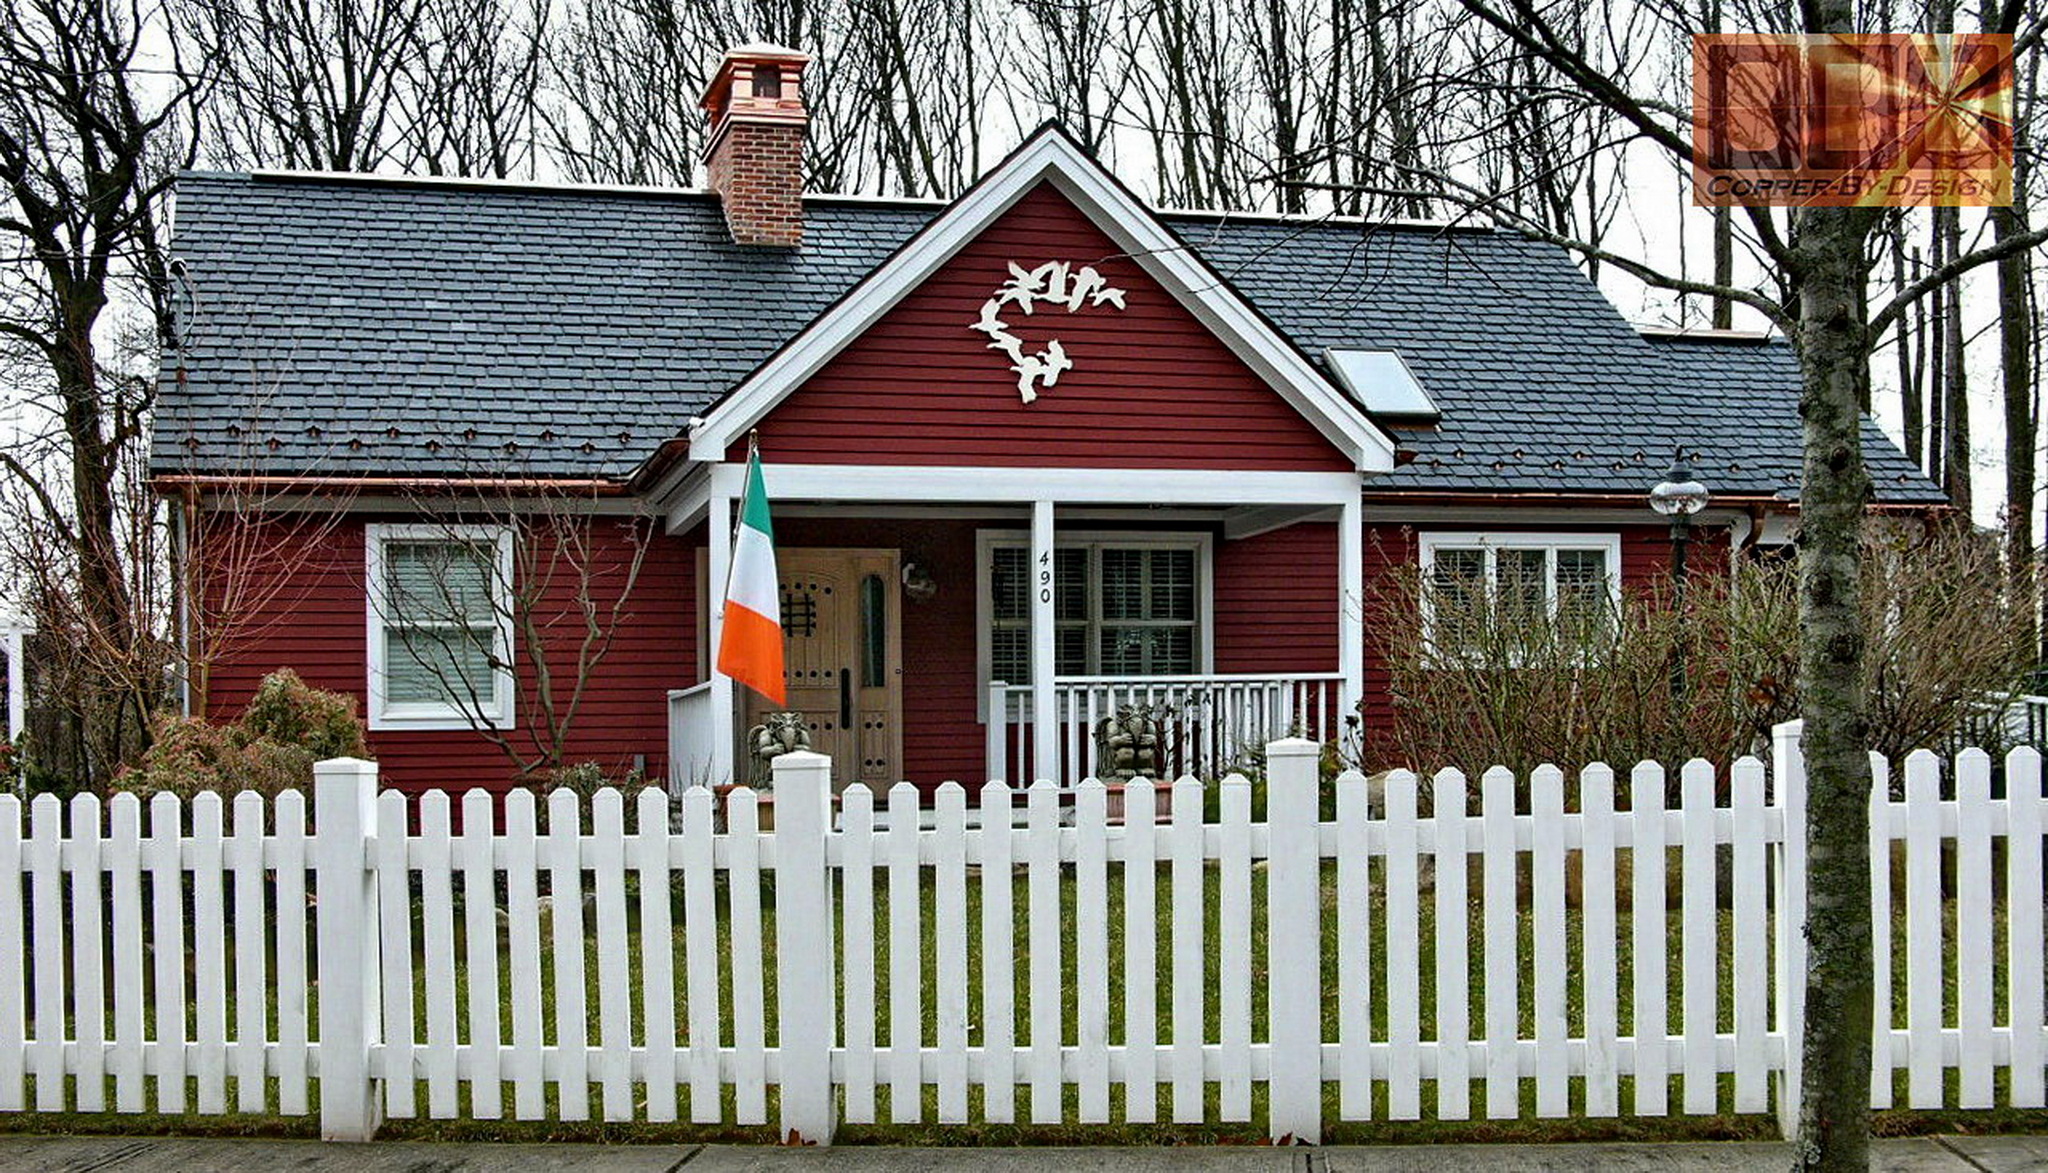
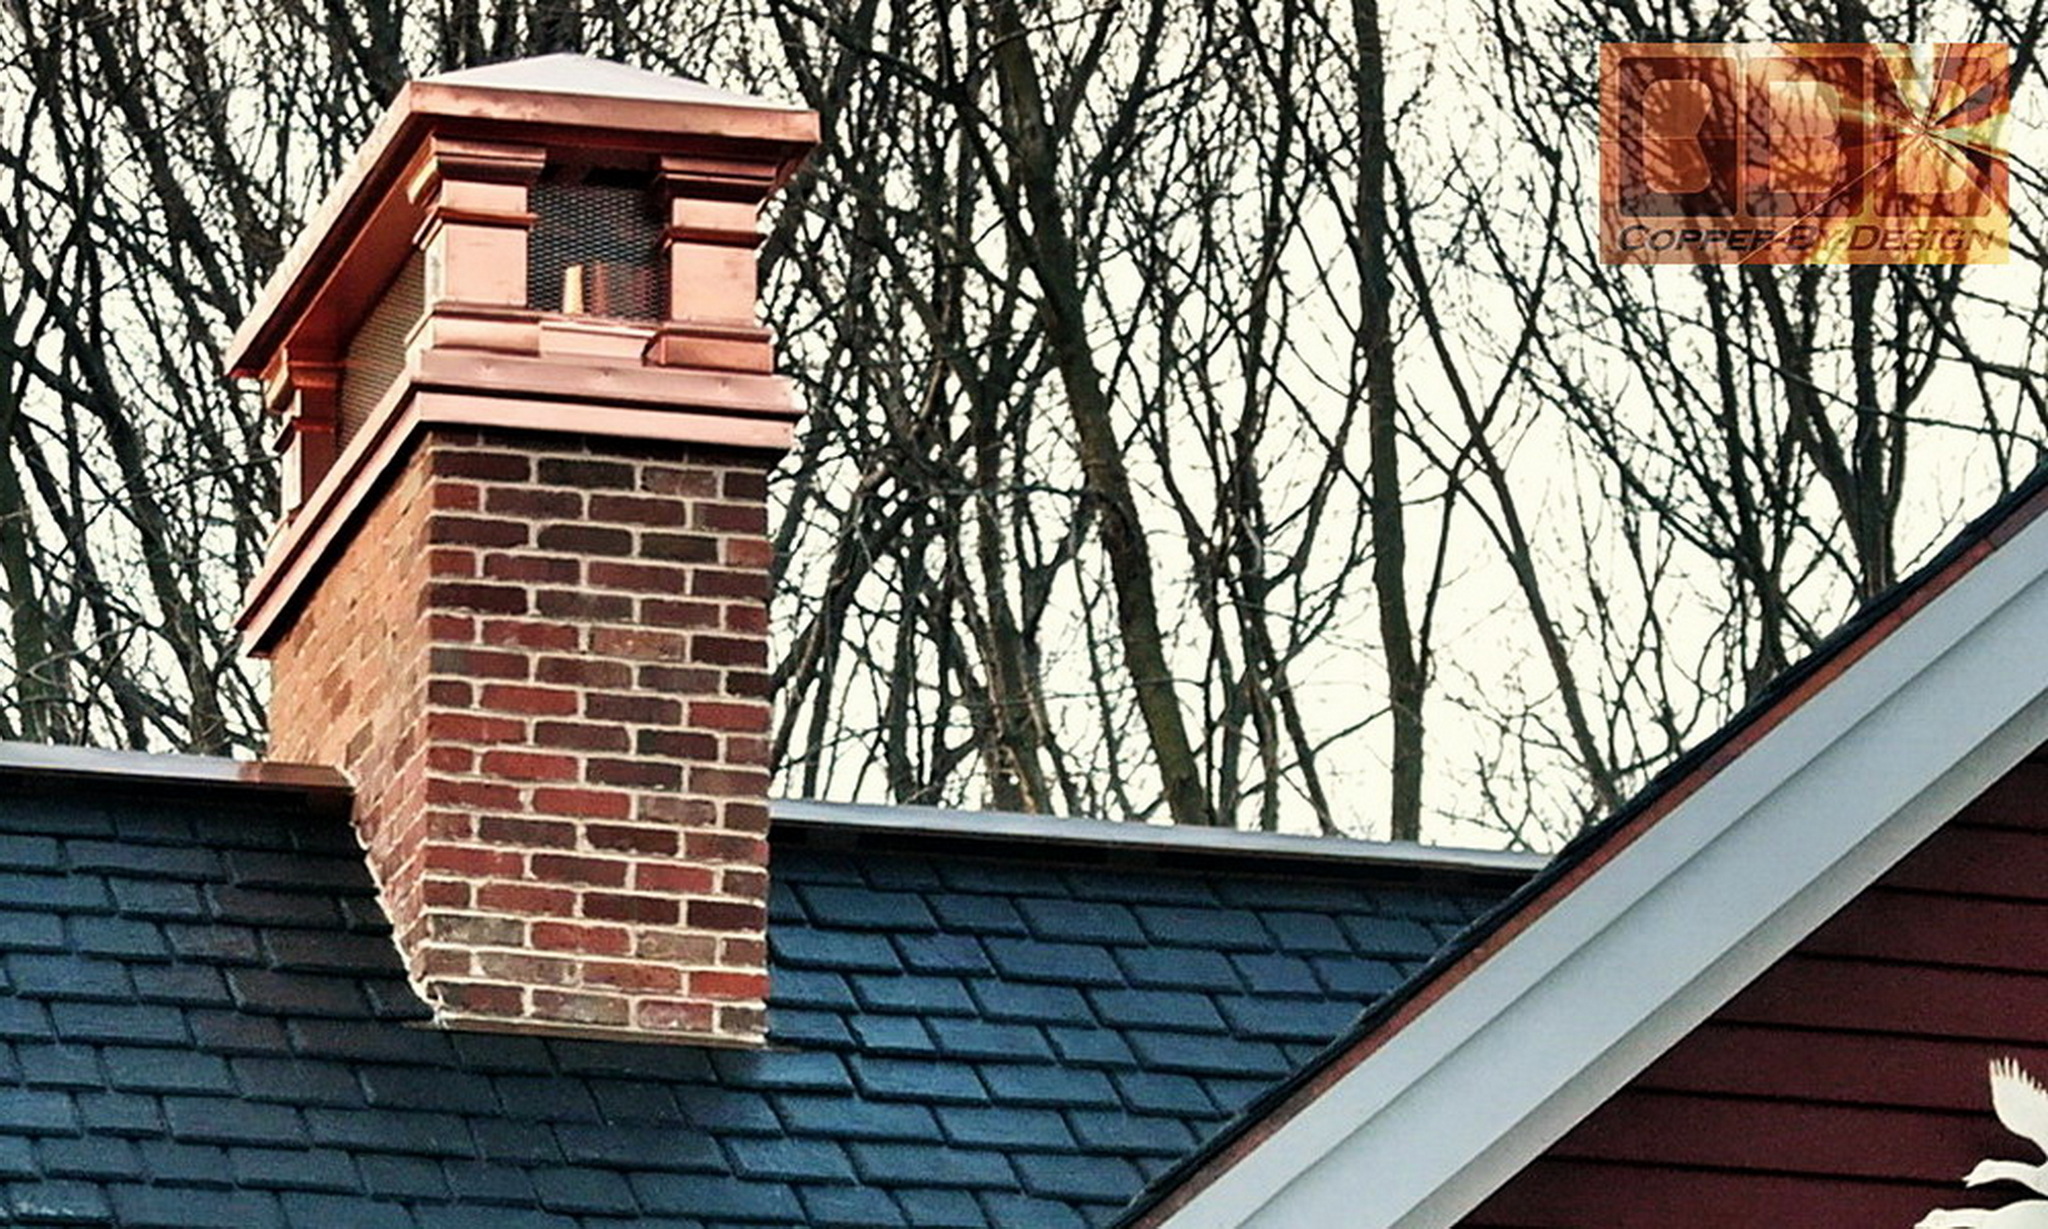
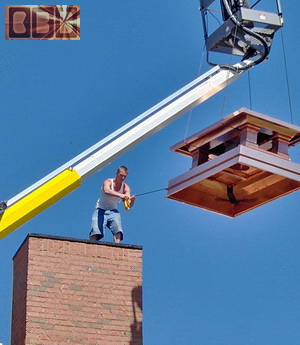
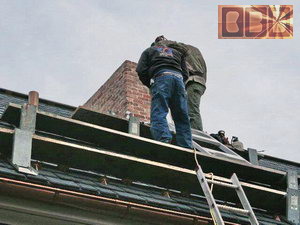
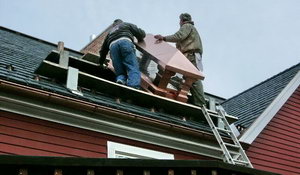
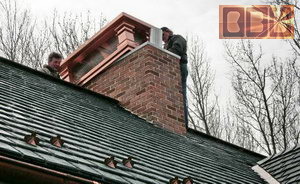
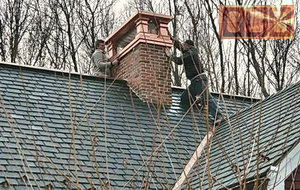
The Installation
The wood frame gets mounted to the top of the
chimney studs:
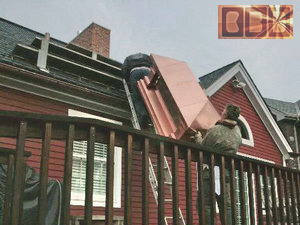
Instead of using a hoist they decided to lift
it manually up to the chimney top:
 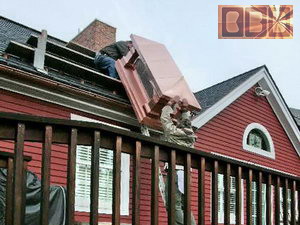
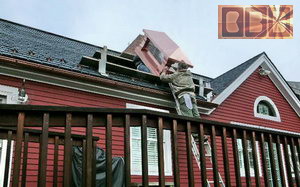 
 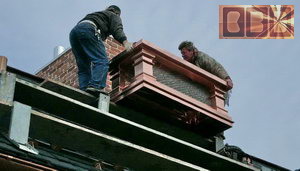
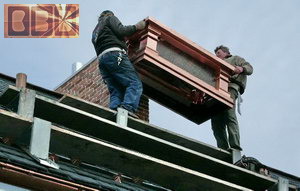 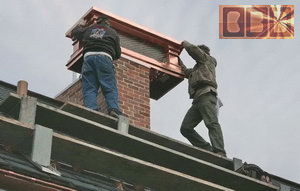
They reported having a little trouble lining
it up over the flue pipe, but got it down over it eventually:
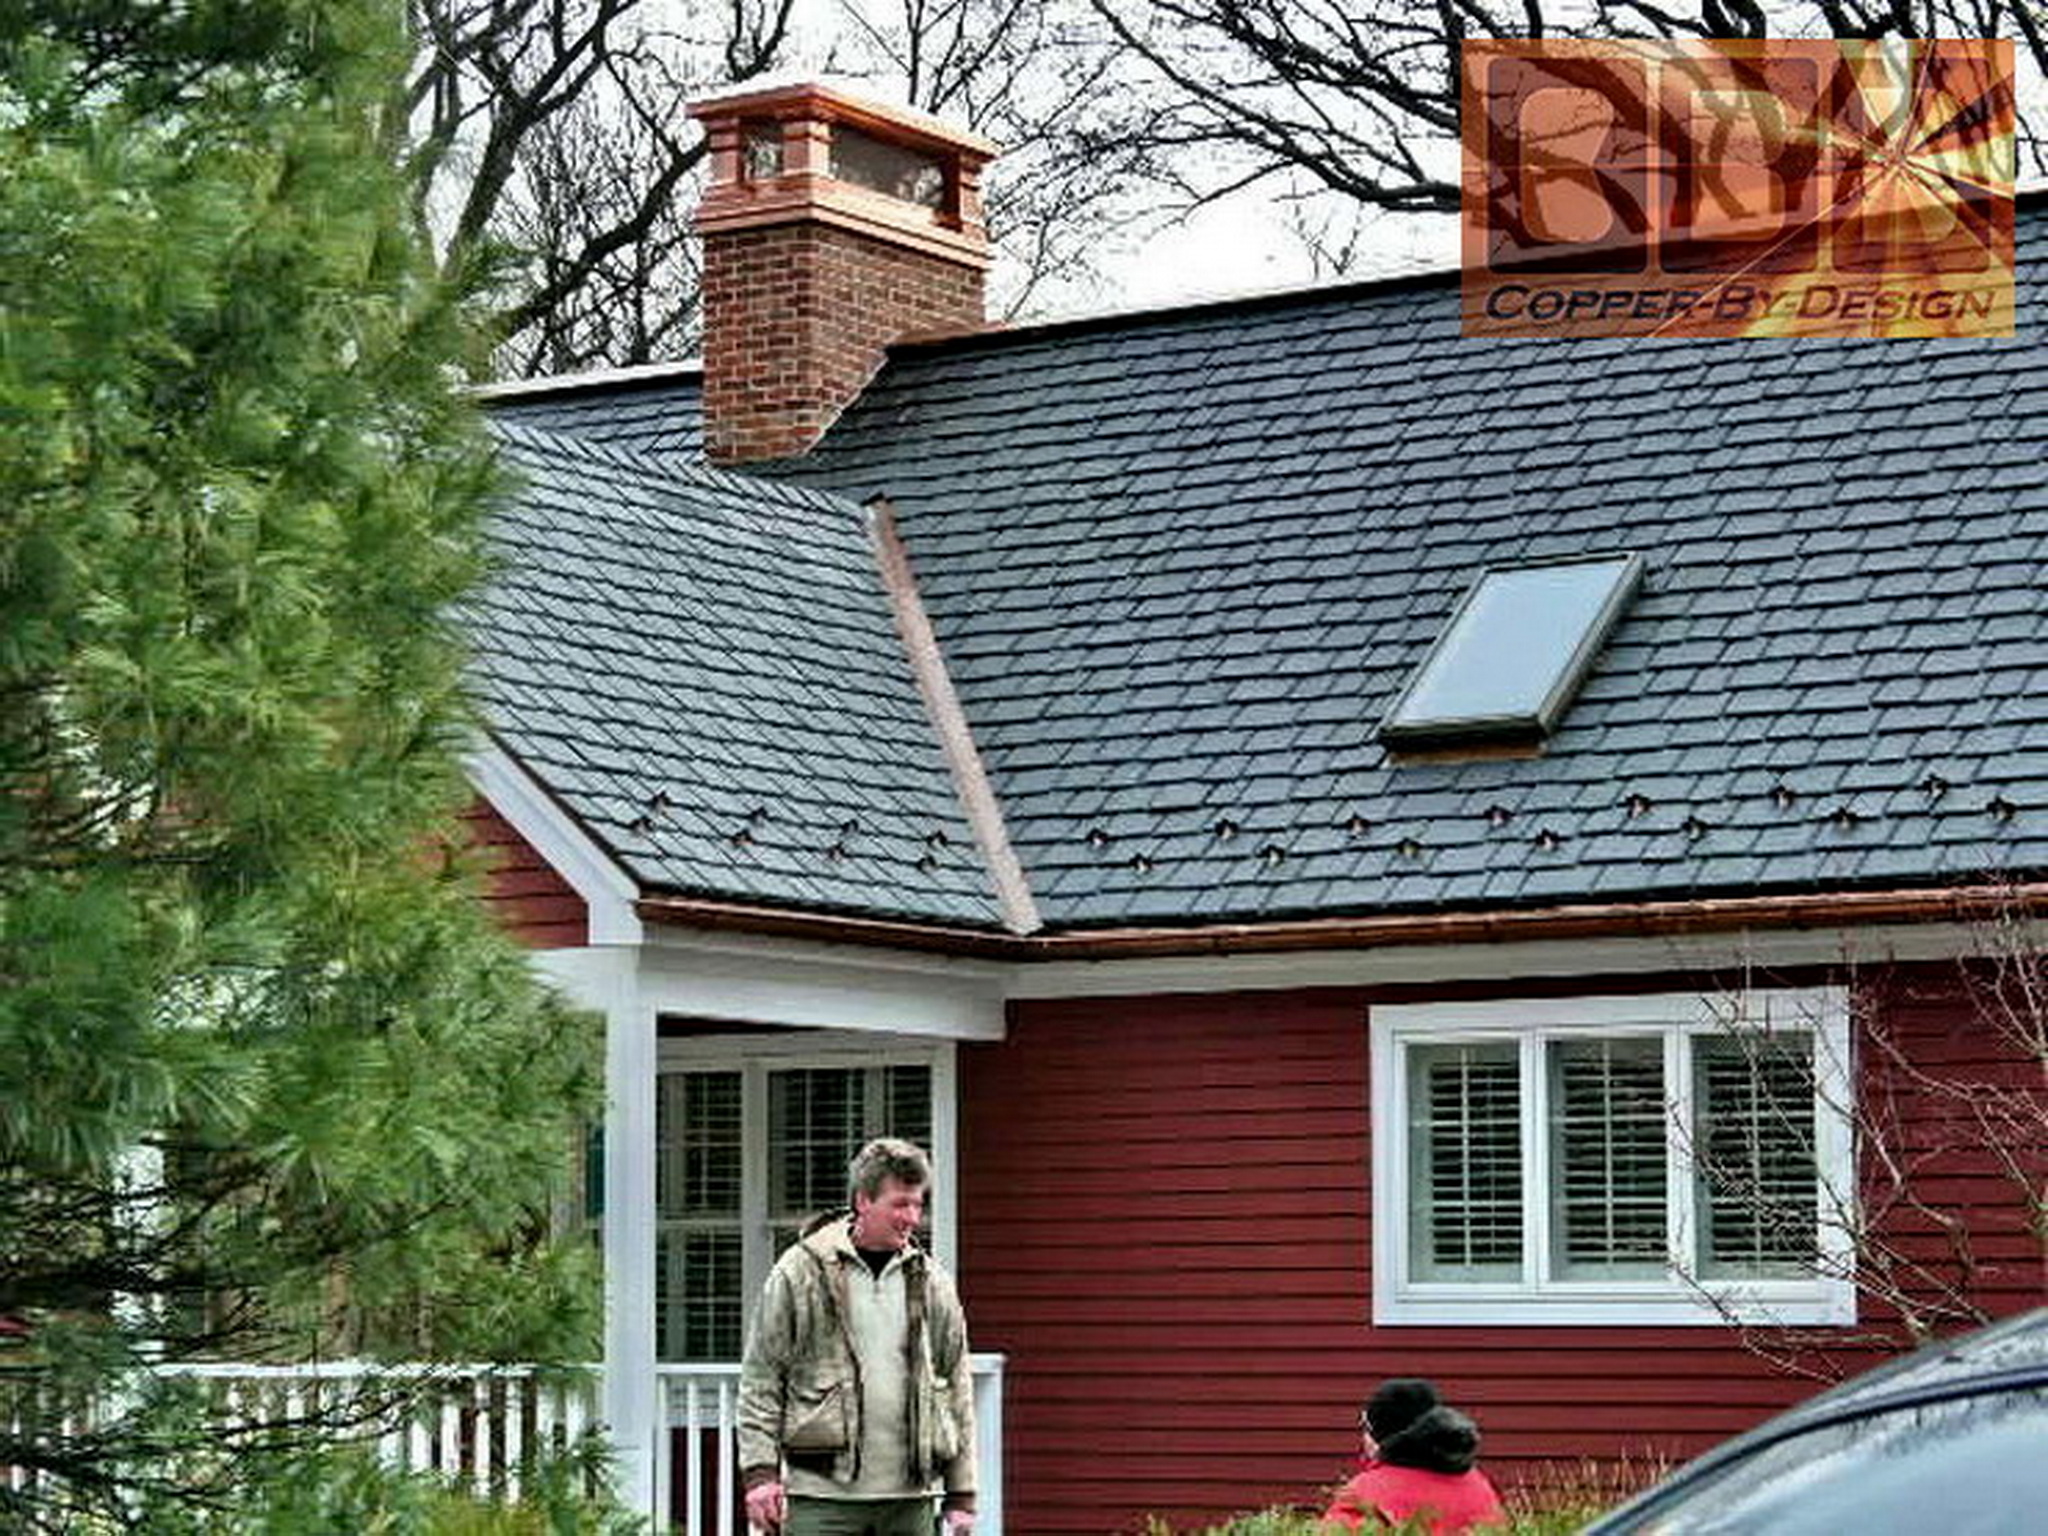
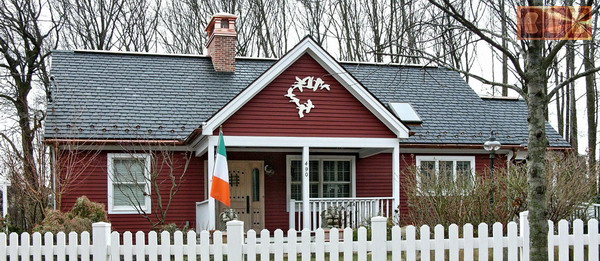
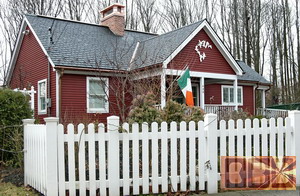
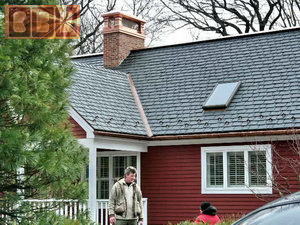
Back side of the house view:
Front of the house view:
|