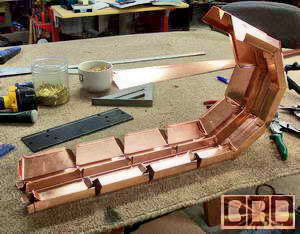
|
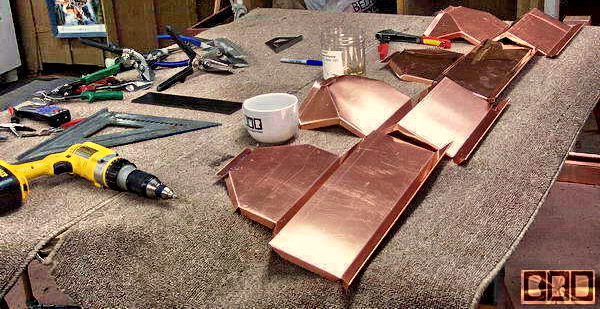
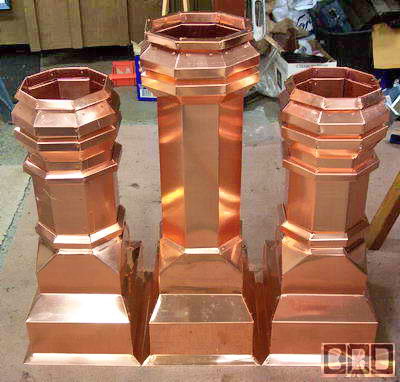
Here is a recent
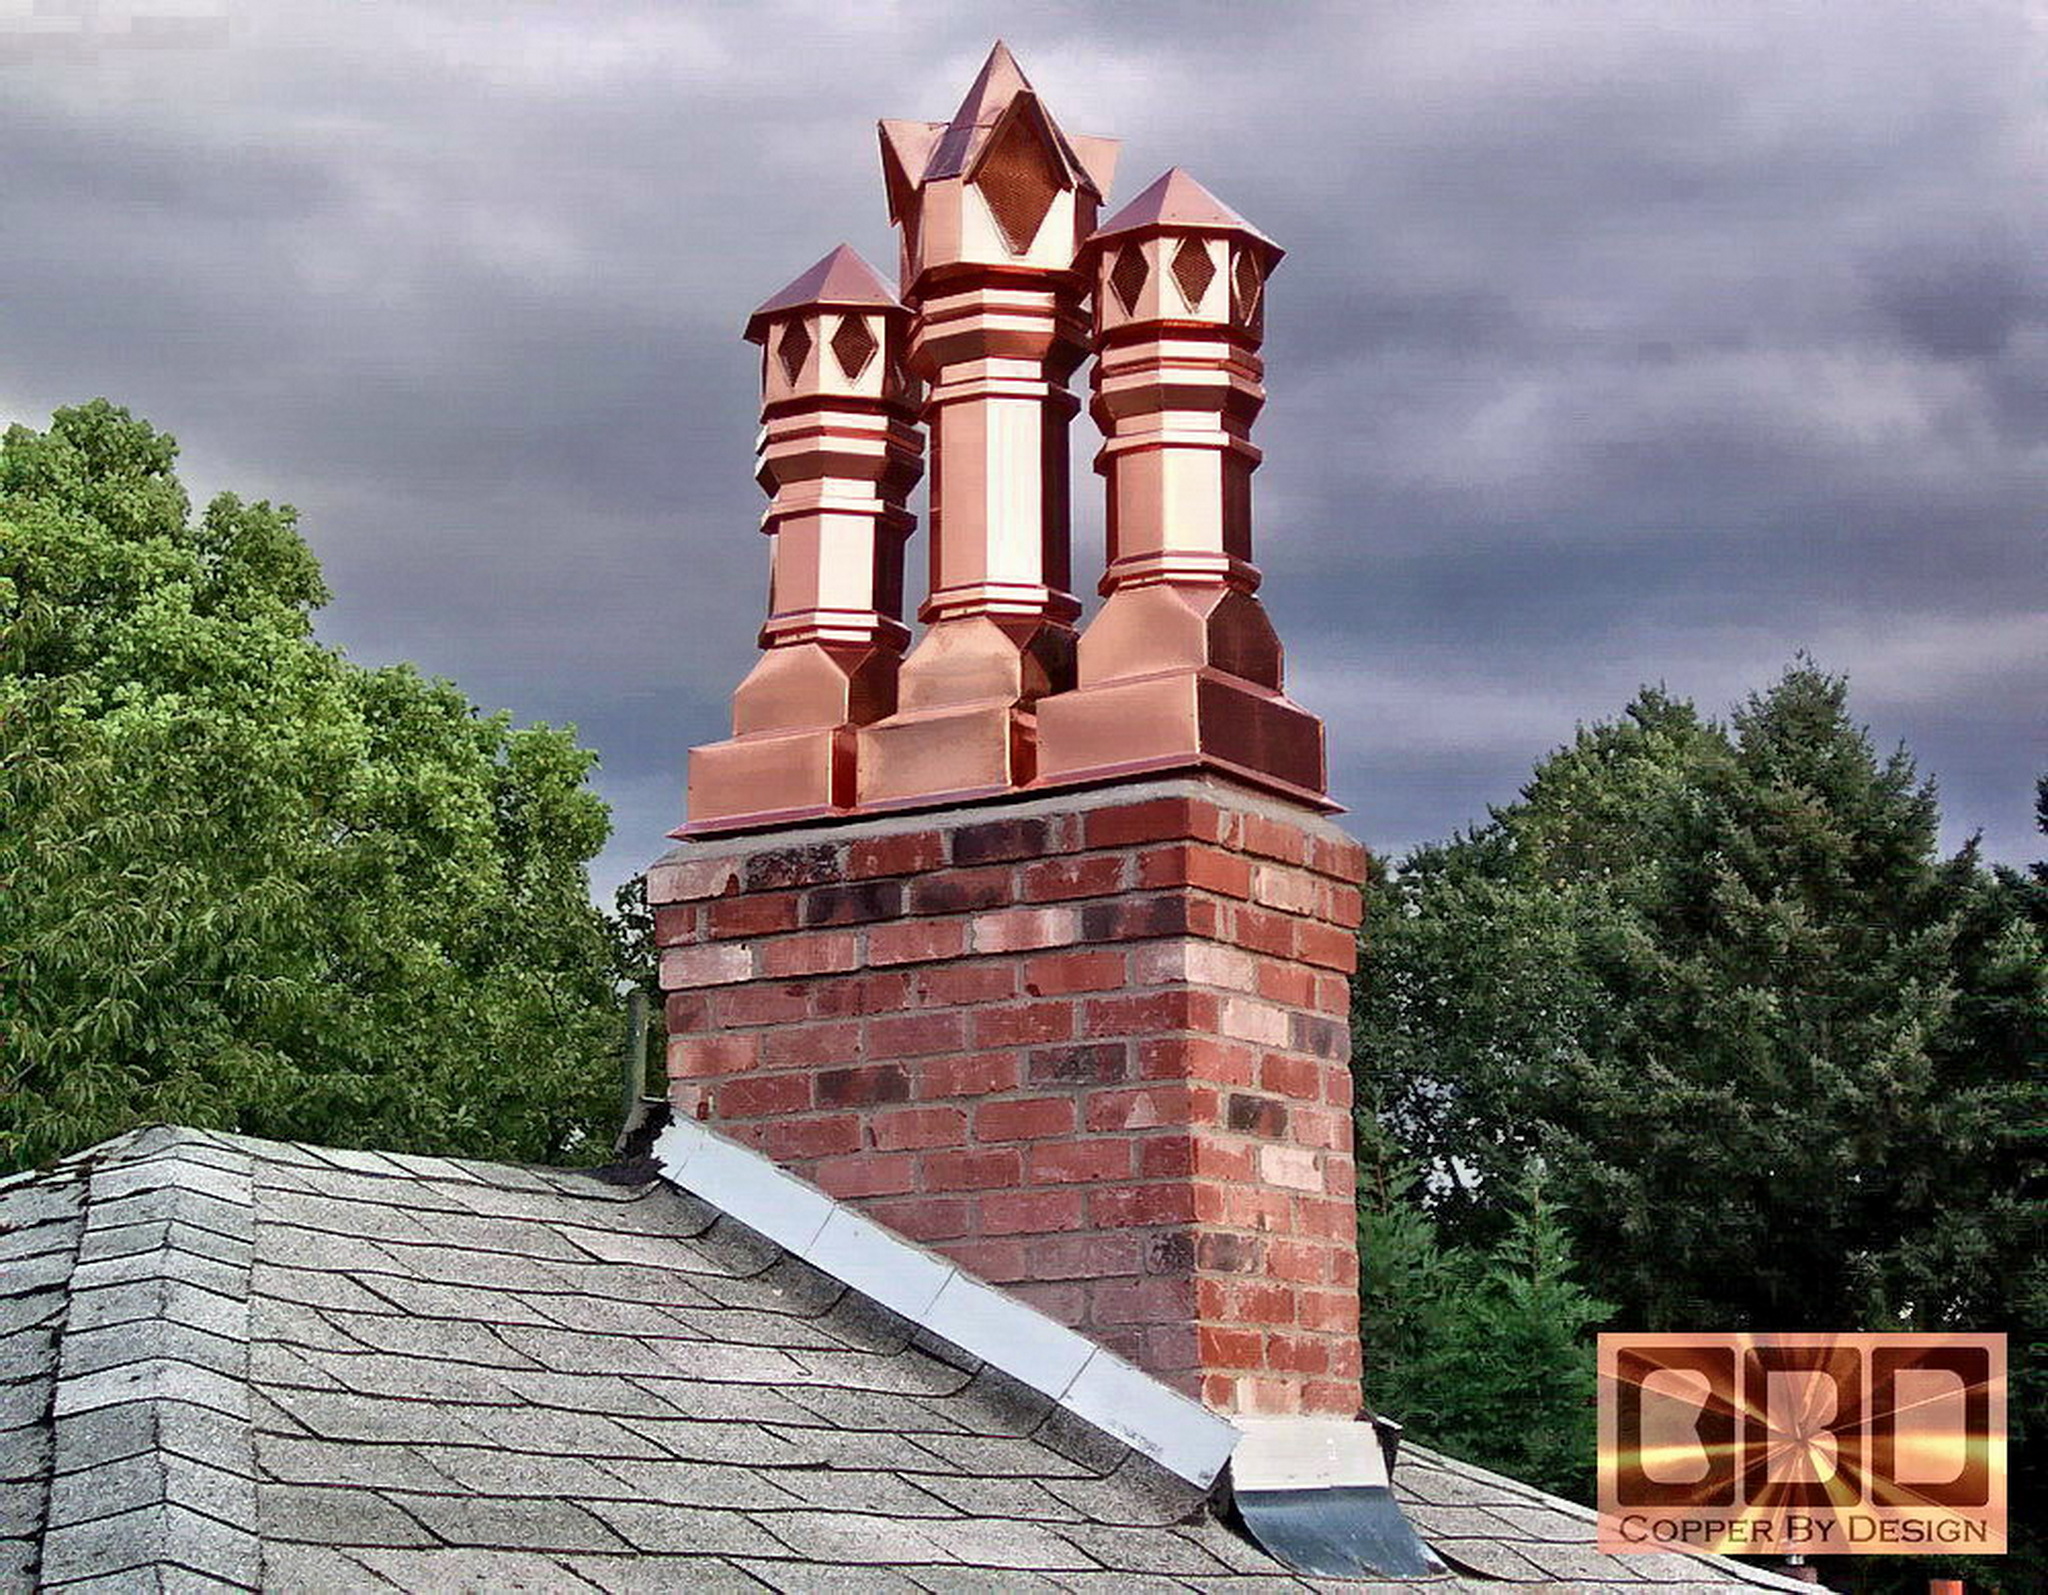
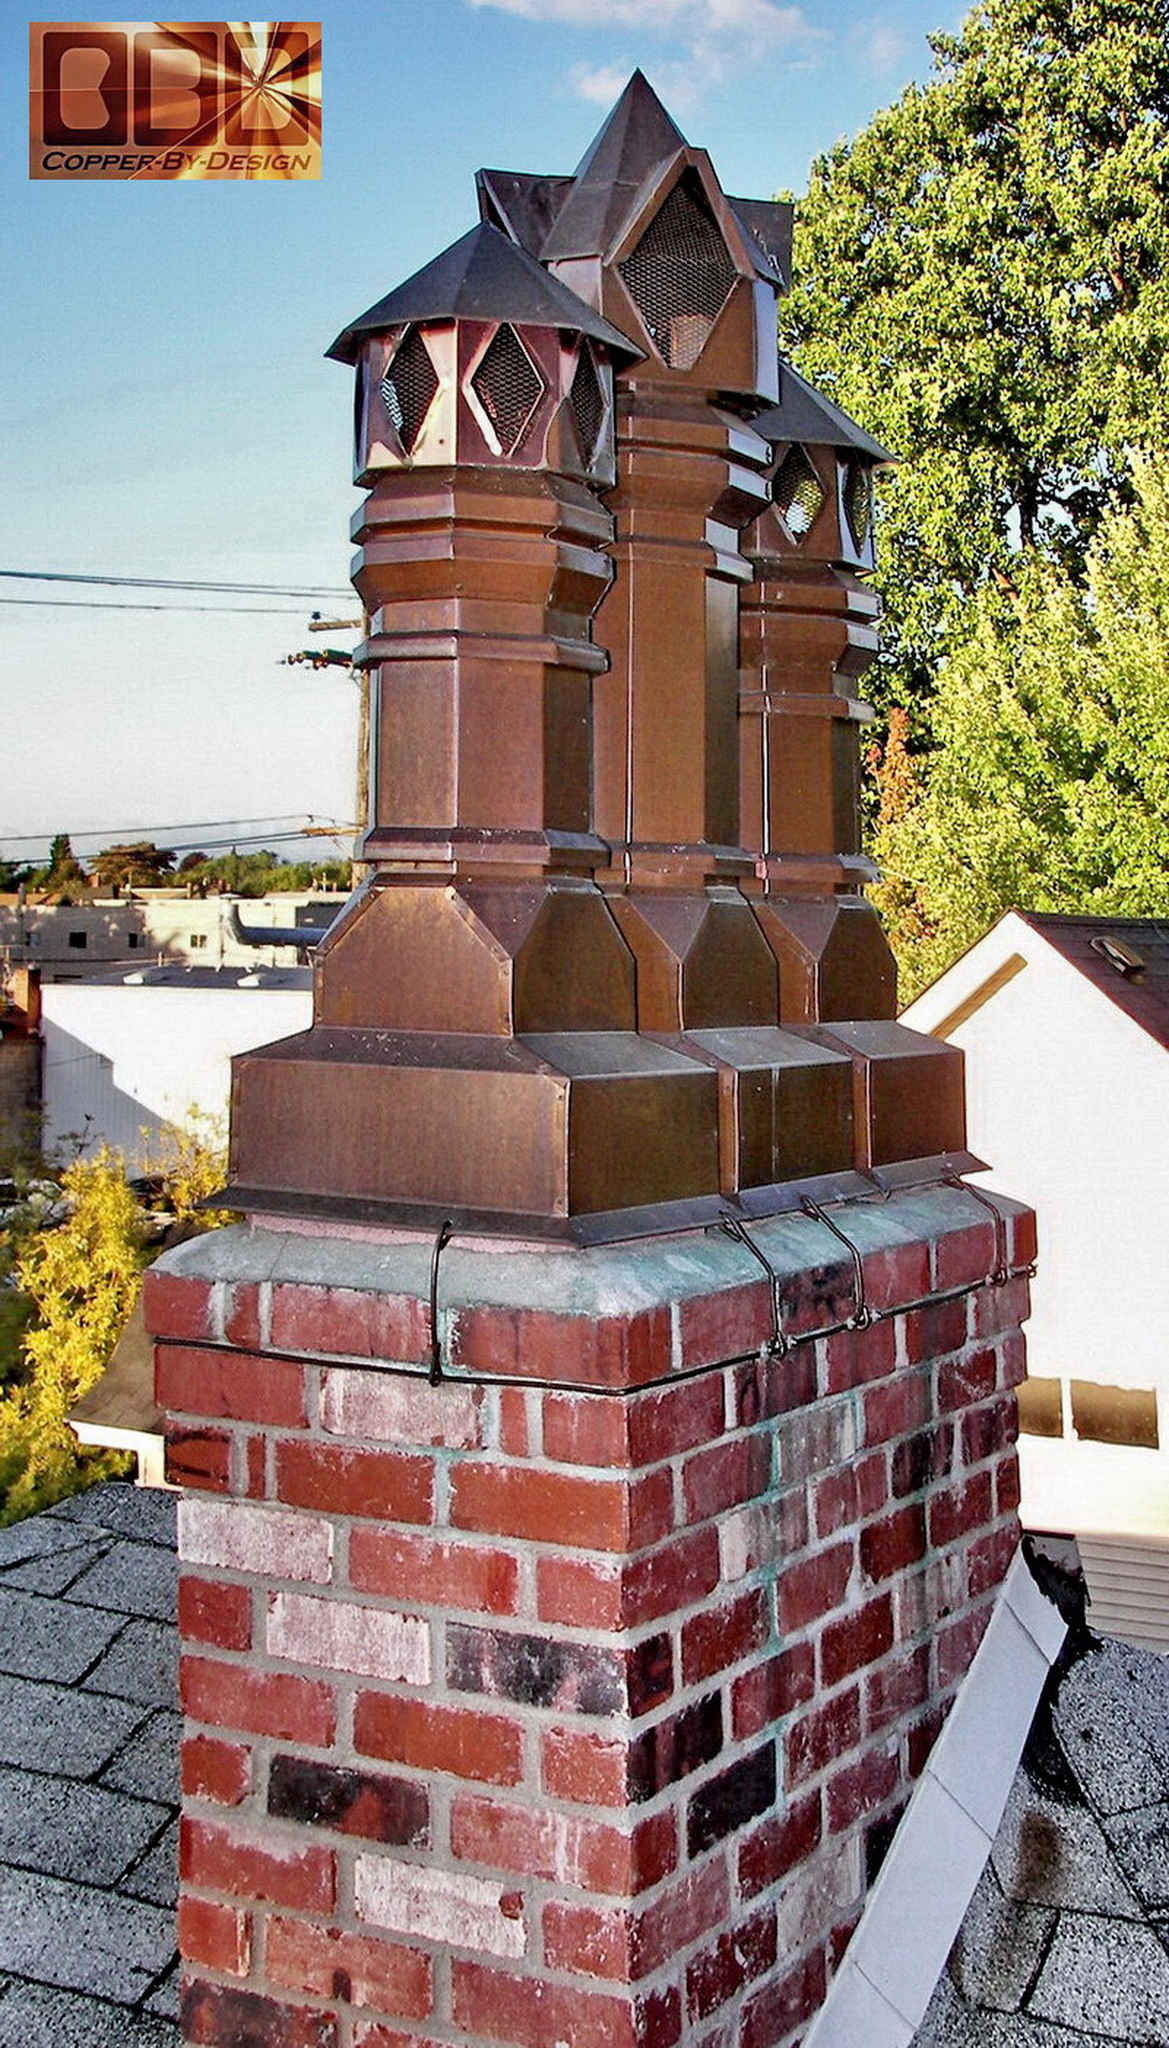
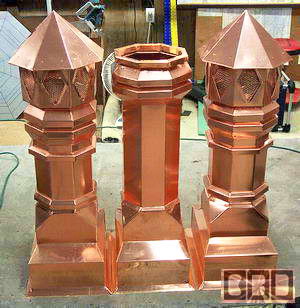
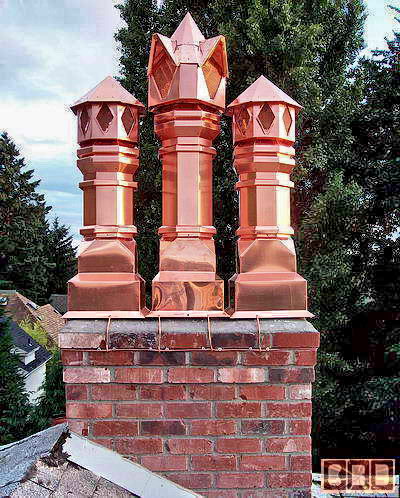
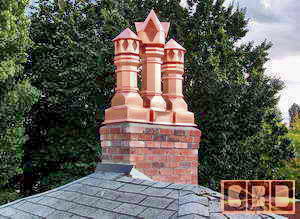
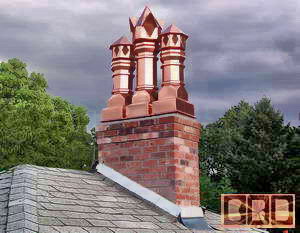
set of 3 chimney stack/caps we made to show an example our versatility
|
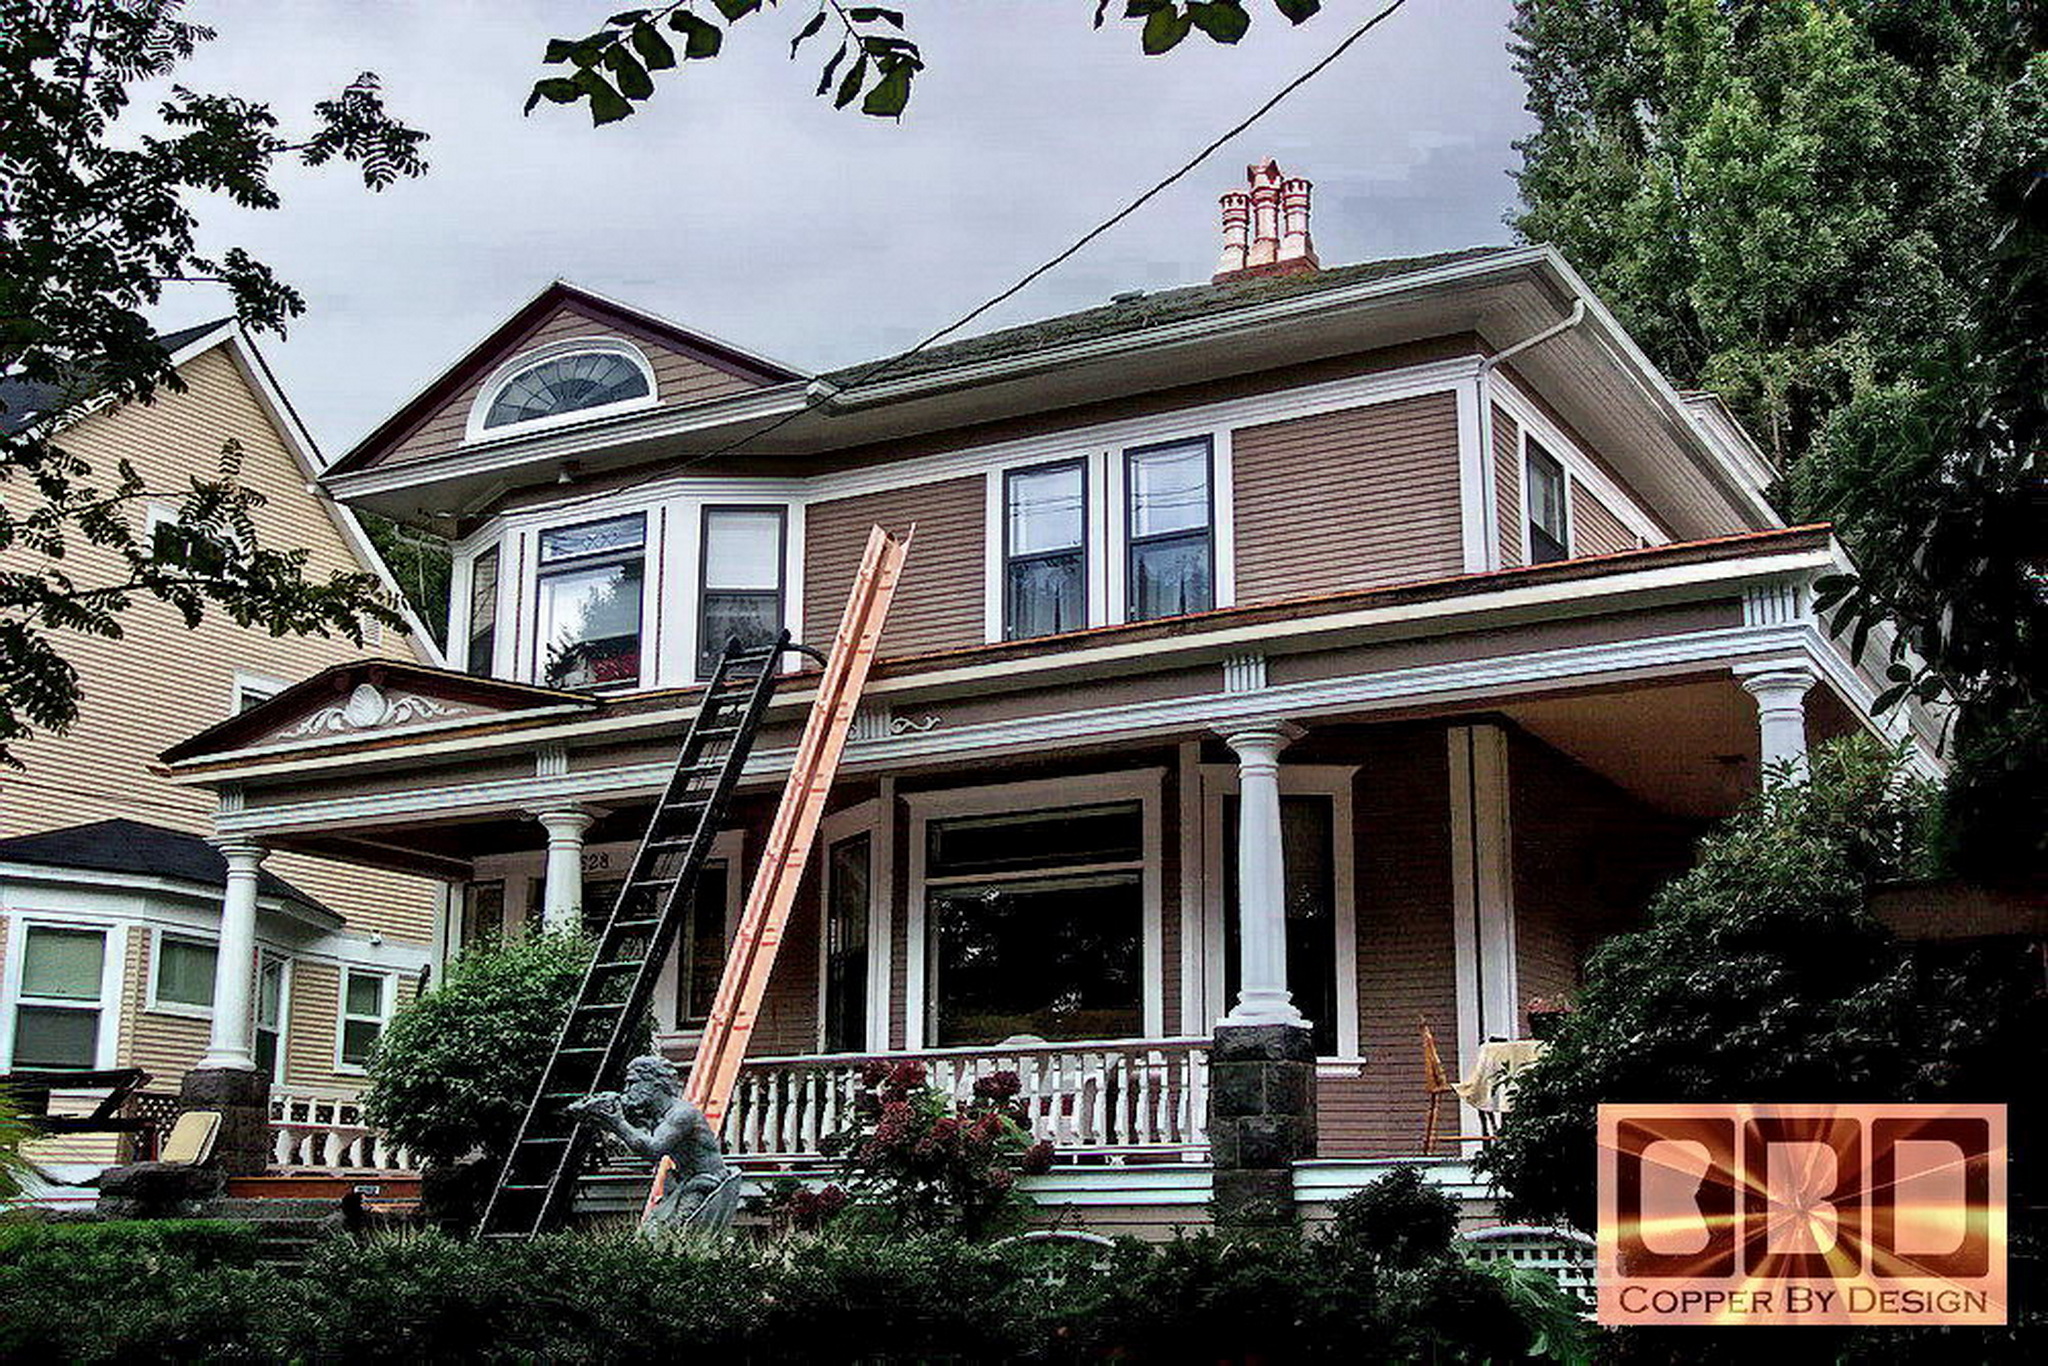
| This is a project I began on 8-30-04.
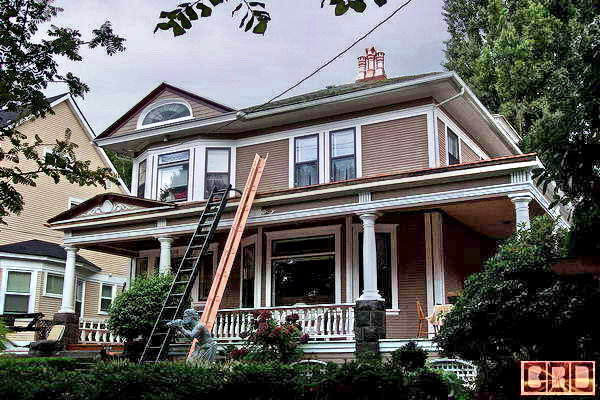
It is for a local client who lives near Downtown Portland Oregon
on the East side. I had
their name and address listed here for over 3 years, but they requested
their personal information be removed from our web site 10/07. But you can
still request their address to see them in person if you want.
They have been gradually restoring their house to it's classic look over the last 14 years
prior. It was originally built for a Steam Ship Captain near the turn of the
century.
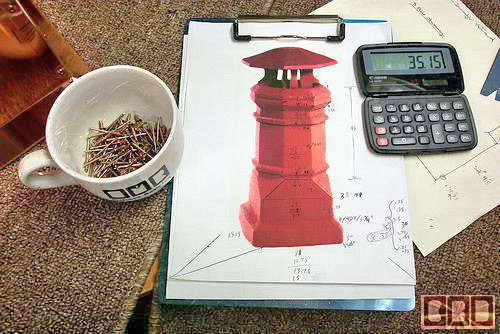
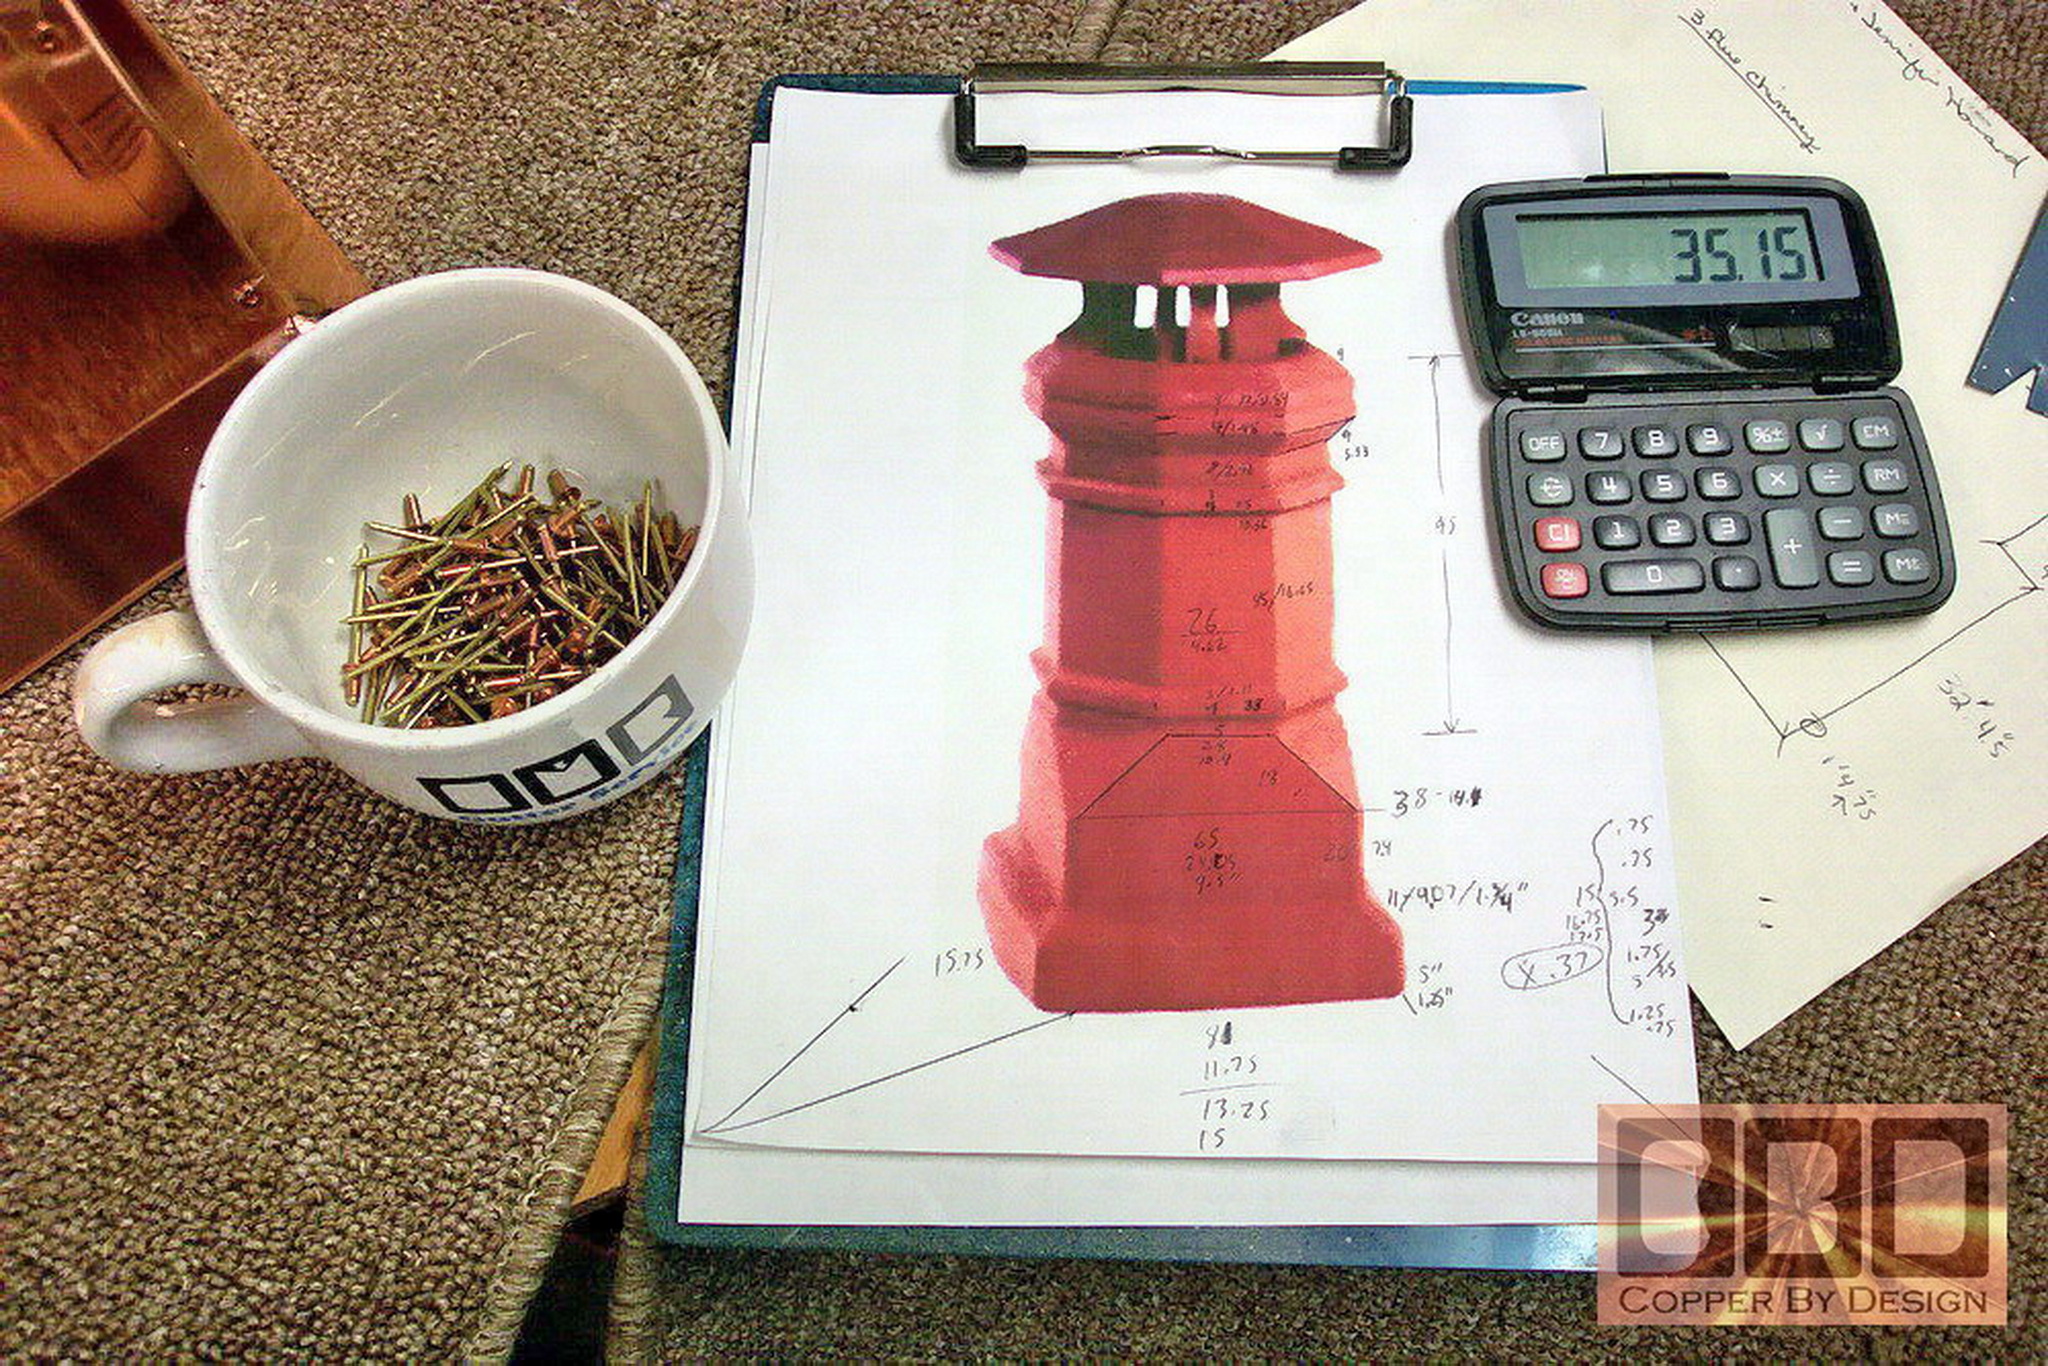
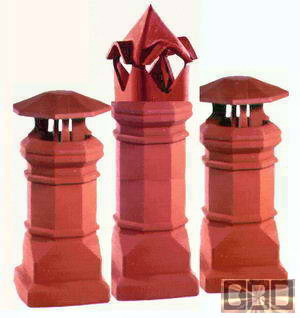
She had run across my web site and could see how I was
capable of making what she had been looking for. Here is the picture
of what she wanted, but wanted me to make in copper sheet metal
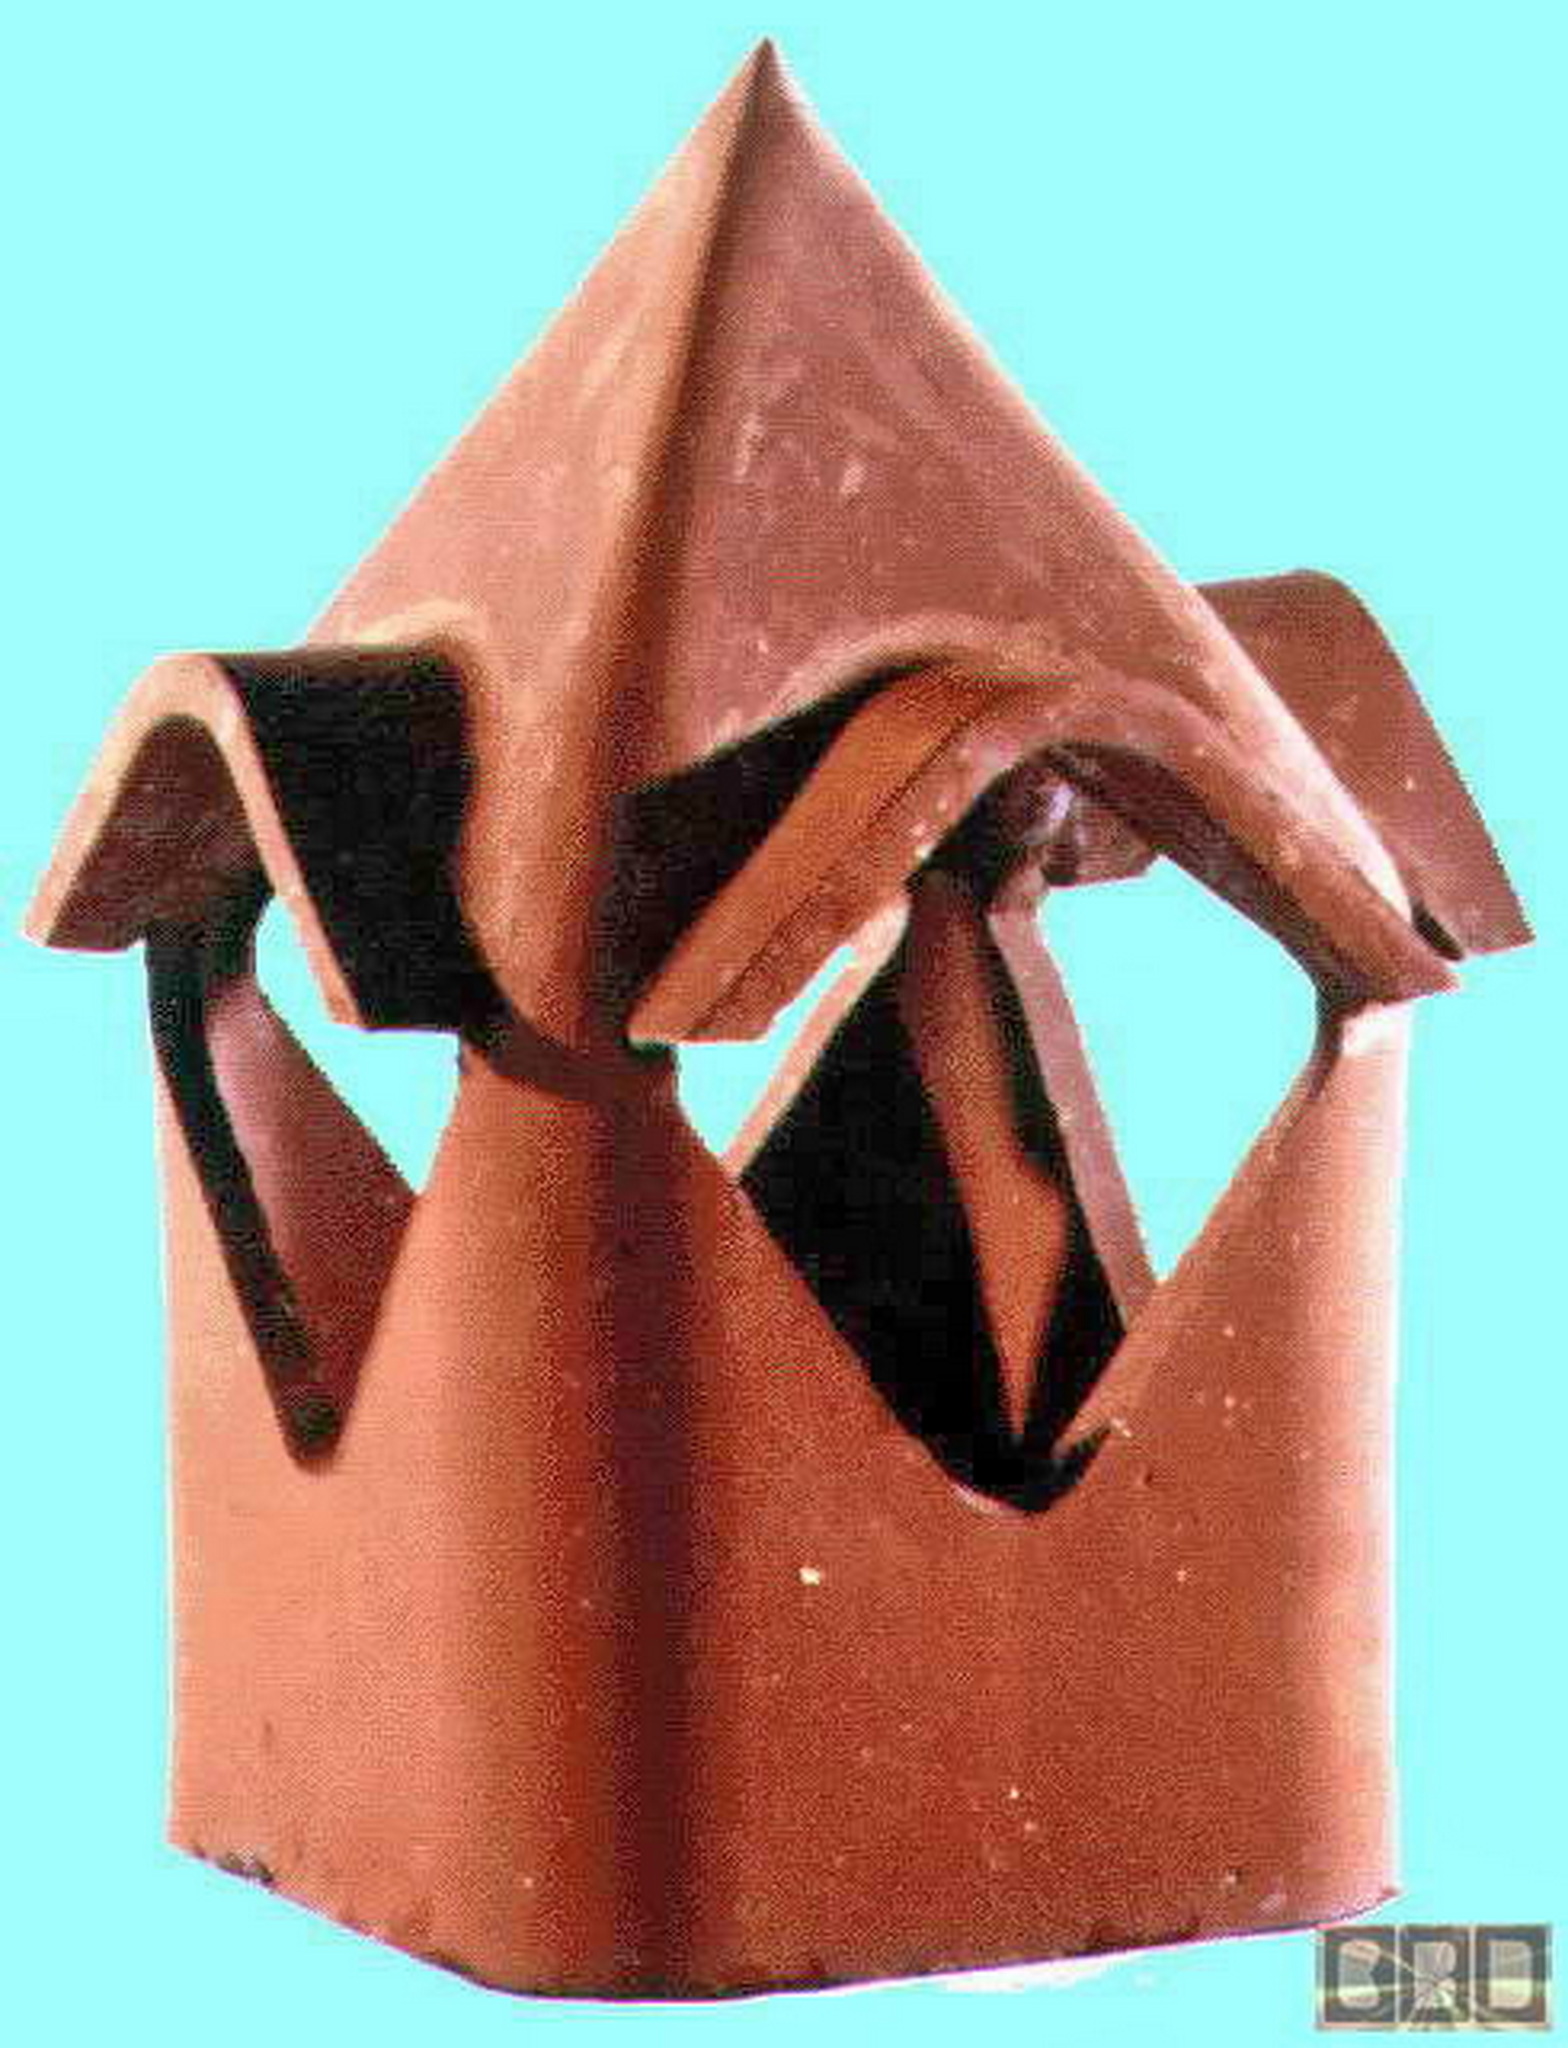
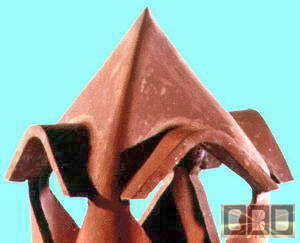
instead of a clay tile like this. These clay
chimney pots are too thick and large. She
wanted to cover all 3 flues separately that were positioned very close together.
They need to be only 11.75" wide and only 2" apart, so I needed to
scale them down to fit.
|
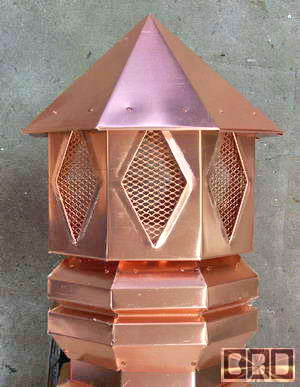
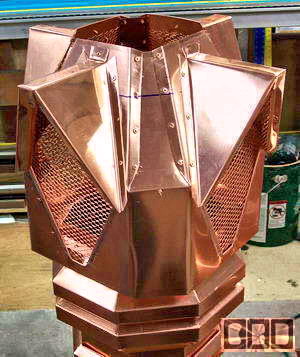
 I
suggested a steeper 8 sided caps for these smoke stacks. And later offered
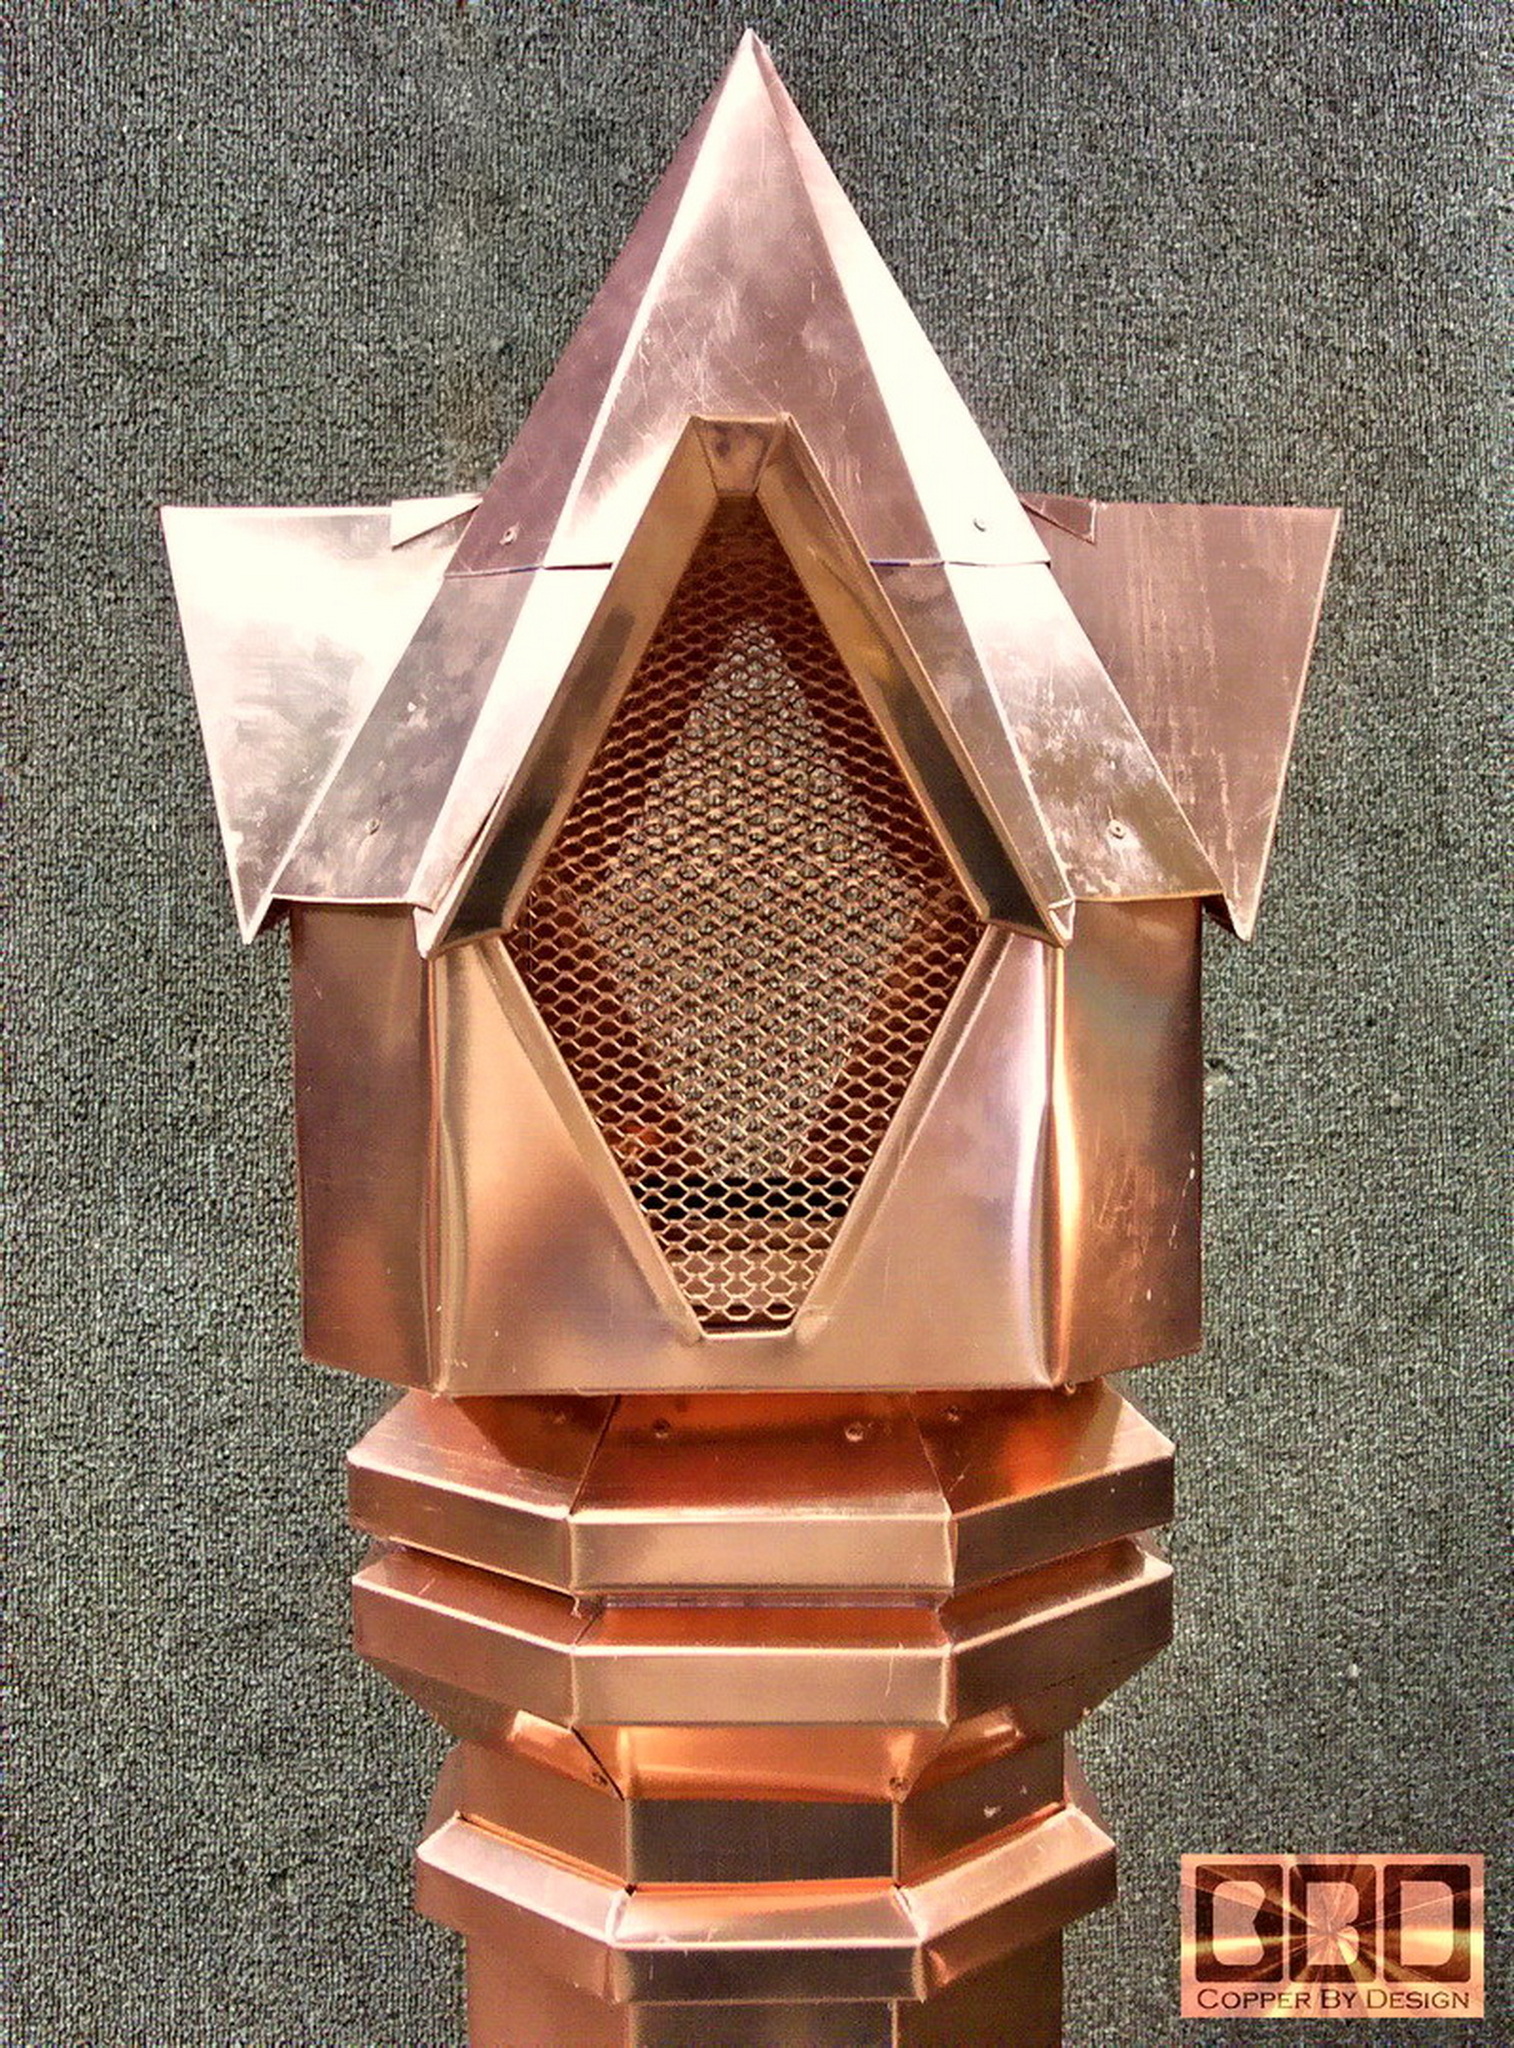
the idea to make the center stack with this sort of Cathedral style
top cap, being more interesting than just the 8 sided cone
shape caps for the taller center chimney stack. I made these in copper with a copper screening over the vents for spark arrest
and pest control, but later found it was best to use a larger 1/2"
hole stainless steel screen in stead. I
suggested a steeper 8 sided caps for these smoke stacks. And later offered
the idea to make the center stack with this sort of Cathedral style
top cap, being more interesting than just the 8 sided cone
shape caps for the taller center chimney stack. I made these in copper with a copper screening over the vents for spark arrest
and pest control, but later found it was best to use a larger 1/2"
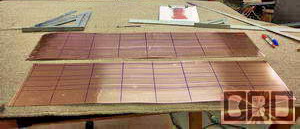
hole stainless steel screen in stead.The background image
of this web page shows the blue painted aluminum templates I had to make, to draw out the
patterns on the copper in order to make these base sections.
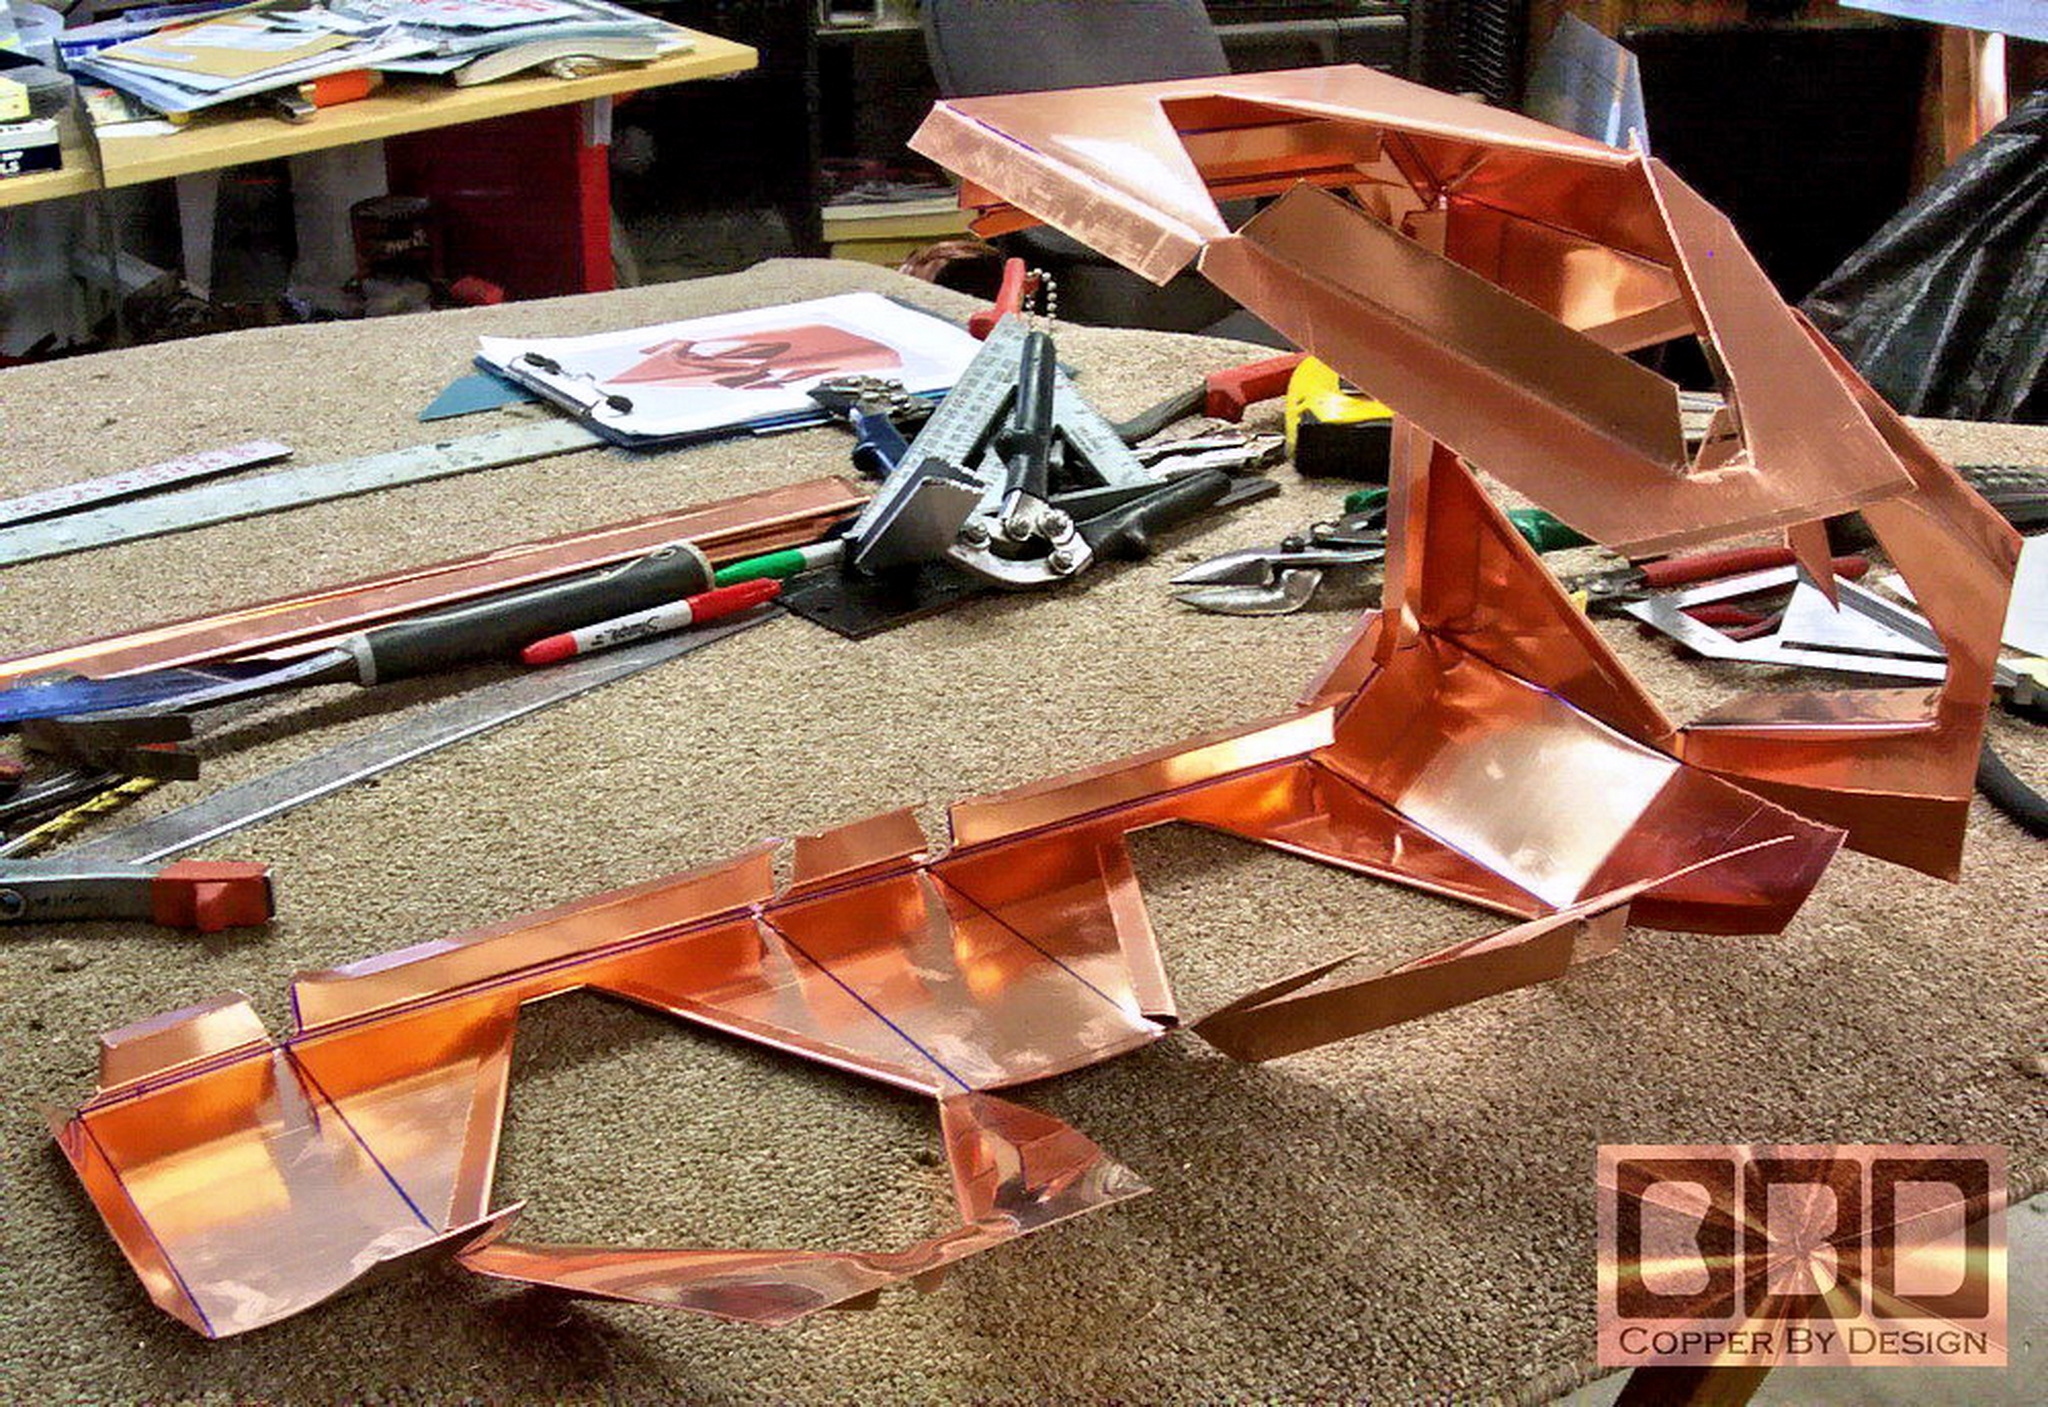
Then I had
to cut the copper pieces out and shape them, as seen below.
|
|
Day one (8-30-04)
|
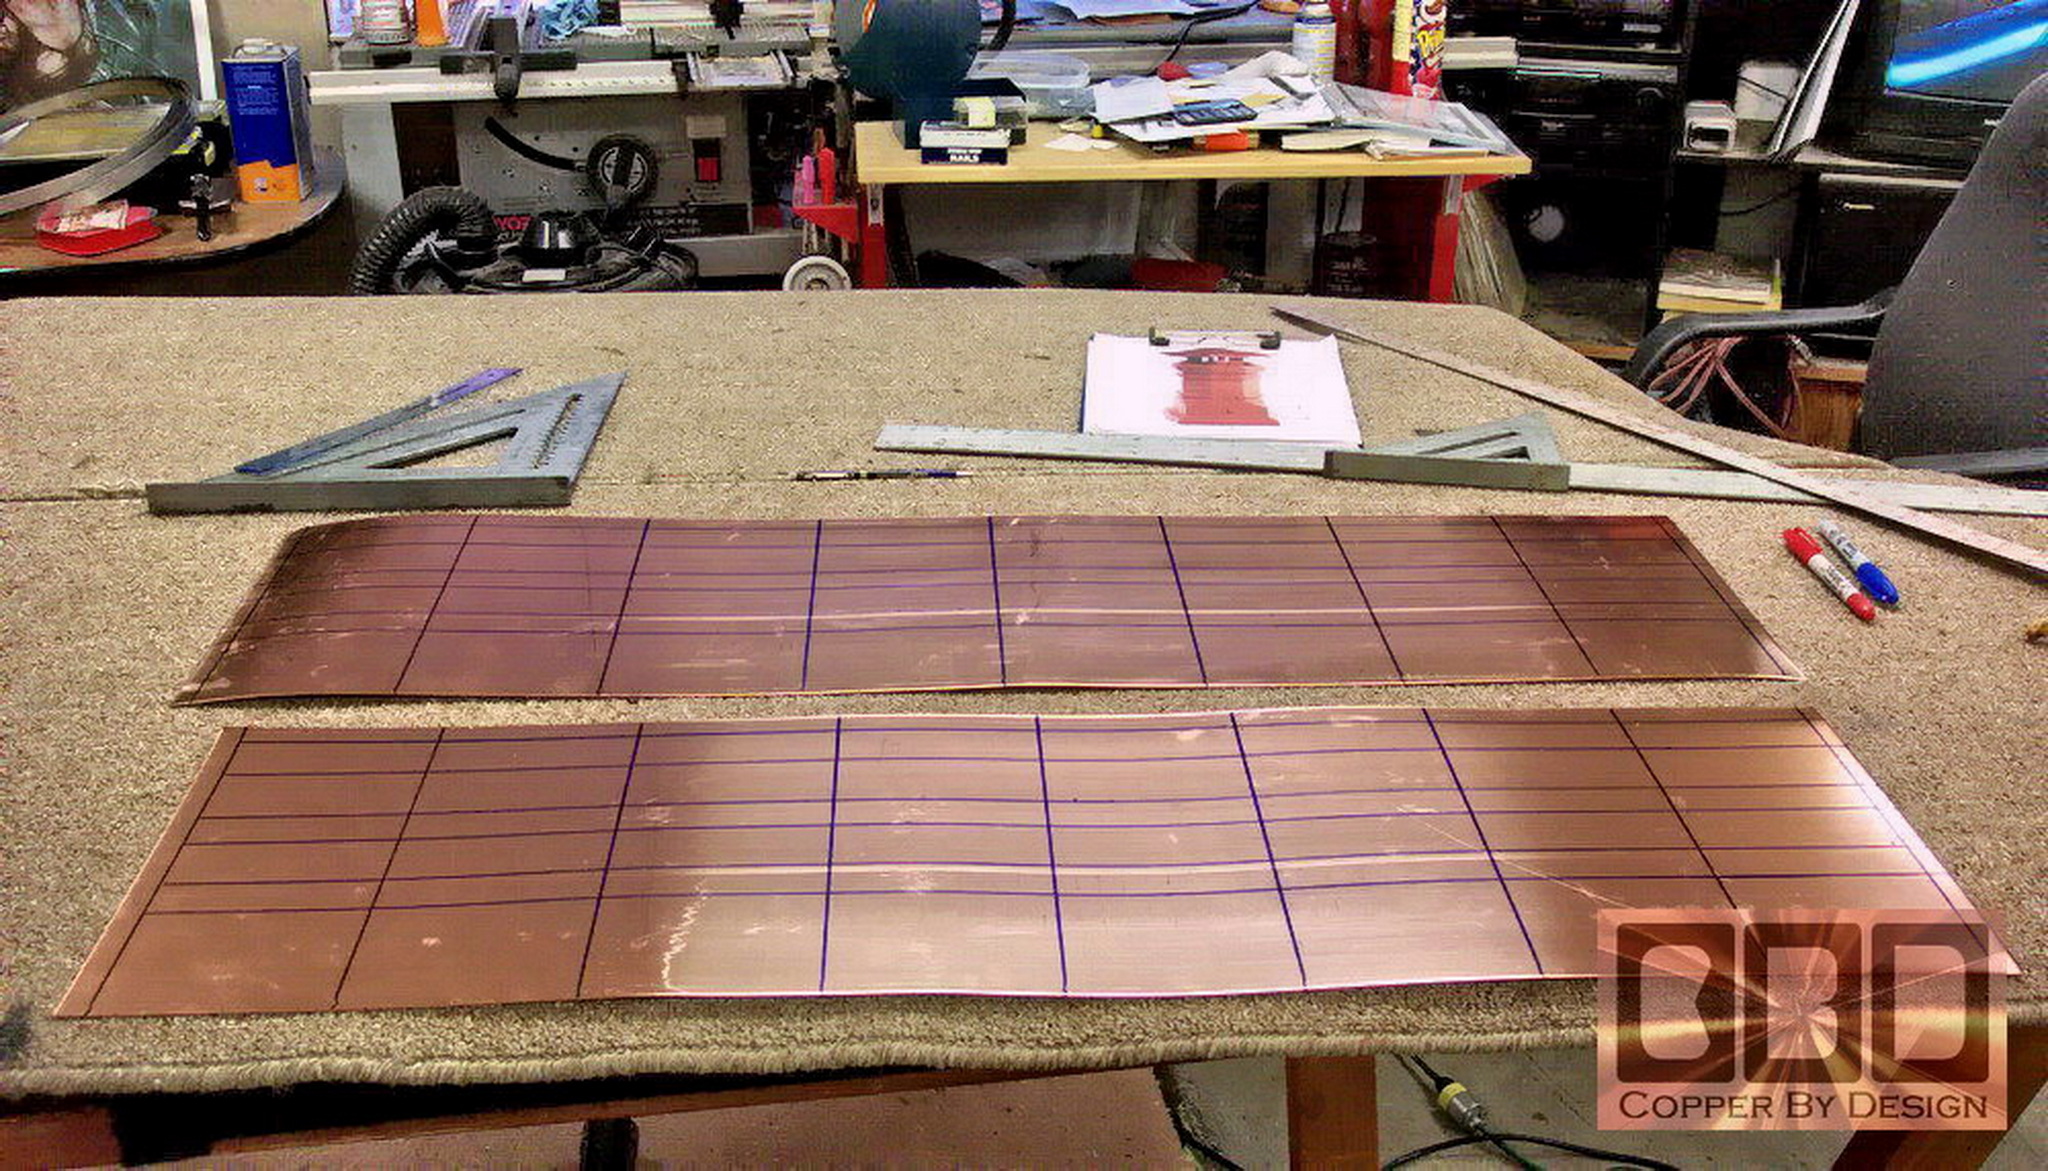
|
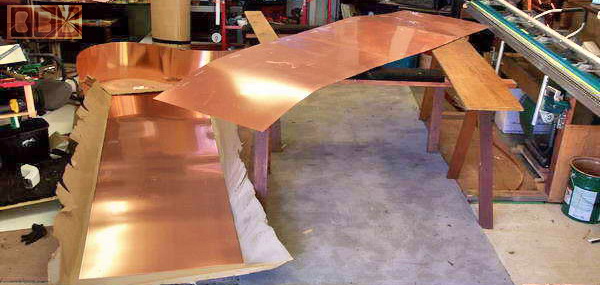
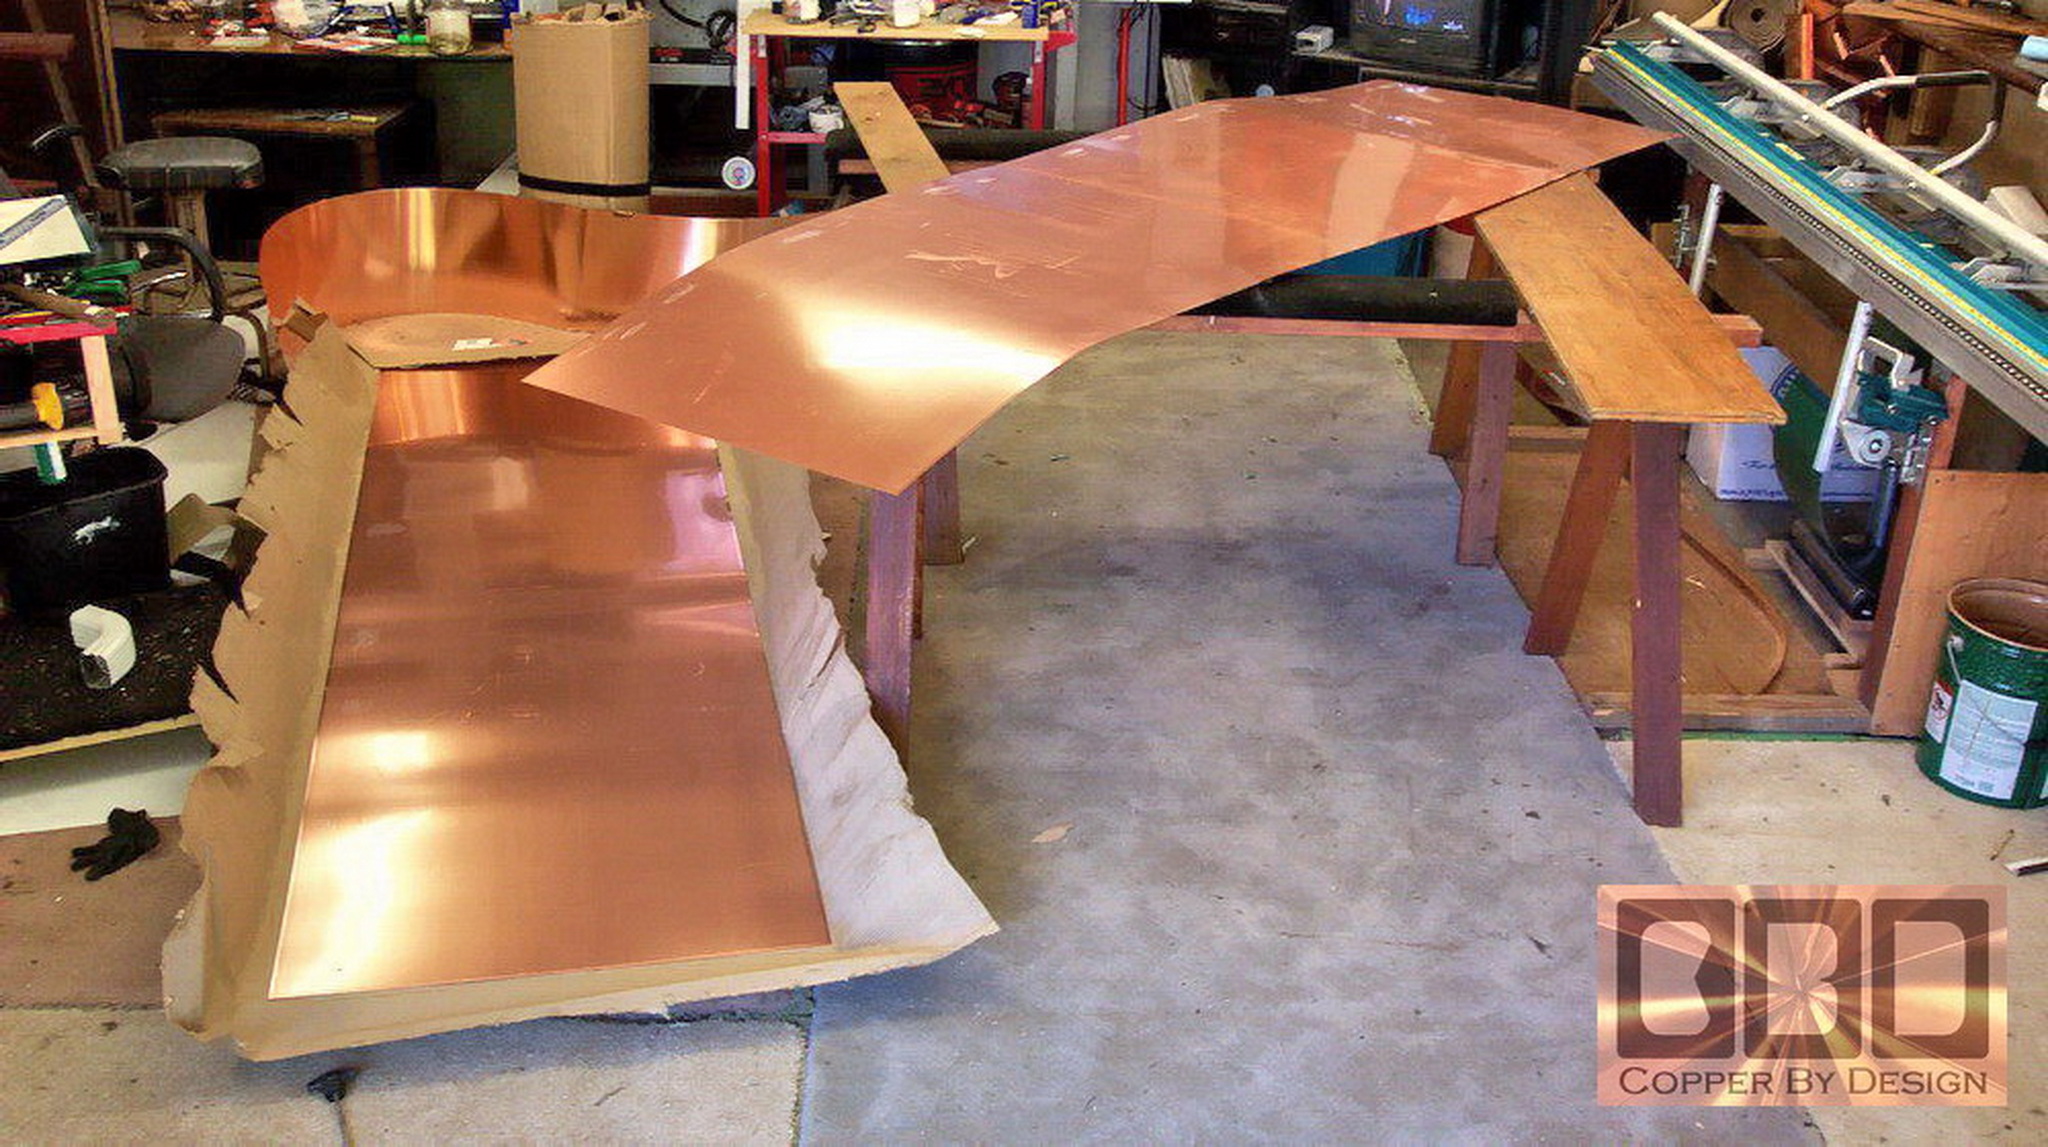
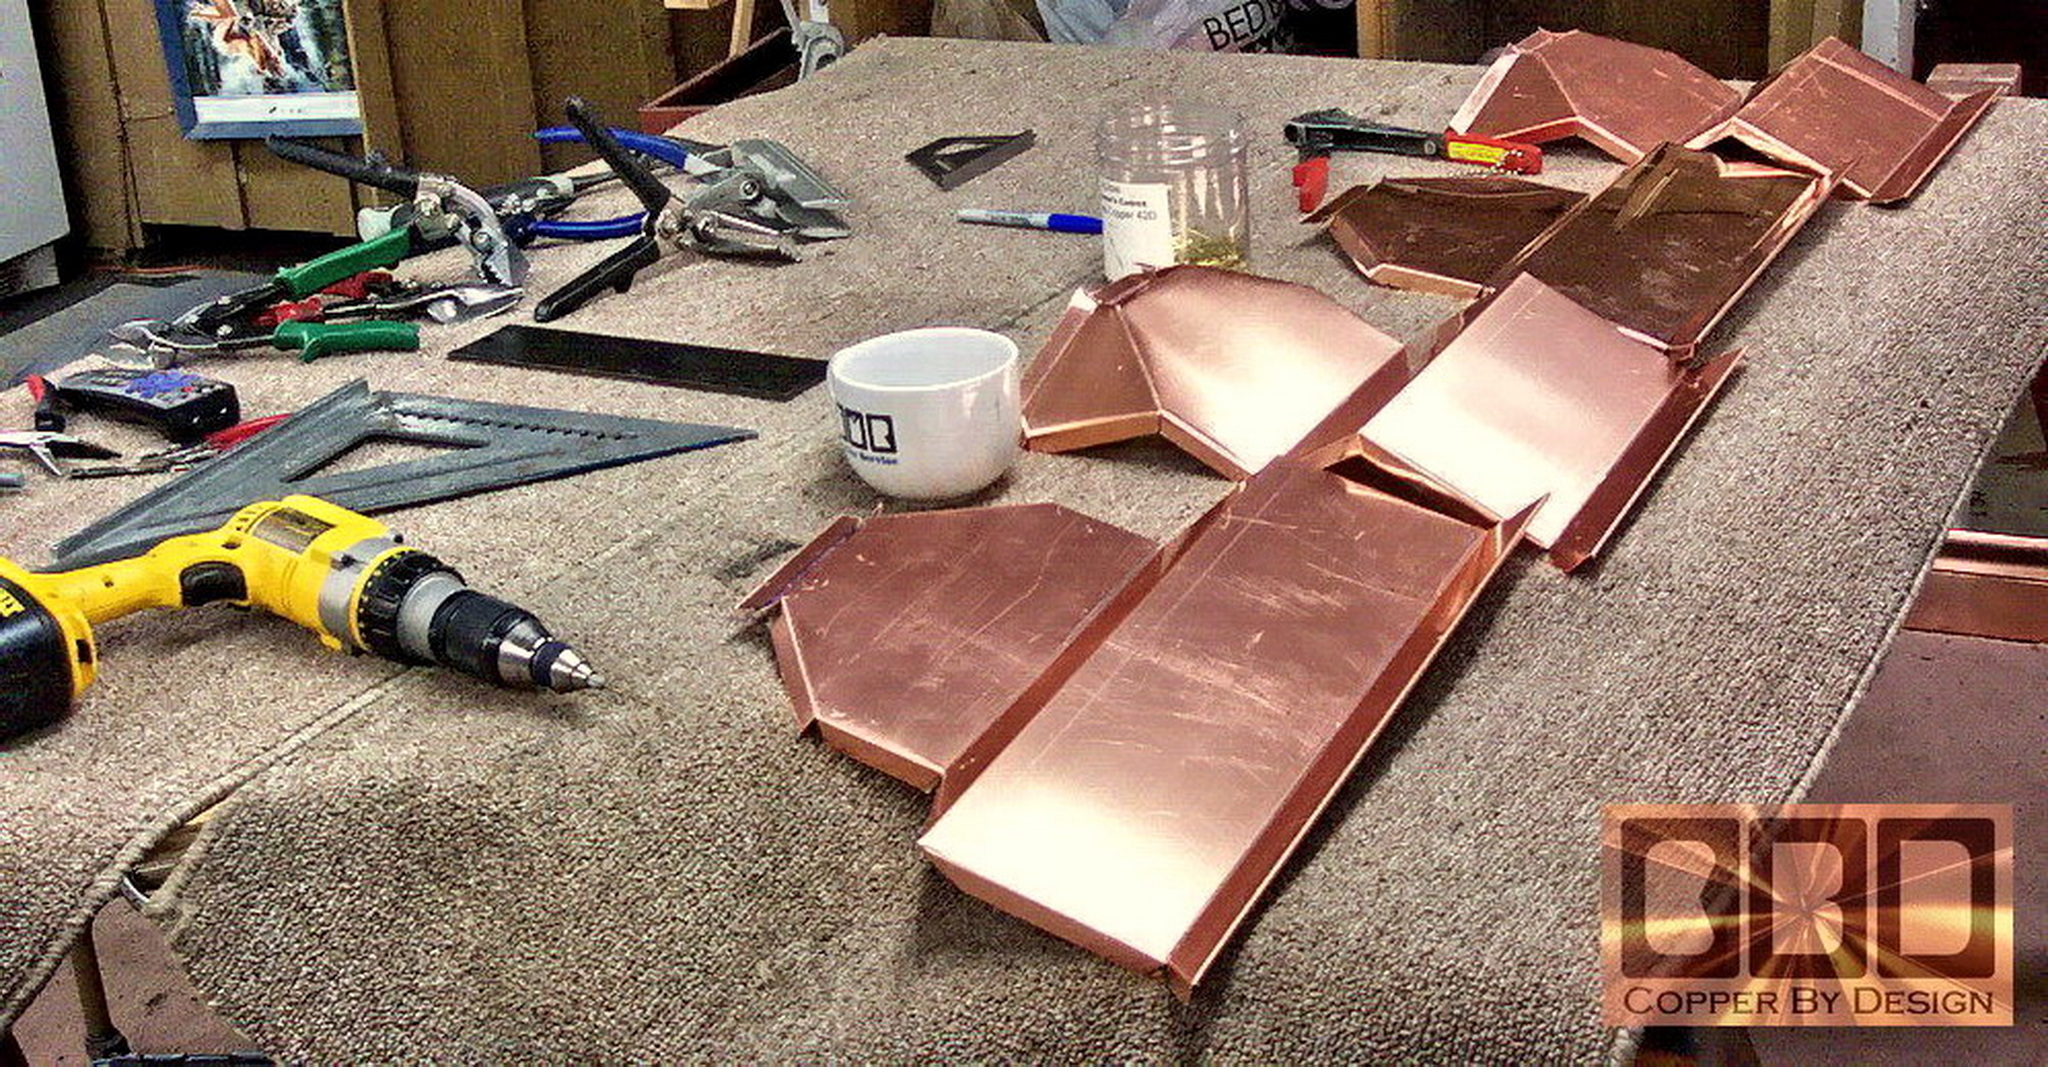
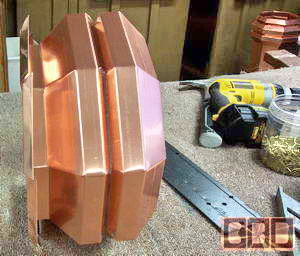
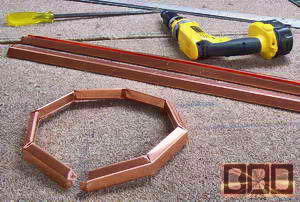
These are the large 10' x 3' sheets of
20oz copper I work with for these sort of custom projects.
|
|

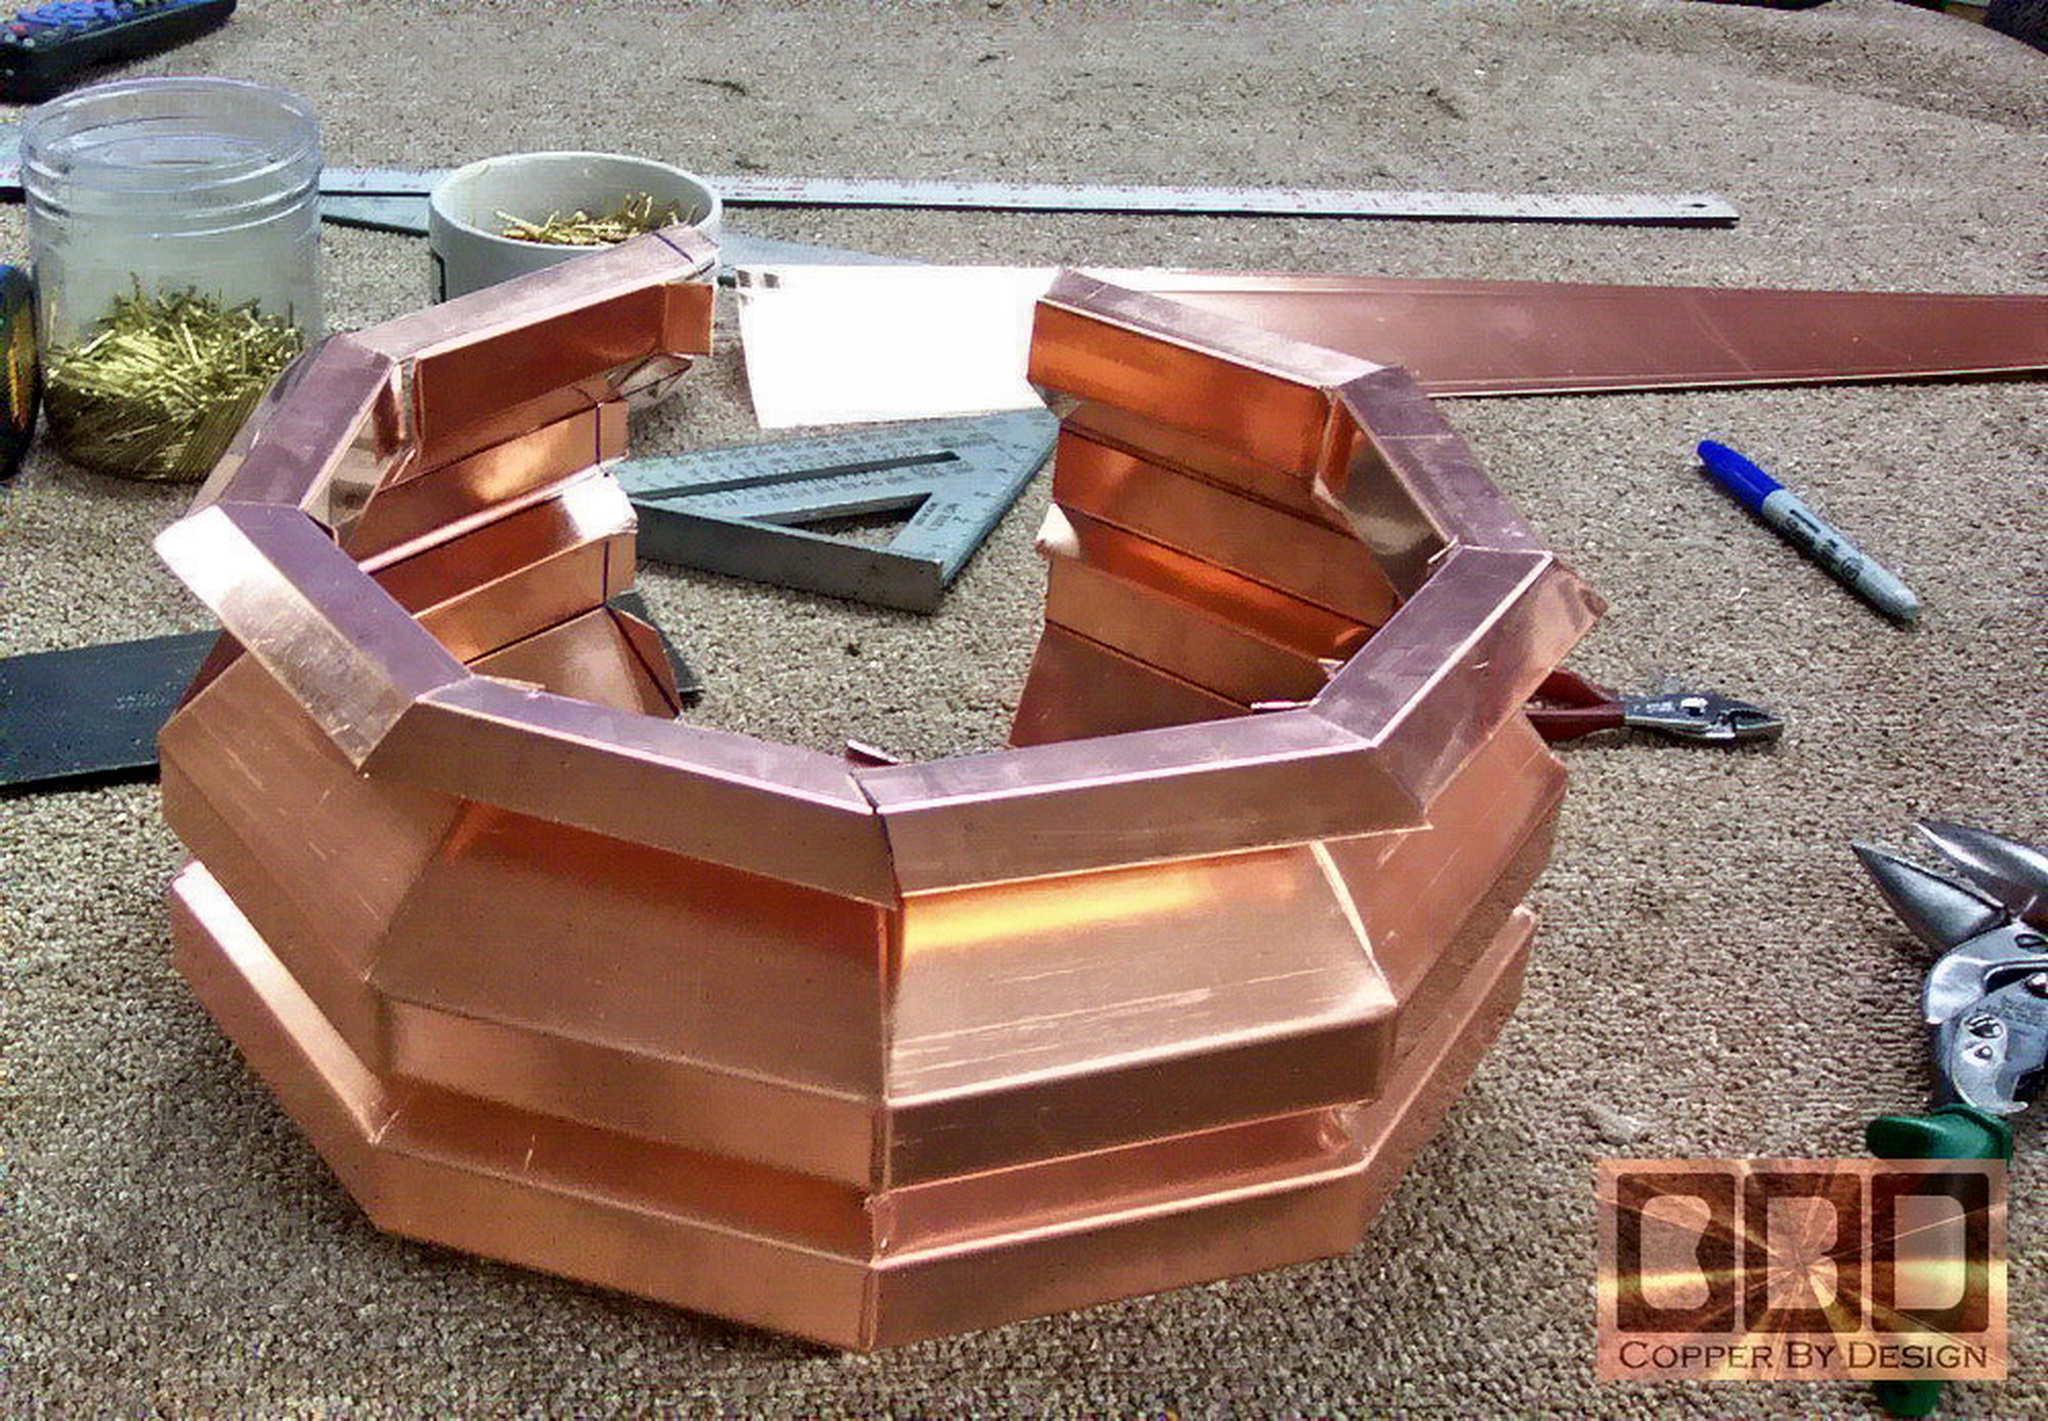
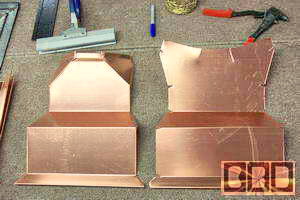
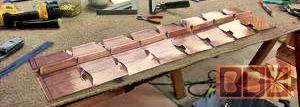
Here is the sides of the base cut out and
shaped before assembly. Below shows the assembly process.
|
|
|
|
|
|
|
|
Day two (8-31-04)
|
|
|
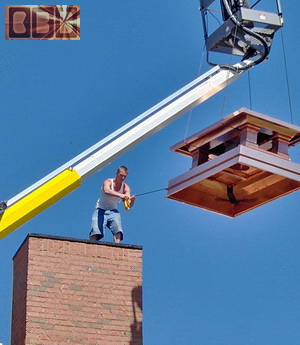
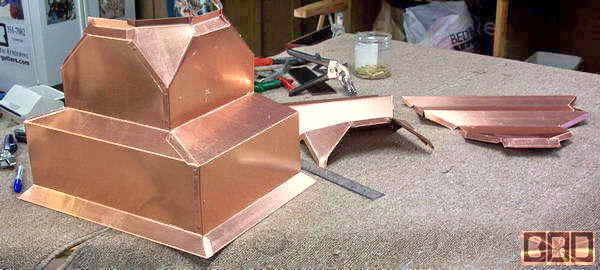
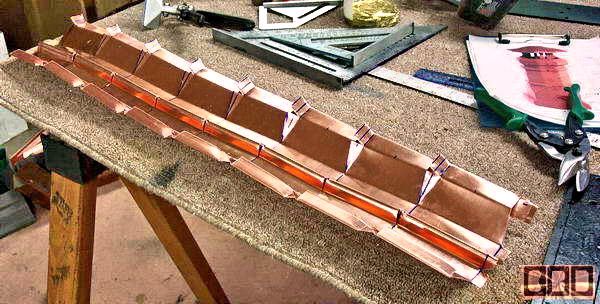
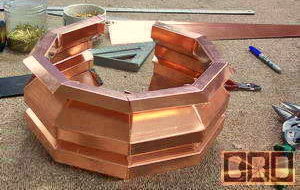
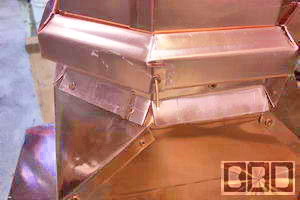
| This design and fabrication took me
2 full days of work. As you see this was
no simple design to make them with reduced horizontal seams, make it
water tight without using caulk or solder because of the heat, and also
make it strong, while minimizing the visible rivets.
|
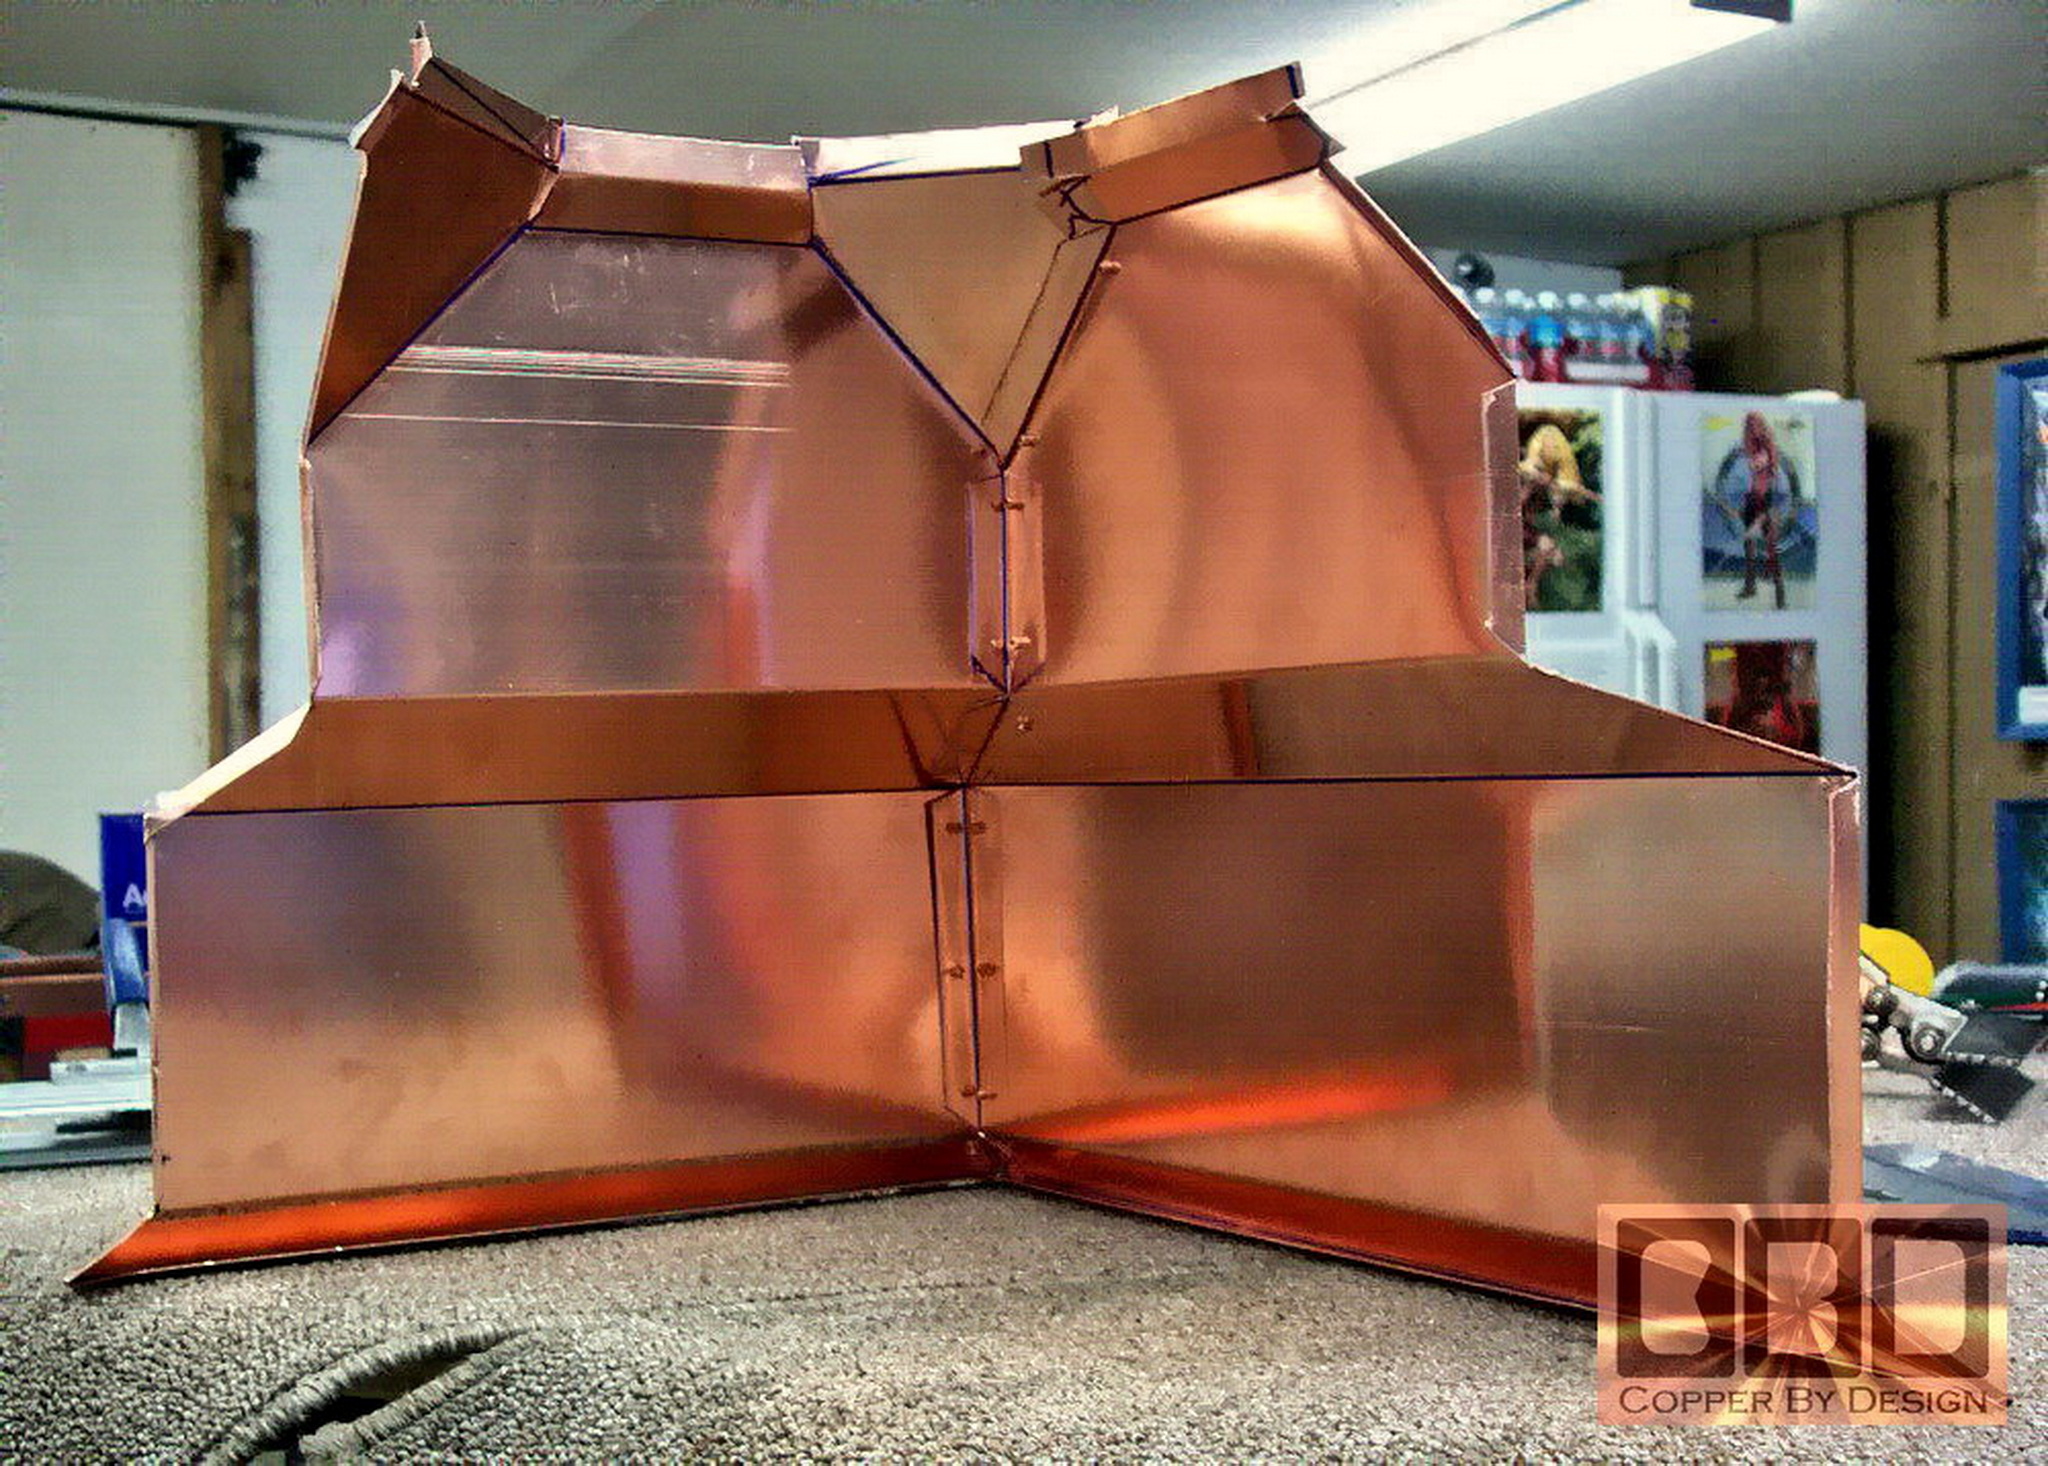
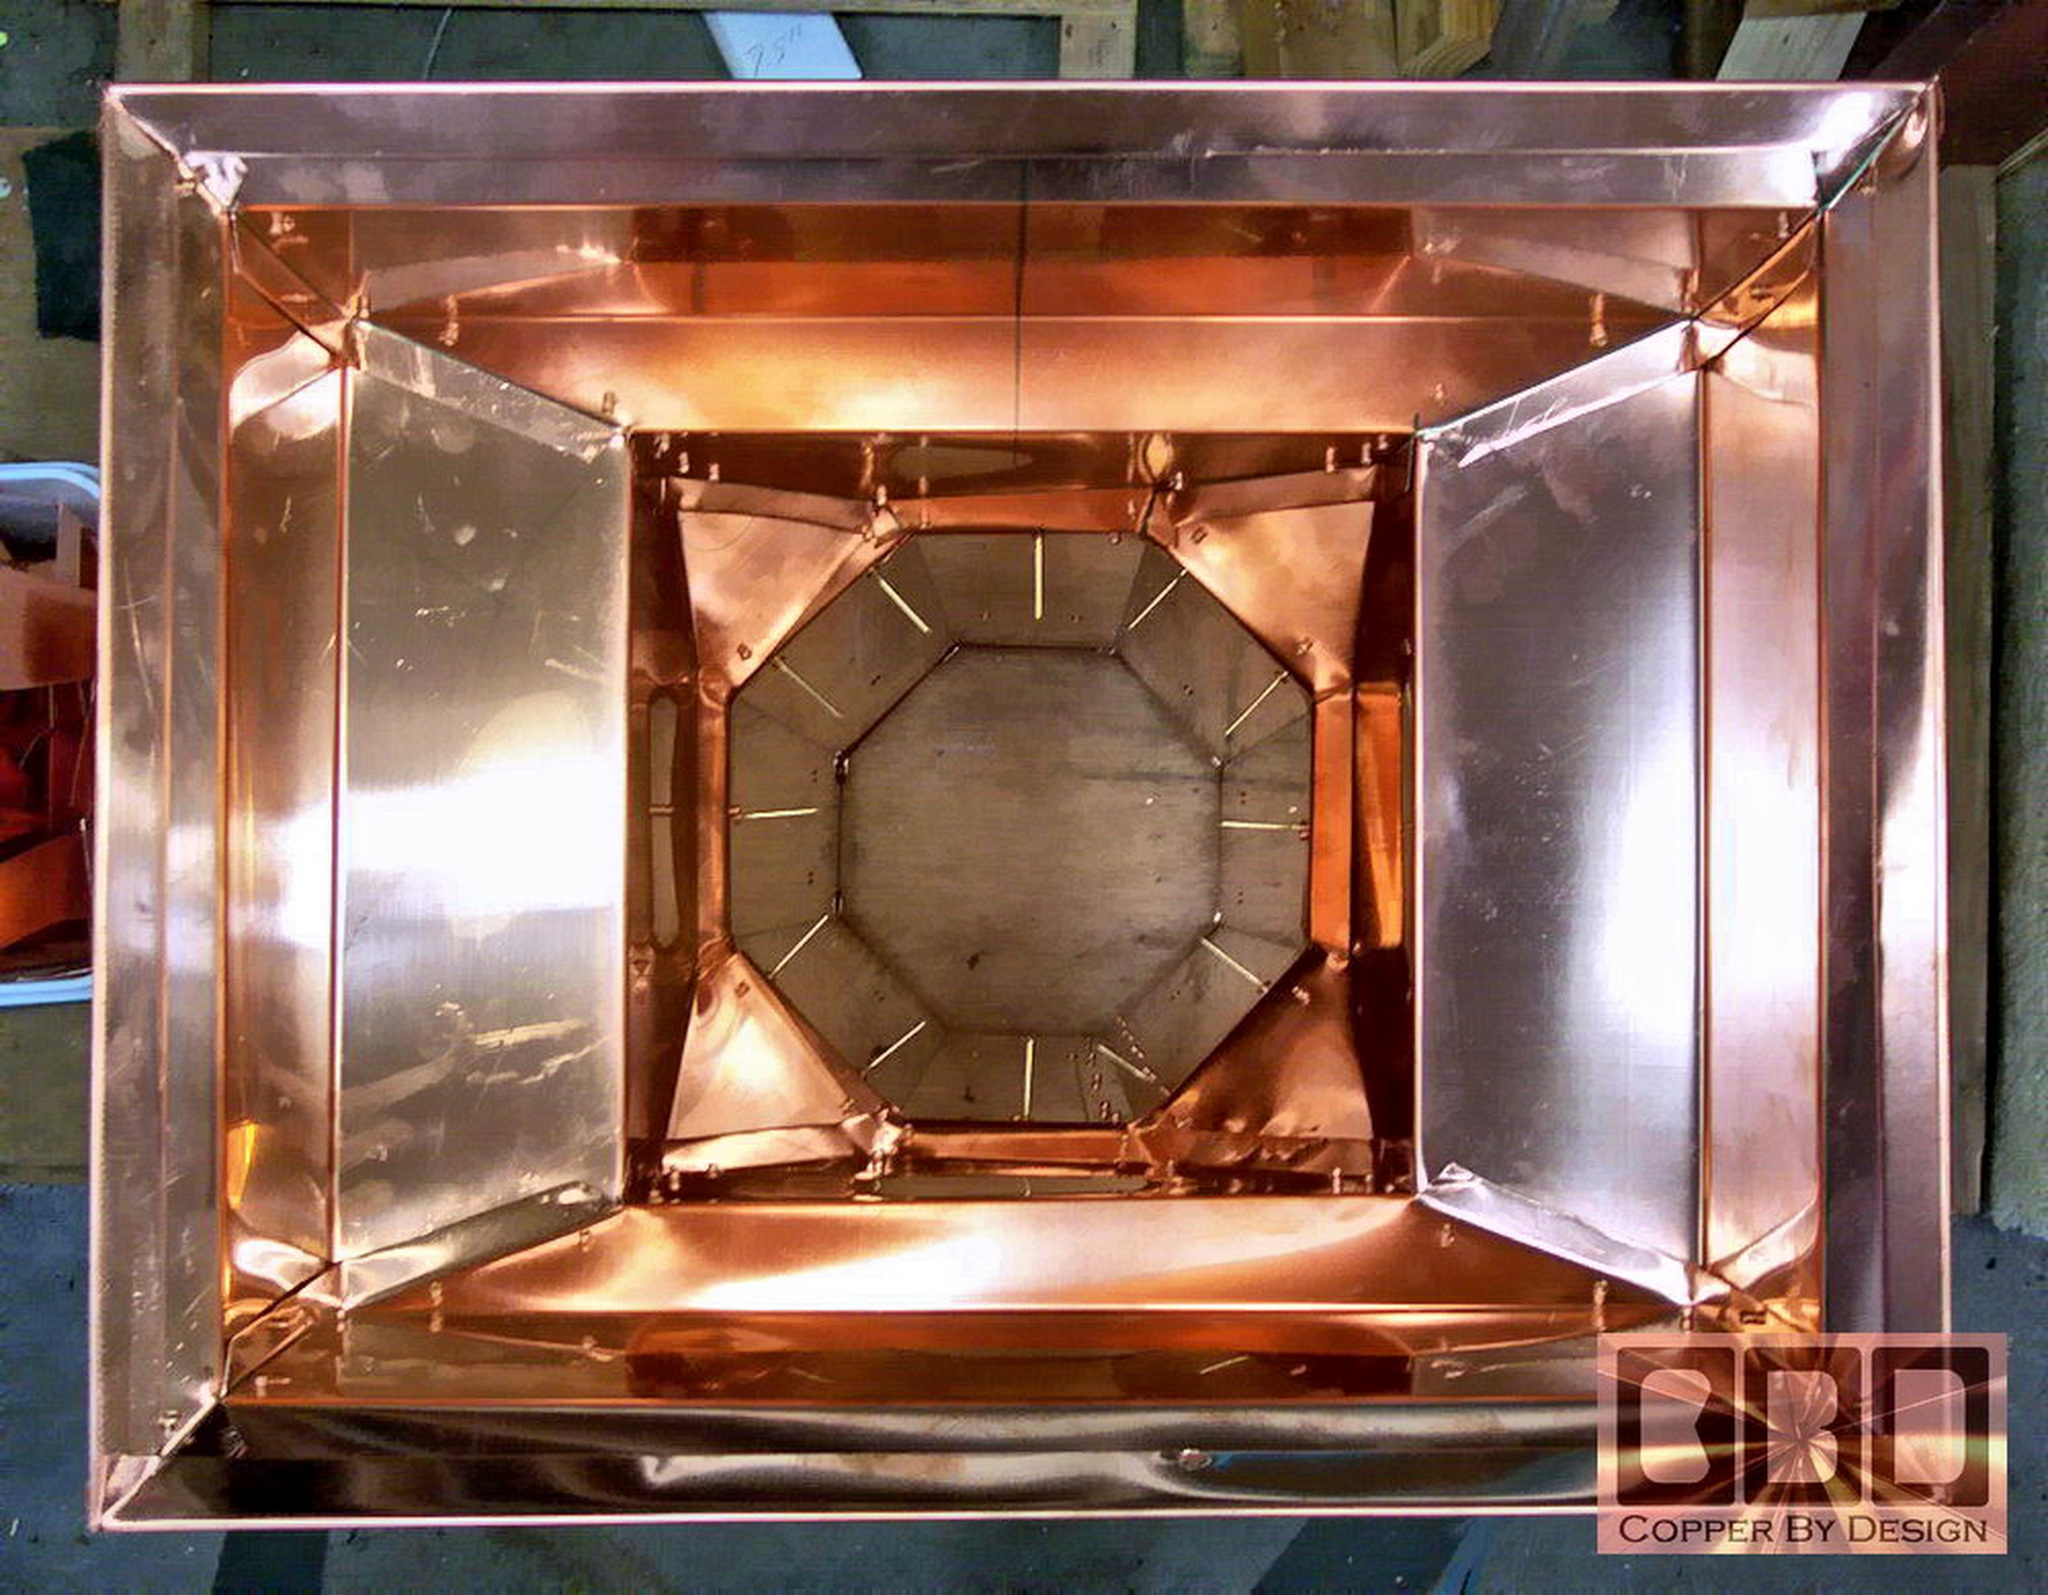
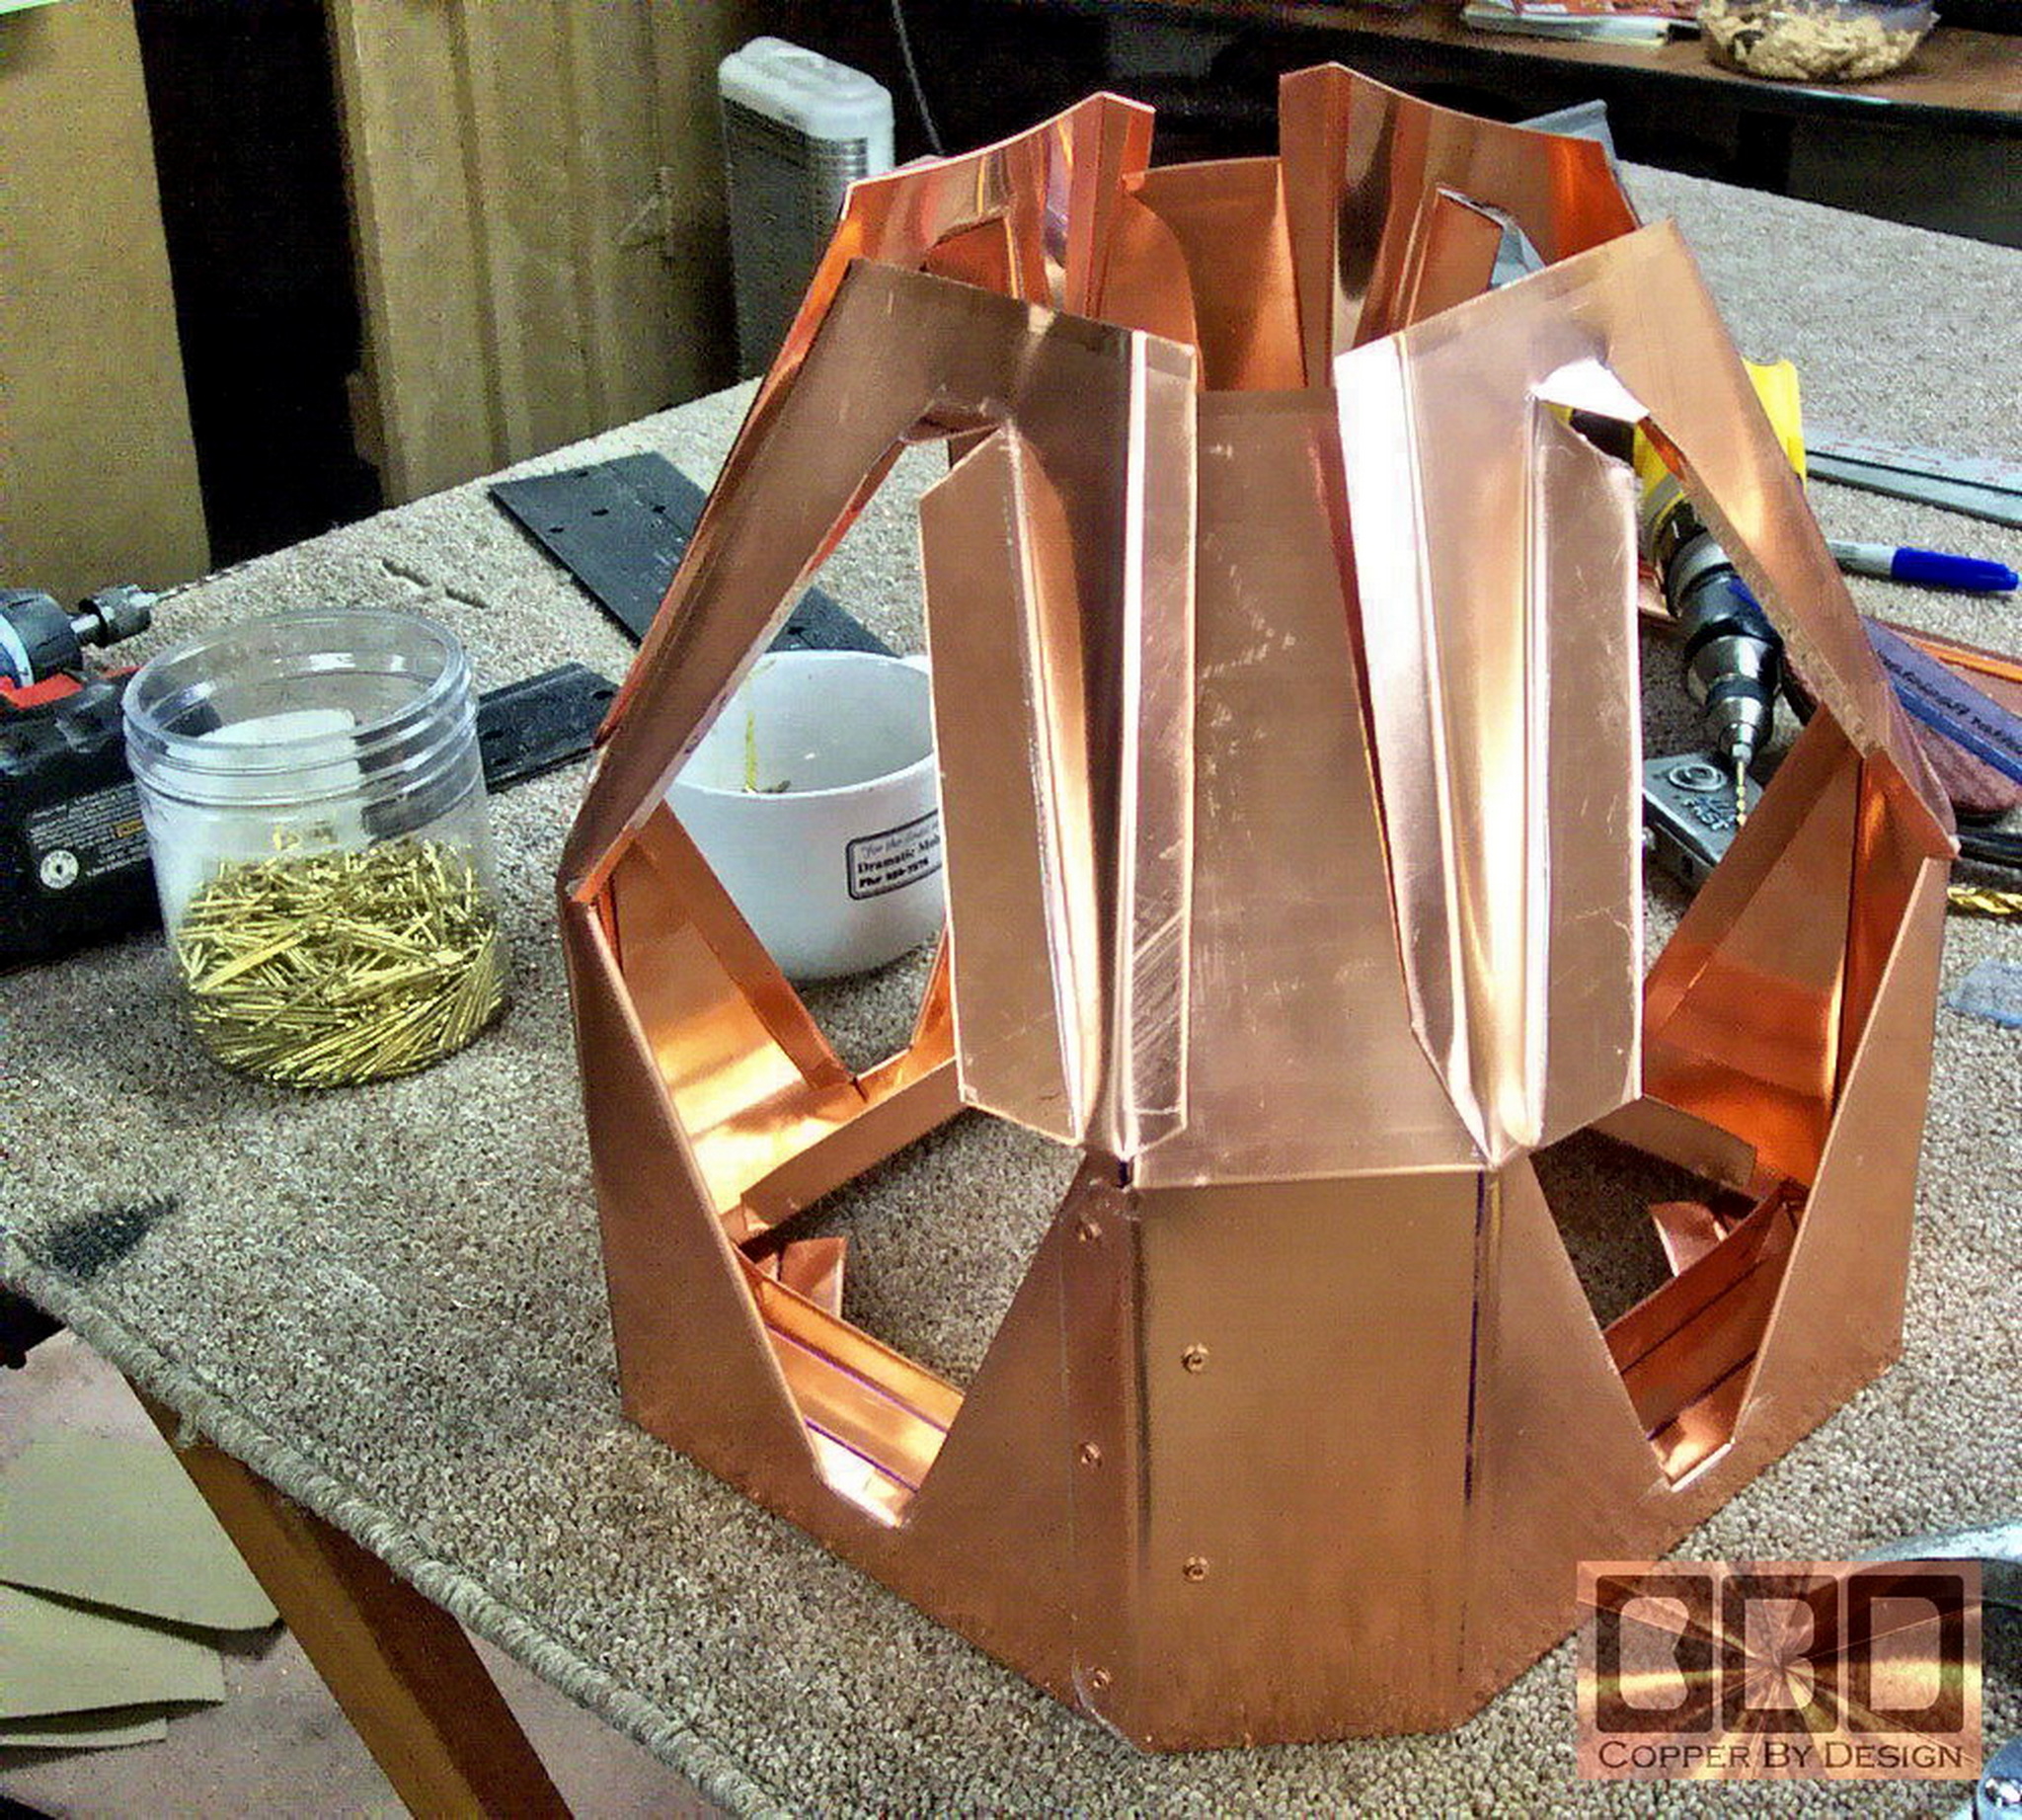
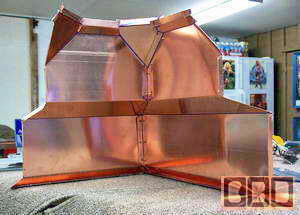
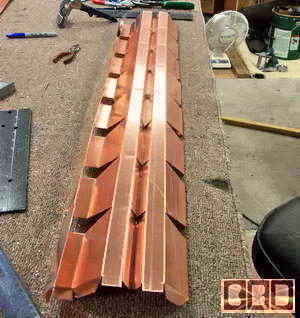
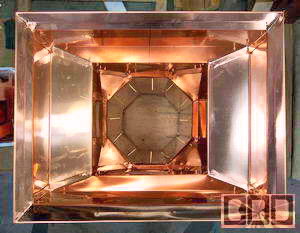
 This
is a shot from the underside of the base. This
is a shot from the underside of the base.
The next mid section will have an 8 sided stack
that will fit over this section and skirt out at the bottom at a 45
degree angle over the top rim of what we made so far. They will
be riveted together and the rings of ornamentation applied over the
stacks.
|
|
Day three (9-1-04)
|
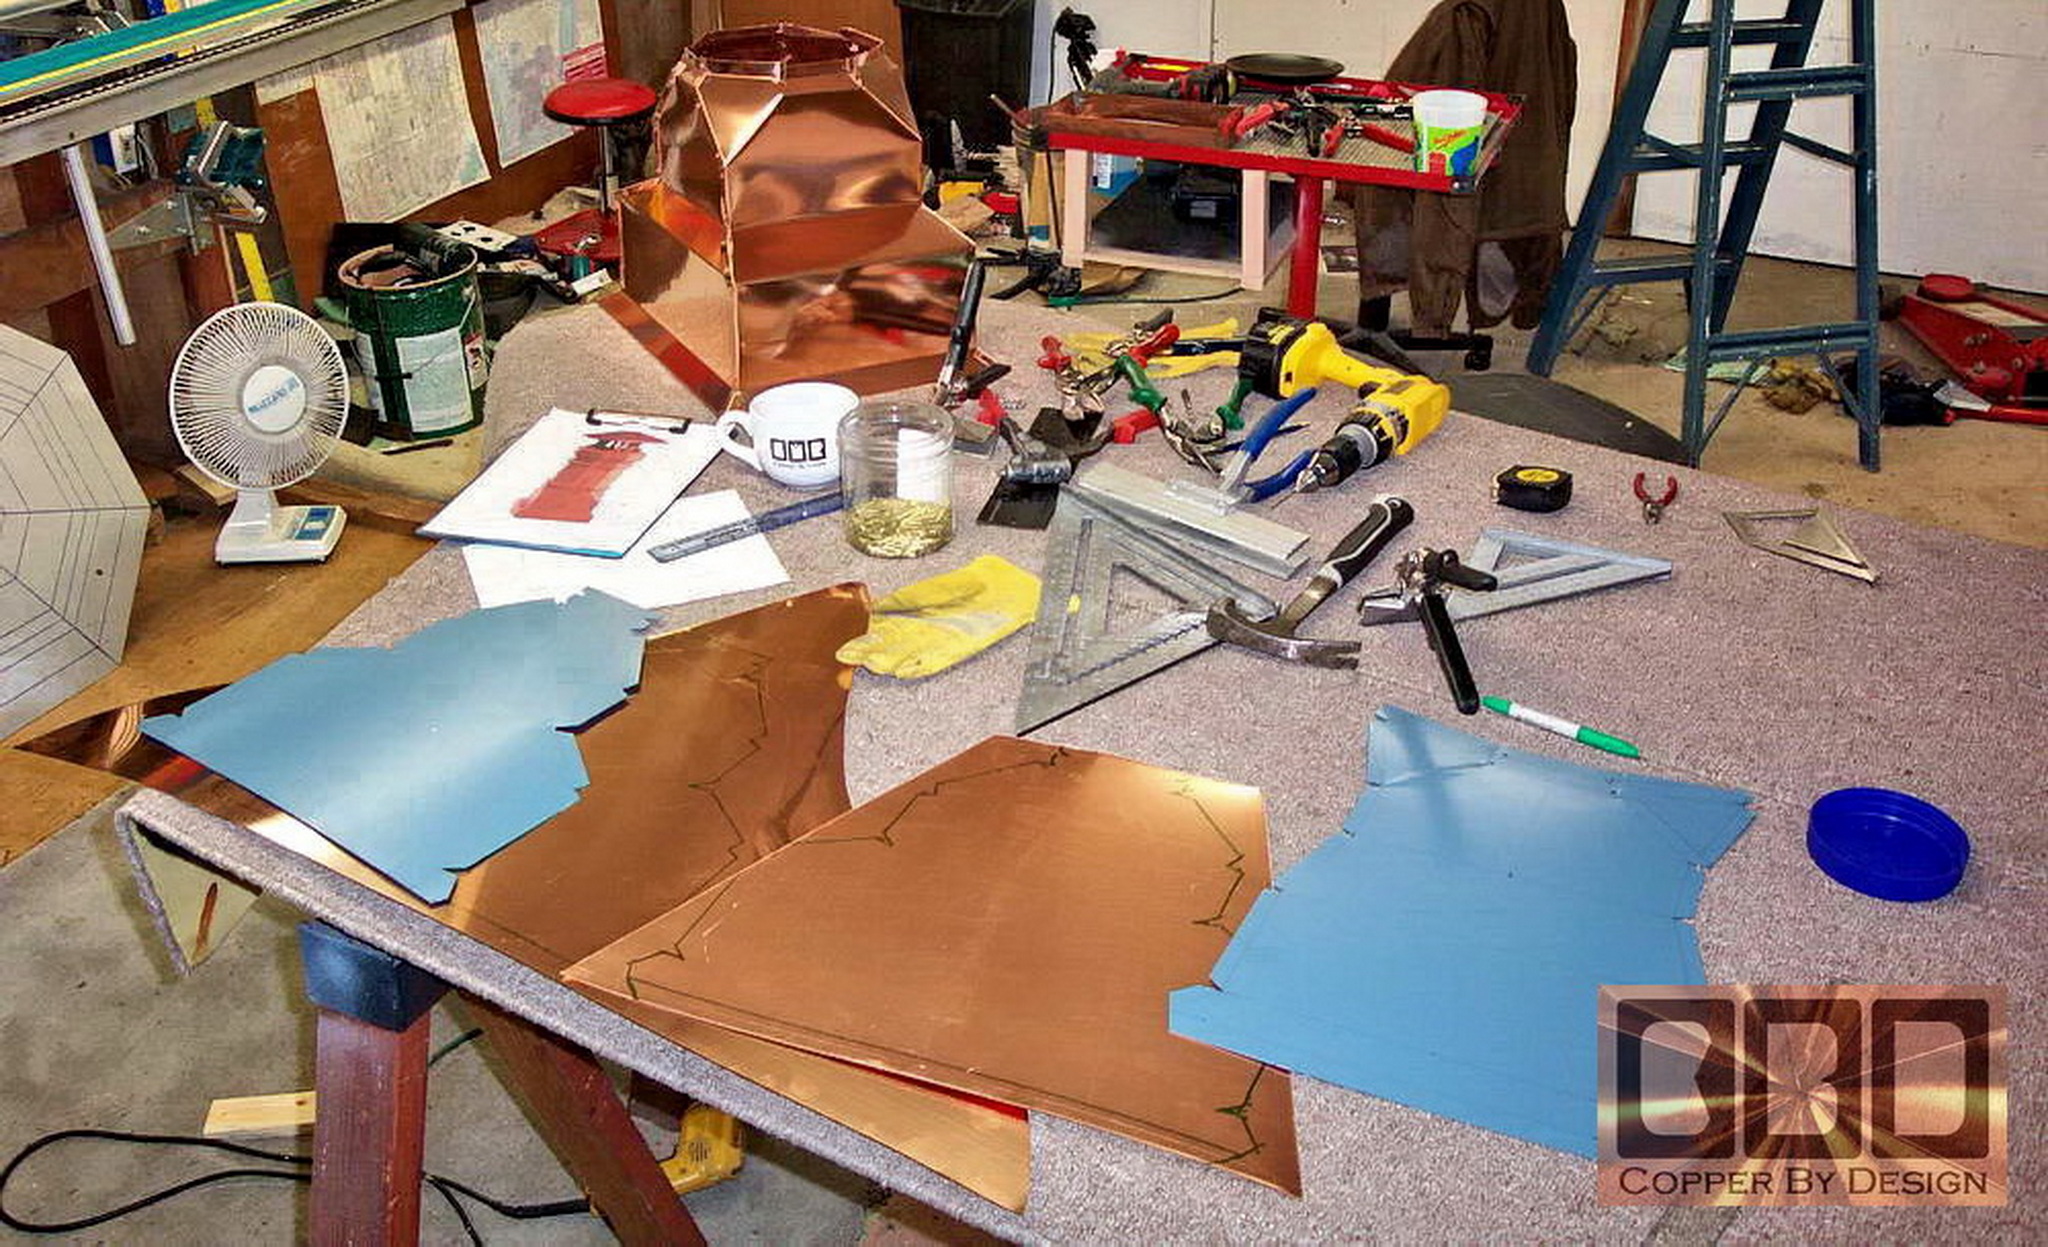
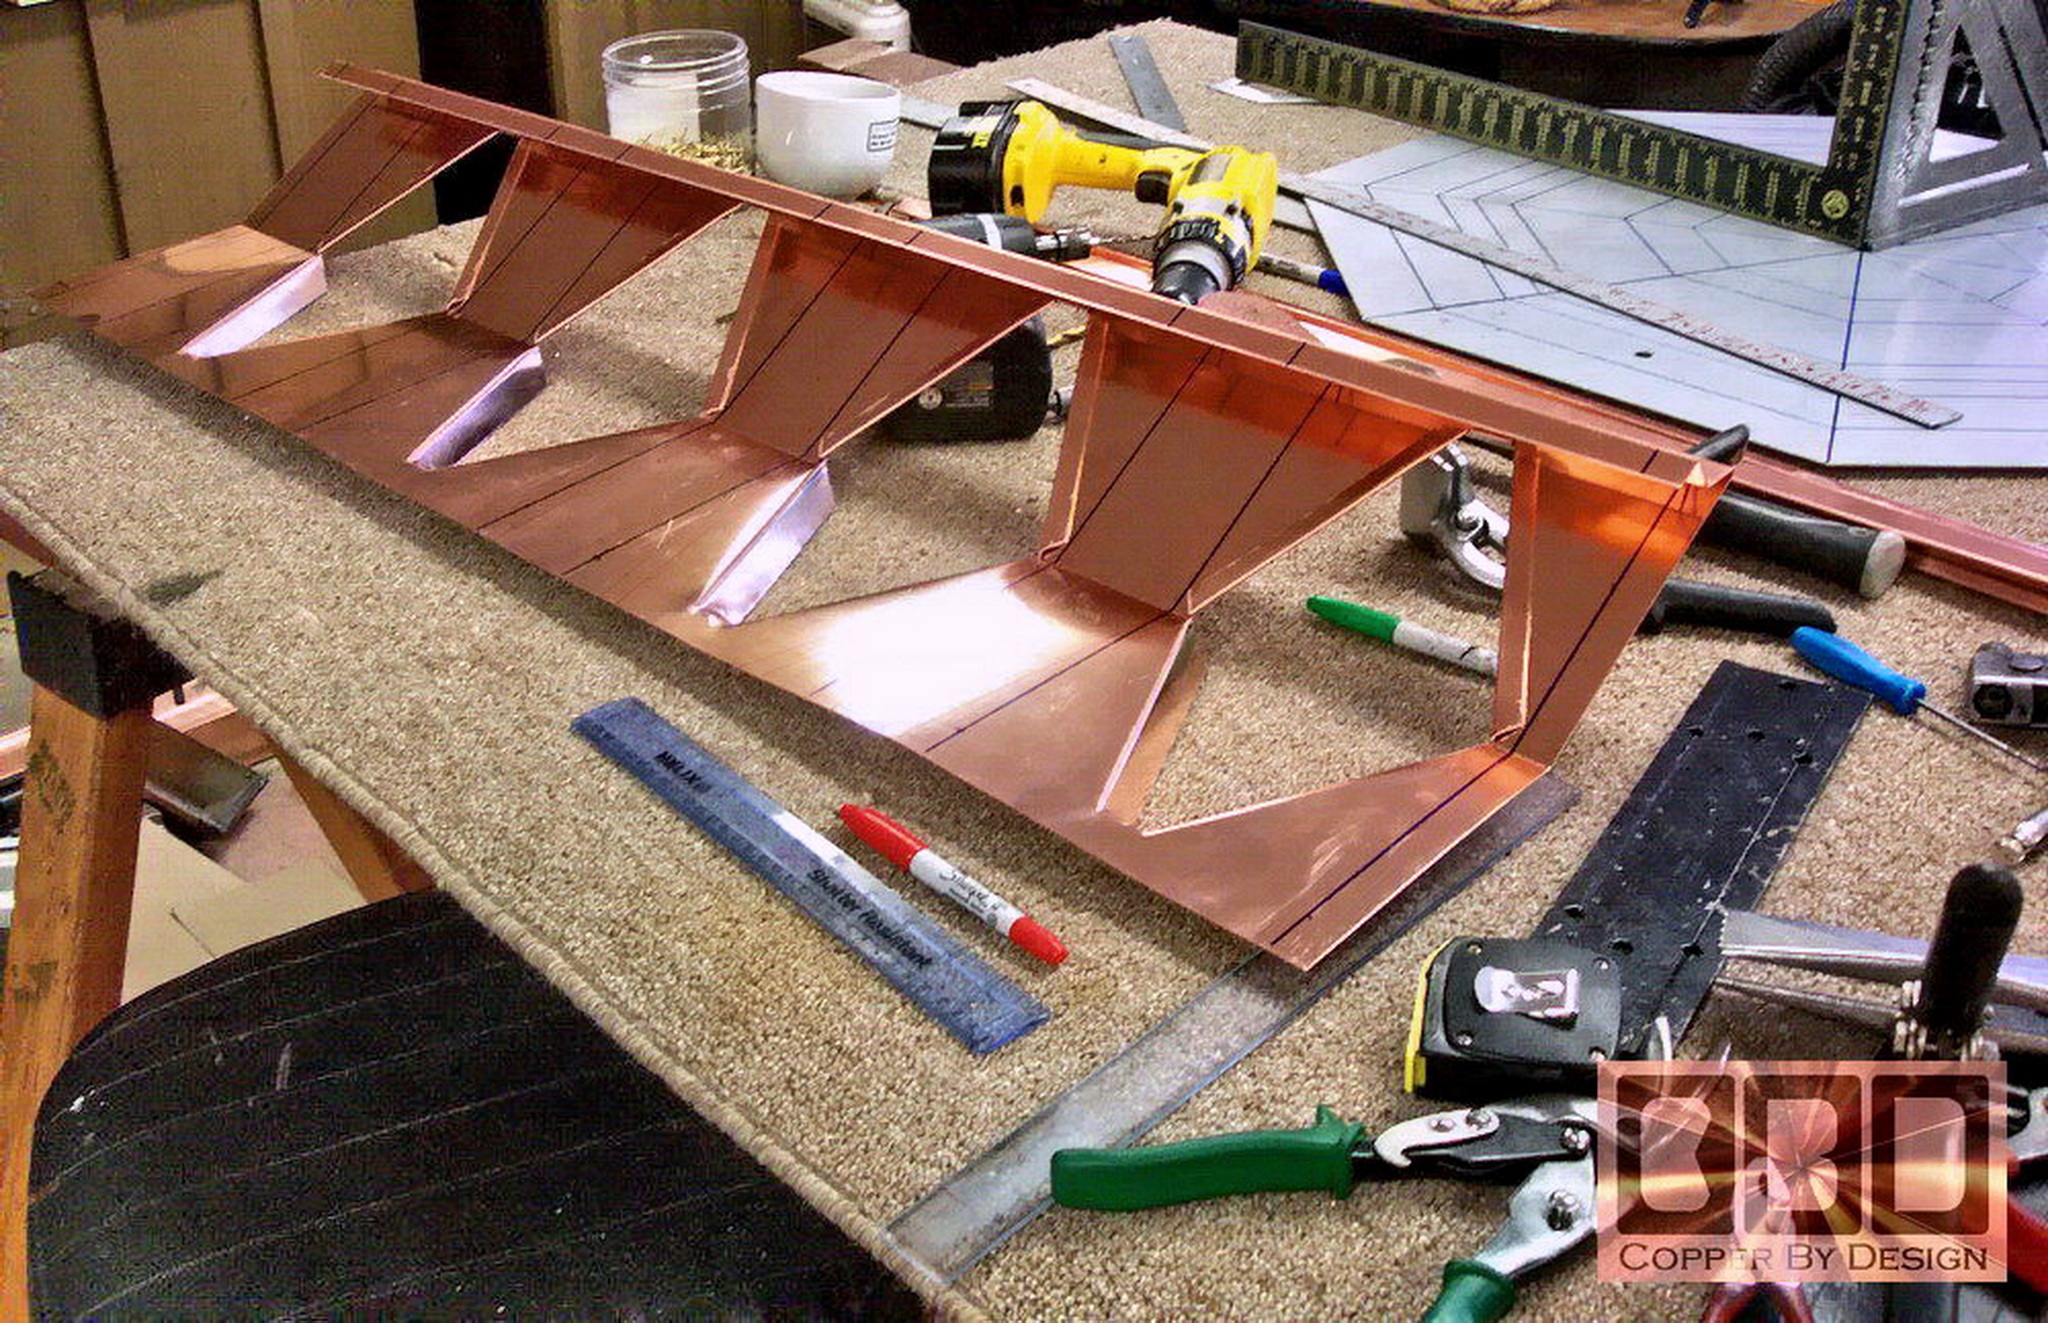
| These pictures
show one of the larger upper ornamentation being drawn out on the under side
of the copper sheet metal. Boy, was that tricky to do the math and design
this to be made in one piece.
|
|
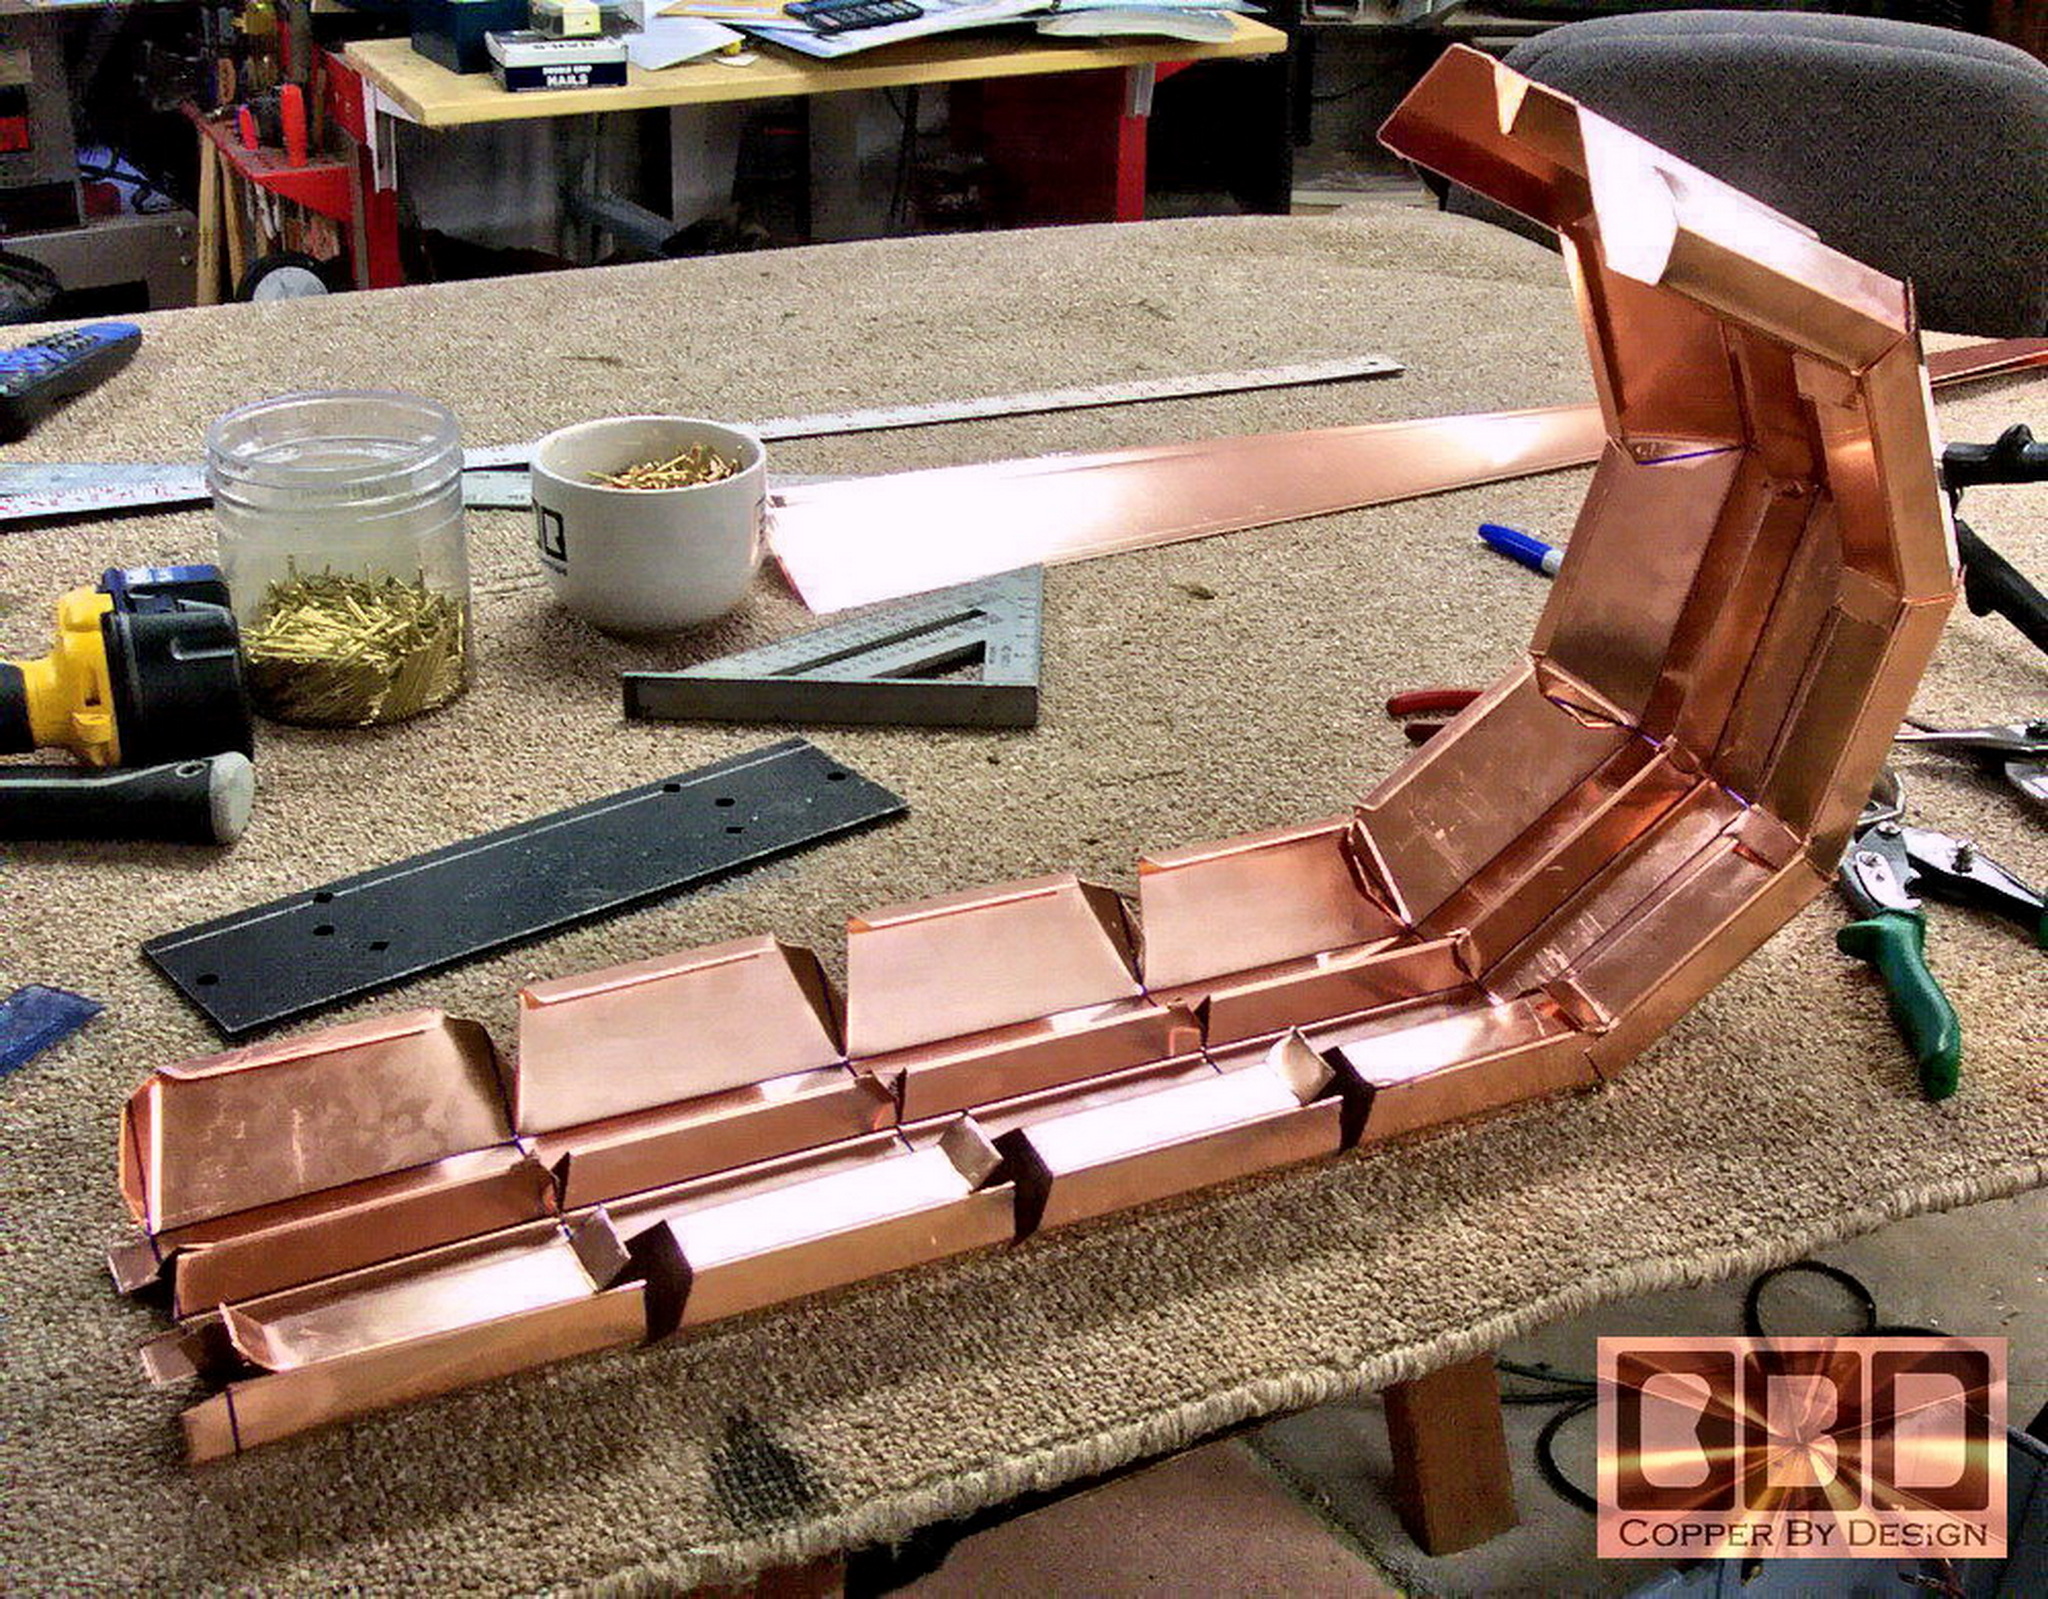
Here it is all bent and cut, ready for folding.
Below is some other angles. Each picture you see here links to
a full screen image to see the details better.
|
|


|
|
|
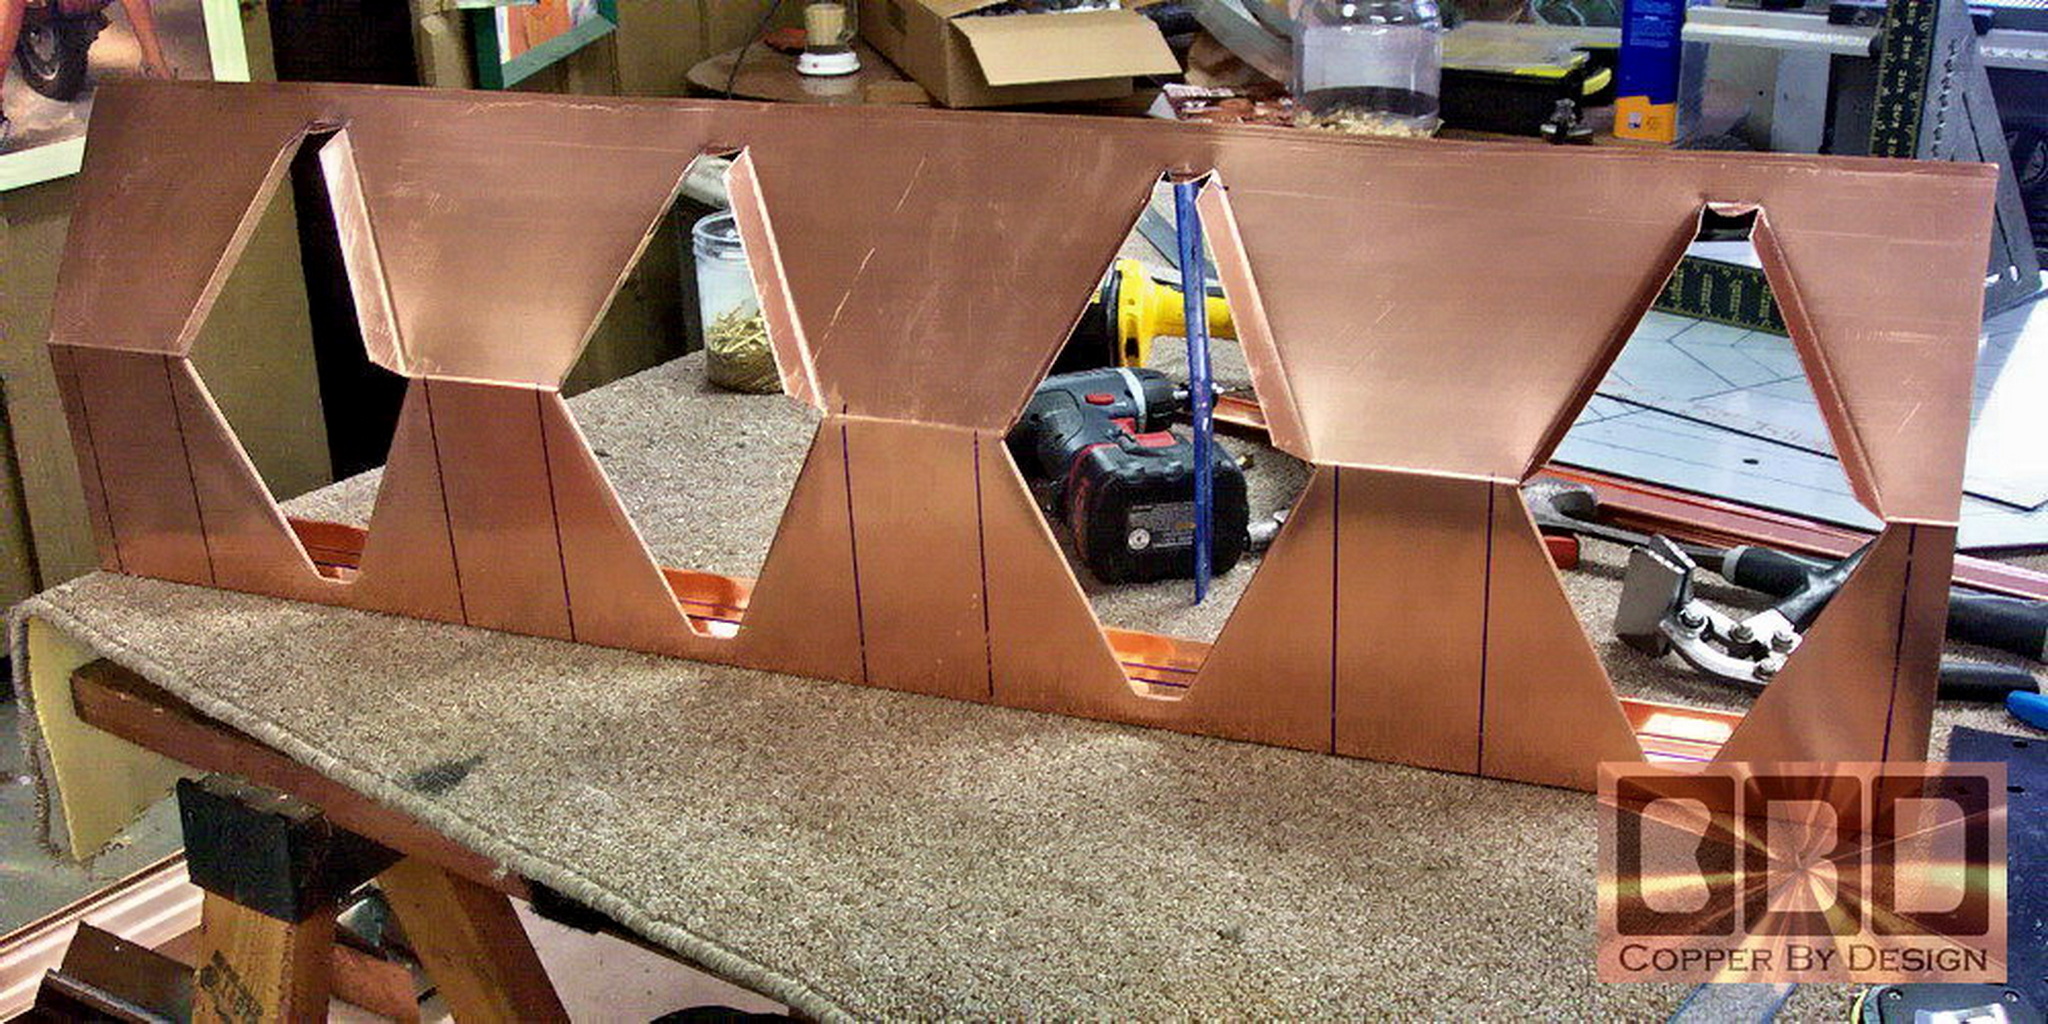
Here it is being folded into shape.
|

|
|
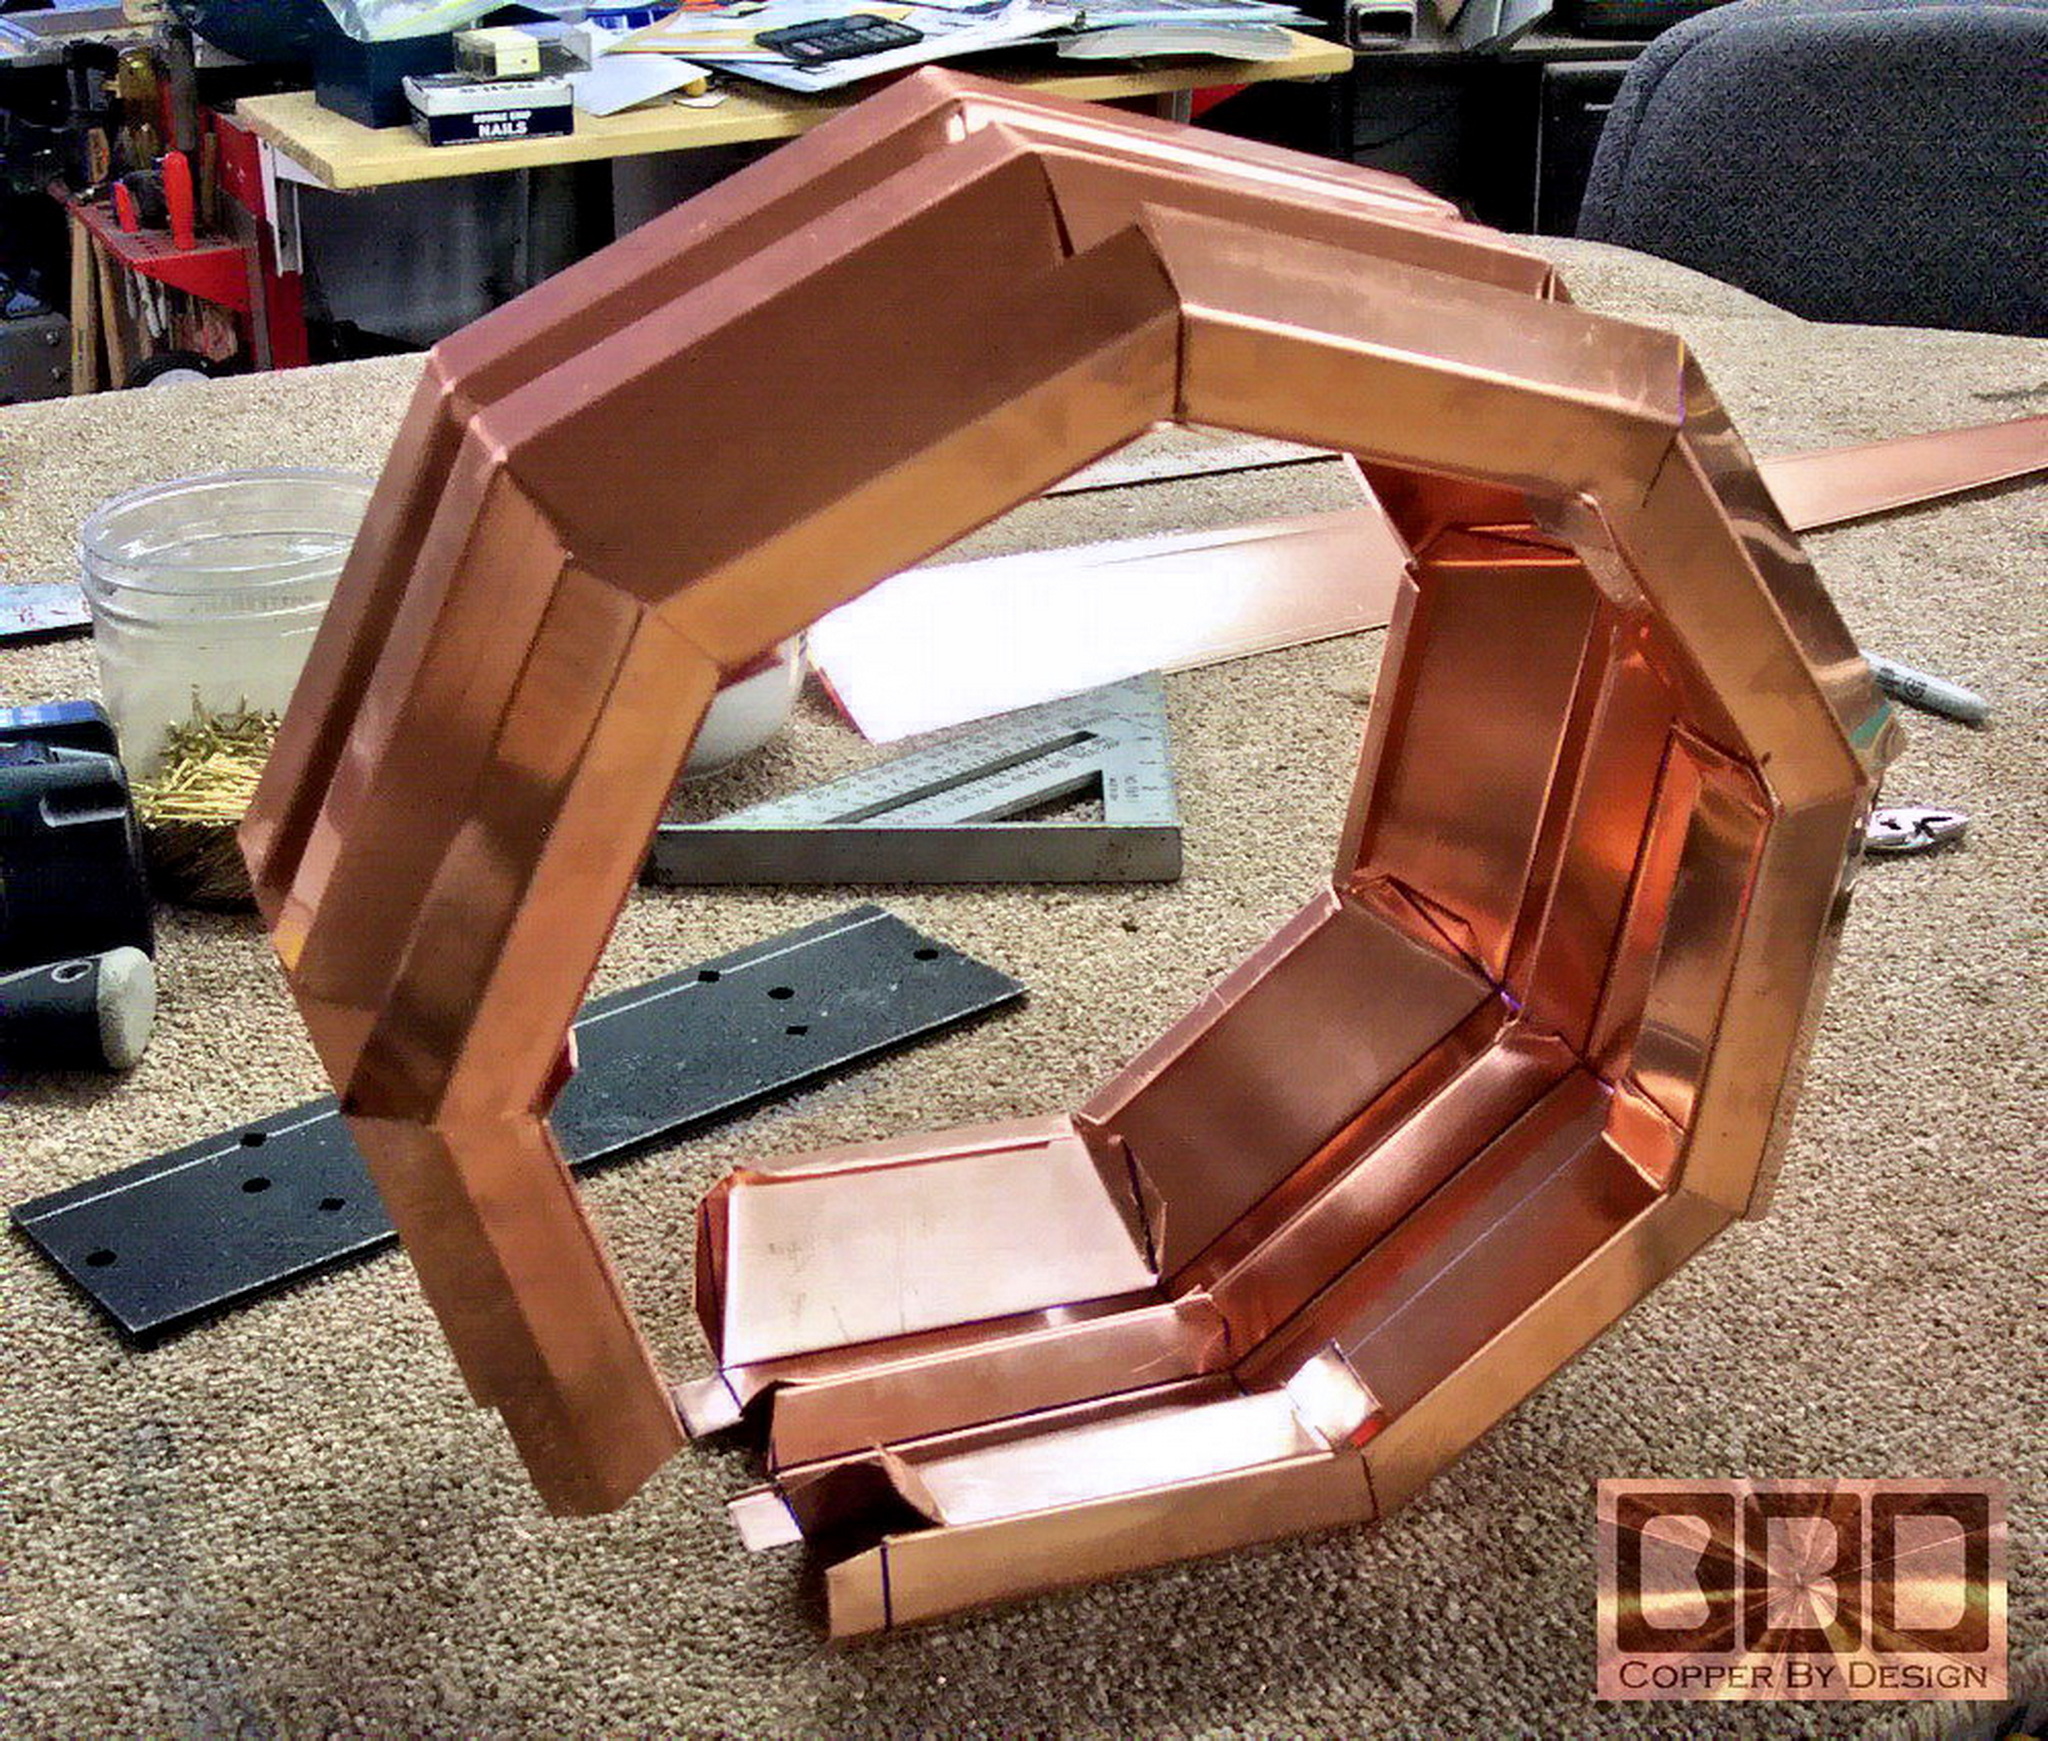
I had to hold it in place
while Tia drilled the first holes for the rivets to hold that upper
ring together. It takes a good 40 rivets just to assemble this
ring onto the smoke stack.
|
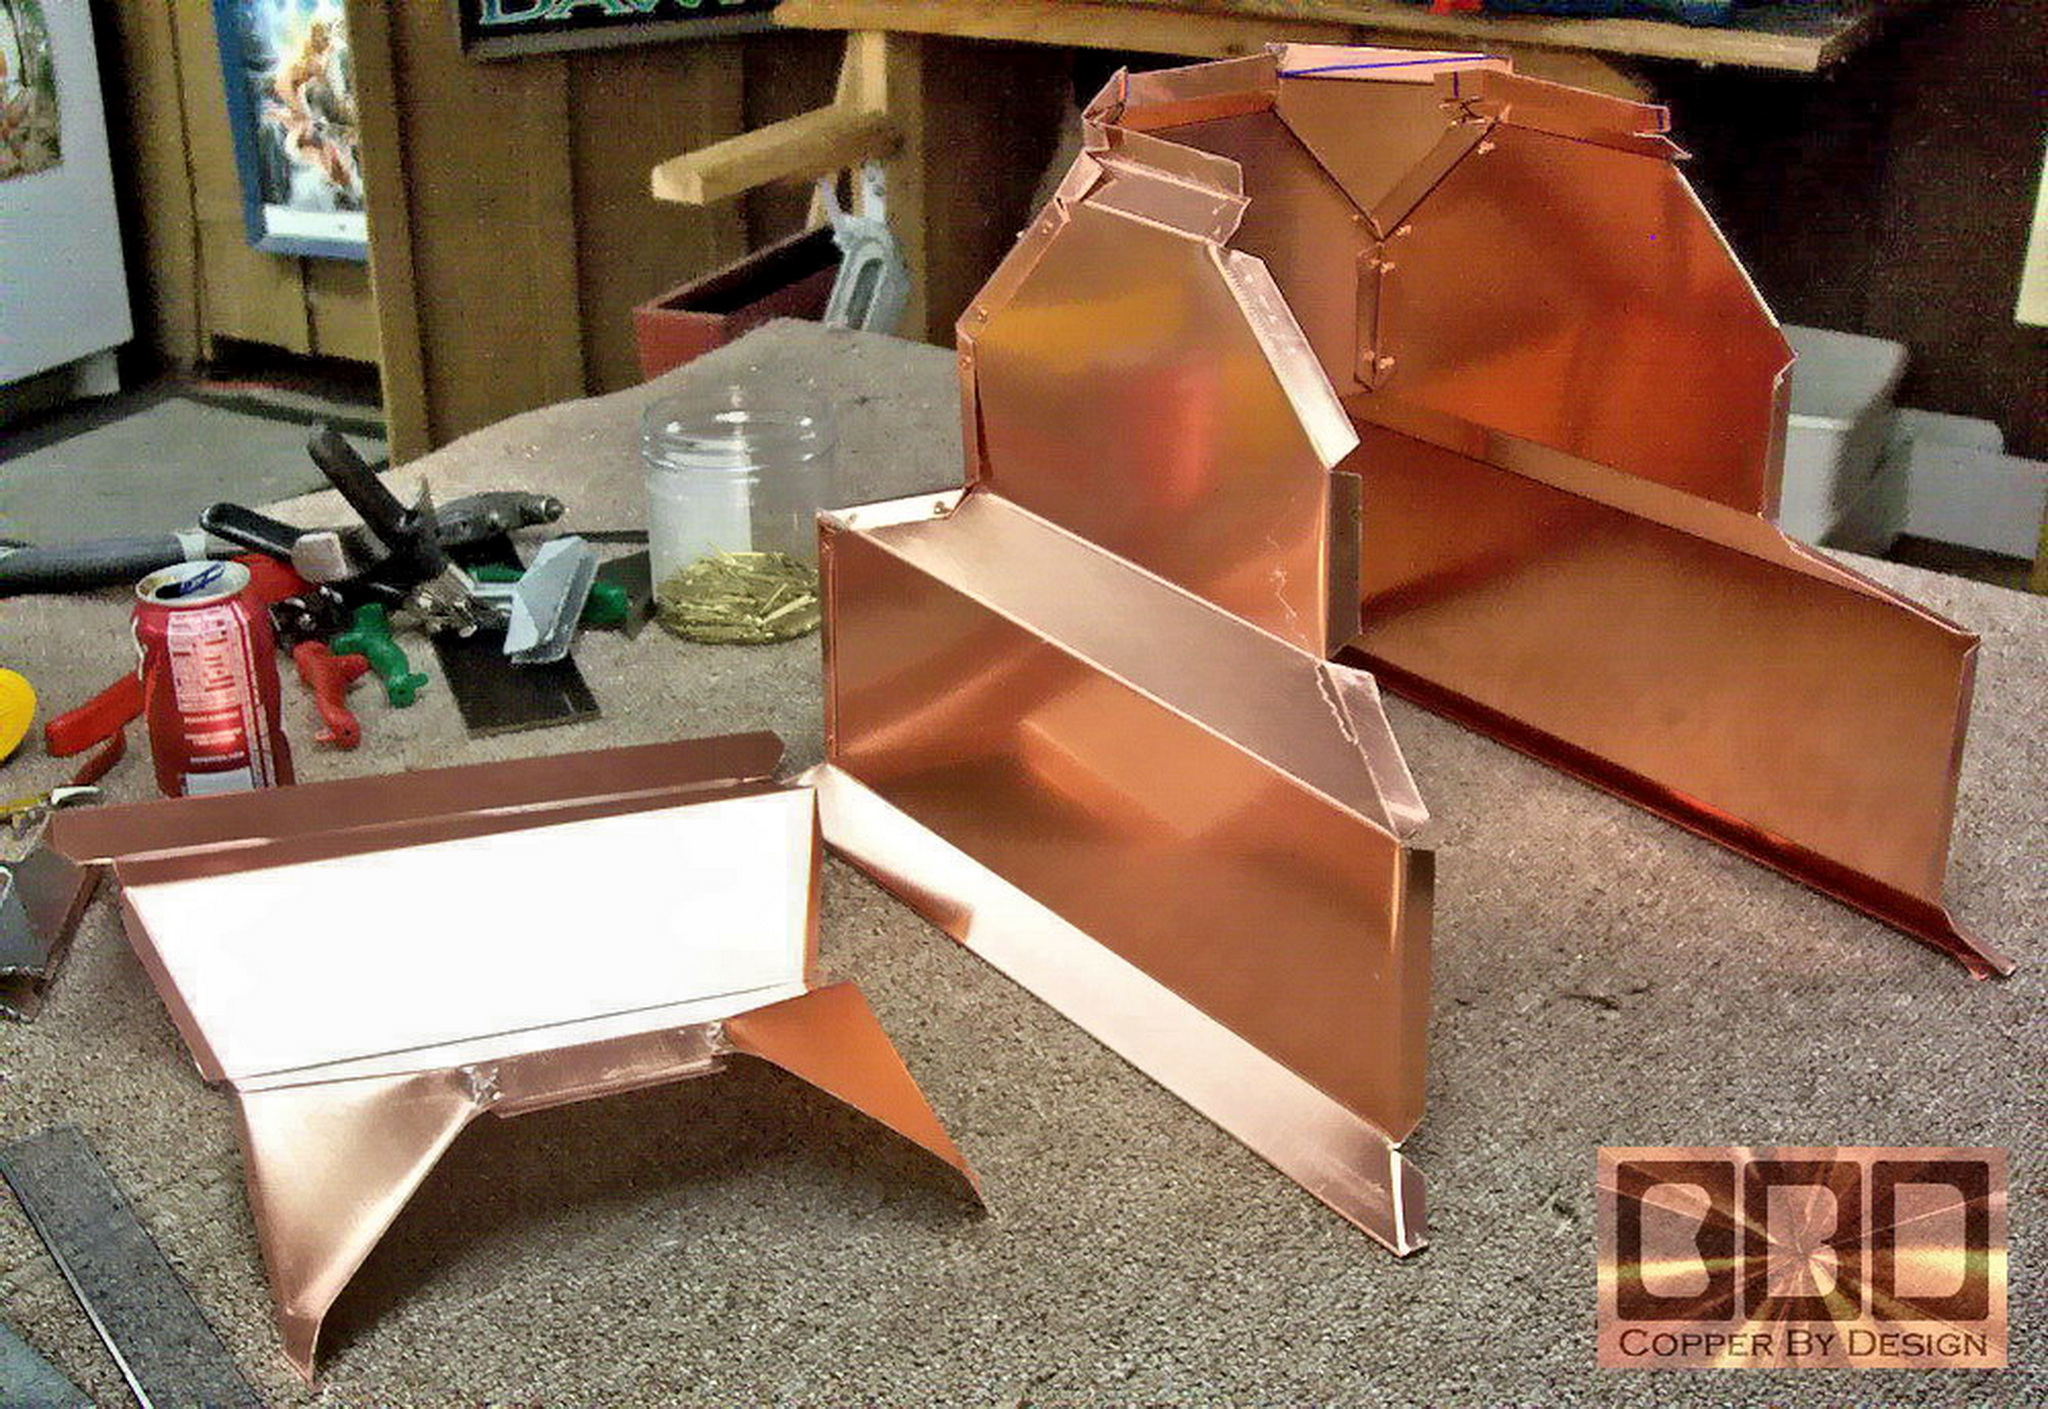
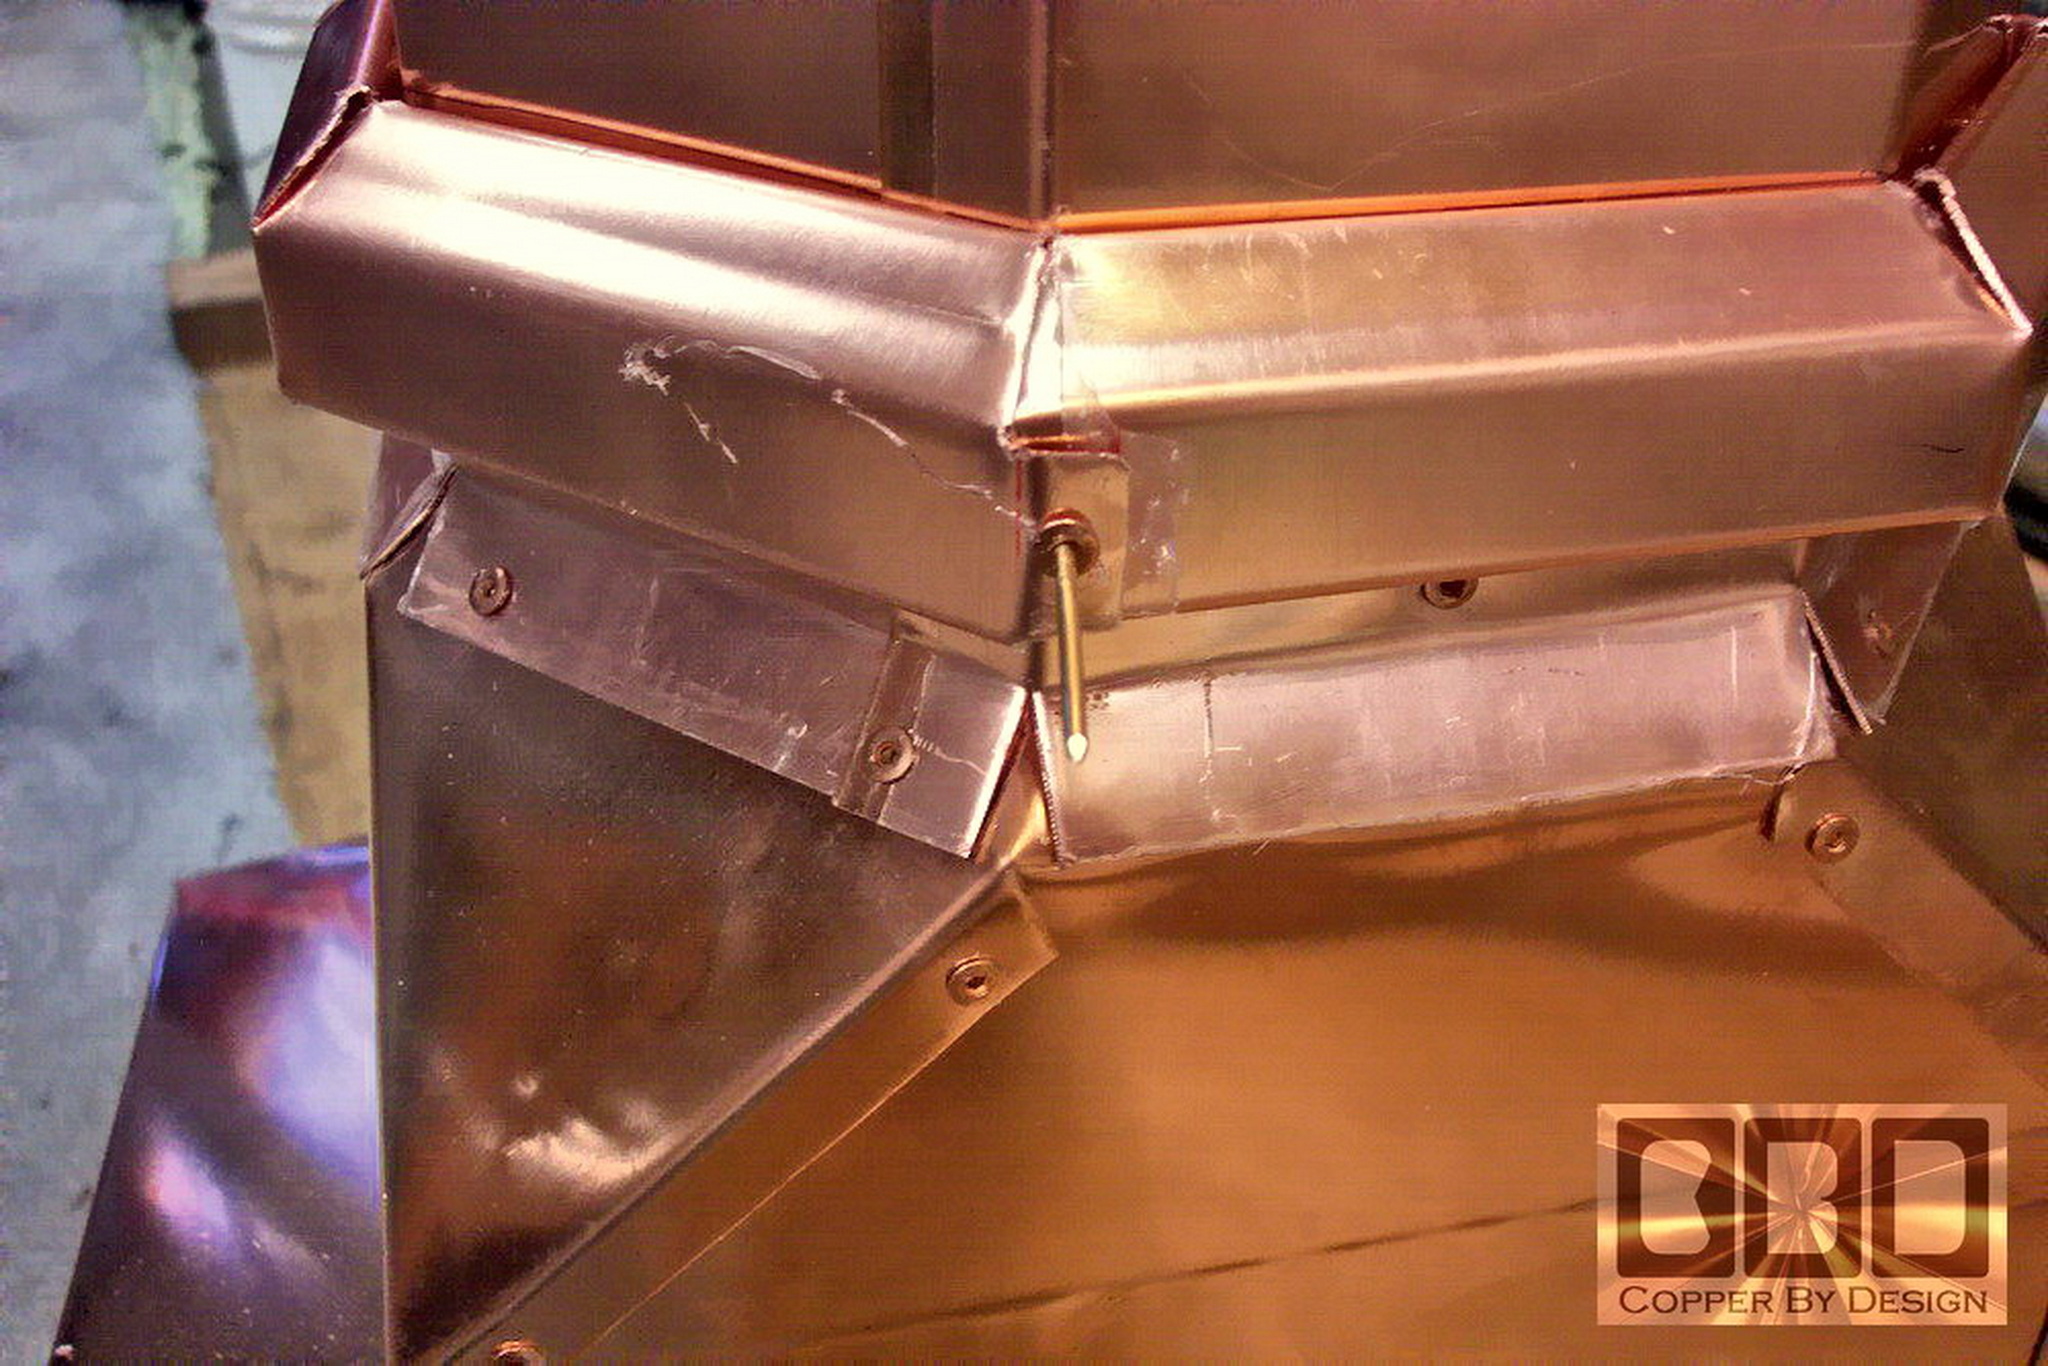
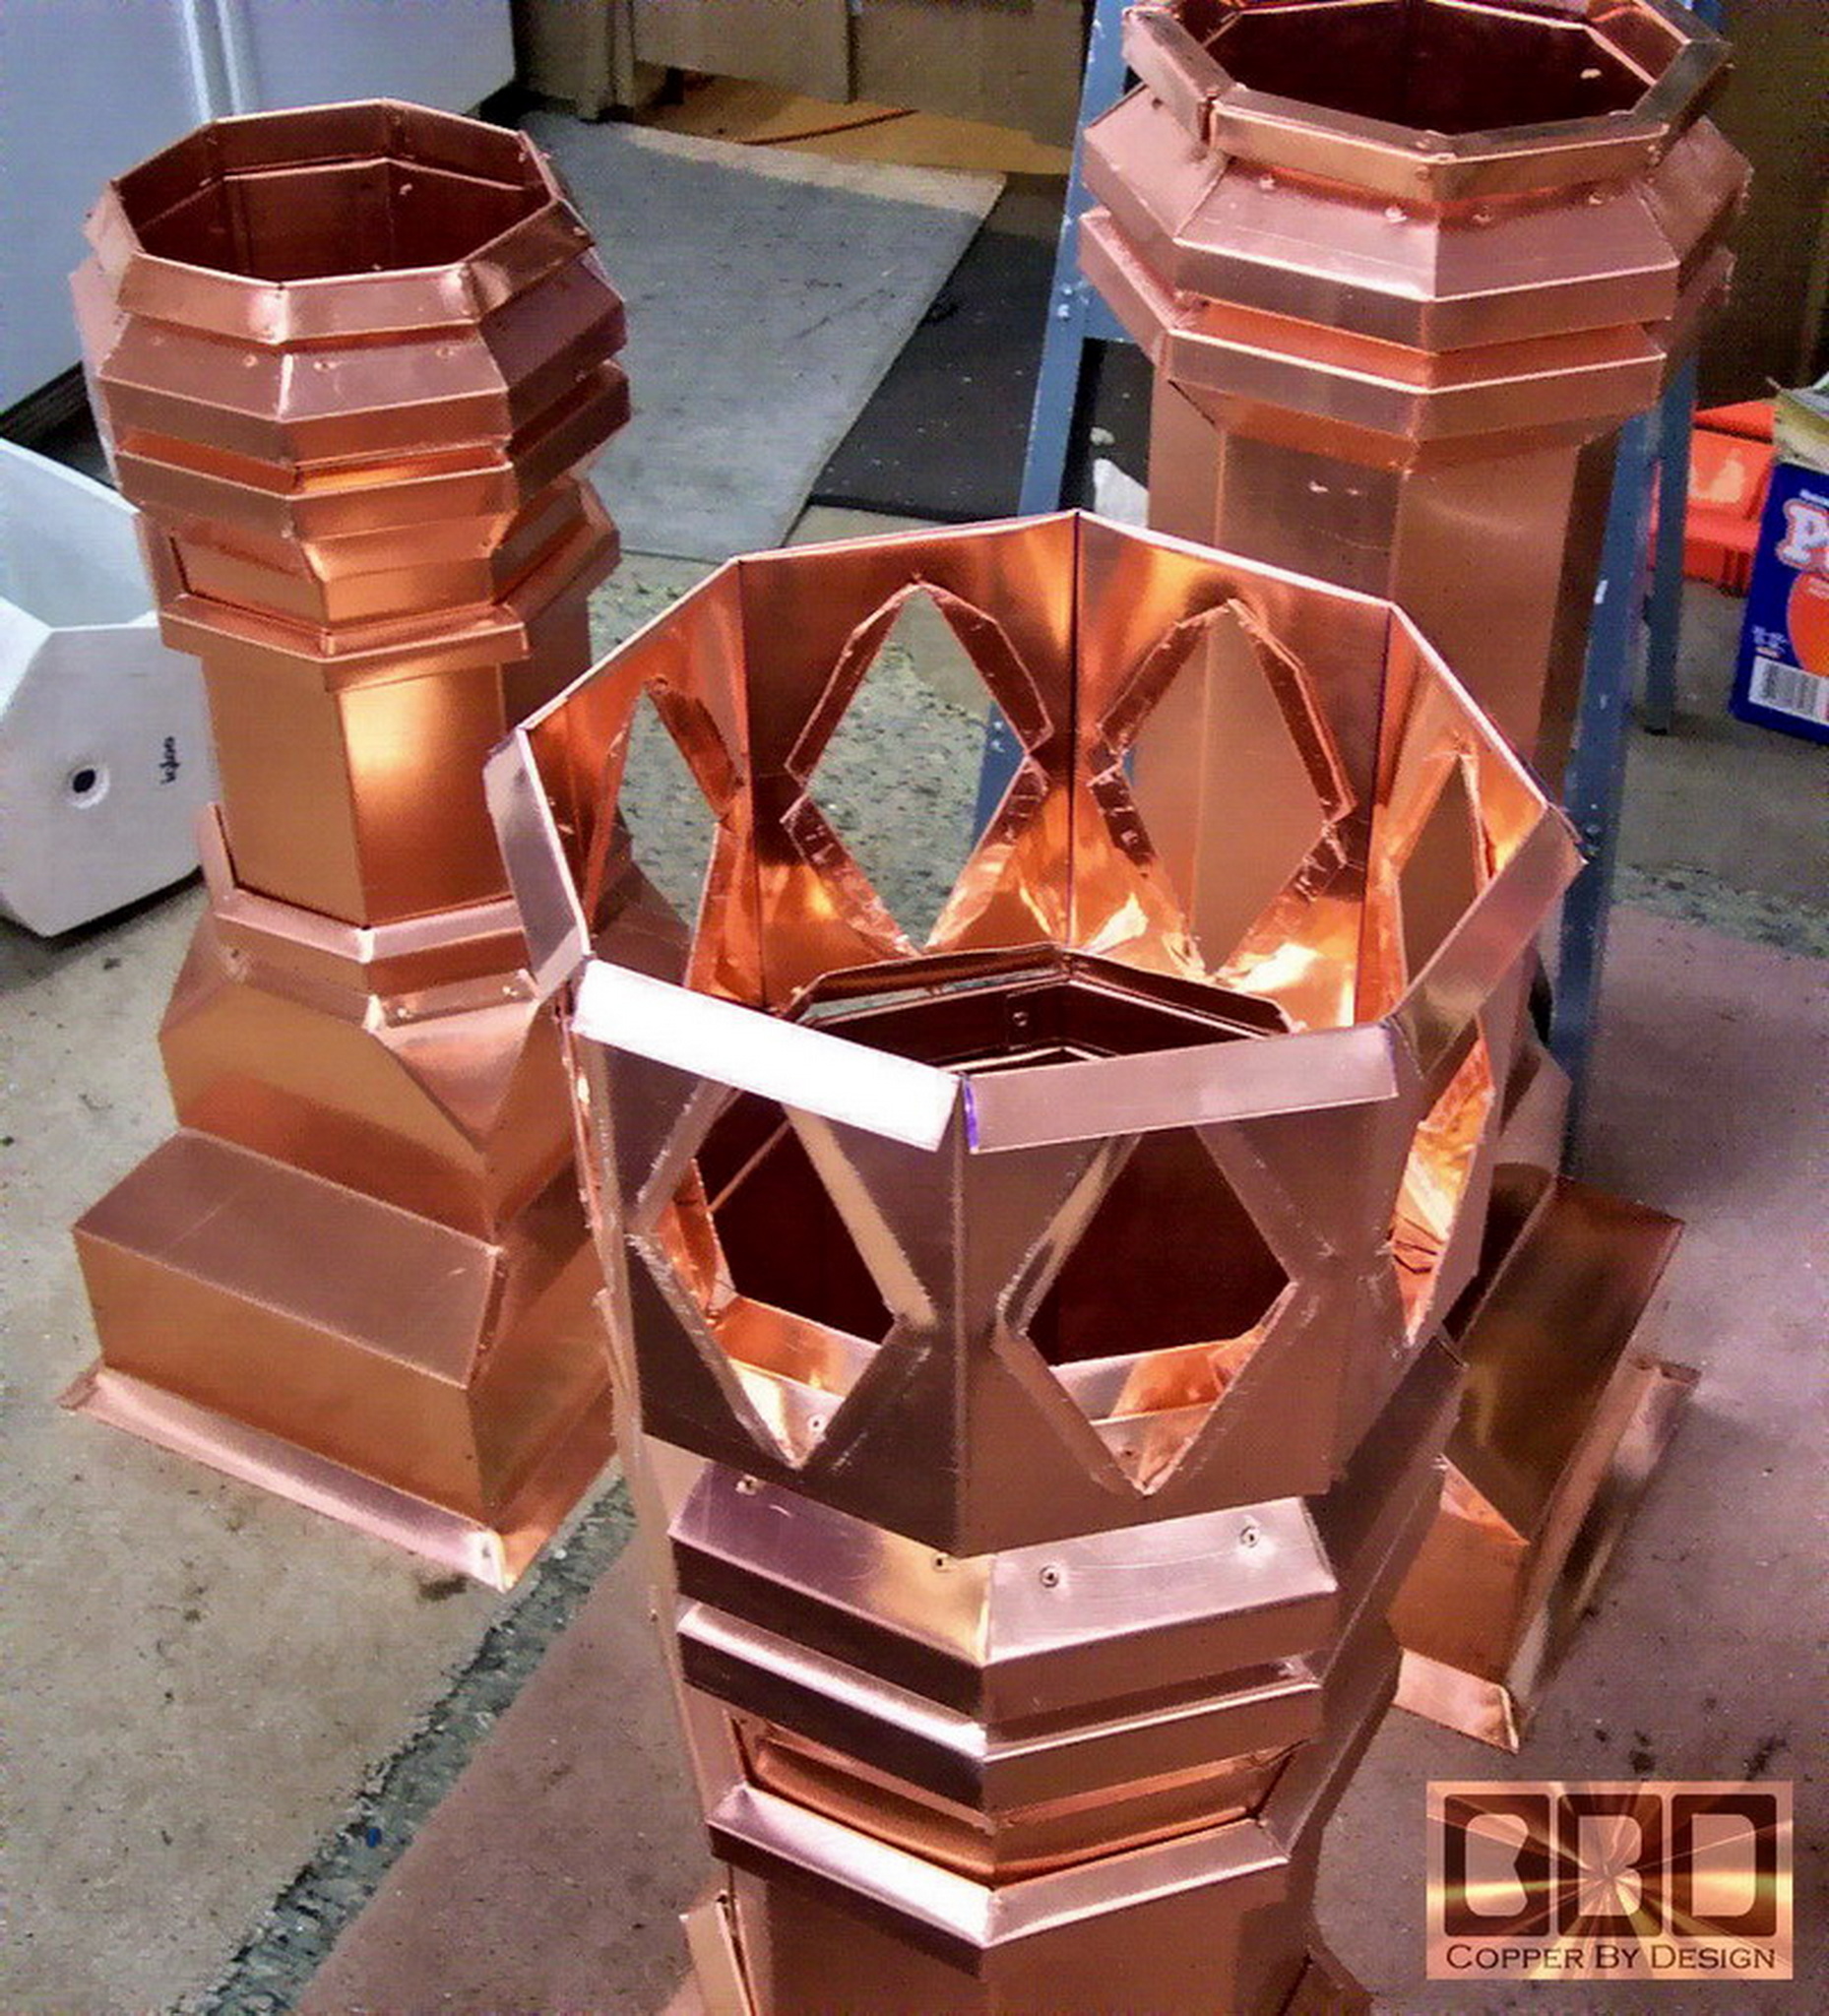
 This
is one of the smaller ornamental rings ready to be installed. There
are 2 more behind waiting to be processed. They are riveted on
from inside the smoke stack with 12 rivets. I have to first draw
the upper line of where it goes. then I drill the rivet holes
in the stack just under that line. I them place the ring on the
stack and mark the holes to be drilled in the ring from inside of the
stack. I then have to remove it to drill the holes in the ring.
Then I have to position it on again, line up the holes, and set the
rivets. Each one takes about 2 hours to do. This
is one of the smaller ornamental rings ready to be installed. There
are 2 more behind waiting to be processed. They are riveted on
from inside the smoke stack with 12 rivets. I have to first draw
the upper line of where it goes. then I drill the rivet holes
in the stack just under that line. I them place the ring on the
stack and mark the holes to be drilled in the ring from inside of the
stack. I then have to remove it to drill the holes in the ring.
Then I have to position it on again, line up the holes, and set the
rivets. Each one takes about 2 hours to do. |
|
|
|
|
|
|
|
This One Day of
E-mail Correspondence (9-1-04)
|
| Here is some of the e-mail correspondence
we have exchanged on the first day of this month, half way through project:
Date: Wed, 1 Sep 2004
At 01:17 AM 9/1/2004, you wrote:
> I can
see that these stacks are very complex. Your work is a beautiful piece
of art that will adorn our home somewhat like three stacks of a steam
ship. It feels like these stacks were meant to be, as I mentioned our
house was designed and built by a steamship captain the turn of the
century. It does appear that the photo that you sent of the clay pot
is three sections. It is interesting to see this stack with a person
standing next to it. I now have a better perspective. I look forward
to seeing the next section. Thank you for the updates they are much
appreciated. I will try and get out to your shop later this week but
will call and let you know in advance.
Greetings again XXXXXXX,
 Thank
you for your prompt responses. This has helped a lot. I did not know
about the Captain, or forgot about that. That is interesting. Thank
you for your prompt responses. This has helped a lot. I did not know
about the Captain, or forgot about that. That is interesting.
I was laying in bed this morning and got an idea. I was thinking
that instead of all 3 stacks having the same top cap, I could do something
like the img_jestateRG2.jpg image file I altered. Only with the outer
2 stacks to have a steeper pitch cap than shown. I have attached a couple
photos of a cap I did recently for a teacher in California. They show
2 different 8 sided cap pitches. Try to ignore the bottom section. #27
was for the base of the steeper cap to go on it and support the bottom
of the weather vane pipe to go on it. I favor the pitch in #27 for these
stacks, so it does not up-stage the center stack.
Keep in mind;
I do not make this suggestion to make these easier to fabricate. I felt
it would make the center one that much more special looking. For some
time I was feeling that all three the same, only different heights,
would seem odd.
Your thoughts?
At 10:50 AM 9/1/2004, you wrote:
> I like
your idea with the two end stacks having caps like photo #27.
Greetings again XXXXXXX,
I am glad you like my ideas and the progress. Here is the latest pictures
of the progress. I decided to go with 16.5" stacks on the side ones
instead of only 13.75", and a 22.5" stack on the center one to be 6"
higher. The center stack is already 3' tall. It is likely to be a good
4' tall when I am done.
The #13 picture shows the upper ornamentation
laying face down. Boy, was that tricky. I held it in place while Tia
drilled the first holes for the rivets to hold that upper ring together.
In #15 it shows the back side of these stacks, and the single seam
on the 8 sided stacks. There is 1.5" that overlaps. It has 3/4" on each
side of the bend.
They seem to be turning out well. I even amaze
myself some times.
Sorry I had to make you worry with all the
delays, after paying out all that money. At least now you can see your
money was not misplaced, and this is going to become a reality.
At 11:37 PM 9/1/2004, you wrote:
David,
I think this is one of the few times in my entire life that
I am almost speechless. All I can say is "OoooH MY GOSH!!!"
Really.........I
am stunned.
Many Blessings,
XXXXXXX
|
|
Day four & five
(9-2+3-04)
|
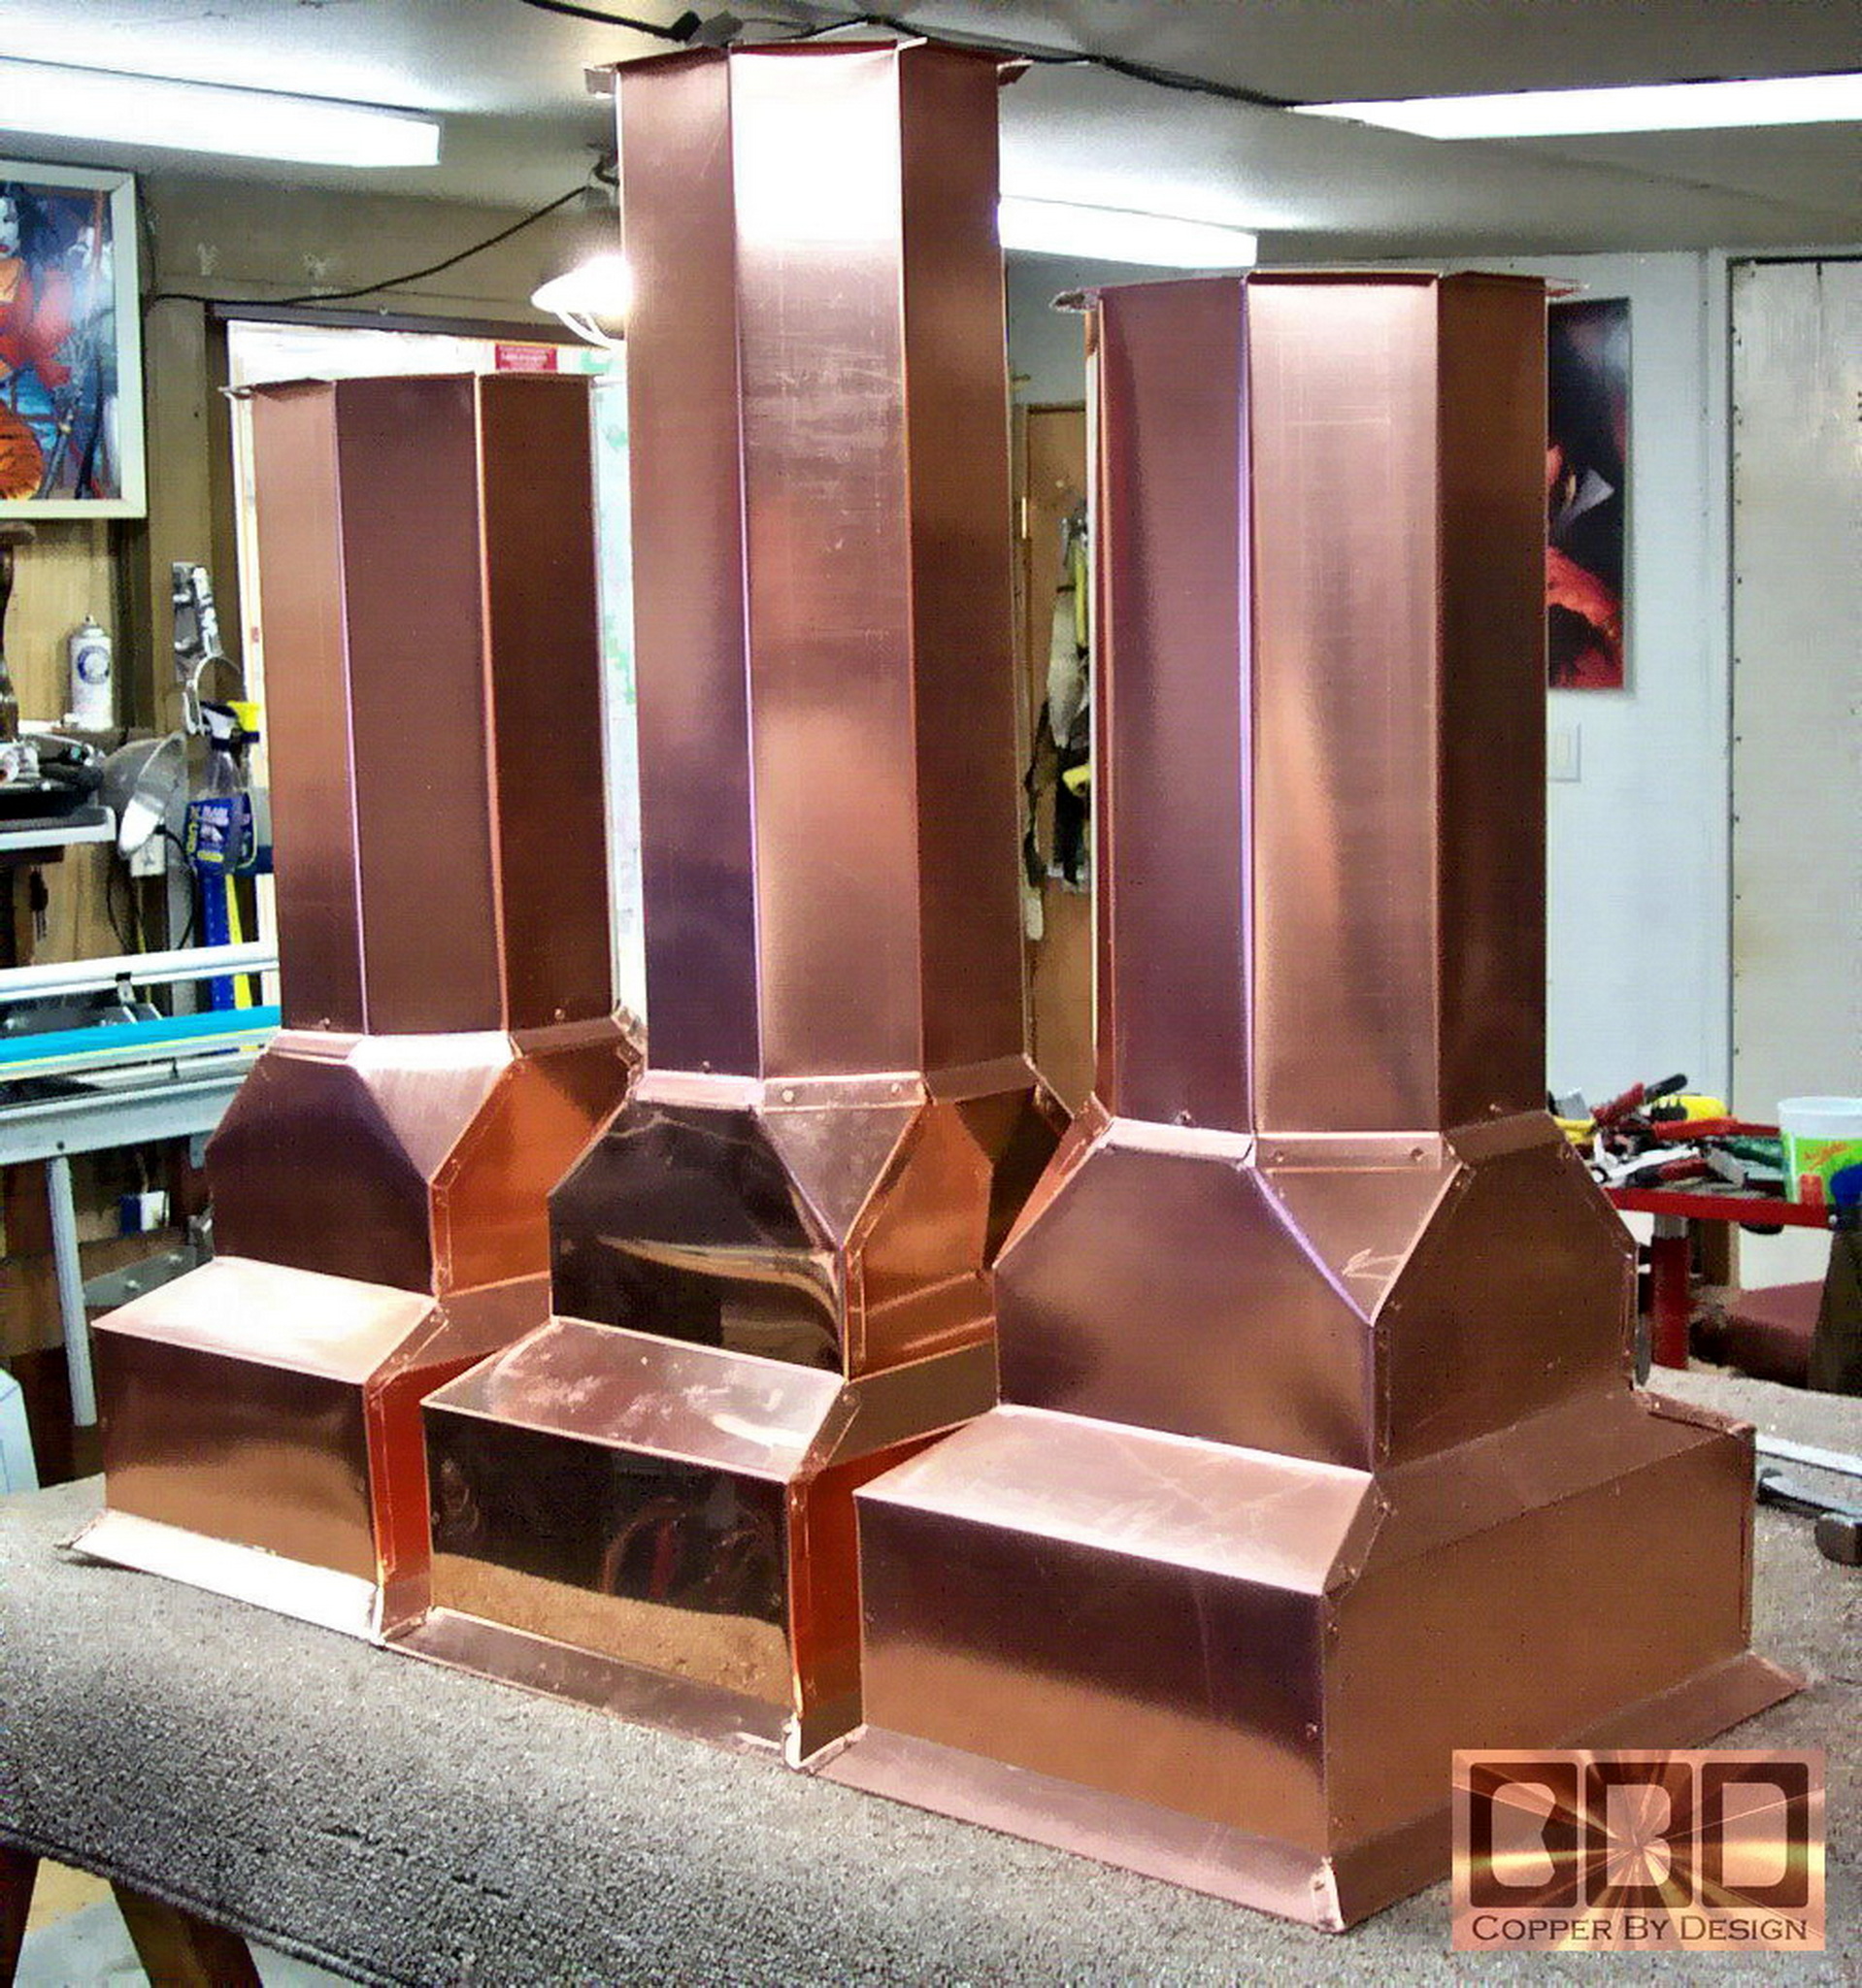
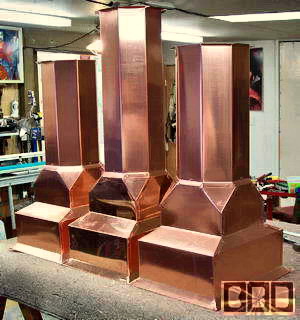
 Here is what
I had done after a week of full time work on these stacks. I decided
to go with 16.5" tall 8 sided stacks for the two outer units,
instead of only 13.75" as would be proportionate to the clay
version. This way it looks a little less stocky. Here is what
I had done after a week of full time work on these stacks. I decided
to go with 16.5" tall 8 sided stacks for the two outer units,
instead of only 13.75" as would be proportionate to the clay
version. This way it looks a little less stocky. I went with a 22.5" stack on the center unit,
to be 6" higher than the other two. The center stack is 3' tall now.
It is likely to be a good 4' tall when we are done.
The right chimney pot in the picture shows
the upper ornamentation installed.
They still have a clear plastic film over most of the copper shown.
I will peal it off after installation.
They seem to be turning out well. I even
amaze myself some times with what I am able to design and create.
|
|
Day 6 (9-7-04)
|
|

|
|
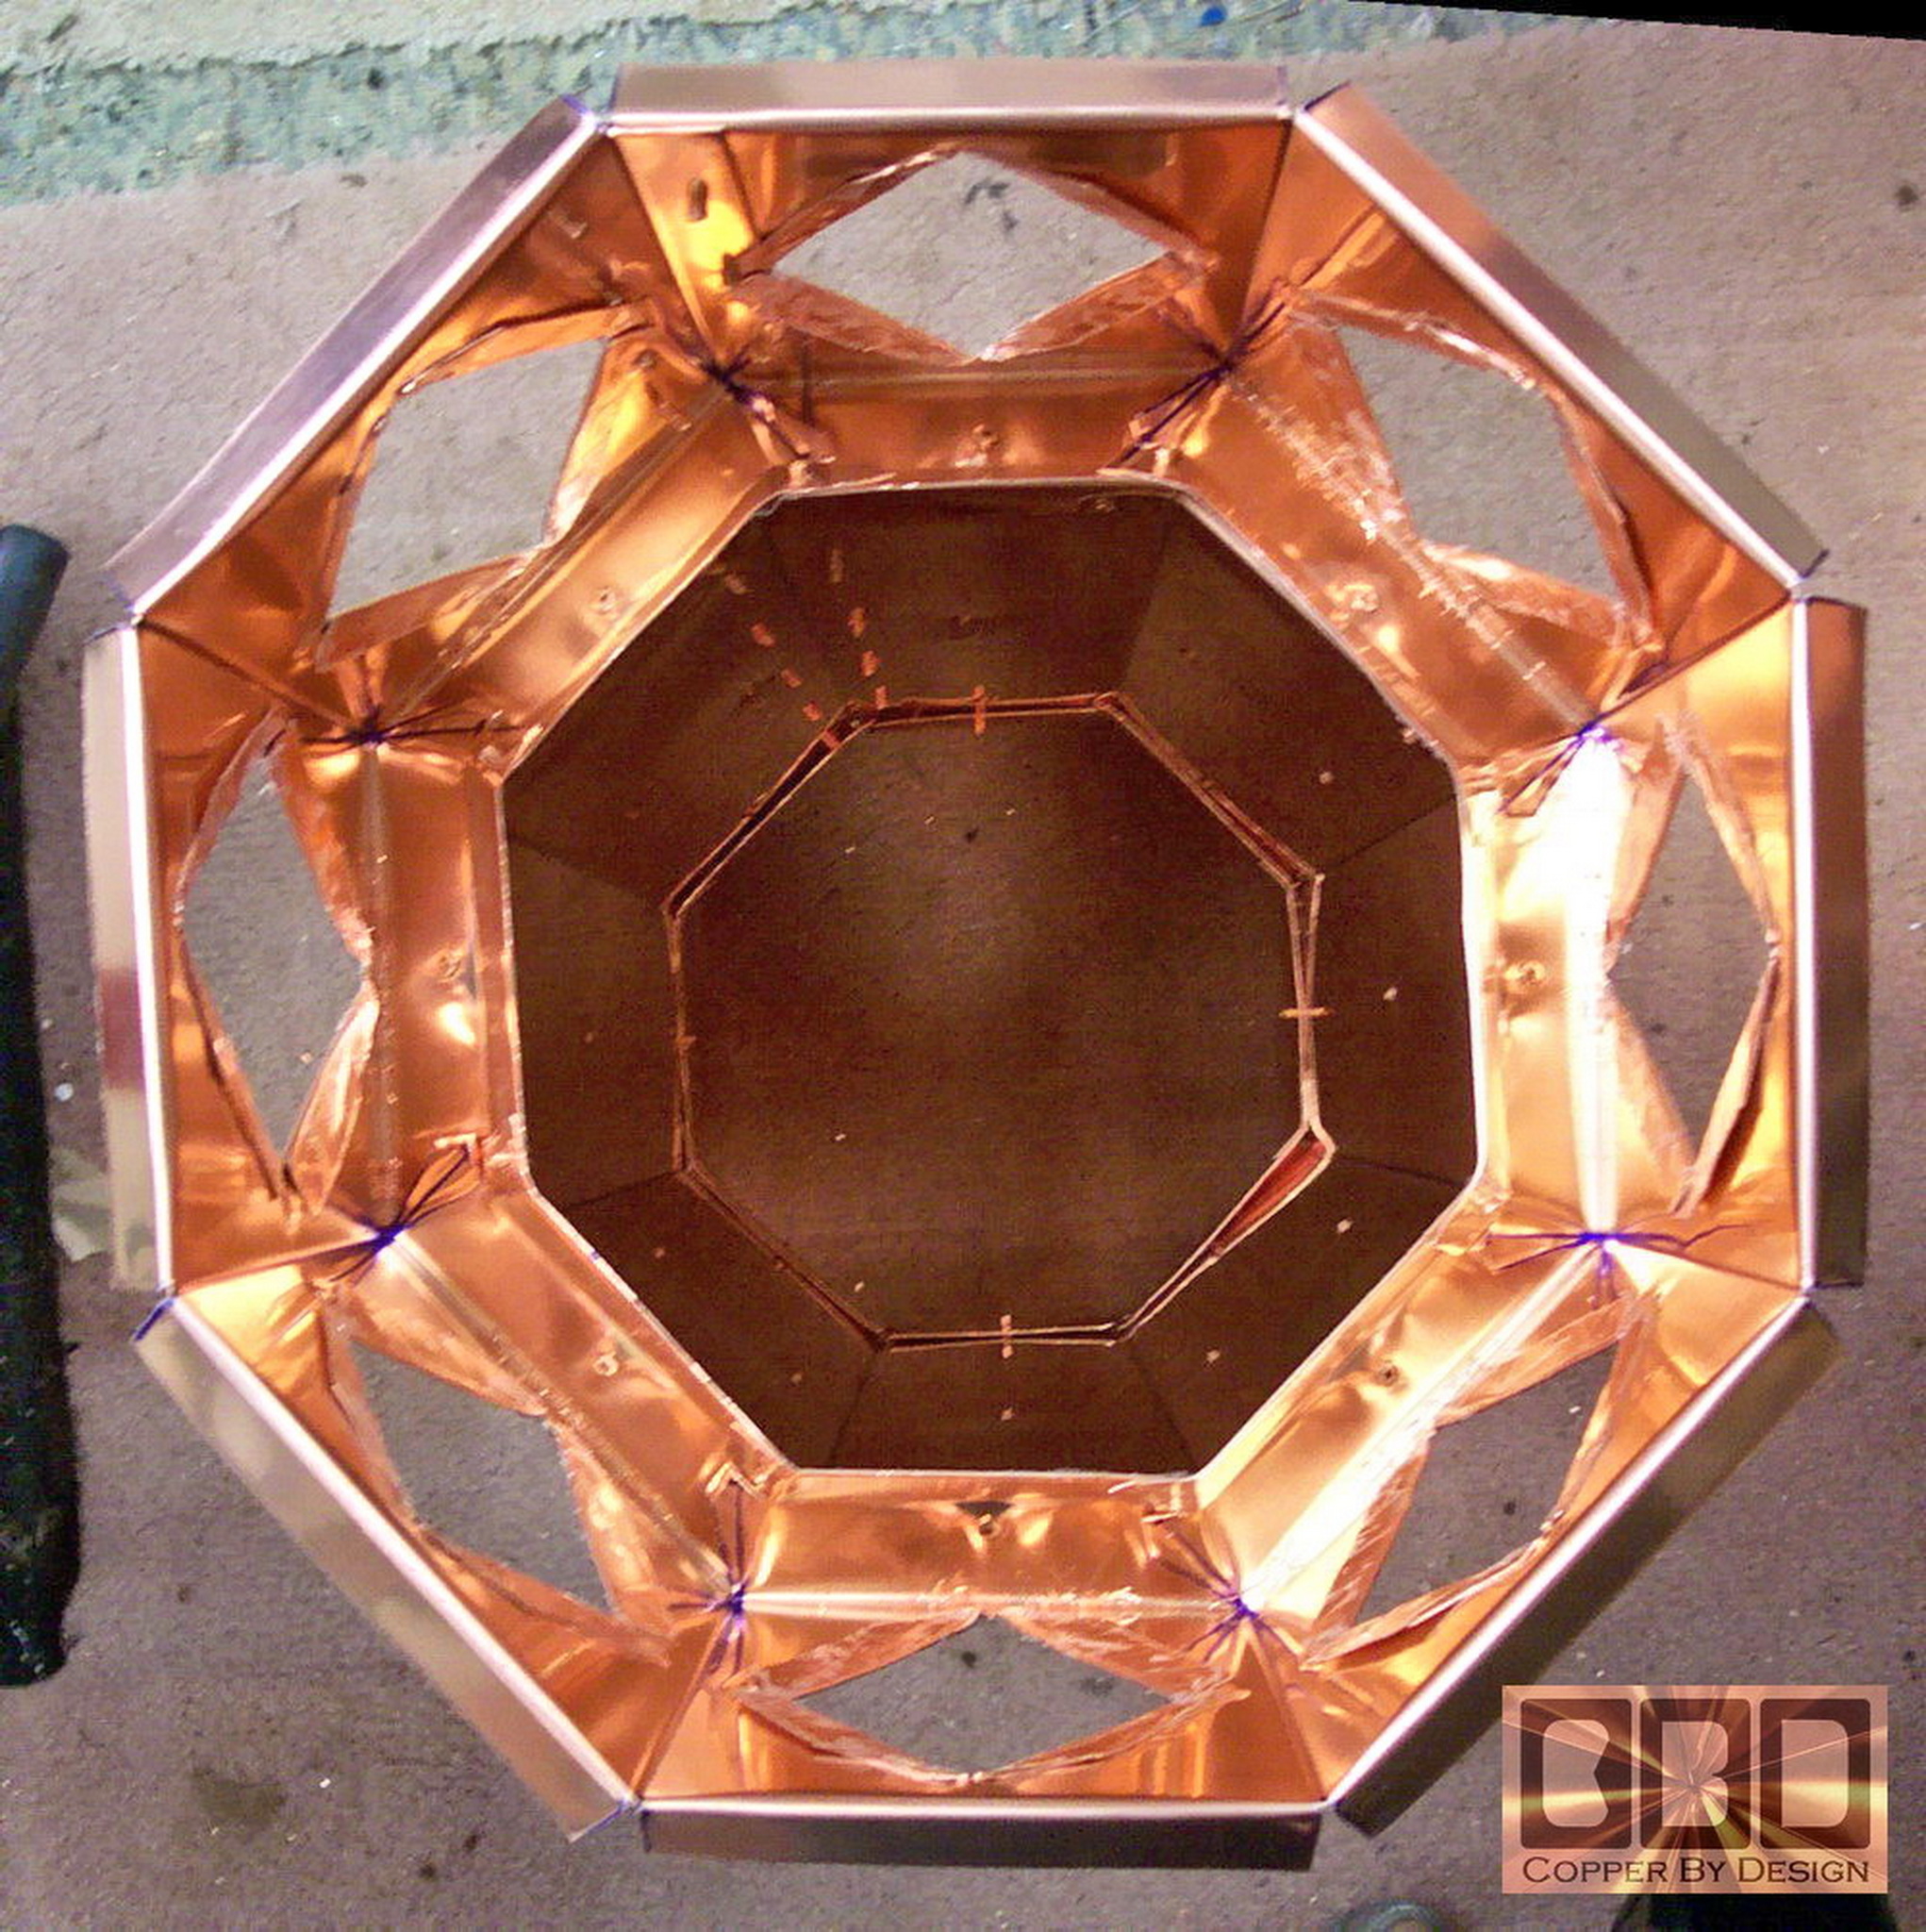
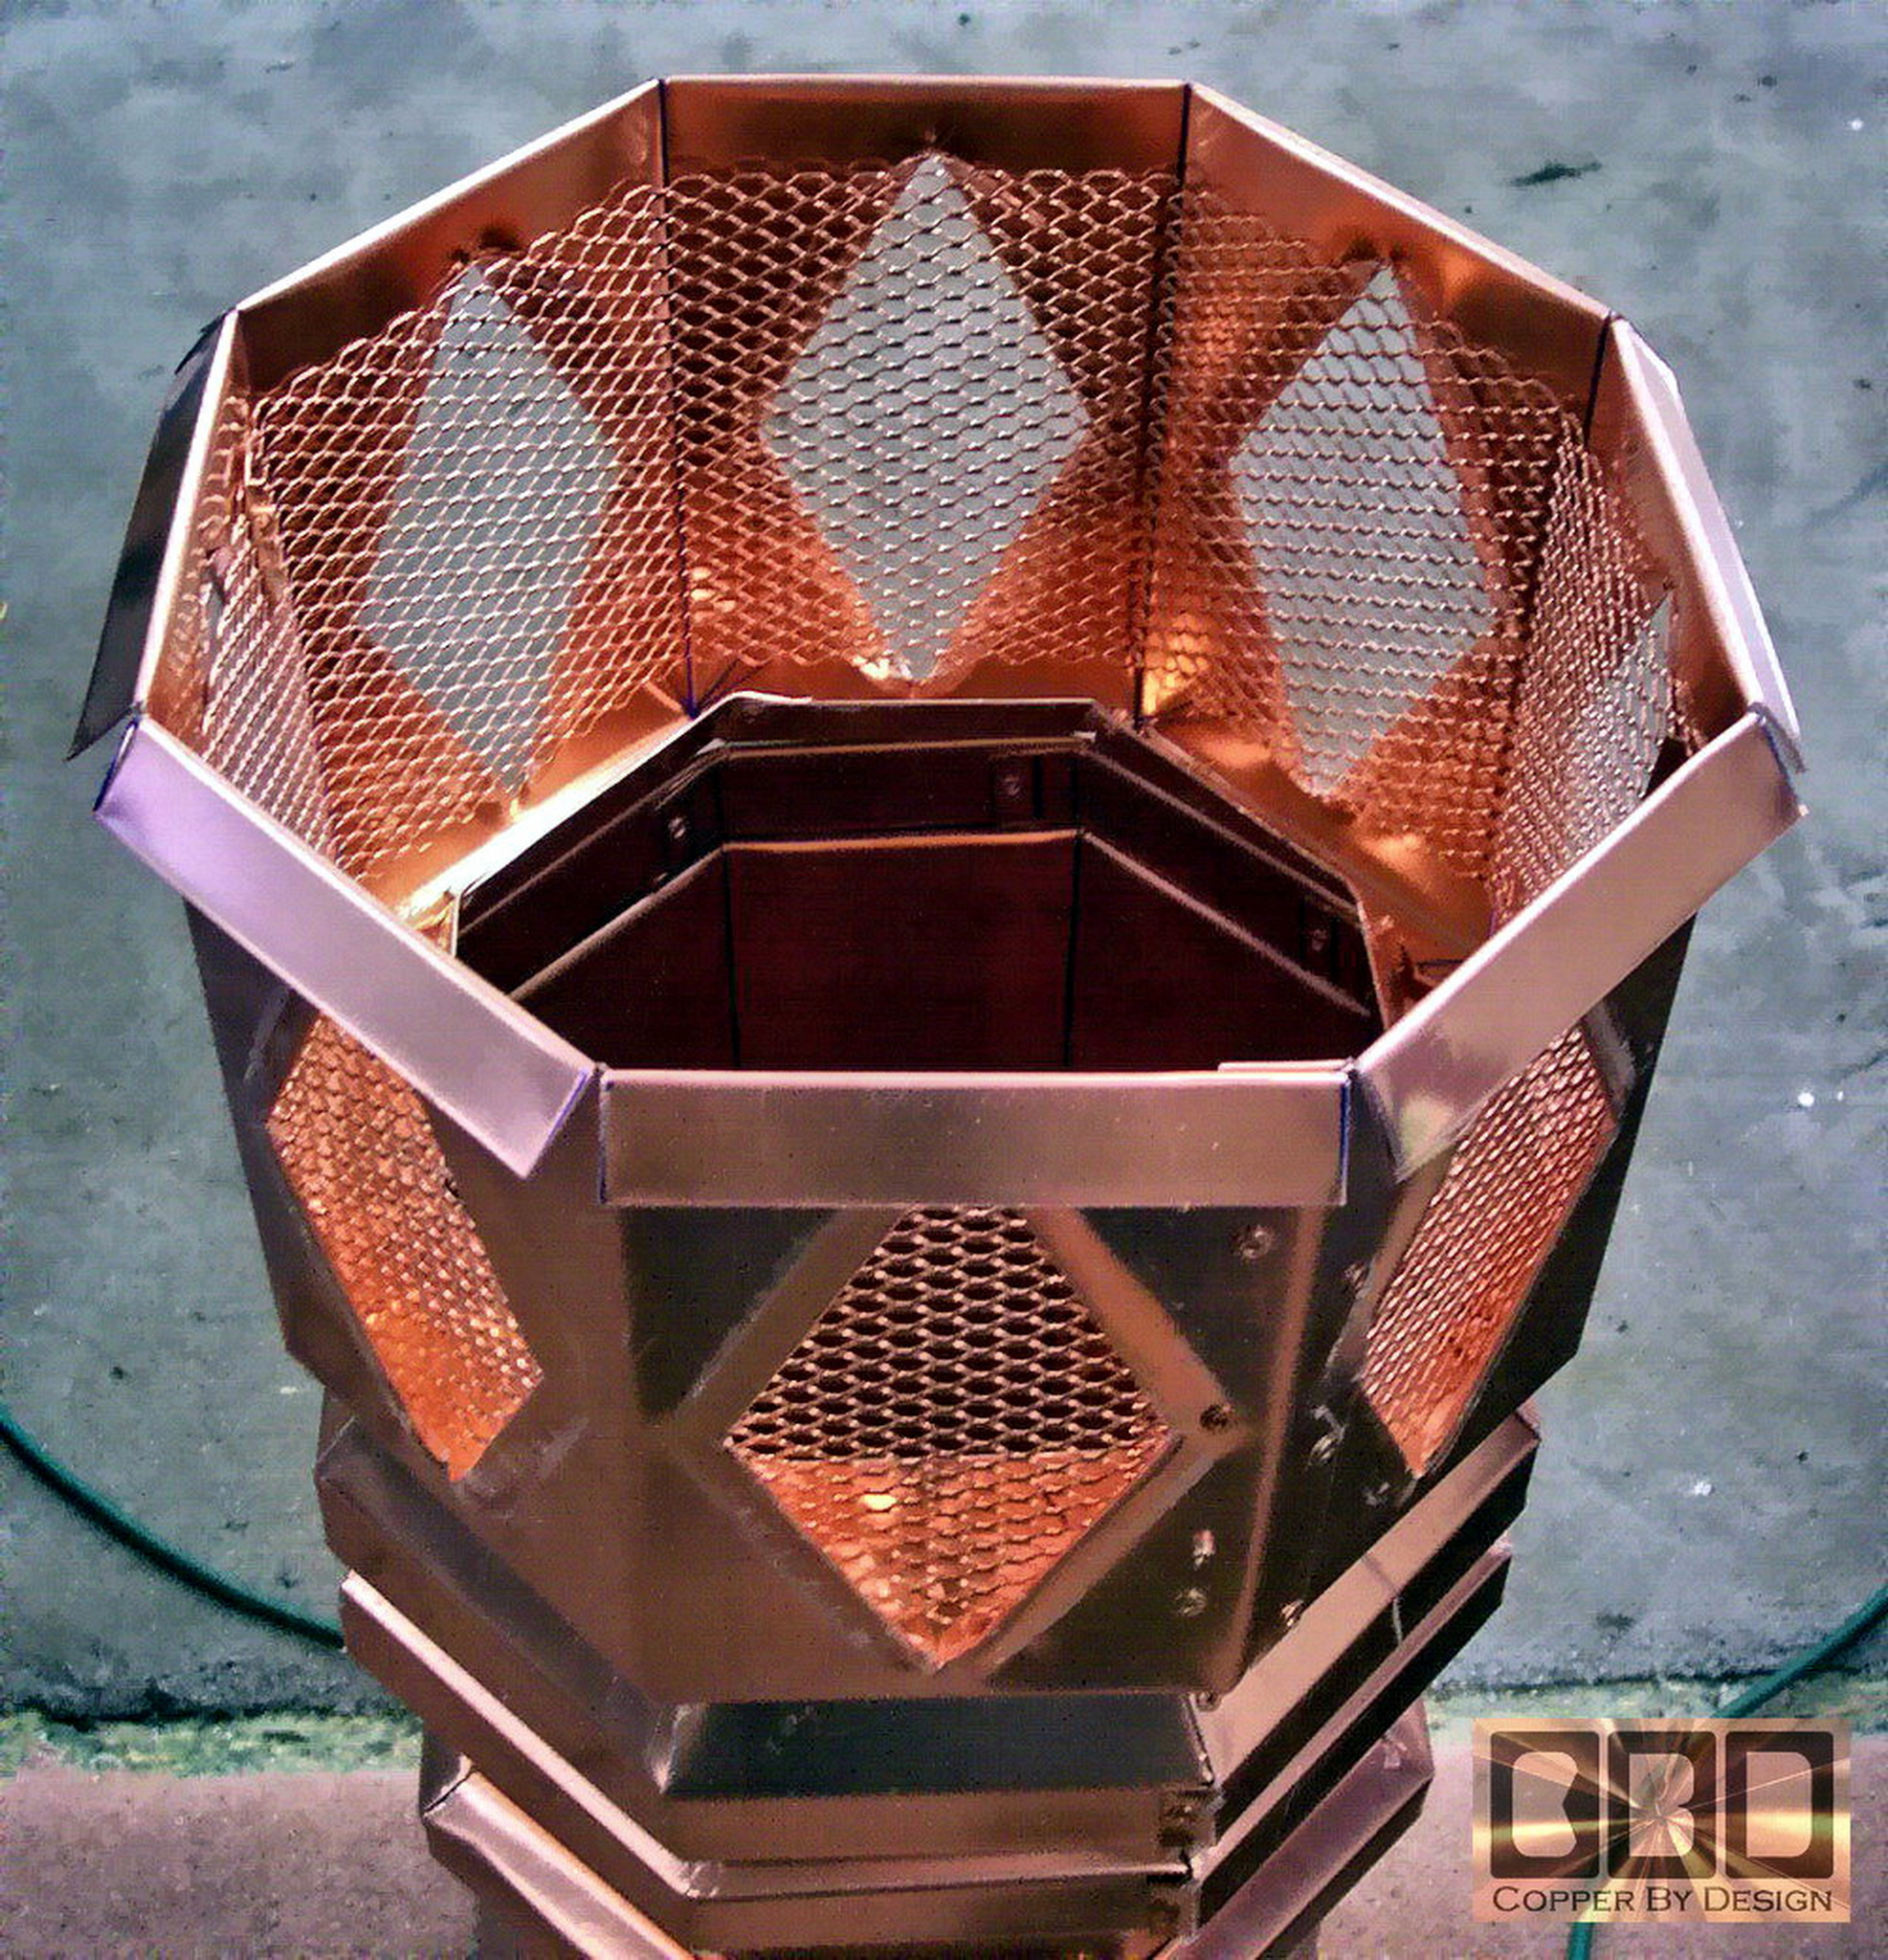
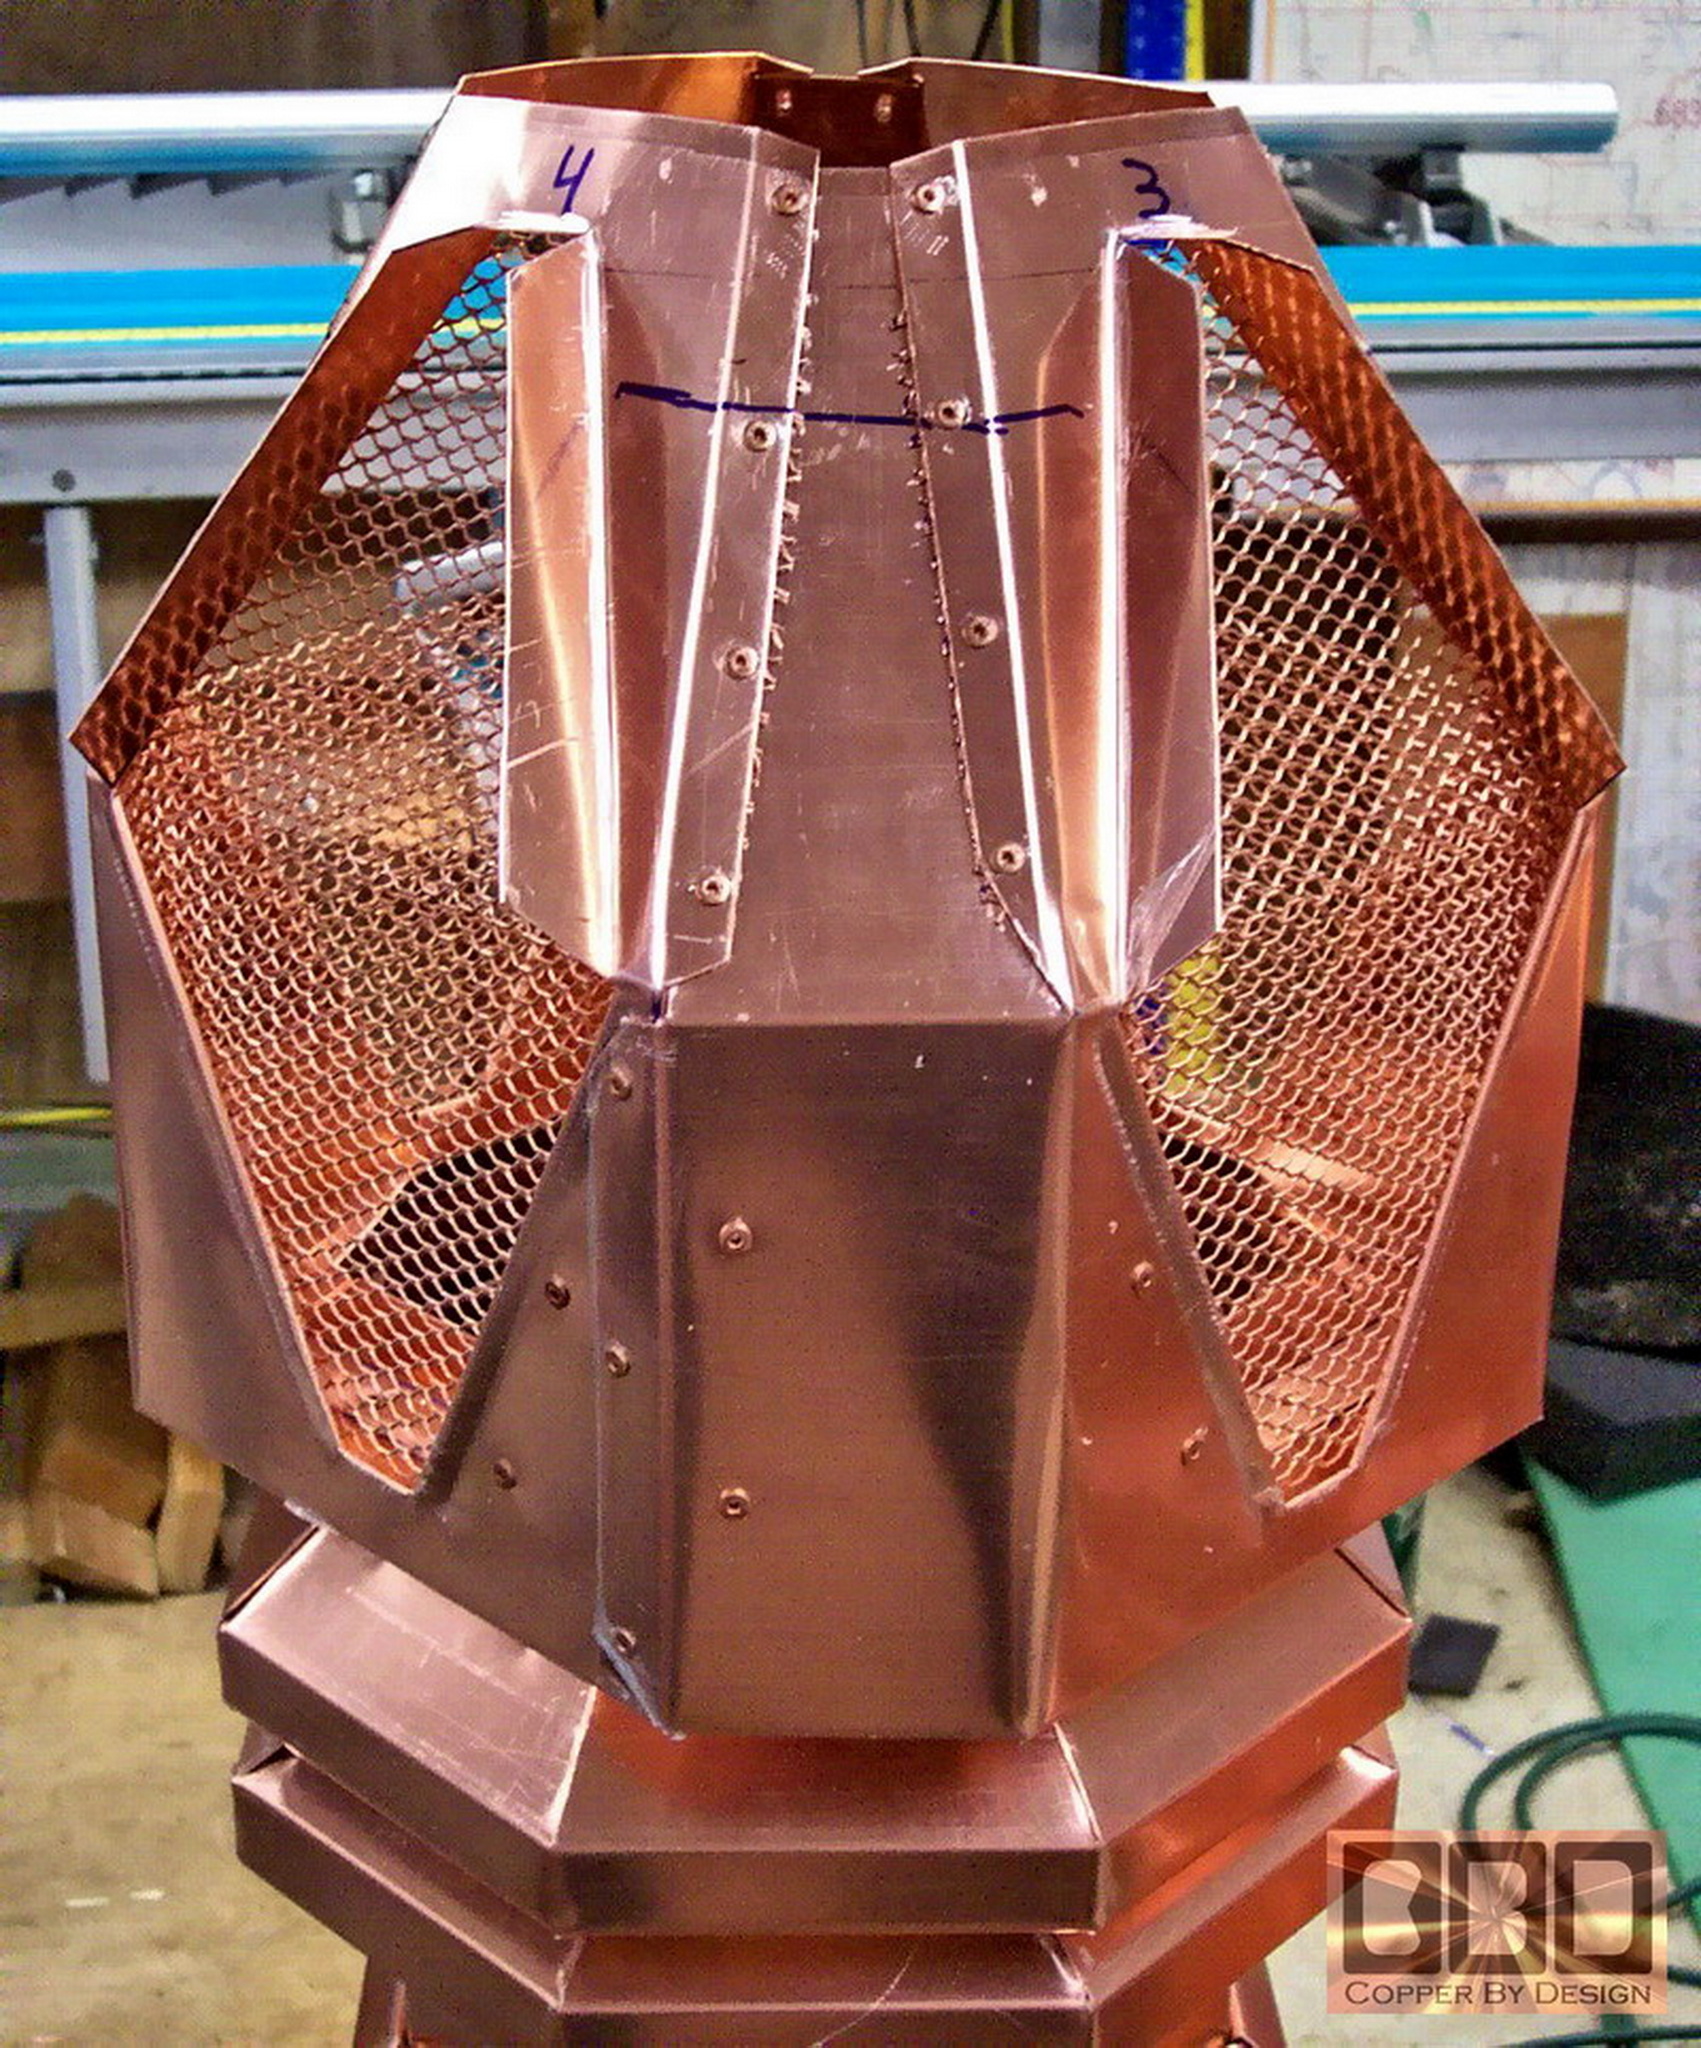
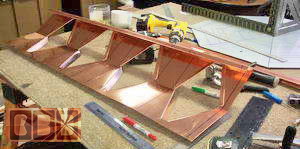
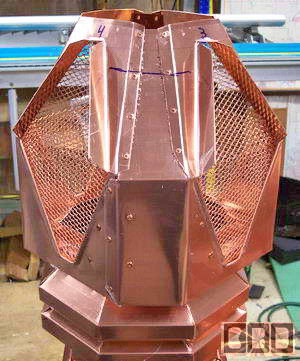
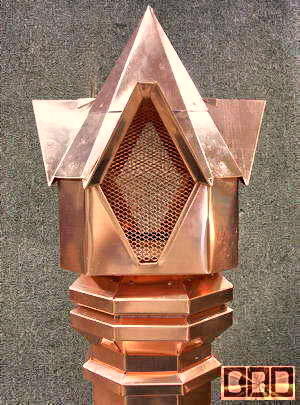
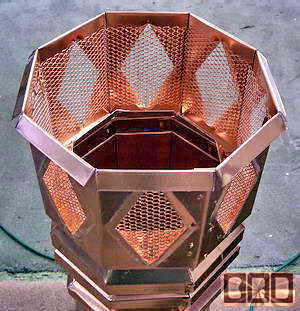 Here
is what we got done on Monday (9-6-04). The top cage made to top
the short stacks. The screen acts as a spark arrest and also will
keep pests out when not in use. I decided that these 8 diamond vents
would look best, and still have a good twice the vent surface as the
size of the stack it's self. Here
is what we got done on Monday (9-6-04). The top cage made to top
the short stacks. The screen acts as a spark arrest and also will
keep pests out when not in use. I decided that these 8 diamond vents
would look best, and still have a good twice the vent surface as the
size of the stack it's self. |
|
|
|
|
Day seven (9-8-04)
|
|
|
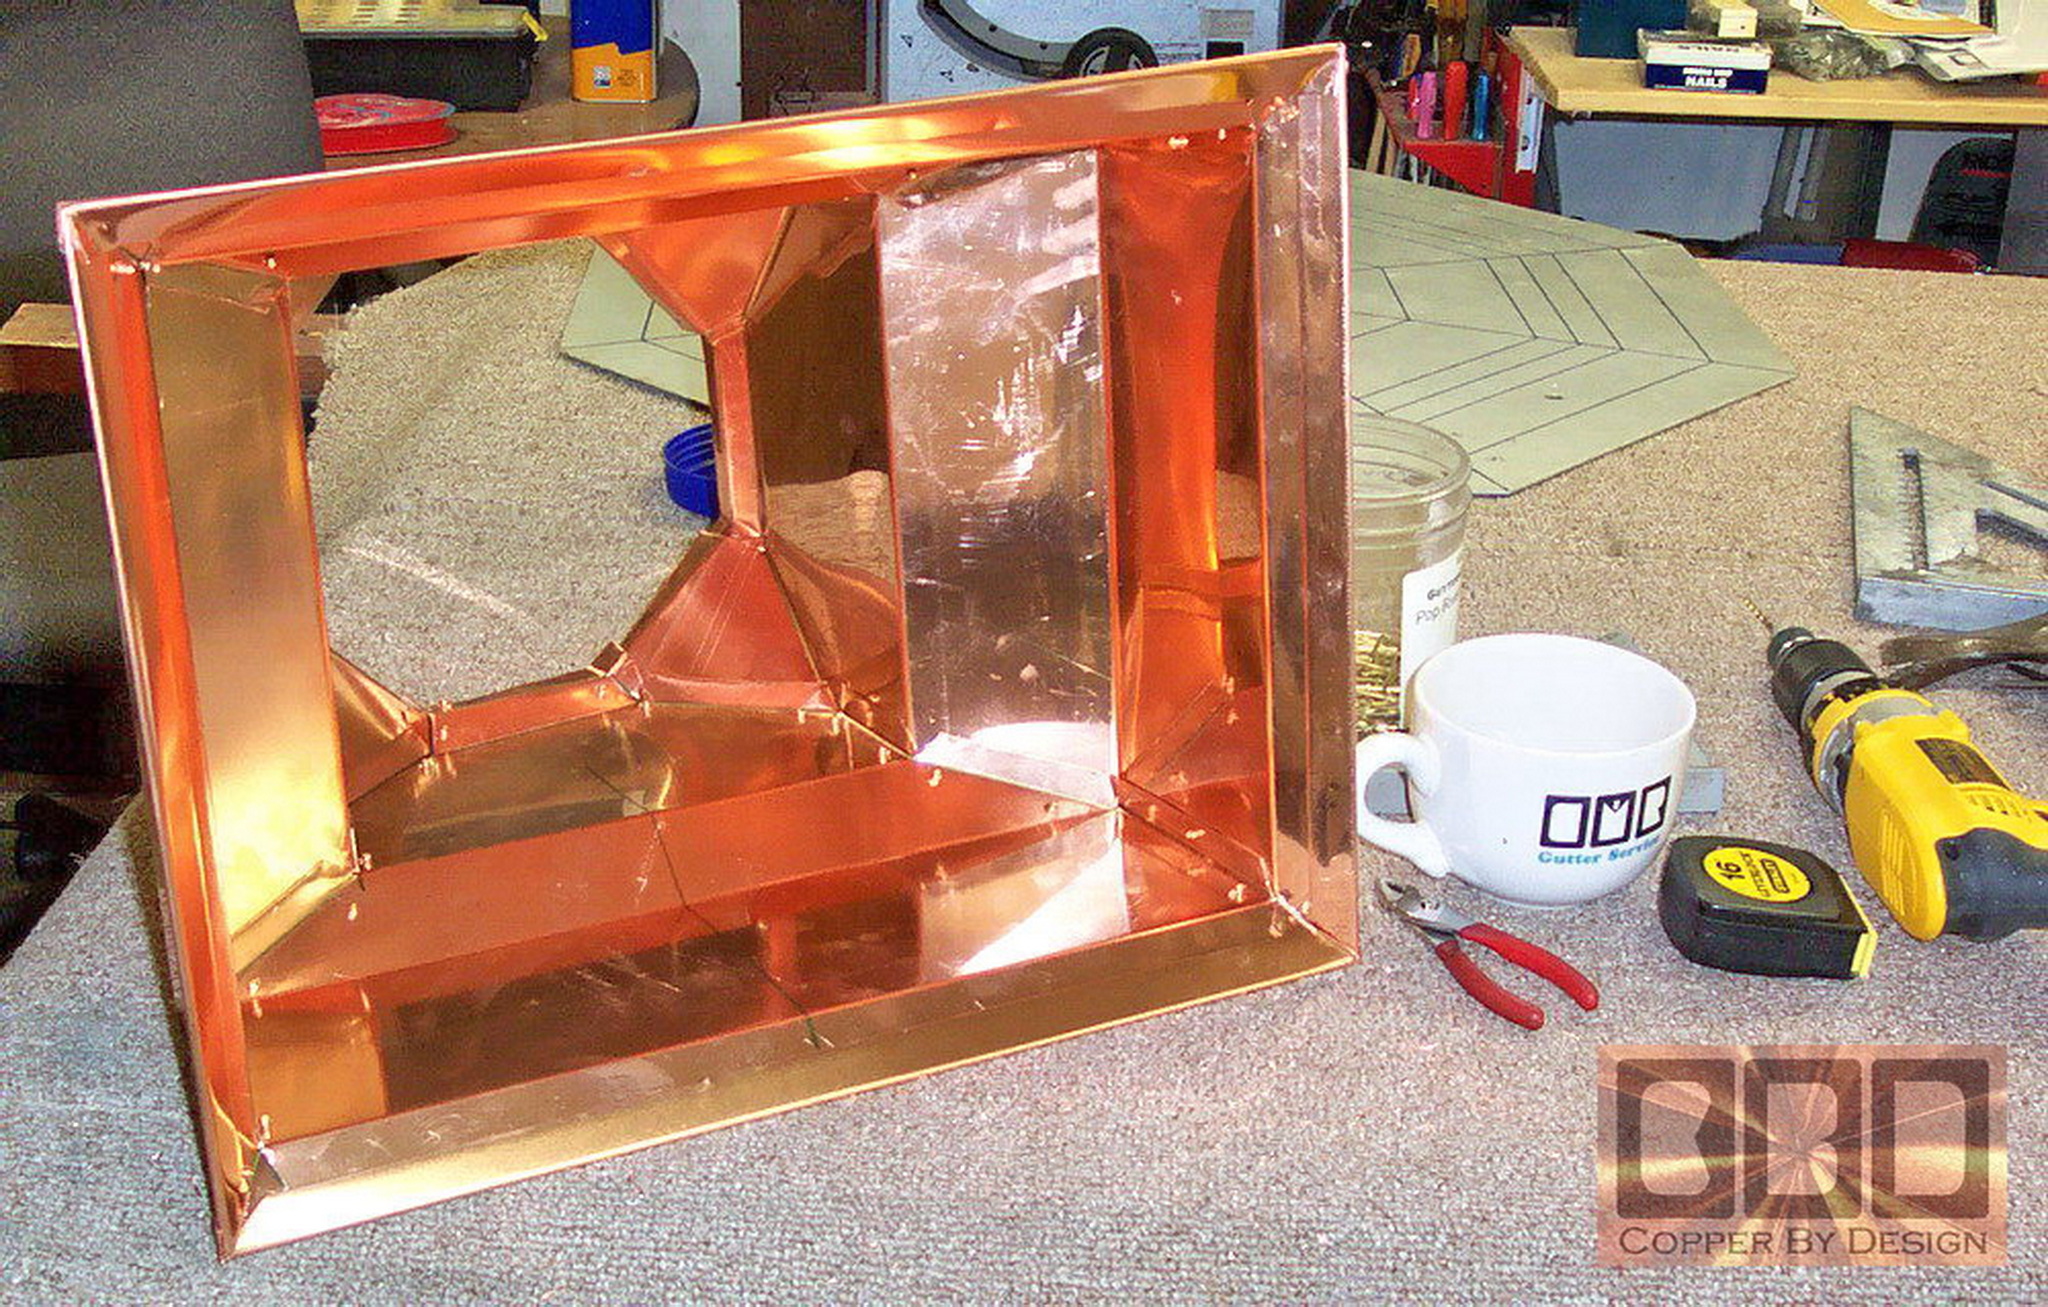
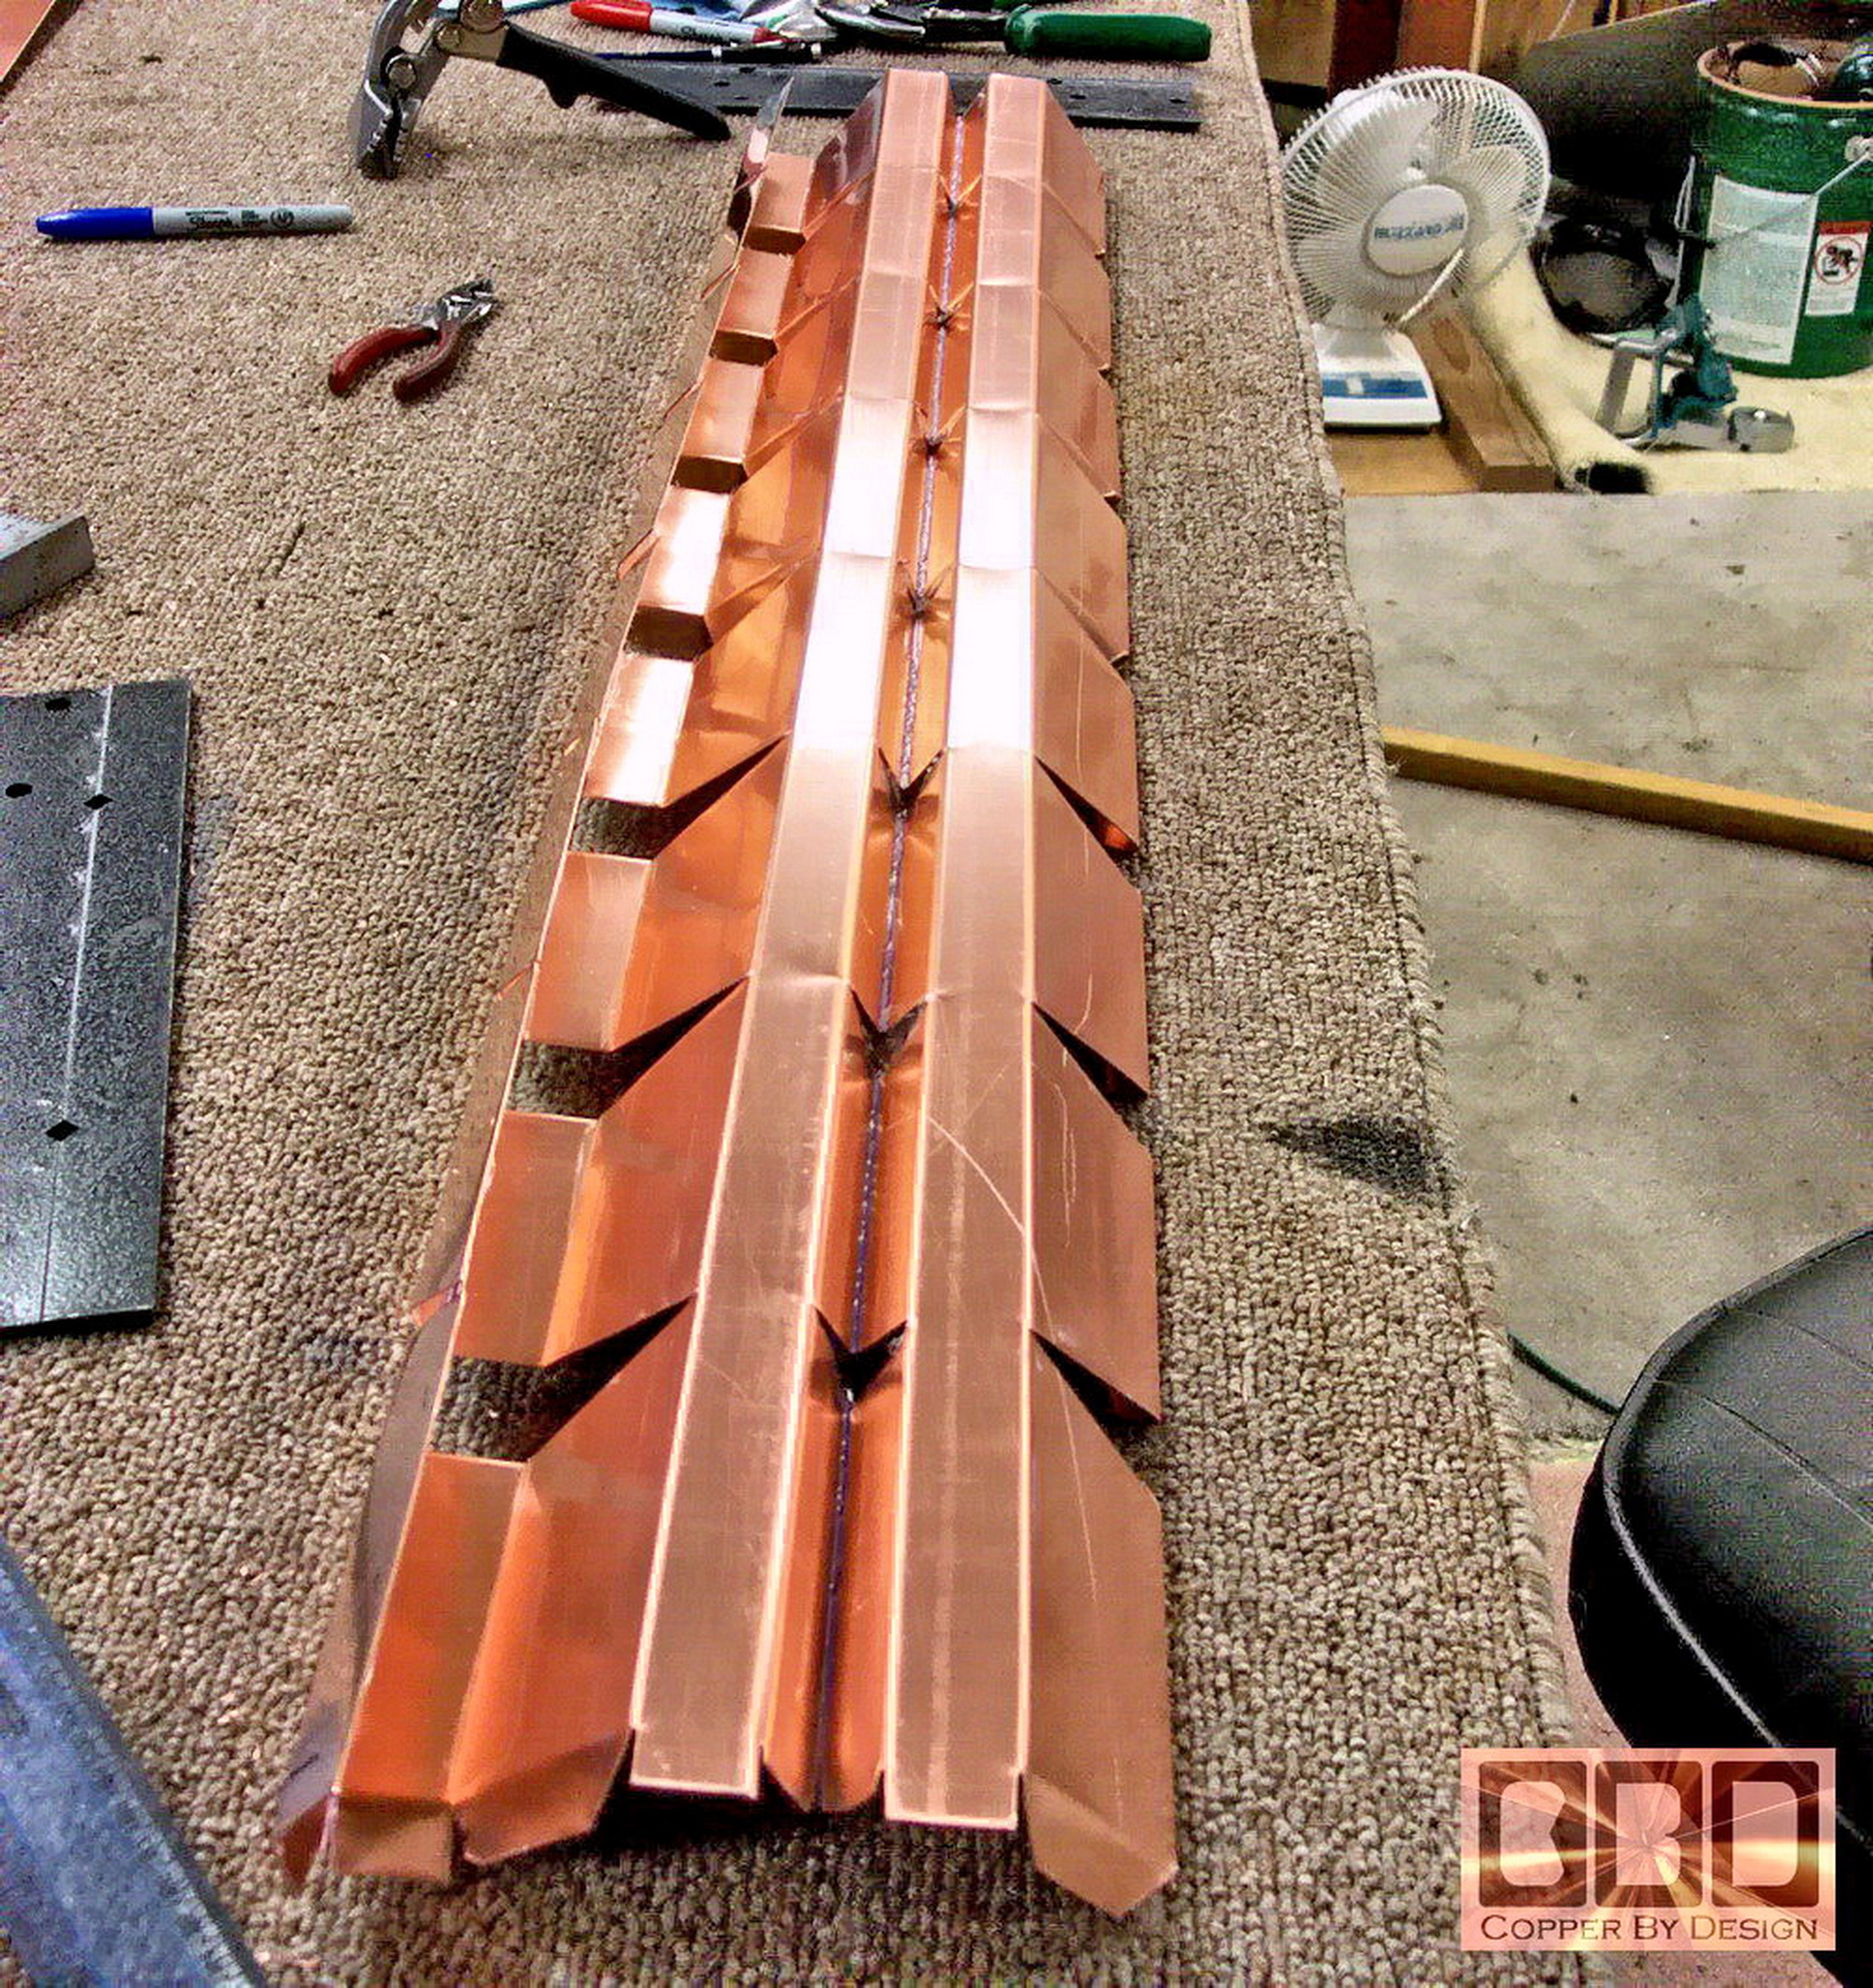
Here is the vent cage being cut and bent into shape.
|
|
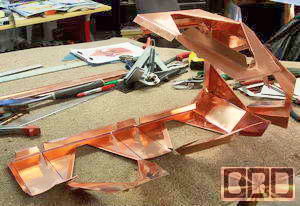
Here it is being folded into shape.
|
|
|
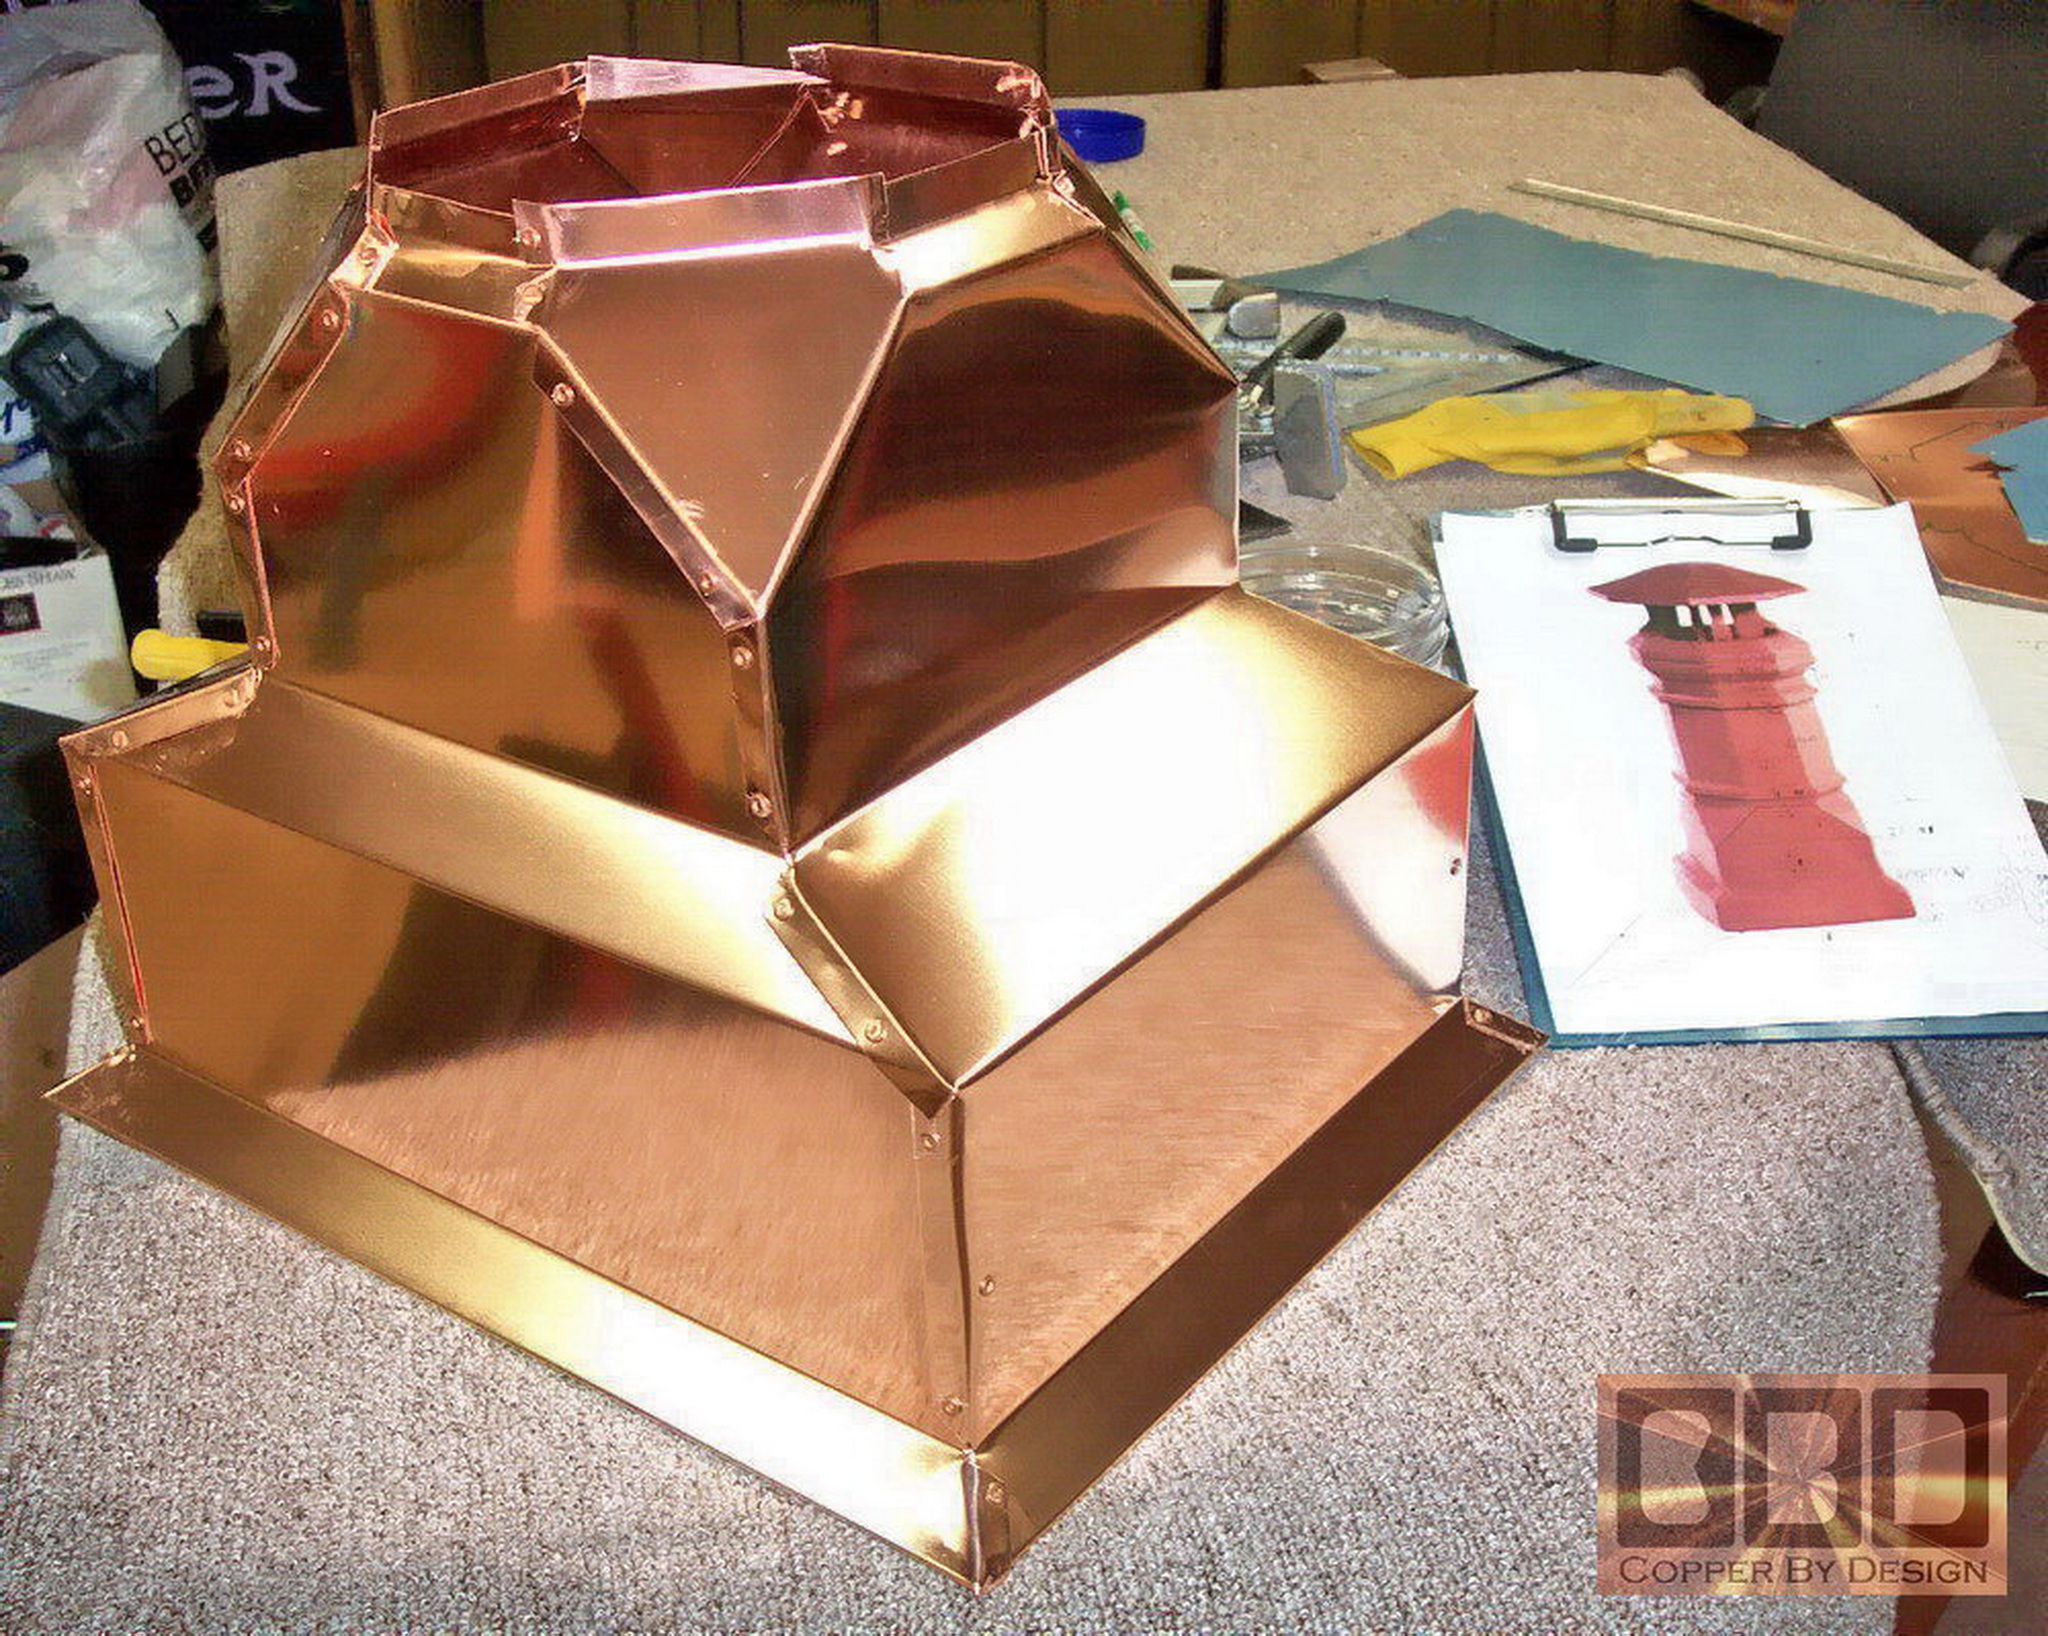
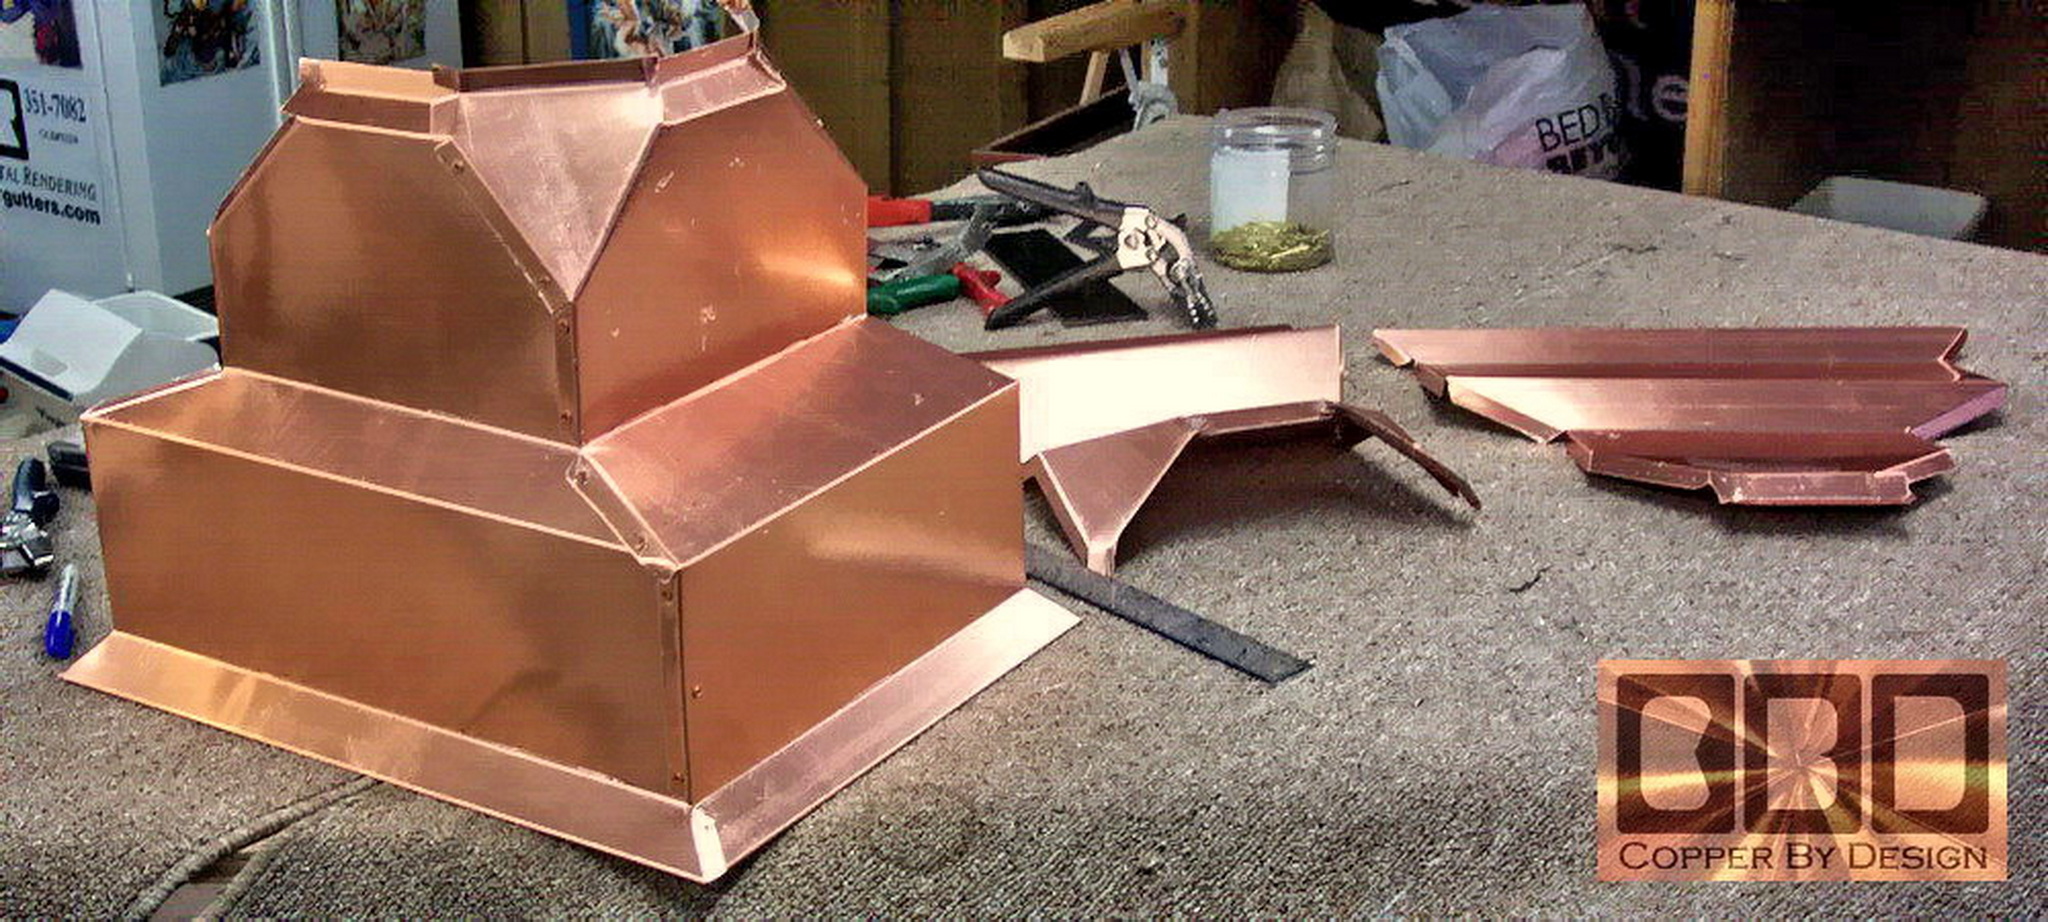
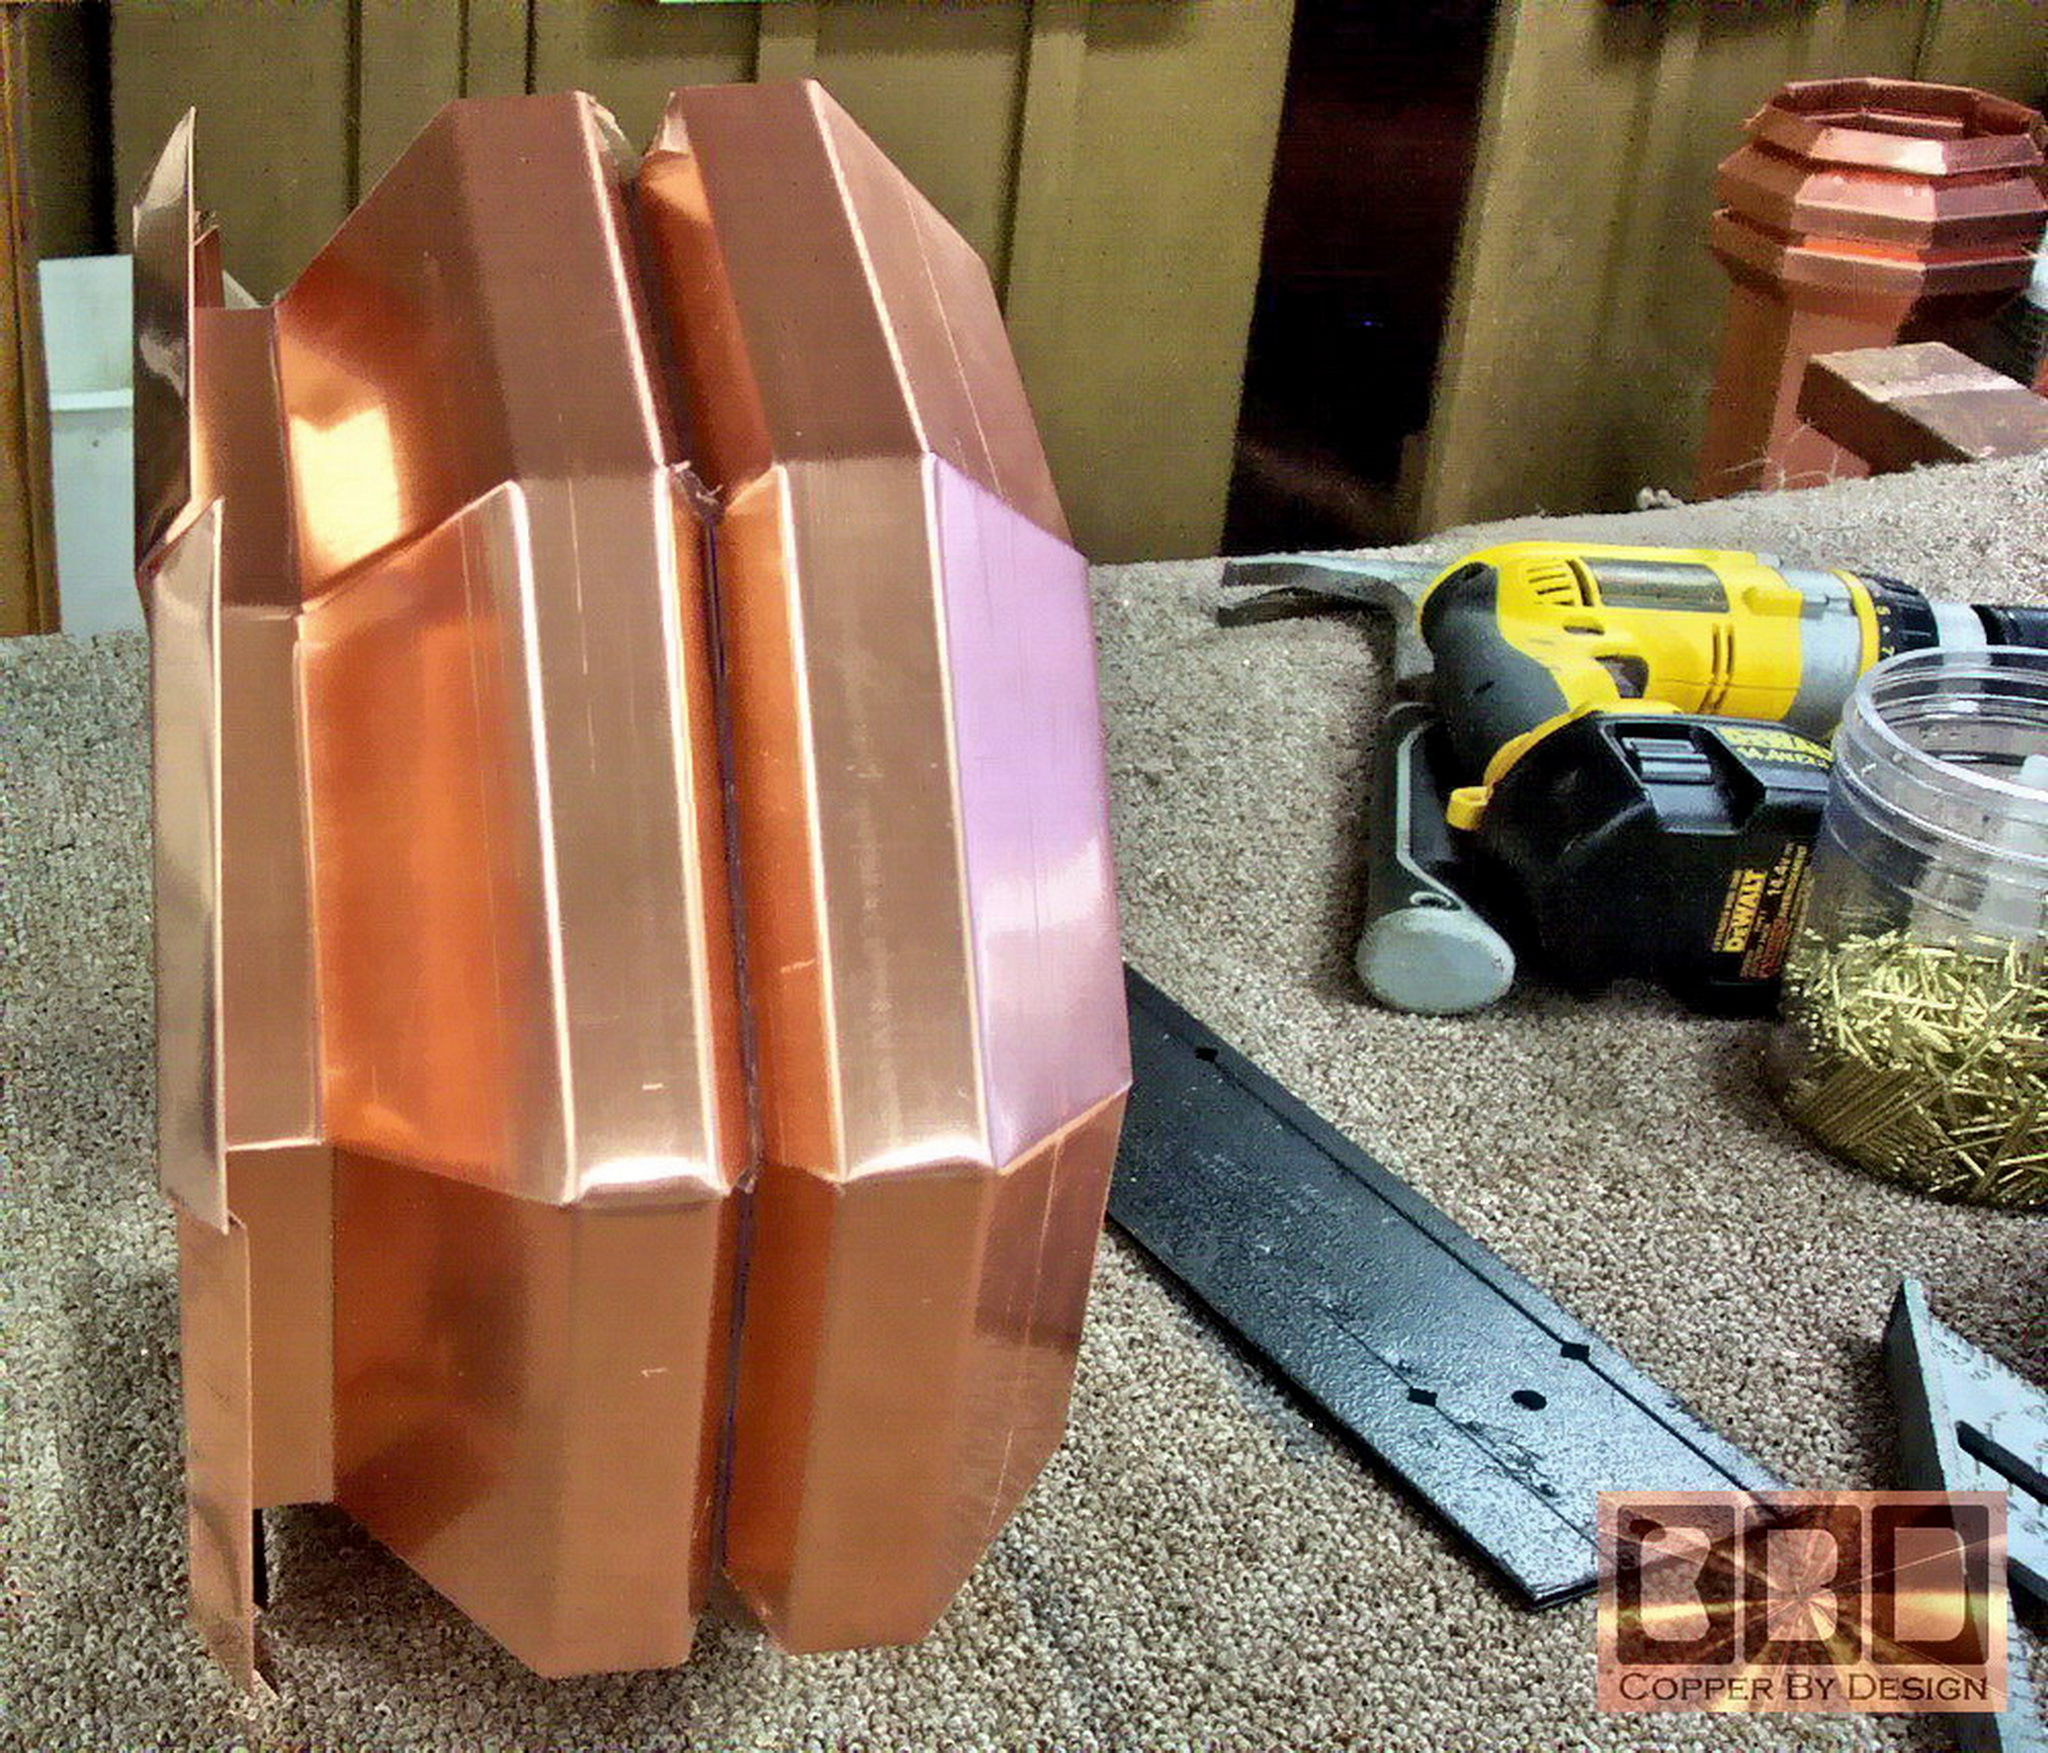
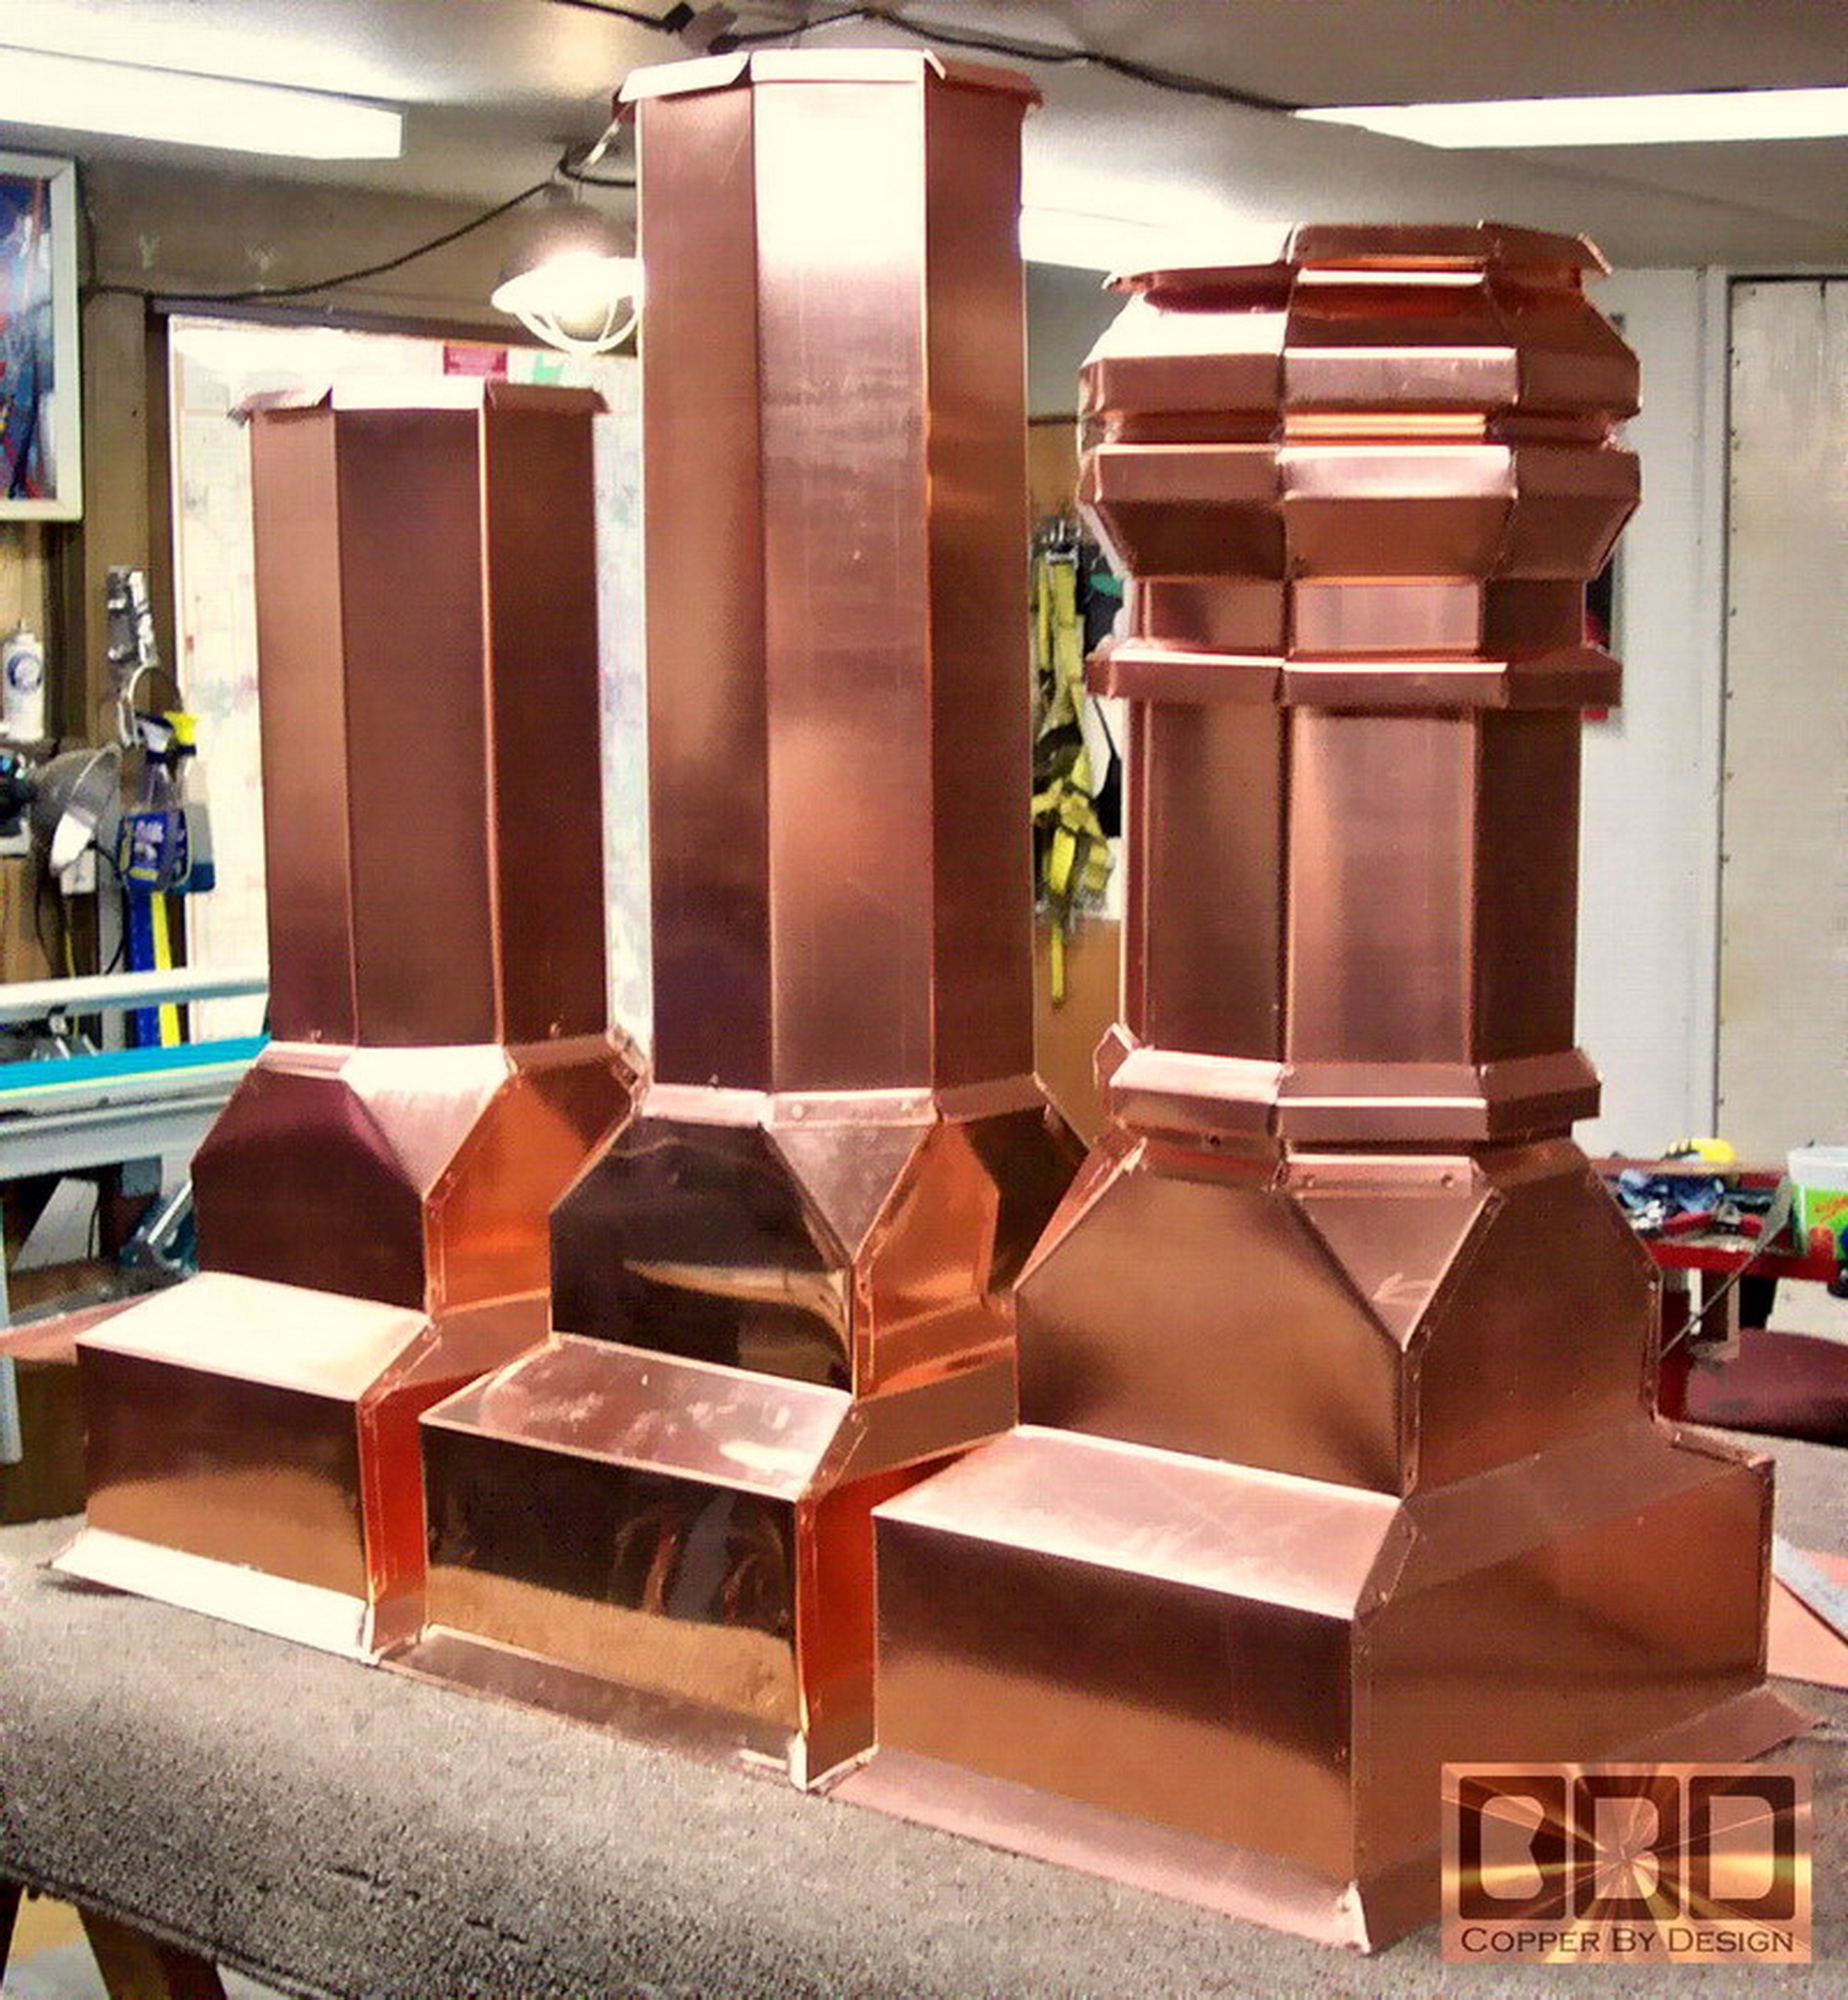
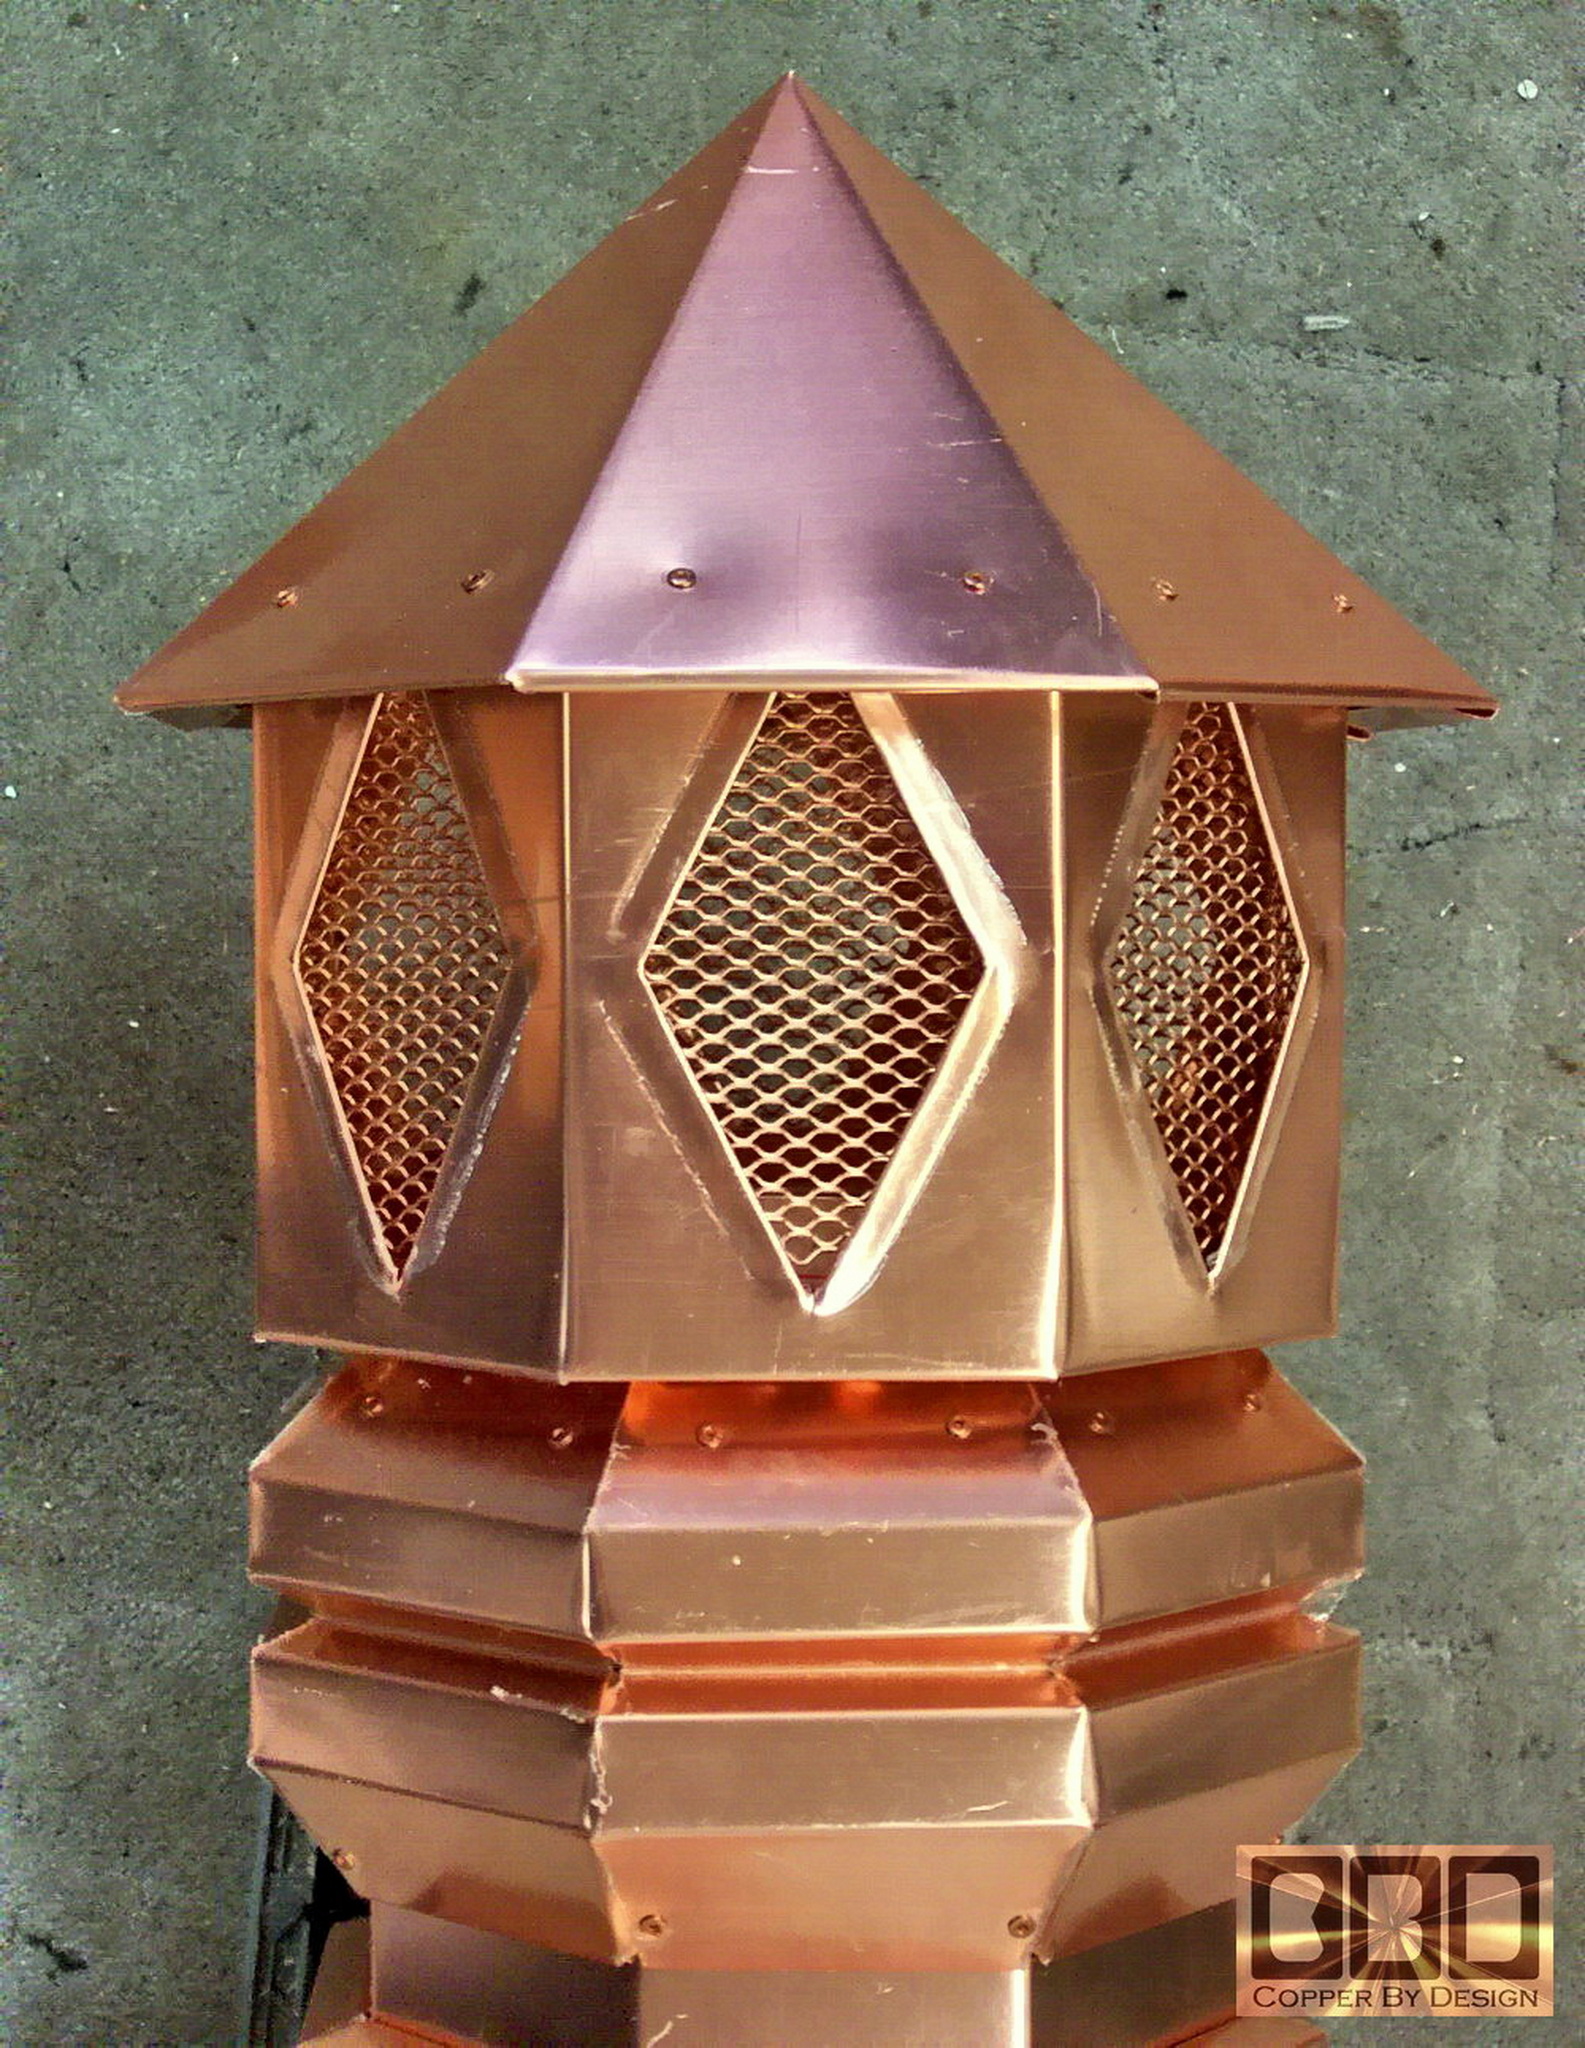
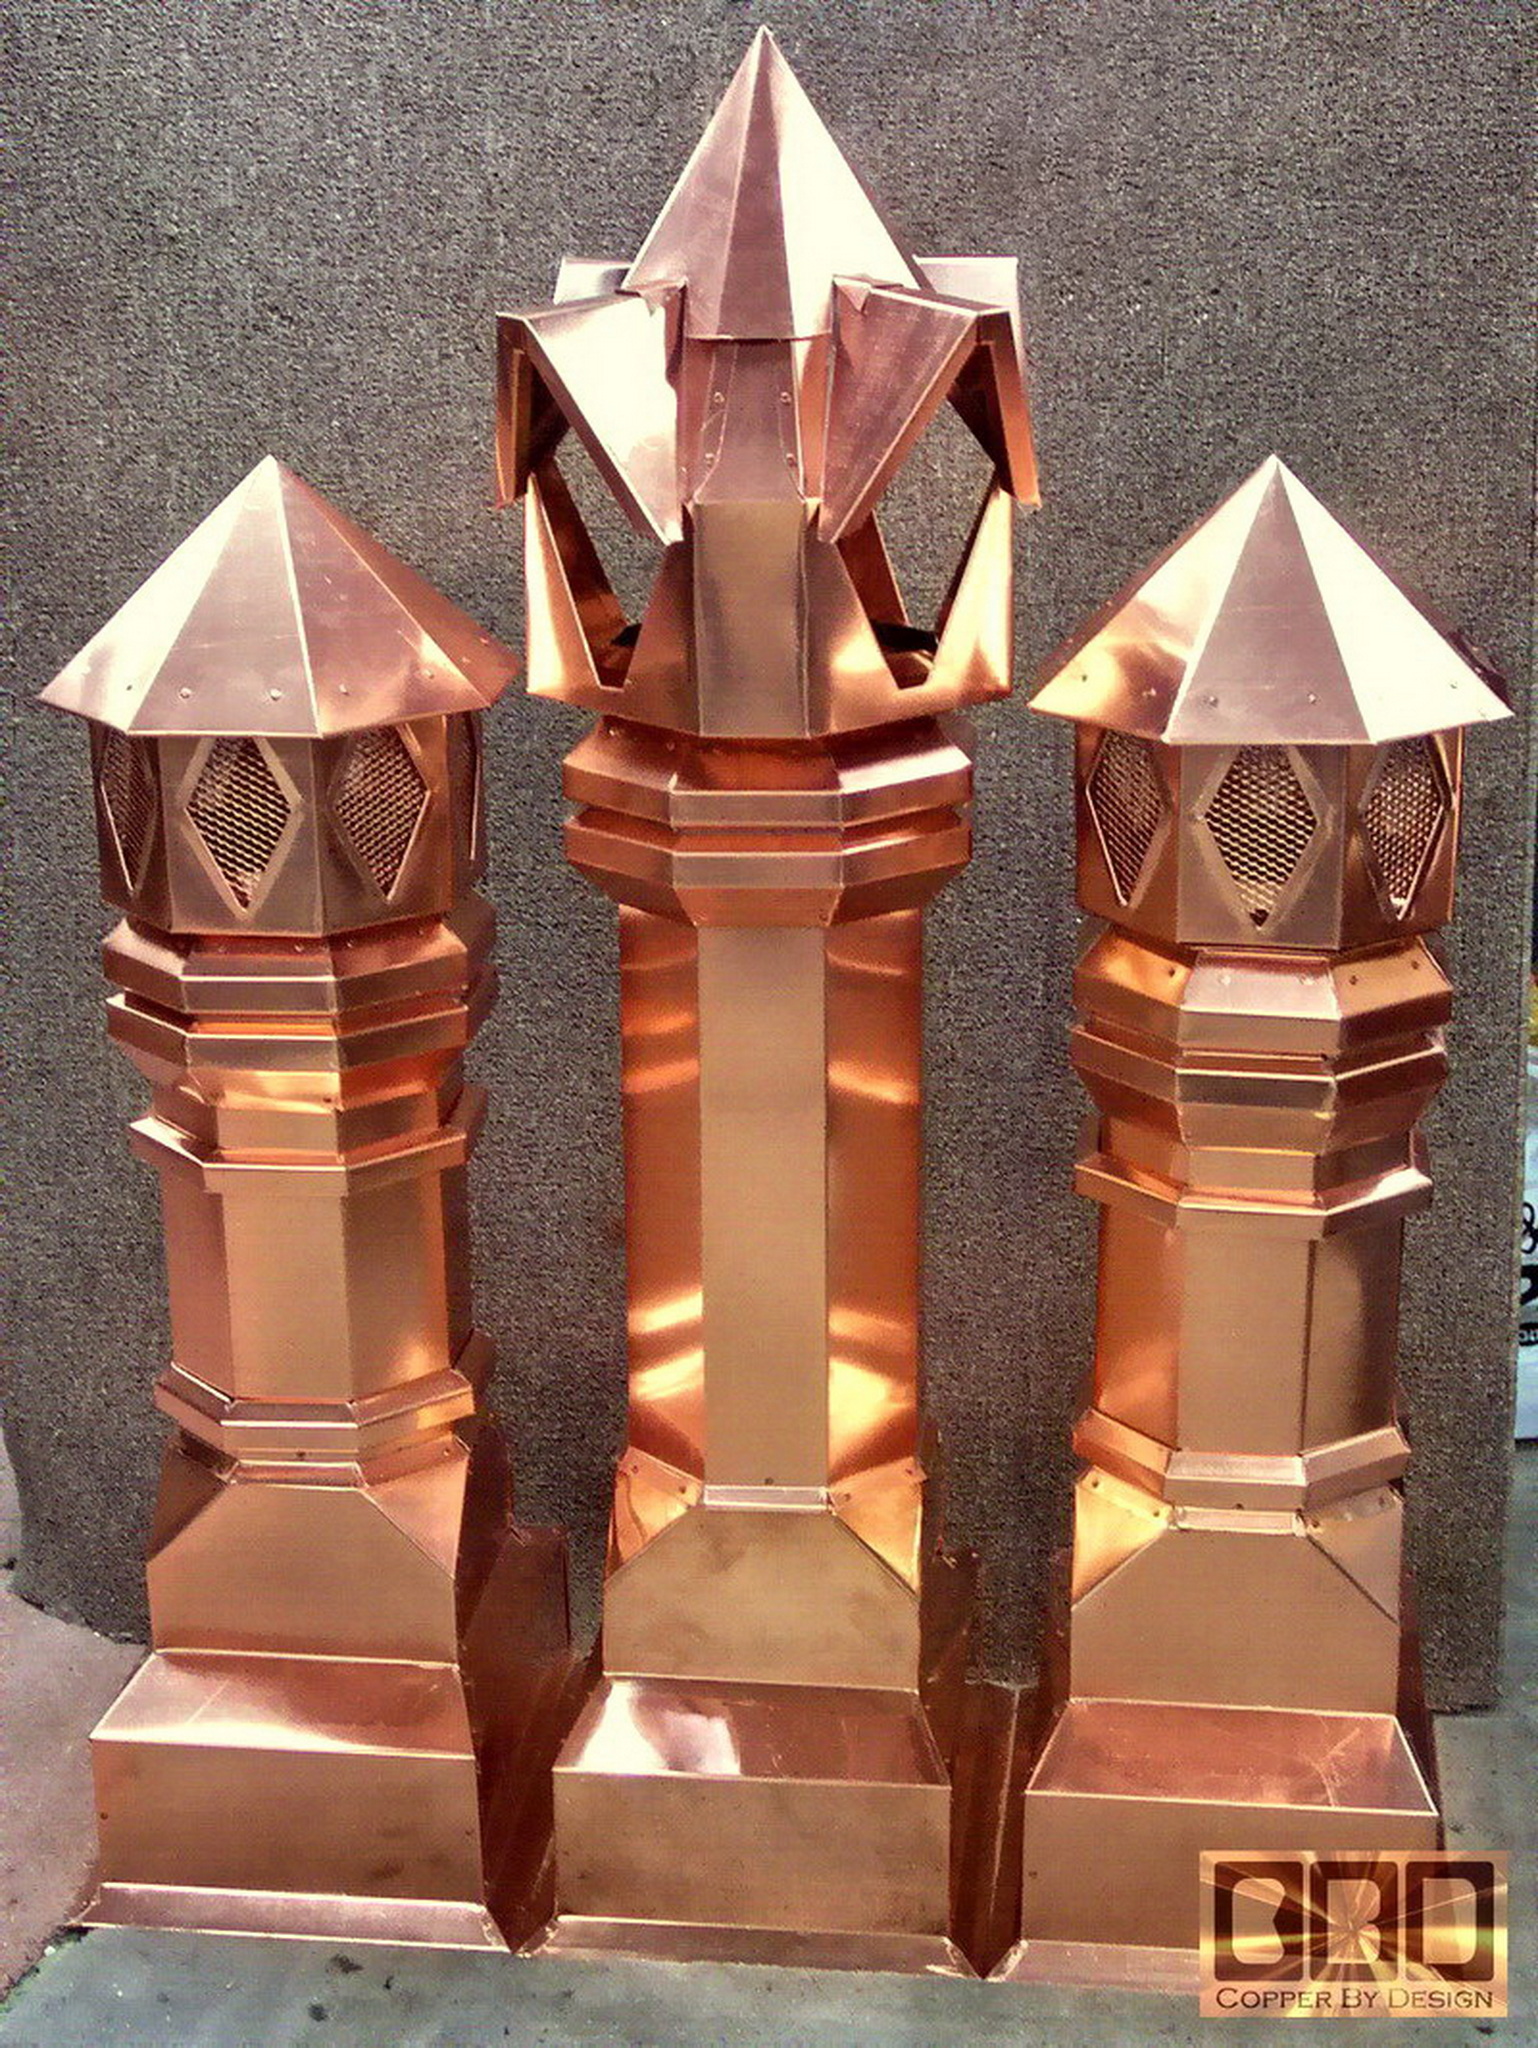
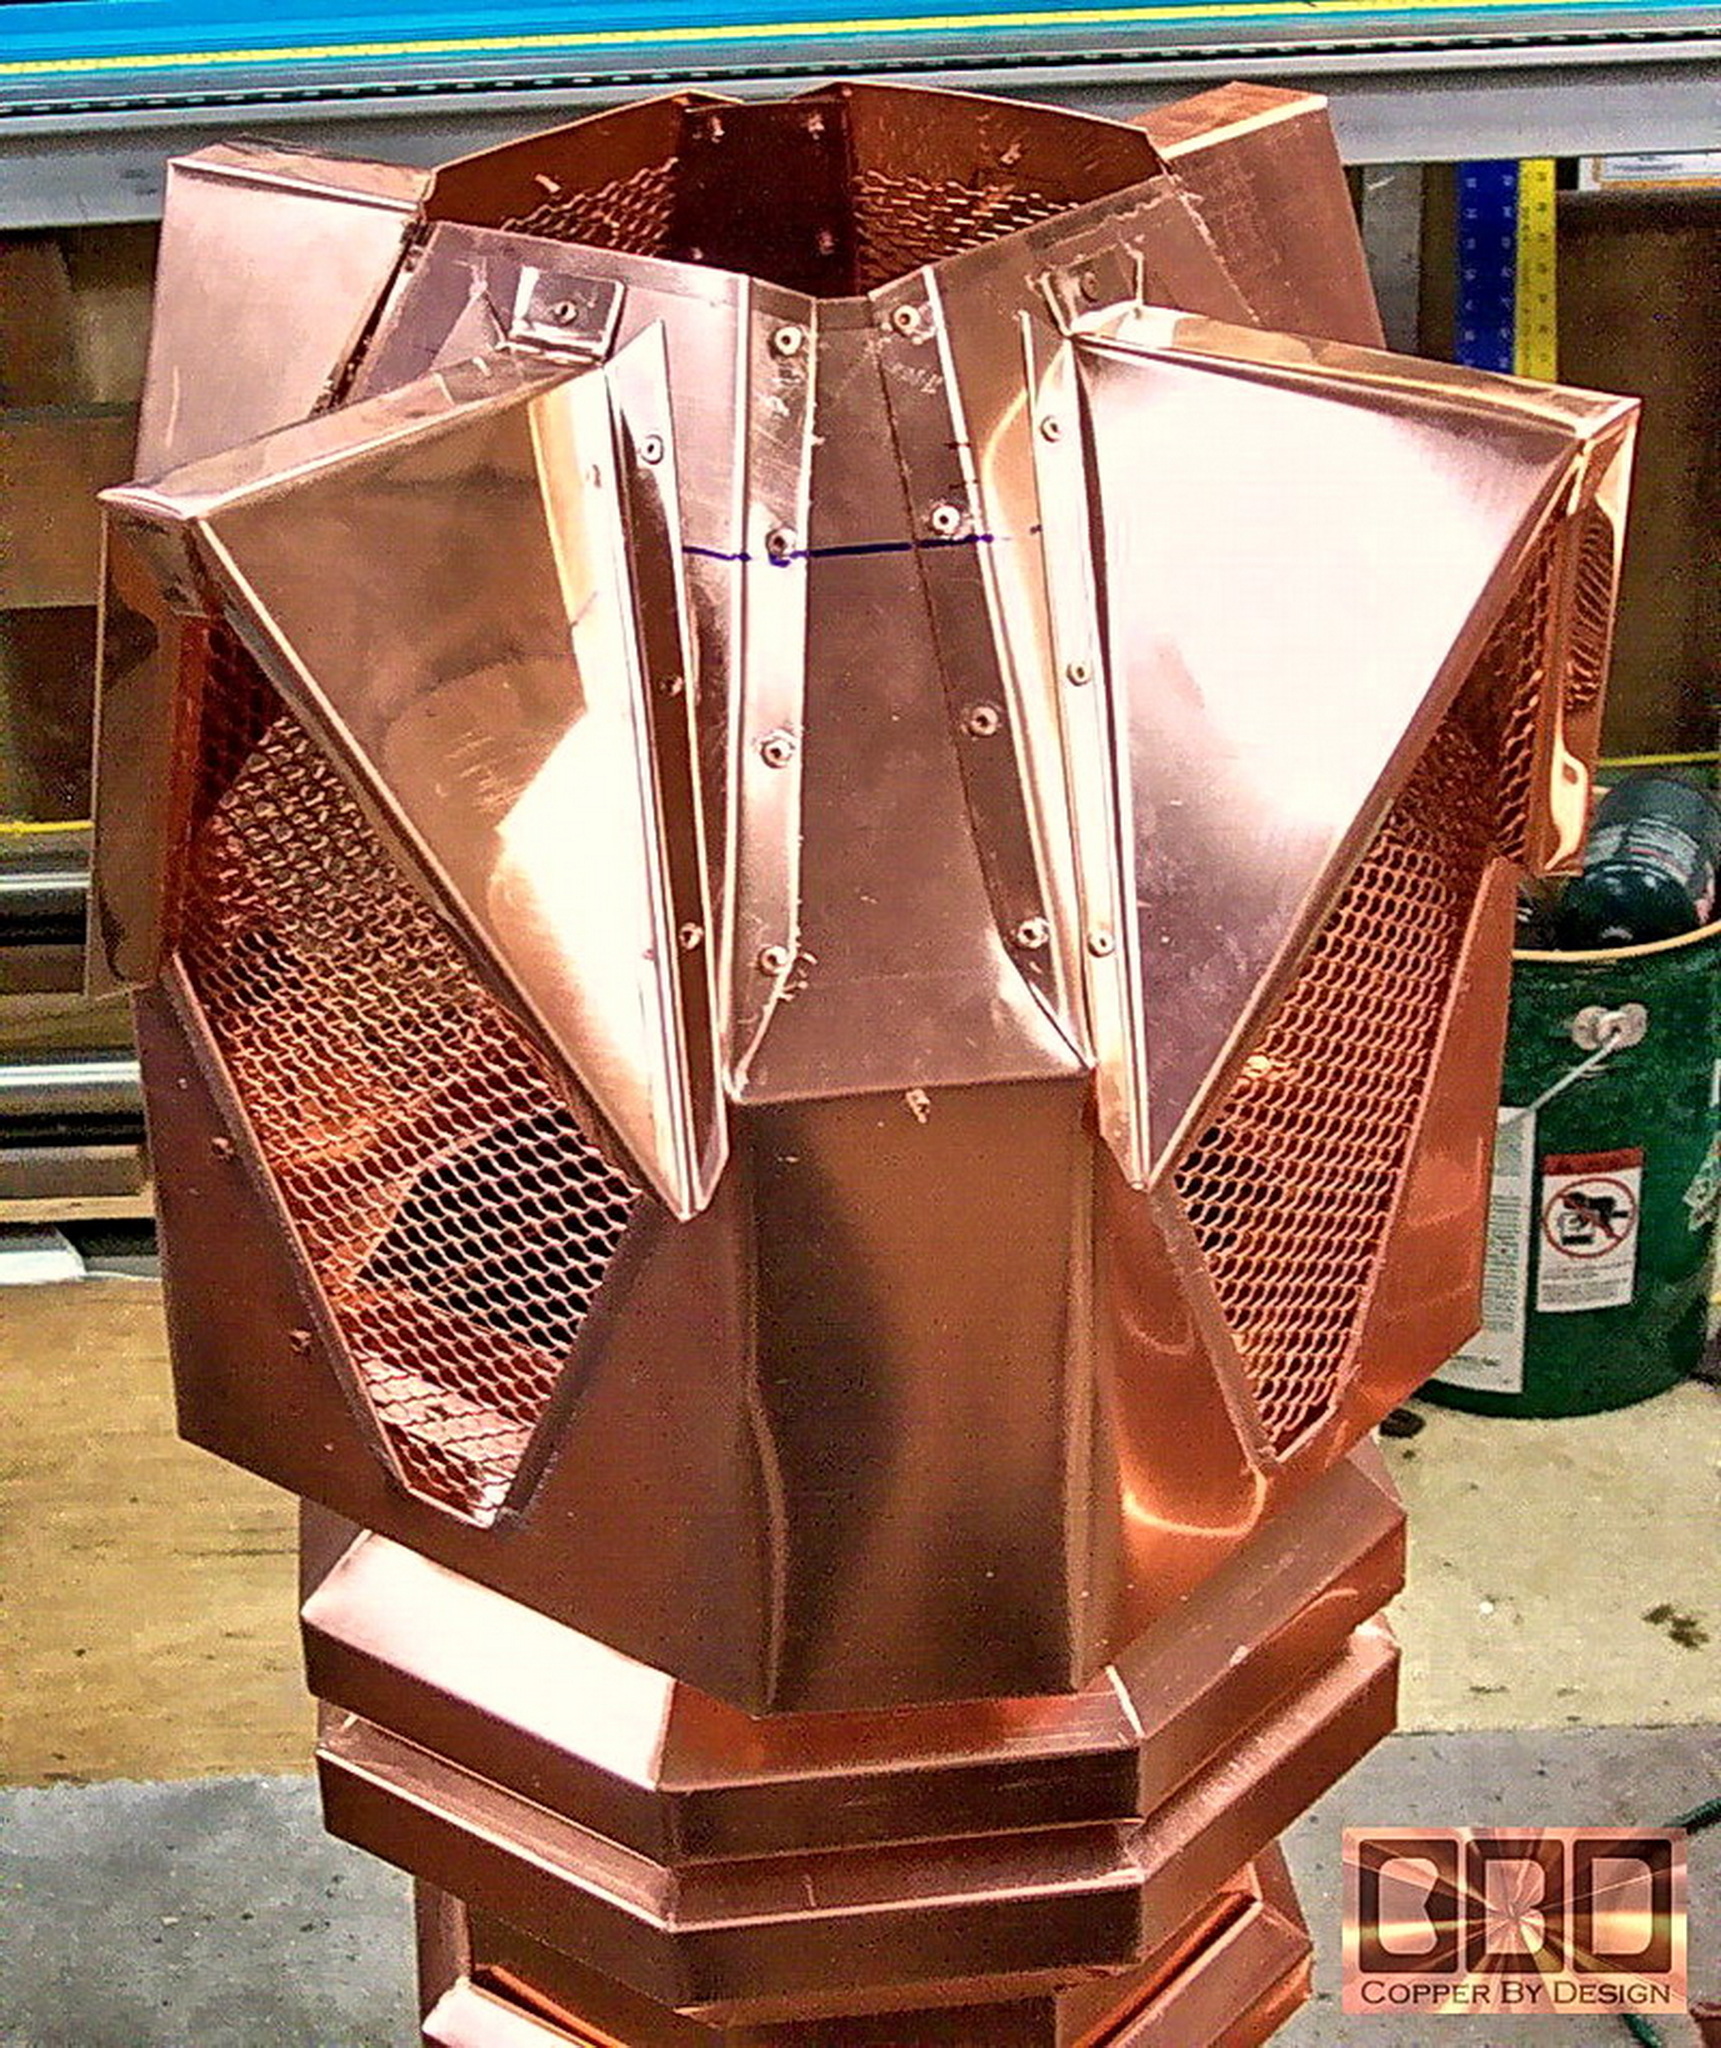
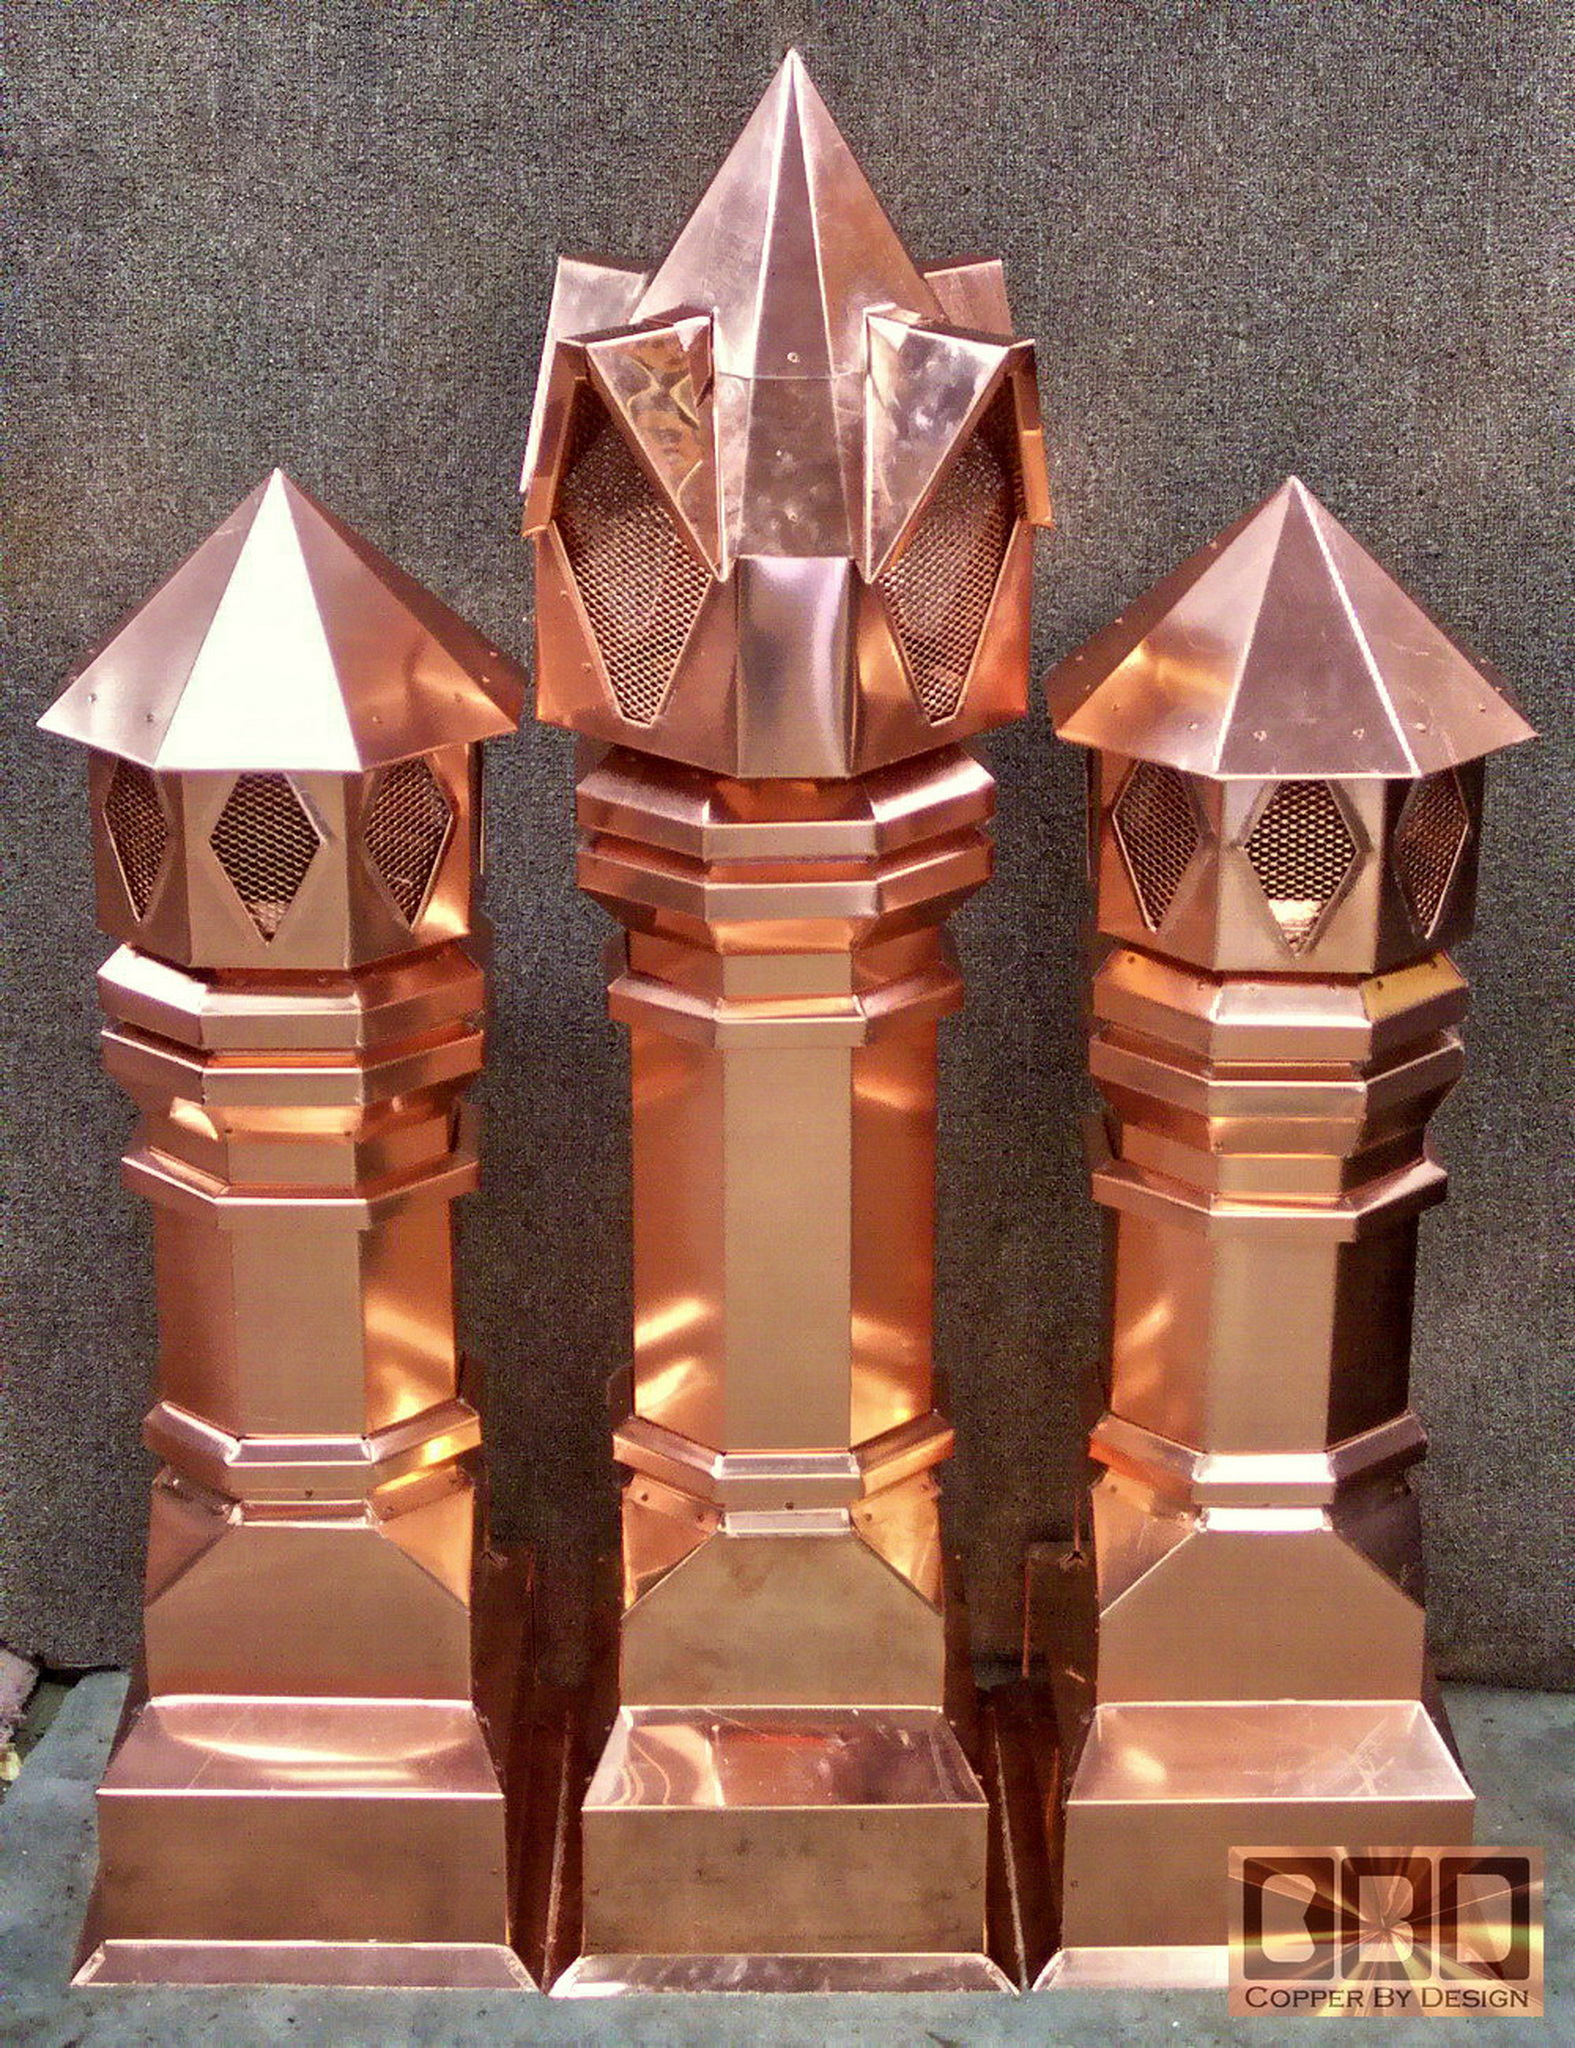
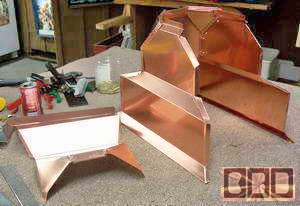
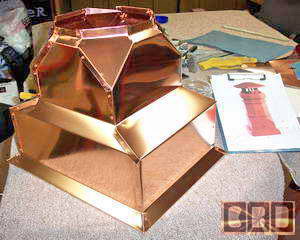
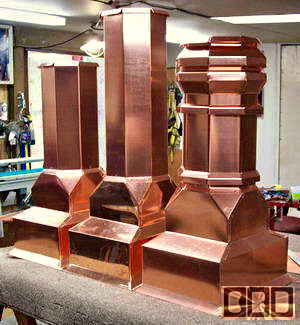
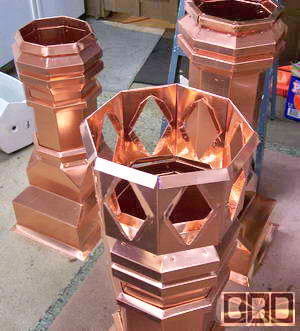
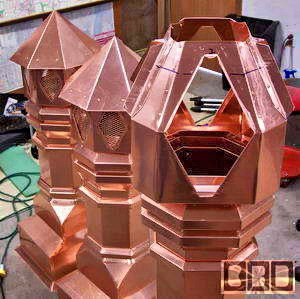
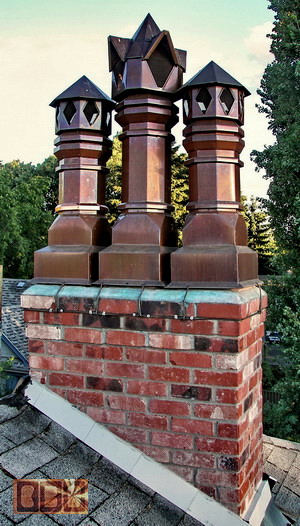
 Here
is the set of 3 stacks side be side again Showing the completed pair
of outer smoke stacks with the 12/12 pitch 8 sided
caps over the vent cages. The
caps are 13.25" wide with safety hems bent under the bottom edge for strength
and so there are no sharp exposed edges. There is 16 copper rivets
holding each cap in place. These shorter stacks are now 3' 6.5" tall. Here
is the set of 3 stacks side be side again Showing the completed pair
of outer smoke stacks with the 12/12 pitch 8 sided
caps over the vent cages. The
caps are 13.25" wide with safety hems bent under the bottom edge for strength
and so there are no sharp exposed edges. There is 16 copper rivets
holding each cap in place. These shorter stacks are now 3' 6.5" tall.
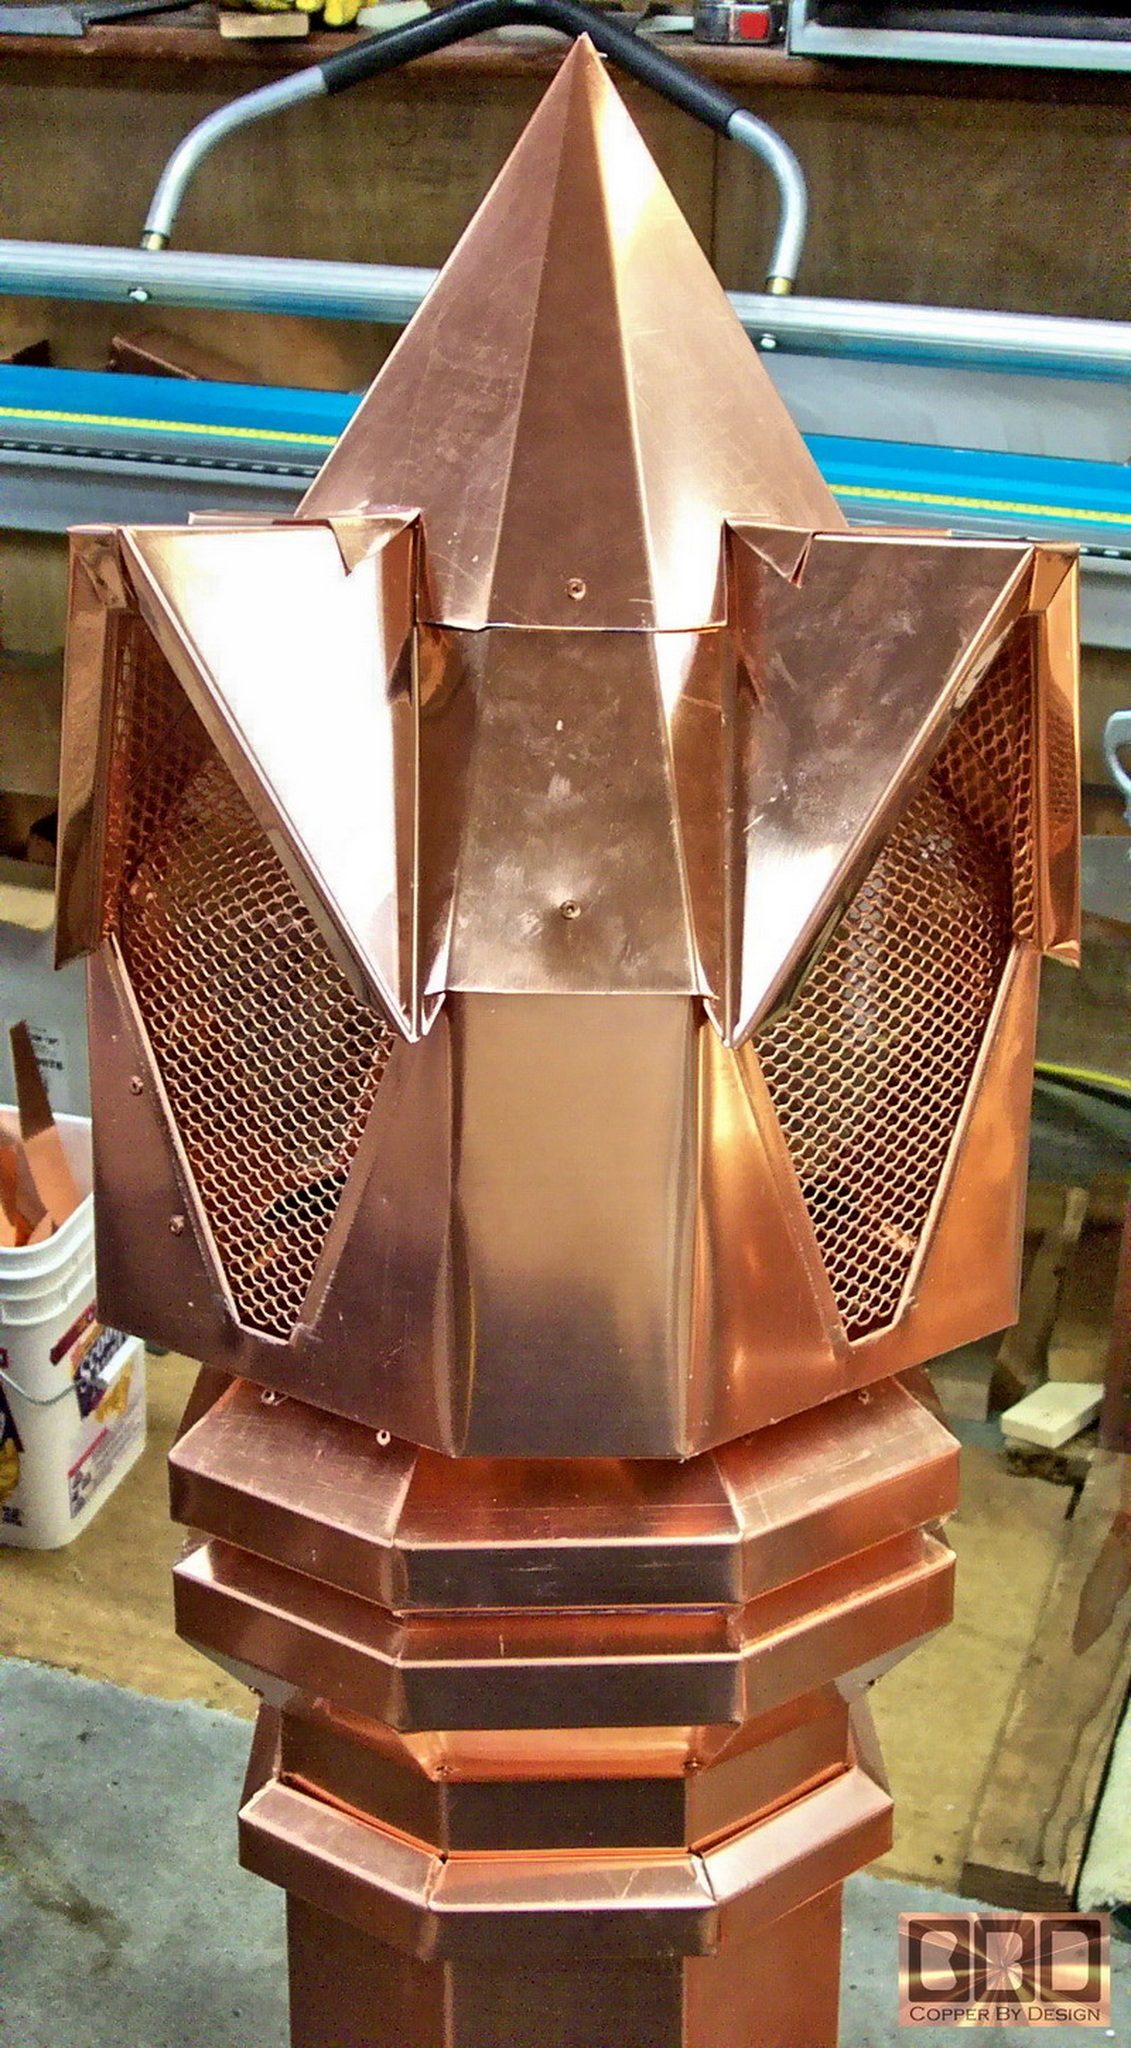
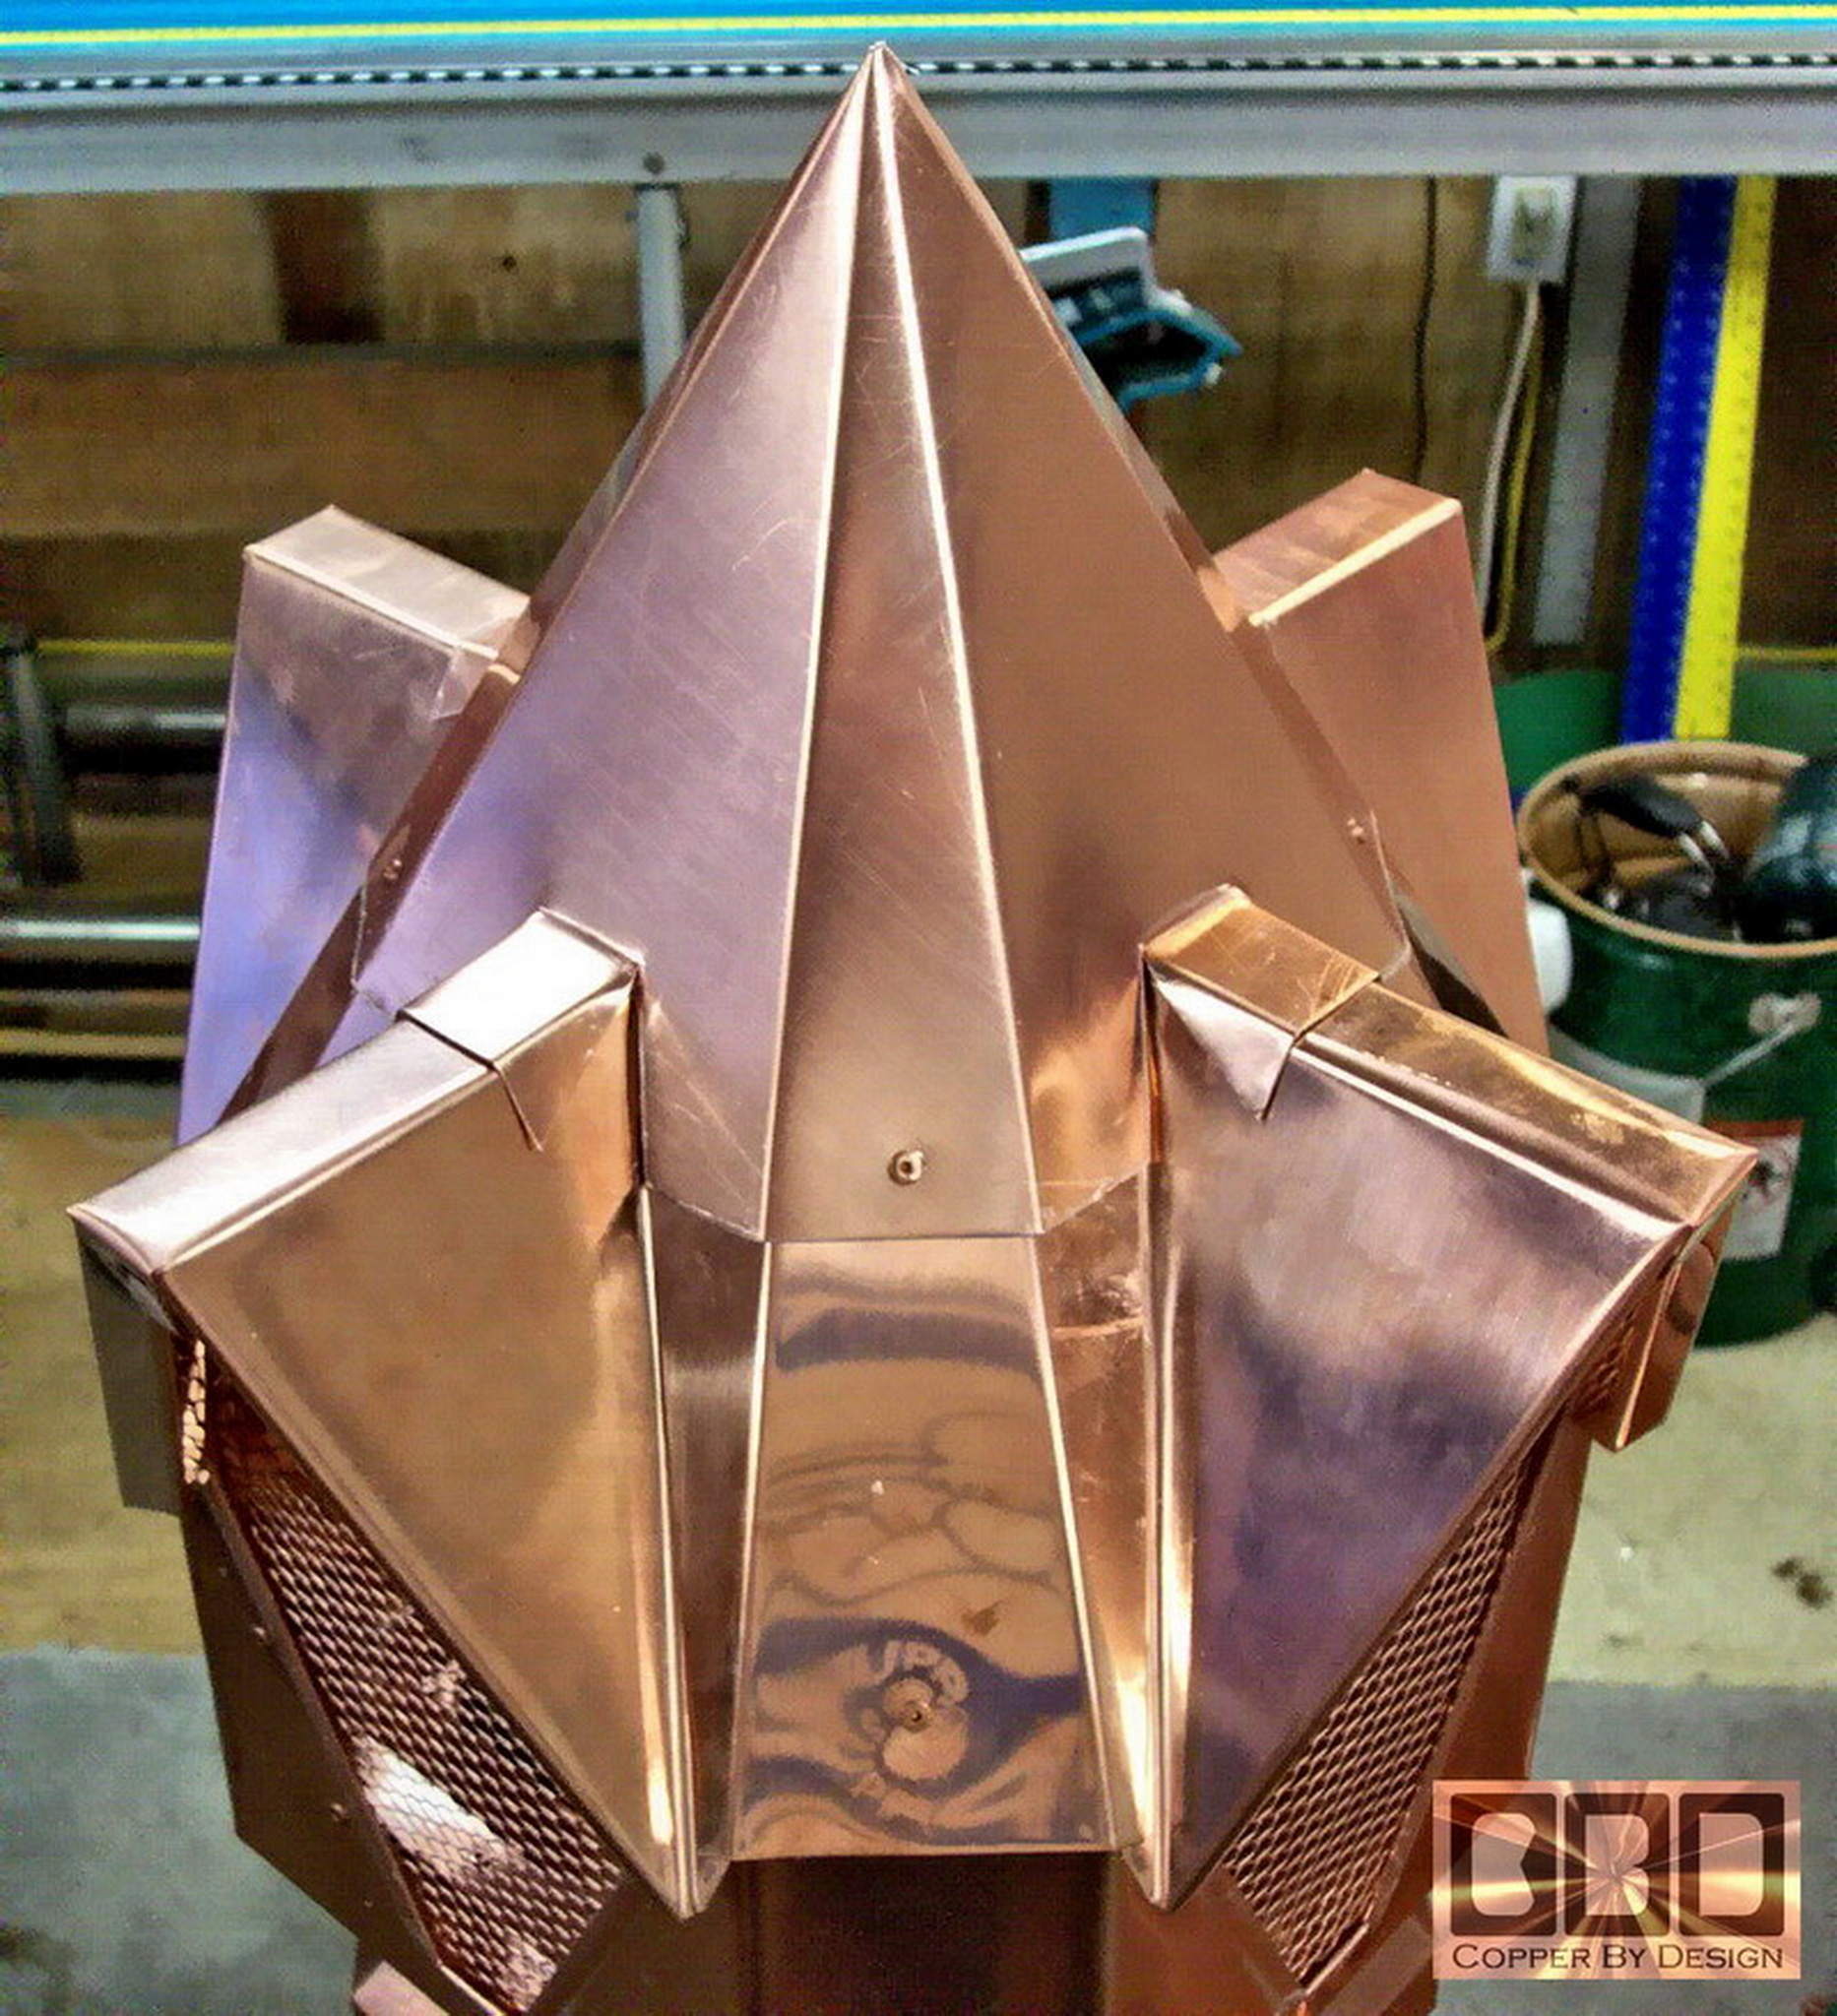
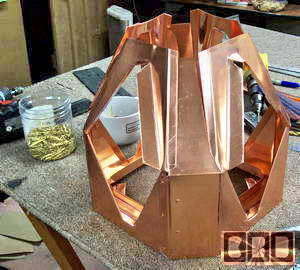
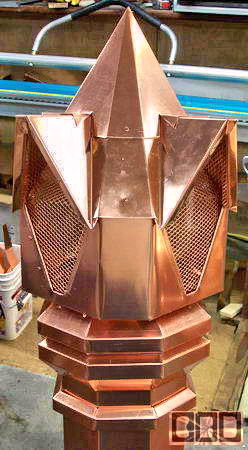
I still have to make the small rings for the taller chimney stack
and the Cathedral style cage vent and cap. This center cap/vent
is not complete yet. There is 6 separate pieces just loosely set
in place to take this photo. It is now 4' 7" tall, but when it
is riveted down tight, it will be about 1/2" shorter.
|
|
Day eight (9-9-04)
|
|
|
|
|
|
|
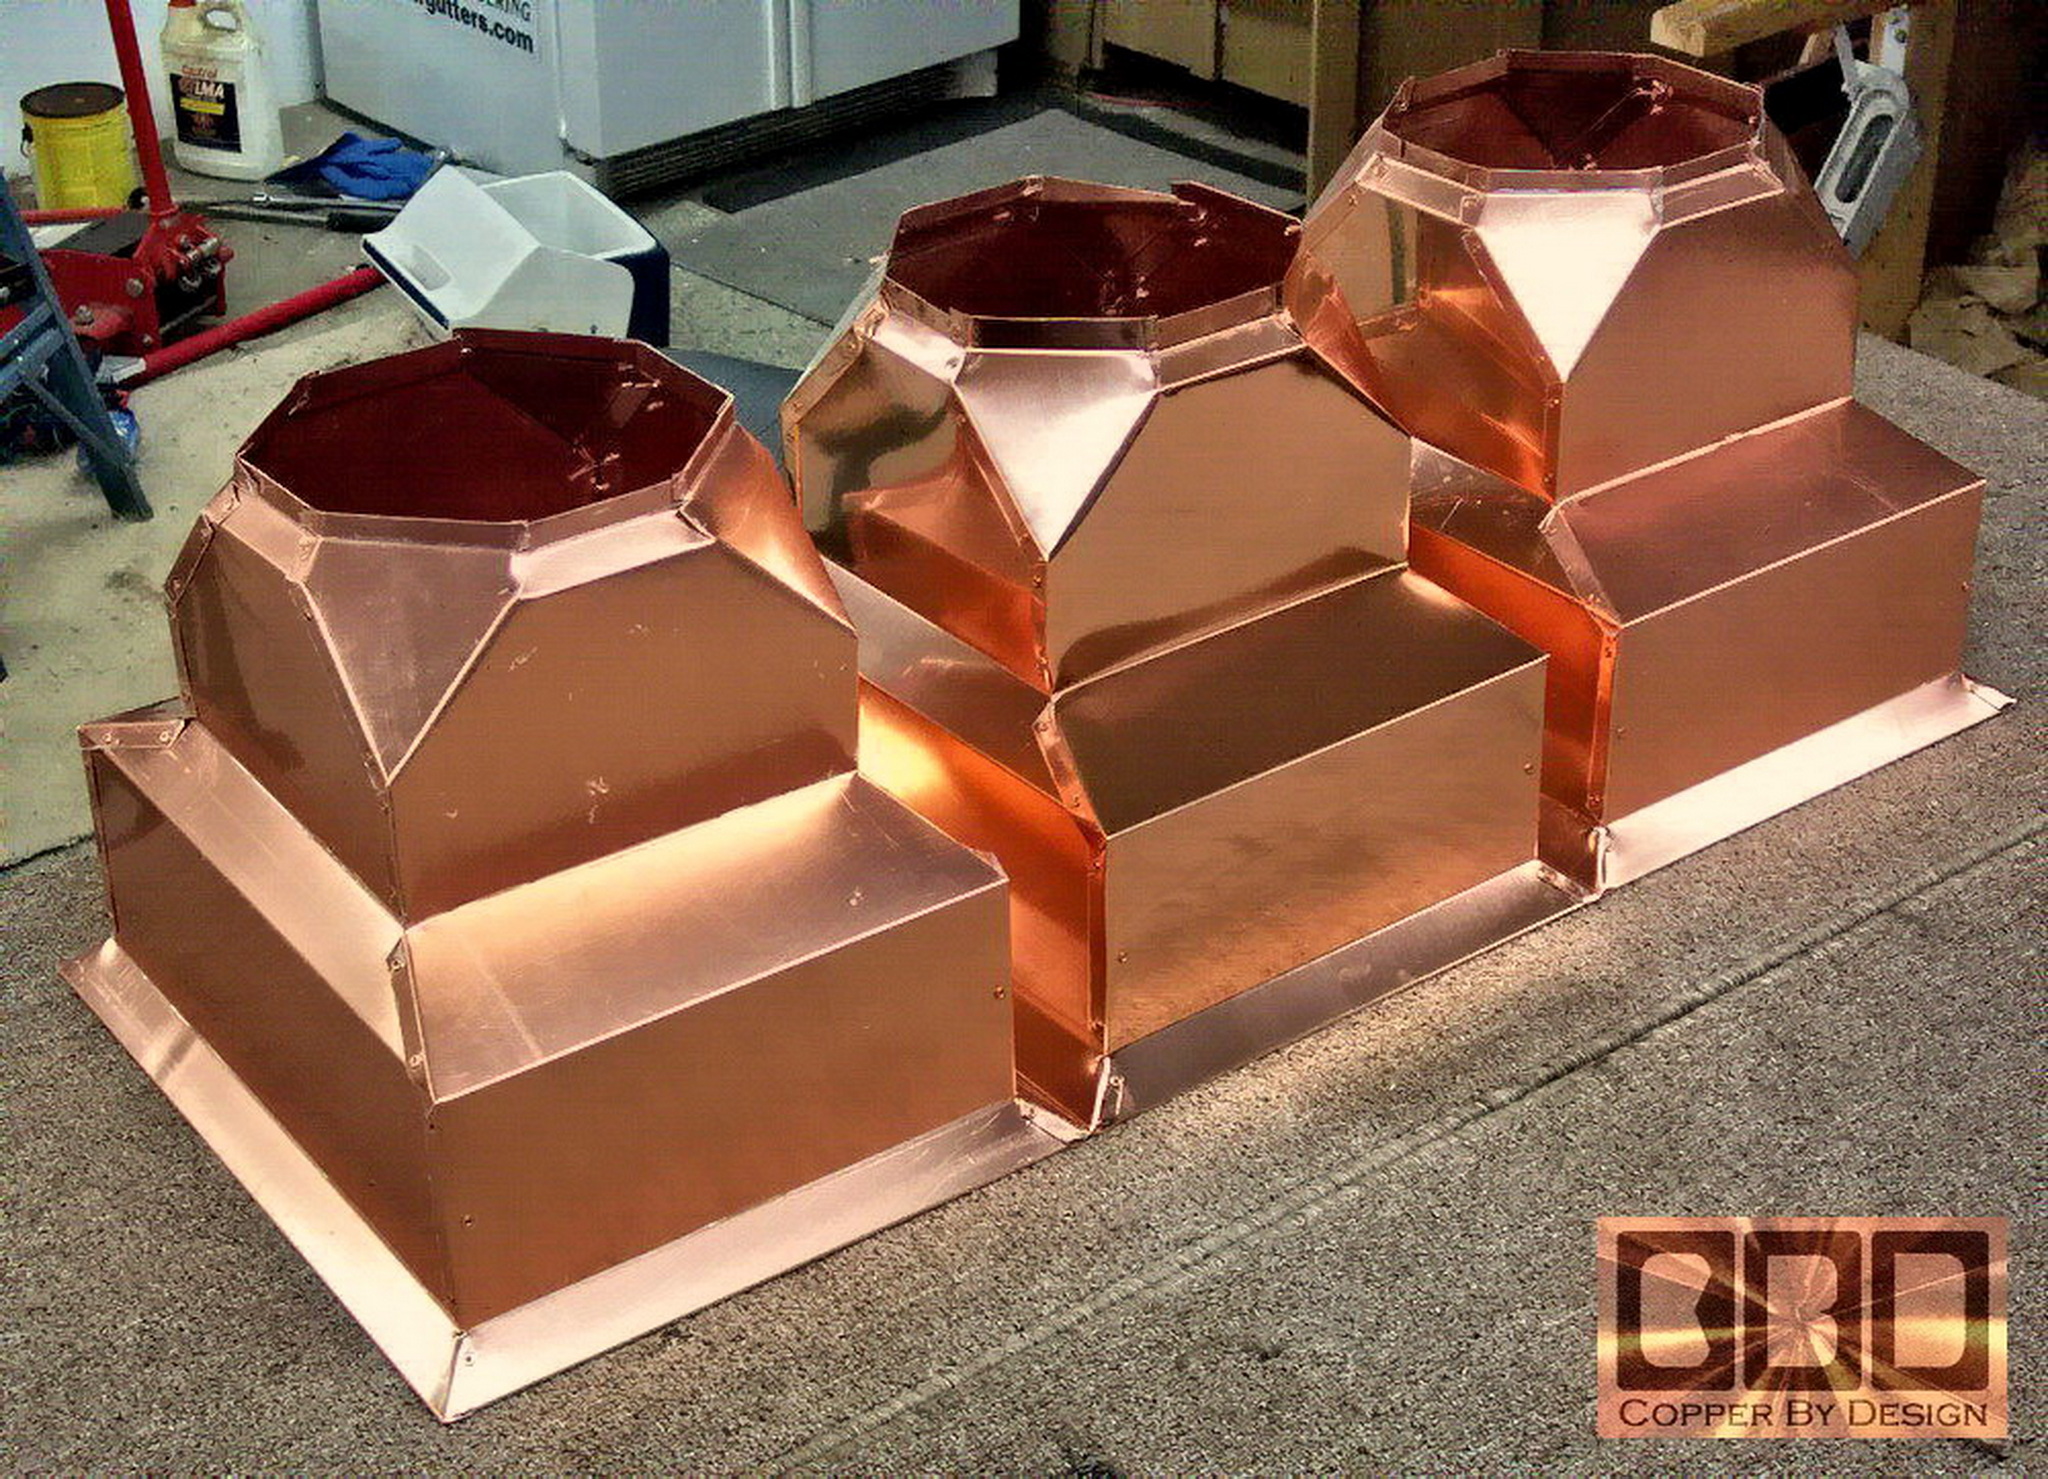
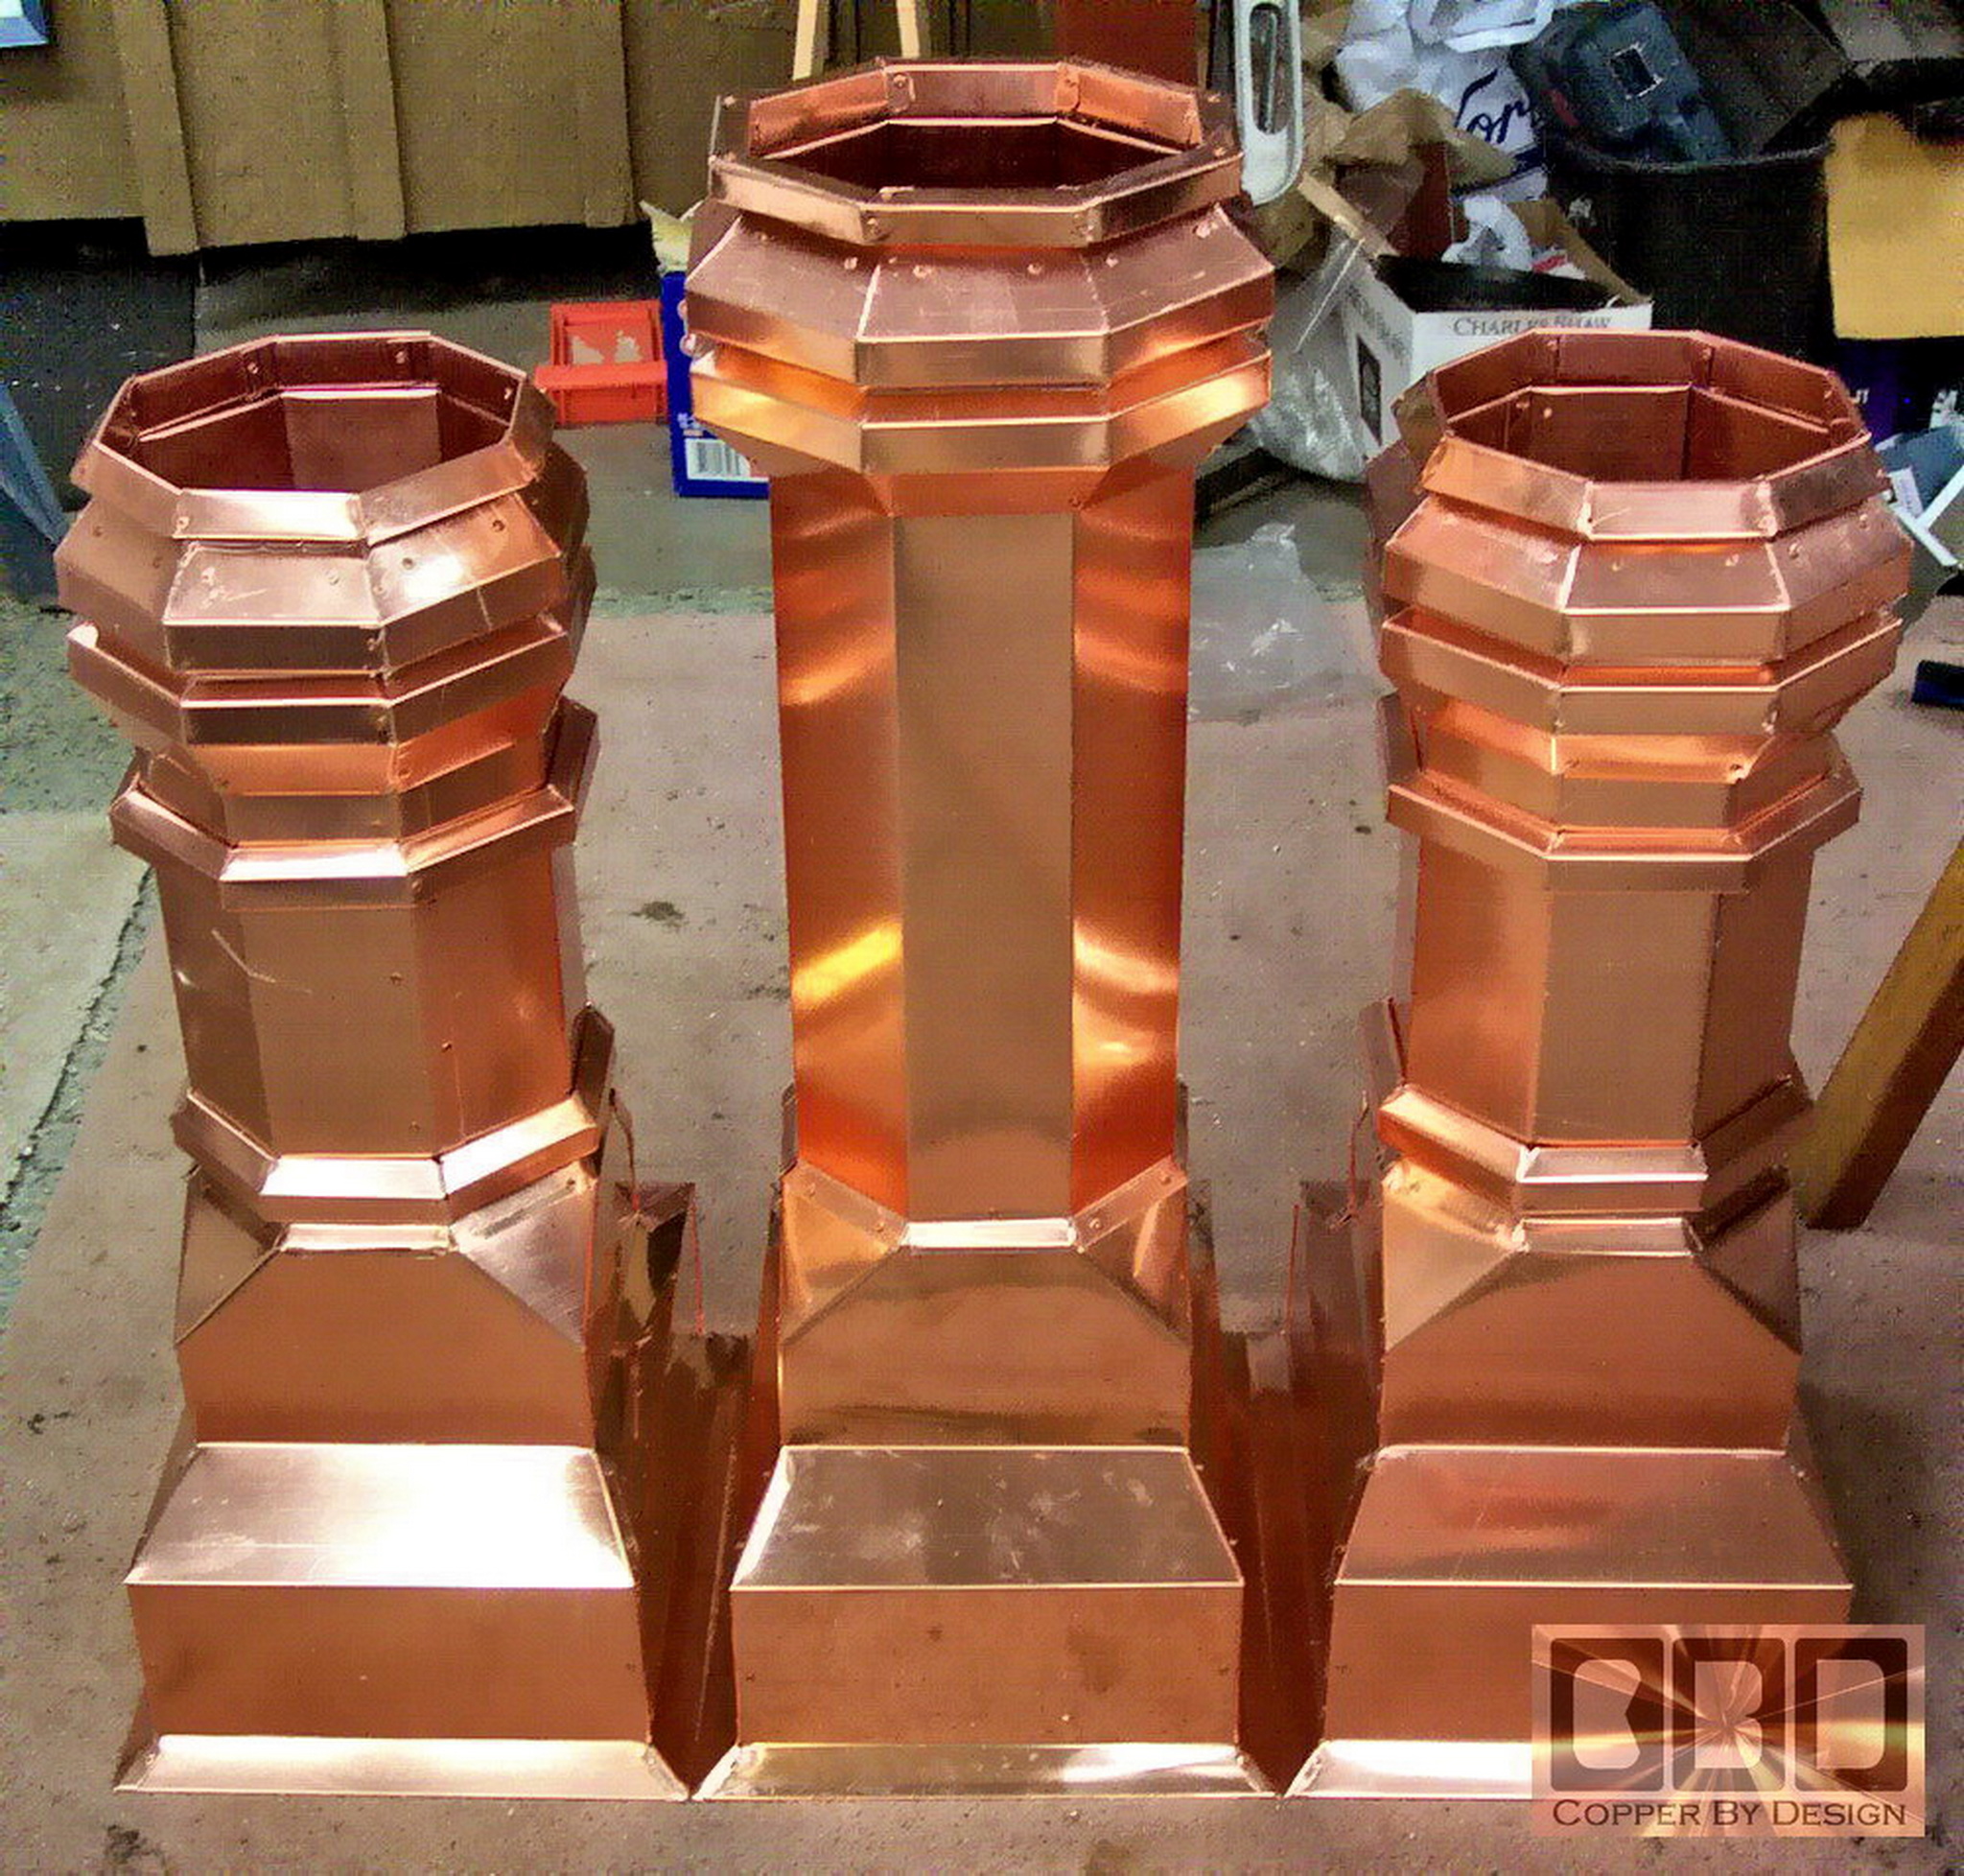
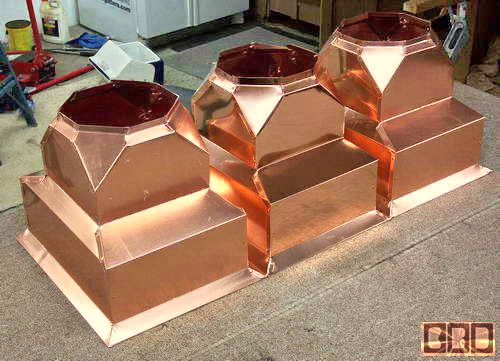
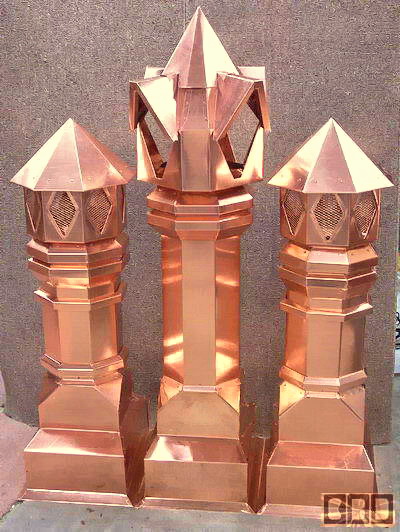
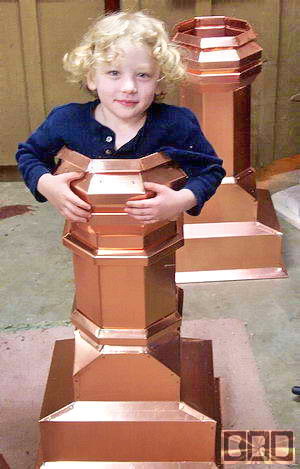
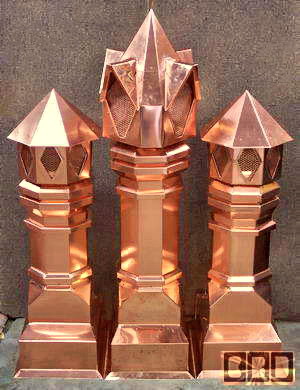 They are looking a lot like chess pieces. Maybe 2 Bishops
and one King? The center one looked more like a Rook before I
set the vent/cap on it. At $2,000
for these 3 chess pieces, this would make for a rather expensive
chess set.
<LOL>
Even at $2,000 for this set; I had
given this client a very good deal, considering
all the design and work I had put into this project. I was
so jazzed about this project to have these photos for my web site,
I was willing to put the extra time and effort into this project,
without charging her more for these design enhancements.
|
|
|
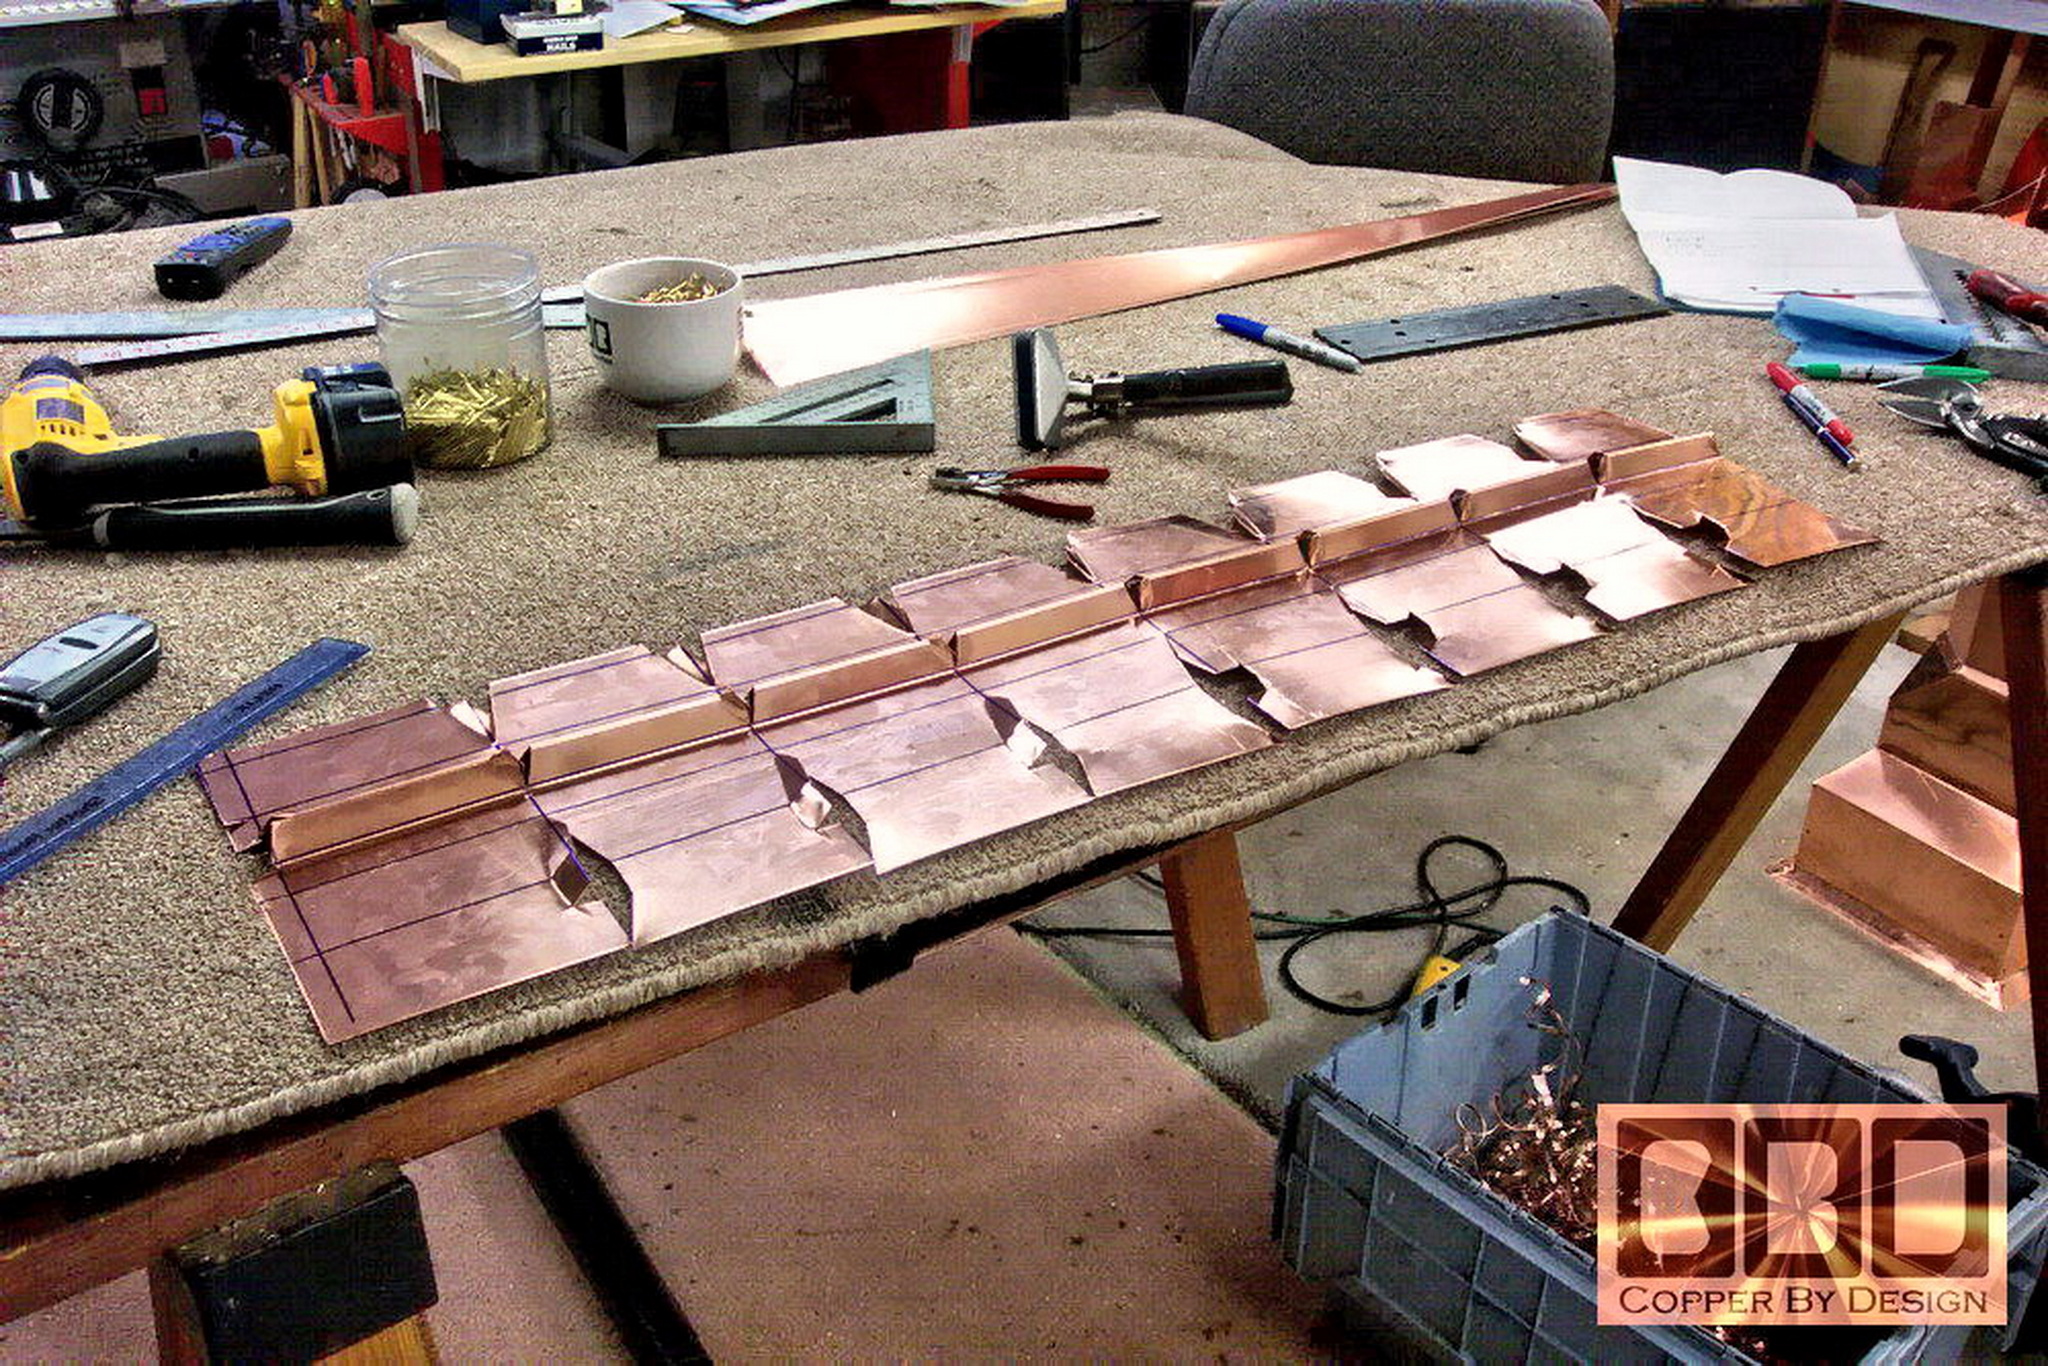
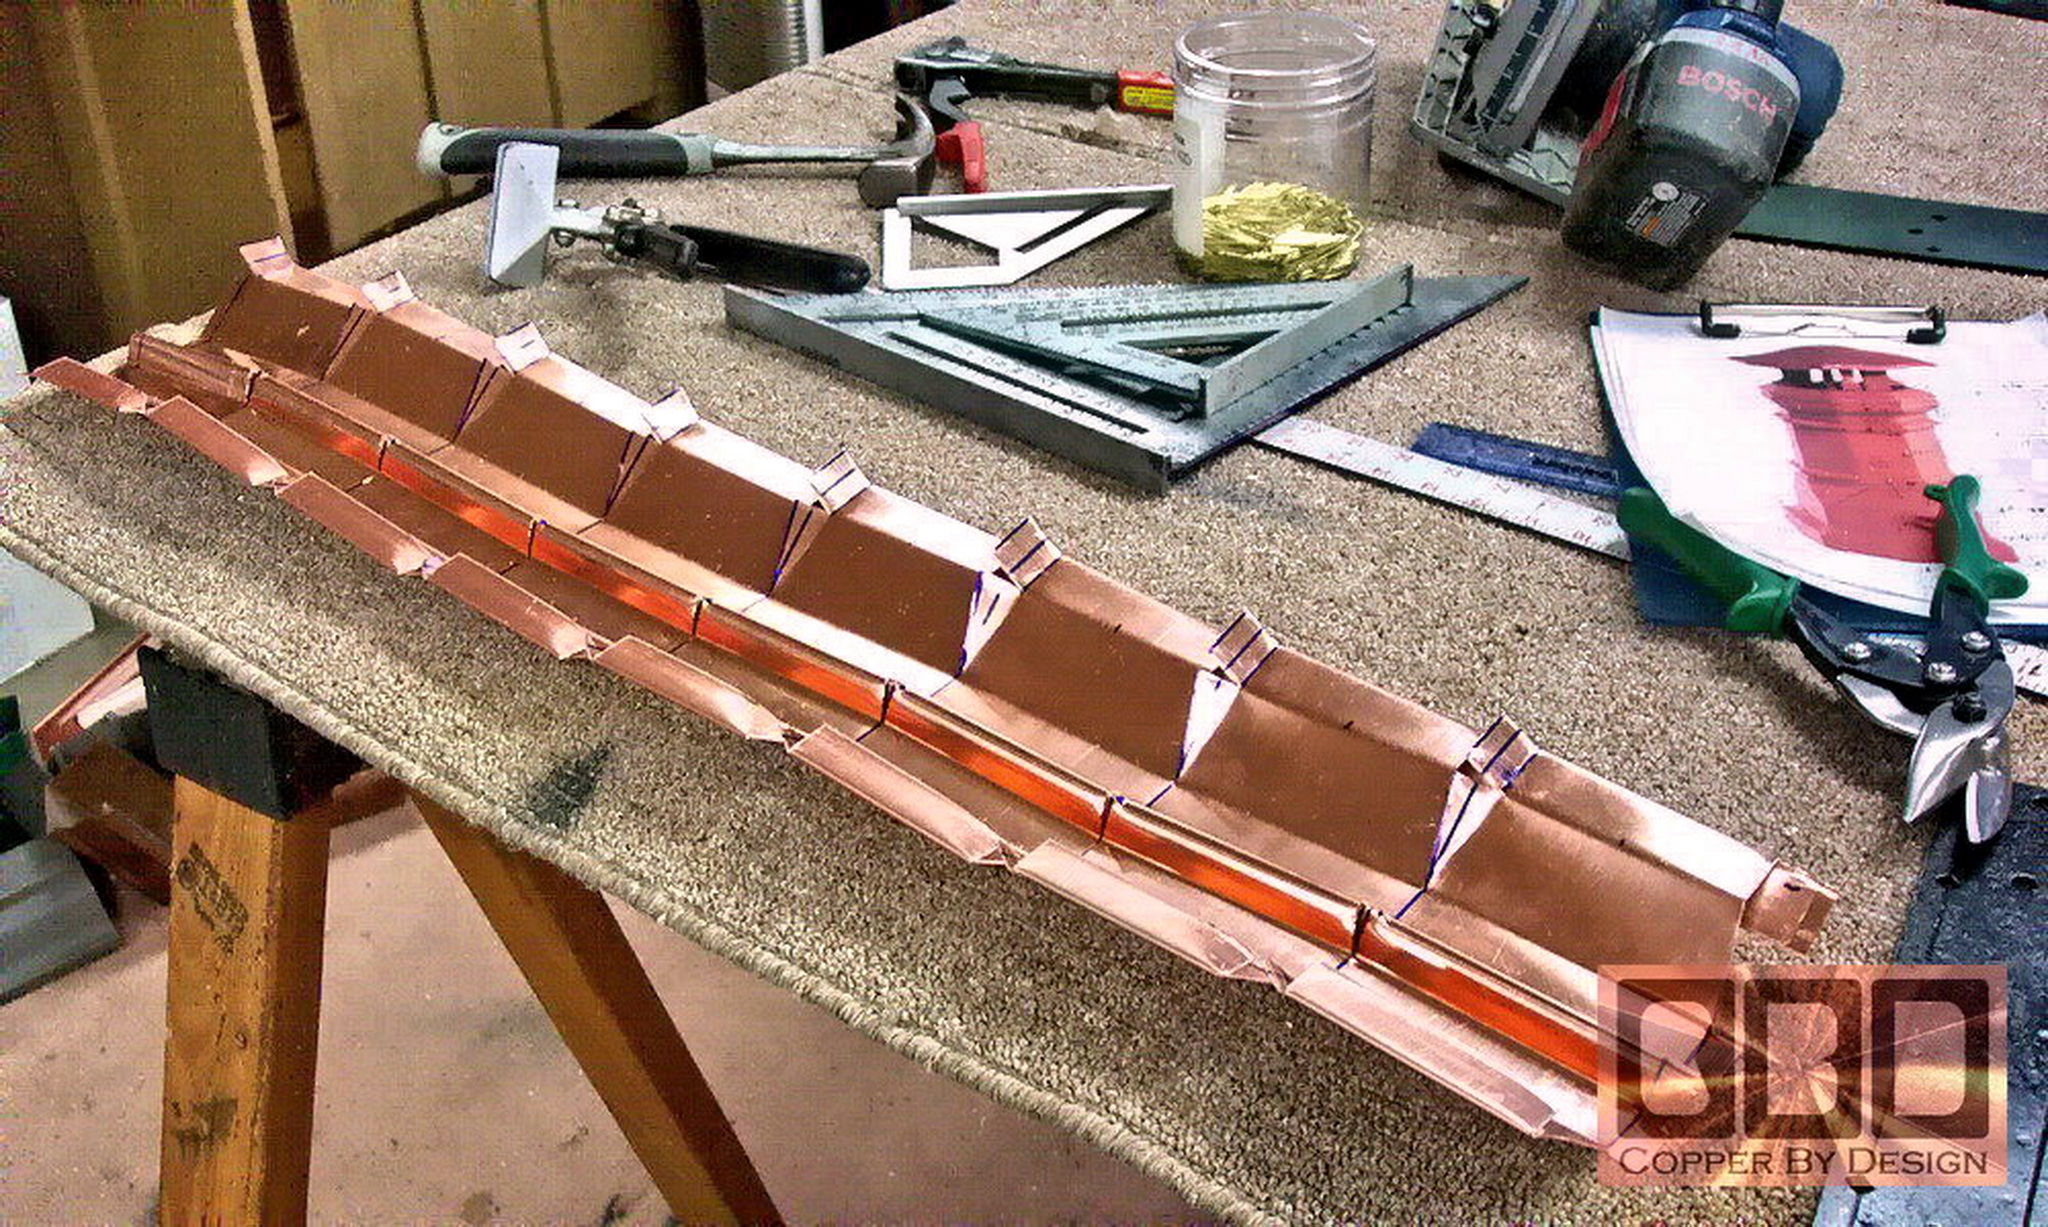
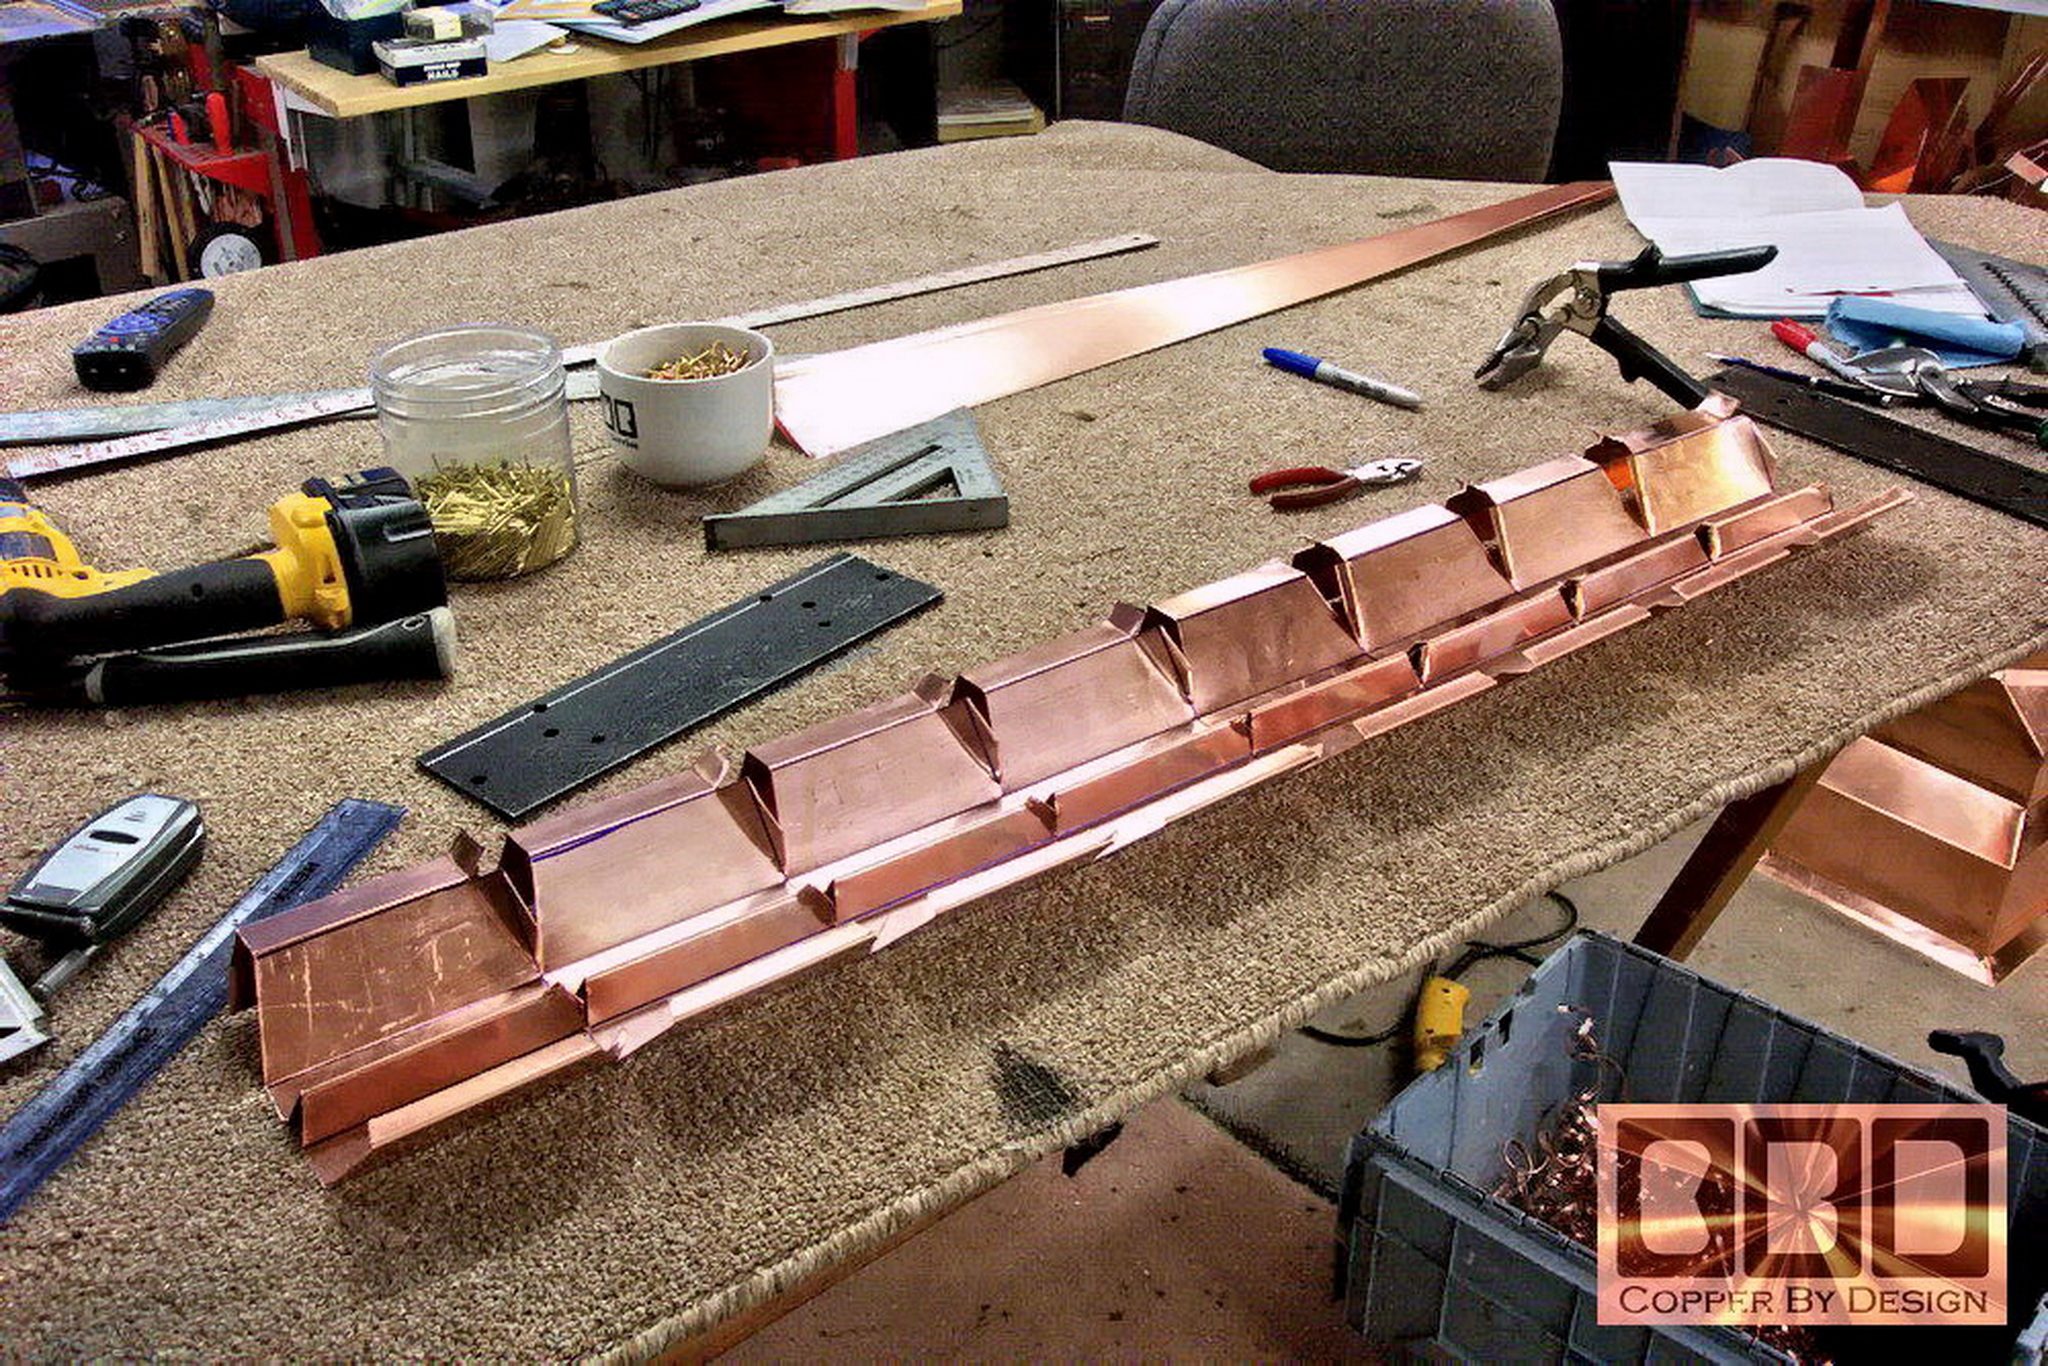
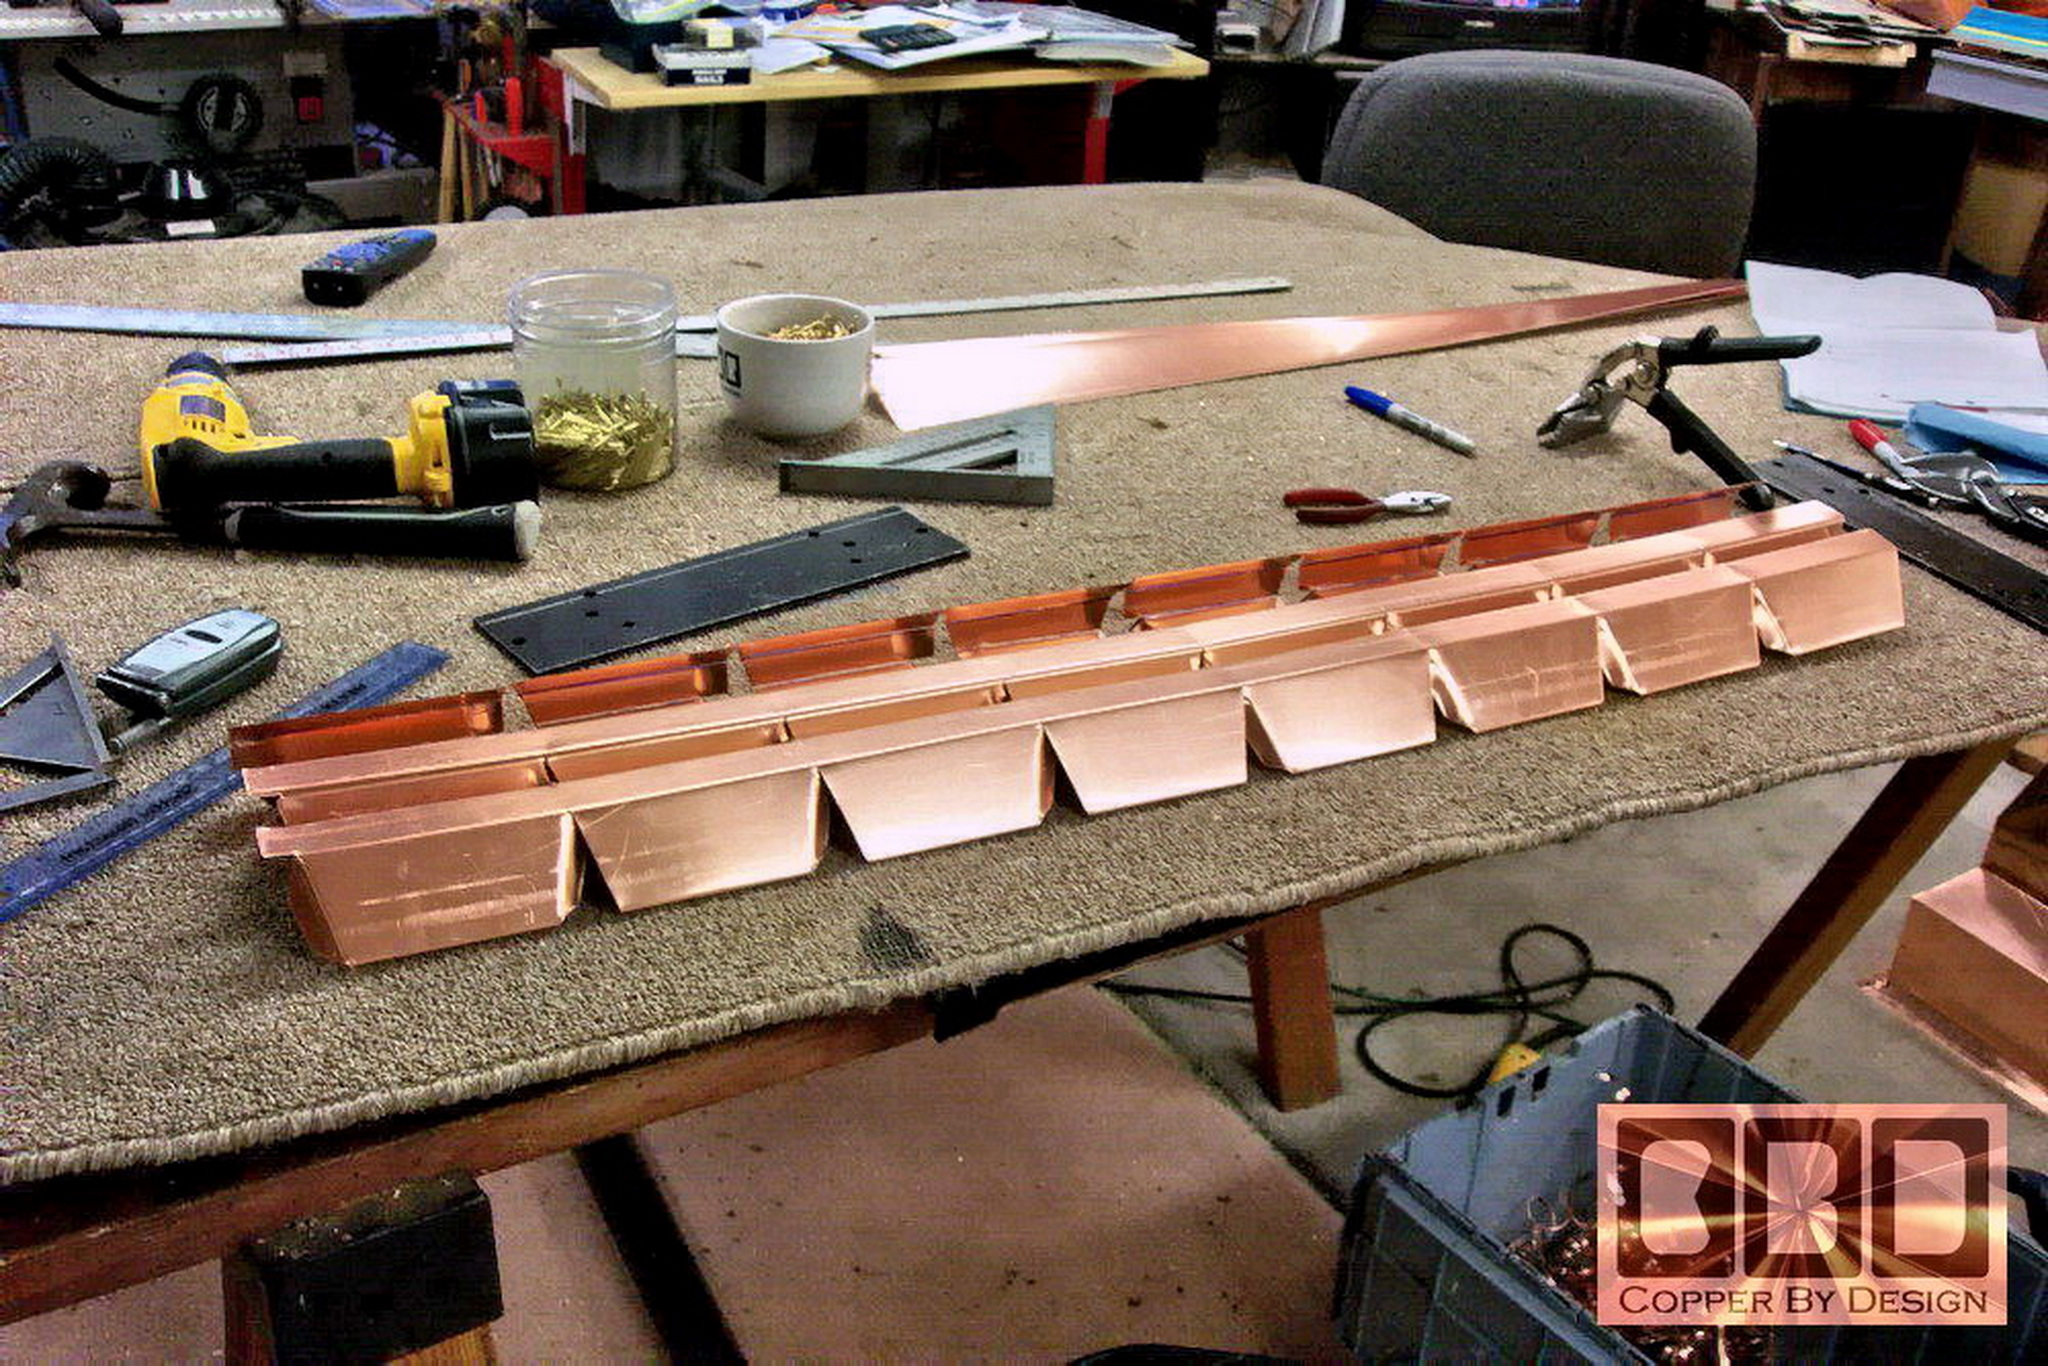
Here is their house with the new copper gutters
about to be installed around the wrap around deck that XXXX had painstakingly
rebuilt.

|
|
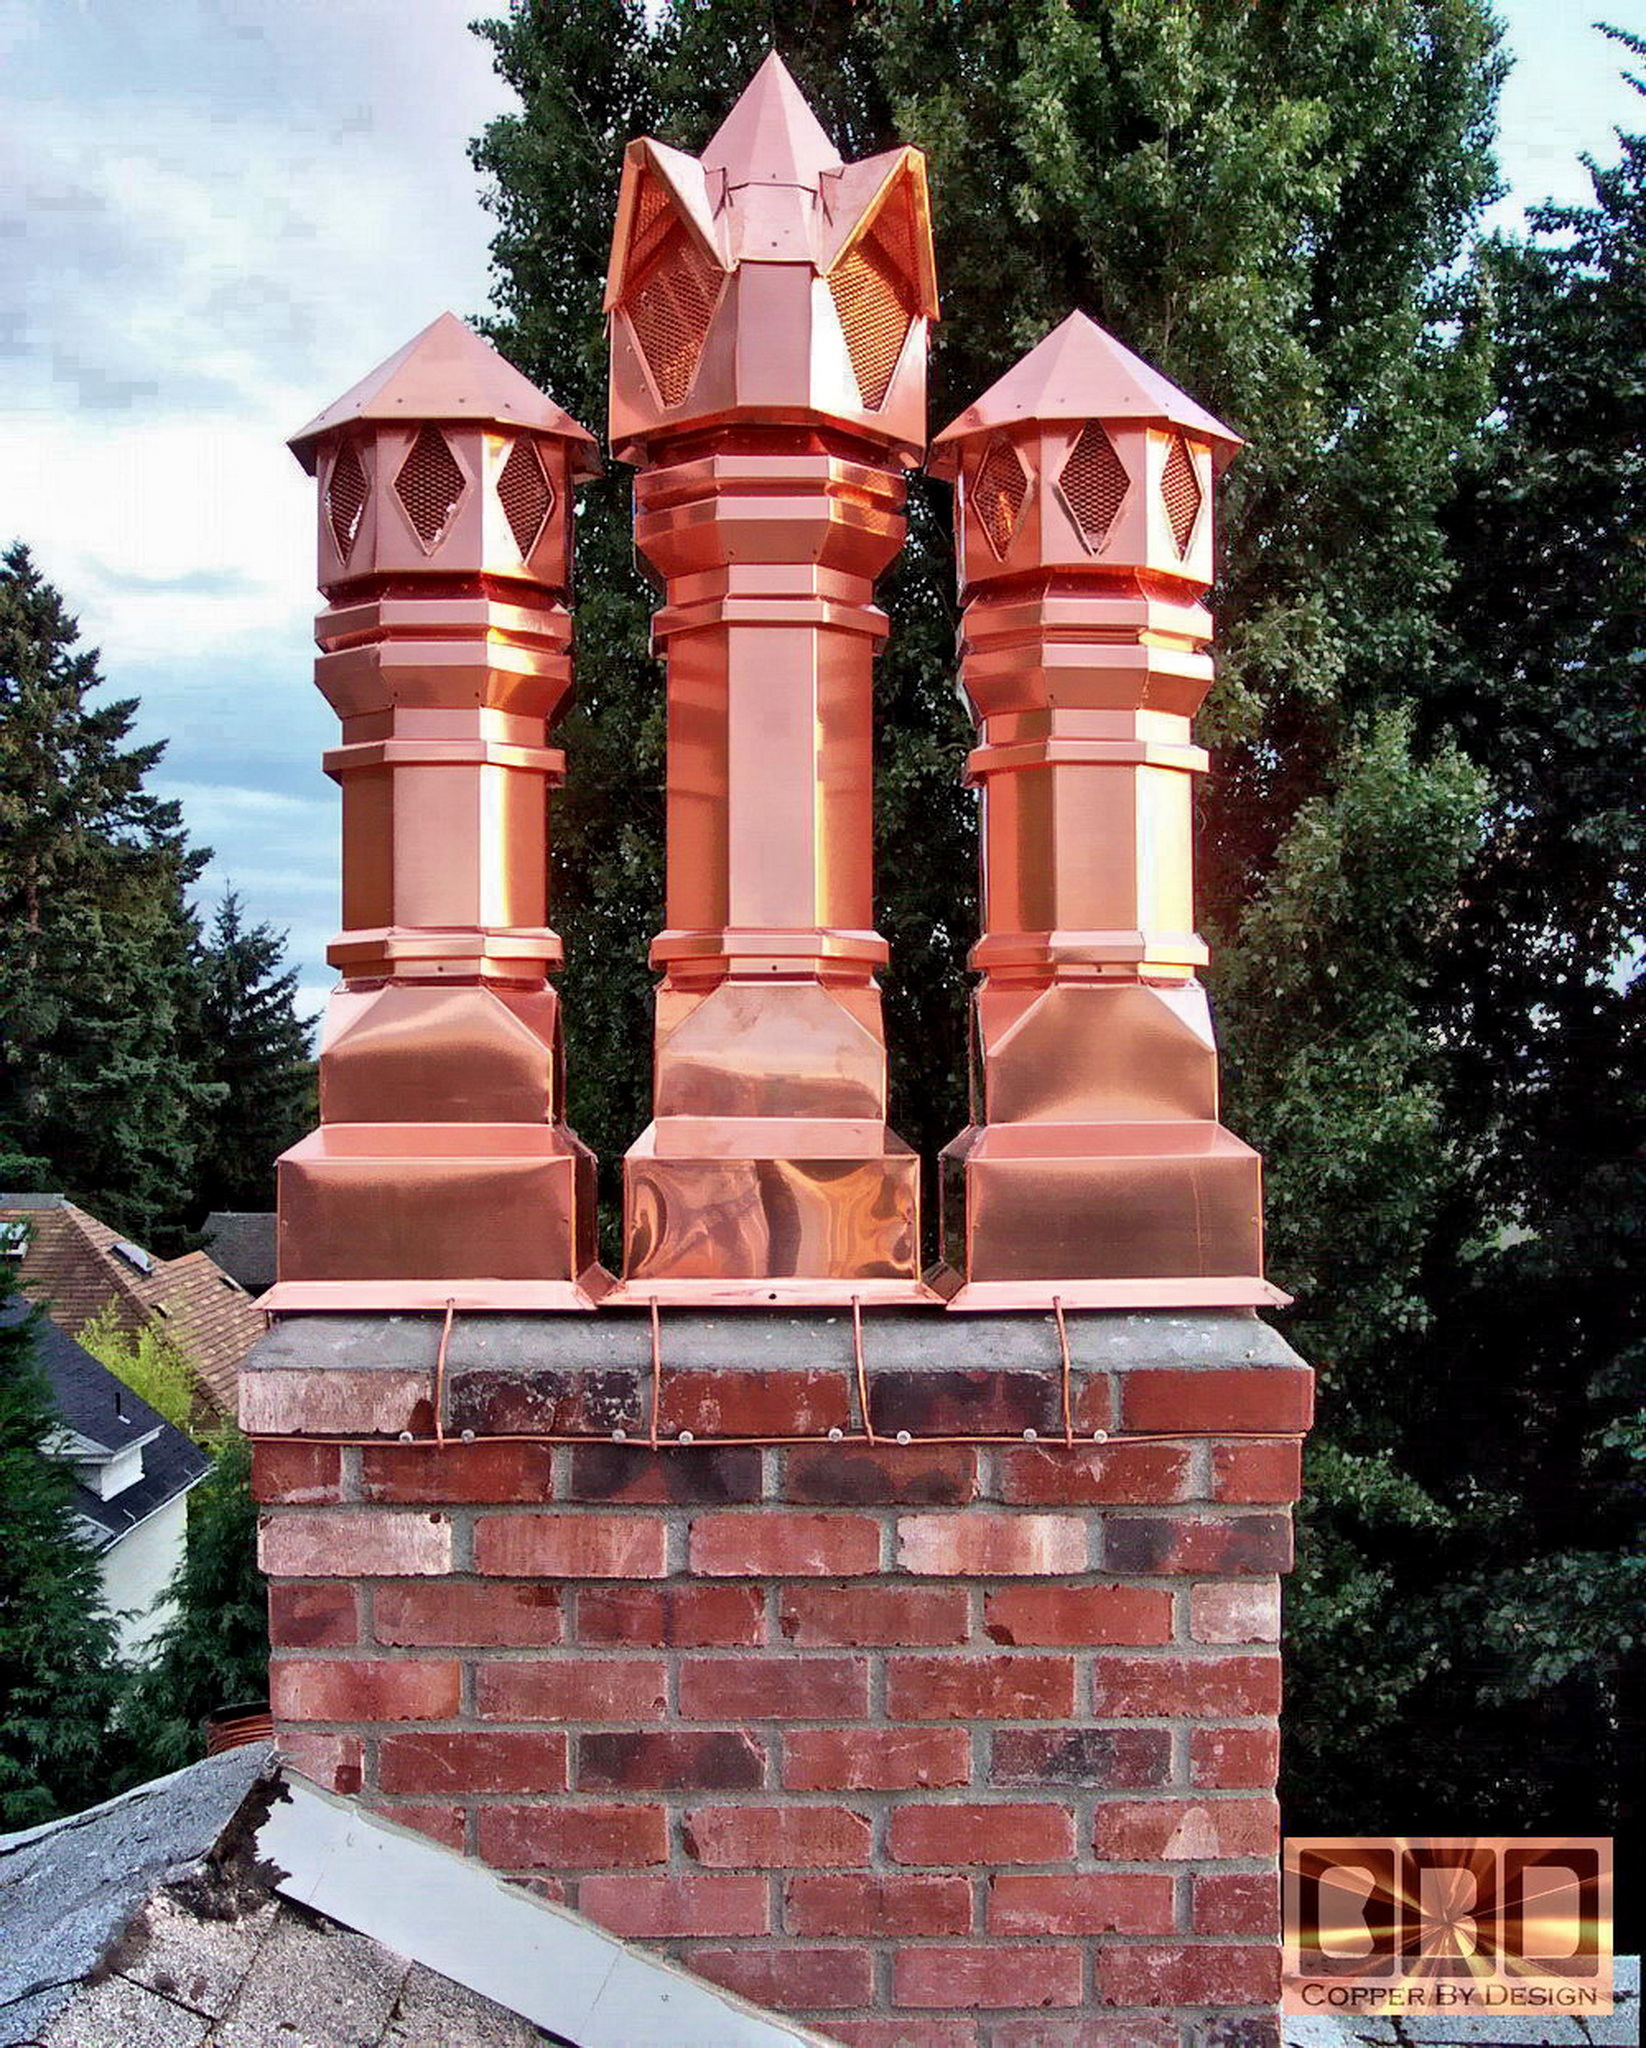
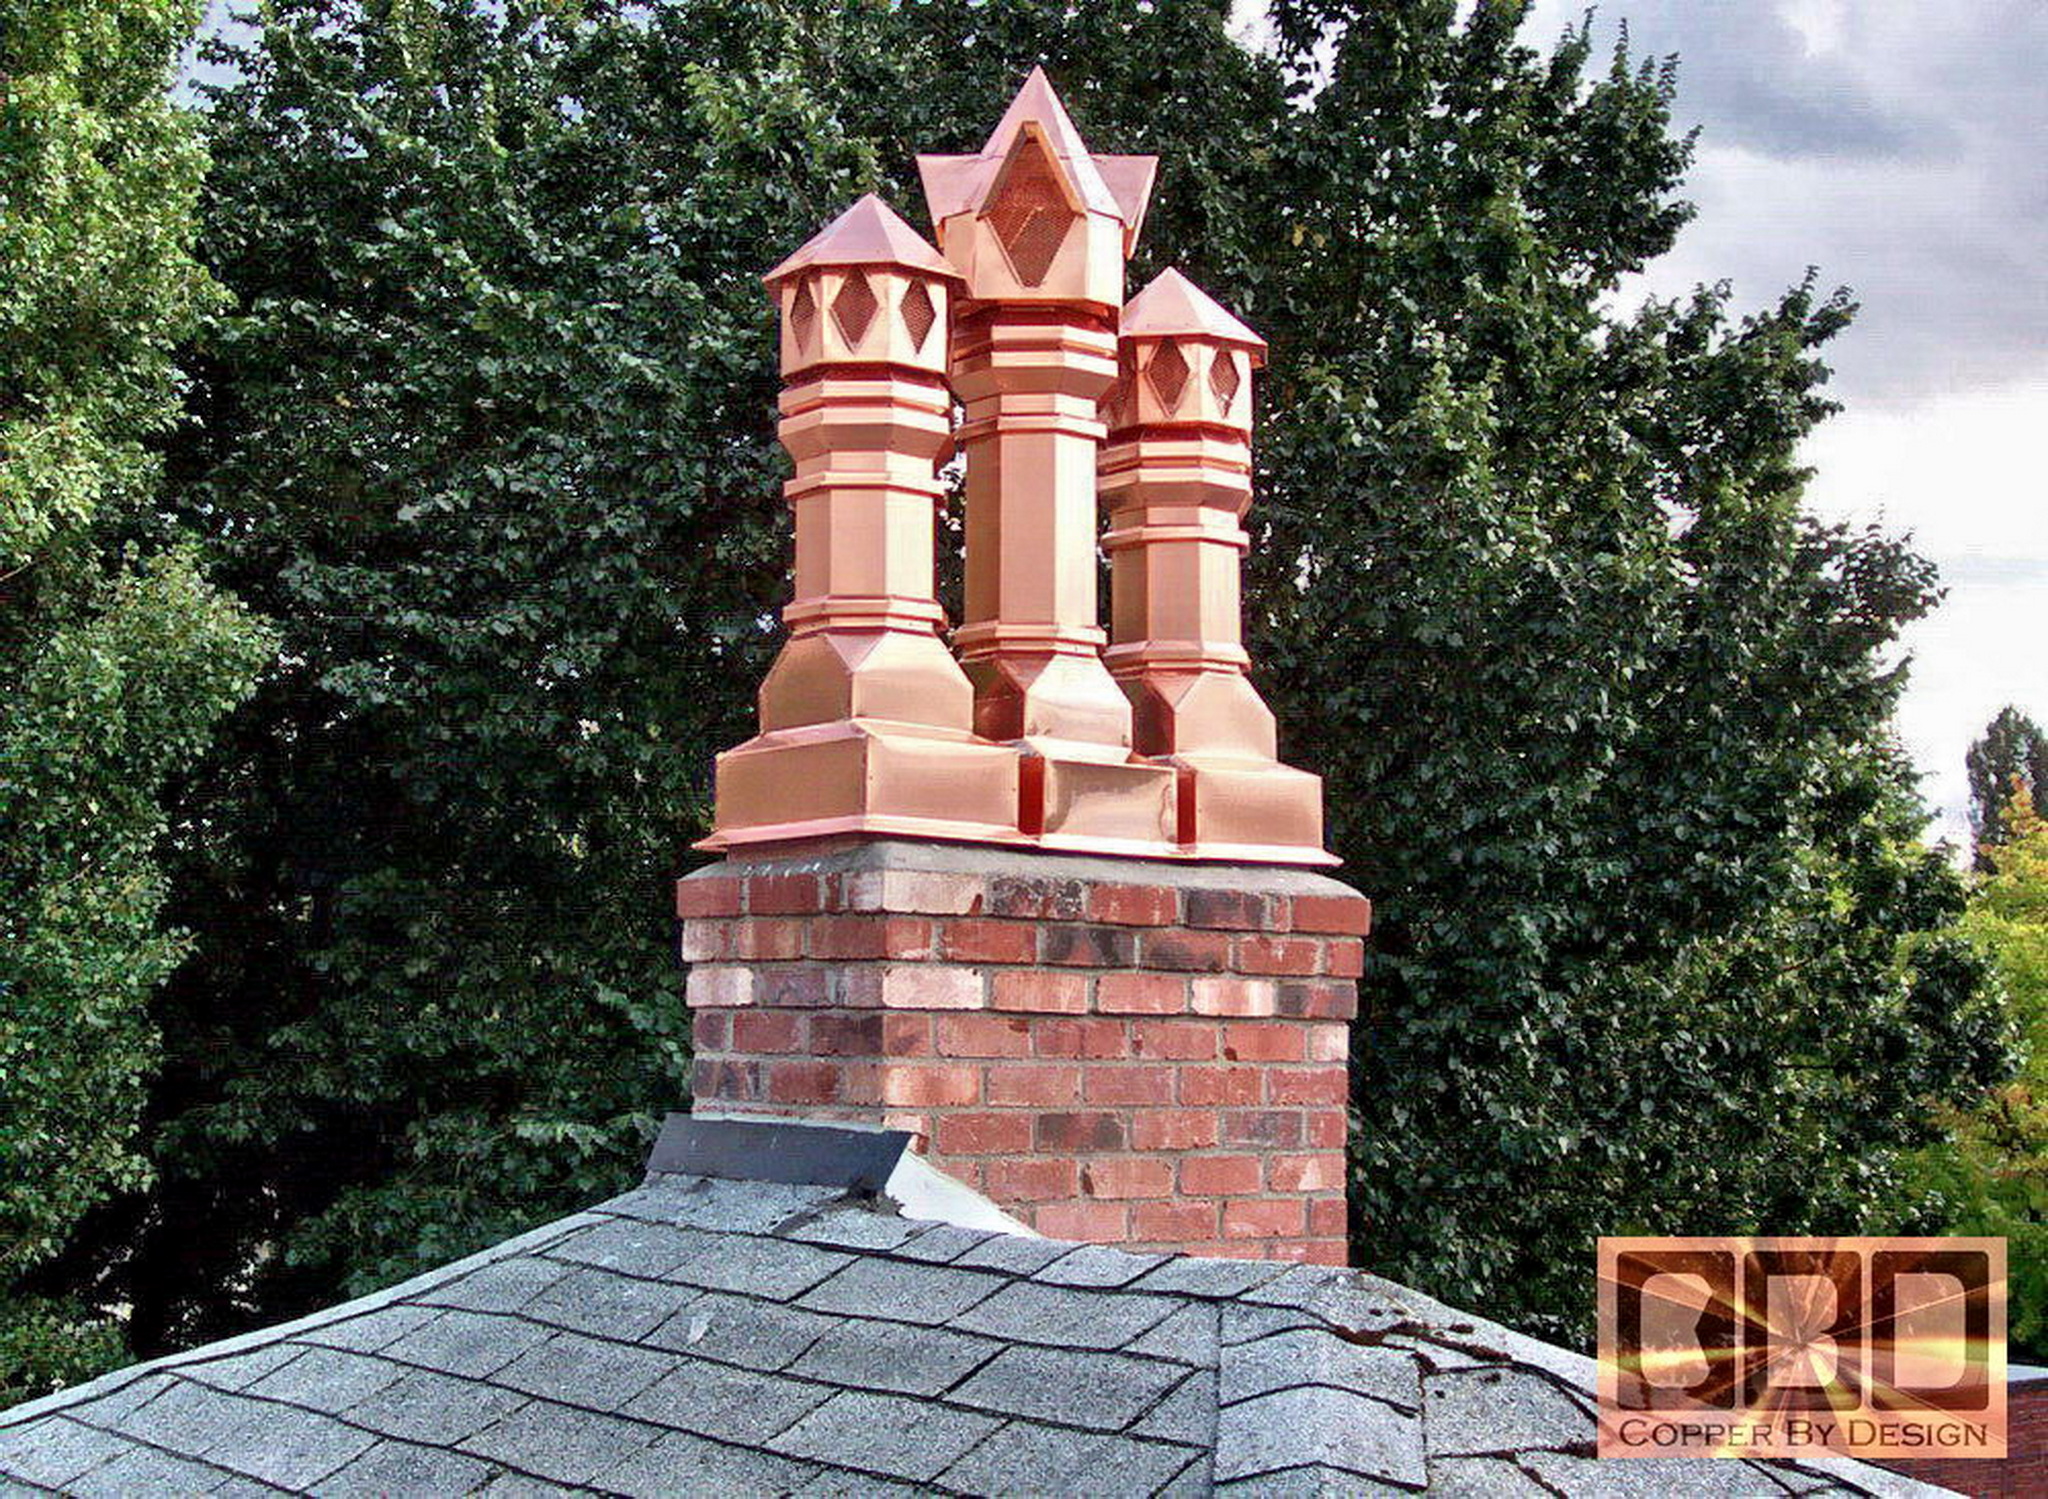
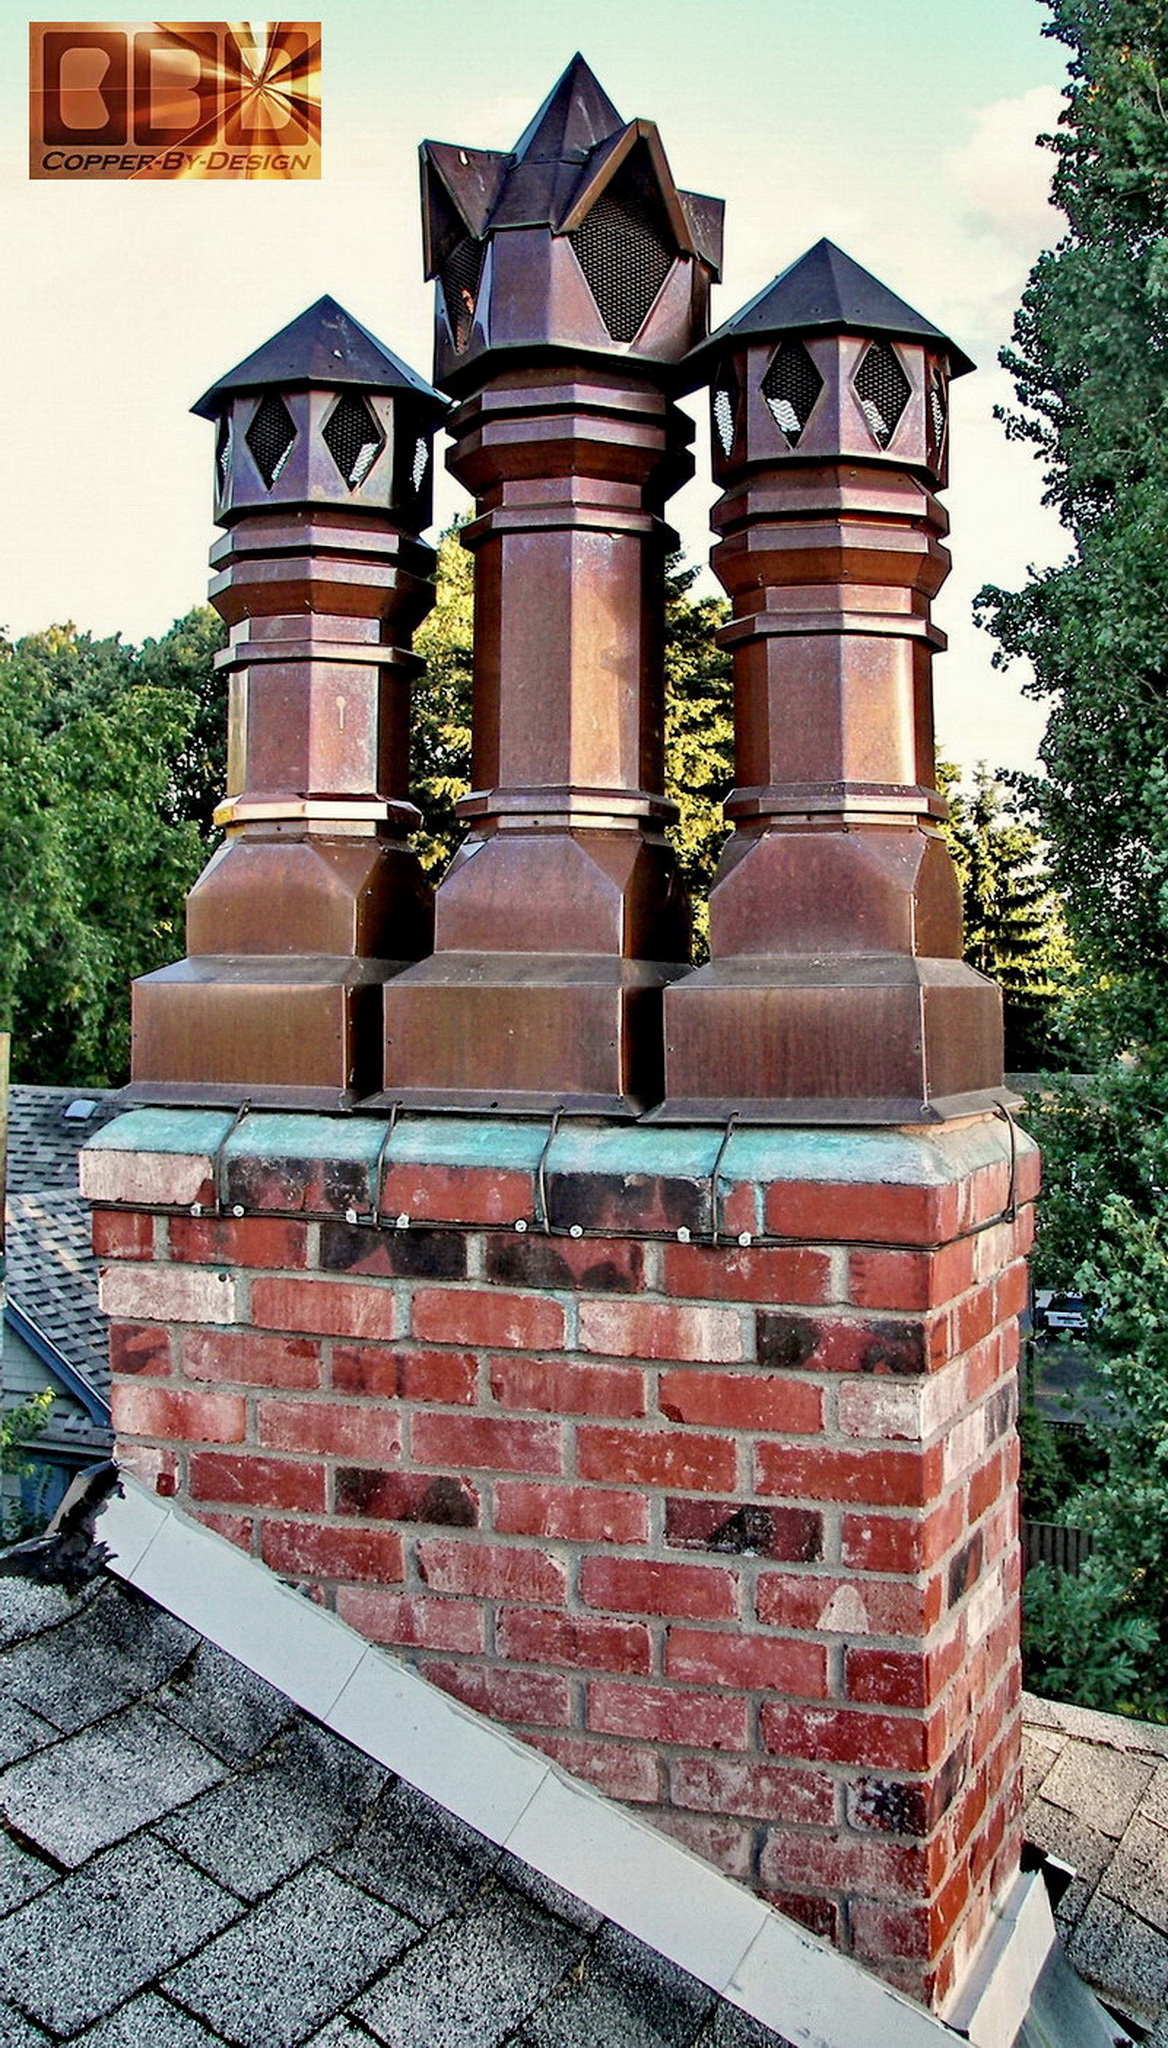
Here are these chimney pots a few years later:
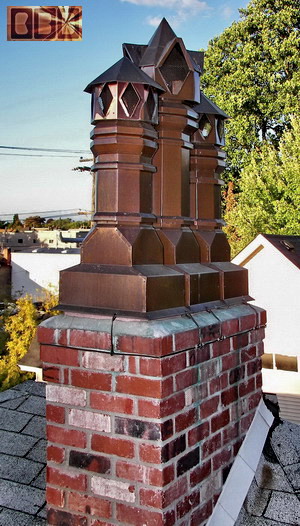 
I happen to stop by a few years later to see how
they had tarnished and managed to get these photos from up on the roof
with the owners permission. I would normally not have bothered them
with this, but I had noticed that I had left some of the clear plastic
film on the copper in a few spots. Can you tell where? It was not easy
to remove after being out under the sun for the last 2 years.
|
|
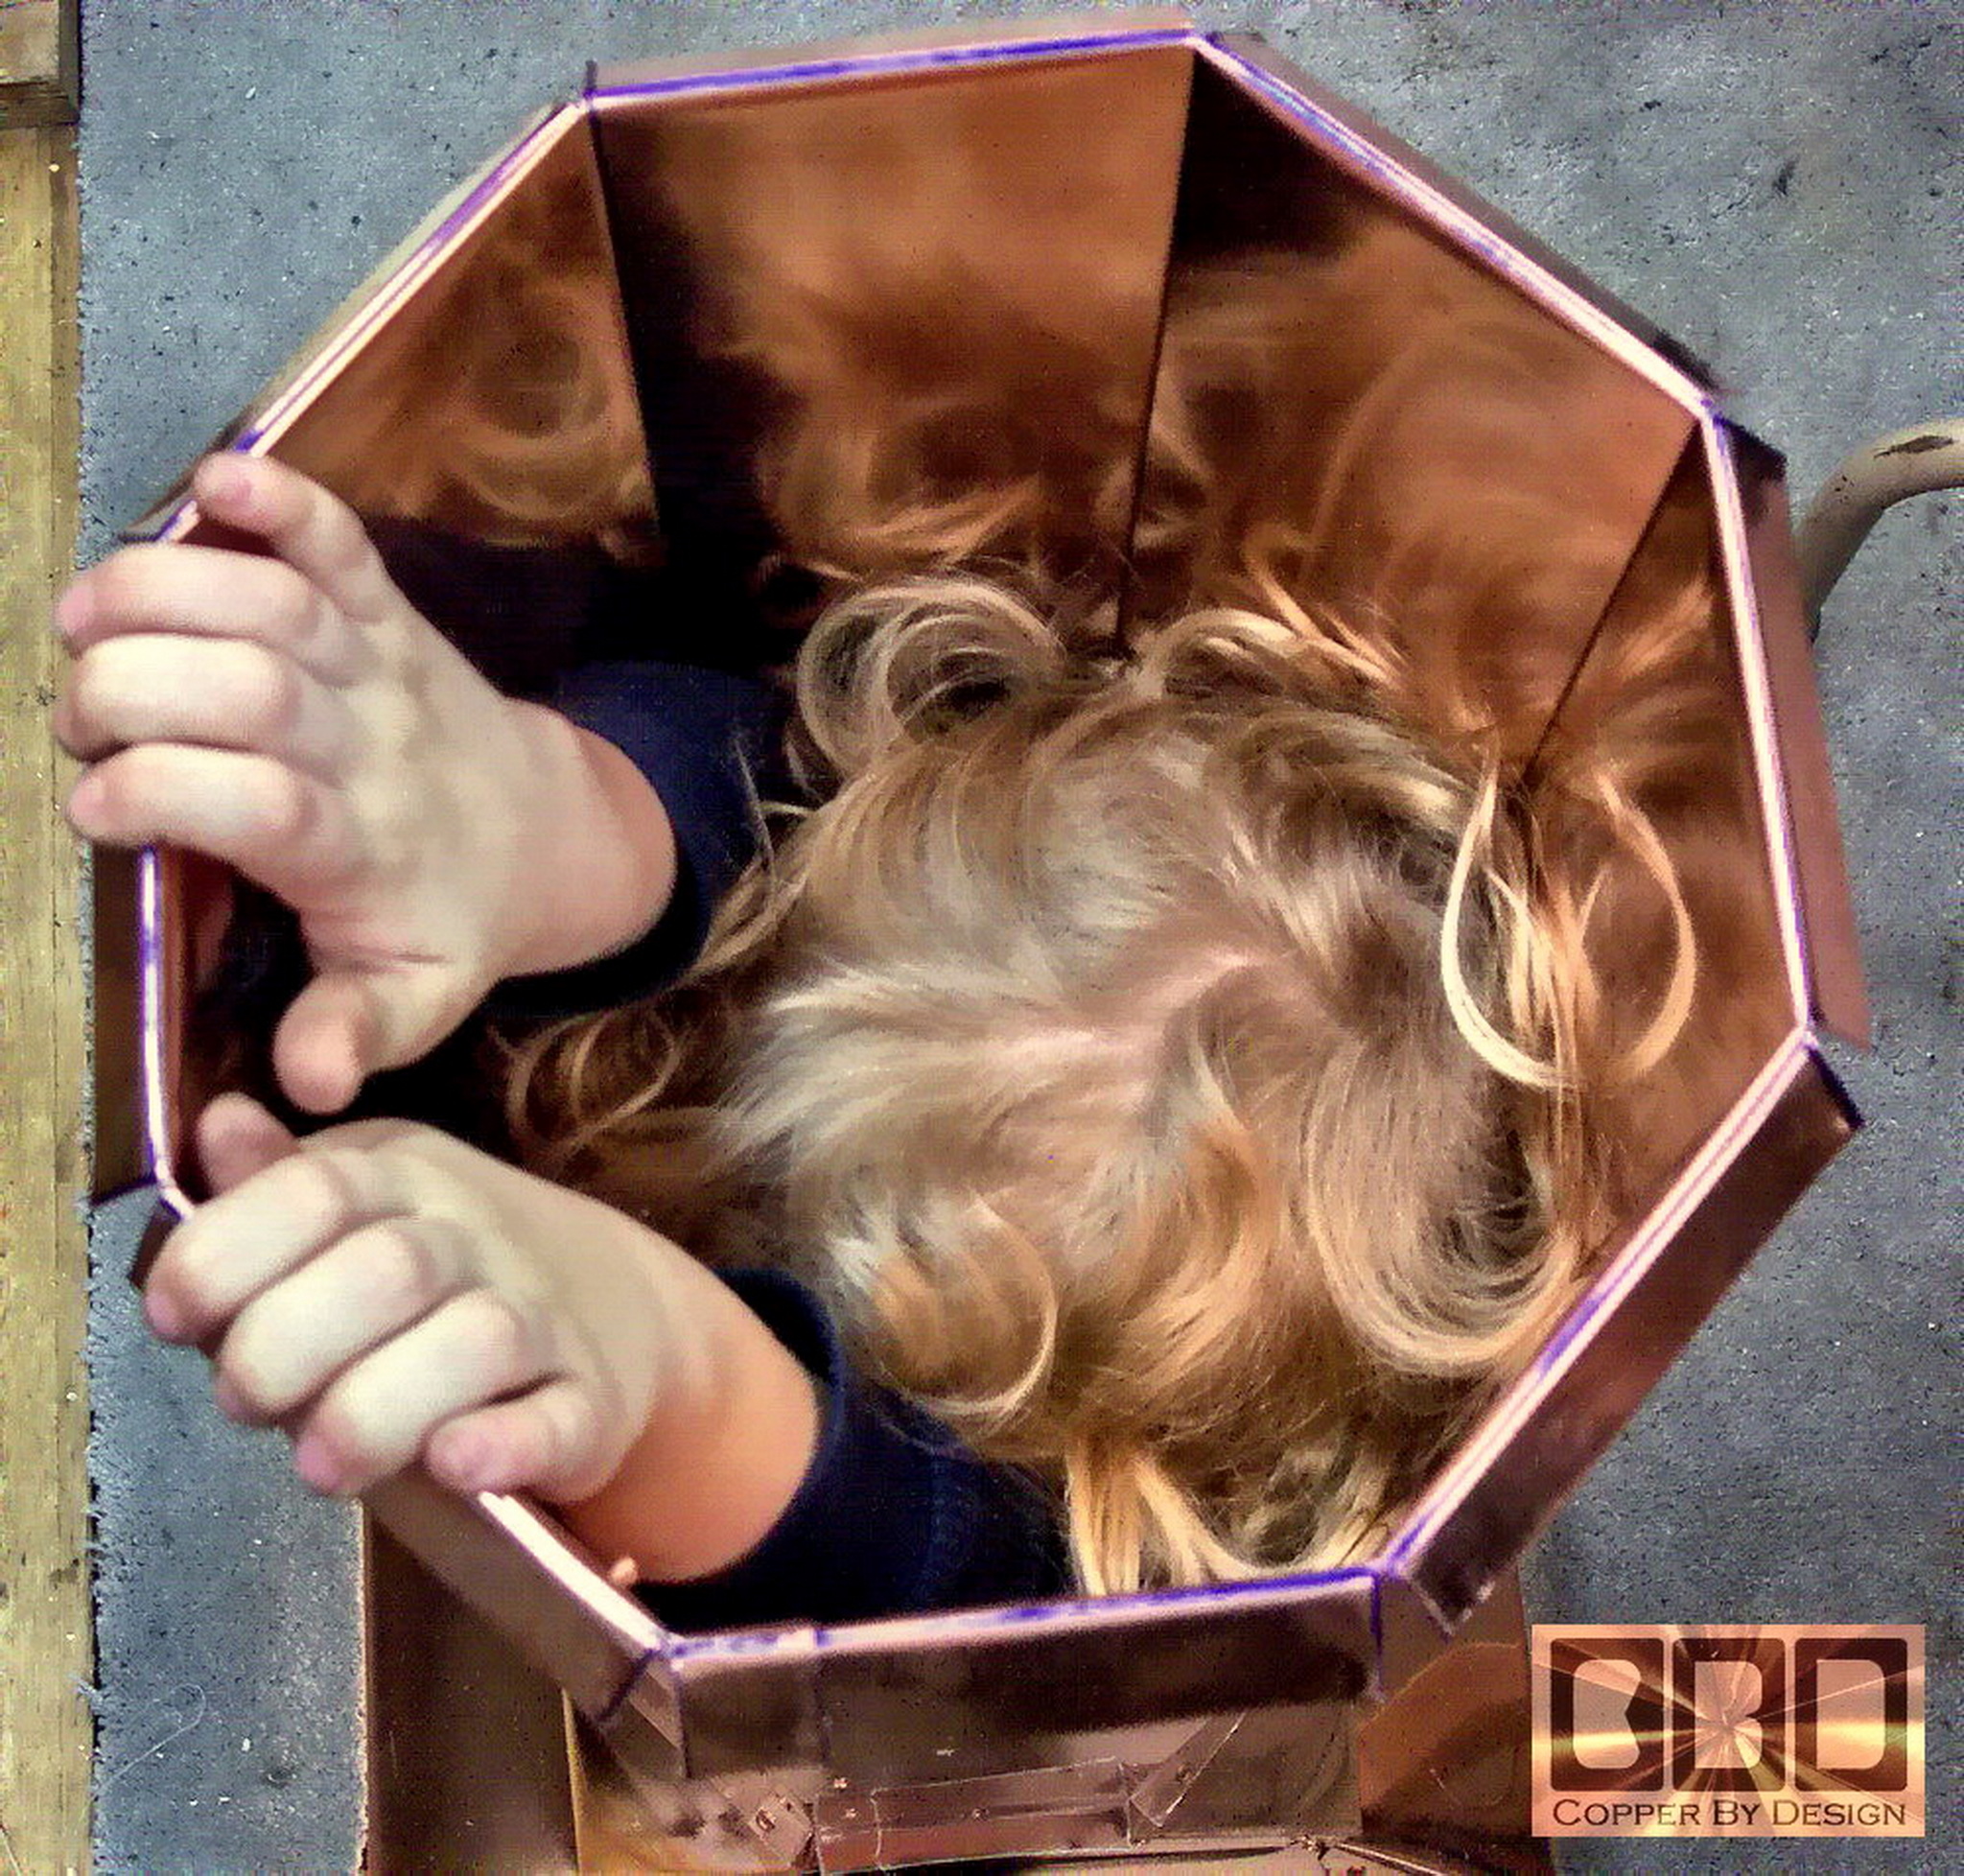
Child's play
|
|
|
|

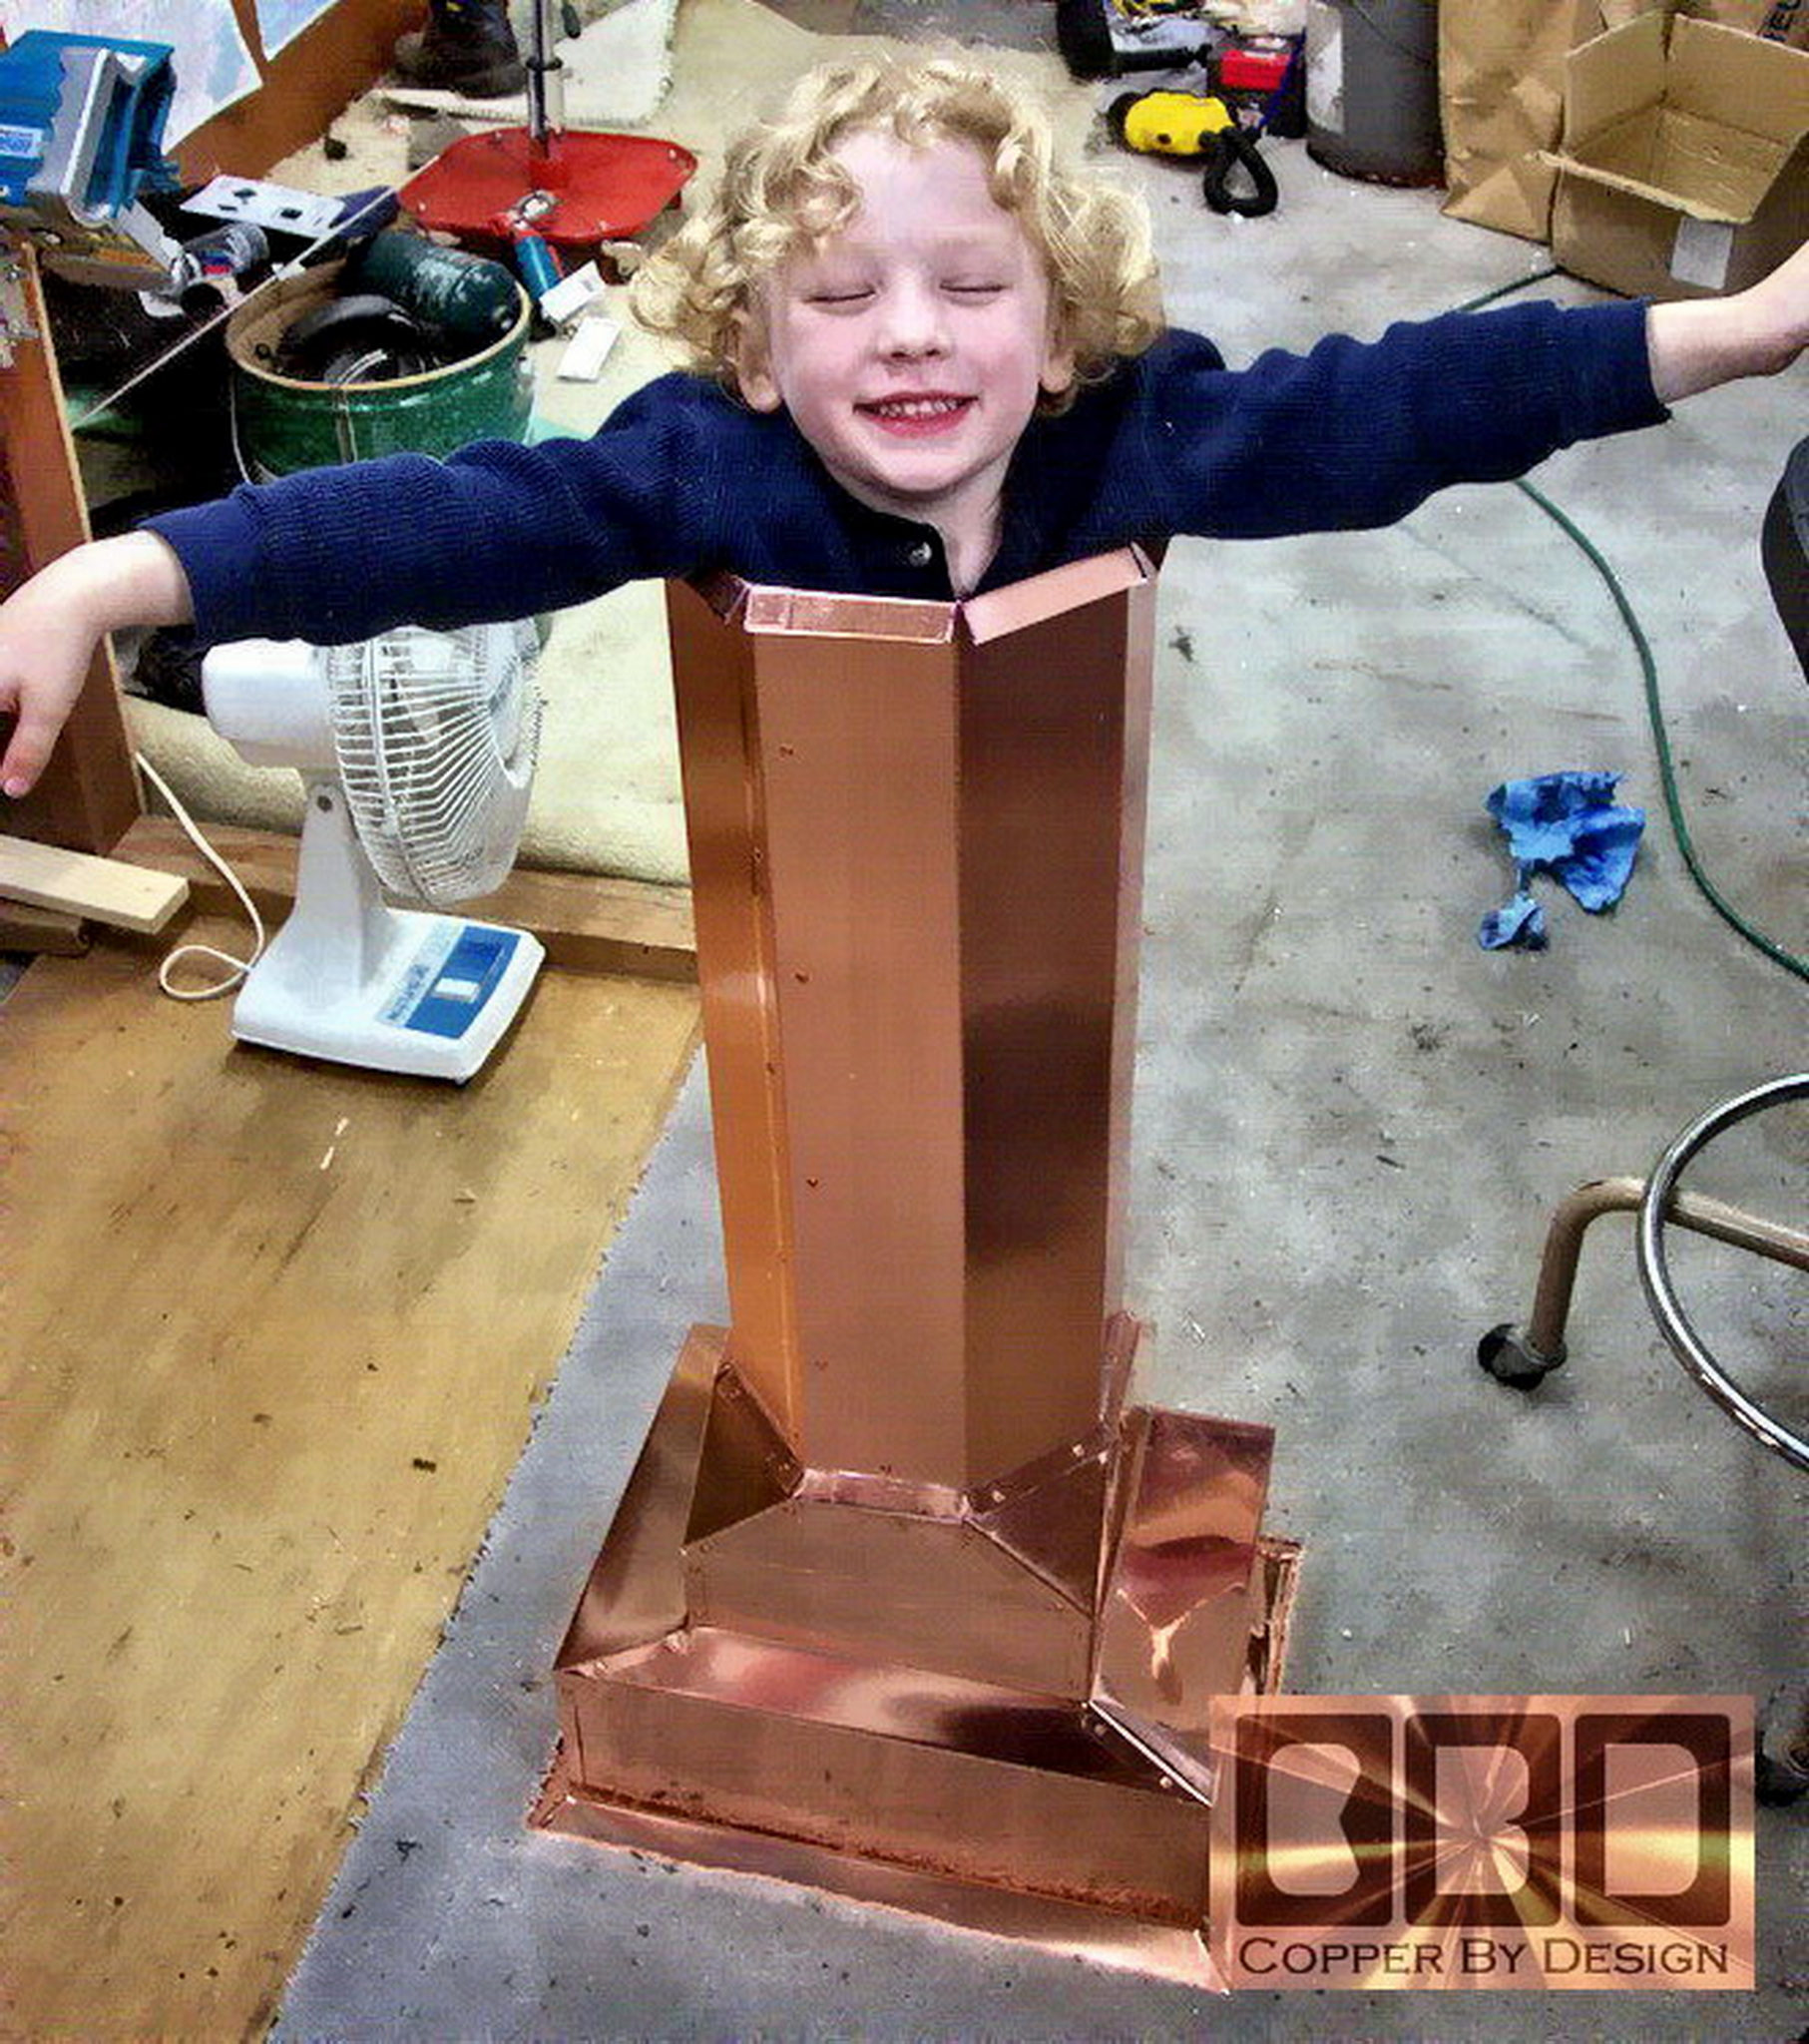
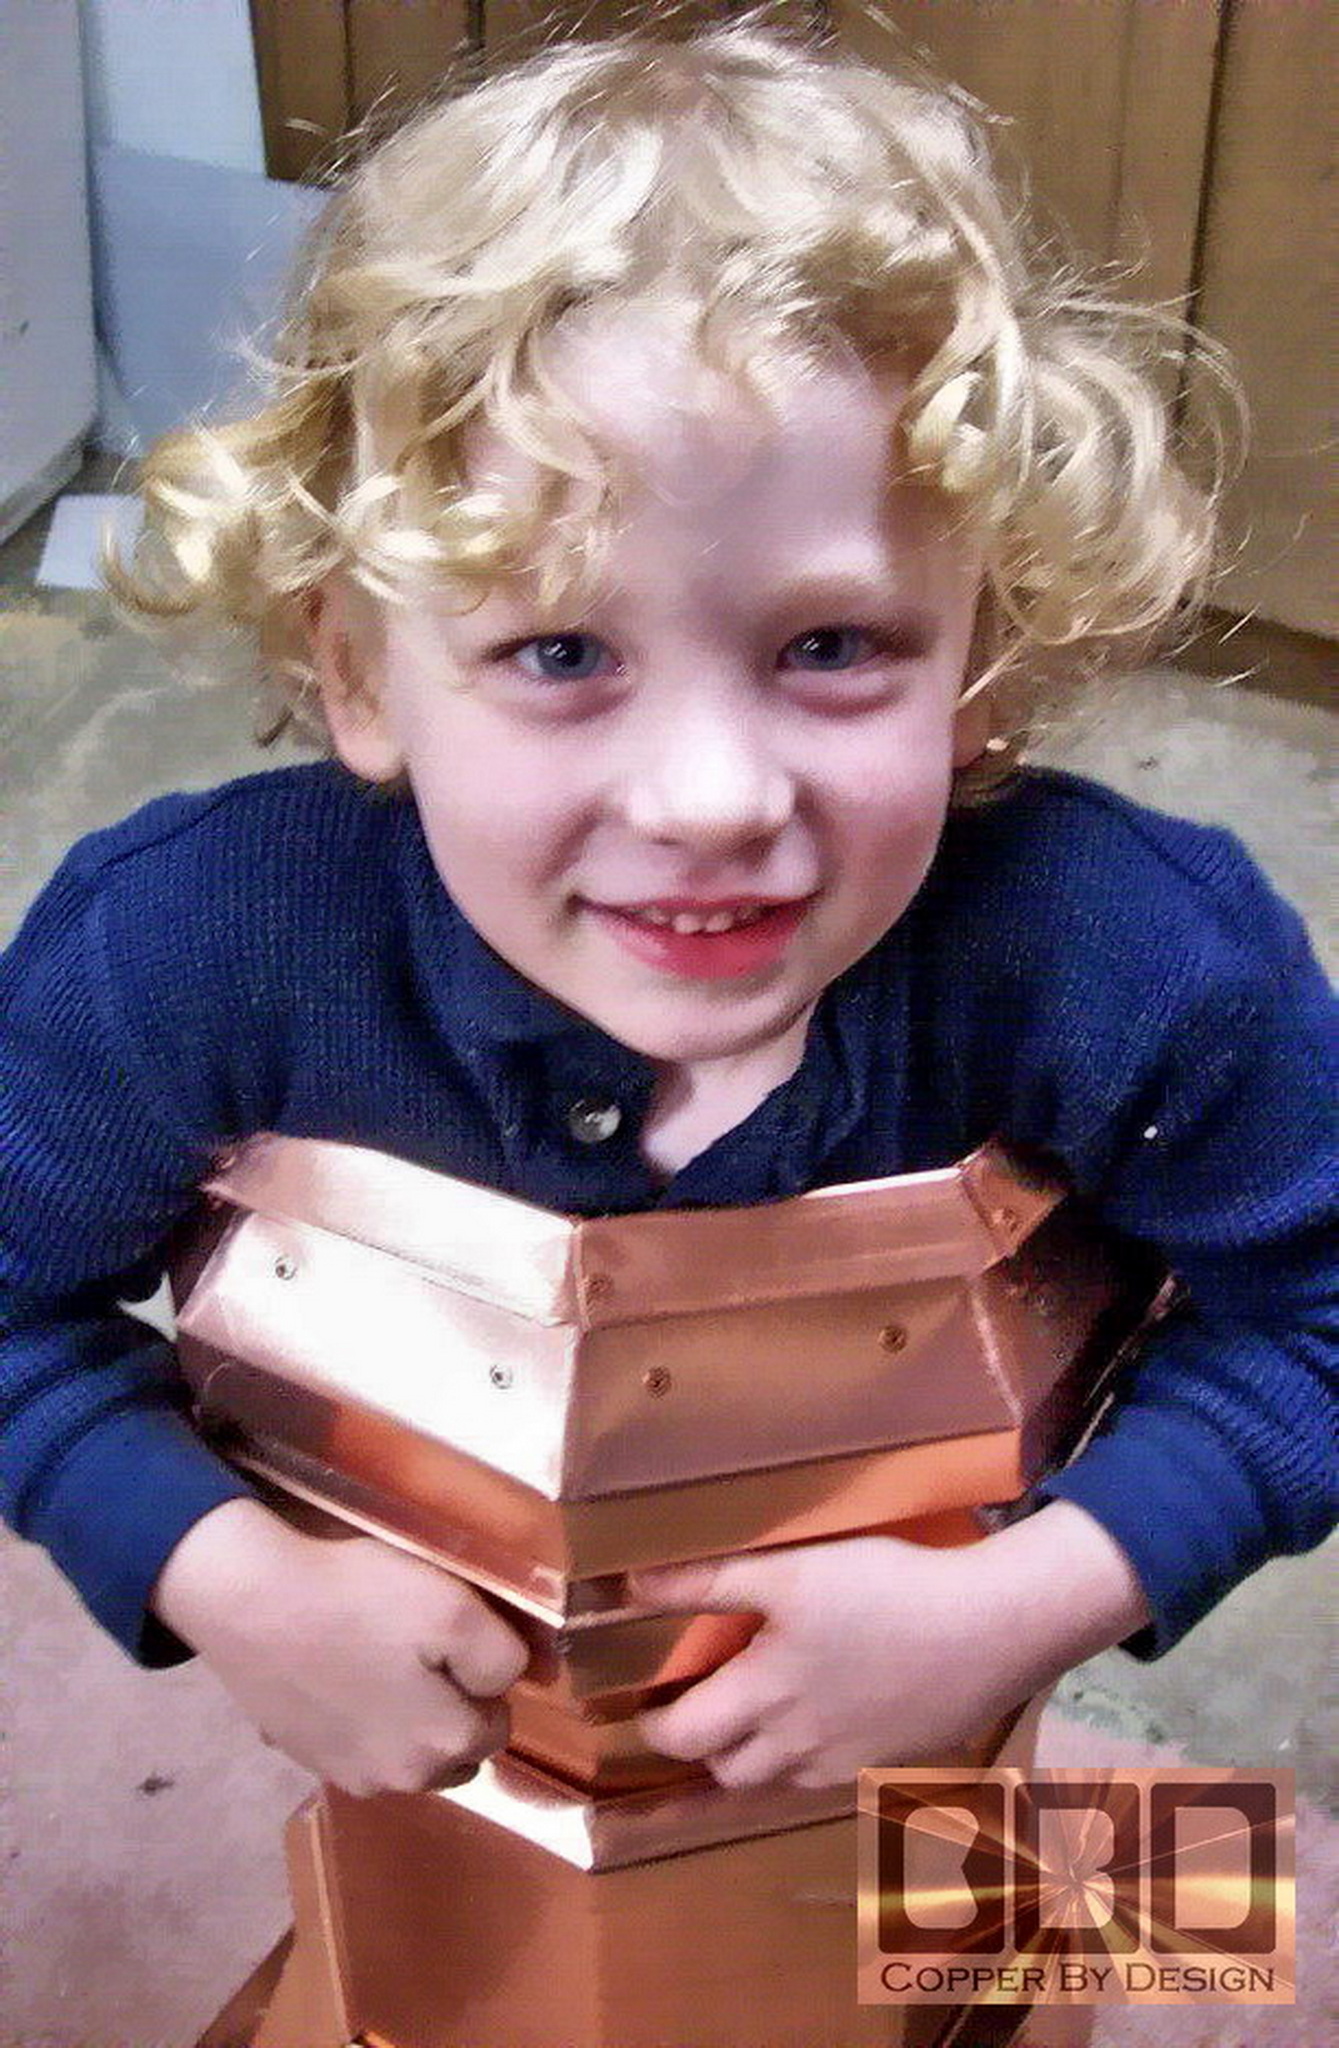
Pop-goes-the-Torrin
|
|
|
|