The Blair Custom Copper Chimney Cap Details & Photo Page

Portland, Oregon (2/10)
Updated 12 / 14 / 2010

Company
Profile
Roof Caps You are here Chimney
Caps
Scuppers Gutters Shipping

Contact Info


.

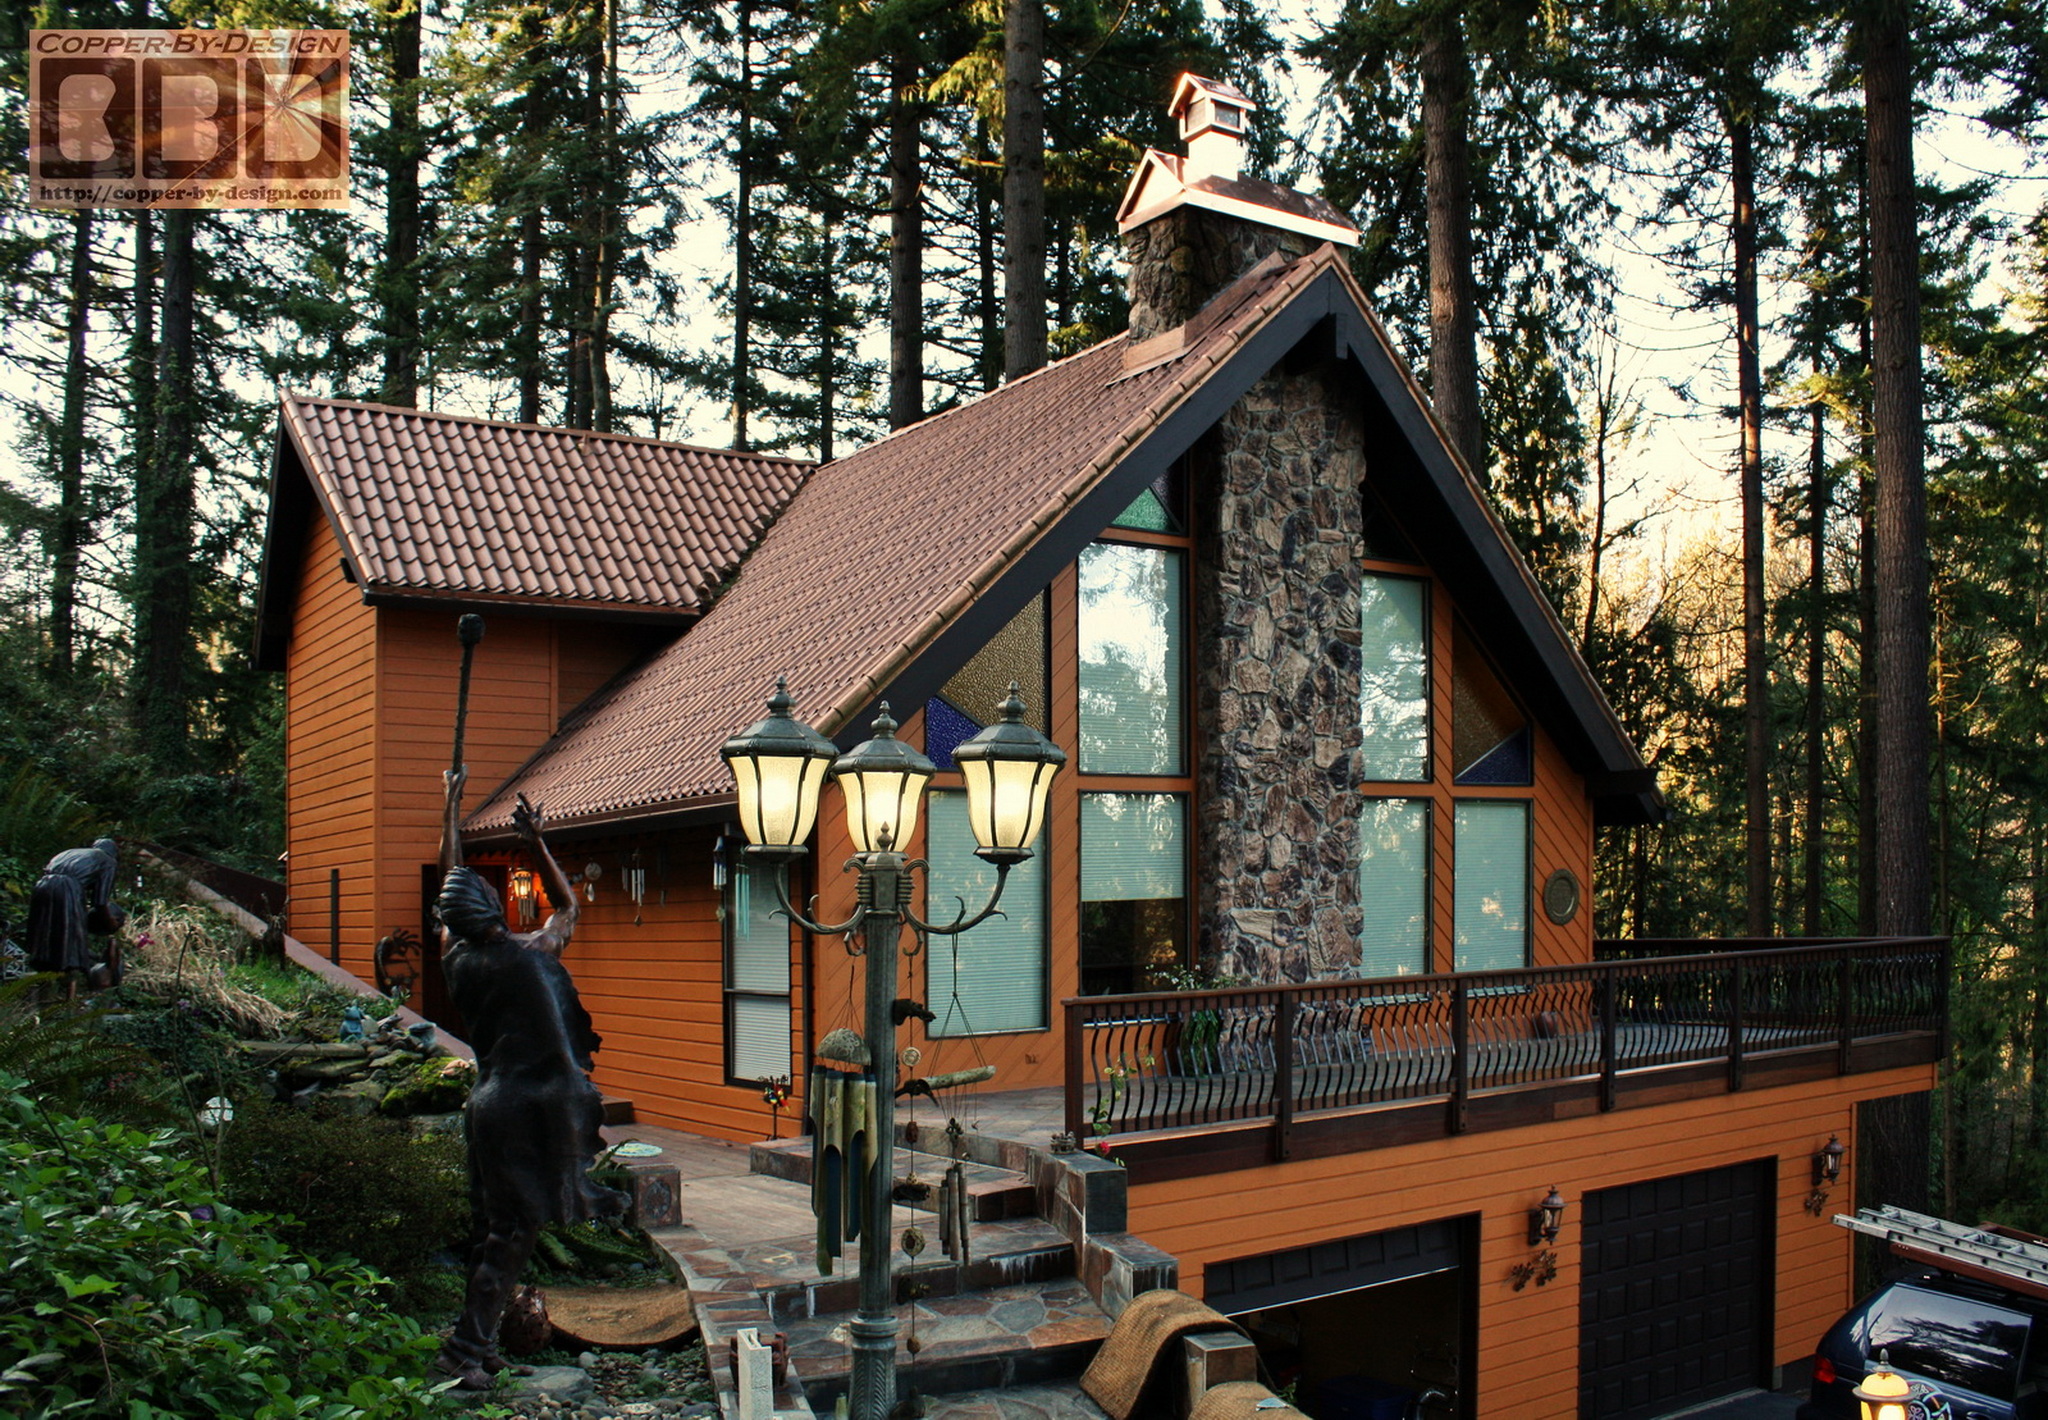
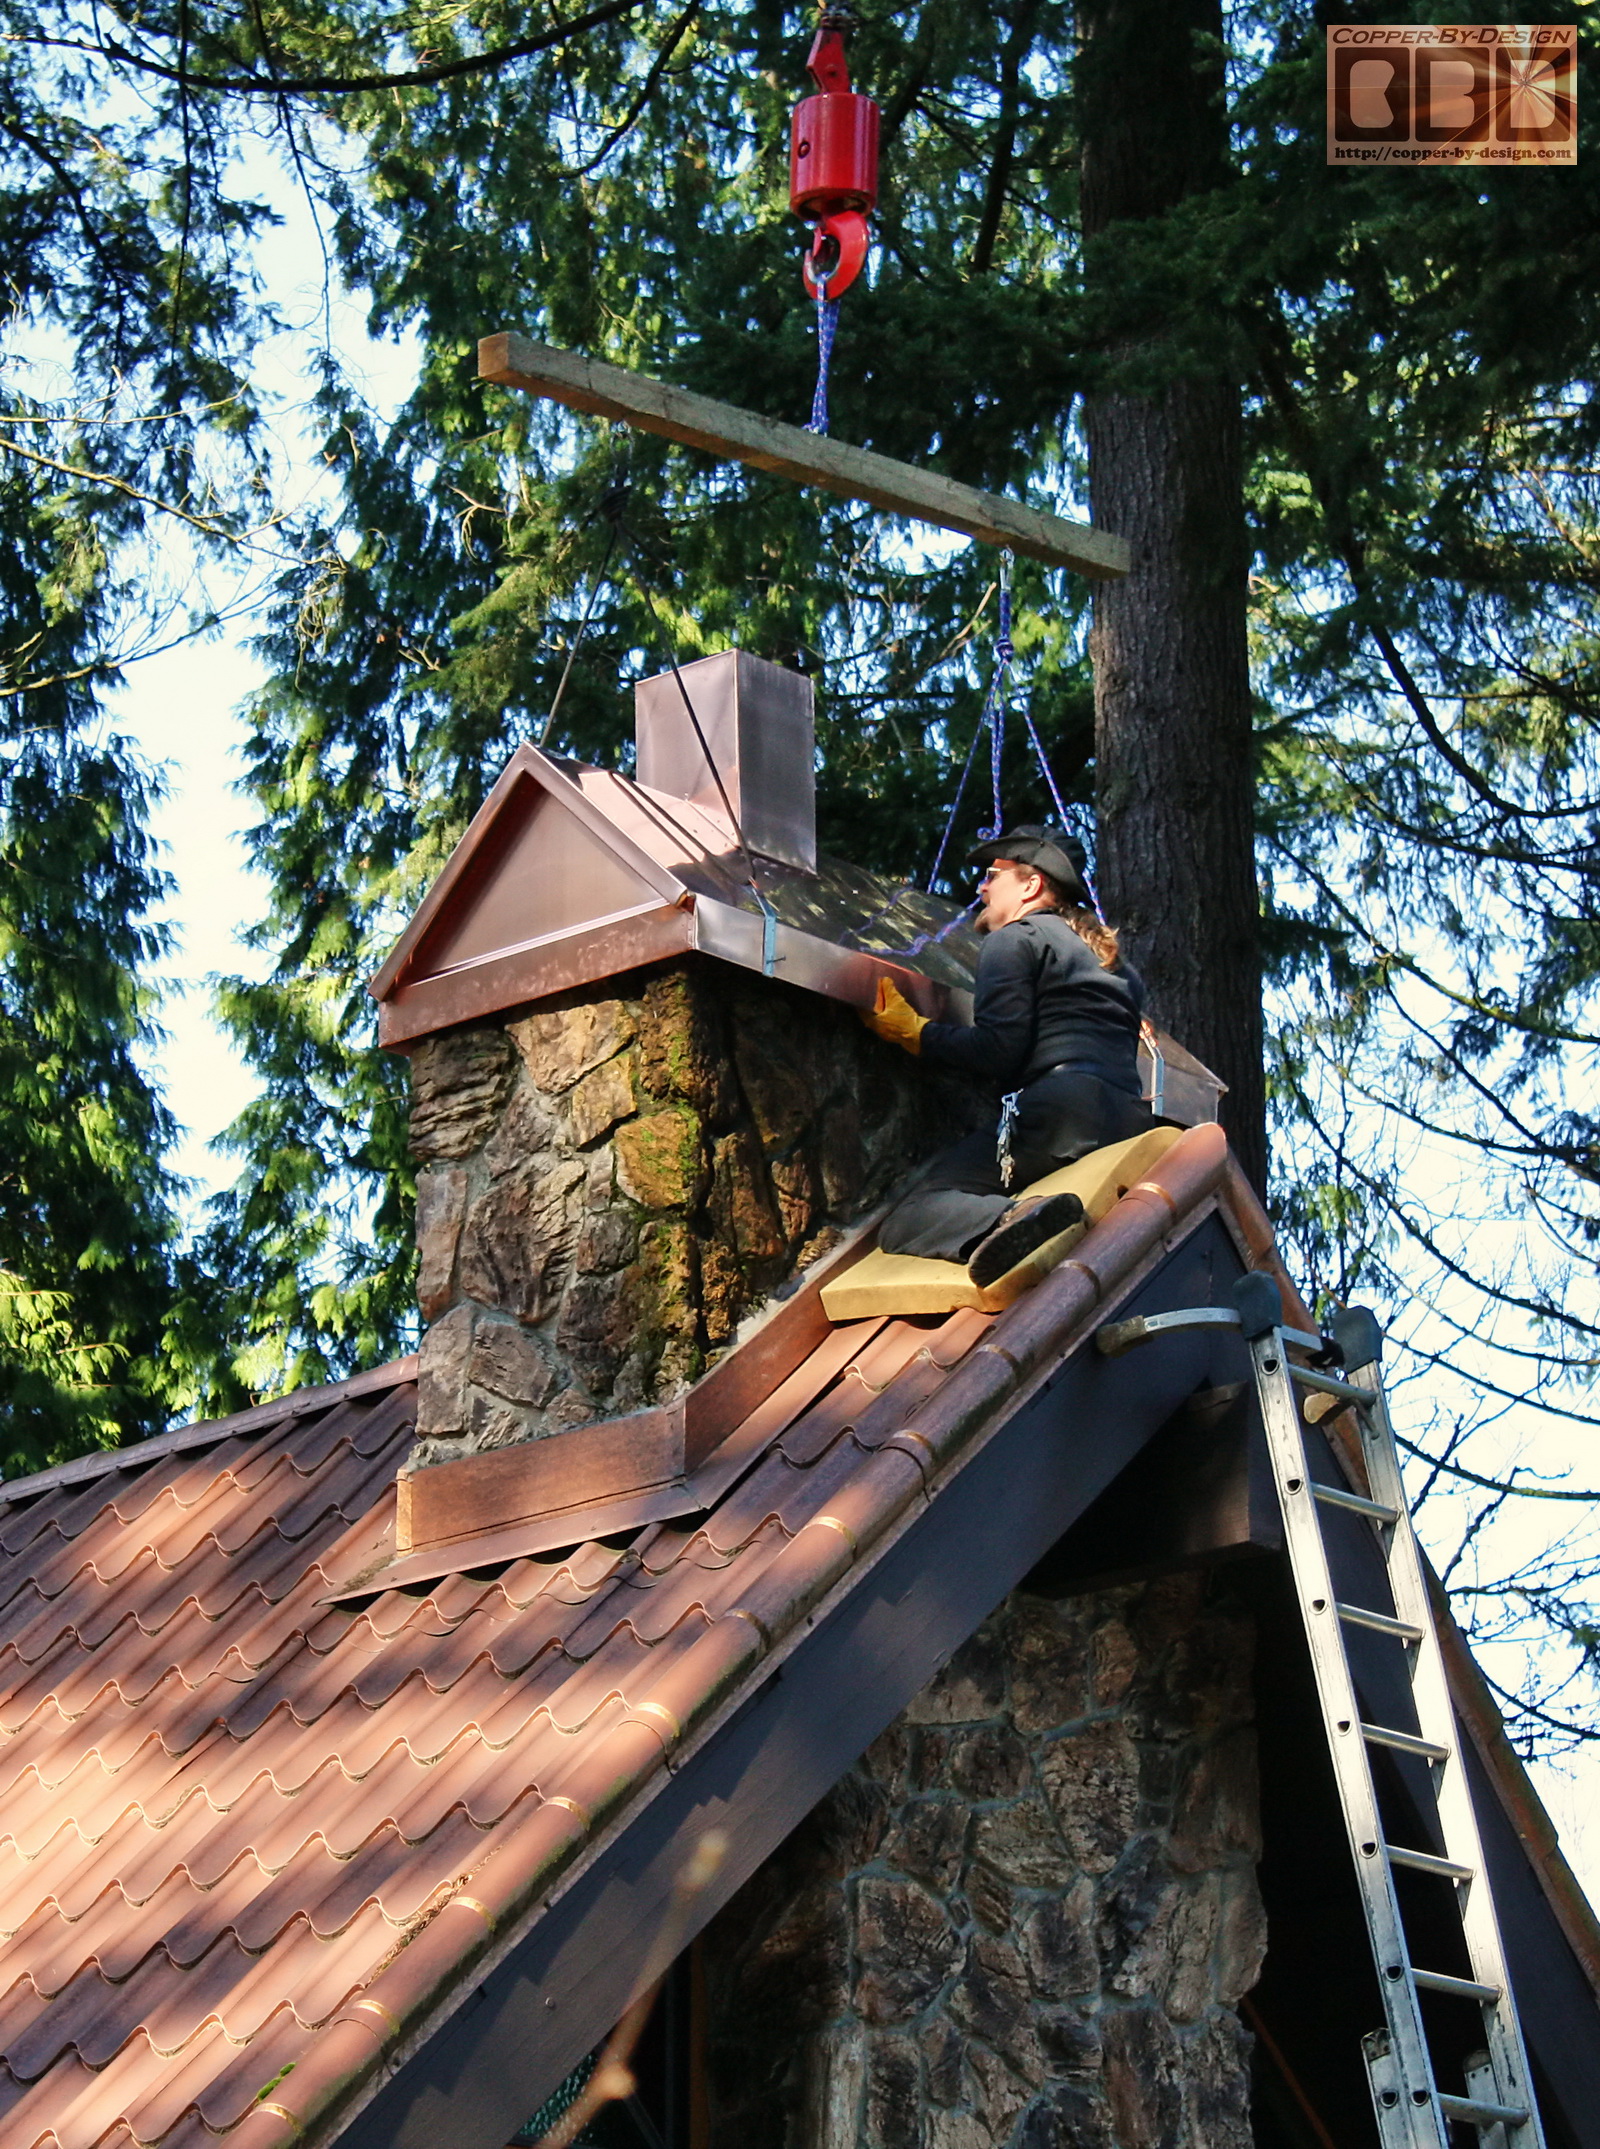
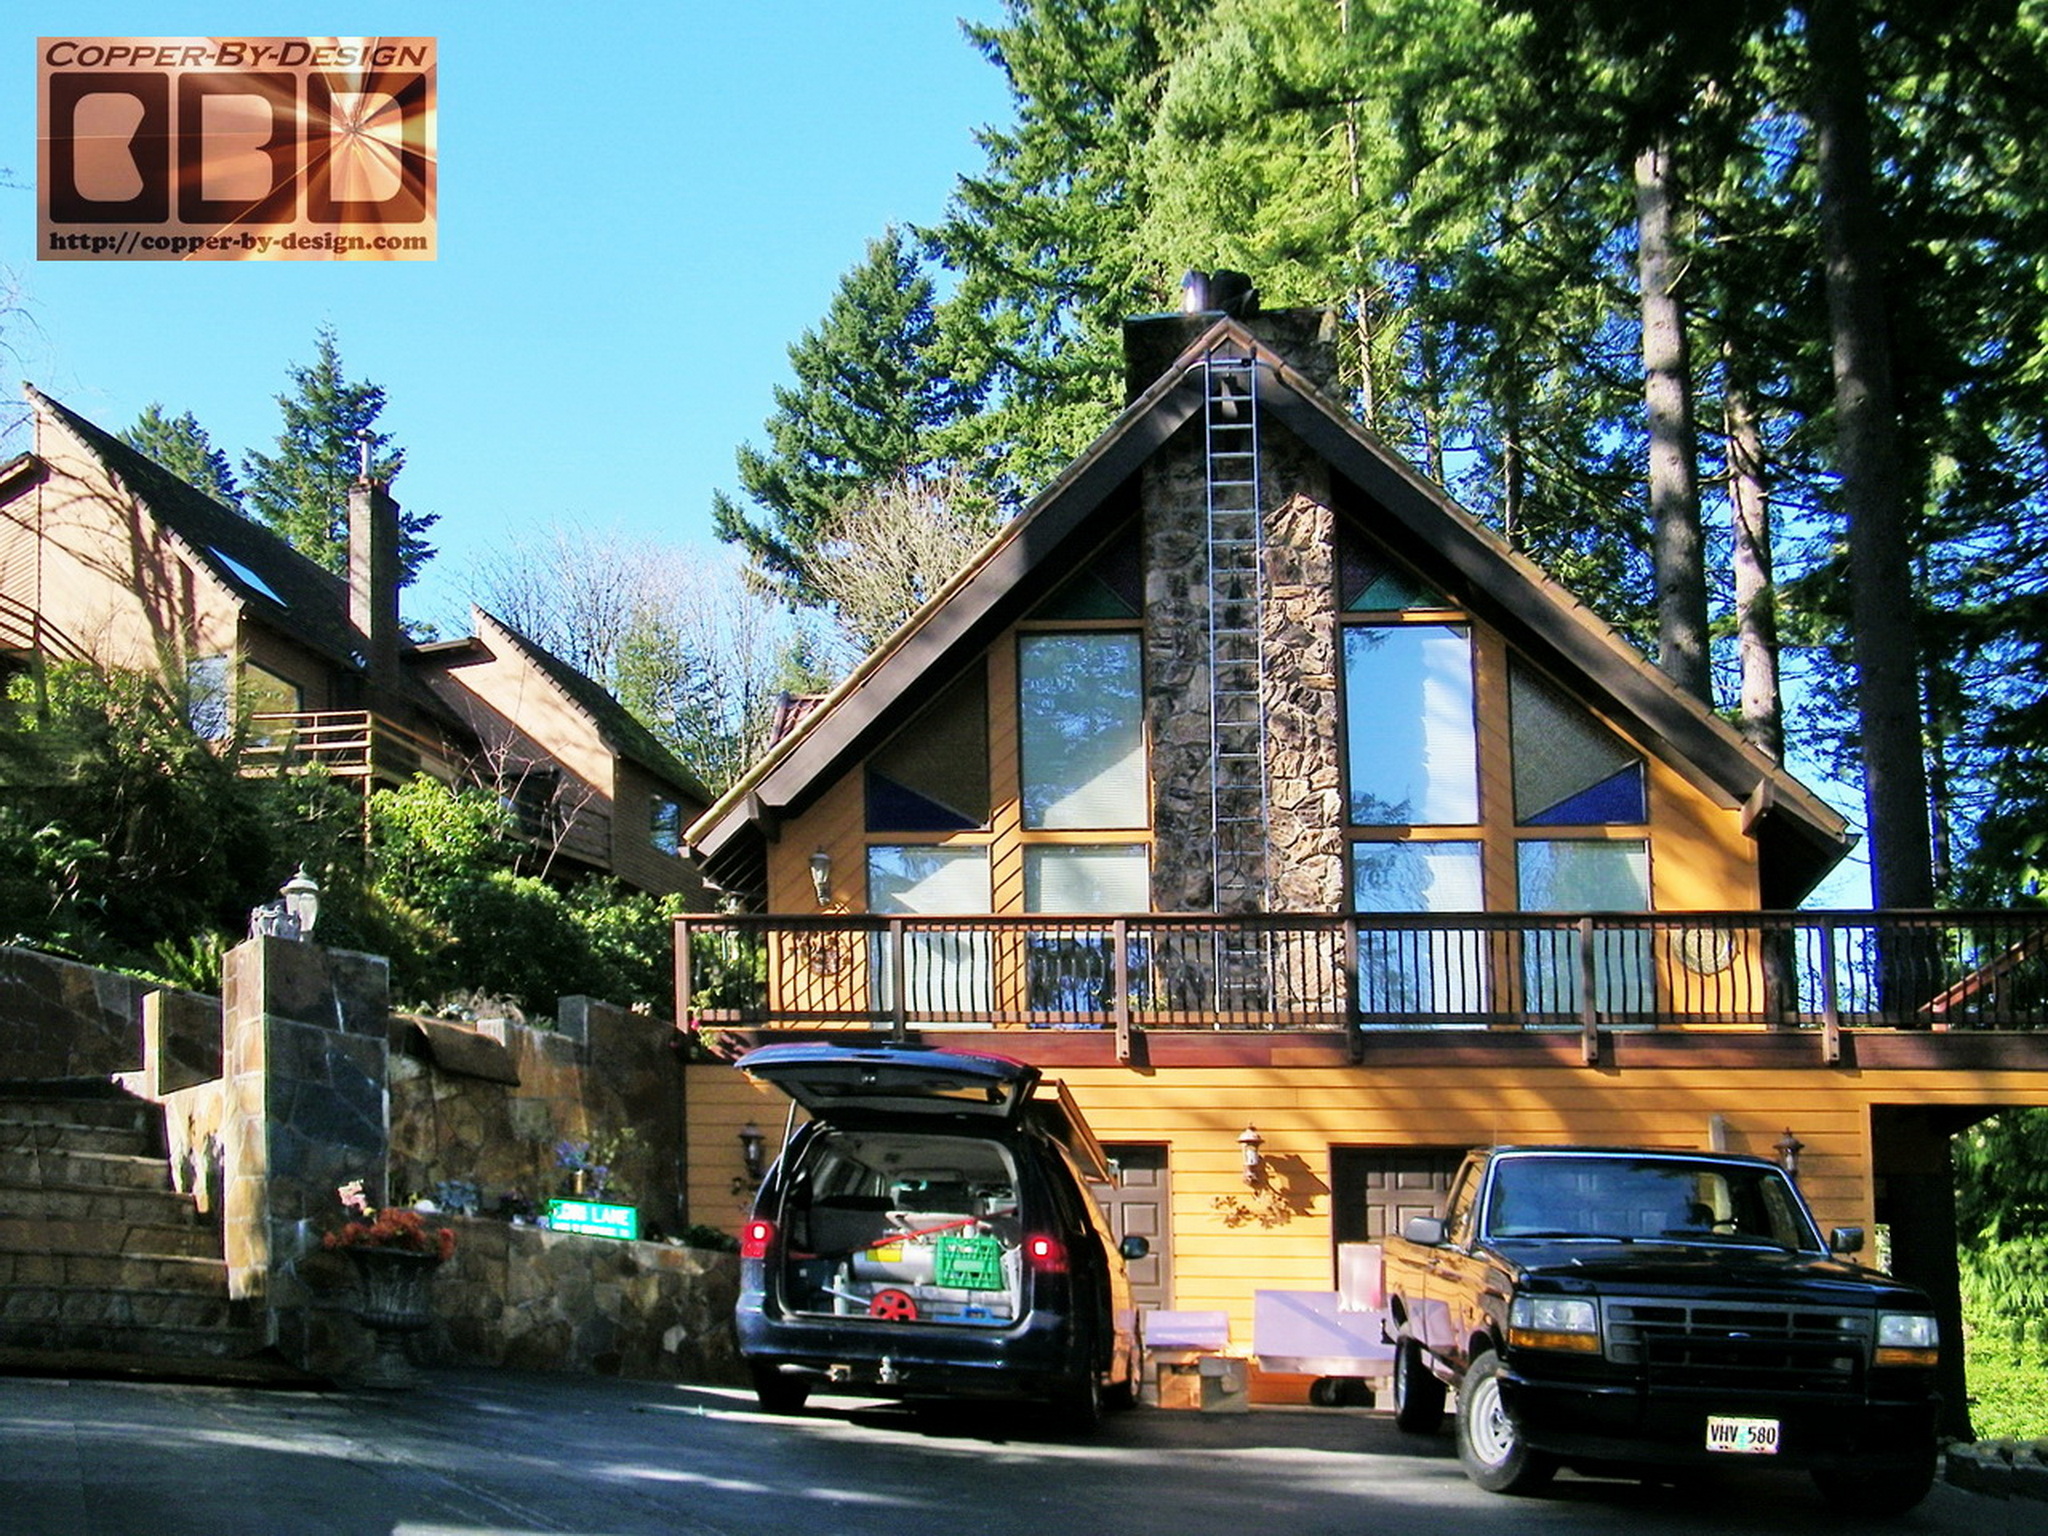
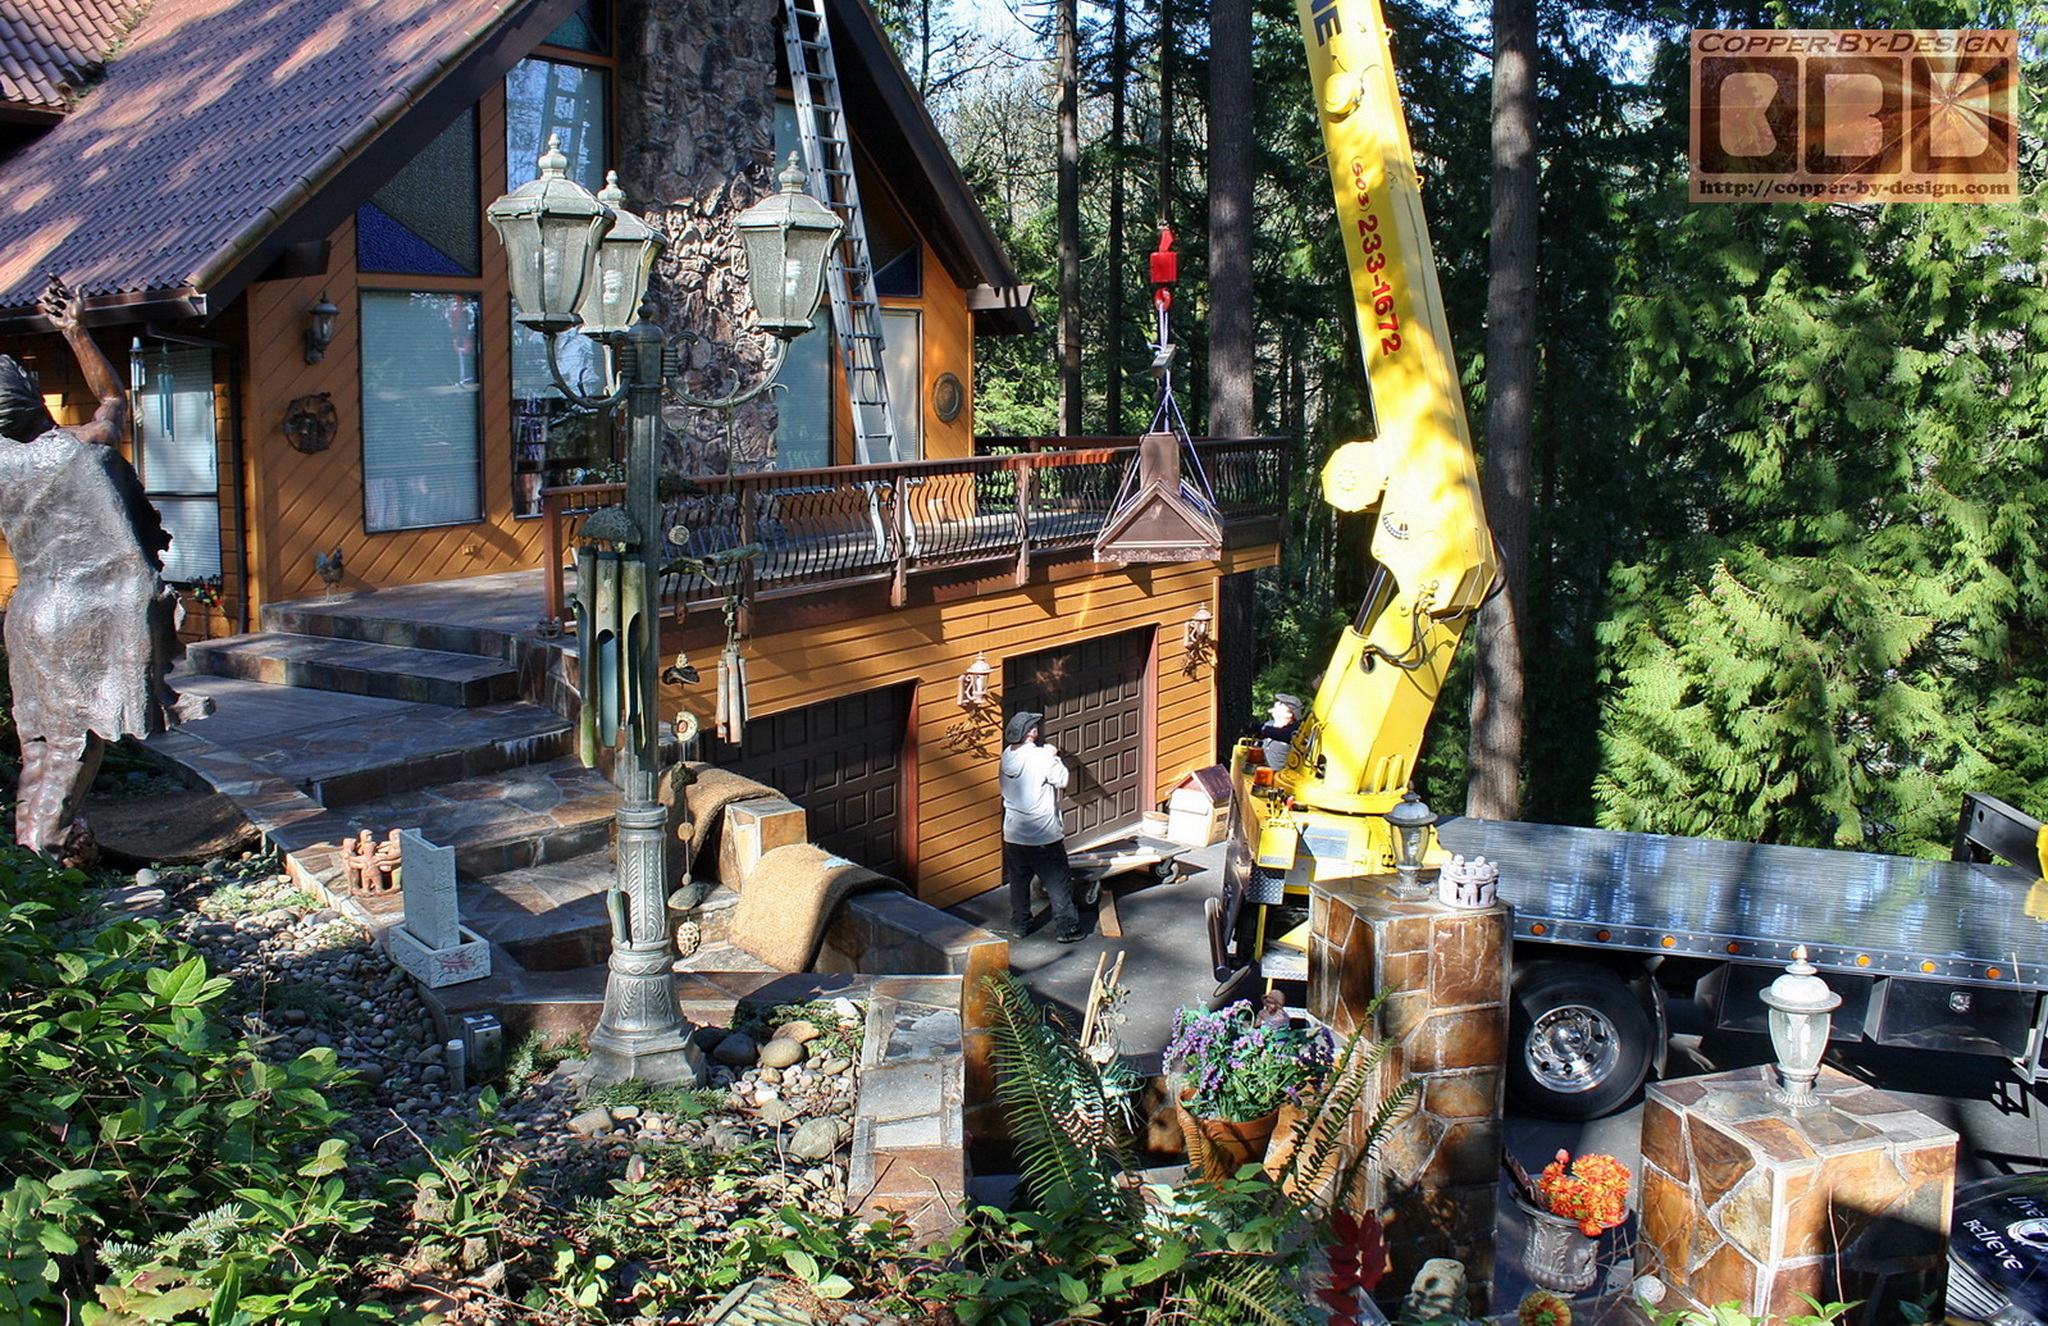
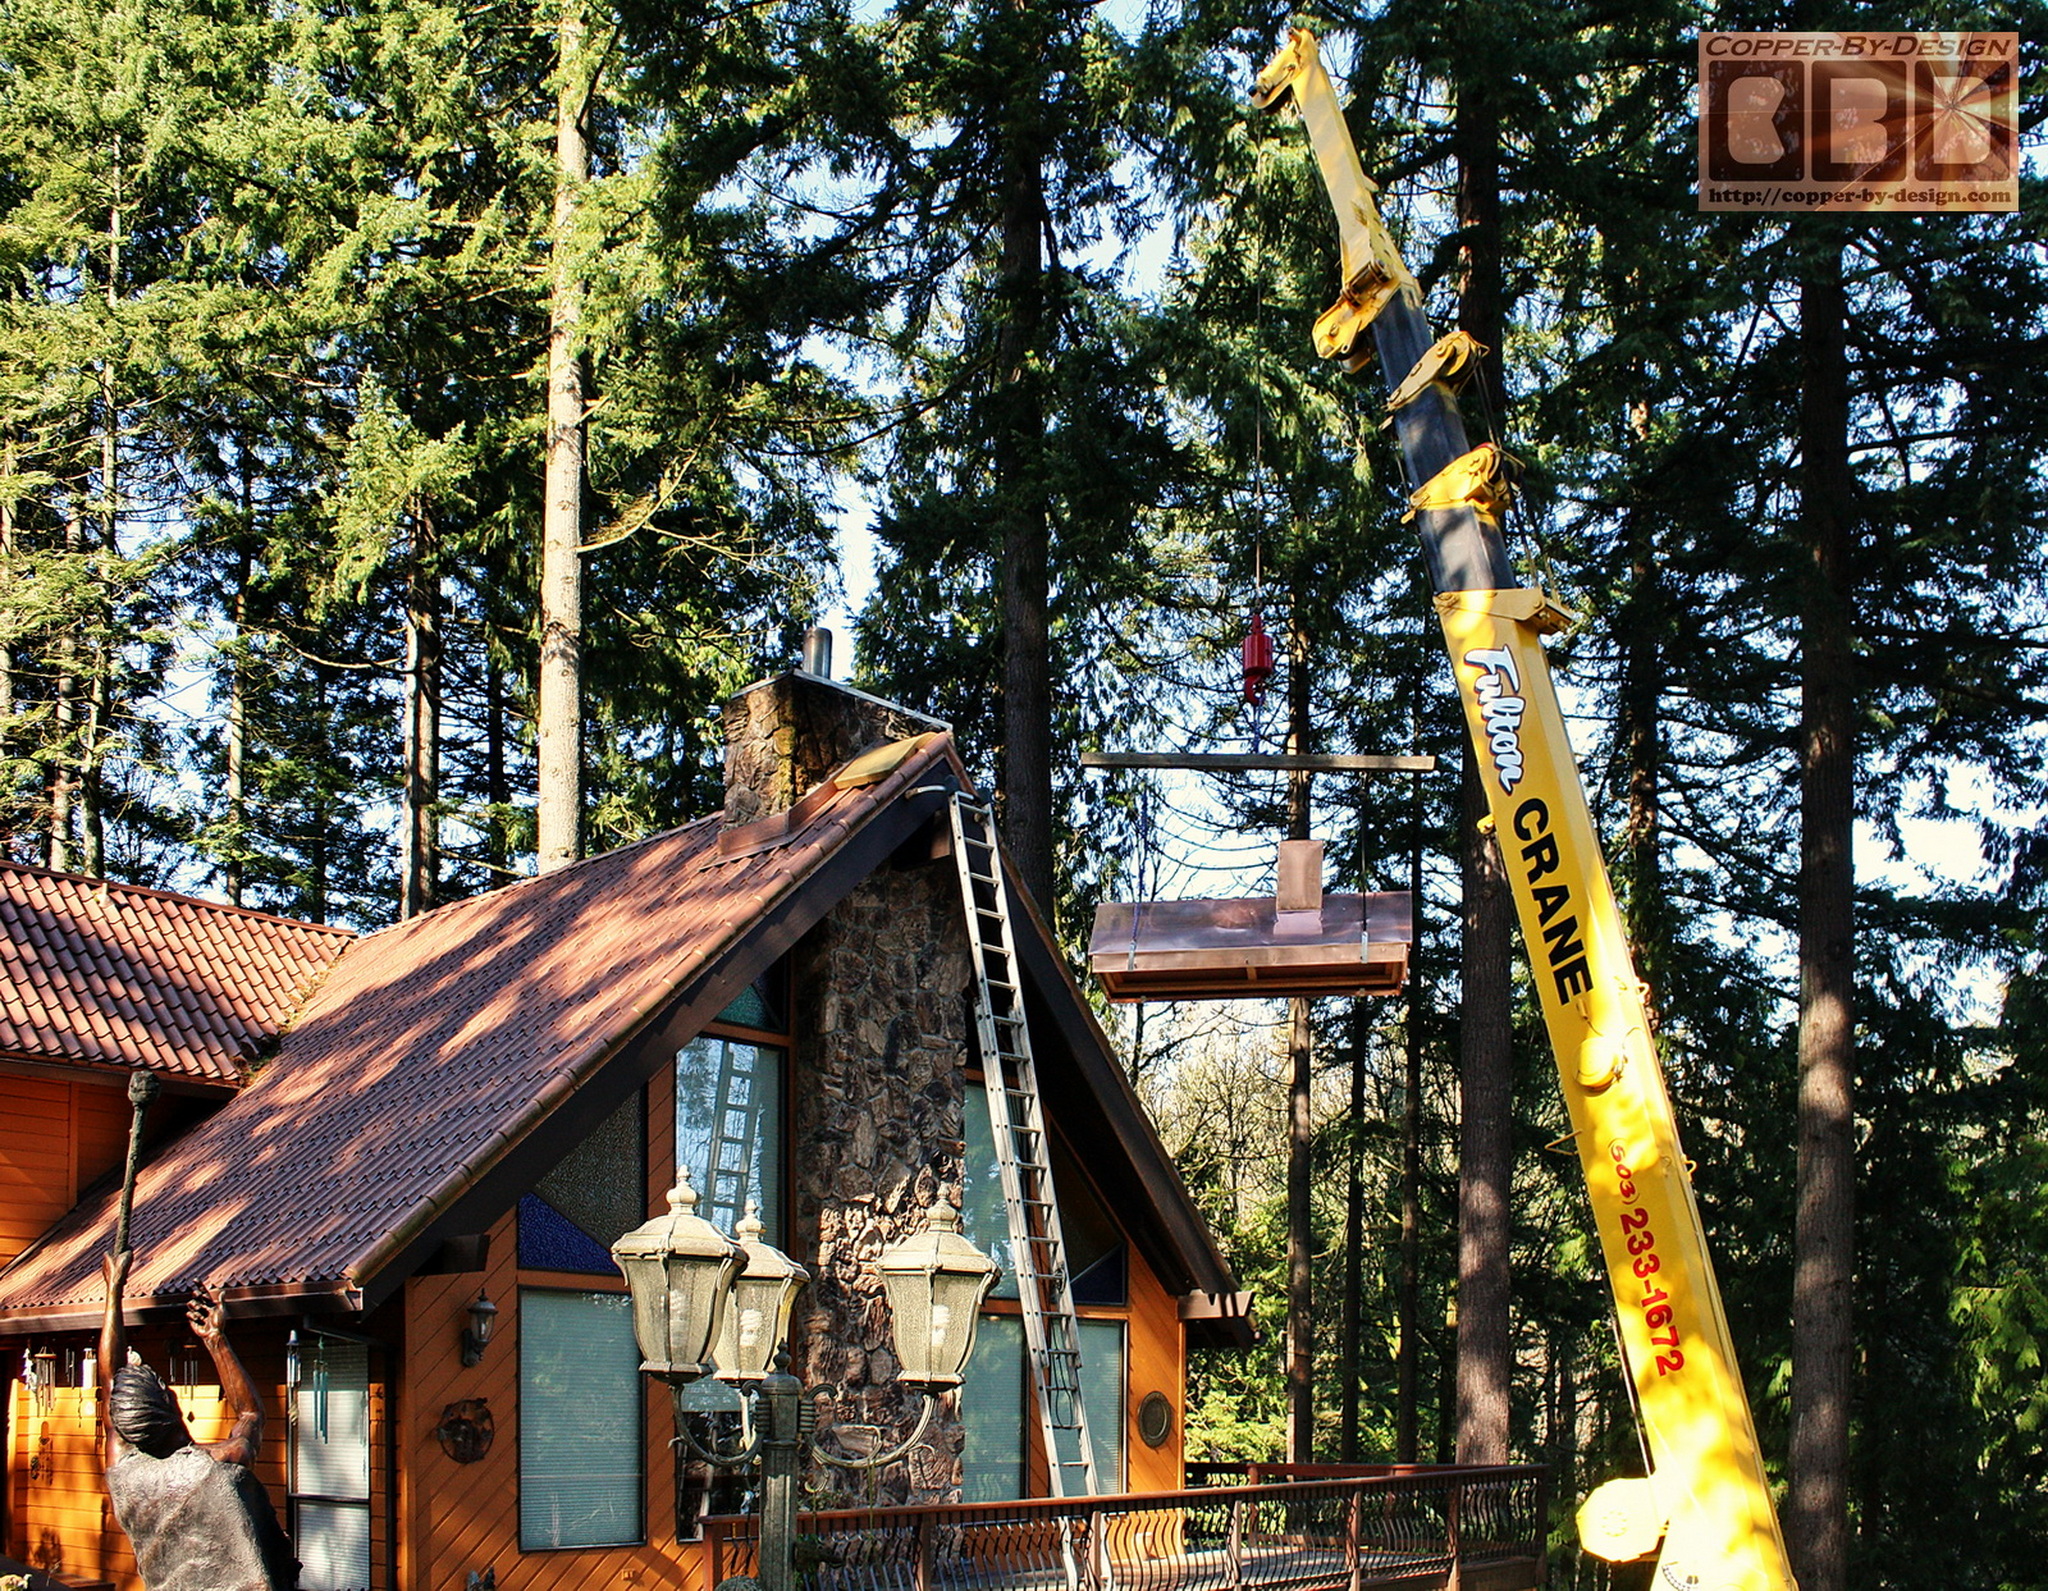
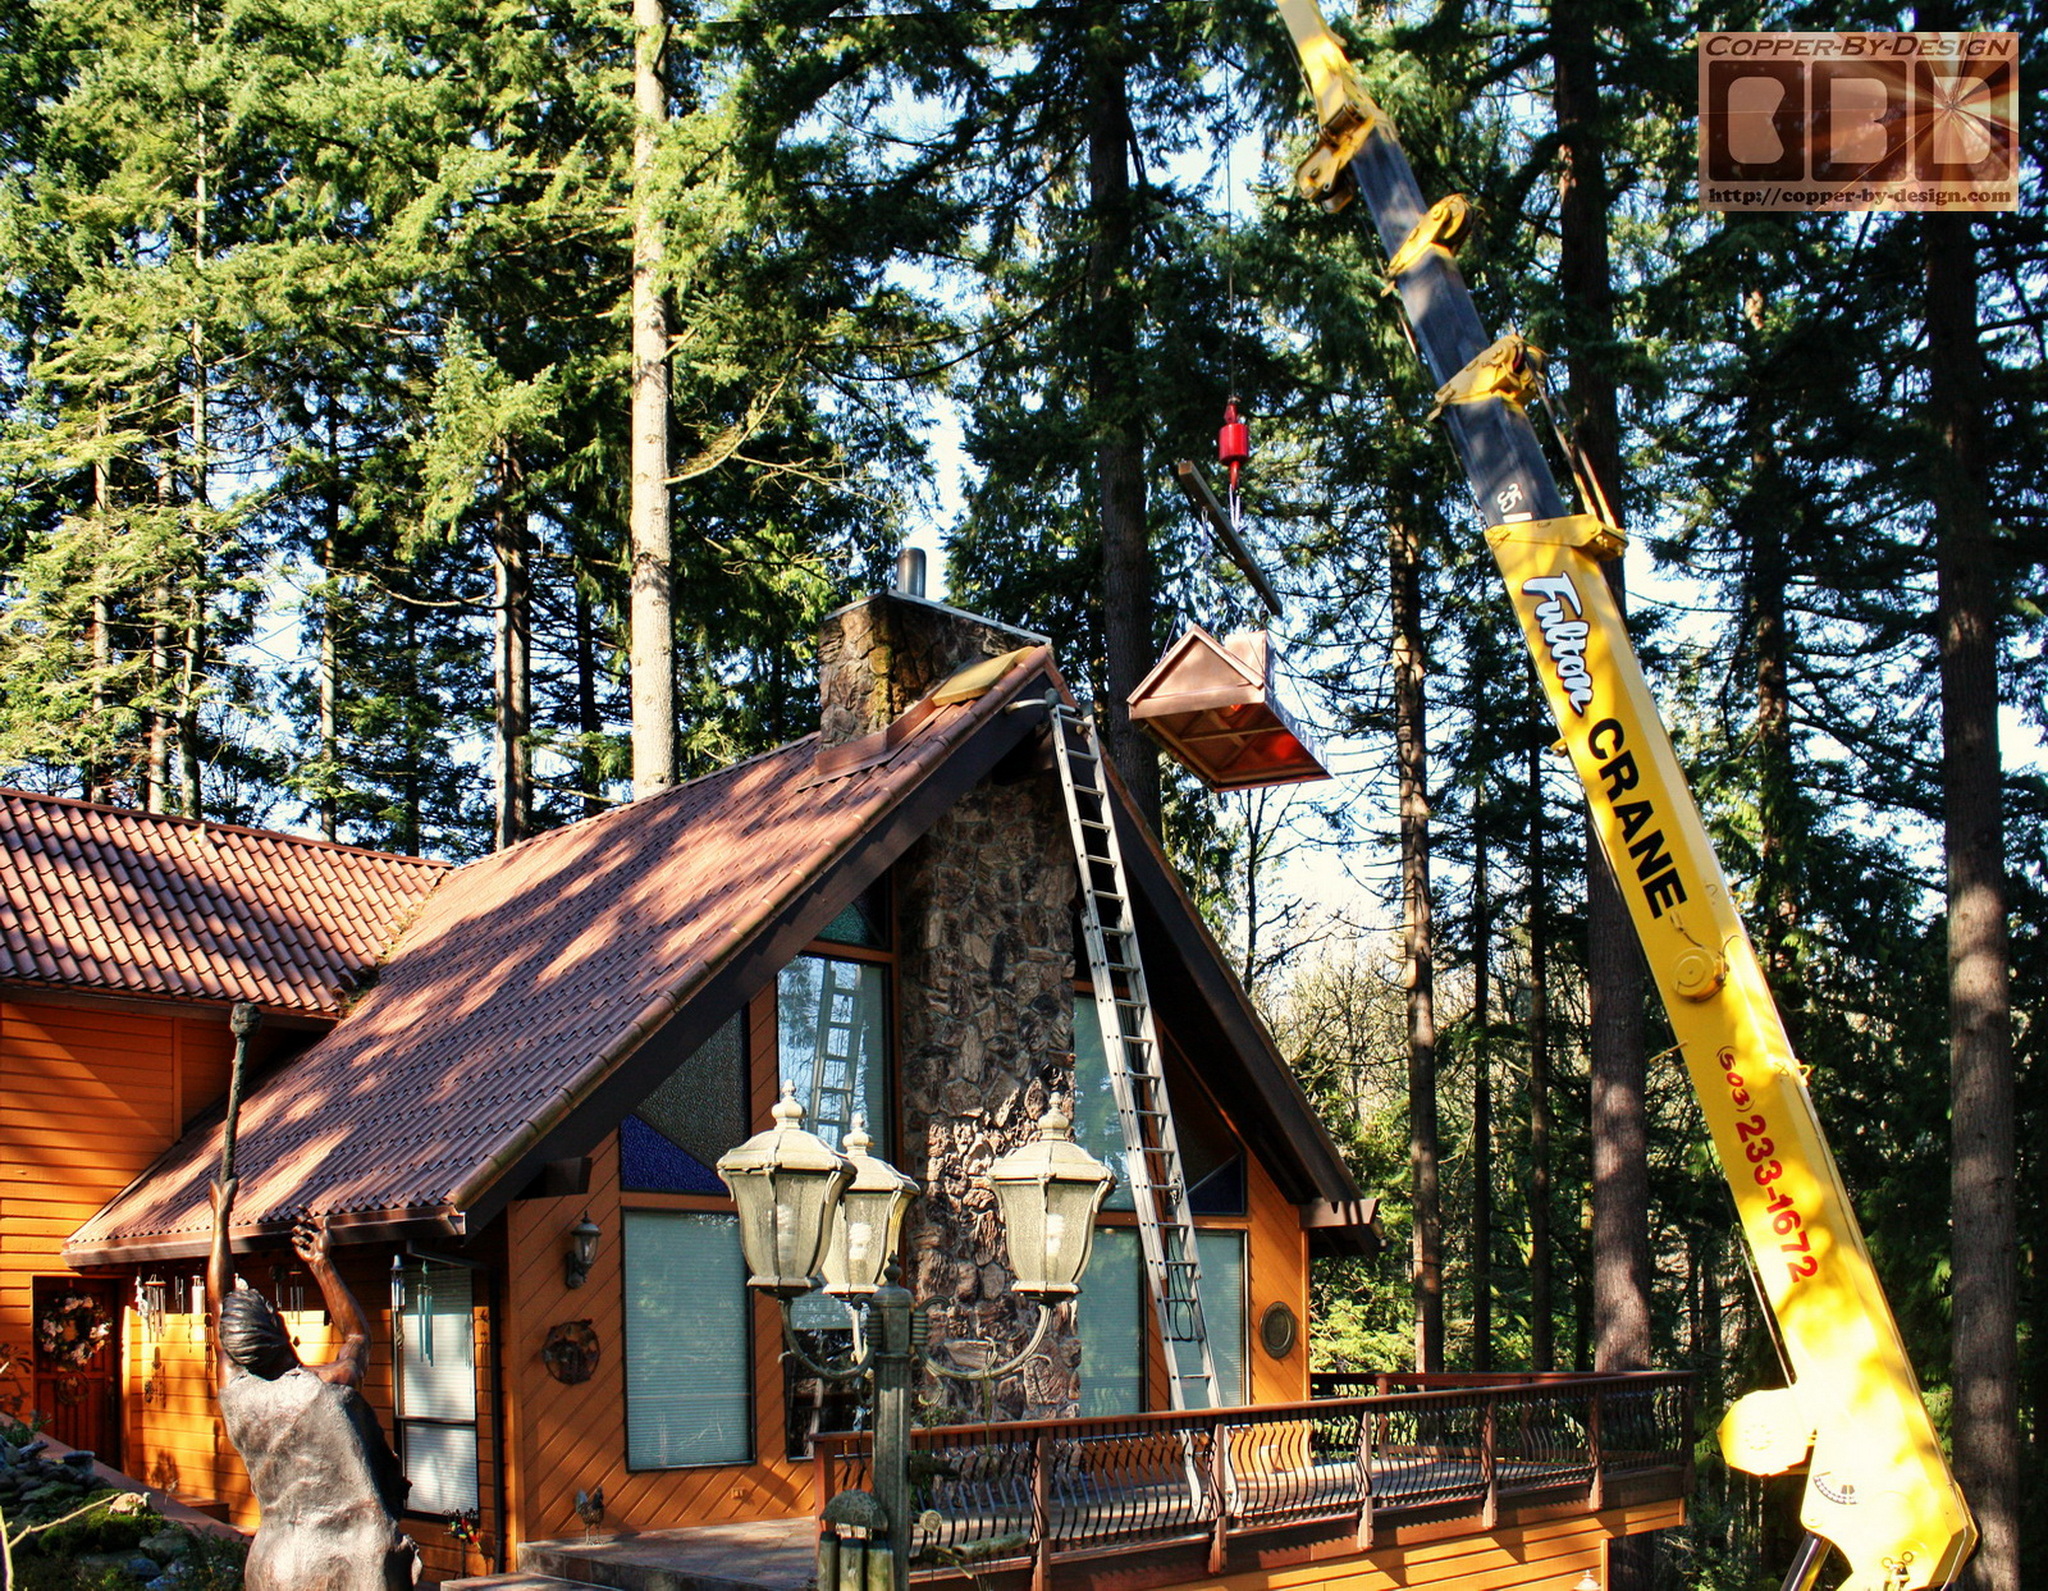
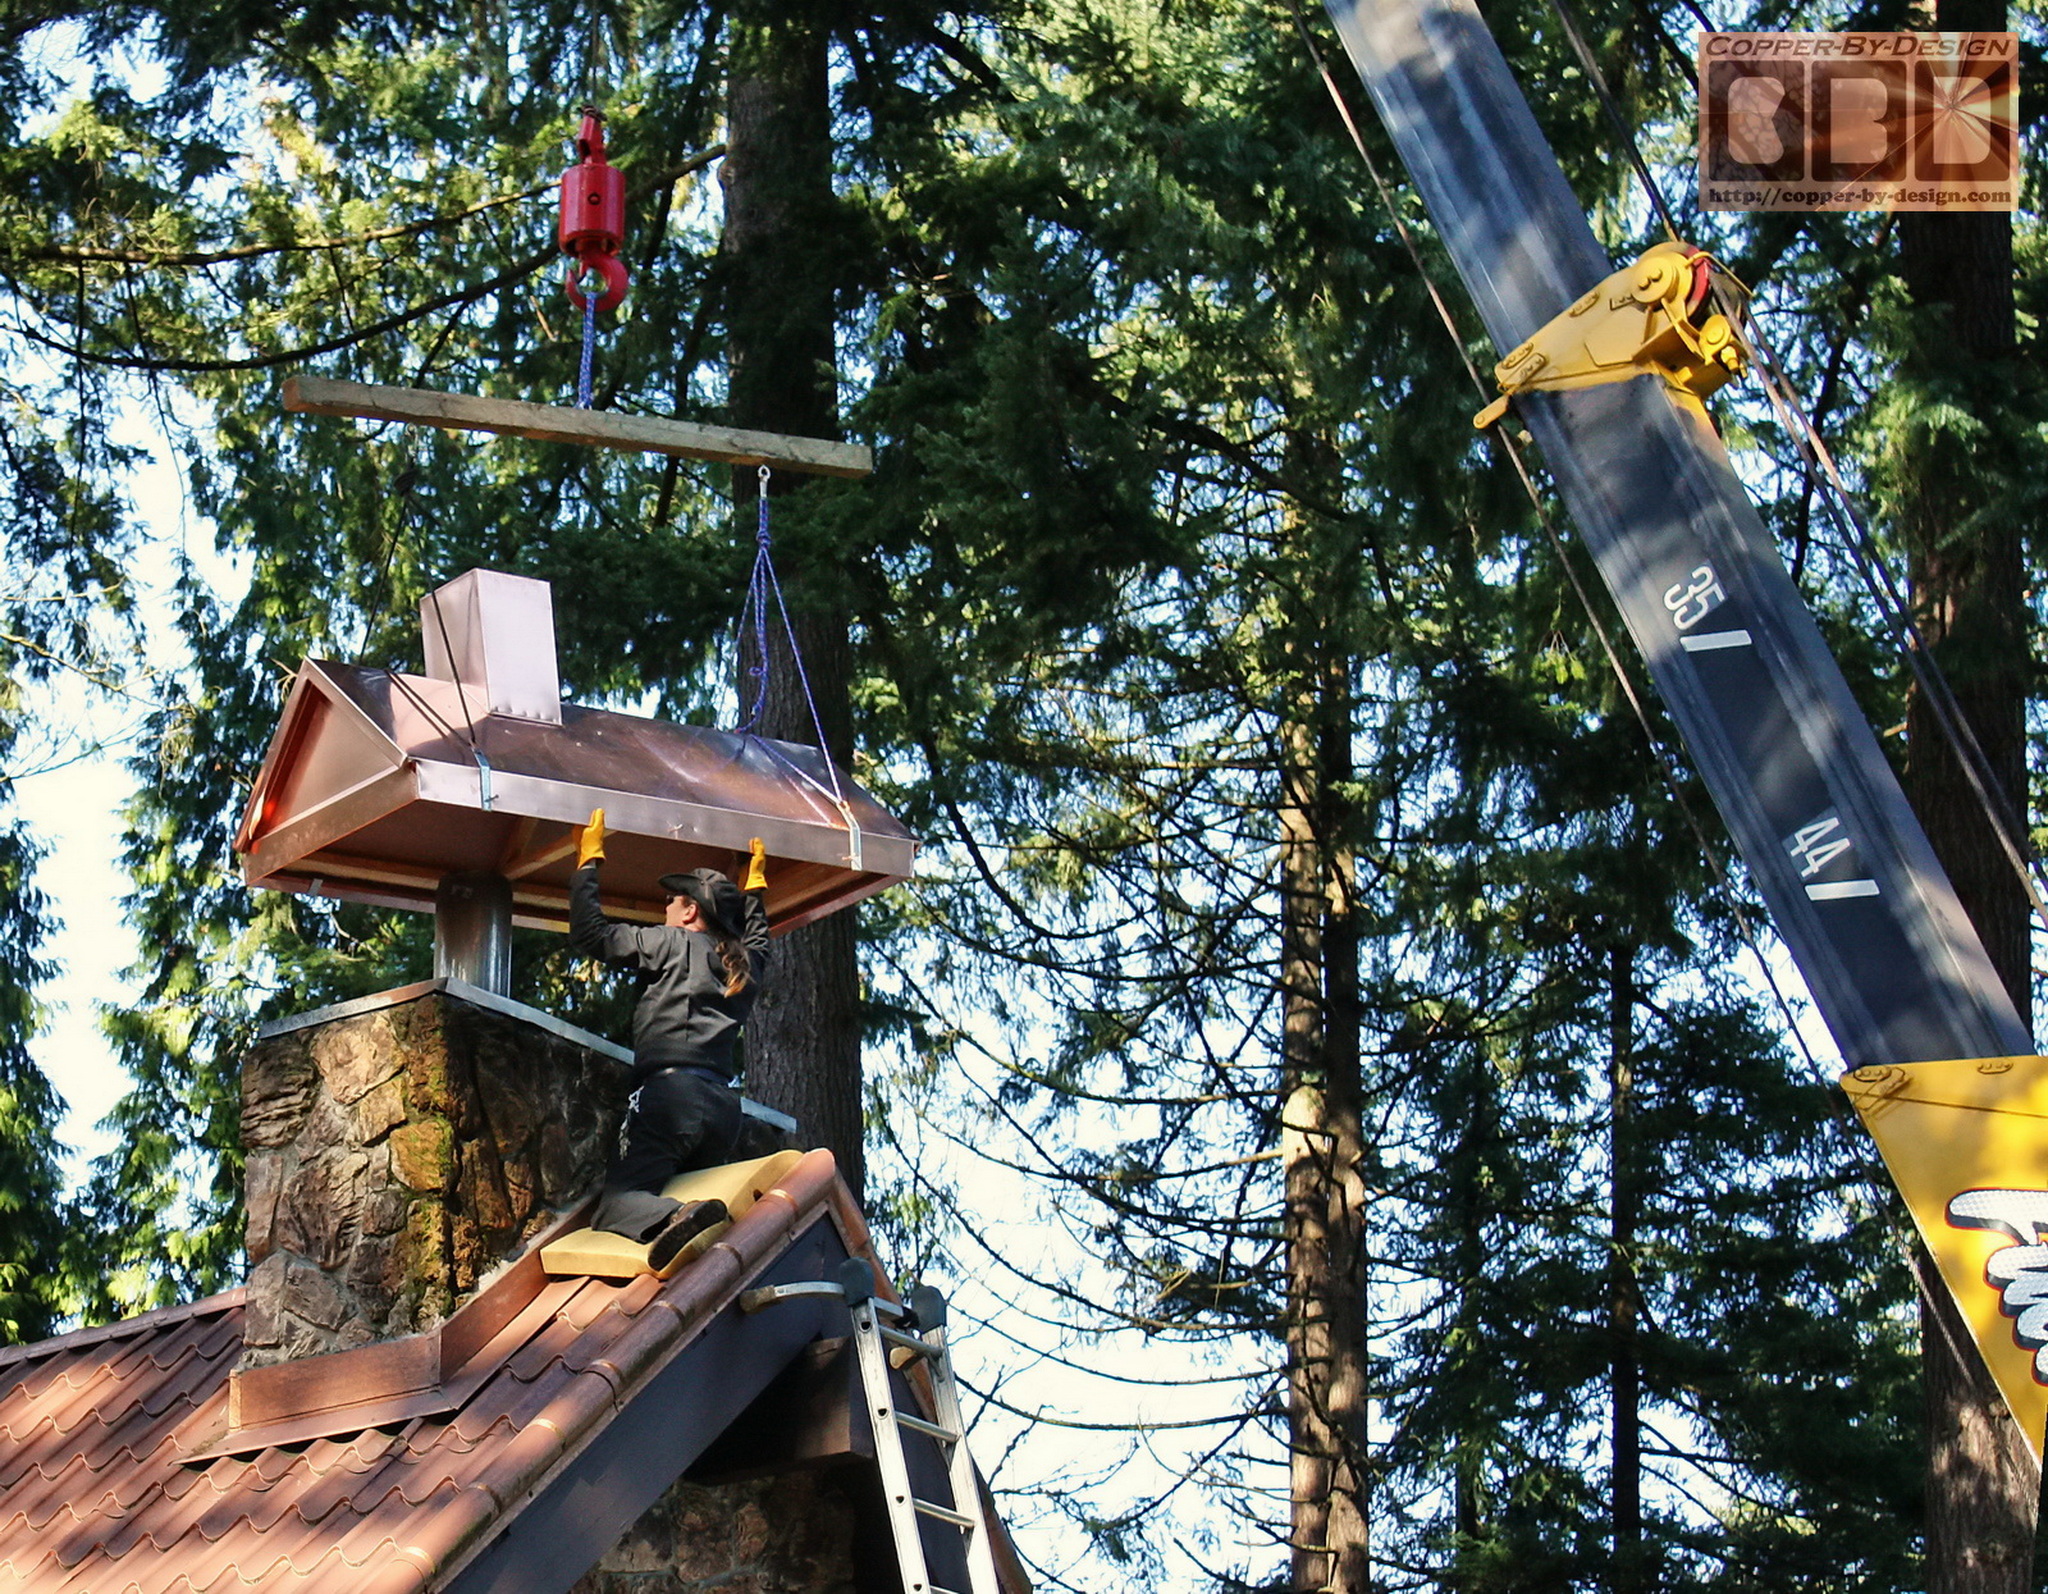
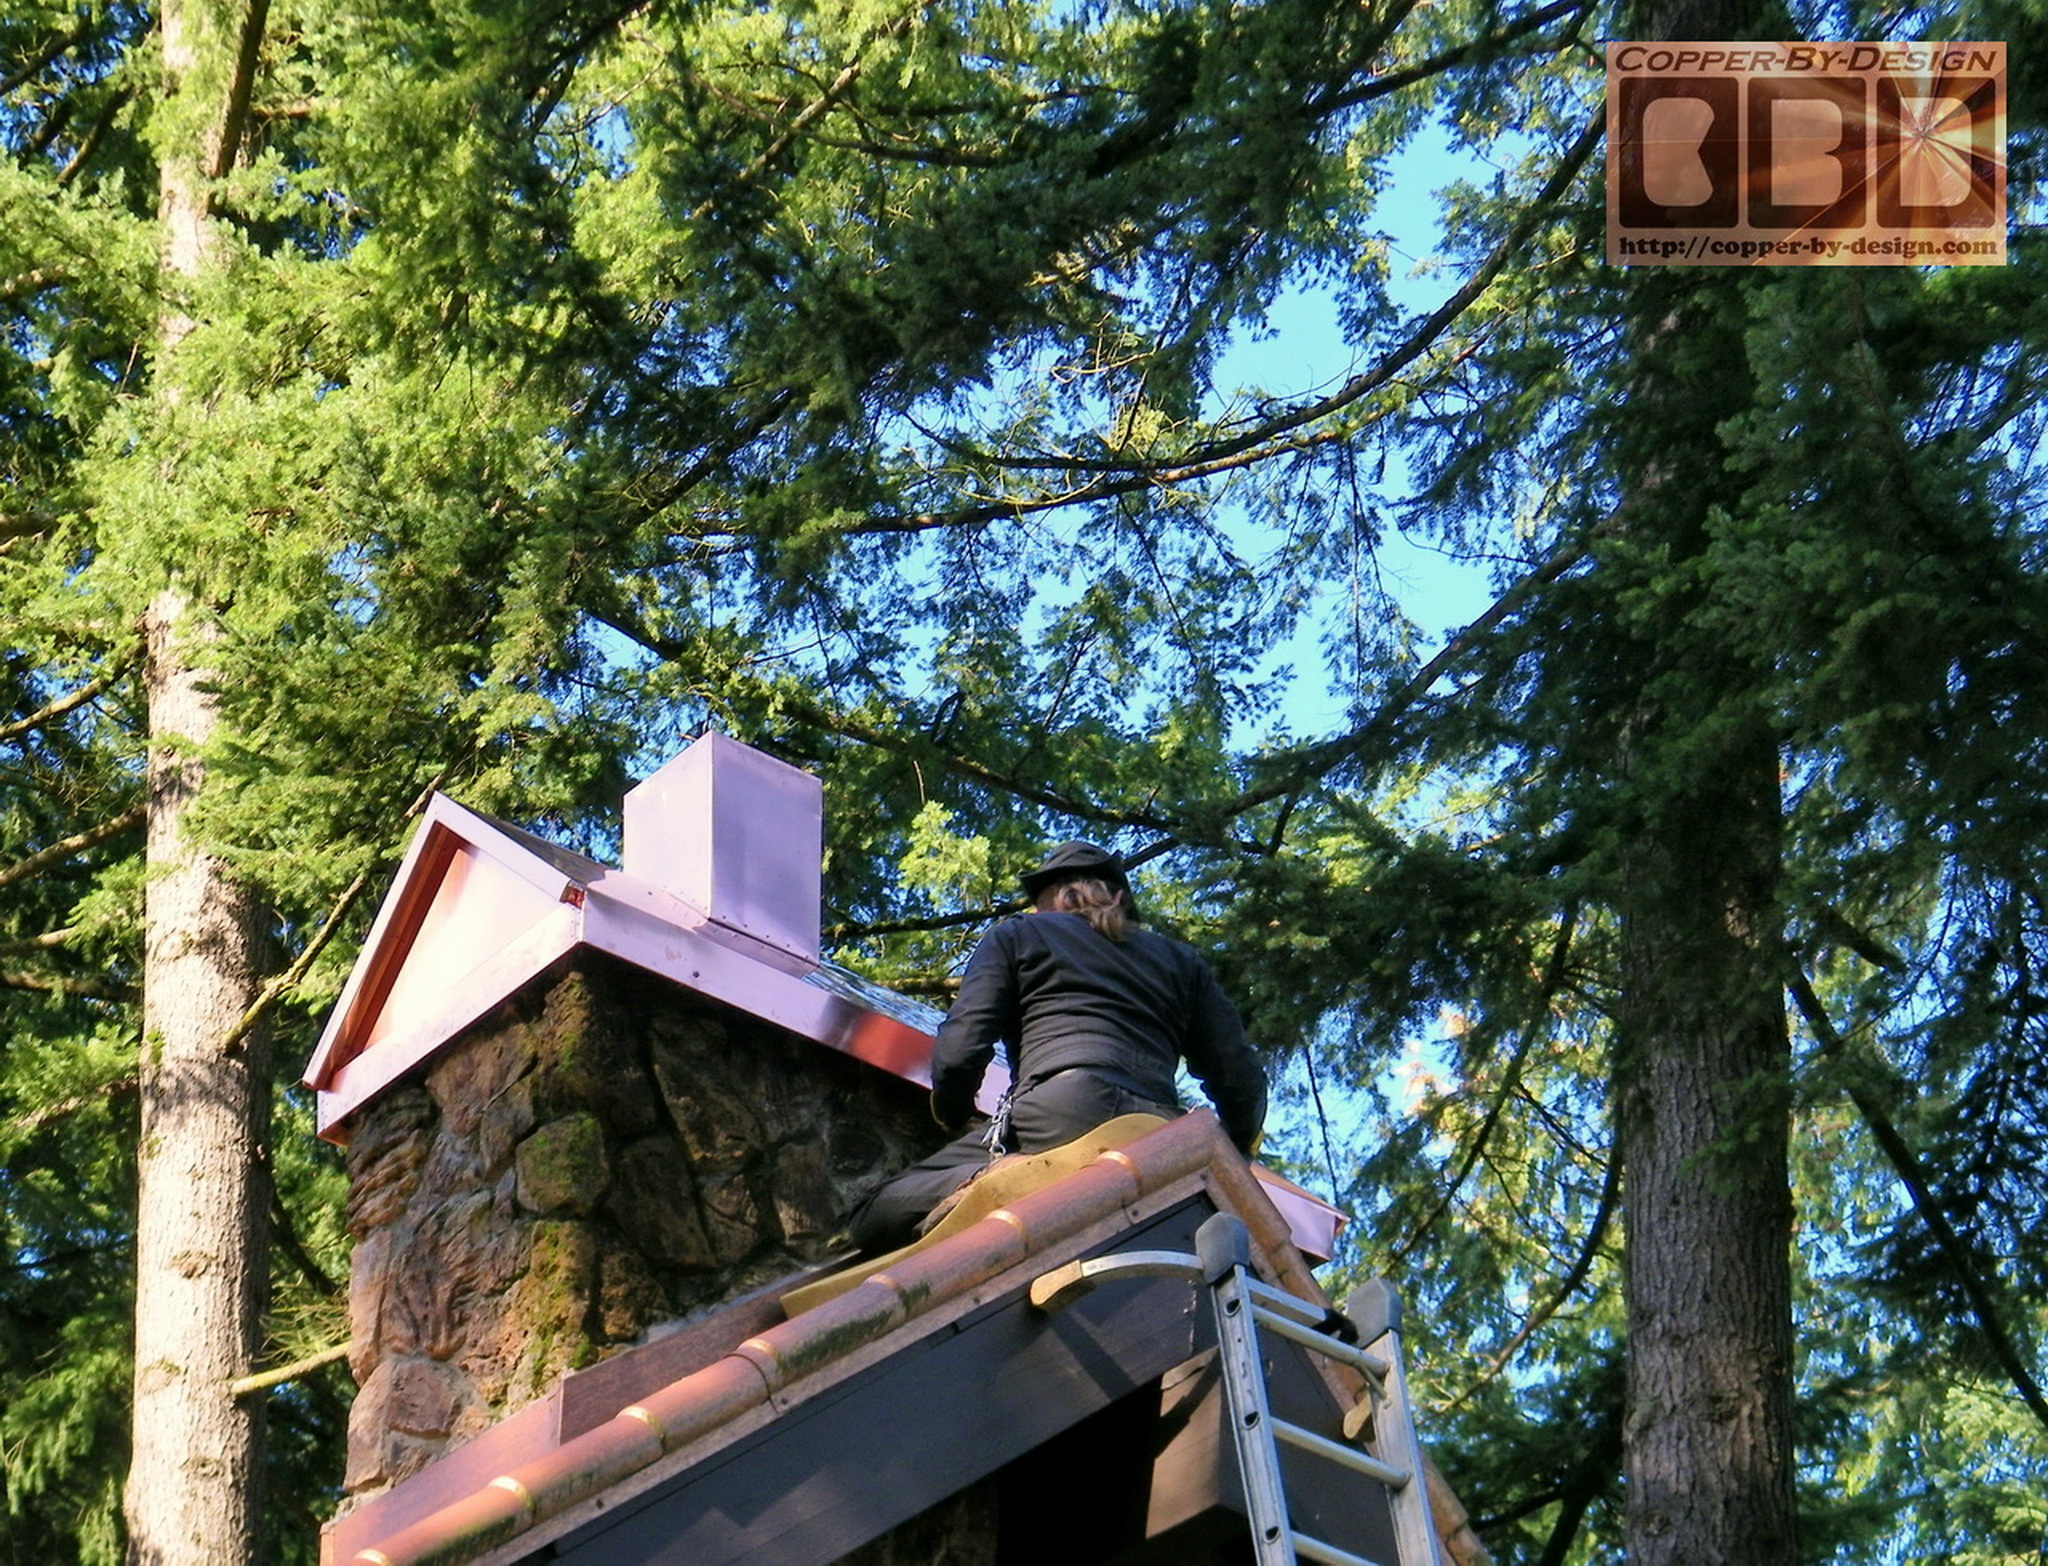
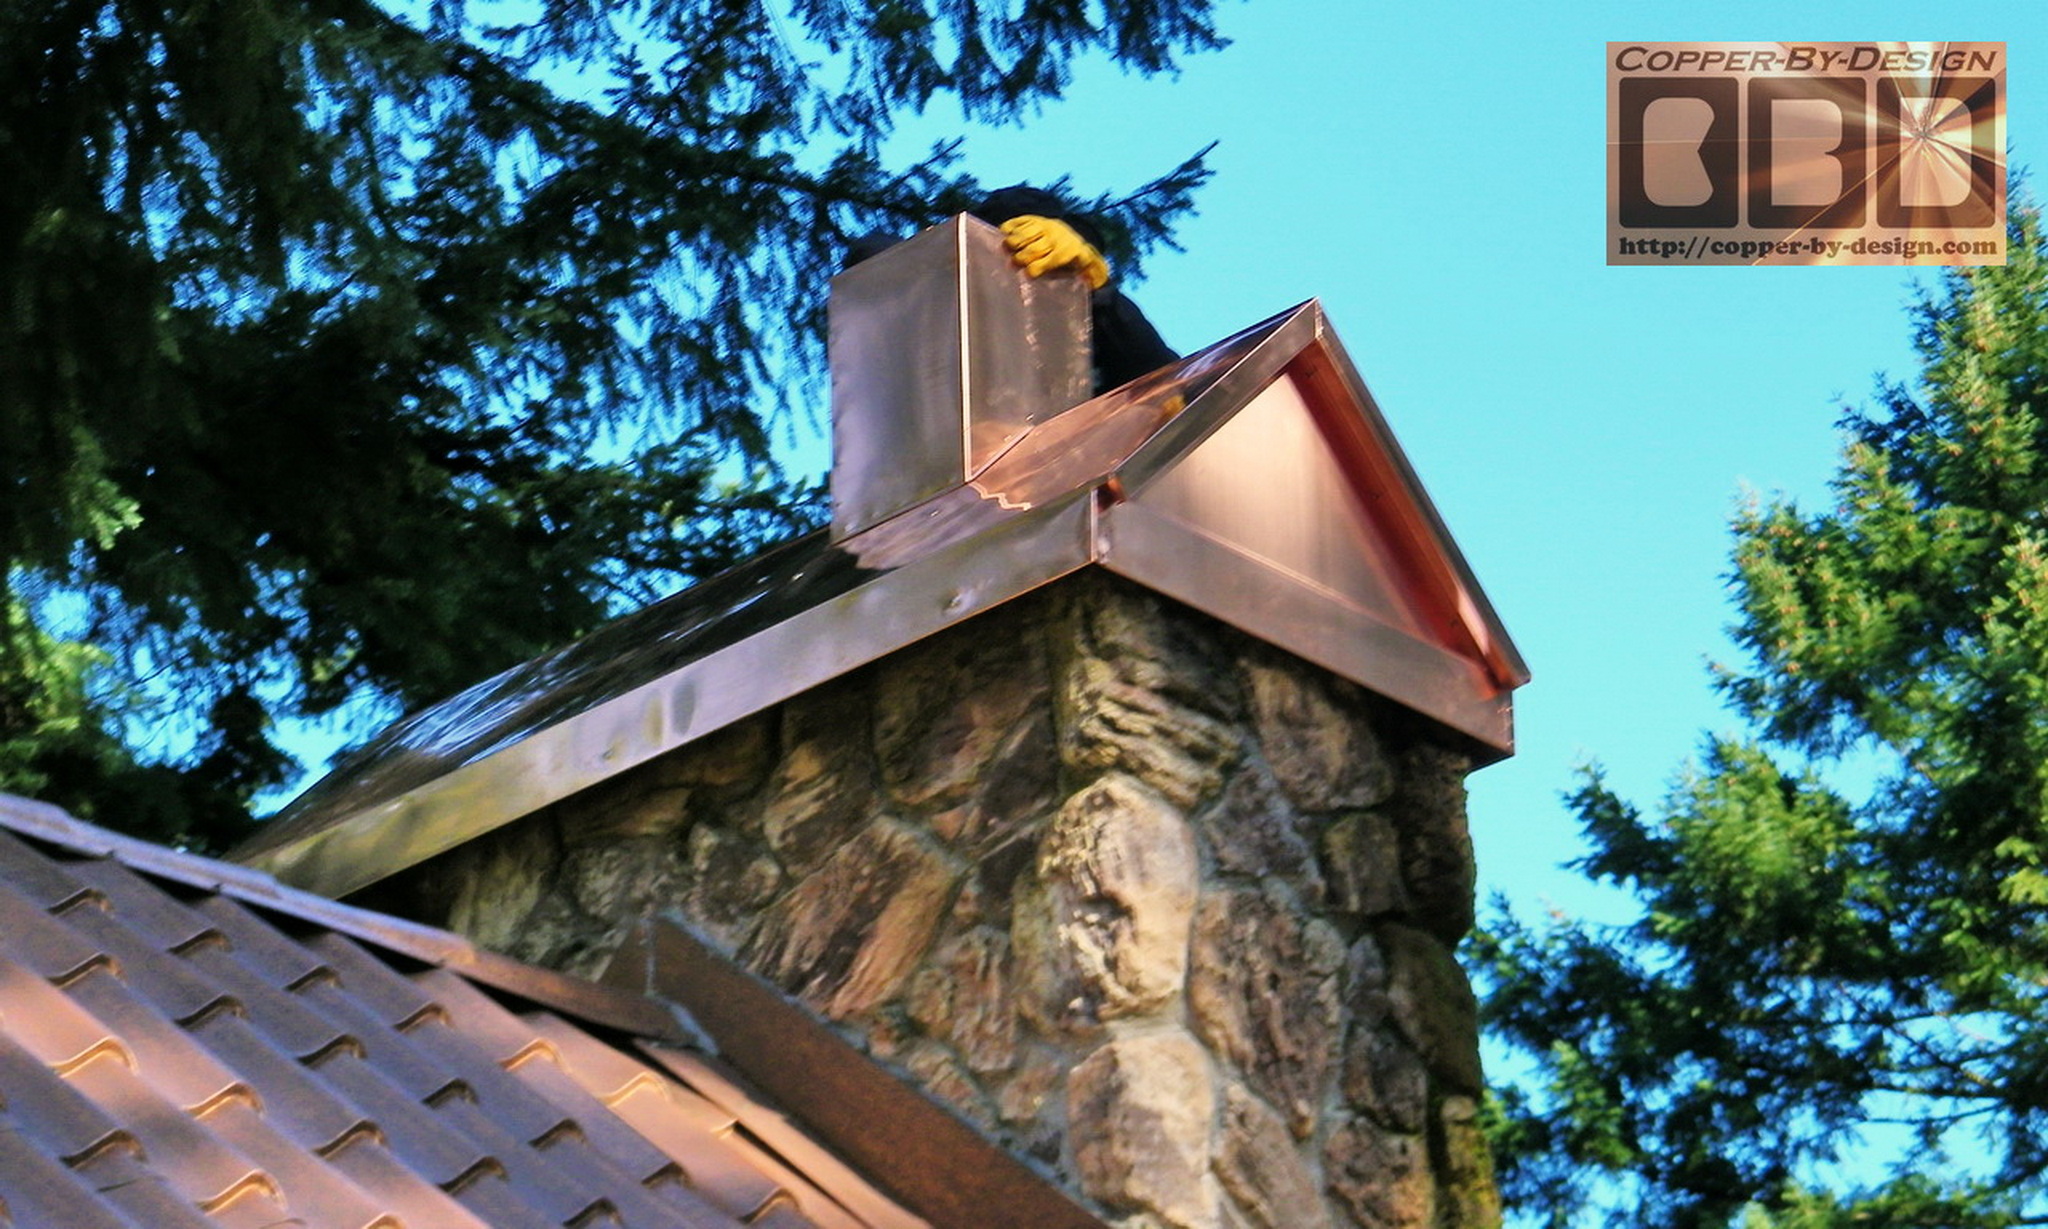
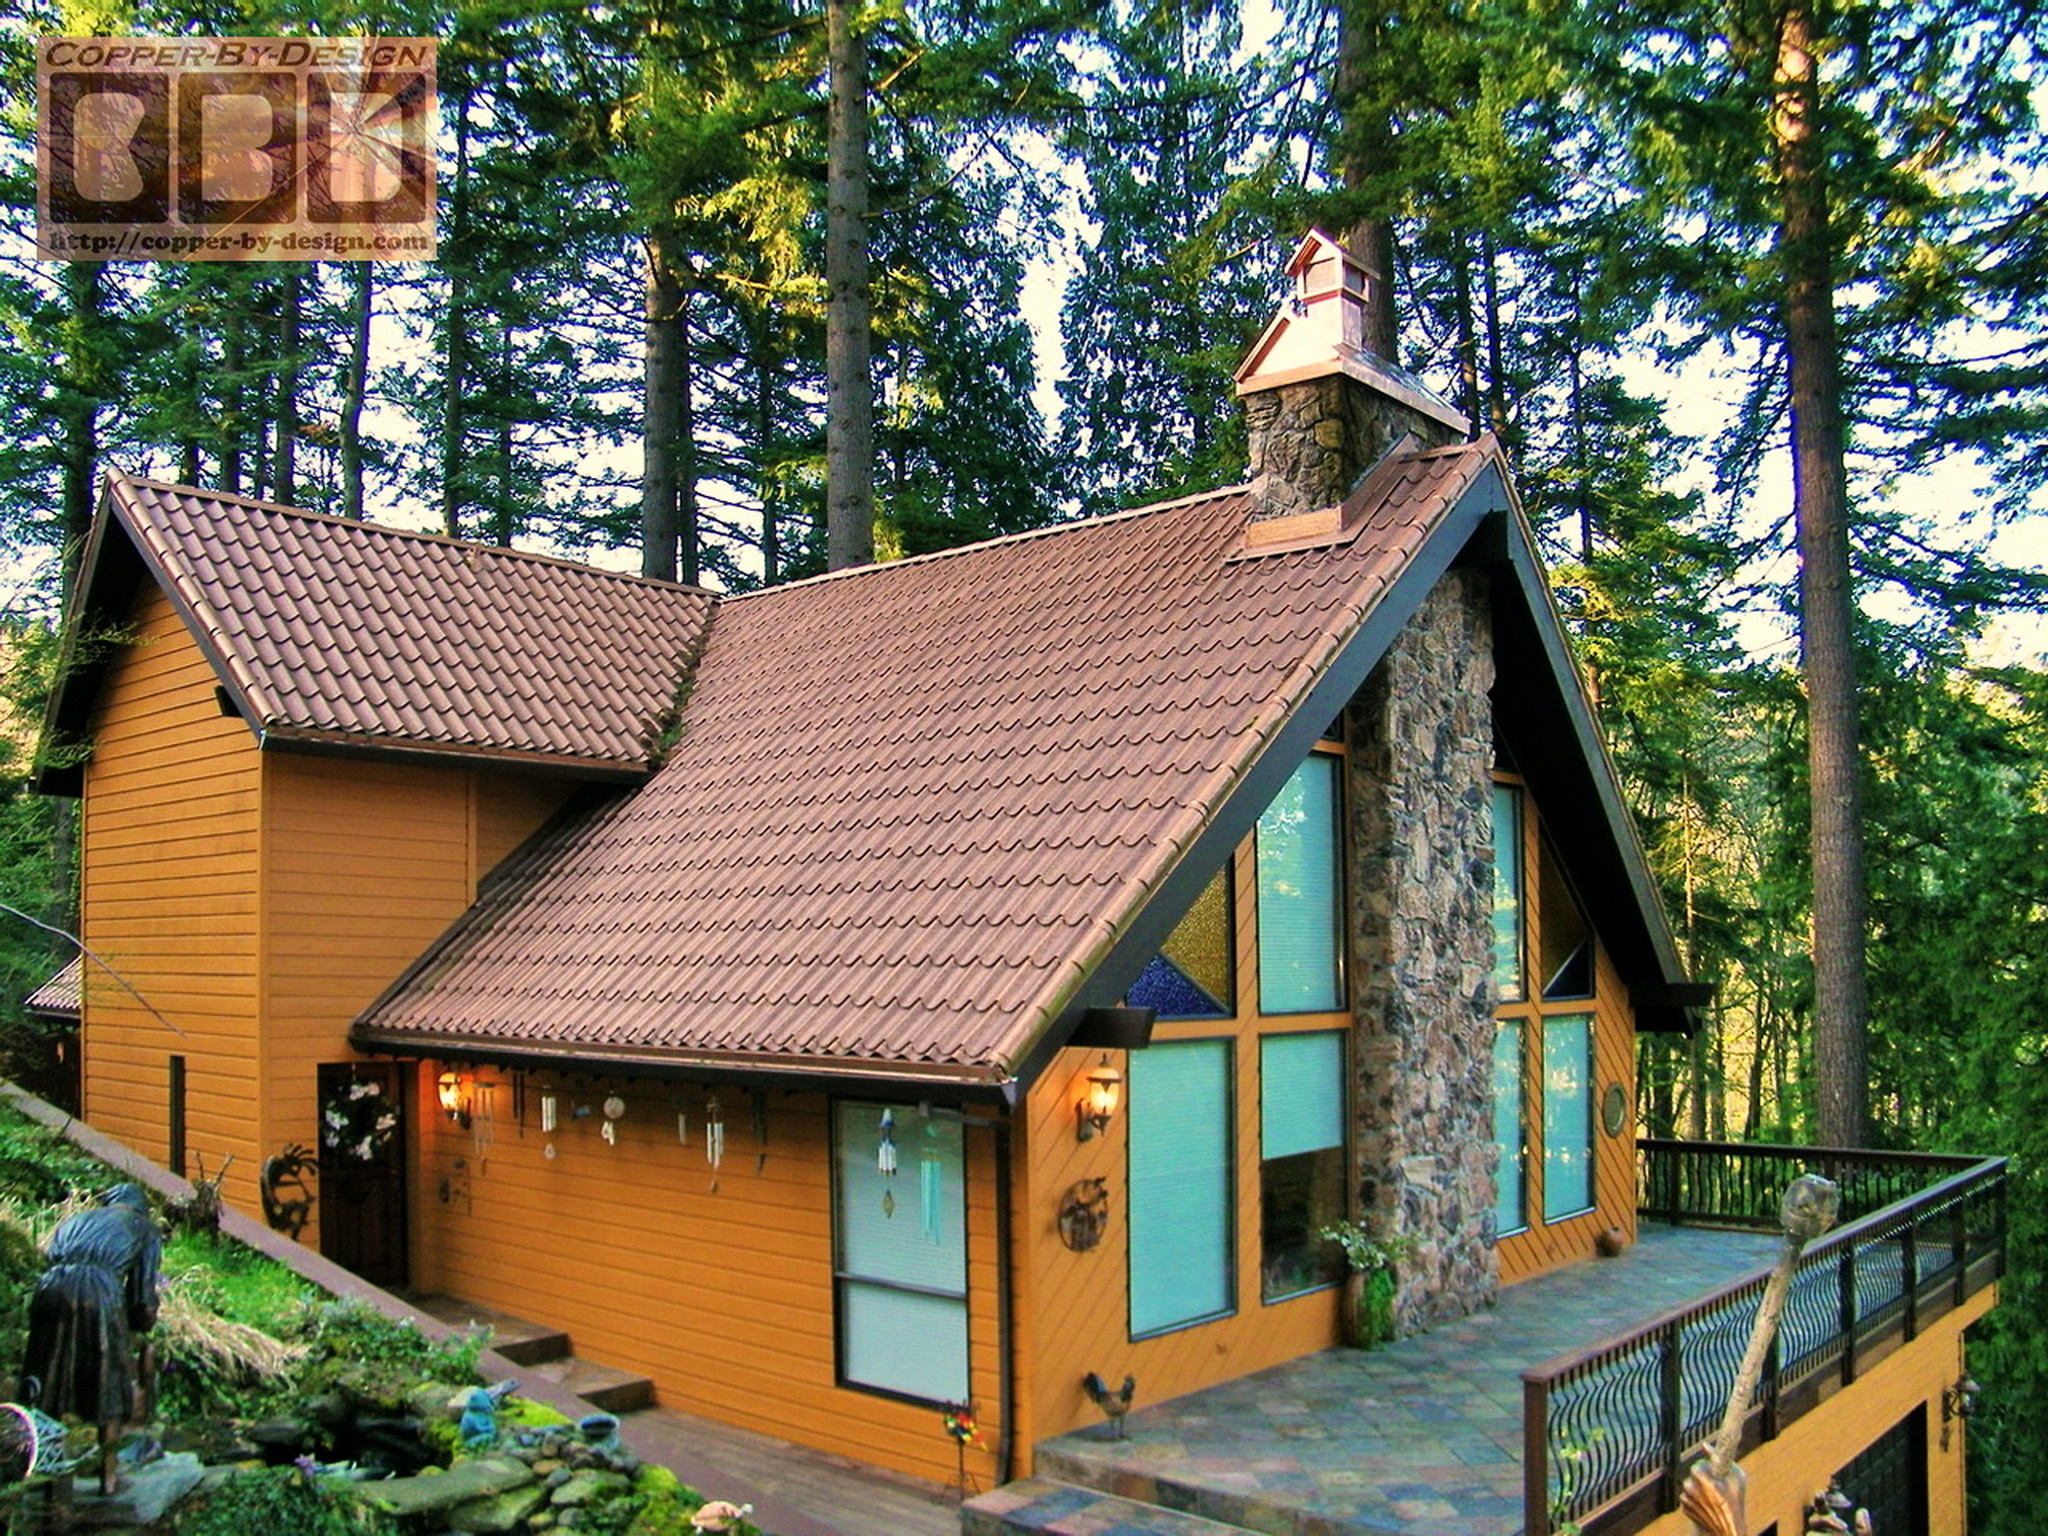
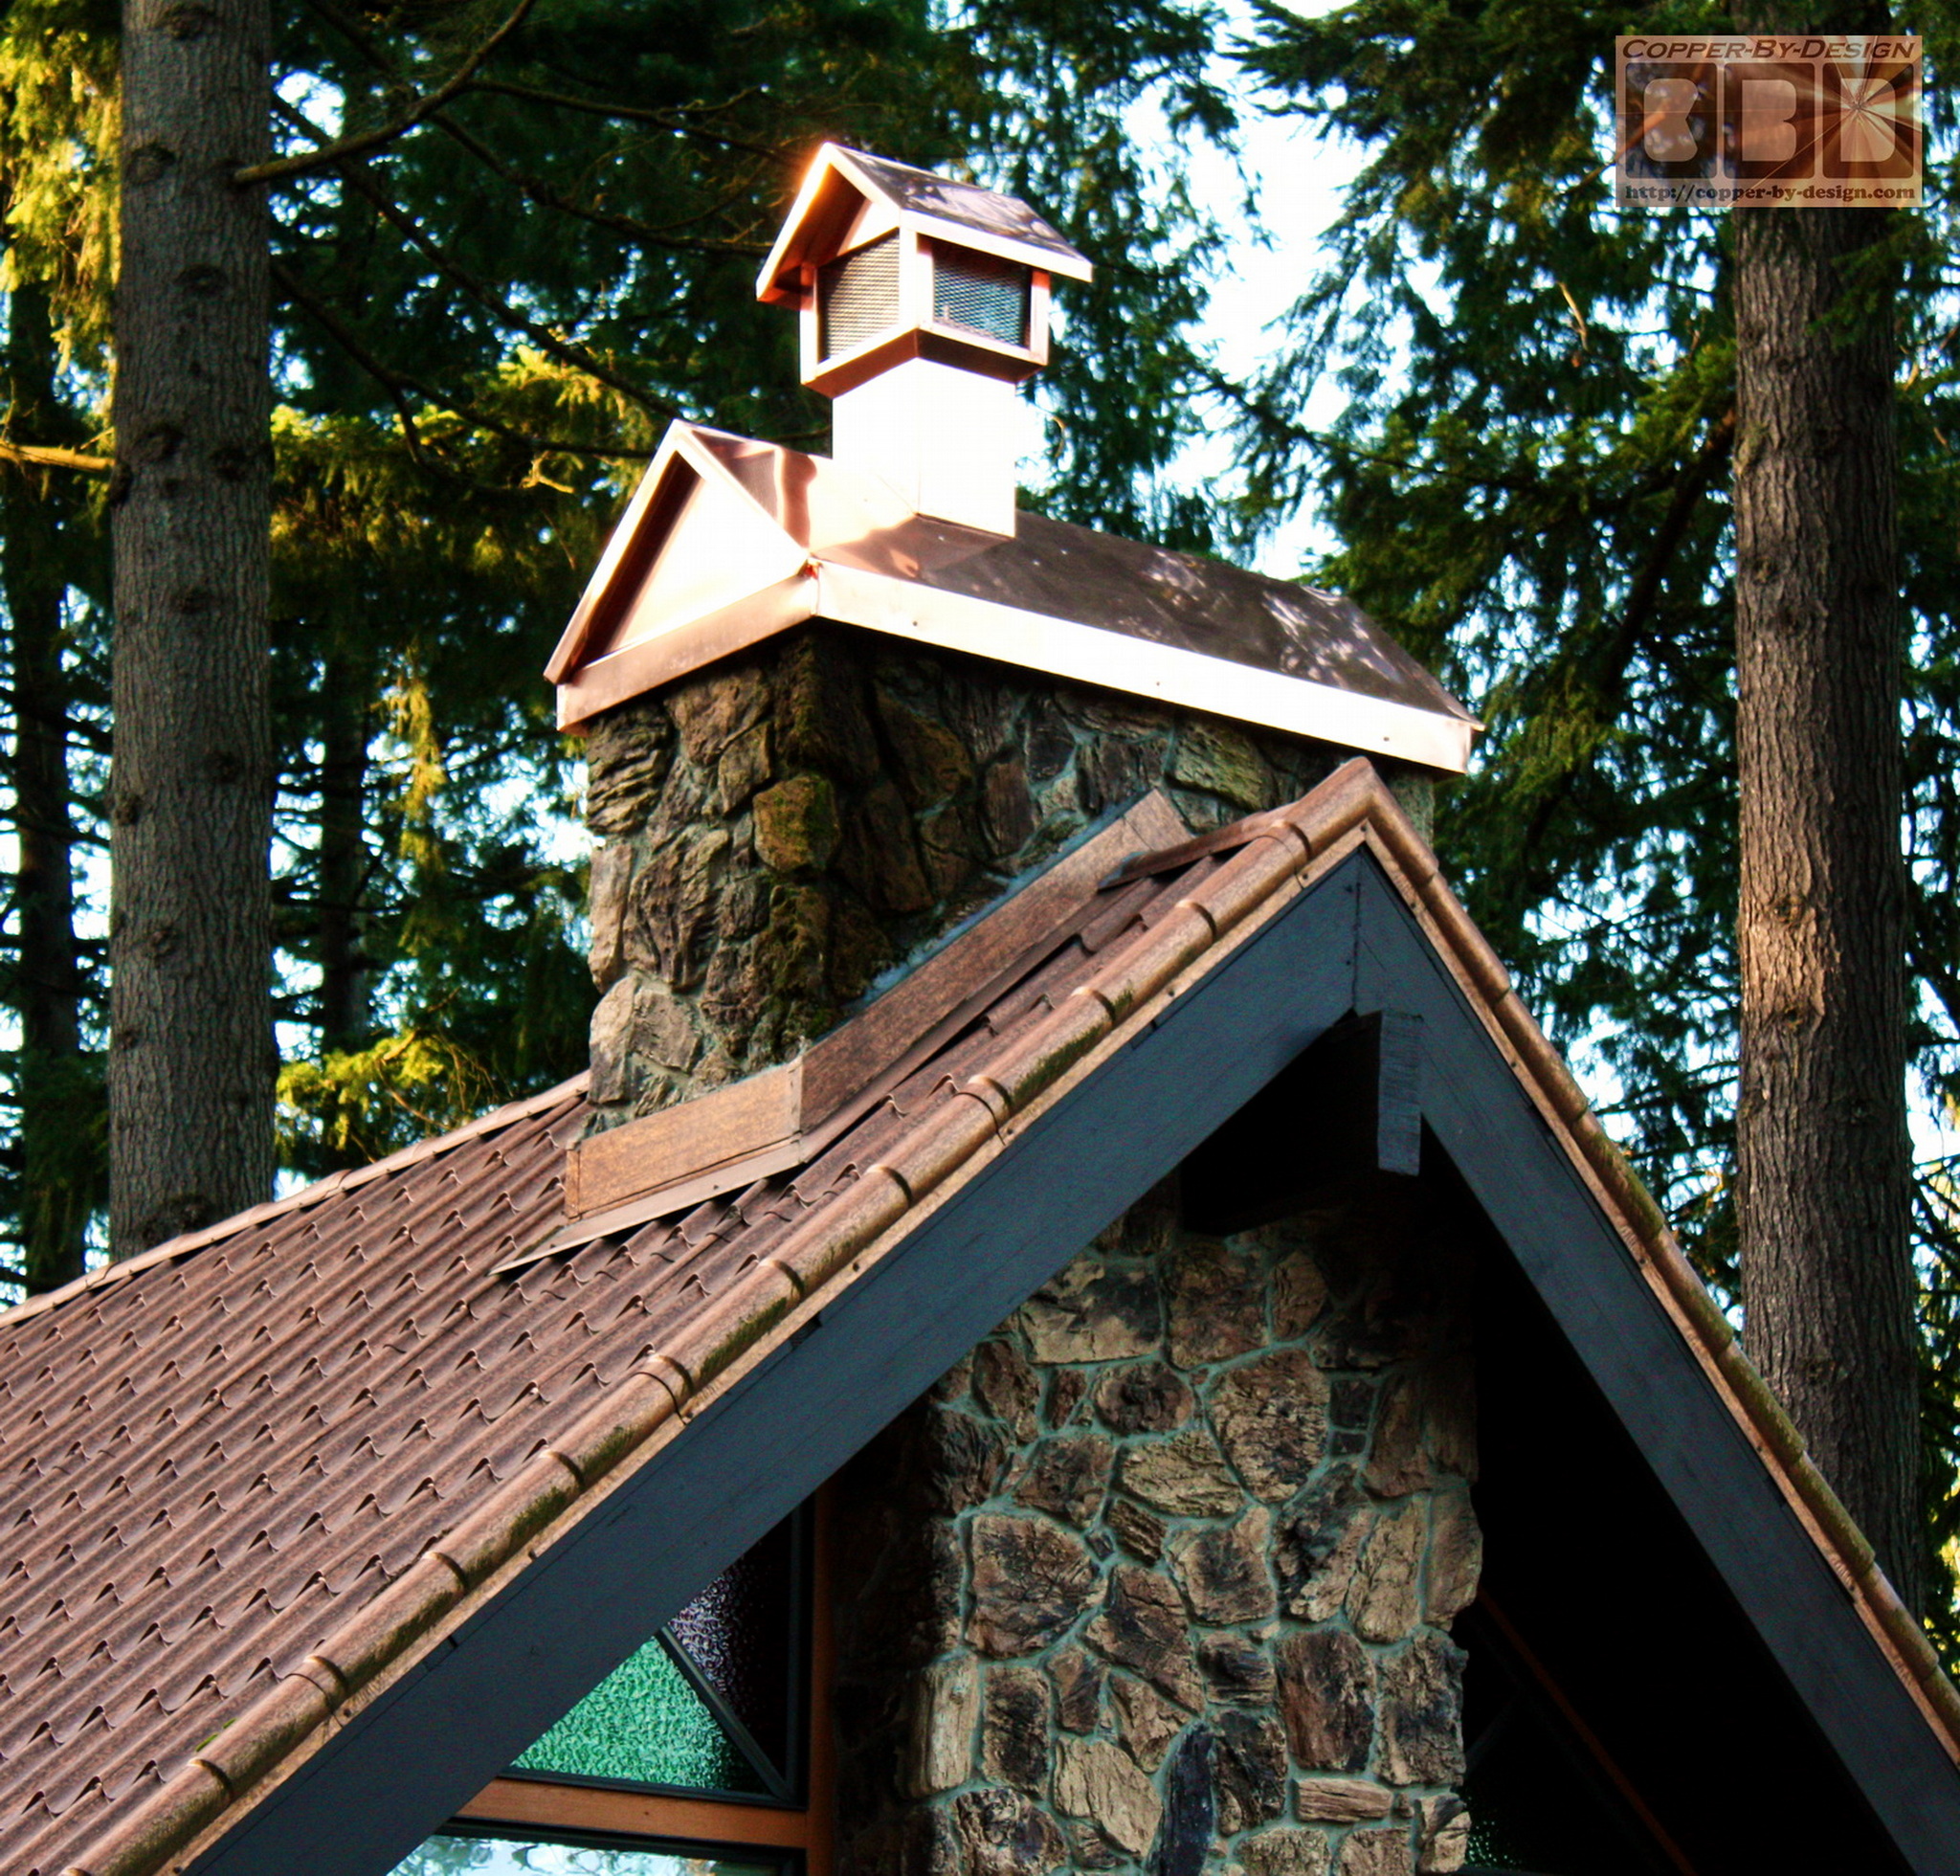
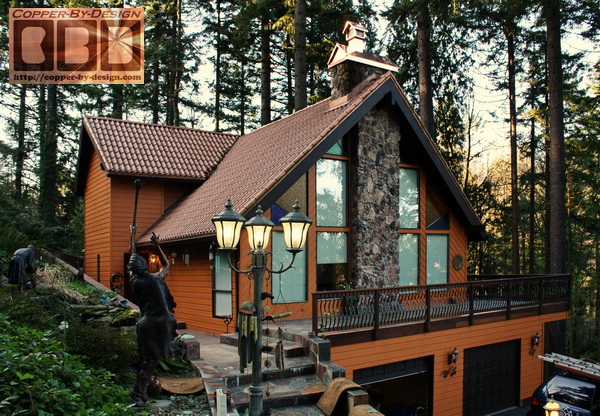
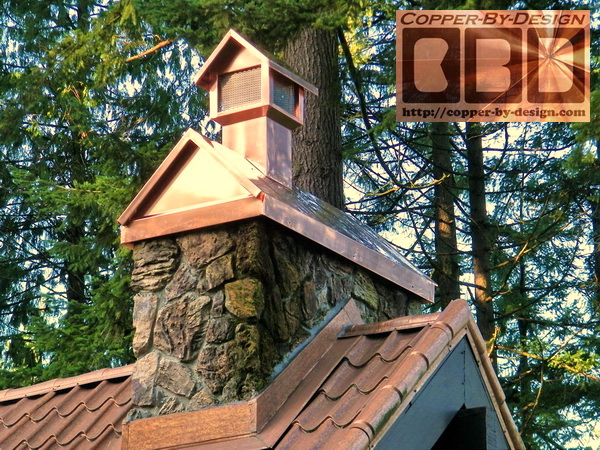
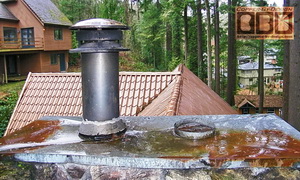
This copper chimney cap was designed and made for Bob and Lori Blair here in W. 
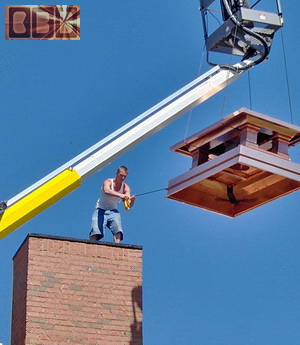
Portland, Oregon. We also installed it over their stone 
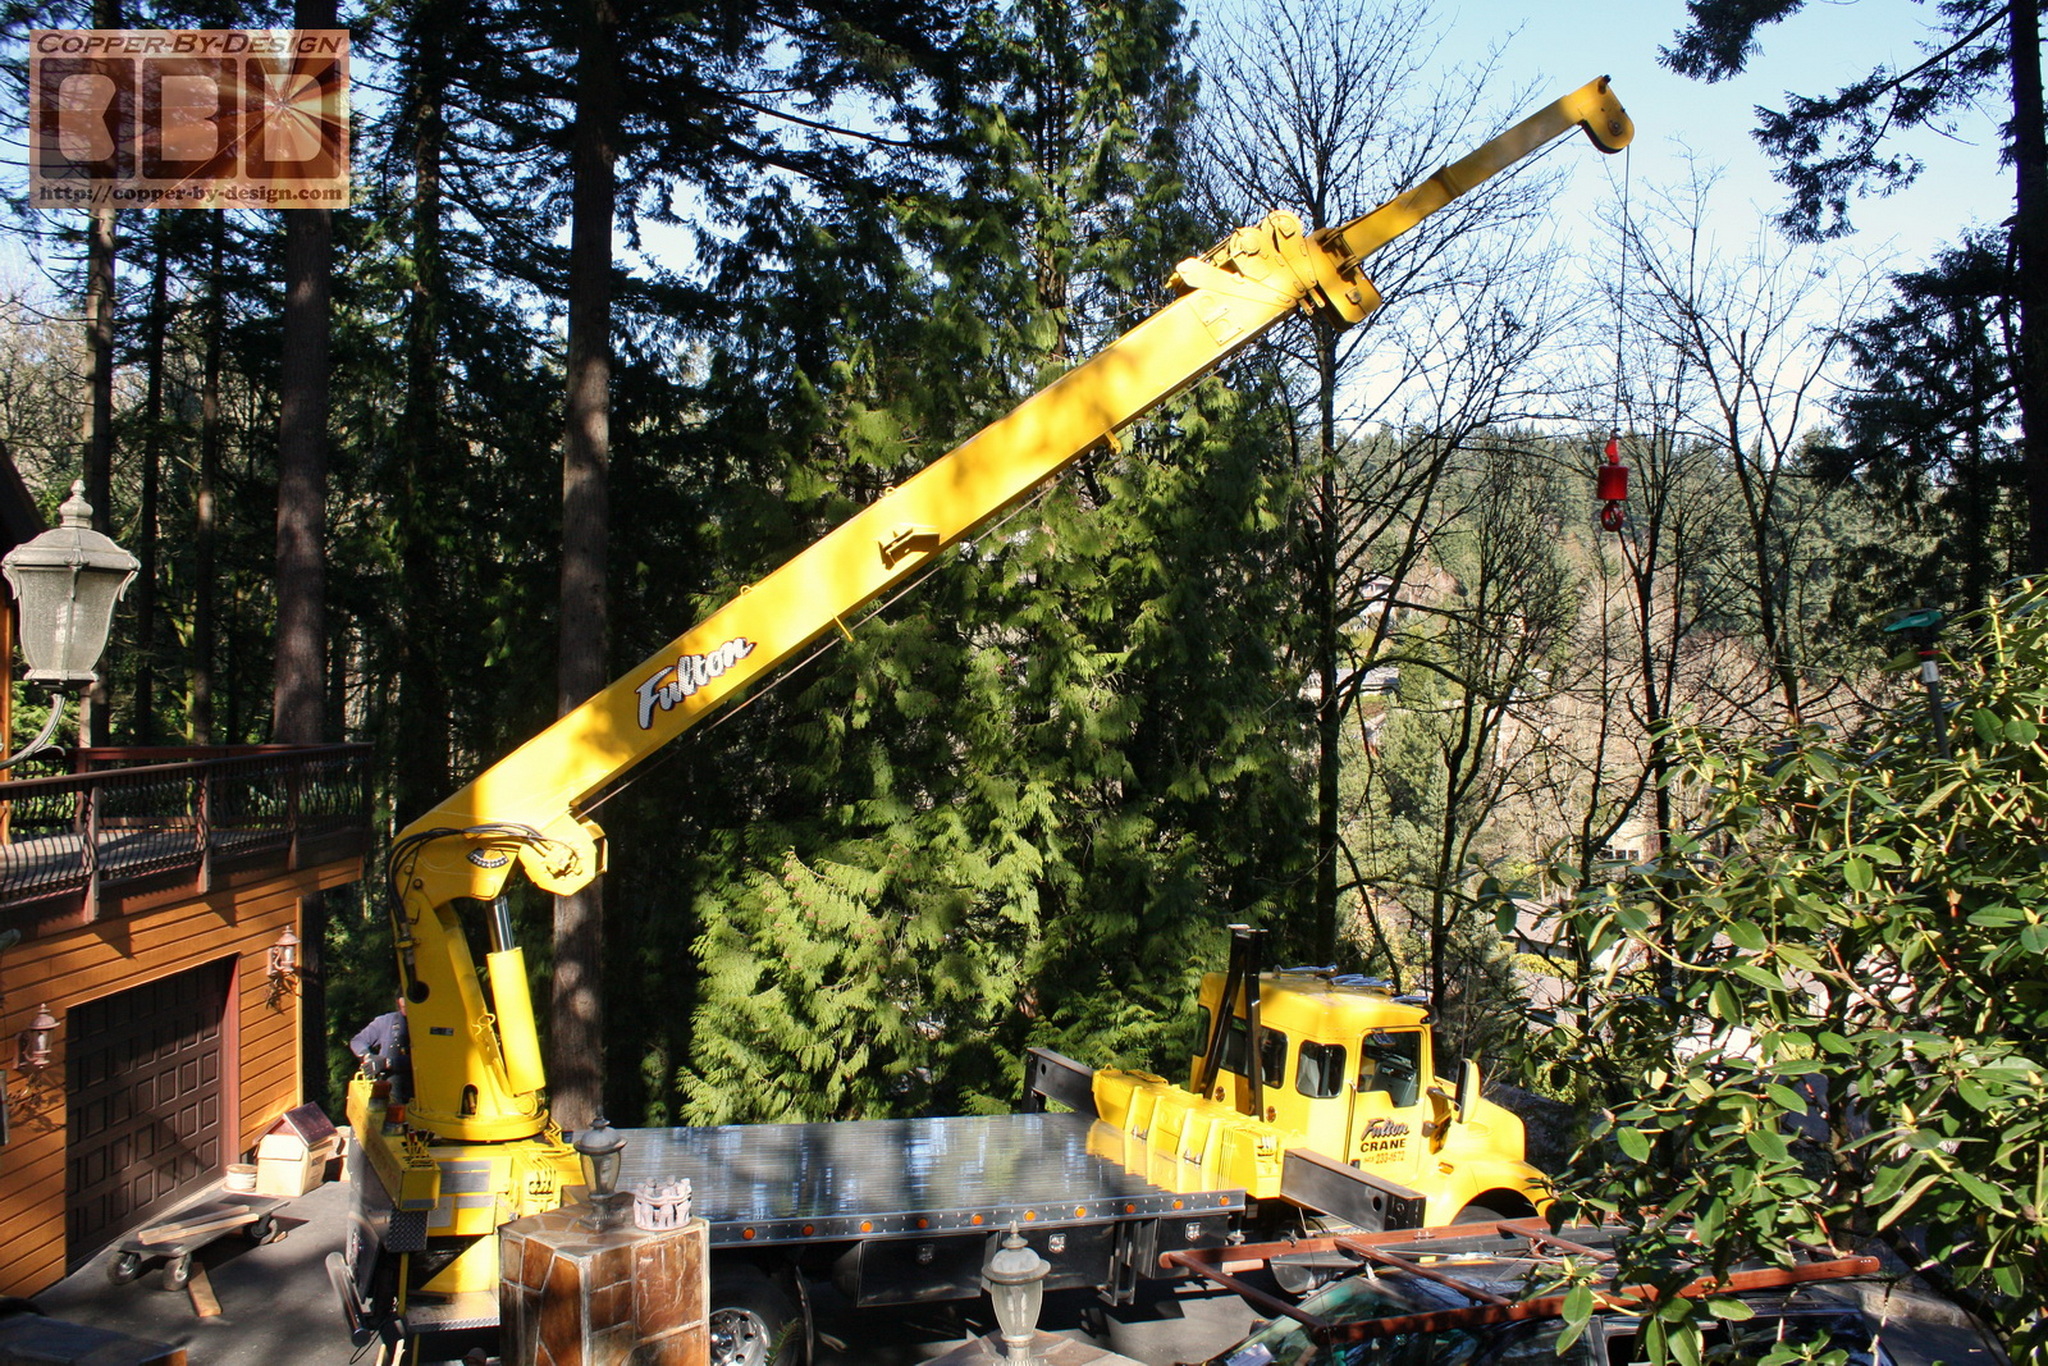
covered chimney of their house with the help of a hydraulic 
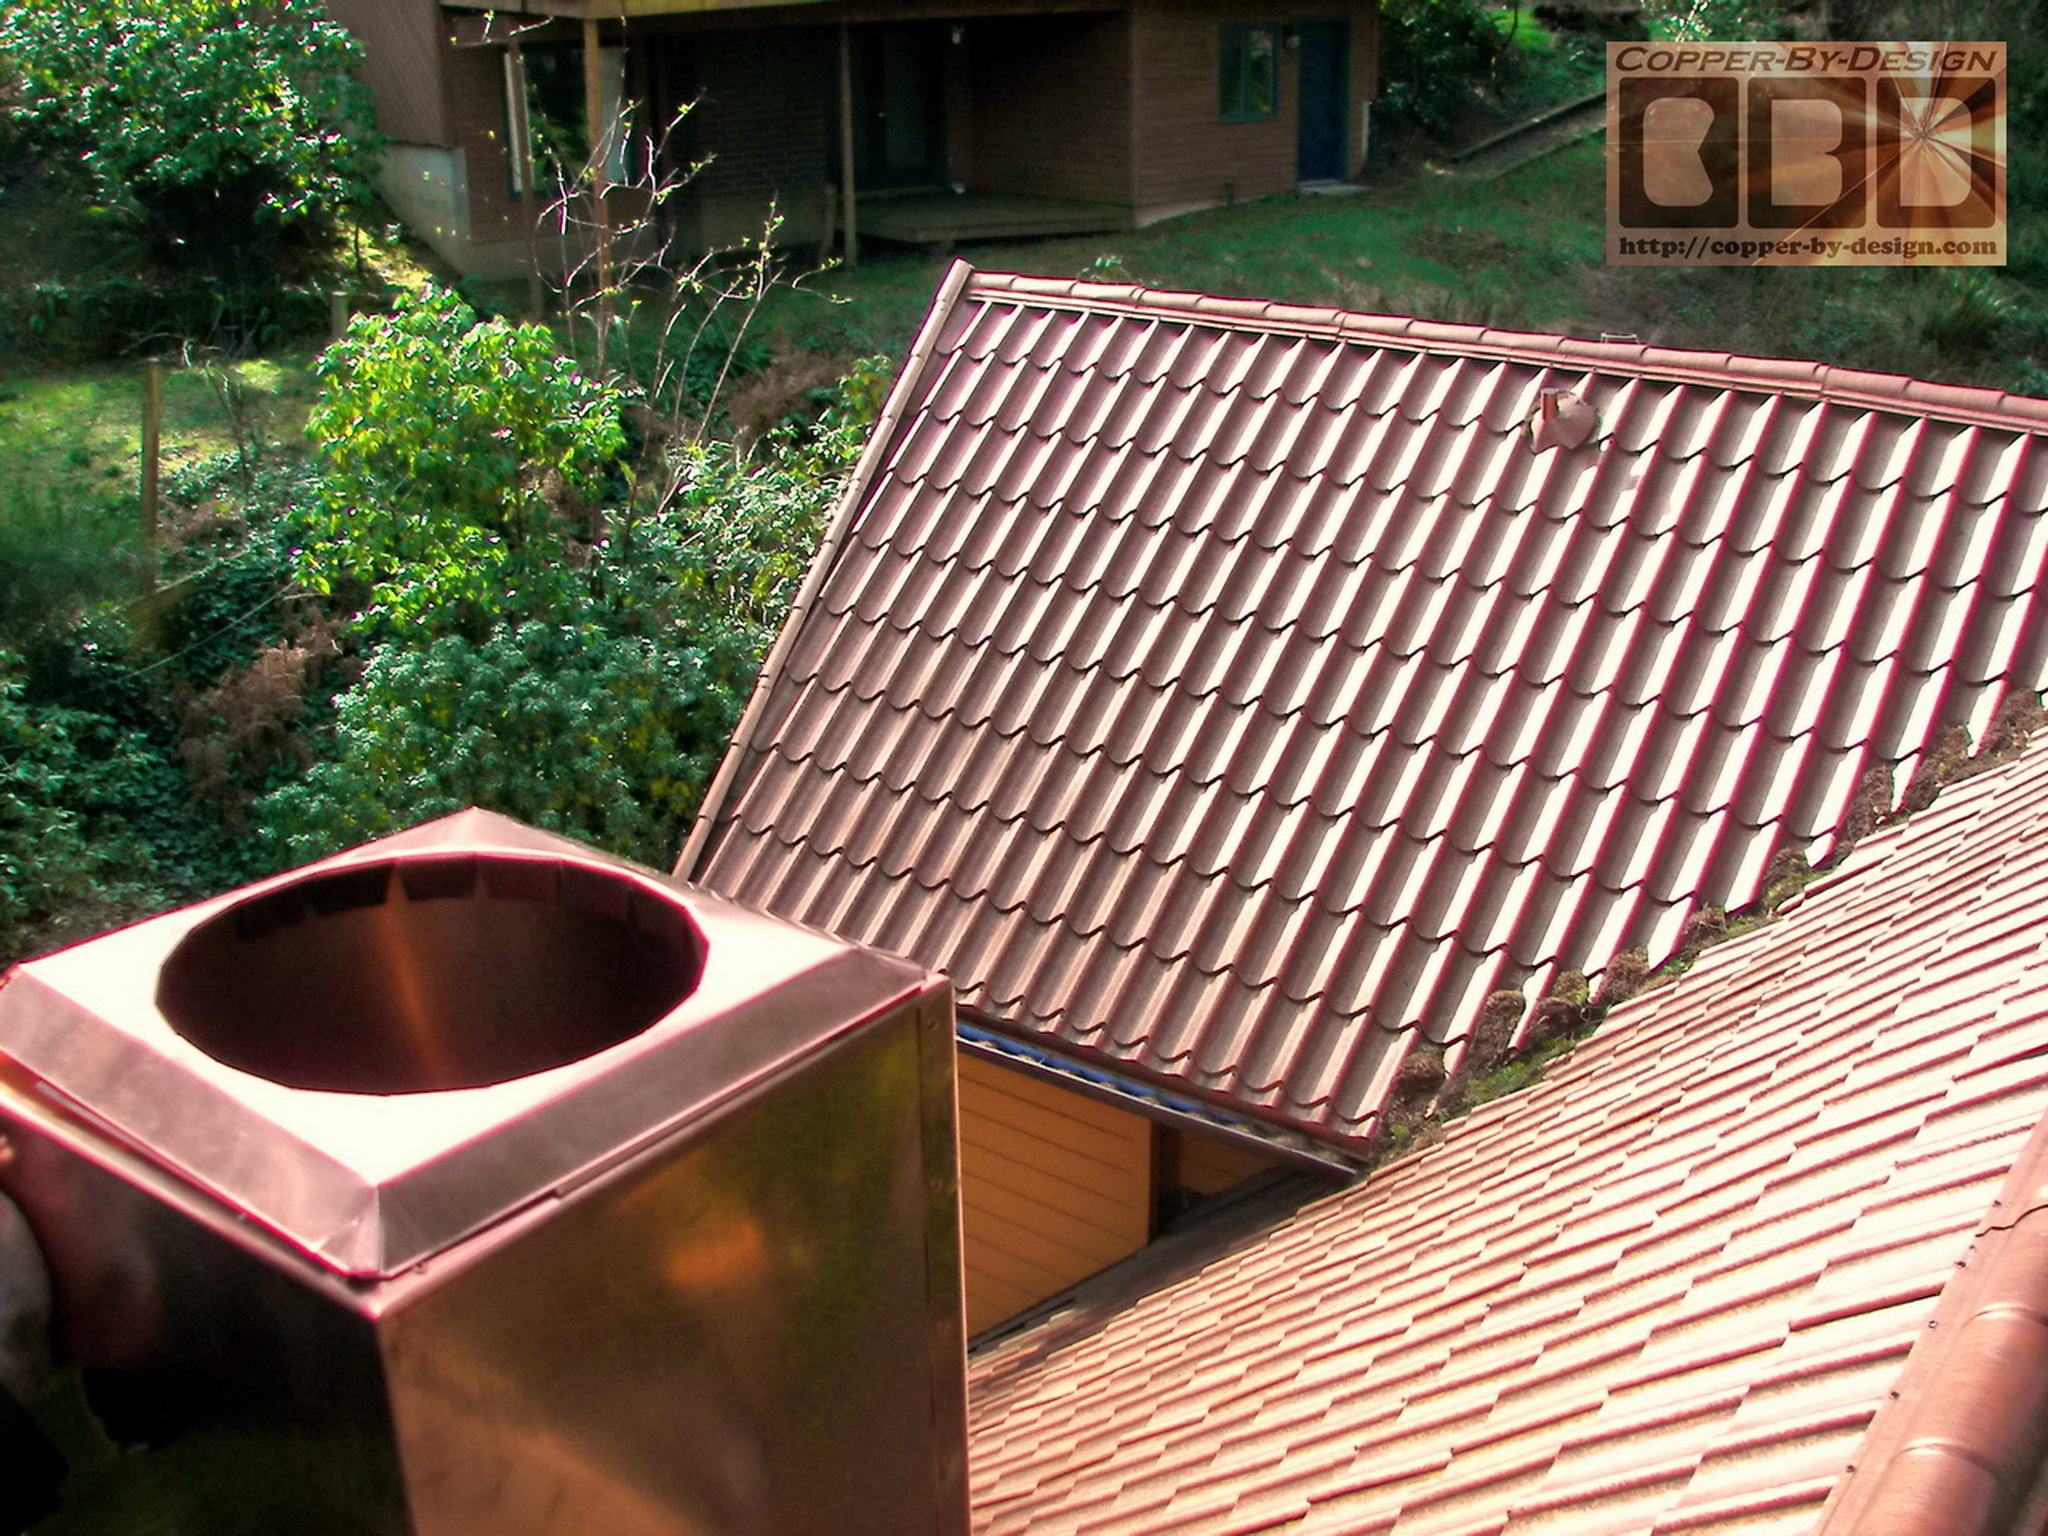
crane. This house has an aluminum roof that looks like a copper covered clay tile roof.

They first contacted me 1/5/10 and we swiftly worked out the details of this project through e-mails, and within a couple weeks they had sent in their 1/3 deposit of $950 to schedule this project in.


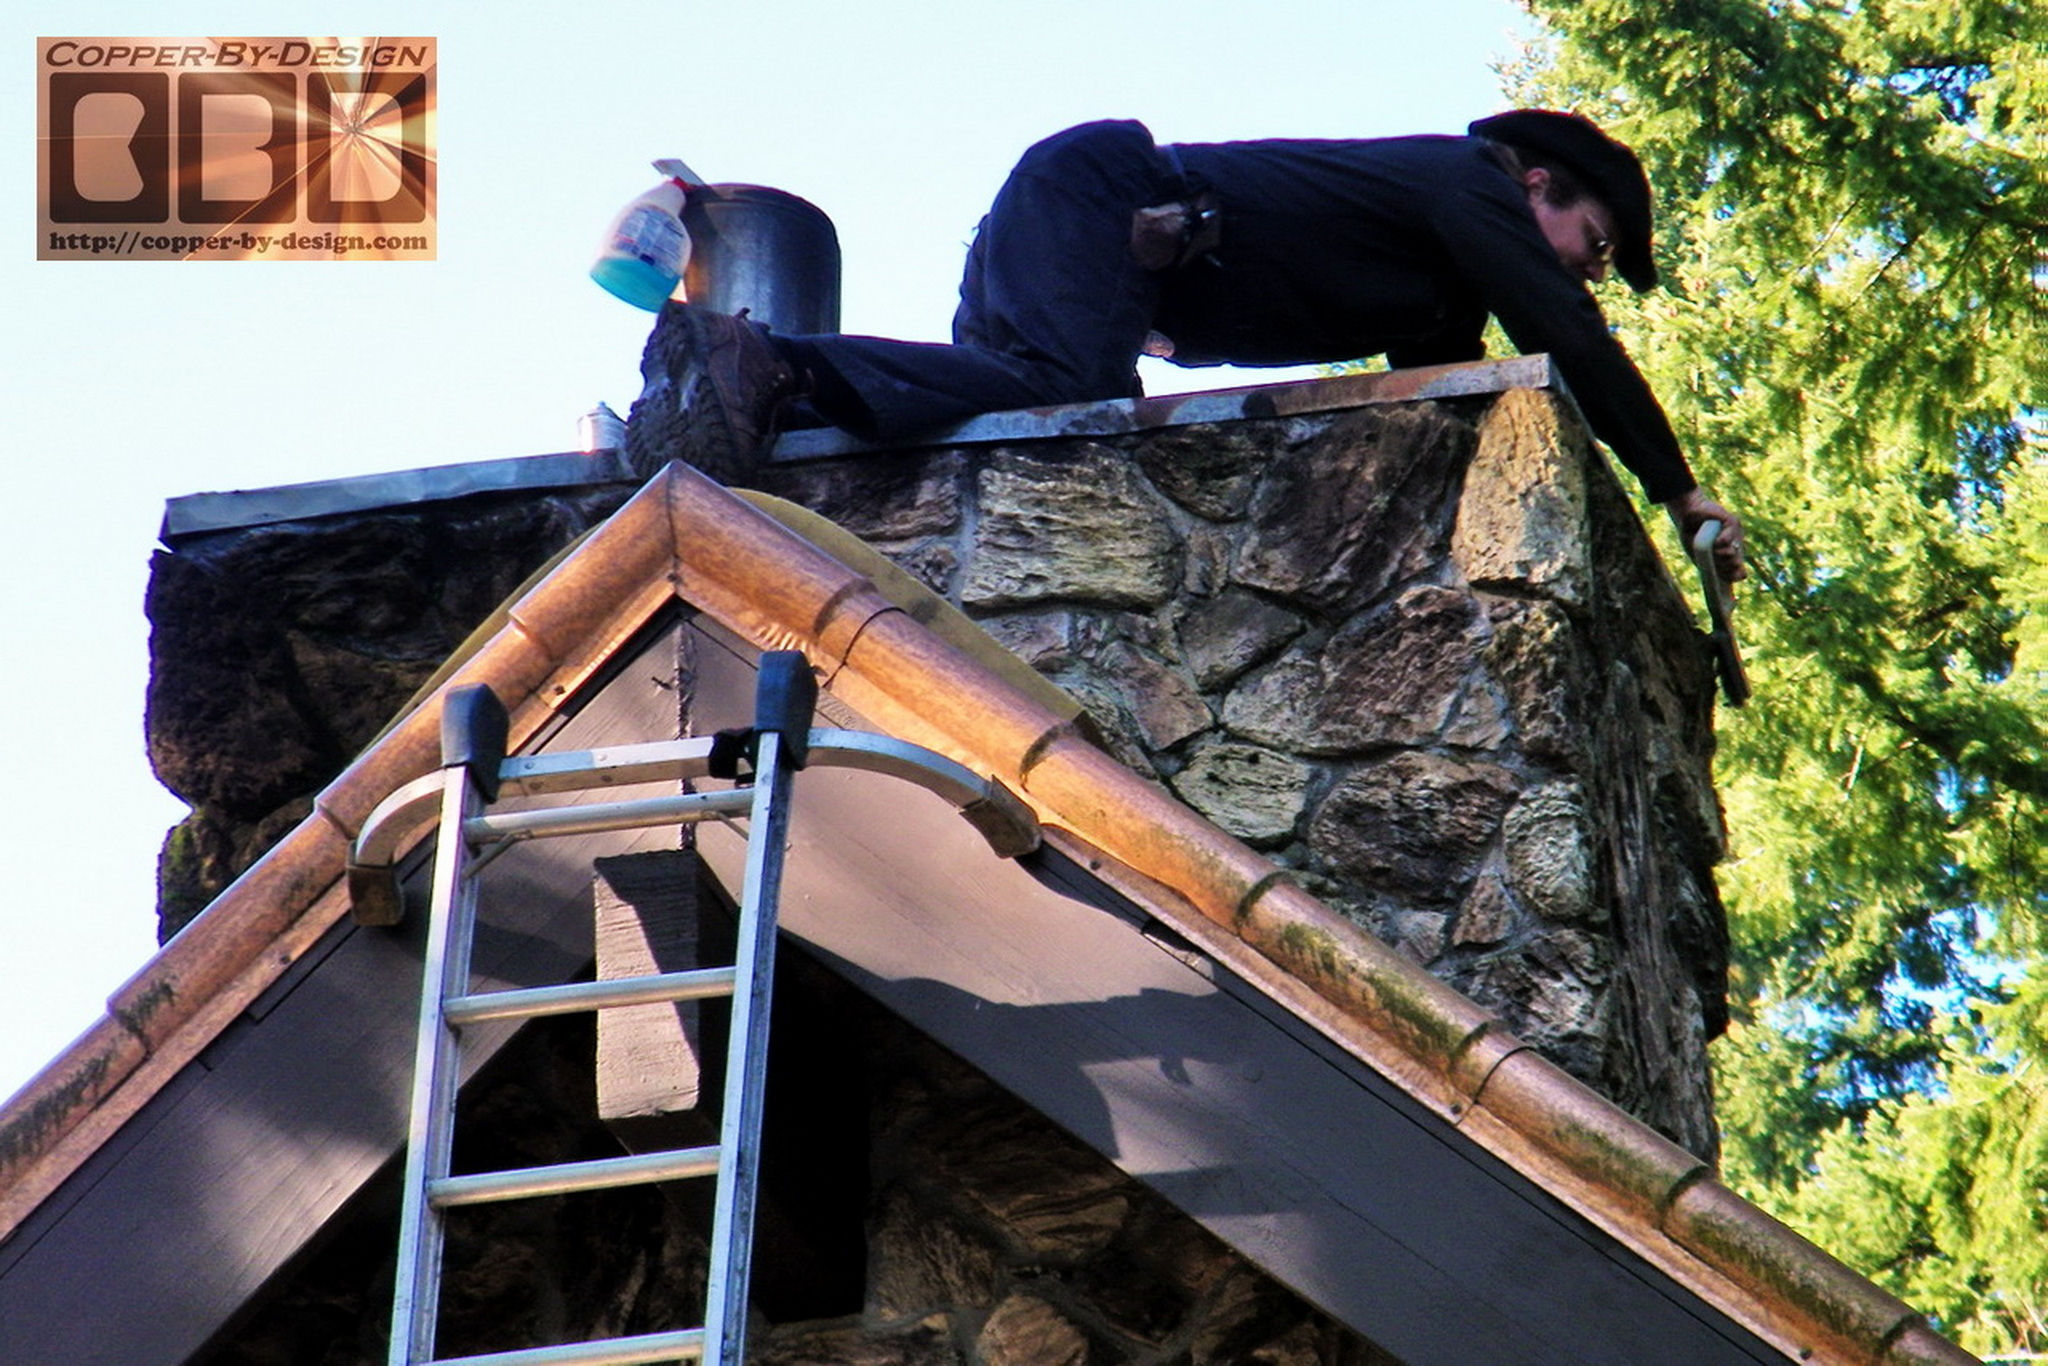
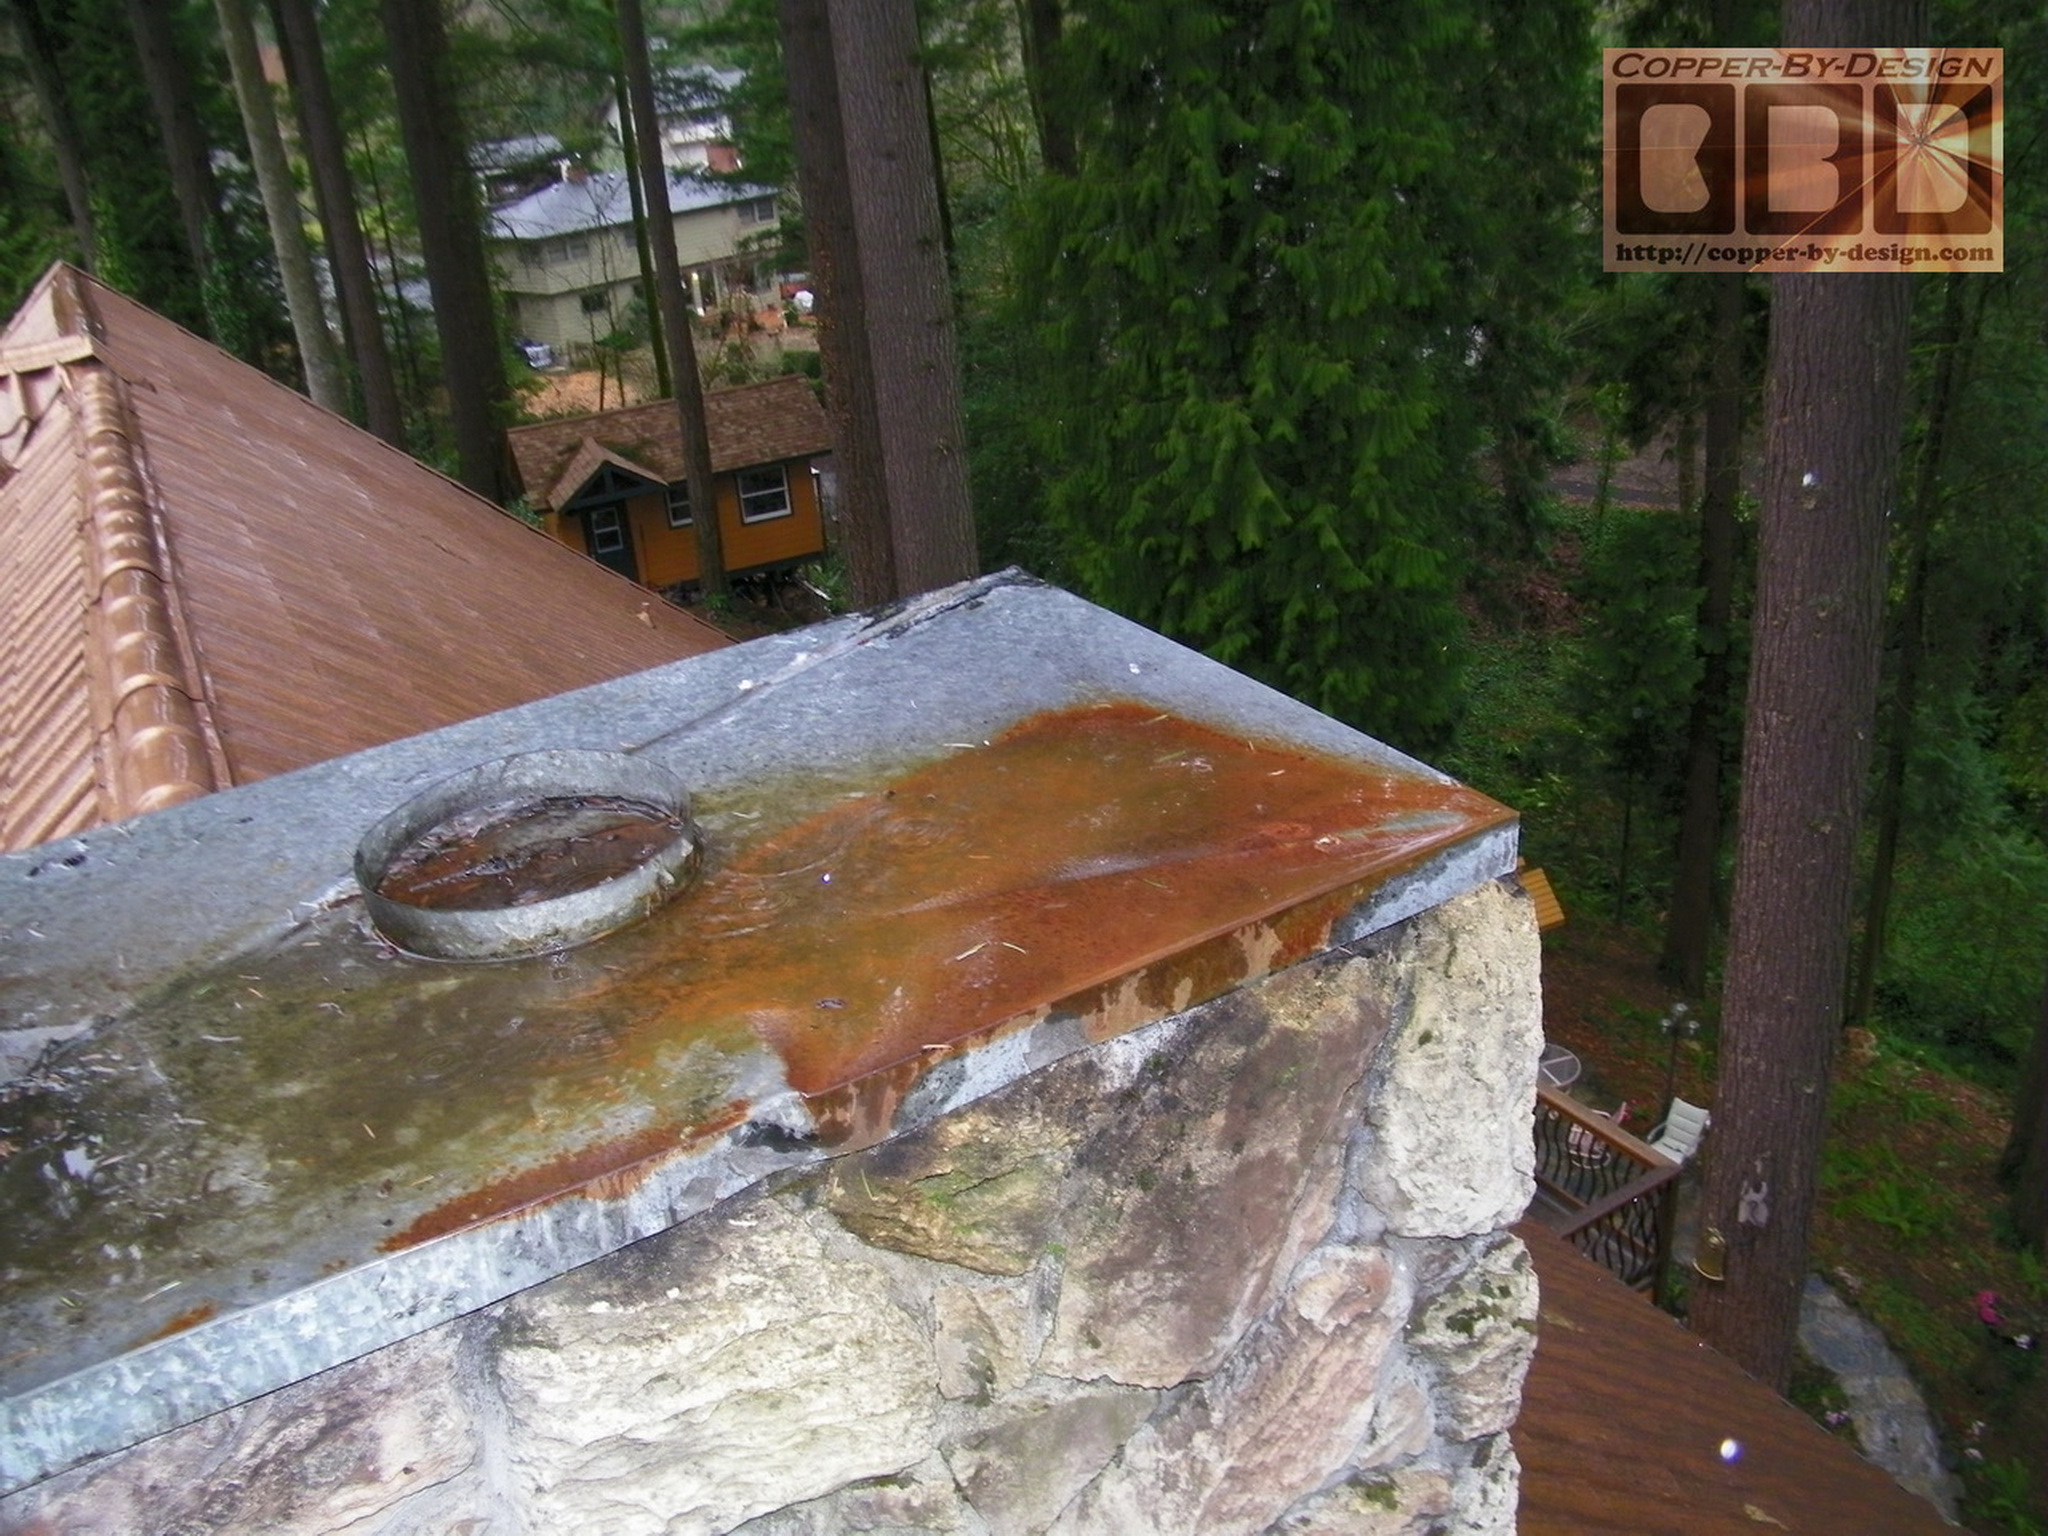
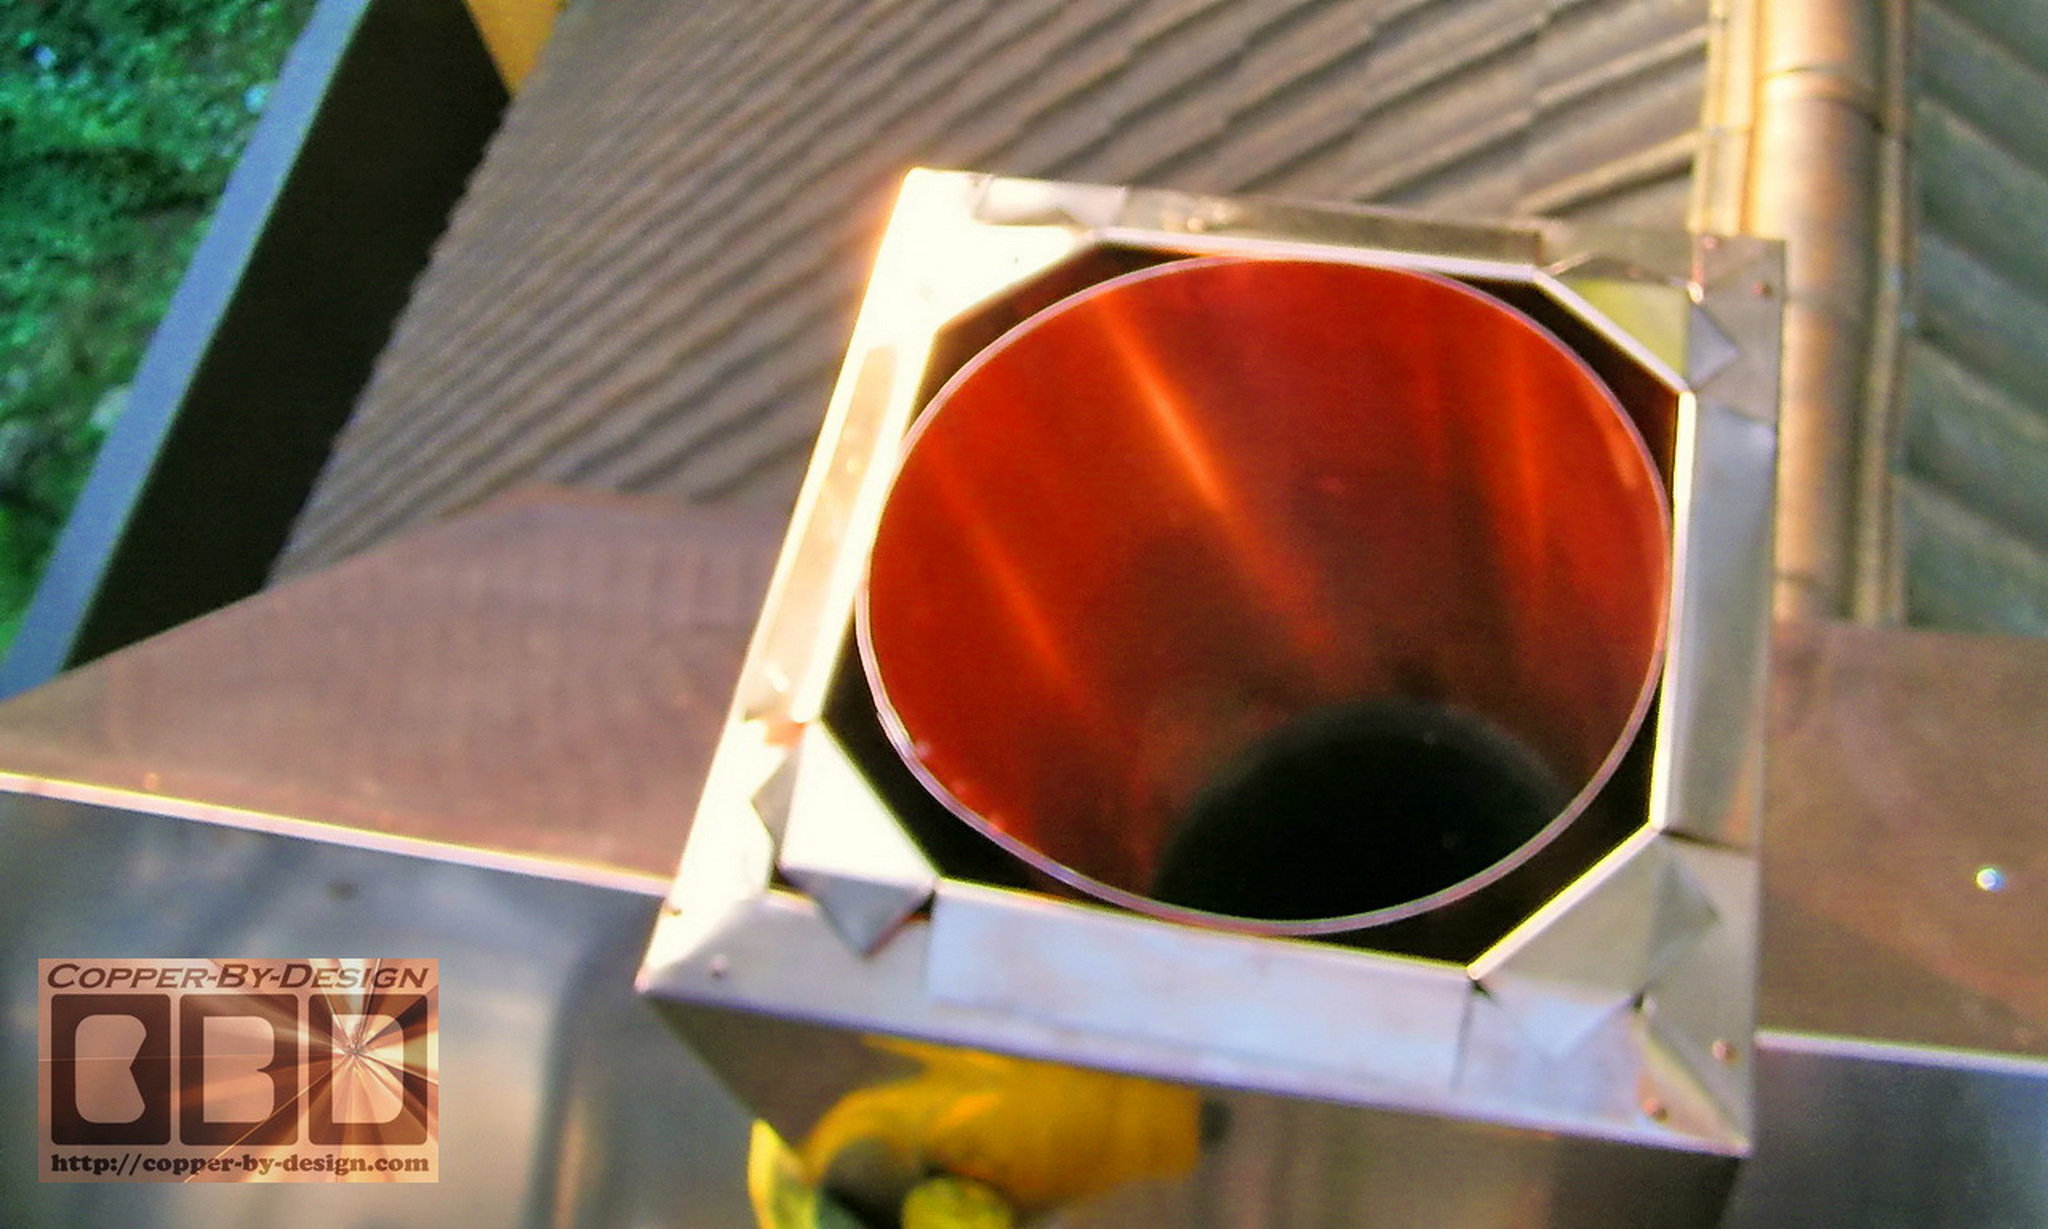
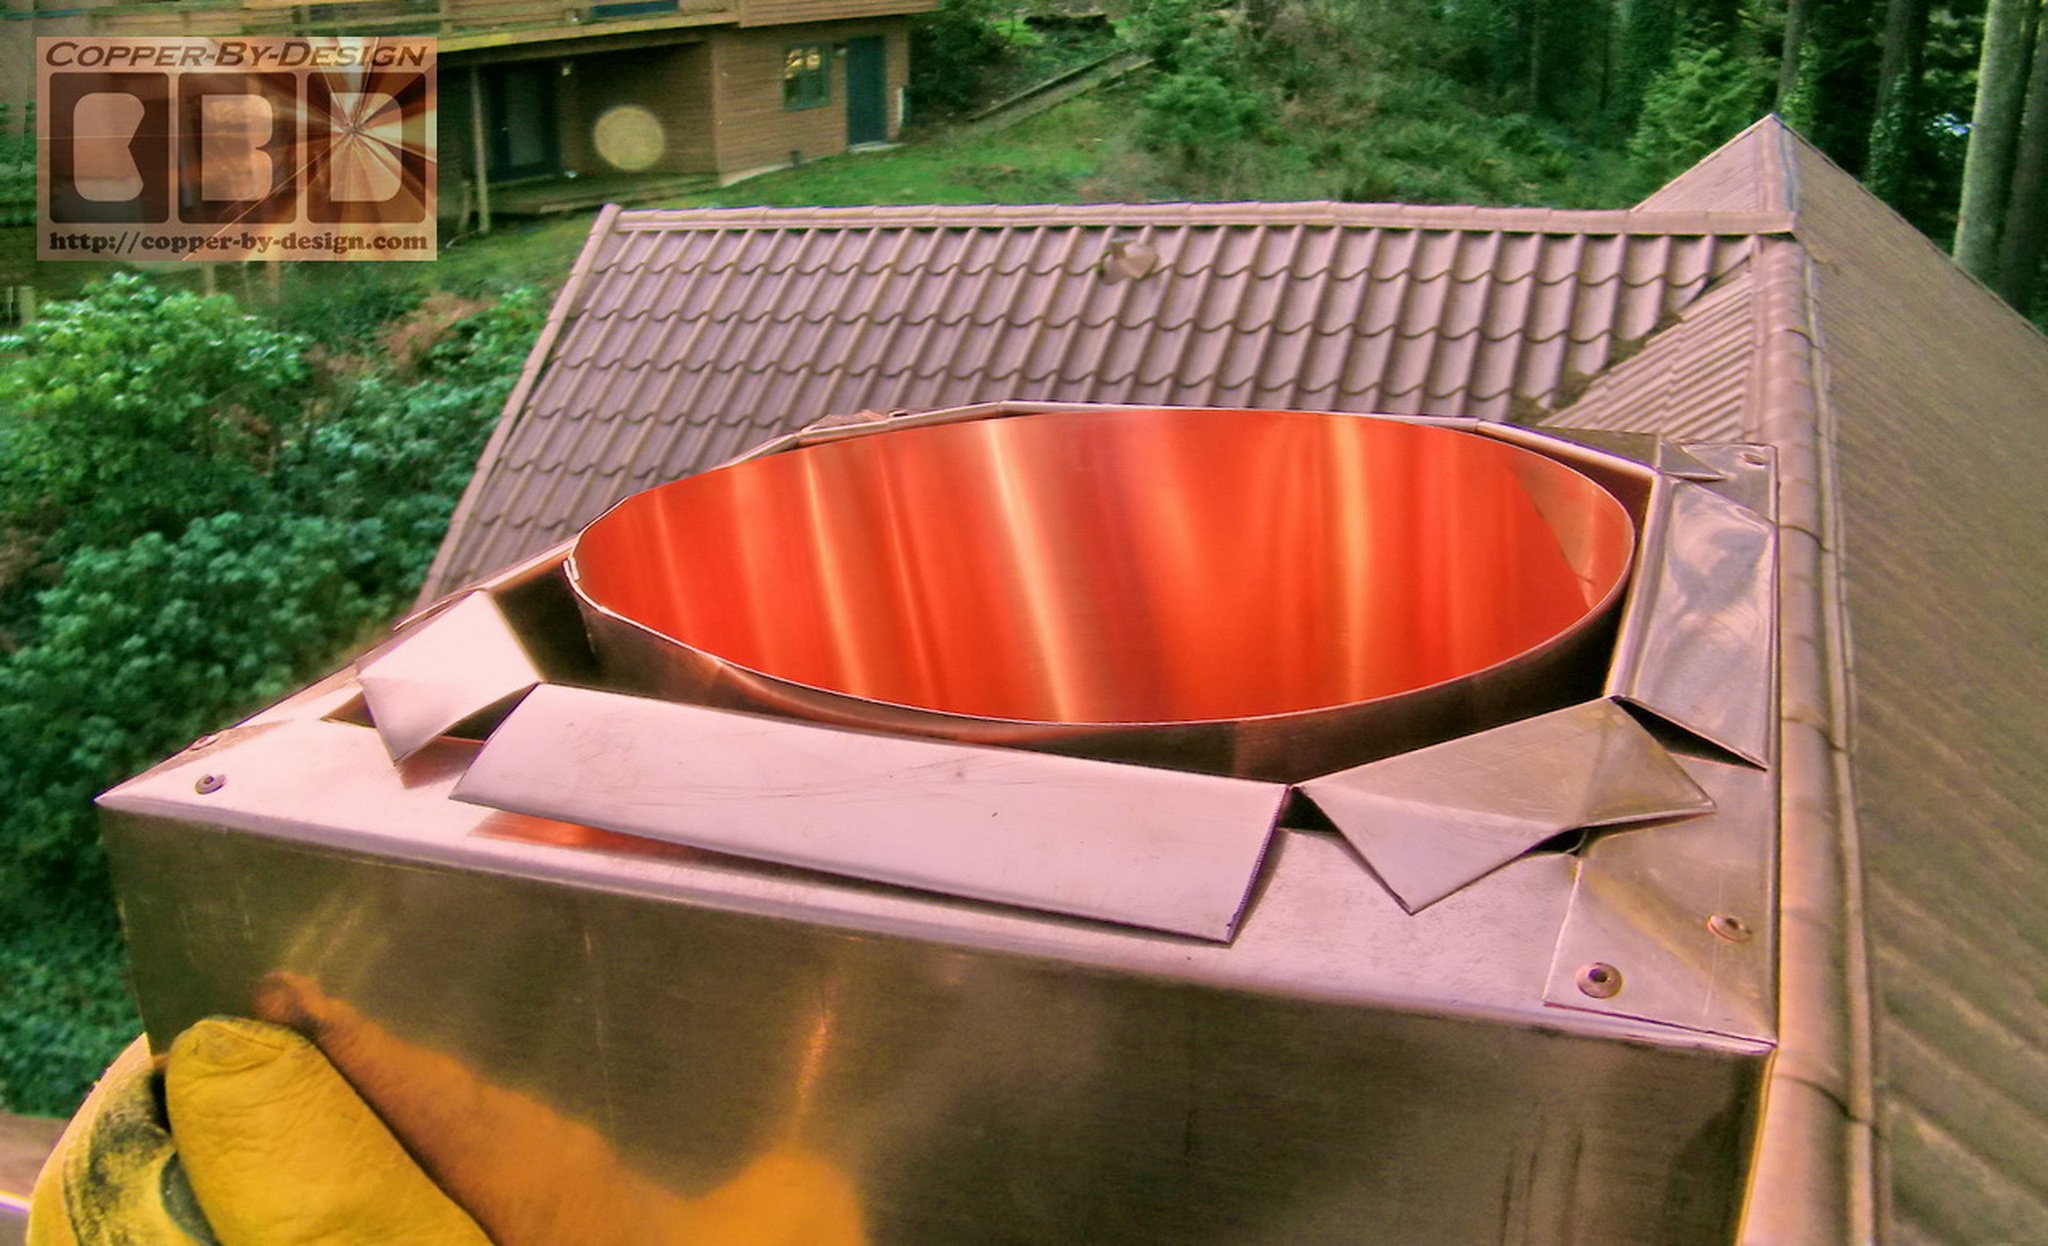
Here's what I found when first examining what was up there and had failed to protect their home. The large chimney top was just covered with a flat sheet of galvanized steel and had begun to rut and cause staining over the rocks, as well as leaking into the house.

The steel pan was rusty, but what concerned me more was the puddling on top from the flat surface having caved in over the decades of snow loads and tree branches coming down in wind storm and hitting this pan.
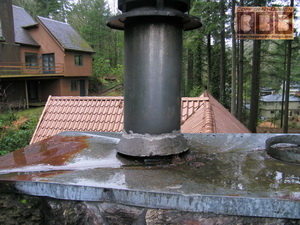
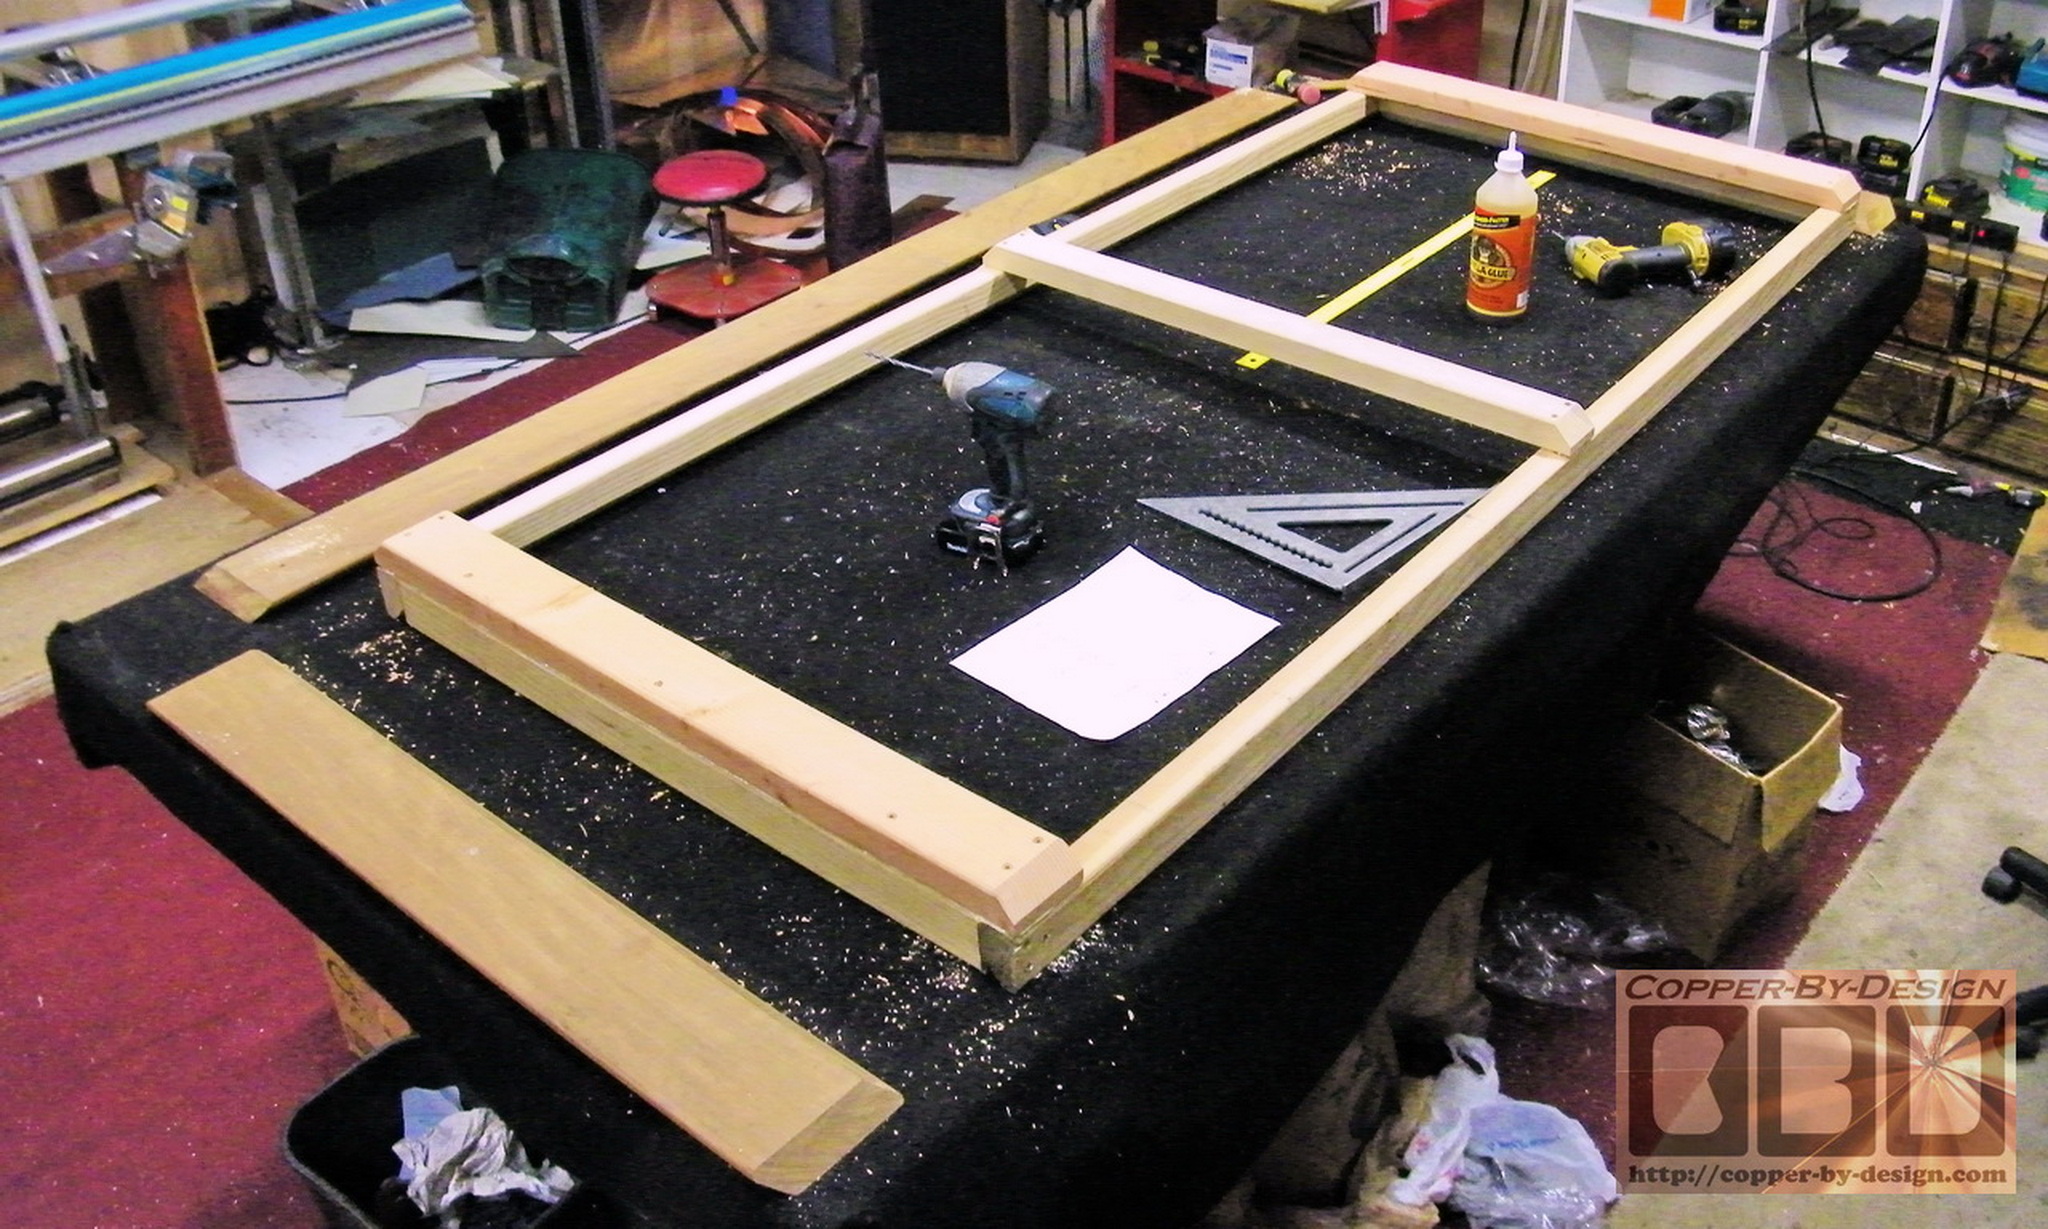
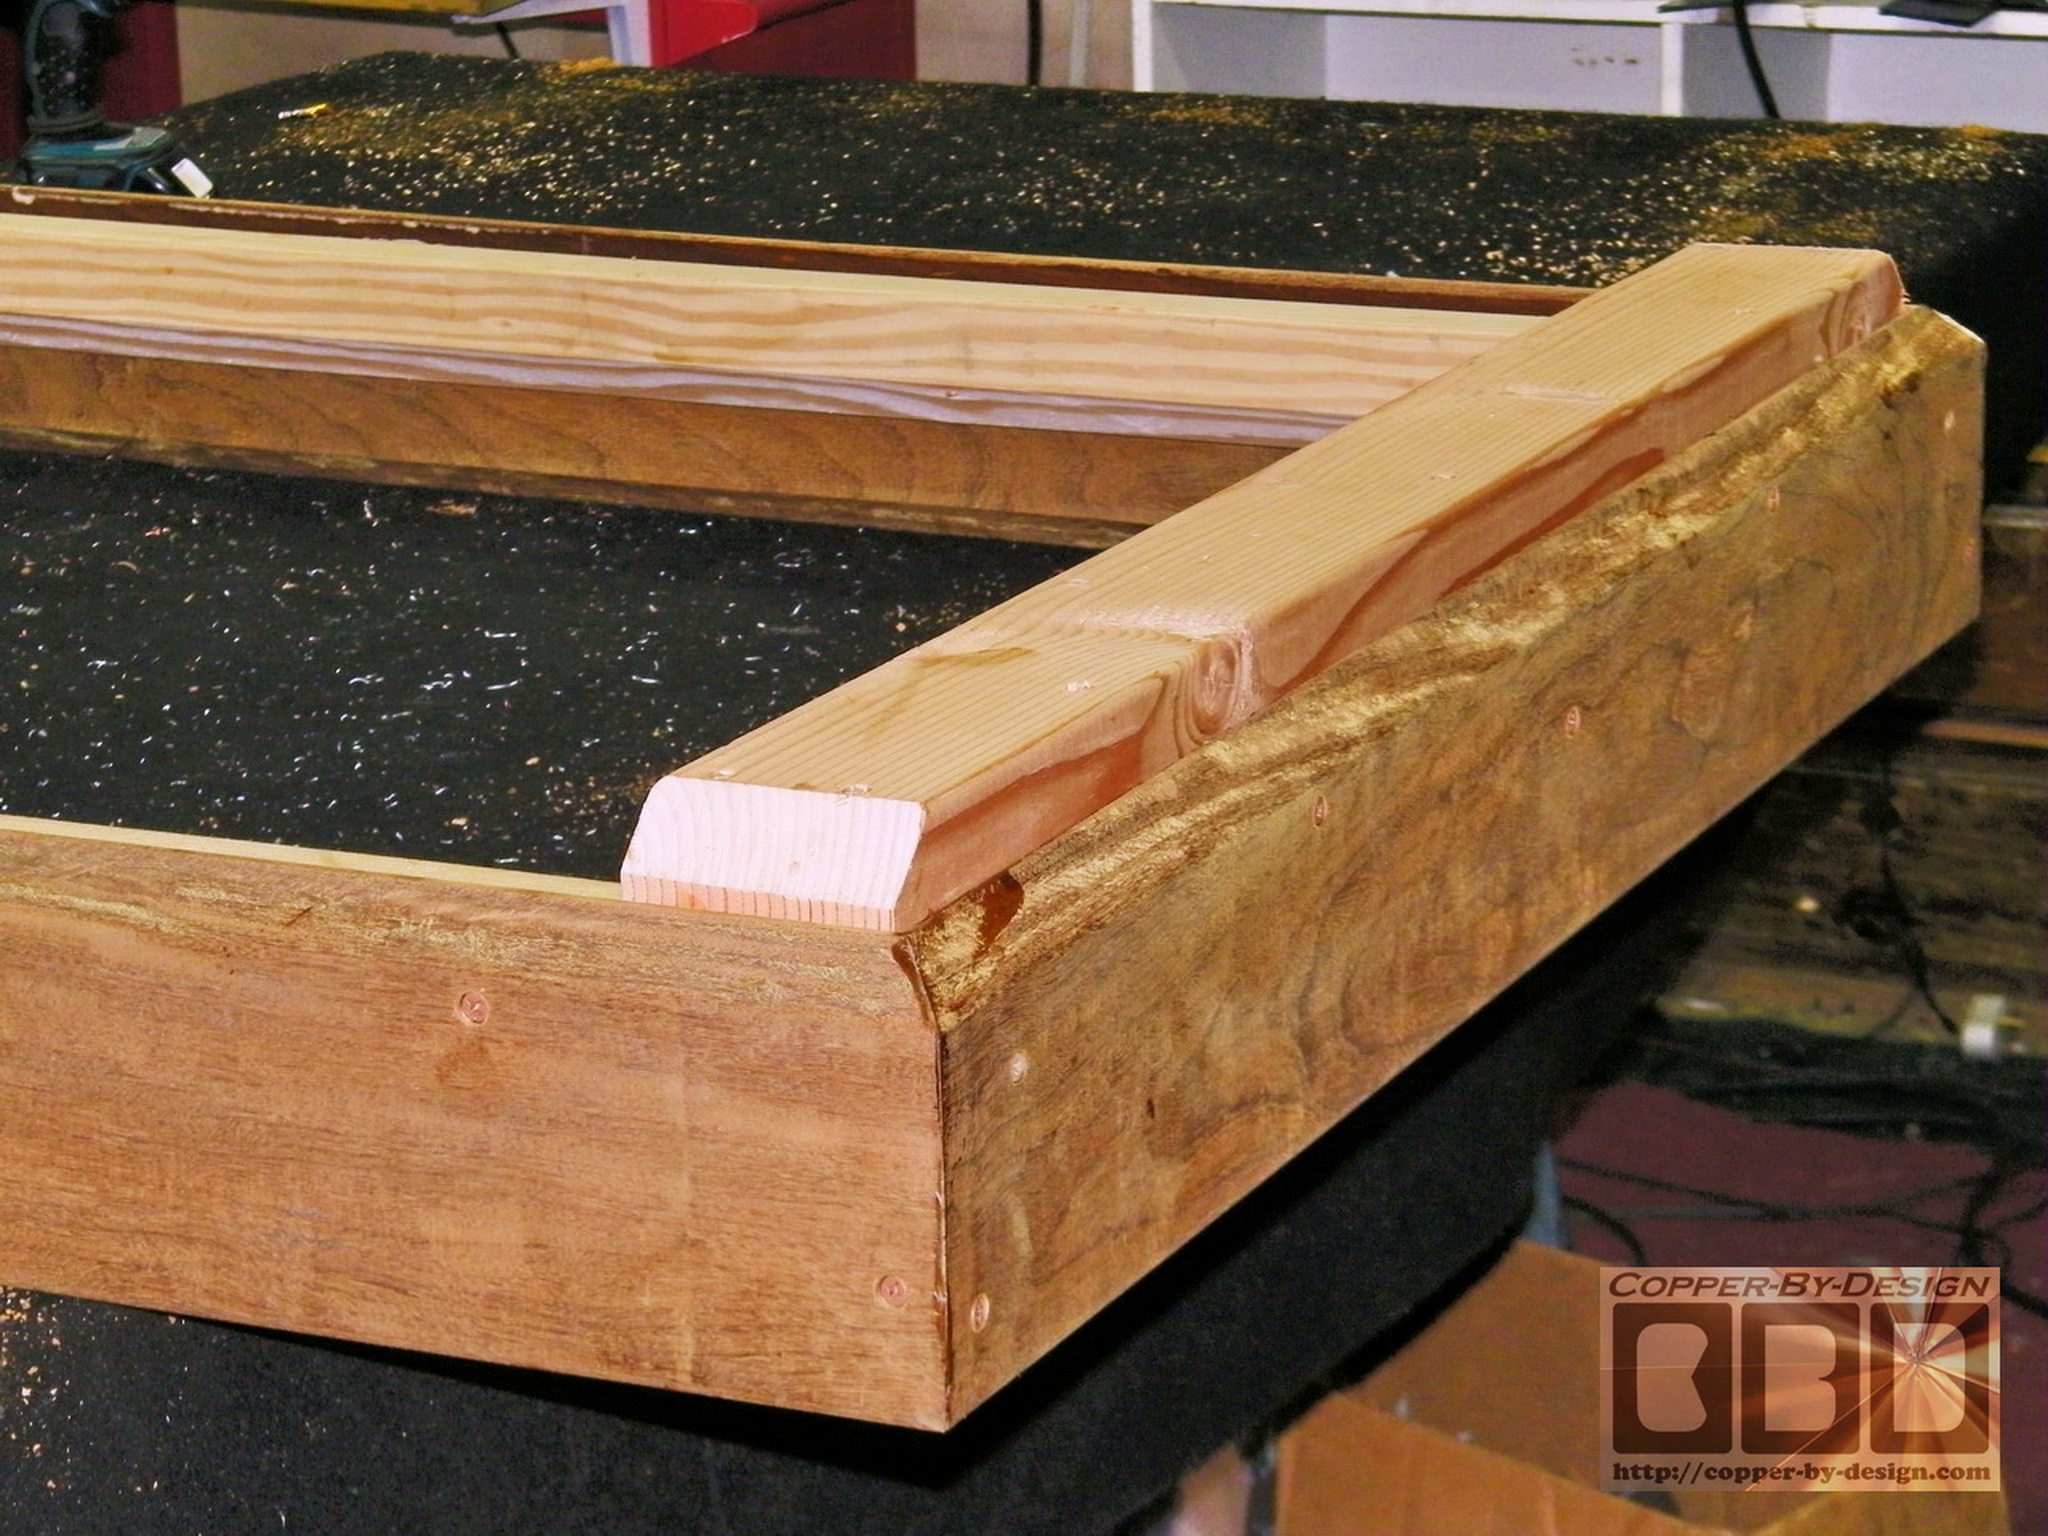
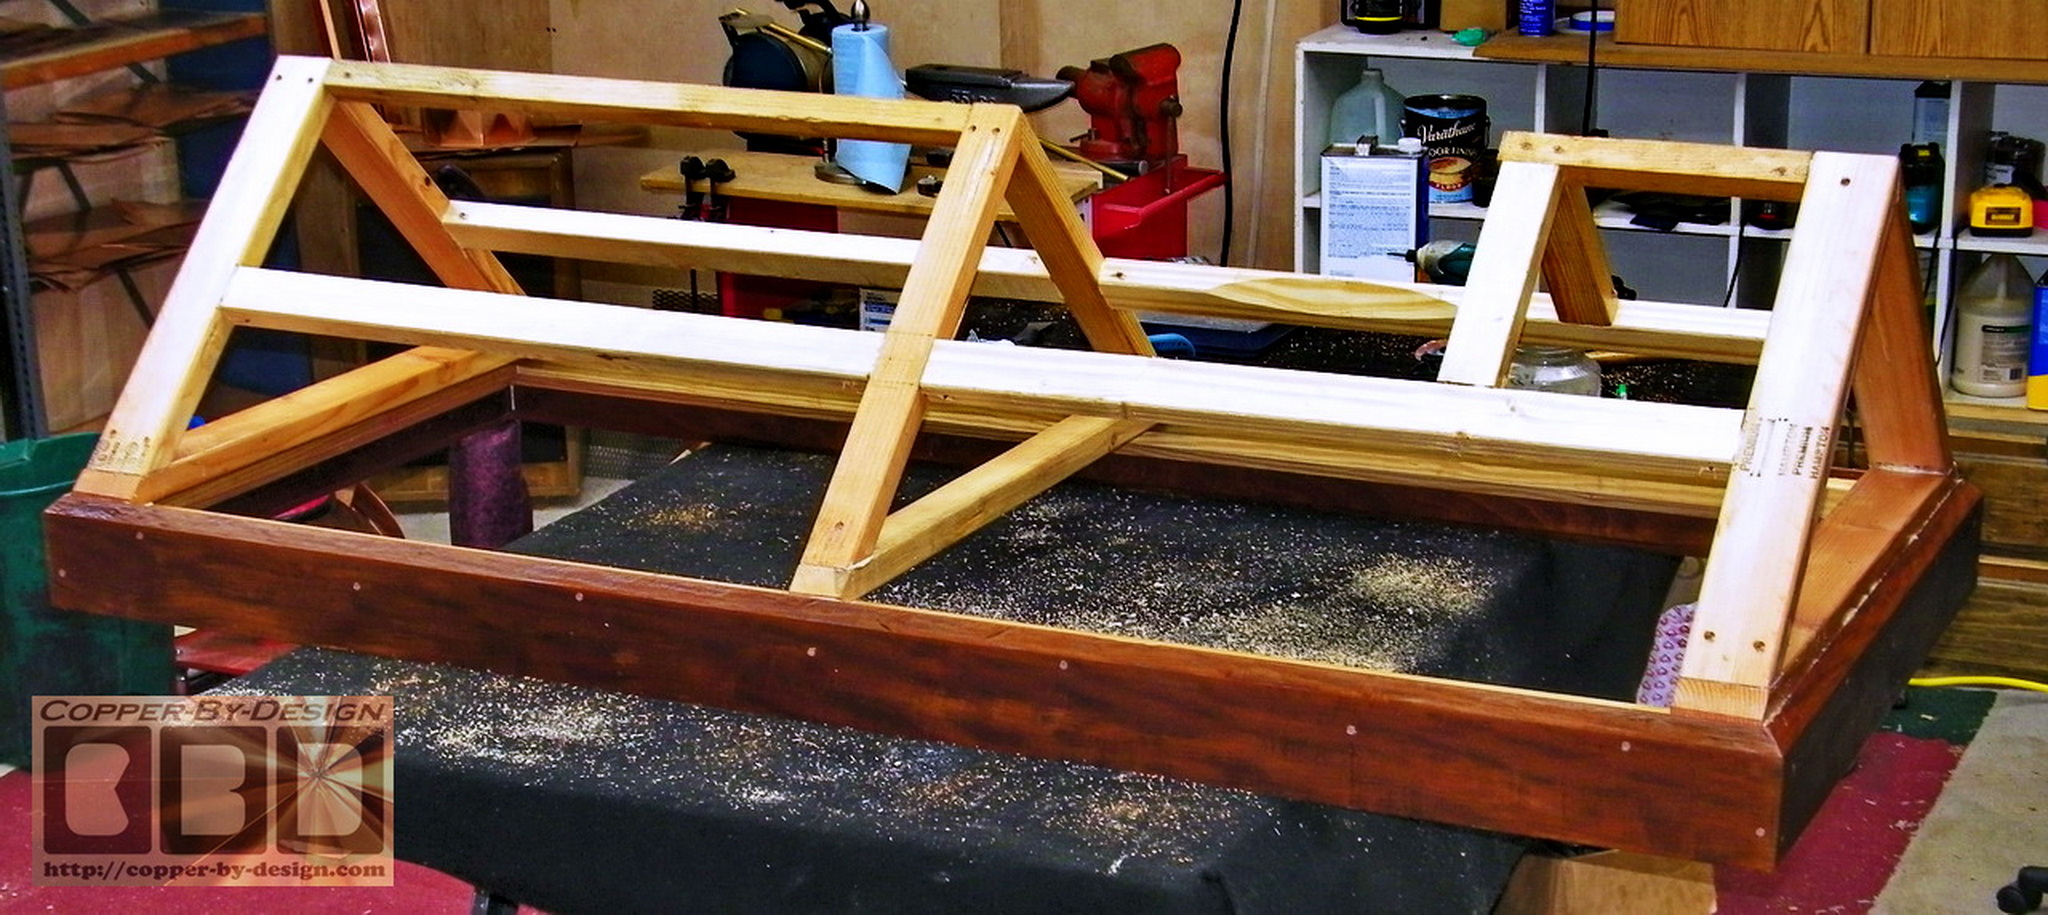
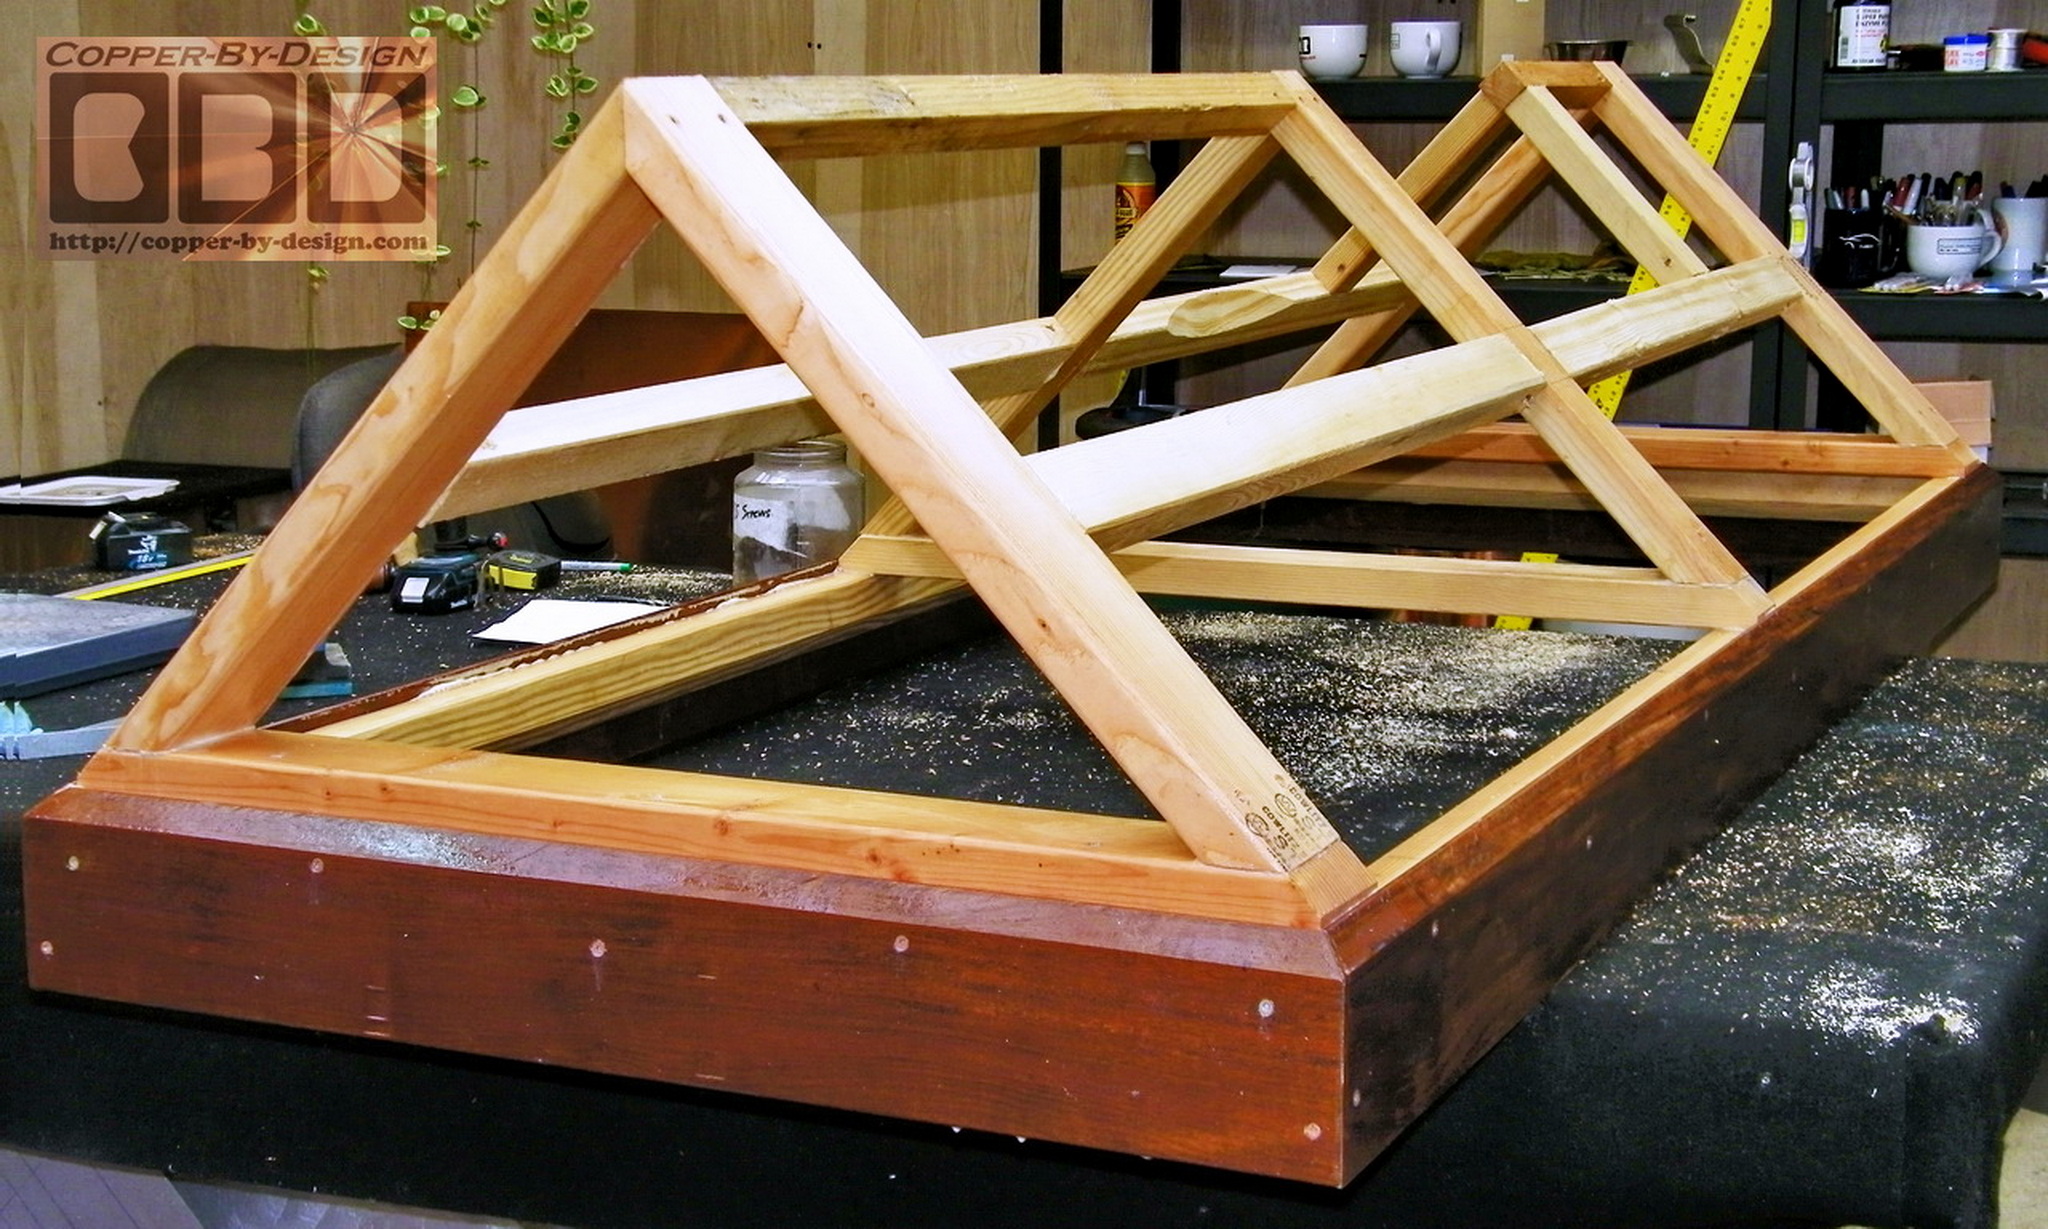
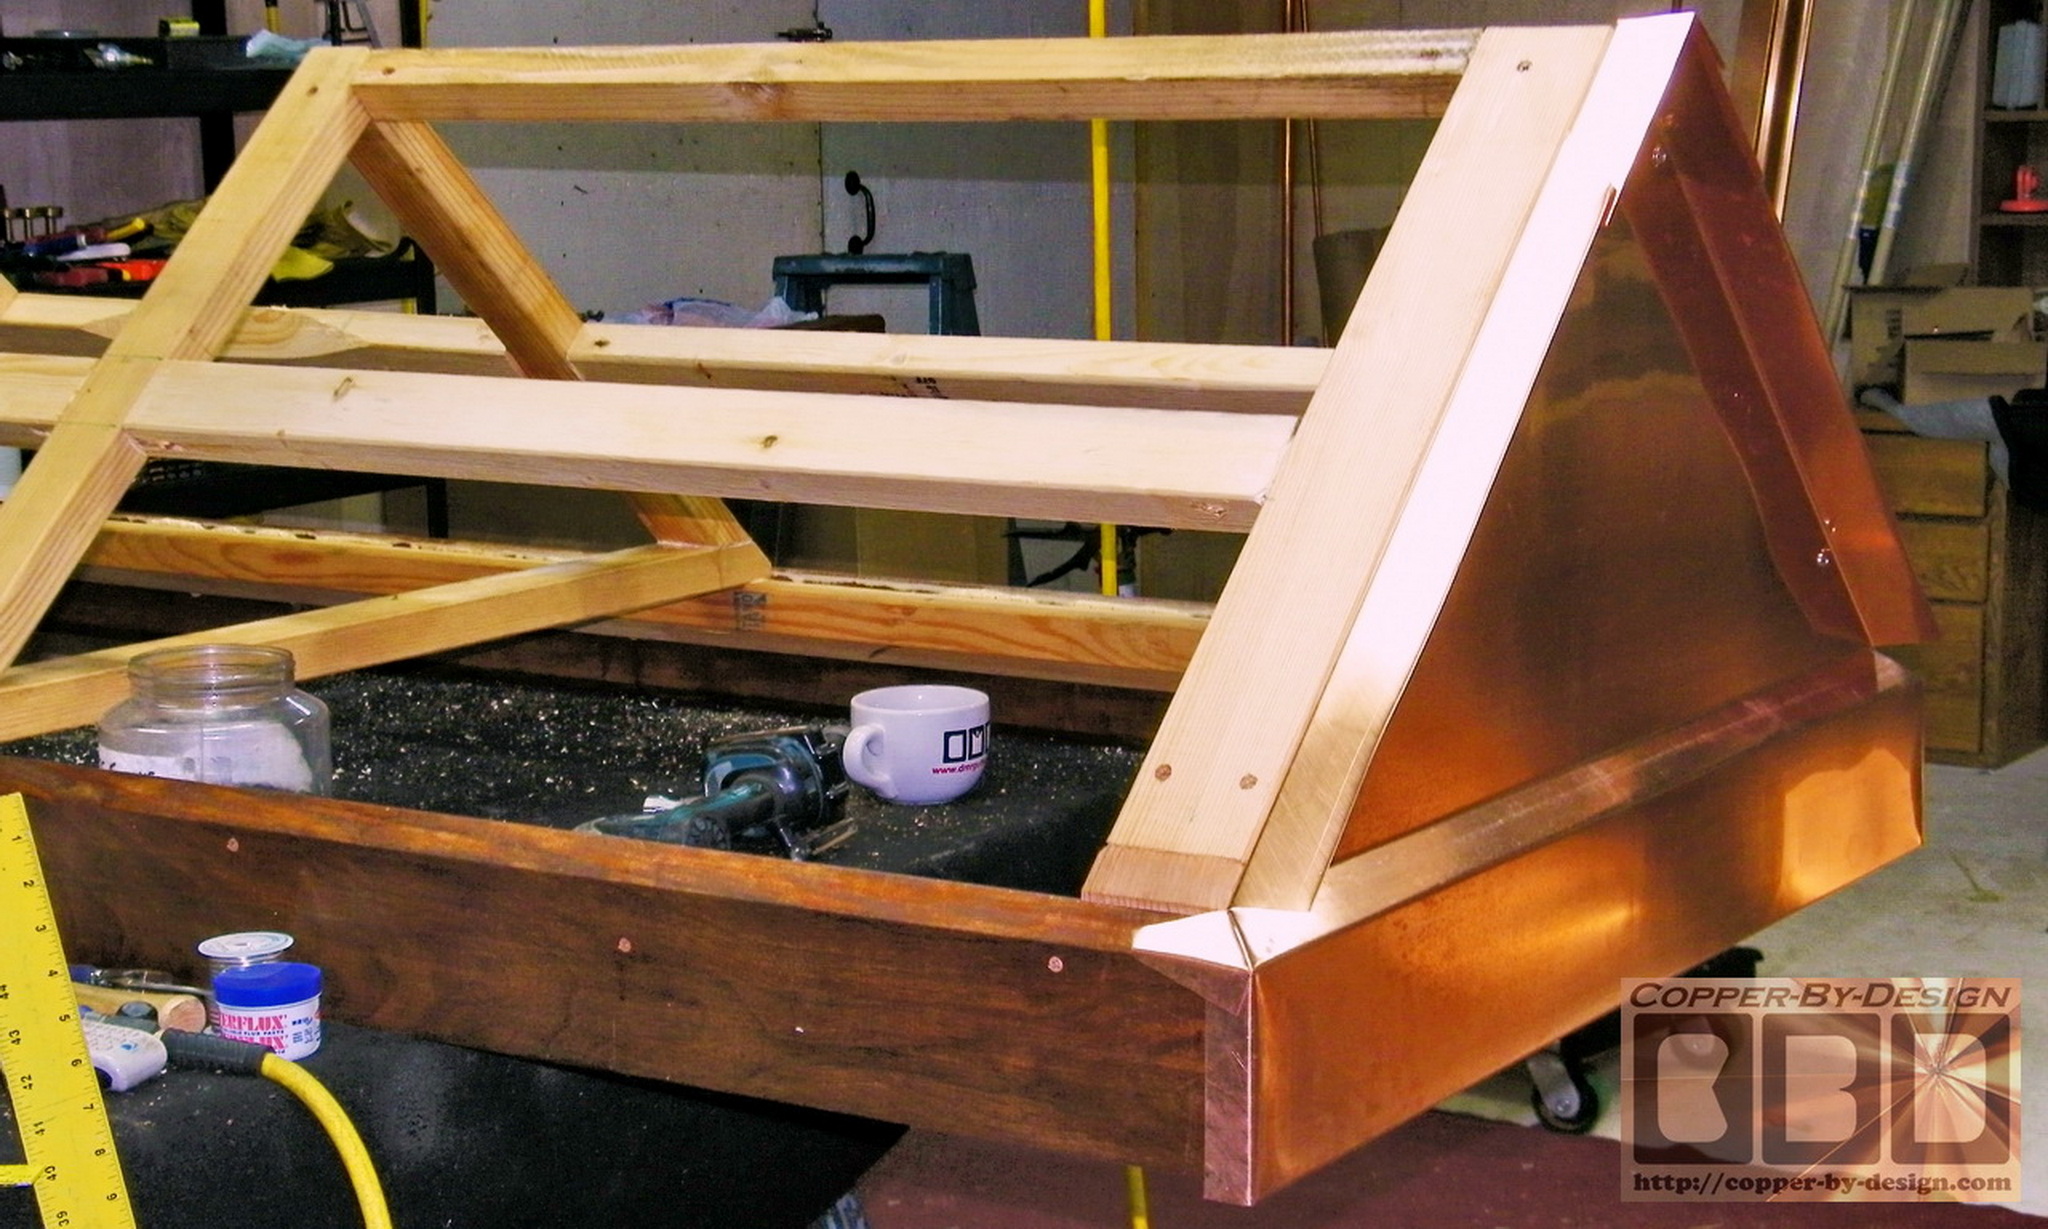
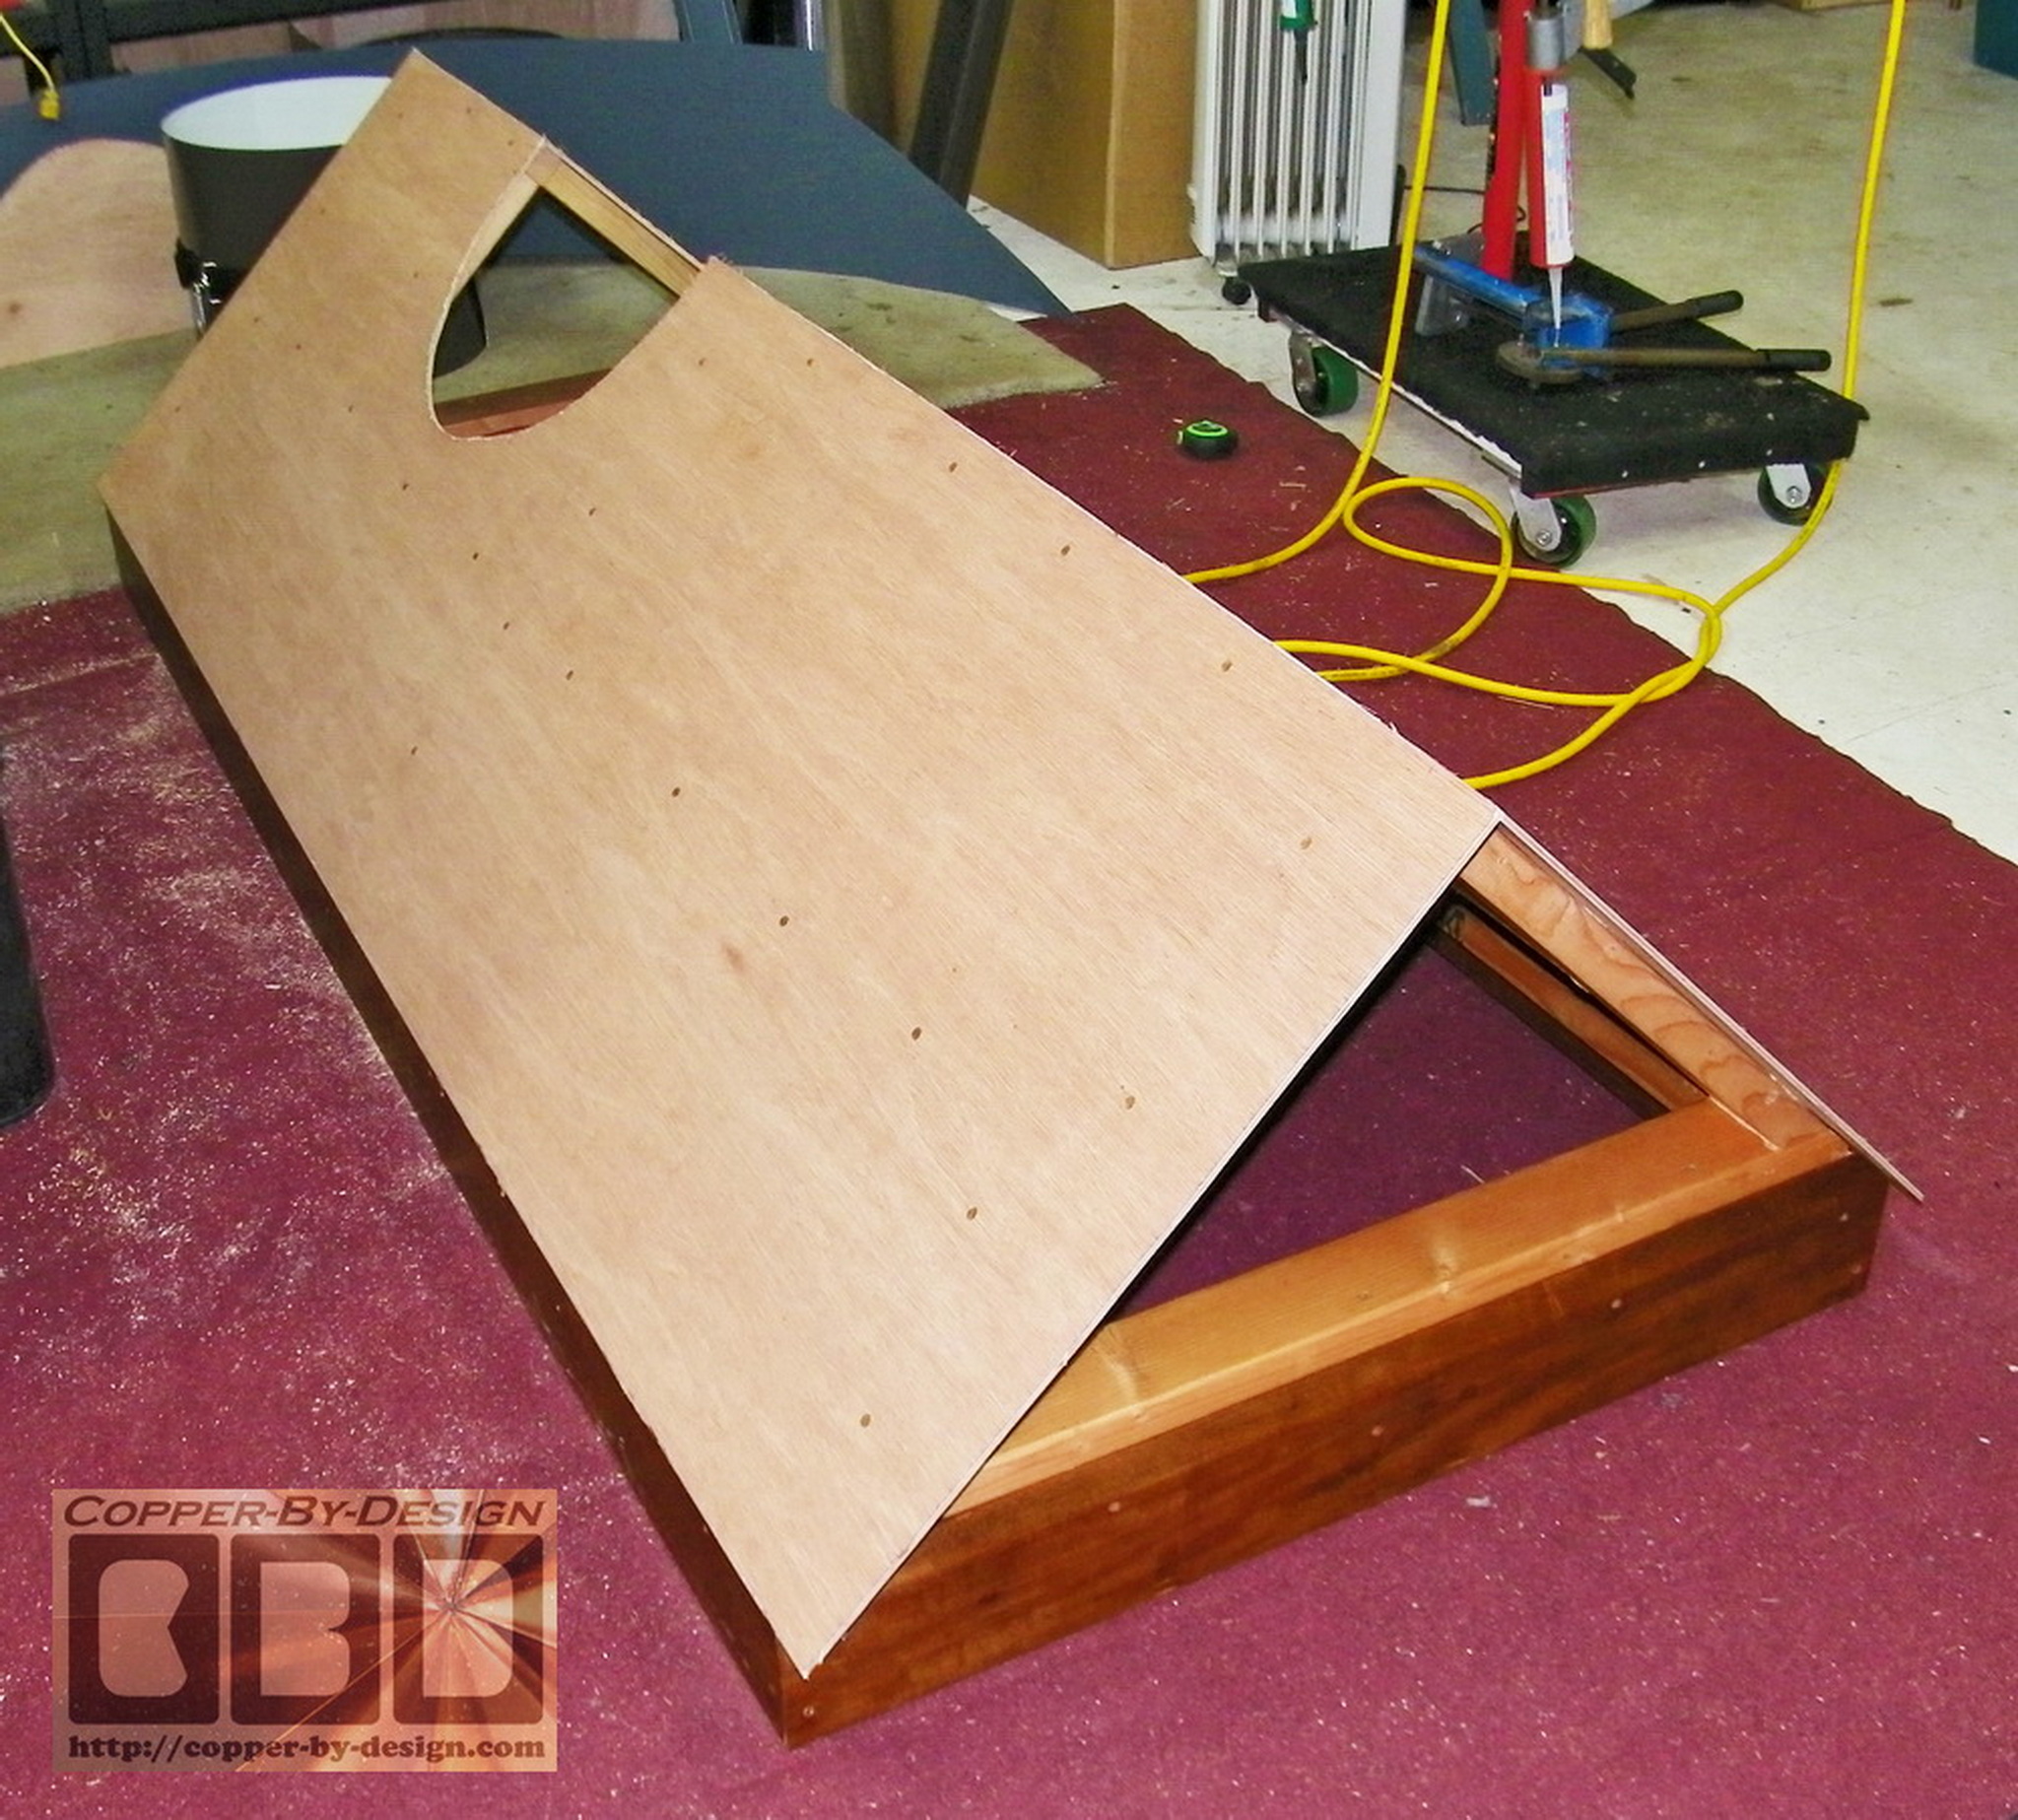
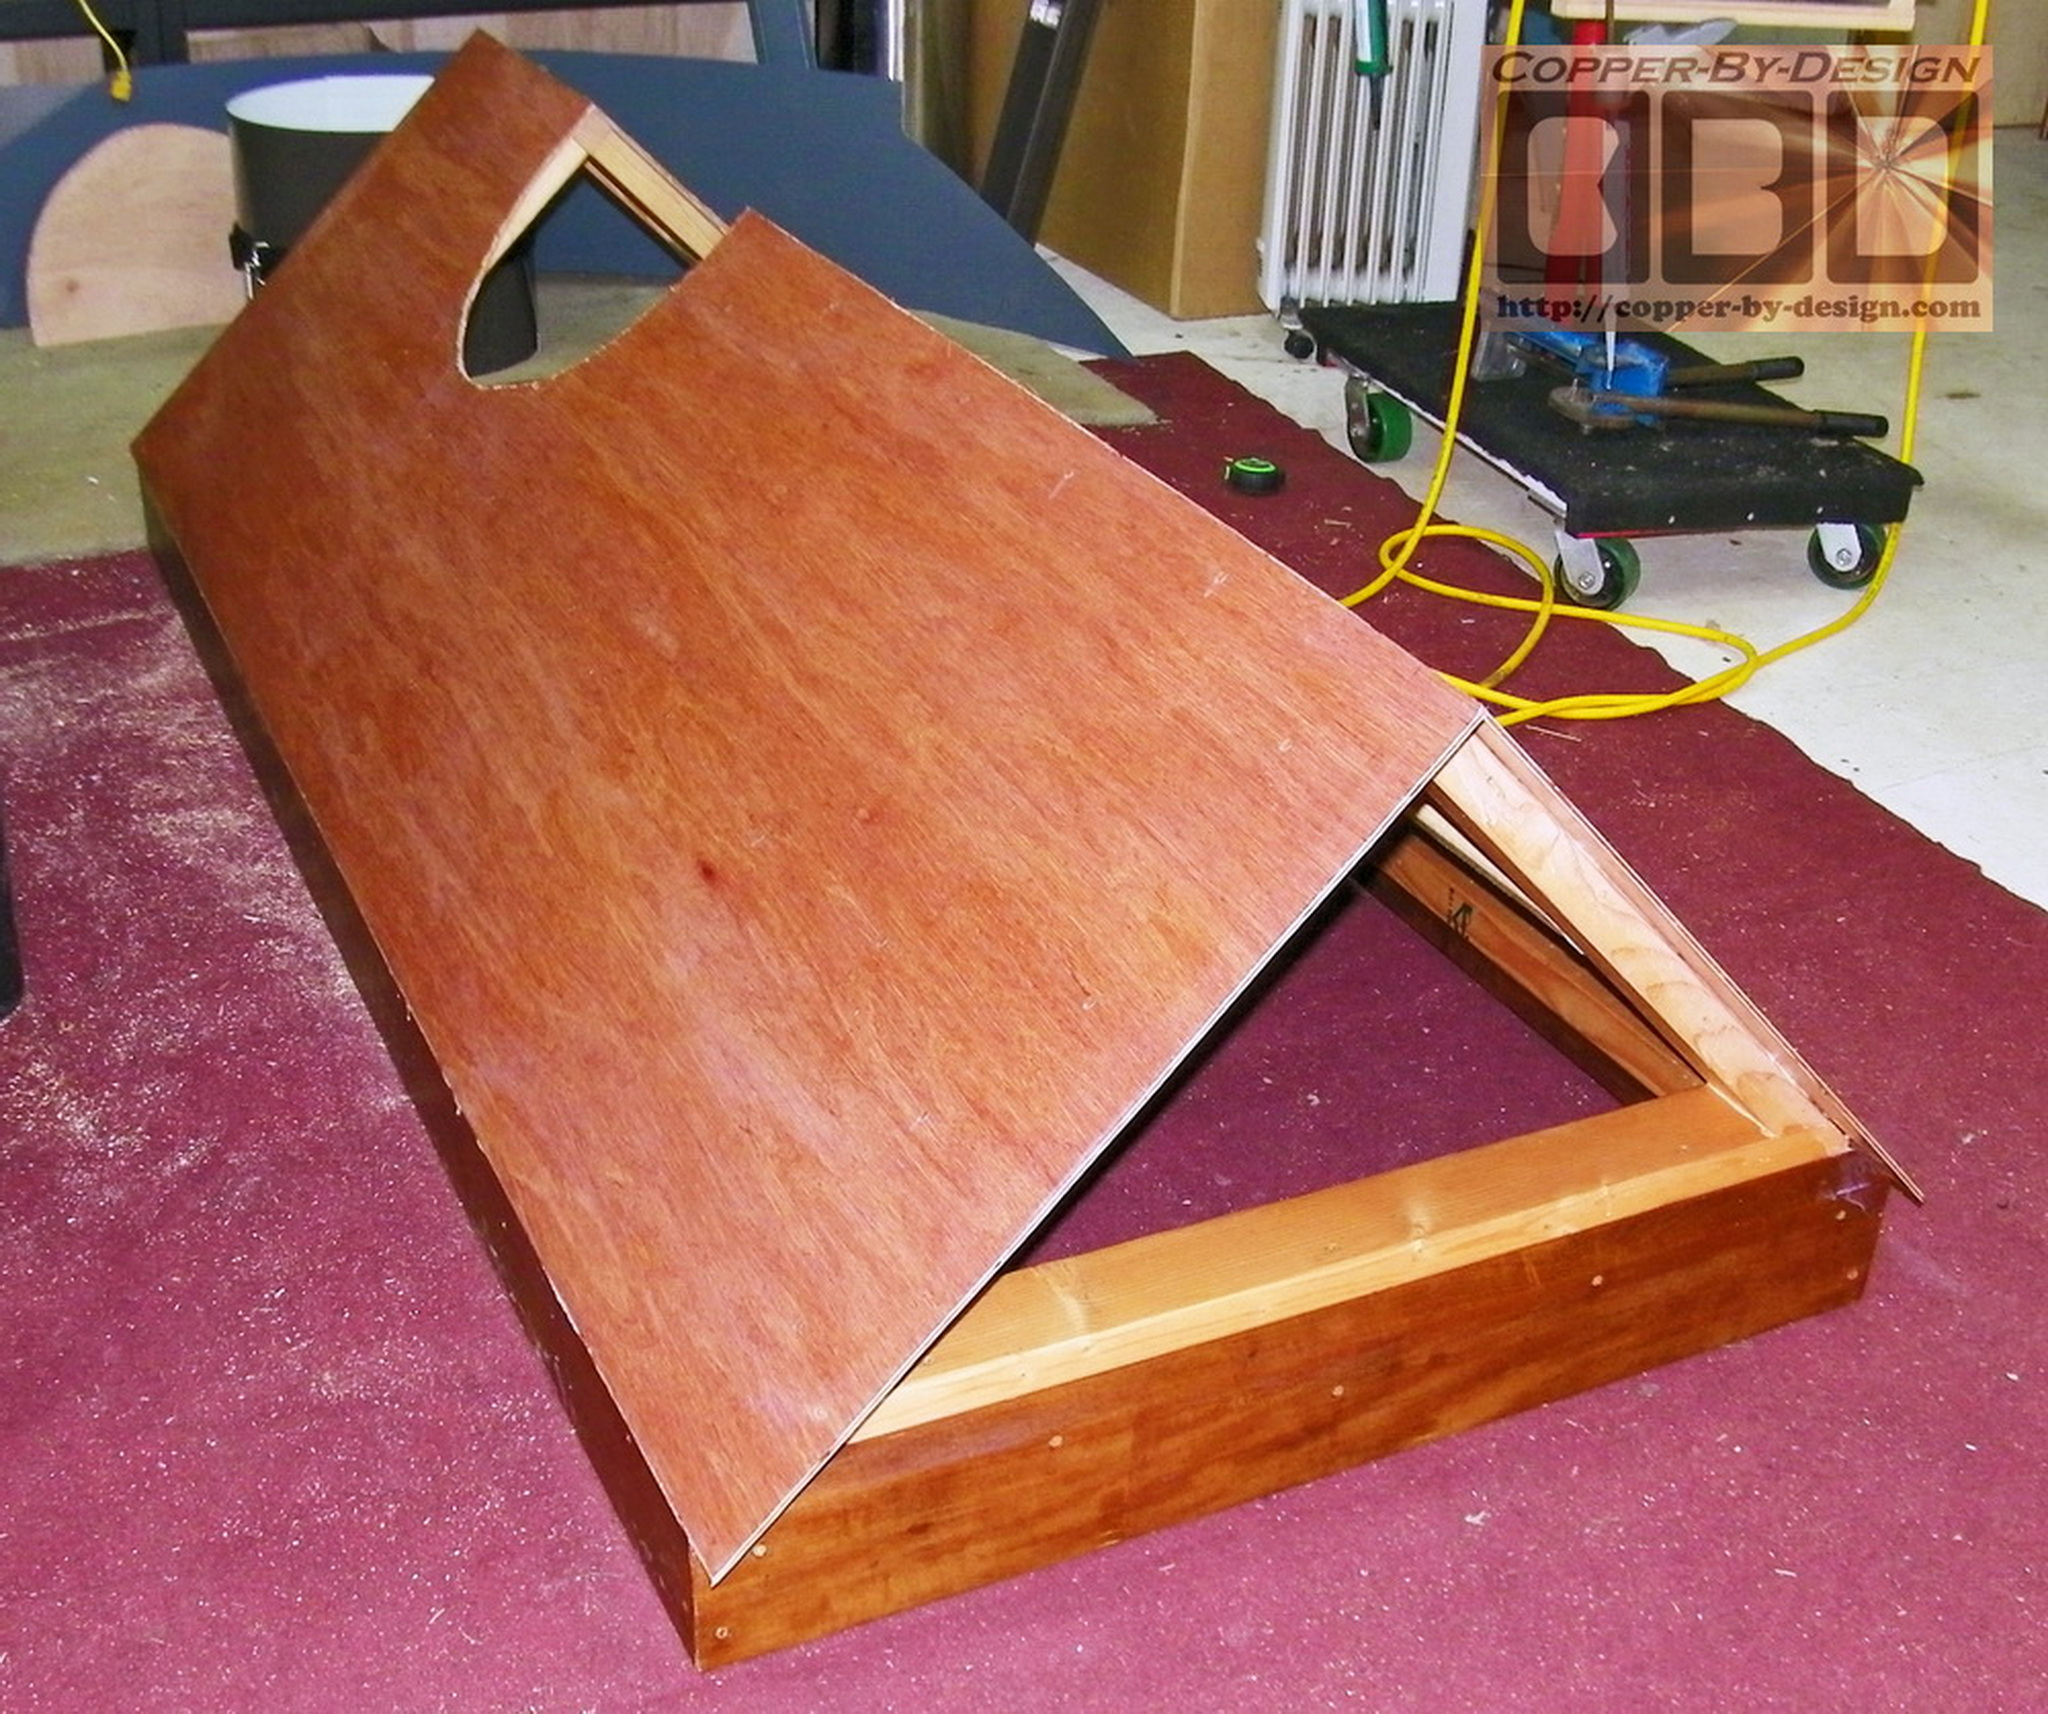
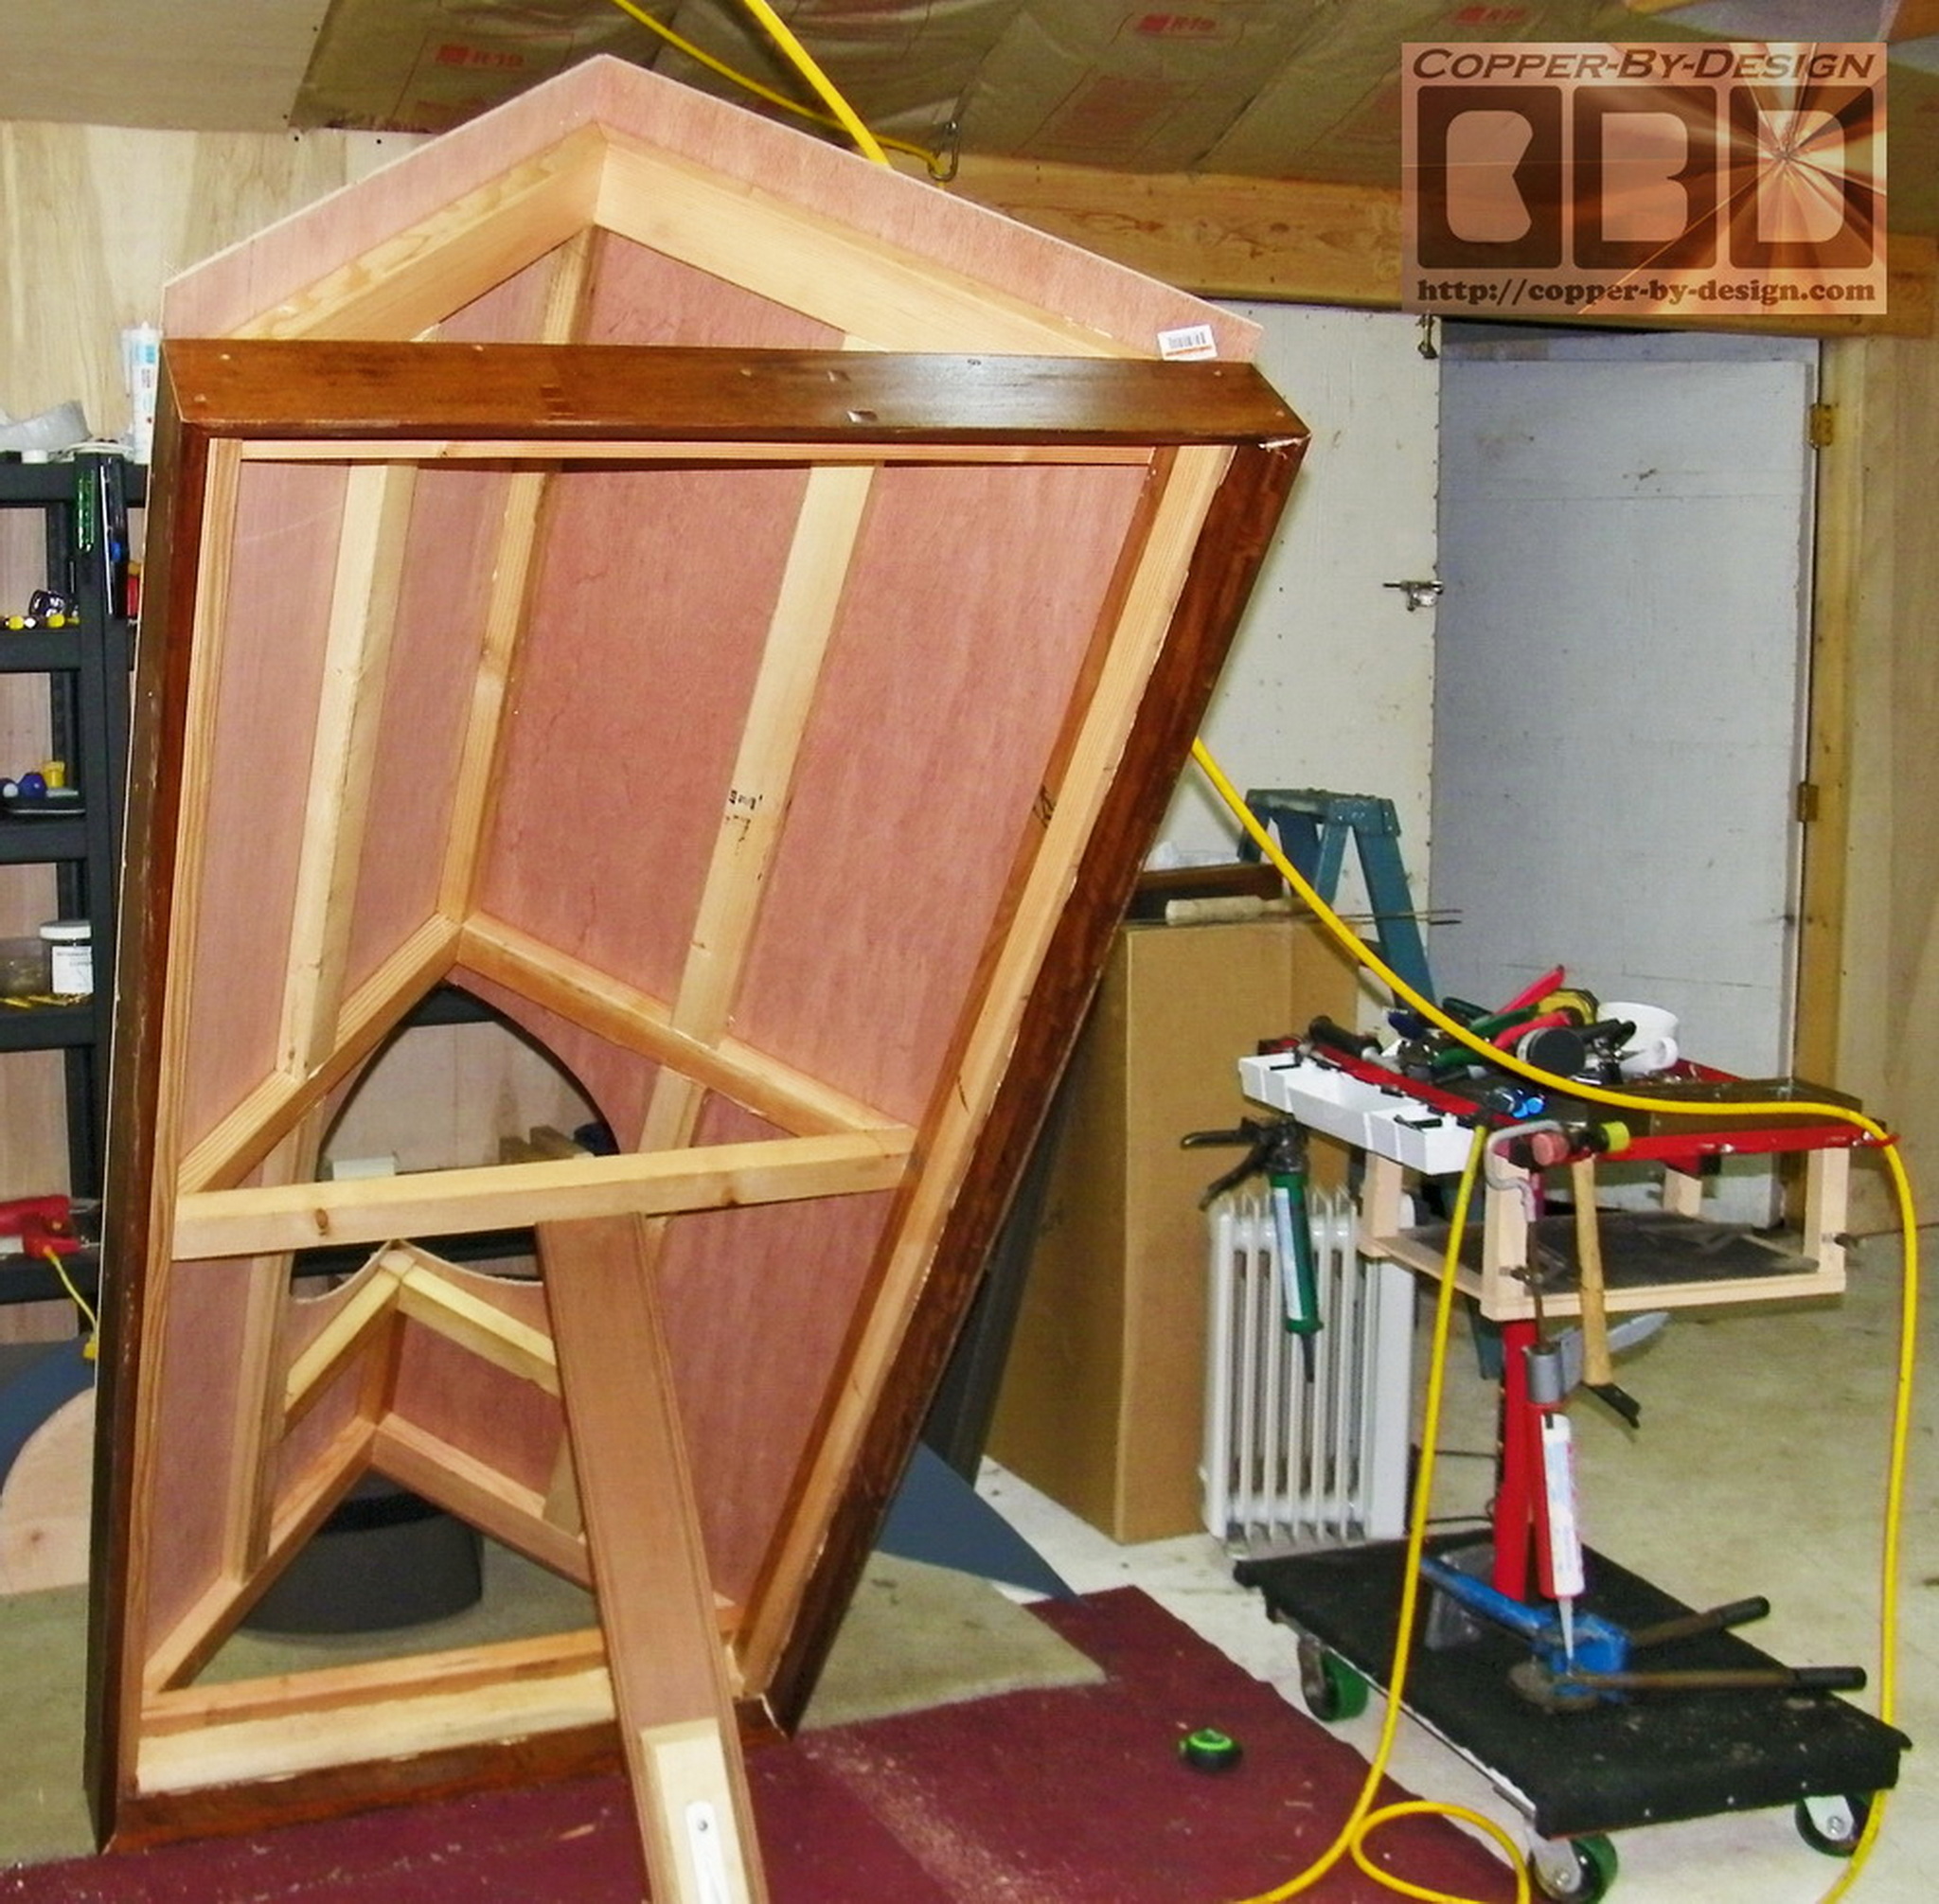
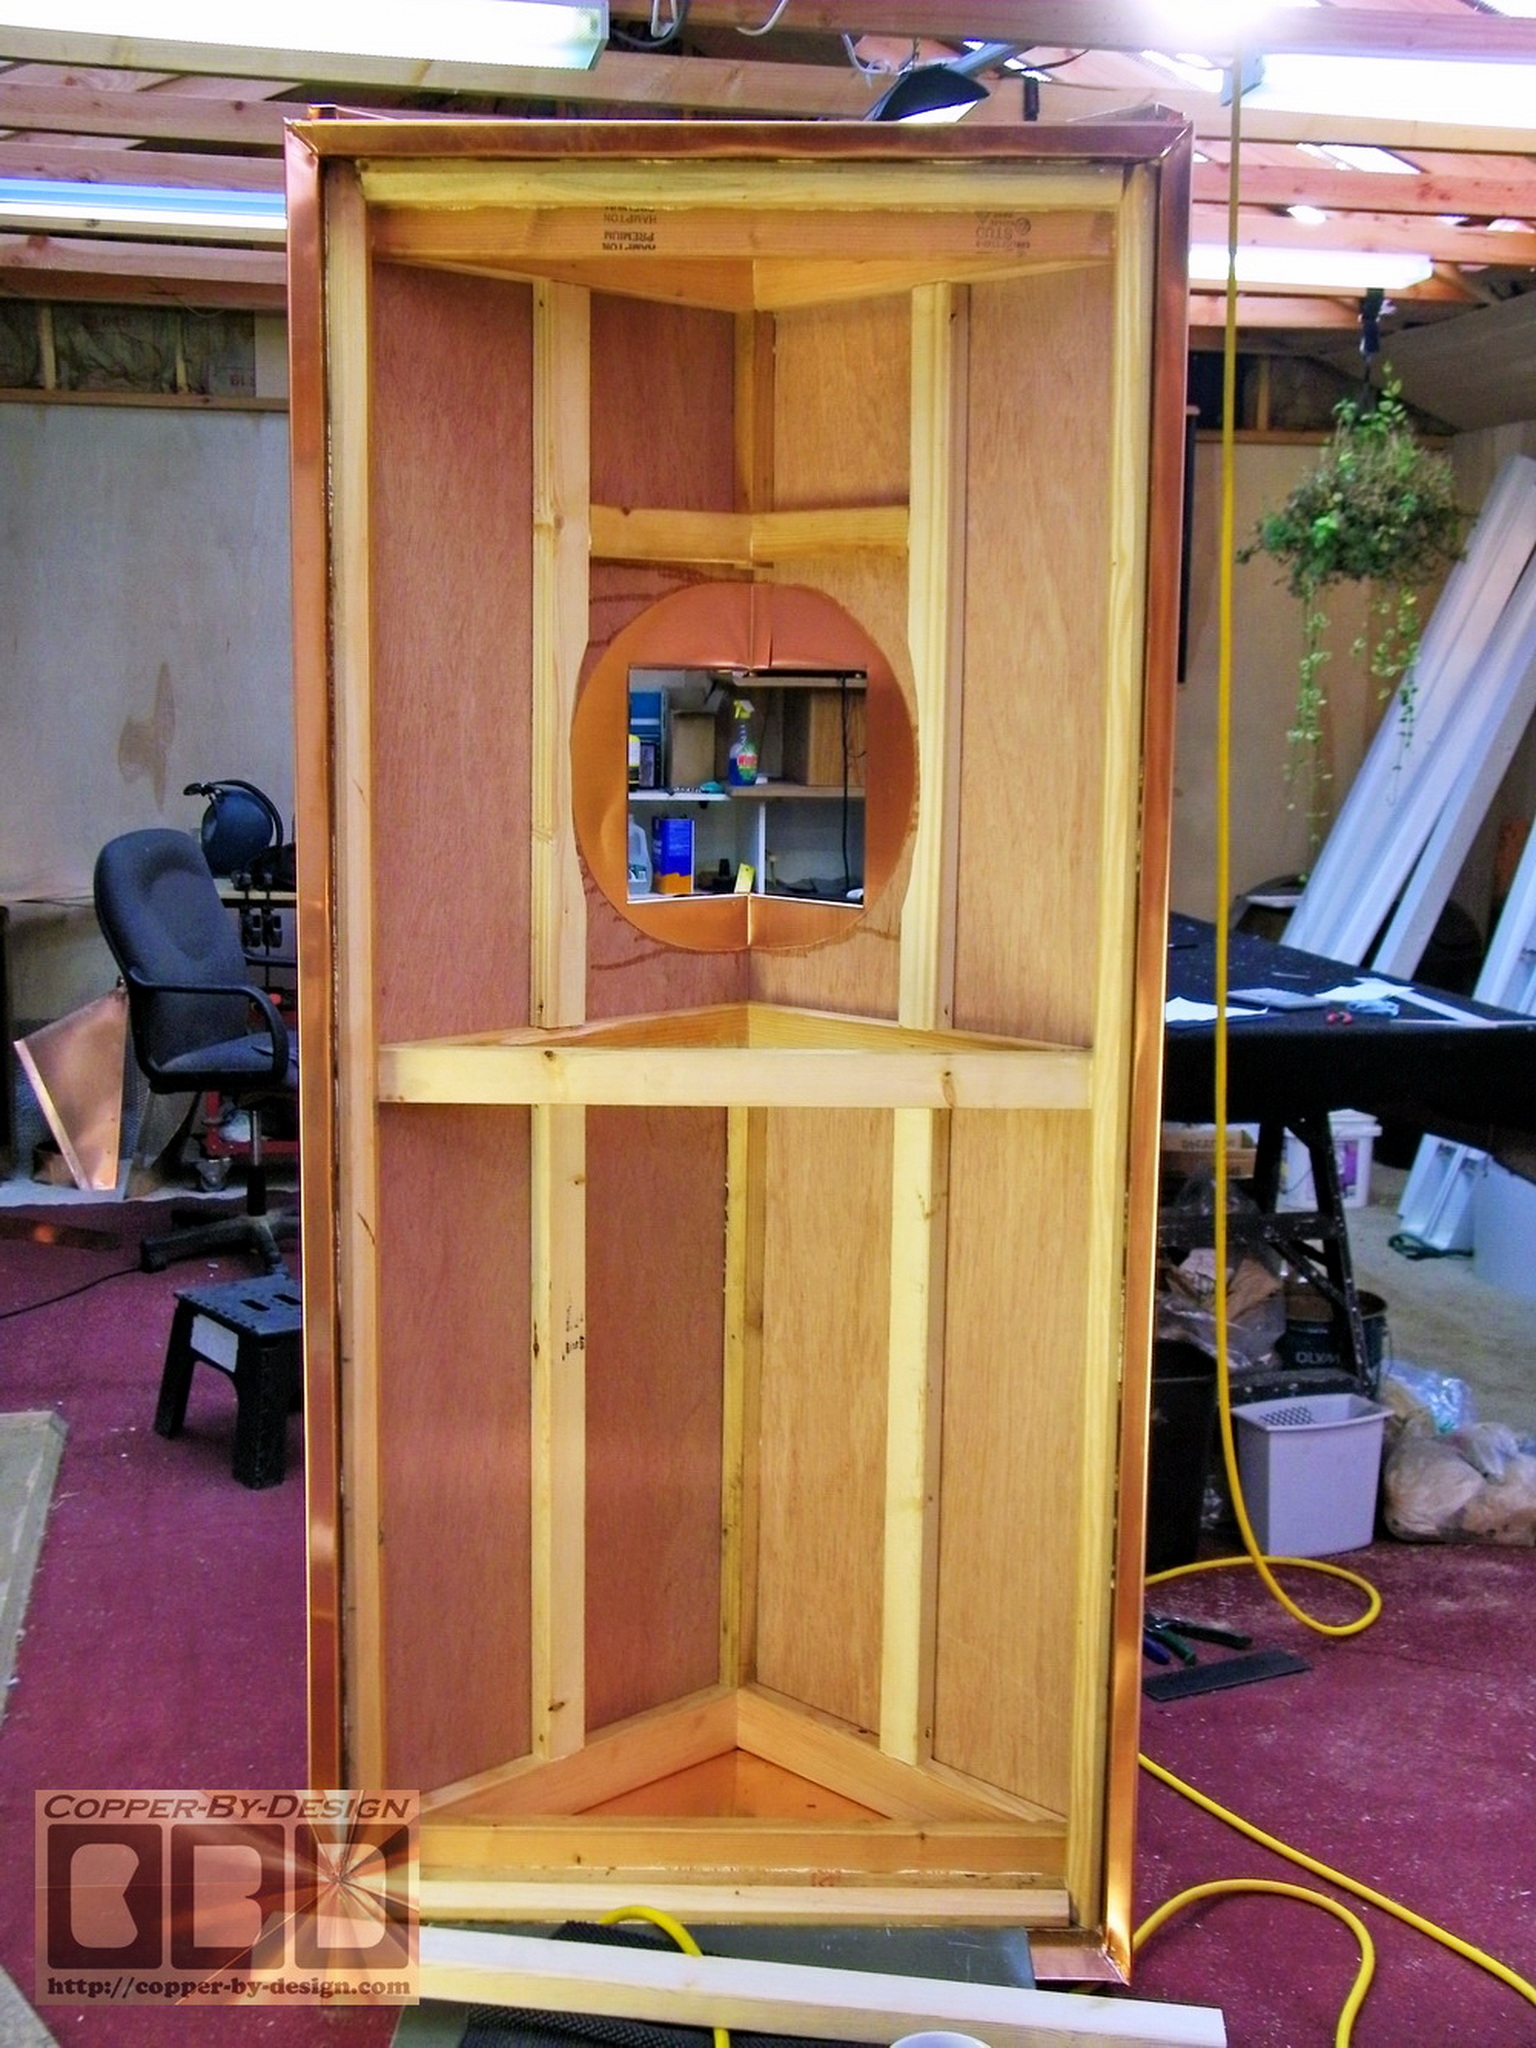
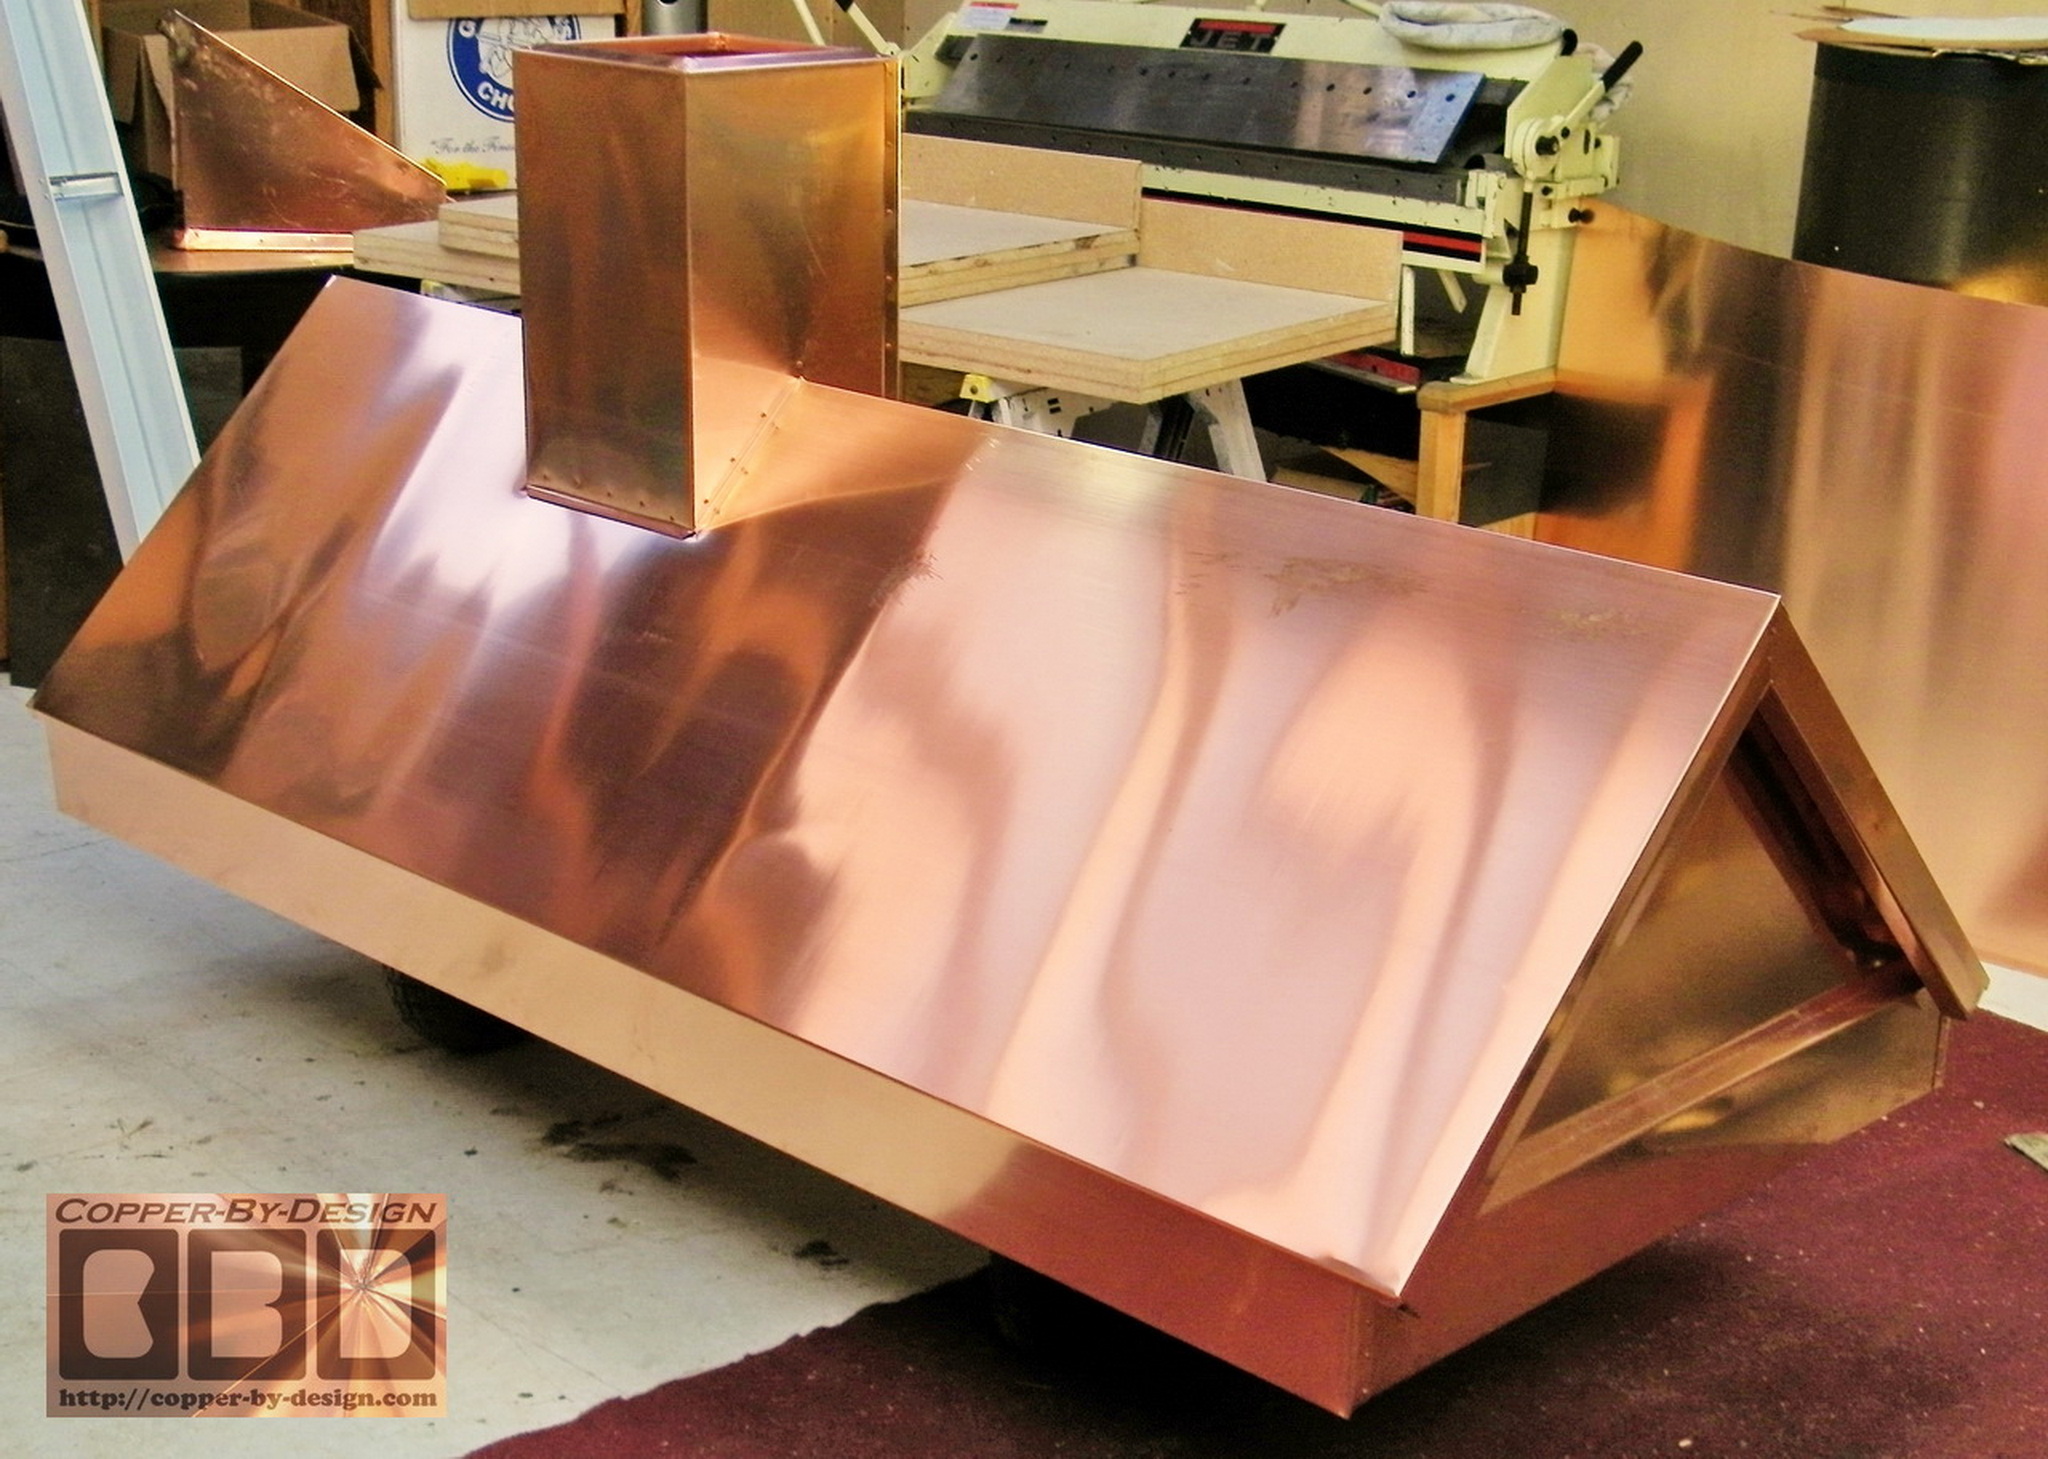
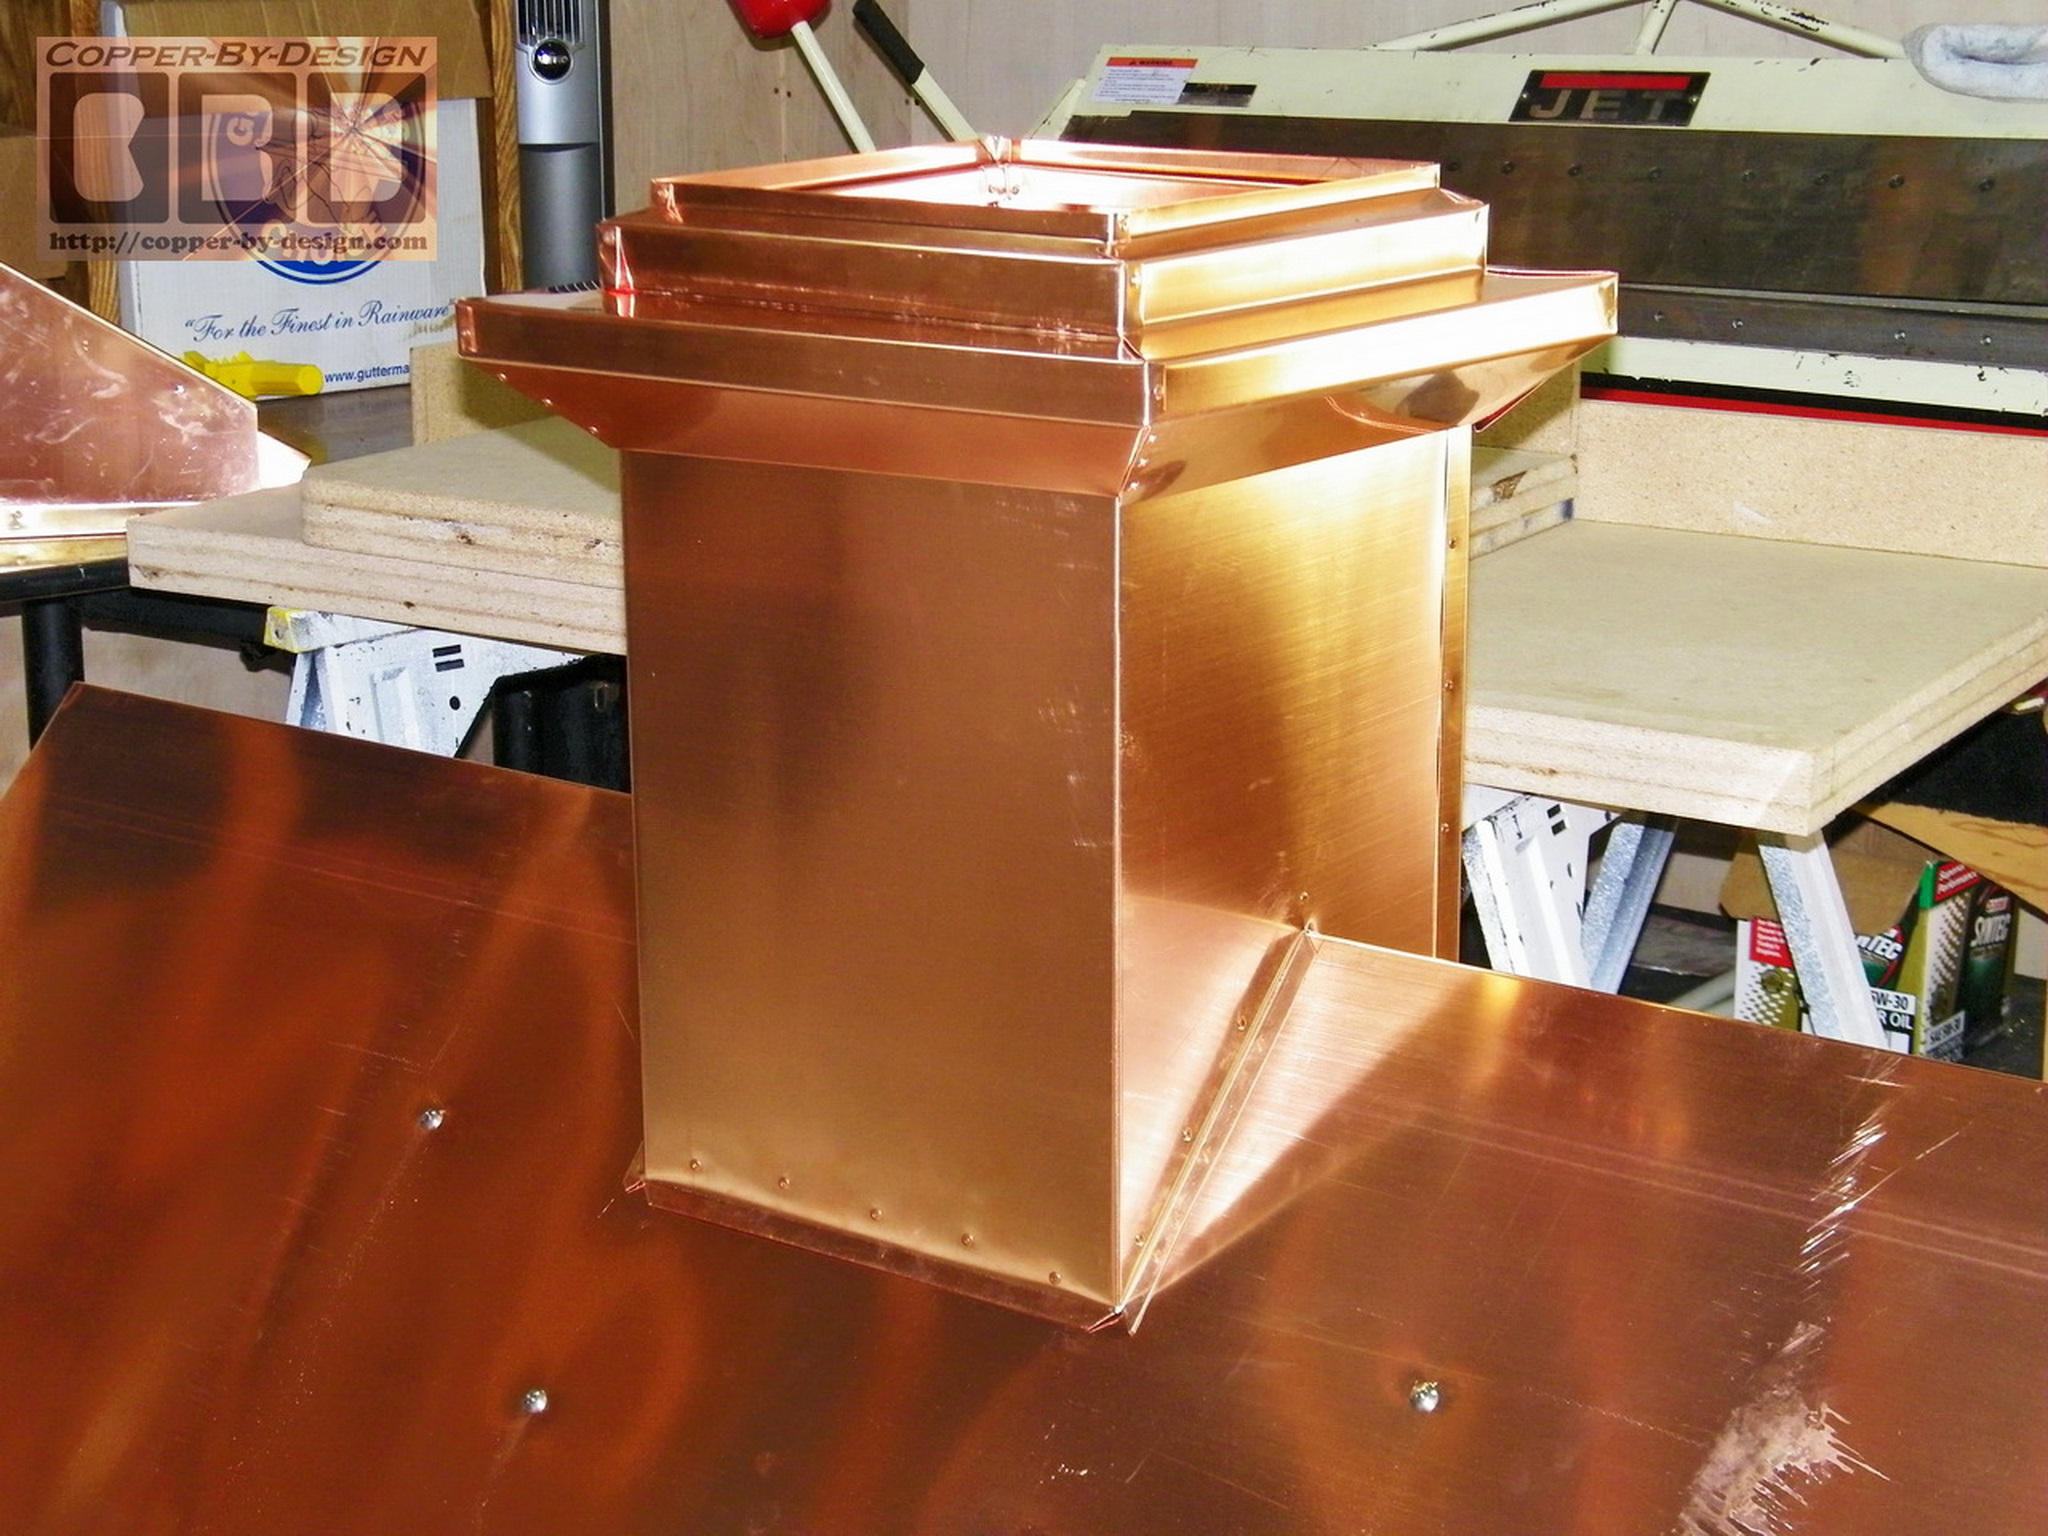
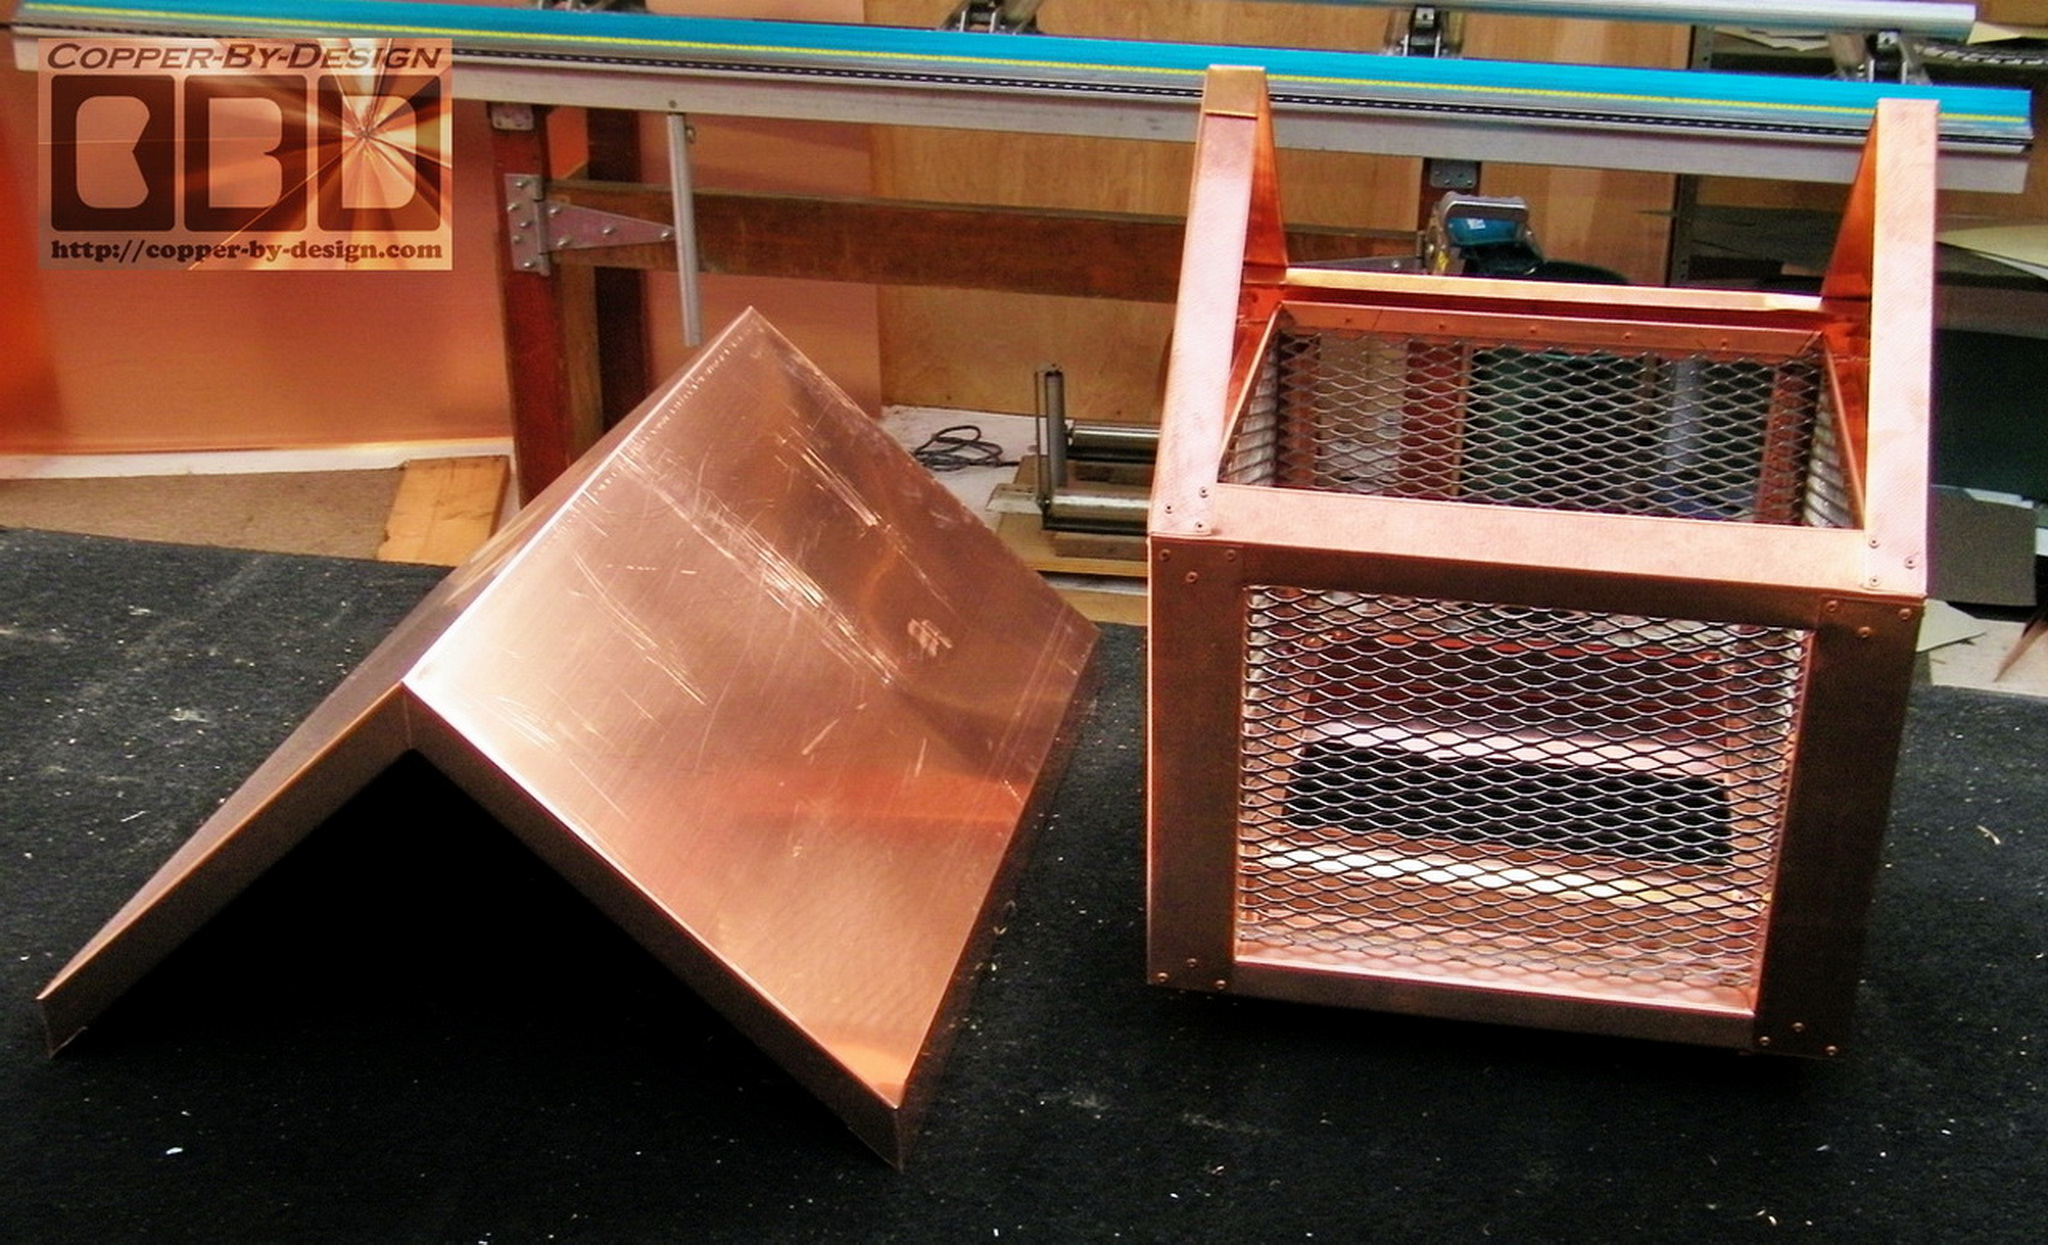
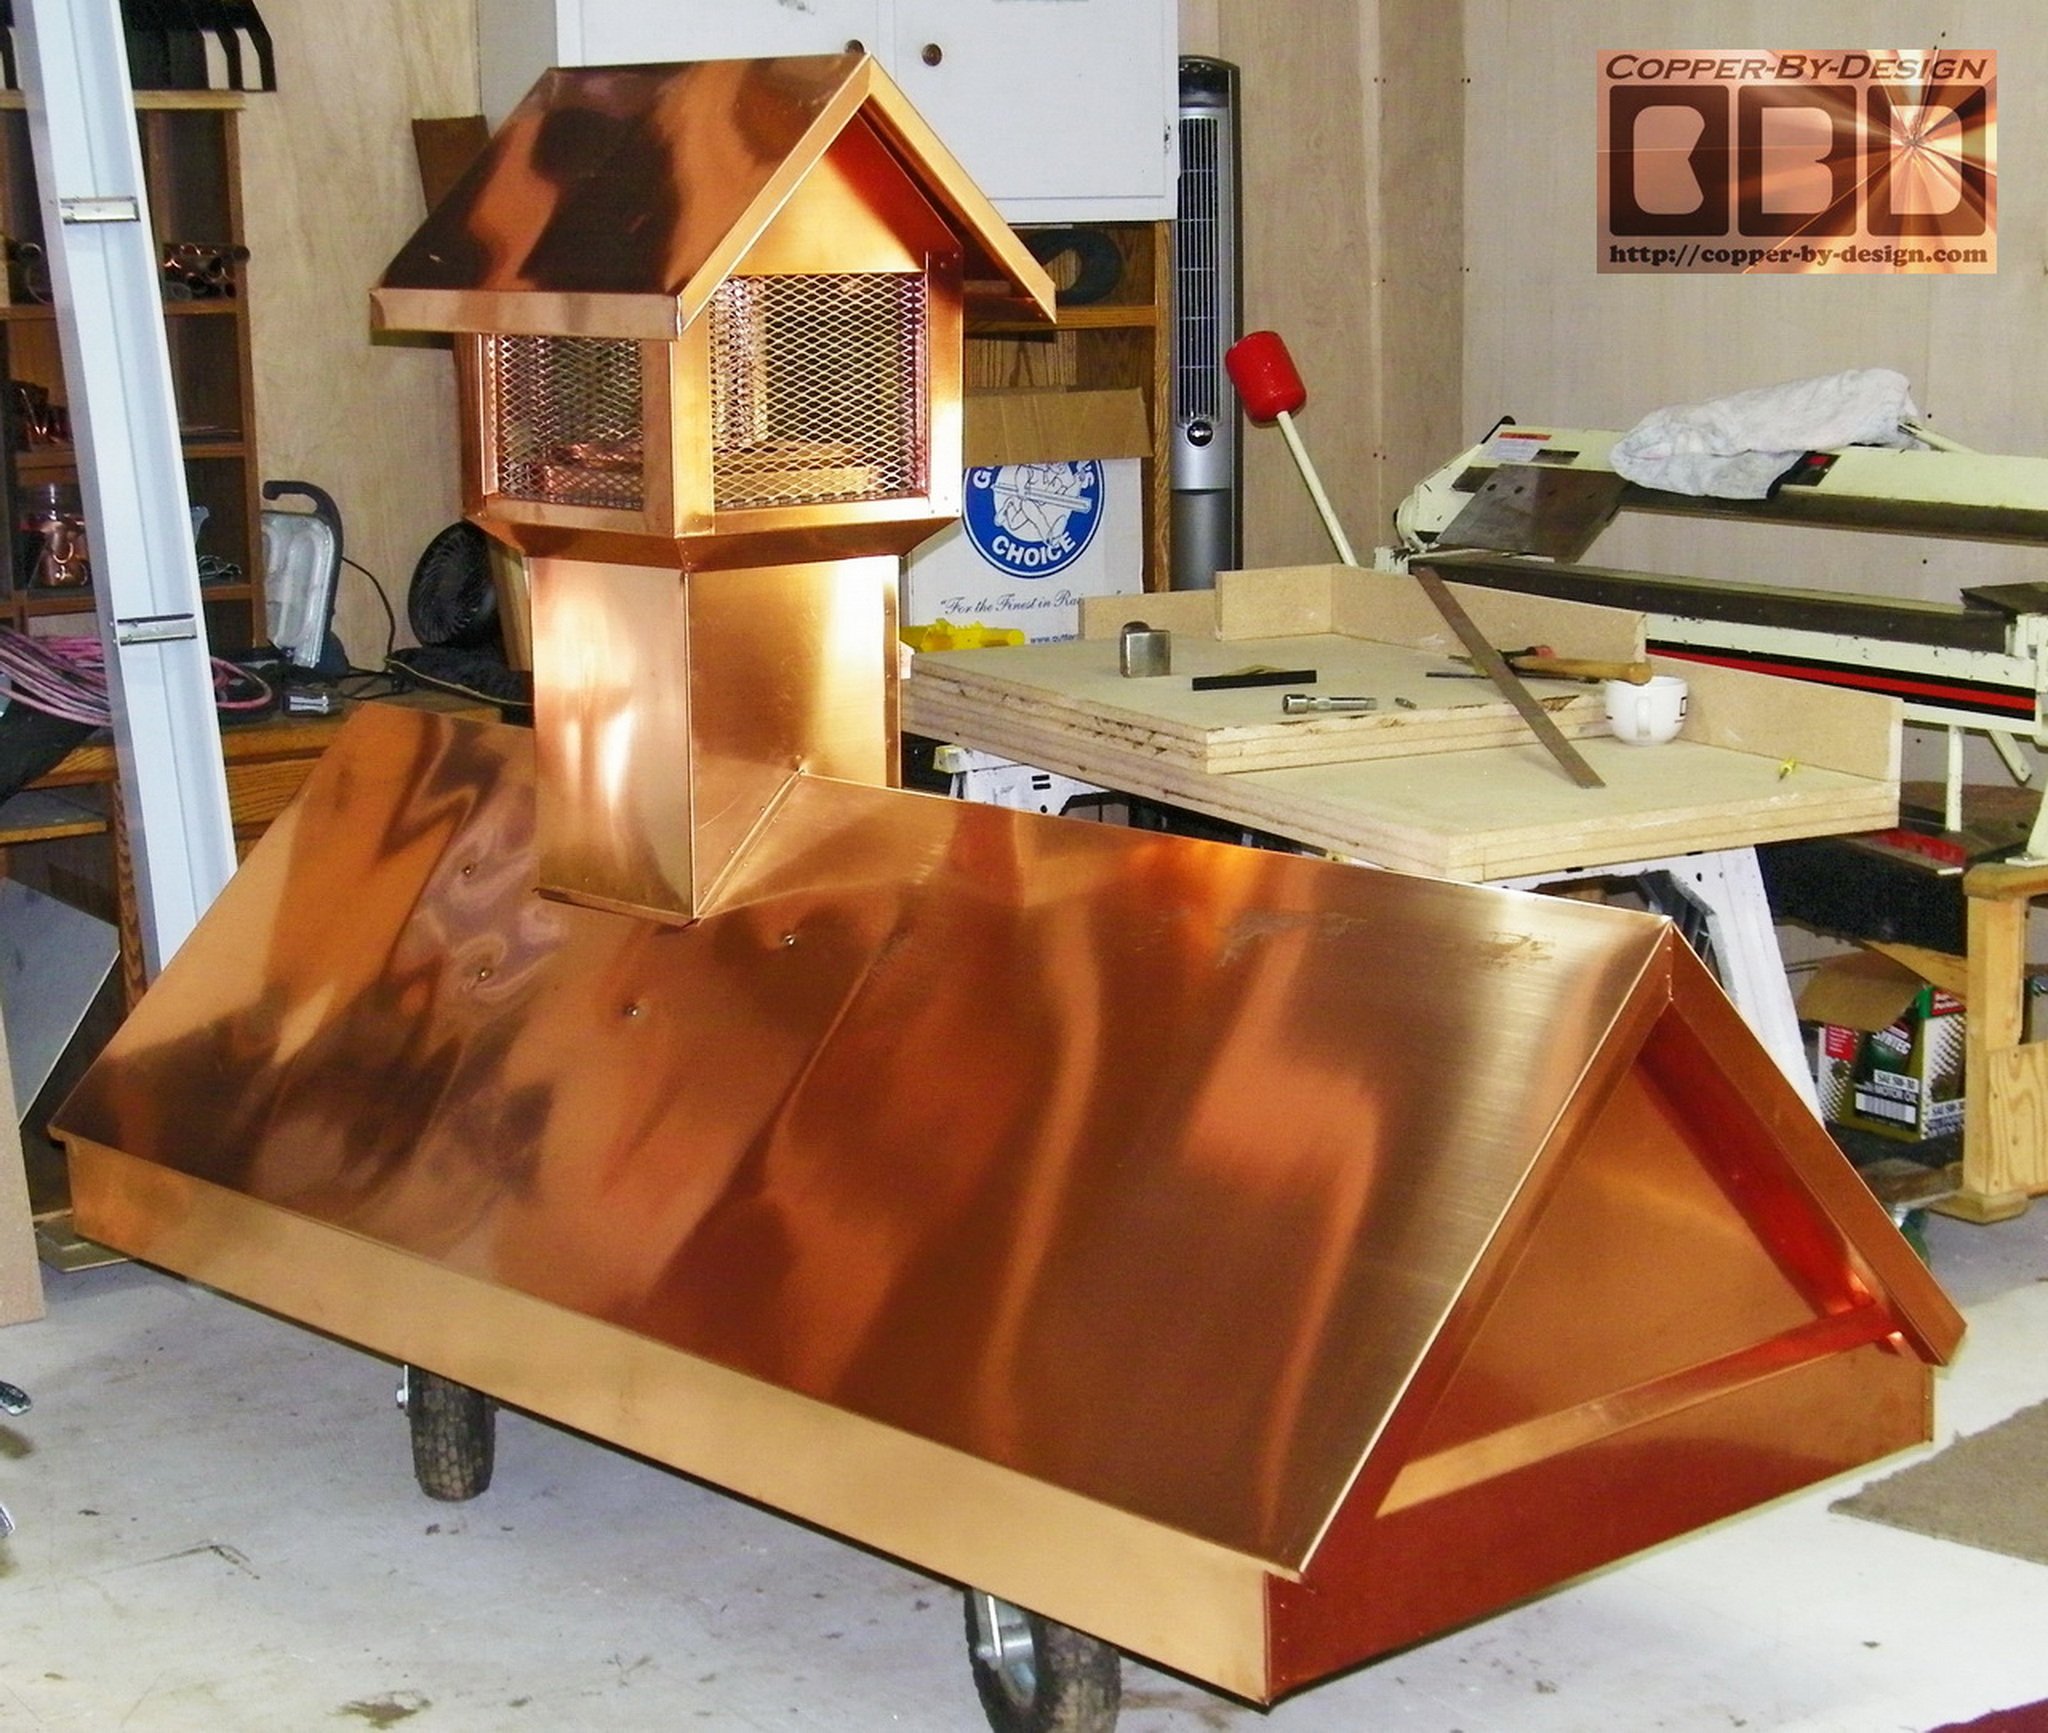
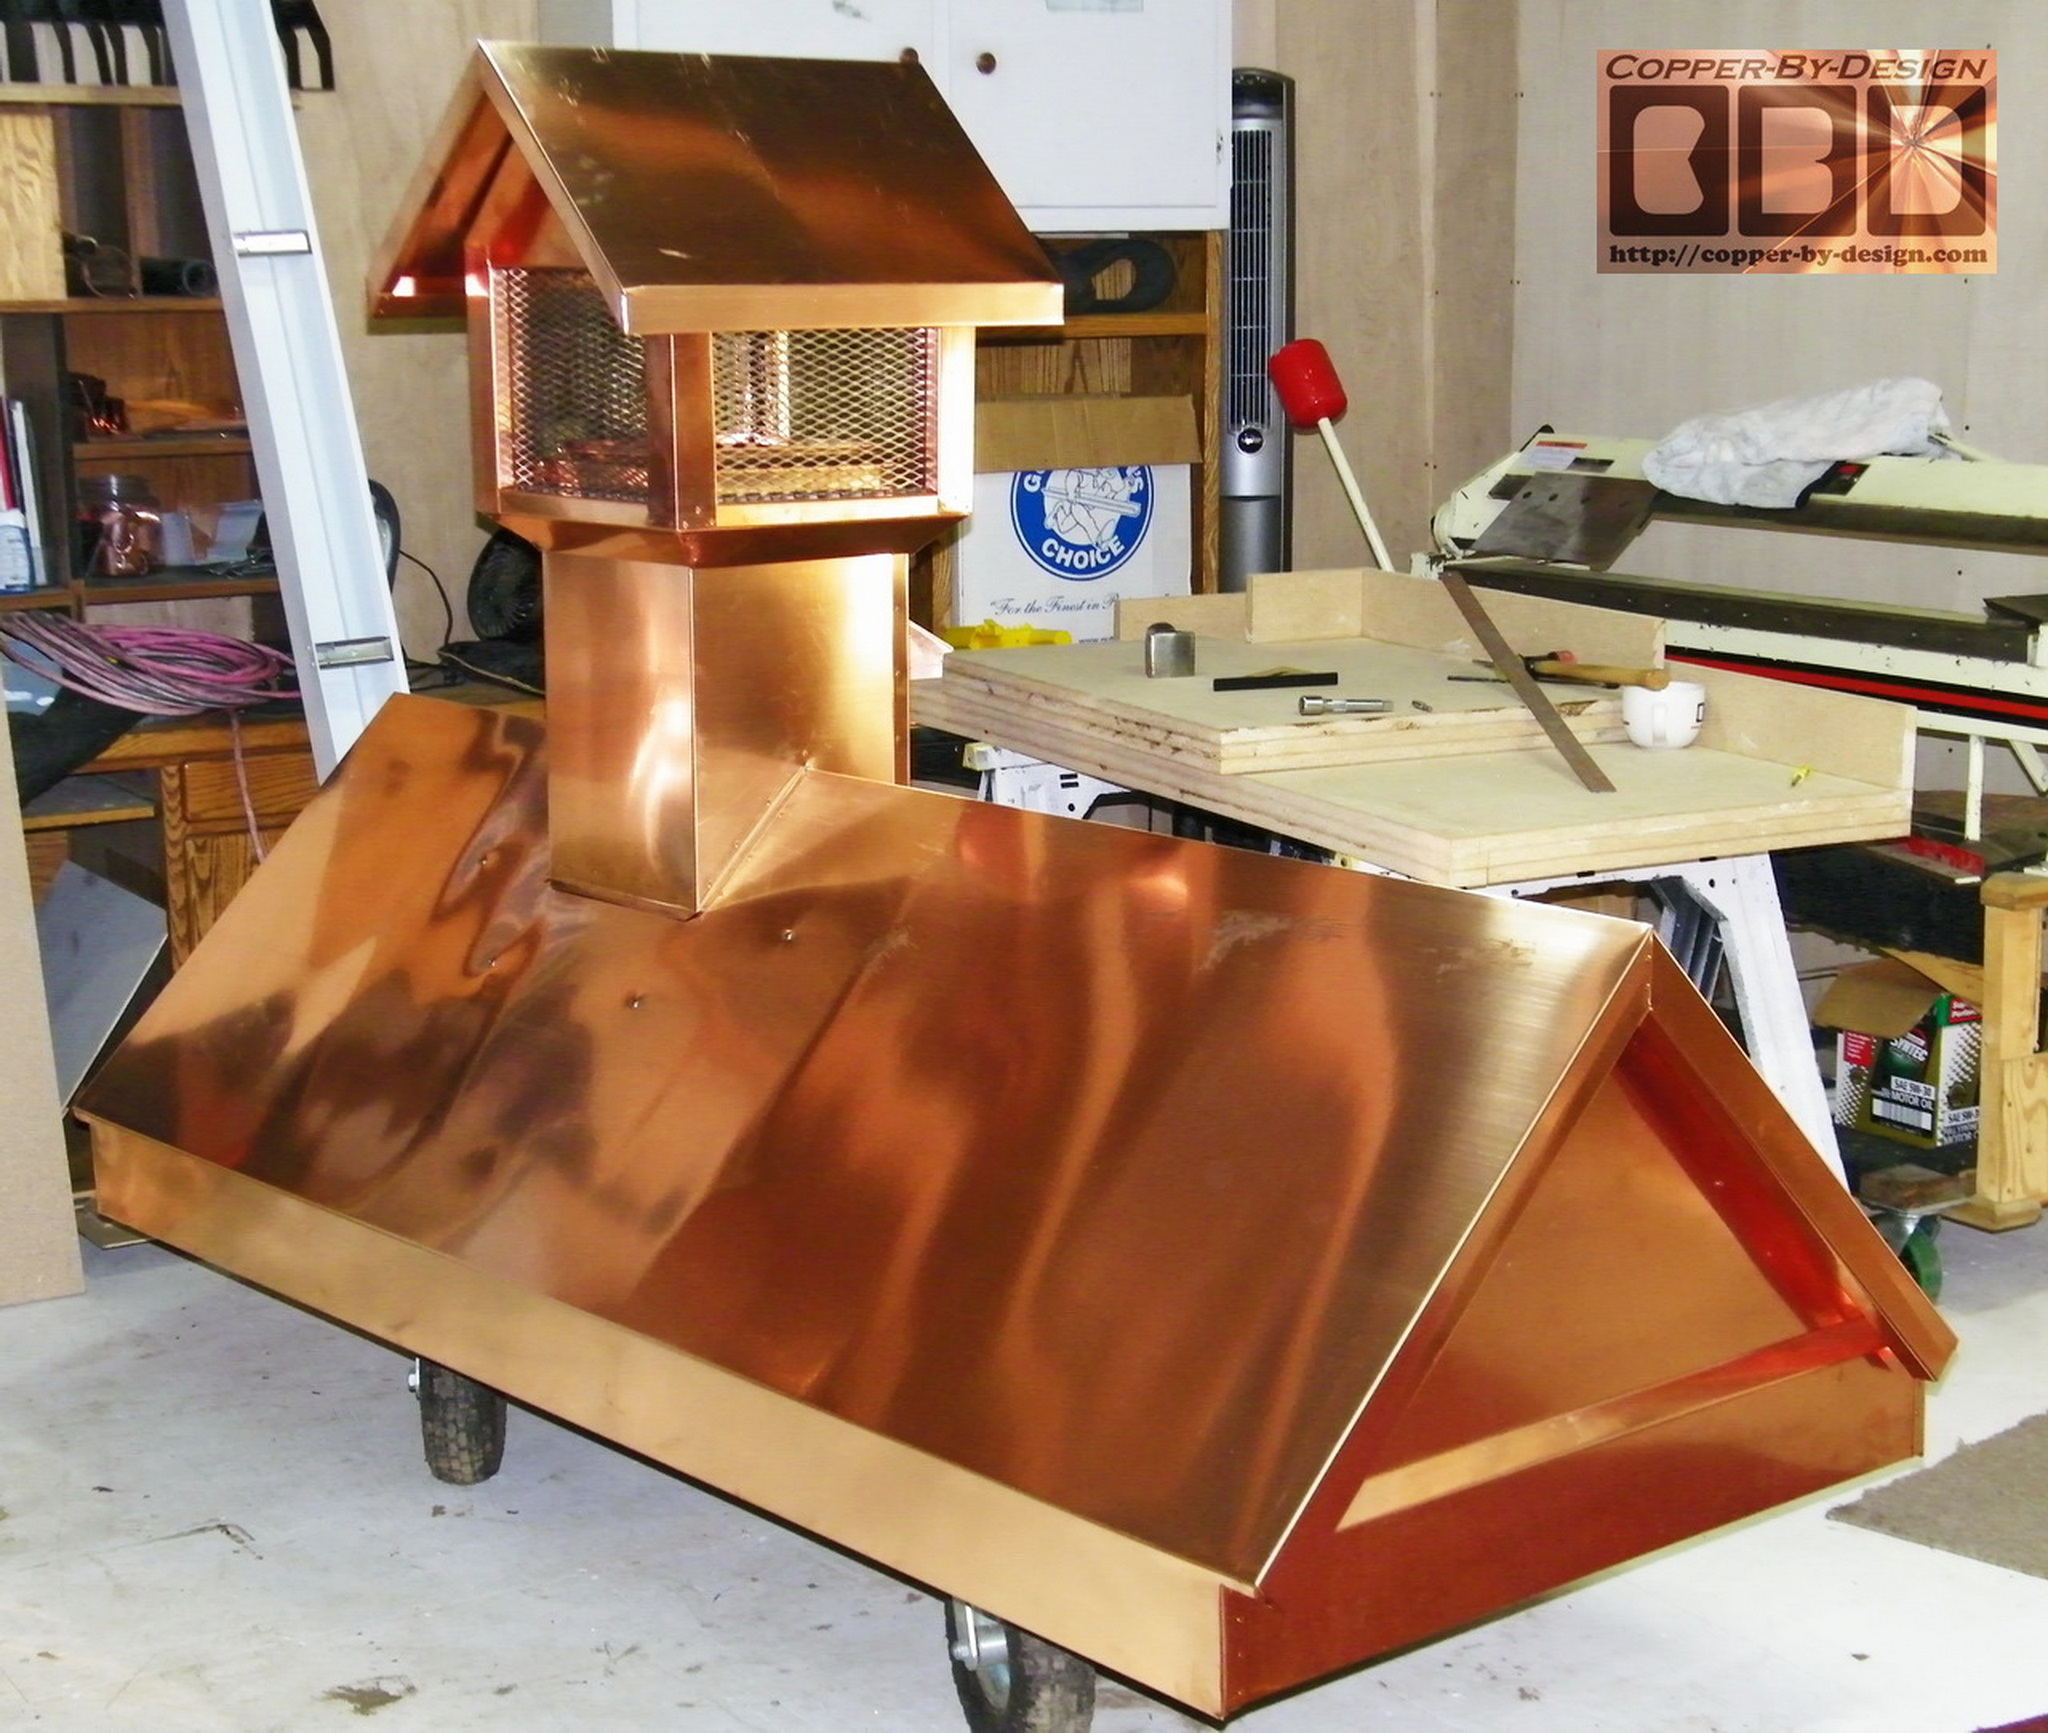
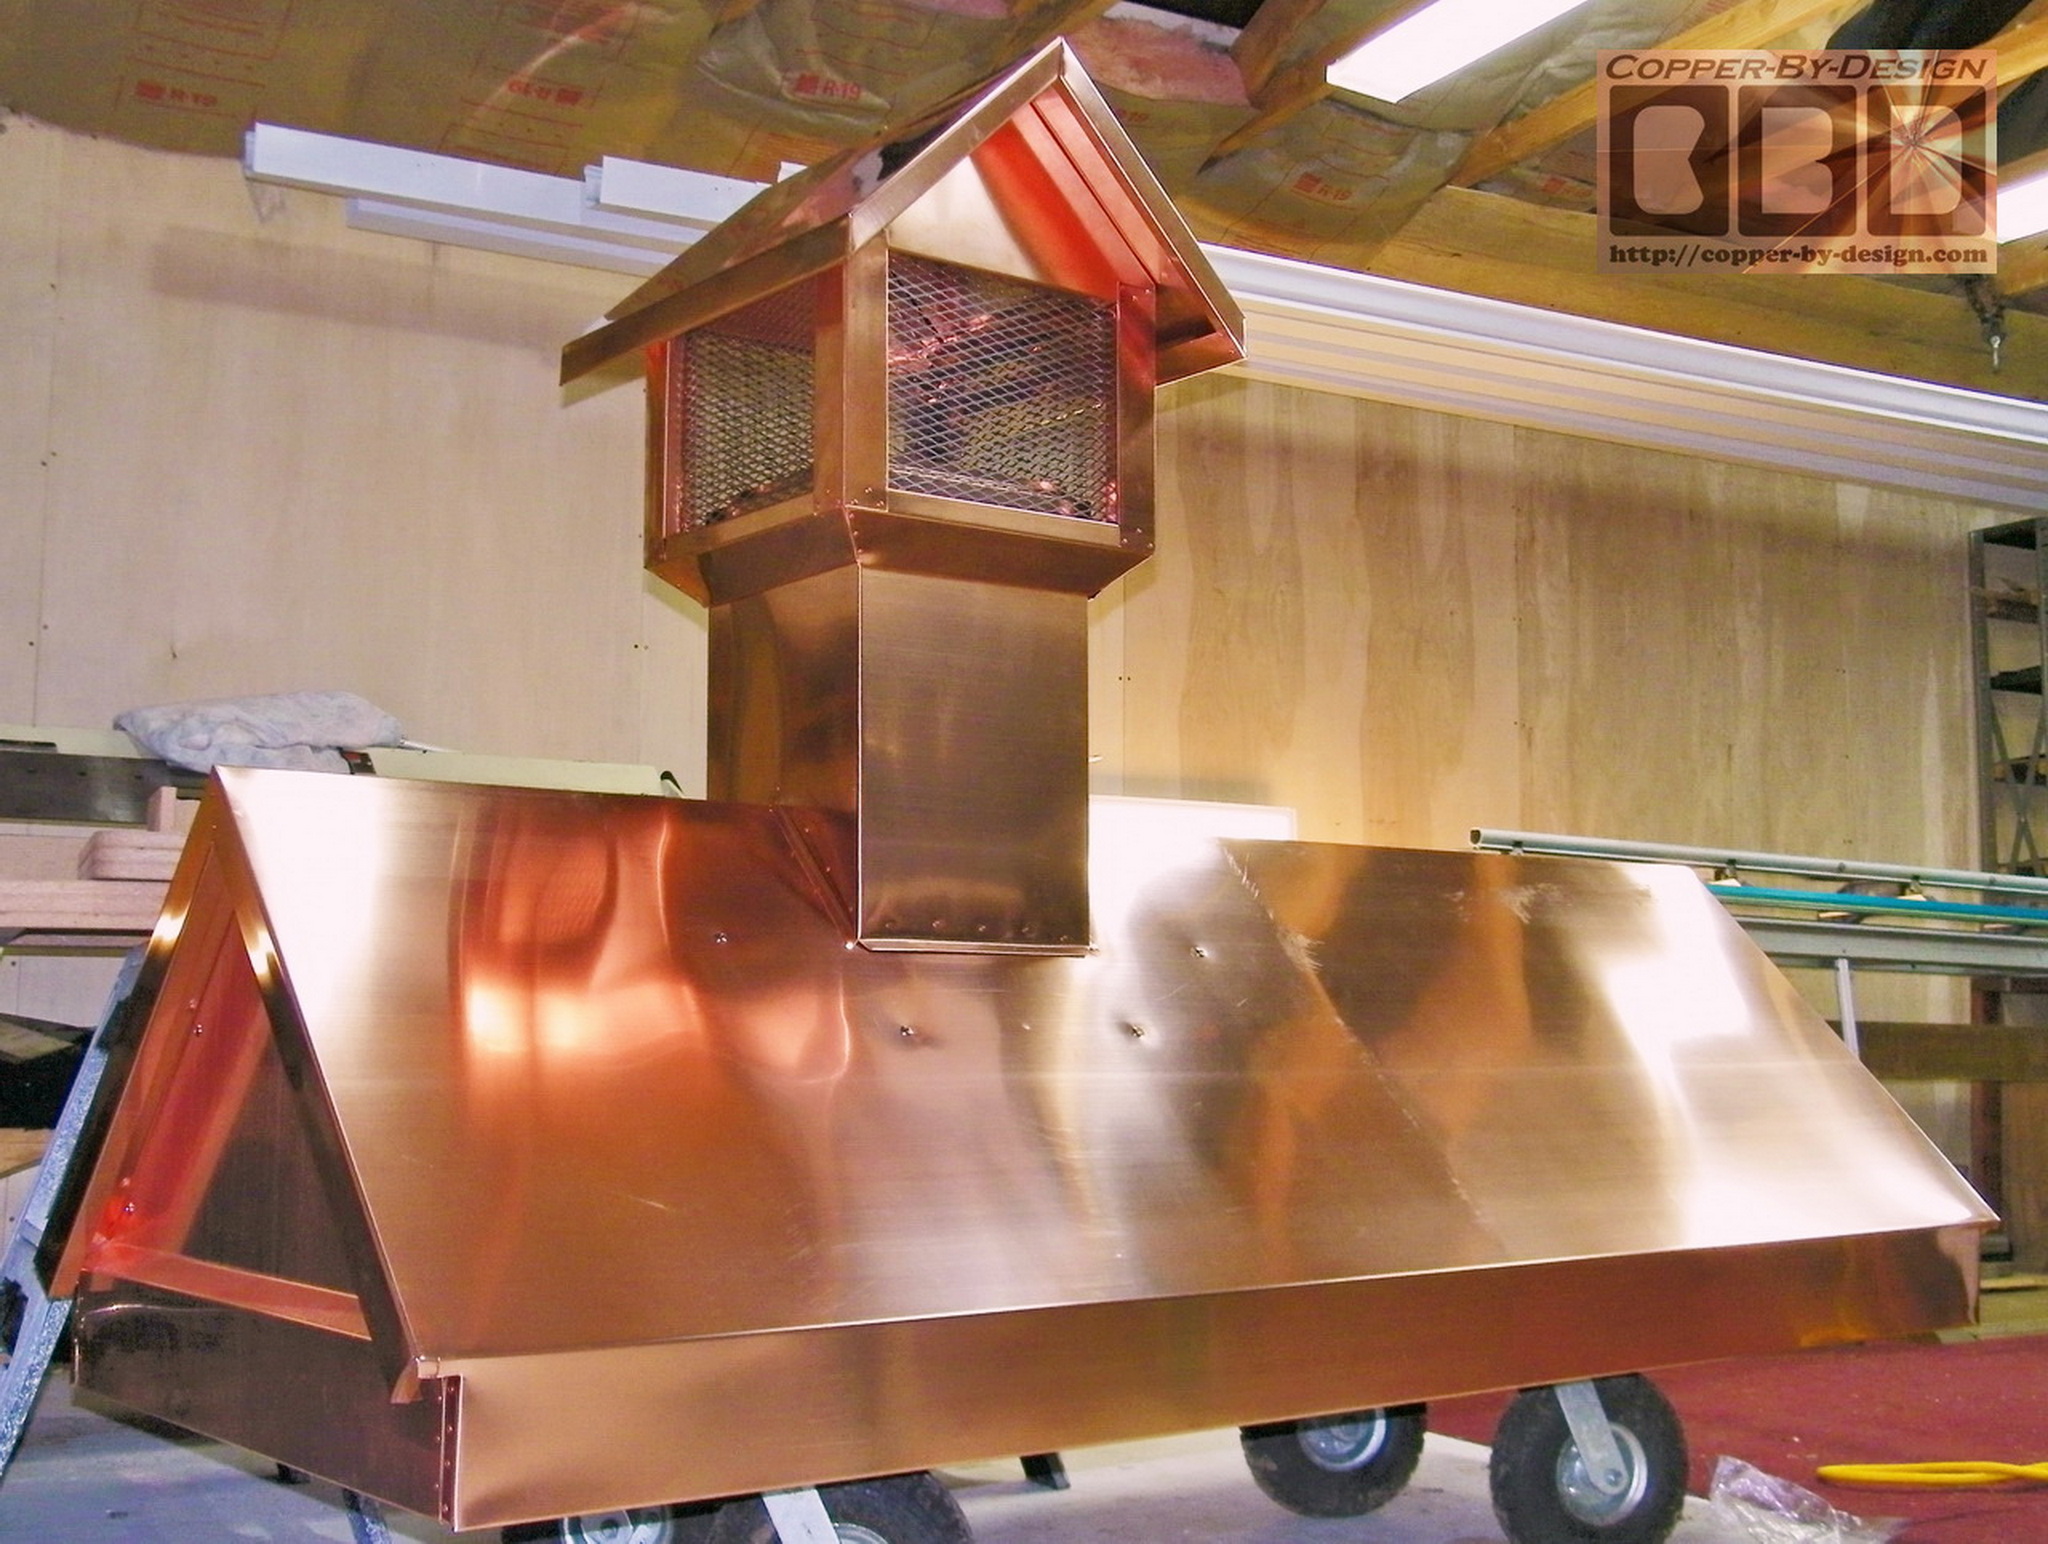
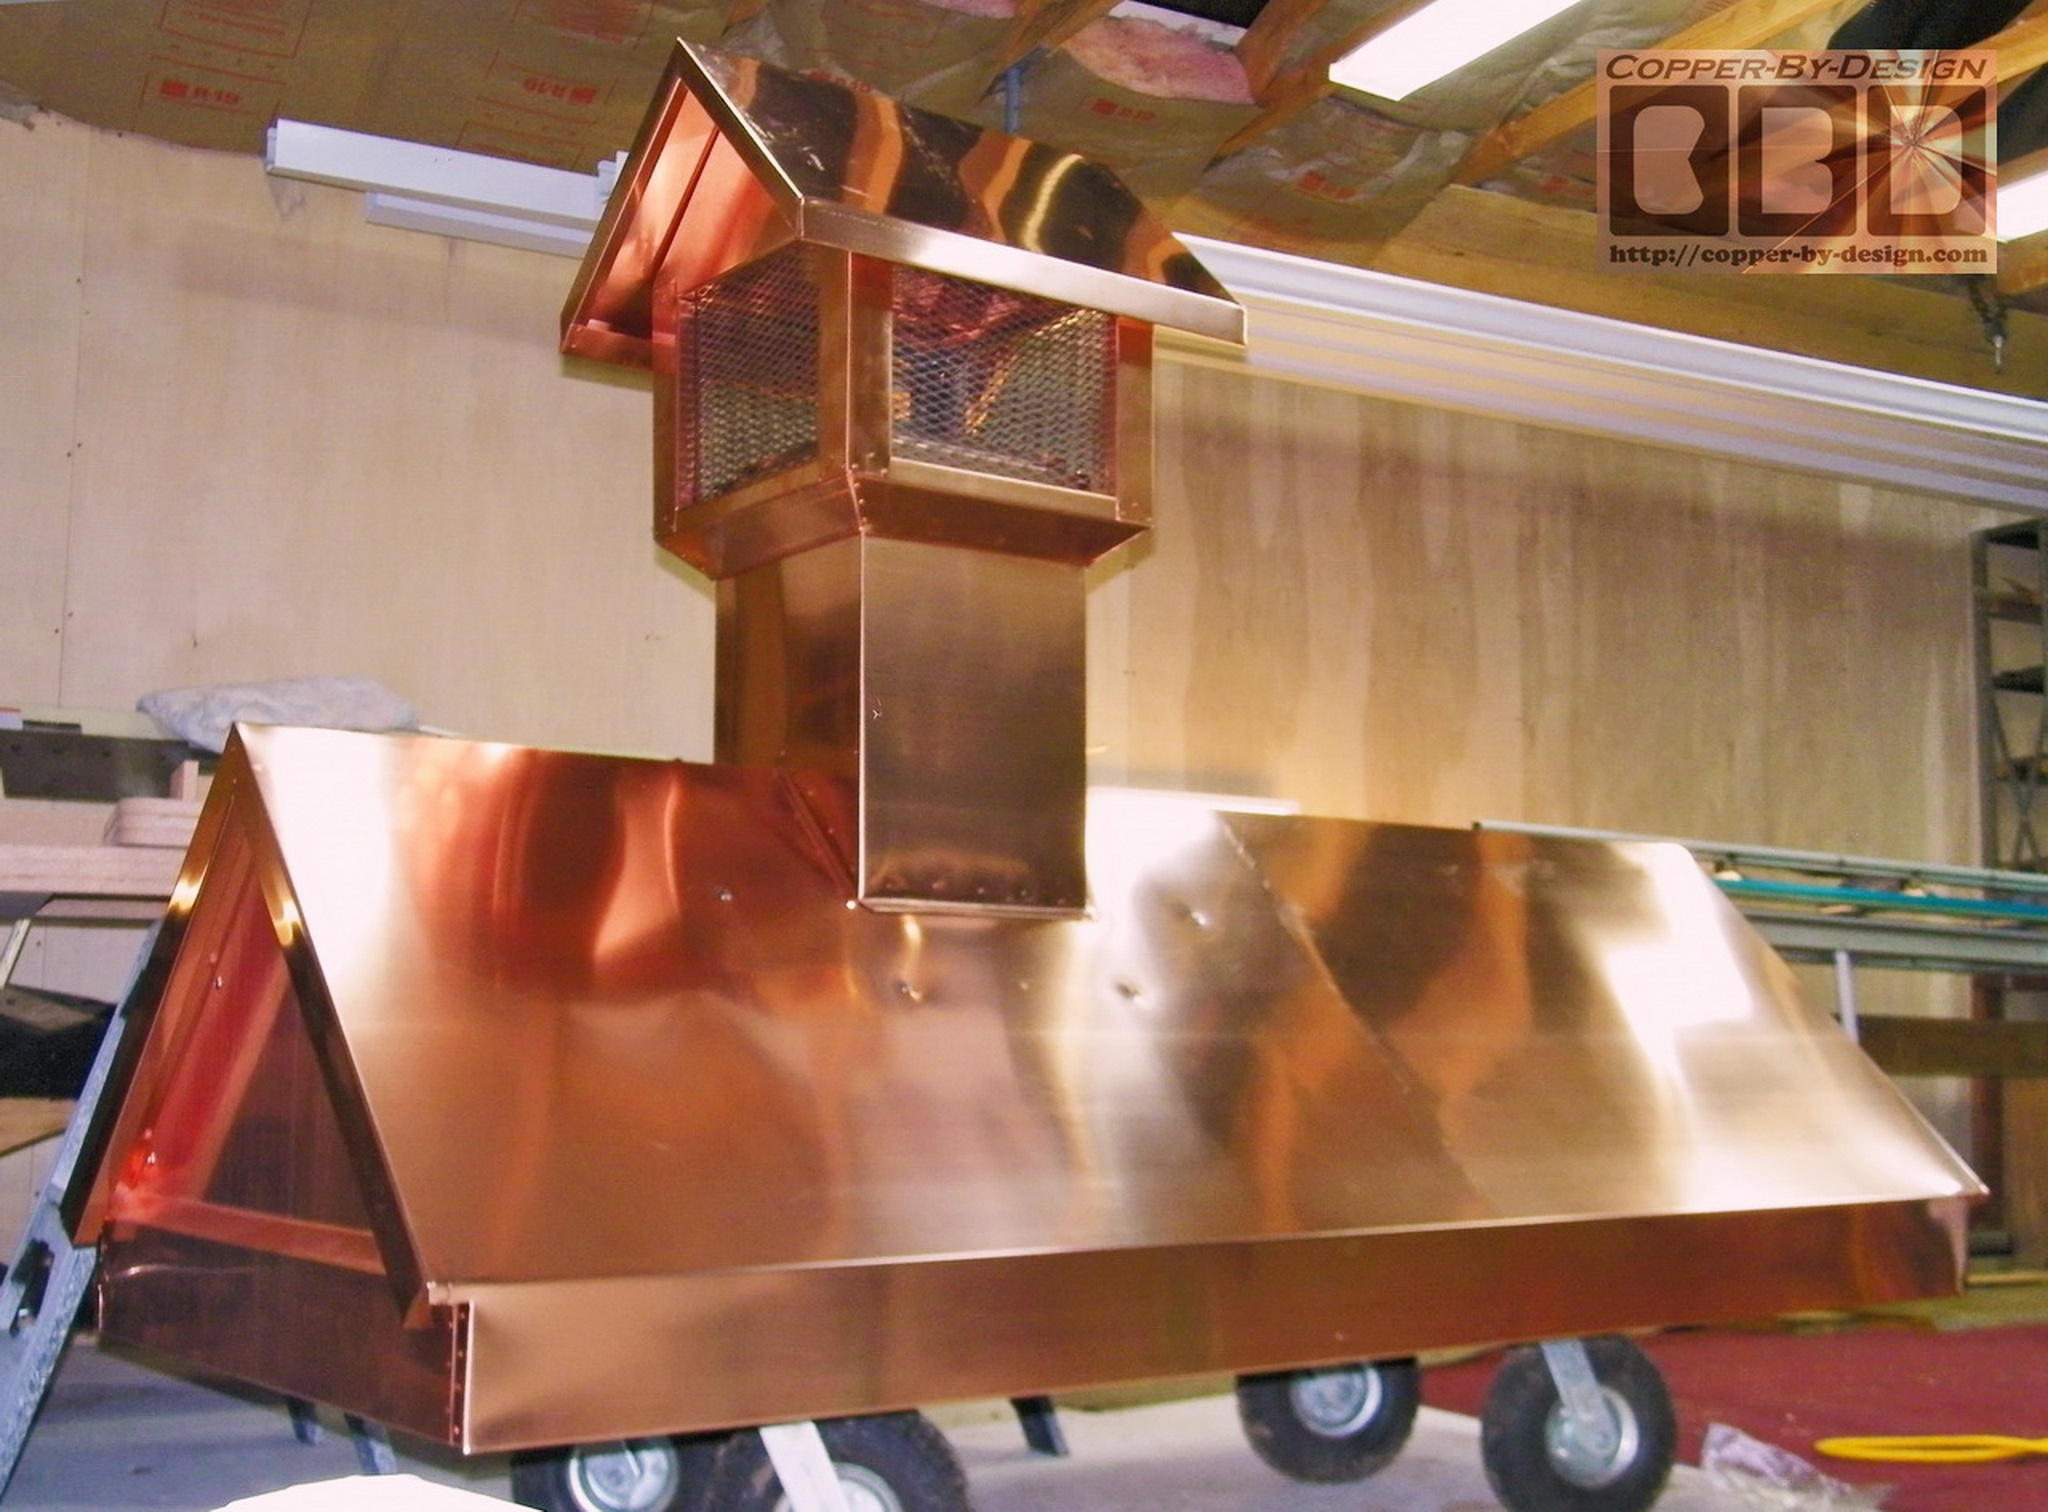
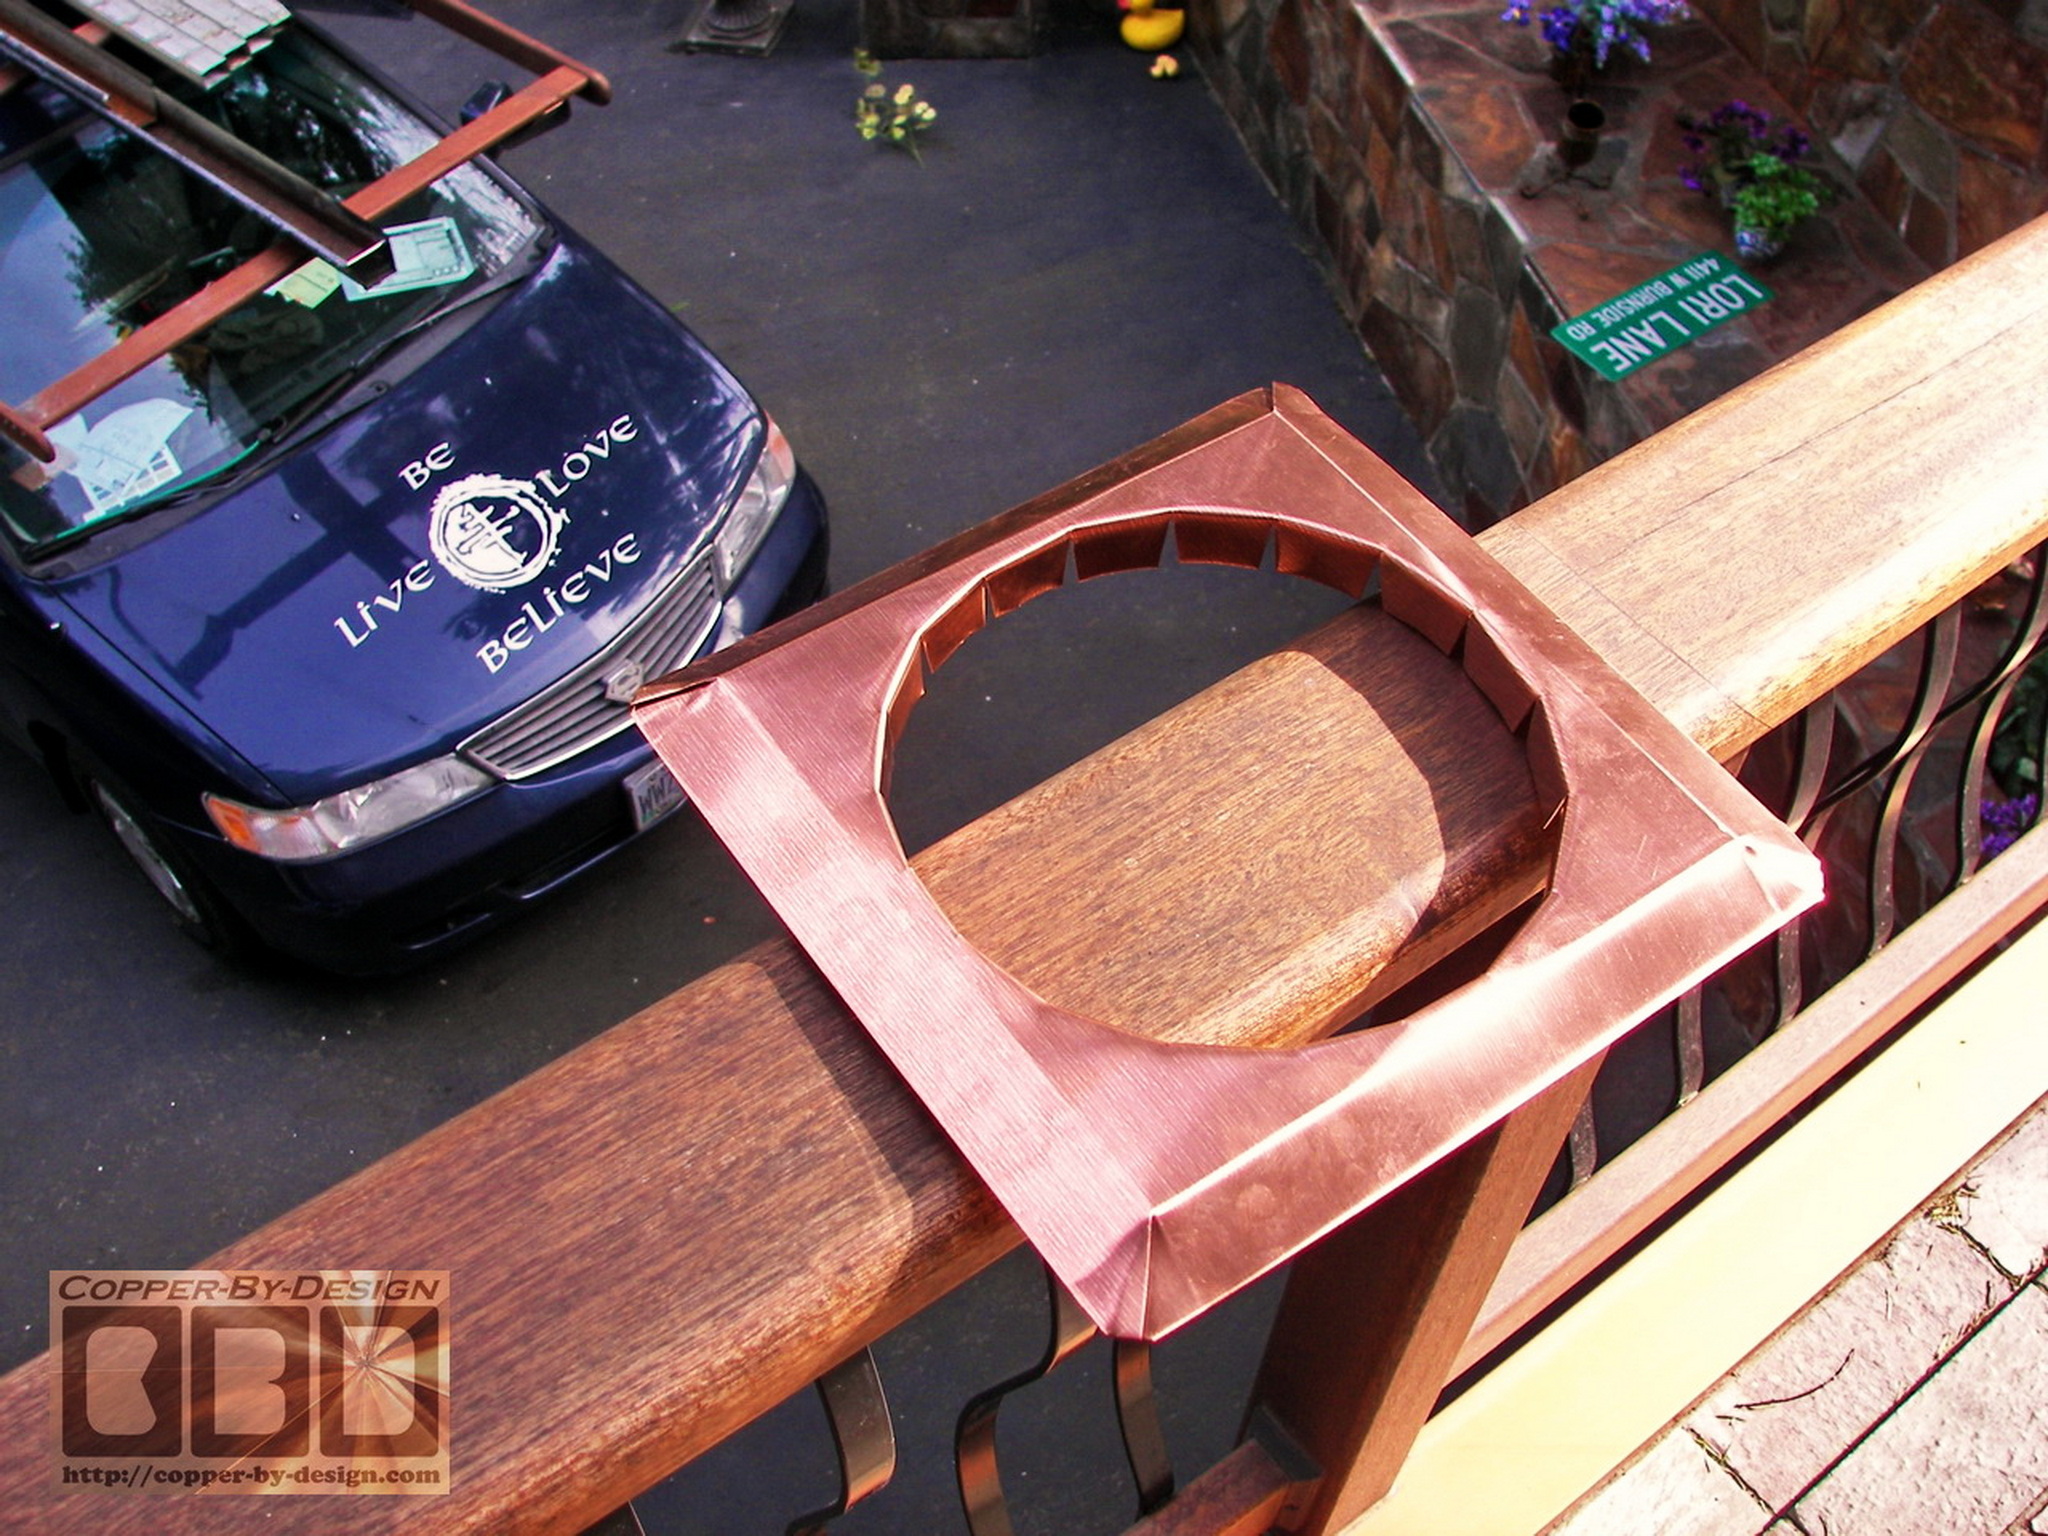
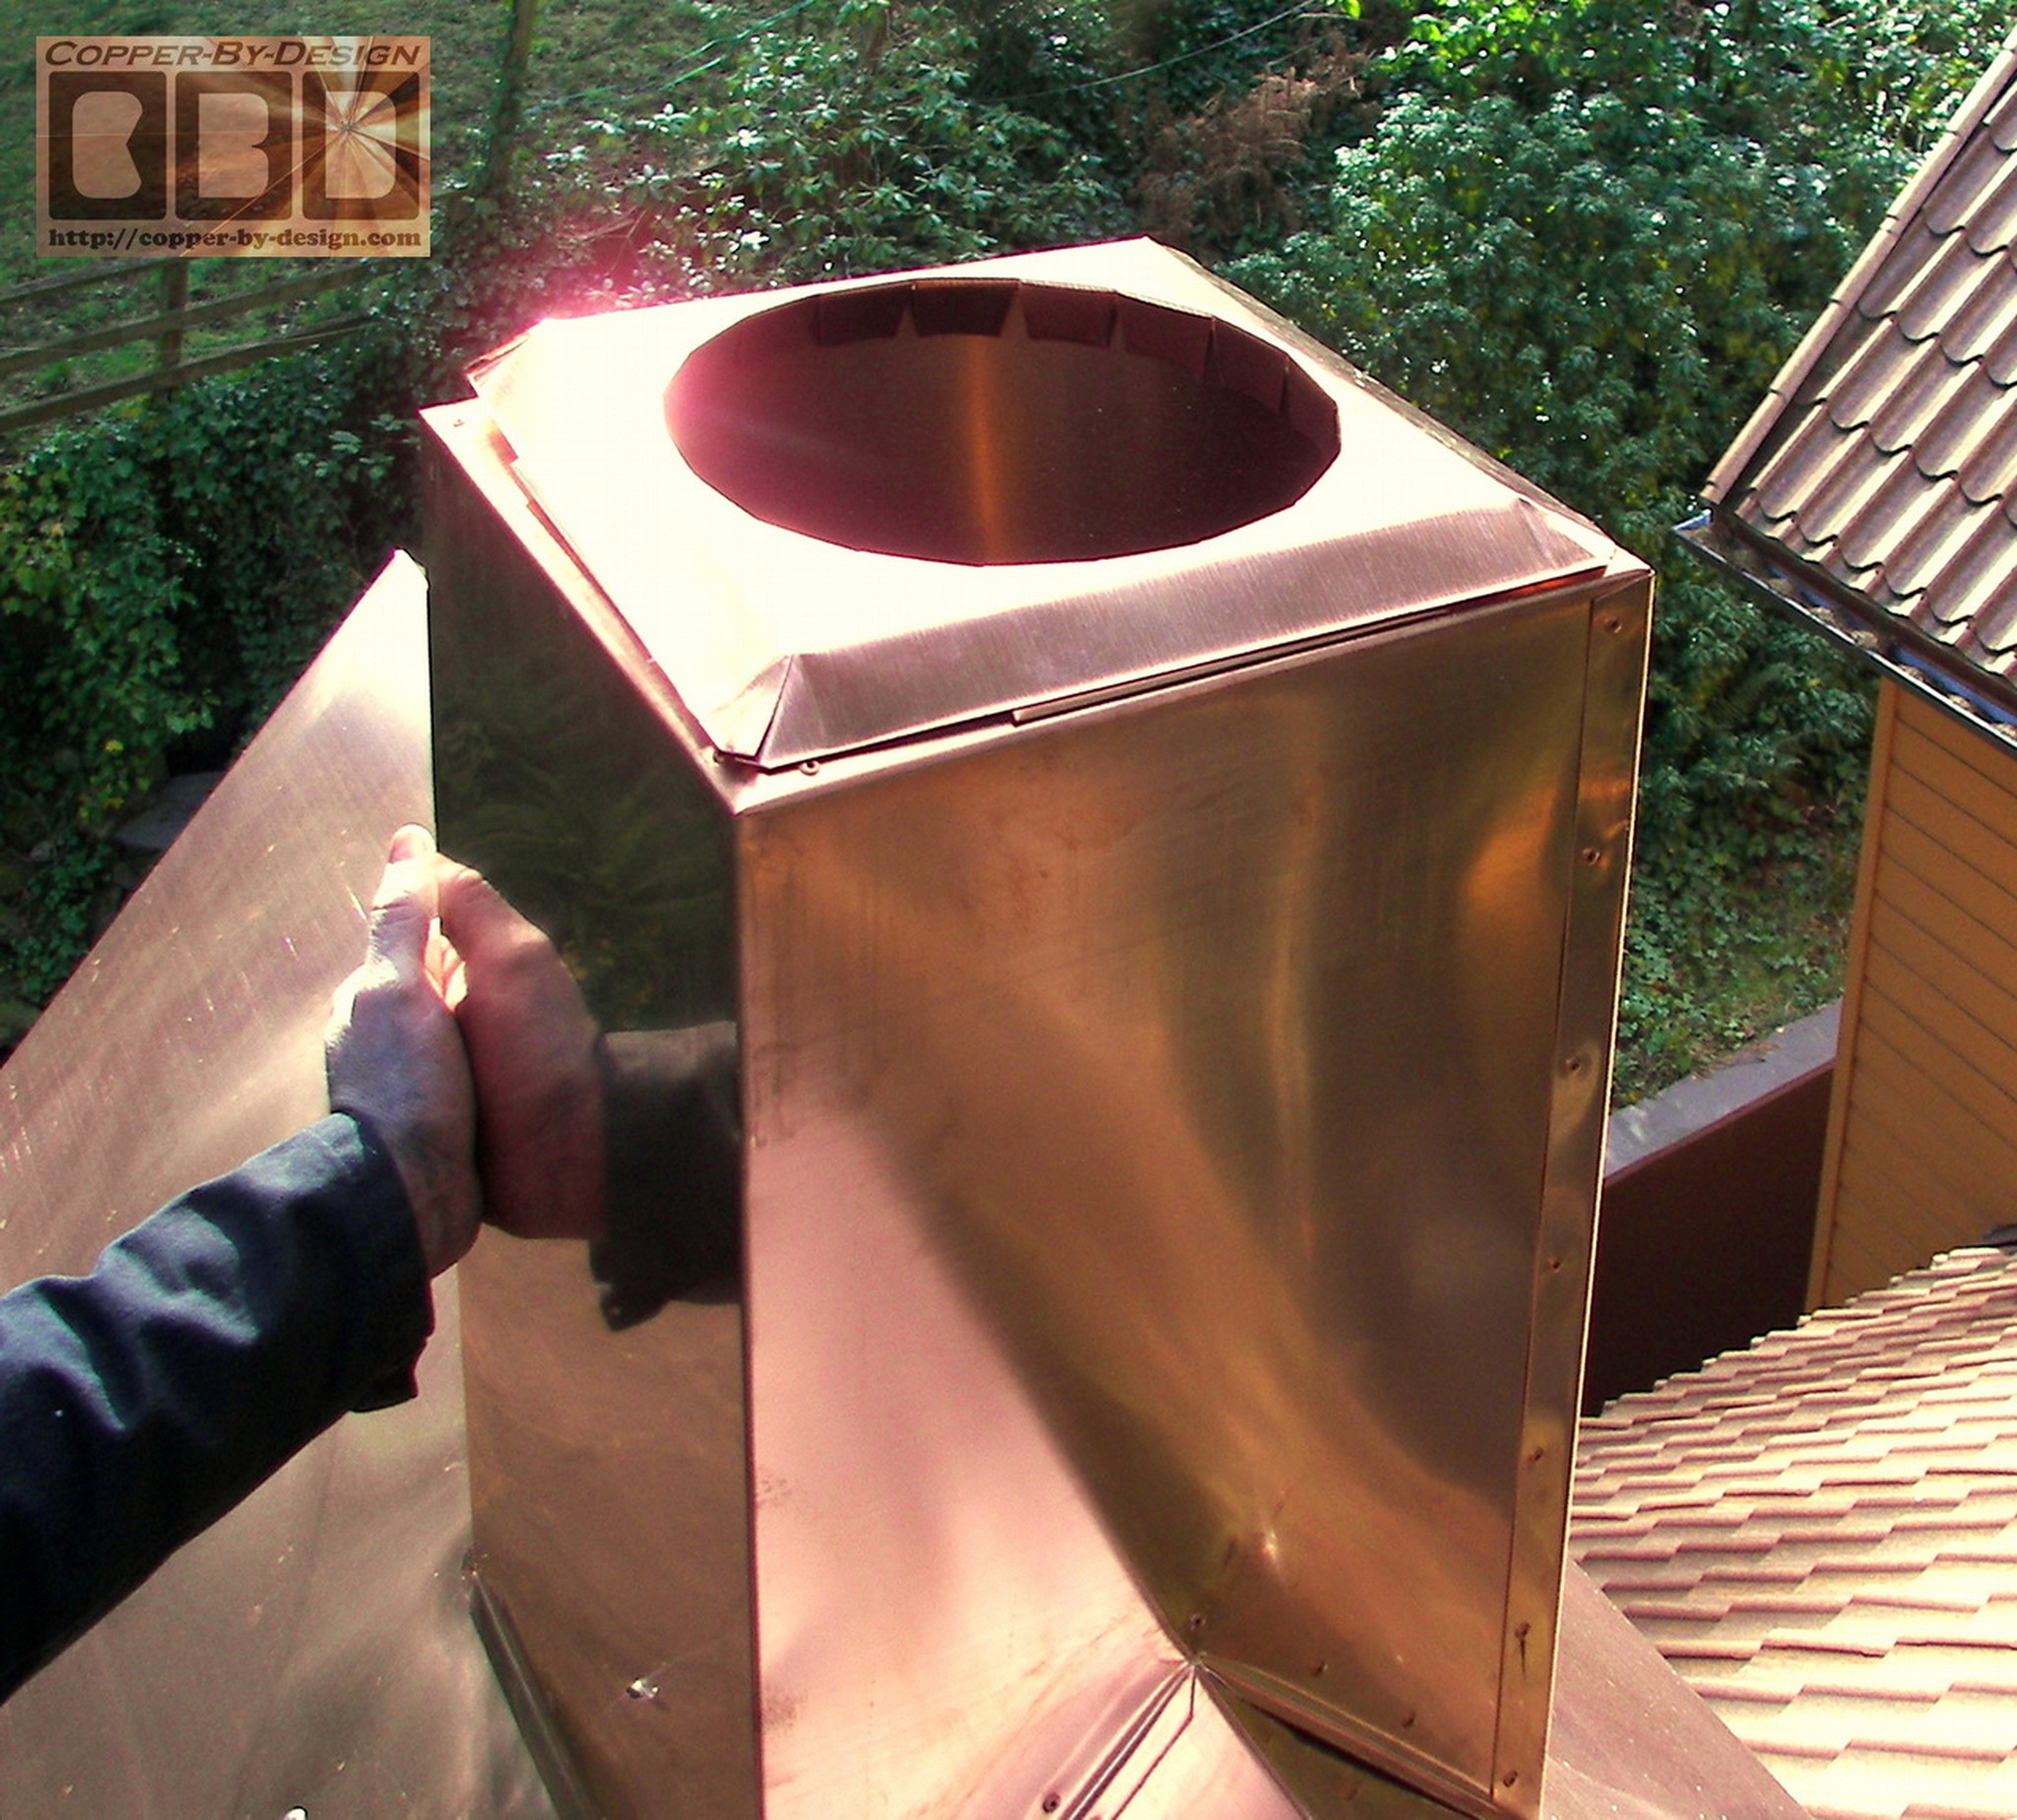
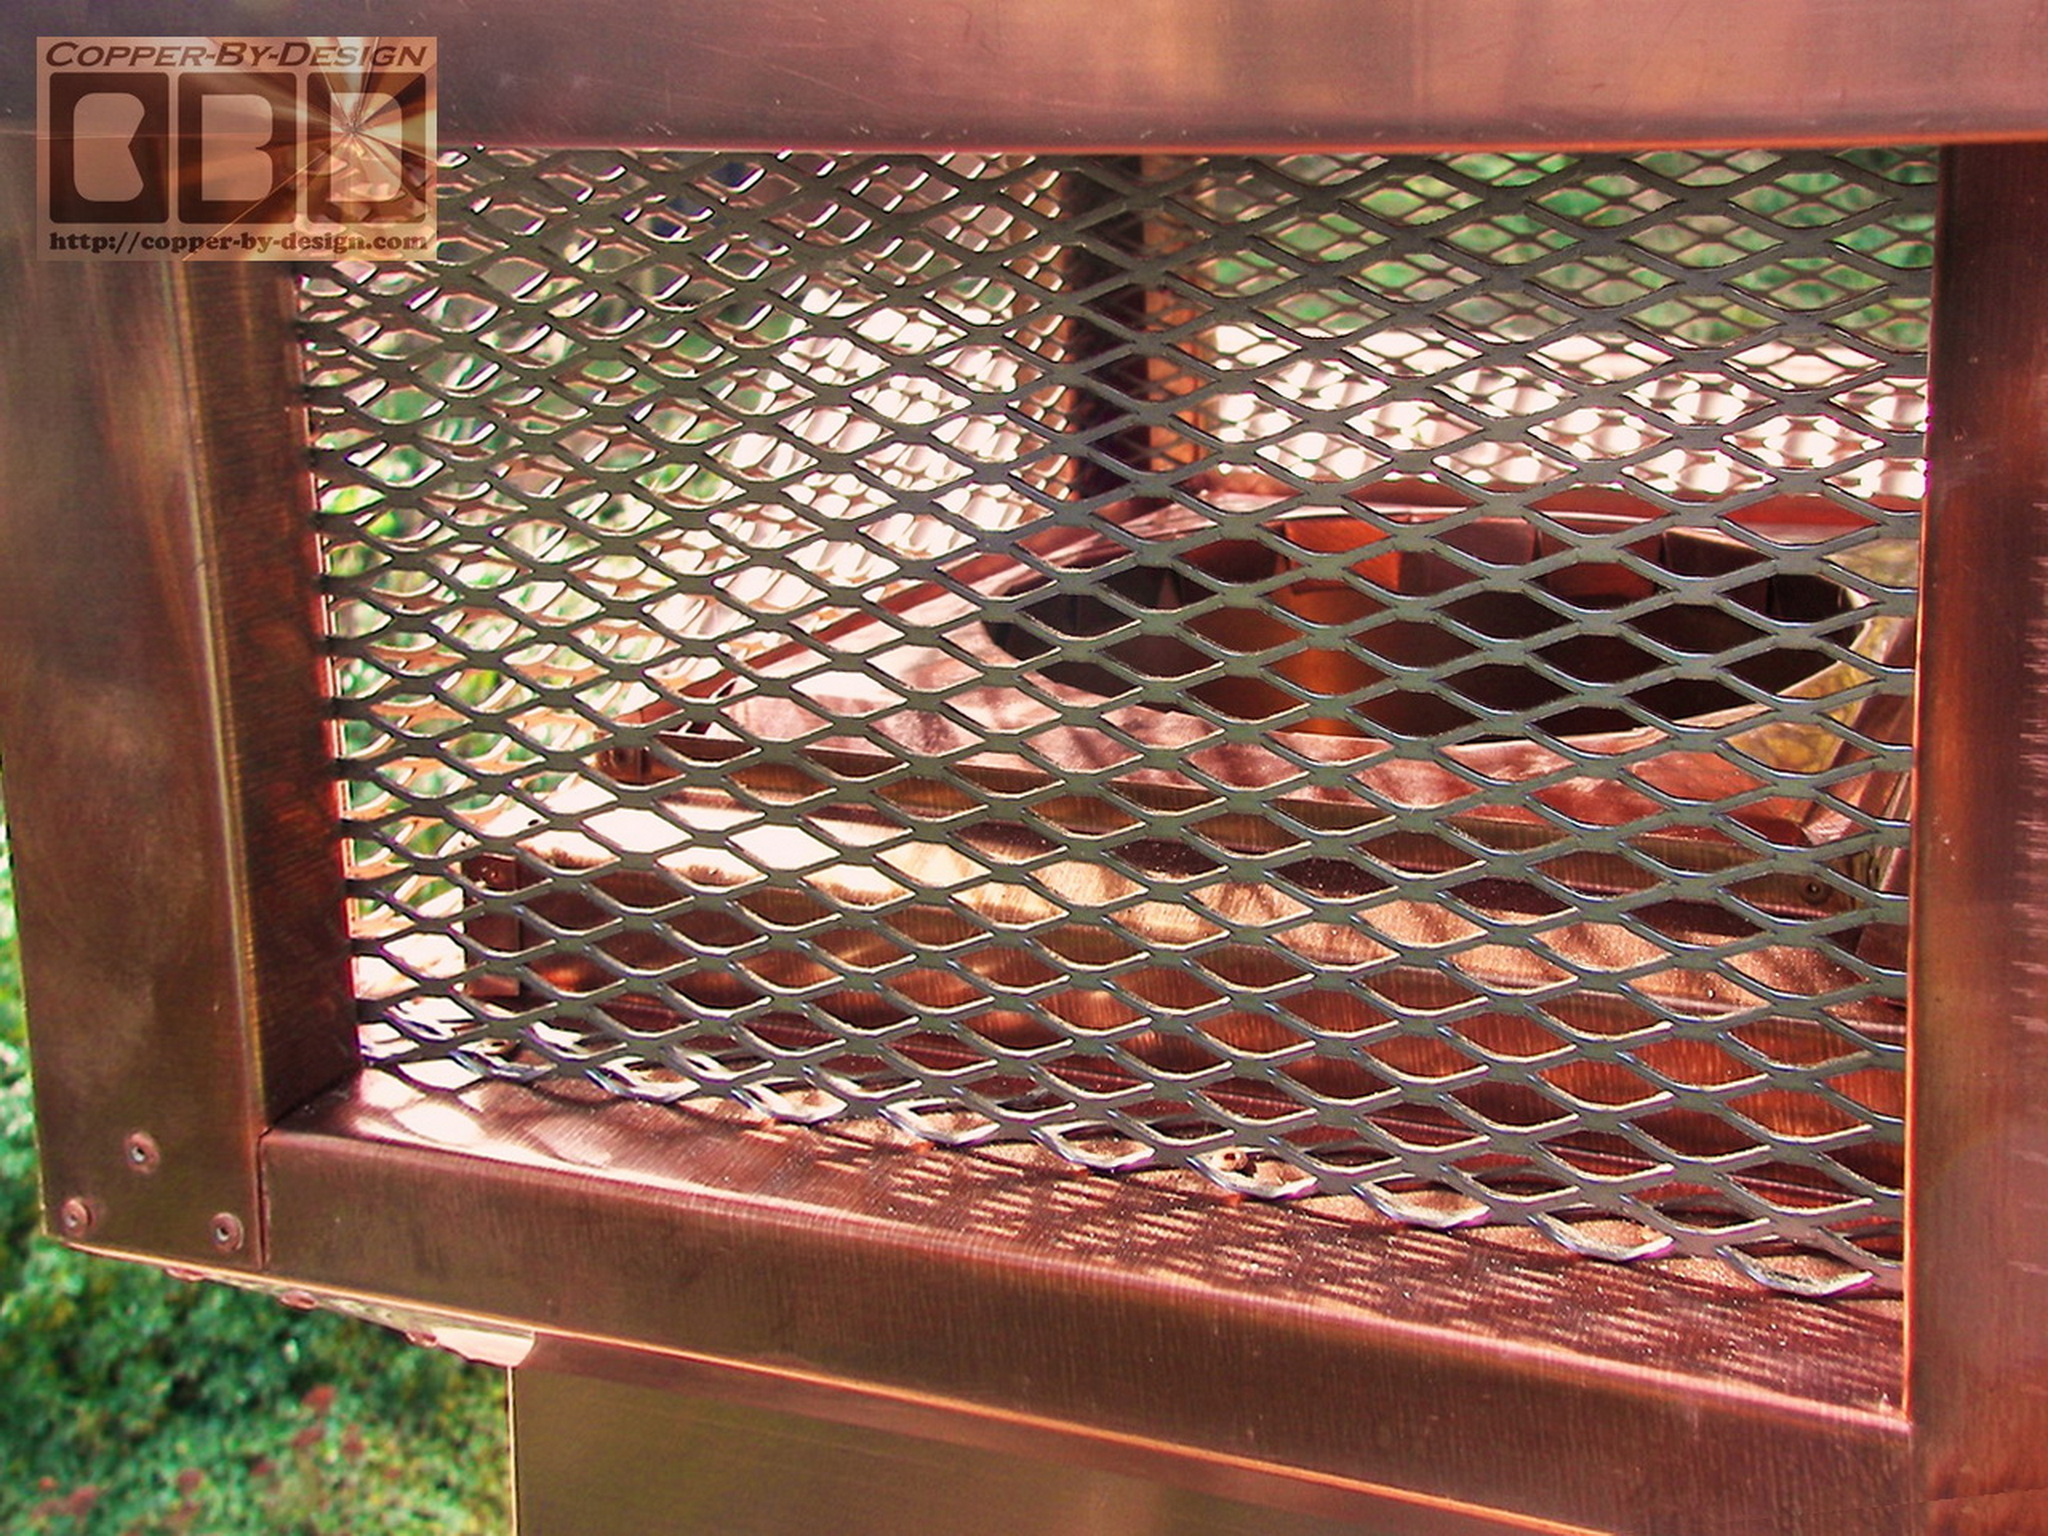
This cover was 77" long X 31" wide. They originally wanted this built in just a simplistic low profile style in order to save cost. Although, just before I had a chance to begin work on it they said they wanted to allow me artistic license and see where my inspiration would lead me. I did my best not to get carried away with this and kept them apprised of my thoughts for their approval and a cost for these changes. The design changes I suggested added $1,100 to the original quote, but they were very pleased with the ideas I had to improve the look and function of this cover.

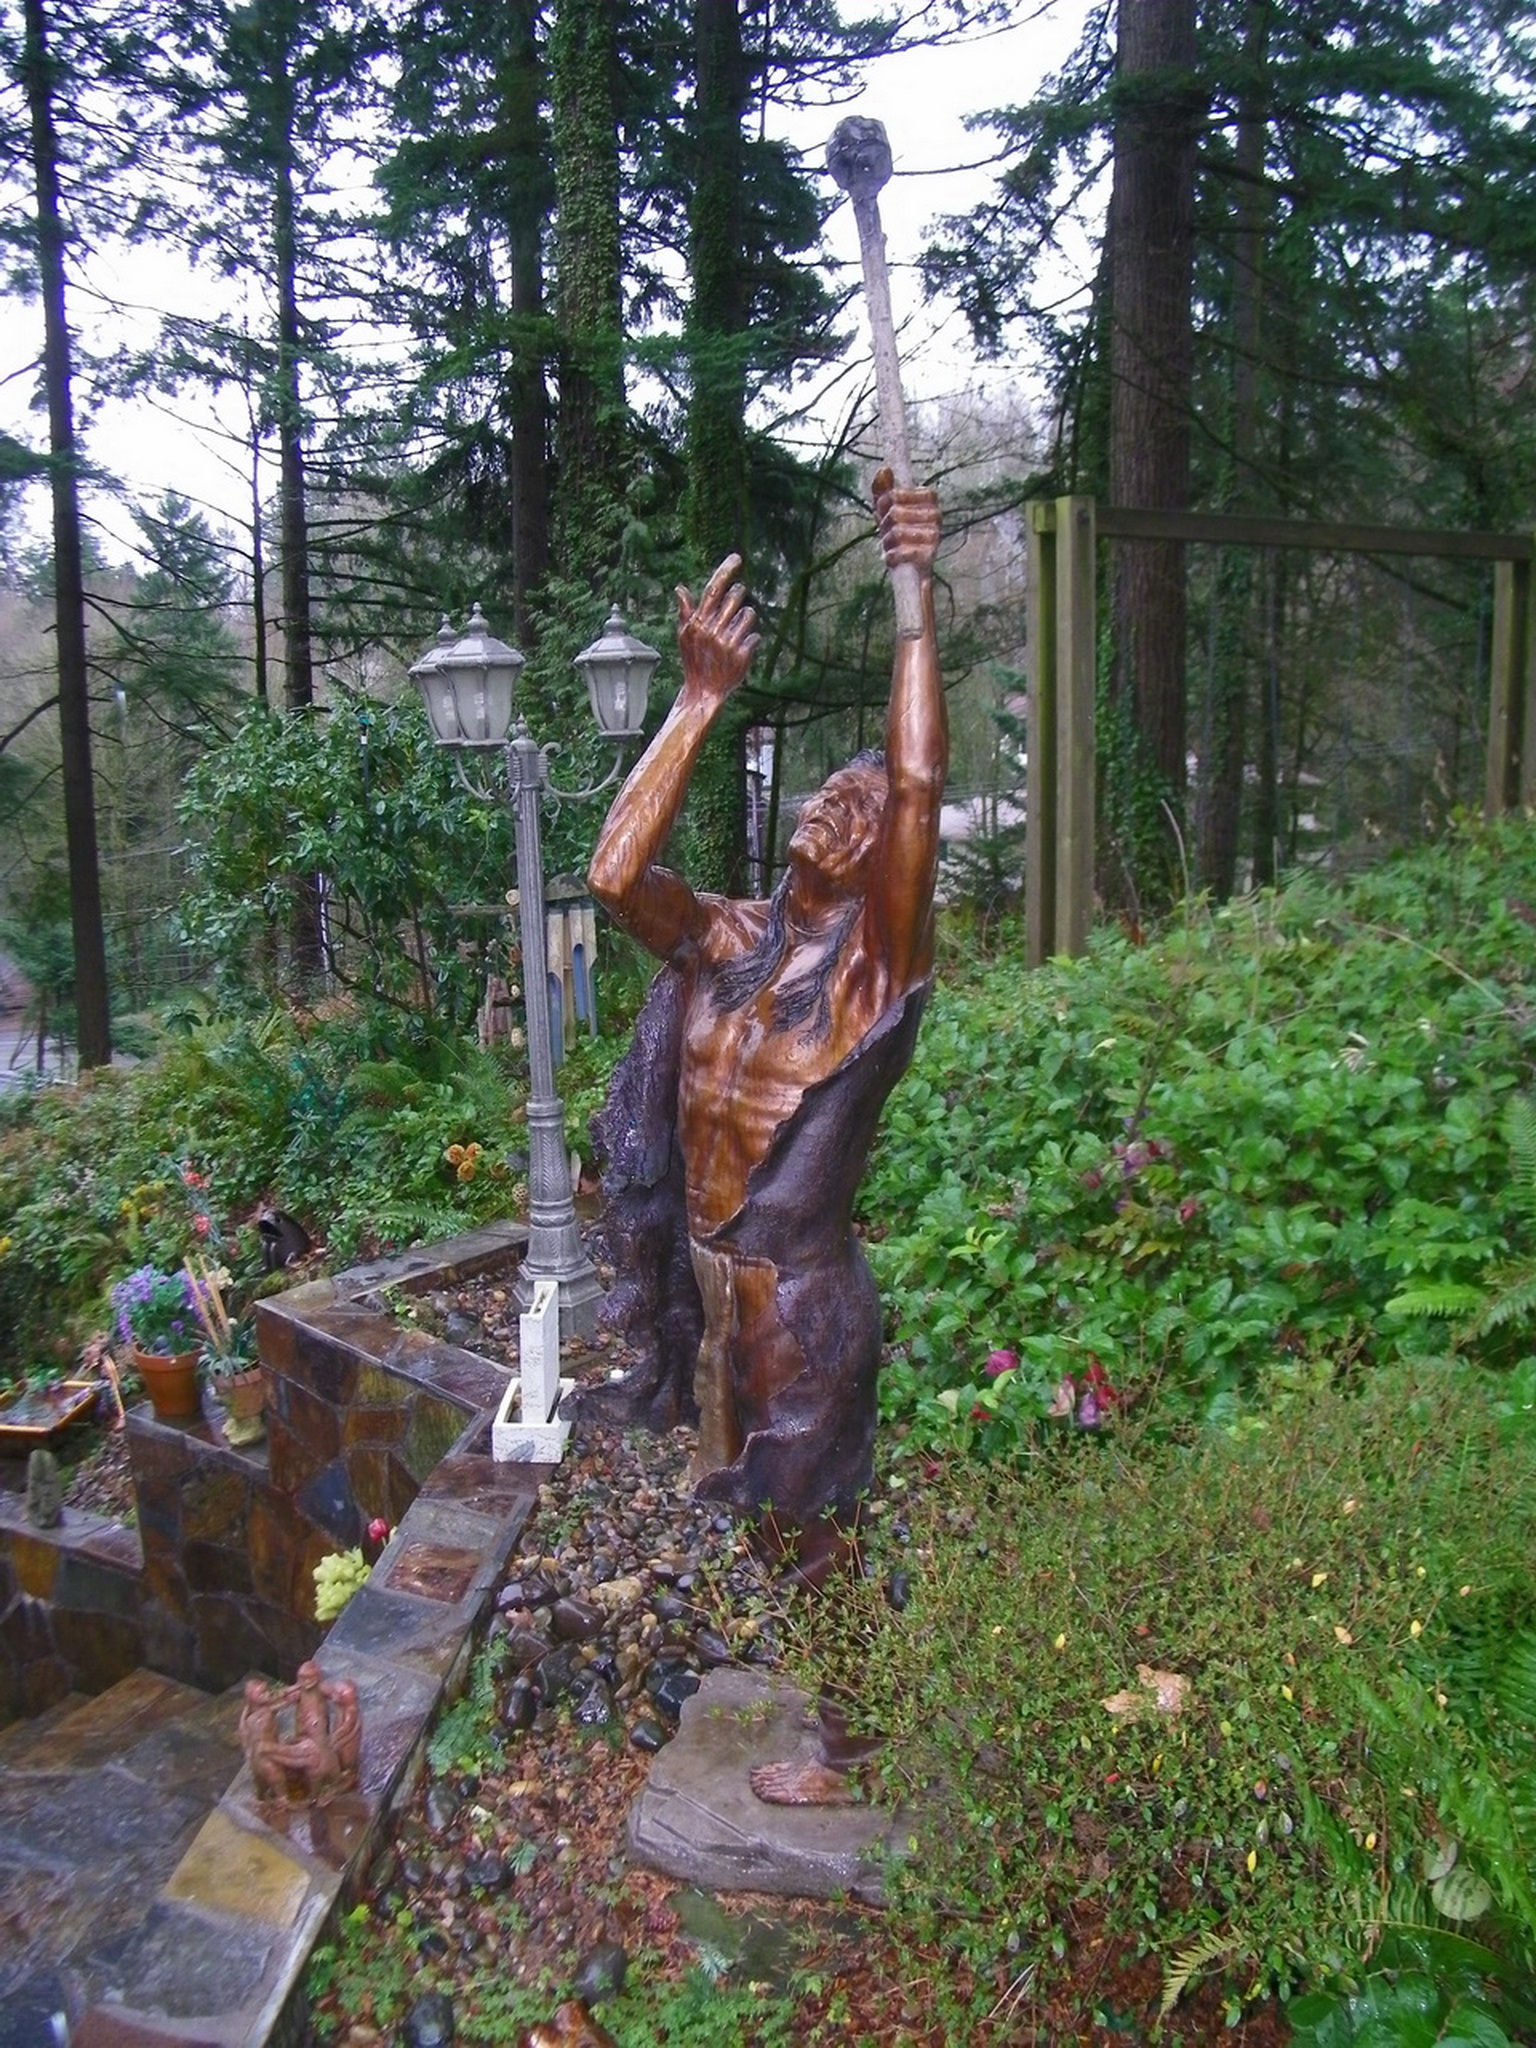
As you can see they have some very nice bronze sculptures adorning their property, so they wanted something nice in copper to compliment their home, yet not cost a fortune of course.


This shows the 5/4 X 6 hardwood board I used for the outer rim of the base. They were attached over a 2x3 frame that was special bevel cut on my table saw.

The upper frame was made at a 45 degree angle, or a 12/12 pitch to match the roof pitch of their house.

I used lots of screws and the expanding gorilla glue at the connections. I also varnished these boards. to help keel them dry.

I then began to custom fit the gable end caps to cover the wood structure in copper.

I used a 1/4" hardwood plywood to cover this frame with the flue hole cut out, and then varnished it. before covering it over with the copper sheets.

I was not able to fit the copper skins over the plywood.


Here's a look from underneath.

This shows the square flue cover I made and sealed to the larger cover with the base of the chimney cap formed.

The exhaust head then needed to be formed. At this point I'm already over 2 weeks into this fabrication.

I sent them these photos to see what direction the wanted the exhaust head to go. The client's opinion is always paramount, so I go out of my way to send them photos like these to get their feedback as I progress.

We arrived a couple hours early on install day to get the area prepped. Fortunately we were greeted with good weather. I used a wire brush and lots of paper towels to clean the top off. I caulked what I could and spray painted the steel to help keep it from getting worse.

I had made a custom lift apparatus from a 4x4 beam and had it ready before the crane truck had arrived.

I t was very trick for the crane driver to back into the clients narrow curved driveway, but with our guidance he managed. Once in place the installation went very swiftly and smoothly.

I had to quickly get up there again on the foam cushion pad to help guide it down over the chimney and set the screws once it was in place. The pad was not for my comfort. It helped me avoid denting the hollow metal roof and from slipping.

It's amazing how easy something like this can be with the right equipment. I dread the thought of what it would have taken us to try to man-handle this heavy cover up there without the use of the crane. Even if we did manage to get it up there without dropping it, we would have gotten hurt doing it.

The installation with the crane truck went smoothly. Sorry we did not get any shots of that , but we had out hands full. The client took plenty of pictures, but so far has not shared those with us.

I was concerned about ash falling back down into the cover, so I made this extra liner to seal the flue.

I was still not satisfied, so I had to come back the next day with another custom flange to add that should fully seal the flue to the exhaust head and keep out the rain water that might get blown in through the spark arrest screen.

I got the separate weights as I worked on these while taking these digital photos to share with the clients most every night for their review as the progress continued:

Chimney Cap:

  • 117.2# - base and wood structure - 72 ln' + 30 sq' - $885.39
    2.7# - SS screens = 4 sq' X $20 = $8
    0
    54.4# - copper roof halves = 43.52 sq'
    6.4# - End eaves = 5.12 sq'
    9# - chimney flue = 7.2 sq'
    3.8# - flue liner and cover flashing = 3.04 sq'
    21.3# - exhaust head = 17.04 sq'
    214.8.6# total weight
    94.9# copper = 75.92 sq' X $25 = $
    1,898
    $2,863.39 sub total
    + $200 - for the crane truck
    = $3,063.39 -
    grand total

.

Click in this photo to go back to Chimney Caps main info page

.


Below is a photo of our
Better Business Bureau's
NW Business Integrity Award
for the year 1998

1999 Better Business Award

We were also a 1997 finalist for this same award. See our referral web page to see how we managed to be honored with this special award


Back to homepage
Homepage

Site Map

.

Company
Profile
Roof Caps You are here Chimney
Caps
Scuppers Gutters Shipping

Contact Info
.

.

.

.

.

.

..

.

.

.

.

 copper-by-design.com