|
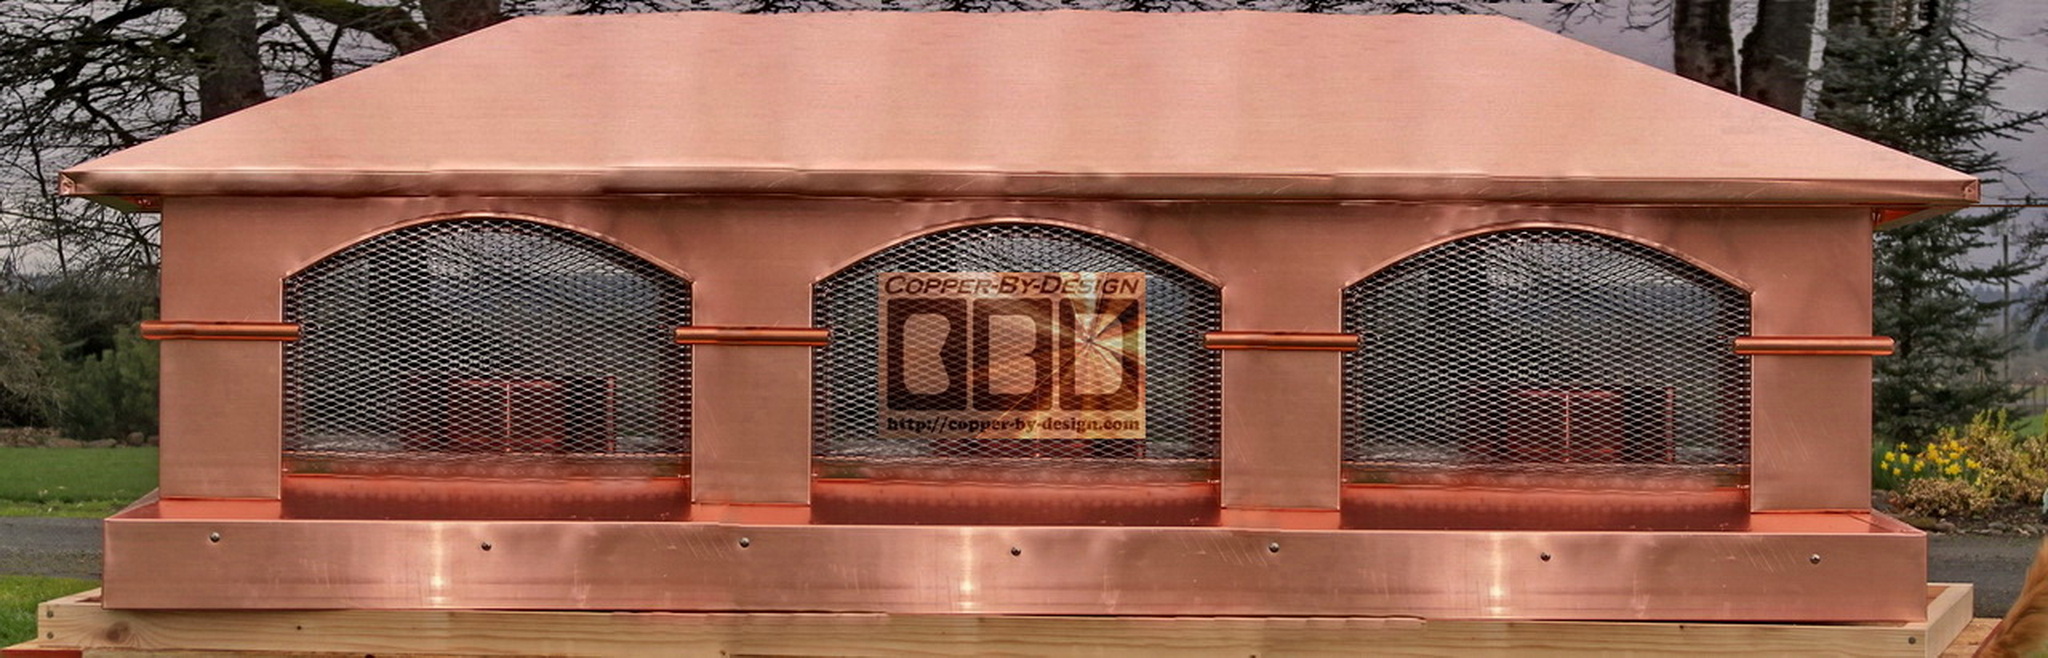
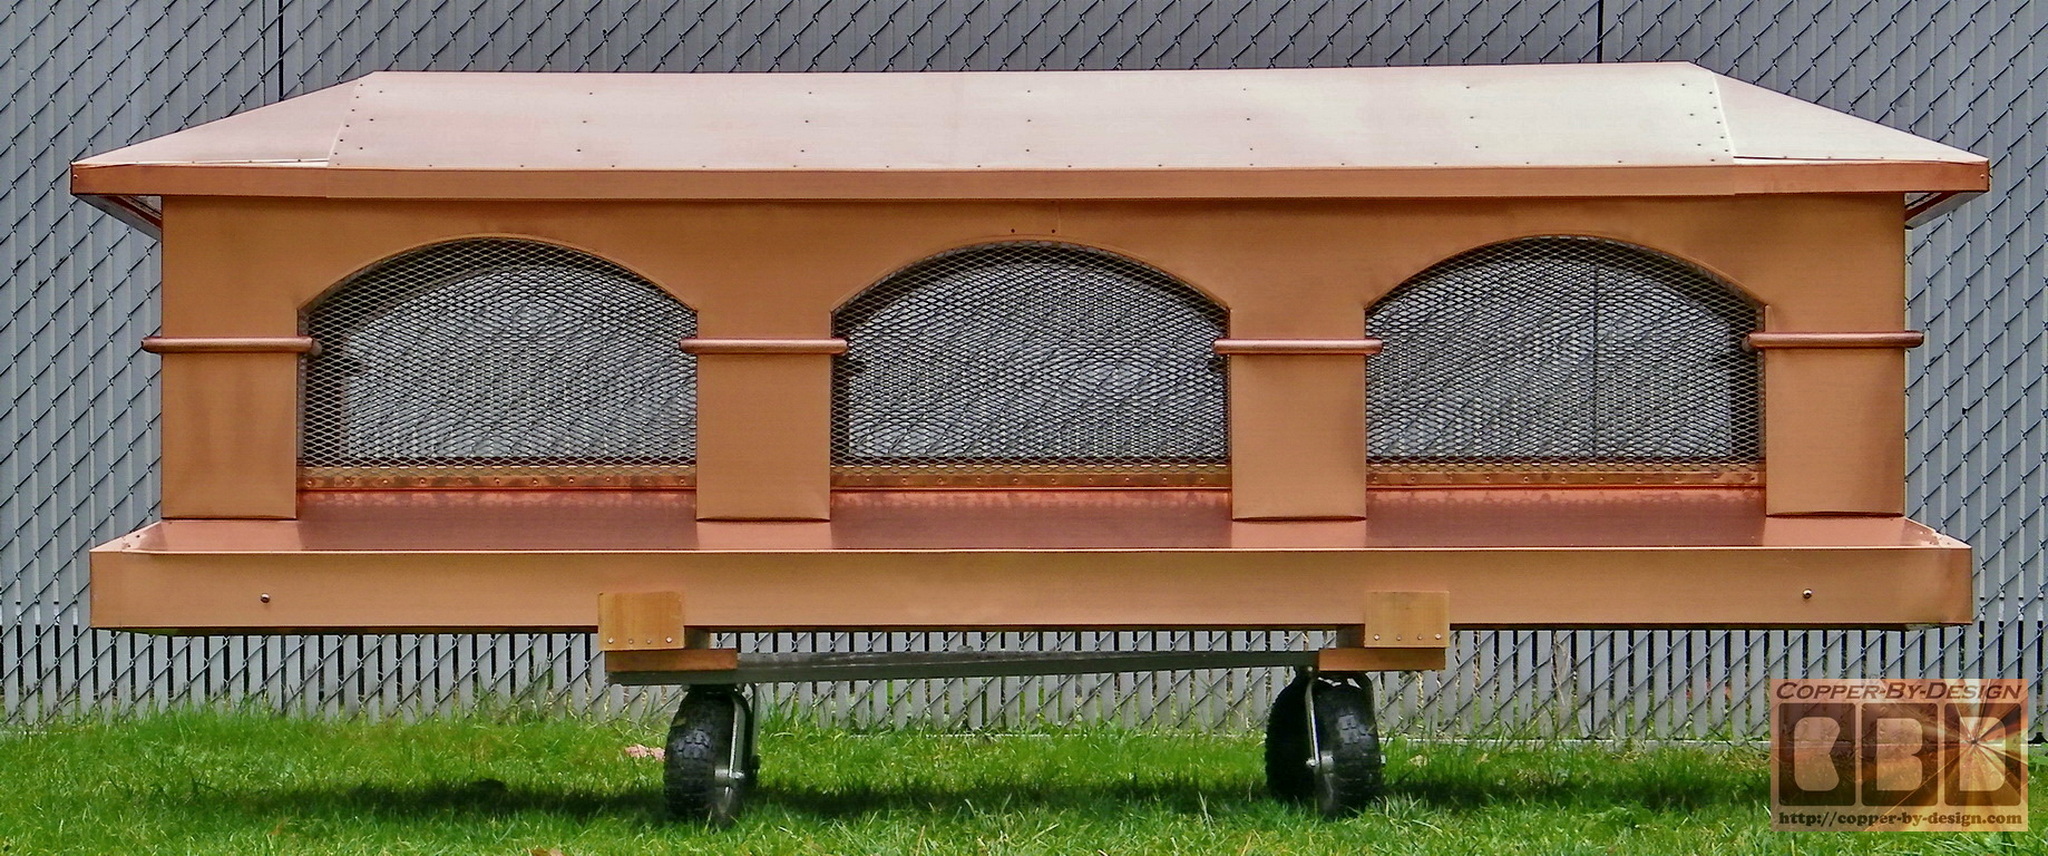
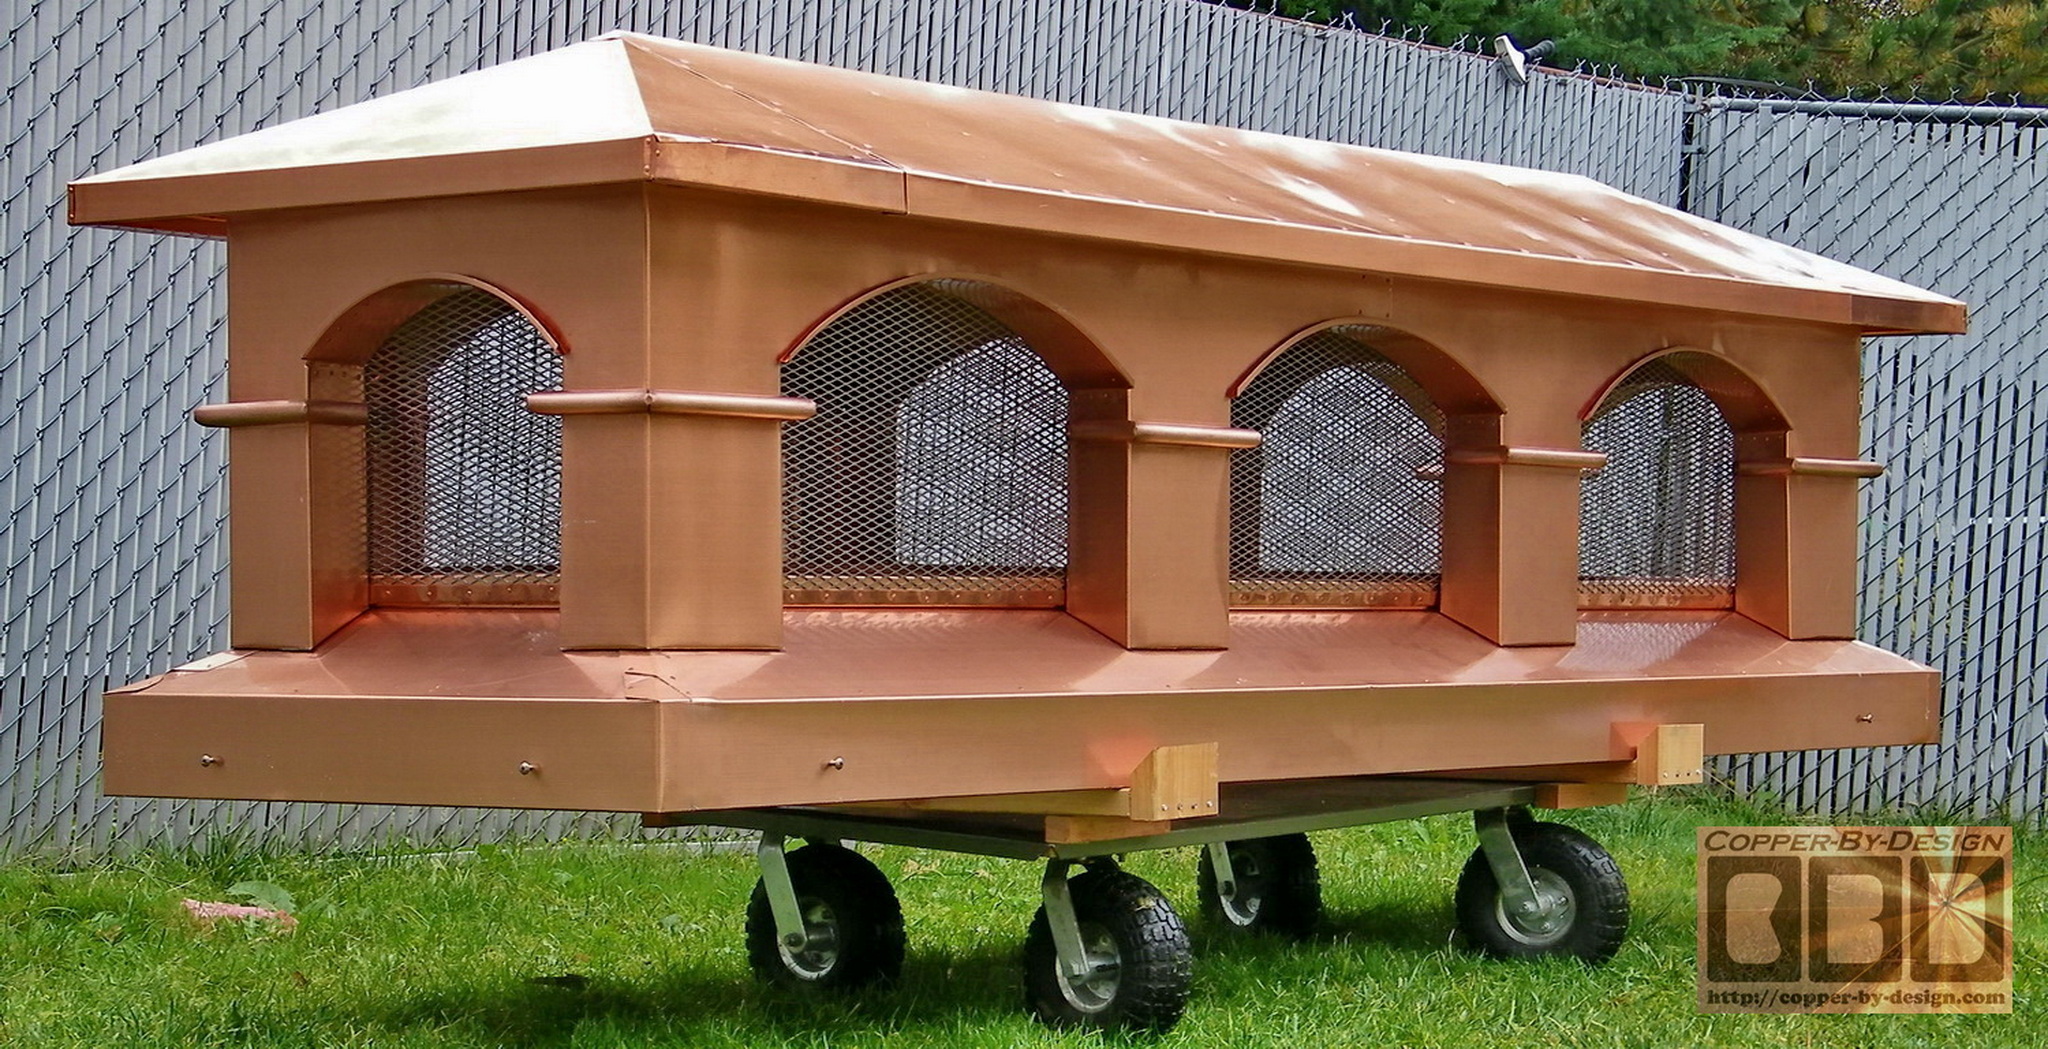
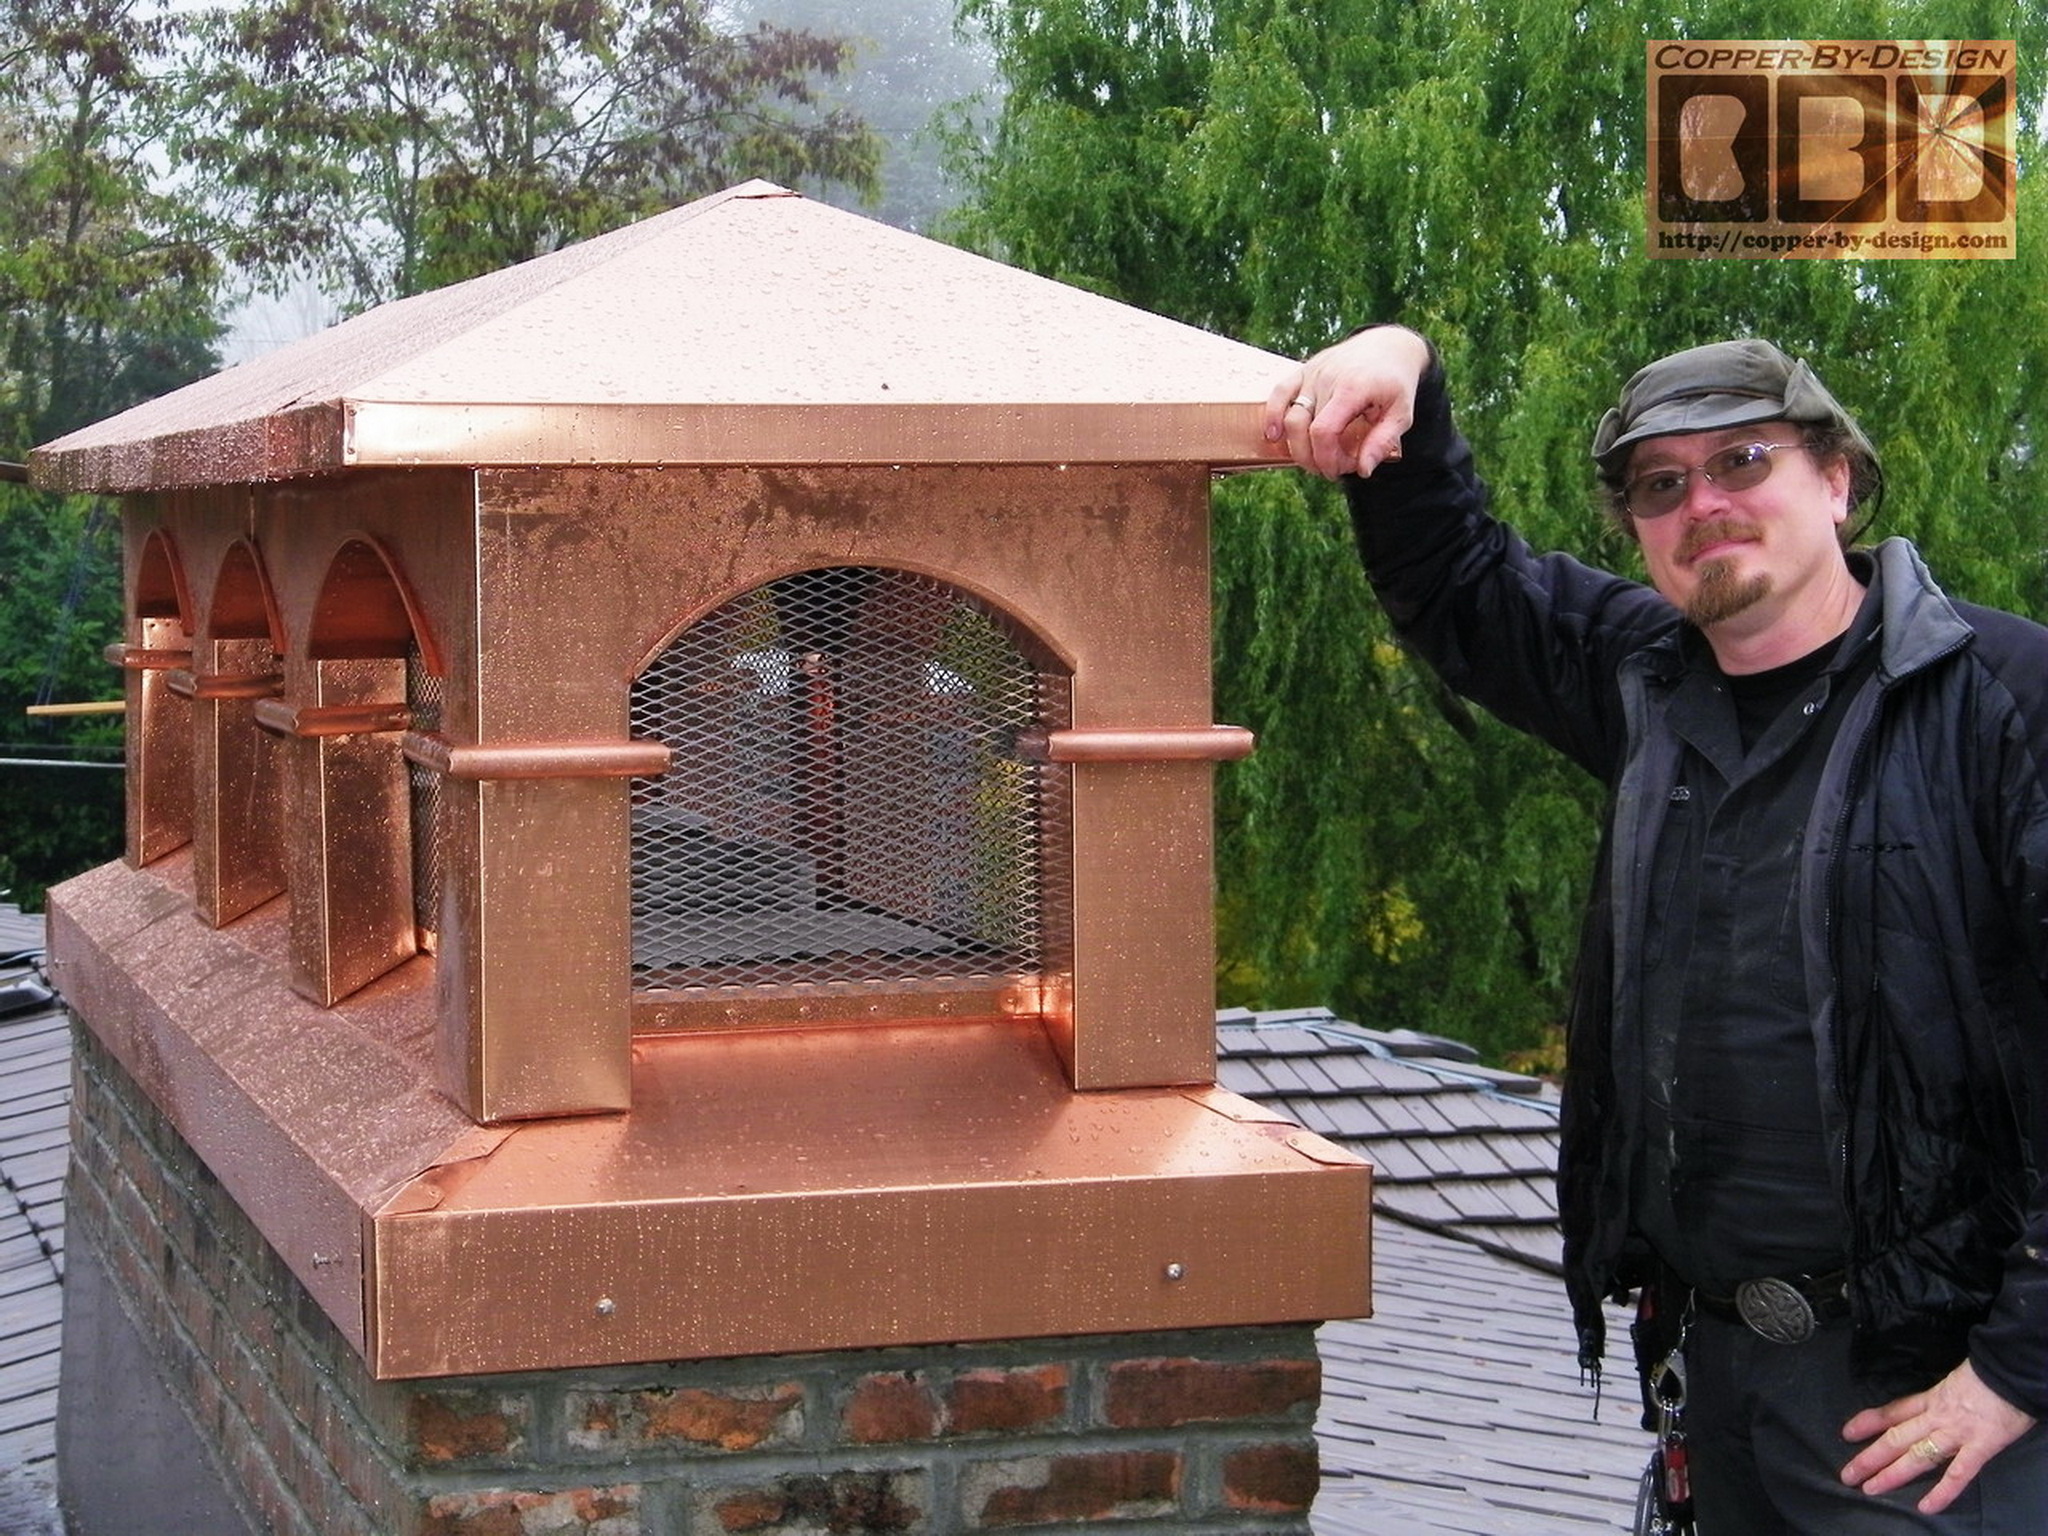
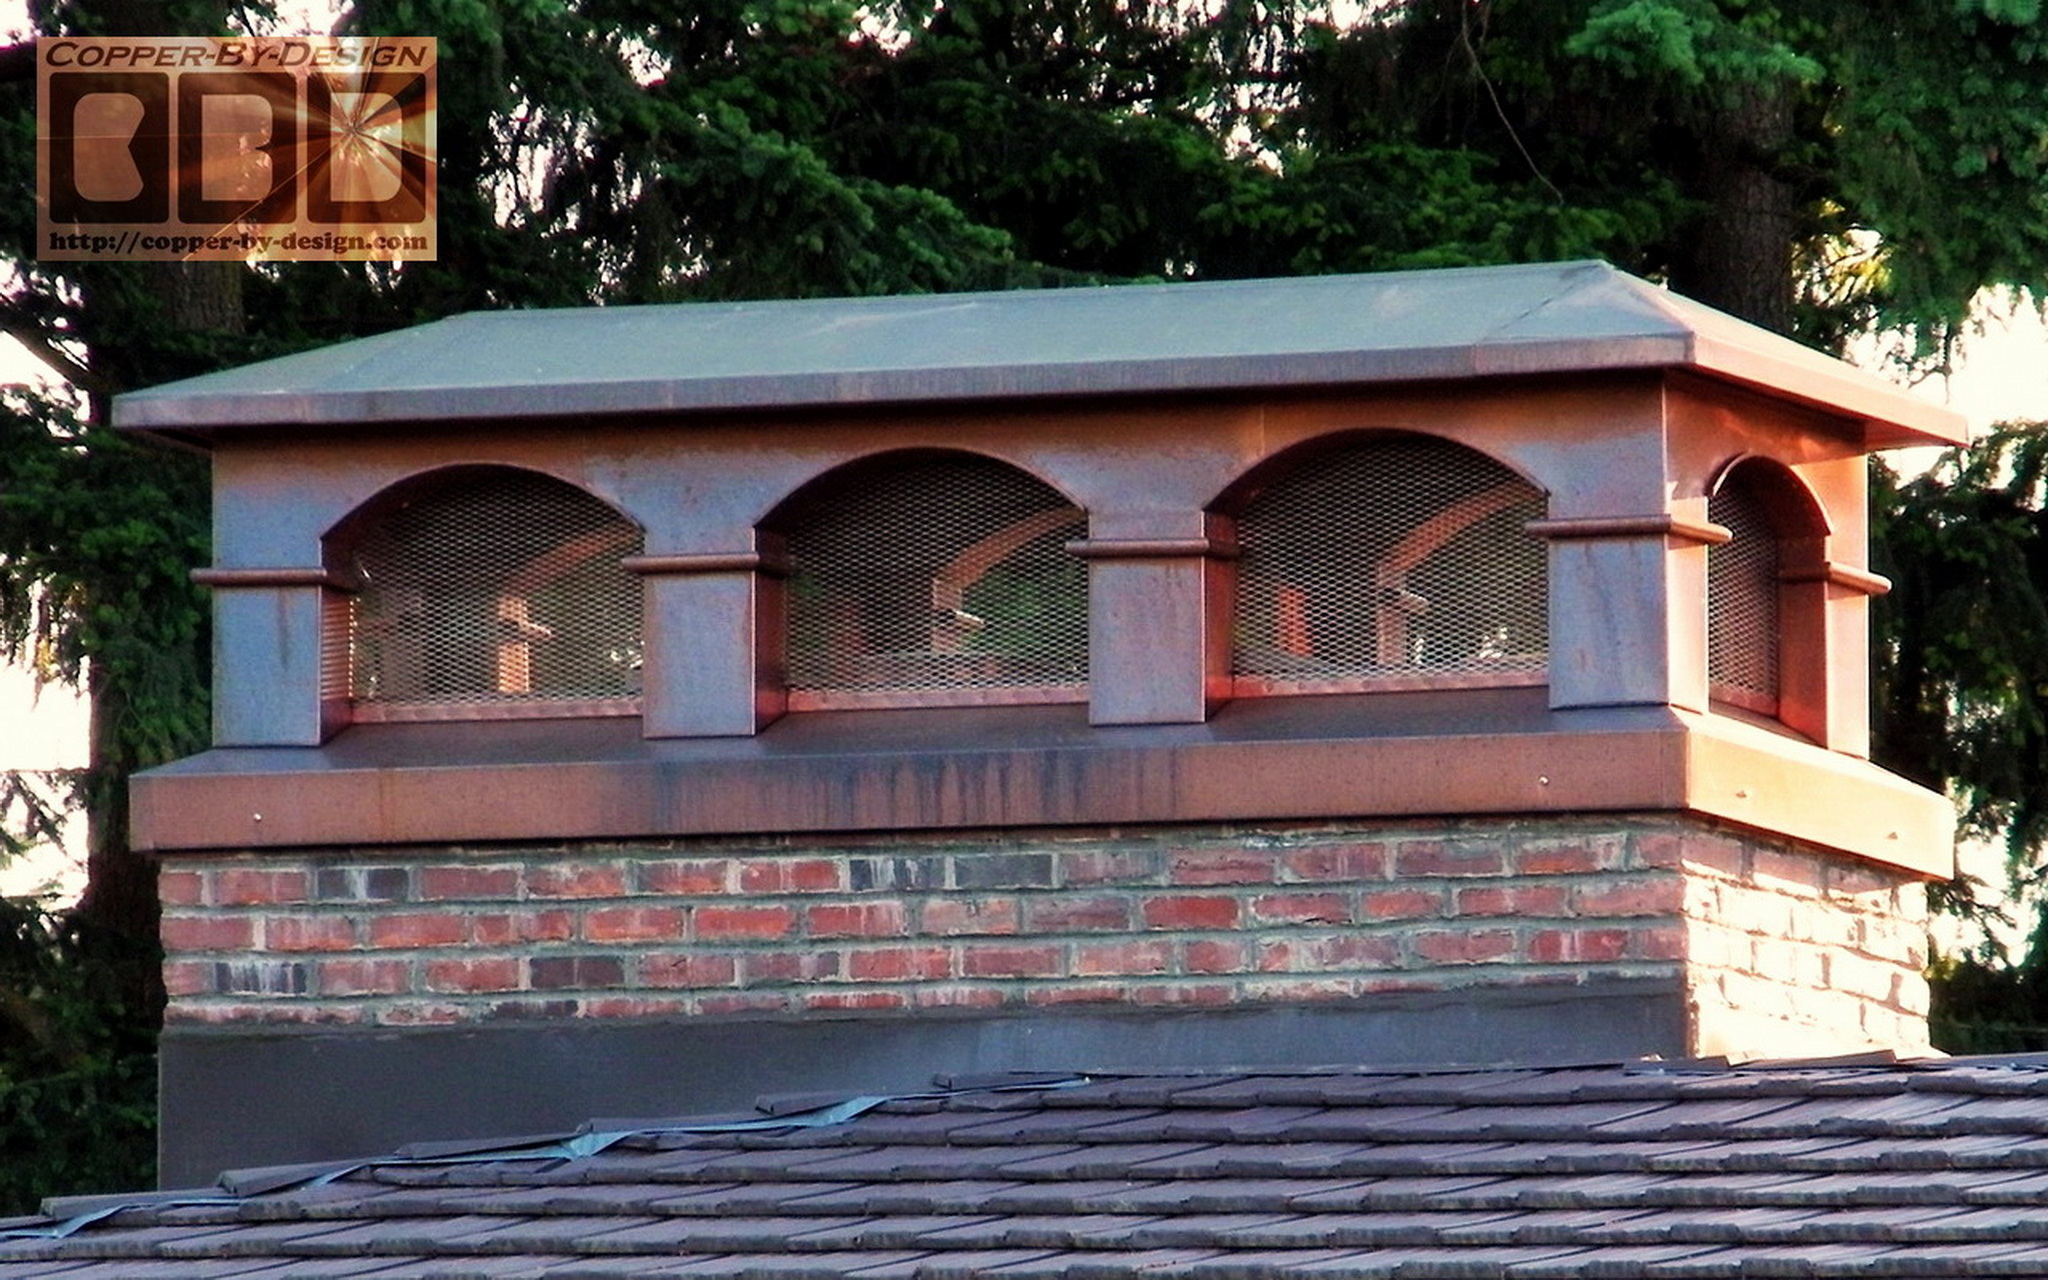
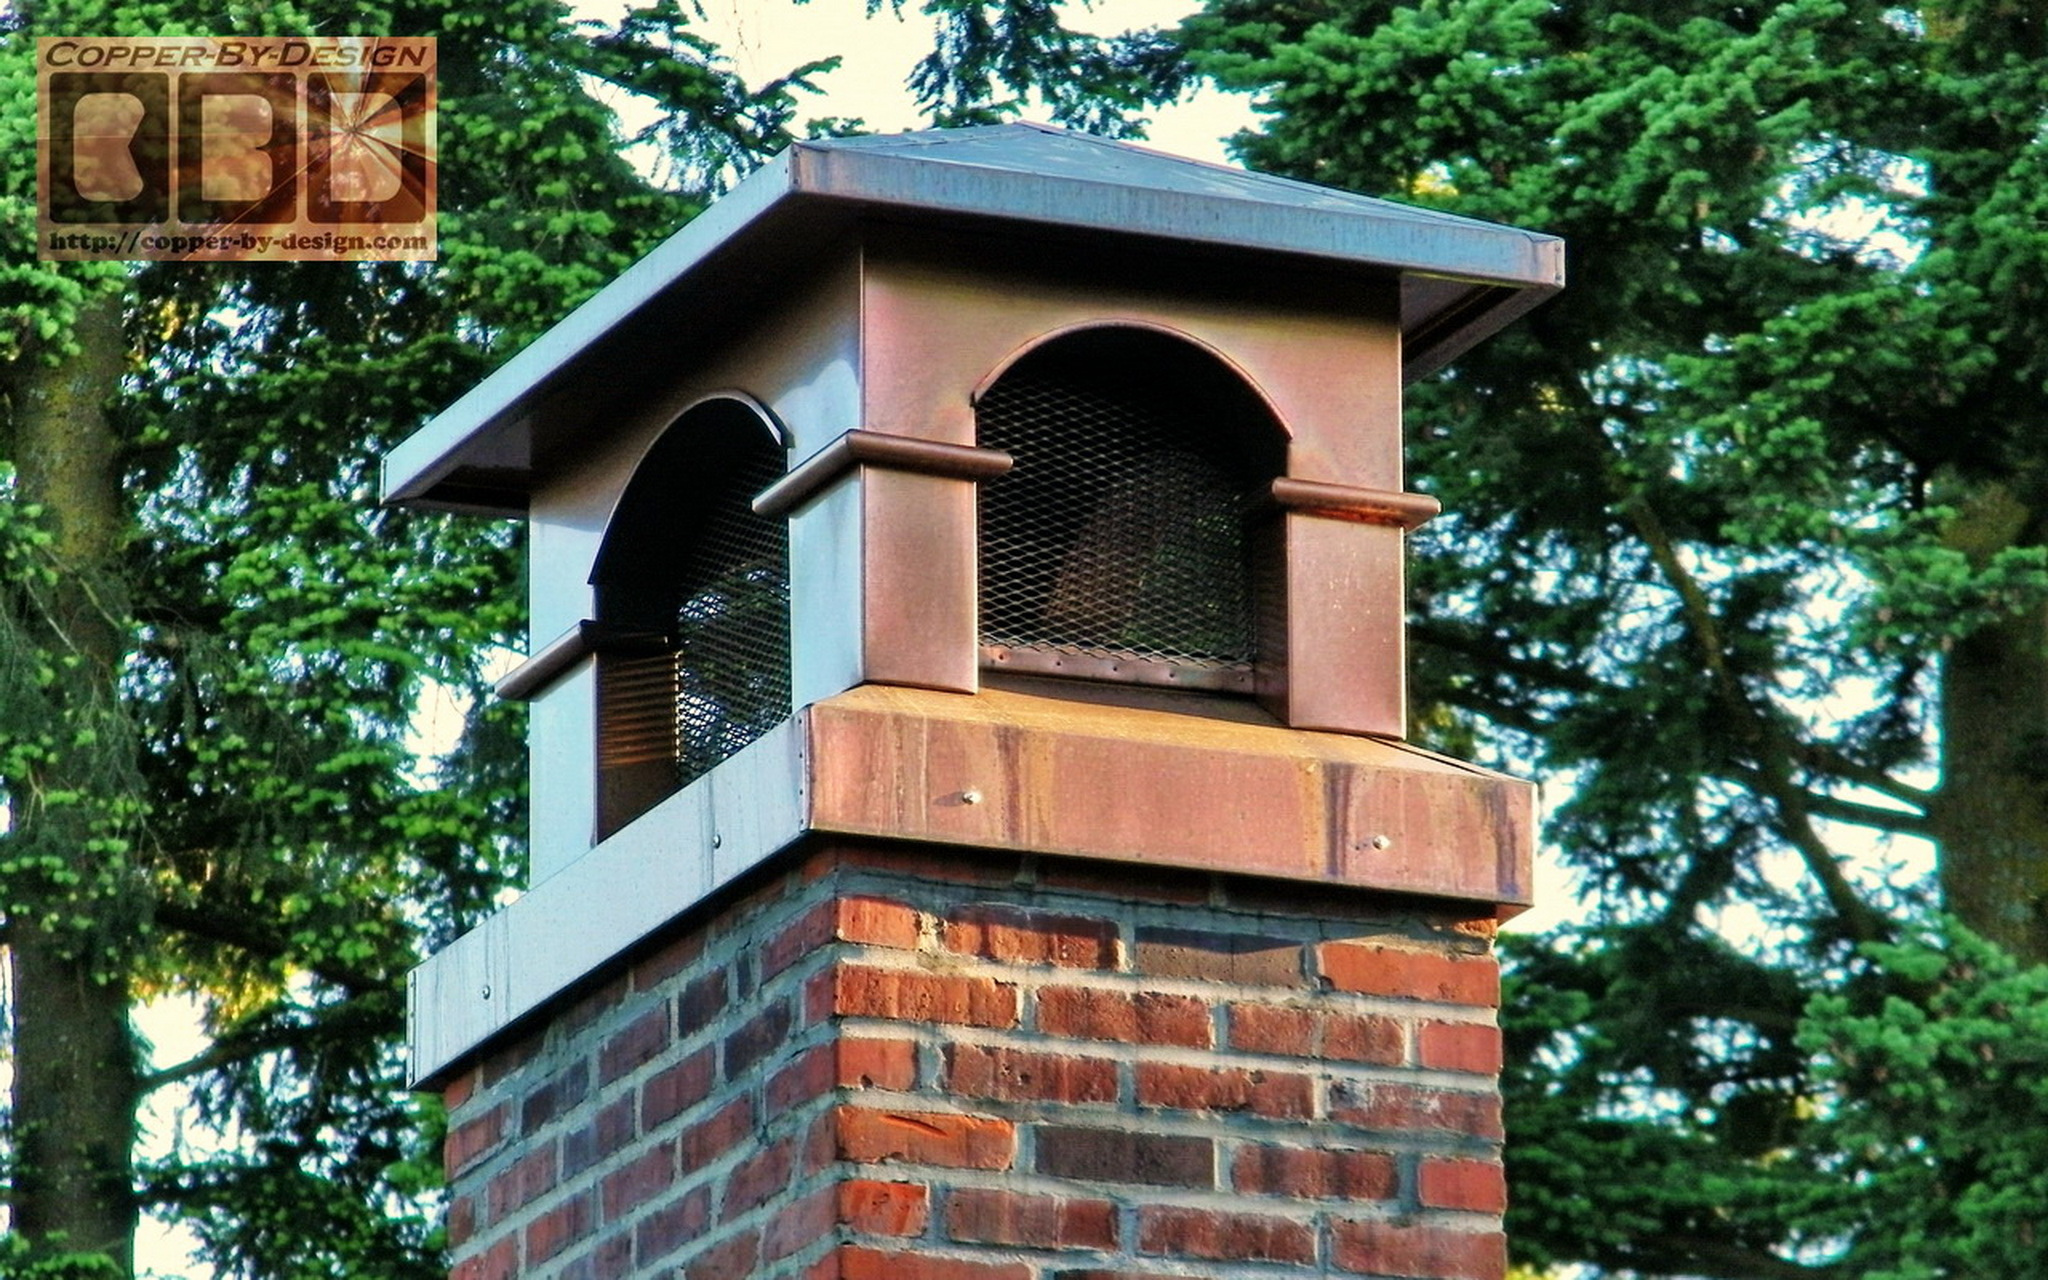
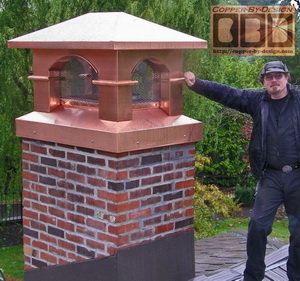
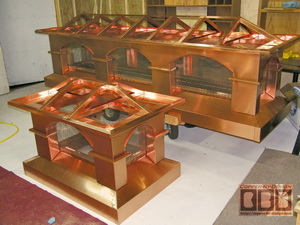
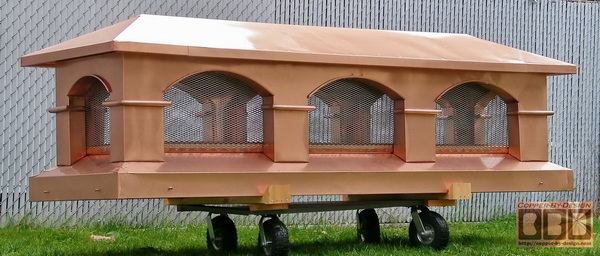
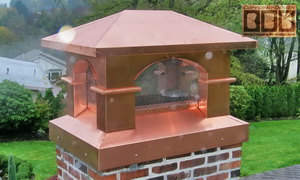
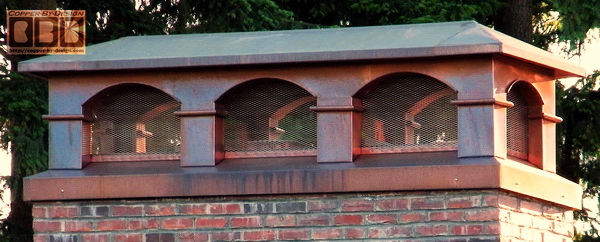
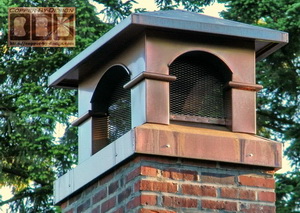
This set of 2 copper chimney caps were for Emil and Norma Bardana
in Lake Oswego, Oregon installed over their brick
chimneys. The larger chimney is over 121" long. They wanted these built in
my Tuscany arch style. I wish I had thought of this sooner for some of the 7' long chimney caps I had built. I could have at least made them with a double arch.
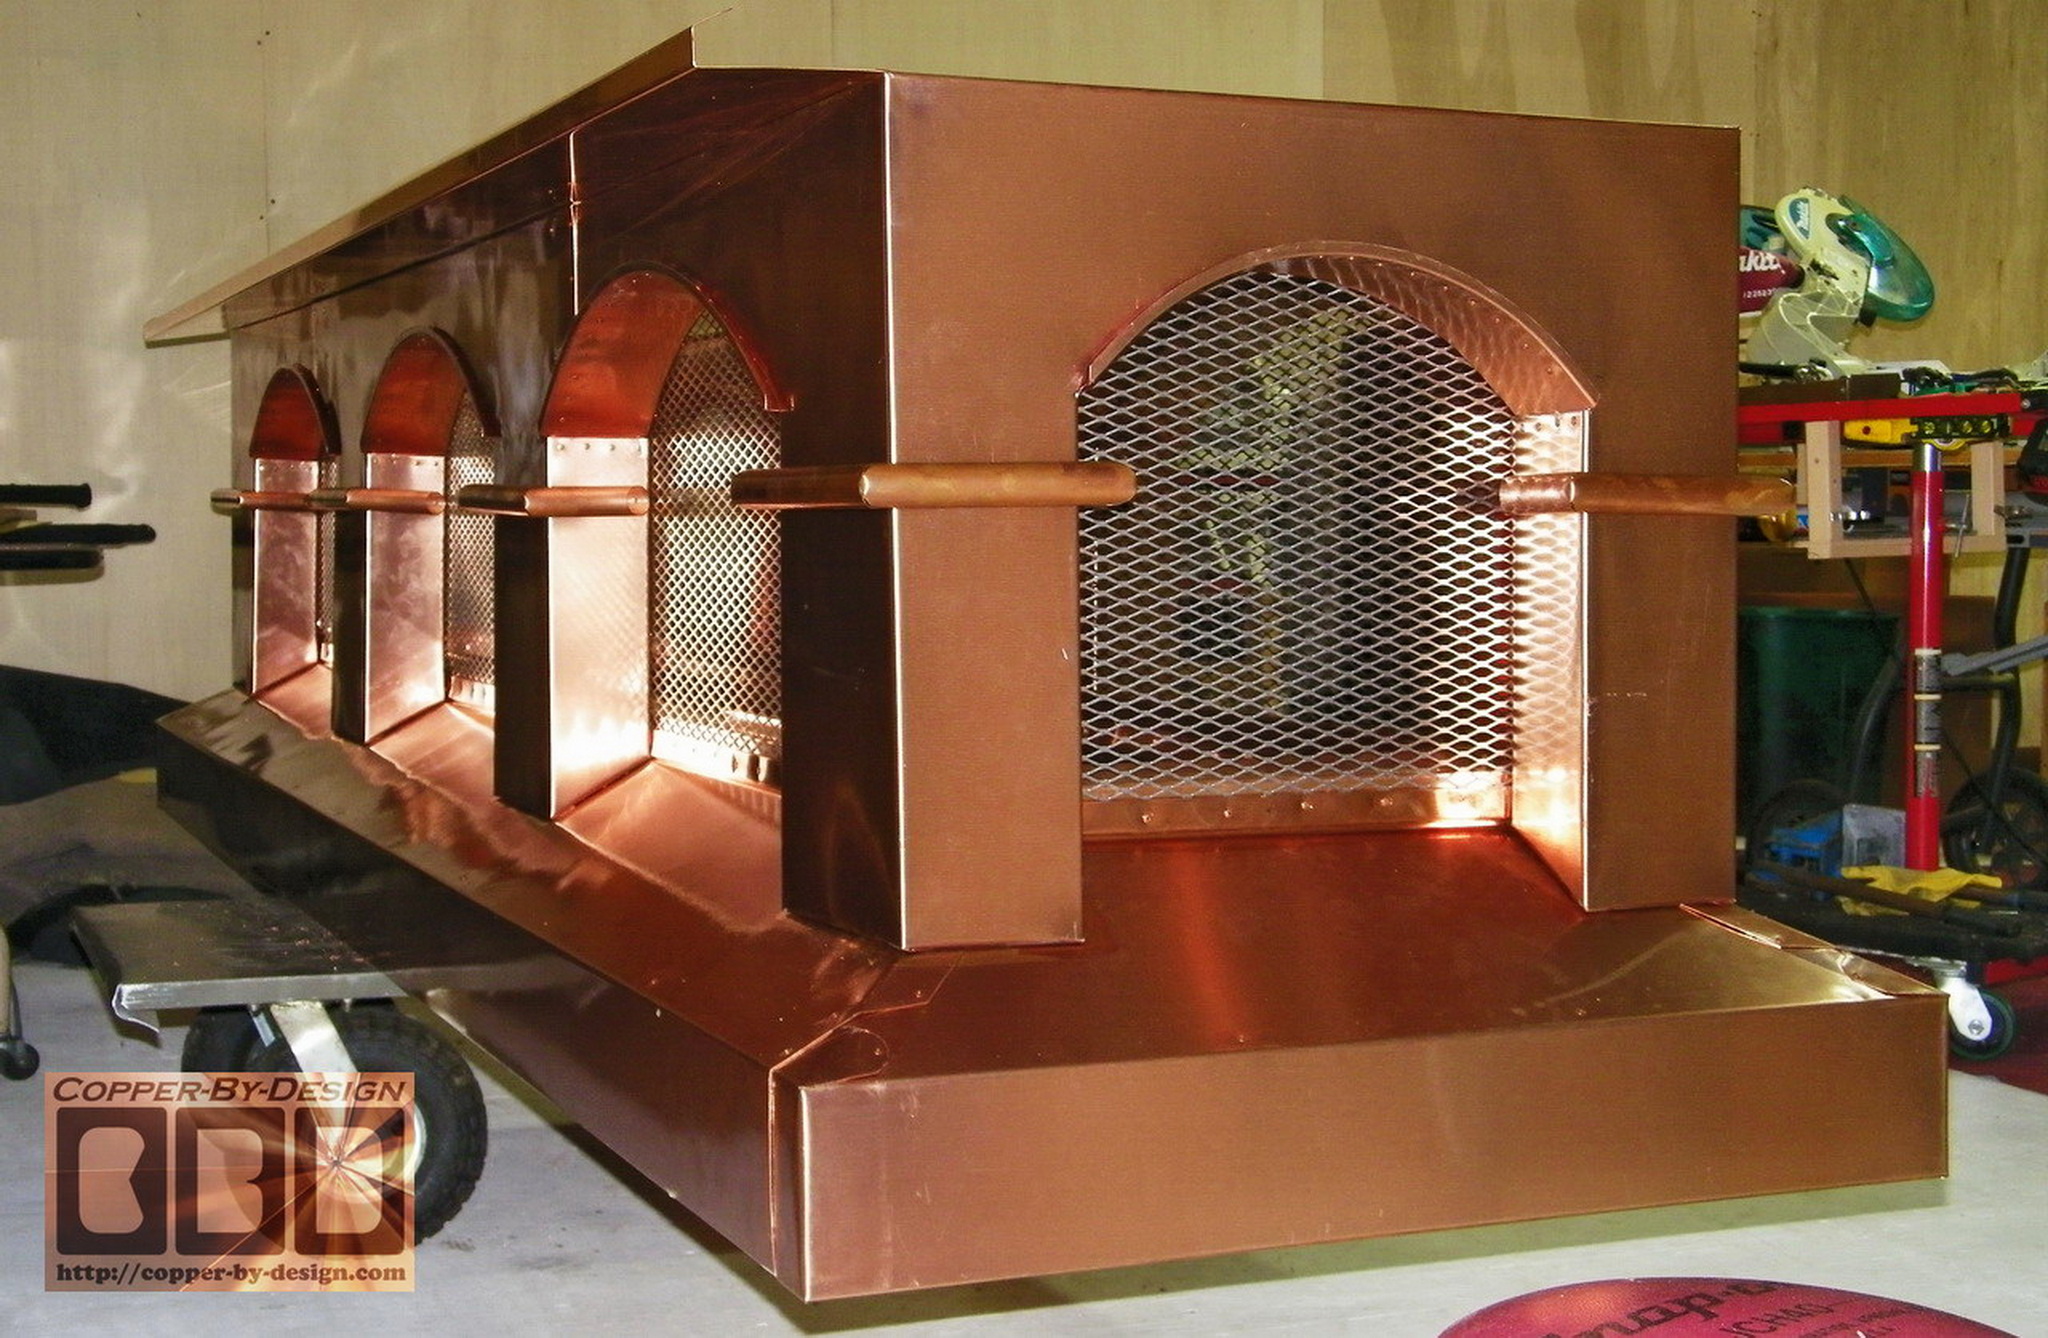
This is the largest Tuscany arch style copper chimney cap
project I've worked on to date. They first contacted me
6/12/09
and we swiftly worked out the details of this project through e-mails
and a personal visit in my workshop not long be fore we moved. I
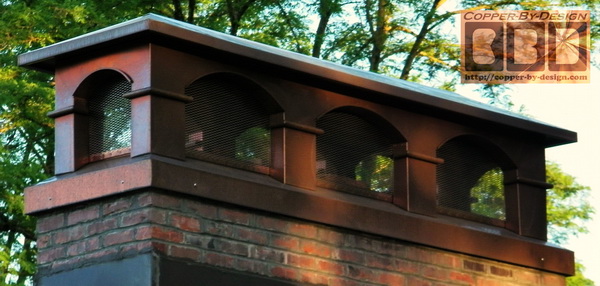
came out to their house to check the measurements. Given the
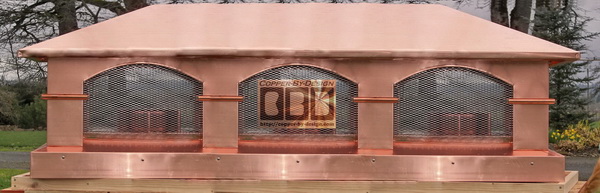
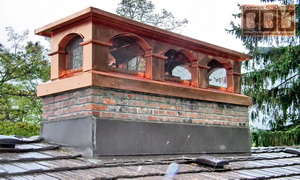
length of over 10' long I came up with the idea to build this
one with more arches along the sides, so I did some elaborate photo
editing to make this image look like it had 3 arches instead of
just 1 to show them what this would look like.
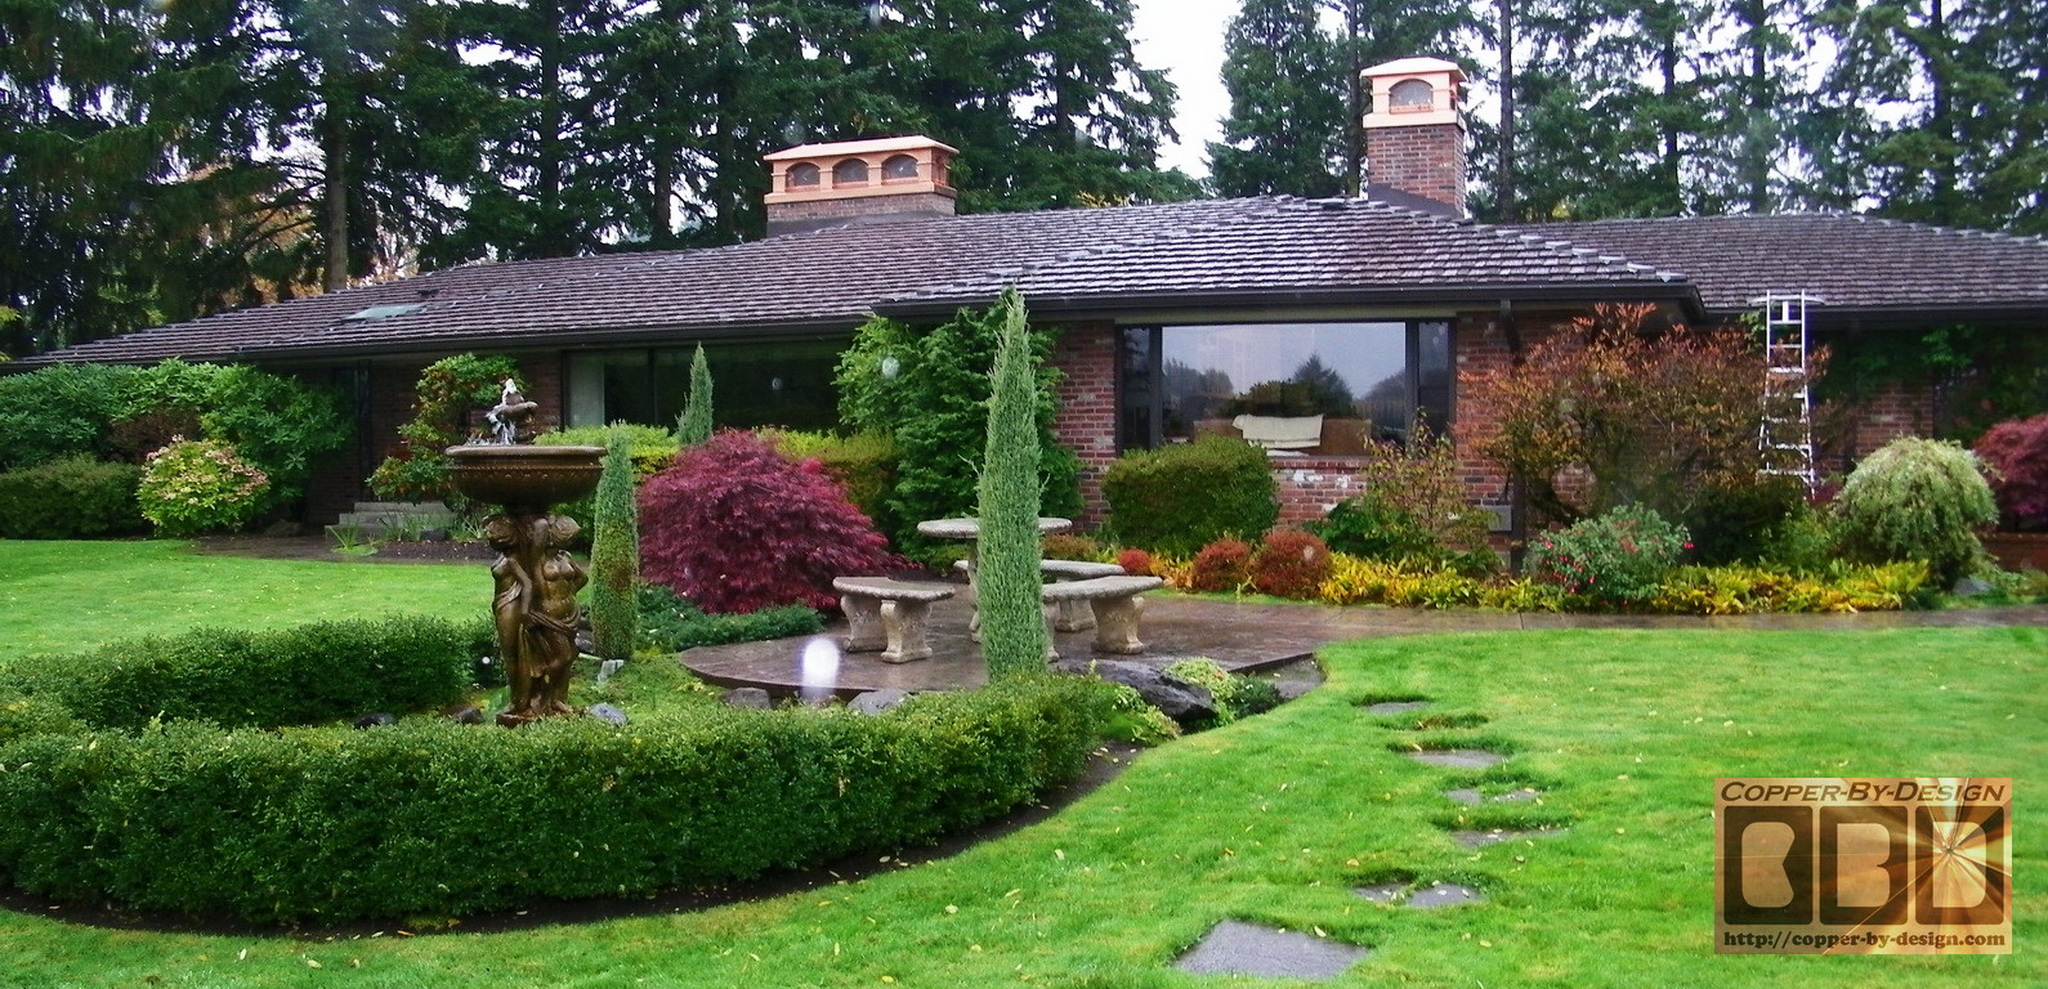
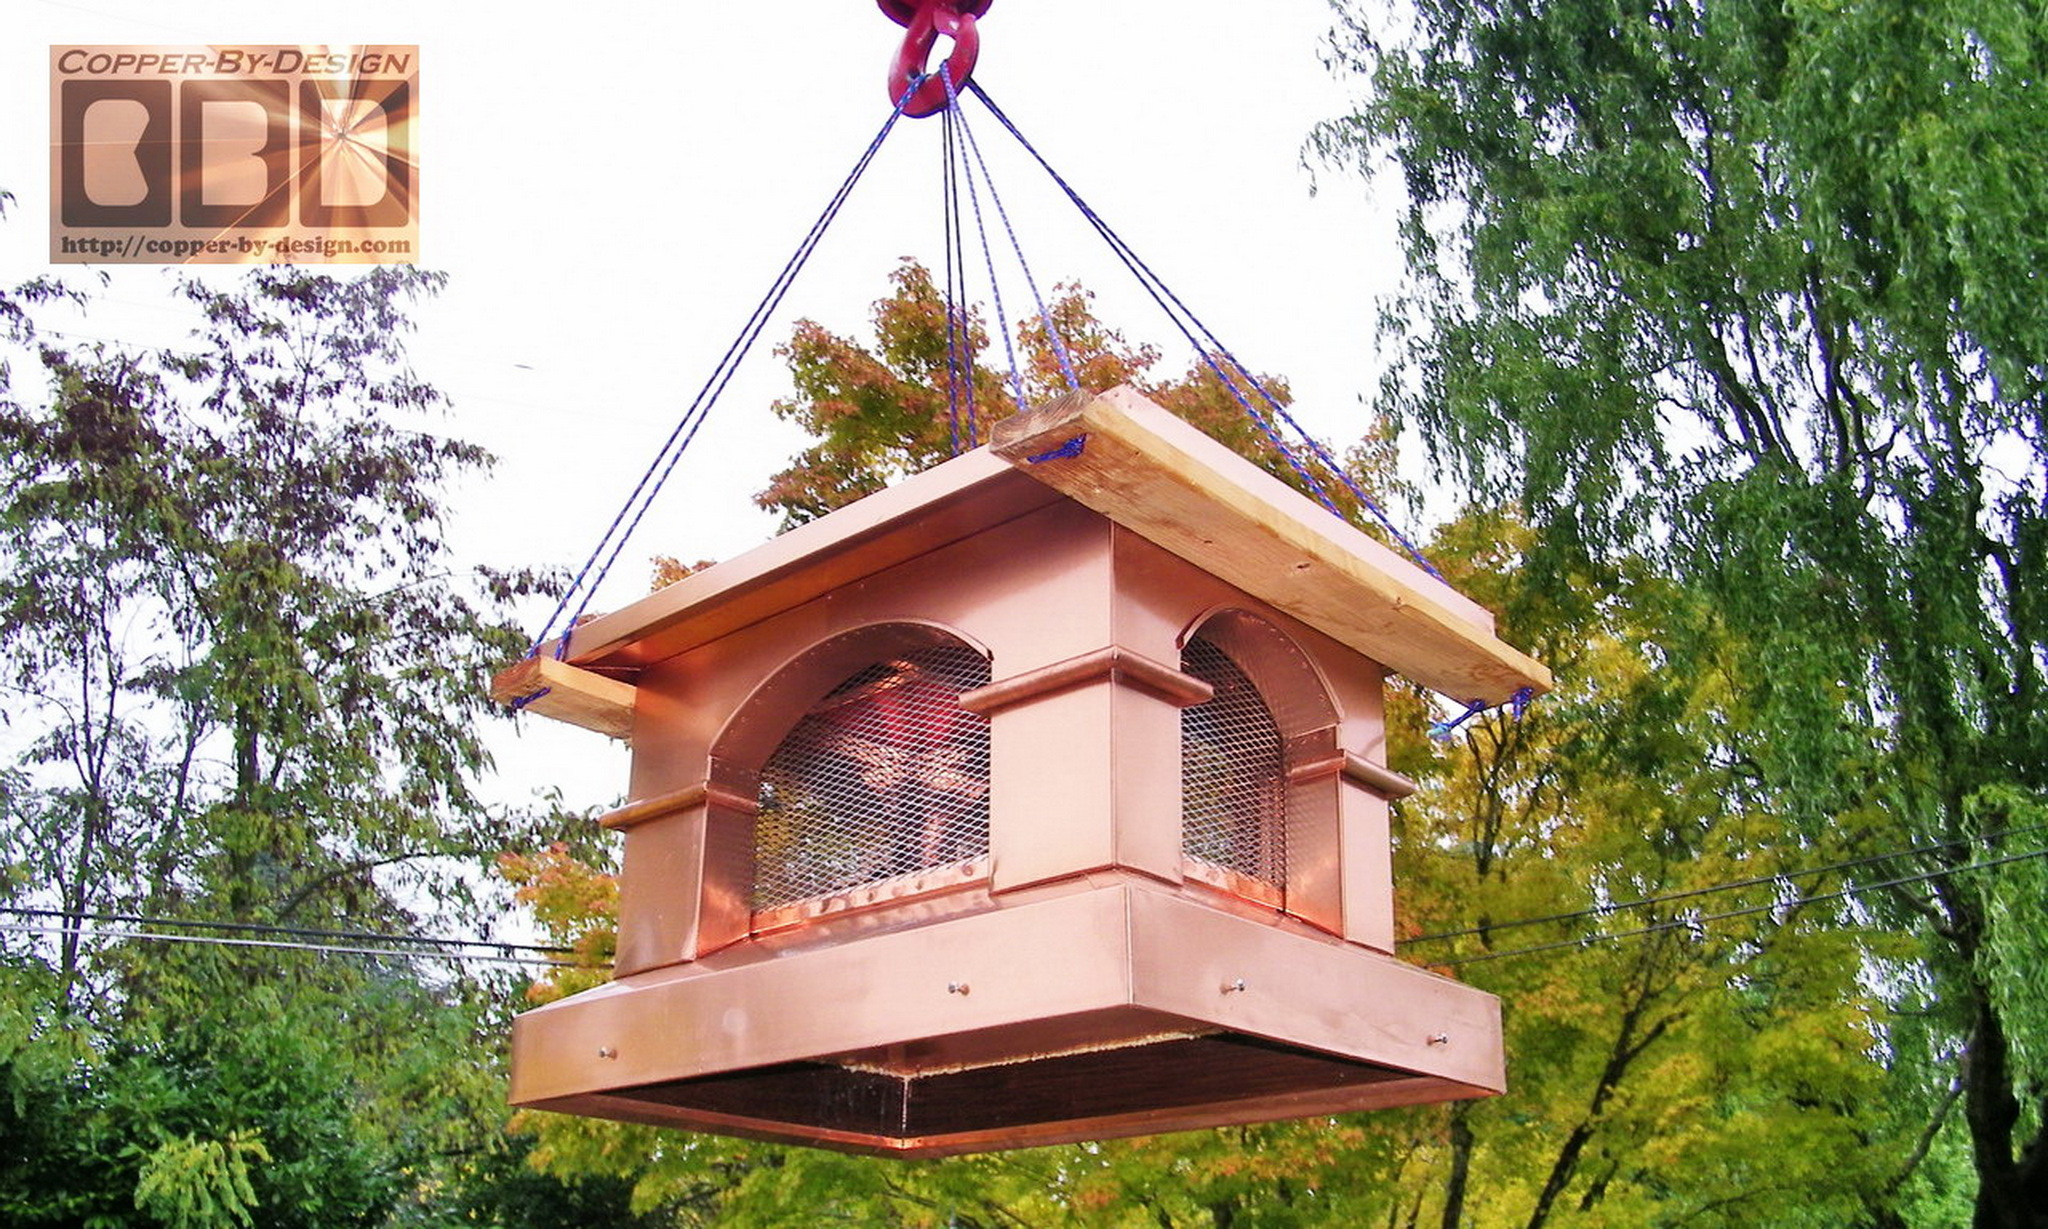
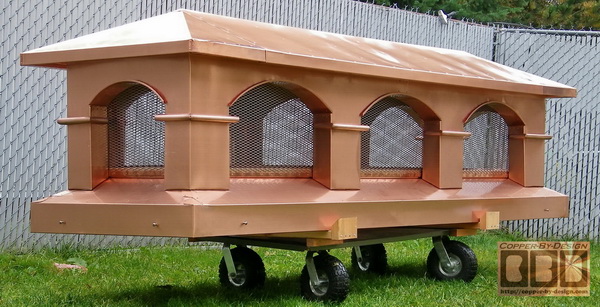
I designed the roof line to resemble their
house with hipped 5/12 pitch, so this will look
more like what the architect might have designed for this house.
The client approved this design and were very pleased with the
results. We
discussed aesthetic options like adding 1" wider
roof that the base/skirt all around.
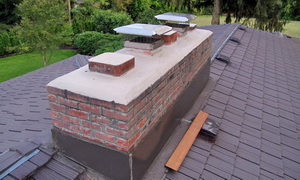 
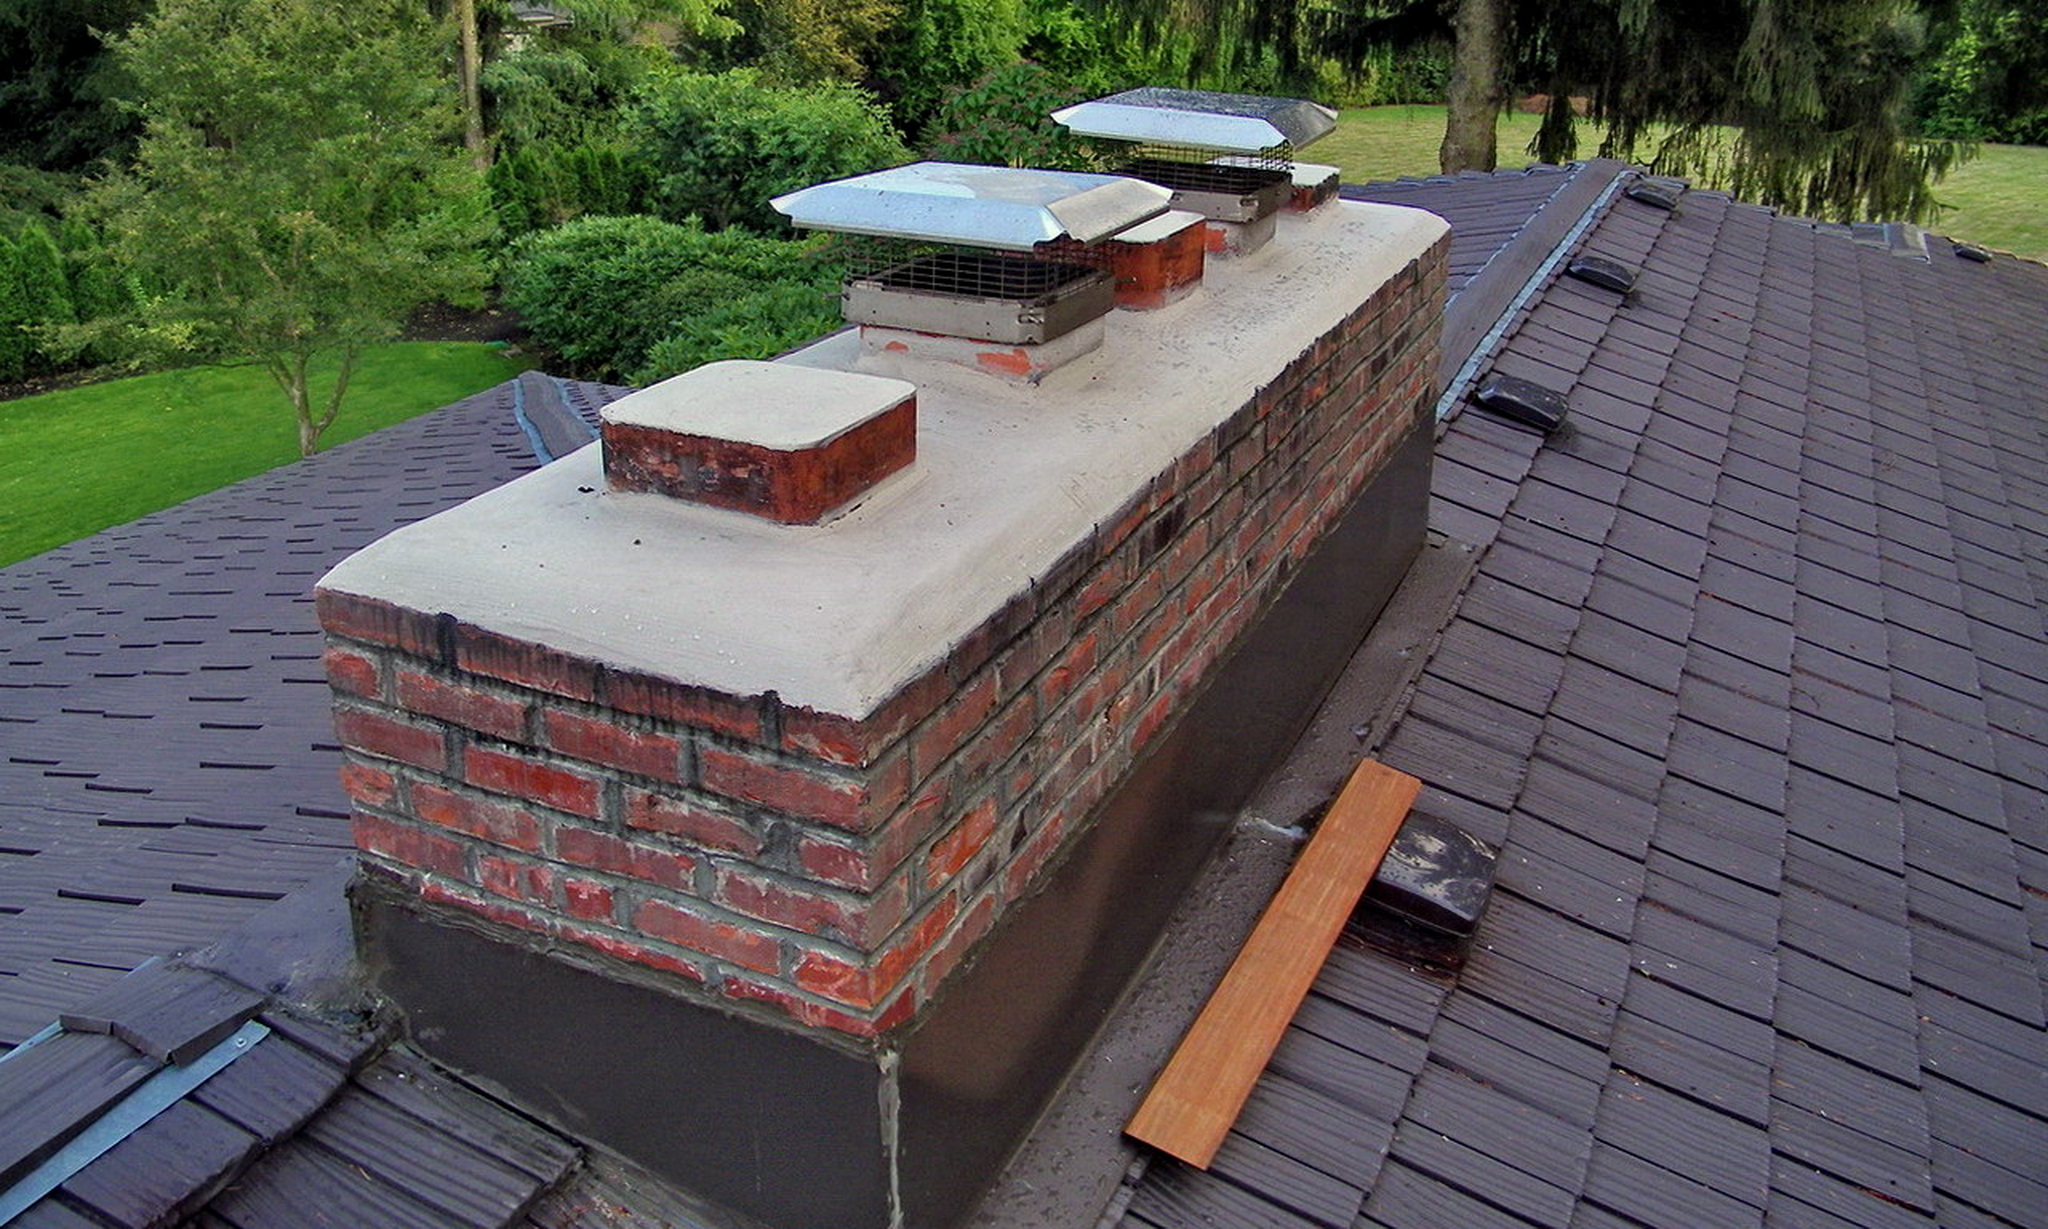
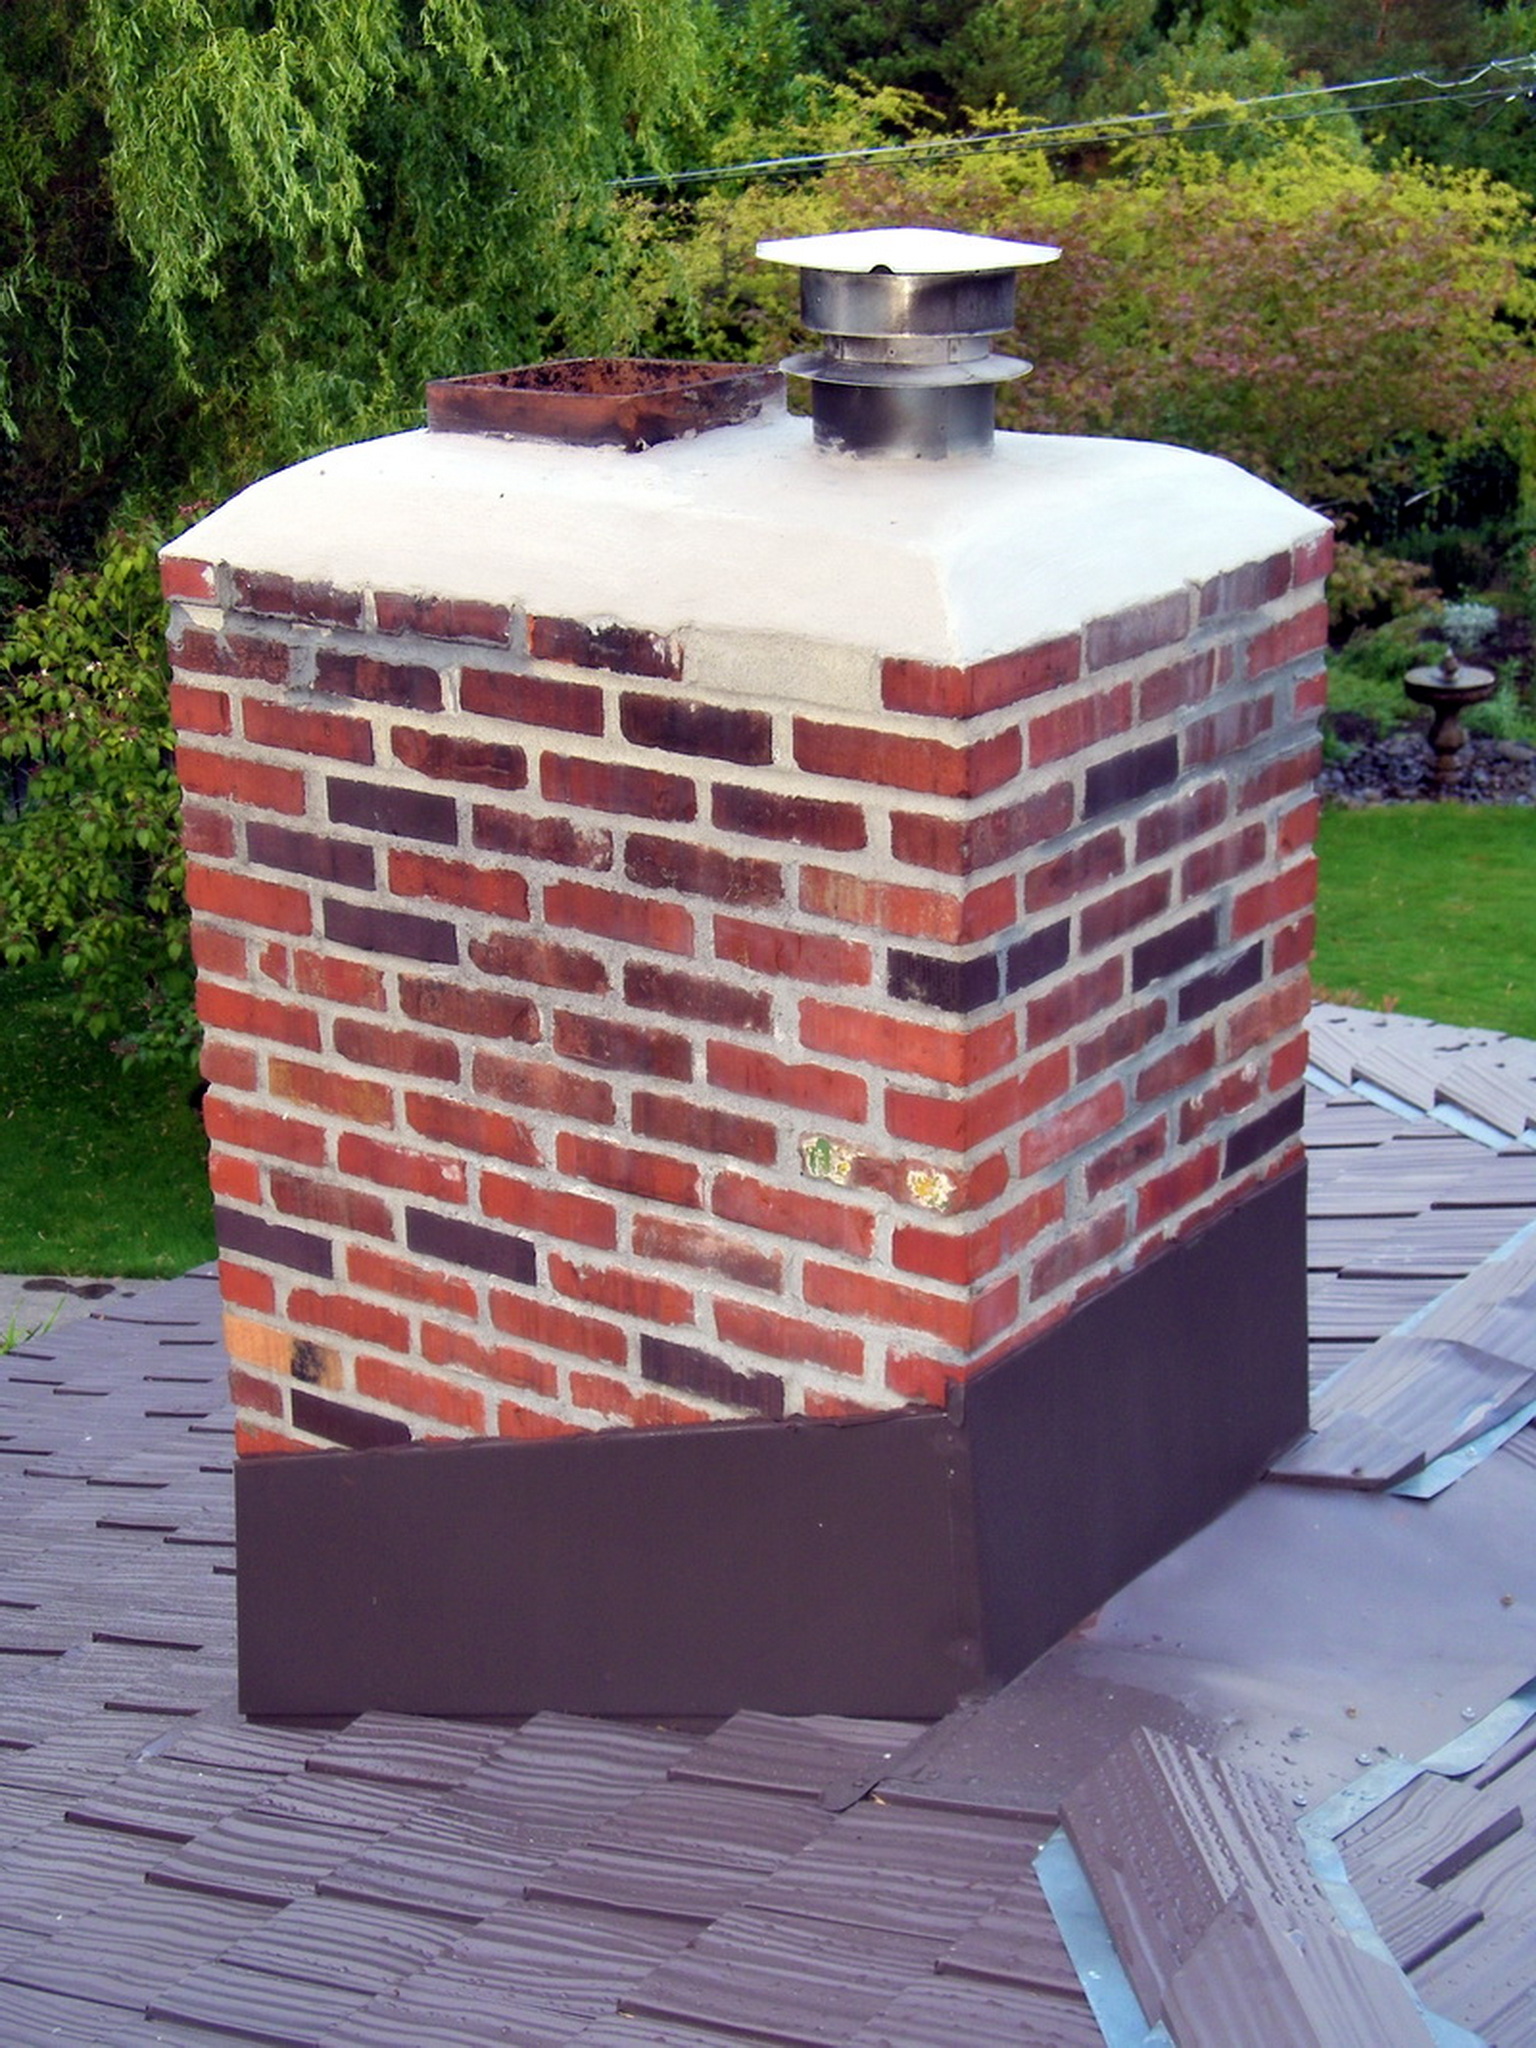
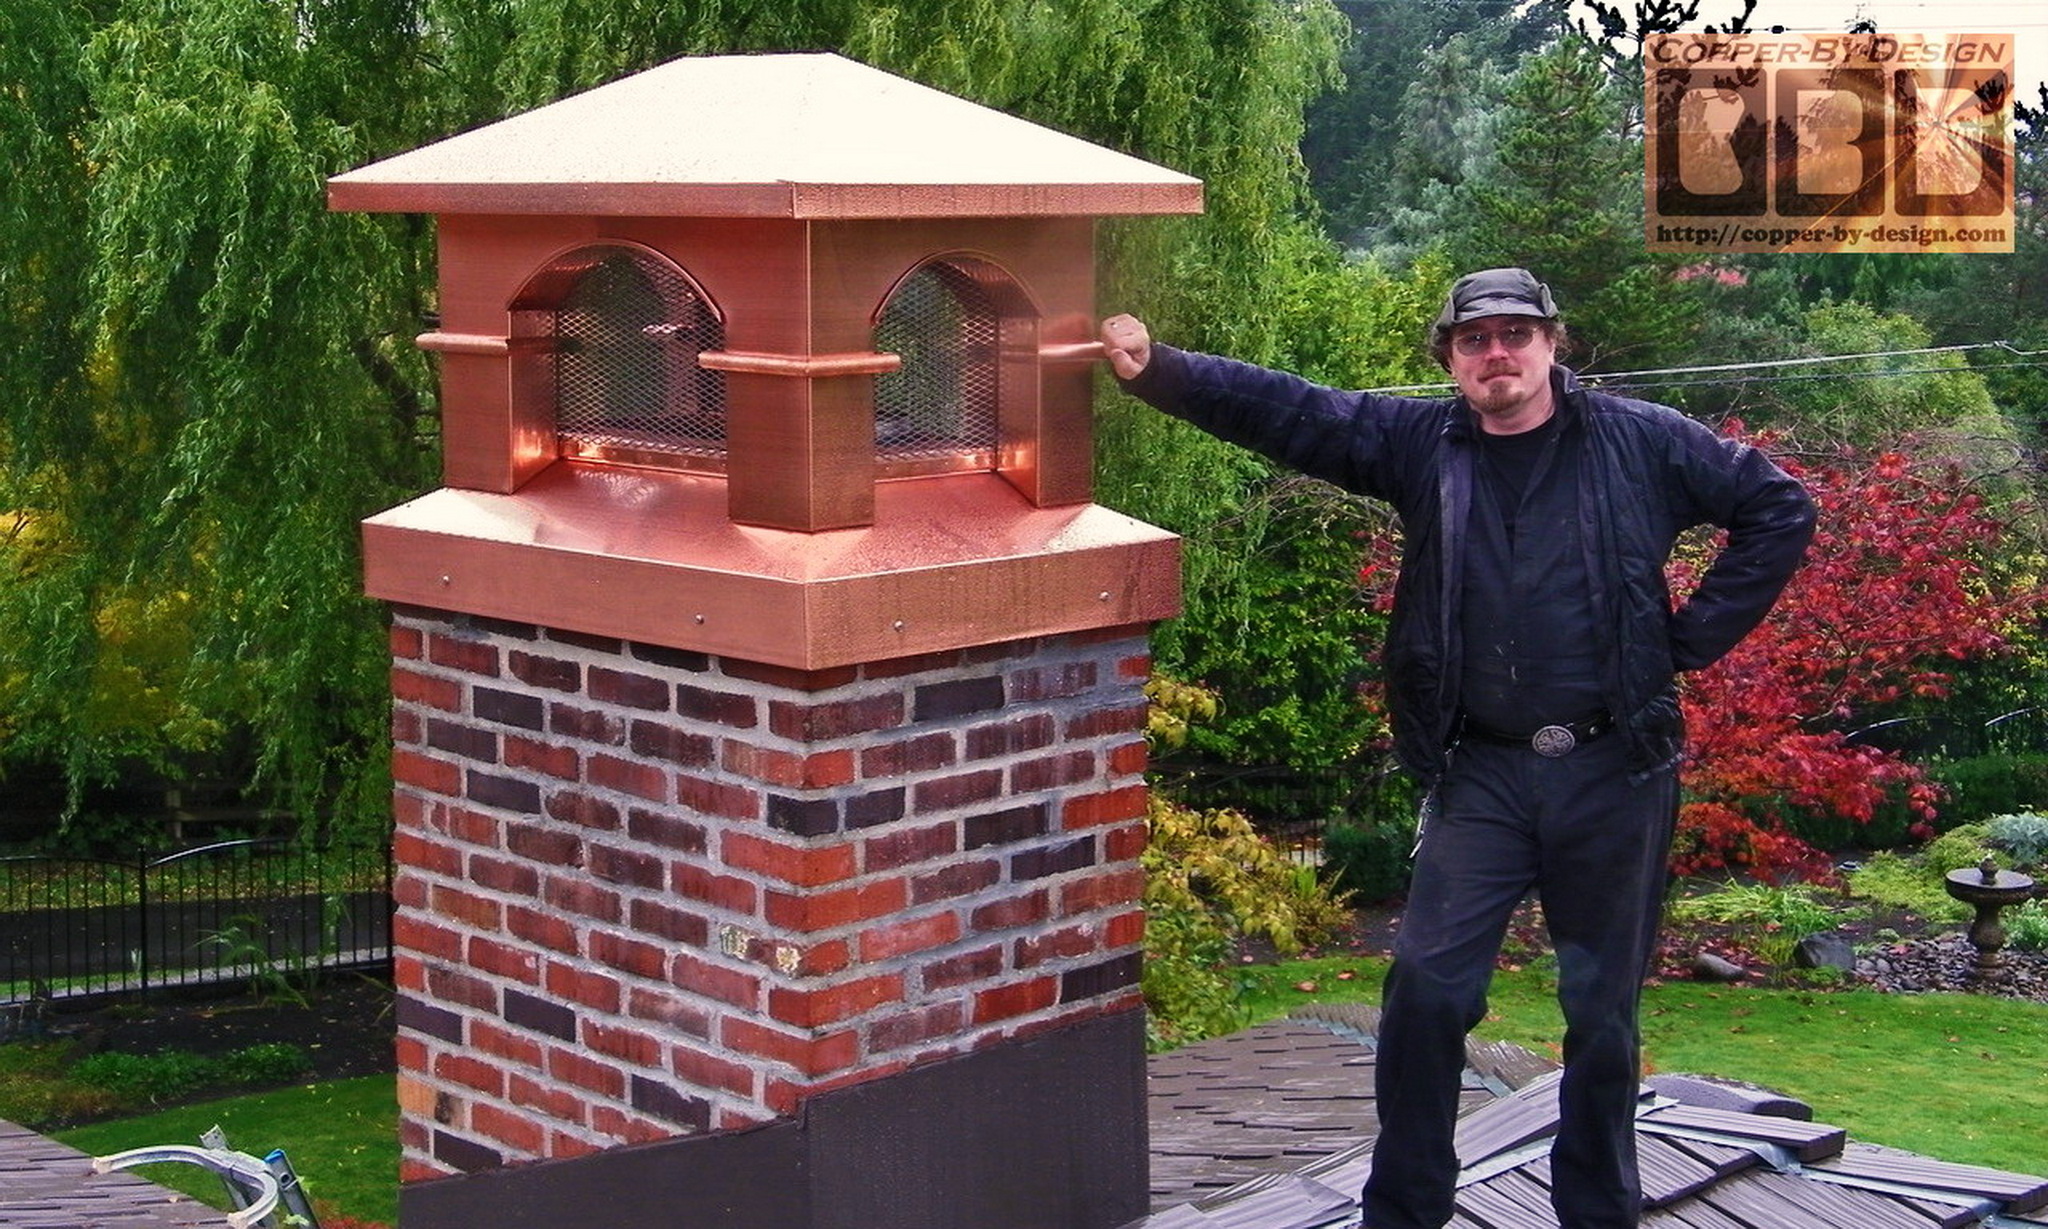
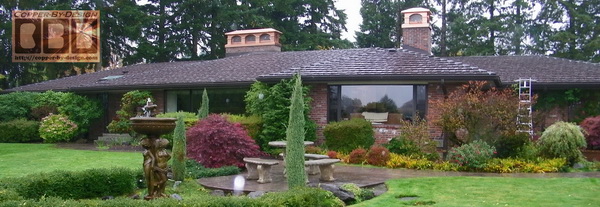
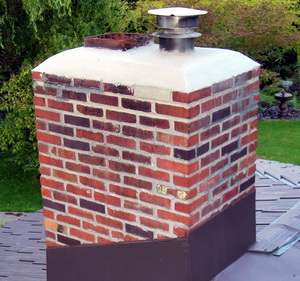
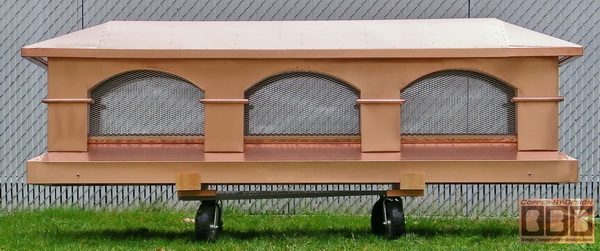
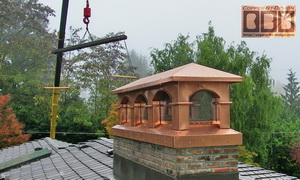
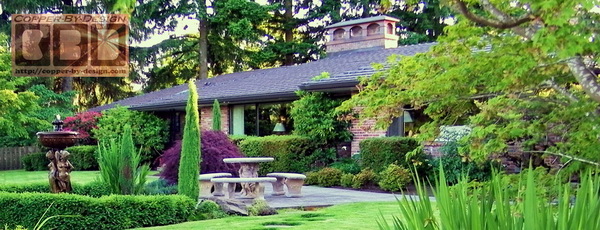
Here's the before and after photos of the installed
chimney caps.
|
|
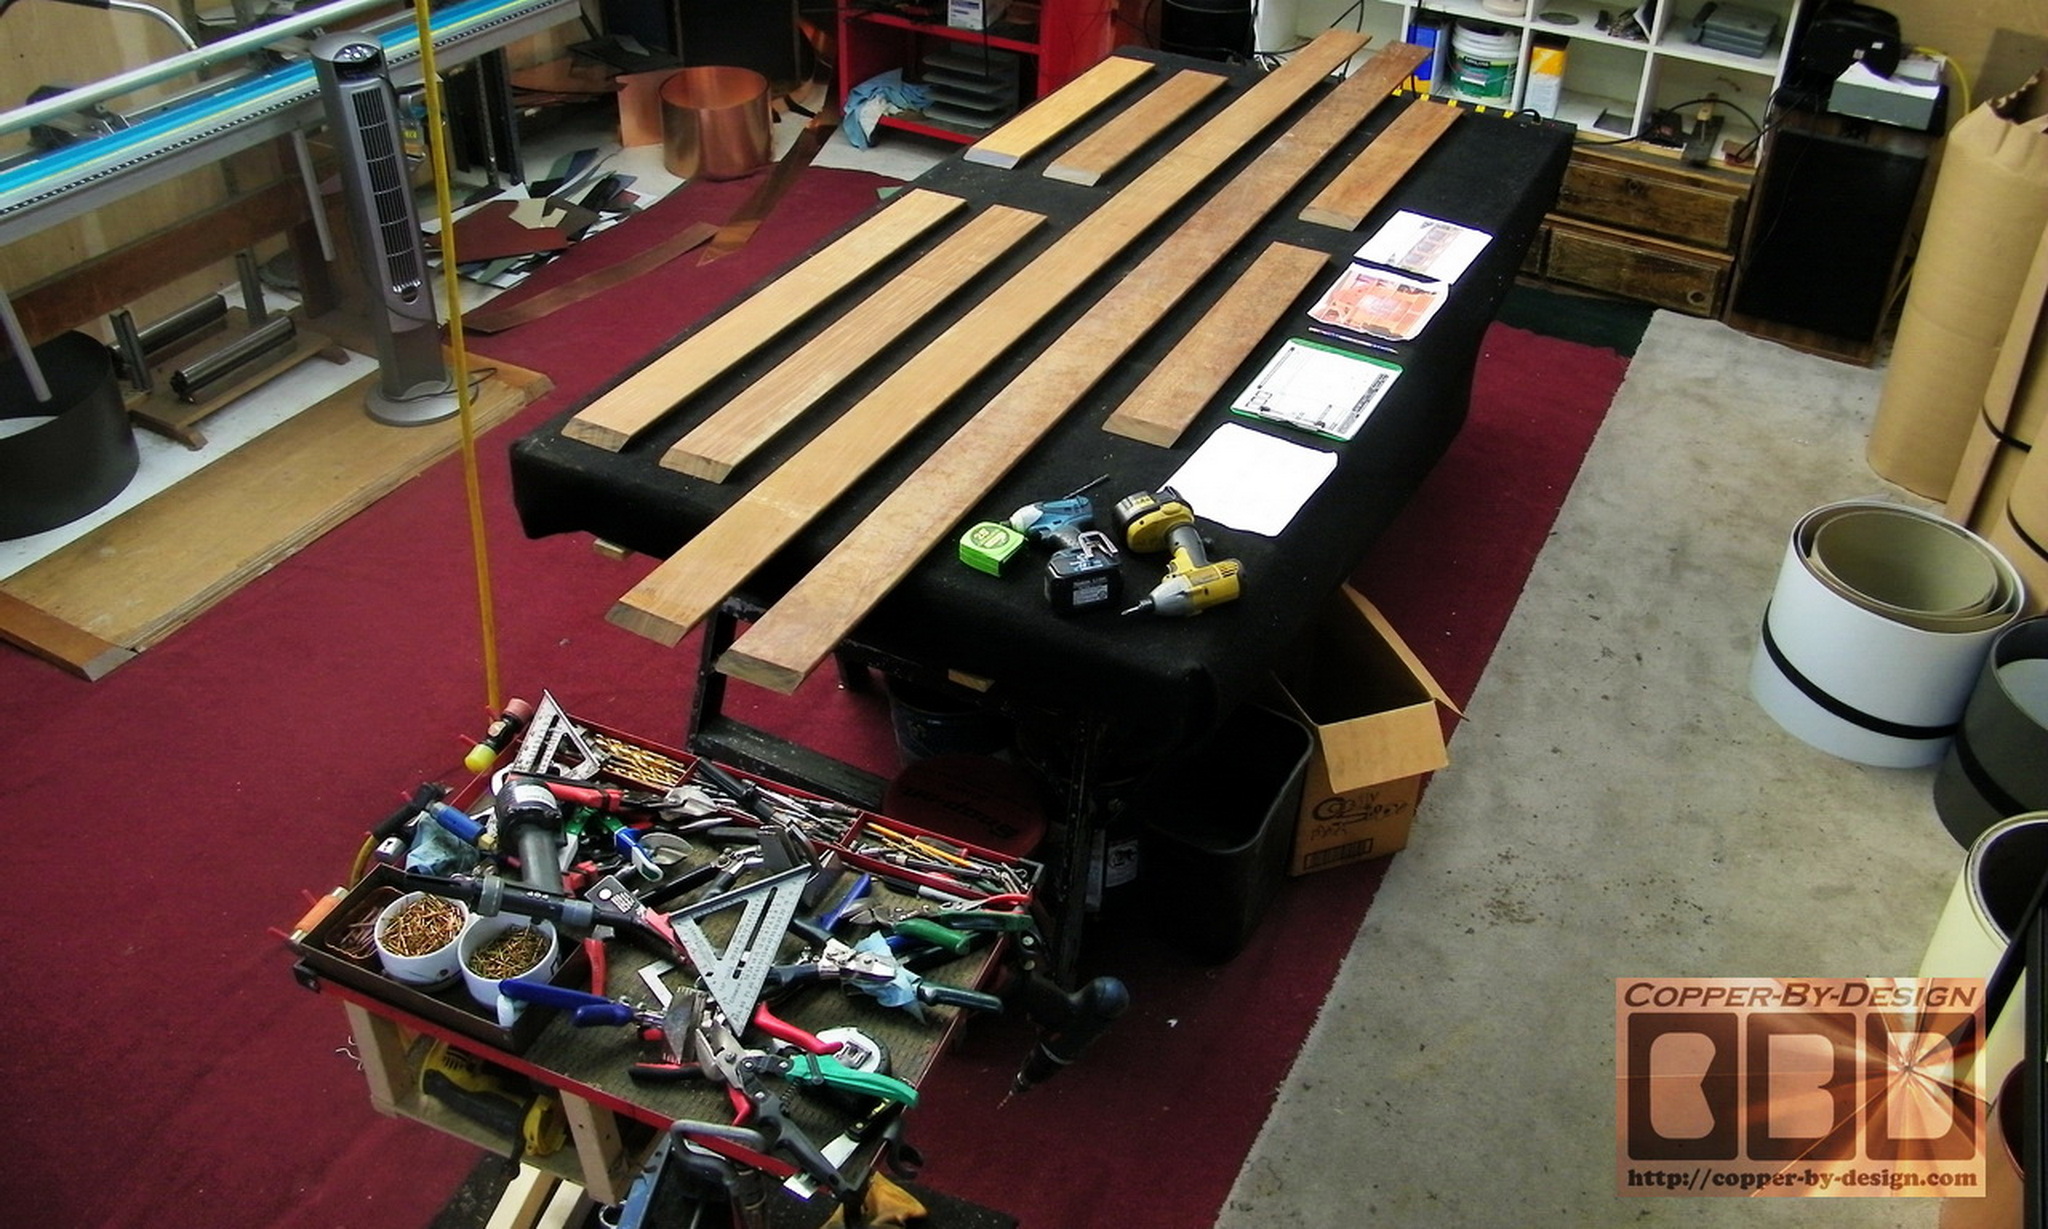
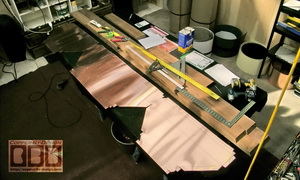
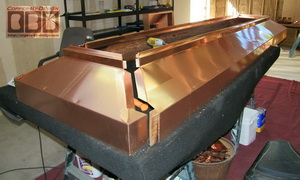
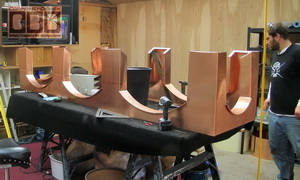
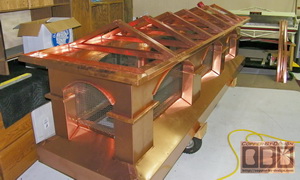
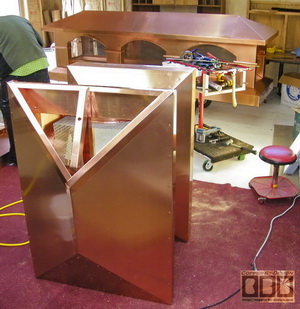
Here's the 8 pieces of Ipe hardwood support frame I need to build
inside the copper base that helps anchor this down in high
wind storms. I had to get a pair of 20' boards just to make sure I
could cut the long sides that are over 10' long. Each board has been
cut on 4 sides at an angle. The top and bottom were cut on my table
saw at a 30 degree angle and the ends were cut at a 45 degree angle
to miter them together. They will be positioned down low where it
should not suffer heat from the chimney.
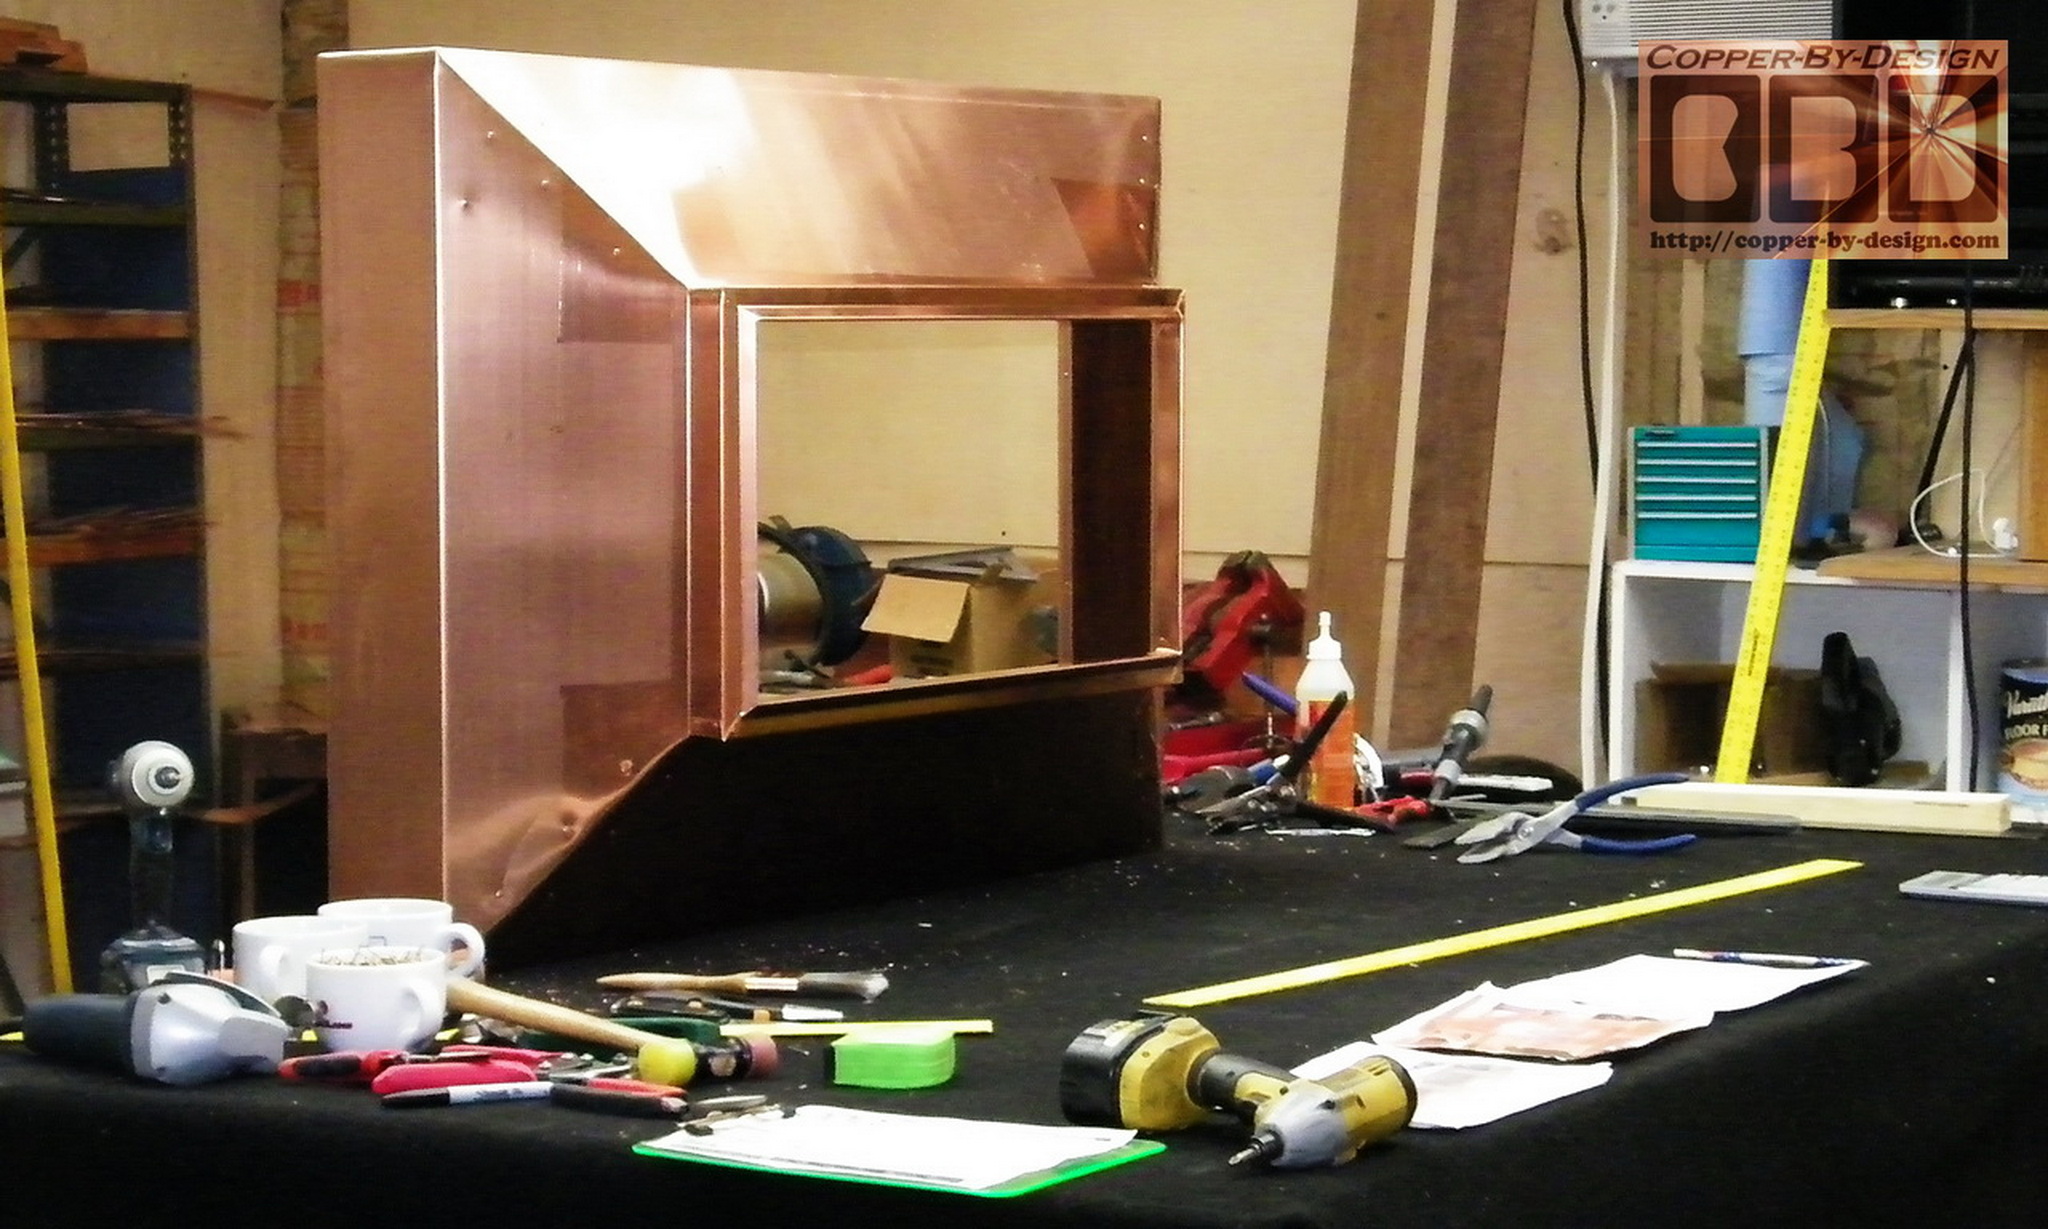
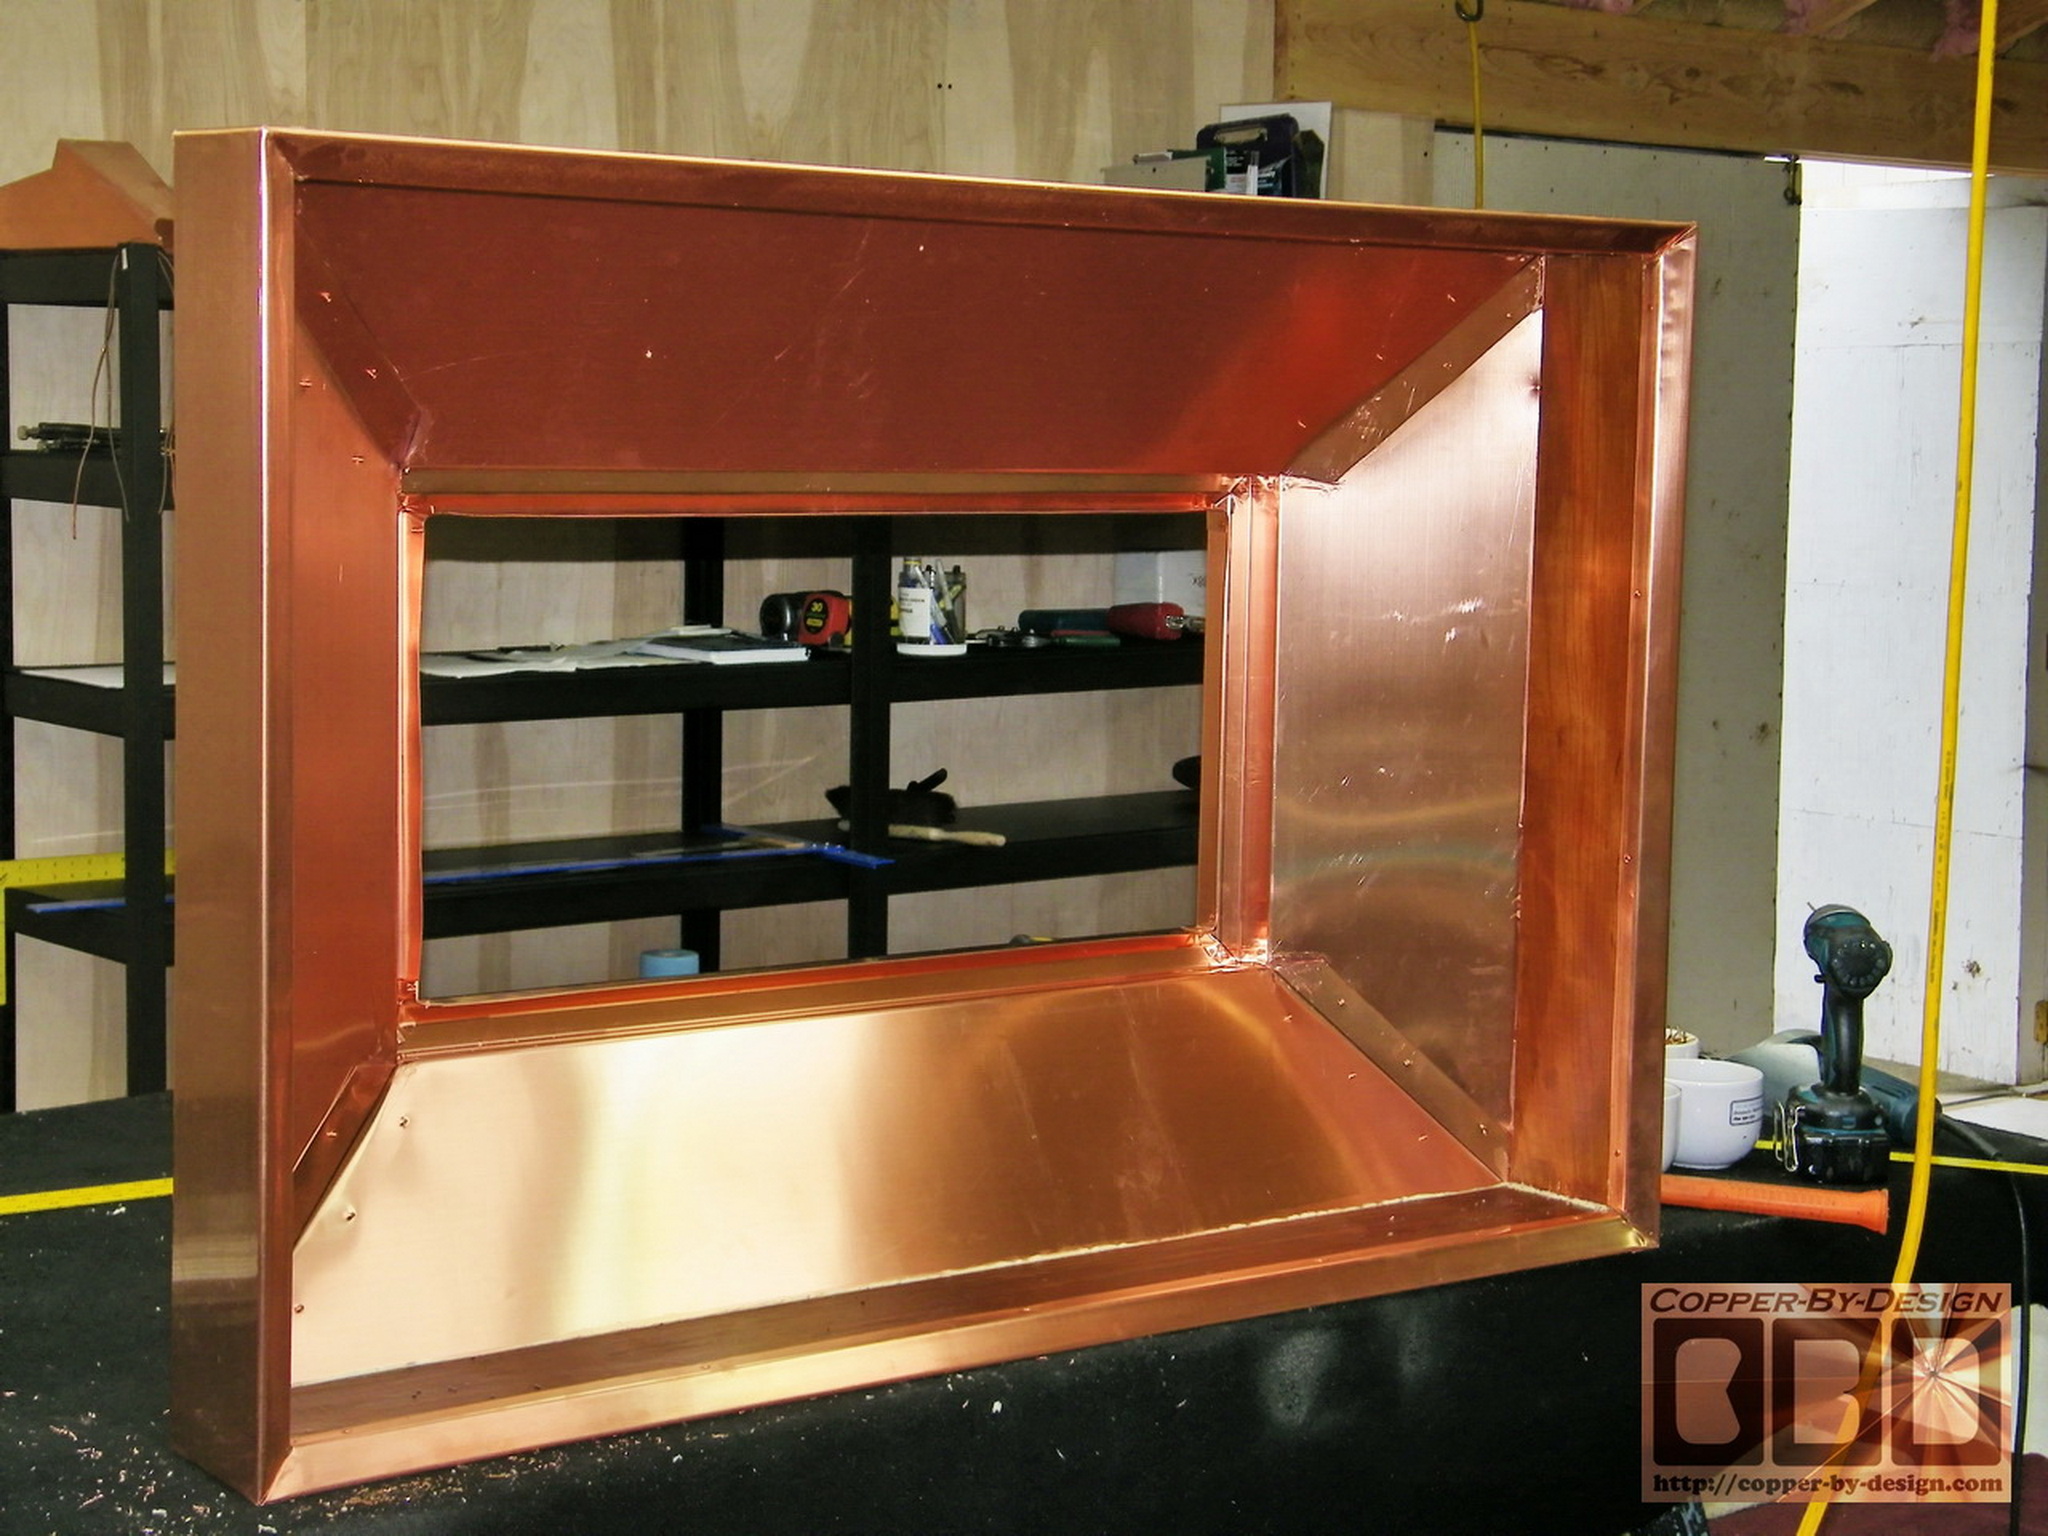
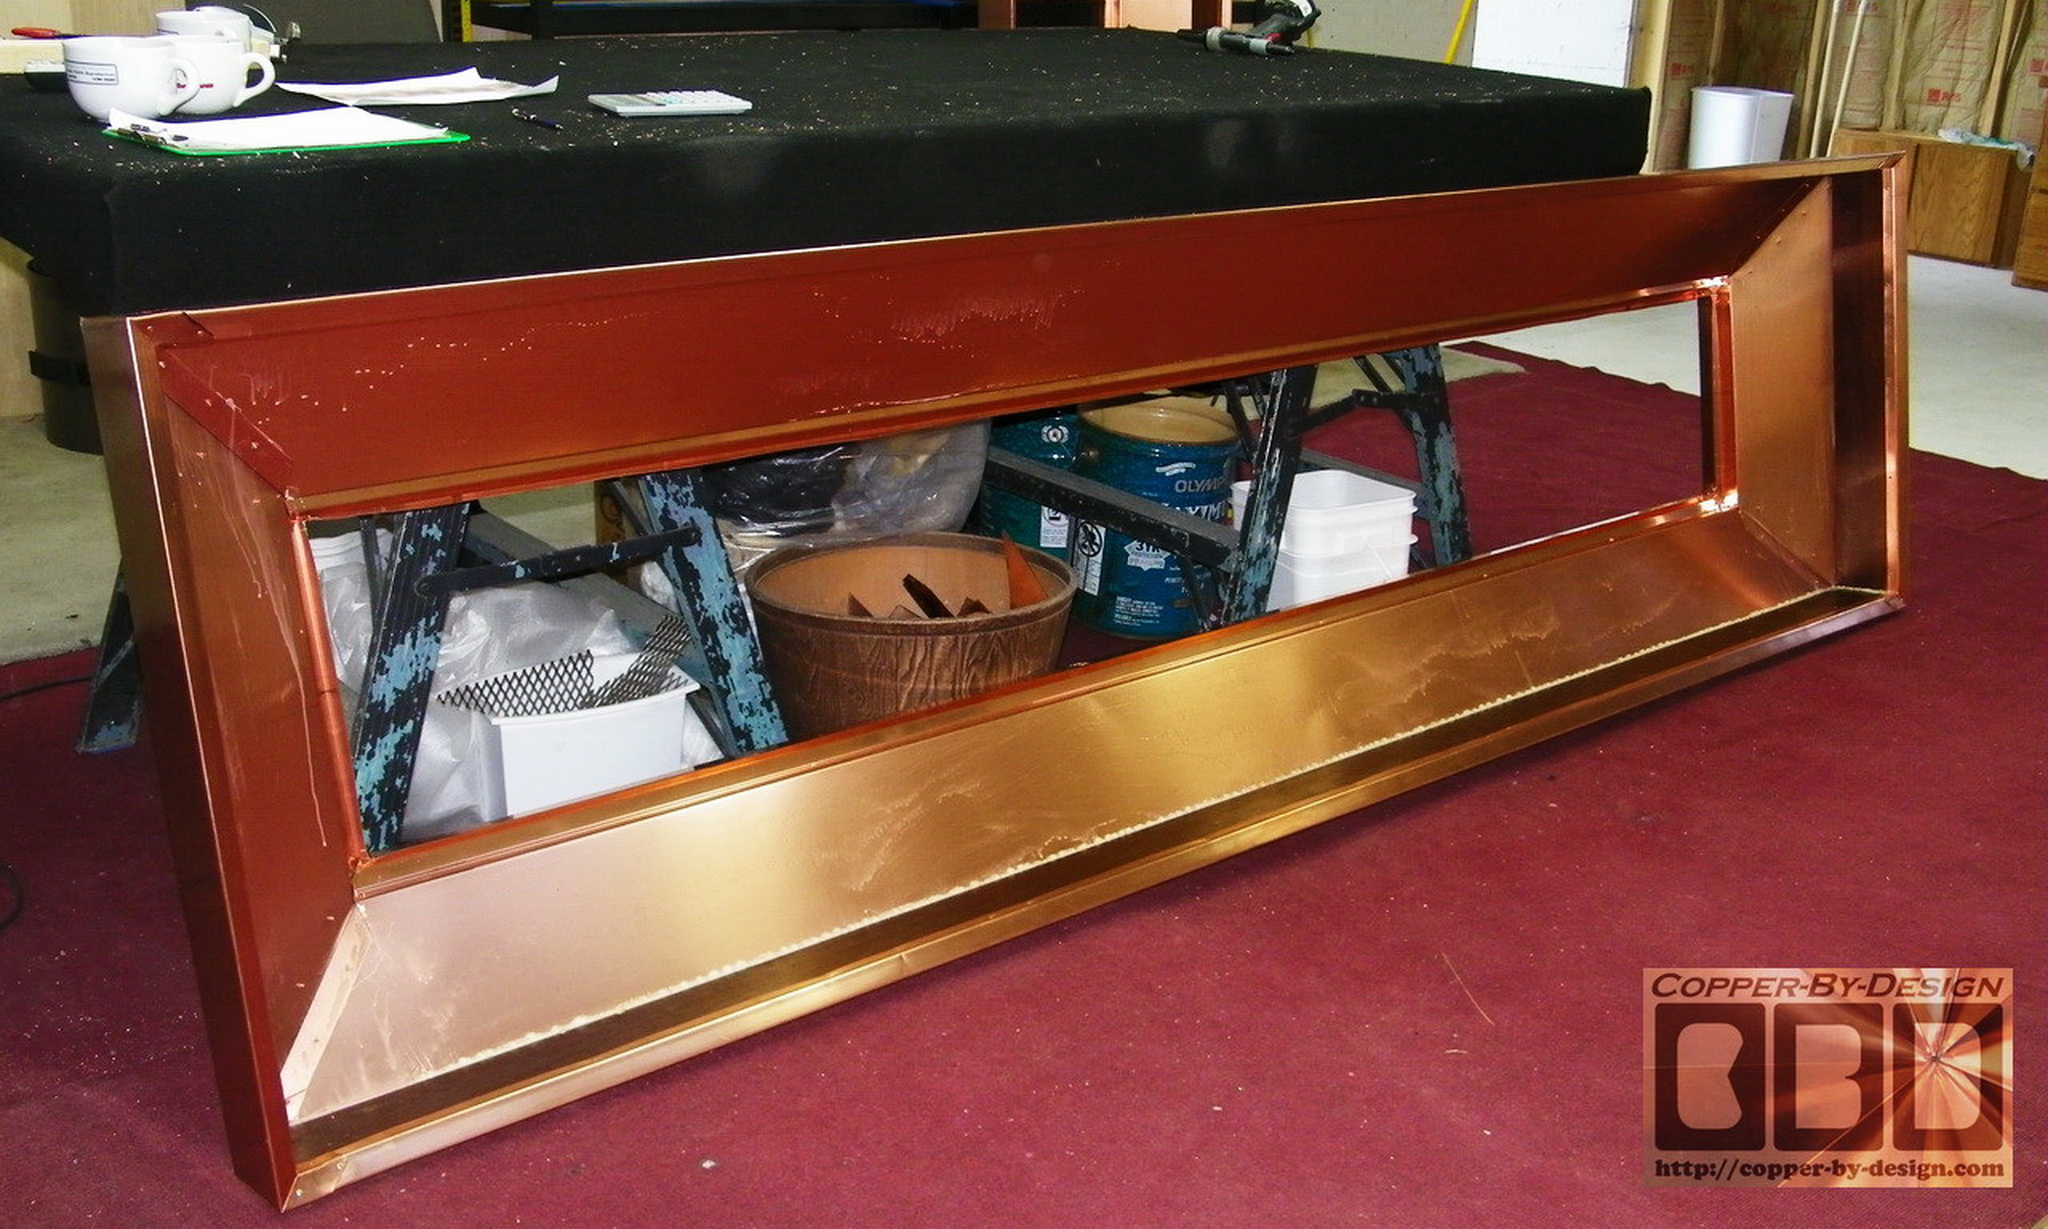
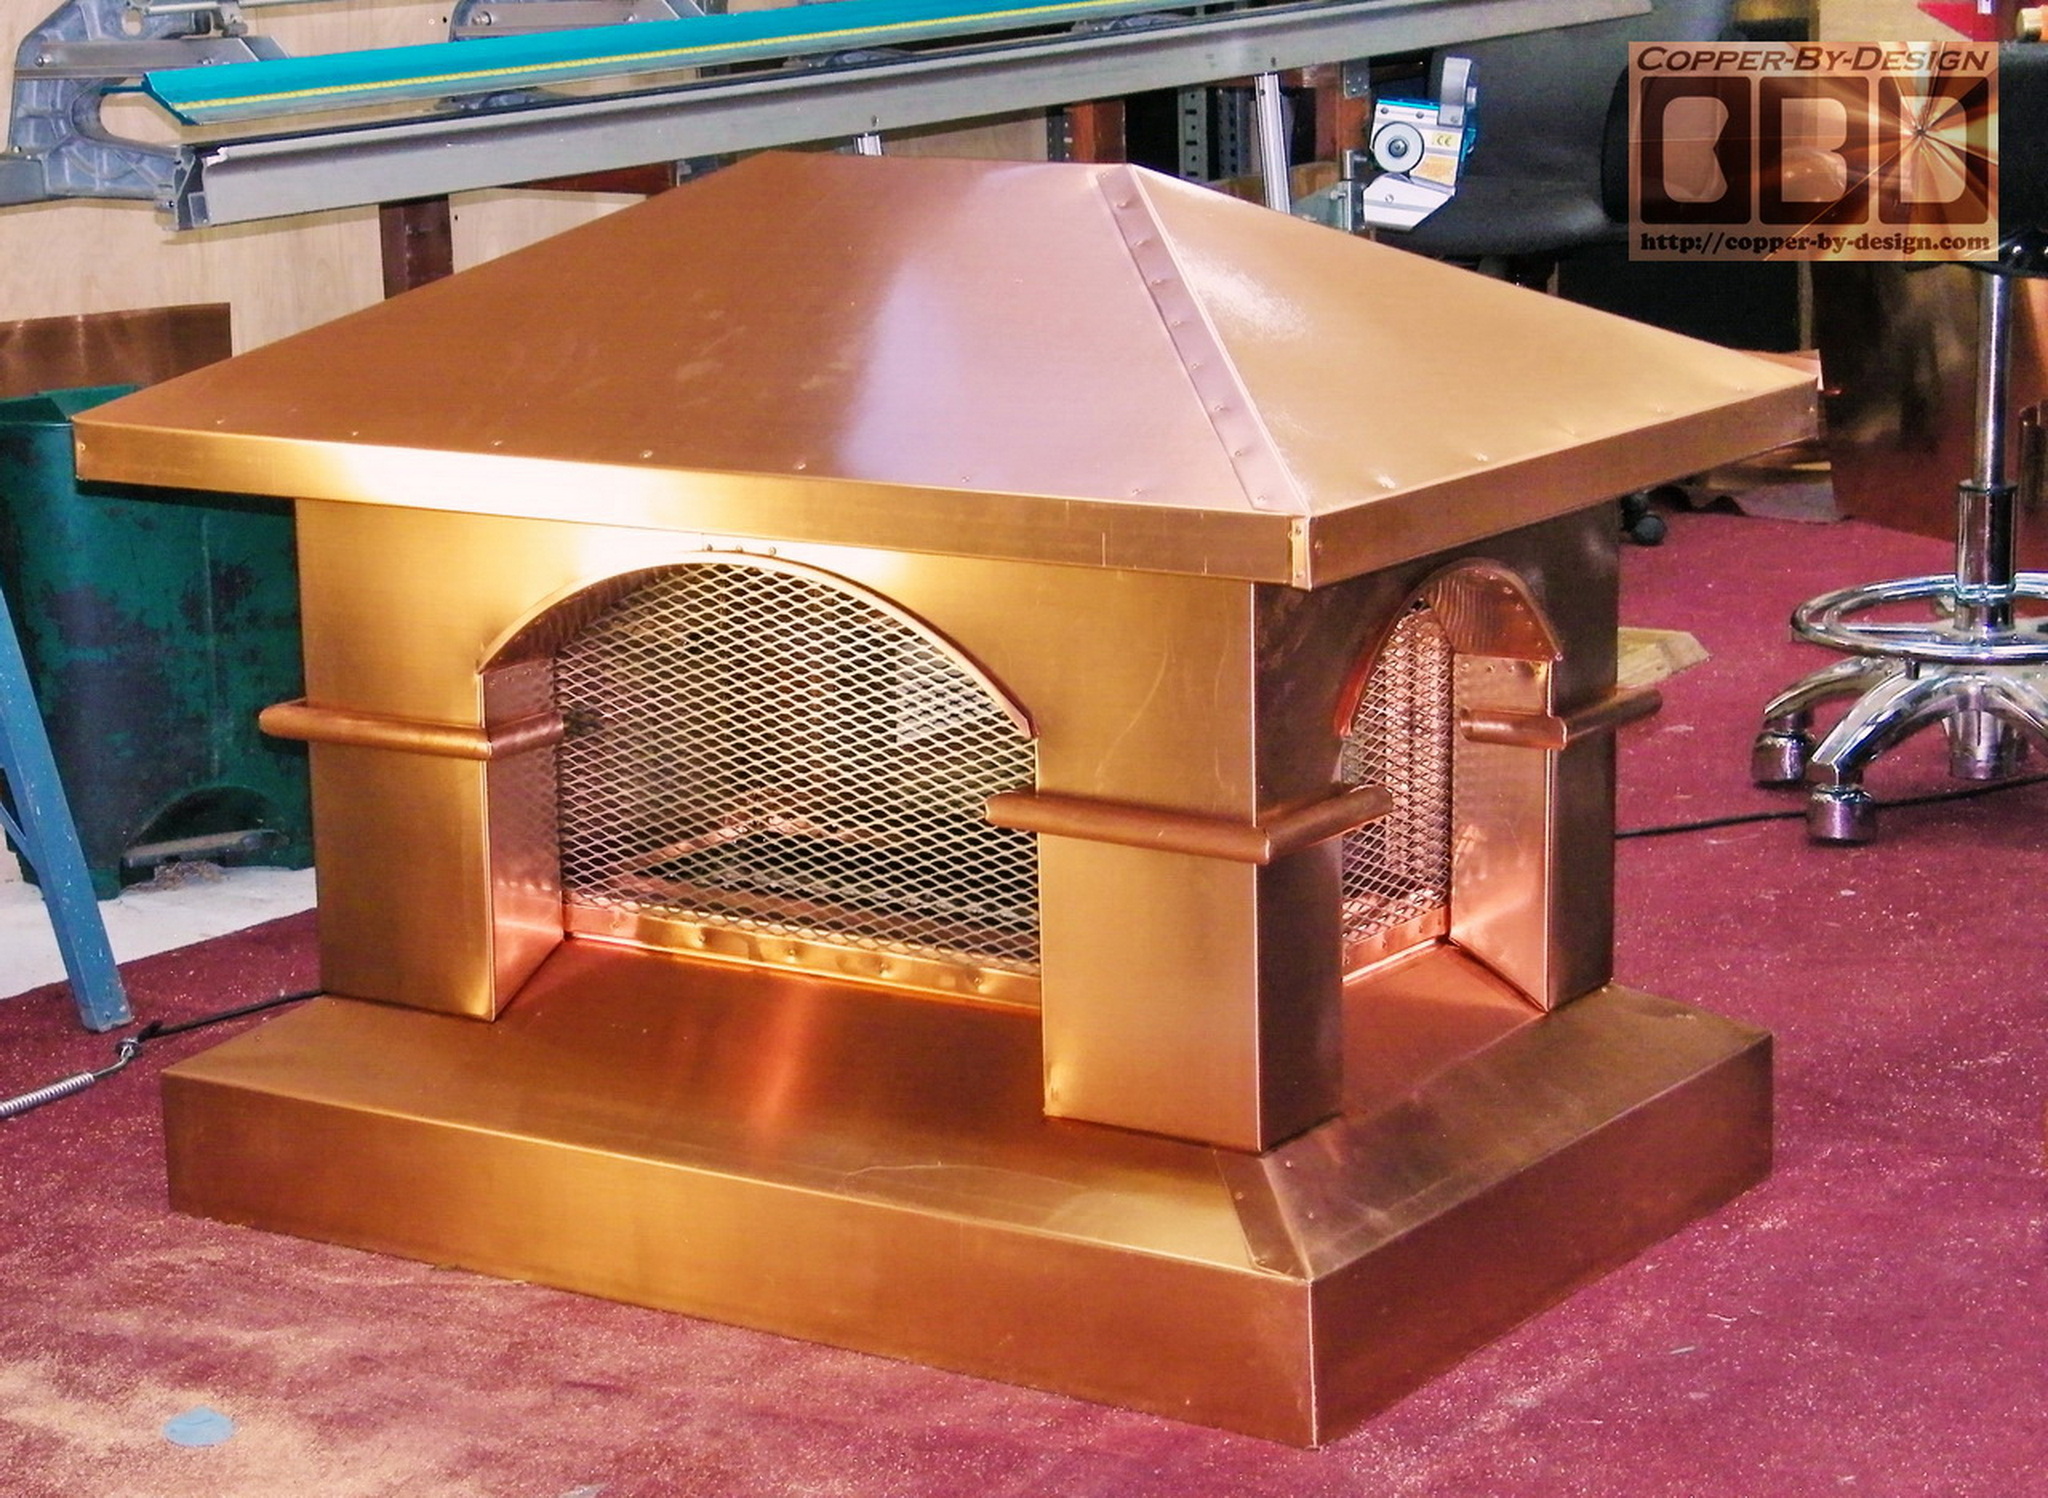
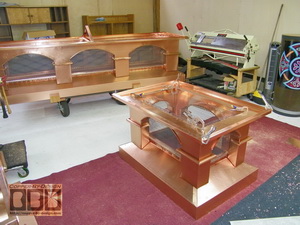
Above right you can see the base/skirt for the smaller
chimney cap cut out and ready to be bent into shape to wrap over
the hardwood frame. Below shows the smaller base/skirt
assembled. The hardwood is glued inside the copper with the
expanding Gorilla glue. It is also held in place with long
rivets and I varnished the inside of the hardwood to keep it
dry.
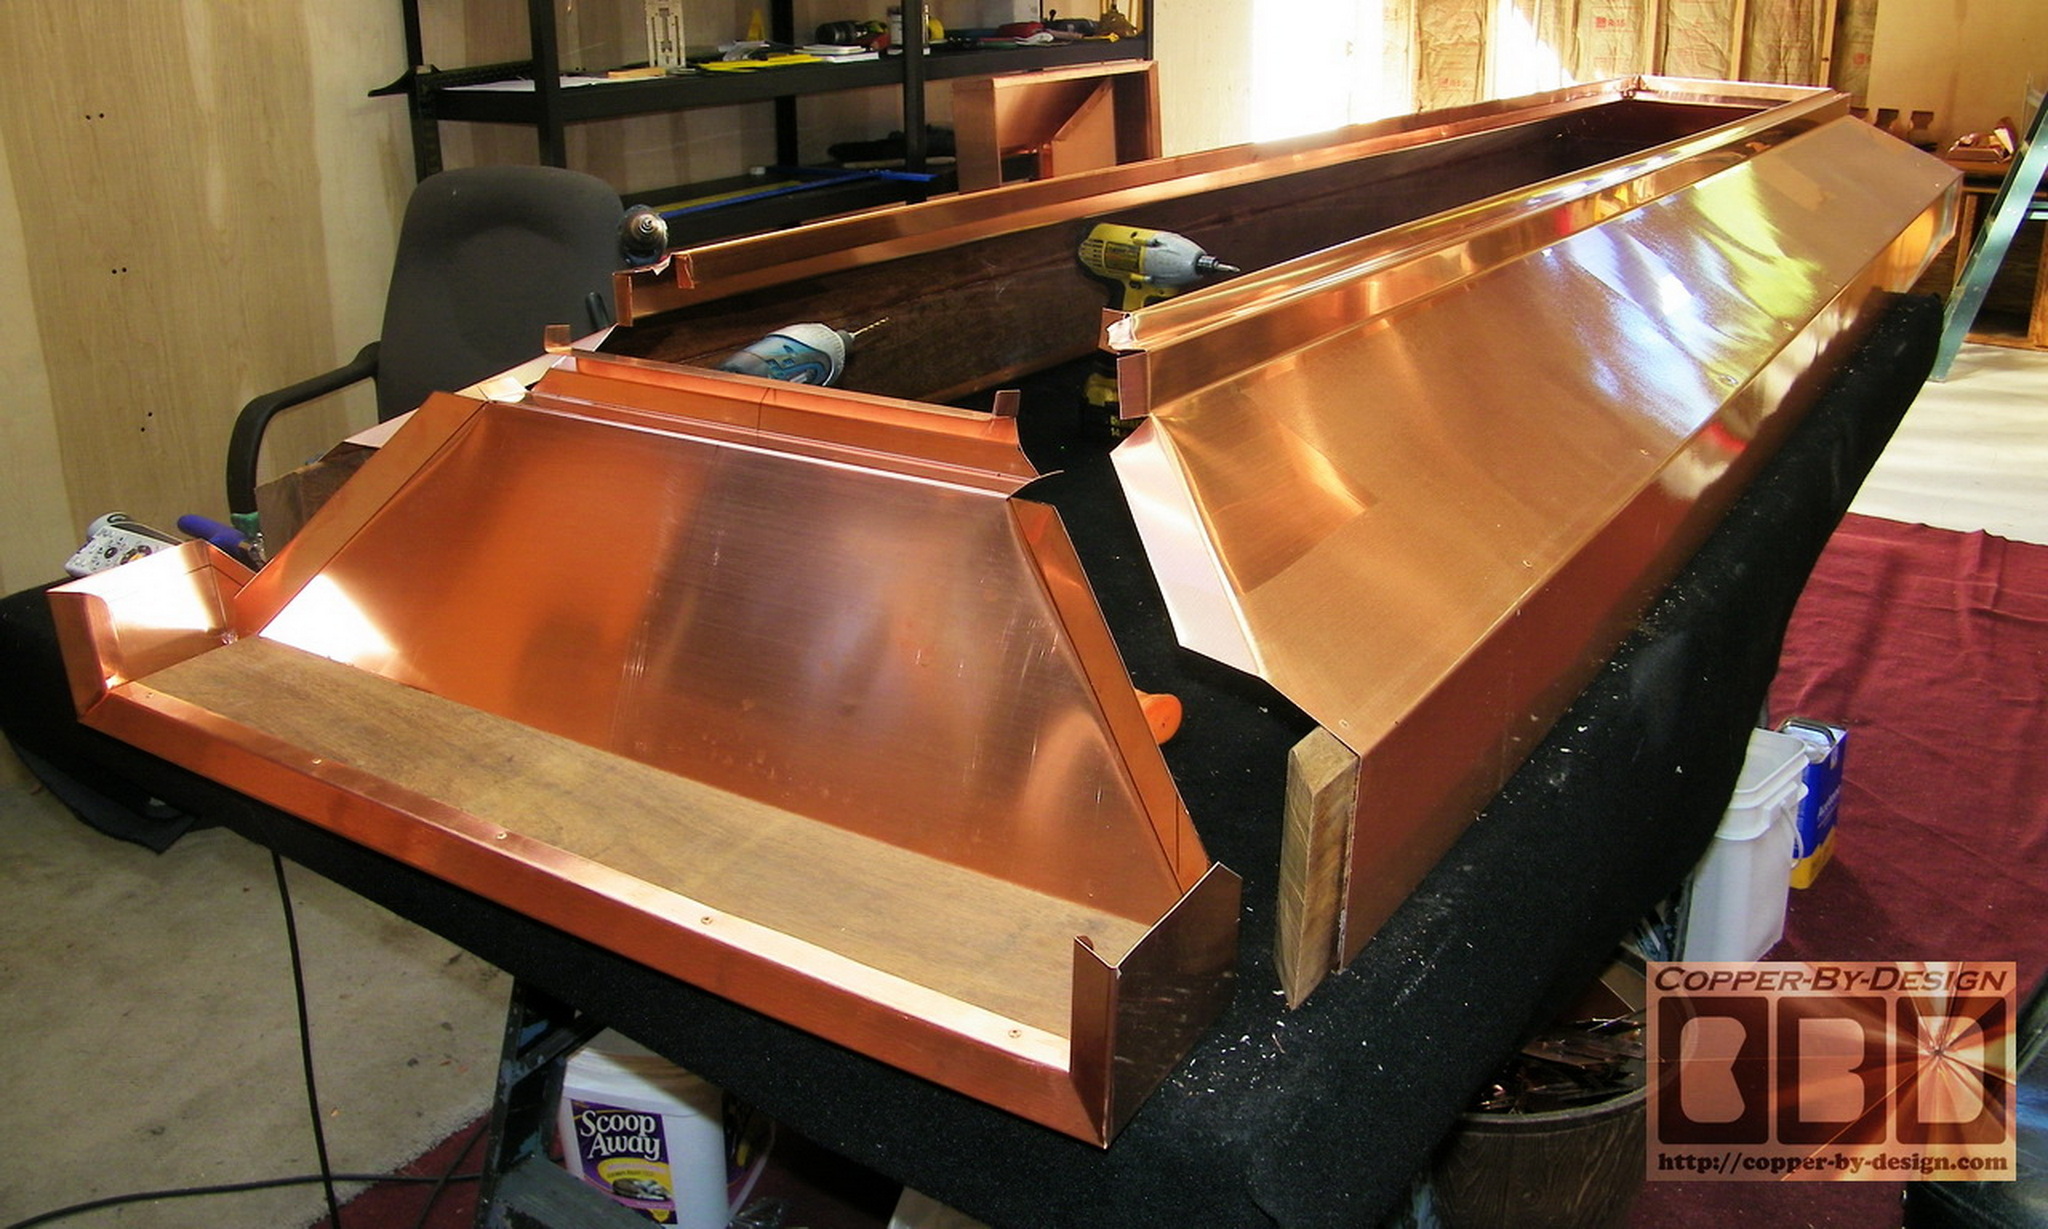
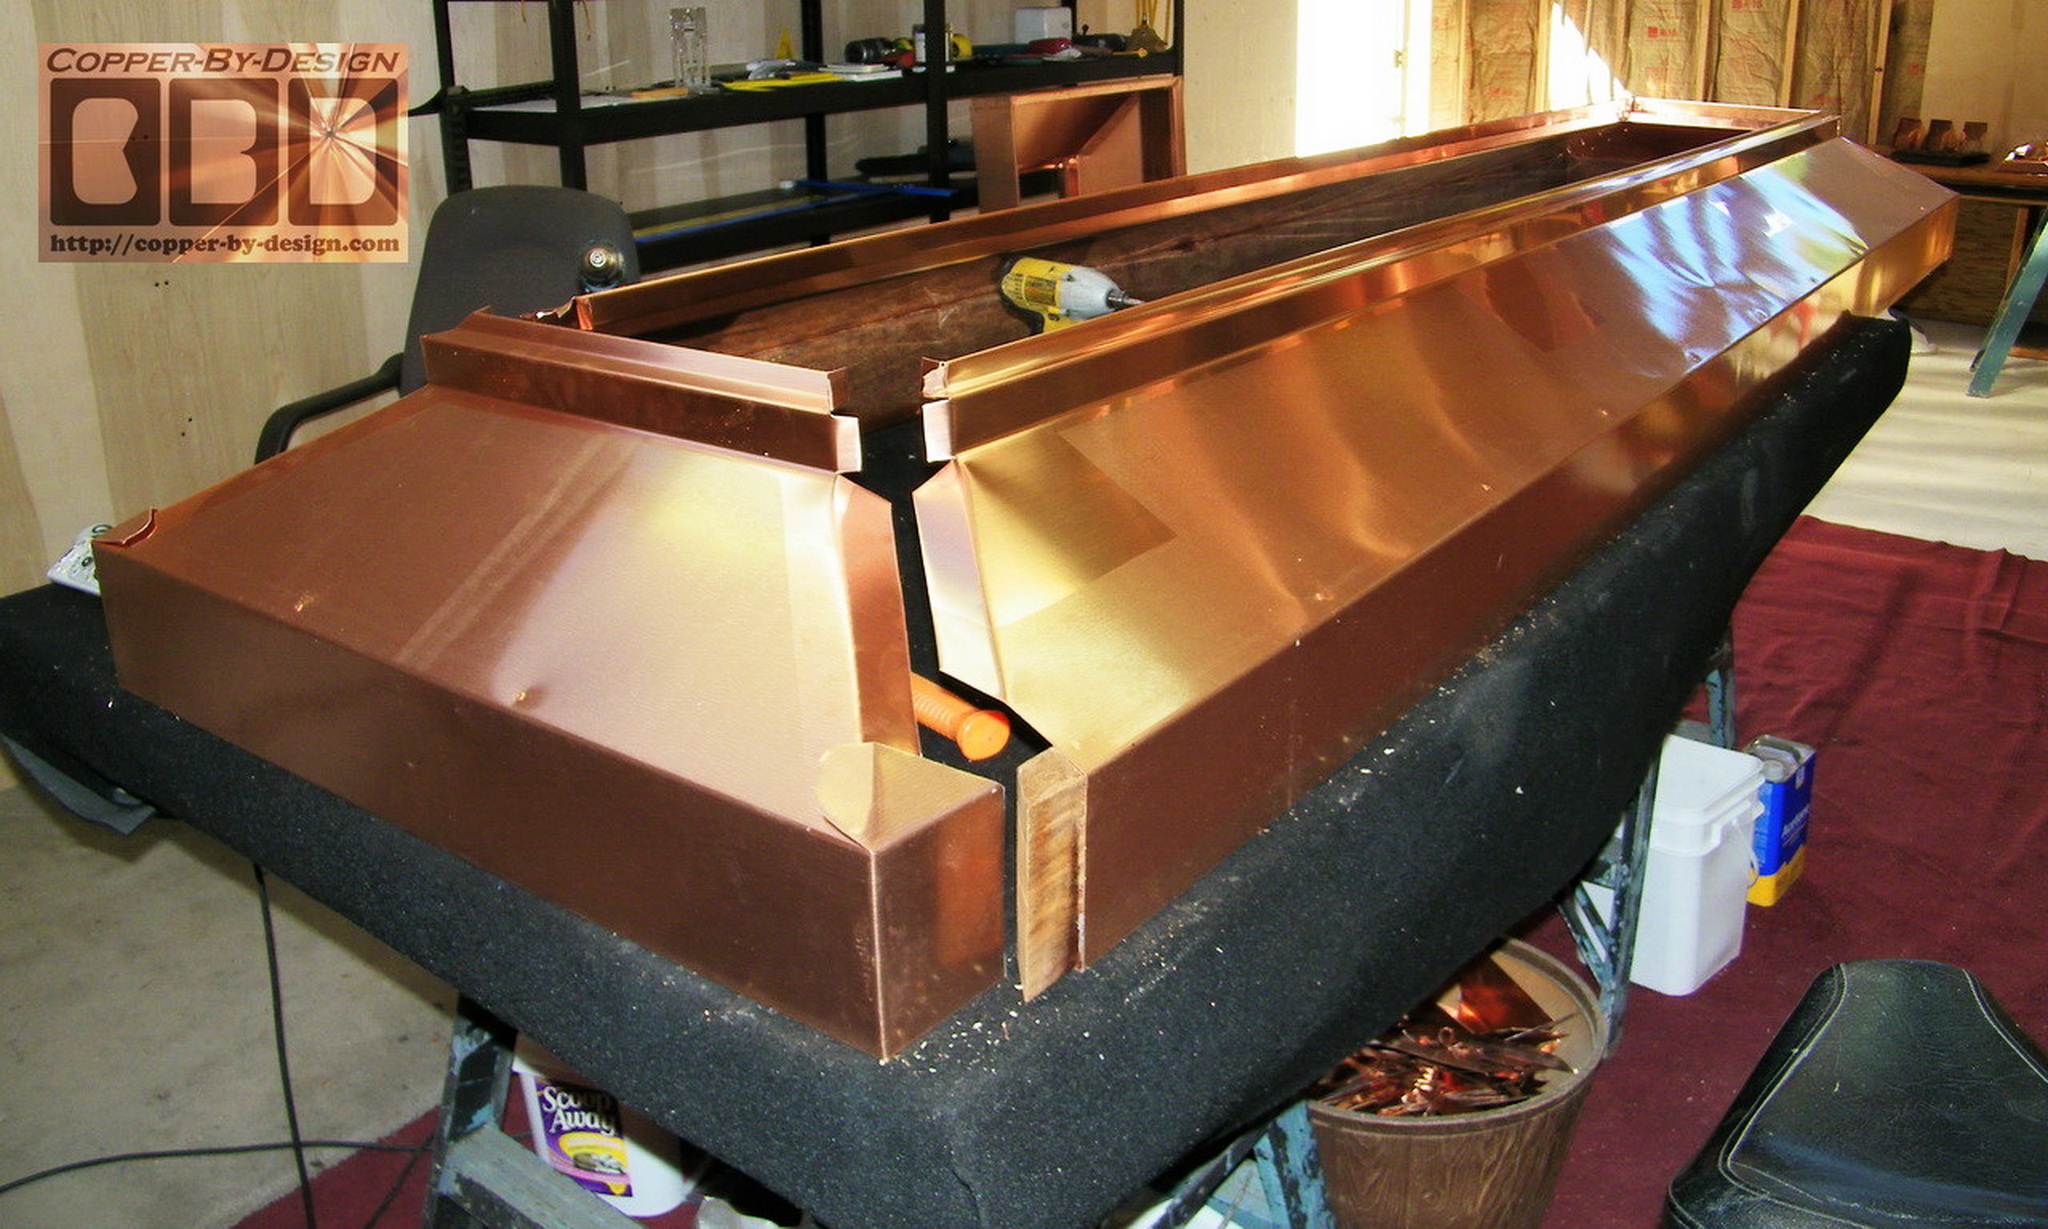
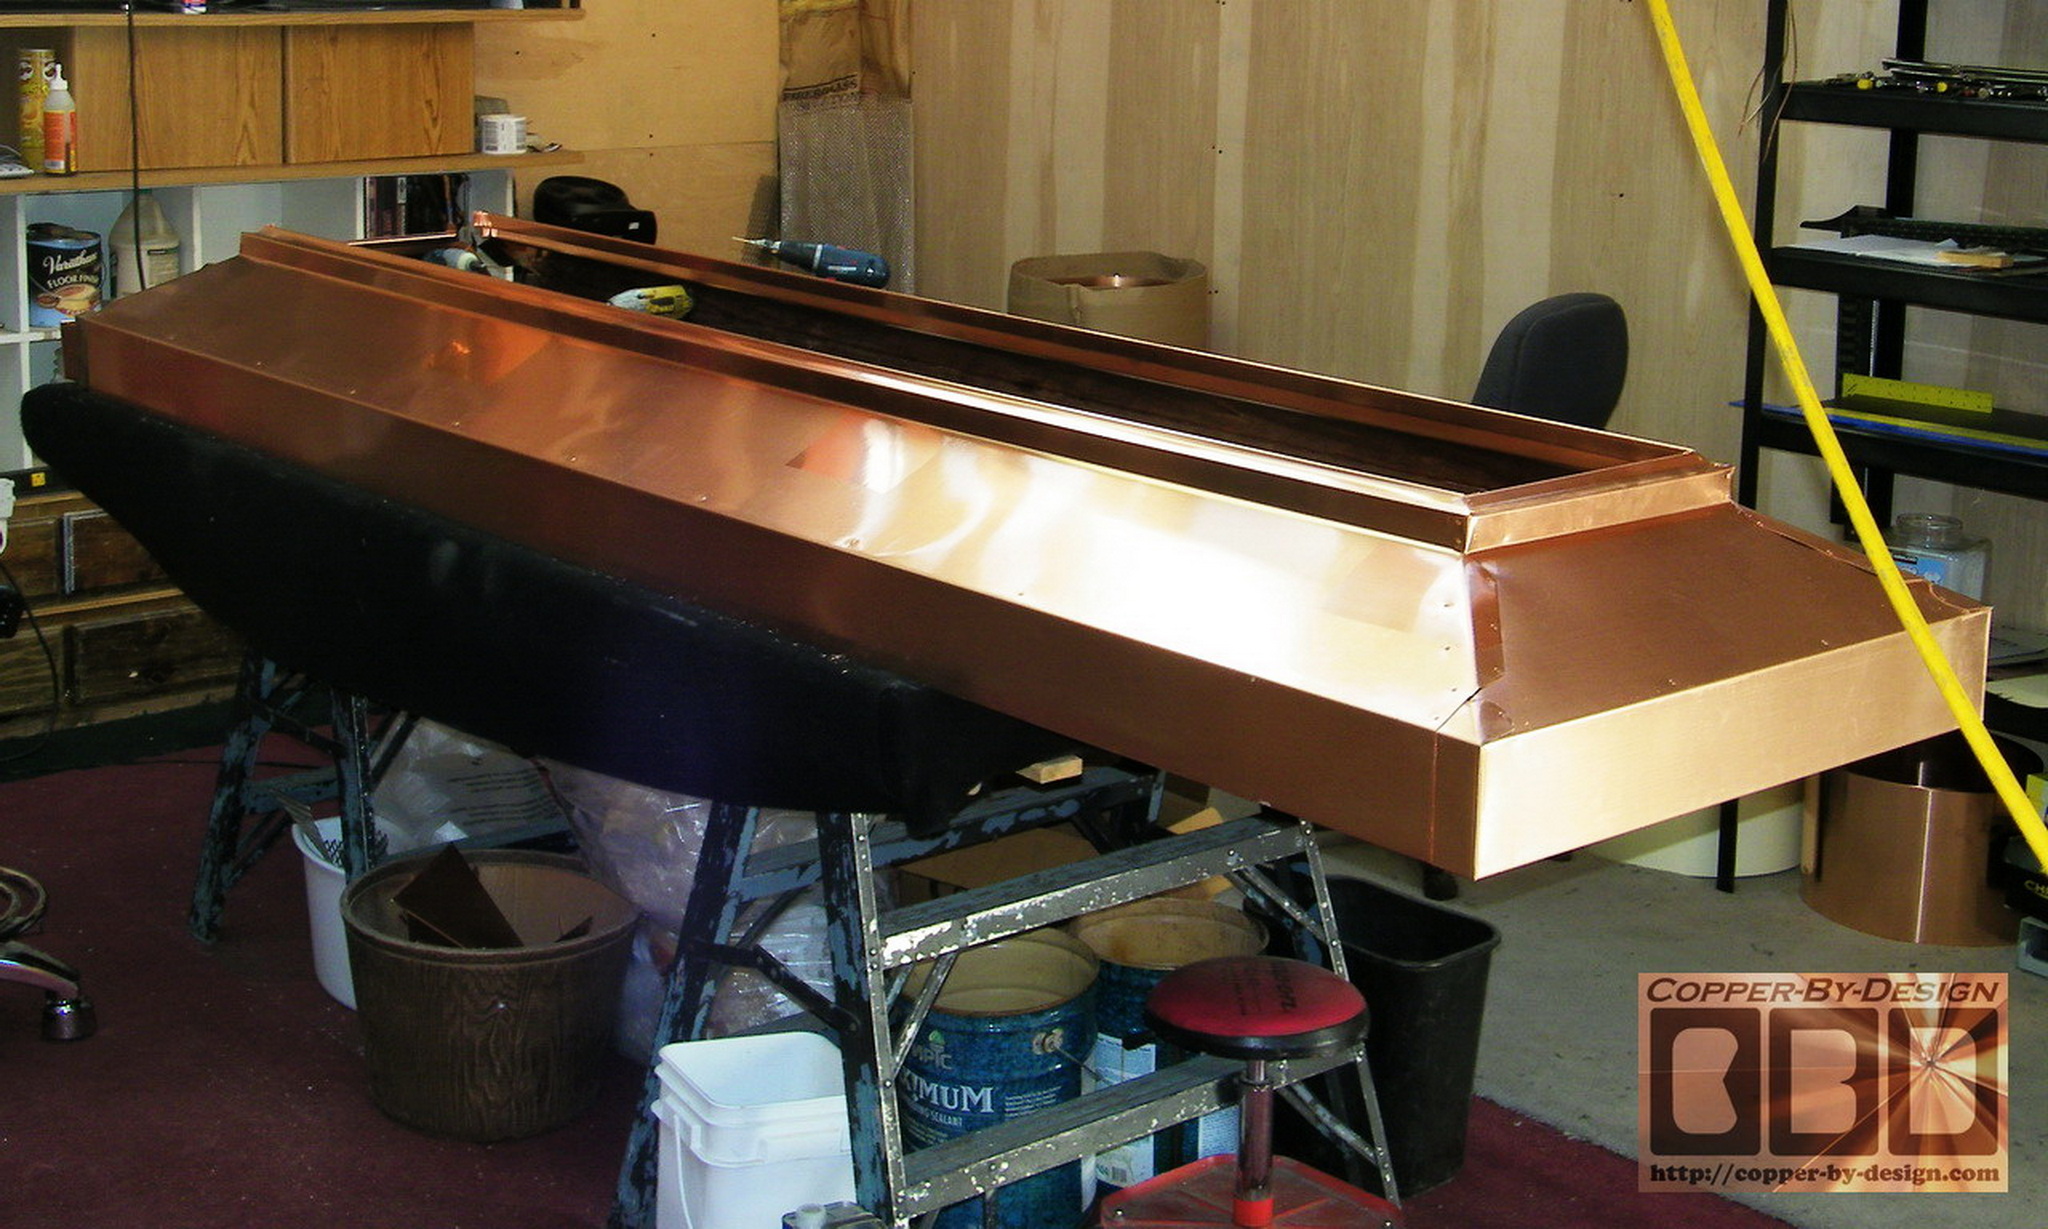
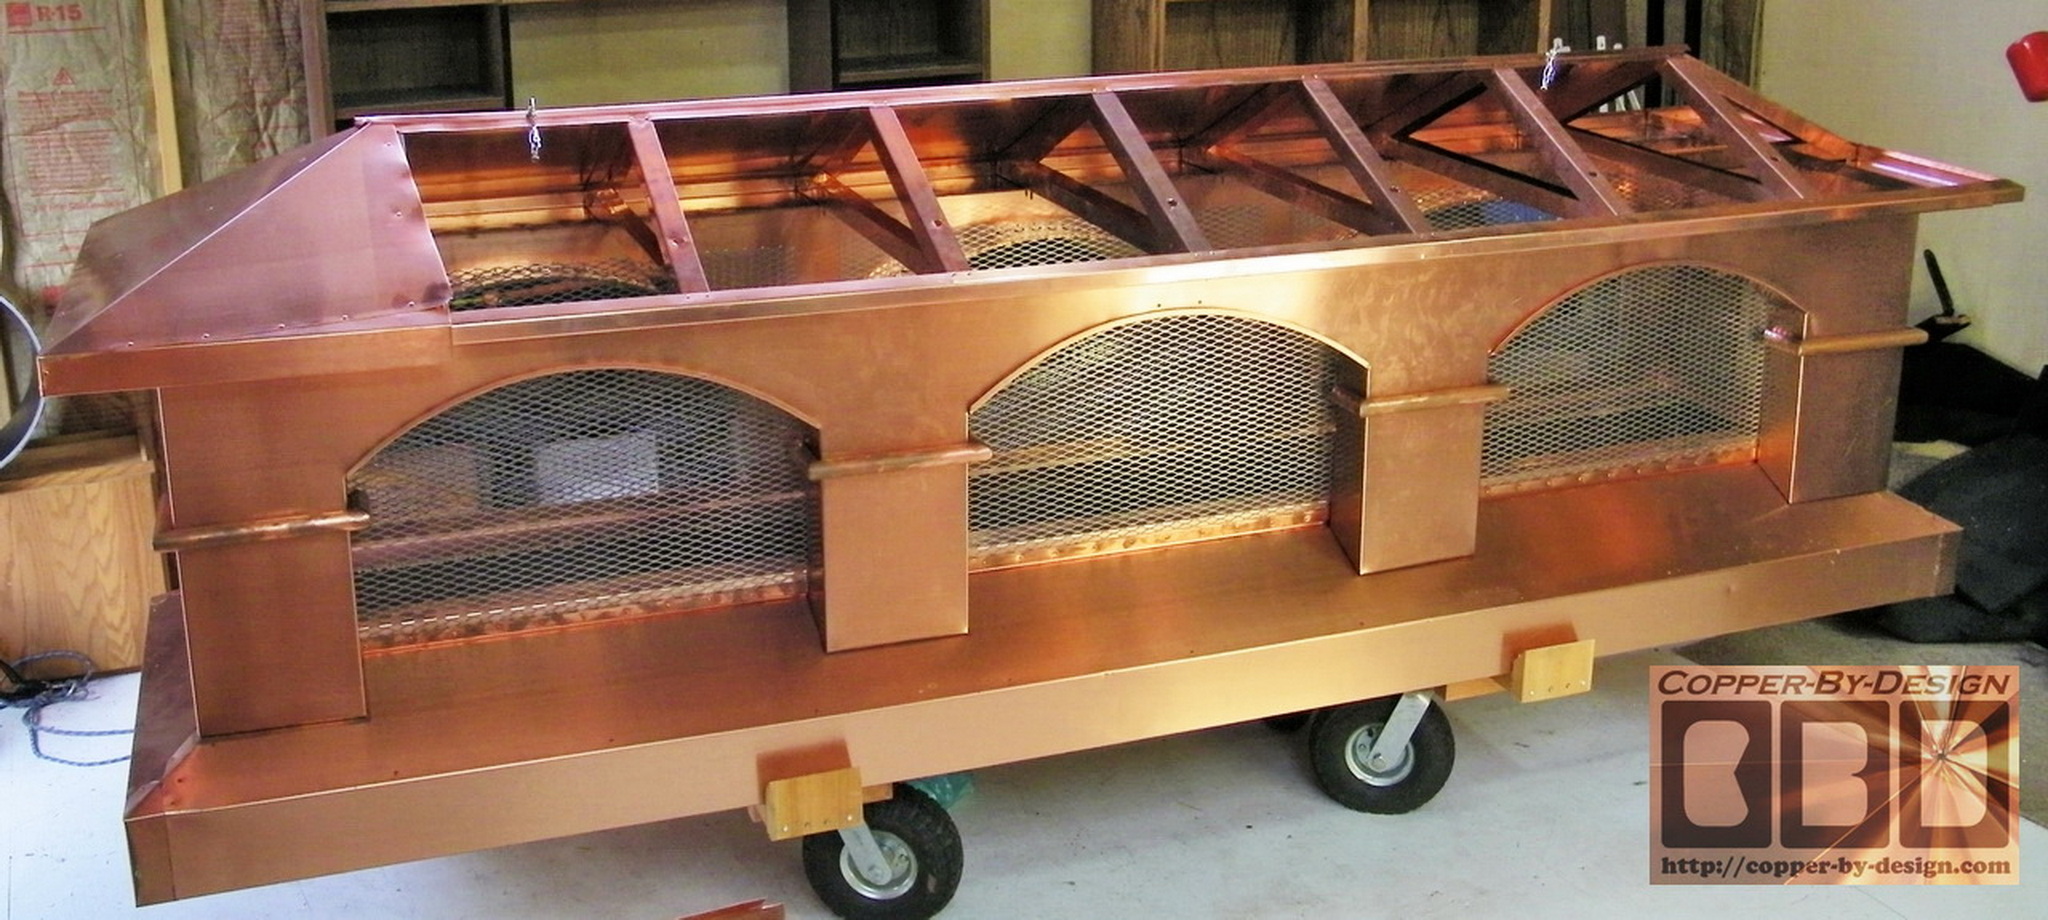
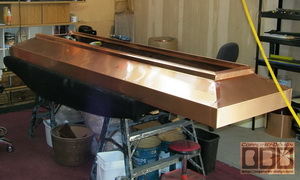
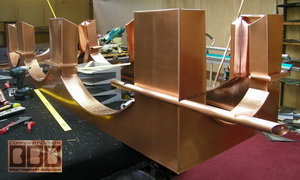
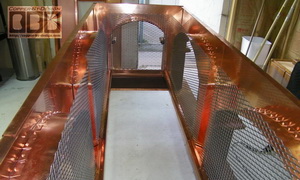
Here's the long base/skirt getting the last
end assembled together. I have the clear plastic film removed
where the seams will overlap and where columns will go over this
structure.
|
|
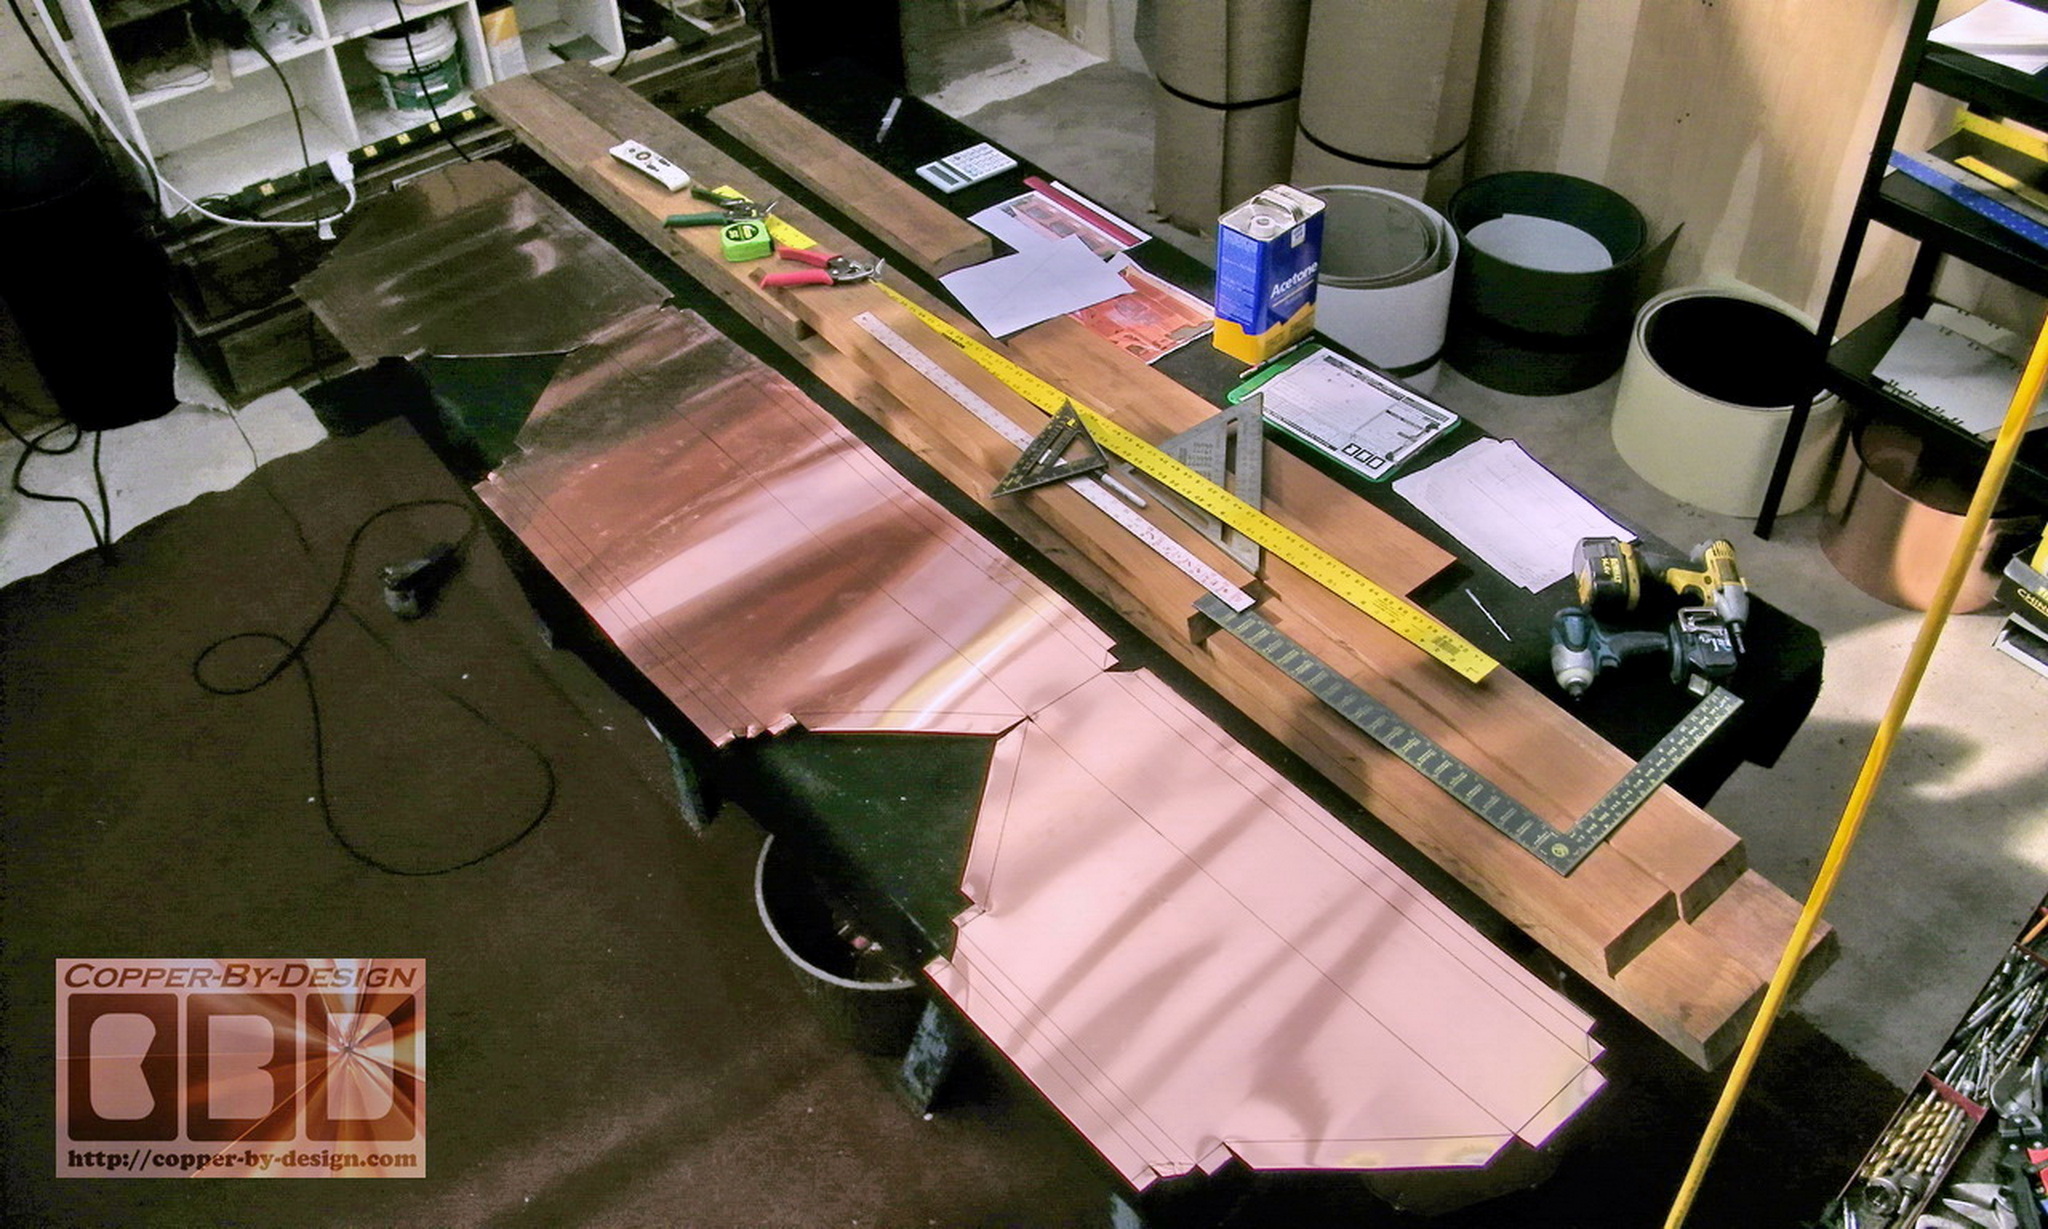
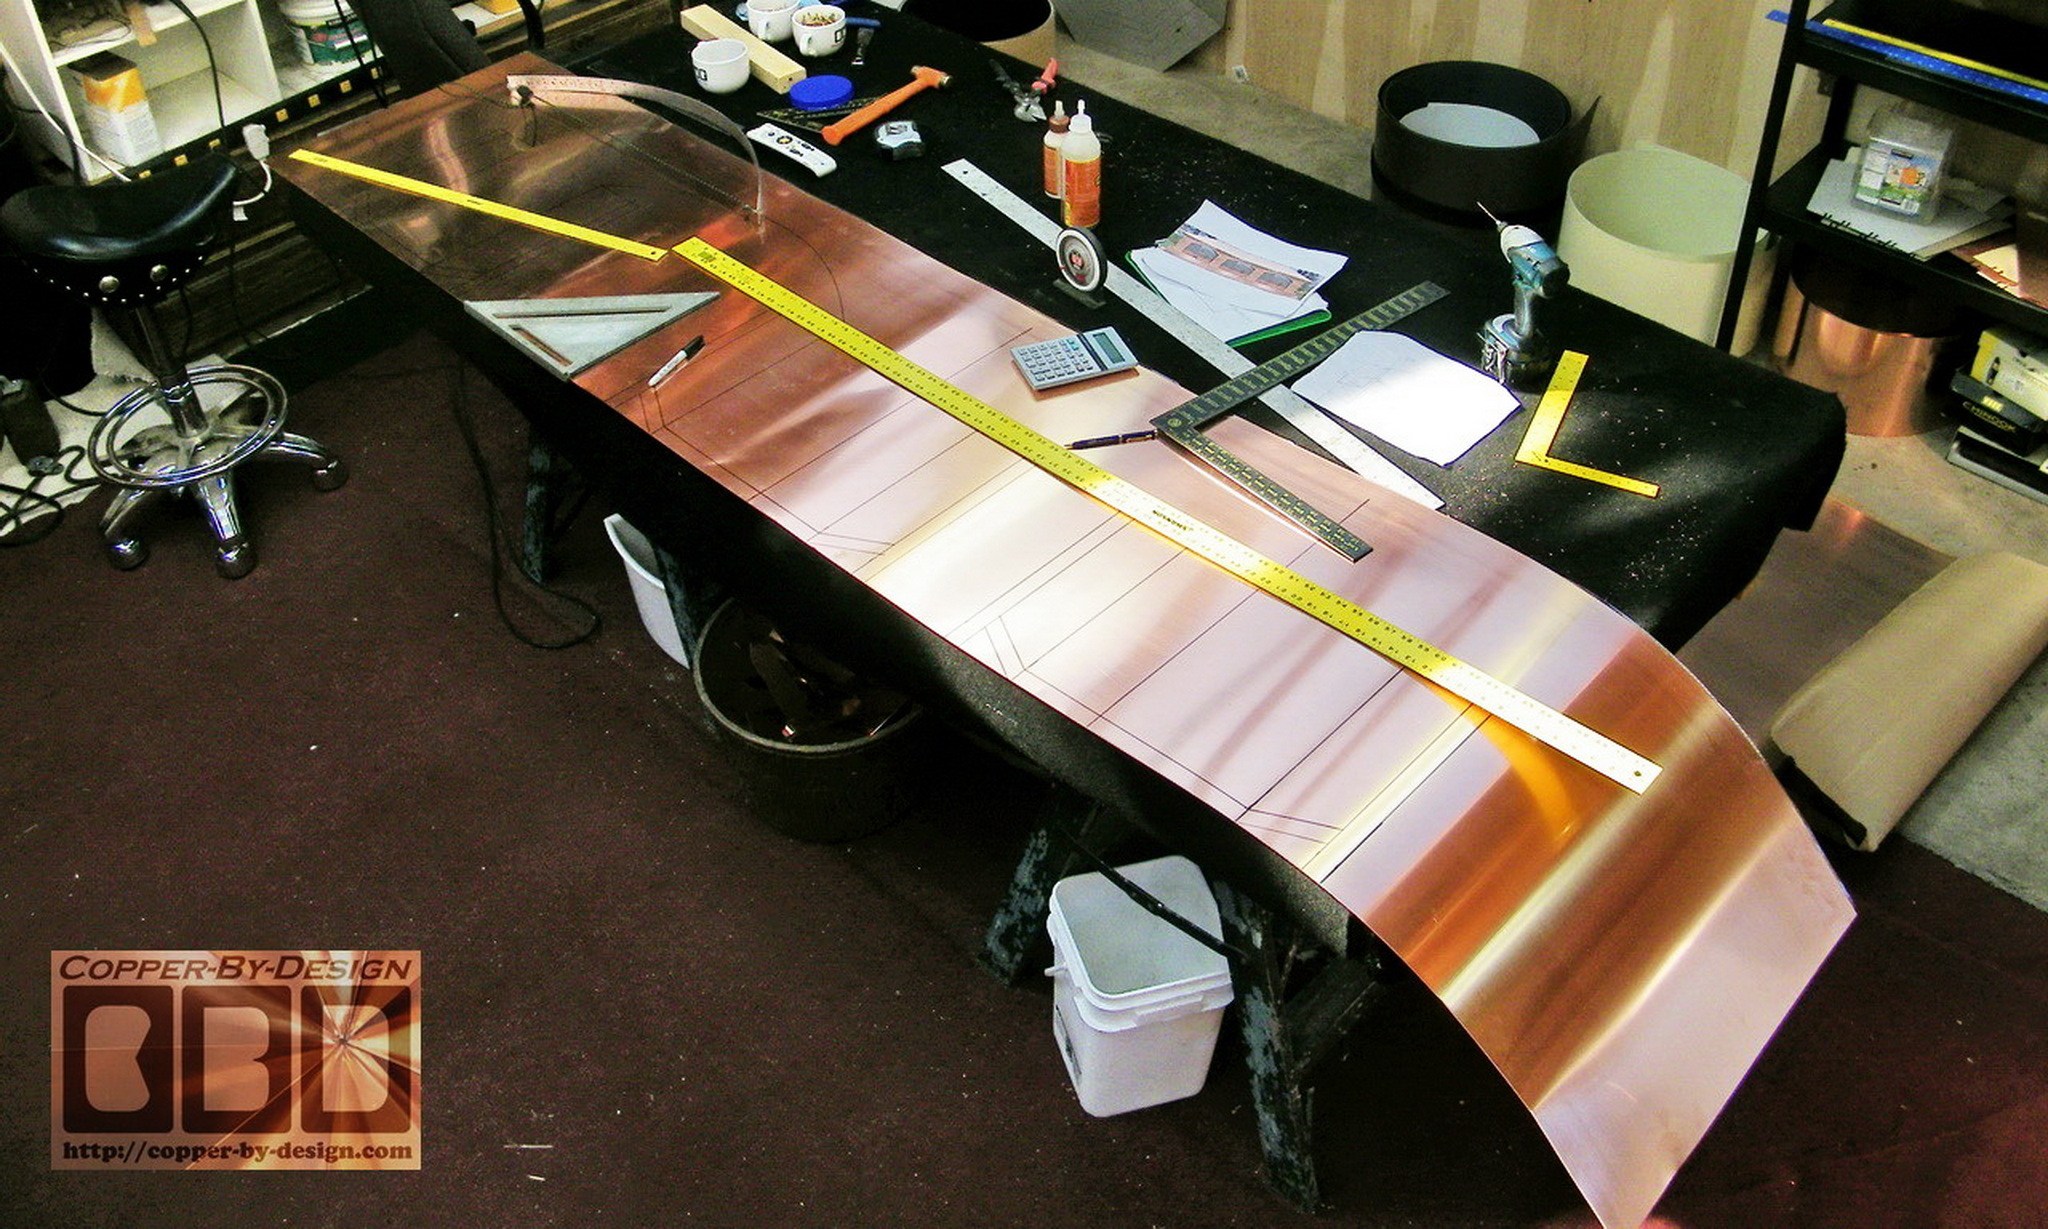
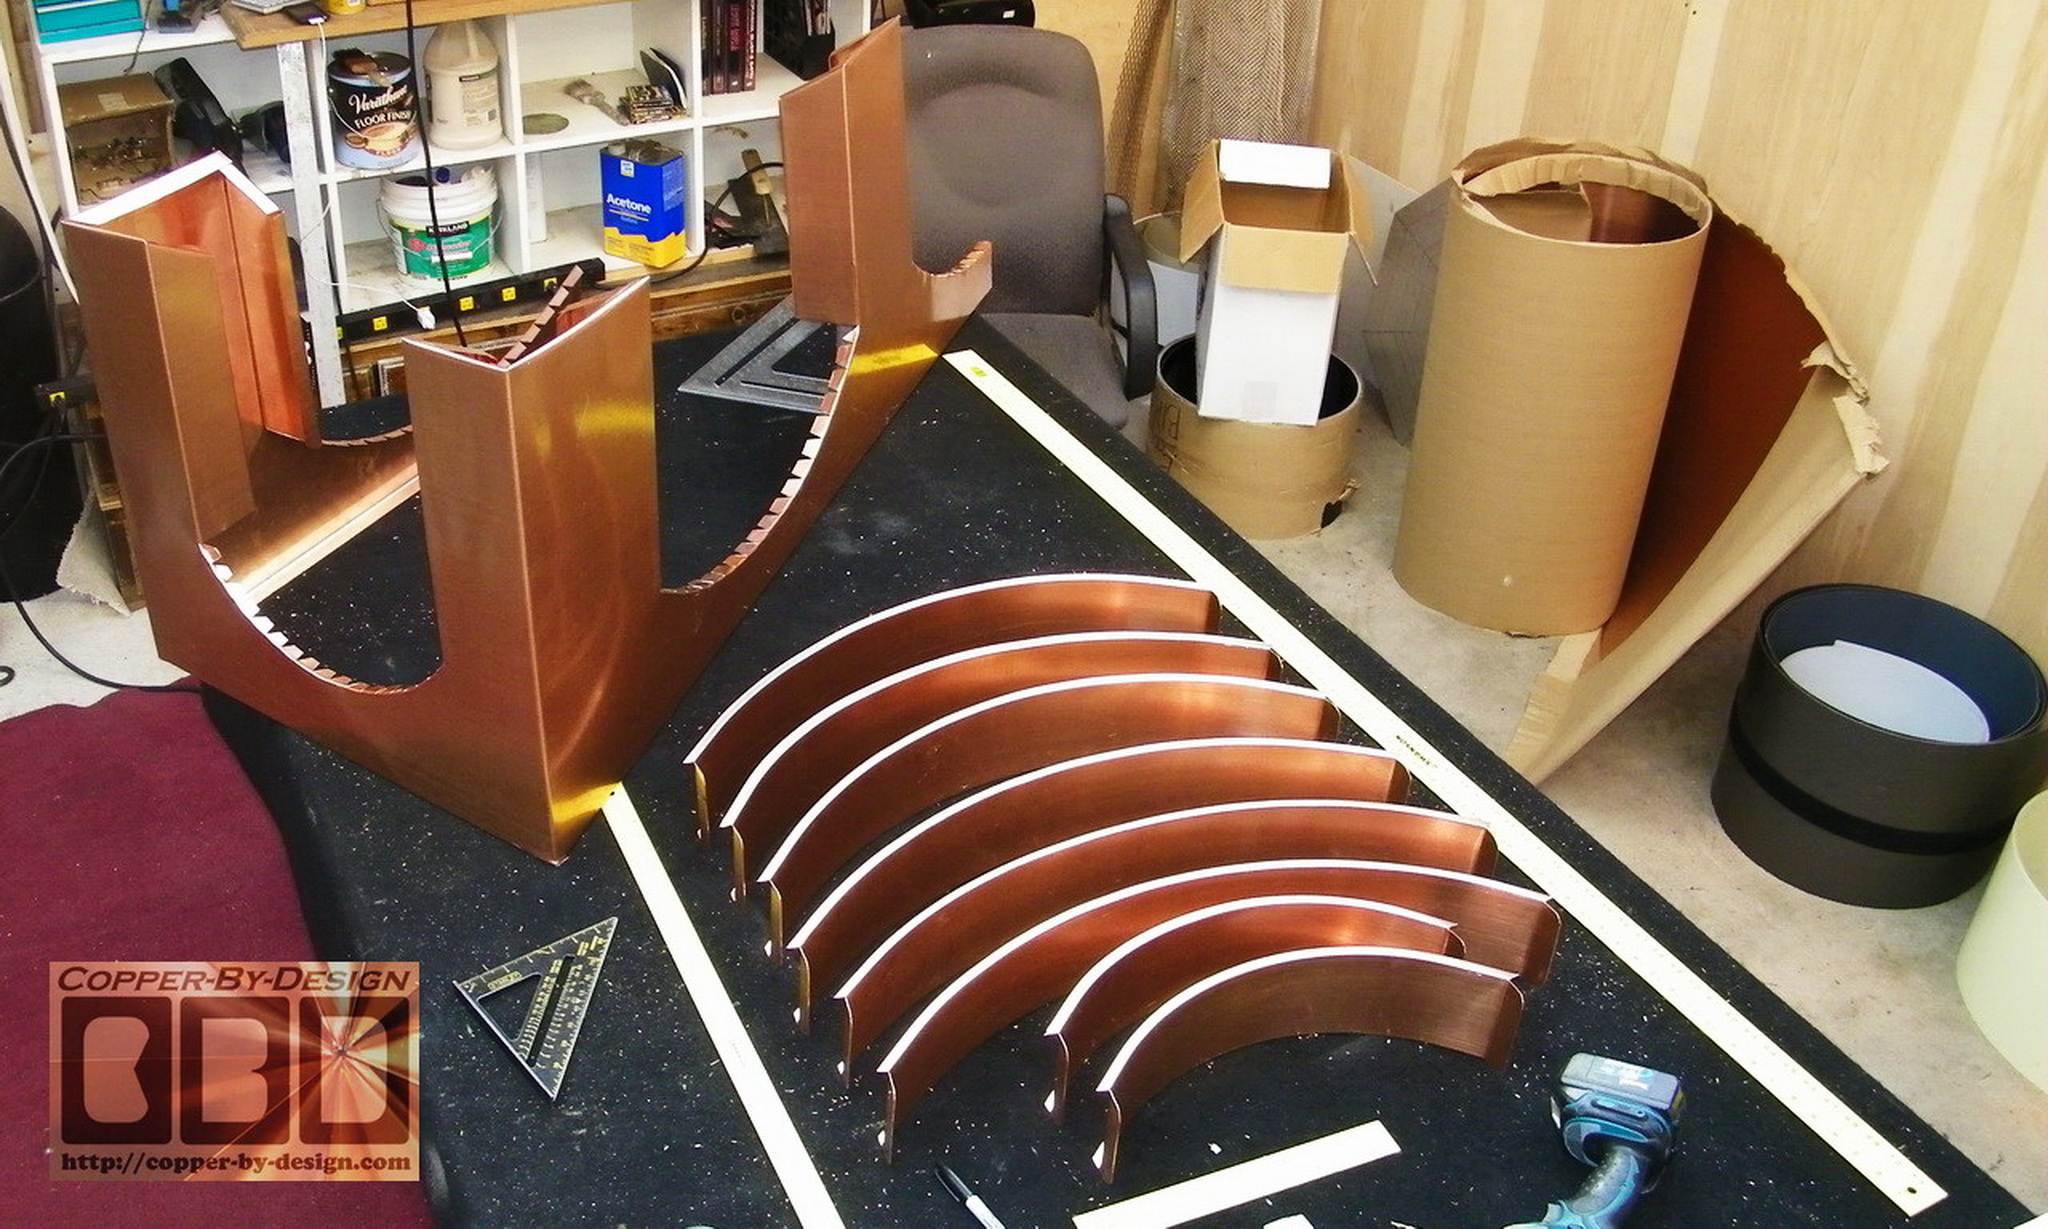
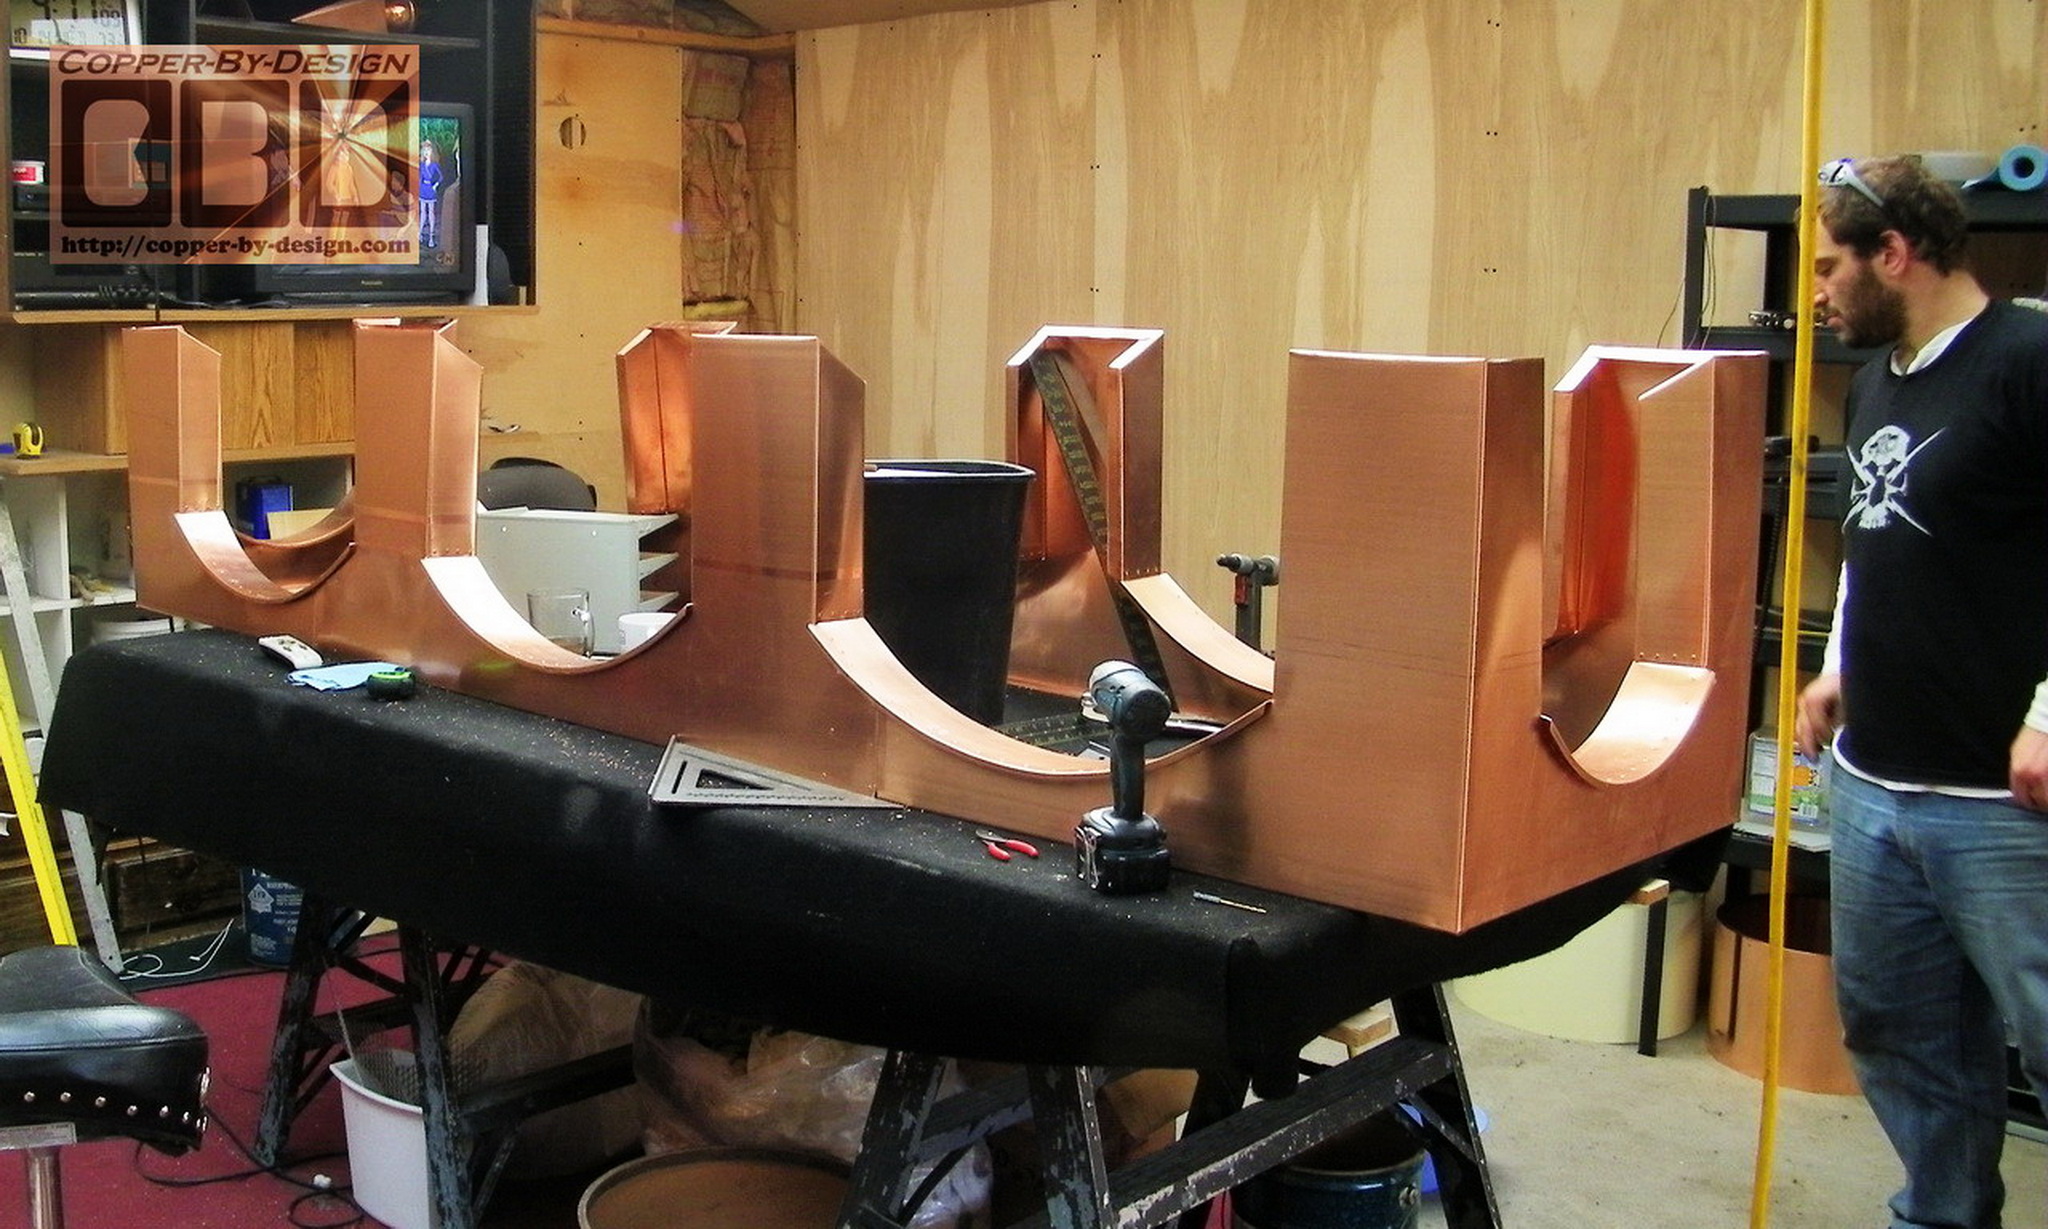
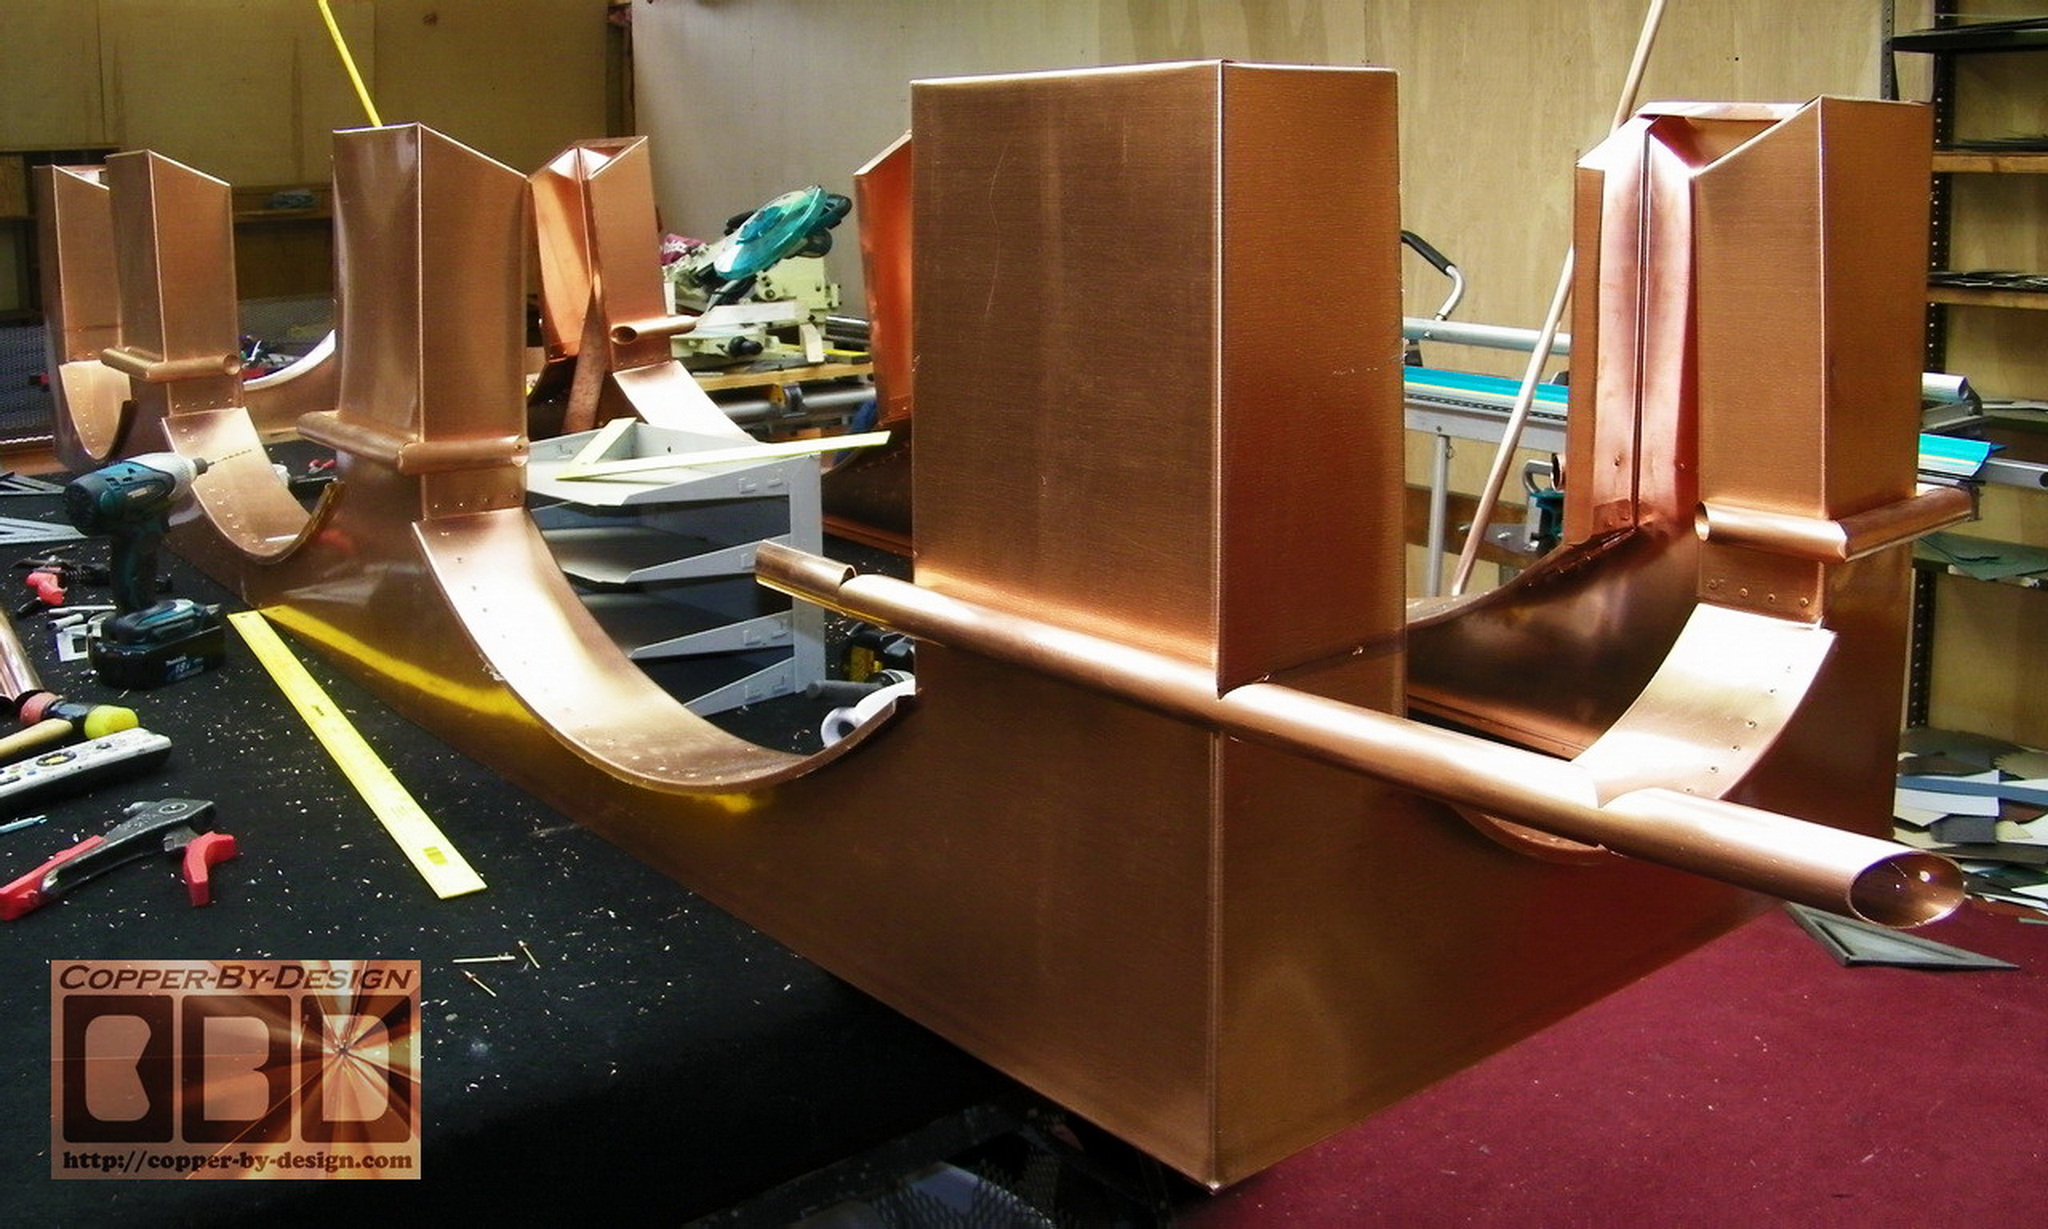
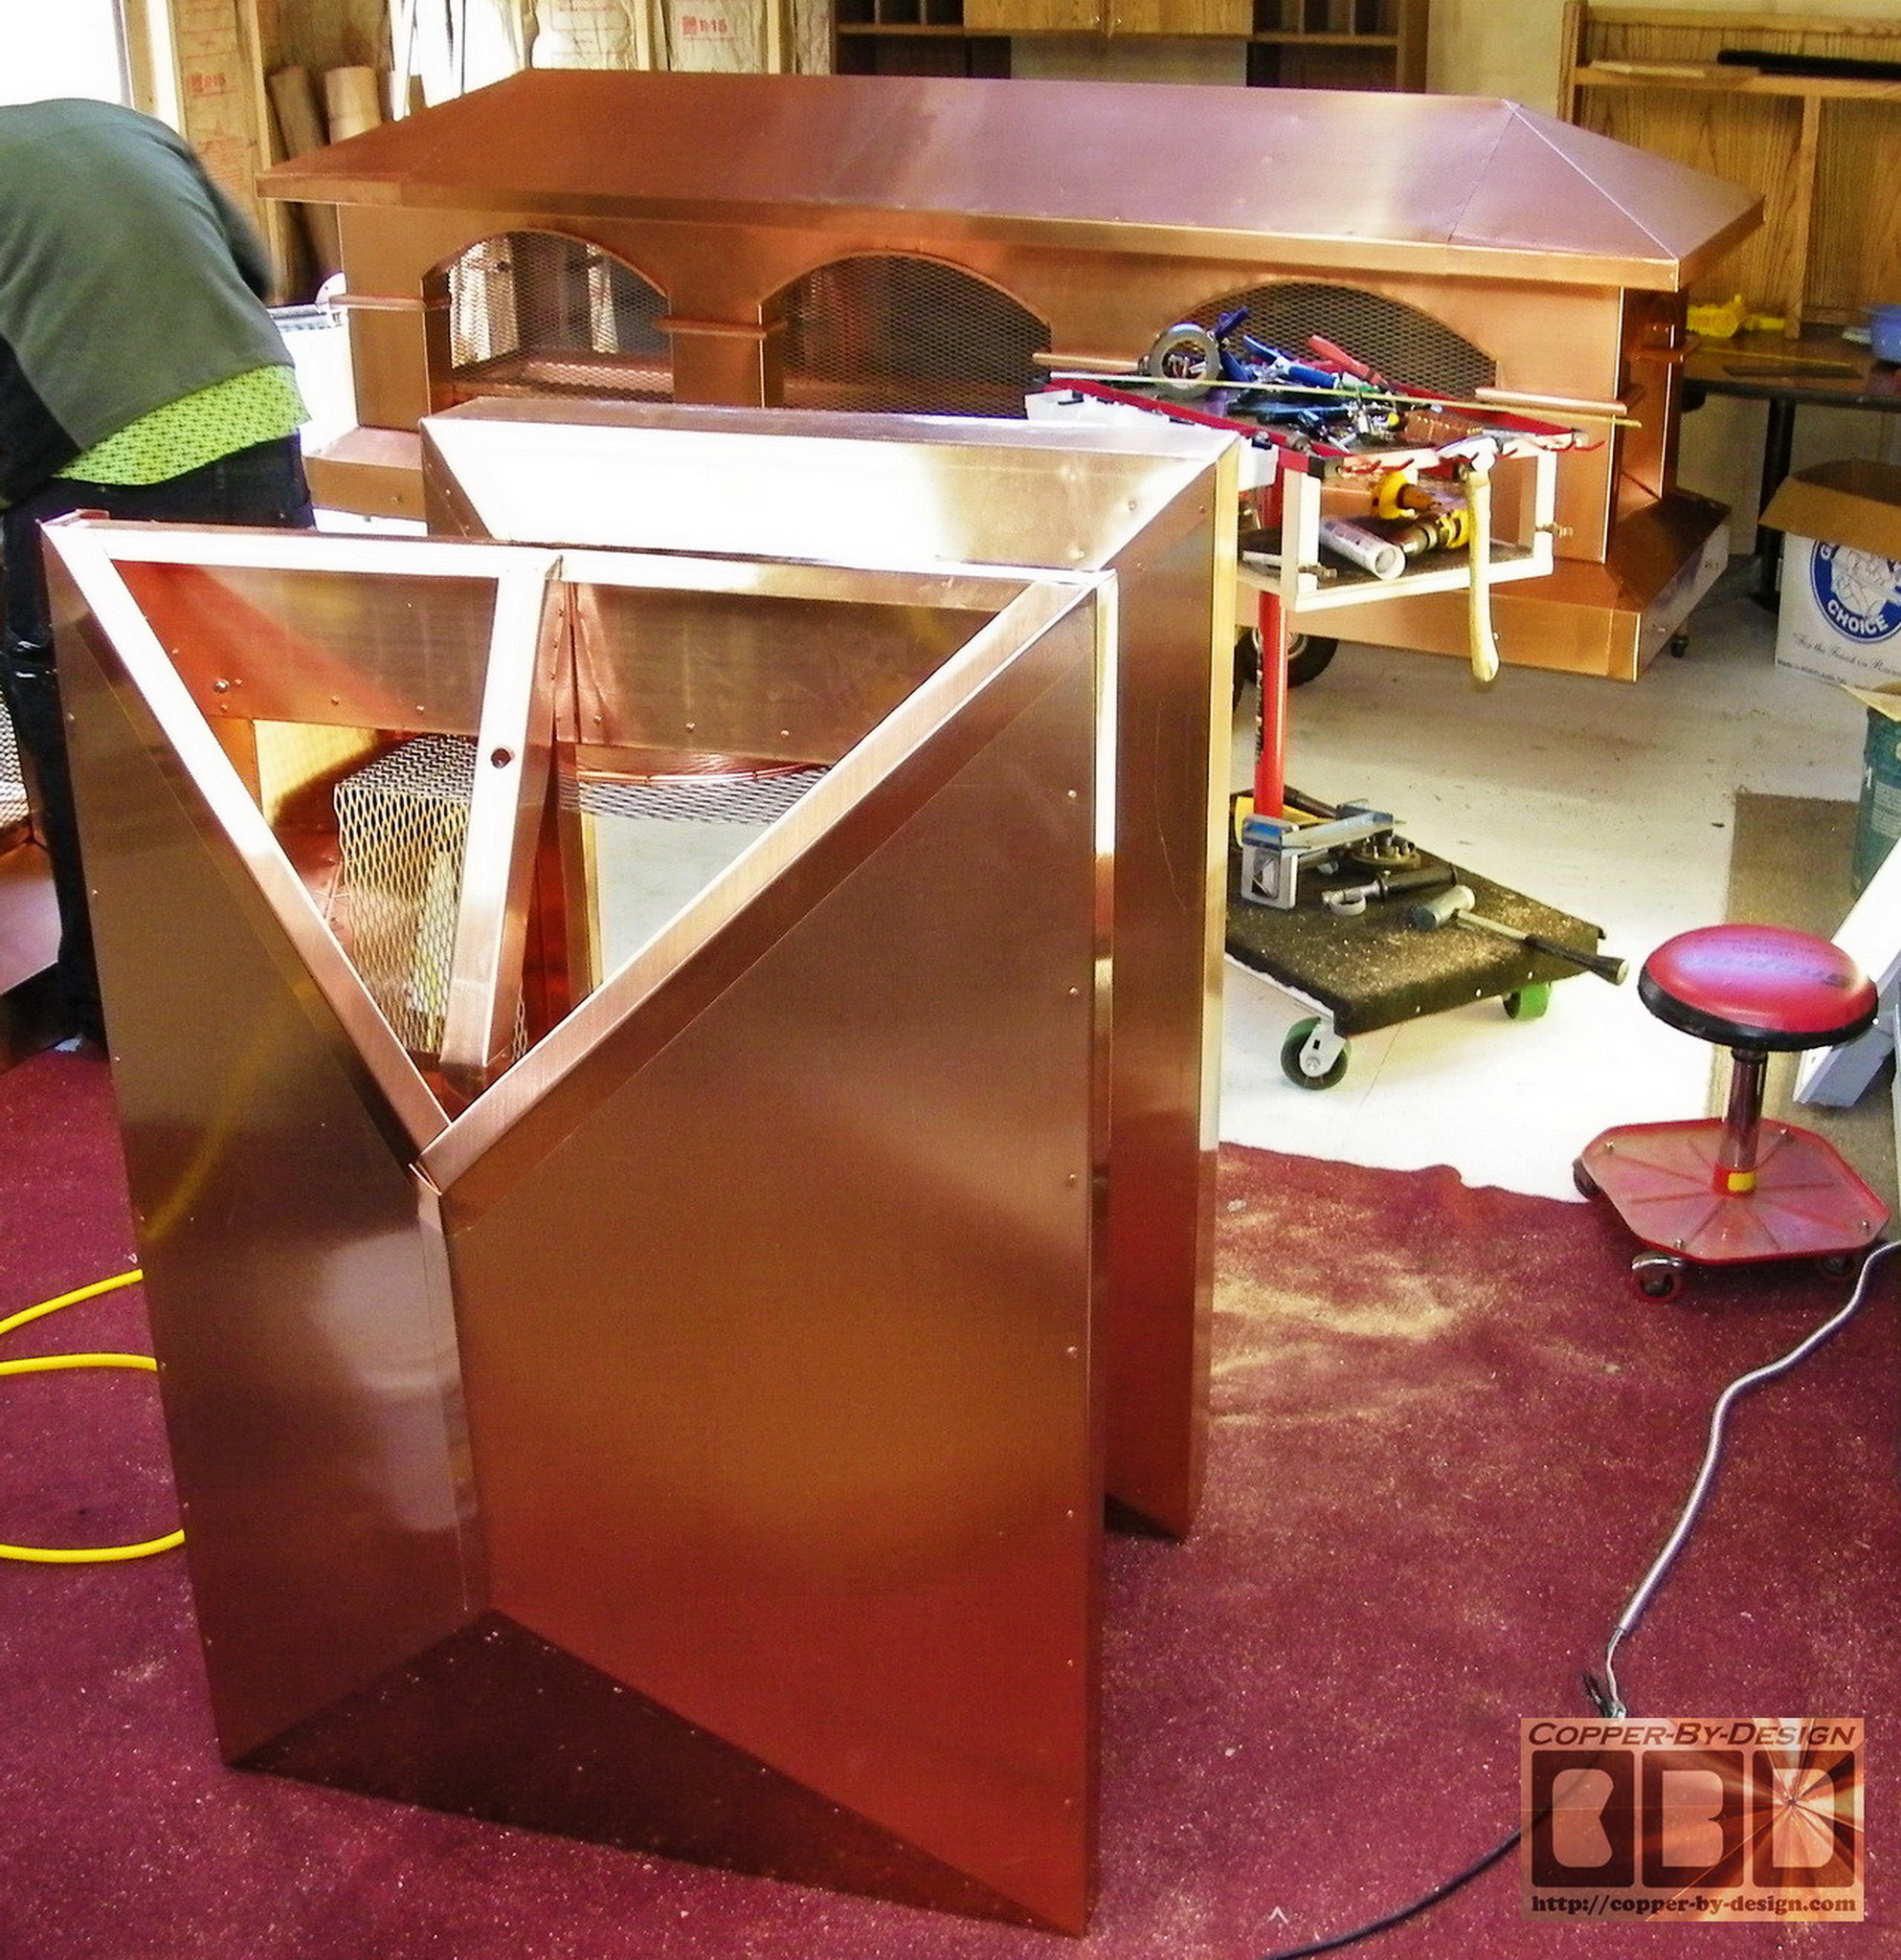
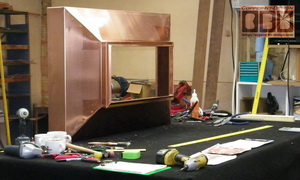
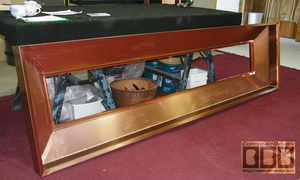
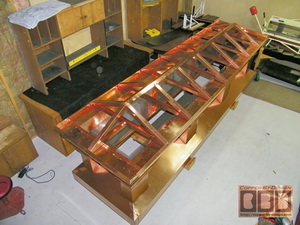
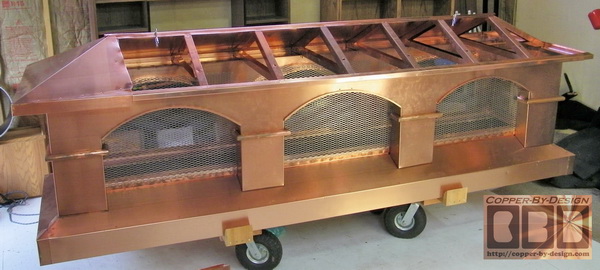
This shows part of the arched columns being
laid out on the sheet of copper. There is a good deal of math
and geometry involved here, so it's all in the right proportion
and the bottom of the columns can sit right on the angled base.
The larger set needs to be made from 3 separate sheets of
copper, because it is so large. This also shows the 8 inside
liner of the arches formed for this 1 chimney cap.
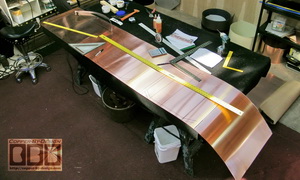 
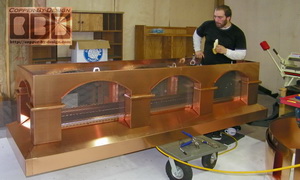
This was a bit more tricky to build than I
had imagined being longer than my 8' work bench and very wabbly.
It took us a few days just to build this set of columns and
arches. Then there was the decorative piping to attach to each
column. Each corner column required a pipe that was about 30"
long. It took the majority of two 10' pipes for this one chimney
cap.
|
|
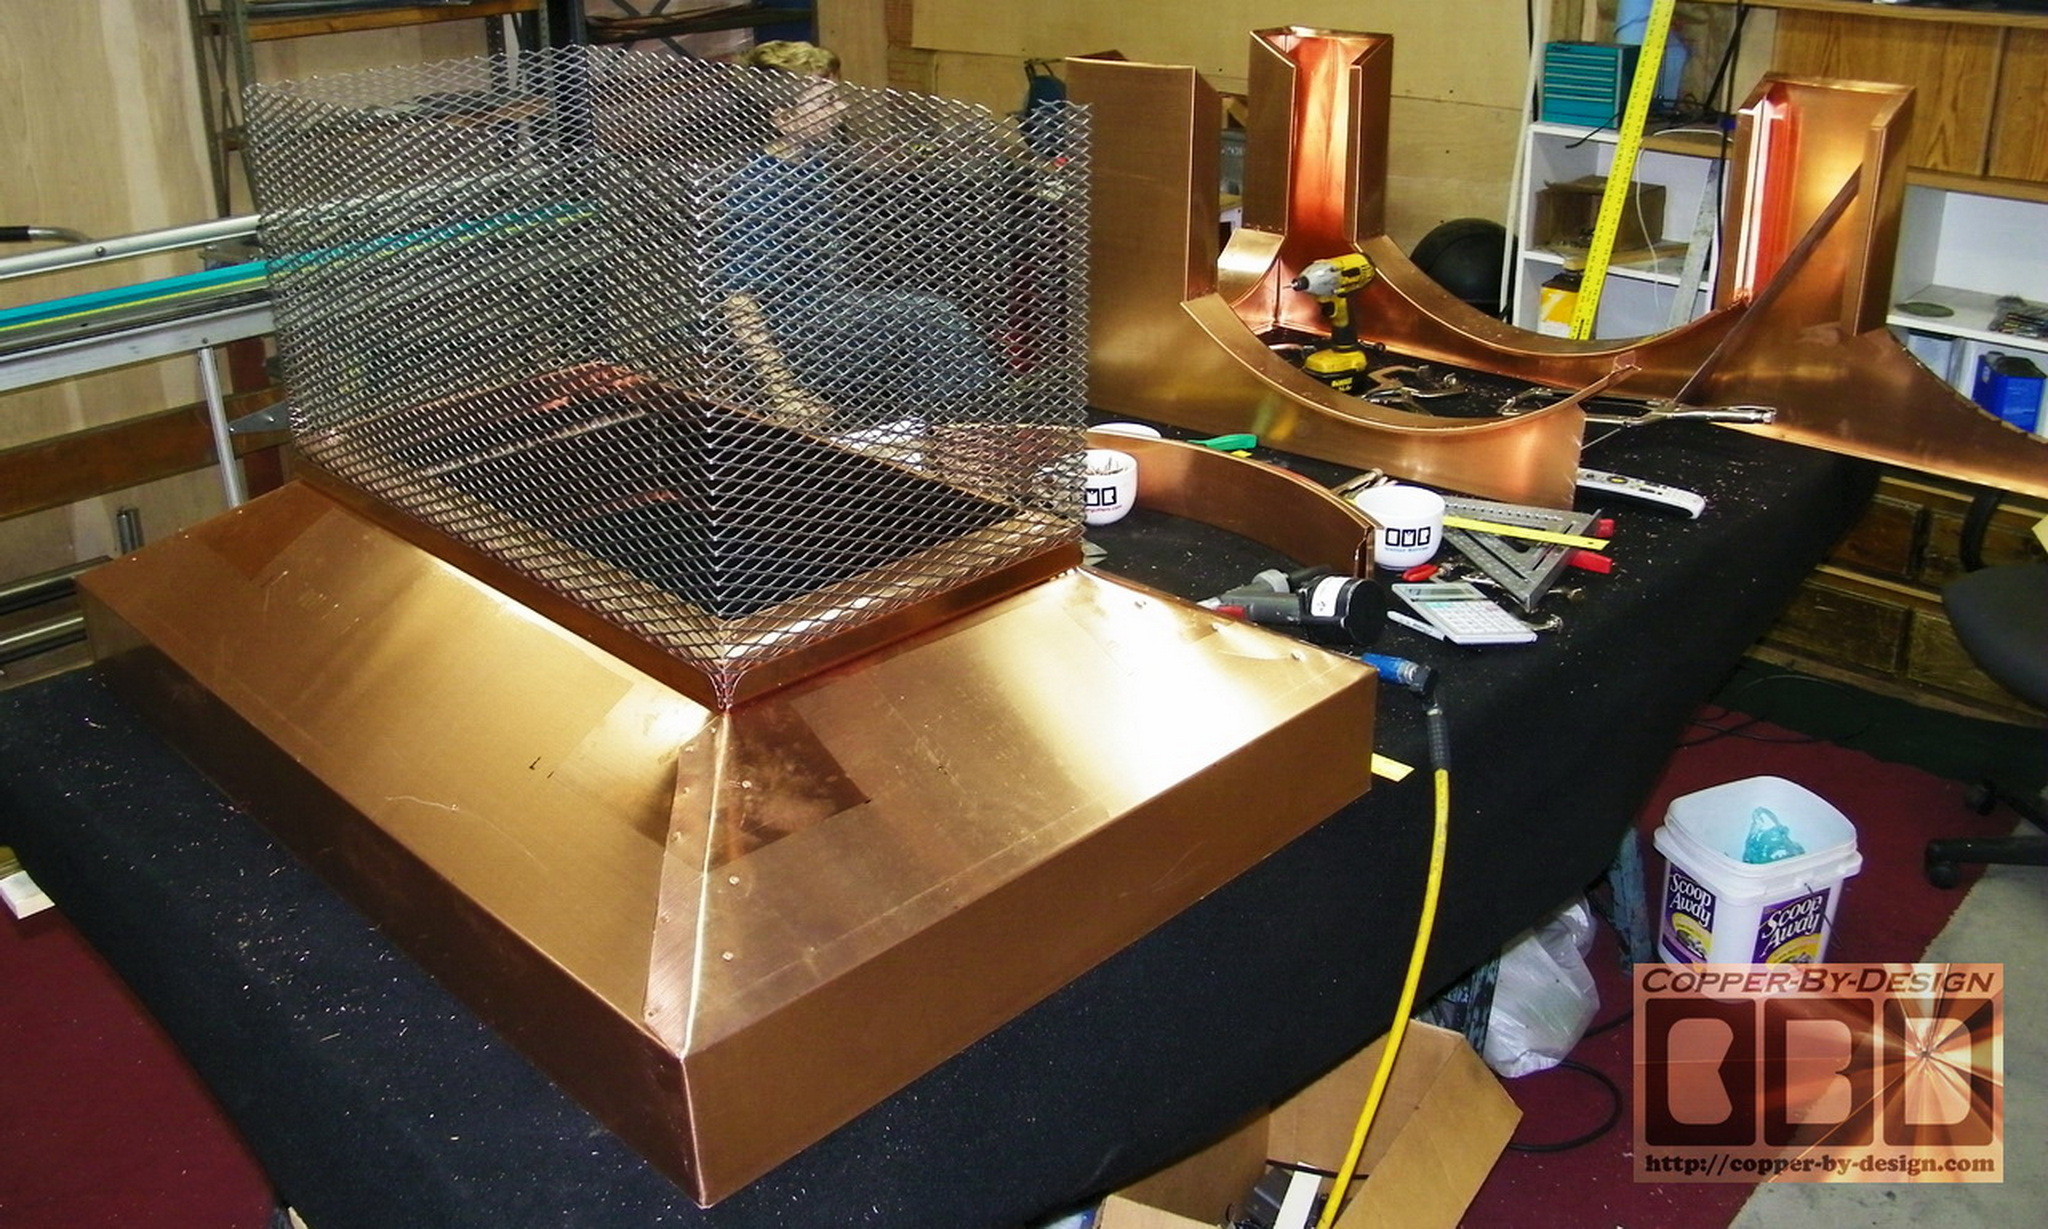
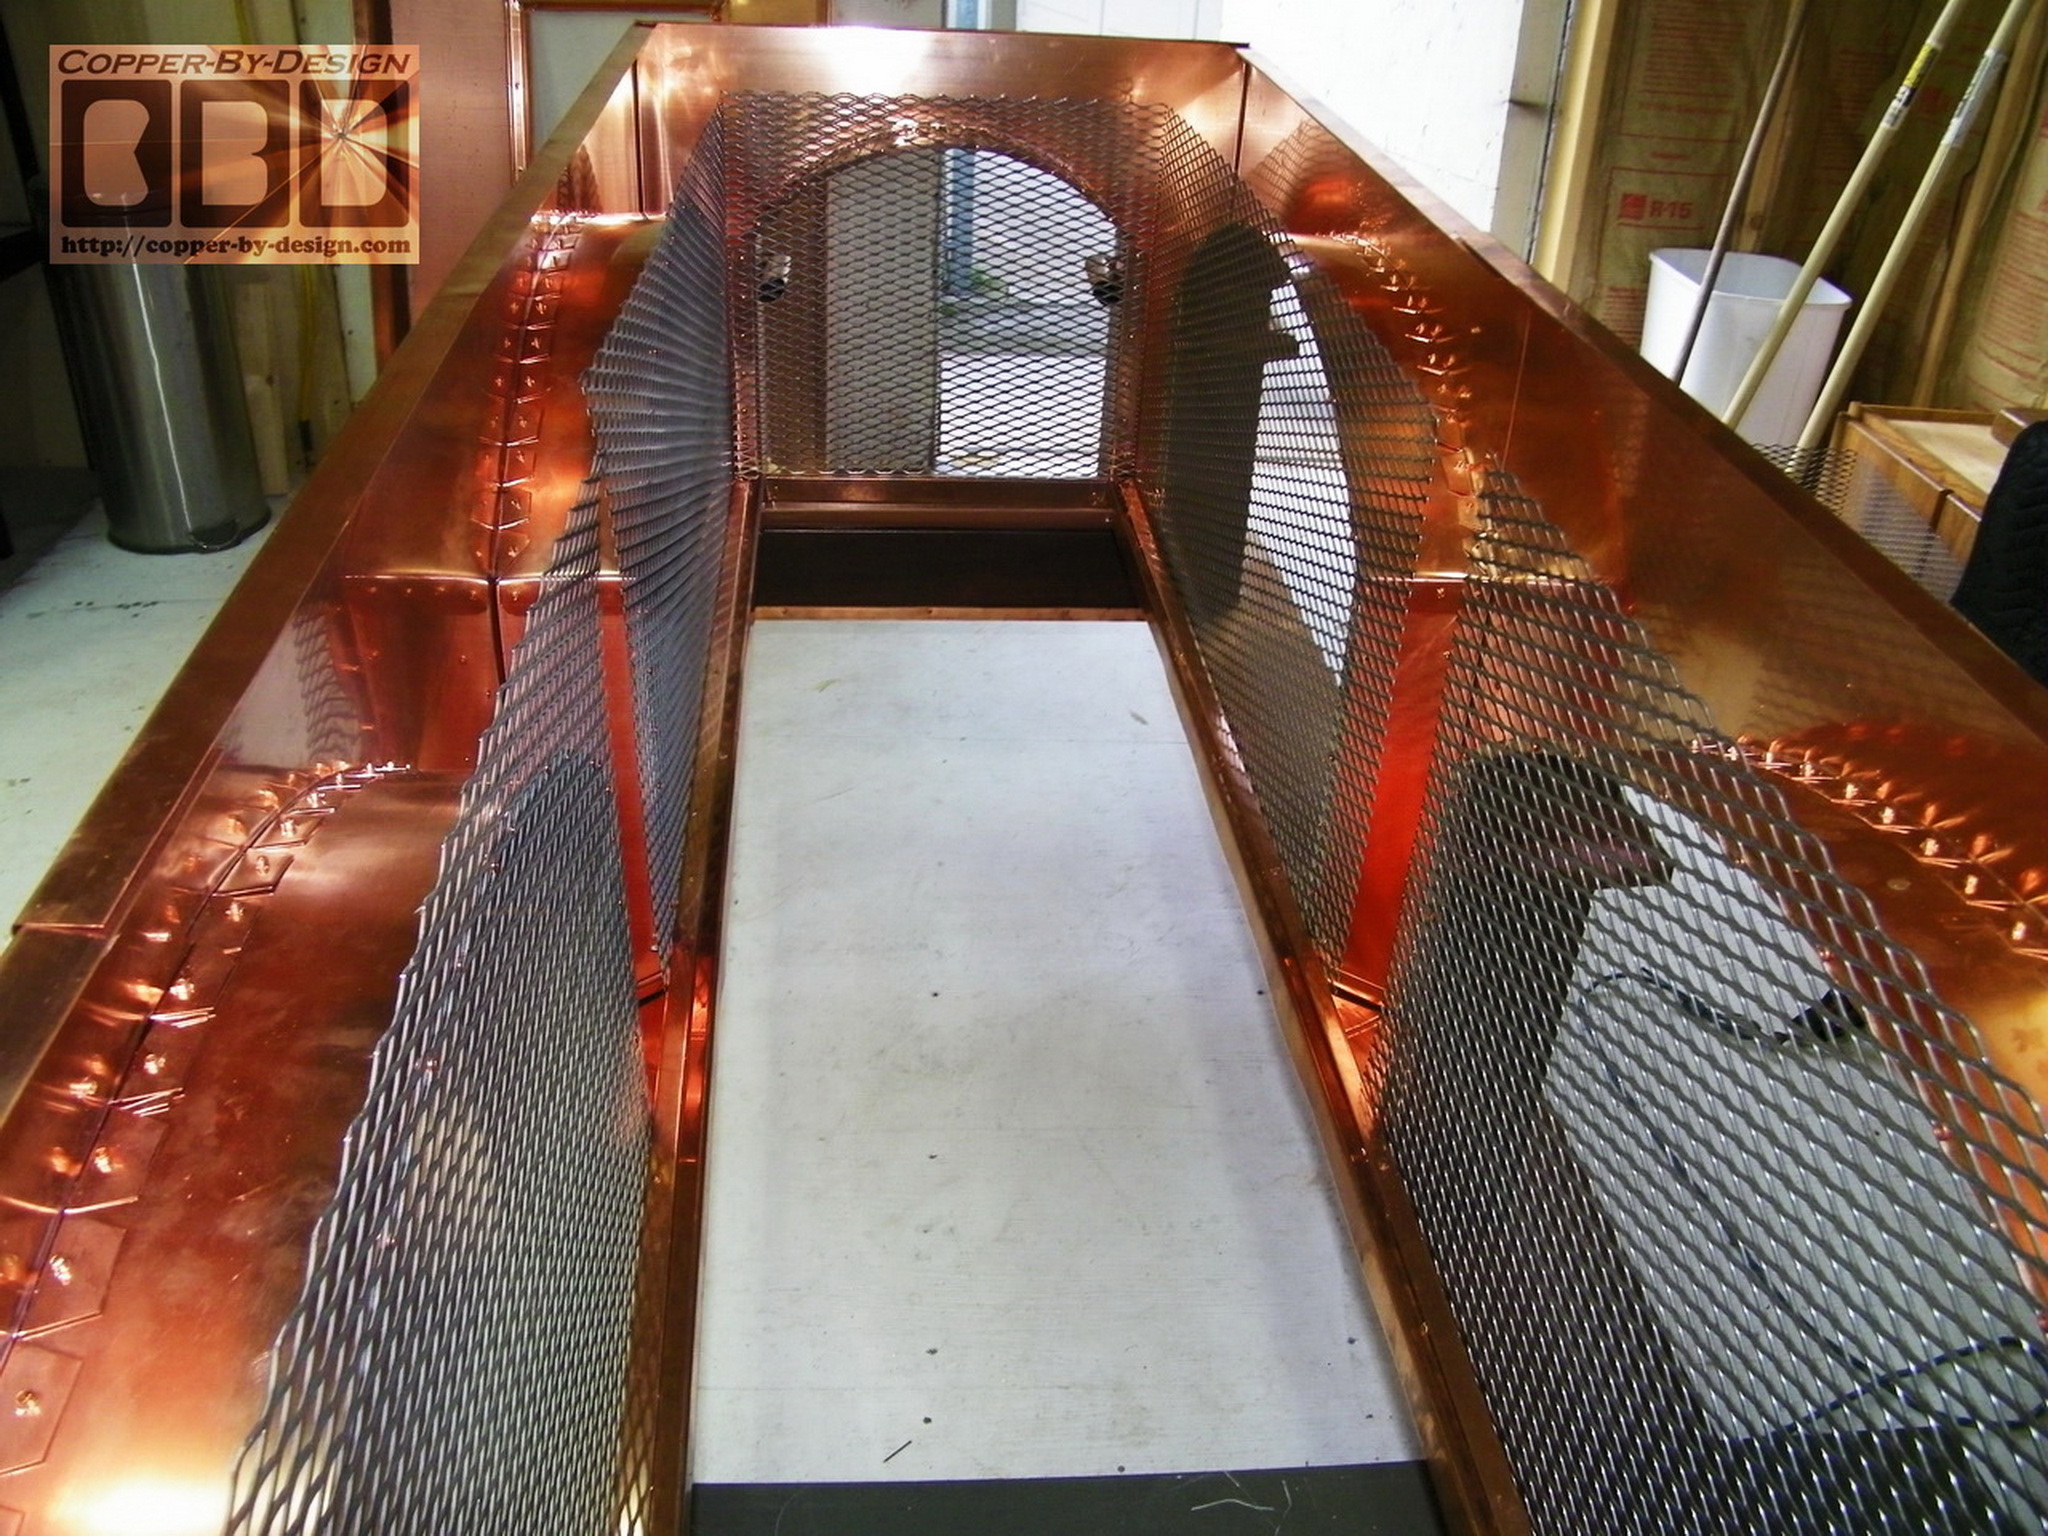
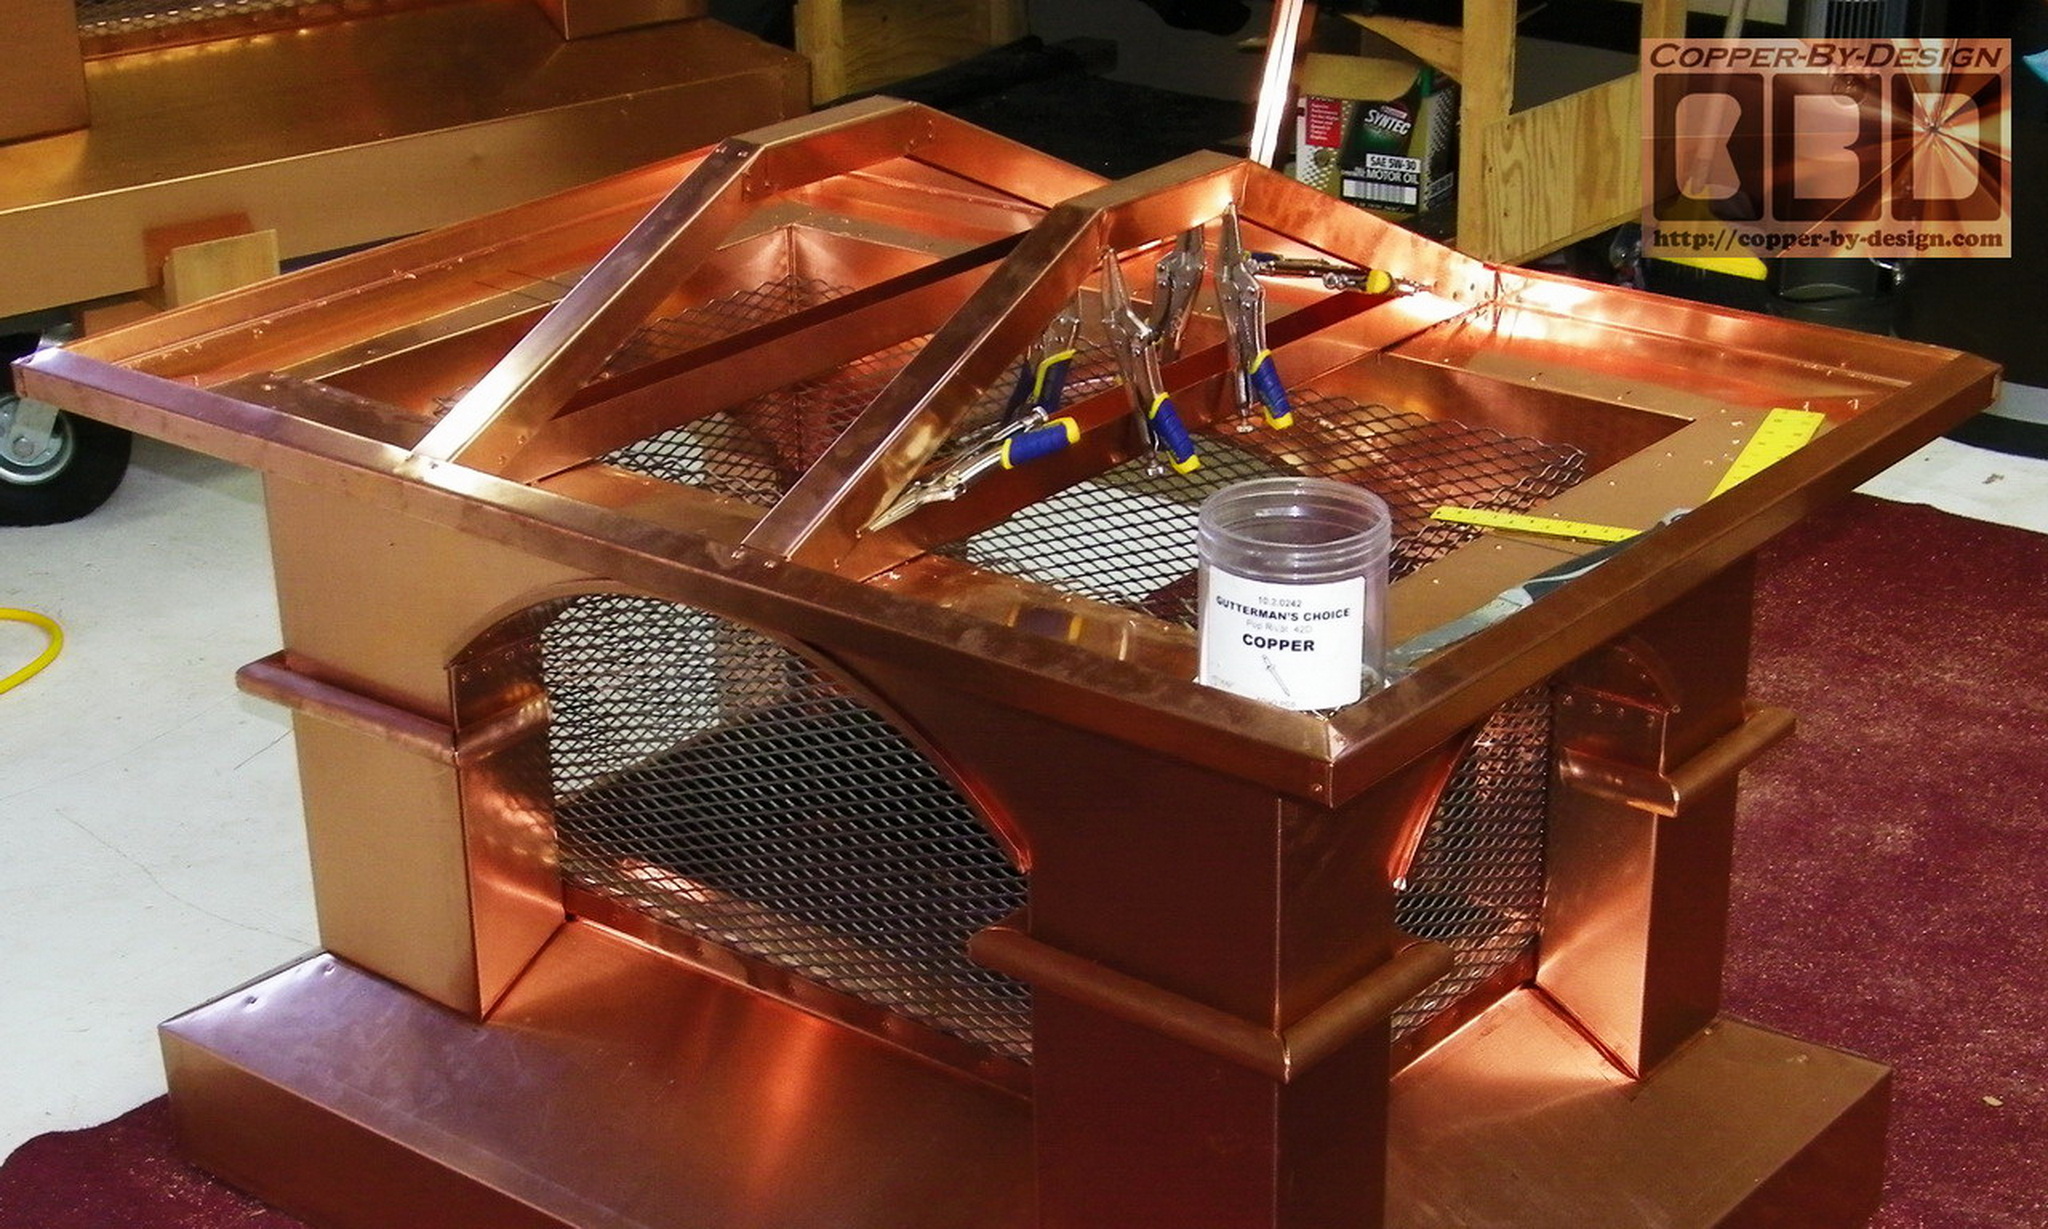
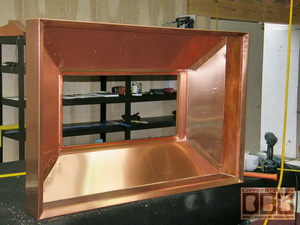
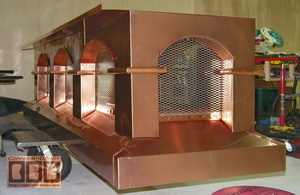
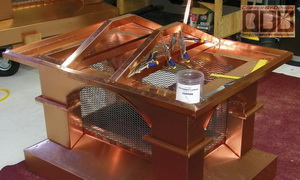
I cut and bent the 16 gauge stainless steel
screen to set into a channel along the inside rim of the bases.
These screens are what I get my hands lacerated on more than any
other aspect of my work, so it's important to cover all the
edges of this SS screen, so these are safe for anyone else after
these are complete. the SS screen is secured to the base through
the 3 layers of copper with dozens of longer rivets.
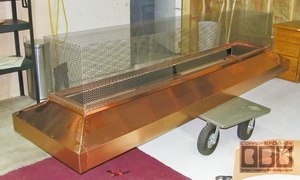 
The column are attached to the base
with 36 SS screws and over 100 rivets. Then several hundred
rivets needed to inside to fasten the screen to the columns and
arches. These add a great deal of strength and stability to this
structure once attached. The sides of these arches no longer
will flex more than a 1/4" now.
|
|
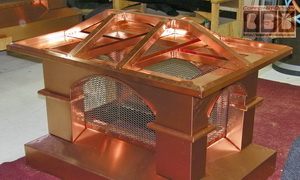
Then the eaves are made and attached, which
adds a lot more strength to this long wall.
|
|
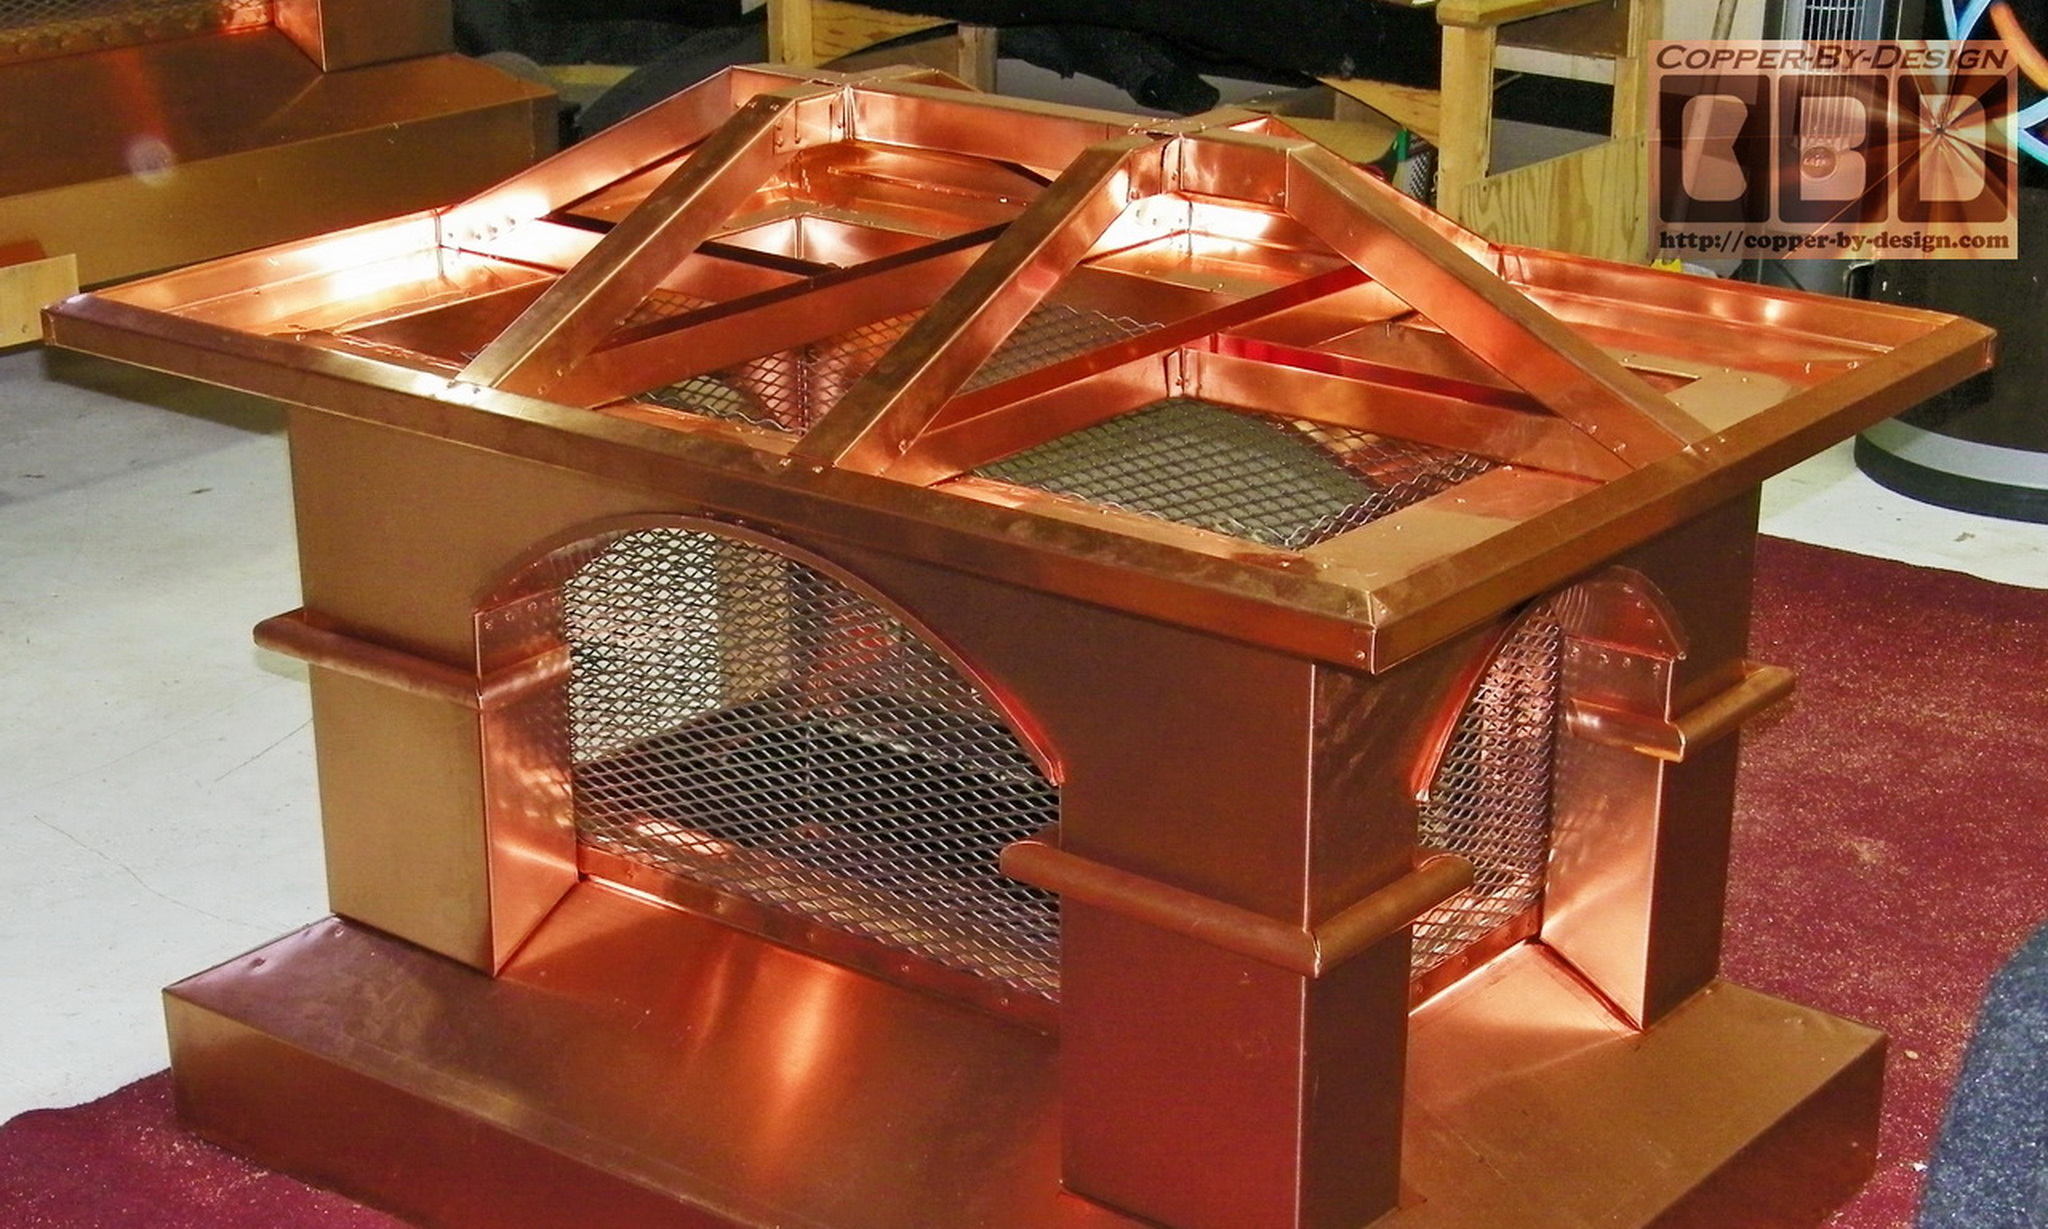
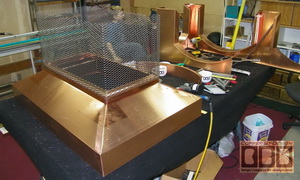
Then there is the roof support braces to make
and attach with SS screws and copper rivets. I believe this is a
very important detail that is not done by most any other sheet
metal shop from what I've seen. Not that we get a lot of snow
around here, but we did get about 15" last winter, so I do what
I can to prepare for the worst.
|
|
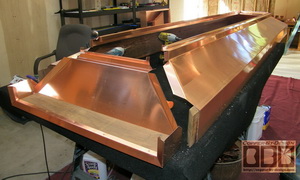
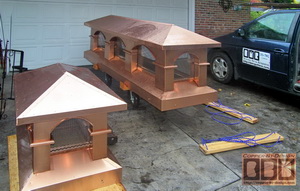
Then these were ready for the copper roof
skins to go over these braces and attach under the eaves.
|
|
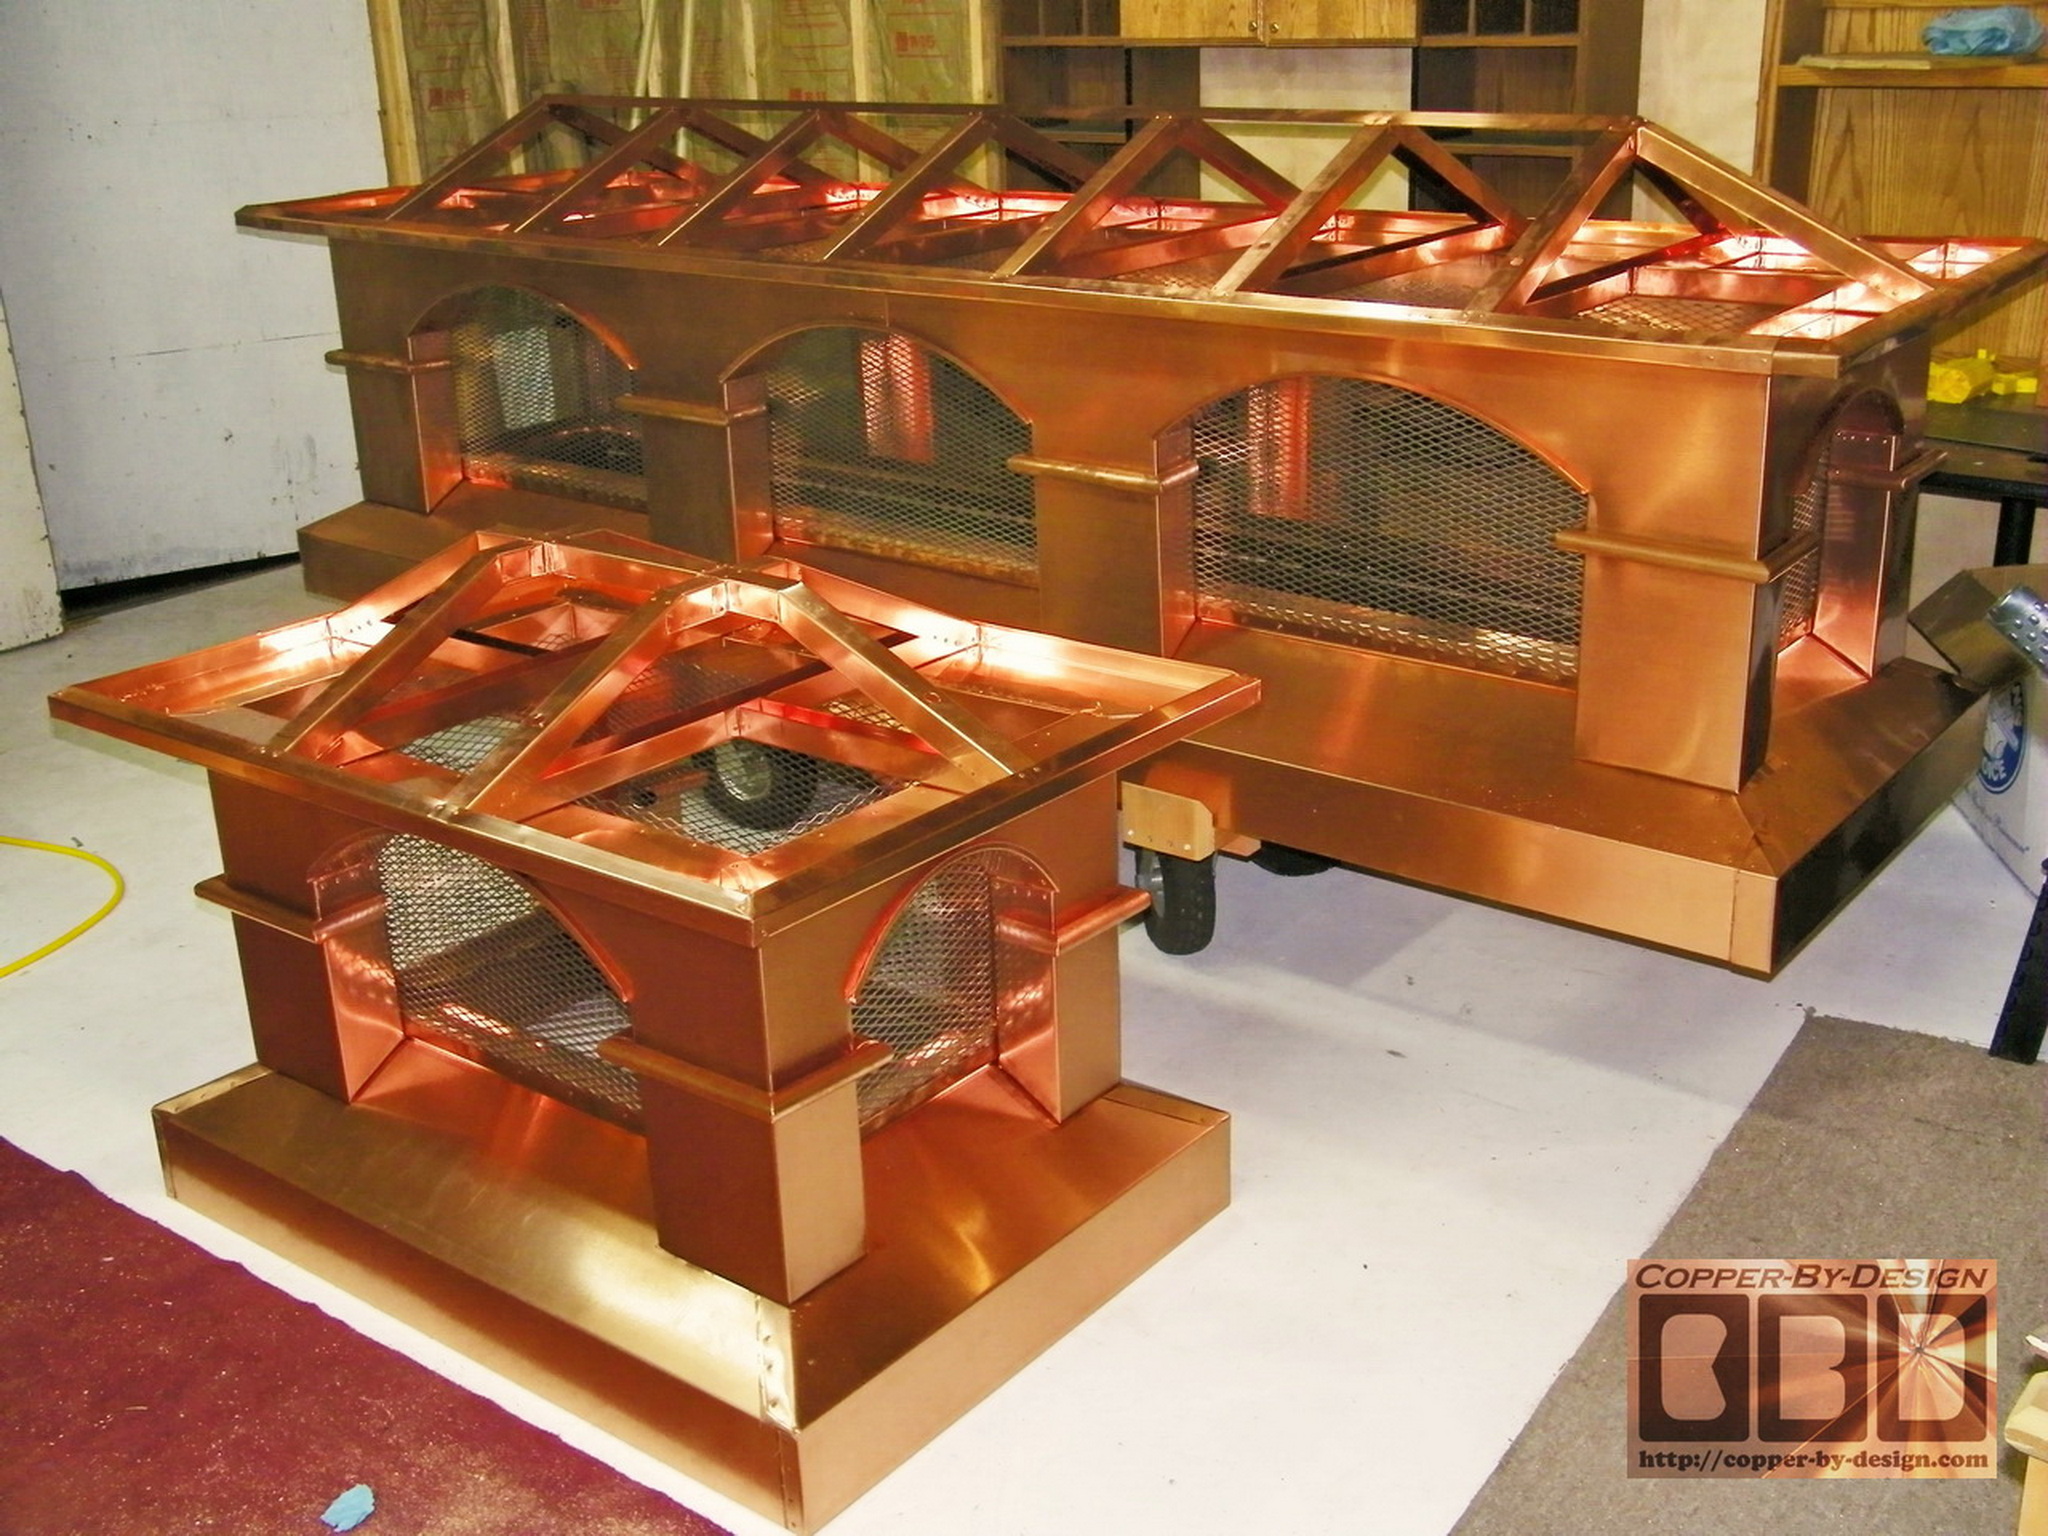
When I got the final weights; the larger one was 317# and the smaller
chimney cap
was 137.6#. I had given them a huge discount for this
being such a large order and I was so excited to build this unique
triple arch version of my Tuscany style chimney cap. They were
so pleased with the work we did they contracted us to cover
their gazebo with new plywood and copper the next year.
The weights and cost
breakdown of these pieces are as follows.
Long Chimney Cap:
-
58.3# - wood frame inside the base/skirt -
26.25 ln'
-
21.2# - SS screen - 30.25 sq'
-
237.5# of copper sheet metal - 190 sq'
-
$6,650 - 190 sq' of copper X $35
-
+ $605 for 30.25 sq' of SS screens X
$20
-
+ $328.13 for 26.25 ln' of 5/4 x 6 hardwood boards
X $15
-
+ $400 for delivery and installation including crane
service
-
= $7,983.13 total
Smaller Chimney Cap:
-
29.2# - wood frame inside the base/skirt -
13.17 ln'
-
7.6# - SS screen -
10.83
sq'
-
100.8# of copper sheet metal - 80.64 sq'
-
$2,822.24 - 190 sq' of copper X $35
-
+ $216.60 for
10.83
sq' of SS screens X $20
-
+ $197.55 for
13.17
ln' of 5/4 x 6 hardwood boards X $15
-
+ $350 for delivery and installation including crane
service
-
= $3,586.55 total
$11,569.68 grand total - less $2,706.40
in discounts = $8,863.28 final cost
|
From: Emil Bardana
<bardanae@ohsu.e*u>
Date: Sat, 24 Oct 2009
Subject: Two Chimney caps for the Bardana
Residence in LO
Dear David: this is indeed unusual and
welcome news. Your integrity is appreciated and will be passed
along should anyone ever inquire. If you need to purchase some
protective mats to protect the shingles let me know. Also if you
could bring some wood to protect my stamped concrete that would
be appreciated. The caps look fantastic! Emil
From:
Copper-By-Design [mailto:quote@copper-by-design.c*m]
Sent: Saturday,
October 24
To:
Emil Bardana
Subject: Two Chimney caps for the Bardana Residence in LO
Good morning Emil and Norma,
I have some good news for
you. I got some weights this morning of what I have so far
without the roof skin on them; the larger one is 250# and the
smaller one is 113#. They both used a bit more screens than I
had predicted and the wood cost more than I had paid in the
past, but I did some calculations of what the roof skins should
require and I see the smaller one should be about 5 sq' less and
the larger chimney cap will be around 70 sq' less than
predicted, so you are looking at over $1k saving off the
original bid of $10,071.30, even with the added cost of the
crane and our participation with the installation. The balance
will be around $2,350, but I will not know for sure until we get
the roof skins finished. It may even be less. I imagine you are
not use to getting news like this form a contractor? |
|

 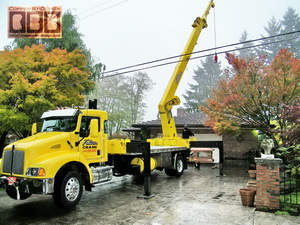
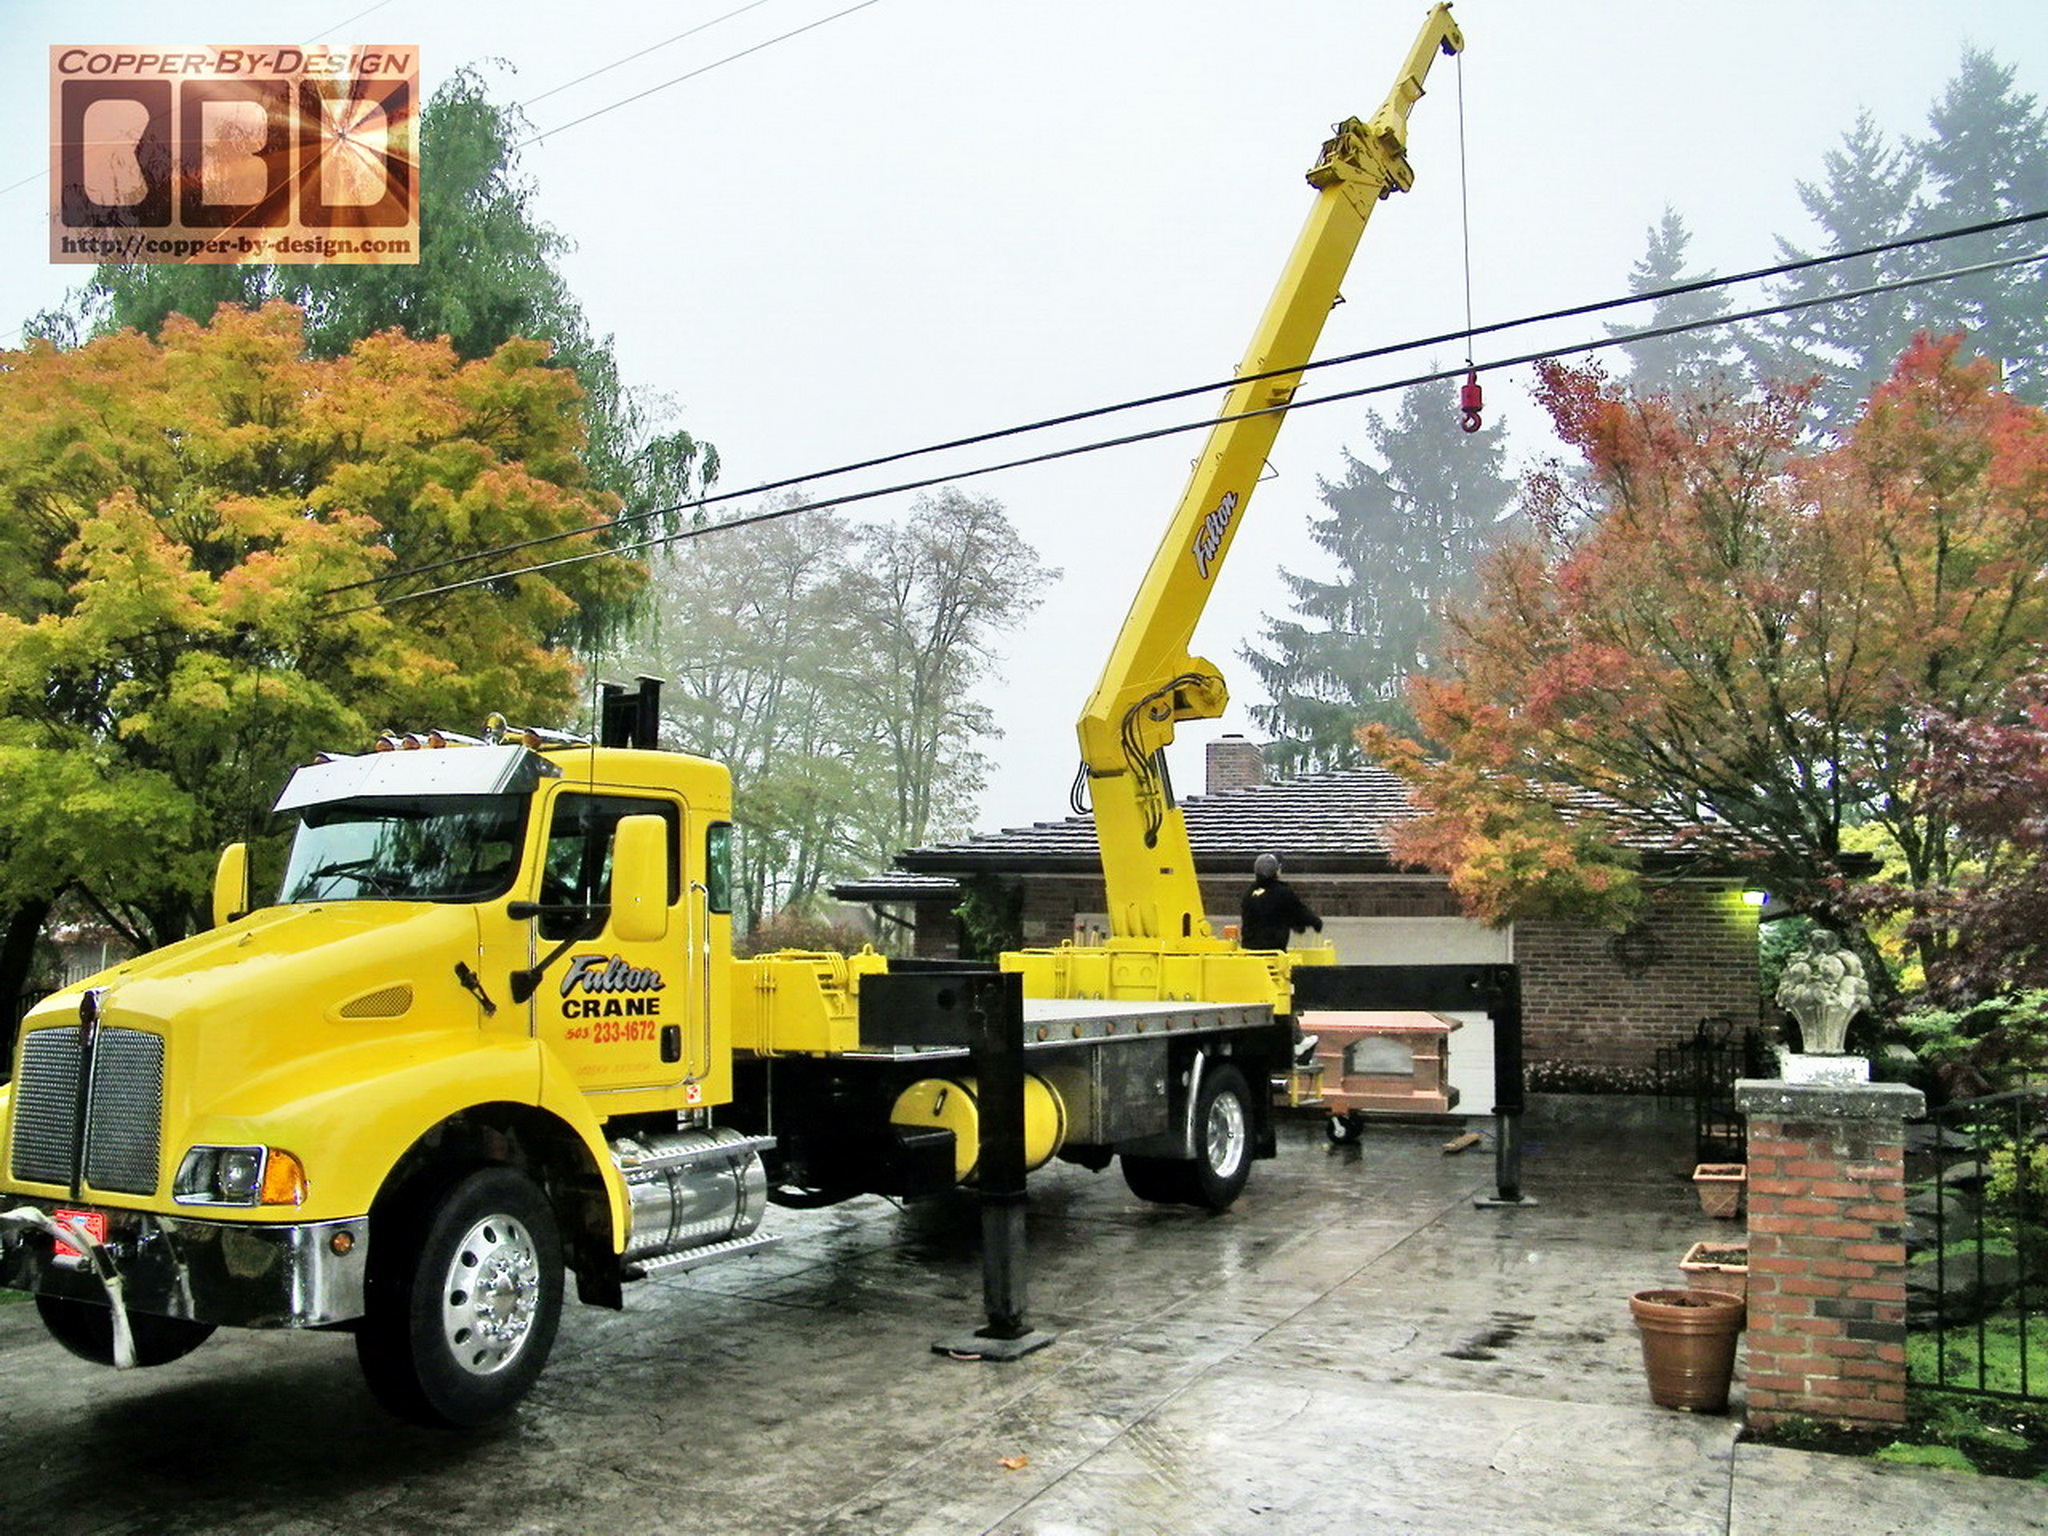
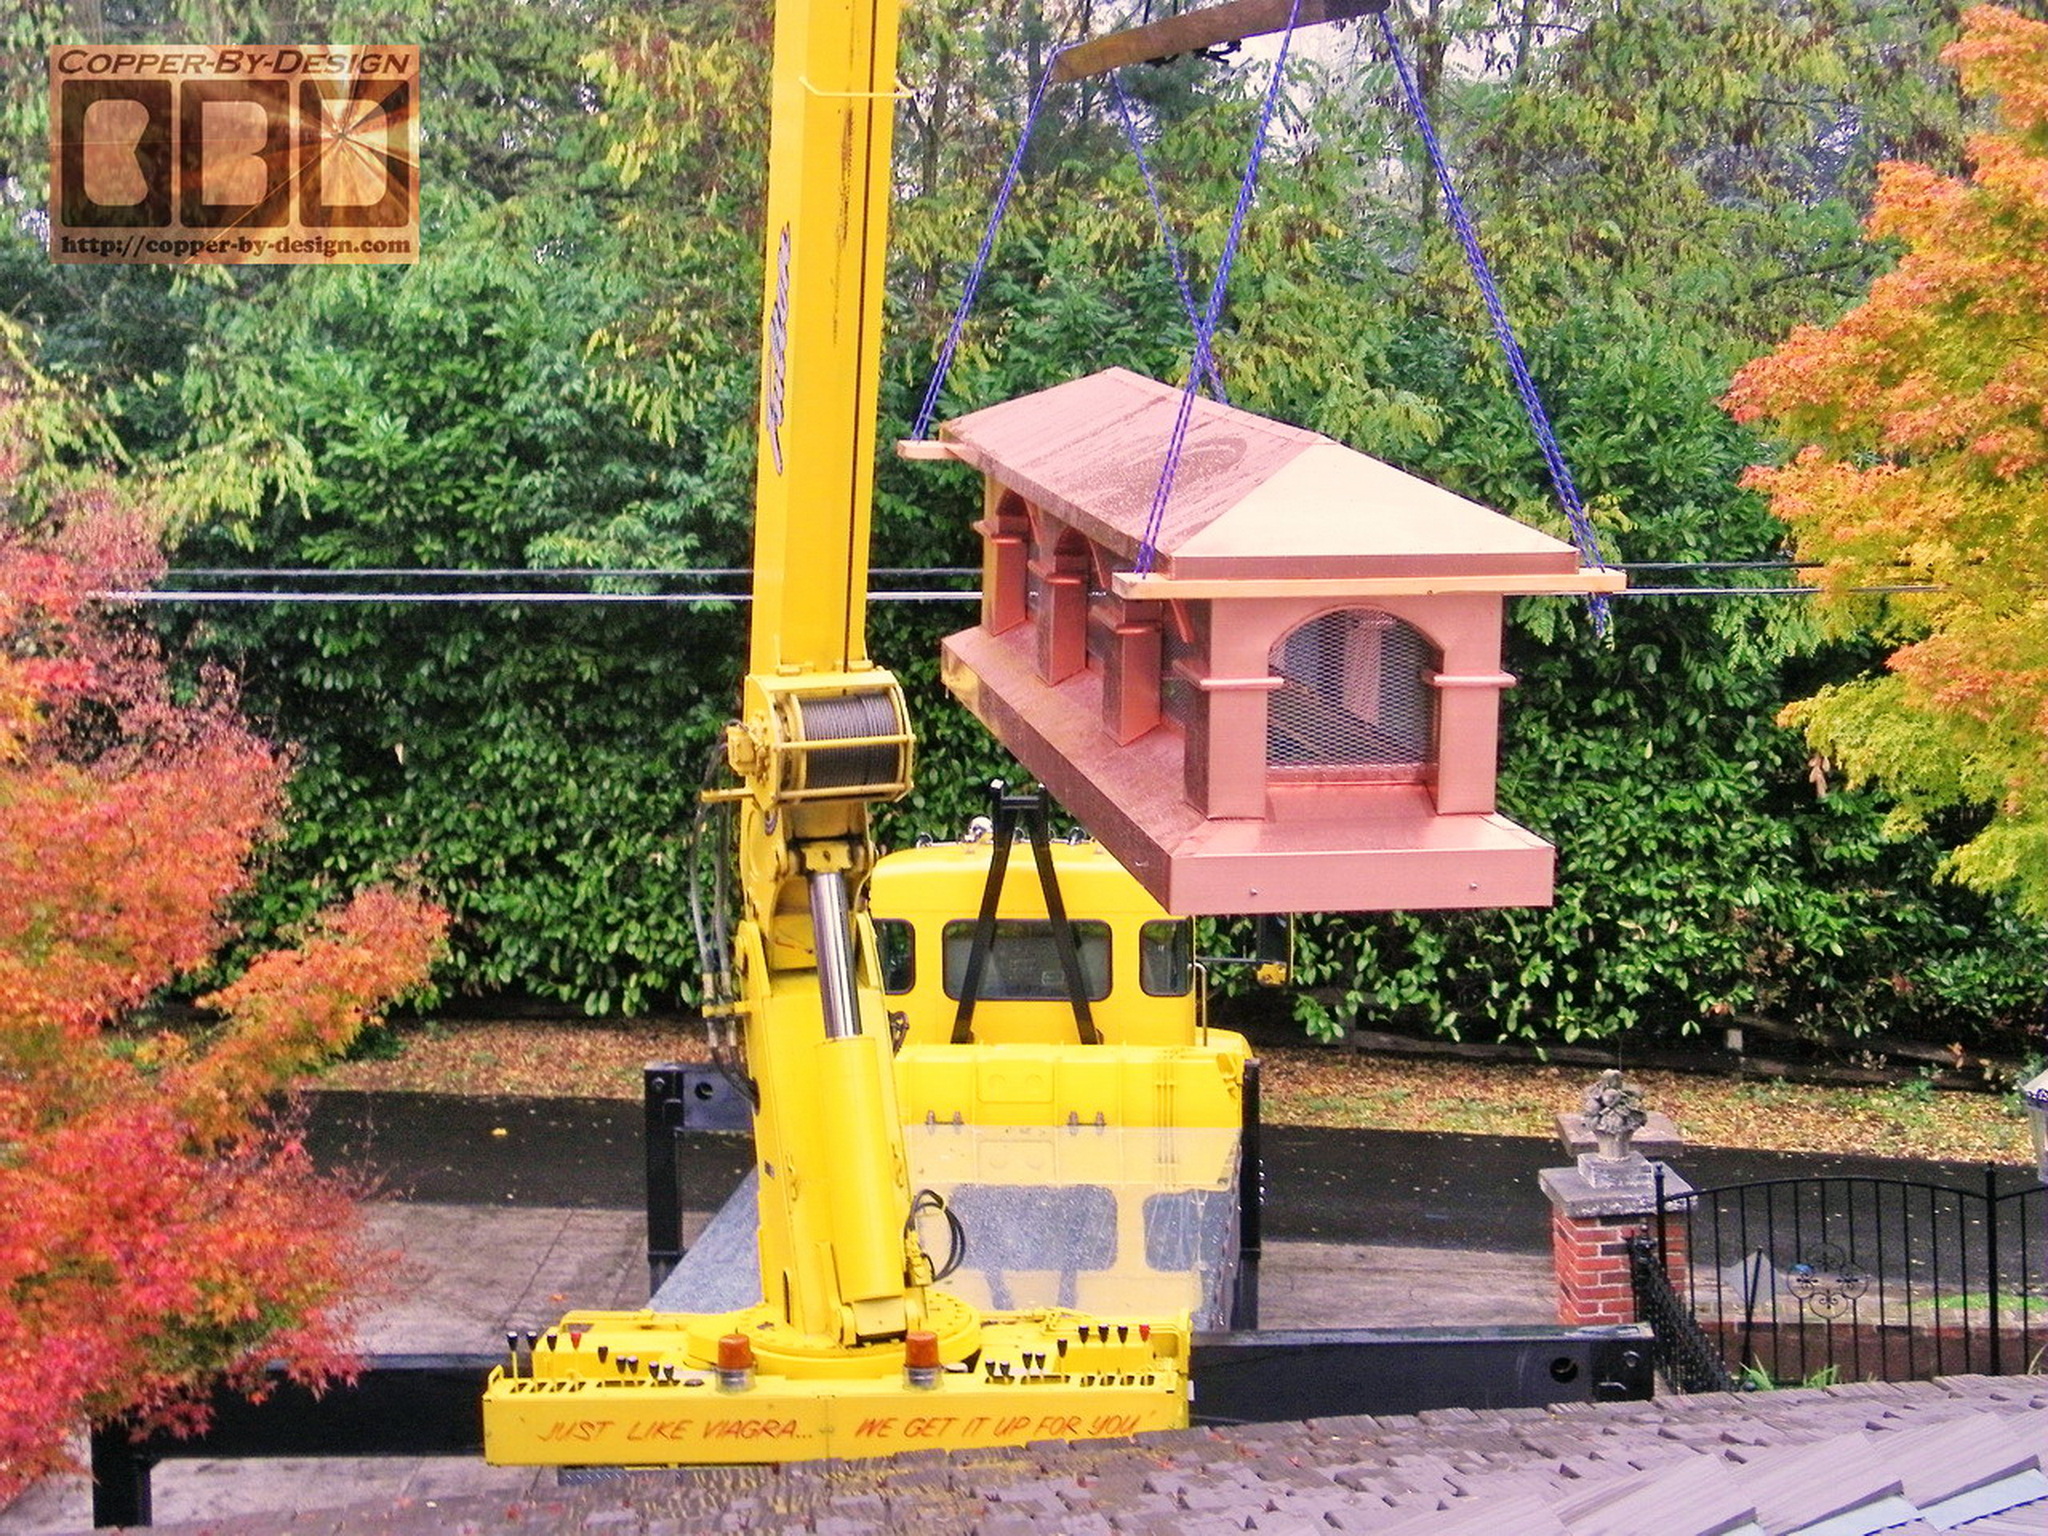
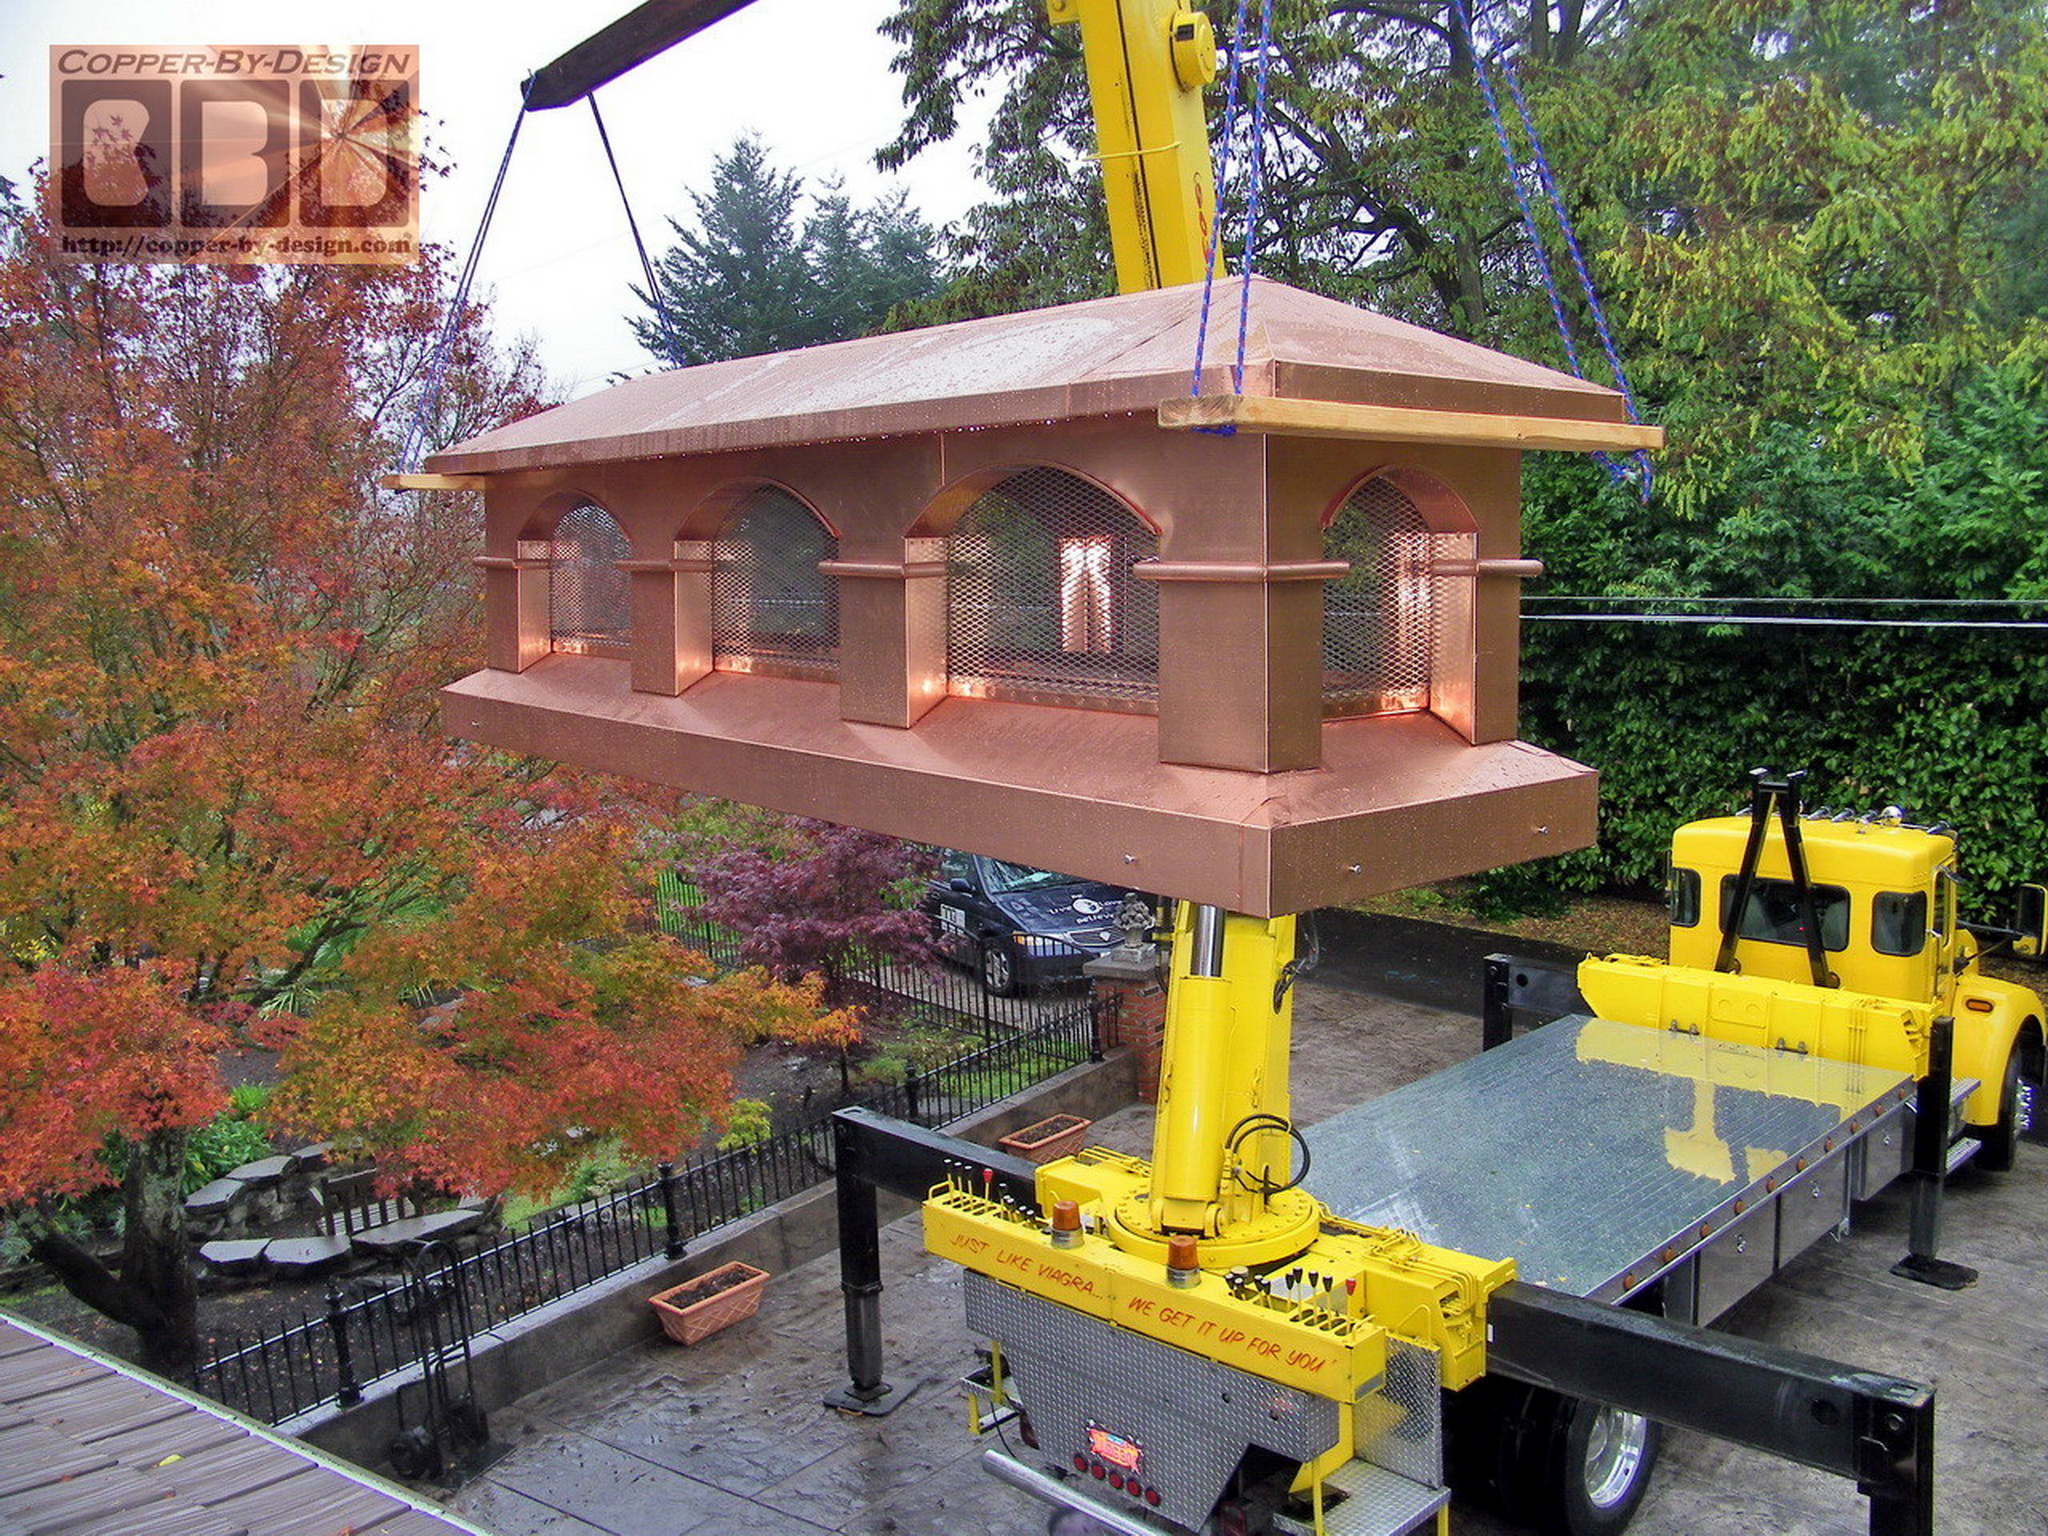
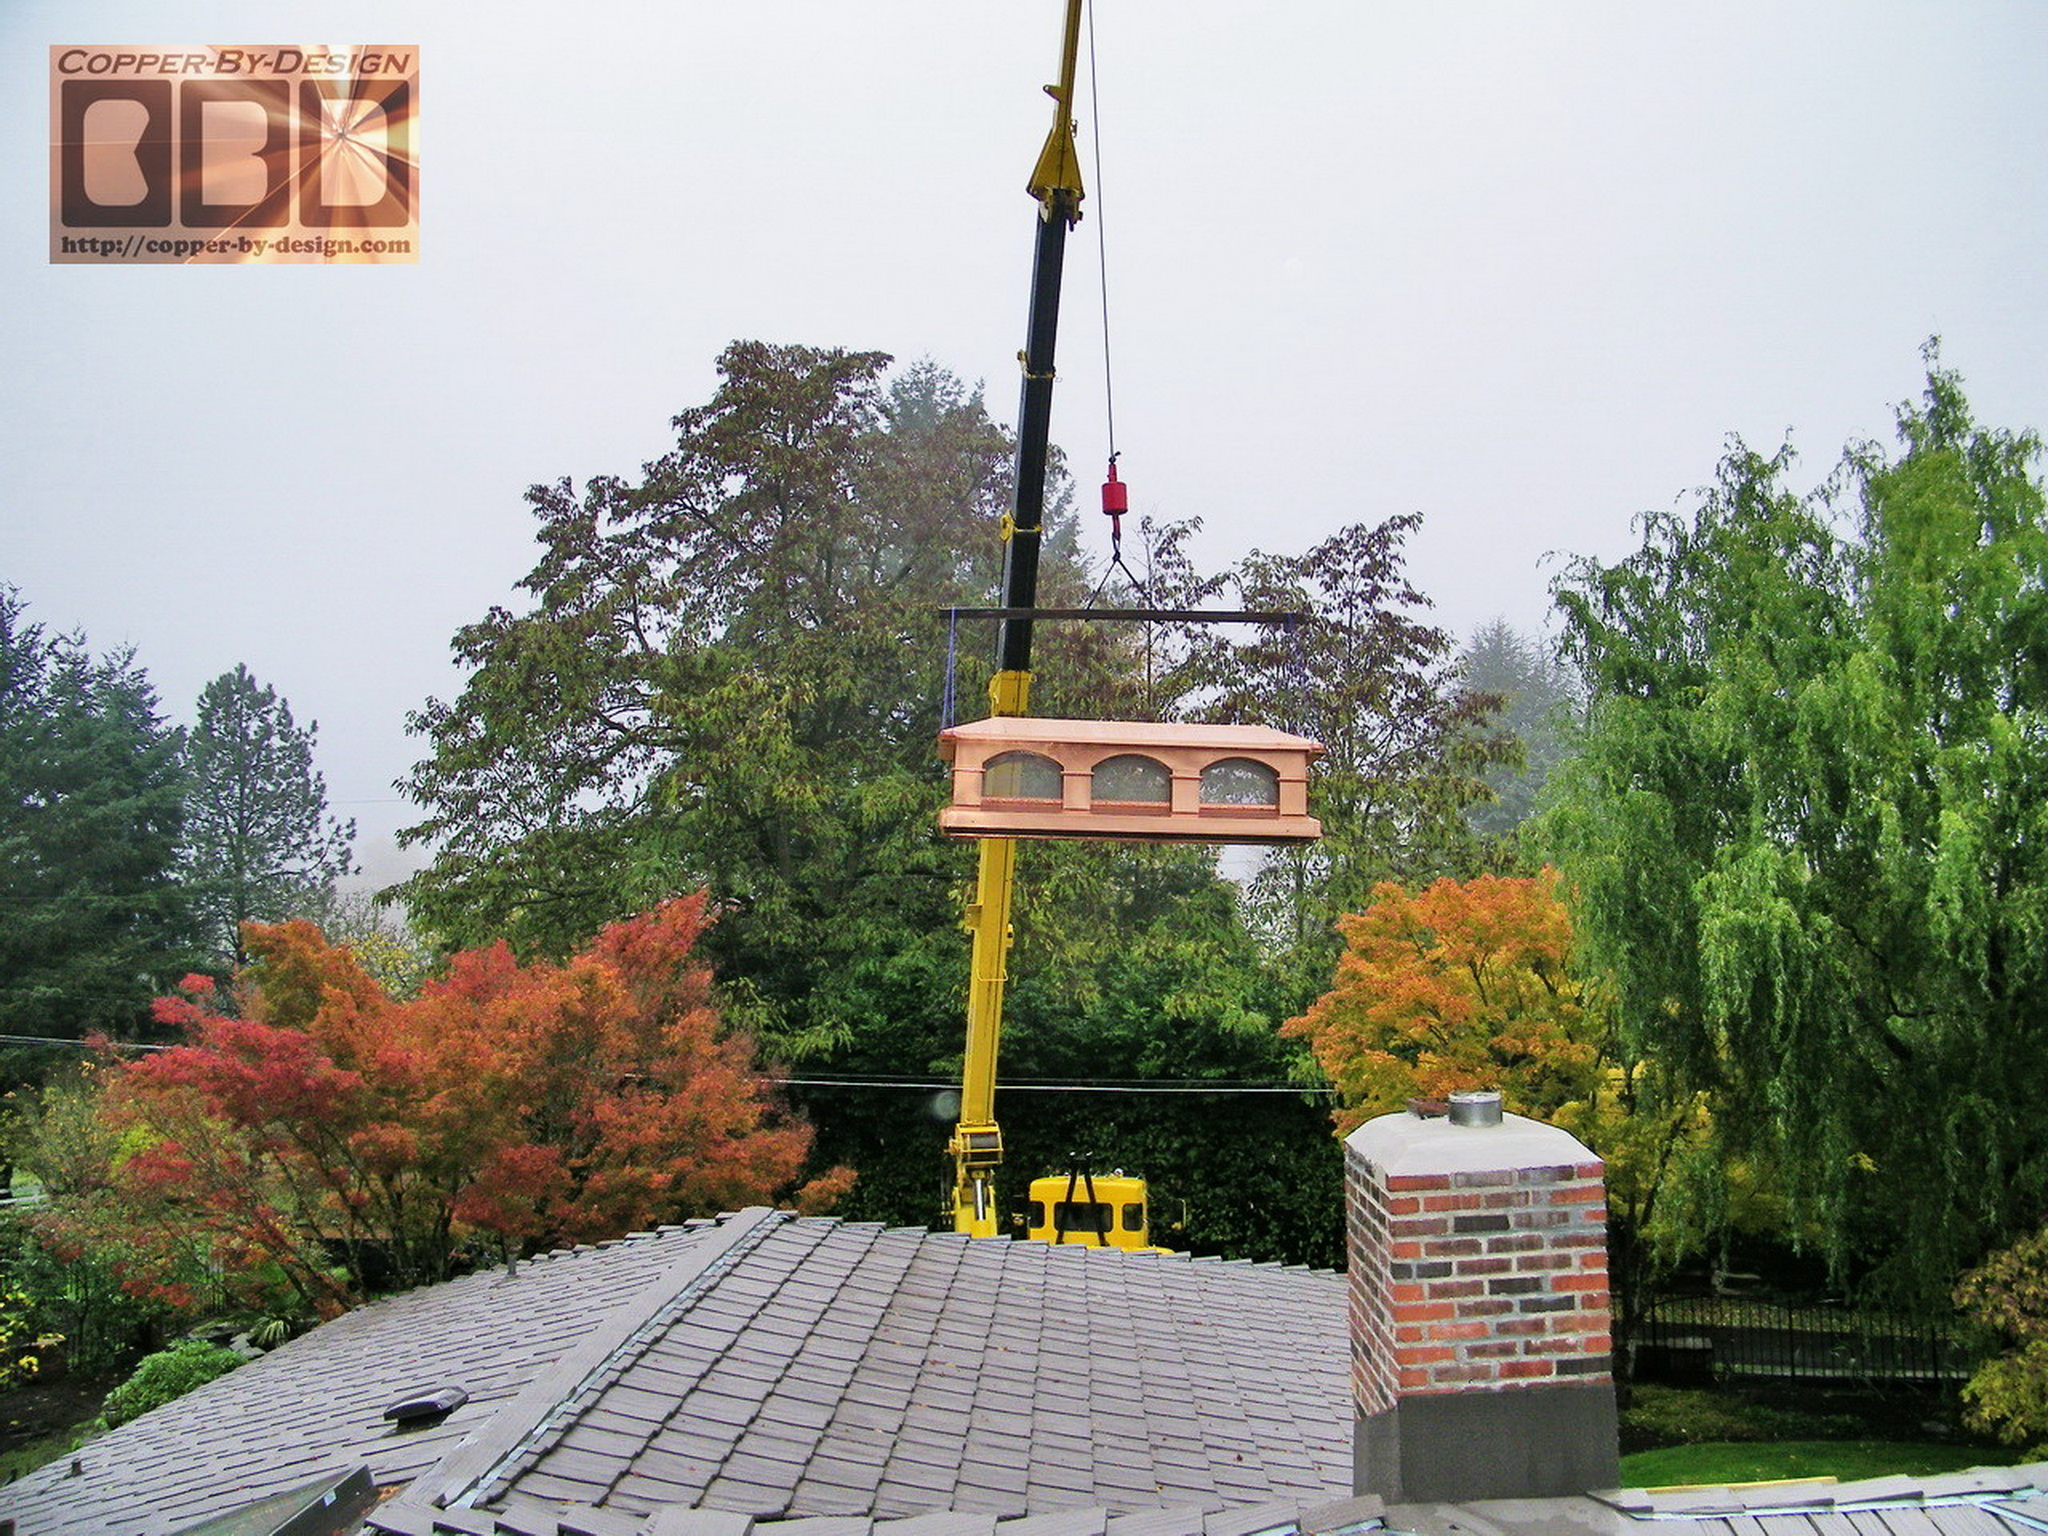
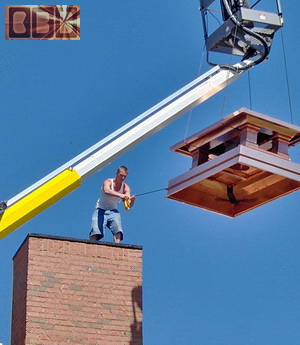
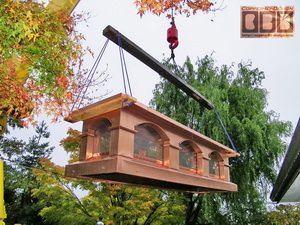
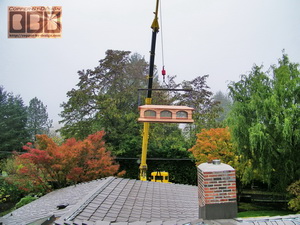
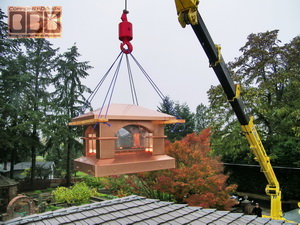
Here is the installation photos we took while
it was being lifted up to the roof with this amazing crane
set-up. It was done by Fulton Crane here in Portland, Oregon Ph#
503-233-1672. I would highly recommend him. He arrived just
after 12 noon and was done before 12:30. It took us a lot longer
to peal off all the plastic film after they were installed.
 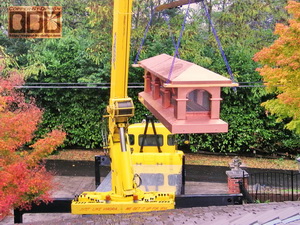
He parked the big diesel truck crane in the
driveway and had a set of large hard rubber pads to place under
the side supports, so not to scratch up their textured driveway
surface. There was a good 70'
reach back over the roof just to get to the big chimney. It was
amazing how simple he made it seem while working blind with only
our hand signals to guide him.
 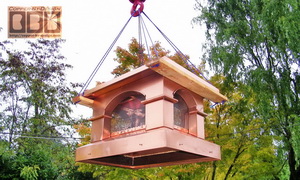
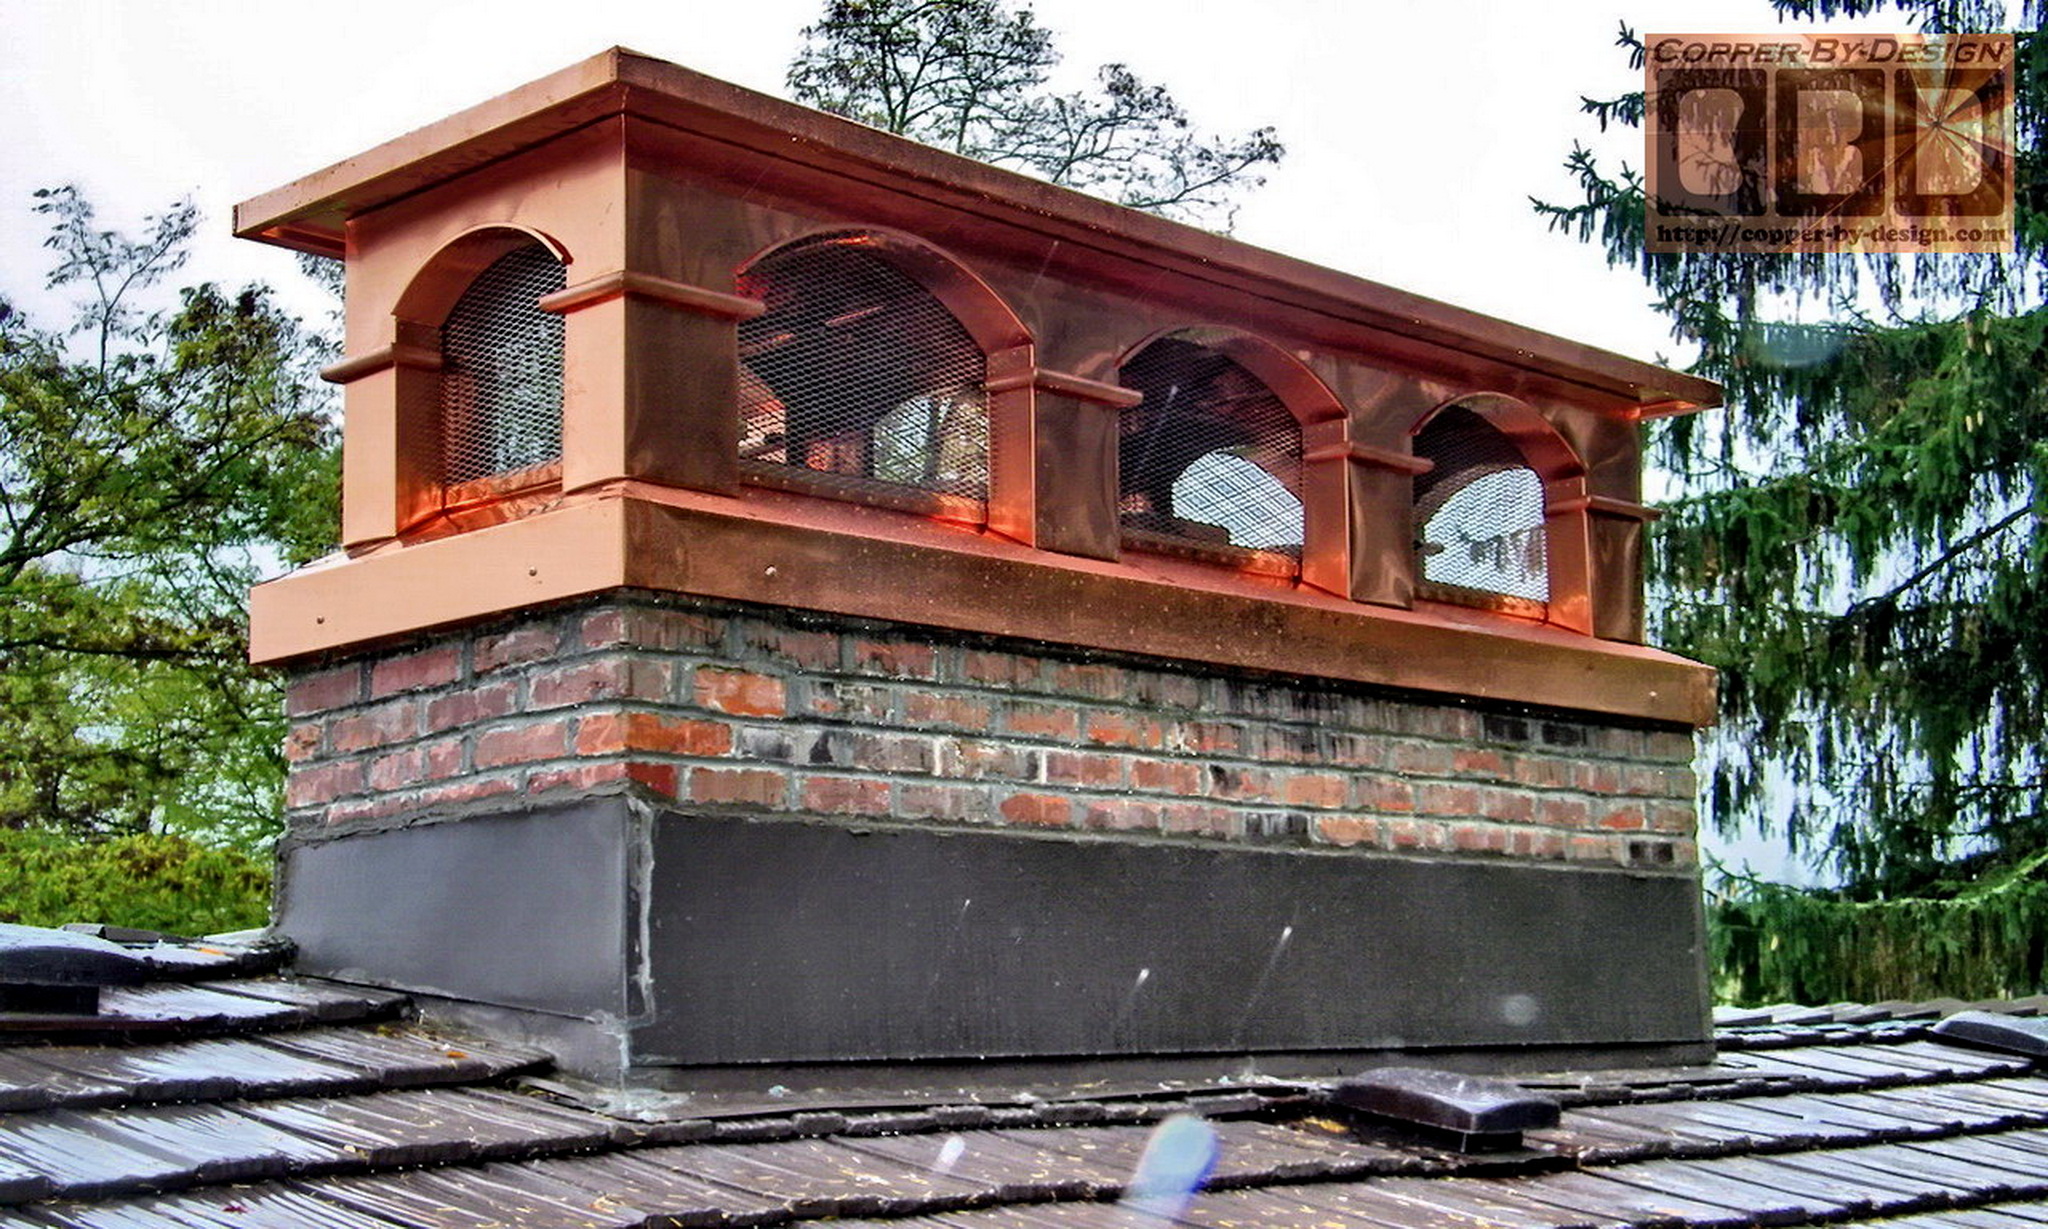
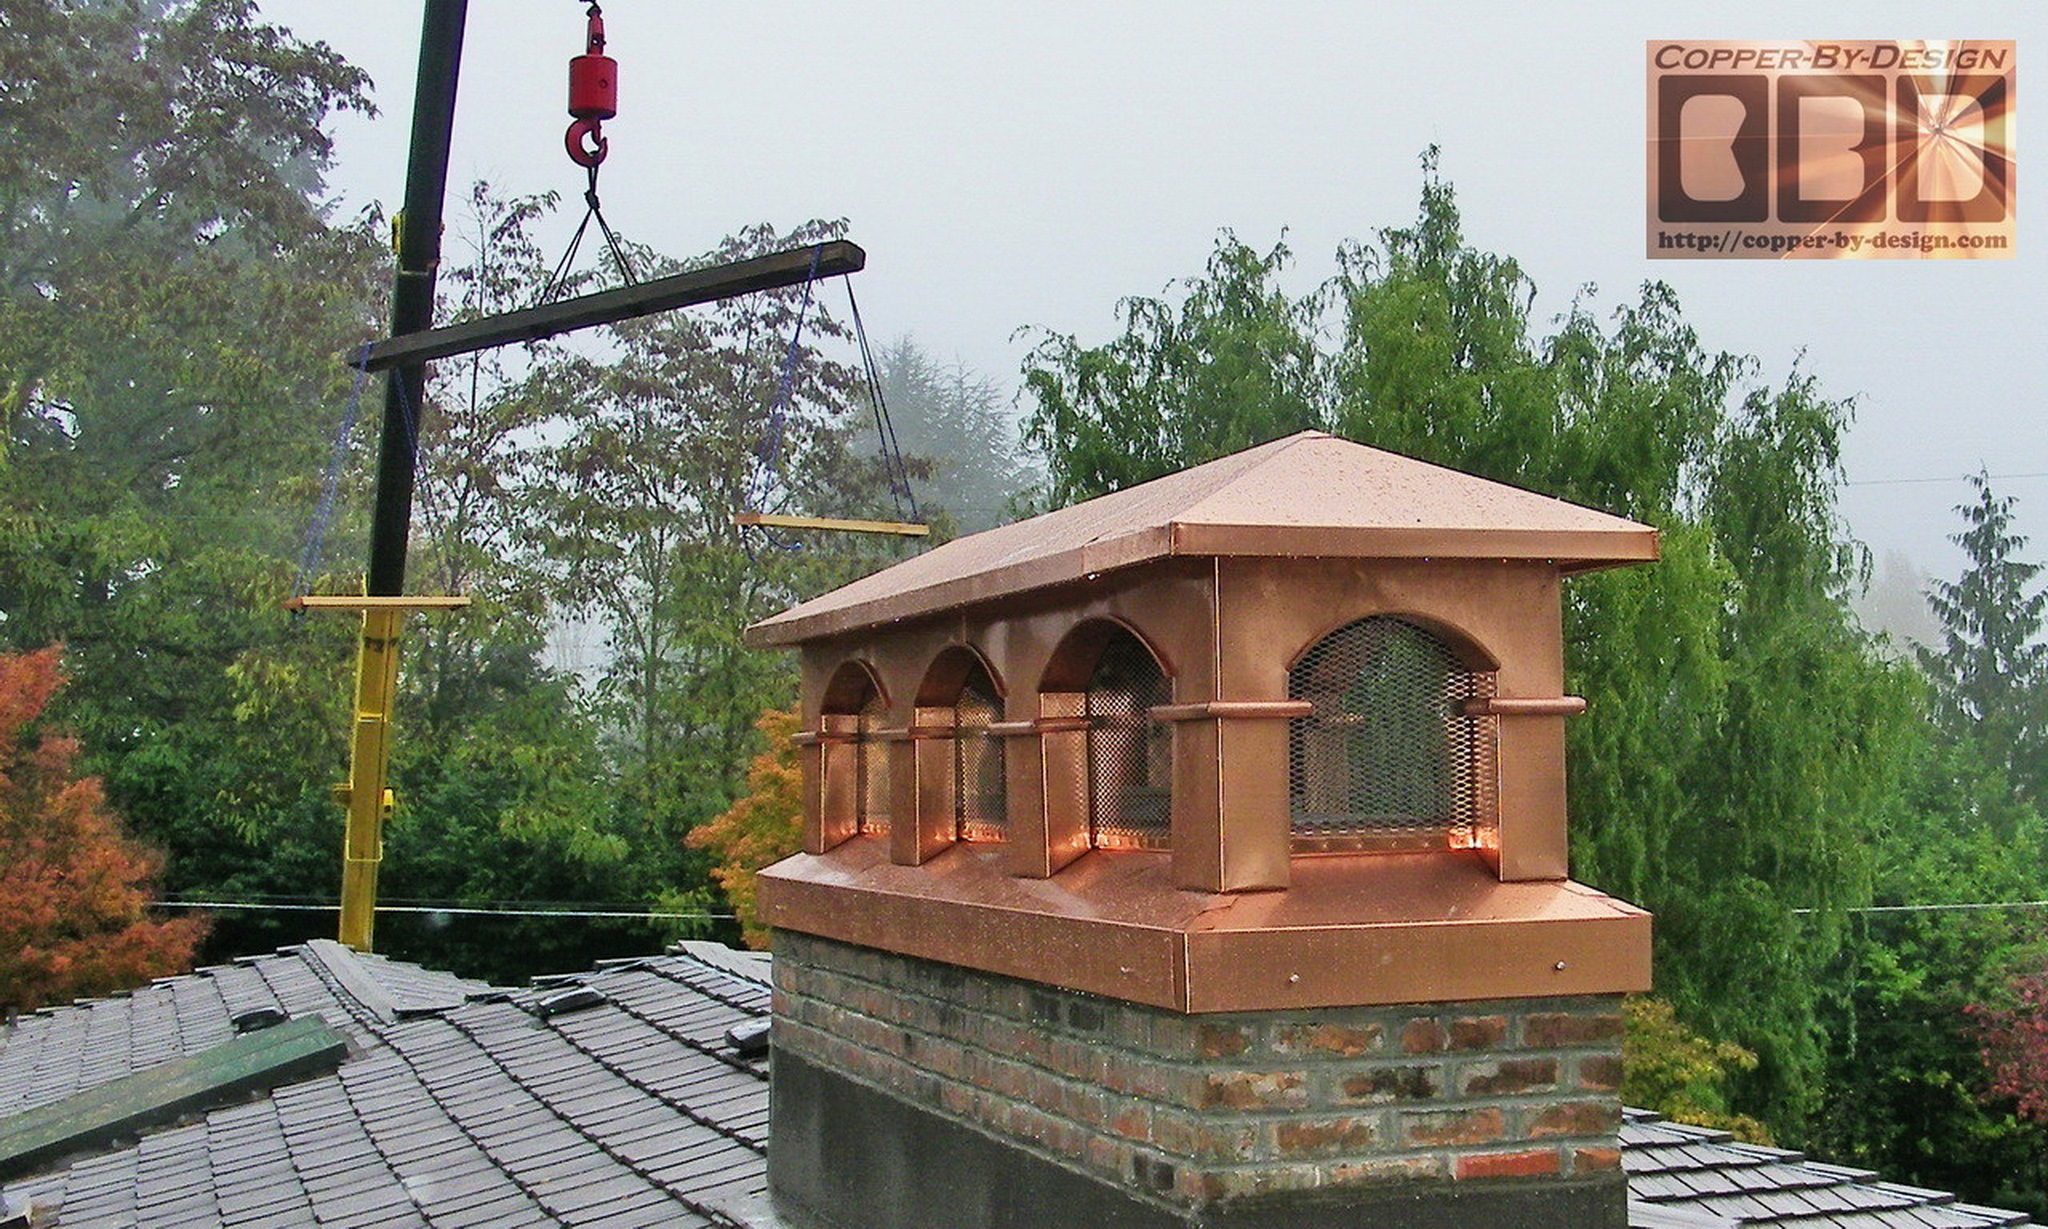
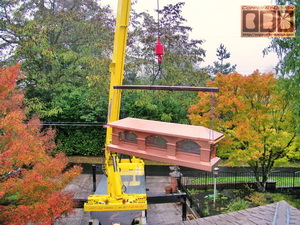
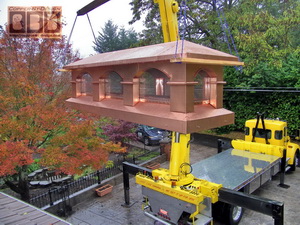
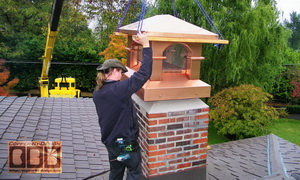
It was a nice snug fit. Then we had to
scramble over to help lift the smaller chimney cap up to the
roof before synching this one down. Once they were in
place it was easy to check the level of them and just tighten the SS screws.
 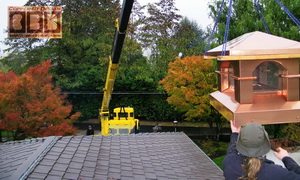
 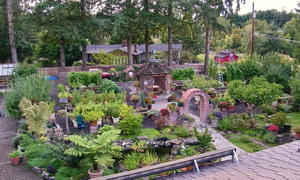
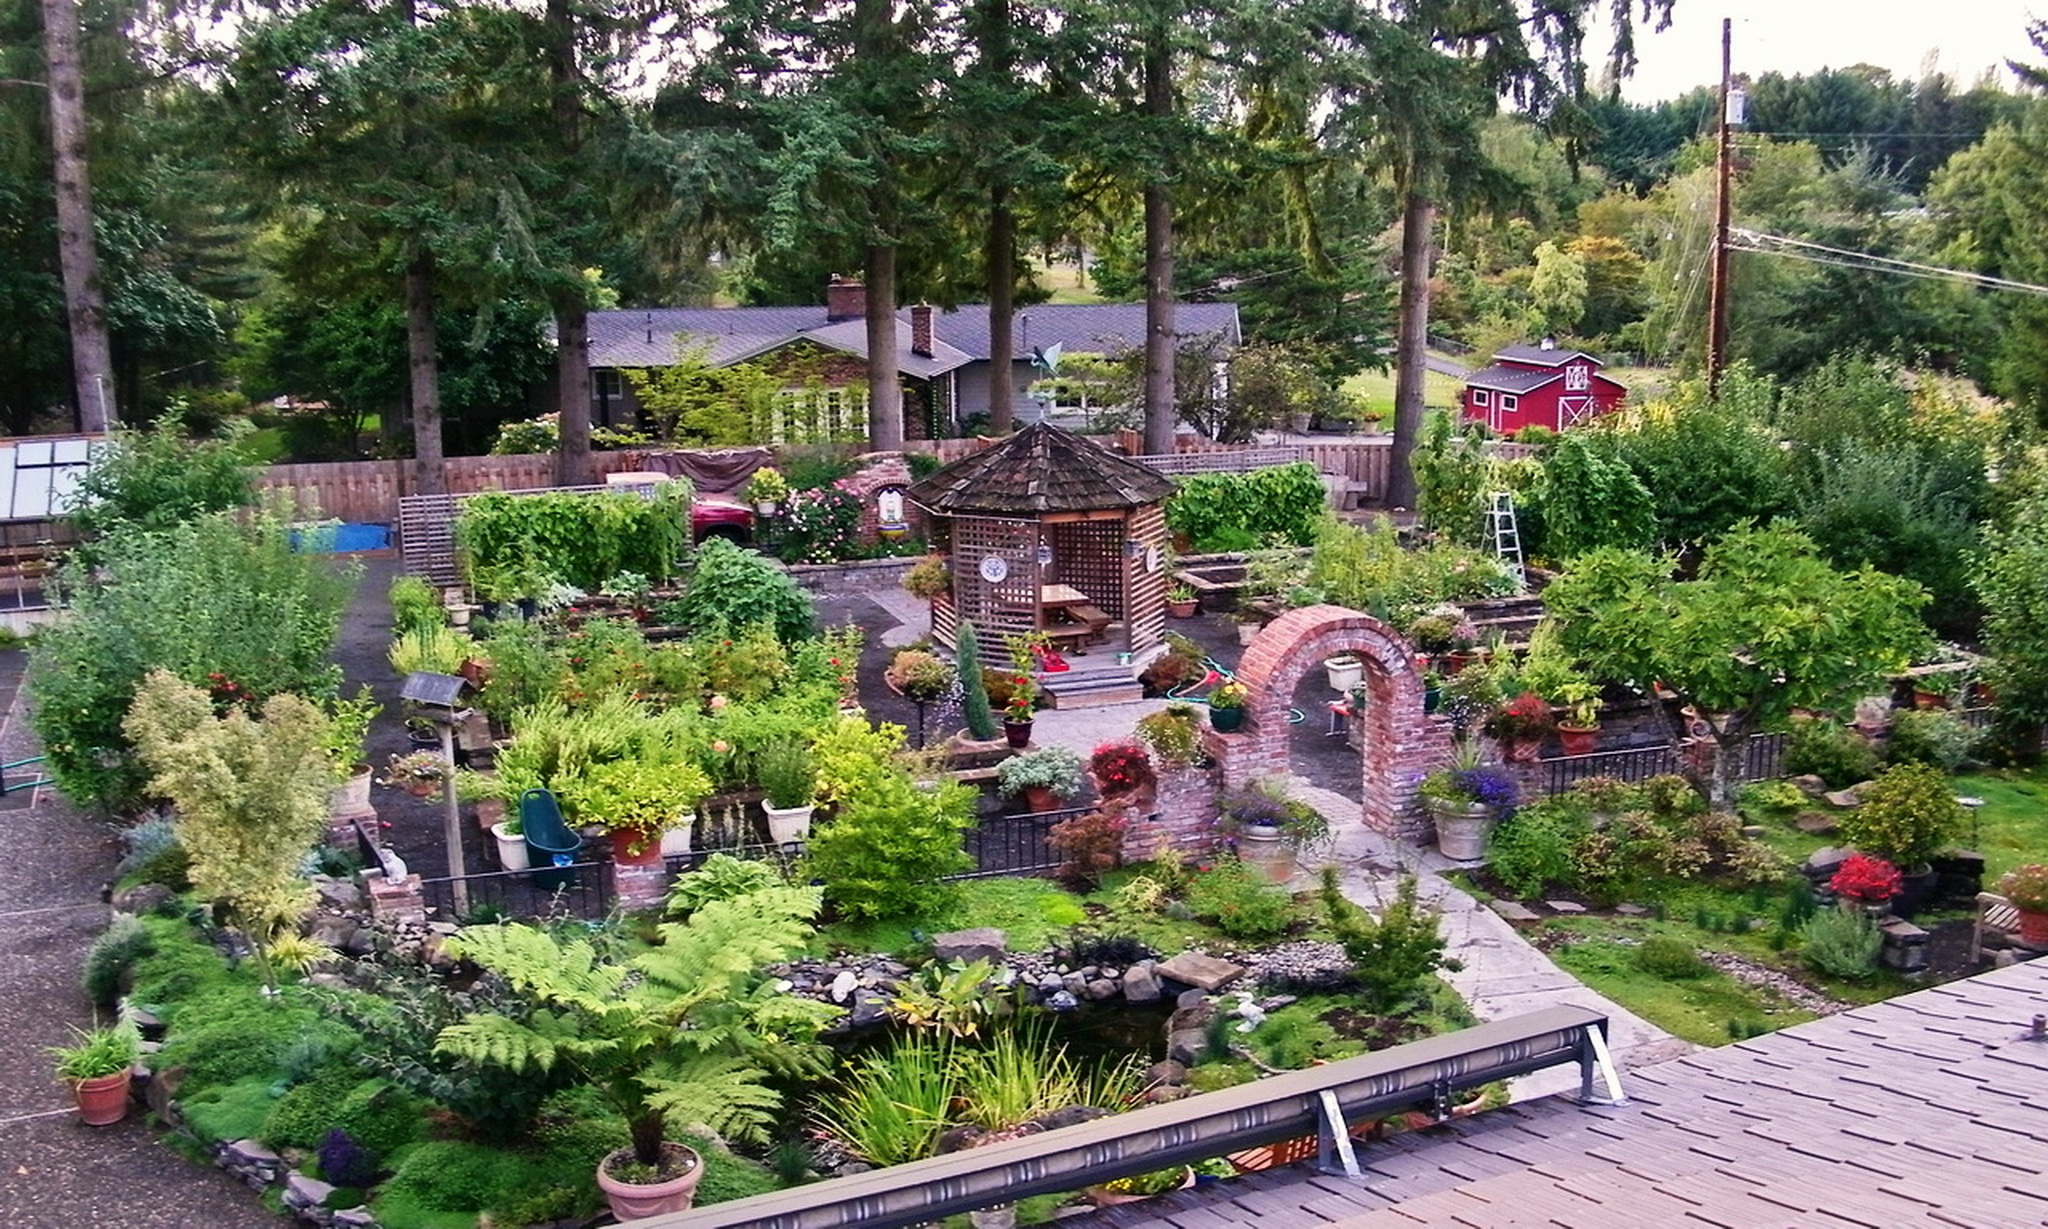
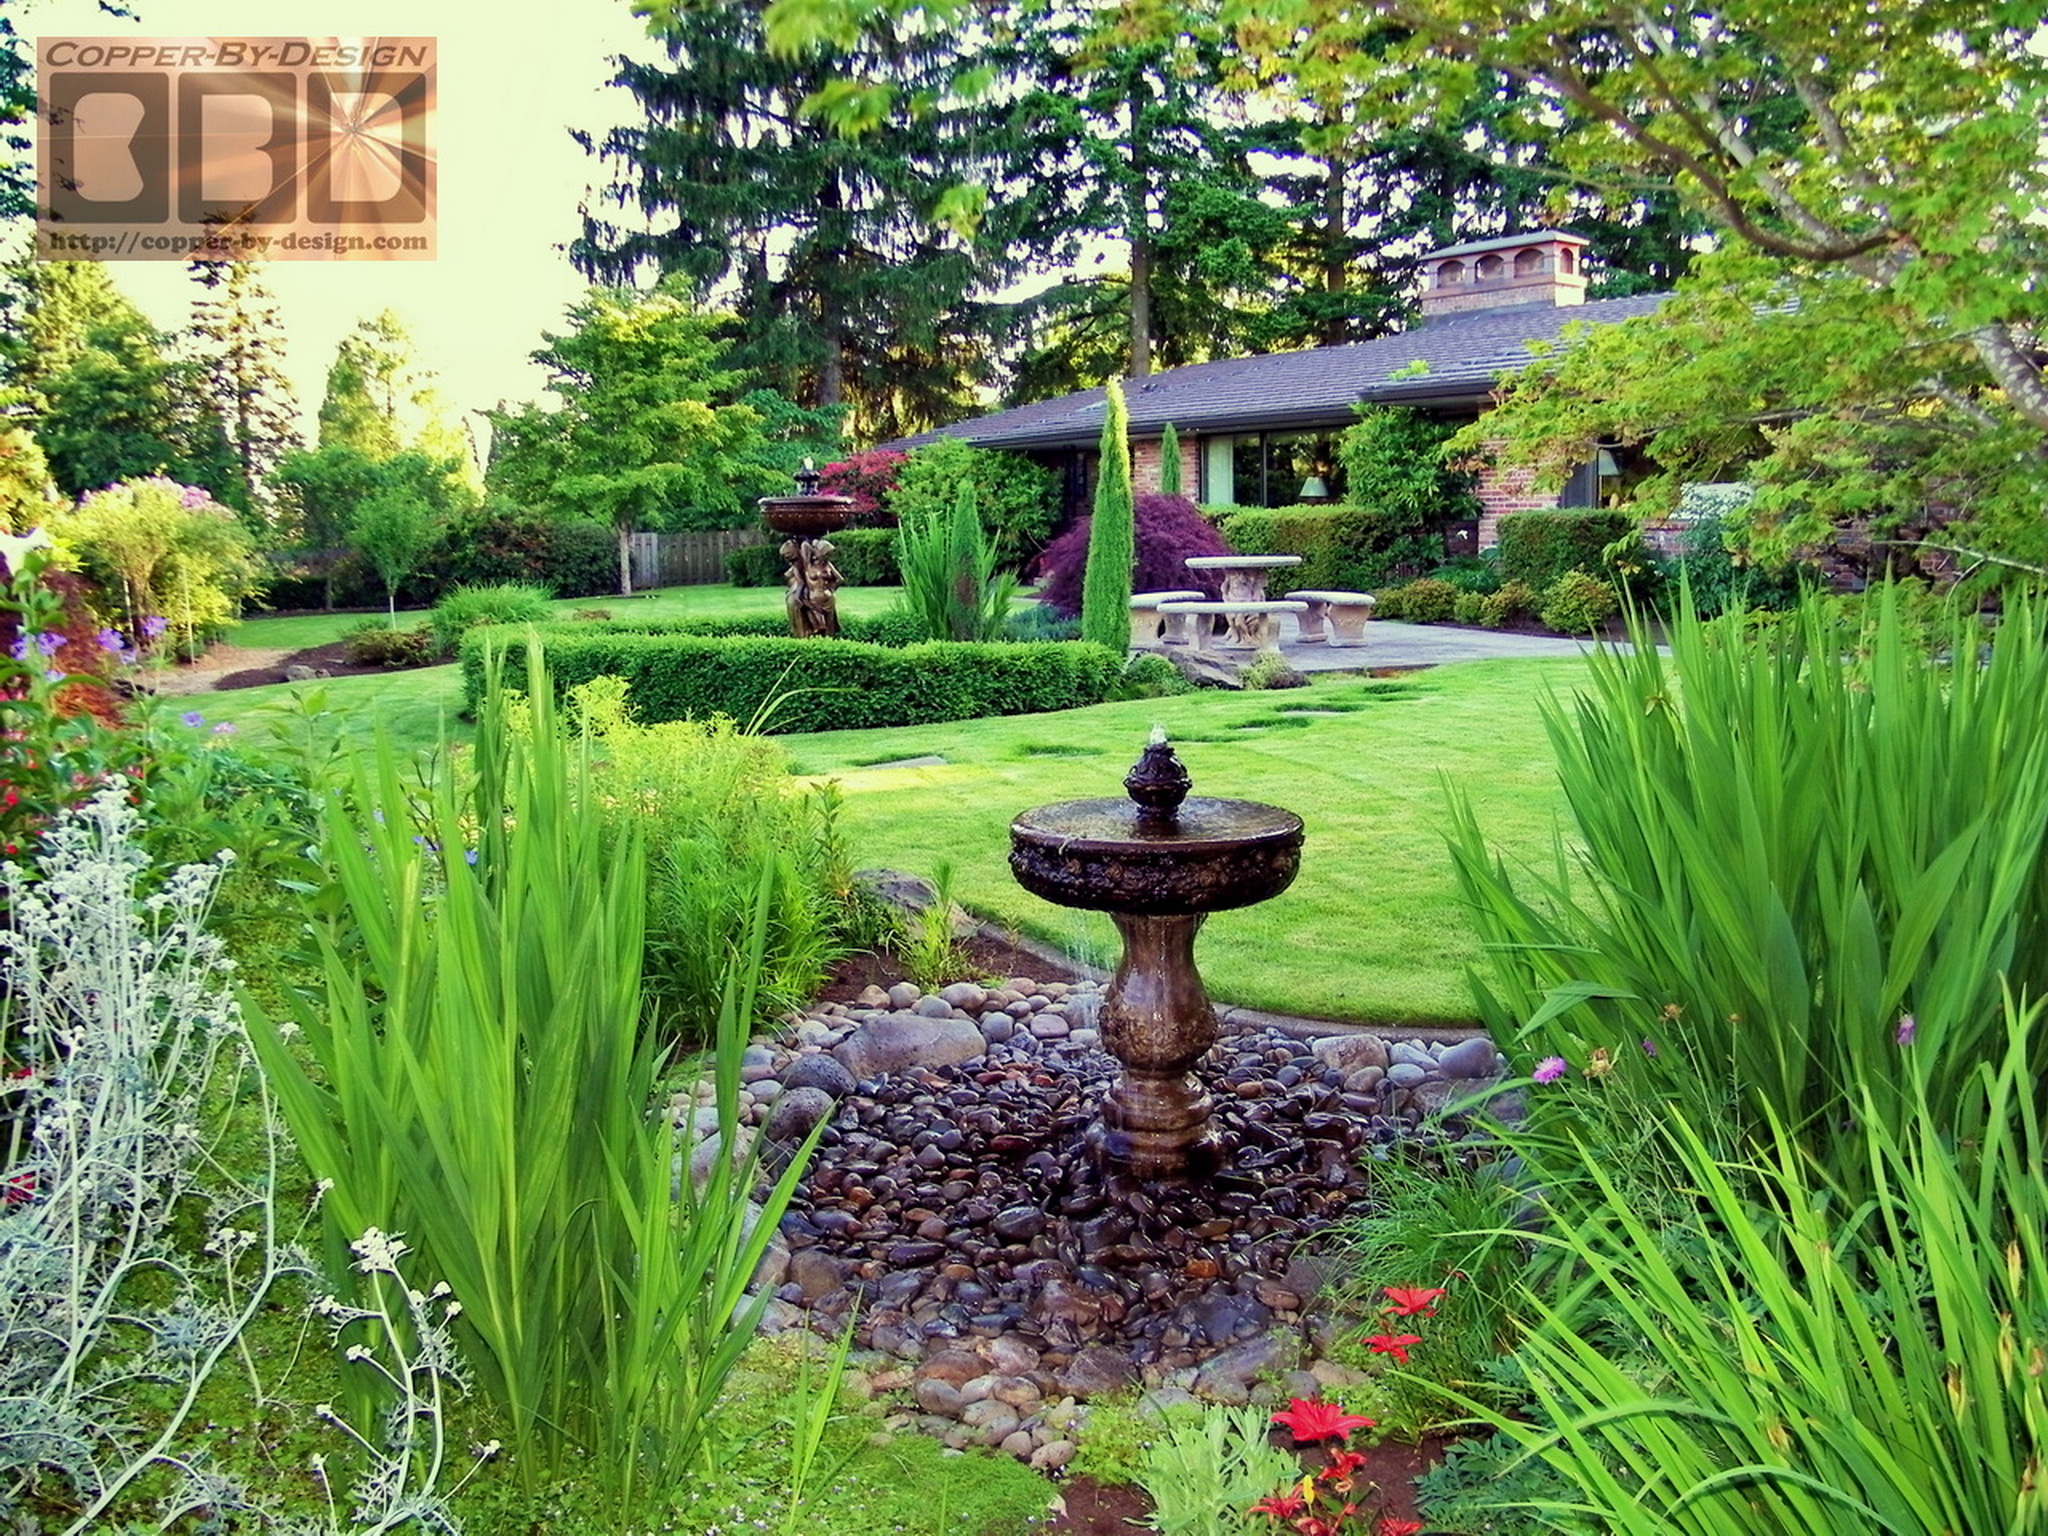
On the right is a shot of their back yard I had taken
from the roof near the long chimney cap.
|
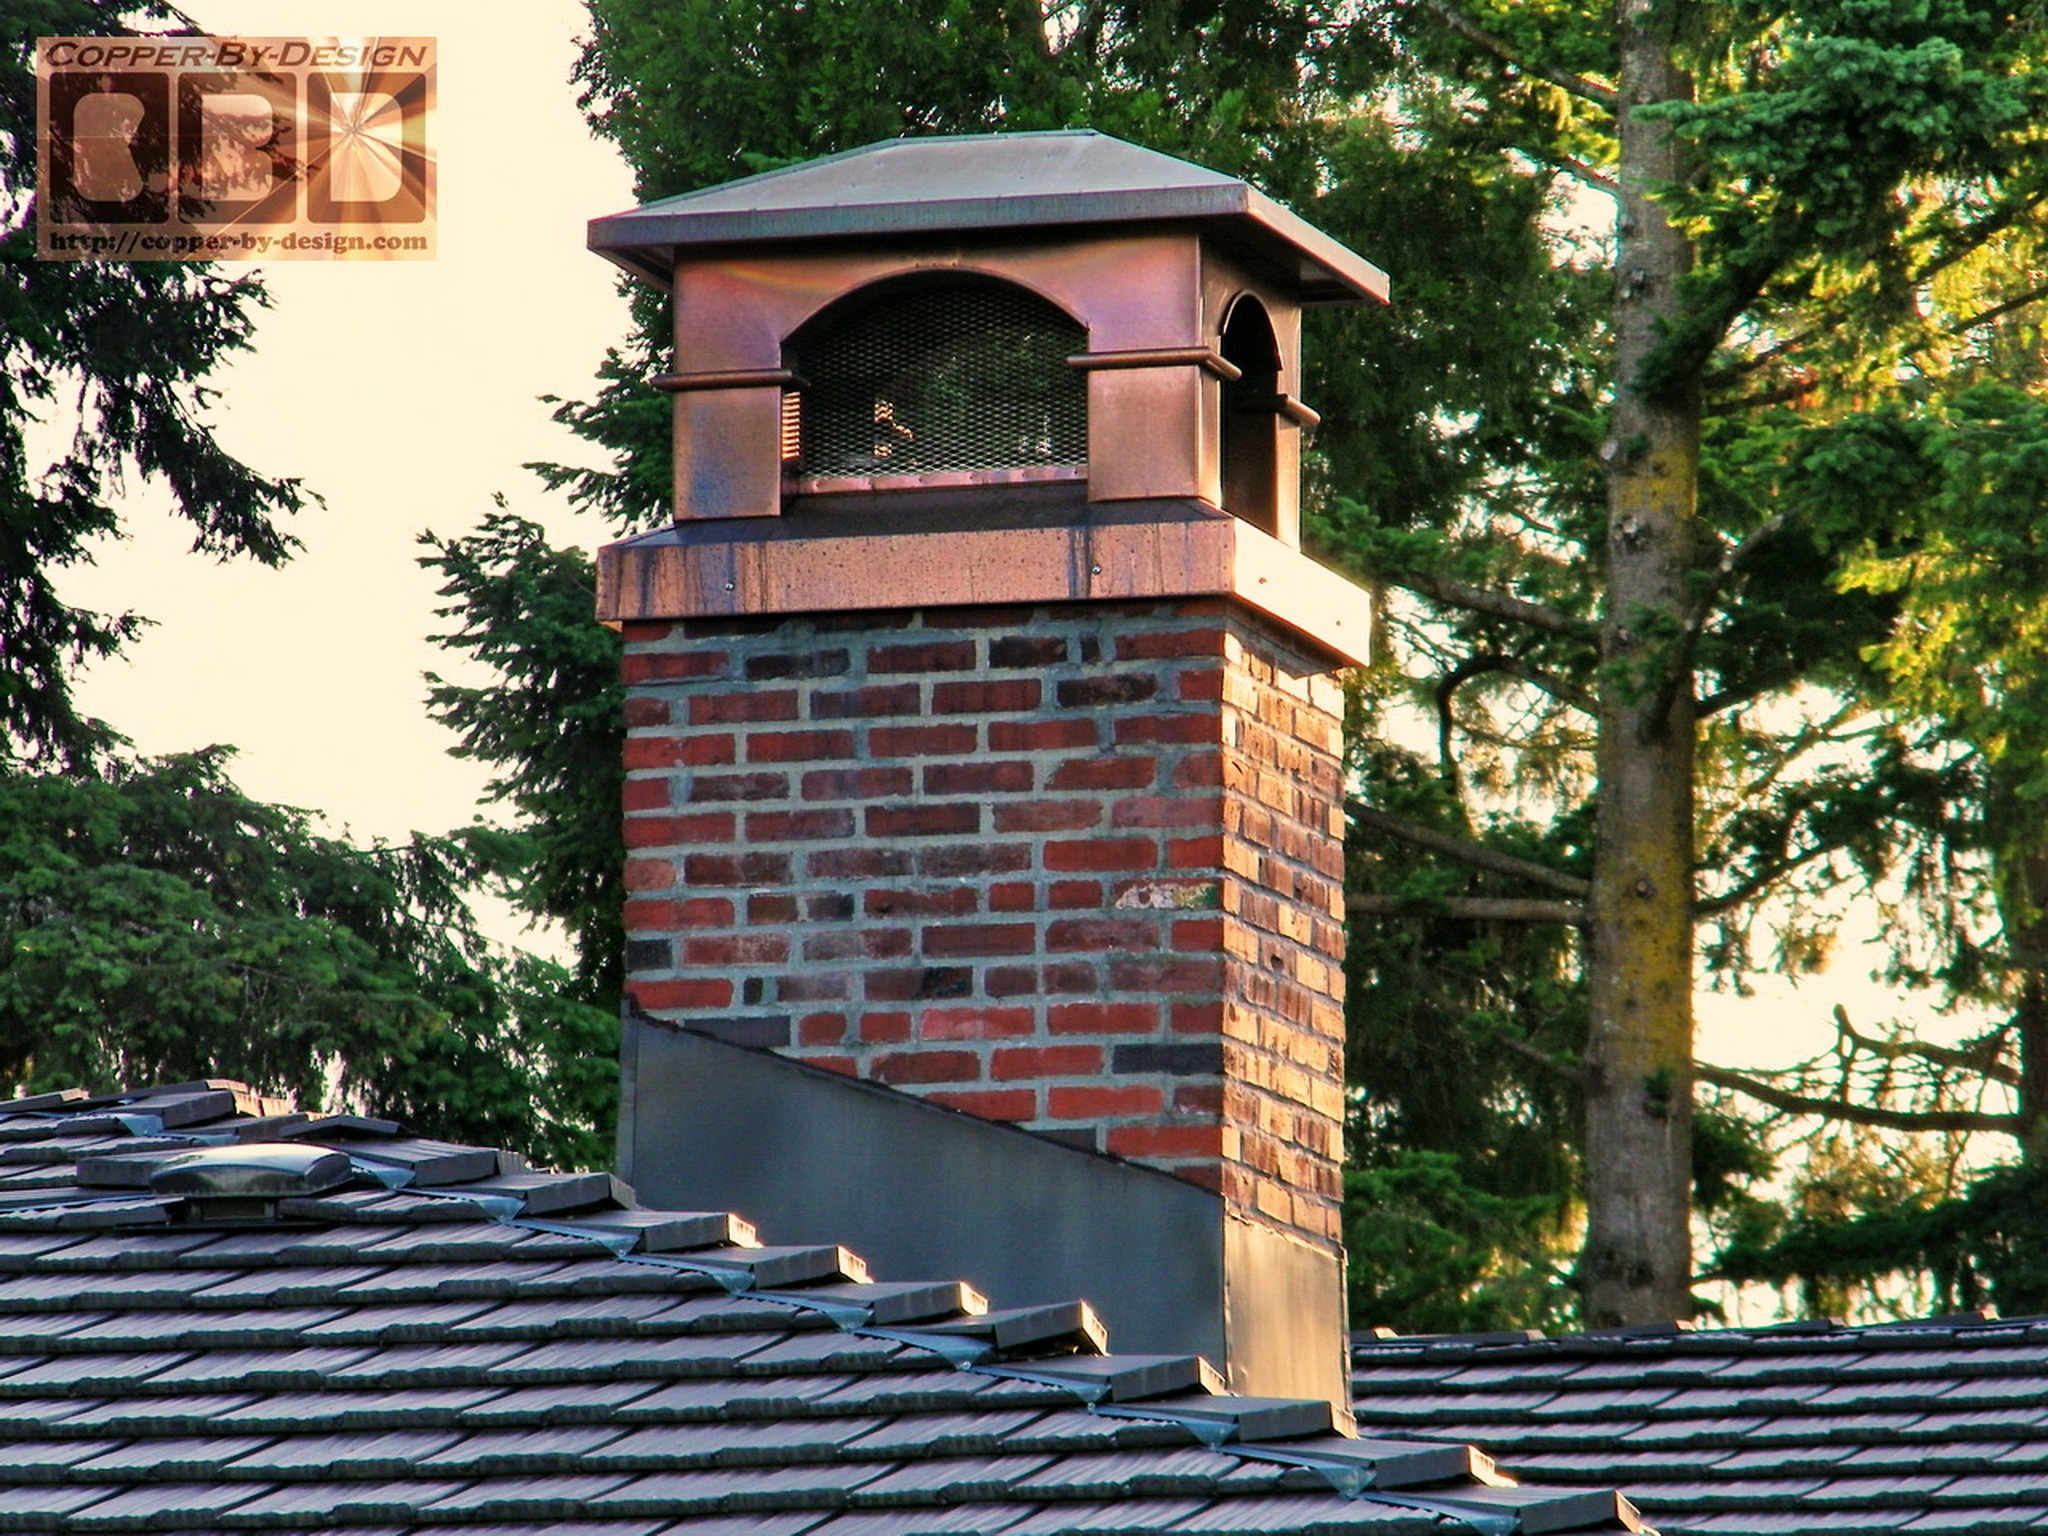
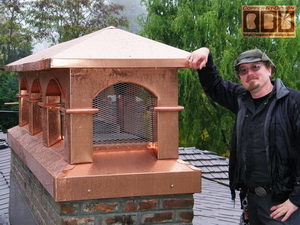
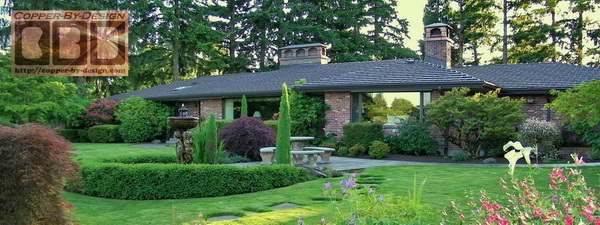
Here is a few more shots of these chimney caps a year later. I
got a chance to take these when they asked me back to rebuild
their gazebo and cover with copper and add a cupola on top.
|